


mikiek
-
Posts
2,276 -
Joined
-
Last visited
Reputation Activity
-

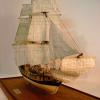
.thumb.JPG.33e8fc9704bbb01f03cf31c187b62df9.JPG) mikiek got a reaction from Retired guy in US Brig Niagara by Tom E - Model Shipways - 1:64 Scale
mikiek got a reaction from Retired guy in US Brig Niagara by Tom E - Model Shipways - 1:64 Scale
Tom - as you begin your collection of spars you will need somewhere to put them. Also a place to work on them as you start to rig them, add the tops, etc. I used a 1"x6" maybe 15" - 18" long. Drill holes in it, about the diameter of the various spars. This was the first one, the second one included holes for the bowsprit and all the yards.
-
 mikiek got a reaction from Tom E in US Brig Niagara by Tom E - Model Shipways - 1:64 Scale
Hello Tom - it's been a long time since I checked in with you. Wow - moving the shipyard, I can't imagine. What a headache. Glad it seems to be working out and falling into place. Will try to keep closer tabs with you and your Niagara.
-
 mikiek got a reaction from Bishophobbies in Section Deck Between Gunbays by mikiek - FINISHED - Panart - 1:23
I'm calling this one done! It has been a fun build, working at 1/2" scale is very cool. Wish I could build a ship in that scale. The kit wasn't without problems though. Obviously, being foreign made there is a language problem with the plans and instructions. Also the plans and instructions did not agree on some structures. I've also noticed the sizing is off in places - a handrail that's almost as tall as a person; there's over 6' of headroom on the gundeck.
Those things aside, I'm glad I did this kit and would recommend it to others. Now to figure out how to change the log title to Finished
A big thank you to everyone that has followed and helped out along the way!
Here's some final pix.
-
 mikiek got a reaction from Nirvana in Enterprise 1799 by mikiek - FINISHED - Constructo - 1:51
Geez - can't believe it's been this long since a post. For those following I apologize.
On a side note - don't know how many of you play online computer games. I allowed myself to get sucked into one called Naval Action. First online game I have ever played. I was attracted from several angles. The fact that it related to ships we build didn't help. But I went way overboard in my involvement. Many things got pushed back in my priority line including finishing this build. It was almost an addiction that I could not resist. People and things that should have been first in my life got relegated to lesser importance. Again, I went way overboard in my involvement. Finally realizing this mess I am attempting to put the games aside and get back to business. And while this build doesn't take #1 in priorities I am returning focus to it as my "passtime". So much for the personal note.
Looking at the last post, I was surprised. Coulda sworn i had some more recent pix. And I recall that was my last endeavor, working on some real images of the build instead of "boaties" from a cell phone. Will recheck my photo folders to see if there is something more current. If not will produce some soon.
The build progresses. Most of the sails are hung and I have learned some tricks along the way. Hope to pass them on soon.
Hang in there guys, Enterprise will be completed. Honestly it may be sooner than I think. Although there are a few more sails to hang, that's about the last of it.
-
 mikiek got a reaction from src in Enterprise 1799 by mikiek - FINISHED - Constructo - 1:51
Geez - can't believe it's been this long since a post. For those following I apologize.
On a side note - don't know how many of you play online computer games. I allowed myself to get sucked into one called Naval Action. First online game I have ever played. I was attracted from several angles. The fact that it related to ships we build didn't help. But I went way overboard in my involvement. Many things got pushed back in my priority line including finishing this build. It was almost an addiction that I could not resist. People and things that should have been first in my life got relegated to lesser importance. Again, I went way overboard in my involvement. Finally realizing this mess I am attempting to put the games aside and get back to business. And while this build doesn't take #1 in priorities I am returning focus to it as my "passtime". So much for the personal note.
Looking at the last post, I was surprised. Coulda sworn i had some more recent pix. And I recall that was my last endeavor, working on some real images of the build instead of "boaties" from a cell phone. Will recheck my photo folders to see if there is something more current. If not will produce some soon.
The build progresses. Most of the sails are hung and I have learned some tricks along the way. Hope to pass them on soon.
Hang in there guys, Enterprise will be completed. Honestly it may be sooner than I think. Although there are a few more sails to hang, that's about the last of it.
-
mikiek got a reaction from Tom E in Enterprise 1799 by mikiek - FINISHED - Constructo - 1:51
Geez - can't believe it's been this long since a post. For those following I apologize.
On a side note - don't know how many of you play online computer games. I allowed myself to get sucked into one called Naval Action. First online game I have ever played. I was attracted from several angles. The fact that it related to ships we build didn't help. But I went way overboard in my involvement. Many things got pushed back in my priority line including finishing this build. It was almost an addiction that I could not resist. People and things that should have been first in my life got relegated to lesser importance. Again, I went way overboard in my involvement. Finally realizing this mess I am attempting to put the games aside and get back to business. And while this build doesn't take #1 in priorities I am returning focus to it as my "passtime". So much for the personal note.
Looking at the last post, I was surprised. Coulda sworn i had some more recent pix. And I recall that was my last endeavor, working on some real images of the build instead of "boaties" from a cell phone. Will recheck my photo folders to see if there is something more current. If not will produce some soon.
The build progresses. Most of the sails are hung and I have learned some tricks along the way. Hope to pass them on soon.
Hang in there guys, Enterprise will be completed. Honestly it may be sooner than I think. Although there are a few more sails to hang, that's about the last of it.
-
mikiek got a reaction from Nirvana in Enterprise 1799 by mikiek - FINISHED - Constructo - 1:51
Getting some progress made on the rigging. Shrouds & ratlines are in. Got a few more stays to put in. The instructions are getting worse - the book is just too general for rigging steps and the rig plan is very inaccurate and incomplete. Shrouds & stays are pretty much common sense - not too hard to figure how they should run. Running rig is a different animal however. The thing i don't like is the plans say to drill holes in the upper masts to run the stays thru. IMO drilling 3-4 .35mm holes in close proximity in a .5mm stick is not a wise thing to do. I have elected to seize all shrouds & stays instead.
I'm thinking ahead to the sails also. I was dreading having to stitch a hem around each of them like I had to do the last time I did sails. Lucked out here. I guess I ordered the deluxe sail kit with the boat. I have to say these sails look quite nice and come already hemmed with the rope (dont know the proper term) stitched around the edge. All very professionally done! That saves a month or more of work and I doubt I could have matched the way they came. The only additional thing I'm doing is inserting a piece of wire into the hems. This will allow me to shape the sails somewhat and they will hold the shape. I'll post pix of that as I get more serious with the sails. At the moment I'm just inserting all the wire.
On the philosophical side. I've always used Syren rope for every build. None can argue it's quality or the extra bang it adds to a build. I use tan for running rigging and black for standing. A while back Syren made the decision to discontinue black rope and offer a dark brown instead. I didn't think much of it at the time except that I like to seize my black rope with a dark brown fly line. I liked that there was enough contrast to see the seizing but it didnt stick out like a sore thumb like seizing black with tan does. Unfortunately, my brown fly line becomes invisible on the dark brown rope. So I guess when I make the switch to brown rope I'll have to find a new seizing color. Now for the philosophy - if you think about it Syren has a lot of influence on how our builds look. Granted using Syren products is totally the builders choice, but I think many, many of us do. I try to imagine all the builds that must be on display with Syren ropes & blocks. And we have used black rope for standing rigging almost as a best practice. Now just like that, black is out, brown is in. Within a year, there will be no more boats built with black rope - at least black Syren rope. Brown is the new black and just like that black standing rigging disappears.
I will say, after my soapbox rant, that this is not an indictment of Syren or Chuck in any way. Obviously they are free to offer what they choose. I will continue to buy Syren products (brown rope included) and support them. It was just an observation I had that I wanted to share.
Now for a few pix. All the new camera gear and photography research I am doing is beginning to make me think in a different way as I take boat pix now. There's a lot more to it than just snapping away. Lens, light, distance, depth of field all must be considered. These pix may be a slight improvement over previous ones, but I think I am seeing the light on what it takes to produce something better than a snapshot. To me the photo side of our hobby is overlooked but is critical. A good photo can make a crappy build look good. A bad photo makes the best build look mediocre. This was my first attempt at a shoot of Enterprise. I think things will get better. One thing I haven't worked out is size, so I apologize if your viewer makes you scroll around to see it all.
-
 mikiek got a reaction from Spaceman Spiff in Philadelphia by Elijah - Model Shipways - 1:24 Scale - Continental Gunboat
It is one of the most real looking wood finishes I've seen on a boat build.
-
 mikiek got a reaction from mtaylor in Instructions Stink, Can't Find a Sample Picture
Fantastic information! Thanks JFC! - was wondering how a tack would be handled regardless of whether the sail tack was run thru some tackle or just straight down to the deck. Kinda clumsy either way.
Your pix were great! Spelled it all out perfectly.
-
 mikiek got a reaction from JerseyCity Frankie in Instructions Stink, Can't Find a Sample Picture
Fantastic information! Thanks JFC! - was wondering how a tack would be handled regardless of whether the sail tack was run thru some tackle or just straight down to the deck. Kinda clumsy either way.
Your pix were great! Spelled it all out perfectly.
-
 mikiek reacted to JerseyCity Frankie in Instructions Stink, Can't Find a Sample Picture
Someone needs to write a decent book about fore and aft rigging on period ships because the topic of gaff topsails doesn’t get any attention. I believe your tack will run directly to the fife rail with no lead blocks as I can not recall ever seeing Topsail Tacks run any other way. Leading the tack anywhere other than straight down to the deck would negatively effect the set of the sail. Hand Reef and Steer by Tom Cunliffe and Sailmakers Aprentice by Emiliano Marino have illustrations of tacks going directly to the deck as does Howard Chapelle in American Fishing Schooners. Emeliano Marino includes clear illustrations of SEVEN different types of Gaff Topsails and ALL have tacks running to the deck. And if you give it some consideration you will see why: any kind of lead block a tack would use would need to be well below the point in space where the tack of the Topsail would be situated, and where would that be but directly on the lower mast itself, and what would that do for you that a direct lead to the deck wouldn’t? Also the Tack winds up serving as the Downhaul and you can’t haul the sail through a tack lead block. Here’s a shot of Lynx’s Topsail set.
-
mikiek reacted to JerseyCity Frankie in Instructions Stink, Can't Find a Sample Picture
A big issue with the use of Gaff Topsails is that it’s impossible to rig them in a way that allows them to be self-tending on either tack. Meaning: the tack of the sail is usually on either the Port or the Starboard side (nearly always Starboard) so you either have to physically lift that tack up and over the Gaff every time you go about OR keep it on one side all the time and just live with the inefficiency of having it awkwardly set pressing against the underlying Gaff and it’s Peak Halyard. The reason I bring this up here is that if you DO want to rig your Topsail so you can reposition the tack of the sail from Port to Starboard then you need two tacks, one for each side. Plus a halyard that opposes them that will lift the whole lower half of the sail high enough to get it over the Peak Halyard each time you go about. This bothersome aspect leaves most people to rig the Topsail with one disposition only, and to live with the inefficiency on half of the tacks.
A “Dirty Tack”, some efficiency of the Topsail is lost on the Port Tack due to the sail shape being altered.
Schooner Pioneer, the ship I’ve sailed on most. If the tack were run through a lead block it would hopelessly complicate the preparation for setting AND make recovery to the deck in a way that kept the sail out of the water impossible.
-
mikiek got a reaction from mtaylor in Sail Prep
If you havent already completed - spray sizing works well. Iron afterwards and while the sail is still hot you can add some shape the usually keeps when the sail cools off.
I am finding that running wire inside the hems from one corner to another is a great way to shape your sails - from the barely a breeze look to the 20 knots look.
-
 mikiek got a reaction from thibaultron in Sail Prep
If you havent already completed - spray sizing works well. Iron afterwards and while the sail is still hot you can add some shape the usually keeps when the sail cools off.
I am finding that running wire inside the hems from one corner to another is a great way to shape your sails - from the barely a breeze look to the 20 knots look.
-
mikiek got a reaction from thibaultron in Instructions Stink, Can't Find a Sample Picture
This should be easy. Working USS Enterprise 1797 and beginning to put in some sails. My first time with gaff rigged. There is a top gaff sail above the main - its 4 sided not 3 sided. Most of it is in place except what I believe is called the tack. The lowermost corner. I can't see from the instructions or plans how this is supposed to be rigged. The rigging plan just shows the sail foot running to the mast and then it disappears. I would expect some sort of tackle and eventually a downhaul of some sort but thats just a guess..
-
.thumb.jpg.6d6ee4bdbfaac2c58ecc77e7b80ae374.jpg) mikiek got a reaction from Matt D in Enterprise 1799 by mikiek - FINISHED - Constructo - 1:51
mikiek got a reaction from Matt D in Enterprise 1799 by mikiek - FINISHED - Constructo - 1:51
Getting some progress made on the rigging. Shrouds & ratlines are in. Got a few more stays to put in. The instructions are getting worse - the book is just too general for rigging steps and the rig plan is very inaccurate and incomplete. Shrouds & stays are pretty much common sense - not too hard to figure how they should run. Running rig is a different animal however. The thing i don't like is the plans say to drill holes in the upper masts to run the stays thru. IMO drilling 3-4 .35mm holes in close proximity in a .5mm stick is not a wise thing to do. I have elected to seize all shrouds & stays instead.
I'm thinking ahead to the sails also. I was dreading having to stitch a hem around each of them like I had to do the last time I did sails. Lucked out here. I guess I ordered the deluxe sail kit with the boat. I have to say these sails look quite nice and come already hemmed with the rope (dont know the proper term) stitched around the edge. All very professionally done! That saves a month or more of work and I doubt I could have matched the way they came. The only additional thing I'm doing is inserting a piece of wire into the hems. This will allow me to shape the sails somewhat and they will hold the shape. I'll post pix of that as I get more serious with the sails. At the moment I'm just inserting all the wire.
On the philosophical side. I've always used Syren rope for every build. None can argue it's quality or the extra bang it adds to a build. I use tan for running rigging and black for standing. A while back Syren made the decision to discontinue black rope and offer a dark brown instead. I didn't think much of it at the time except that I like to seize my black rope with a dark brown fly line. I liked that there was enough contrast to see the seizing but it didnt stick out like a sore thumb like seizing black with tan does. Unfortunately, my brown fly line becomes invisible on the dark brown rope. So I guess when I make the switch to brown rope I'll have to find a new seizing color. Now for the philosophy - if you think about it Syren has a lot of influence on how our builds look. Granted using Syren products is totally the builders choice, but I think many, many of us do. I try to imagine all the builds that must be on display with Syren ropes & blocks. And we have used black rope for standing rigging almost as a best practice. Now just like that, black is out, brown is in. Within a year, there will be no more boats built with black rope - at least black Syren rope. Brown is the new black and just like that black standing rigging disappears.
I will say, after my soapbox rant, that this is not an indictment of Syren or Chuck in any way. Obviously they are free to offer what they choose. I will continue to buy Syren products (brown rope included) and support them. It was just an observation I had that I wanted to share.
Now for a few pix. All the new camera gear and photography research I am doing is beginning to make me think in a different way as I take boat pix now. There's a lot more to it than just snapping away. Lens, light, distance, depth of field all must be considered. These pix may be a slight improvement over previous ones, but I think I am seeing the light on what it takes to produce something better than a snapshot. To me the photo side of our hobby is overlooked but is critical. A good photo can make a crappy build look good. A bad photo makes the best build look mediocre. This was my first attempt at a shoot of Enterprise. I think things will get better. One thing I haven't worked out is size, so I apologize if your viewer makes you scroll around to see it all.
-
mikiek got a reaction from Tom E in US Brig Niagara by Tom E - Model Shipways - 1:64 Scale
Gary - I was blessed to have the guidance of a builder who convinced me to go with a historical representation rather than a copy of todays version. Of course that required learning a lot about the history of the build and the times. While there were no plans and it is debatable what boats were actually dredged up in the several "restoration" efforts, given the need for an urgent completion, one can only surmise that only what was absolutely necessary was included in the build. I can't find the exact quote, but it is recorded that the head of the project told a builder that excellence was not required. Good, was good enough. Everyone knew that win or lose, the boat would fight one fight only, so there was no point in "extras".
Joel and I took the approach that other than a capstan none of the other deck furniture was required. As quoted in an article he wrote - "Commodore Perry would have to read by candle light." The grate placements were completely a guess on my part. The positions of 2 of them were just to make easy the trick that I did adding stairs leading to the 2nd deck. You can see that here - post #167
MESSIS - thanks! It was fun working thru that side project.
-
mikiek got a reaction from Tom E in US Brig Niagara by Tom E - Model Shipways - 1:64 Scale
Tom - you should be very proud of your progress so far. And nothing wrong with smelling up the place with good food as long as you can keep the crew at a distance.....
-
mikiek got a reaction from Retired guy in US Brig Niagara by Tom E - Model Shipways - 1:64 Scale
Tom - re: your compass - in those days a compass (or several) were usually mounted into a cabinet called a binnacle. The binnacle was set in front of the wheel/tiller. There were several typical requirements:
1. all cabinet hardware to be made of brass or copper - iron could confuse a compass
2. there should be a place to set candles next to the compass - for night vision
3. the cabinet had to be able to completely enclose the candles else they might be seen from a distance.
If you Google binnacle there is not much on binnacles before about 1850 and the styles changed radically after that.
Here is a pic of what I did - it was fun to build - just like miniature furniture
Of course you could just put a satellite disk up in the main top 😉
Whether Niagara had any of these features is debatable. Remember they were in a race to complete before the Brits completed their build. No frills. What you had to have and nothing more. A compass on the ocean would have been mandatory. On a big lake, eh.
-
 mikiek got a reaction from cdrusn89 in US Brig Niagara by Tom E - Model Shipways - 1:64 Scale
Tom - re: your compass - in those days a compass (or several) were usually mounted into a cabinet called a binnacle. The binnacle was set in front of the wheel/tiller. There were several typical requirements:
1. all cabinet hardware to be made of brass or copper - iron could confuse a compass
2. there should be a place to set candles next to the compass - for night vision
3. the cabinet had to be able to completely enclose the candles else they might be seen from a distance.
If you Google binnacle there is not much on binnacles before about 1850 and the styles changed radically after that.
Here is a pic of what I did - it was fun to build - just like miniature furniture
Of course you could just put a satellite disk up in the main top 😉
Whether Niagara had any of these features is debatable. Remember they were in a race to complete before the Brits completed their build. No frills. What you had to have and nothing more. A compass on the ocean would have been mandatory. On a big lake, eh.
-
mikiek got a reaction from Tom E in US Brig Niagara by Tom E - Model Shipways - 1:64 Scale
Tom - re: your compass - in those days a compass (or several) were usually mounted into a cabinet called a binnacle. The binnacle was set in front of the wheel/tiller. There were several typical requirements:
1. all cabinet hardware to be made of brass or copper - iron could confuse a compass
2. there should be a place to set candles next to the compass - for night vision
3. the cabinet had to be able to completely enclose the candles else they might be seen from a distance.
If you Google binnacle there is not much on binnacles before about 1850 and the styles changed radically after that.
Here is a pic of what I did - it was fun to build - just like miniature furniture
Of course you could just put a satellite disk up in the main top 😉
Whether Niagara had any of these features is debatable. Remember they were in a race to complete before the Brits completed their build. No frills. What you had to have and nothing more. A compass on the ocean would have been mandatory. On a big lake, eh.
-
 mikiek got a reaction from Elijah in Enterprise 1799 by mikiek - FINISHED - Constructo - 1:51
Getting some progress made on the rigging. Shrouds & ratlines are in. Got a few more stays to put in. The instructions are getting worse - the book is just too general for rigging steps and the rig plan is very inaccurate and incomplete. Shrouds & stays are pretty much common sense - not too hard to figure how they should run. Running rig is a different animal however. The thing i don't like is the plans say to drill holes in the upper masts to run the stays thru. IMO drilling 3-4 .35mm holes in close proximity in a .5mm stick is not a wise thing to do. I have elected to seize all shrouds & stays instead.
I'm thinking ahead to the sails also. I was dreading having to stitch a hem around each of them like I had to do the last time I did sails. Lucked out here. I guess I ordered the deluxe sail kit with the boat. I have to say these sails look quite nice and come already hemmed with the rope (dont know the proper term) stitched around the edge. All very professionally done! That saves a month or more of work and I doubt I could have matched the way they came. The only additional thing I'm doing is inserting a piece of wire into the hems. This will allow me to shape the sails somewhat and they will hold the shape. I'll post pix of that as I get more serious with the sails. At the moment I'm just inserting all the wire.
On the philosophical side. I've always used Syren rope for every build. None can argue it's quality or the extra bang it adds to a build. I use tan for running rigging and black for standing. A while back Syren made the decision to discontinue black rope and offer a dark brown instead. I didn't think much of it at the time except that I like to seize my black rope with a dark brown fly line. I liked that there was enough contrast to see the seizing but it didnt stick out like a sore thumb like seizing black with tan does. Unfortunately, my brown fly line becomes invisible on the dark brown rope. So I guess when I make the switch to brown rope I'll have to find a new seizing color. Now for the philosophy - if you think about it Syren has a lot of influence on how our builds look. Granted using Syren products is totally the builders choice, but I think many, many of us do. I try to imagine all the builds that must be on display with Syren ropes & blocks. And we have used black rope for standing rigging almost as a best practice. Now just like that, black is out, brown is in. Within a year, there will be no more boats built with black rope - at least black Syren rope. Brown is the new black and just like that black standing rigging disappears.
I will say, after my soapbox rant, that this is not an indictment of Syren or Chuck in any way. Obviously they are free to offer what they choose. I will continue to buy Syren products (brown rope included) and support them. It was just an observation I had that I wanted to share.
Now for a few pix. All the new camera gear and photography research I am doing is beginning to make me think in a different way as I take boat pix now. There's a lot more to it than just snapping away. Lens, light, distance, depth of field all must be considered. These pix may be a slight improvement over previous ones, but I think I am seeing the light on what it takes to produce something better than a snapshot. To me the photo side of our hobby is overlooked but is critical. A good photo can make a crappy build look good. A bad photo makes the best build look mediocre. This was my first attempt at a shoot of Enterprise. I think things will get better. One thing I haven't worked out is size, so I apologize if your viewer makes you scroll around to see it all.
-
 mikiek got a reaction from CiscoH in Enterprise 1799 by mikiek - FINISHED - Constructo - 1:51
I've never been crazy about 30-40 photos of the kit parts so I will spare you and me from that effort. I'll just say so far everything looks to be in order.
Bulkhead frames to keel was the first order of business. Everything popped out from the laser sheets OK. The fit was a little on the loose side. Not bad, but I decided it could use a little help. I cut brace blocks from a 1"x1" and used them kind of like a square. After positioning the block to get a frame at 90 degrees, the block was glued to the frame and keel. This is something I usually do anyway. It got rid of all the slop very well.
Next was the deck substrate, one of the first big frustrations. The frames have a lot of slope from the centerline to the bulwark. Of course the plywood base for the deck did not. Getting that glued well was a struggle. The slope was obvious right away so I figured the best plan would be to glue down one side then the other. Got the first side down without incident - tacked with CA then white glue at the joints. I let that set overnight.
Things looked good the next morning so I was ready to work the other side. I put down some CA on the top edge of the frames and tried to bend the plywood down from the centerline to make contact. Not enough fingers . Just to mess with me a little more, the base popped up and off several of the frames on the first side And I still didn't have the second side glued down yet
There really is no clamp that I am aware of to use in situations like this, so I did a lot of manual holding down of the edge. Finally got that side down except for two frames - I decided I should shim those rather than distort the base getting it to glue down. So back to the first side for some repairs. Holding the base down on that side caused one on the other side to pop. And so it went. Close to two hours of holding pieces together.
The deck was planked next. I followed the plank pattern from the plans. Don't care for it that much. I also screwed up and stopped all the butts at one spot near the bow. I guess the brain was parked somewhere else.
I've already passed on a brief description of the hull planking debacle. More of a bluff bow than my previous build and I fought with it. The double planked hull had some overly thick sticks that had a mind of their own. Enterprise wound up gathering dust & bugs waiting for me to try again. A few weeks back, armed with some better bending techniques, I was able to get a few sticks in place. Did a few more and decided that it was possible. So that pretty much brings me up to now. I'm continuing with the same sticks - a long soak in hot water, edge bending in a jig I made, then lateral bending with the electric style plank bender. It still isn't easy to lay a strake but it's manageable.
As usual, I am using the proportional dividers to help taper the sticks and as usual they are providing me with a pretty accurate pattern. To shave off the material I am using a thumb planer. This is a miniature version of the hand planers used in wood working. I have found this tool to be very useful. One caveat - I tried a couple of the $5 versions first. I quickly decided this was one of those times where I was going to have to spend some $$ and get something on the higher end. In the end the Veritas planer has proven to be worth every penny.
As I mentioned the sticks are extremely thick. Holding them down while the glue sets was getting old. Couldn't find any clamp that really helped beyond the second or third strake so I thought I would try these. Did not like them at first but a retry a few days later showed them to be helpful. I would recommend them if you don't have a problem with stabbing things in your bulkhead frames.
I think I have hosed up the filler blocks at the stern. The instructions & plans were very vague. Several other logs show the blocks shaped more squarely. I rounded the back end. I imagine this can be overcome.
So there you have it for the moment. Thanks for reading!
-
 mikiek got a reaction from JesseLee in US Brig Niagara by Tom E - Model Shipways - 1:64 Scale
Tom - re: your compass - in those days a compass (or several) were usually mounted into a cabinet called a binnacle. The binnacle was set in front of the wheel/tiller. There were several typical requirements:
1. all cabinet hardware to be made of brass or copper - iron could confuse a compass
2. there should be a place to set candles next to the compass - for night vision
3. the cabinet had to be able to completely enclose the candles else they might be seen from a distance.
If you Google binnacle there is not much on binnacles before about 1850 and the styles changed radically after that.
Here is a pic of what I did - it was fun to build - just like miniature furniture
Of course you could just put a satellite disk up in the main top 😉
Whether Niagara had any of these features is debatable. Remember they were in a race to complete before the Brits completed their build. No frills. What you had to have and nothing more. A compass on the ocean would have been mandatory. On a big lake, eh.
-
 mikiek got a reaction from GrandpaPhil in T24 Tugboat by mikiek - FINISHED - Tippecanoe Boats - RADIO
Construction on this build is finished. I'm not changing the thread title yet because I still have a few things to "trick it out" - tires, airhorns, exhaust pipes. I had her on the water today for a few minutes. She rides higher than I thought. At full throttle she will do circles around the RC sailboats. The motor has an incredible amount of torque. I didn't have the prop shaft fastened tight enough in the universal joint and it twisted loose pretty quick.
I have to come up with somewhere a little more elegant to take final pix I'll try to get some water shots real soon.
I still have the marker hauling barge to build. That looks pretty simple. Guess that means I need some sort of hitch for hauling. And right as I was typing that I thought of some big mooring cleats. All tugs have lots of those.