
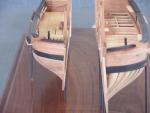
Supplies of the Ship Modeler's Handbook are running out. Get your copy NOW before they are gone! Click on photo to order.
×

dgbot
-
Posts
3,993 -
Joined
-
Last visited
Reputation Activity
-

 dgbot got a reaction from MarisStella.hr in TRAJTA by MarisStella.hr - FINISHED - fishing and cargo boat from Korčula, Croatia
This should prove to be interesting. What are you basing your build on?
David B
-
 dgbot reacted to pete48 in Herreshoff Buzzards Bay 14' by pete48 - FINISHED - 3/4" = 1' - SMALL
Hi David, She will only have a White Waterline Stripe and thats it . ( sweet and simple )
Best Regards,
Pete
-
 dgbot got a reaction from pete48 in Herreshoff Buzzards Bay 14' by pete48 - FINISHED - 3/4" = 1' - SMALL
Lovely looking hull. I know inside the hull should be painted, however all she needs is a stripe along the waterline.
David B
-
dgbot reacted to Karleop in Vasa by Karleop - FINISHED – Billing Boats – reviving a poorly built model
Hola amigos:
After sanding, staining and varnishing the masts and spars I started to assemble the bowsprit placing the topmast, masts, blocks and tops.
,
,
Because deadeyes are partially tucked into the top I decided to make the shrouds separately because otherwise it would be more difficult to hold them.
To put the shrouds between the masts I leave unglued the topmast cap. This operation is contrary to the normal way of doing it.
Saludos, Karl
-
dgbot got a reaction from pete48 in Herreshoff Buzzards Bay 14' by pete48 - FINISHED - 3/4" = 1' - SMALL
It looks like a fun sailor.
David B
-
dgbot reacted to captainbob in Lettie G Howard by captainbob - FINISHED - 1:48 - POB - schooner
The deck is almost done. I apologize for not taking pictures of the parts as I built them. I tend to get carried away with the build and don’t think of pictures until it’s too late. I still need to put pin rails near the dead eyes and cut the samson or pawl post to the right height. I also need to add supports for the deck boat. The mackerel boats towed a seine boat which was around forty feet long but they also carried a dory on deck.
Bob
They put braces on the corners of the skylight to keep the lines from snagging.
Apparently they were not concerned with the smoke stack.
-
dgbot reacted to captainbob in Lettie G Howard by captainbob - FINISHED - 1:48 - POB - schooner
Wow, So many responses. Thanks to all of you and to the many “likes”. Right now it is just pushed together. I will be taking all apart and will paint the wood white except for the barrels. The brass parts will stay brass. But I still have a few other items to make before I paint, such as the main cabin and the steering box.
Bob
-
 dgbot got a reaction from HIPEXEC in USS Constitution by Hipexec - FINISHED - Constructo - 1:82
If possible make a fixture that will hold up the sides of the ladders. Once you are sure they are properly aligned try dry fitting the steps in. Widening the slot a little if you have to once together glue the entire thing up. There are other ways, however this might be the easiest way to do the job without making them.
David B
-
 dgbot got a reaction from Mike Y in 18th Century Longboat by dcicero - FINISHED - Model Shipways - 1:48 - Tri-Club
I think you are doing a bang up job Dan. Pretty soon you will become the Longboat mentor and everyone will be asking you questions. Keep upo the great work.
David B
-
dgbot reacted to mtaylor in Mandatory - for sellers new to MSW (model builders or commercial retailers)
There are two types of sellers....
1. Model Builders who just have some second hand tools, kits, etc and wish to sell them to other hobbyists. You must be a member in good standing at MSW to post stuff for sale if you are in this category.....You must have 25 or posts on MSW as a member in good standing to post stuff for sale.
2. Commercial business....online stores No advertising/self promotion is allowed on the forum. If your business is interested in posting about your products or services, please contact admin (Chuck) about becoming a sponsor of this site. As a sponsor you will be able to promote your products and services here in the the traders and dealers area as well as have a banner linked to your website along the right side of the forums main page. Unless you are a sponsor of this site, All commercial business promotion is forbidden without permission from the administrators.
Those in category one......Please read.......If you wish to sell something here on MSW, please read and follow the rules given. We're not, by nature, a suspicious bunch. But over the years here and in other forums, people with something to sell have come in and offered various and sundry items. Not all have been honest. So please, follow these guidelines so that everyone has a pleasant experience. You must have been a member that has 25 posts before you can post a topic in this forum.
1) Post some pictures of the item.
2) Offer to give your phone number via PM.
3) Offer Paypal or some other secure transaction method.
4) Provide a price (given the different currencies, put the price in your currency).
5) Be sure to post your real name, location by city and country.
6) Do not post personal data such as addresses, emails, etc. You will probably get spammed, etc. as this forum can be read by anyone including miscreants.
Lastly, expect questions and do answer them.
-
dgbot reacted to dcicero in 18th Century Longboat by dcicero - FINISHED - Model Shipways - 1:48 - Tri-Club
I've been pretty busy lately, so not a lot of progress has been made on my longboat. Got some stuff done over the weekend, though, so I figured it was time for an update.
A couple of weeks ago, I brought the model up to Manitowoc, WI for the 38th Annual Model Ships and Boats Show and Contest at the Wisconsin Maritime Museum. What a great event in a great location! Obviously, the longboat was there just for display this year. Next year, it'll be in the contest.
Back in the workshop and motivated by all the great models I saw in Manitowoc, I started installing the knees around the boat. There really isn't much to this. They go in pretty easily for the most part.
The two knees in the bow and the part that fits around the bow itself were a little trickier. I got the knees in last night (and didn't take a picture) and the bow piece is going to take a little surgery. The part in the kit needed to be sanded down quite a lot to fit the bow, to the point where it really didn't look correct. I'll take a swing at making a new part and fitting it in.
Next came the windlass. I was a little apprehensive about this part. Bob Filipowski made a presentation at our last NRMSS meeting about how he made his windlass. Looked like a tricky operation. Here's how I did it.
The first thing I needed to figure out was how to make those eight sides all parallel to the centerline of the windlass. I cut the square stock and marked the locations of the various sections of the windlass. I plunked the square stock on my building board. That held it securely in place and gave me a reference to the centerline of the windlass.
Then I carefully sanded, using a sanding stick, parallel to the building board. It only took, maybe, four passes with the sanding stick to finish off one of the sides.
As the instructions say, I scored the lines between the sections to make them stand out more. And I made the square holes almost the same way Chuck did. The difference? The business end of my square file is square, but the other end is round. I had to use the business end, which worked out fine. (Getting the sawdust out of those little holes was a little tricky!)
Then I drilled holes in the end of the windlass and put short pieces of wire in them. Here they are, prior to trimming.
I wish I'd taken a picture of the end of the windlass. You can clearly see eight sides, all nice and symmetrical.
And so here it is, installed.
Chuck mentions that the wire axles on the end of the windlass need to be short. He's right about that. I ended up trimming them down to almost nothing to get them to fit into the small holes in the risers. Once installed, though, the thing rotates just as it should!
I didn't take pictures of them yesterday, but I also installed the two lifting rings in the bottom of the boat. They look good and add a nice level of detail to this model. More pictures of that stuff to follow.
Dan
-
dgbot reacted to JerryTodd in Constellation 1856 by JerryTodd - 1:36 scale - RADIO - First Class Sloop of War
Spent Saturday at the Chesapeake Bay Maritime Museum's Model Boat Expo. This was now my second event of this sort, two weeks after the first, as well as my second visit to the museum since my first in 1979 when I went there aboard the barkentine Gazela Primeiro. All three models went, and I even got a little pop-up gazebo tent, knowing it was going to be quite sunny.
Macedonian got quite a bit of attention, to my surprise. Being able to see how she was constructed got a lot of questions about what was used, how it was glued, etc. If I do this any more I think I'll adopt the theme "Don't be afraid to scratch build" as that was what seemed to impress people most - that these were not kits and were built, for the most part, of scrap wood, and materials from the local lumber/hardware stores.
Pride didn't sail, though she very much wanted too. I don't have ballast attached to her fin, or her steering set-up as yet, so I took her solely for display. She was very well received because of being a Baltimore Clipper and the 200th anniversary of the War of 1812, which is a major theme running at the museum right now.
It was blowing 10-13 mph and gusting a bit as it whipped around the building upwind of us, so I wasn't too sure about putting Constellation in the water, not to mention how crowded with obstacles the pool was, but a friend from another forum put his Ram schooner in and didn't seem to have any trouble, so I went for it.
On the pool the wind didn't seem to blow as strong, but it was very flukey and was often doing something different at either end of the pool. none-the-less, Stella made through and actually sailed a bit, though she would often get caught aback just as it was getting fun.
I did install a test rig in Constellation to try out a new idea for handling sails with double sheets, like heads'l, etc. I'll delve more into that in some detail later.
-
dgbot reacted to HIPEXEC in USS Constitution by Hipexec - FINISHED - Constructo - 1:82
I made the chimney from a 6mm dowel and painted it. I drilled out some material in the end to make it look like the chimney opening. I'll pin and glue it tomorrow.
I glued all grates except the bowsprit grate. I also glued a shim in the bowsprit hole so the bowsprit slides in perfectly exactly at the correct angle. Next, I'll make the dowel hole through the bowsprit and deck, so when it comes time to mount it, it should just slip into place.
-
 dgbot got a reaction from ranikola in Sewing Ratlines
One of the things that will help you isthe surface tension of your line. Even if it is the smallets diameter you can find it may still have a memory. Let the line soak in some washing detergent ot softener. Once you rinse it and let dry this might help out tremendously.
David B
-
 dgbot got a reaction from marktime in Sewing Ratlines
One of the things that will help you isthe surface tension of your line. Even if it is the smallets diameter you can find it may still have a memory. Let the line soak in some washing detergent ot softener. Once you rinse it and let dry this might help out tremendously.
David B
-
dgbot reacted to danri in US Brig Syren 1803 by danri - Scale 1:64
Timberheads - i make a jig to be sure all had same profile.
Boarding panels - was laminating from 1/32 sheets
Hammock Cranes - soldering from 1mm tube, 0,7 and 05 mm wire
And those in place
The hammock netting started
-
dgbot reacted to JSGerson in Rattlesnake by MikeWz - Model Shipways - American Privateer - My first build
I made my Rattlesnake Long Boat from a separate POF kit because Mamoli provided a semi-completed shell. I felt like that was cheating so I took the different route. A least the Model Shipways method forces you to construct the boat. I am waiting with anticipation to see how it all comes together. This is the same method that their USF Constitution's boats are made, which in the next decade or so I hope to start. I learn from example.
-
dgbot reacted to tlevine in HMS Atalanta 1775 by tlevine - FINISHED - 1:48 scale - from TFFM plans
The upper deck planking has been installed and the first bit of sanding is complete. It still needs more scraping and find sanding. I used 3" holly for the planking throughout. The binding strake would have been inset into the deck beams but since that detail is not visible I do not model it. After looking at a lot of models, I decided to only plank the port side and the midline plank. I wanted to be able to look into the lower deck cabins and so I only installed decking between the binding strake and the midline and the four outside strakes. The central planks are fairly straightforward. The open area in front of the foremast step for the bowsprit step. The plank located by the well has not been glued in so that can be removed during installation of the bitts. The plank edges were "caulked" with a pencil. The treenails are bamboo, drawn down to a #77 drill and inserted into a #76 hole. I prefer to pressure fit these rather than use glue. The finish will bind them all together. The blotchy color on the pictures is not real. I had just washed the deck off for the pictures and did not give the wood sufficient time to dry. Compare the color contrast between the inner and outer planking. This all came from the same billet of holly.
-
 dgbot got a reaction from Canute in Teazer by dgbot - FINISHED - CARD - Blockade Runner
Next up was the rest of the super structure. The navigation deck was finished off.
The aft deck was then completed with the wheels, compass and ventilators.
This is about as good as I am going to get it. Once more I am learning about shaping and folding. Another item is a leather strop block I use on my xacto blade every now and then. This helps to keep the tip super sharp so that there are no tears.
-
 dgbot got a reaction from trippwj in Teazer by dgbot - FINISHED - CARD - Blockade Runner
Thennext parts were the cleats. This was pretty straight forward. Just fold over and glue together. I applied a little CA to stiffen up the pieces a little bit and with a marker to touch they were placed on the model.
So far so good.
-
dgbot got a reaction from trippwj in Teazer by dgbot - FINISHED - CARD - Blockade Runner
Unfortunately I was preoccupied with being at the University of Iowa and the kind people at the Hope Lodge so I did not have much energy to get much done. But I am now back. I finally started on the bow. The crane, anchor and chain. Since I am working with just the stock itself I did the best I could. Though this would have been easier with other material. I cut out the sheet and glued it up
This time around I soaked the pieces in CA in order to reinforce them. And once cut out I used a marker to touch up the color. Note to self always keep a pack of markers handy.
By using CA I was able to make everything piable enought to glue to the hull. For this I used white Elmers.
So far so good.
David B
-
dgbot got a reaction from trippwj in Teazer by dgbot - FINISHED - CARD - Blockade Runner
The next part of this build was to build up the smoke stacks. After cutting out the bottom have I had trouble lining the pieces up so I cut around the parts and glued one of them to a backer of paper and then glued the other one next to it and trimmed them to fit. I also added a strip tab to edge glue the part together. This worked out very well
The top half was done bacically the same way
Then they were asembled and applied to the model.
So far so good less do overs and learning a little more.
David B
-
dgbot reacted to aliluke in HM Colonial Cutter Mermaid by olliechristo - FINISHED - Modellers ShipYard -
Sharp as a tack Oliie. This has/is really turning into a wonderful model. Your first and second photos really capture that (not that your other pics don't). Great stuff.
-
dgbot reacted to olliechristo in HM Colonial Cutter Mermaid by olliechristo - FINISHED - Modellers ShipYard -
Hers what the bowsrpit traveller ring that was supplied started out like, a fraction loose i think..
-
dgbot reacted to DWright in Bluenose by DWright - Model Shipways - 1:64
Haven't quite got the hang of the picture thing!
If anyone out there can tell me how I can narrate an individual picture with a caption either before or after I would appreciate it.
Thanks,
Darrel