HOLIDAY DONATION DRIVE - SUPPORT MSW - DO YOUR PART TO KEEP THIS GREAT FORUM GOING! (Only 24 donations so far out of 49,000 members - C'mon guys!)
×


Overworked724
-
Posts
1,258 -
Joined
-
Last visited
Content Type
Profiles
Forums
Gallery
Events
Everything posted by Overworked724
-
 my wife asked me a great question. How will you mount it? Hmmmmmmm
- 69 replies
-
- 1
-

-
- lady nelson
- victory models
- (and 1 more)
-
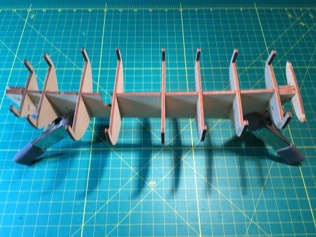
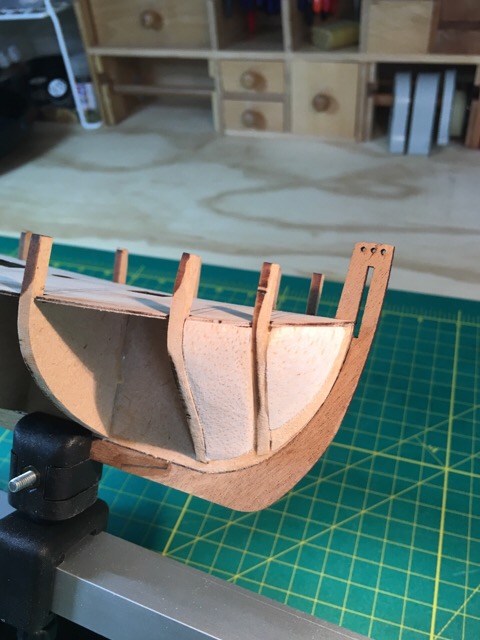
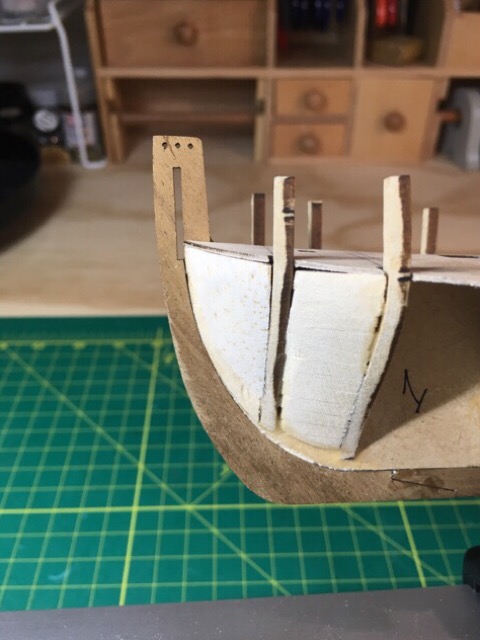
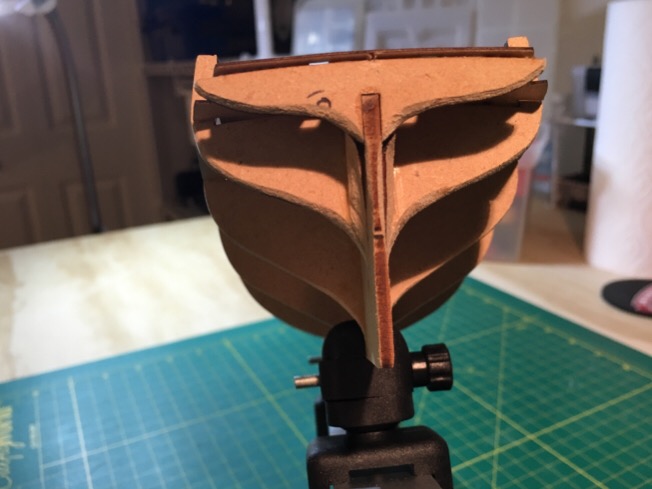
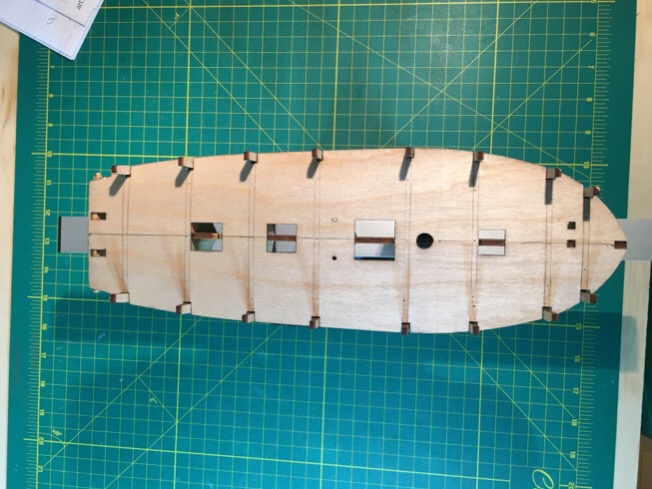
Happy 4th. Time marches on. A few hiccups. In trying to pre-bend the bulwarks after soaking, discovered that I put them in the jig backwards...after resoaking and rebending, discovered I had mangled them pretty badly. Yay...made new bulwarks (pretty fair job...get it? FAIR JOB! I laugh at my own jokes. Deal with it) Ok. During the remake of the bulwarks, I made bow and stern bow fillers. I am stopping with 2 on each side for each end. Pretty happy with it. Tried both basswood layering and balsa. Found balsa easier to shape but more difficult to cut (wanted the grain to flow laterally for easier shaping but cutting balsa blocks along the grain can be difficult) Learned a lot about shaping fillers...I found myself 'feeling' more than 'seeing' to note the curvature consistency. Next...bulwarks and whatever comes next.

- 69 replies
-
- 2
-
-
- lady nelson
- victory models
- (and 1 more)
-
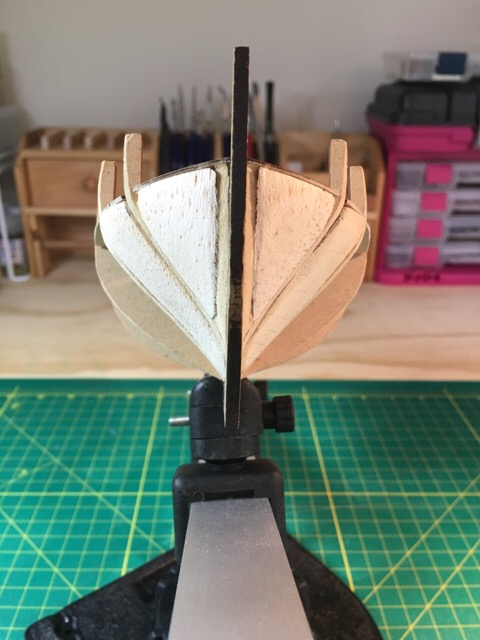
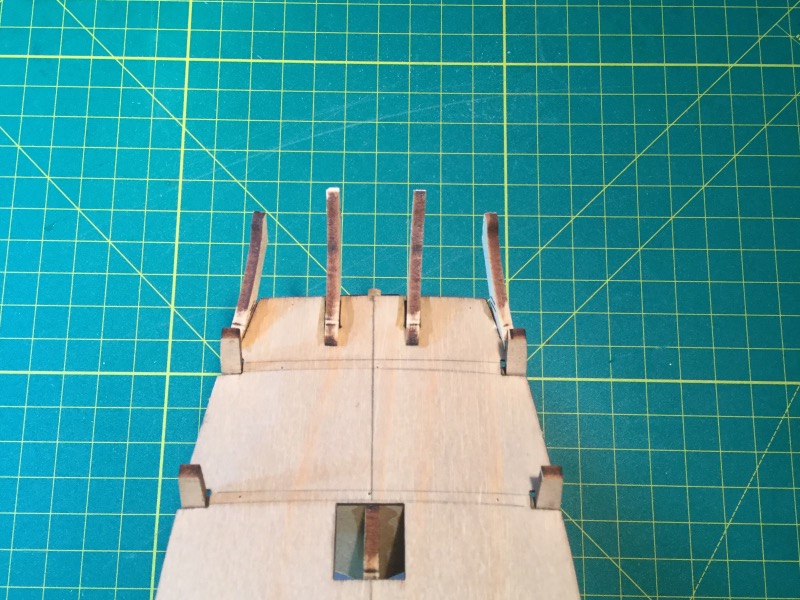
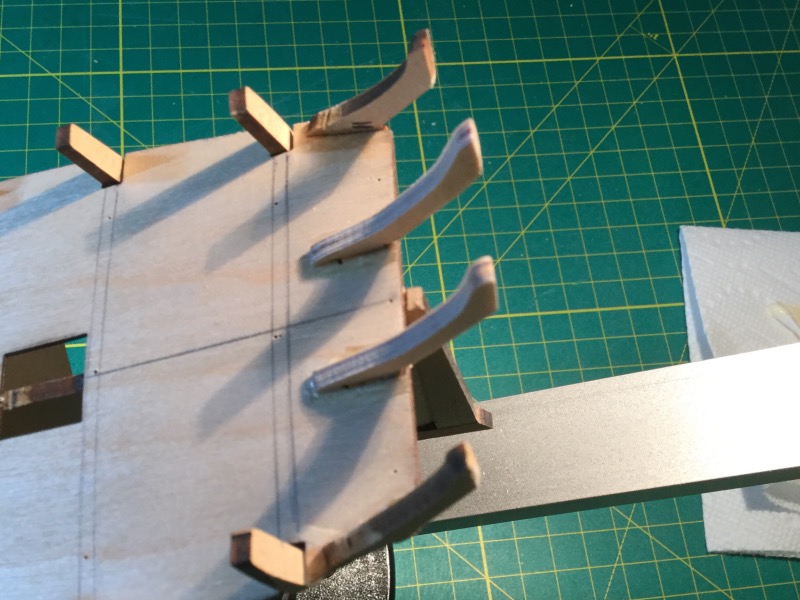
Notes from the novice ship yard. 1. Accidentally snapped the nose piece (bow stem) while trying to pre-fit the fake bulk heads. Wonderful stuff, CA glue. 2. Am now re-pre-soaking bulkheads. But during the repair of the bow I decided I would try to put together some bulkhead filler blocks. Pretty obvious that I over sanded the bow filler pieces and have a feeling I can use the help When planking. Did my best. Slow and steady. 1 down, many to go.
- 69 replies
-
- 2
-
-
- lady nelson
- victory models
- (and 1 more)
-
On a positive note...I now have an instinctive knowledge of the difference between bow and stern.
- 69 replies
-
- 3
-
-
- lady nelson
- victory models
- (and 1 more)
-
Excellent. Will also try! On a different note: soaked bulkhead frames in water and put them in my 'bending jig'...nails on a board...and did a right brilliant job preforming them for mounting. But.... Put the damned things in backwards. Would be fine if the bowsprit was intended to come out of the stern. (I am such a bloody idiot sometimes). No pics. Too friggin embarrassing. The only reason I am posting is to keep myself honest and in task.
- 69 replies
-
- 3
-
-
- lady nelson
- victory models
- (and 1 more)
-
Another question: If you make a mistake and need to realign a piece glued using wood glue...how do you go about 'getting it unglued'? Yes, wood glues like Elmer's is water soluble... But once dry, it might as well be superglue! How do you go about 'wetting' the glue to get it to release? I have this vision of dunking the model in a bathtub. Any advice, with pics, website/video references would be useful.
- 69 replies
-
- 2
-
-
- lady nelson
- victory models
- (and 1 more)
-
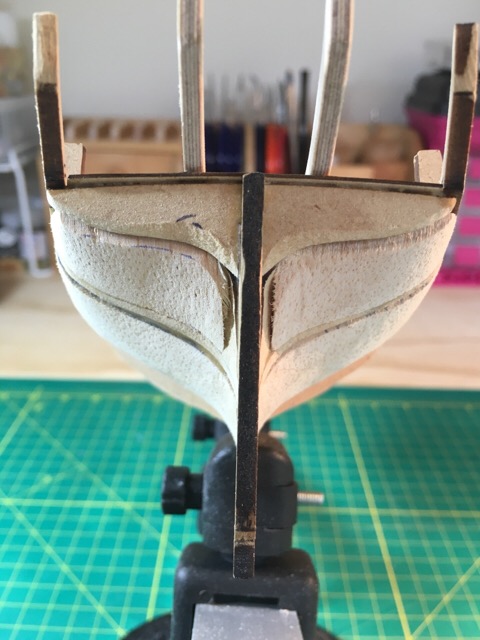
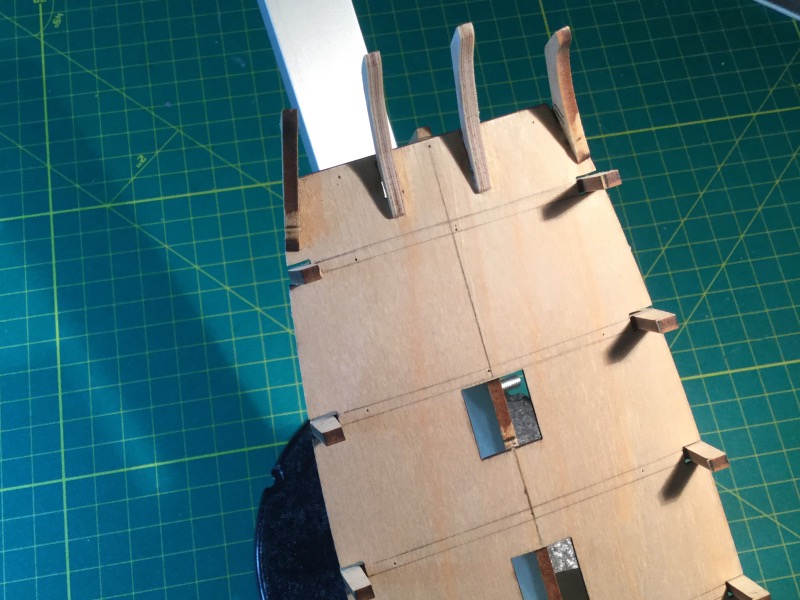
Well...been a while. Small progress....of a sort. Trying to make the filler blocks after I put on the deck was proving a bit frustrating. Finally decided to refocus on the other mistake I made. When I put in the stern pieces which are attached directly to the deck....I used CA glue. Good and bad in that it certainly gives you a strong bond for a piece that lacks any additional collateral support....bad in that it gives you about 0.5 seconds to get it properly aligned before it sets...such was the case with the two inside pieces. I stared at the askew pieces for the past two weeks until last night when I finally said 'what the heck'. It was bothering me so much, I did something I have never done....Last night, I drilled them out, sanded down the CA residue stuck to the deck, carved out new pieces to the best of my ability using 1/8" birch stock plywood and my scroll saw, and set them in using wood glue to ensure I could get good alignment. This morning I touched up the underside where the slot fits into the hull with some CA...just to give it some additional support...not bad. This represents the first time I have 'made' a piece from scratch to replace a screw up. I am now basking in the glory of my newly corrected mistake. One thing...mistakes tend to make me less motivated to continue to push on....having to problem solve around a screw up is VERY difficult when working with plastic. Not so with wood it seems....gave me some excellent experience and some new confidence that I can actually do something simple from scratch.


- 69 replies
-
- 3
-
-
- lady nelson
- victory models
- (and 1 more)
-
Hi Elijah. Not much movement past couple weeks. Still settling into new house. Plan To start making progress again this week.
- 69 replies
-
- 2
-
-
- lady nelson
- victory models
- (and 1 more)
-
Been using a Dremell to start out. Then moved to a half round file to get the areas near the stern and bow with the greatest curvature. Now using a sanding block (1"x3") for finer work. Have been careful to try and keep things aligned. But may have messed up a bit putting in the stern pieces as they don't look exactly true. Hopefully some sanding and careful work will allow me to push forward without needing to drill them out and replace them with freshly made pieces. Will make a series of some small wooden files (Starbucks coffee stirrers with some glued on strips of sand paper 220 grit). Good tip. Filler blocks...um. Yeah. Never done that. Have read up on the process though. I guess worth a shot. Certainly can't hurt! More to come.
- 69 replies
-
- 2
-
-
- lady nelson
- victory models
- (and 1 more)
-
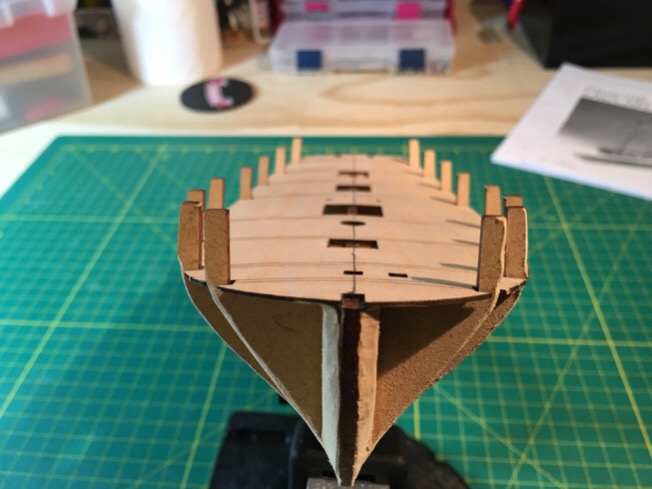
Deck on. Fairing the hull. Trying not to over-do. The particle board the bulkheads and centerpiece are made of grind down quickly. Thinking of putting in stern and bow fillers, but also eager to move on a make more mistakes. (Already made a few but am pressing on. Learning a lot!!!!)
- 69 replies
-
- 2
-
-
- lady nelson
- victory models
- (and 1 more)
-
I wonder if my insurance covers Dremell injuries?
- 69 replies
-
- 1
-
-
- lady nelson
- victory models
- (and 1 more)
-
Well...the bulkheads were not perfectly square. Crap. But darn close. So I am taking a stab and deciding to push ahead. Seen a few posts (and recommendation from club member) to use filler blocks to shape the hull surface. Yeah...I agree. But the kit did not come with it and I need to learn from my mistakes. So darn it! I will make them!!!! Put the deck on and will post pics later. Time to fair the hull. God help me.
- 69 replies
-
- 1
-
-
- lady nelson
- victory models
- (and 1 more)
-
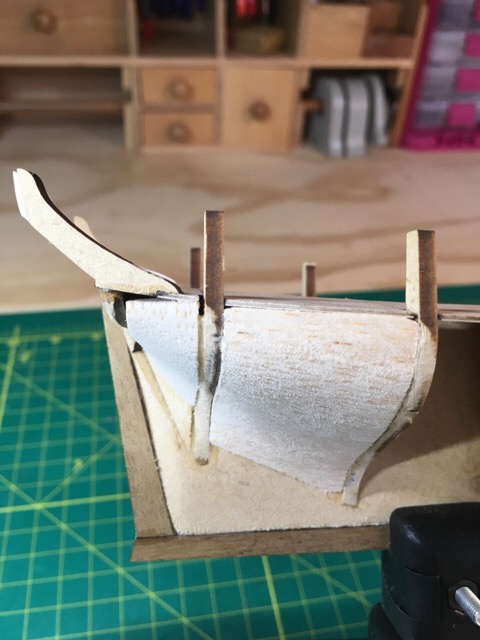
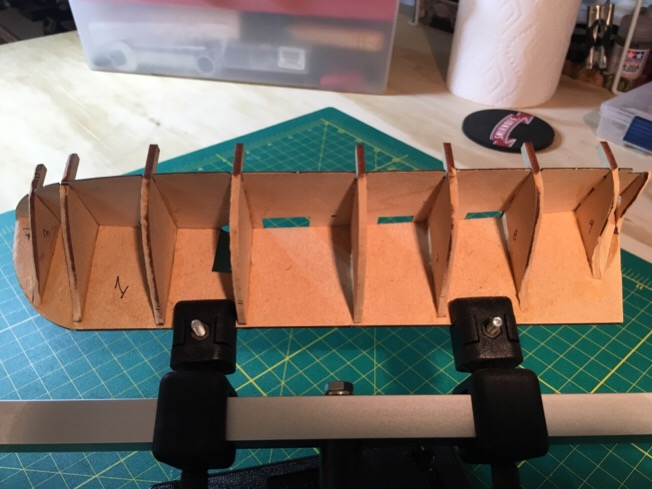
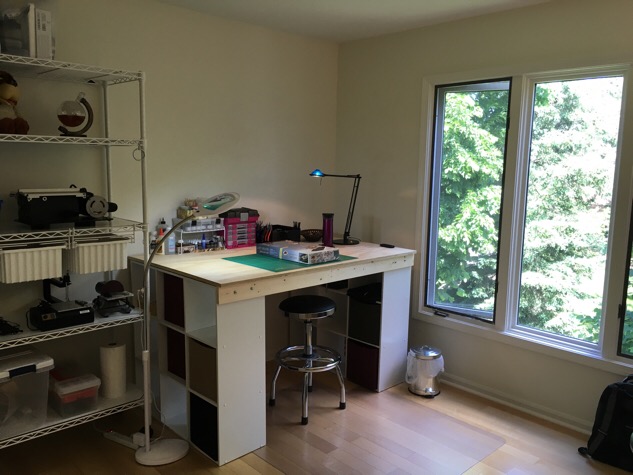
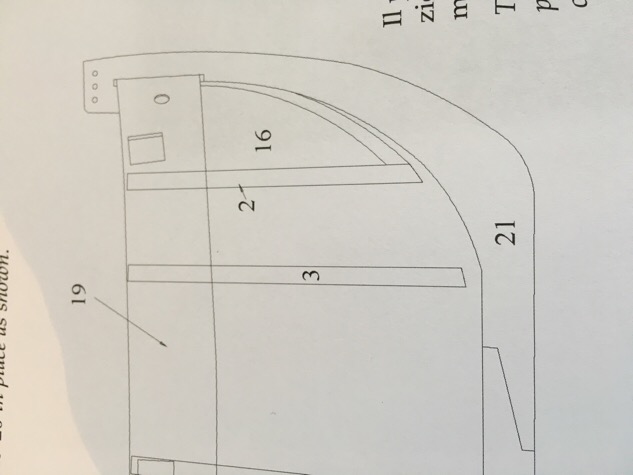
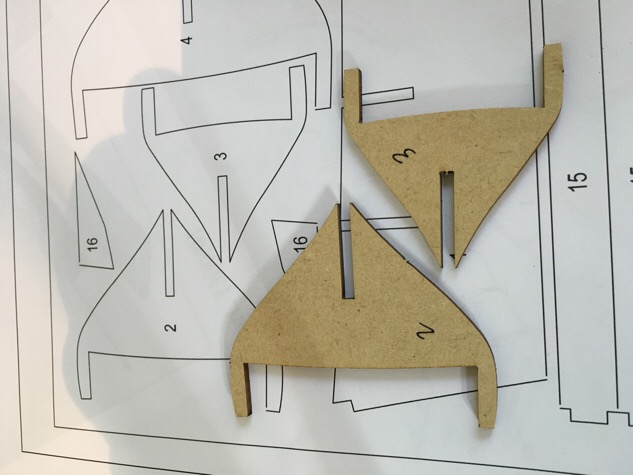
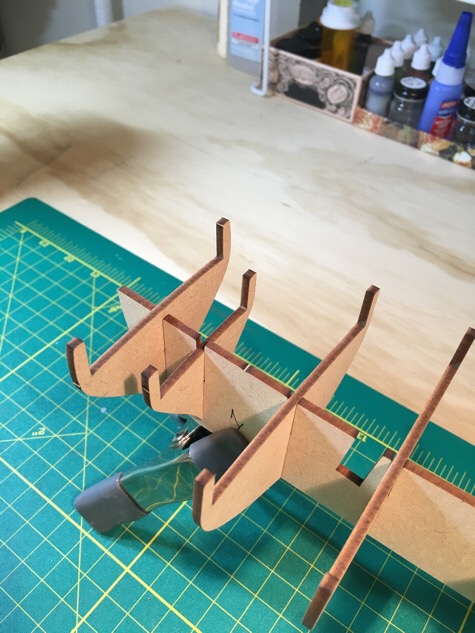
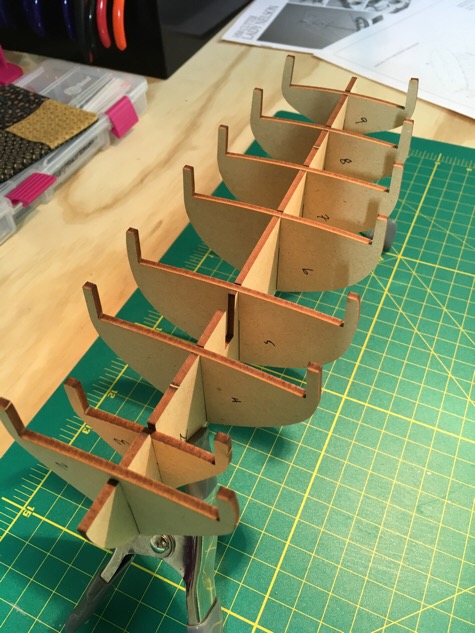
First, I thought I would post a pic of my new hobby shop (shipyard). After a flurry of packing/unpacking....we are slowly getting settled in...and my wife is extremely happy she can now 'send me to my room!' I now (finally) have some elbow room and storage which I did not have before. (I made the desk from 3/4" plywood, (2) cheap 9-hole cubby bookshelfs, and some 1" x 3" stock pine - all from Lowes) I thought I would also post my first (tiny) hiccup. (People have probably mentioned this before - but I haven't been reading any other forums yet....so I am proud of myself that I caught this mistake)..The plans call for the bulkheads to be placed within the frame sequentially from the bow beginning with 2, 3, 4 and so on... The problem is that the bulkheads #2 and #3 seem to be reversed. When I dry fit them, it was obvious that what the directions list as #3 is obviously incorrect. Needless to say, if I were to line up the bulkheads (see below for dry fit picture), I would have a bear of a time with the planking! (Not to mention my ship would end up with a very novel profile!) Now in the process of glueing up the bulkheads (correctly). More to follow.... Patrick Current questions: 1. Any particular brand of varnish which is best to use for wooden ship models? 2. Same question with regards to paint manufacturer? (I plan to use Acrylic)
- 69 replies
-
- 3
-
-
- lady nelson
- victory models
- (and 1 more)
-
Thanks all!! Just getting the ship yard desk together. Now just adding bulkheads (sweet Jesus, I hope they are square) and will look back towards the advice as I get into (GASP) planking. <shiver> Pat
- 69 replies
-
- 2
-
-
- lady nelson
- victory models
- (and 1 more)
-
OK folks....I have officially retired this build. For a number of reasons - life being the main obstacle. We have recently moved from our tiny condo to a much larger town home, and I now have an official 'designated' shipyard for my relaxing (ahem) hobby. As part of the packing, moving, unpacking, re-organizing, etc...the baby Connie suffered a unfortunate accident. During the transit to our new home, I ran over it with my car...! I know what you are thinking...how could I possibly have done that? Well, I simply wanted to ensure that when I broke it that it would stay broke. =-) In truth, I learned a lot about the hobby, and some of the pluses and minuses from building in plastic. I still love ships, and have decided to make the transition to wood kits for the very simple reason which is that was where I planned to go all along. So...my next build log will be on a nice little starter kit, The Lady Nelson. See you in the next thread! I will be posting that adventure in (hopefully) steady pace as we have now officially landed in more solid living circumstances! (Yay!) Best Pat
- 32 replies
-
- 3
-
-
- constitution
- revell
- (and 1 more)
-
Beautiful!
-
Hi Charlie.....following along with great interest! Although I am not as ambitious as yourself, your unique approach made me to decide finally upon my first sojourn into wood. Bought the Sultana kit...and will enjoy making and learning from my mistakes. One thing this thread has taught me is how easily you can adjust with wood....and that it truly is forgiving. Many thanks and keep up with your awesome build! Pat