
HOLIDAY DONATION DRIVE - SUPPORT MSW - DO YOUR PART TO KEEP THIS GREAT FORUM GOING! (Only 24 donations so far out of 49,000 members - C'mon guys!)
×


Overworked724
-
Posts
1,258 -
Joined
-
Last visited
Content Type
Profiles
Forums
Gallery
Events
Everything posted by Overworked724
-
 Good Luck! Building this same model myself...but got sidetracked temporarily on a solid hull model!
- 33 replies
-
- 2
-

-
- lady nelson
- victory models
- (and 1 more)
-
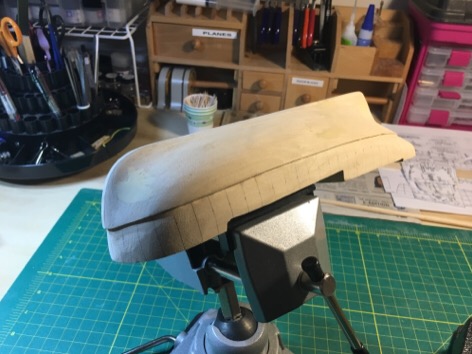
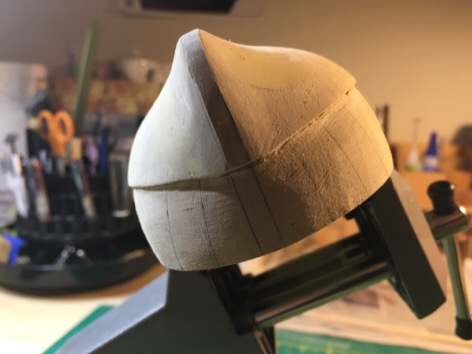
I actually have two kinds, both shown above in the pics. I use them both, and they have heavy bases so don't need to be bolted down, but you can if you wish. I attached a mounting block on the main deck so I could work on the underside of the ship. And also drilled pilot hole into the keel for mounting purposes later...and can attached a block through them if I wish to mount it upright. For a small ship like this, I can use both without fear. A longer ship would be best using a keel clamp as the two points of attachment give it great stability. Panavise: https://jet.com/product/detail/ccdc67f92cb34135a5f61231353c02ab?jcmp=pla:ggl:a_nj_dur_gen_hardware_a1_b1:tools_tool_clamps_vises_a1_other:na:PLA_648327839_30263576182_pla-161691684060:na:na:na:2&code=PLA15 And Ship Modeler's Vise (keel clamp): http://www.micromark.com/Ship-Modelers-Vise,7120.html?sc=WGB&utm_source=GoogleBase&utm_medium=feed&utm_campaign=GoogleBase&gclid=CKTuzsjNzNECFYEYgQod7hgPLg Hope that helps. I use them both a lot!
- 449 replies
-
- 2
-
-
- sultana
- model shipways
- (and 2 more)
-
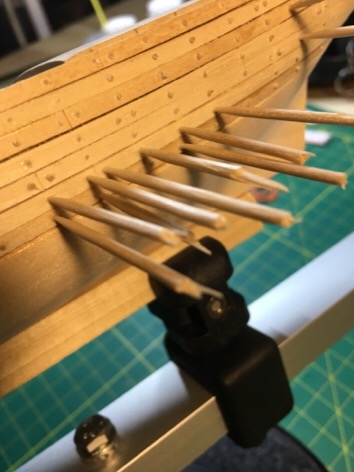
Quick picks of my toothpick/eElmer's glue tree nail process. Yes...cost savings from getting the cheapie toothpicks because you get 2 tree nails per toothpicks. Think green people! Pics of gaps in the planking. Kills me but wood filler(Elmer's color change stuff) is water soluble. Thin it out with some water and it spreads like butter. Might have to recarv the fake butt joints. Good night all!


- 449 replies
-
- 6
-
-
- sultana
- model shipways
- (and 2 more)
-
Agreed! Also good to see him kit bash a junior level kit to give you a sense of limitless possibility in building a modeL!
- 449 replies
-
- 2
-
-
- sultana
- model shipways
- (and 2 more)
-
Amazing...looking back on the pics I am missing so much. I'll do better as I go along.
- 449 replies
-
- 2
-
-
- sultana
- model shipways
- (and 2 more)
-
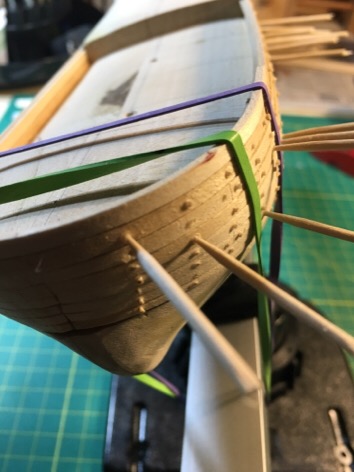
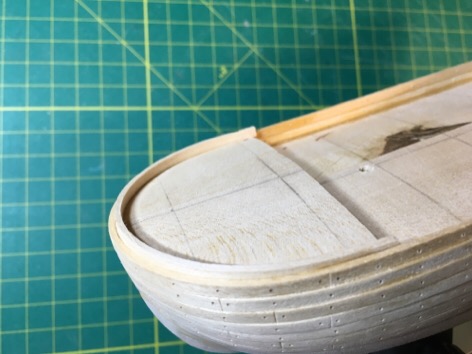
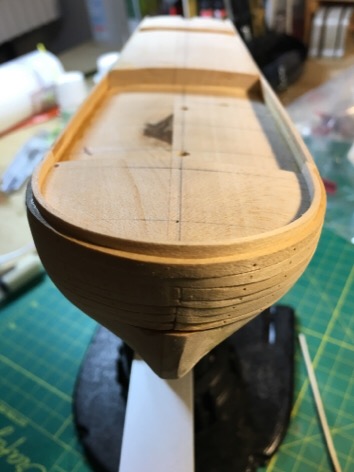
A brief word on my planking. Chuck's practicum fails to mention (or I missed it...which is possible)...every ship and build are different. If you trim the bow to look and feel like a can of soup...yes, the planks will be adjustable and easily stackable from stern-bow-stern. But hull geometry (which is a wierd and wonderful thing) will dictate how you can lay your planks. In my case, I had more bow curvature which forced me to consider how to even out the lay of planks. You can see that the first 5 rows of my planks above the wales requires trimming towards the bow. I had to do some math to figure out how much to trim off (and from where) in order to achieve a single flat plank that wrapped around the ship on planks #6/7. Your ship is unique...so referencing anyone else's build log should be for information and ideas....NOT for direction..,.at least where planking is concerned.
- 449 replies
-
- 2
-
-
- sultana
- model shipways
- (and 2 more)
-
Sad. 2 months of work distilled down to 30 min on a MacBook to start and catch up my project. Life goes on. Next, completion of stern inner bulwark and planking...followed by transom prep, deck, and cap rail. Amazing. I actually know what I am(almost) talking about.
- 449 replies
-
- 2
-
-
- sultana
- model shipways
- (and 2 more)
-
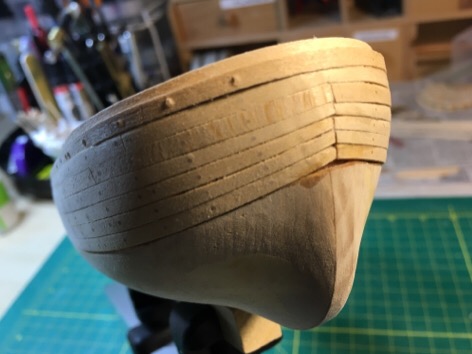
Planking above the Wales. Harder than it looks but a plank bender makes life easier) Wales predetermined based on plans but need a lot of check/recheck. Simulated trunnels (tree nails) using #73 drill in Dremel followed by wood glue and toothpicks in the holes. Shave off with straight razor...and sand down for final finish. (Have bandaids ready) Work in progress.
- 449 replies
-
- 6
-
-
- sultana
- model shipways
- (and 2 more)
-
Sanding...(inhaled 50% of the sawdust...invested in face mask) Trimmed bulwark down and remove 1mm external hull to allow room for planking per Chuck's great practicum (cut myself numerous times...no hospital bills were incurred. Luckily)
- 449 replies
-
- 3
-
-
- sultana
- model shipways
- (and 2 more)
-
I have read logs on Sultana. As this was the first wooden model kit I bought – I was SO eager and vibrating with excitement to get my hands dirty and start building…only to get overwhelmed with the minutia of what tools/jigs/materials I needed to make a perfect job of my first attempt. So…this kit quickly got sidelined by a bit of frustration (as I am a bit of a perfectionist) on me part. Subsequently, started a build log for a plank on frame for newbies (Lady Nelson). However, life got in the way, and so did planking! (A skillset that will take some time to develop is planking) Fast forward many months, and the Lady has been sidelined by the Sultana. Having overcome one major obstacle…my fear of failure. Yes, I no longer care if I screw up – because that was what was holding me back from trying new things! That mind set was really killing my love of modeling (I have built many plastic models but always wanted to get into wood ship models). So….damn the torpedoes…the build logs/post/forums/ship club members really helped recharge my self confidence…and the fact that great ship models are nothing but a series of skilled mistakes overcome by patience, experience, laughter, and some wood filler. (Haha) With that said, I can honestly say that my model's name, Sultana, could be replaced with more colorful Names….for instance: The Bloody Thumb The WhatTheHellDidIJustDo The Chuckling Asymmetry (My favorite) So…I have made some progress on my Sultana and intend this to be my first finish! I will be updating this posts with a variety of pics and lessons learned. Stay tuned! -Patrick
- 449 replies
-
- 7
-
-
- sultana
- model shipways
- (and 2 more)
-
Brilliant. Love it. Using it. I am working on my first ship - need all the help I can get!!!
-
Just FYI. Life got best of me but the Lady continues to beckon me!!!!
- 69 replies
-
- 1
-
-
- lady nelson
- victory models
- (and 1 more)
-
On a happier note...I went to a ship-club mate's house to get some expert advice. Needless to say, a wealth of wisdom lies not within books, forums, or practicums (although they have their place in supporting learning)...it truly lies in watching, discussing, and practicing new techniques with others who know more than you. Experience is the best teacher...but having a teacher can be even better when you hit a brick wall. I learned how to use a plank bender and have a new respect for the ease in which filler blocks can be placed. Valuable week! My frustration has been broken by club mates and the feedback on this forum. Thanks all! I will sail on.....
- 69 replies
-
- 3
-
-
- lady nelson
- victory models
- (and 1 more)
-
Well....2 planks a day sounds pretty bloody fast to me...considering I am averaging one plank per month. And....I am a scotch drinker! (Hmmmm.....maybe if I switch to rum.....)
- 69 replies
-
- 1
-
-
- lady nelson
- victory models
- (and 1 more)
-
Rick Love the idea of the thinner walnut planking. Will take your advice!!! Pat
- 69 replies
-
- 2
-
-
- lady nelson
- victory models
- (and 1 more)
-
Will send pics later...I find it difficult to post pics as I always need to resize and whatnot before this site allows me to post. There are many logs on the Lady Nelson (just FYI - the Amati kit is name Lady Nelson - but is more or less a typical cutter from that age....the real Lady Nelson had two masts!) As this is my first Wooden Ship model - I wasn't expecting things to go smoothly. I was expecting to have been much farther on than I am, though. PLanking is, by far, the most difficult piece of this job. I am terrified to make a mistake...and NO...I cannot take the plank off and do a 'redo'...the glue holds entirely too strong. I think I am using carpenters wood glue, which appears to hold much faster.
- 69 replies
-
- 2
-
-
- lady nelson
- victory models
- (and 1 more)
-
After many delays and continued visitors....I am finally able to spend some time on the Lady Nelson. I have just discovered that I am not good at planking. Not from the lack of reading, watching practicums and tutorials, etc. I have an ample library.... The problem is, as with all things, practical experience. Seeing a things done and doing a thing are two really different things. In short...I placed the first plank and now I can't go any farther. Soaked plank...check. Attached in place to dry and form, check. Verified fit prior to gluing, check. But now the next plank on both side has to ride up a large 'now existent' gap between the bottom edge of the first plank beneath the bulkhead, and a steep sweep of the bow...unless I force bend the planks, or separate them and make a patchwork 'plank' quilt....I can't get my second plank into position.... Been staring at the model for a week....too frustrated...and yes, I can post a photo....no energy at the moment. Taking a breather. Just wanted to vent.
- 69 replies
-
- 2
-
-
- lady nelson
- victory models
- (and 1 more)
-
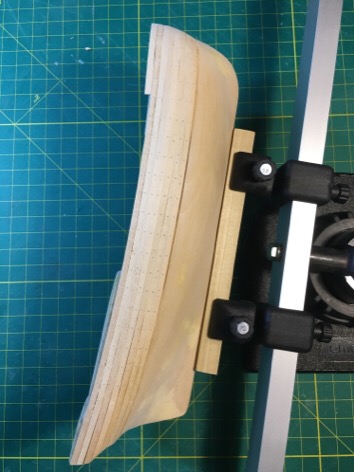
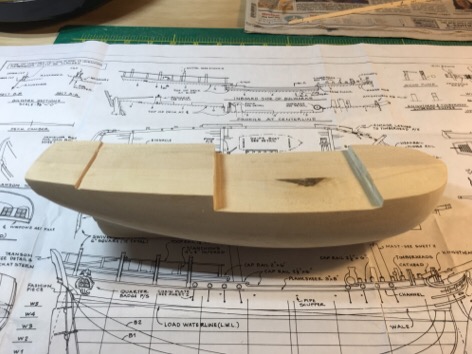
Bulwarks on....and here she is on basic mount with correct angle. Not bad.

- 69 replies
-
- 3
-
-
- lady nelson
- victory models
- (and 1 more)
-
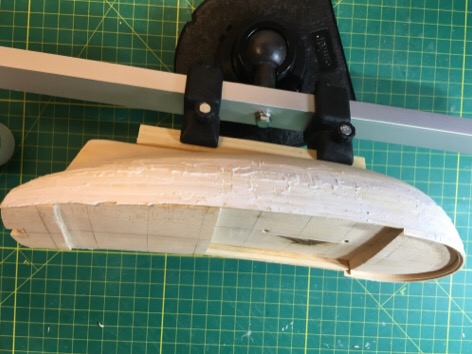
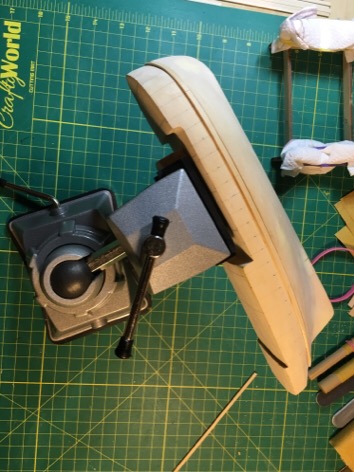
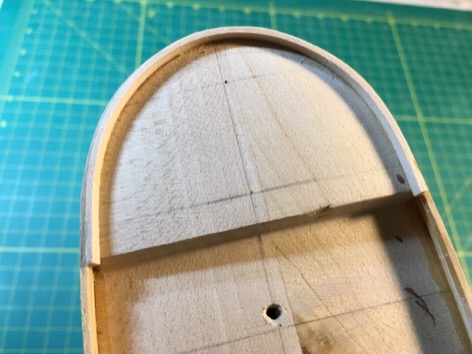
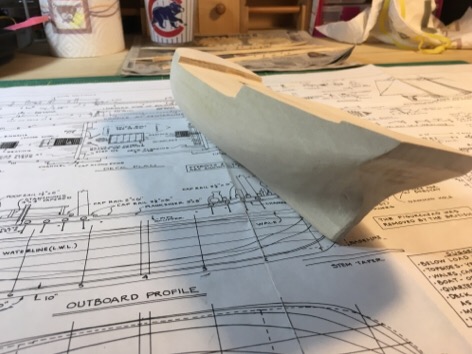
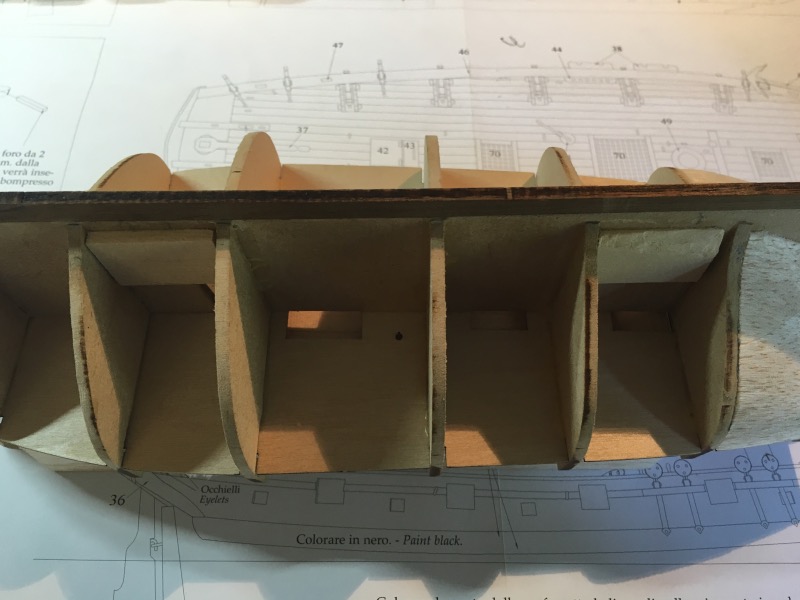
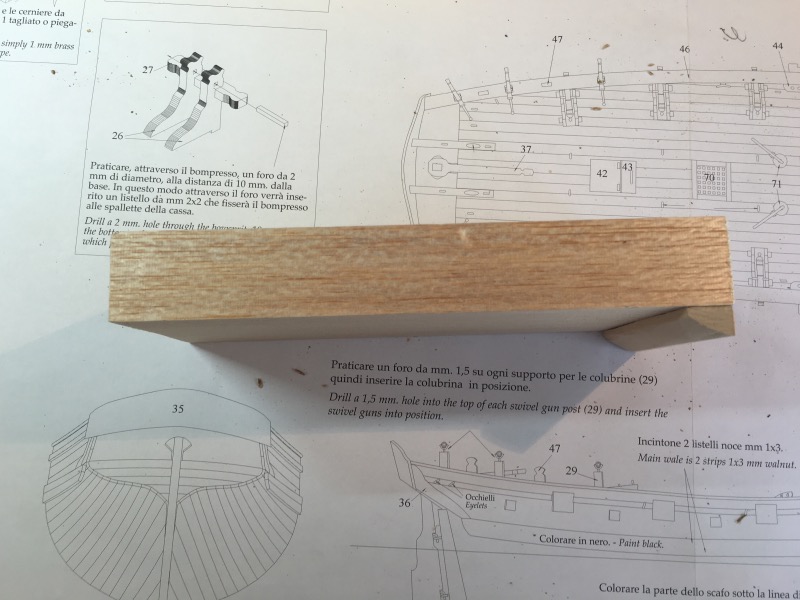
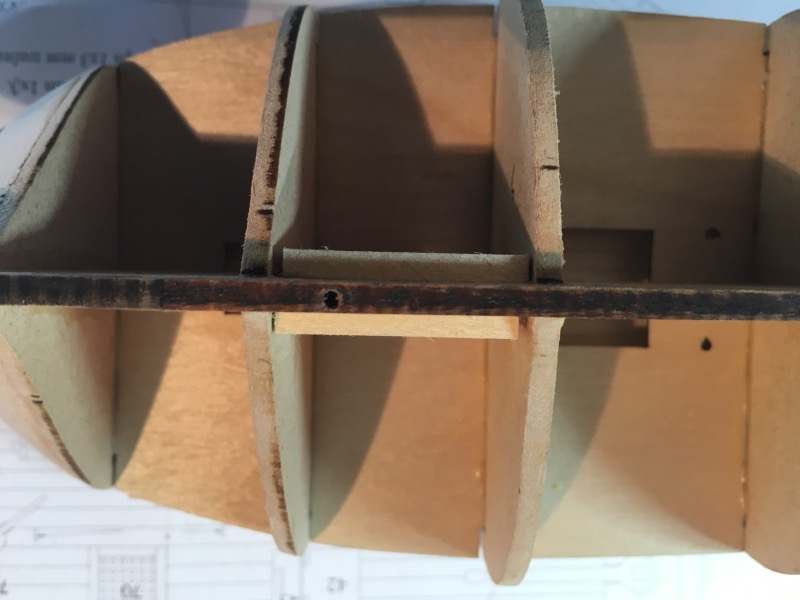
So...here is the rather rough (and totally risky) way I got the angle for the mount so I can mount with a level waterline. - Measured angle per the plans to achieve level water line - Added some 'filler blocks' to ensure there was enough 'meat' around the mounting screws - Prepared a mounting block to mount the ship keel up so that I could use a drill press at the correct angle - Secured ship and drilled pilot holes The time will come when the planking is done and I am ready to mount it for remainder of the work. I really did not see any other way than planning to use wood screws. But with a 3 mm keel, there is not a whole lot there to ensure a stable mount. So I simply planned for a bit of 'off center mistakes' when I drilled the pilot holes...no worry as long as I had some additional wood. Not the most elegant way of getting around not thinking enough ahead, but it will work. The next build I post will have the mounting considerations FIRST BEFORE I DO ANYTHING WITH THE FRAMES!


- 69 replies
-
- 3
-
-
- lady nelson
- victory models
- (and 1 more)
-
Well...not much progress, but I did finally decide how to get a fairly good approximation of how to get the correct angle for the mount...and I was laughing the whole time. Hey...the hobby is supposed to be fun! Pictures later, but let's just say that I have officially found a use for high school trigonometry. Also...I have a new rule: Never eyeball drilling pilot holes for a ship mount while tipsy. Pat
-
Exactly. Please share the jig design. I am in the exact same situation!!
- 69 replies
-
- 1
-
-
- lady nelson
- victory models
- (and 1 more)
-
Hi Antony Thanks. I have mounts (brass pedestals with 3/16" bore. The question I have is: If I predrill the holes and install a nut into the center piece (false keel), then I would end up drilling out a gap in the walnut keel attached to the centerpiece. This would make the planking a bit more difficult as I would have basically two 'Gaps' along the keel which my mounts would cover, when it is ready to be mounted. Trying to envision how exactly I prepare the mount without damaging or wreaking the walnut keel. Many lessons as I grind through to the inevitable chore of planking. (Shudder)
- 69 replies
-
- 1
-
-
- lady nelson
- victory models
- (and 1 more)