


Overworked724
-
Posts
1,263 -
Joined
-
Last visited
Content Type
Profiles
Forums
Gallery
Events
Everything posted by Overworked724
-
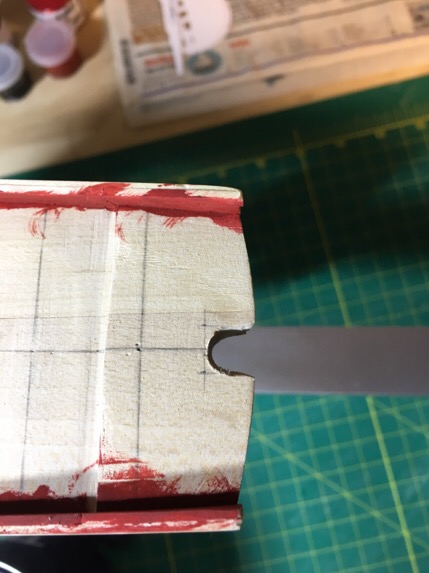
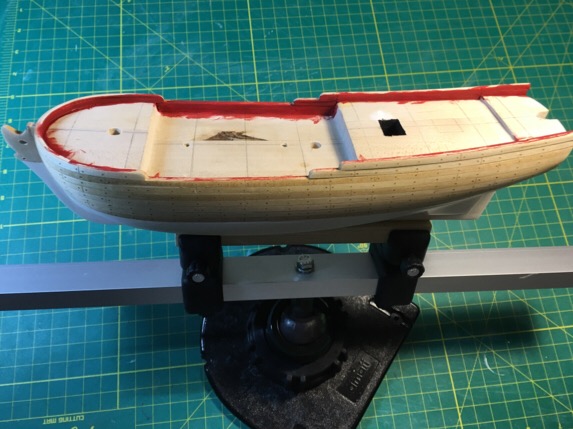
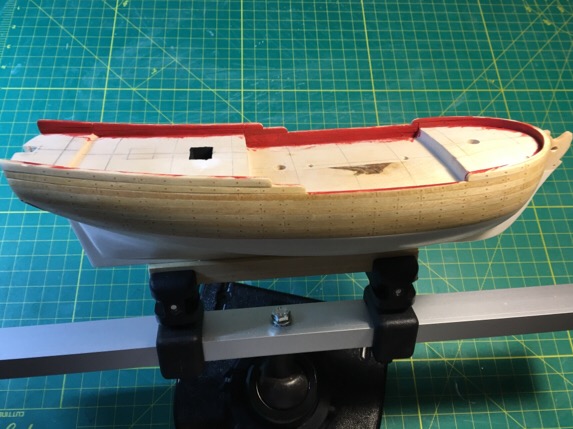
 Quick update (pics to follow this evening); First – Thanks Russ. I considered and reviewed some forums and decided to go with basswood. Also, changed to basswood veneers for the steps on the fcstl/quarter deck to adjust for the wood which I mistakenly trimmed off. I put those in last night and discovered I had accidentally sanded a bit too much off the port side of the forecastle. Crapola…I christen thee the HMS Assymetry… Second – After adding in the veneers and shaping them to the level of the deck, I can see the lopsided effect of the sanding mistake I made when I was truing (or ‘overtruing’) the hull and deck of the forecastle. With the planking and bulwarks on, this make adjustment by sanding on the starboard side to even the deck a nonstarter. So…if I too too much off, I can put some back on. In this case, the amount I overtrimmed off is roughly 1/32…(a bit more actually). So I have trimmed out a small section of basswood sheeting which I can use to even the deck, and then smooth it out with filler. The final result, once the deck planking is in, should look better than the lopsided view I have now. This is the ONLY thing I can think of…simply slapping on woodfiller and hoping for an even result is a non-starter too – I am not that good at eyeballing. Third – Did not like the initial attempt at painting the bulwarks. The gaps in the planking on the bulwarks stood out like a sore thumb. So wood filler in/sanded for another attempt. Painting the bulwarks and steps will take place after I have put in the filler around the veneers and the forecastle true up area on the port side. …The correction of my mistakes on this kit is keeping me humble, yet oddly focused. The Sultana is actually a lot more challenging that the Lady Nelson so far. Wondering why in the heck I switched kits. But, I have momentum now, and will press on. Pics to be posted later…
- 449 replies
-
- 2
-

-
- sultana
- model shipways
- (and 2 more)
-
Hi Russ Good feedback! Ok. I'm not crazy. Love the look of walnut but believe you are right. Stuff fragments so easily. The basswood I have. The grain and texture is as you say. Easier to work but doesn't take on an even look when stained. The thinness makes it difficult as well since the stain or paint tends to bleed across and through the sheet. It is easier to cut though. I guess I am needing to rethink the wood step veneers then as well. If I go with basswood it makes my life a bit simpler.
- 449 replies
-
- 1
-
-
- sultana
- model shipways
- (and 2 more)
-
Thanks Russ! Walnut sheeting tends to be much harder (1/32) and I was surprise how difficult it was to cut. I will try your technique!
- 449 replies
-
- 1
-
-
- sultana
- model shipways
- (and 2 more)
-
Update - the pics above show my first couple of passes as the bulwark painting. Upon review, I should have used wood filler along the inner bulwarks to clean up the surface before painting. So, my frustration at the unclean got the better of me and I filled in and sanded down. Will plan to repaint the inner bulwarks tonight. I was so satisfied with my "git 'er dun" attitude, that I decided I would keep the momentum and clean my workbench (my wife was very happy). Sadly, when doing this, I threww away the walnut veneers I made for the step fronts to the forecastle and quarter decks. <grumble> At least it looks nice.
- 449 replies
-
- 2
-
-
- sultana
- model shipways
- (and 2 more)
-
General question for anyone reading: How do you accurately (and safely) cut thin wood? The problem I seem to have is that the thin wood sheets are so thin that they splinter along the edge when using the scroll saw. They seem too hard to cut using a simple exacto knife. How do other do this? It would help me remake the transom layers.
- 449 replies
-
- 3
-
-
- sultana
- model shipways
- (and 2 more)
-
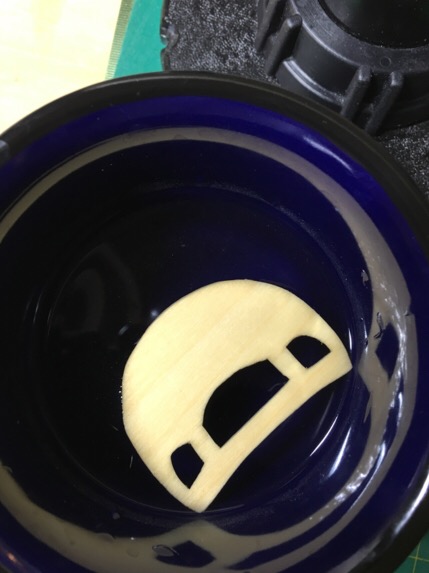
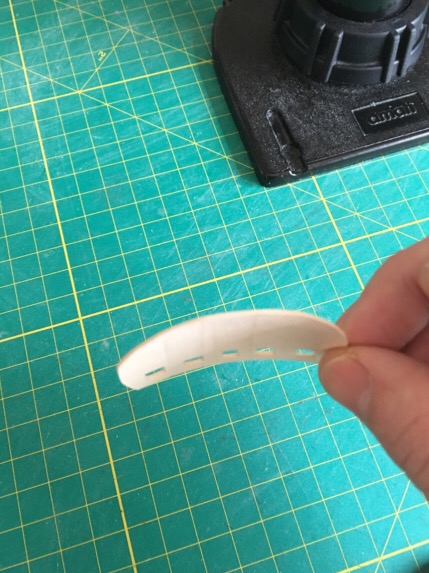
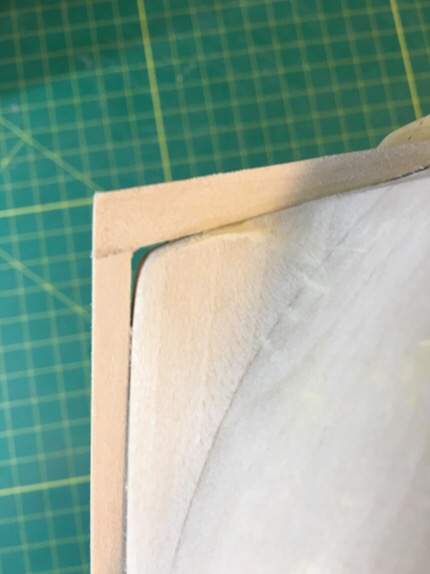
Hi Elijah Pic above is the transom layer bone dry. So now I'm rethinking how to make the transom. Chuck's practicum gives a great idea, but now I know how to get the right curvature, thinking to redo the layers in walnut. Decisions decisions!!!
- 449 replies
-
- 2
-
-
- sultana
- model shipways
- (and 2 more)
-
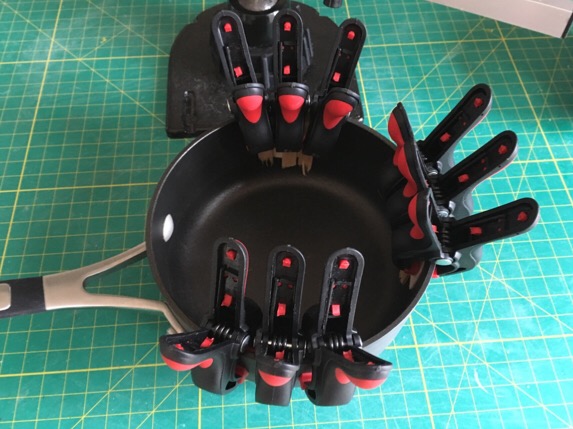
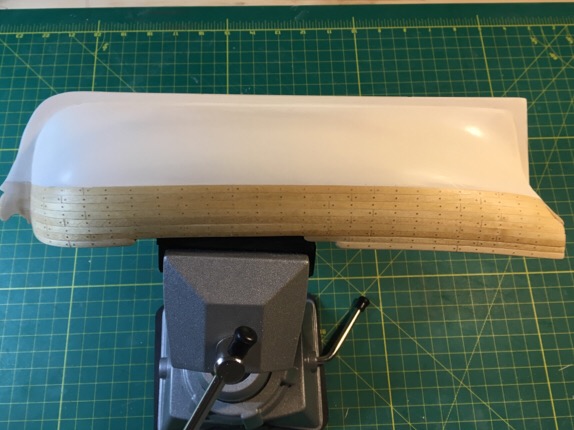
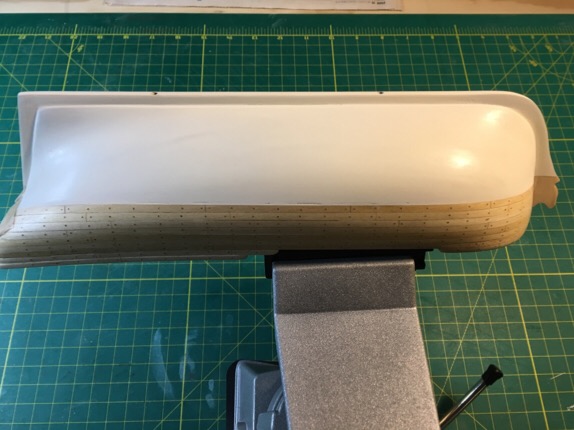
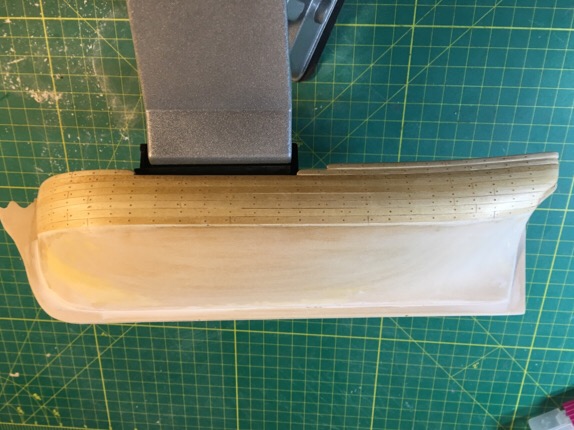
Answer: A few wooden stir sticks from Starbucks (use to keep clamps from bruising the wood), some spring clamps, and a 1qt cooking pot with flat sides. Wet wood, clamp, have a beer. Wake up to perfect prebent transom sections. Never underestimate the tools available in your own kitchen! (My wife is a genius...)
- 449 replies
-
- 5
-
-
- sultana
- model shipways
- (and 2 more)
-
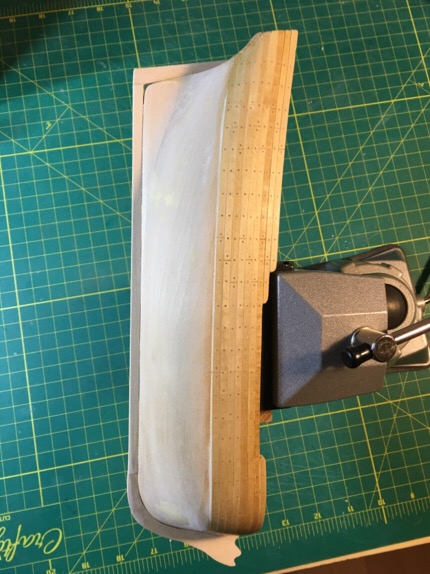
There's always something with this kit. It's like a continual stream of problems that need to be solved. I to plan the transom now, but the curvature of the stern prevent an easy approach to future gluing/placement. Additionally, the plans require some modification as my bulkheads are a bit higher and my stern curvature might be slightly deeper than the plans. I could try a plank bender but the 1/32 boxwood sheeting I am using to make it is to flimsy, and the grain is to thick...it would snap if I tried. Trying to put this on without prebending simply is not a option. Problem: How do I prepare my transom to meet the curvature of the stern without making a curved jig to prebend the wood.. Some things just aren't captured in Chuck's totally awesome practicum!! Answer: will surprise you...and will be covered in the next post! But it works like a charm and is EASY.
- 449 replies
-
- 2
-
-
- sultana
- model shipways
- (and 2 more)
-
Fukui-san Sugoi kire! Gambatte! Yoroshiku onegaishimasu! (That's all the japanese I know! LOL) Beautiful work! Pat
-
Moving on into treacherous water. Forgot to drill the bob-stay and gammoning hole in stem (mostly because I was pretty sure I was going to have problems getting it on.
- 449 replies
-
- 4
-
-
- sultana
- model shipways
- (and 2 more)
-
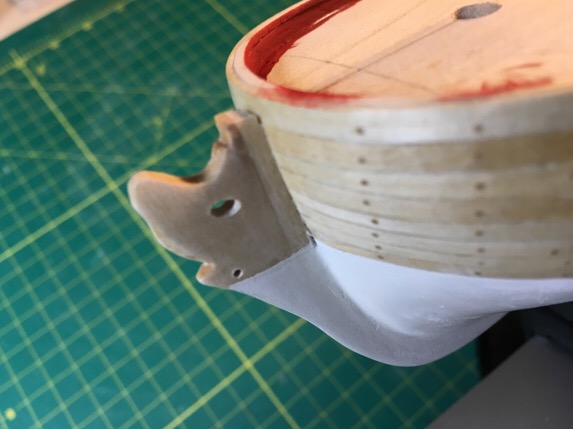
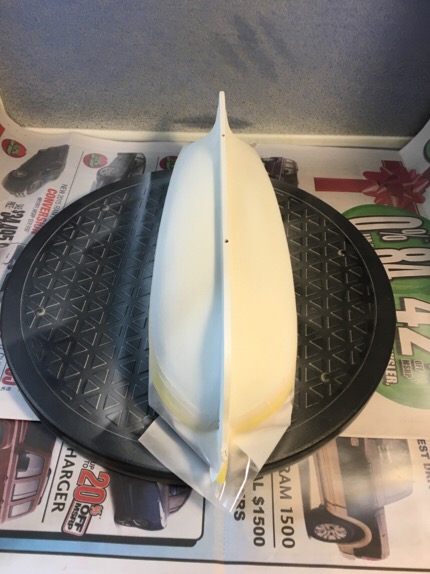
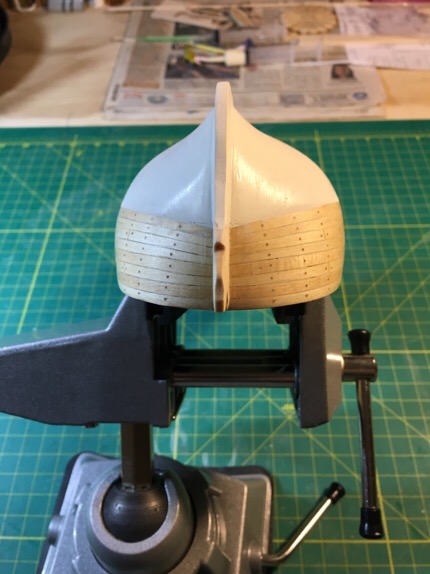
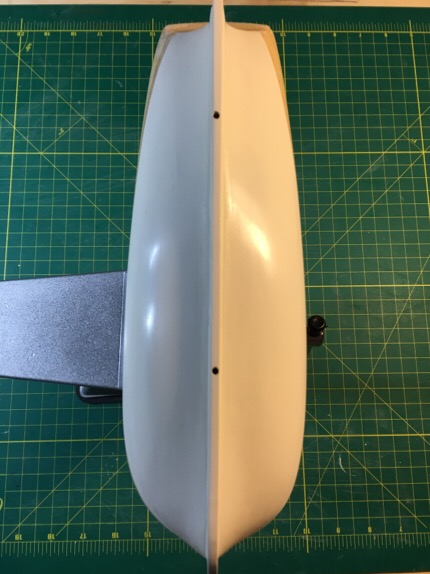
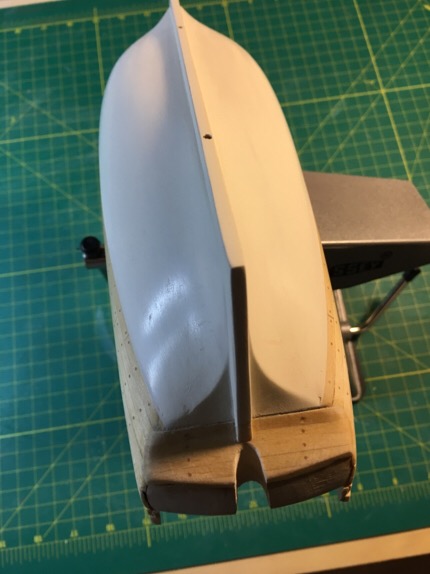
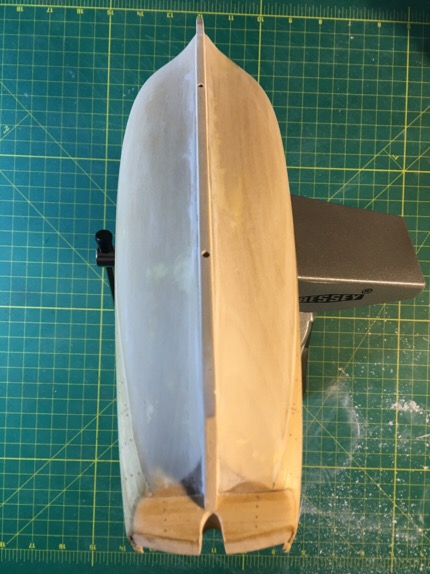
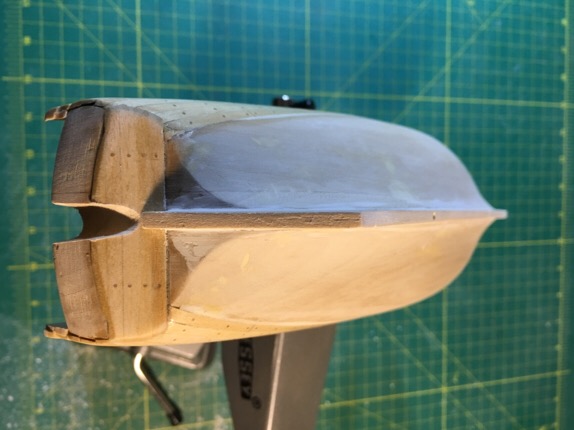
Well...took the plunge. Carved down the stem to fit the figurehead (which gave me a heart attack). The figurehead fits nicely now, and I prefer the positioning and shape now since the wood of the stem won't wrap under it to the front. Leaving the figurehead fully exposed. A feature I like! So perhaps a blessing in disguise to carve it in a way that makes me happy. =-) Also painted the hull. 4 coats of paint with sanding in between. A small pot of Tamiya (flat white) with 10 drops of Tamiya Desert Yelliw to soften it a bit. Pure white is ghastly, and the softer off white tinge gives it a more pleasing look (at least to me). The recommended tallow color was hard to match, but I really prefer how it ended up. My Airbrush technique is awful, but it did the job. Sanding between with increasing fine sandpaper/pads took the matte finish away. Surprisingly it ended up with a nice finish with sanding alone. Win! Moving on... (Noted that my stern piece is a bit wide...but I'm just going to adjust at this point as I can't bring myself to carve it down now...).

- 449 replies
-
- 3
-
-
- sultana
- model shipways
- (and 2 more)
-
I think you did a marvelous job! This is my 'work in progress ship'. And I had some difficulties on the first layer of planking. But you did wonderfully! Something to be proud of!!!
- 57 replies
-
- 1
-
-
- Lady Nelson
- Victory Models
- (and 2 more)
-
Already got it reshape and pre-fit. Pics to come later! (Sweat bullets during the 'stem surgery'!) Moving on... Also: Lesson Learned #2: Do NOT start painting until you have a smooth hull. That means wood filler/polyurethane/sanding sealer....choose your poison. I thought I had sanded enough...the hull felt like a baby's bum...nope. Not even close. Next time....sanding sealant before I start painting. =-( Crapola.
- 449 replies
-
- 2
-
-
- sultana
- model shipways
- (and 2 more)
-
Lesson learned: Check figurehead placement and fit before gluing on the stem. Crap. Need to reshape and carve down to get it fit without snapping/breaking/etc. the glued on stem For every single thing I do right - I seem to do 2 things wrong. But...I will overcome...I actually made 2 stems just in case!
- 449 replies
-
- 5
-
-
- sultana
- model shipways
- (and 2 more)
-
Got the stem, keel and stern post on. The fact wood filler exists keeps me from freaking out. The point where stern post and keel meet was really over sanded. Could drive a truck through that gap. Wood filler (mixed with a bit of water...stored in a salad dressing disposable container for freshness) did the trick. If I could count how many pounds of sawdust I have inhaled by now... Moving on. Hull is looking fairly decent. (After 1000 mistakes...amazed). Pat
- 449 replies
-
- 5
-
-
- sultana
- model shipways
- (and 2 more)
-
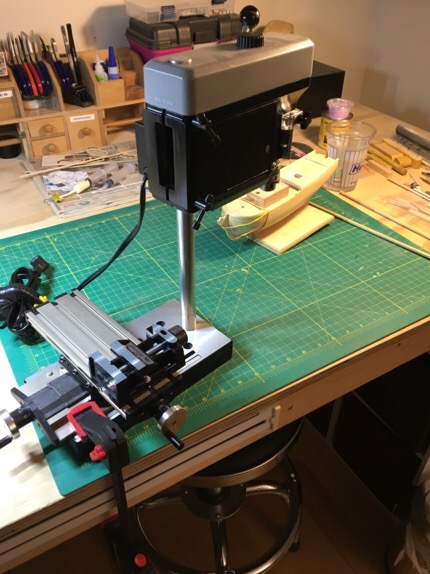
Hey Tigersteve My drill press is a cheapie from Micromark. Microlight Made in Japan. Good for the job! Best Pat
- 449 replies
-
- 2
-
-
- sultana
- model shipways
- (and 2 more)
-
Thank you, sir! In all honesty, there was simply no other accurate way to get to needed alignment and angles without rigging up something. Interested to hear how others accomplish this task!
- 449 replies
-
- 2
-
-
- sultana
- model shipways
- (and 2 more)
-
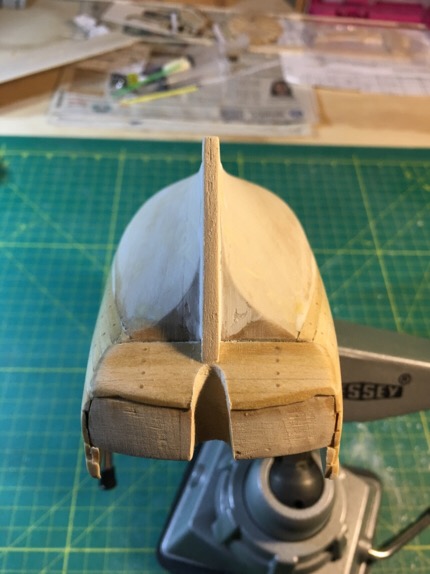
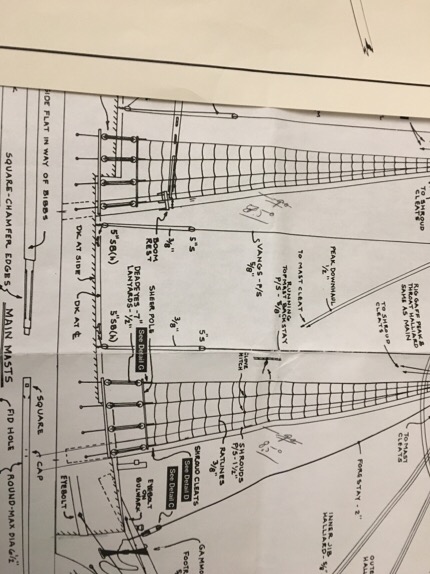
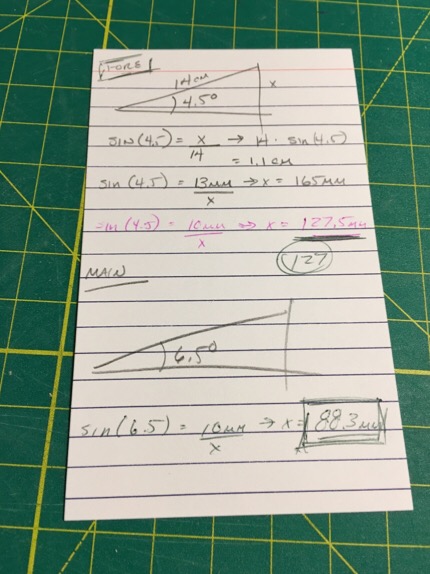
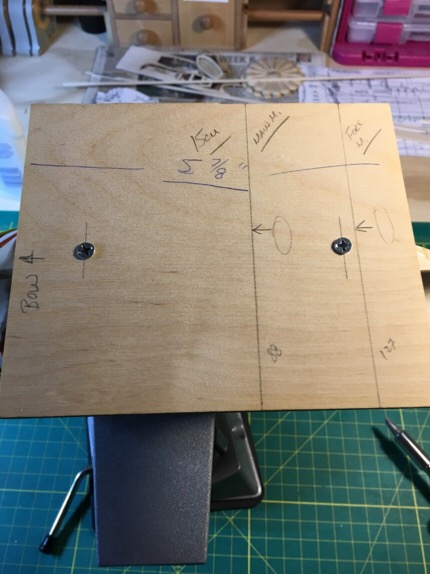
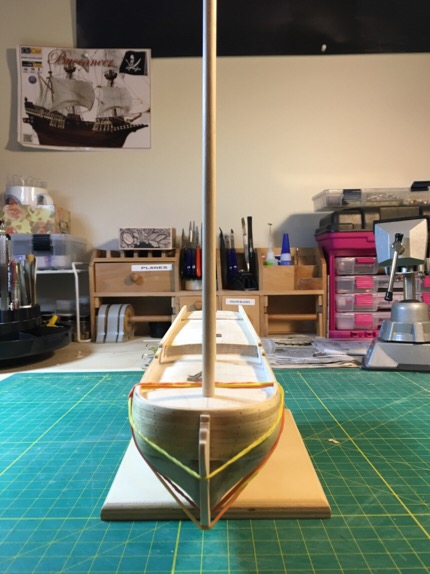
So....decided to mark deck furniture and drill mast holes. Mast holes are not adequately covered in Chuck's practicum nor in the Model Sjipways directions. Specifically - what is the respective rake angles of the fore and main mast? The MS plans measure 7.5 and 8.5 degrees from vertical for the fore and main mast respectively. But...the original plans appear to have rakes of 4.5 and 6.5 degrees. Ok...executive decision...will go with her majesty's plans. Problem: How to drill the right angle with a drill press. Answer: Made my own trigonometry jig to flesh out the correct angle using my stubbornly vertical drill press. There has GOT to be an easier way. But the proof is in the pudding. The angles and alignment came out perfectly.
- 449 replies
-
- 5
-
-
- sultana
- model shipways
- (and 2 more)
-
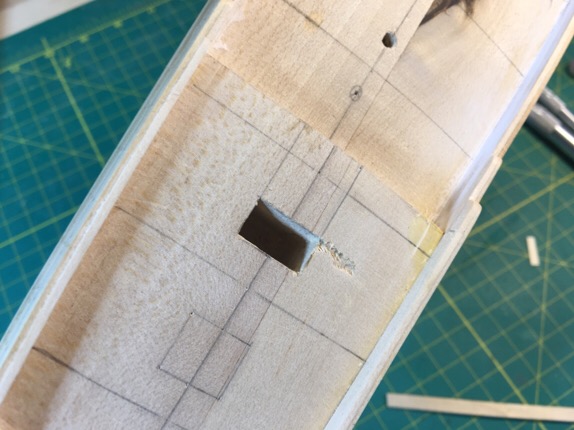
Hazards of working with a Dremel. Sigh. Trying to carve out stairway and slipped...my Dremel carving bit went for a ride across the deck. So...carved down using exacto blades until I was about 1/4 inch down. Nice ledge to act as a bumper for Mr Slippy Hands.
- 449 replies
-
- 2
-
-
- sultana
- model shipways
- (and 2 more)
-
Hi Elijah Thanks for the compliment! Alas, I am a newbie. The only ship content I know is what I read from chuck's practicum and the variety of websites/articles/books I occasionaly skim as I creep my way through my first wooden model ship! My current profession is a global project manager for a pharma company. My past life is in science (I majored in chemistry in both undergraduate and graduate school) - long time ago. Also, the planking is scribed sheets. But I think they won't look as good as individual planking, so I have decided to go with my own planking and have got basswood strips (~2-3mm width) slightly thinner than the deck planking which I plan to use. And I have learned from my mistakes....I will 'pre stain' them! I am slow moving on this model - mostly out of fear. But I find myself becoming a bit more confident to 'overcome' my mistakes. My model might look nice - but it rrepresents 1000 mistakes! It will be amazing if I can get to the finish line. So...I will try to be honest about keeping this log! Wish me luck... Best Pat
- 449 replies
-
- 3
-
-
- sultana
- model shipways
- (and 2 more)
-
Here is a pic of my rough step forecastle and quarter deck step veneers. Wonder if this will work as good as I hope.

- 449 replies
-
- 4
-
-
- sultana
- model shipways
- (and 2 more)
-
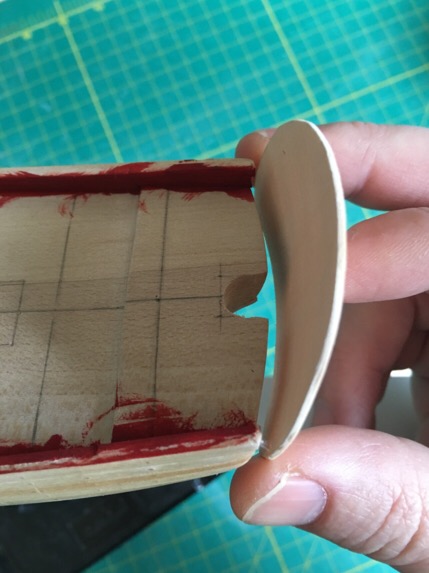
Well - a couple of problems. 1. Keel sanding - where it meets stem is 'rounded' as you see in the pics. Not my fault in this case and the uncarved hull came this way from ShipWays. Will do my best to address with filler, but not exactly skilled as a putty master. I could shave the stern and put in a filler bock - then reshape the hull to obtain a nice sharp corner, but not entirely certain I wouldn't screw other things up (i.e. over sand the keel as I shaped the stern). Thinking safety here...try wood filler first then Plan B is adding wood and shaping. 2. Deck shaping/Bulwark removal - when I was following Chuck's practicum, I overshaved both the bow/stern 'steps' to the forecastle/quarter deck. Crap. (I christen thee...the USS WhatInTheHellDidIJustDo) So...as 'wood is forgiving', I will fill it in with wood. But what wood? Since I have only overshaved by approximately 2-3mm on both sides, I can simply 'add' a veneer on both sides and shape appropriately. So, this is where I will veer off script a bit and do my own thing – because it is my model! Instead of basswood or balsa veneer – which would simply be painted, I am thinking to use a veneer of dark walnut. This would allow a visual break in viewing the painted inner bulwarks. I think it might be a pleasant modification if I also stain the wood to help it blend better with the amber color of the bulwark paint. Note – I have not yet mixed the bulwark paint, and there is no way I am using flat red – too bright and garish. So an darker rust or amber color would be less gaudy, and more easy on the eye. Not trying for historical accuracy – I’m trying to enjoy myself and make a nice looking model! (Also, my wife said she didn’t like the red painted bulwarks in Chuck’s practicum – so her request and only input is to choose a different shade of bulwark red. =-) 3. Cap rails - I over sanded in the side near the forecastle deck rail meets the main deck rail. This means my cap rail might look 'odd or lopsided' if I stick in on without trimming down the respective width of the cap rail - which may impact overall appearance. Nothing to do at this point but see how it goes - the cap rails on the forecastle deck have to be carved out of a larger sheet - but if I thin them down on the ends, it may impact how I can make the volutes for this rail. TBD
- 449 replies
-
- 5
-
-
- sultana
- model shipways
- (and 2 more)
-
Tung oil. New found respect. Holy moly...what a difference. After the experiments and feedback from forum and club mates...the use of stain would have been a disaster. Thanks guys!!! Moving on!!!

- 449 replies
-
- 4
-
-
- sultana
- model shipways
- (and 2 more)
-
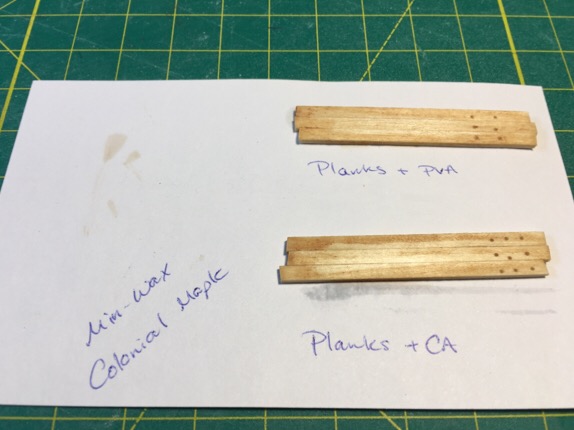
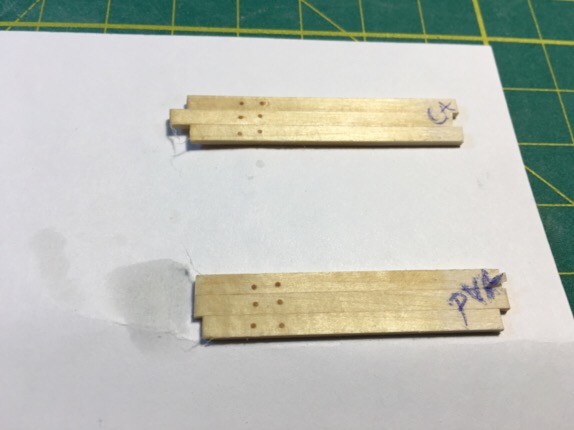
A note on staining. Had my heart set on a deeper color stain. However, I noticed that superglue keeps stain from absorbing into the wood. My club mates recommended I use ting oil. My bad for mixing PVA and CA during the planking process. Since I don't want to paint over the wood and trunnels (after all that work) considering to go with ting oil. See pics below for some experimental planking using CA followed by staining. Yikes.
- 449 replies
-
- 3
-
-
- sultana
- model shipways
- (and 2 more)
-
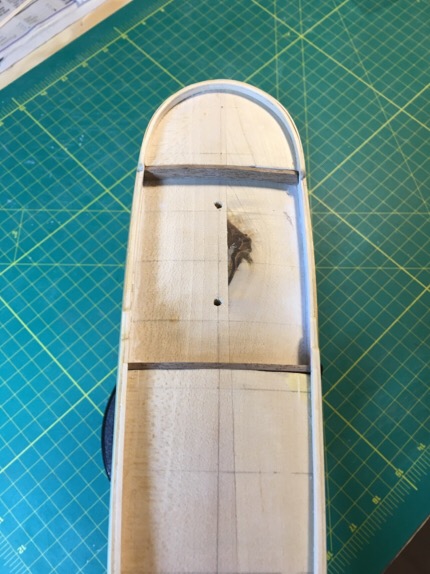
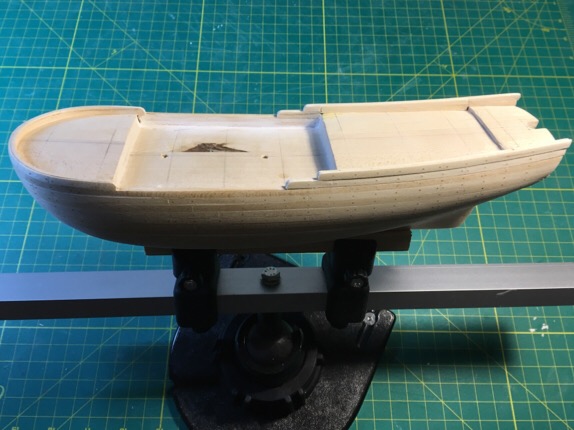
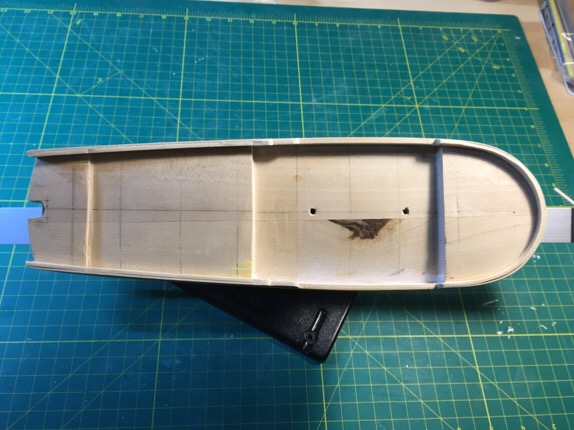
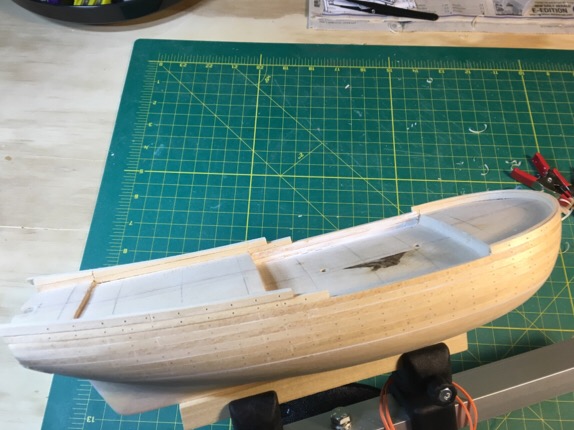
It's strange how this website orders photographs. Attached are a few pics of my ship after final planking and treenails. Now I'm ready to paint the bulwarks and get the deck started. Think I over sanded near the bow caprail where the volutes will go...oh well. Will adjust.

- 449 replies
-
- 3
-
-
- sultana
- model shipways
- (and 2 more)