Modeler12
-
Posts
1,716 -
Joined
-
Last visited
Content Type
Profiles
Forums
Gallery
Events
Everything posted by Modeler12
-

Plank edge sanding
Modeler12 replied to rebekb's topic in Building, Framing, Planking and plating a ships hull and deck
Rebecca, to be sure that the edges are square, you might want to make a simple base and use the sanding 'block' or file as shown. The block has some sandpaper glued to one (or both) side(s). This 'cutting base' helps me also to cut pieces to length. Notice I use a stop with a clamp if I have to cut more than one. -
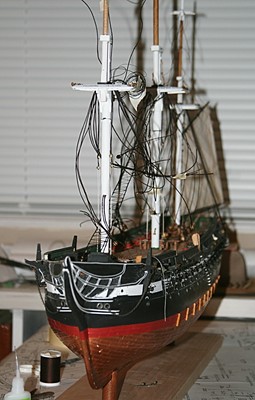
Well not completely, but pretty much. The head on view did seem like an interesting puzzle that I sent on to my grand kids. They think I am crazy to tackle this project in the first place. But actually the view below shows a different story. I am in the process of attaching the deadeyes to the lower parts of the shrouds and that created the 'confusion'. But, yes, there are many!! As I go along, I throw them over the stays to make room for the next one (gently).
-
Are you the same Dave that ran away with my daughter?
-
Yup that' s the one. It is a nice demonstration. Somehow I stumbled onto the same idea but did not do as nice a job of making my gadget. Thanks for mentioning Hubert web posting.
-
Remember that I mentioned ‘gotchas’? Here is one that got me. When I put the deadeyes on the channel I did not pay close attention. For the foremast there are three different lines coming to the channel. Sure enough I did fine with those on the starboard side (as shown on the drawing), but I reversed the order on the other side (mirror image, you know). The thing that gave it away was that a couple of the shrouds seemed very short. It was because they had to go too far back!!! So I had to pull out a few large deadeyes plus smaller ones and reversed them. This time I epoxied them in place. Sorry, I don’t take pictures of most of my gotchas. You might have to go back to the bottom of section 7 to see what I mean.
-
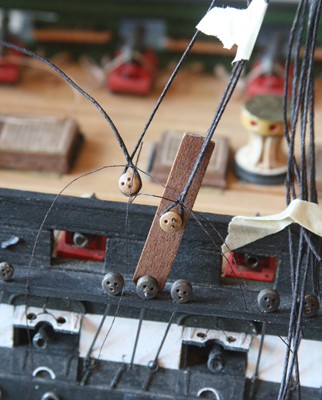
The lower shrouds were attached loosely and still needed the deadeyes installed at the bottom. To get the alignment so that the distance between the two was all about the same, I made a fixture with three brats. The bottom brat fits in the existing deadeye previously glued in place on the channel. The new deadeye uses two brats to prevent the piece from rotating while I fit the shroud and tie the two lined together with some thread. This will be temporary until I am ready to do the final lanyards. Notice that I chose to have the top deadeyes just above the main rail. That is the way it looks like on the real ship. I will have to make a similar fixture for the smaller deadeyes in the other locations. These brats are too large in diameter. I ran into some problems with the old deadeyes. While working the shrouds a couple of the chainplates worked themselves loose. You can see one in the picture. More repair work.
-
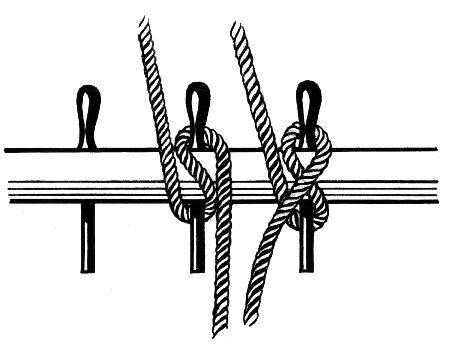
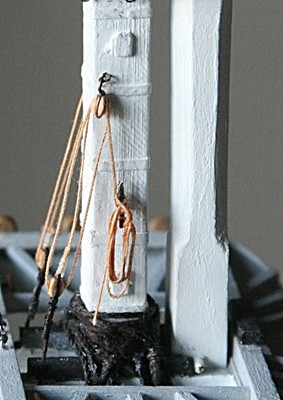
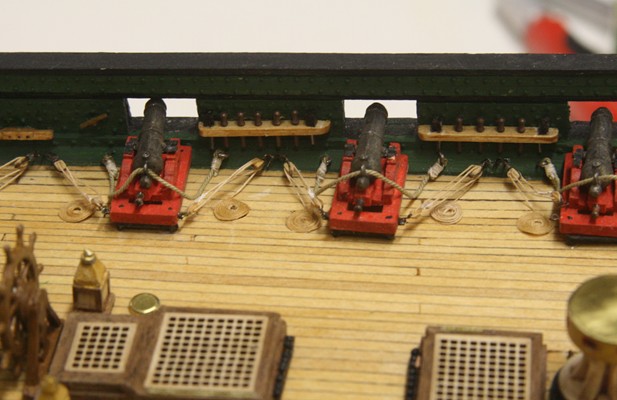
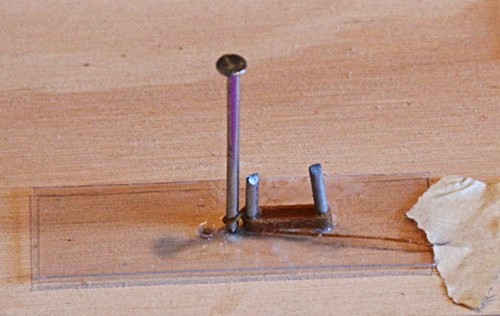
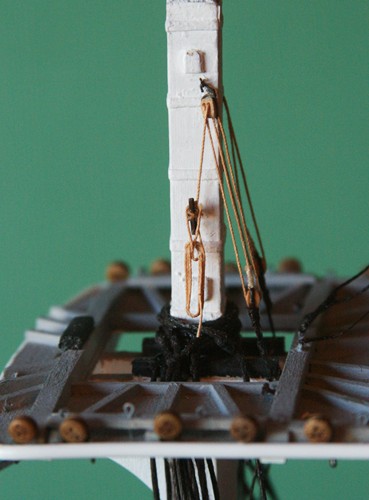
Belaying a line around a pin is the first step. I cheat a bit and do this first when belaying around a pin or cleat. I make the first couple turns and put a dab of CA on the line to hold it in place. Then I cut the line!!! Next I take the same line I just cut (or another section of the same material) and make the coil. The fixture is simply two nails, a pin and some thinned PVA glue. Wrap as shown, let dry a bit and remove. Again they are not perfect but that is life. The last picture shows the two truss tackles with a double and single block that are 2.5 mm. Pretty small. A cleat was mounted on the mast just above the top.

-
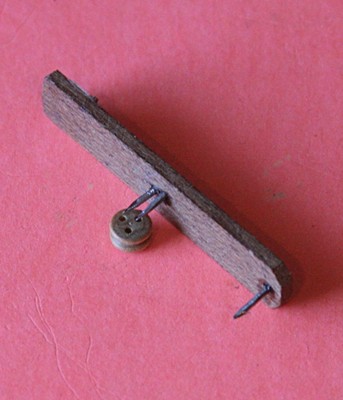
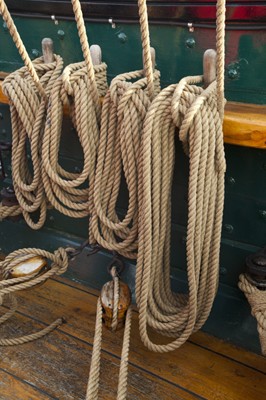
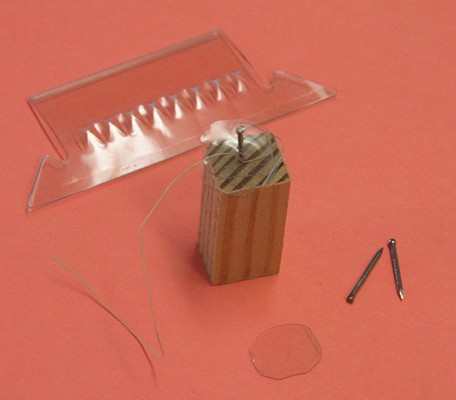
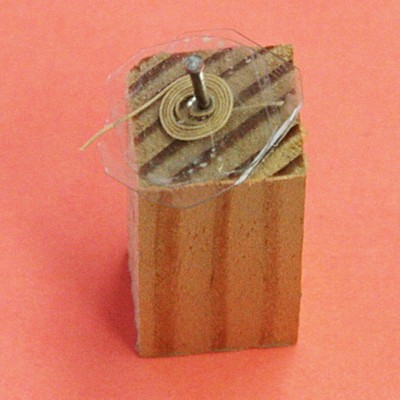
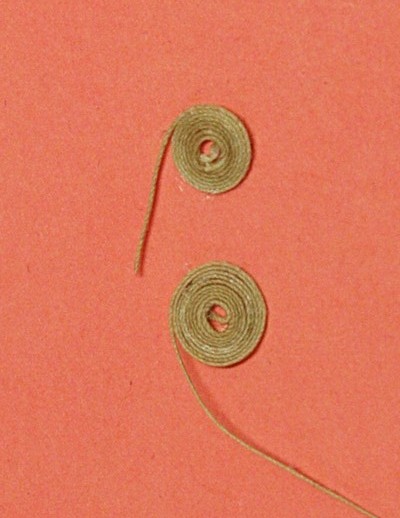
MSW 1 had a couple topics about making rope coils. I would like to review some of that and perhaps others can add to this. There are at least two types of rope coils. The first is the spirally wrapped one that might lie on deck. The second is the coil that is part of belaying a line on a cleat or belaying pin. I'll cover them one at a time. There is a fellow (help??) who made a fixture to make the flat coils. I took a similar approach with some materials on hand. I took a piece of plastic that is not kind to PVA glue, made a wooden block with a hole in it and a nail. I coated the line with a thinned bit of glue. Then using the nail I pushed the line through the hole of the plastic and into the hole of the wood. Now I have a sandwich with the line being the lunch meat. Instead of wrapping the line around, I turned the block while holding the sandwich loosely together so the meat does not fall out. When I think I have about enough, I let the whole thing sit a while (but not too long!) You can see that some are not perfect, but good enough. I'll cover the second type of coil in the next thread.

-
So is my Admiral's.
-
Carl, my Admiral is right 80% of the time and I am right the other 50%. I remember in Holland one would say 'Dat mag' or 'You may (do that)'. Usually in the States we would say 'You can', but not with my Admiral.
-
Thanks Patrick, and, Geoff I hope you don't mean a case that goes under ground. She is too young for that But you are right, by the time you add the bowsprit we may need to rethink not only how big a case, but where to put the little girl. My admiral already knows where it is not going.
-
You know Jeff, I think I won't regret adding the topsails and two jibs. It would fill up Conny's middle a little and take the flatness out of her
-
Shrouds, hammock cranes and how to climb up
Modeler12 replied to dafi's topic in Masting, rigging and sails
Indeed the top rail is about six feet above the deck (on my model). One would have to assume that the crew would climb on top of the guns or fife rails to then climb over the netting to the outside of the shrouds, etc. Do I understand your question correctly? -
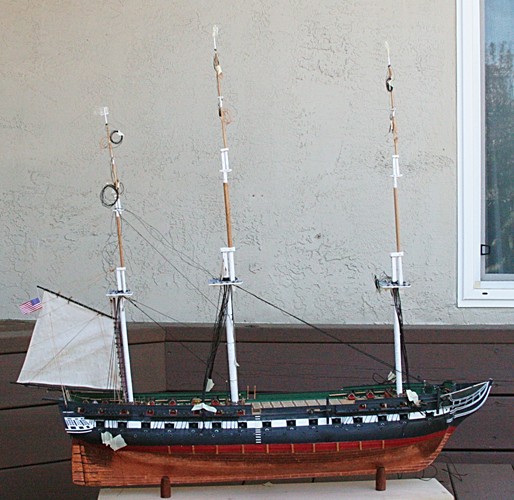
My poor Conny, she is getting to be so tall! And she does not have much up front yet. But she is still growing. Pretty soon I will have to find her a new dry-dock. The masts and top masts are glued in place. A point of no return. Now I can add more lines and some day a bowsprit.
- 732 replies
-
- 2
-

-
- constitution
- model shipways
- (and 1 more)
-
Hank, you make some real good points. I have a CAD program on my computer. It is an old one: Design CAD. It also has the 3D feature, but I don't use it very often. Hence I forget a lot of the key strokes very quickly and it takes me a while to get the hang of things again.
-
Food for thought, isn't it, Harvey? But in a way you are ahead with your Connie. I skipped over a lot of other details. Haven't even undone the laser cut pieces for the ships boats, haven't done the carving of the bow decorations, and . . . .
-
Adding the 'white' lines also helped to keep those things hanging straight down. They kept wanting to go sideways. You'll see that there are numerous 'gotchas' as you go along, Geoff. But I just grin and bear them.
-
Jeff, rigging is fun. But, as Geoff mentioned, you have to really think ahead. I don't know if I mentioned how I make rope 'coils', but here goes. It is really high tech and requires special tools such as nails, a hammer and some glue. First of all I cheat. I belay the line around the cleat or belaying pin on the ship. I glue the end with a drop of CA and cut the rest of the line off. Then I use some of the same line and wrap it around the nails as shown below. I dab on some diluted PVA glue and let it dry enough so I can still remove it from the pins. The plastic underneath is from a index folder and PVA does not like that. The glue was still wet when I took this picture. But you can see what it looks like in an earlier picture I showed.
-
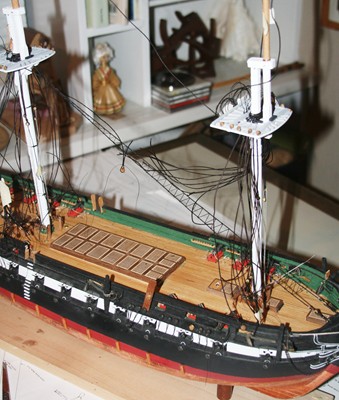
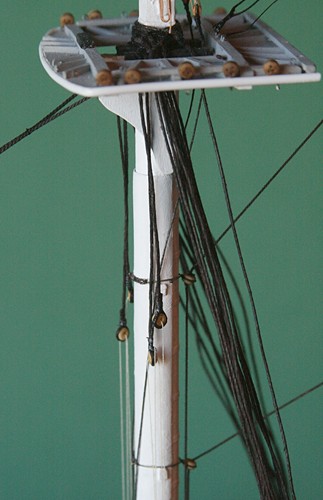
Moving right along (well, trying any way). I added the shrouds on the mizzen and main masts. Added various stays for and aft (including the main and preventer stays with the tricky snaking weave) and some pendants. The shrouds are bundled together and don't have the deadeyes in place yet. I want to hold off as I said earlier. However, I did have to put the shrouds around the masts in order to continue moving upwards. I decided to add a thin line through the pendants and lashed those to the pinrails below the masts. I didn't think that having them loose and swaying in the wind was proper. In fact, a photograph of the USS Constitution in Boston shows those lines also. In the picture above you can see the light colored lines. Also, I added a cleat on both sides of the mast, so there was something to belay the tackle for the truss lines. Next come a couple more stays and the slings for the jacks. Then some day I will get to the bowsprit
-
Thank you Hank for those comments. Please allow me to post a couple results that I think are worth repeating: 1. The patina I used, Novalac, has been very effective on most metals and has had good reviews by people who have used it for several different applications. 2. The metal should be cleaned, brass wire should be sanded or rubbed with steel wool to remove any coating. 3. The concentration of the solution should be checked for the particular metal you are working with. Brass is slower or requires more acid than copper or solder, for example. 4. Don't over-treat. The extra selenium oxide will rub off and you should be careful with the 'soot'. 5. Rubbing the final coating with a paper towel will not wipe off the coating in total but will impart a nice sheen. 6. Don't try to solder any metal that has been treated unless you sand off the coating first. Bonding with CA or epoxy works fine. 7. The coating will remain in tact for many years.
-
I wonder how many cooks are out there that have never burnt their hand. Or how many wood carvers have never seen their own blood. It happens, but it also teaches you a lesson to be more careful the next time around.
-
I really don't know the composition of the alloy. It came with the kit. For more information you might have a look at http://www.ehow.com/facts_7384655_chemical-composition-pewter.html
-
Looks great Jeff!! You got the right idea about all those gunports. I kept all of mine open, but that is really not necessary. Keeping them open led to a lot of 'oops'. The skylight came out very nice. It is very uniform. As you might have seen, I ended up also being confused with a six and eight sided shape. Yours are better than mine. Want to trade???
-
Bob, lapstrake is not only easier but much more authentic. I love what you are doing. It reminds me of the little sailboat I had in the SF Bay. It was a 'junior folkboat' (built in Denmark) and had mahogany lapstake planking on the hull. The 'problem' was that the outside was varnished and we had to haul her out twice a year to redo the hull and topsides. Lot's of sanding, but boy did it get some attention!!! Are you familiar with the dories used by Powell when he went down the Colorado River? They look about the same?????