Baker
-
Posts
4,286 -
Joined
-
Last visited
Content Type
Profiles
Forums
Gallery
Events
Everything posted by Baker
-
 Looks great, Make the top of your plywood frames as sturdy as possible sorry about your band saw belt 😓
-
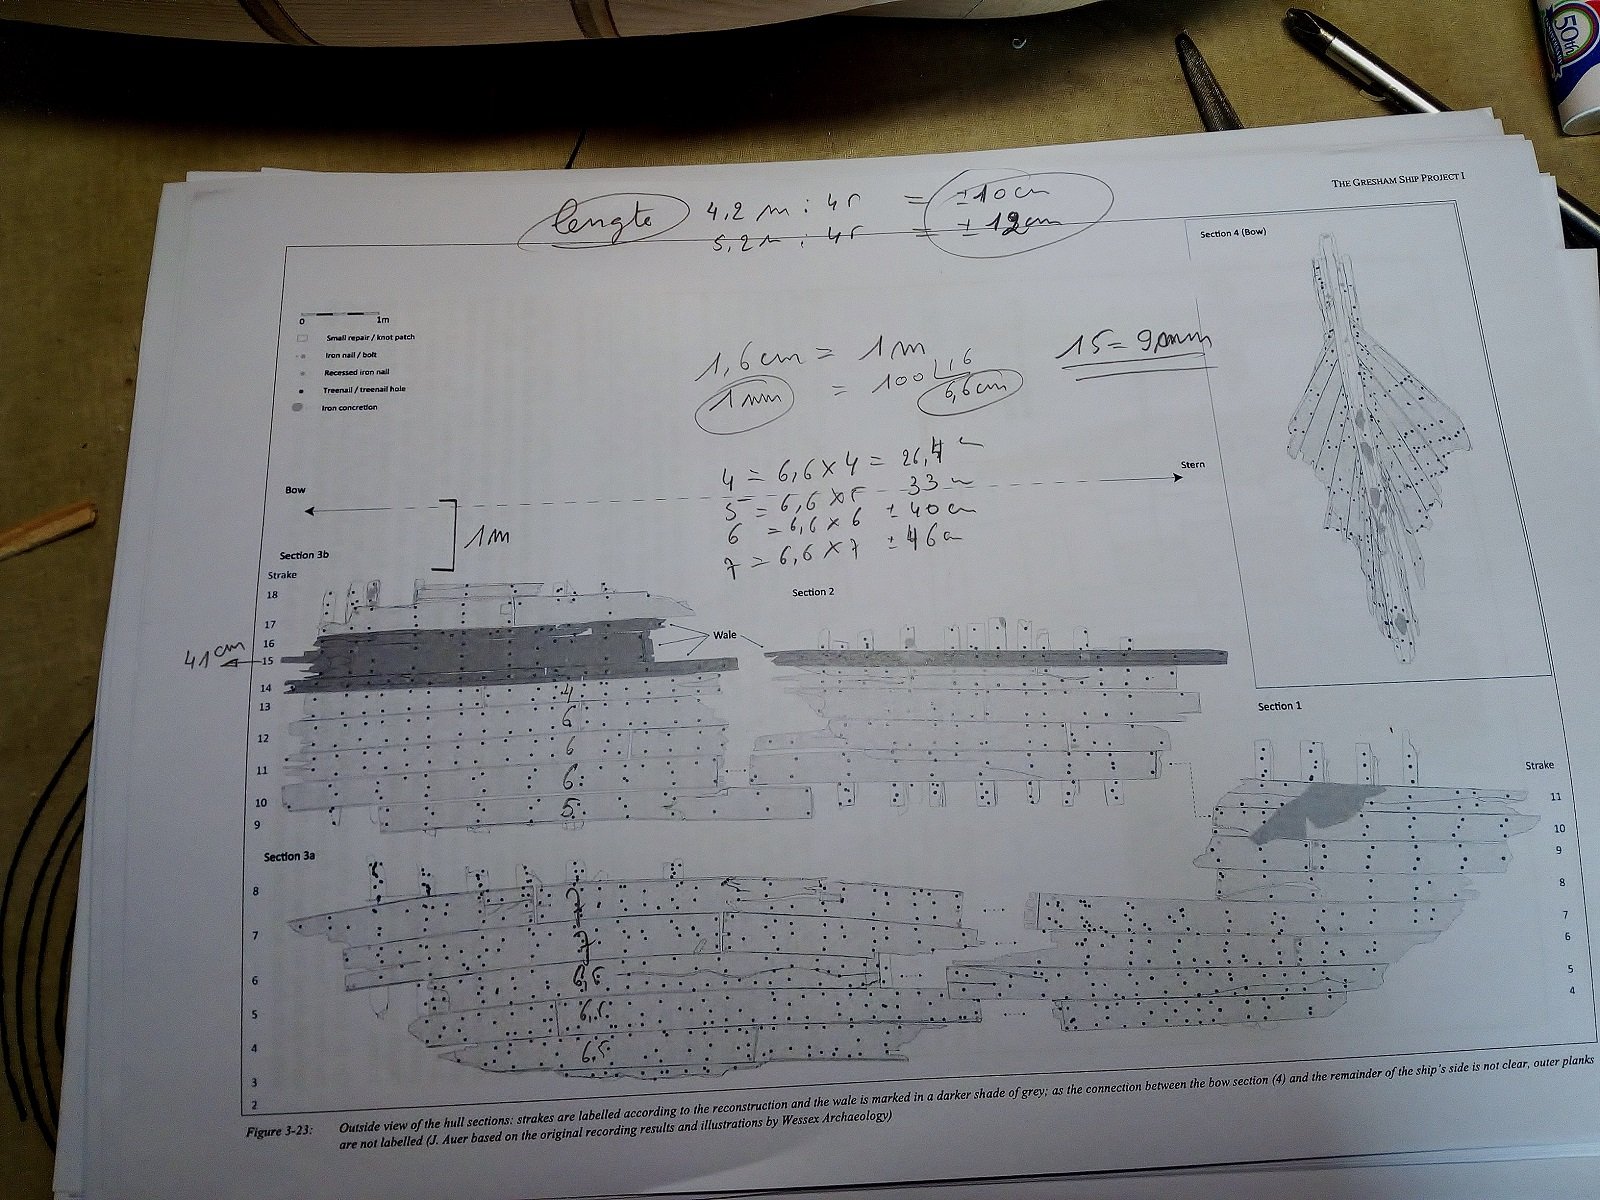
You have mail PLANKING scale 1:1 The planks are of sawn oak; their lengths vary between 2m and 6m. The average plank width is 300–460mm; thickness varies between 50 and 70mm. I used this data from an English wreck for the dimensions of the planks.

-
My brother-in-law fishes in his spare time. I told him I caught a really big fat fish. But the hole in the ice was too small to pull it up... He didn't believe me. Home now, today or tomorrow i will look fore info and answer on your Questions.
-
Indeed, a very intriguing view of the upper part of the fore castle 🤔
-
Most drawings of that era show the fore mast in front of the fore castle
-
If I were to redo mine GH it would be without. because historically more accurate
-
Nice Is the scale 1/100 (signature) or 1/300 (titel) ?
- 12 replies
-
- 1
-

-
- Queen Annes Revenge
- Blackbeard
- (and 2 more)
-
Nice find on the coins and nice military models in the background. I did a Nato manoeuvre in 1983. Cardboard frames are looking great.
-
Indeed. For this, solid wood is always better than plywood.
-
Swedish Lapland. go fishing, snowscooter, husky sled.

-
Done 👍
-
During the construction of my GH I downloaded quite a few pdf's. currently on vacation, just wait until next week then I will send via pm. in case i forget, remind me
-
Nice start. I follow. My first scratch model was an attempt to make a copy of the GH. good luck with yours
-
-
I can send you more info and drawings via pm about these shields. But then you have to wait a bit, Baker is on vacation
-
Great start Steven
-
Large update 😉. The strakes normally follow the lines of the planks and seal the seams between two planks neat indeed 👍 Here indeed there was no clinker planking, but removable shields. Good and nice work