HOLIDAY DONATION DRIVE - SUPPORT MSW - DO YOUR PART TO KEEP THIS GREAT FORUM GOING! (Only 13 donations so far - C'mon guys!)
×


RGL
-
Posts
5,529 -
Joined
-
Last visited
Content Type
Profiles
Forums
Gallery
Events
Everything posted by RGL
-
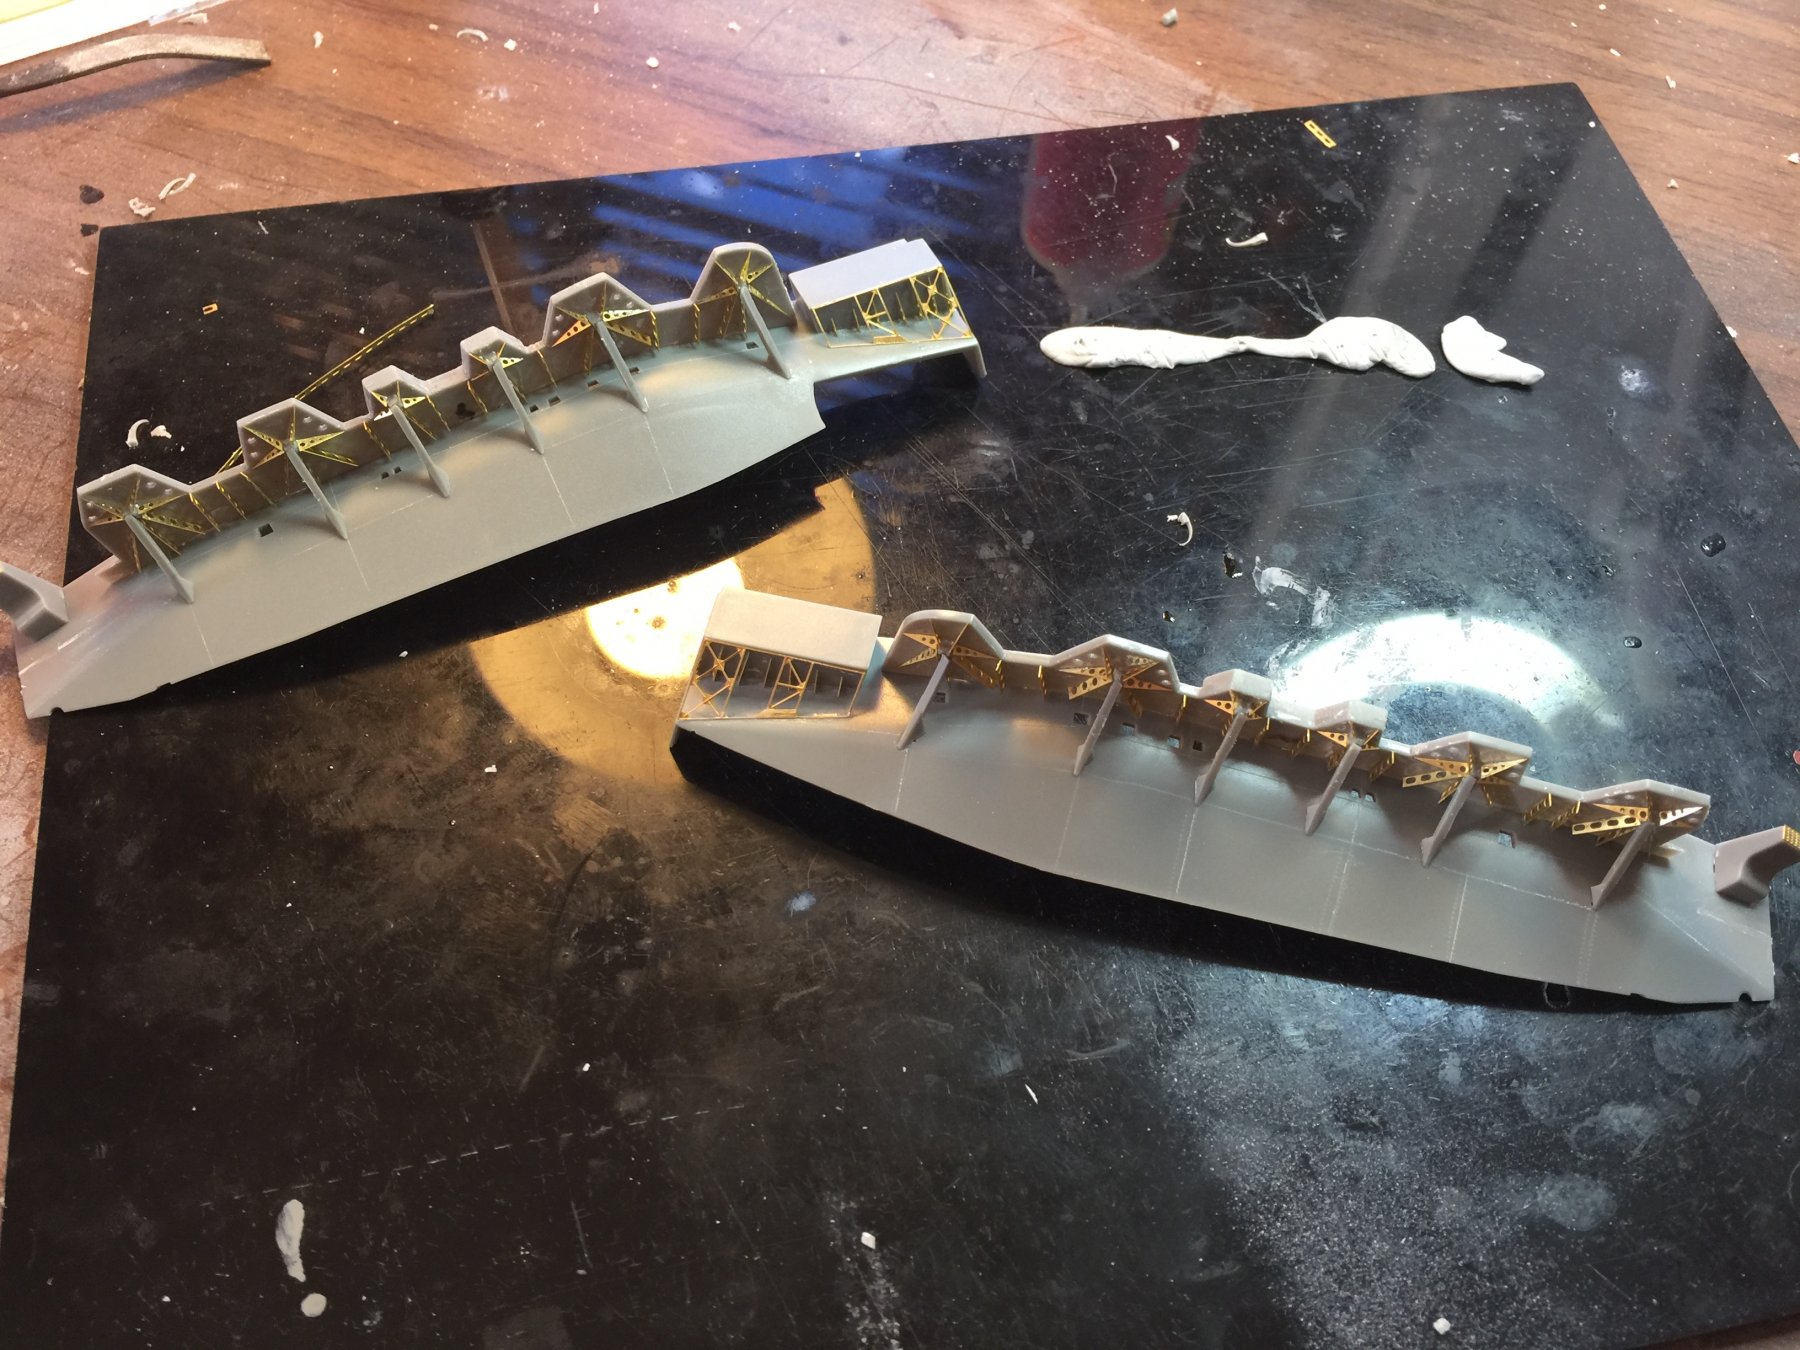
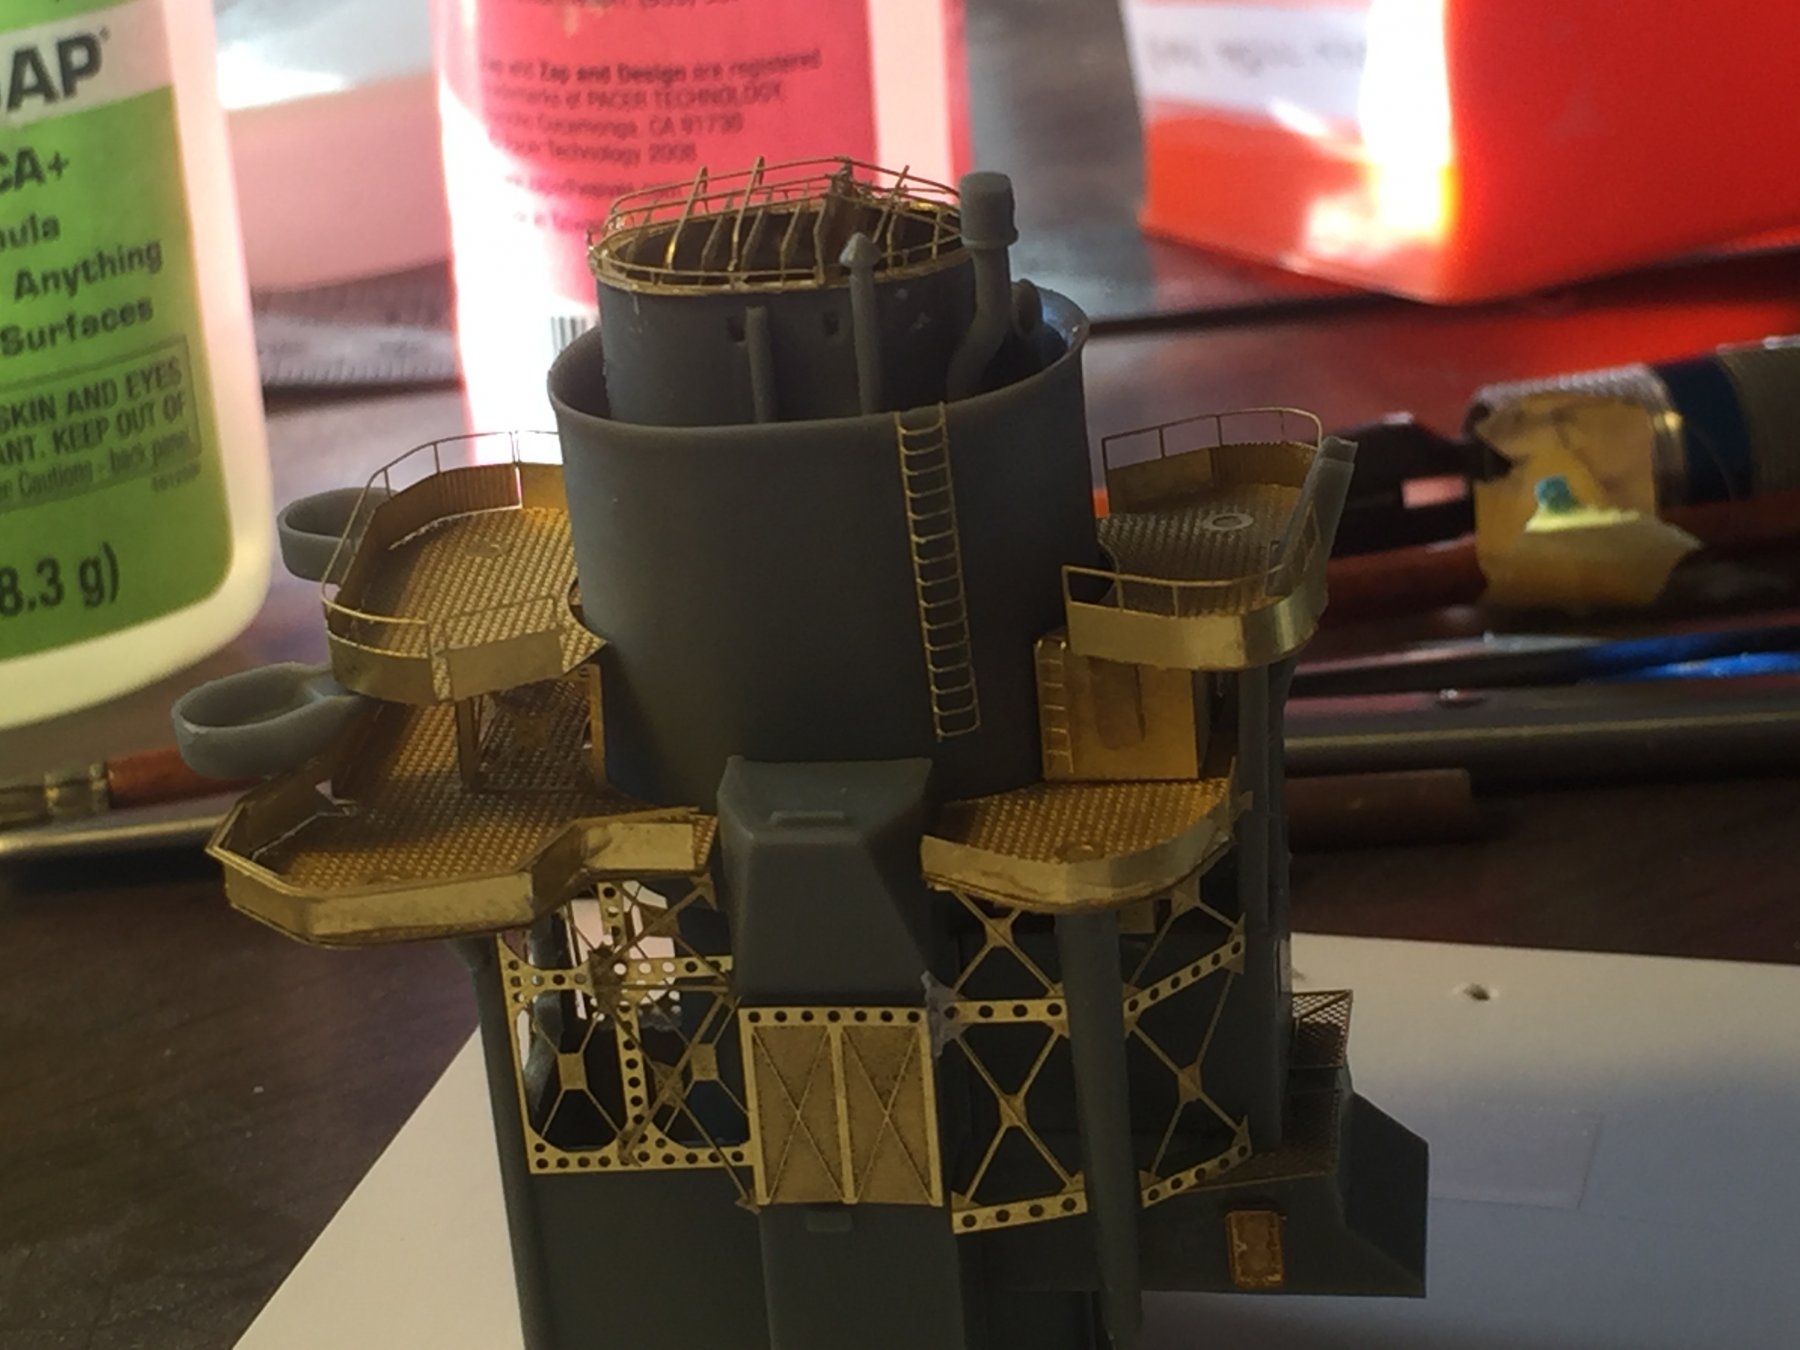
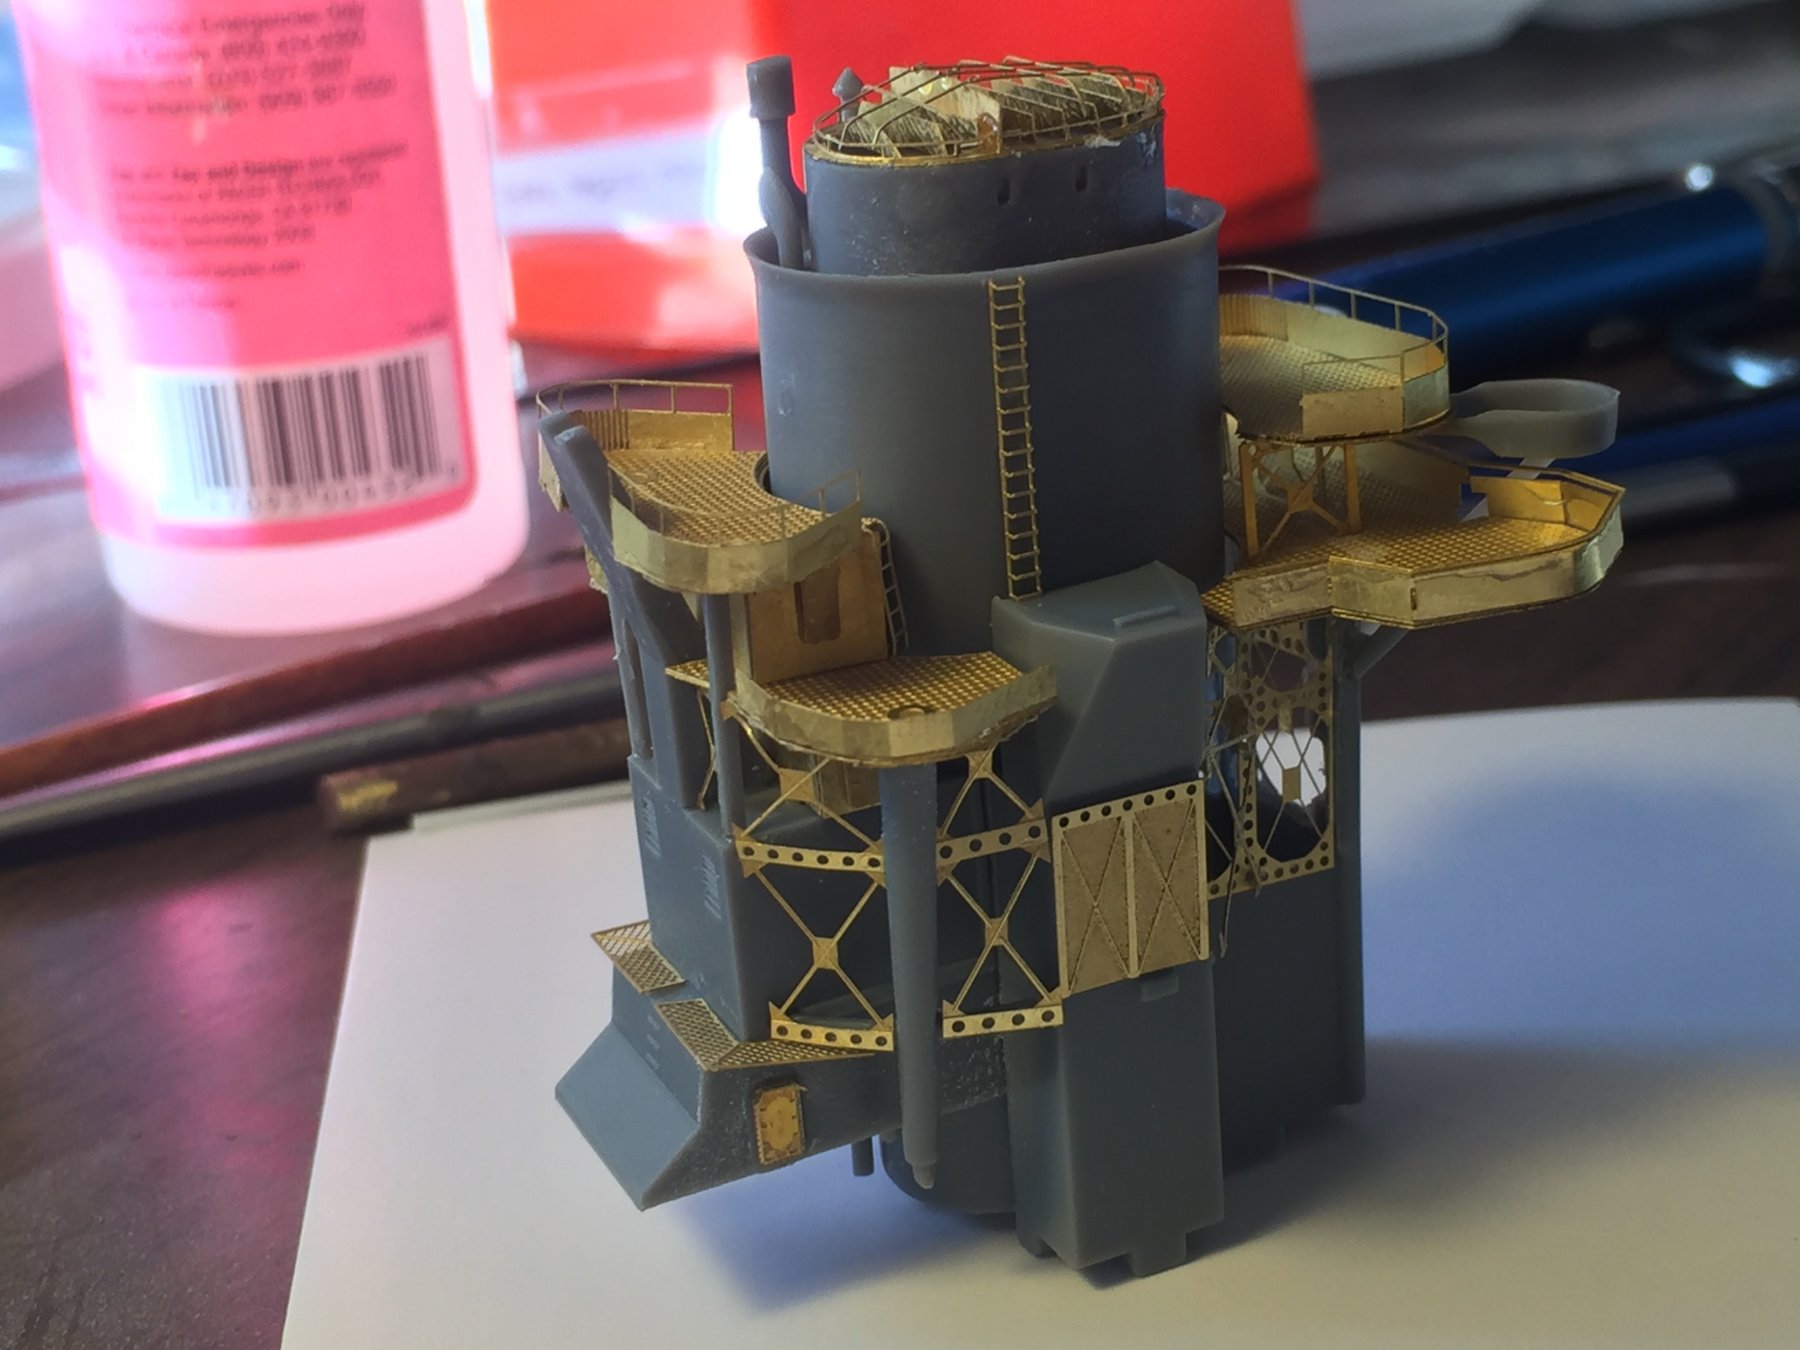
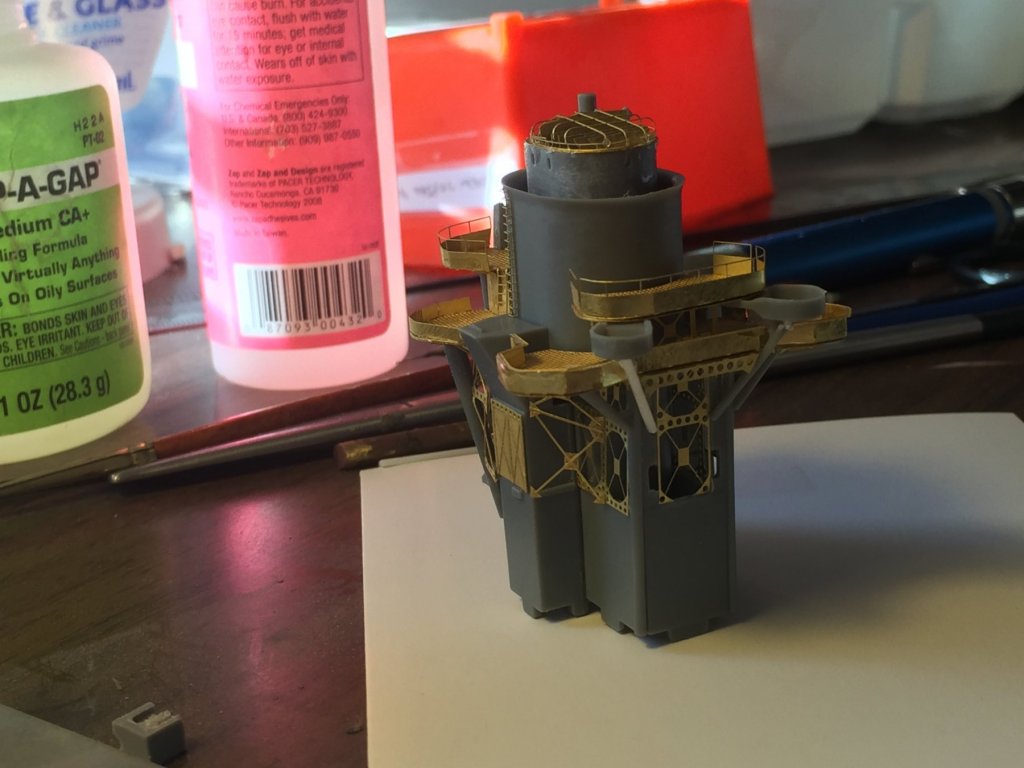
 The Japanese ships had these huge Pagoda towers. Given they are so intricate I am going to try and construct it so it pulls apart for ease of painting and add the multitude of ladders afterwards. Im still awaiting drill bits so I can't progress the rear of the bus. So far, that's the first two stories of 9.

- 224 replies
-
- 13
-

-
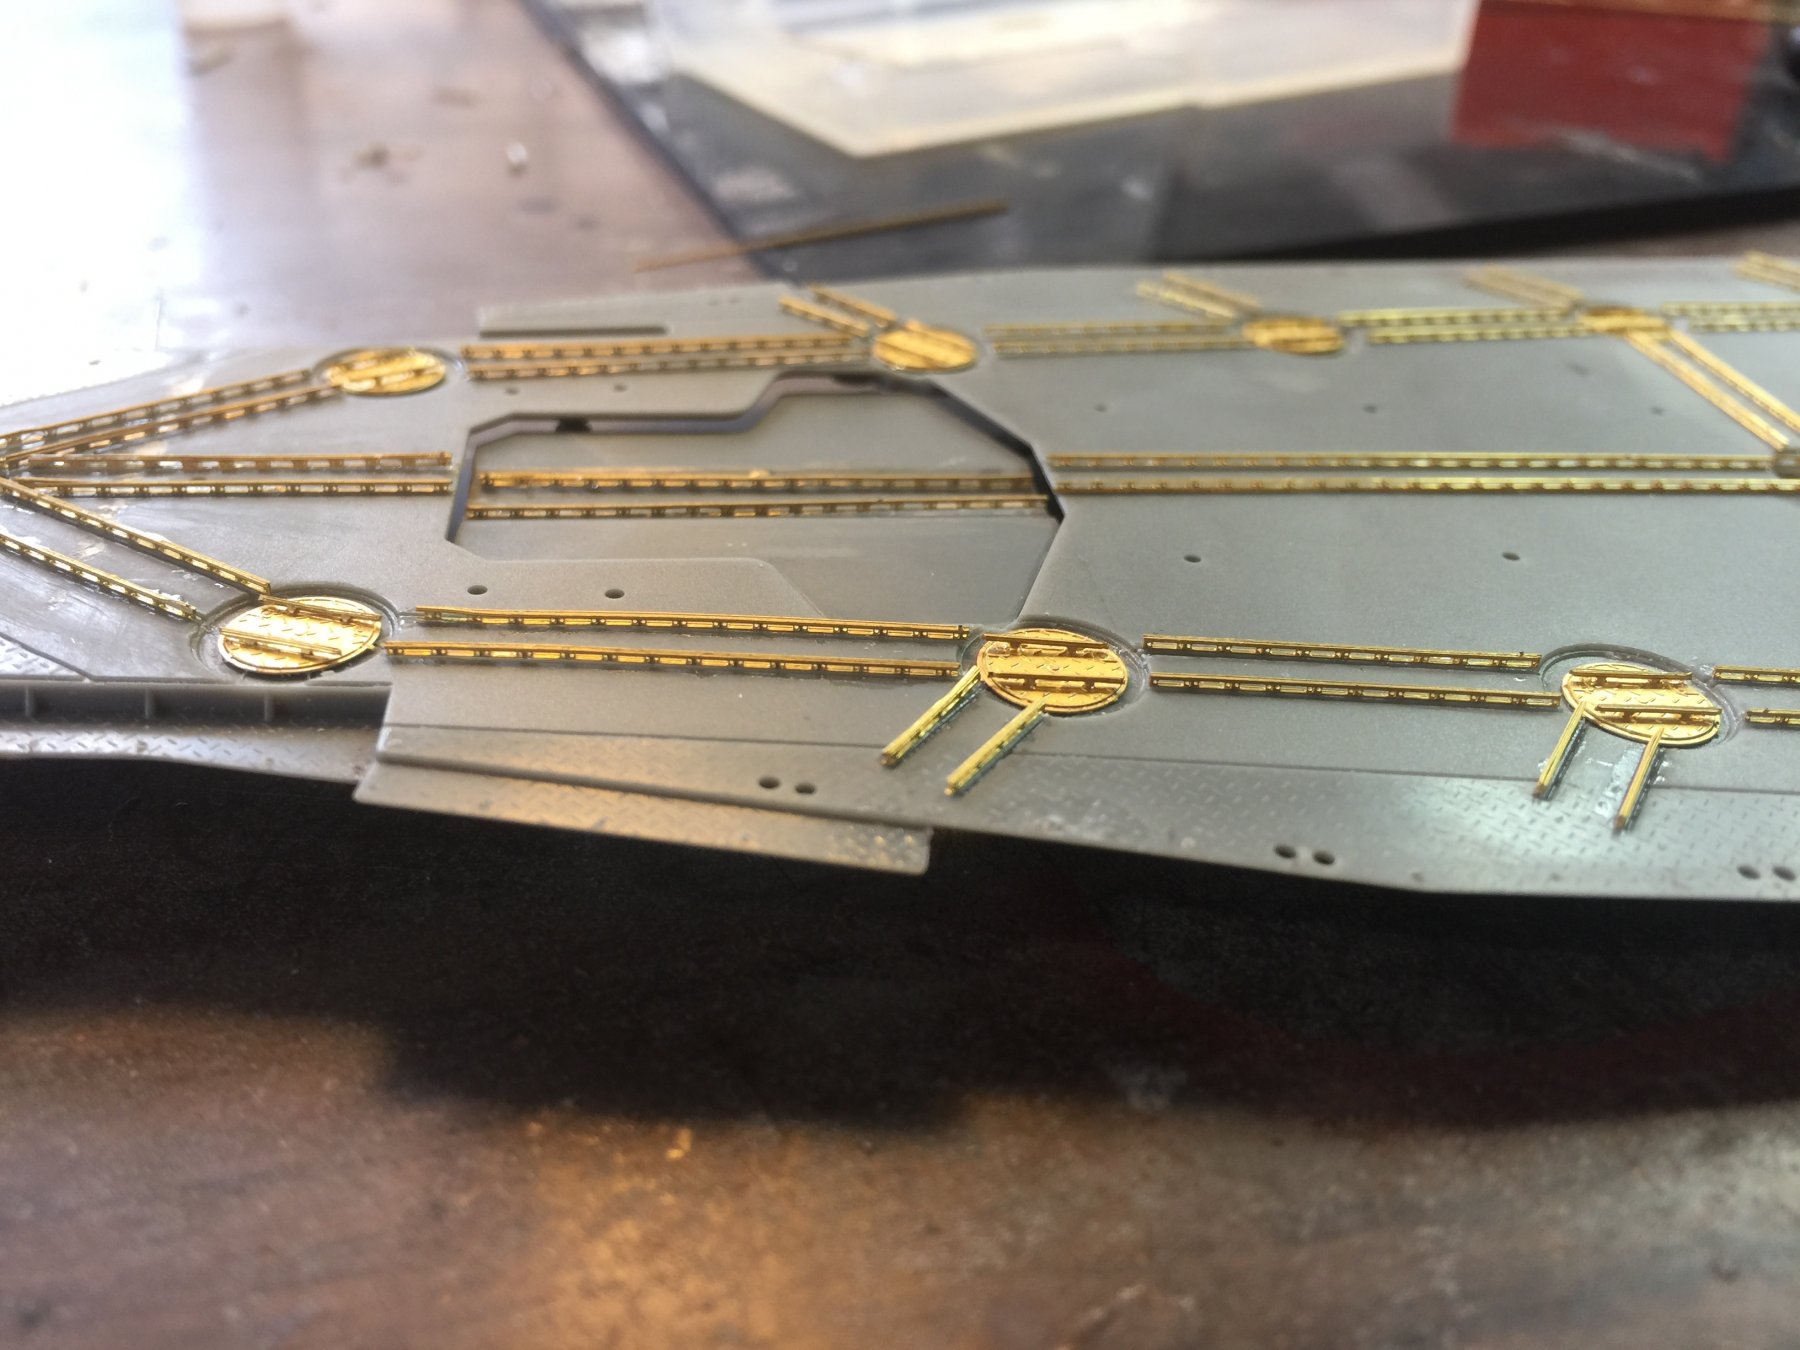
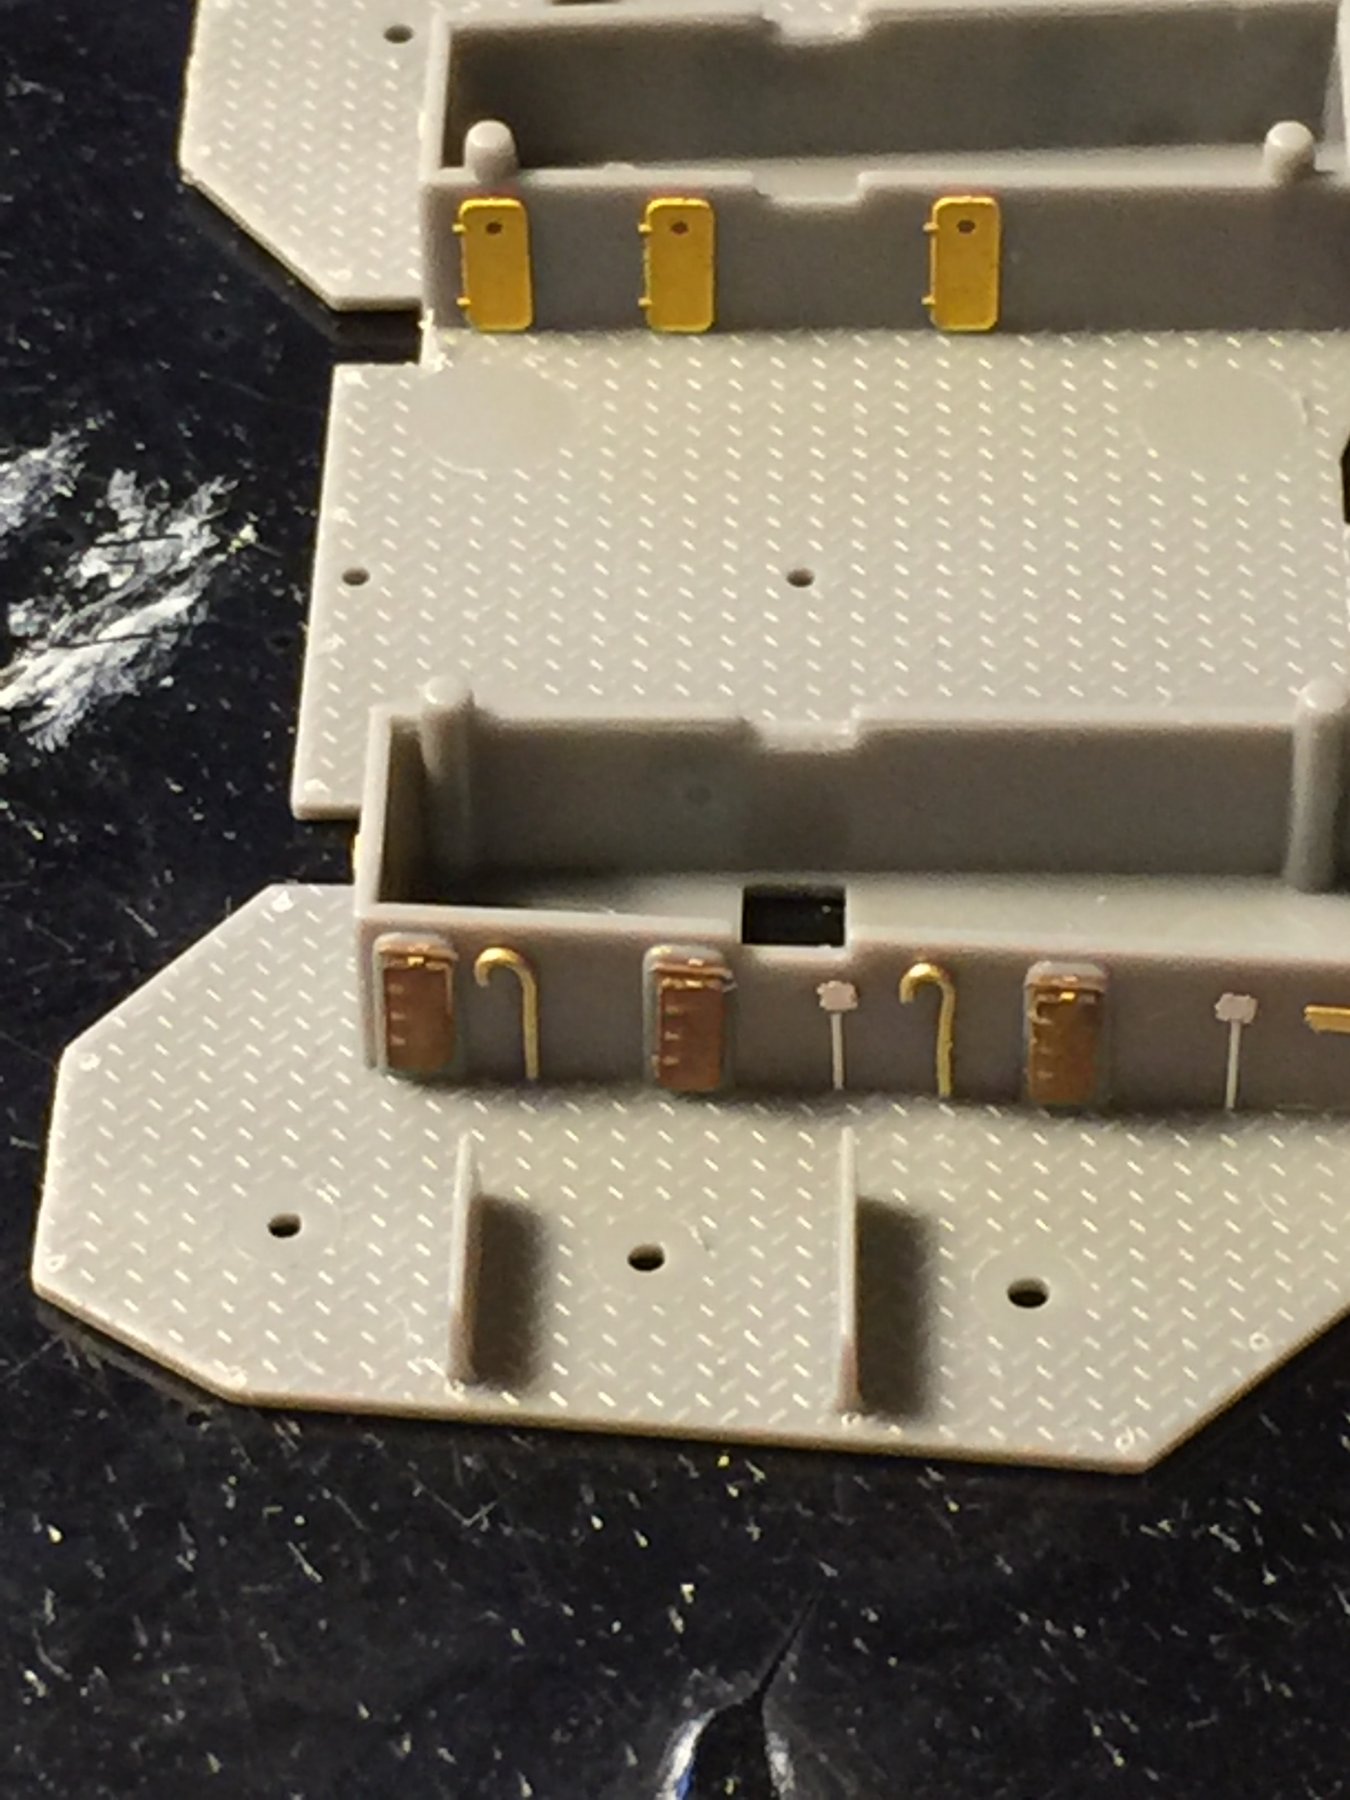
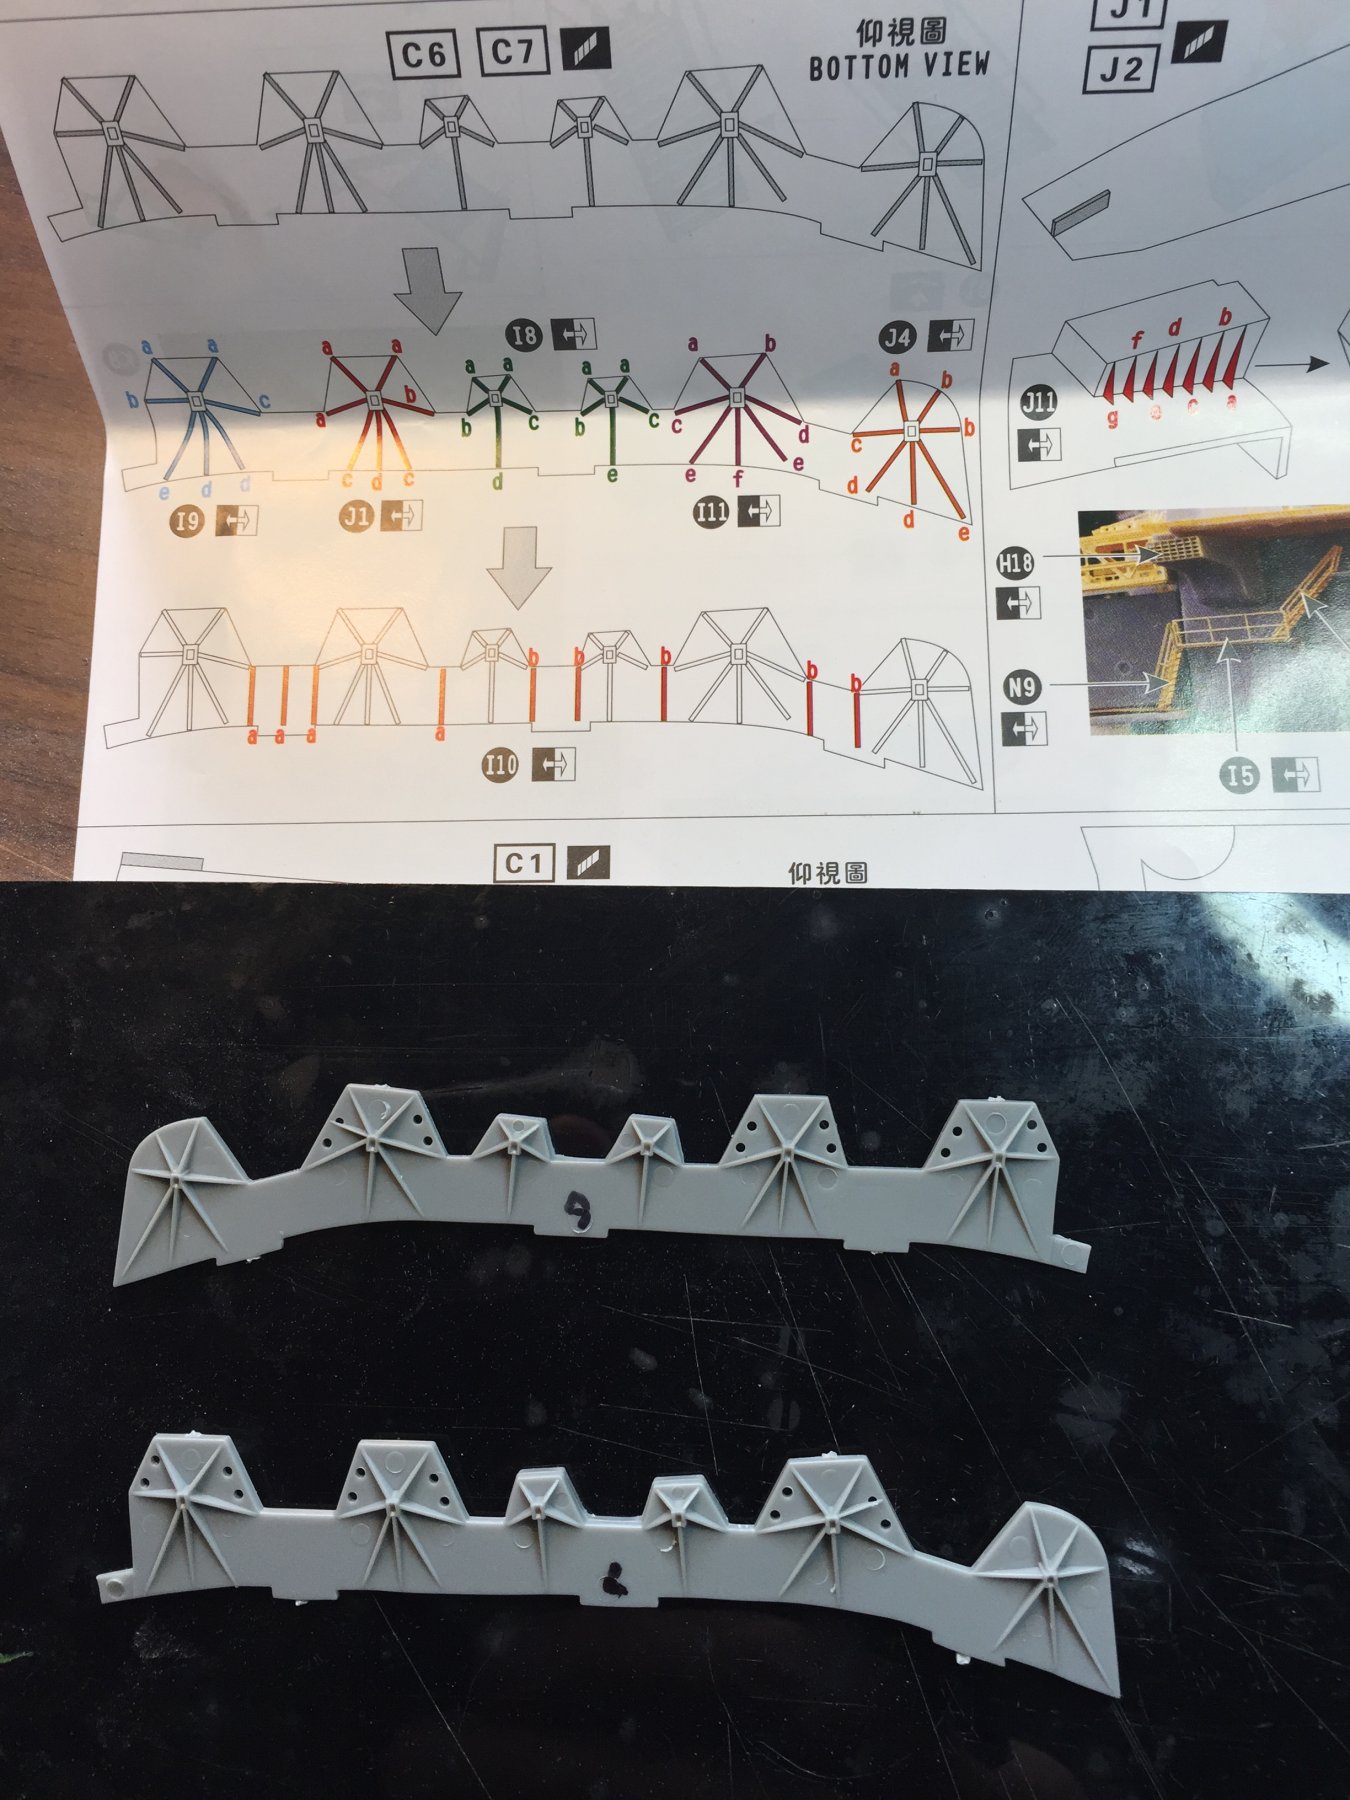
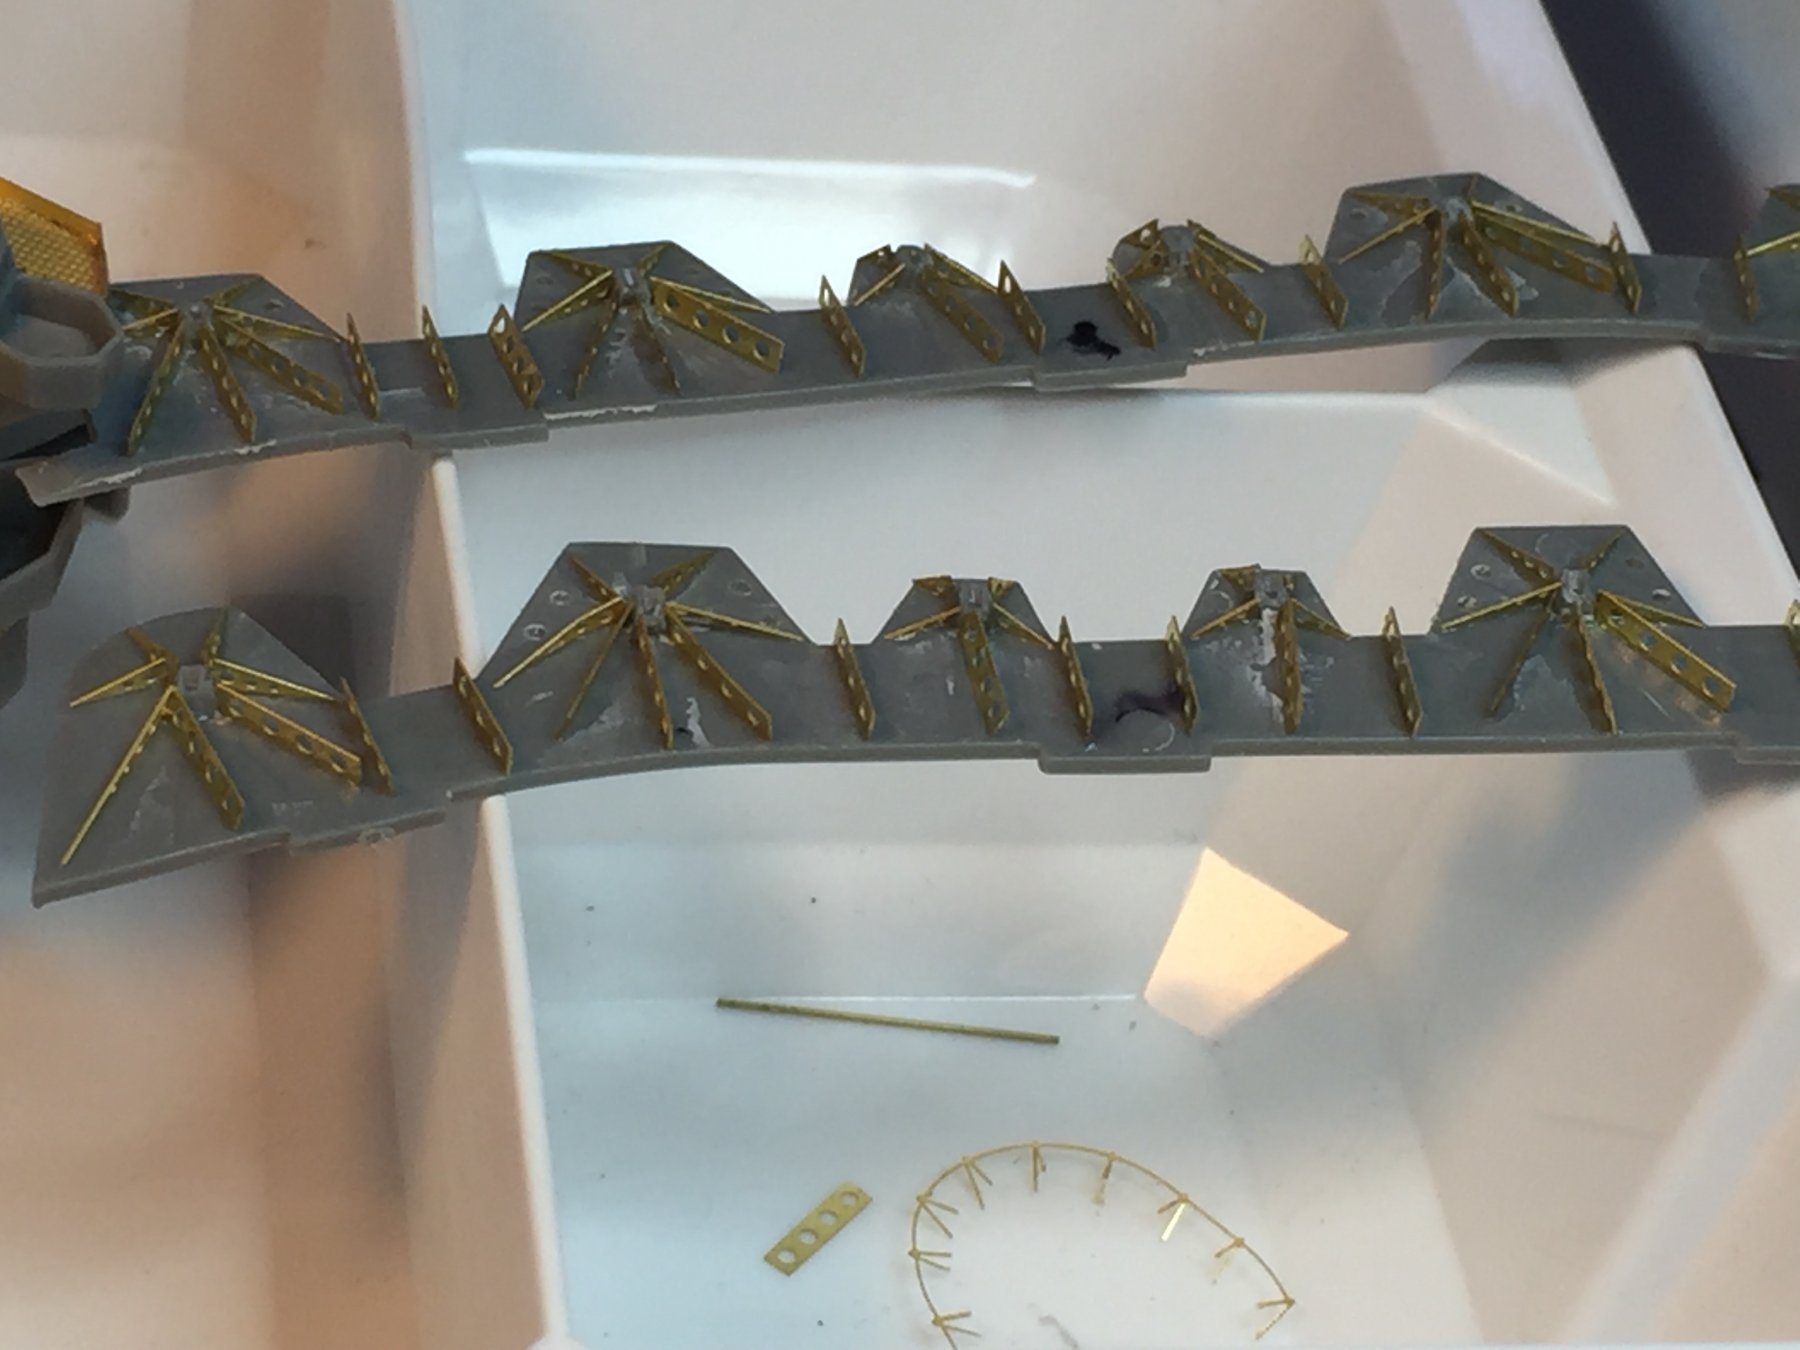
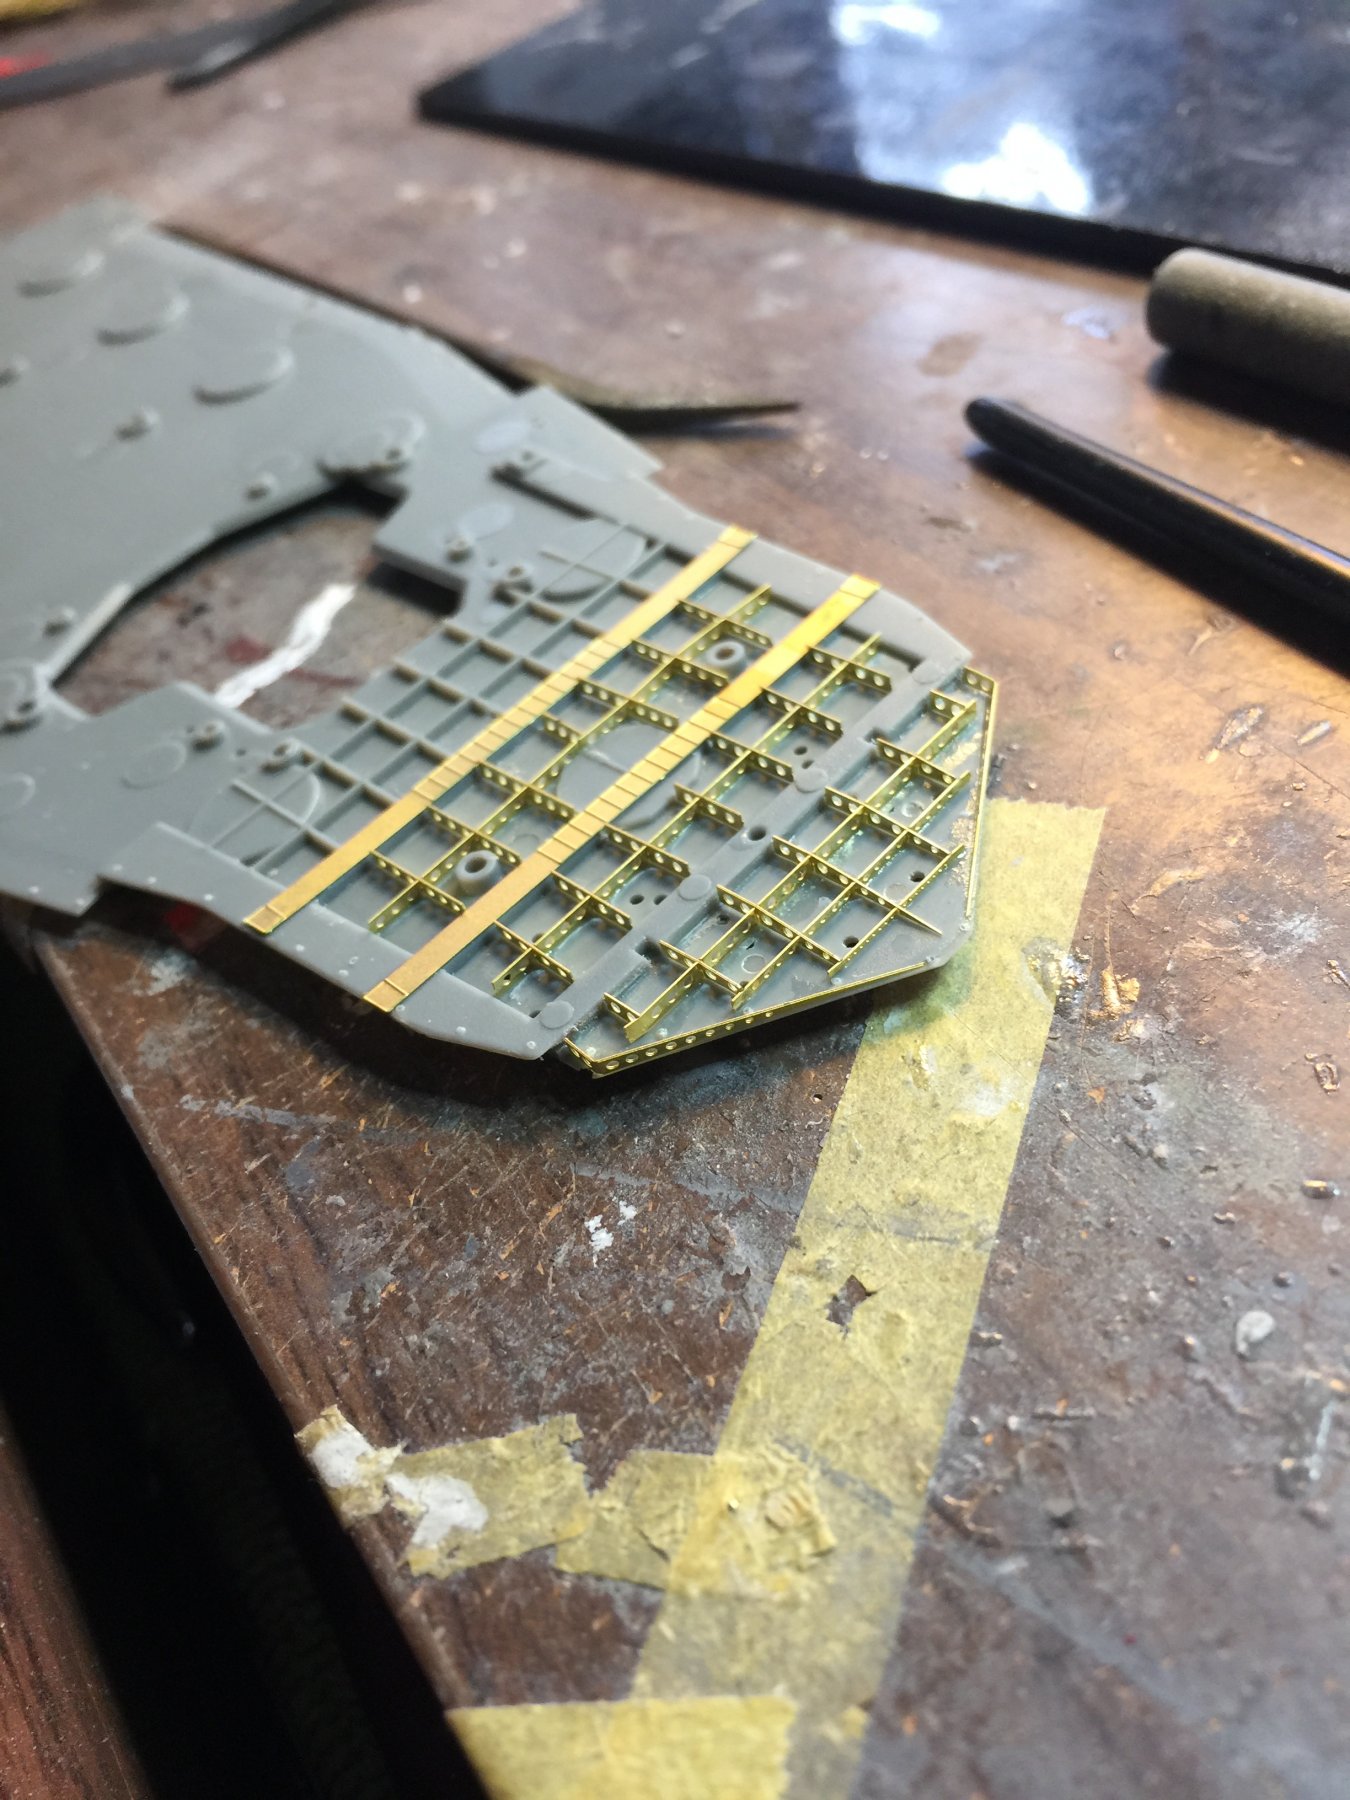
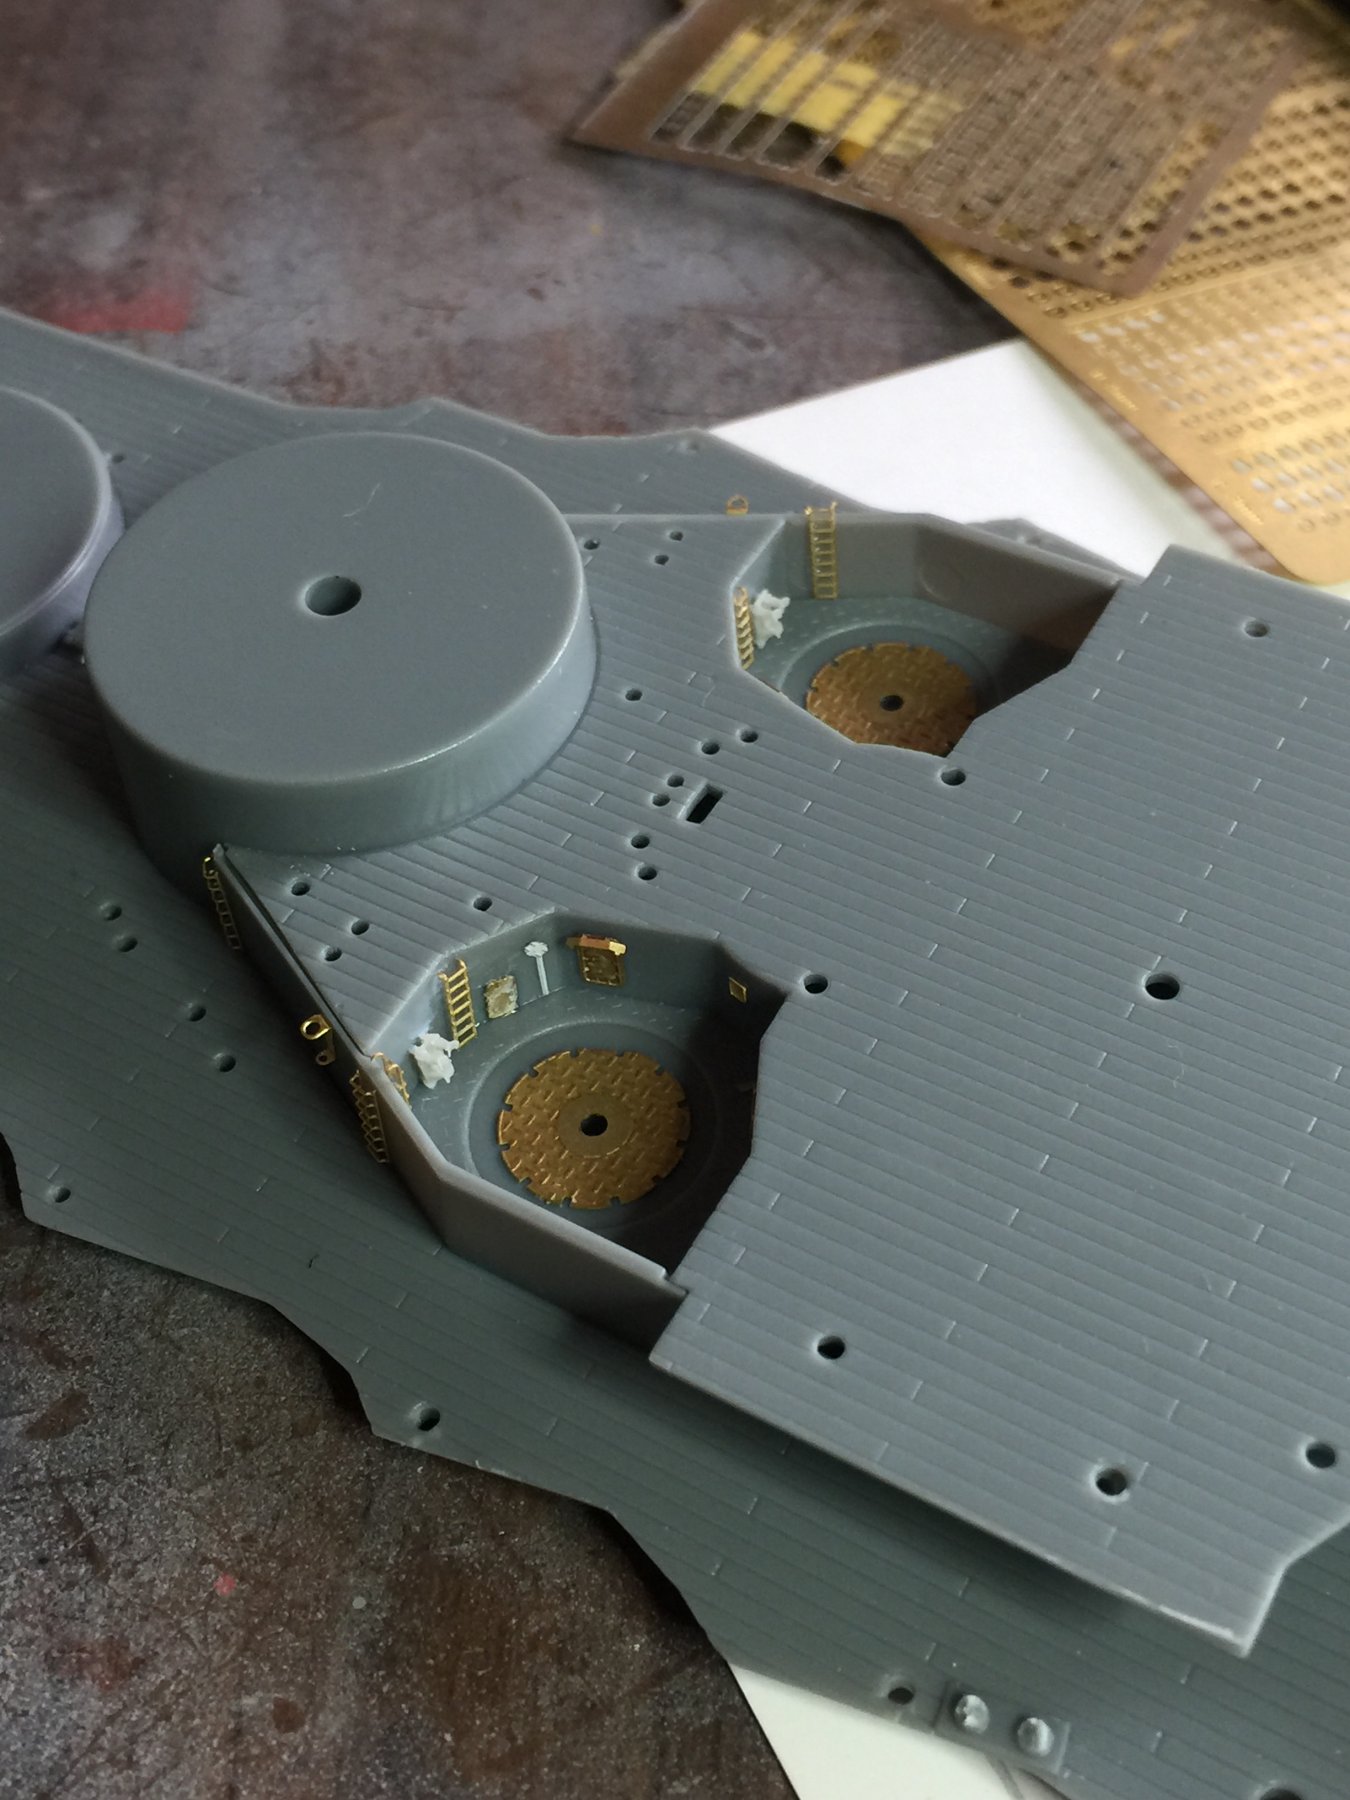
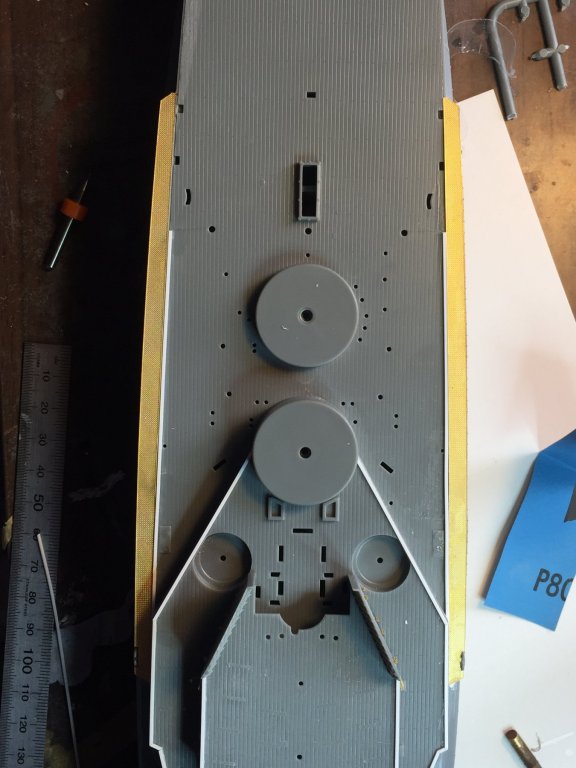
Next, back to the rear deck. There are 12 turntables, requiring me to buy 2 sets of Alliance model works railing sets. I've started on the railings and will probably use a hole punch to make up the last two turntables. Looks so much better than the kit "apathy", apparently aircraft could only fly off via the catapult anyway and the only way this would work is to use the traditional railing system. The deck itself was concrete, used as a counterweight as the rear two turrets were removed. Photos and video of the Ise show the blocks of cracked concrete and the railings. About a day's work to go on this then I'll flip it and continue with the underside.
- 224 replies
-
- 12
-
-
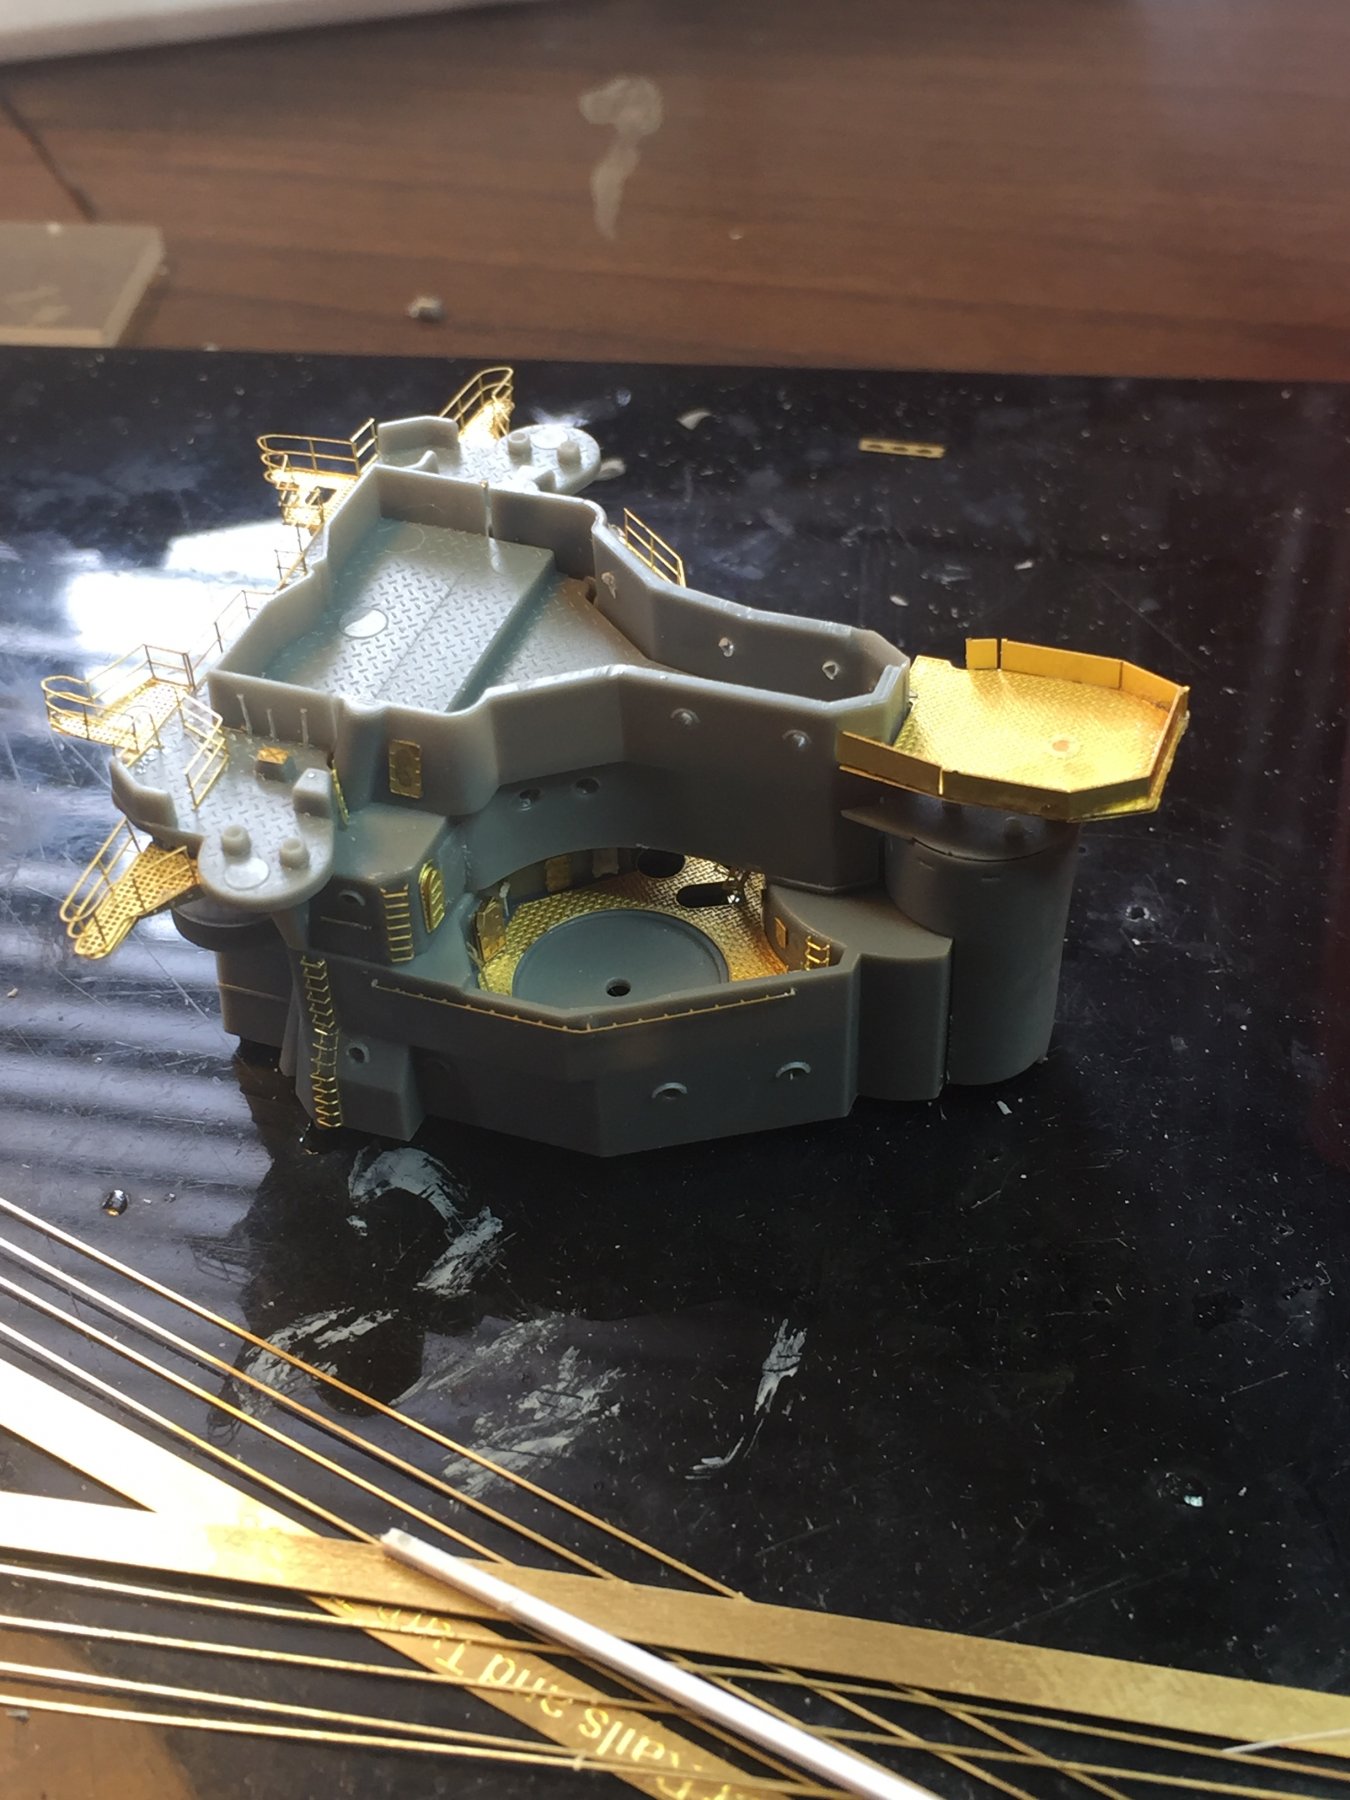
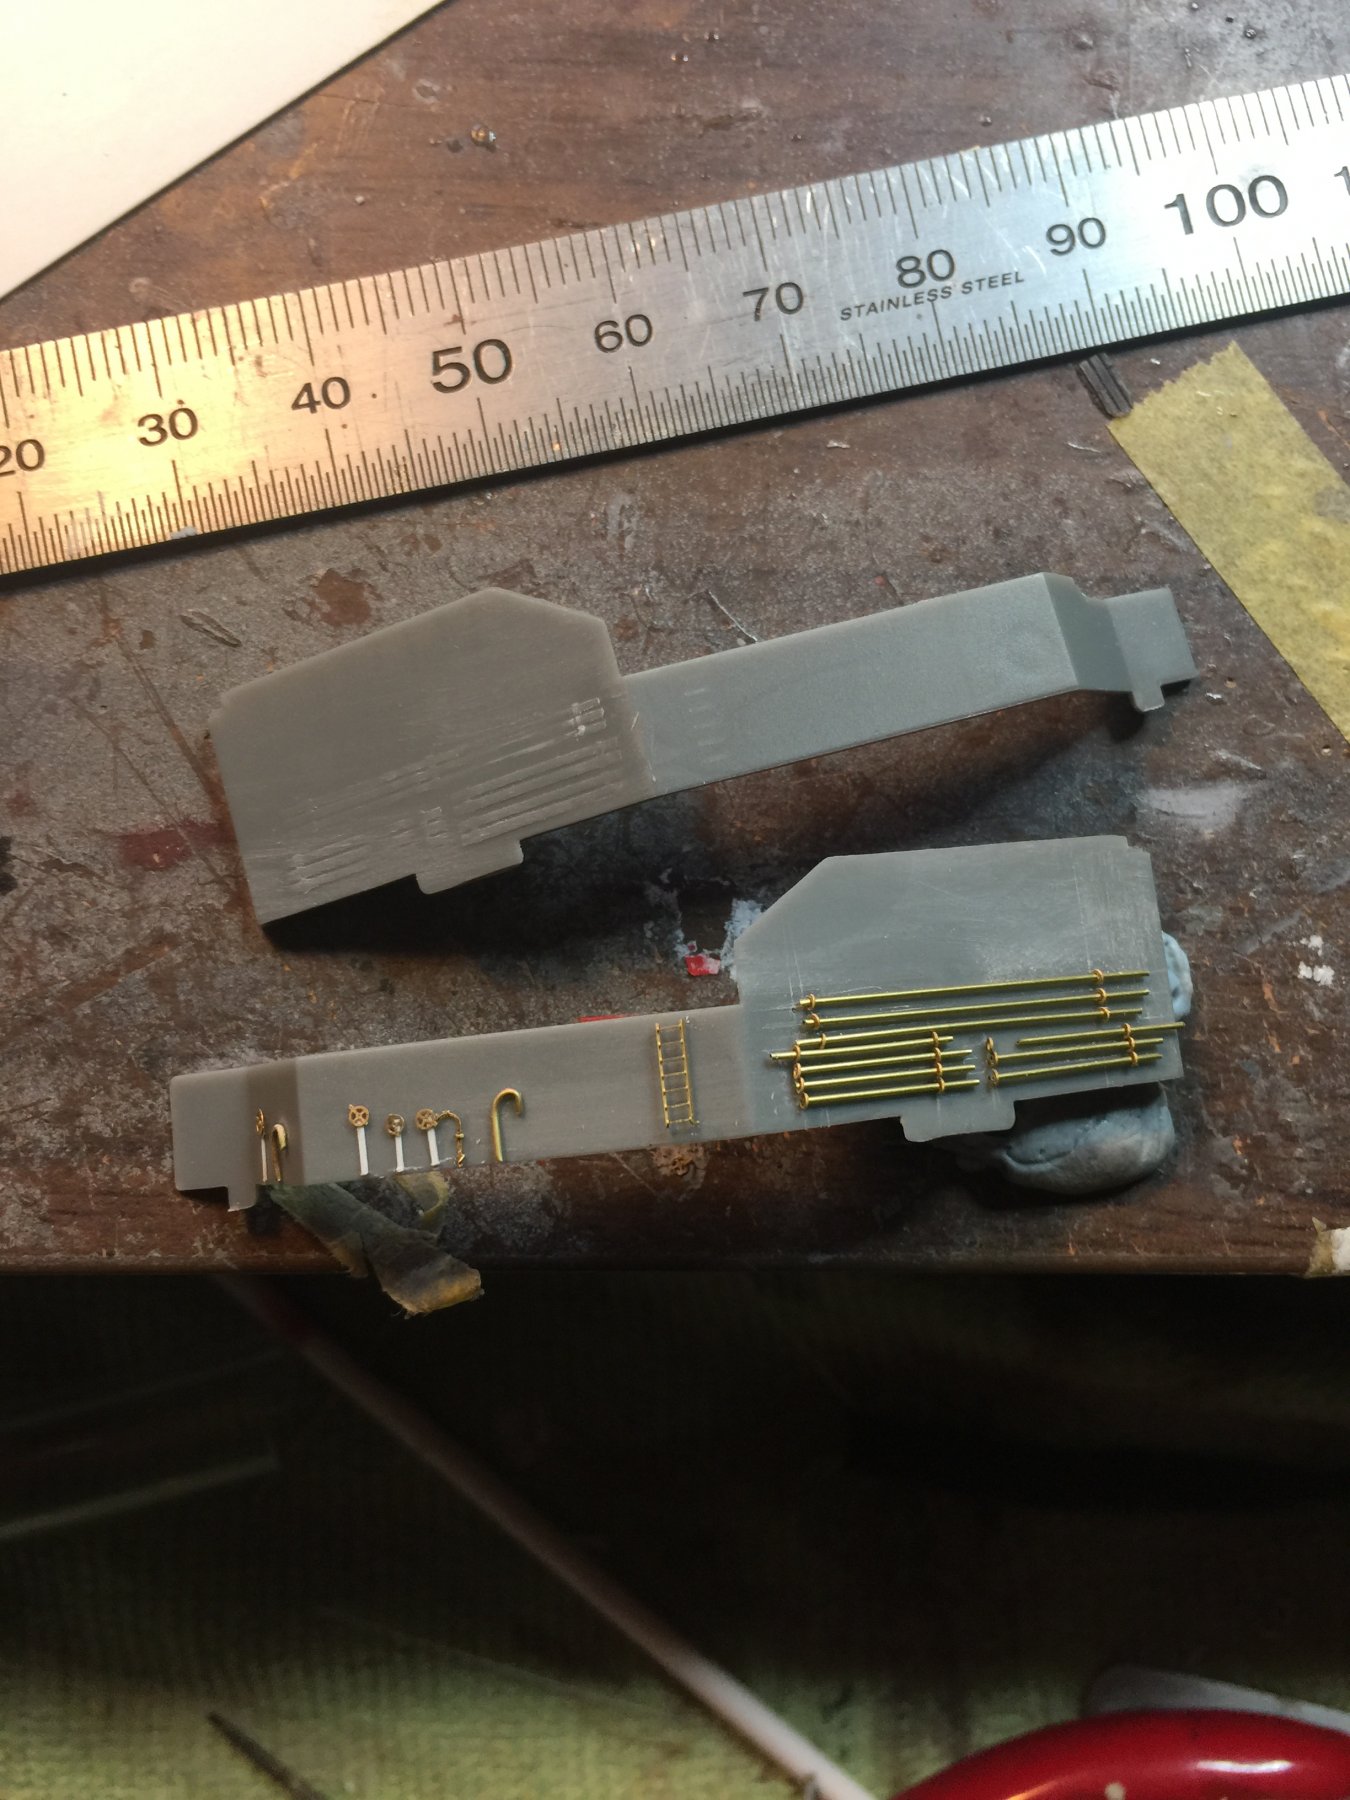
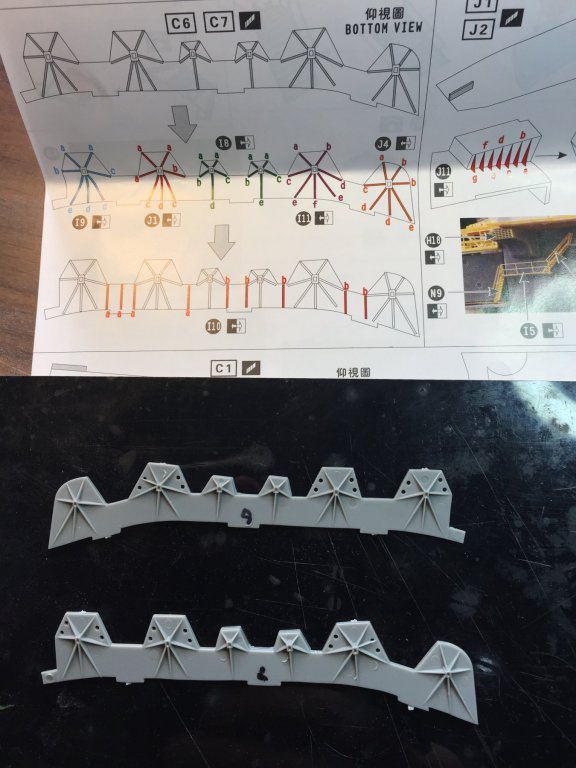
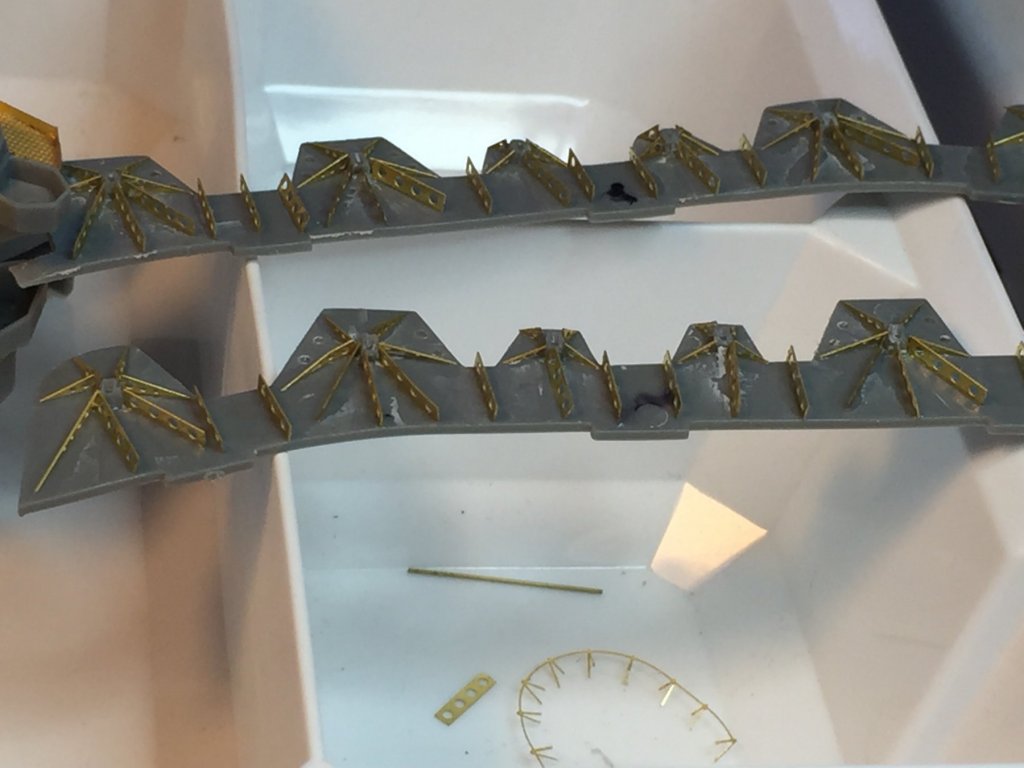
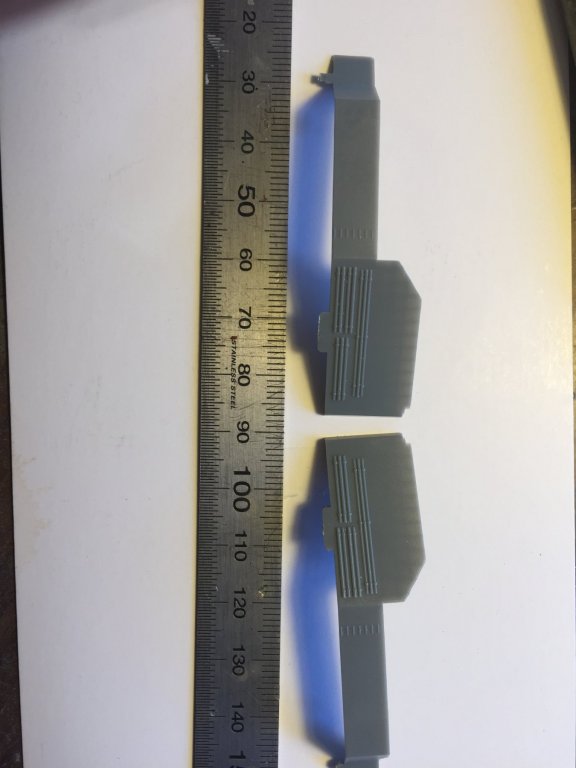
Small update, this piece is the rocket launcher platform that sits at the stern. Apparently they were fairly inaccurate and bloody dangerous to use, so you had to run and hide in the rooms behind them. I've value added a bit and managed to break my last drill bit doing up the stanchion holes.

-
Yes mate I got it on kindle, 50% of the book is about what aftermarket is available for it, and it brushes over the service history of the ships.
-
No mate, type in translate into google, then type the phrase you want, such as 'battleship mikasa' into the screen that comes up, and select language below it. This is the the way I found the builders blueprints on a Russian blog for my Varyag.
- 467 replies
-
- 7
-
-
- mikasa
- wave models
- (and 1 more)
-
Do a google translate search for mikasa torpedo booms in both Russian and polish. Then look at the images, there are a LOT of amazing modellers in Eastern Europe.
- 467 replies
-
- 7
-
-
- mikasa
- wave models
- (and 1 more)
-
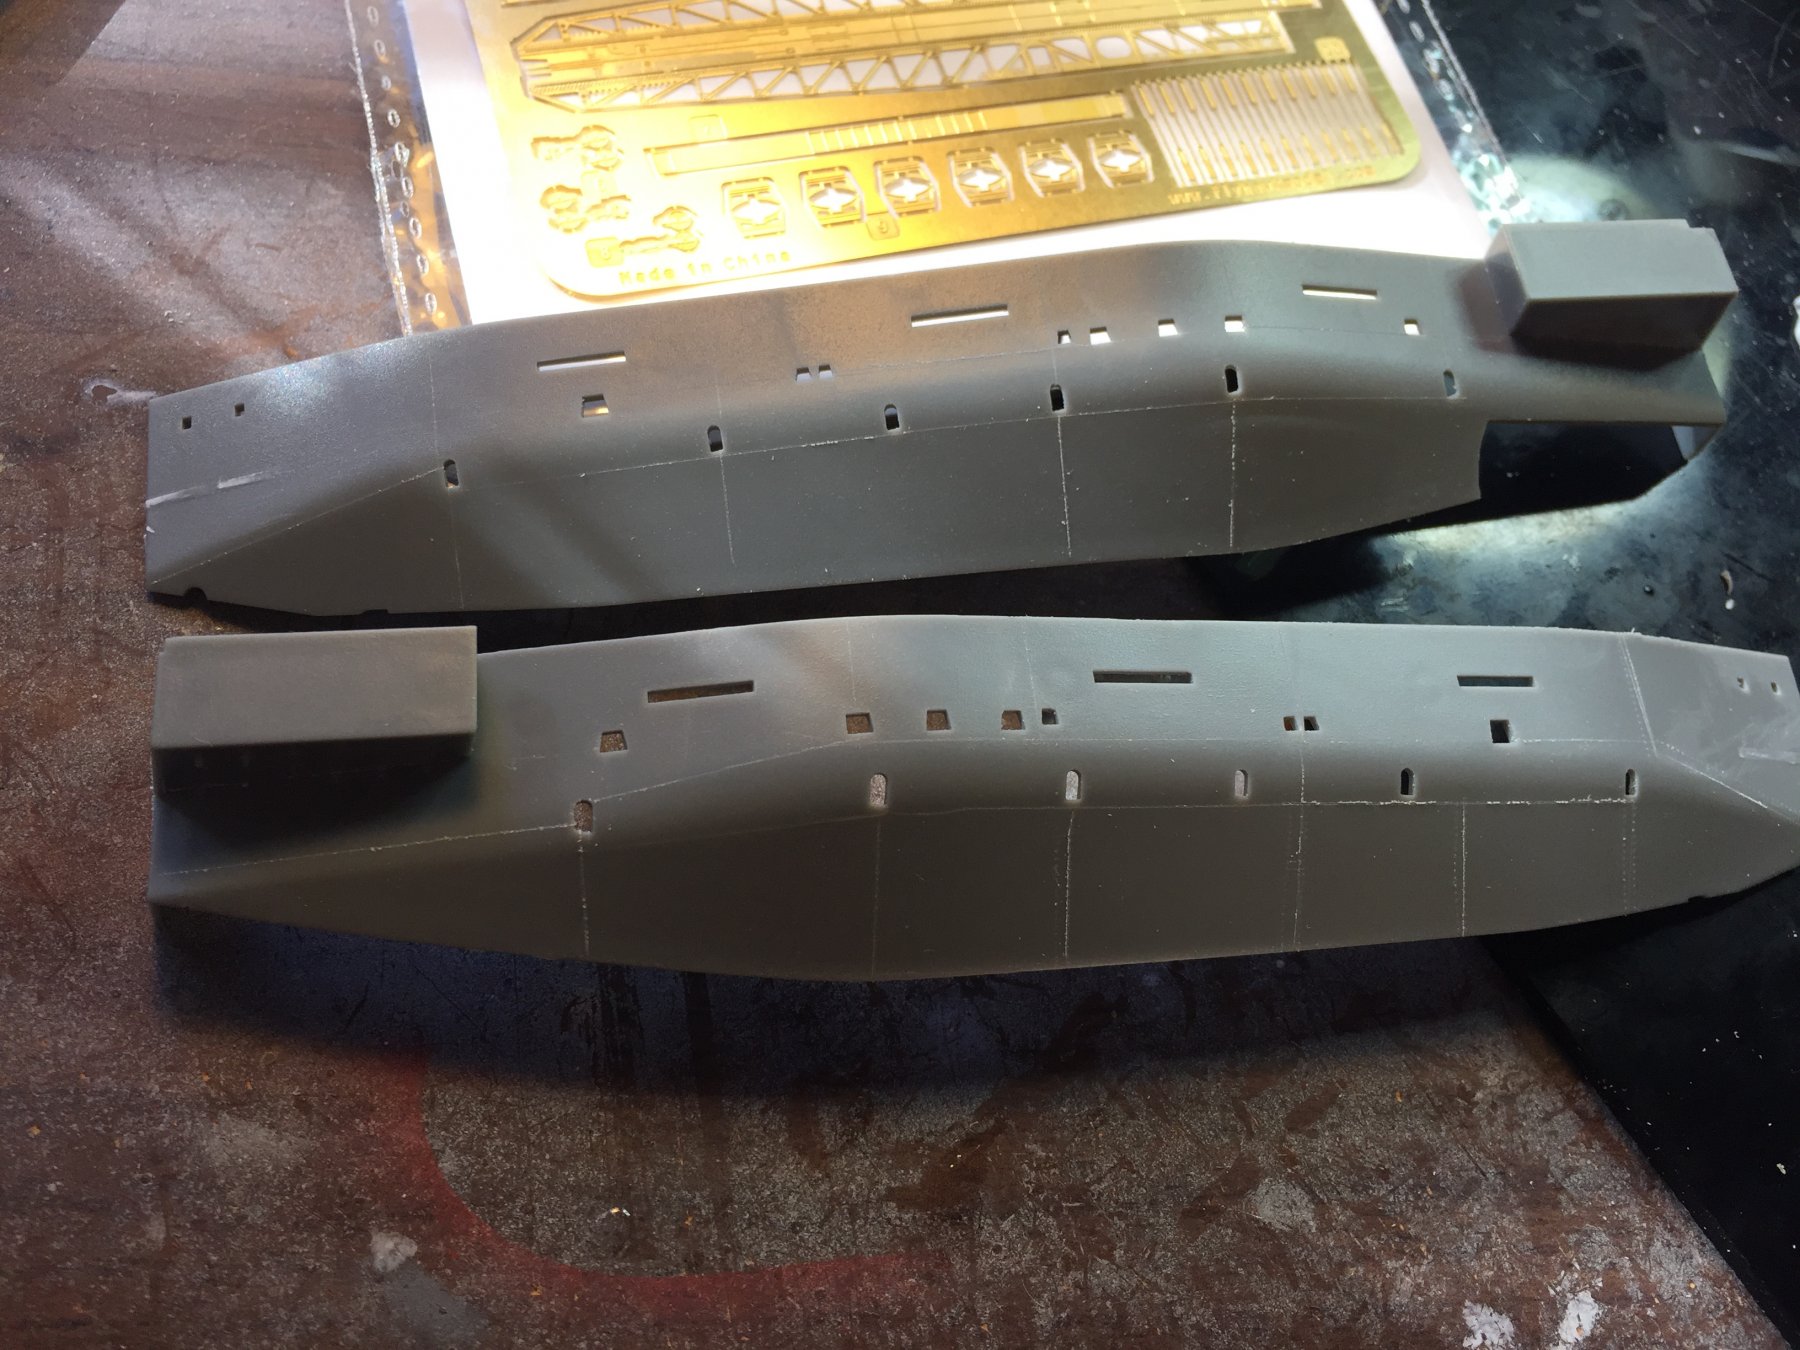
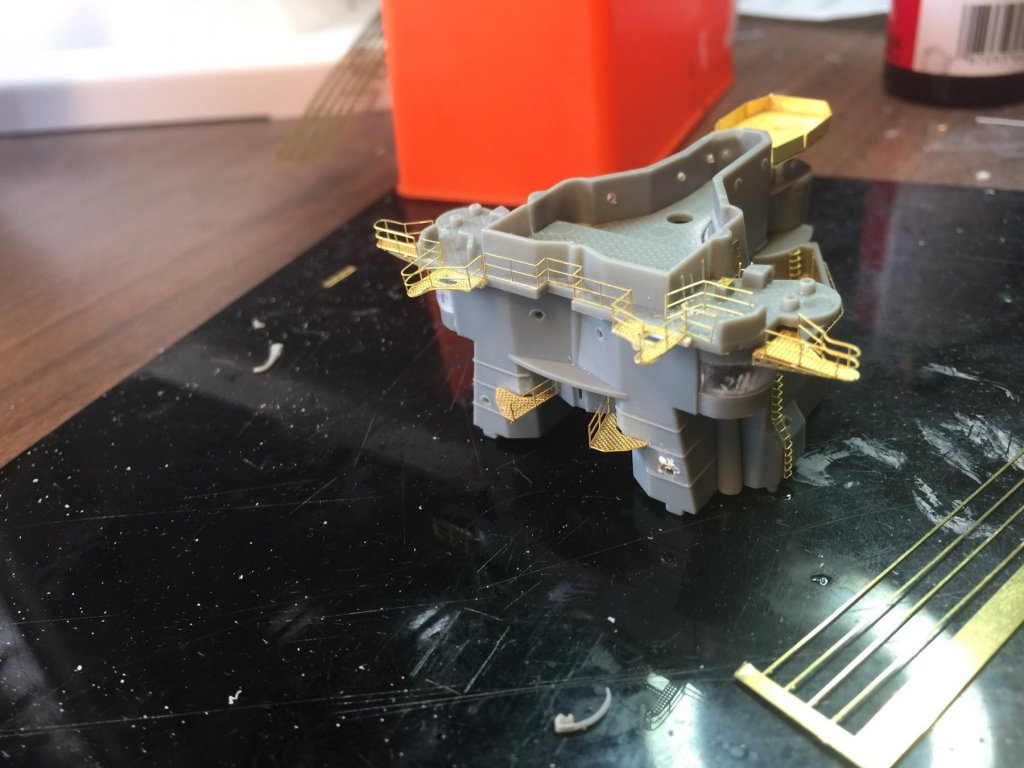
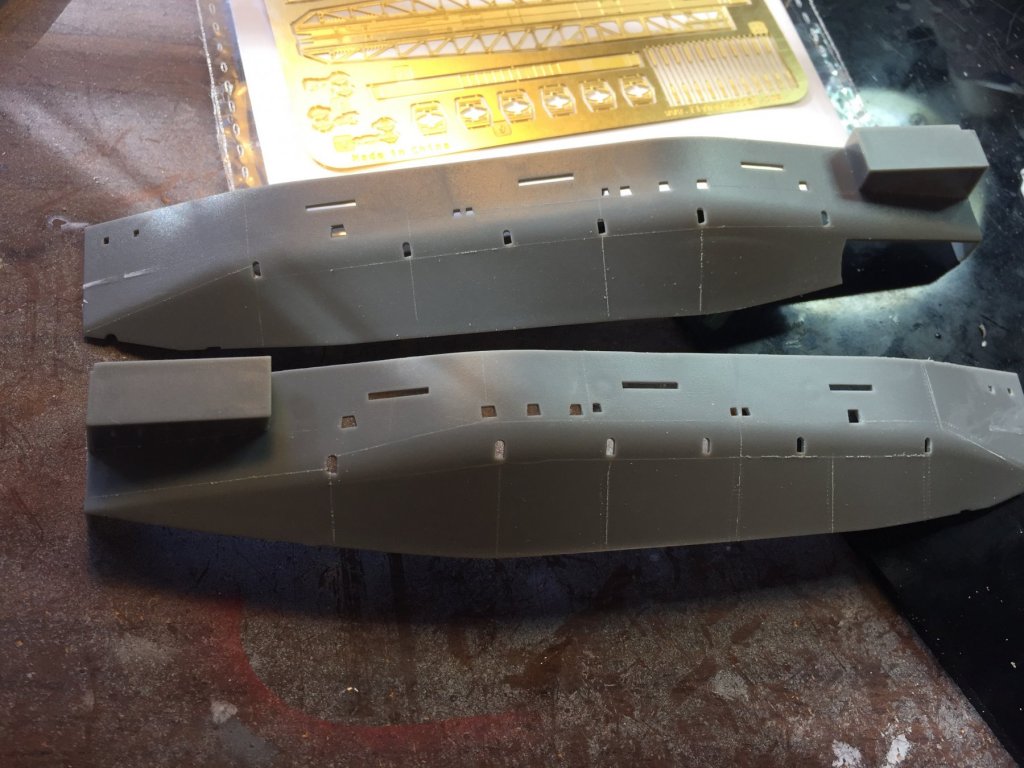
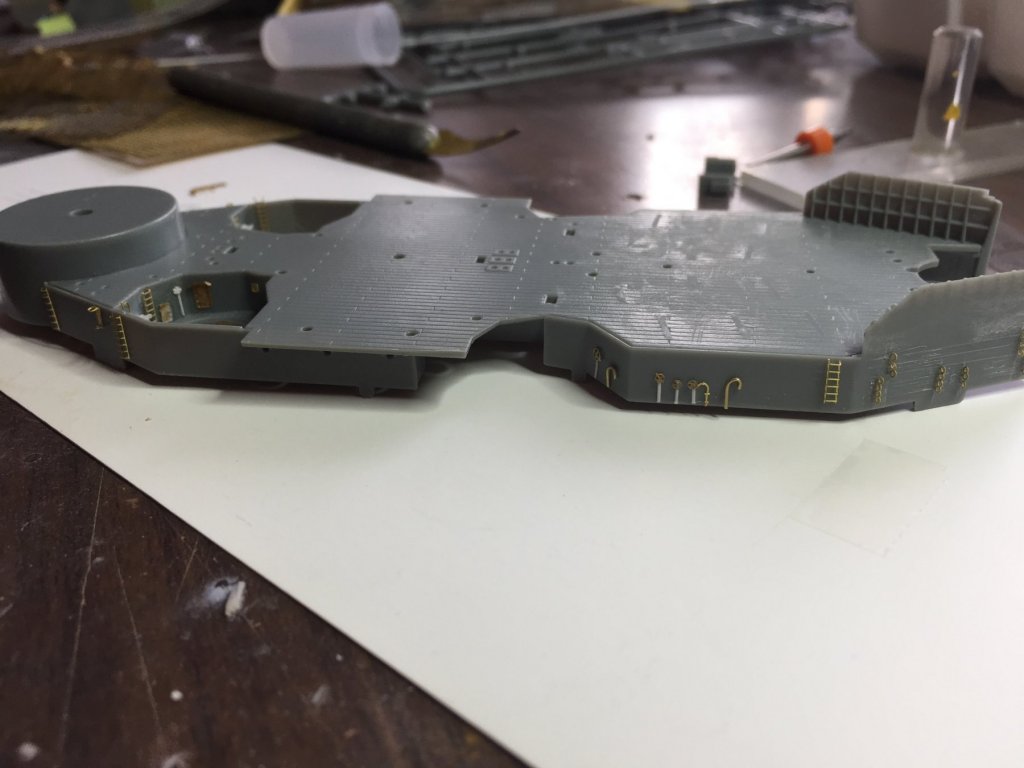
The side of the ship below the flight deck has platforms for 25mm MG's and another platform for rocket launchers (not shown yet). I have scribed some pannels as i cannot see it being one continuous piece of steel.

- 224 replies
-
- 16
-
-
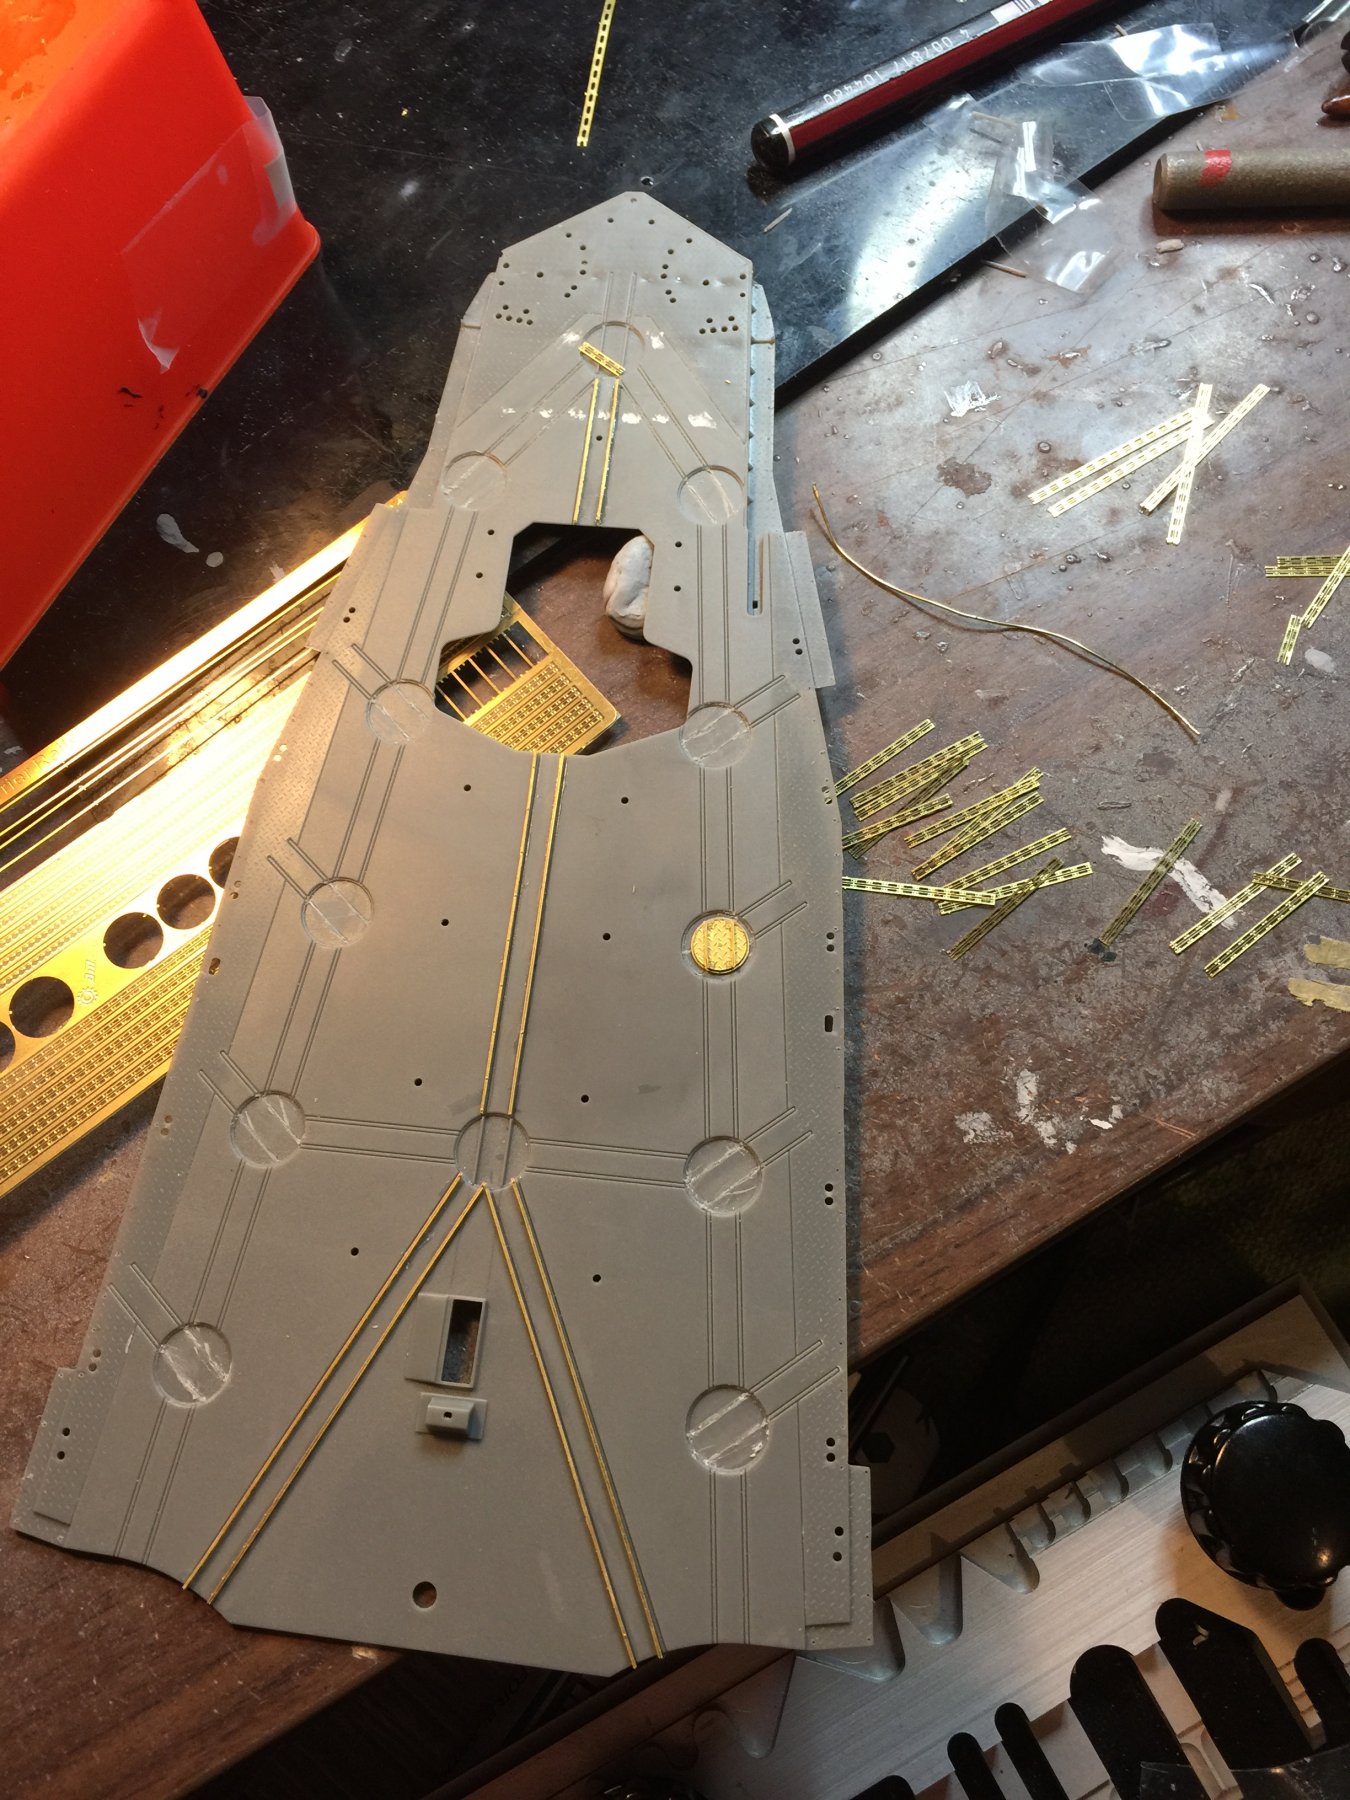
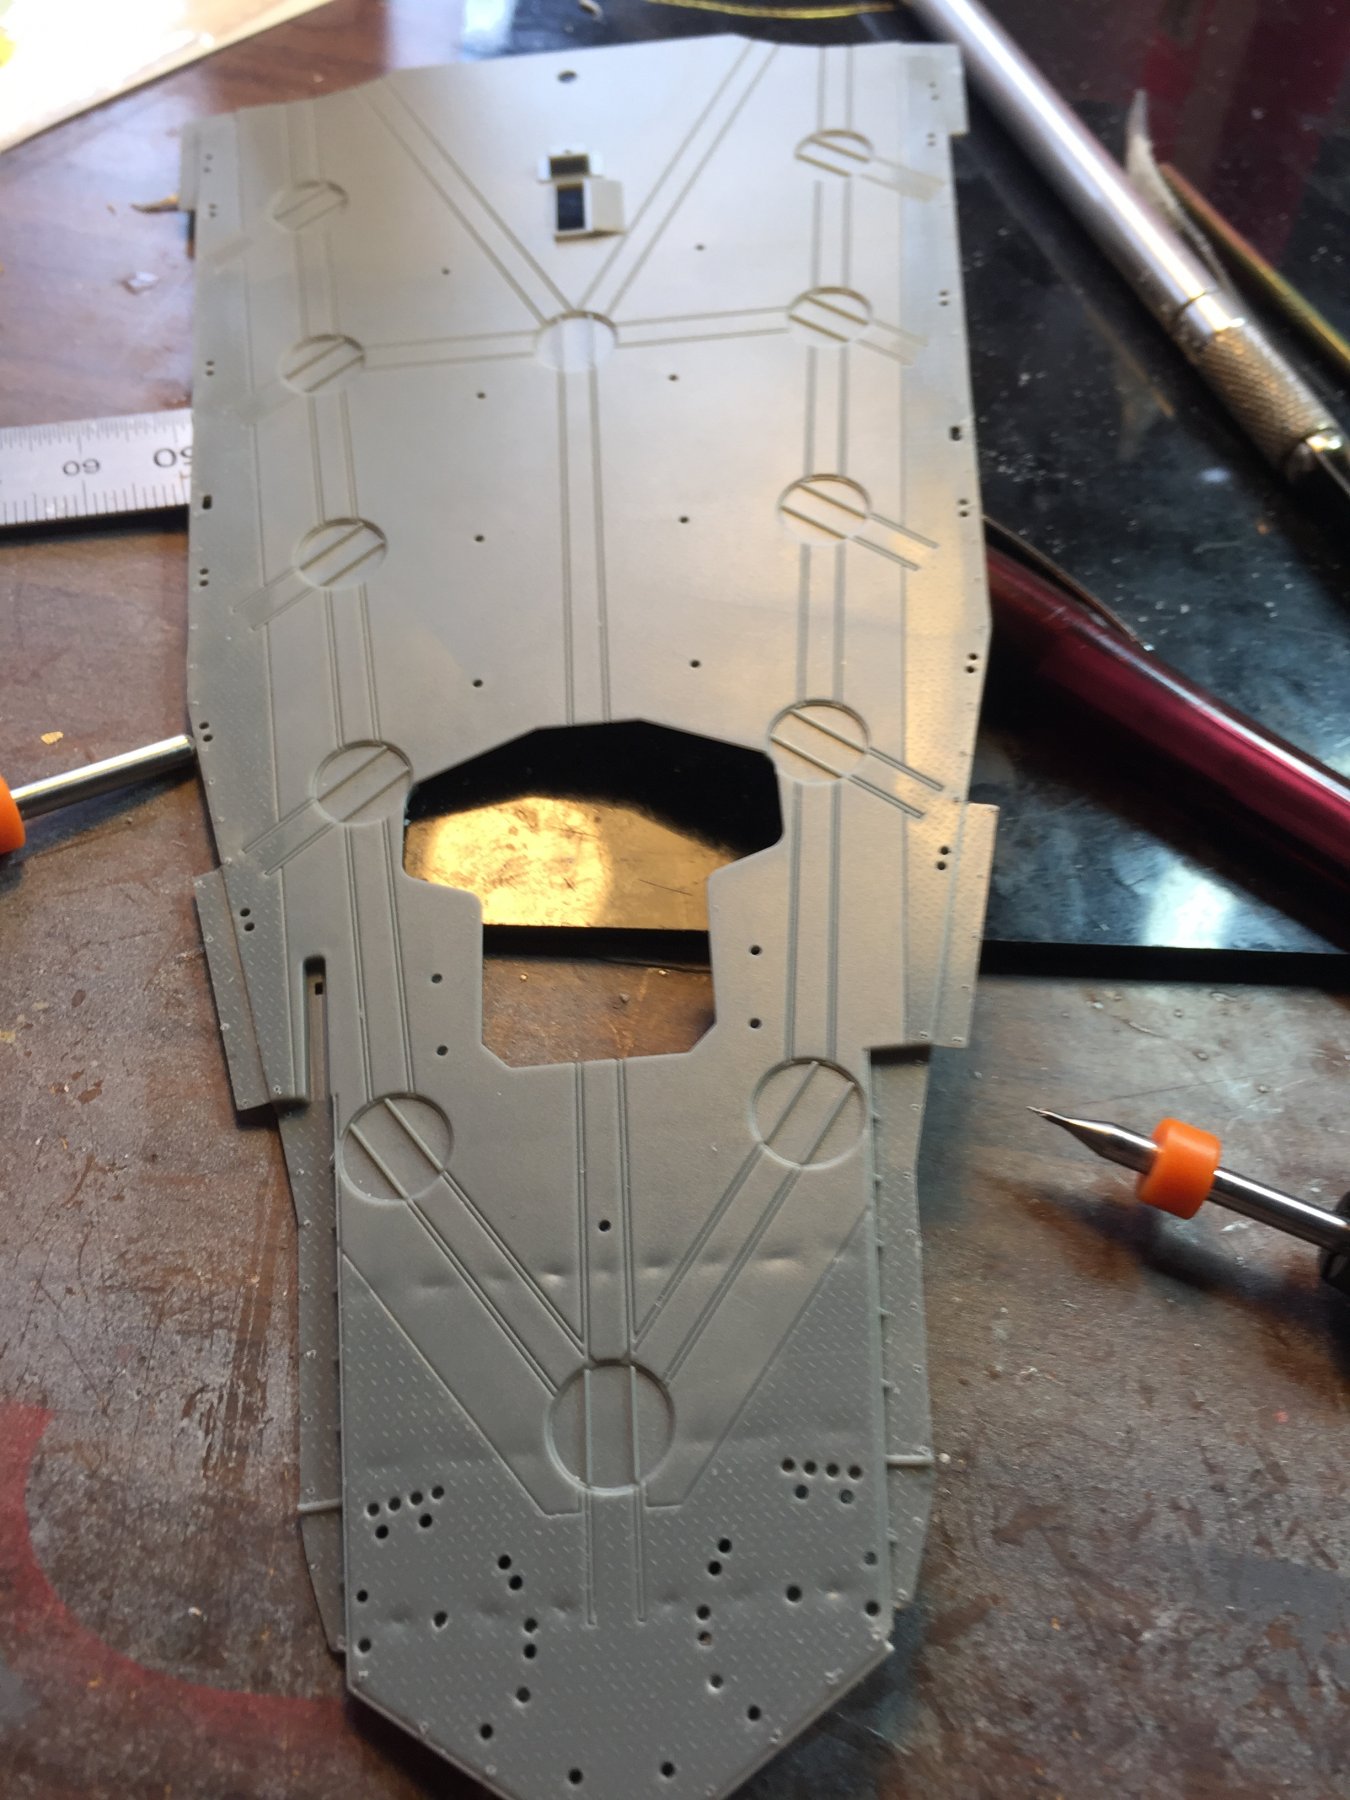
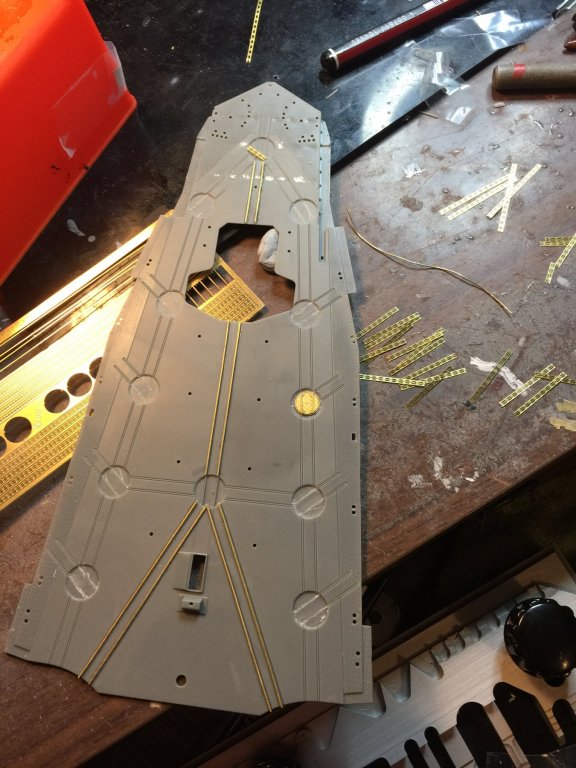
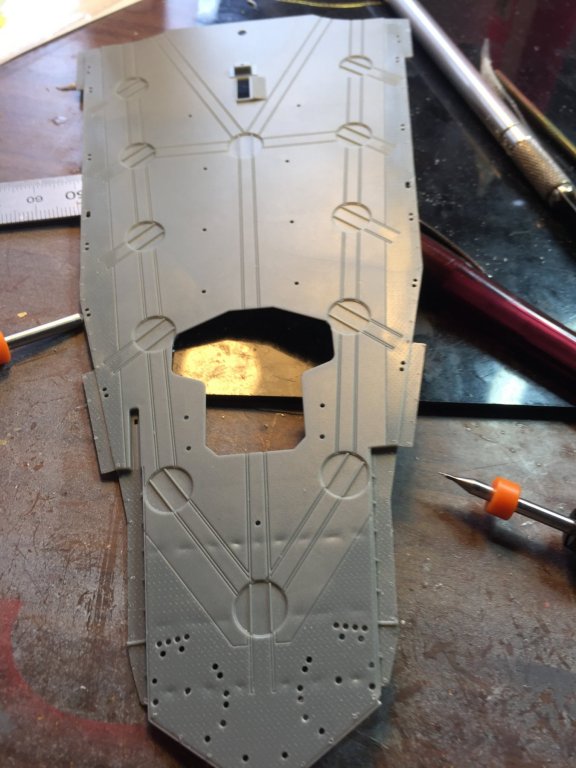
I'm kind of meandering with this build. The flight deck has some bonus dimples innit which I've rectified, and you can see the 'railings' really aren't and will be an aftermarket instillation. Underneath there is the the beginning of the latticework which is actually quite simple so far.


- 224 replies
-
- 13
-
-
Yes you should! The only difficulty may be finding references for rigging. At 1/200 you should be able to knock it out if the park.
- 467 replies
-
- 7
-
-
- mikasa
- wave models
- (and 1 more)
-
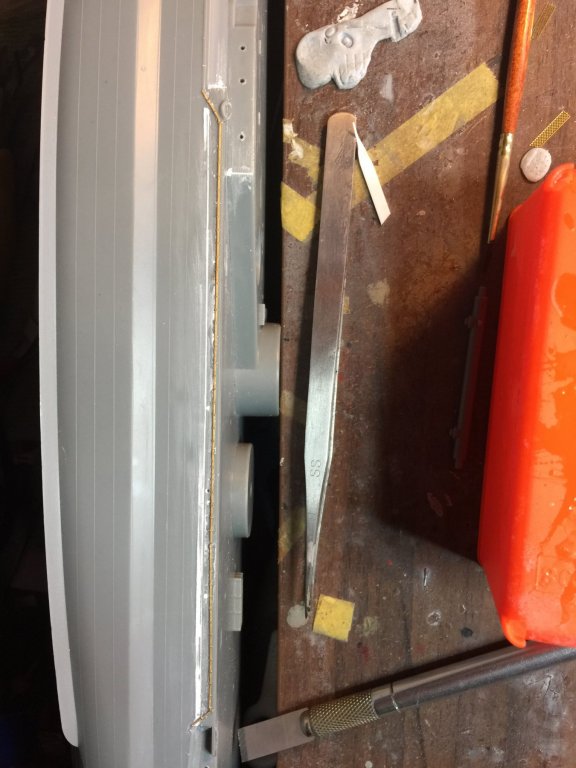
Sorry, gaps st the joins of the plastic strips. The deck will probably have to be trimmed to fit inside the strips. Just broke 1 drill bit trying to drill the PE so that answers that question.
-
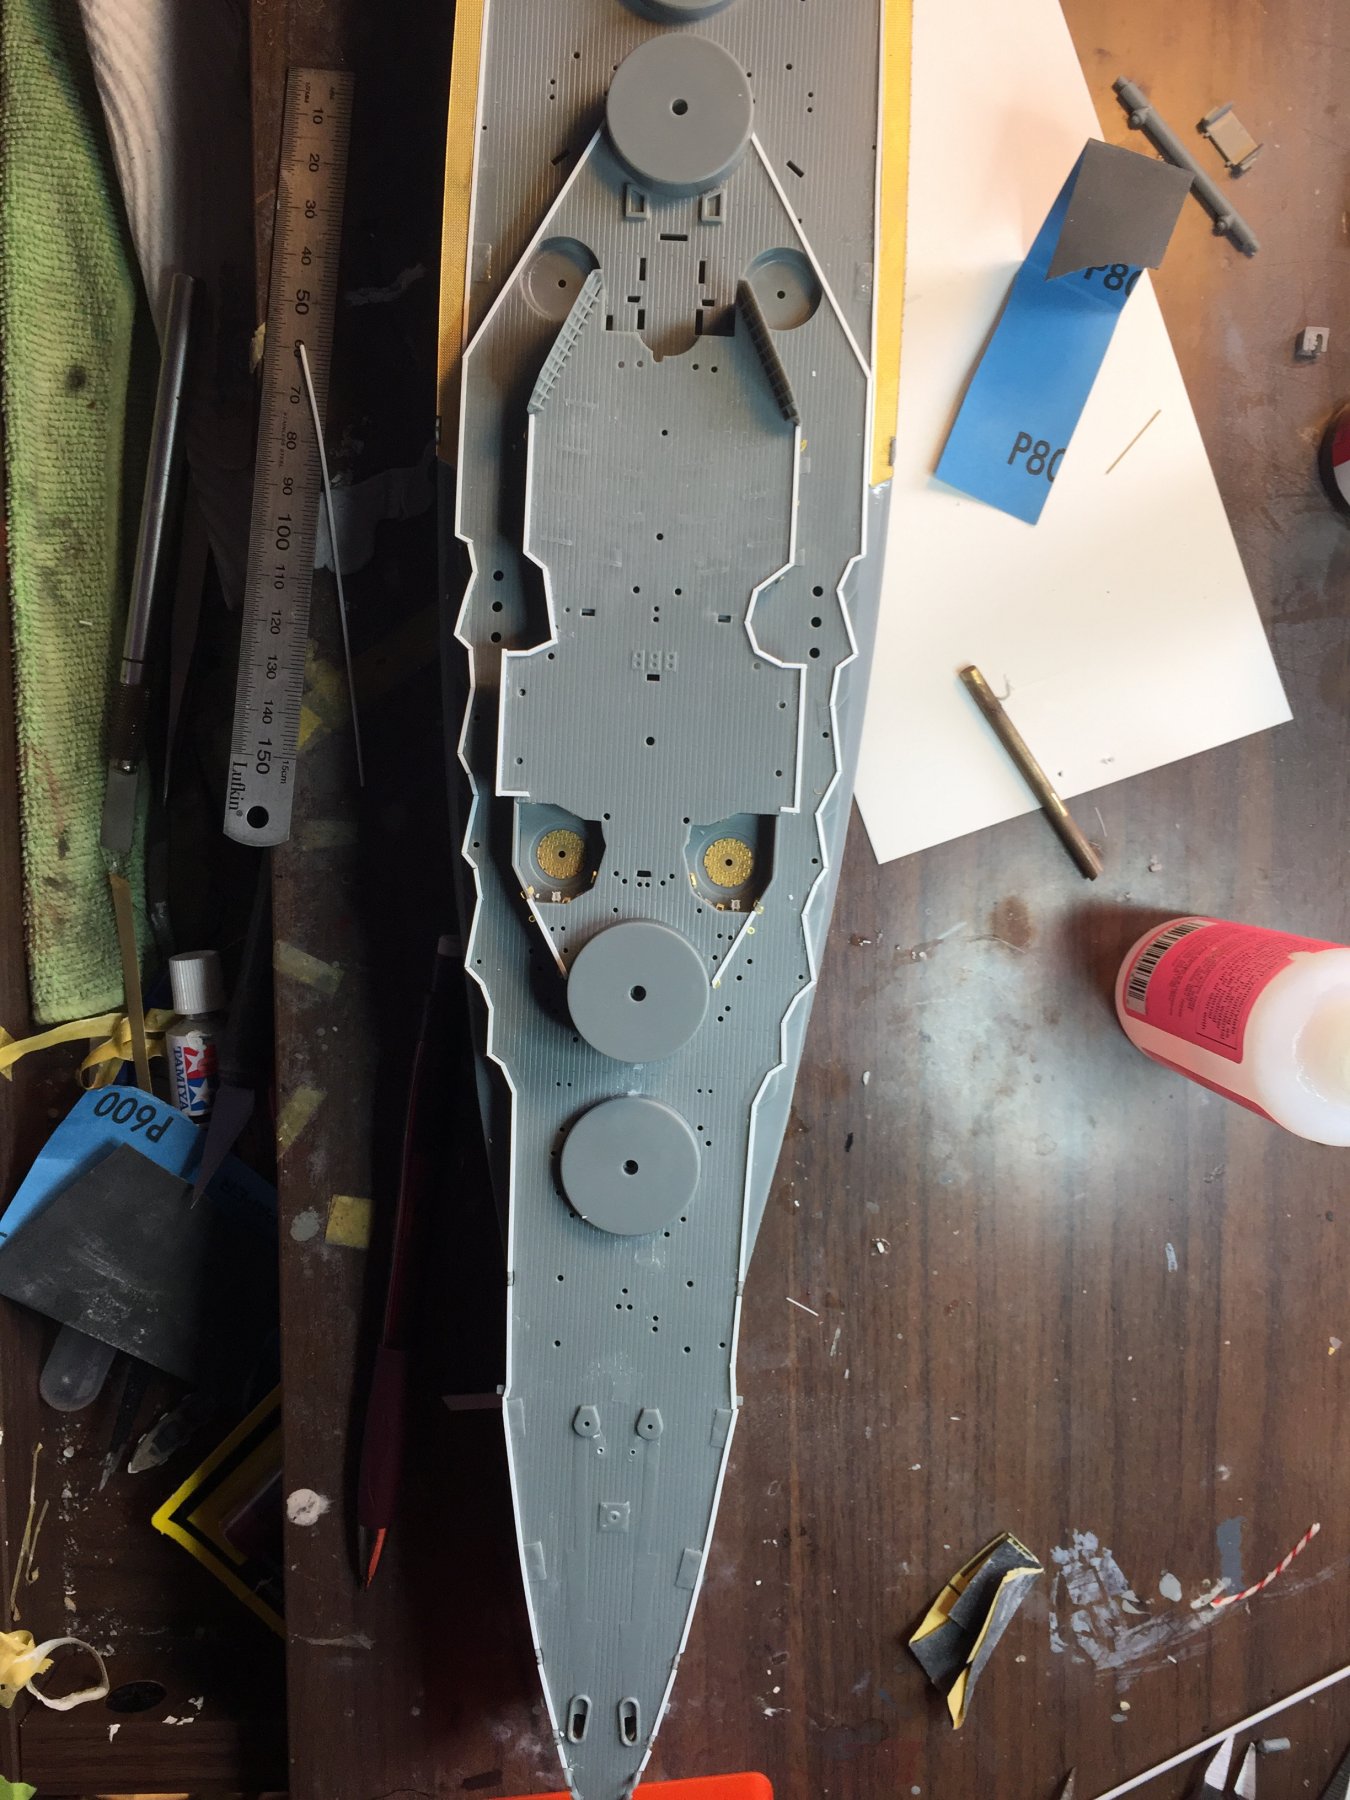
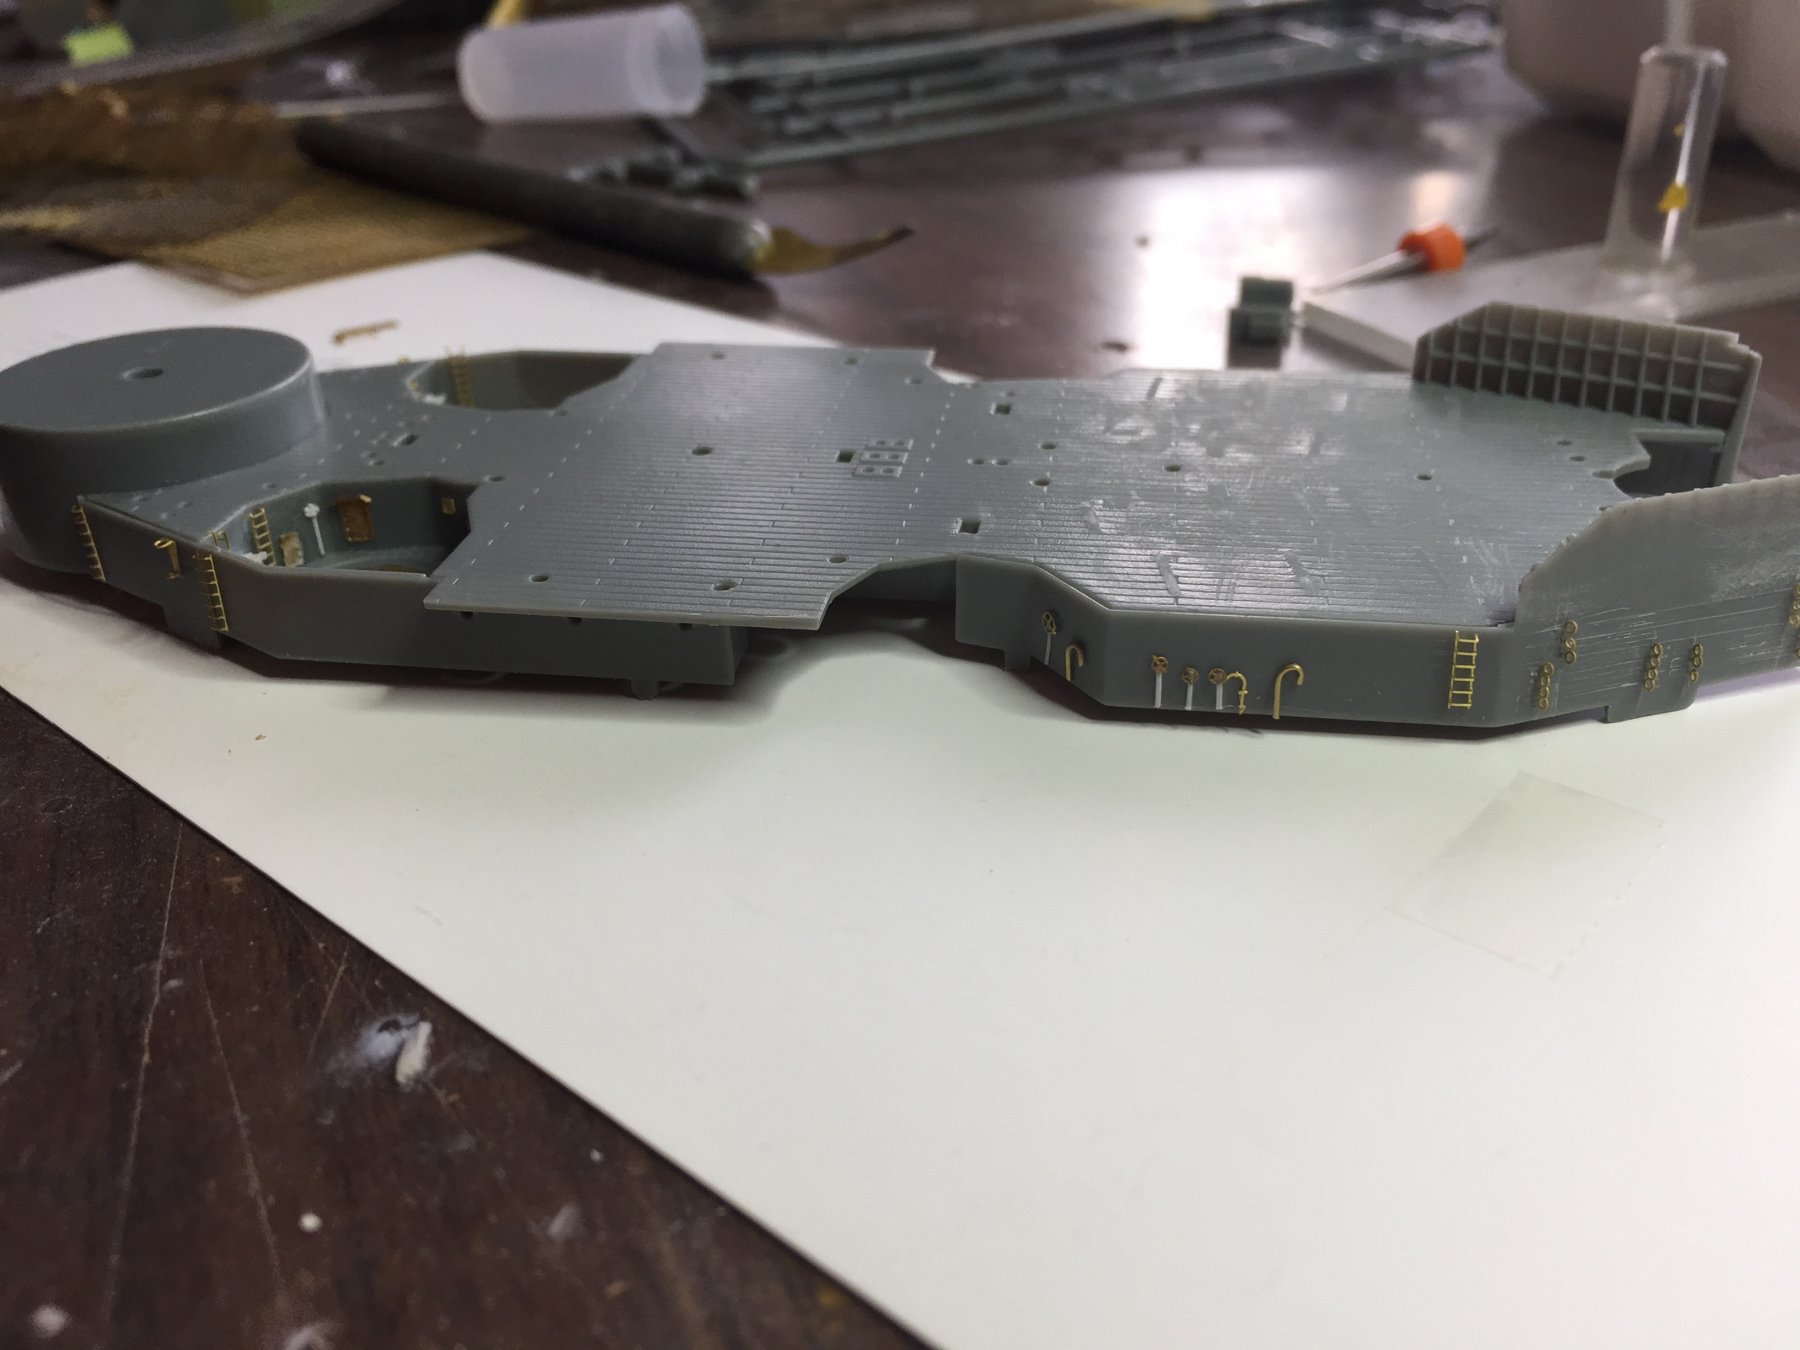
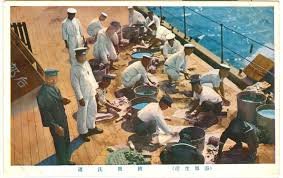
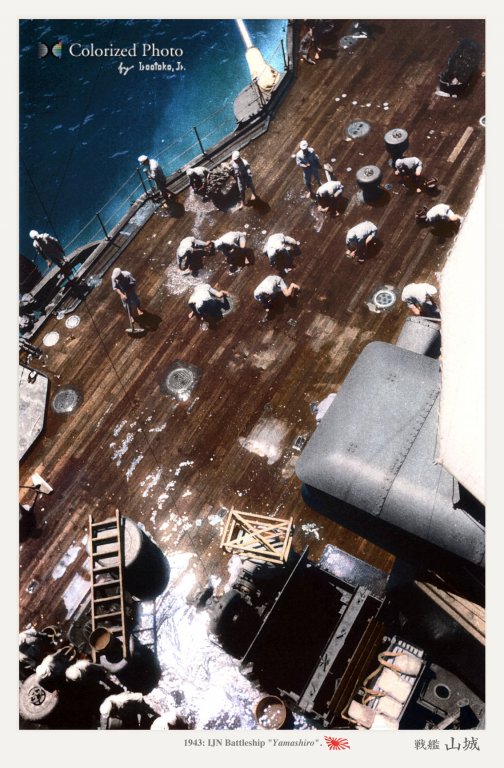
Because the edges of the deck are so narrow, kit and aftermarket expects you to drop in PE railings. With the wooden stick on deck, there is even less room. You has see from these colourised postacards of a Fuso class, the edge is quite substantial and have individual stanchions. As such I've placed some plastic strip around the edges where the wooden deck will drop in. The idea is to fill the gaps with putty, then pre drill all the stanchion holes. Well, that's the idea. You can see there is also two brass strips amidships which may or may not drill requiring a PE railing.

- 224 replies
-
- 15
-
-
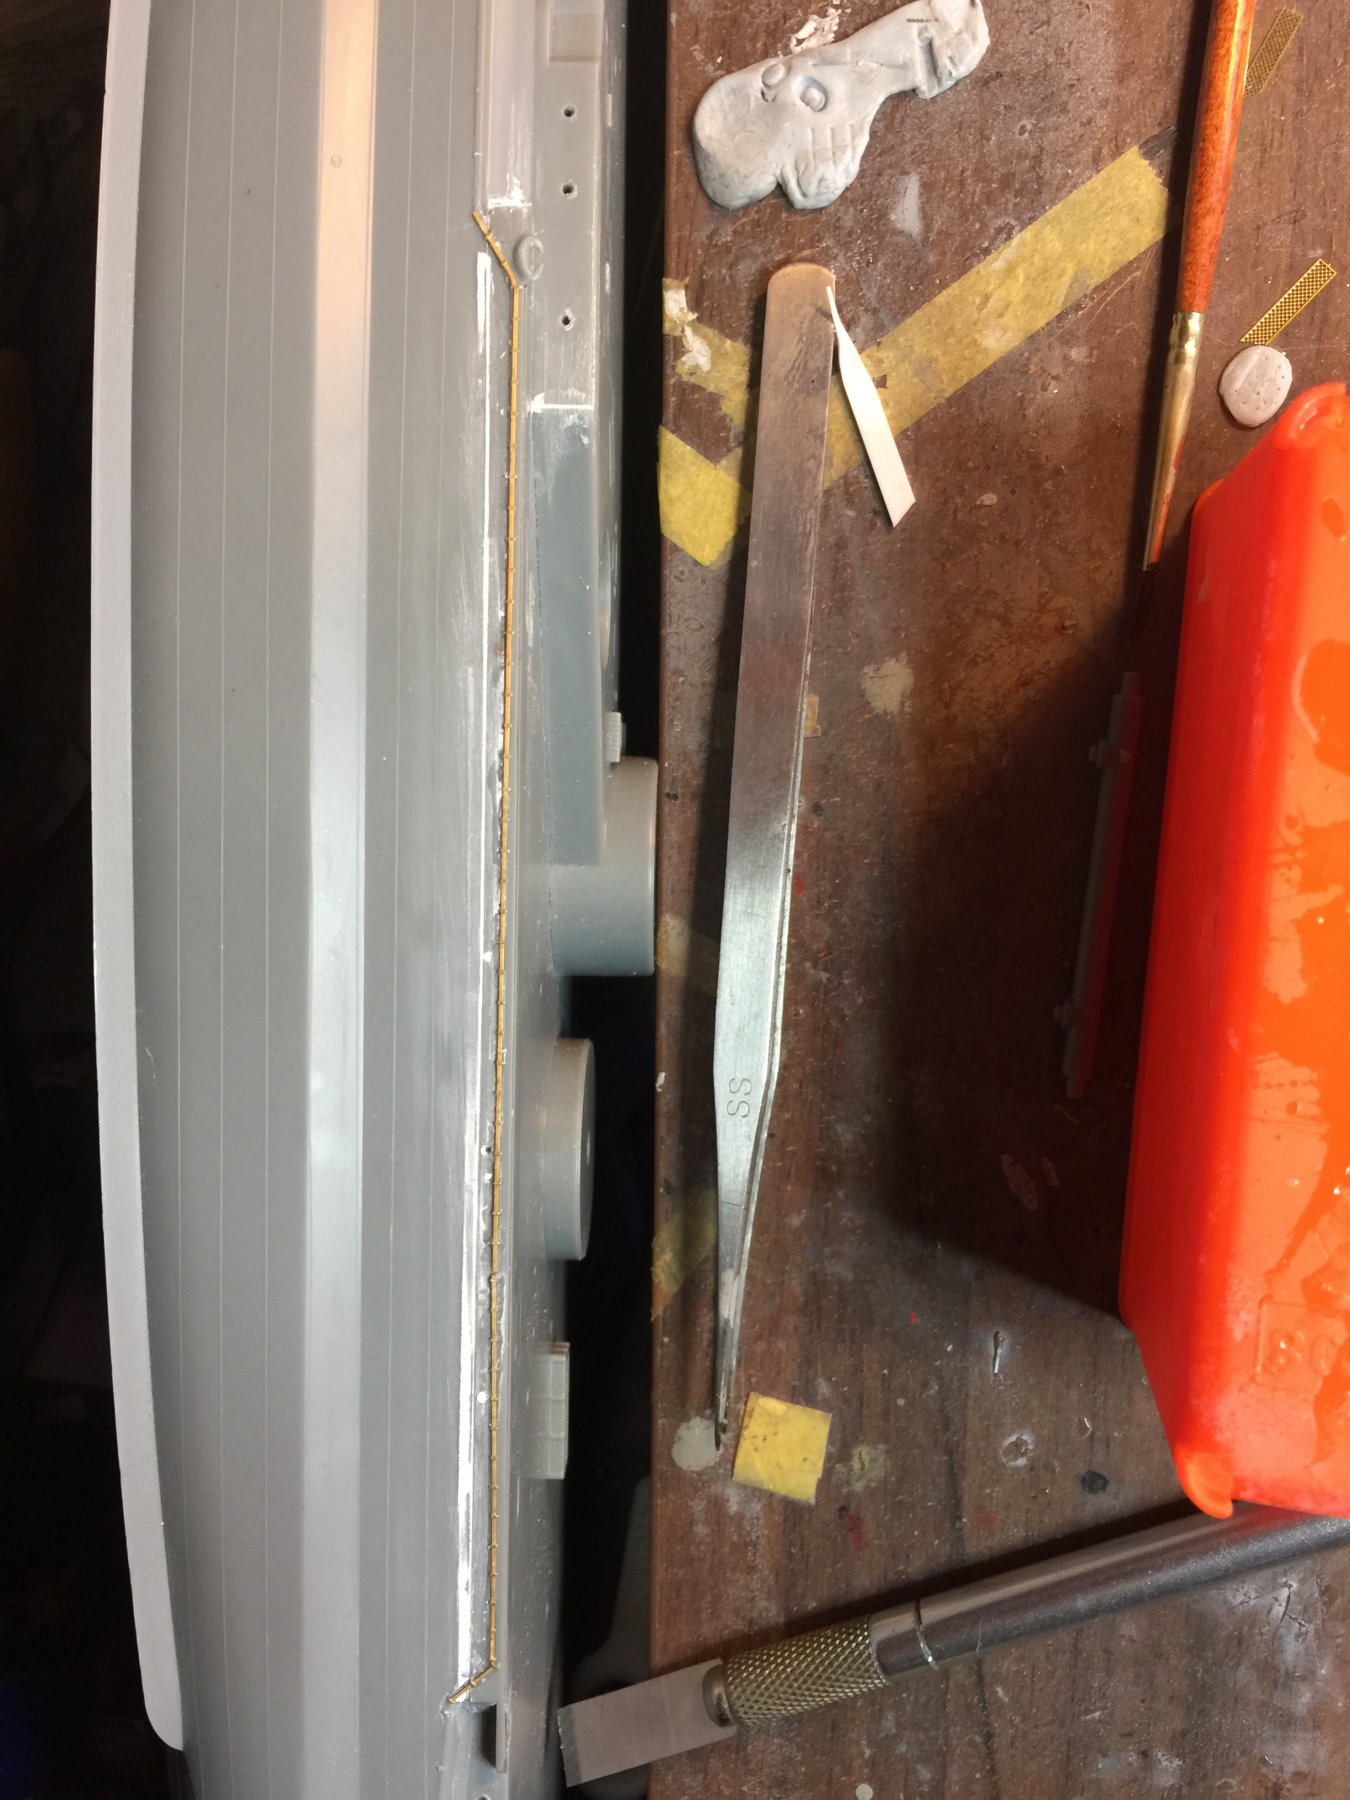
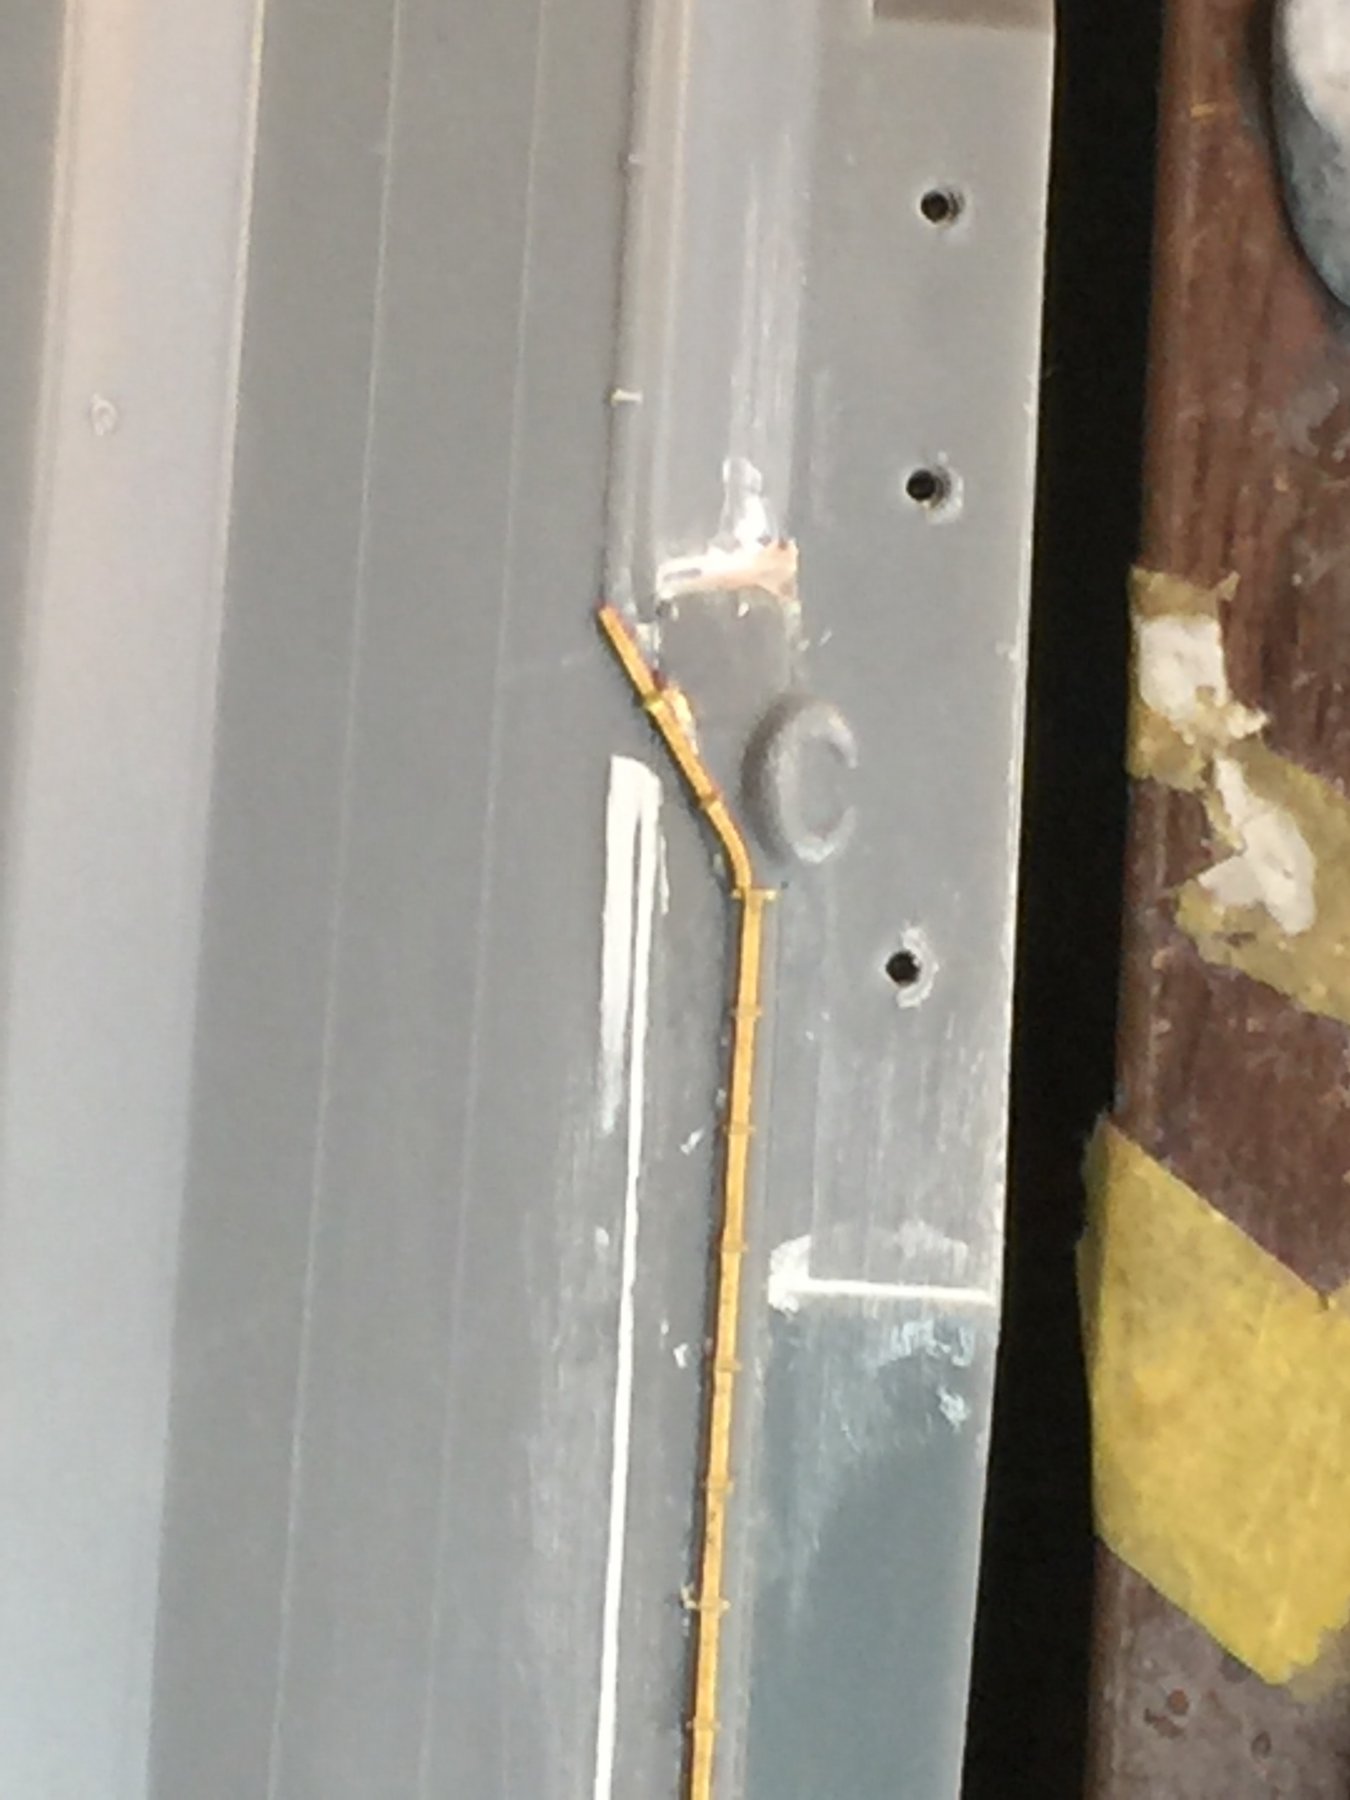
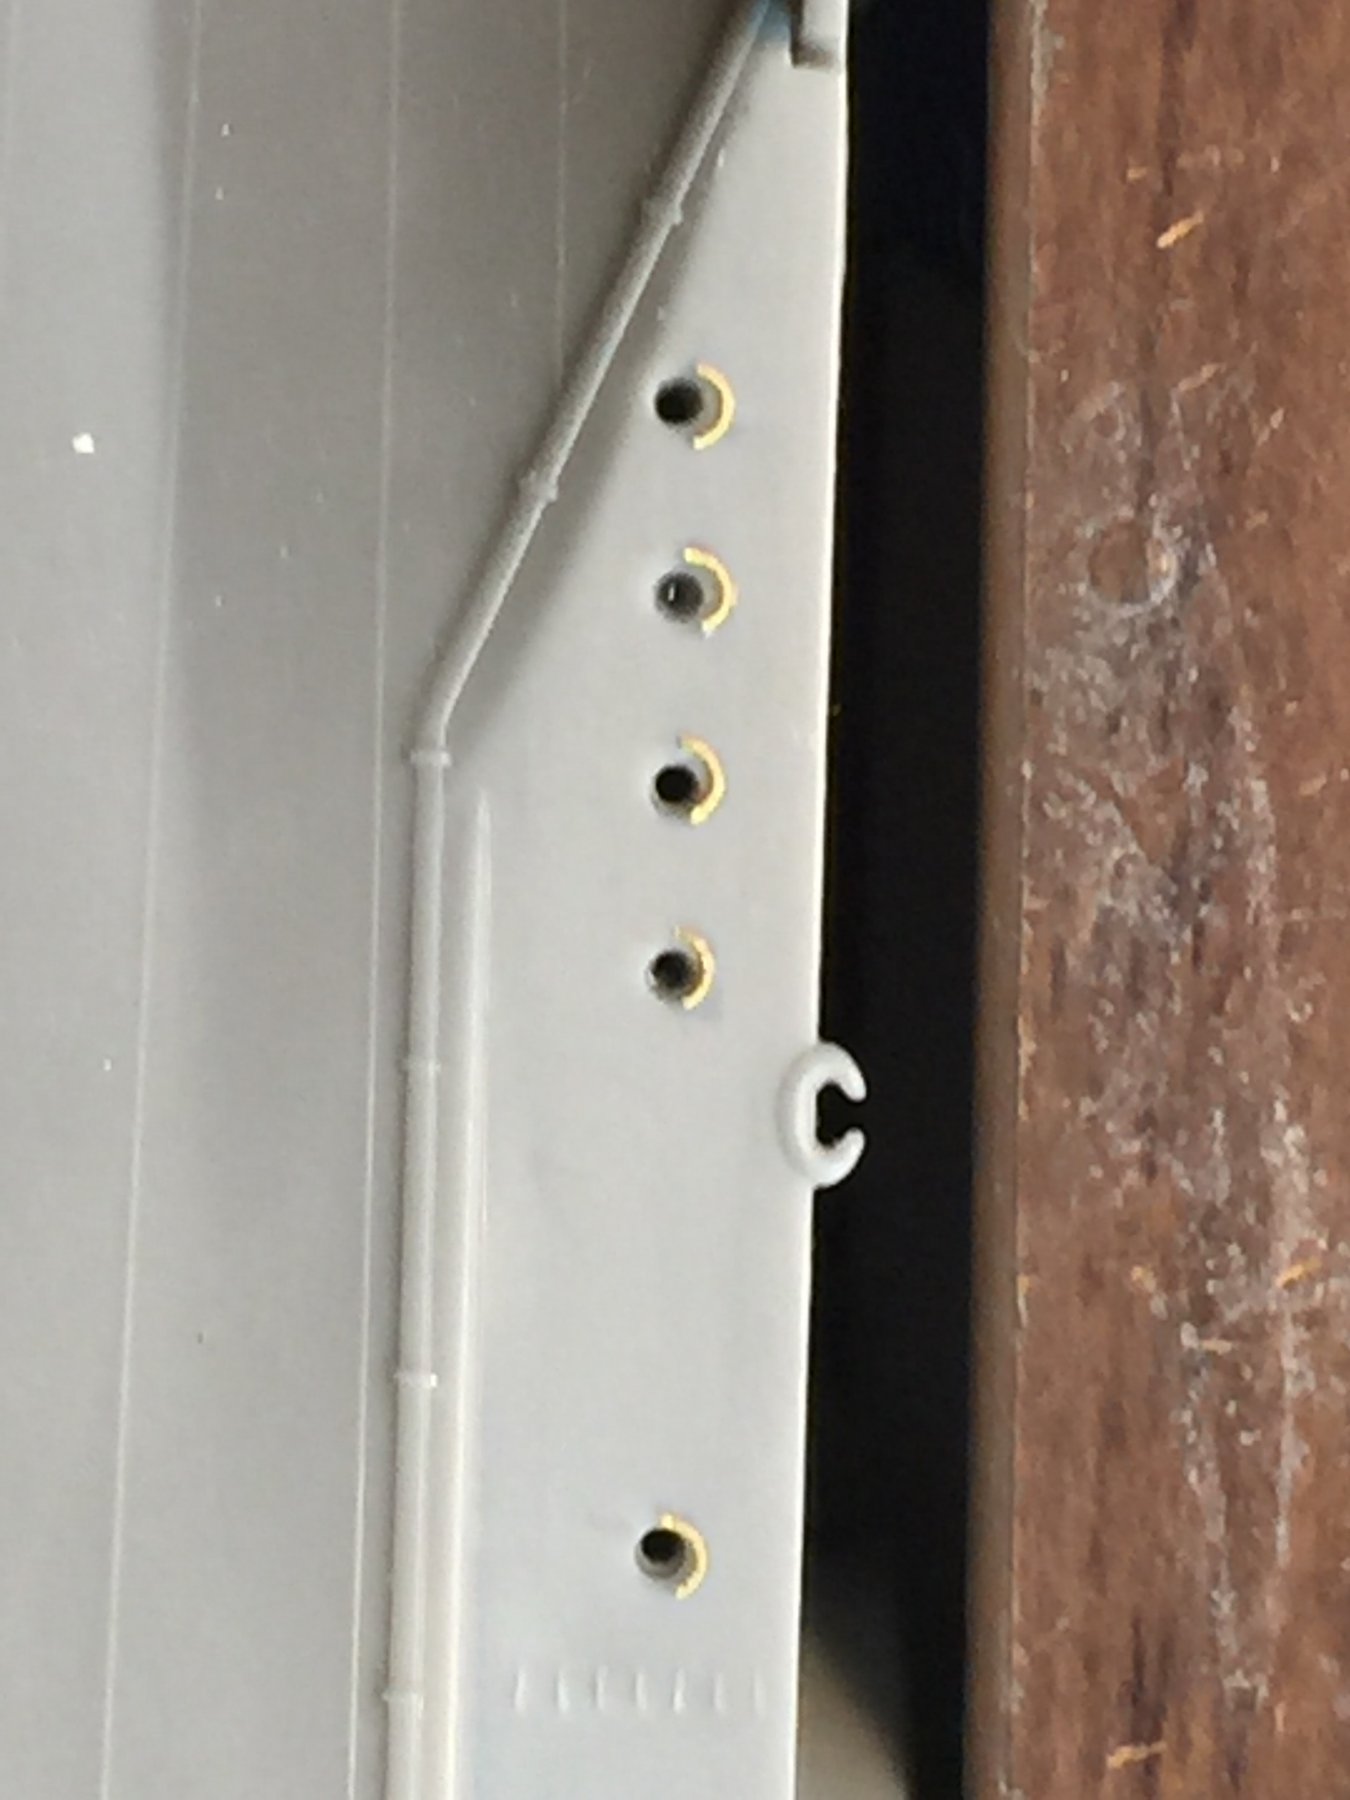
So, not much today, took the kids to school, then had a car crash when some kid decided he did not have to give way at an intersection. Nonetheless, no injury, and back to modelling. For some reason, amidships there was a small section which has to be added on and it does not sit well. Gap filled, and the degaussing cable repairs with brass. The molded plastic is actually pretty good and does not need replacement tho the Flyhawk does provide it. I have replaced the ringols on some portholes where it is not noticeable in the molded plastic. Tomorrow I have to add some card along the entire gunnels of the ship to I can drill holes for individual stanchions.


- 224 replies
-
- 13
-
-
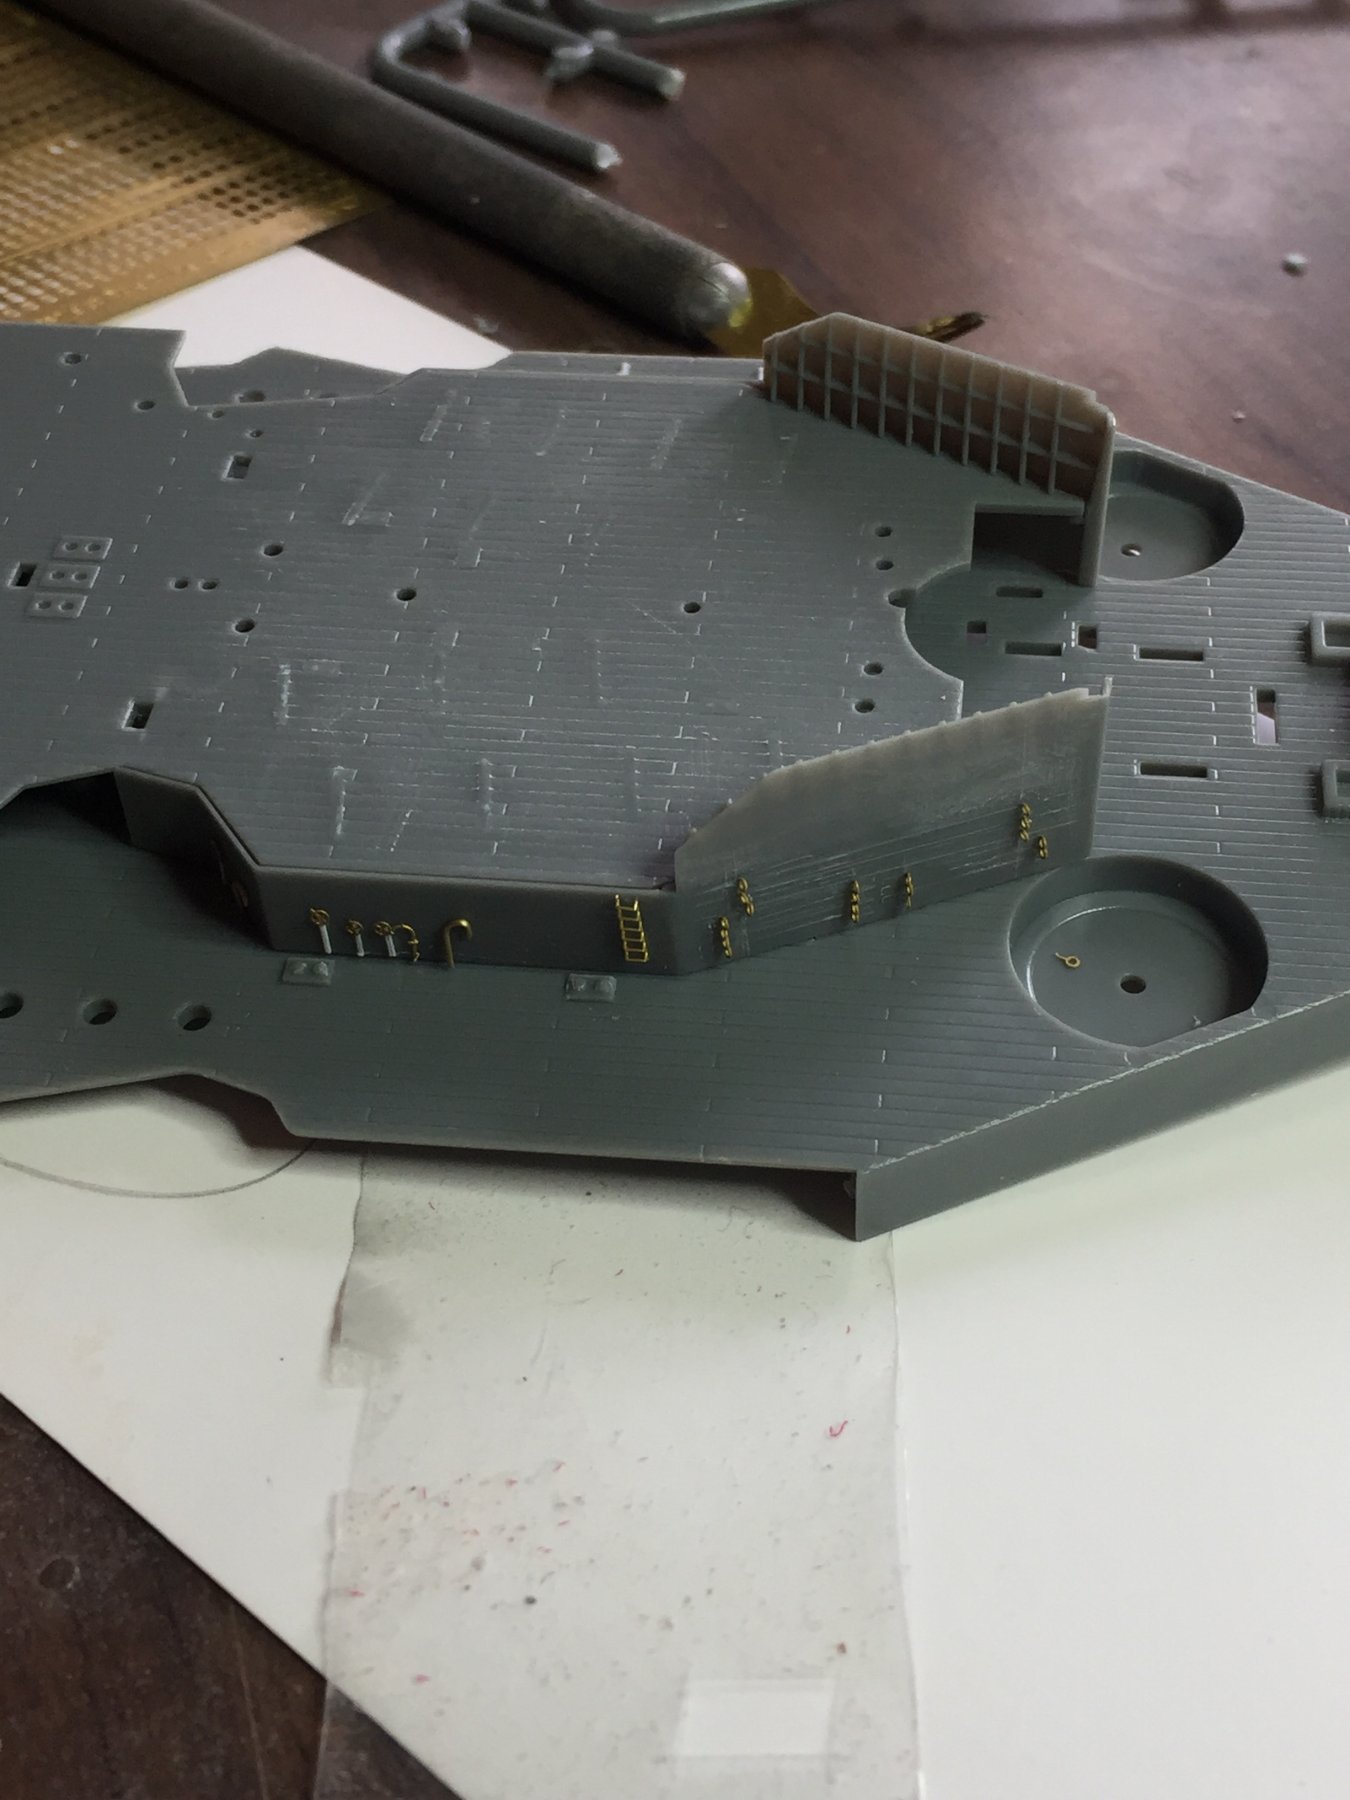
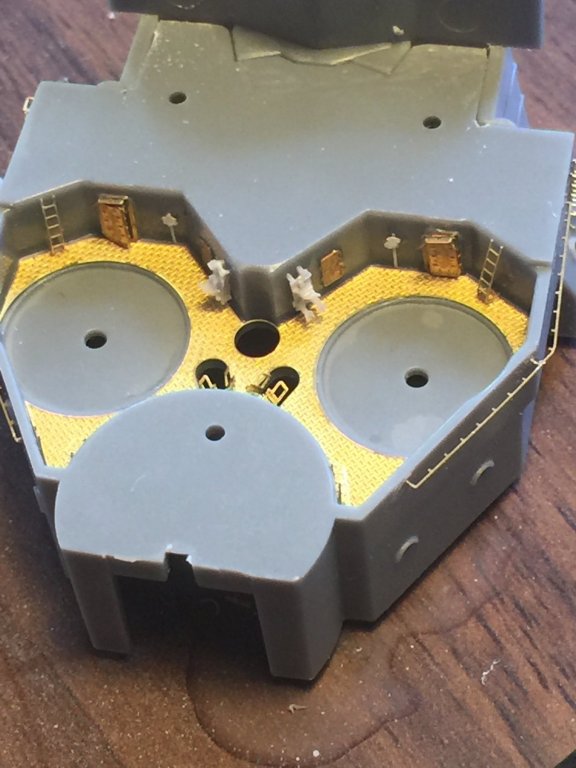
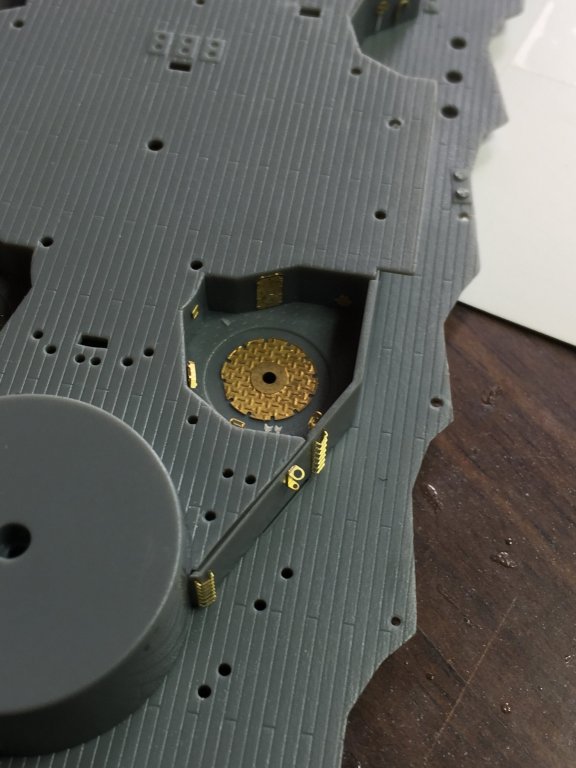
This is going to be a long build I reckon. This section is at the bow end just below the Pagoda. Doing a bit of value adding to the 12.7 gun pits. I want to run a 1mm strip on the edges so I can place stanchions as the wooden deck will about it.


- 224 replies
-
- 15
-
-
They appear to be hoses, there is a blog with a 1/100 version that shows them as white hoses. The IJN awning stanchions are fixed along the side of the ship.
-
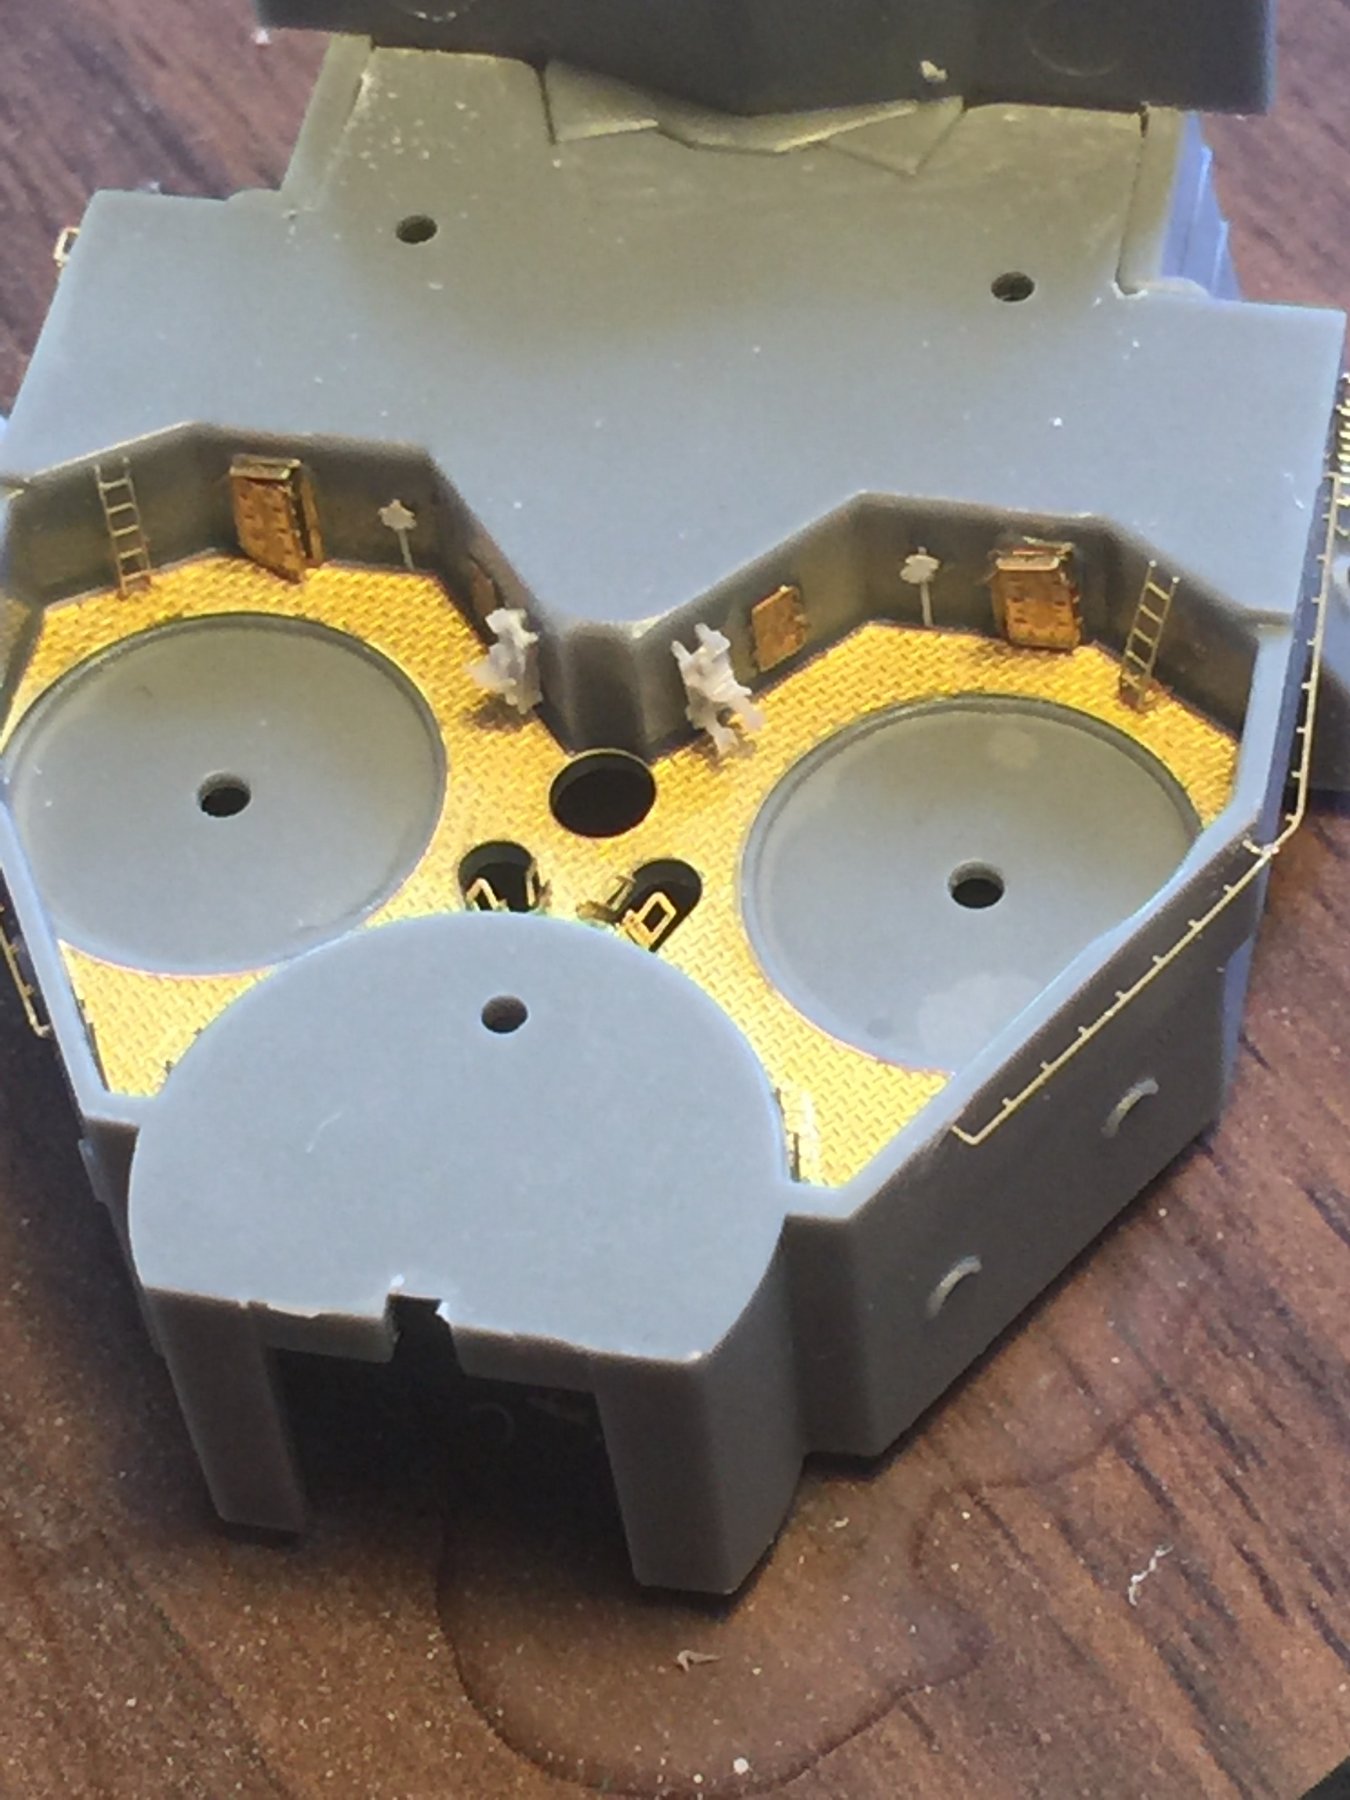
The walls directly beside the stack house molded pipes (refuelling?), so I stripped them back and added some firefighting equipment. I have not glued the pipes yet as I will only place them after painting. The ring flues let them slide in and out. Its not not perfect but it gives it some depth.

- 224 replies
-
- 11
-
-
Maybe, that's why I leave the stairs and ladders off, painting them off kit. The pagoda tower owner is huge on this one and will be fun to paint.
-
I just picked up some bonding fluid when I got some supplies today. Anyway, 3 days work and the funnels, lots to add yet but I can't till it's painted.


- 224 replies
-
- 12
-
-
I'll get there Danny. Pat, the Ise only had a short period of time out of drydock when the whole idea was seen as stupid and the catapults were removed and it became a cargo ship then an AA platform. A stationary AA platform that got the hell bombed out of it. Ergo, the period of time that it had catapults it would have precluded a lot of weathering.
-
I'd like to see the 1.200 Mikasa, the thing about changing scales is lack of spares though.
- 151 replies
-
- 6
-
-
- duke of york
- tamiya
- (and 2 more)
-
So, 2 days of working on the funnel. No photos to show yet, multiple platforms. Got most of it finished then pulled it apart again as it was misaligned. I'll have another go on day 3. Its soo dry here the CA will not go off which is really becoming problematic as the thing with PE is getting a rapid set as it's all so small it's hard to hold for any extended period.