BenD
-
Posts
477 -
Joined
-
Last visited
Content Type
Profiles
Forums
Gallery
Events
Everything posted by BenD
-

HMS Snake by BenD - Caldercraft - 1:64
BenD replied to BenD's topic in - Kit build logs for subjects built from 1751 - 1800
Hey David, Wood seems to be a problem in a lot of kits, I see you had some problems even with the wood on your Syren. -
The deck planking is looking good! You might want to bevel the bulkheads more and work on the bow filler block before adding more planks. There are some good resources for planking on this forum, I'll link you one that helped me. http://modelshipworldforum.com/resources/Framing_and_Planking/plankingprojectbeginners.pdf
-
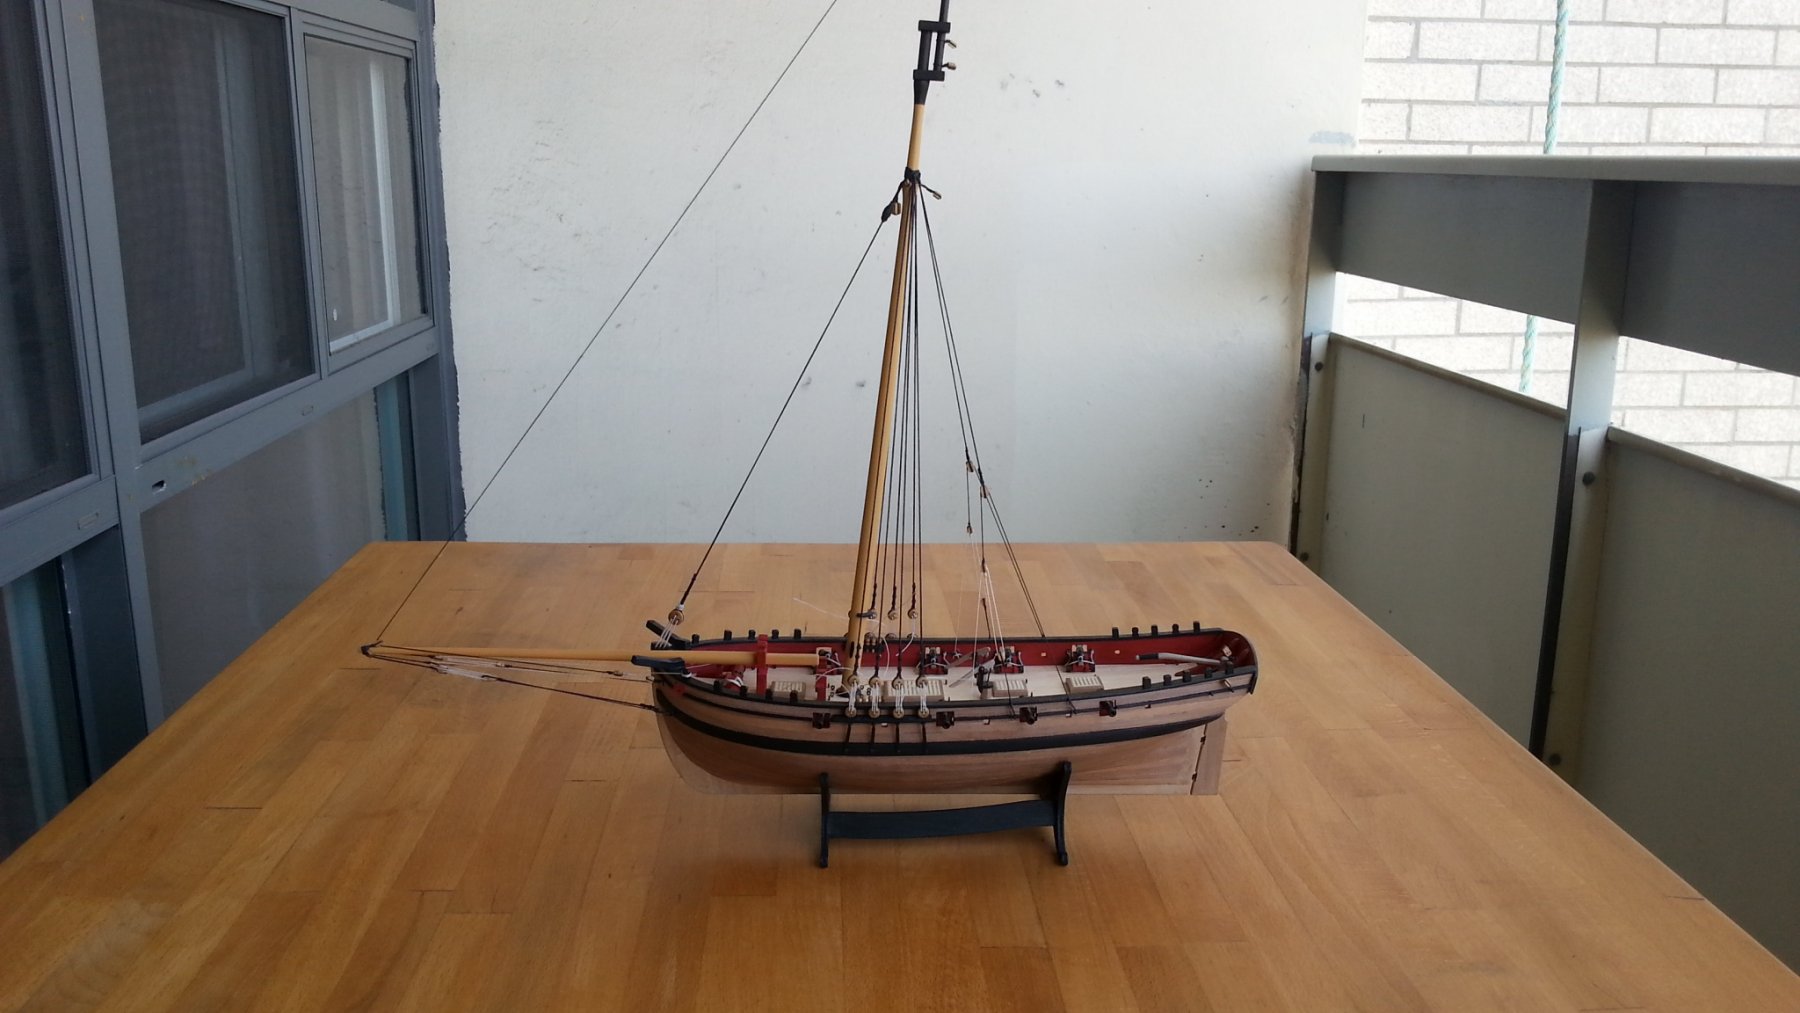
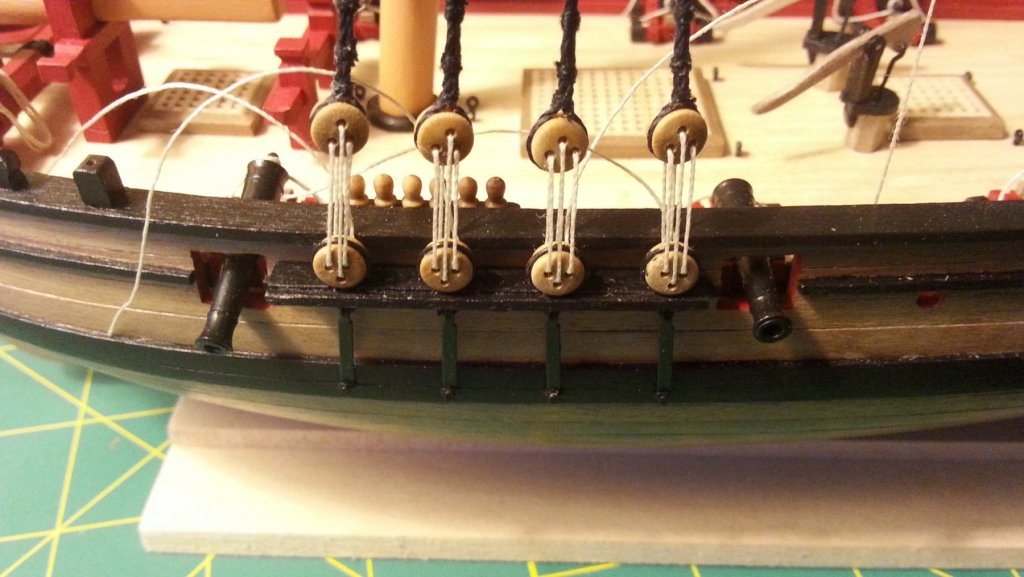
Lanyards I've followed the instructions for this and It's not really shown how they should be tied off. I just guessed when tying the lanyard for the main stay. I think I'll have to look at some other builds to get my bearings. Here she is in the natural light on top of my kitchen table that's in the middle of getting some new stain. I should take more outdoor photos because the difference is amazing!

- 49 replies
-
- 11
-

-
- sherbourne
- caldercraft
- (and 1 more)
-
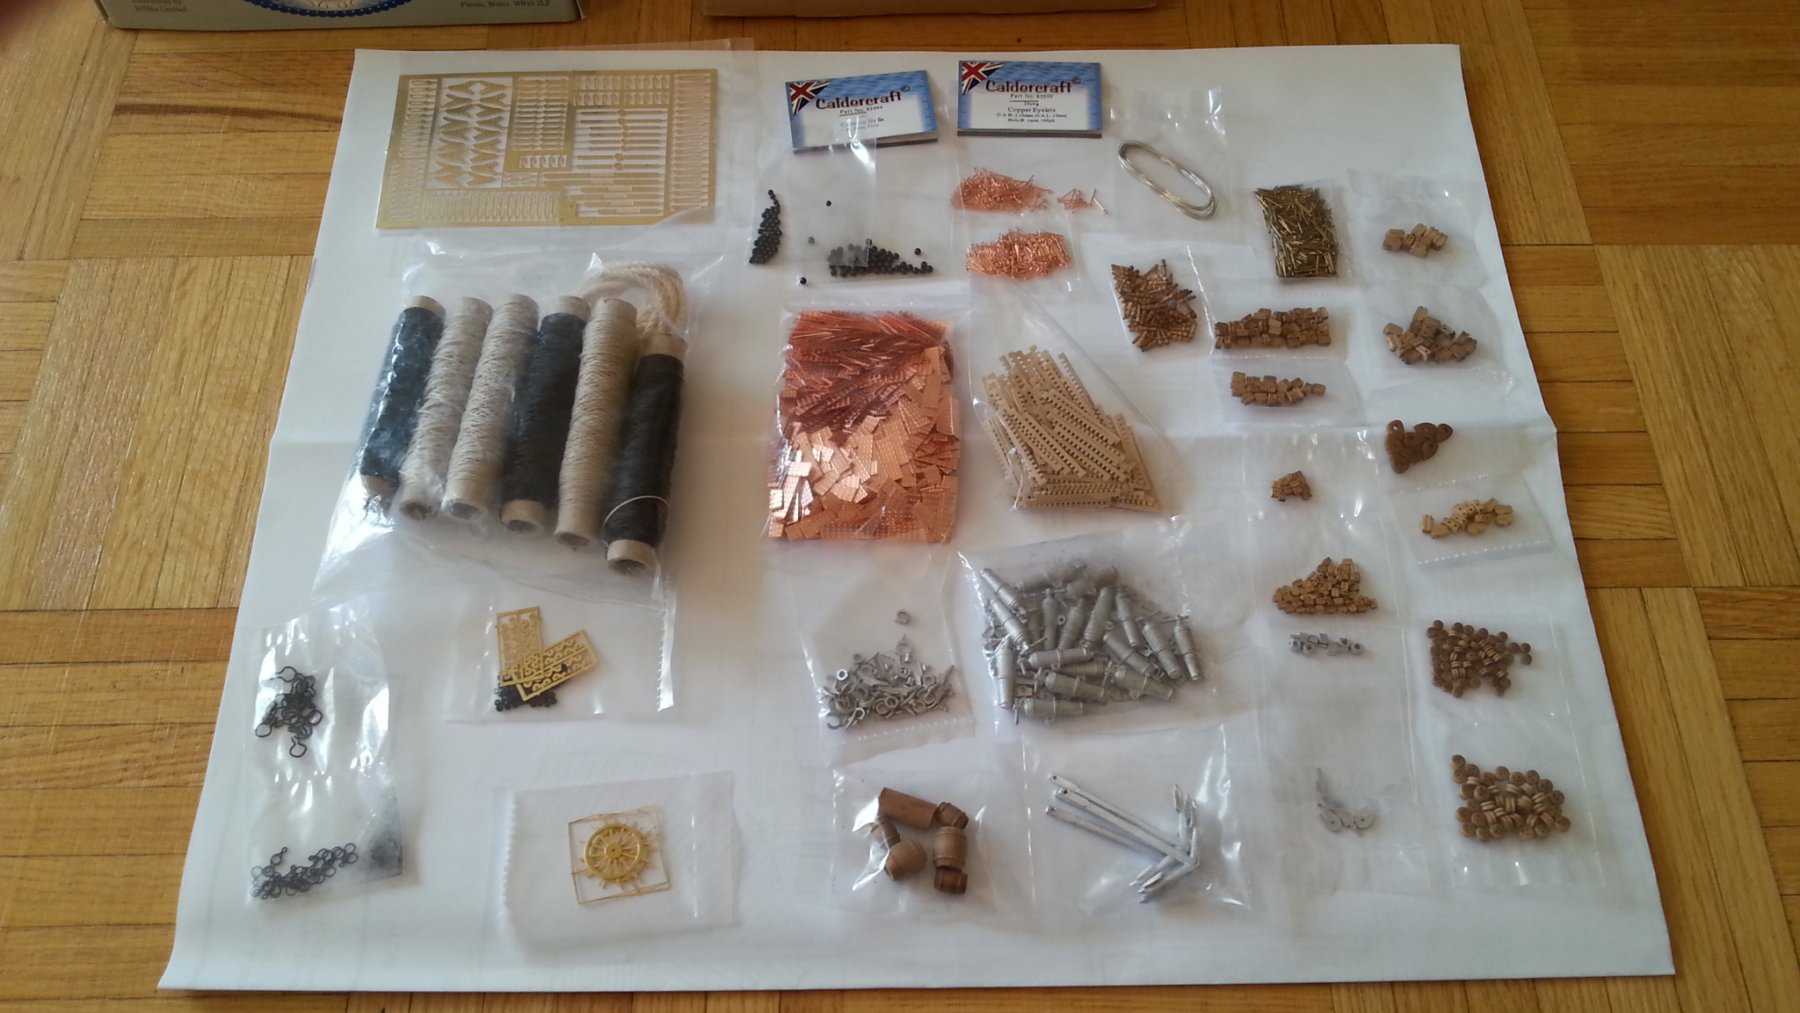
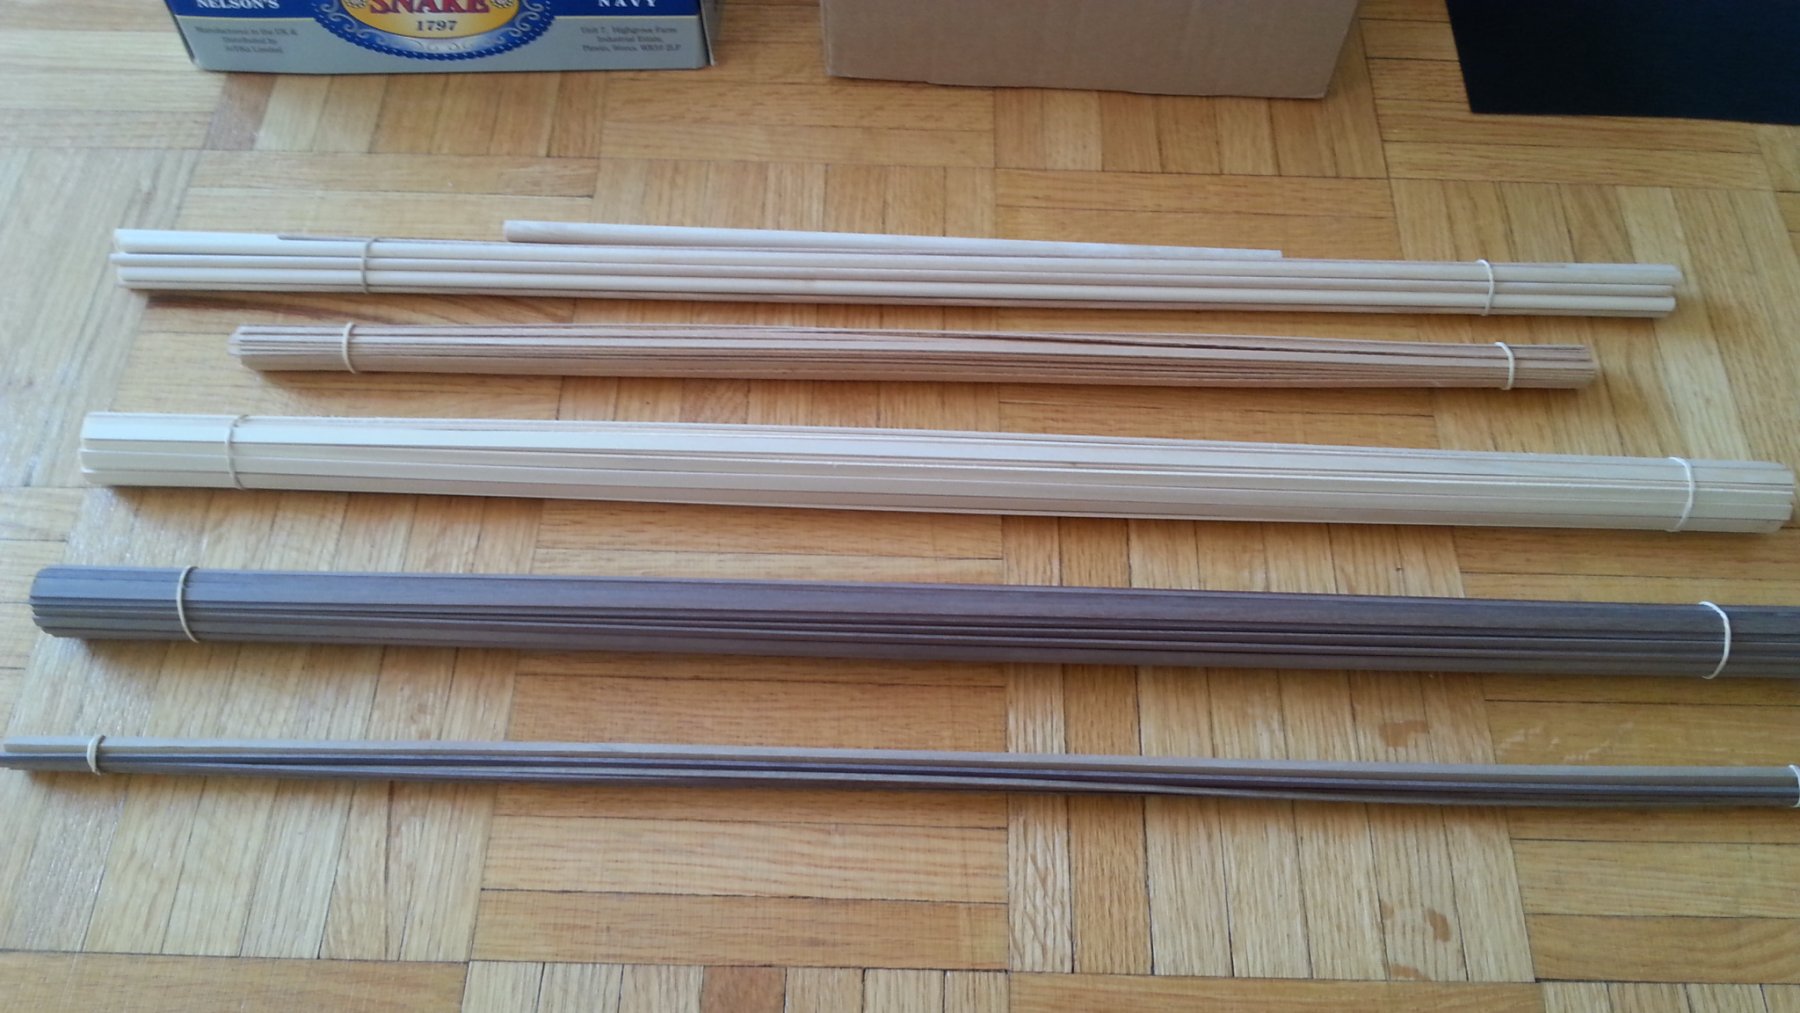
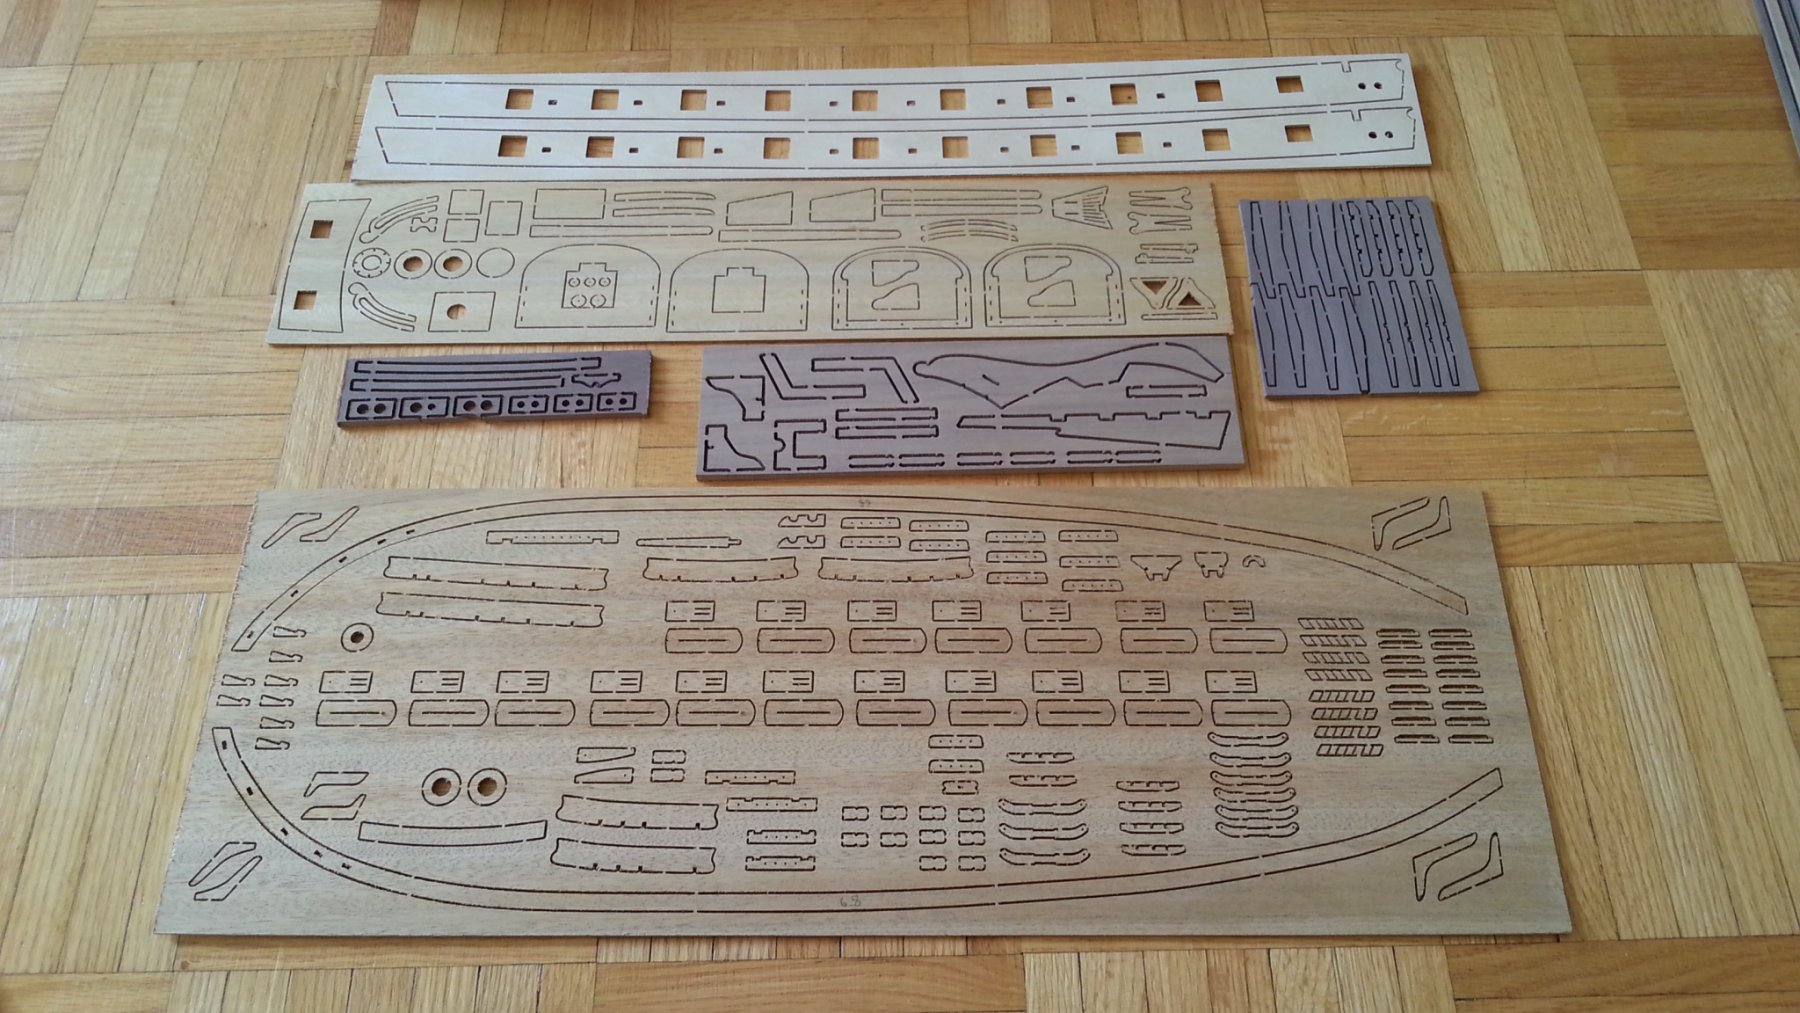
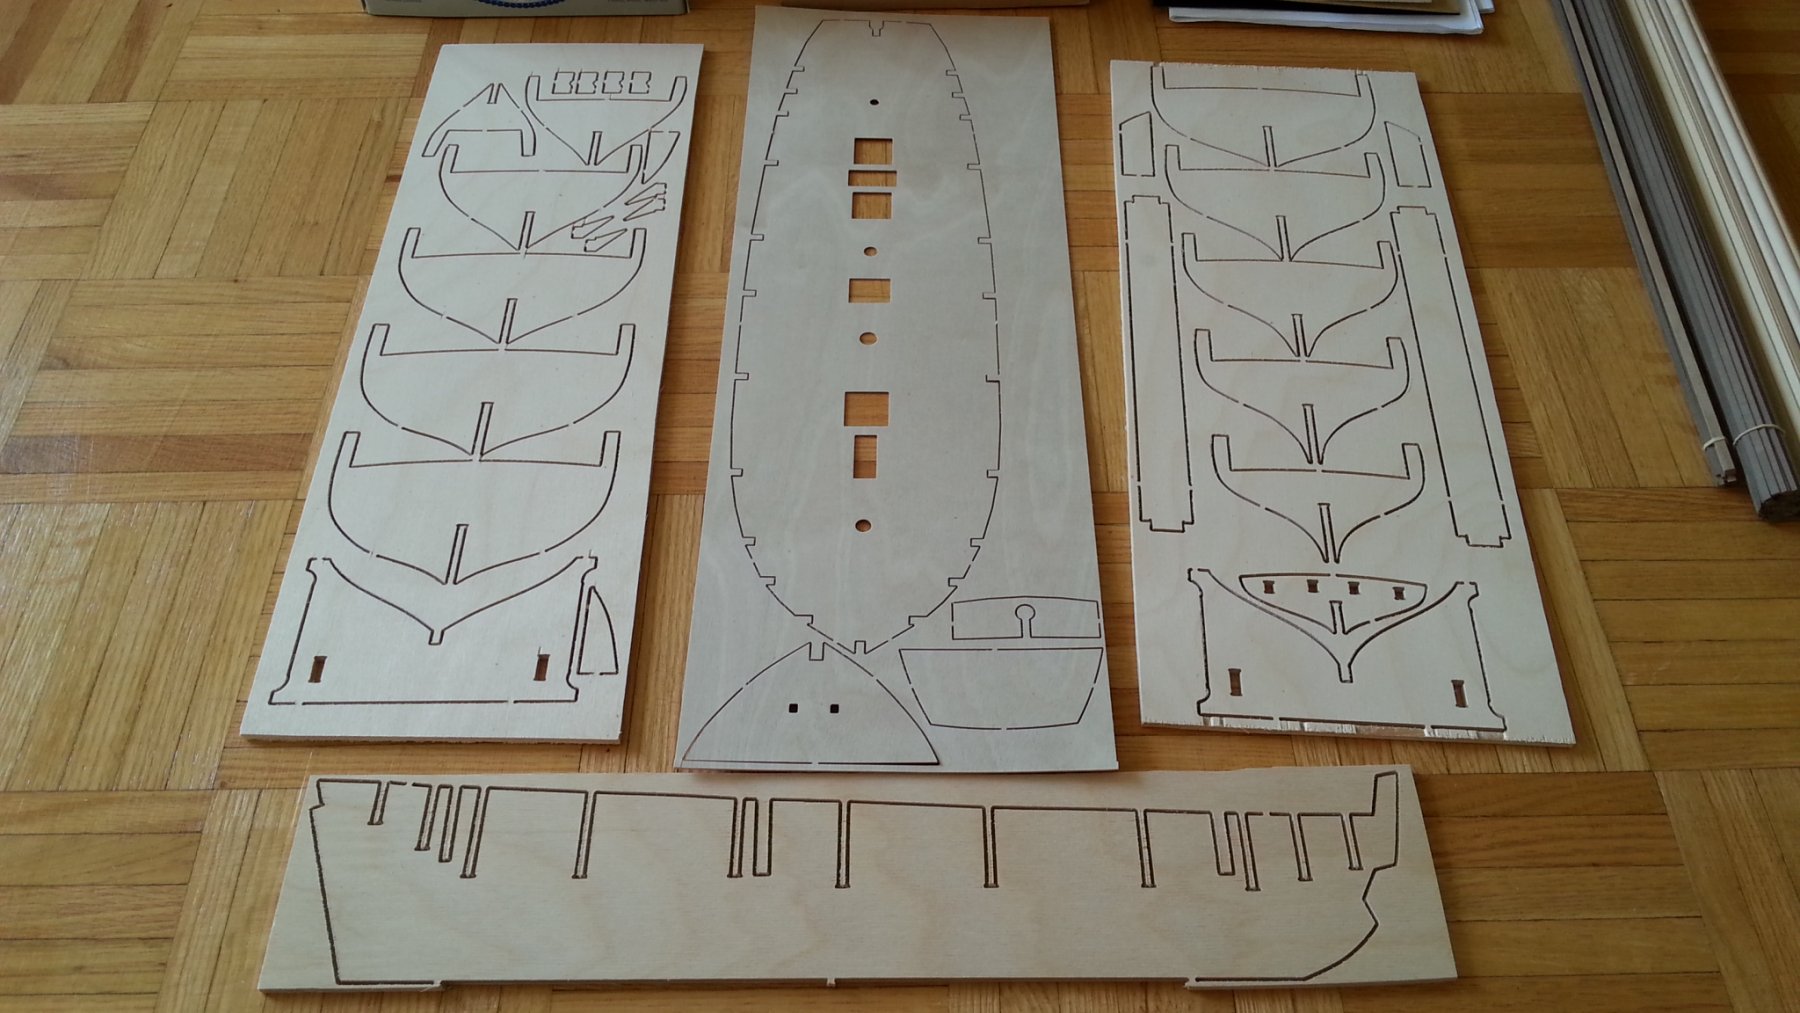
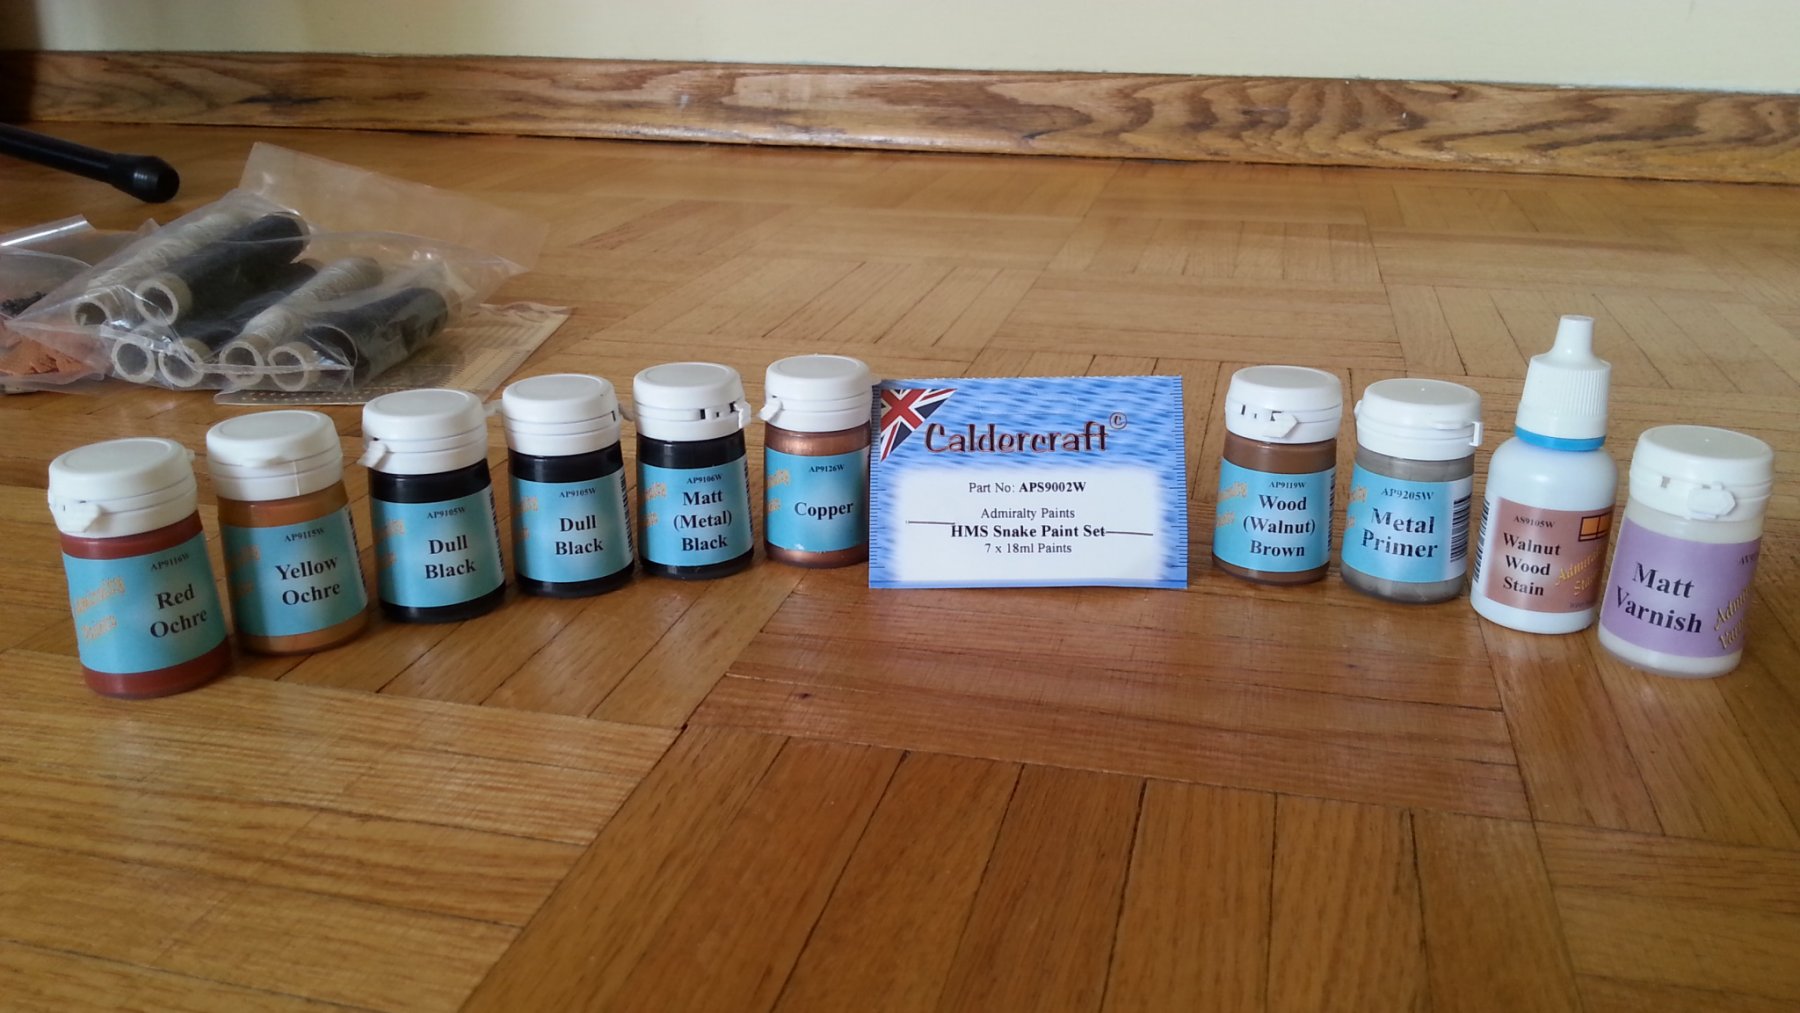
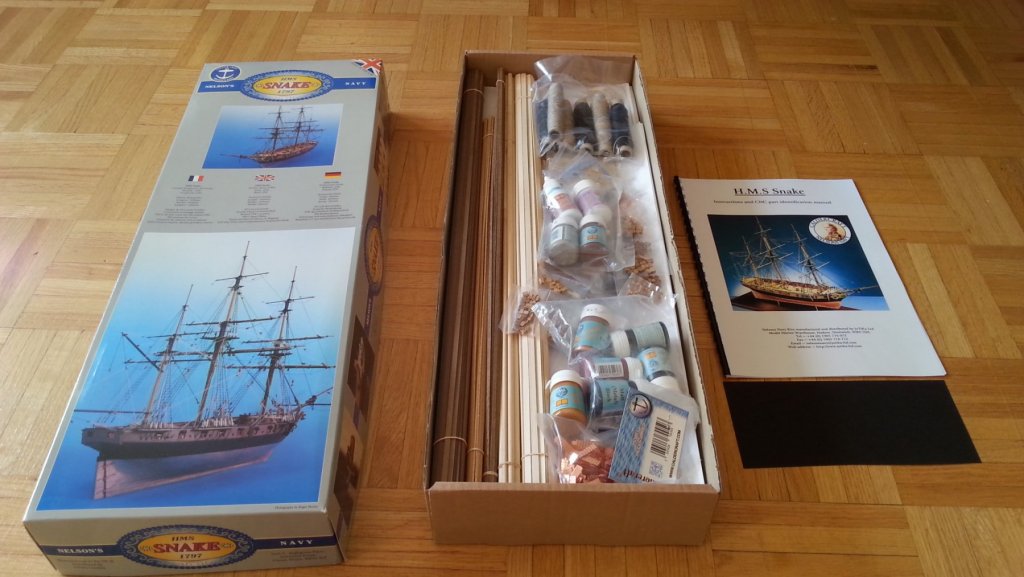
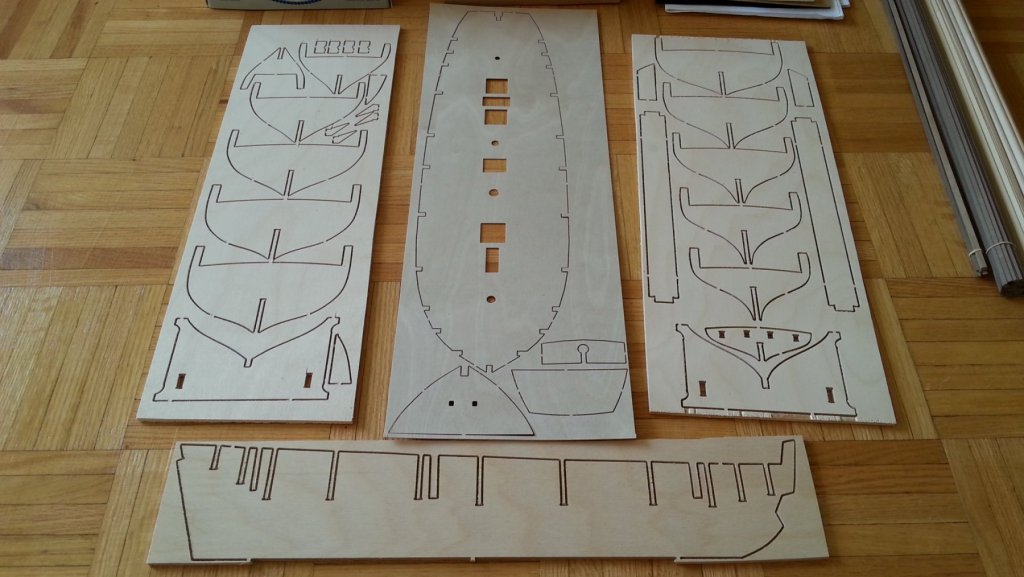
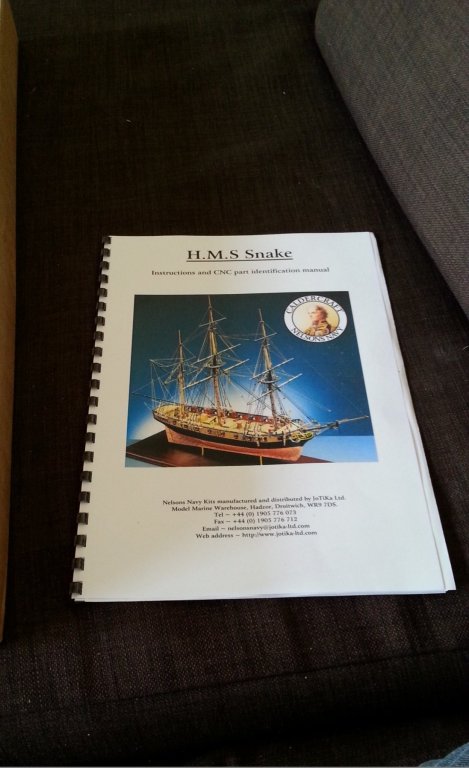
HMS Snake As requested by a user on this forum I will show all the contents of this kit, The other snake builds do not have this it seems. I ordered the kit with some extras (cannon balls, Snake paint set) and a few other things. I will start work on it in a few weeks, Just need to finish up the running rigging on the Sherbourne and make her a display case. All of the fittings are good quality and even the blocks seem to be of highers quality that what came with the Sherbourne. The Caronades are rough looking but the cast is aligned they just need a some work. The bag of copper plates is surprisingly heavy! The wood strips are so much better than what I had on my Sherbourne, they are all well milled and don't look like a dog chewed them. The dowels are mostly strait. The Tanganyika strips are a bit weird as in one side is darker that the other on most of the strips so I will have to keep that in mind while laying the deck. The plans are just huge and there are 7 sheets! The instruction manual is just a few pages though as it is one of Caldercrafts older kits, it's not to bad because it makes you reference the full size plans. The cutouts are one of the highlights I feel. The CNC cuts are good they just have a bit of fuzz in them but I think it beats laser cut char any day. The keel has just a slight bend which will be easily adjusted. Everything else is solid. And finally the paint set plus some extras I bought. I thought they would have been smaller given the price so I'm pleased. -c


-
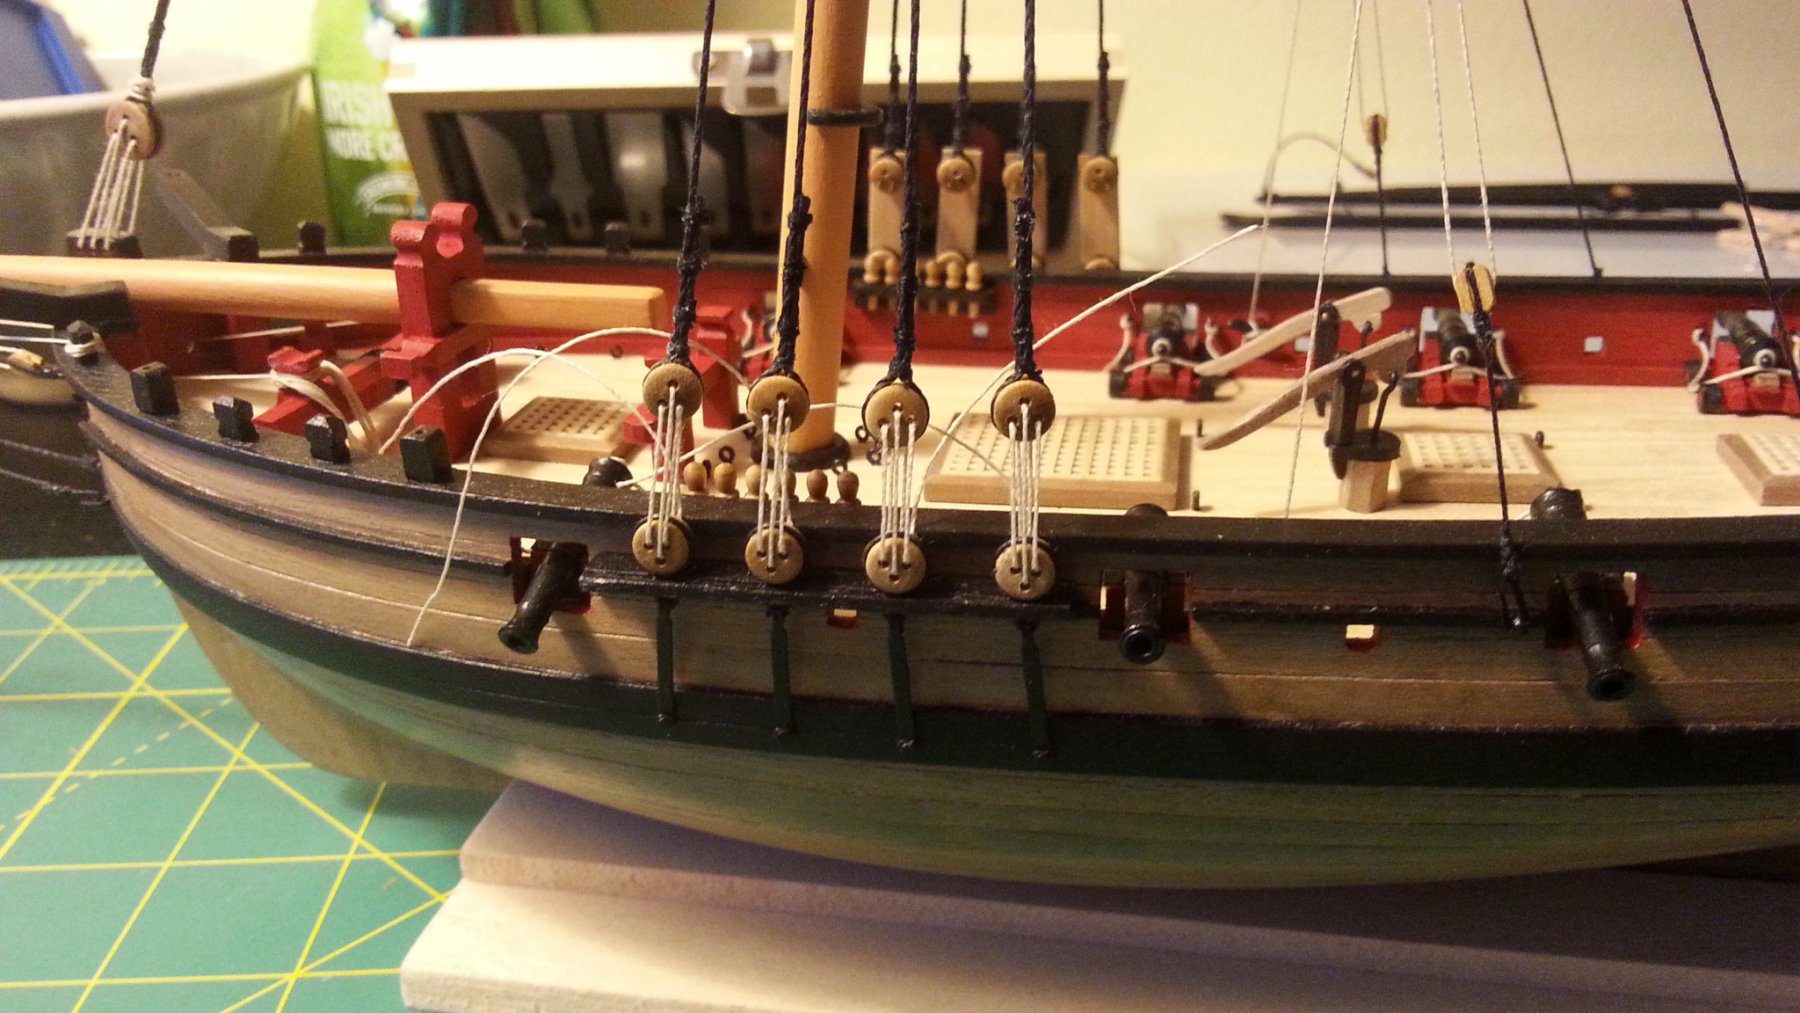
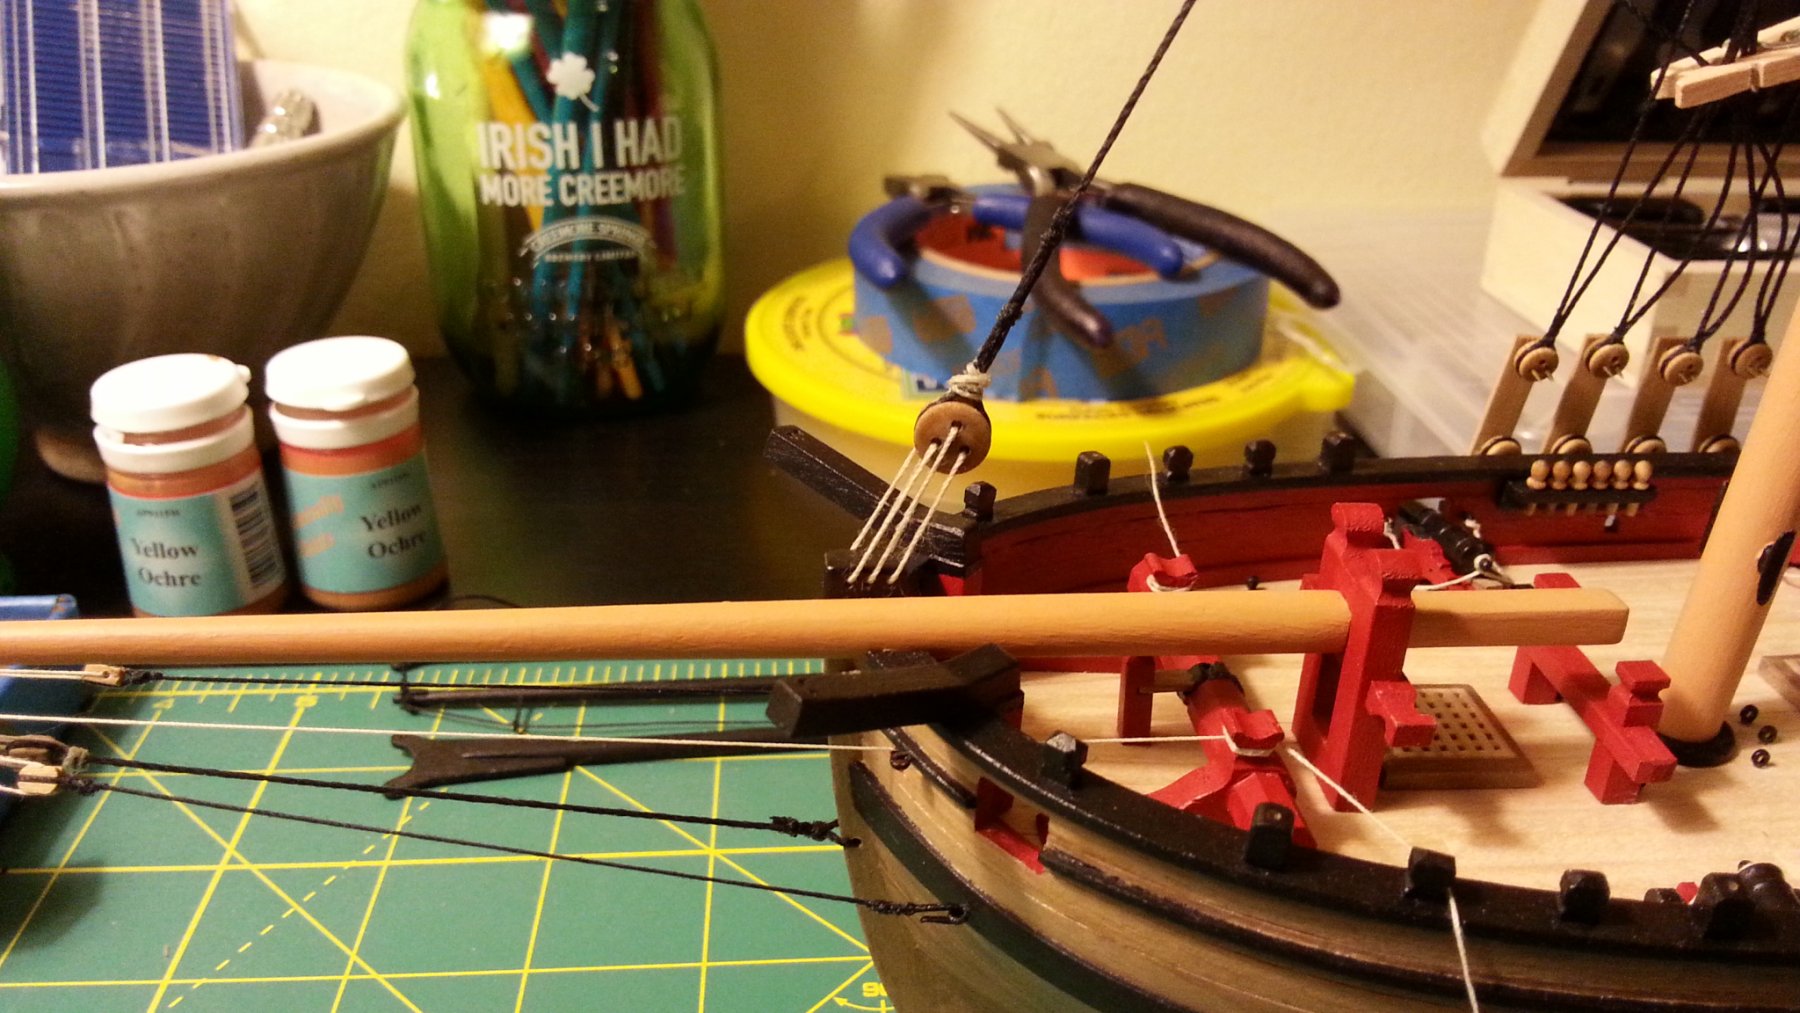
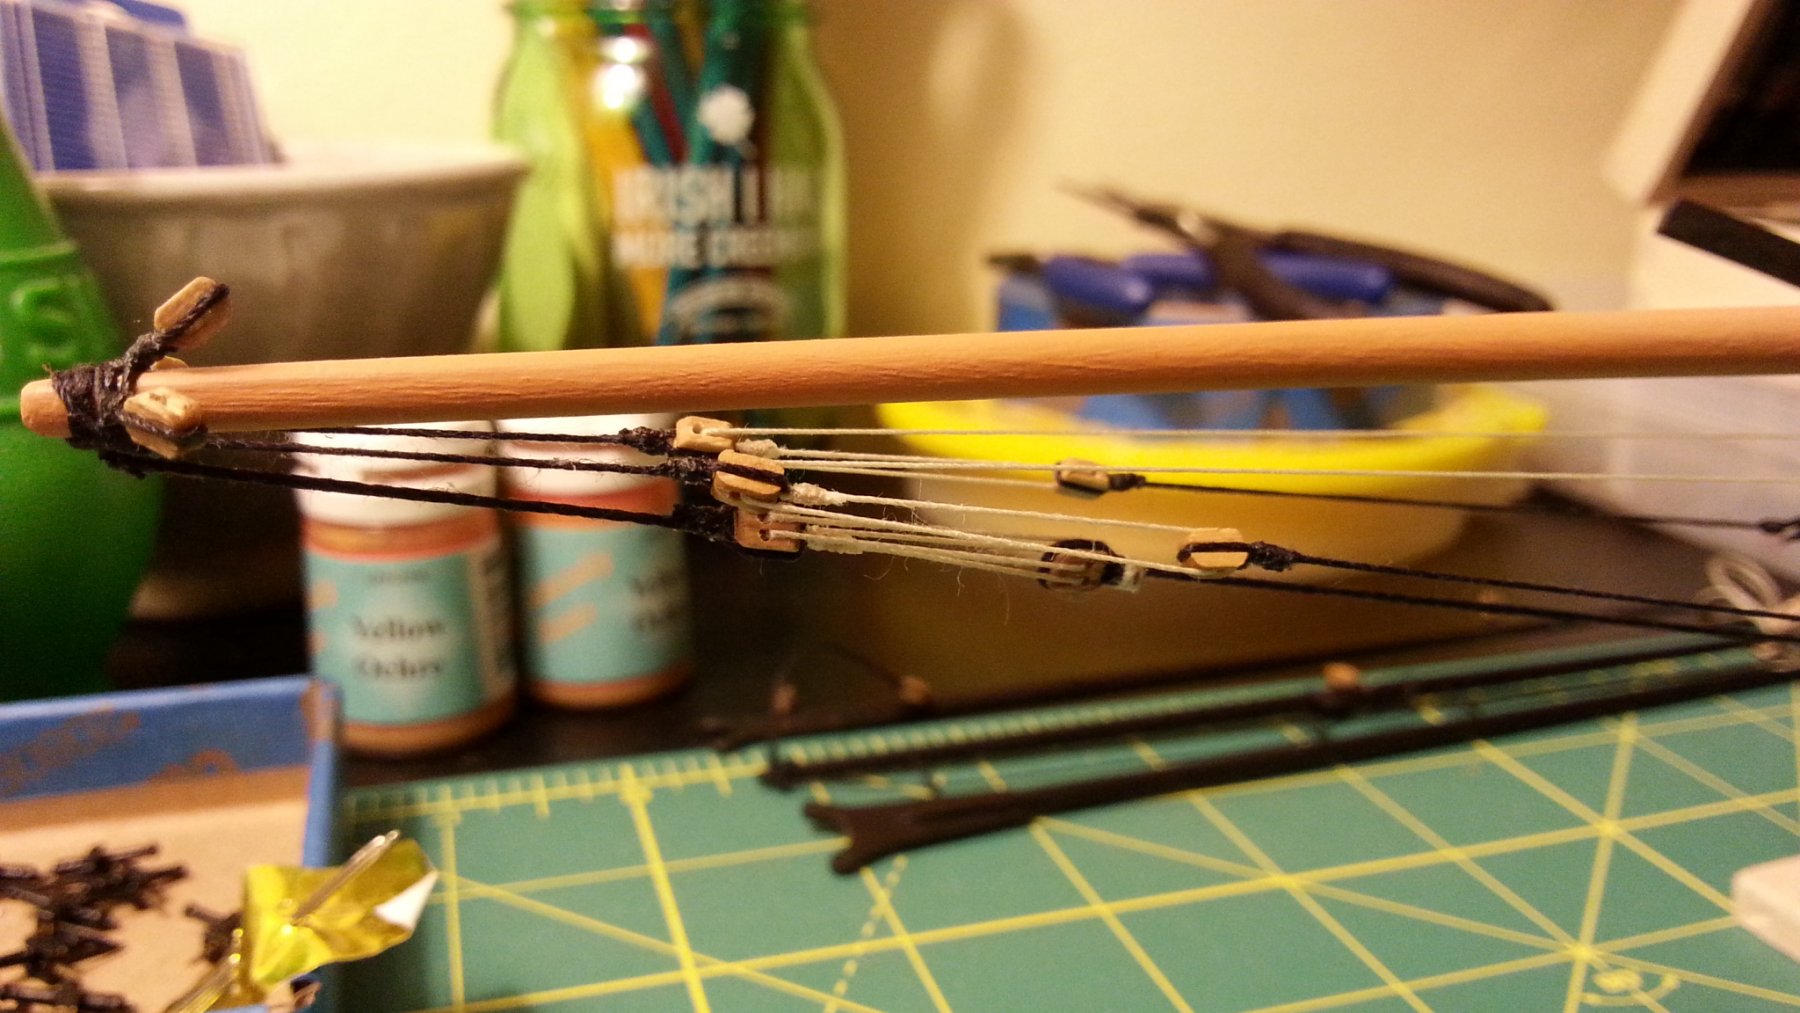
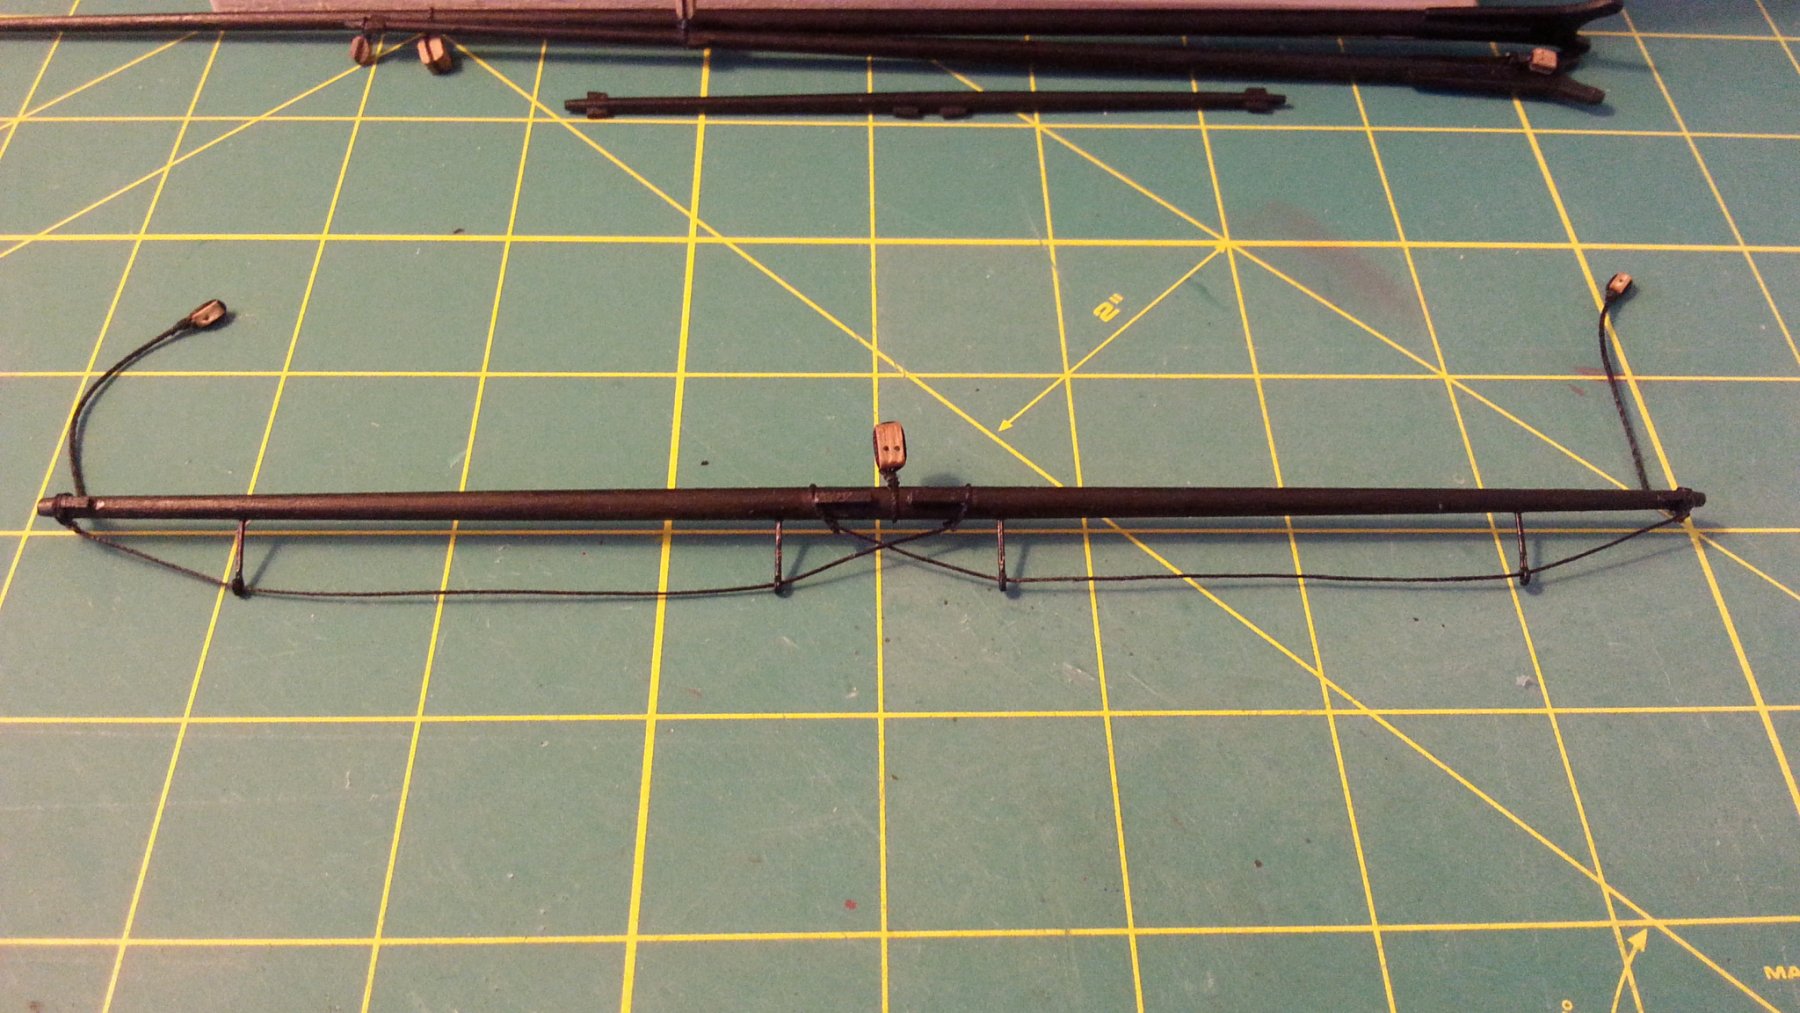
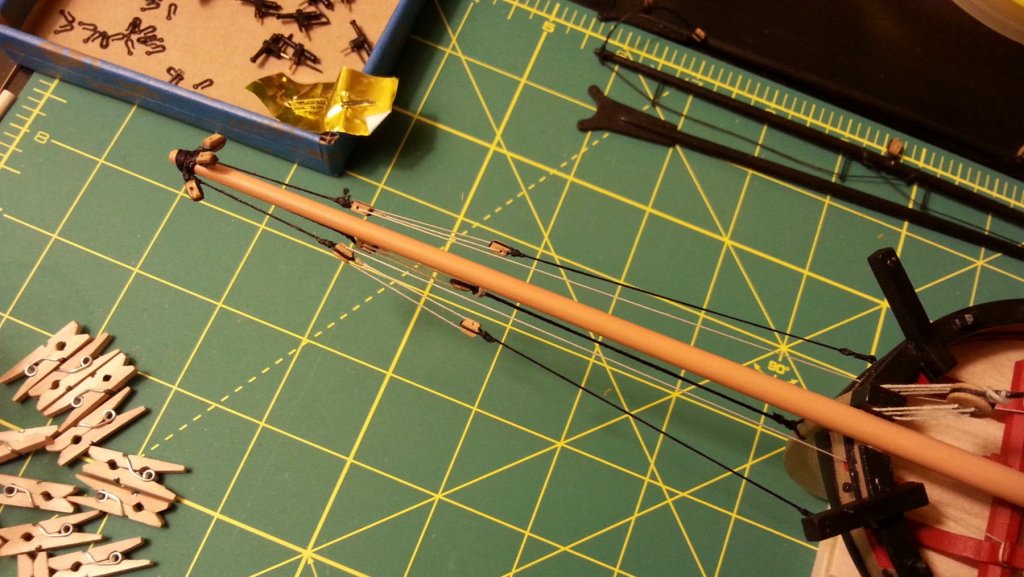
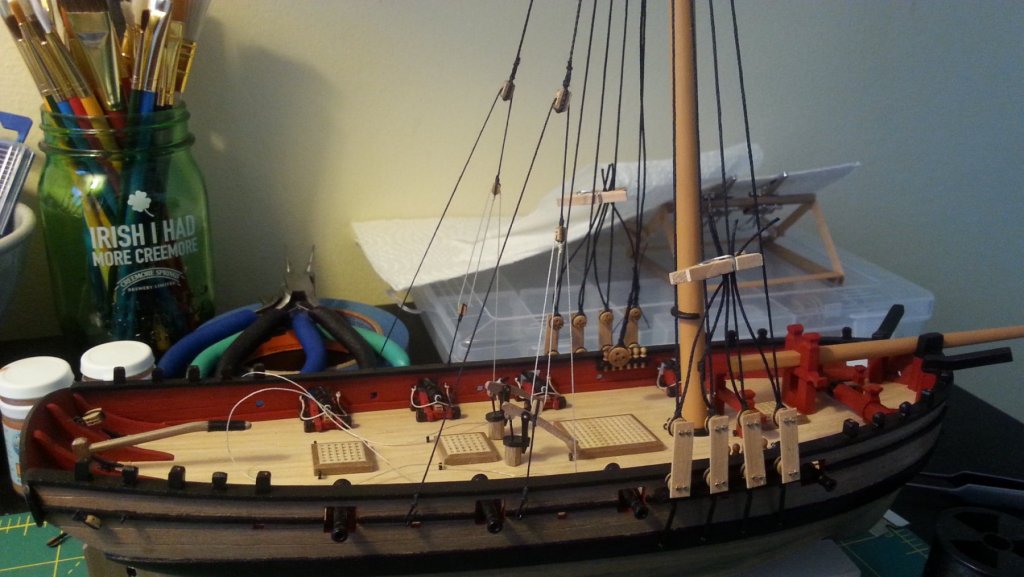
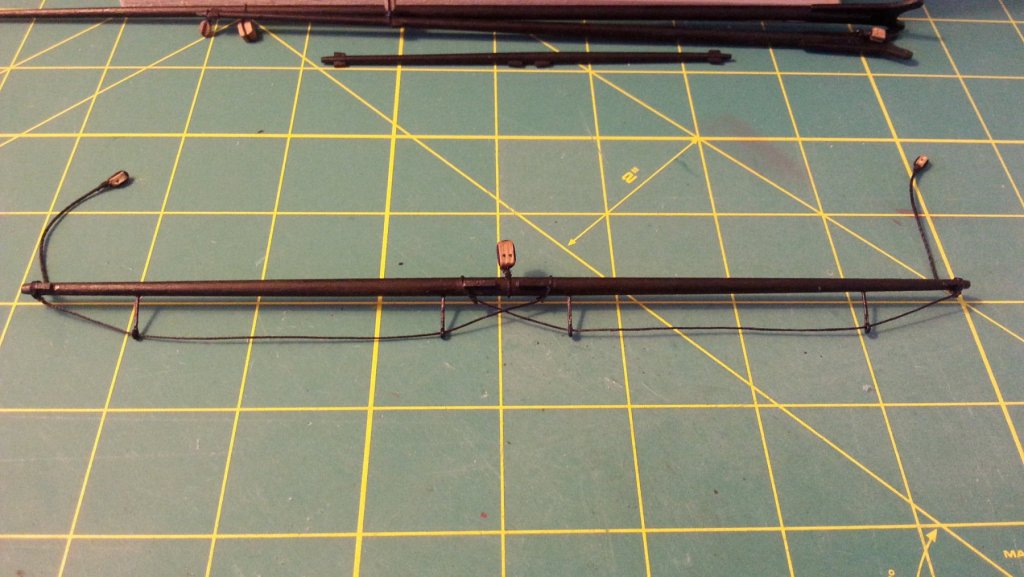
Mast & Bowsprit stays I've been cursing at these little strings for days now and after some reworking and getting the right amount of tension I think there done. I've followed the plans for the most part though I did add another "bowsprit stay" (I don't know what else to call it) that is attached to the cutwater. The forestay for the mast is also done and tied, The lanyard is a bit rough but I'll leave it. The view looking down is my favorite. A sailor would scoff at me most likely... Rope Coiling Jig I'm currently playing around with this jig to make some rope coils and there just looking wrong. In the second picture below you can see my "attempt". I've seen some rope coils that are tied in the middle but I don't if that was done back in the 18th century. Also I don't really think there would be rope terminating on a windlass would there? Anyone have ideas about making nice looking coils?


- 49 replies
-
- 9
-
-
- sherbourne
- caldercraft
- (and 1 more)
-
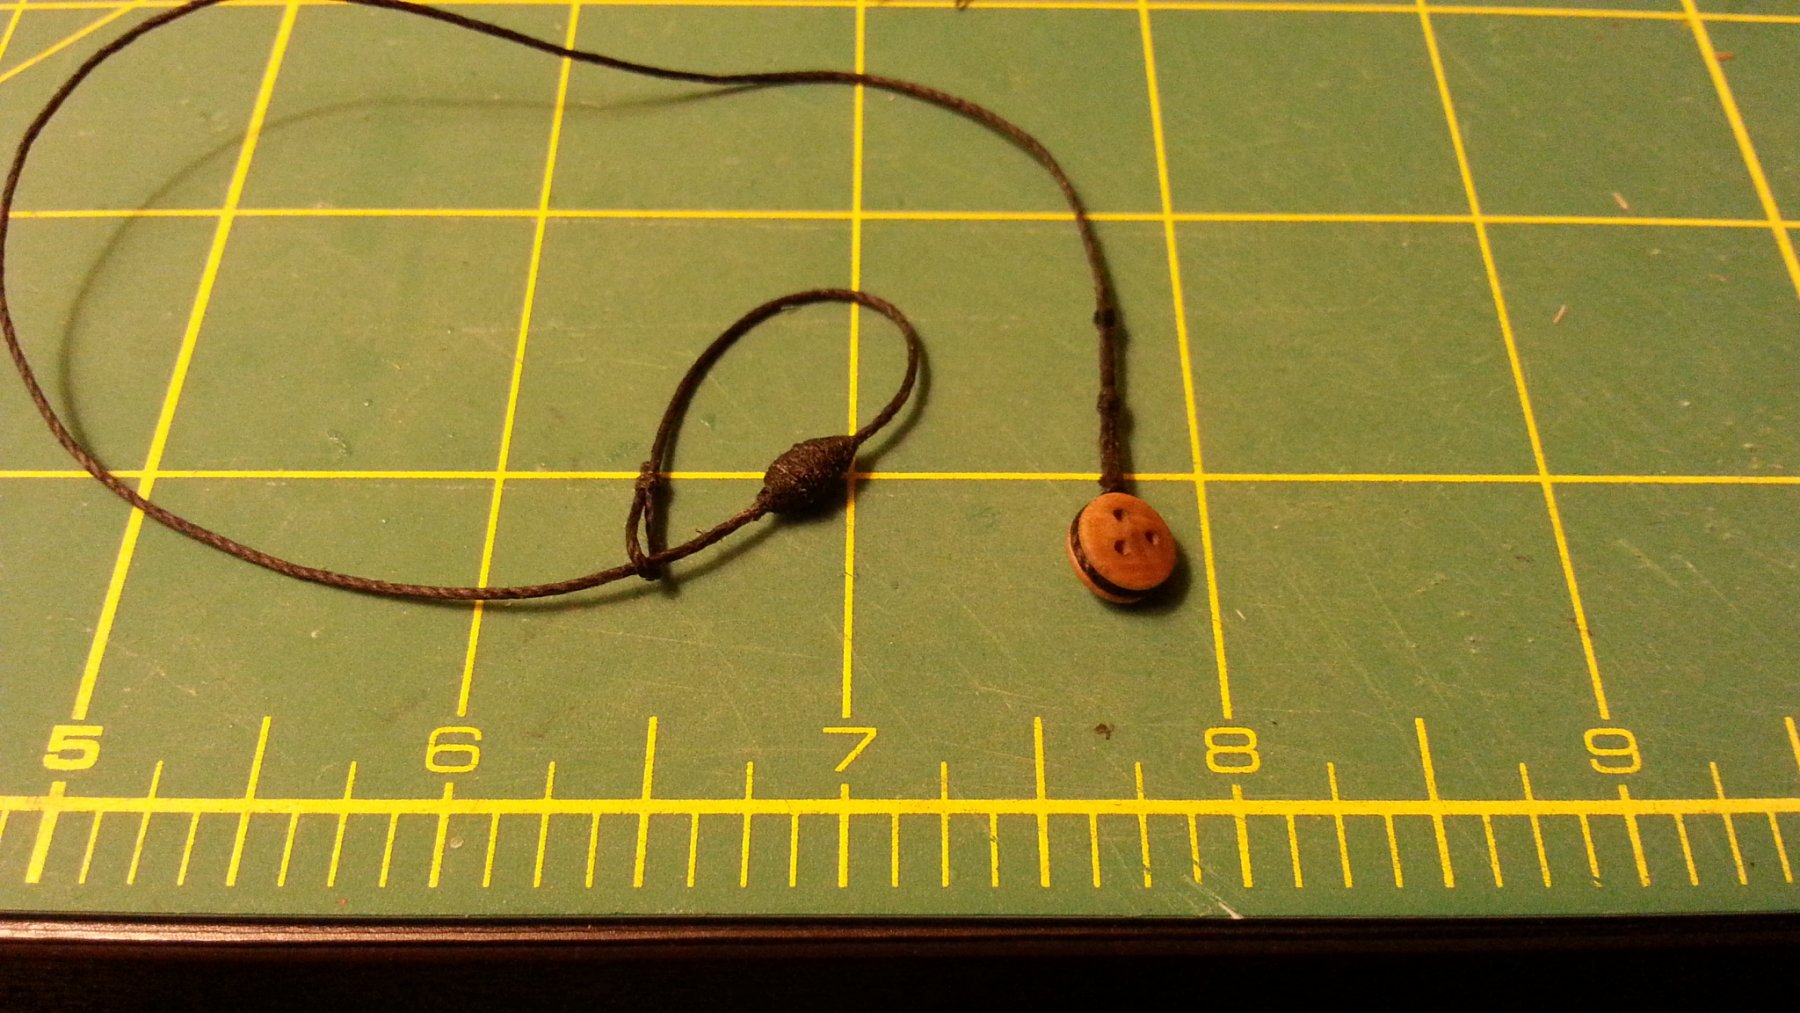
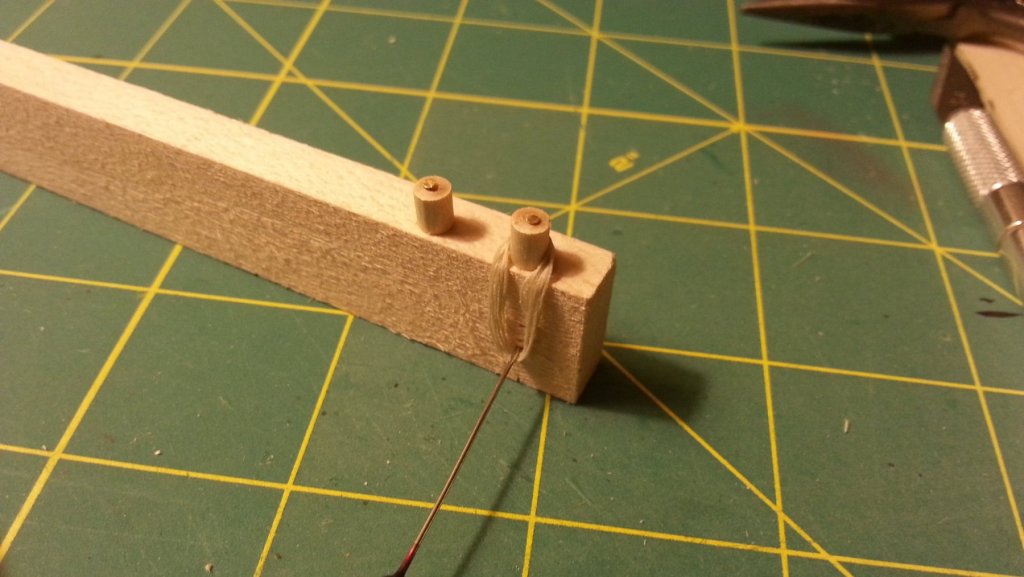
Standing Rigging Working on the backstays then I'll work on the forestayes. I've been putting "lashings" on almost everything as simple knots just look ugly and out of place. I've run into a bit of a snag in the second picture. I don't really know if I belayed the rope right and what to do with the end of it, make a pool of rope on the deck or make a hoop of pope around the cleat? I should have bought a book about this rigging business. The instructions are lacking in this regard and make it seem like all the rigging can be done in an afternoon... maybe I'm over thinking things. Mouse I made the Mouse with a small piece of dowel, glued it on and wrapped it with fine black thread. Not quite the shape I was looking for but it will do fine.

- 49 replies
-
- 8
-
-
- sherbourne
- caldercraft
- (and 1 more)
-
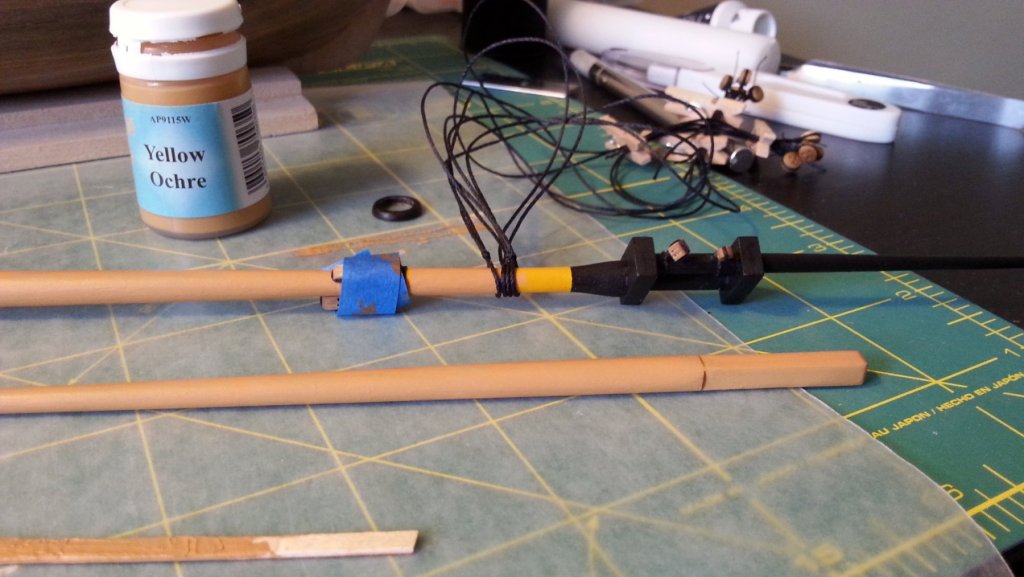
Mast & Bowsprit repaint I left a bit of the old paint for comparison and you can see my "yellow ochre" attempts were just miles off. After some research this is what was used on the Victory in 1804 and is whats painted on her currently since 2015. I like it on the the Sherbourne as you can see in the bottom photo. Just fits in nicely I think. It's a strange color to be sure. In some light its peach and some light its pale mustard. Has anyone else bought this stuff recently and seeing the same?

- 49 replies
-
- 6
-
-
- sherbourne
- caldercraft
- (and 1 more)
-
Hey Steve. It's not a problem when people point out mistakes! I will definitely post unboxing pictures of the Snake as there has been a lack on the other builds. I can't wait to get onto that build that's for sure.
- 49 replies
-
- 2
-
-
- sherbourne
- caldercraft
- (and 1 more)
-
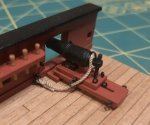
Hey Tony. Yeah the bottom deadeyes are upside down atm because my jig wont fit otherwise. the channel doesn't protrude far from the hull and the pins were hitting the capping rail. They are not glued in so they can just be spun around when it comes time to tie the lanyards. Thanks guys!
- 49 replies
-
- 3
-
-
- sherbourne
- caldercraft
- (and 1 more)
-
Hey Steve. I was following the plans I should definitely look into this. Thanks for looking out!
- 49 replies
-
- 2
-
-
- sherbourne
- caldercraft
- (and 1 more)
-
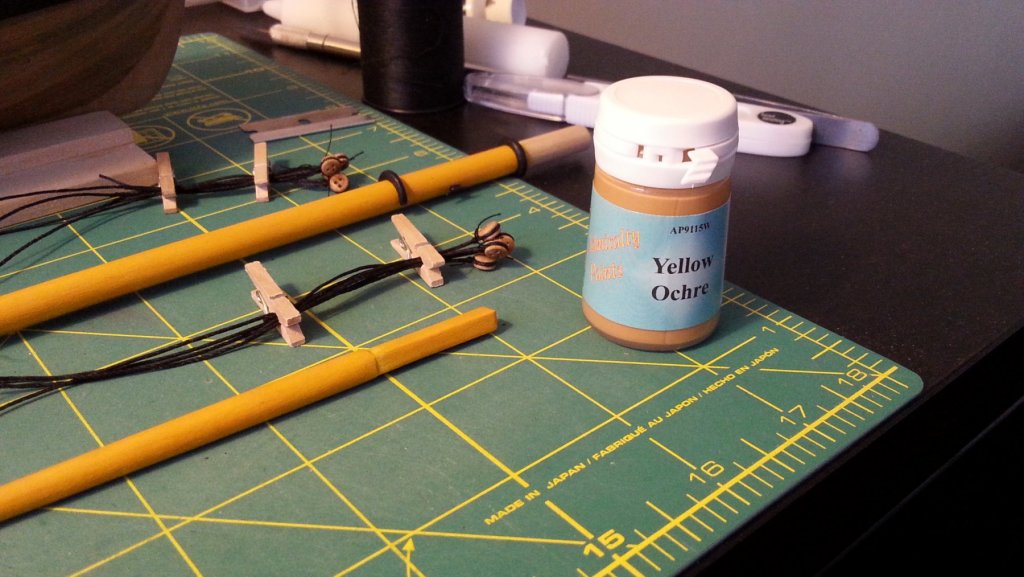
Rigging the Shrouds Instead of tying a knot around the deadeye I used a tight lashing that could be shifted to get the right positioning. I used 1mmx5mm lime wood strips with pins in them for holding everything in position. Not quite sure how else to do it really. Yellow Ochre at last! My snake arrived and with it the paint set and some extra paints I bought. The Snake kit I received was amazing, so much stuff and the wood strips were smooth and well milled but I'll save the rest for its build log. I plan on giving my mast and bowsprit a splash of yellow Ochre to take down the awful yellow/orange I currently have. It is quite off putting at the moment. Another option is that I could take off the yellow with paint remover and use the walnut stain I got with my delivery. Decisions to be made.


- 49 replies
-
- 7
-
-
- sherbourne
- caldercraft
- (and 1 more)
-
Right now model shipways is really backlogged so its possible they are using what ever materials they can find to get kits out the door. Then again I had 3 ply for my Sherbourne from Caldercraft and didn't have any issues.
-
Oh wow that does look like my stuff! how about that eh?
- 49 replies
-
- 2
-
-
- sherbourne
- caldercraft
- (and 1 more)
-
Hey Steve, I'm from Toronto Canada. I bought the stuff from around here. I suppose you get similar stuff in Ireland.
- 49 replies
-
- 1
-
-
- sherbourne
- caldercraft
- (and 1 more)
-
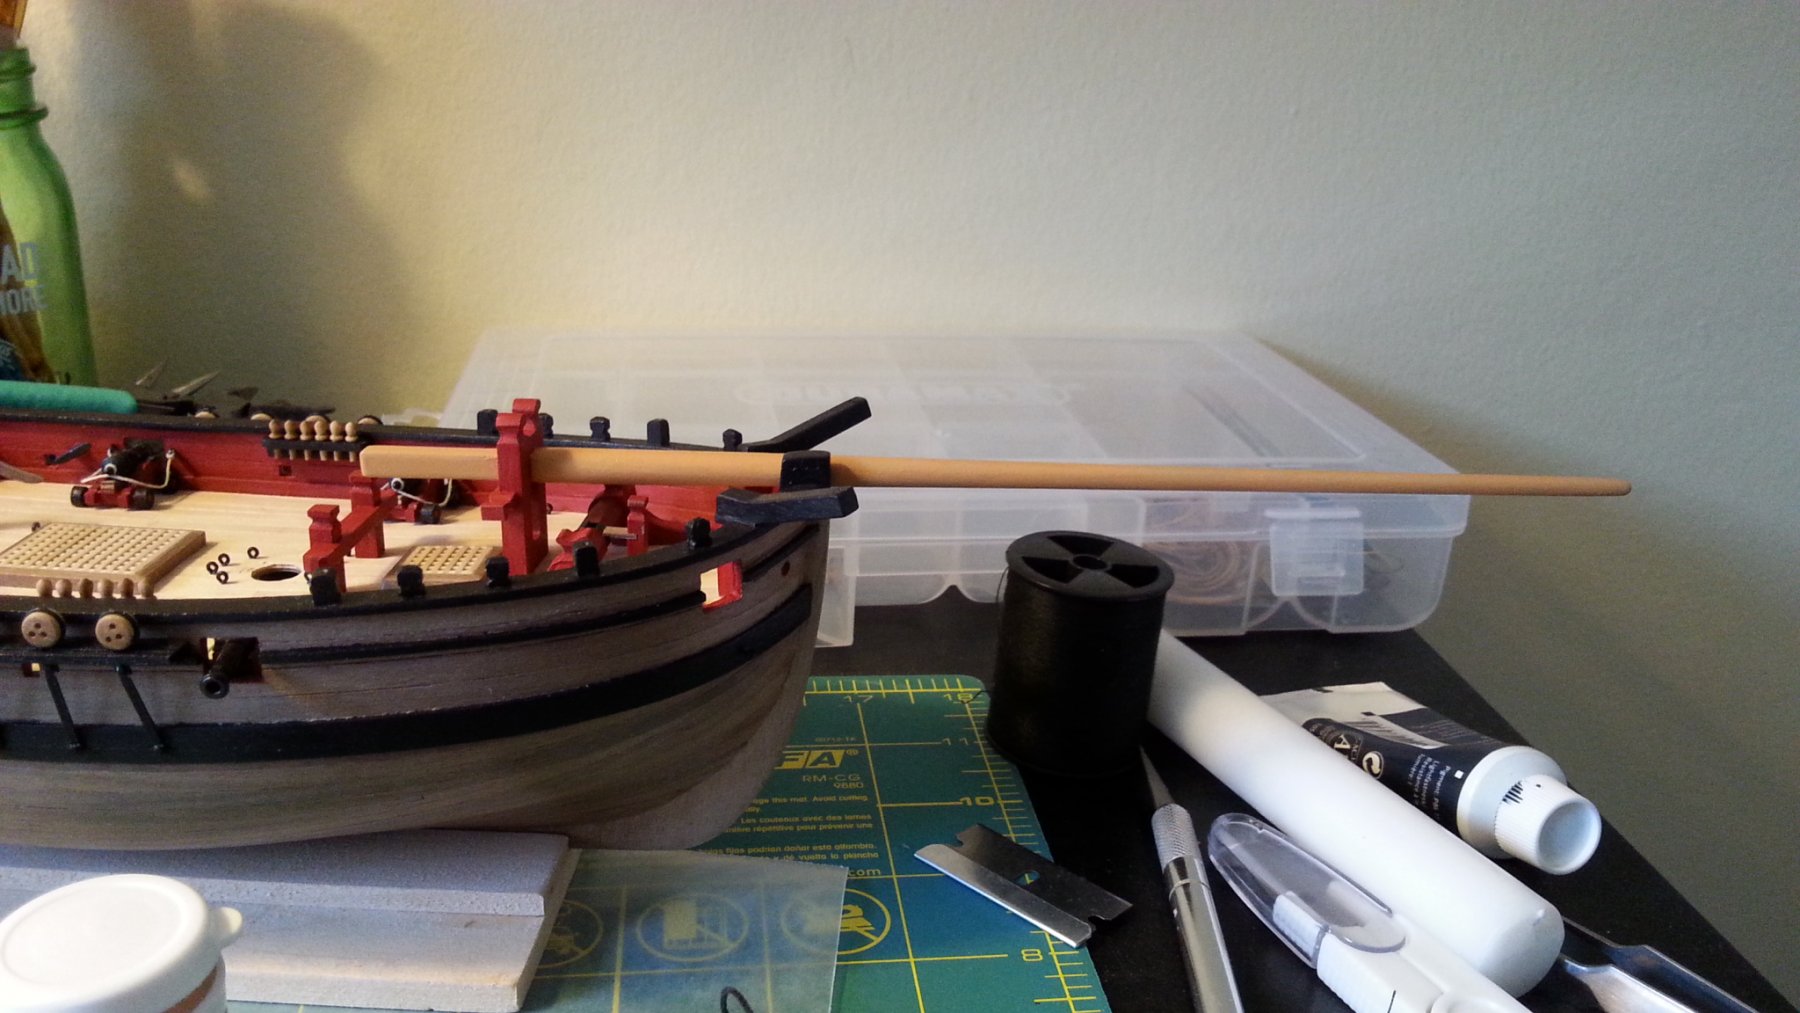
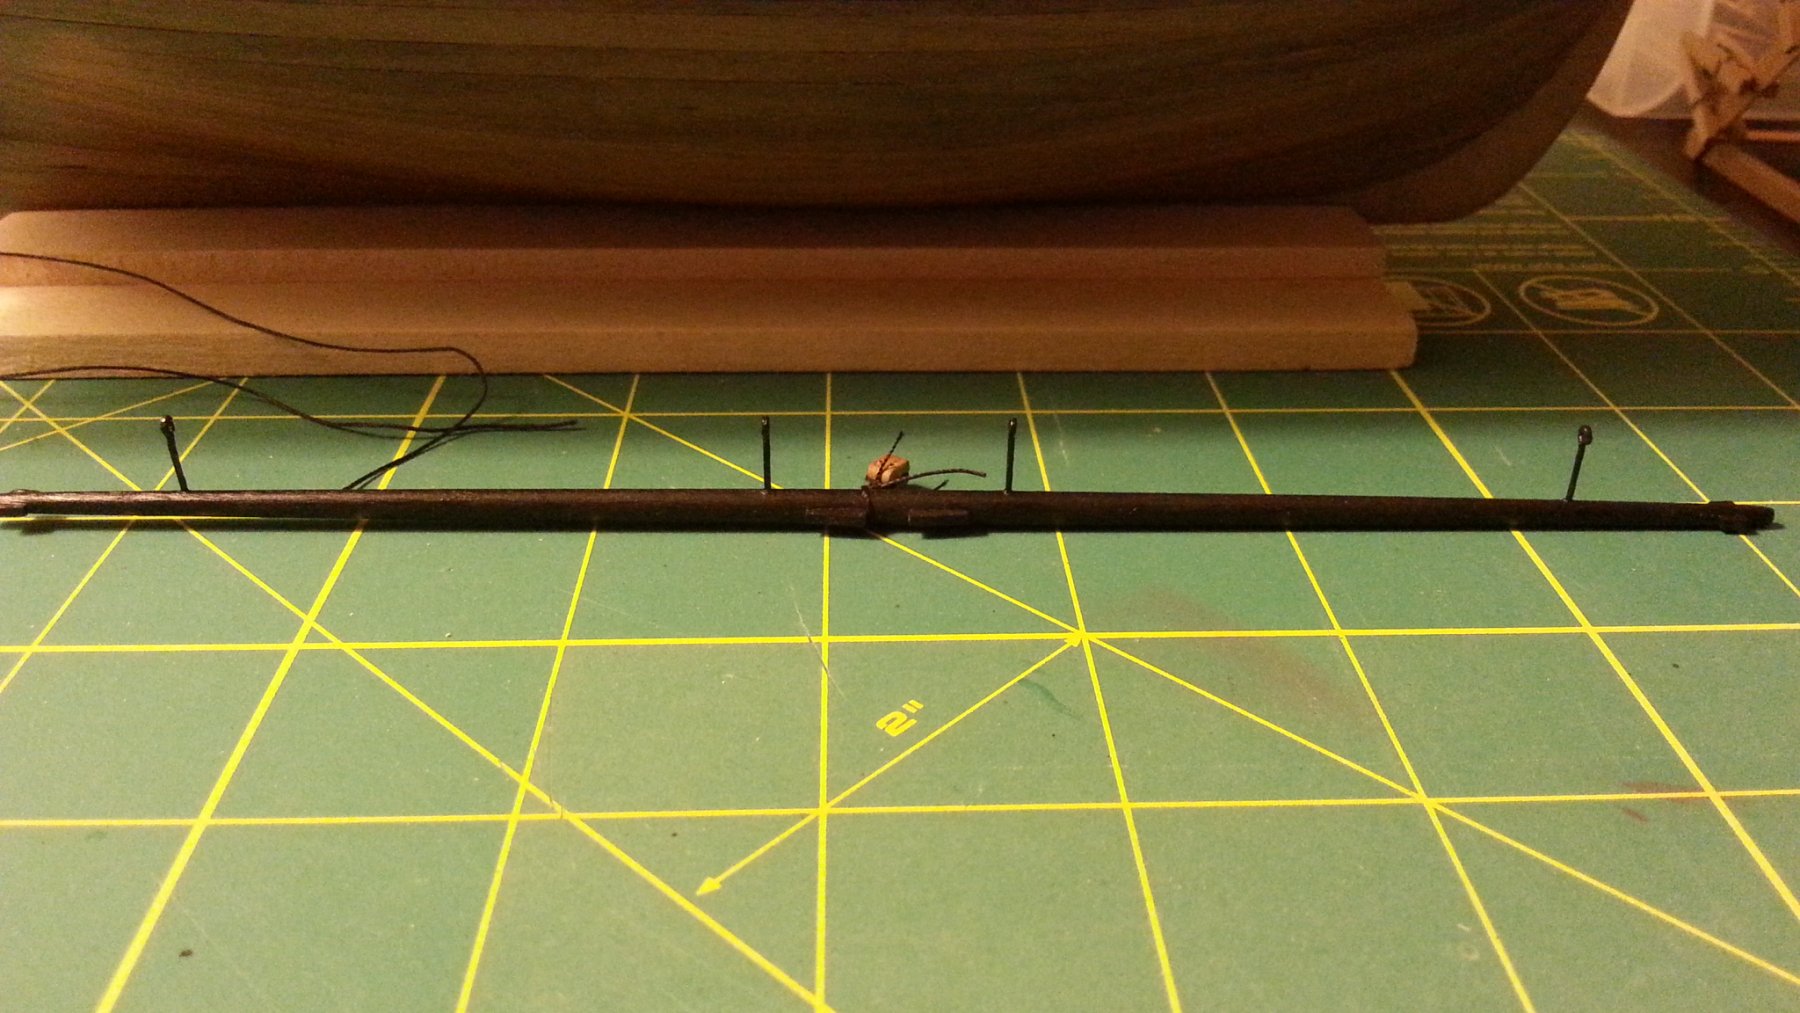
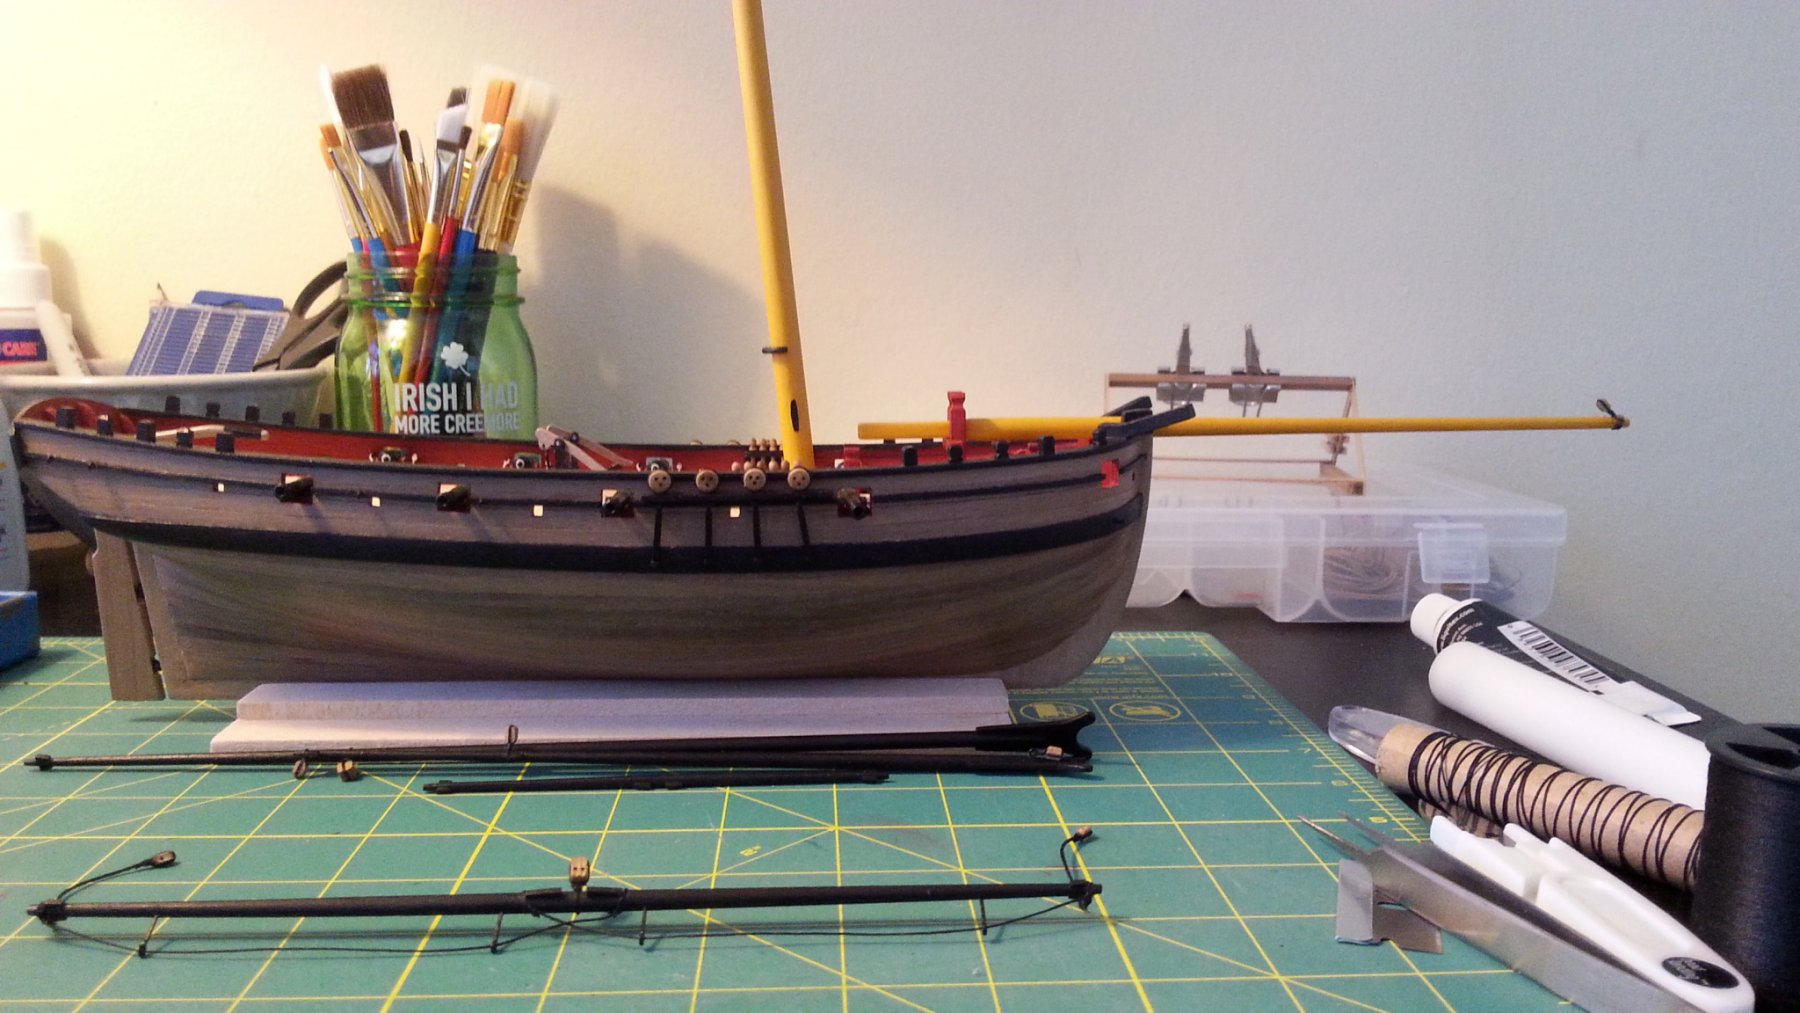
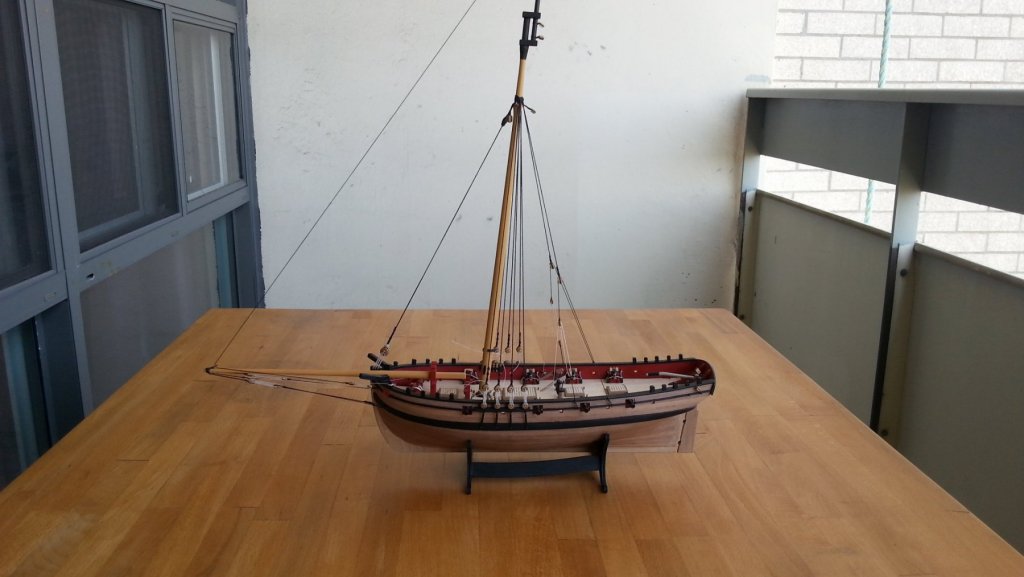
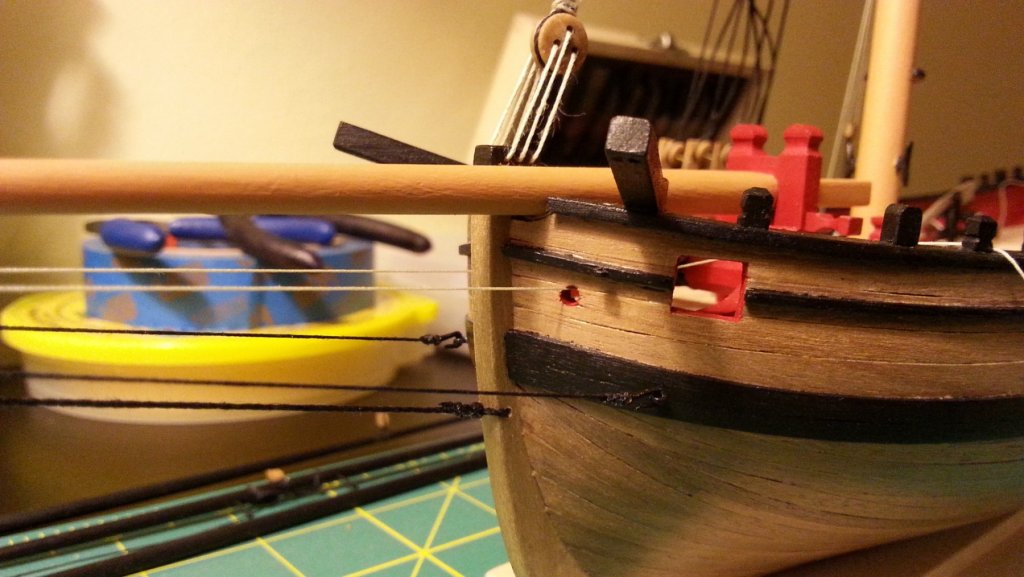
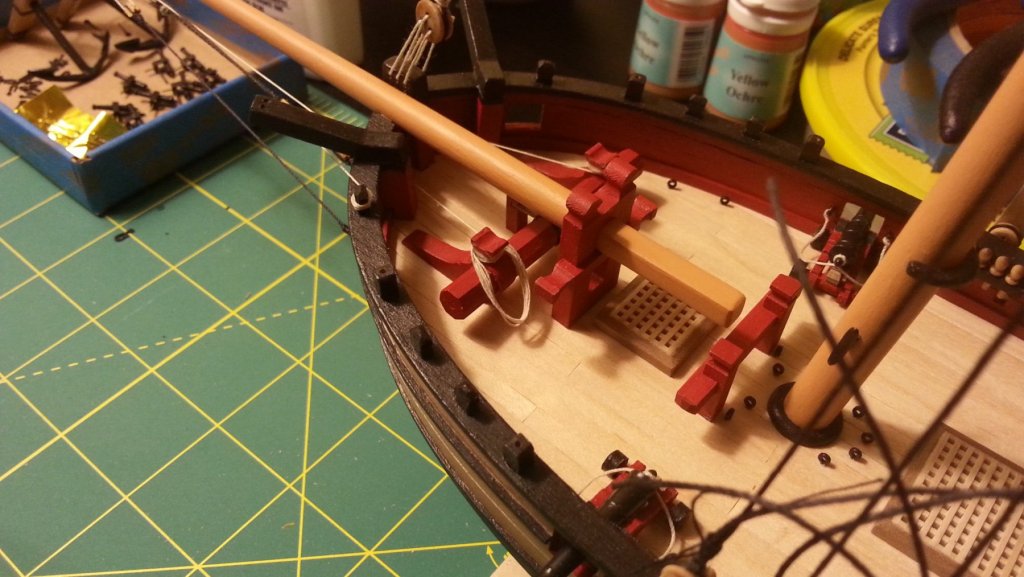
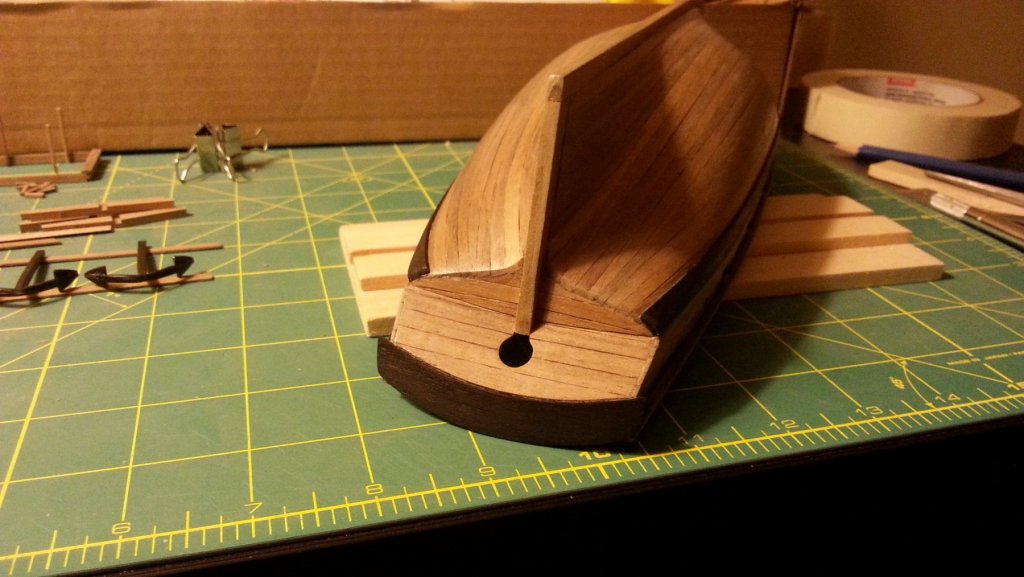
Lower yard I changed what the instructions told me to do and I added 4 small eyelets to the yard for the footrope. I Think they would have been rope but I cheated and used the eyelets, I think I've seen some like that on other builds. Tying all of these little lashings and knots is quite time consuming, fun though. Bowsprit positioning I've held the ship up to the plans to see if the angle is right but it seems too low maybe? I don't think I will be gluing the mast or bowsprit in as all the rigging seems like it will do the job of holding everything down, There is a discussion in another thread on this site about it and it seems quite normal.


- 49 replies
-
- 6
-
-

-
- sherbourne
- caldercraft
- (and 1 more)
-
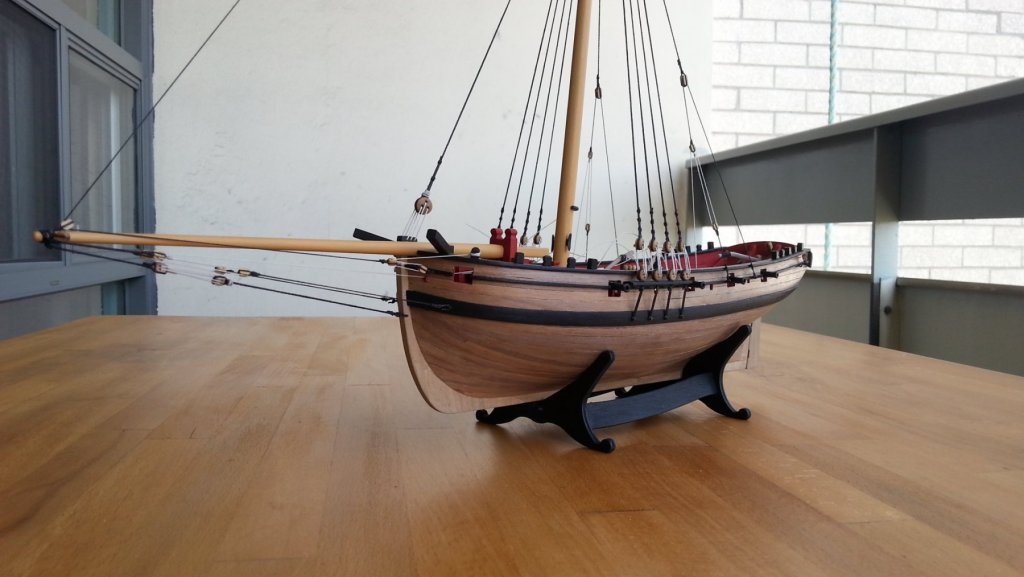
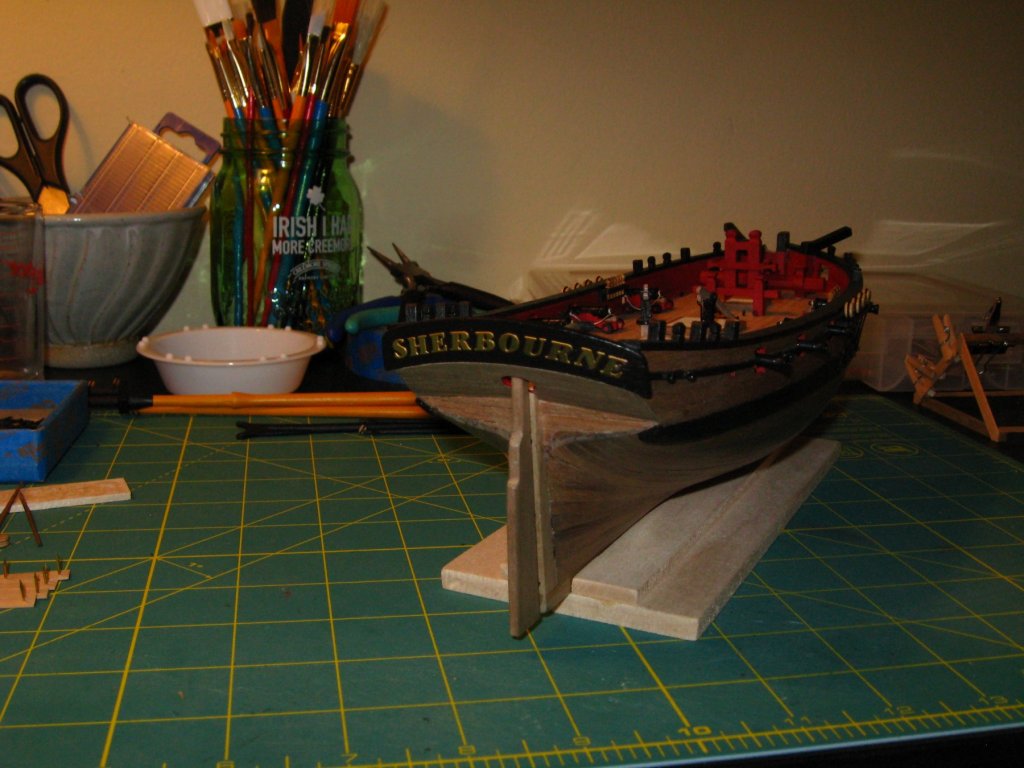
Stern Fascia I chose to stick with the photo etch letters that came with the kit. Getting them on there with an even curve was hard to say the least, shaky hands sweaty palms. I used fine grit sand paper on them and used satin varnish and liked the results. These Pictures are with a proper camera I found in the house. I'm working out how to use the old thing... might be making an investment in a new one on my next build. Mast & Yards I chose to paint the mast and bowsprit yellow ochre because I didn't like any of the stain I had. learning to tie blocks was a lot of research. The footrope on the lower yard is going to be reworked (the plans are rough in this regard) I will do them up proper.

- 49 replies
-
- 6
-
-
- sherbourne
- caldercraft
- (and 1 more)
-
You're making me wish I did treenailing! Nice work.
-
Oh man this is looking good! I like how you did the deck pumps with a hexagon shape like I did on the Sherbourne.
- 291 replies
-
- 3
-
-
- bounty
- billing boats
- (and 1 more)
-
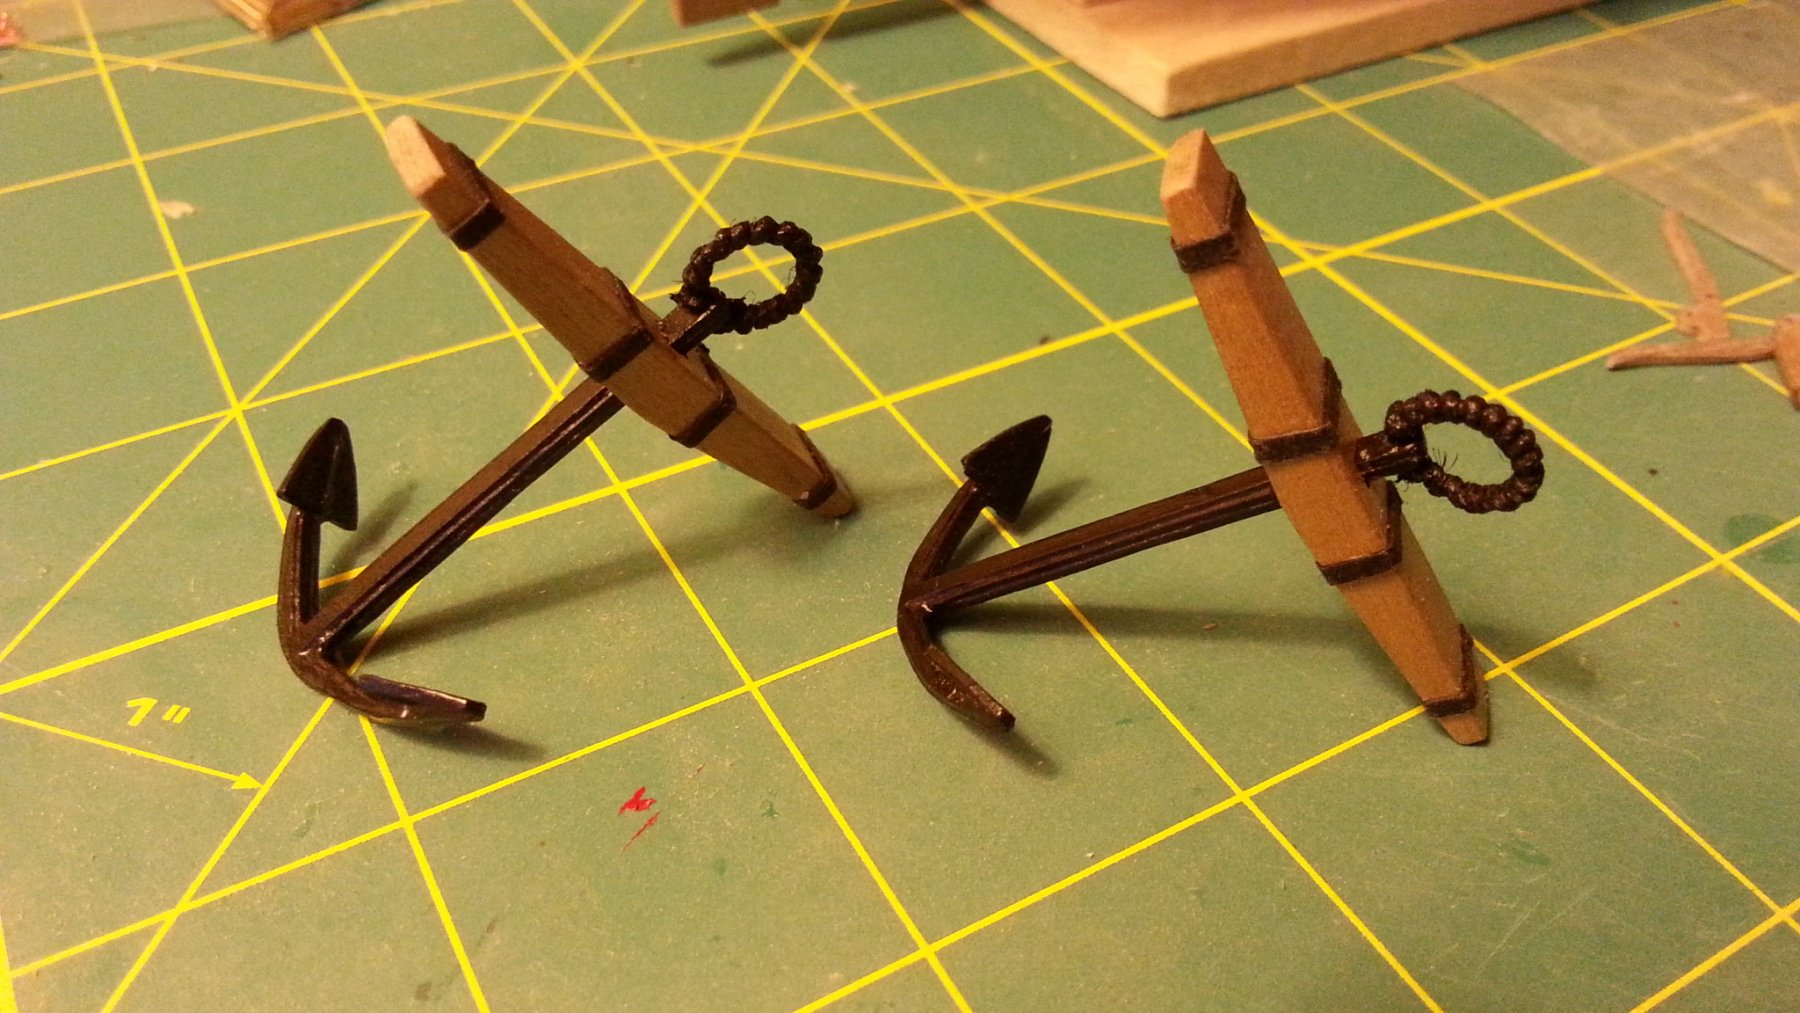
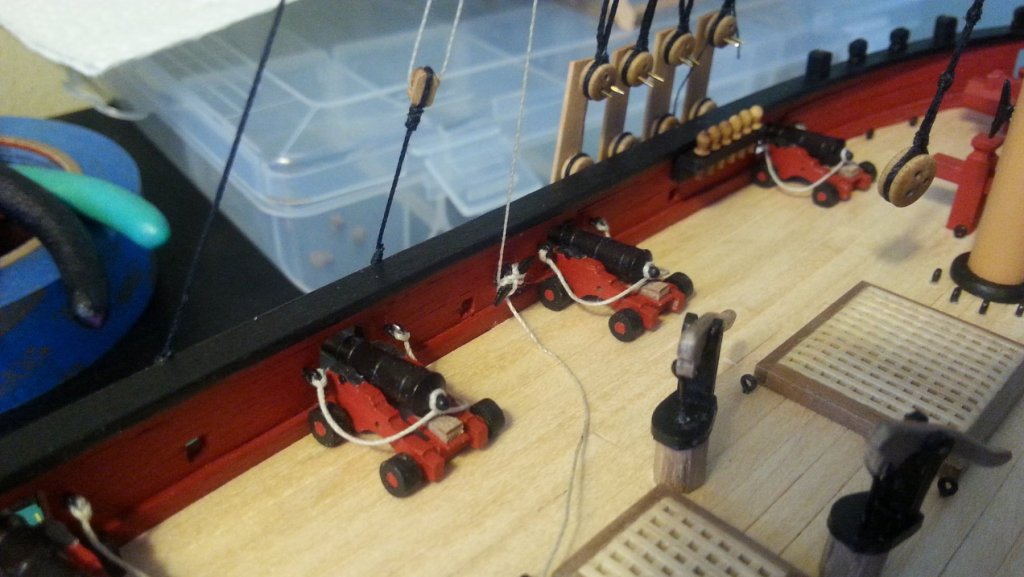
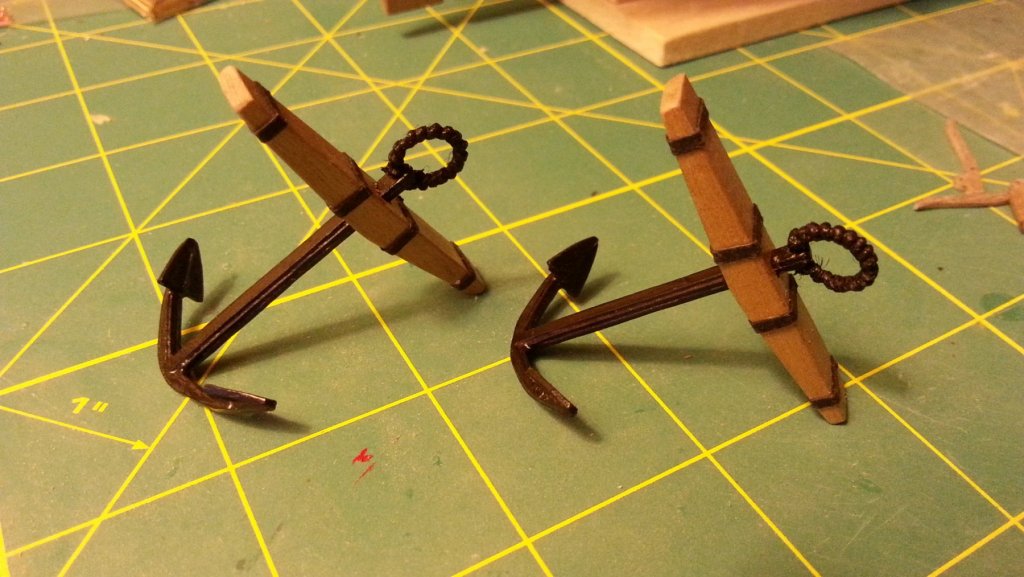
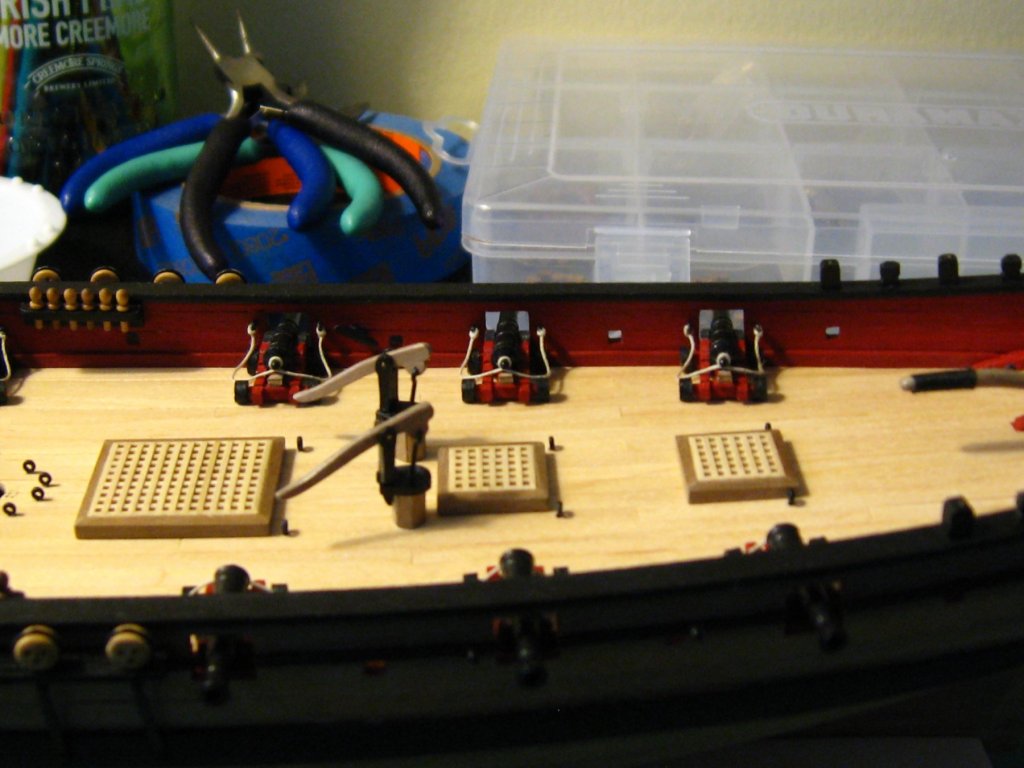
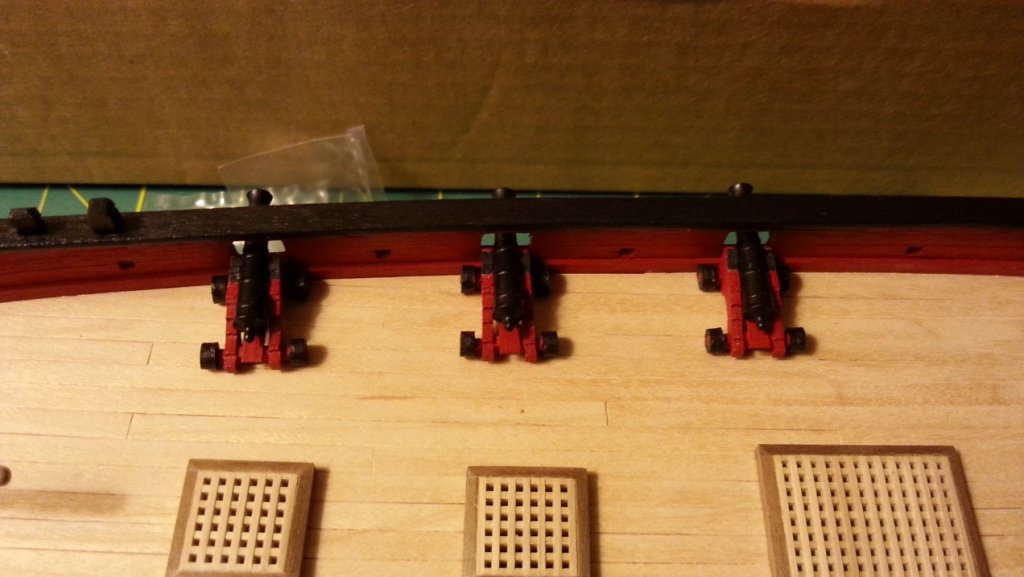
Anchors The kits anchors were a fun little side project. I don't know if my pudening is right but I like the way I made them look tared up. Deck pumps I removed about 3mm from the end of the handles as they just looked over sized for the kit. They are still a bit monstrous. The kit told me to use 4mm dowel for the pump stand/pipe it seemed realy small so I ran some strips around it and made and octagon shape, its probably not realistic. Breaching rope I did my best I swear! I had glued the guns to the deck before I realized I should have made a jig to get all the rope the right length. So there all a little bit different, I'll live with it. Next time I'll do it to code Up to date progress That's where she is currently. I'm working on the mast and booms.

- 49 replies
-
- 7
-
-
- sherbourne
- caldercraft
- (and 1 more)
-
Thanks Scott! I put breaching rope for this build. I'm definitely going to do it on my next build though.
- 49 replies
-
- 1
-
-
- sherbourne
- caldercraft
- (and 1 more)
-
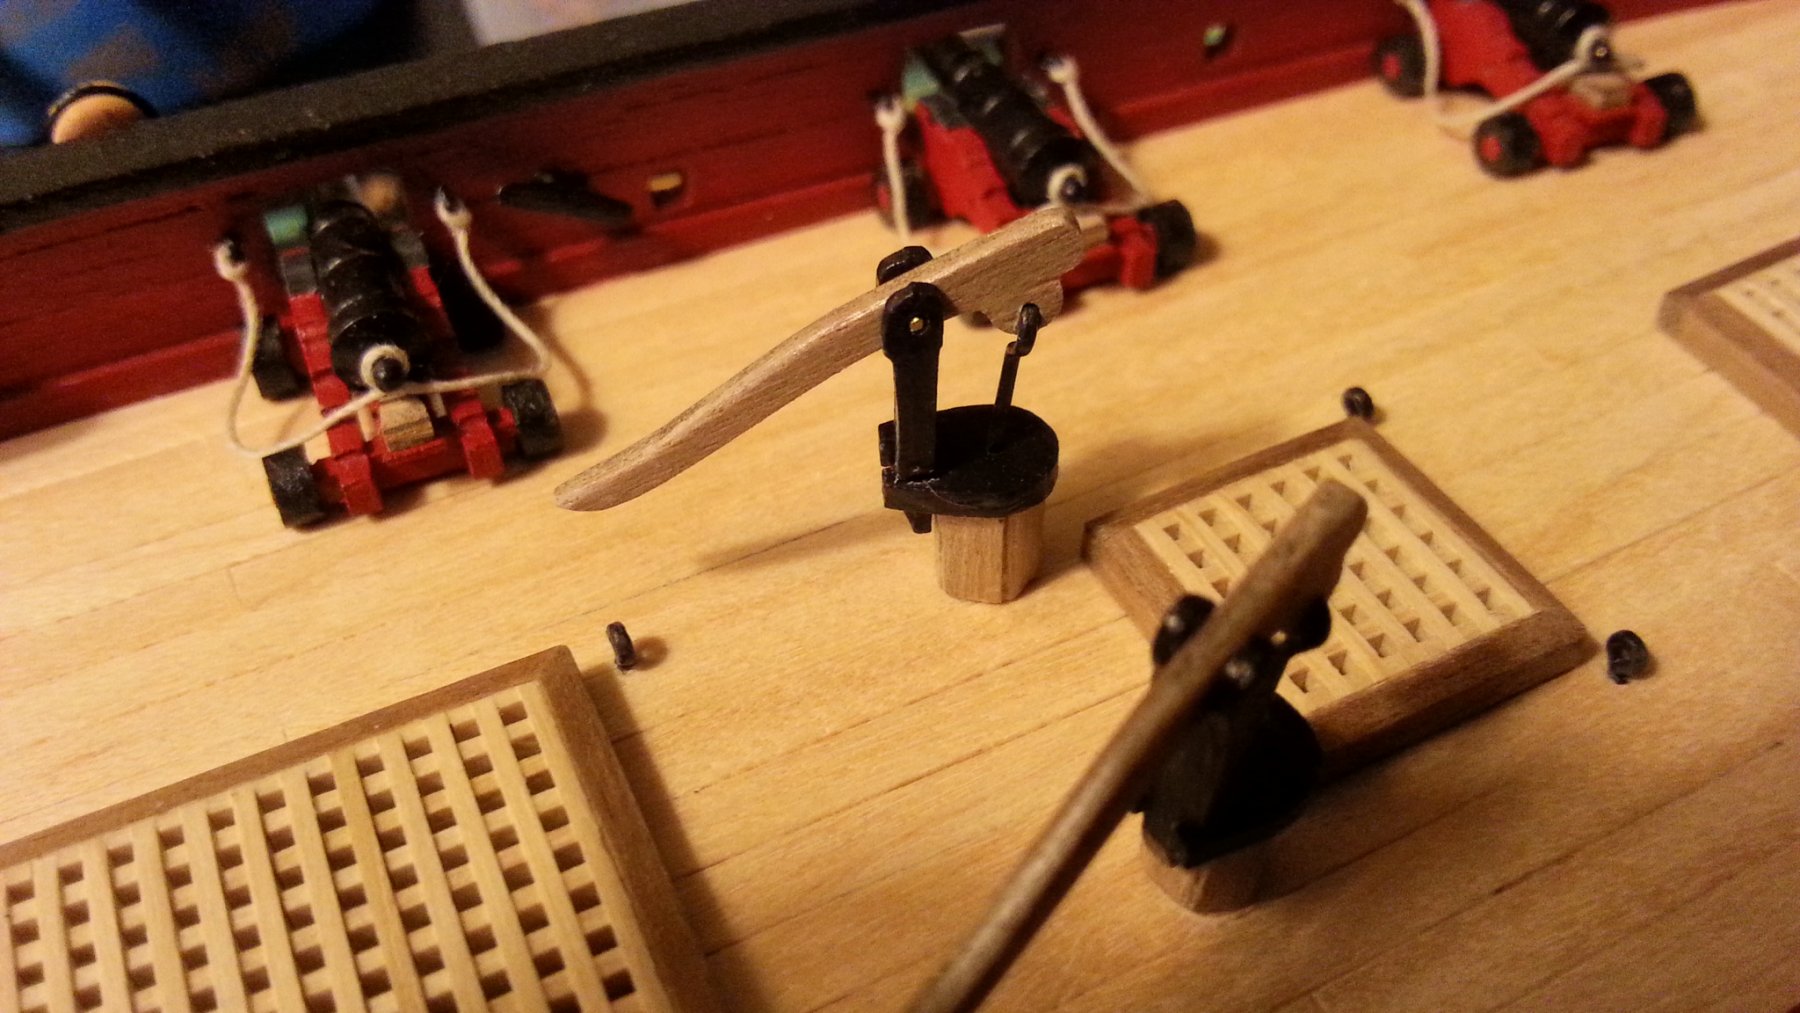
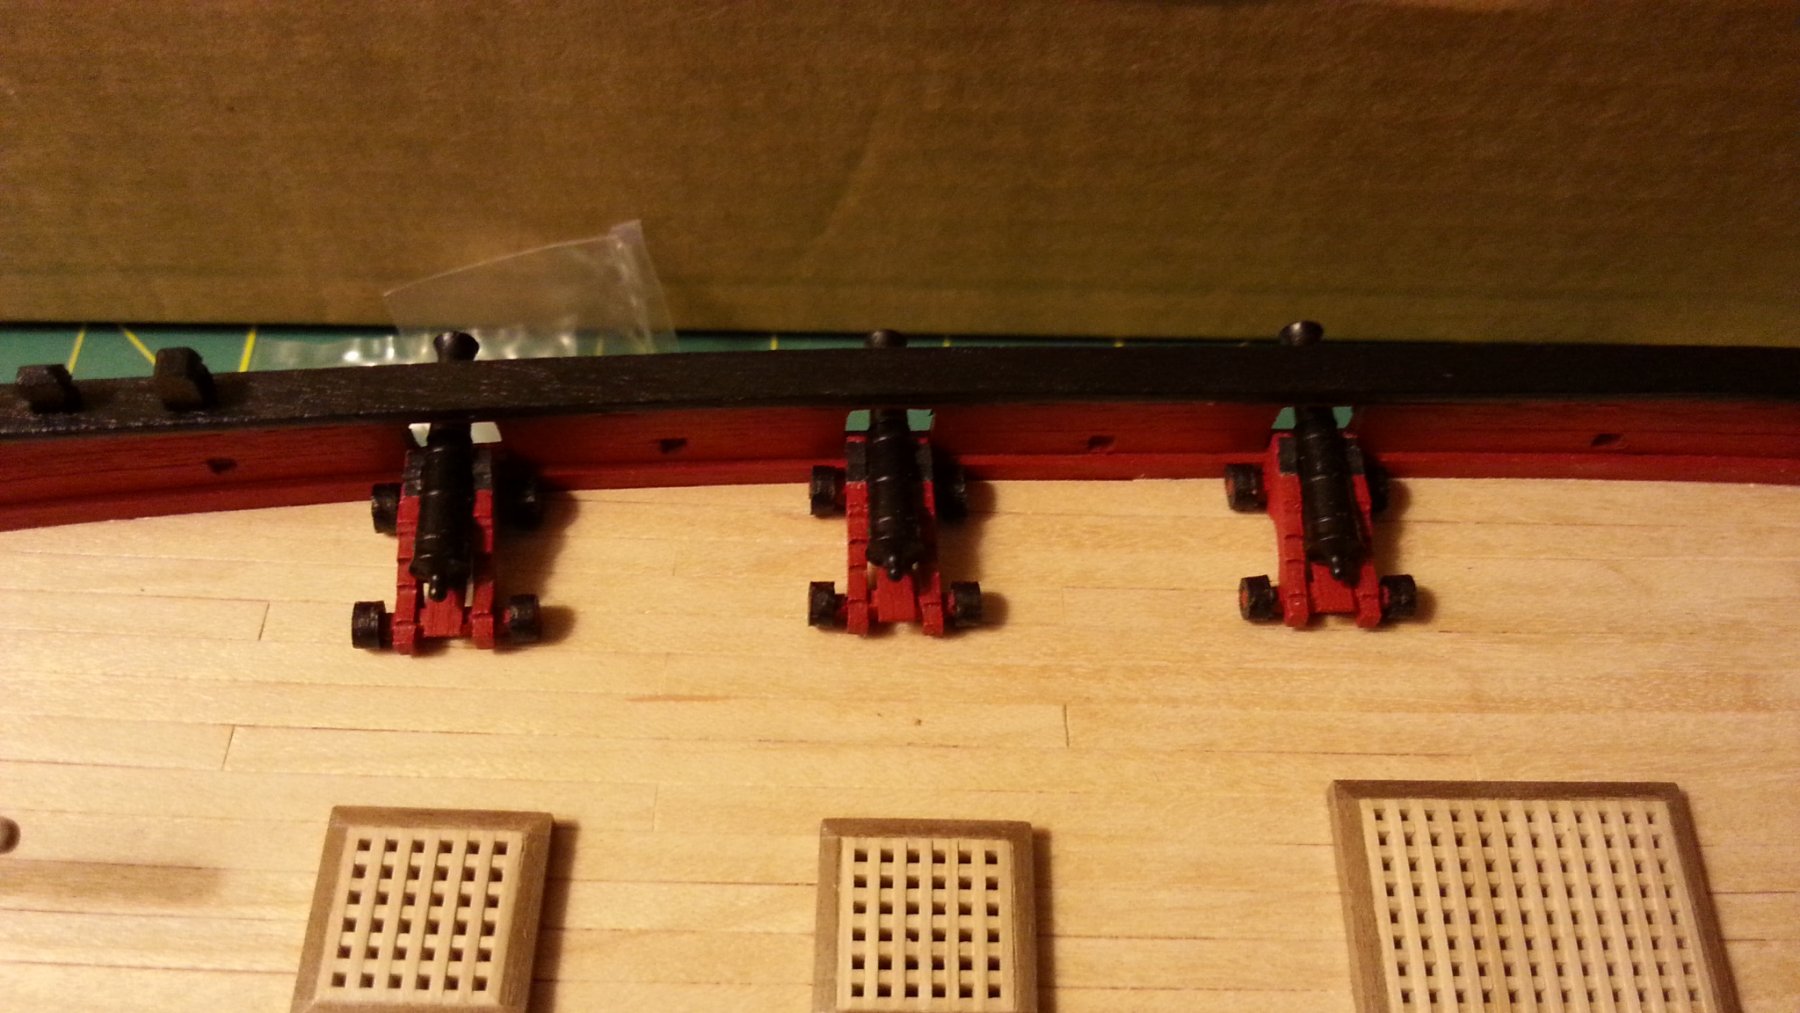
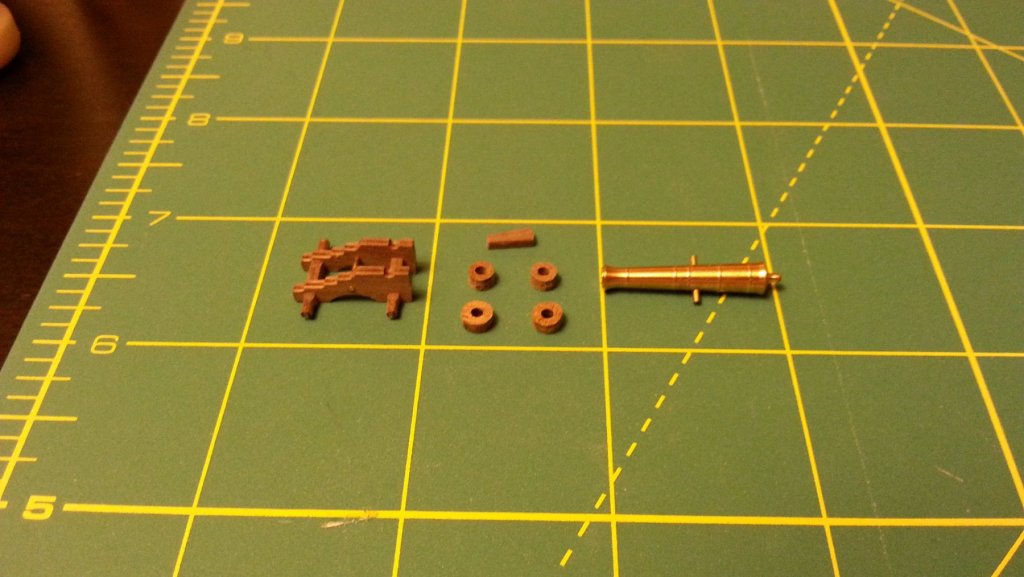
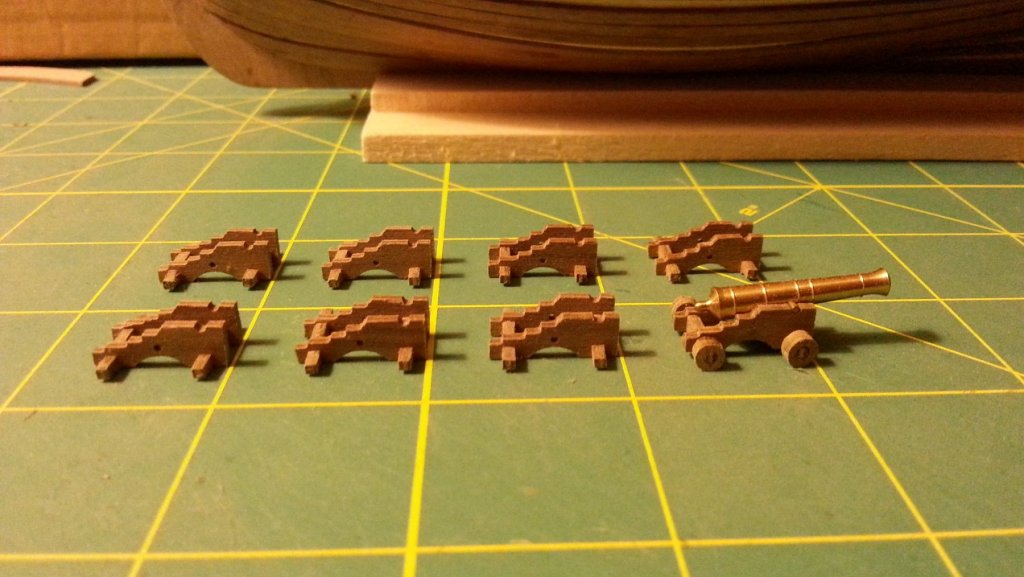
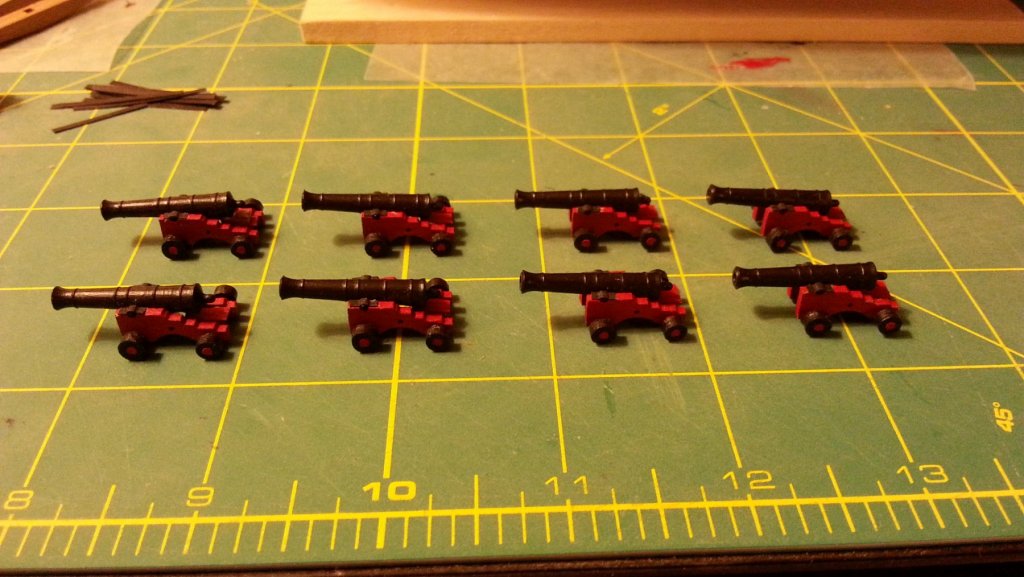
The Cannons I saw on some of the older builds that the guns were badly cast white metal but at some point Caldercraft upgraded to turned brass. I was impressed with the carriages to but I did add a tray for the quoin. I could have kept the wheels natural but they were so hard to sand down to make them look nicer.
- 49 replies
-
- 8
-
-
- sherbourne
- caldercraft
- (and 1 more)
-
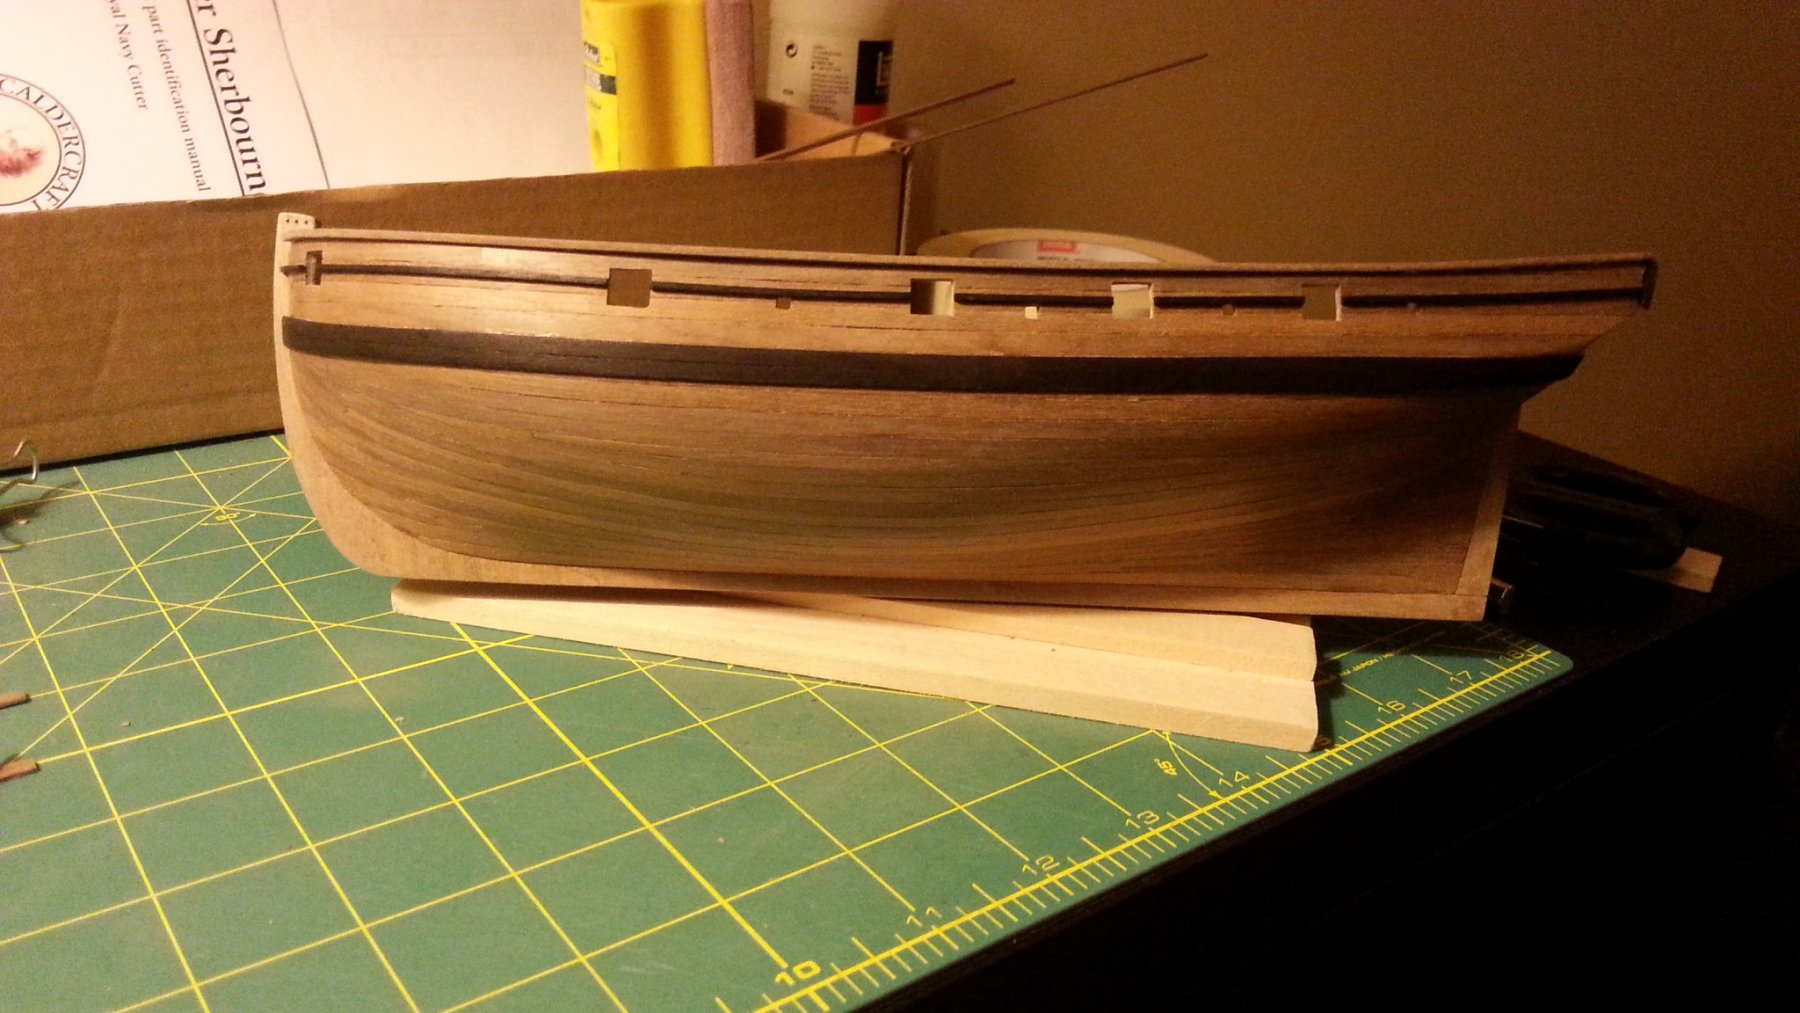
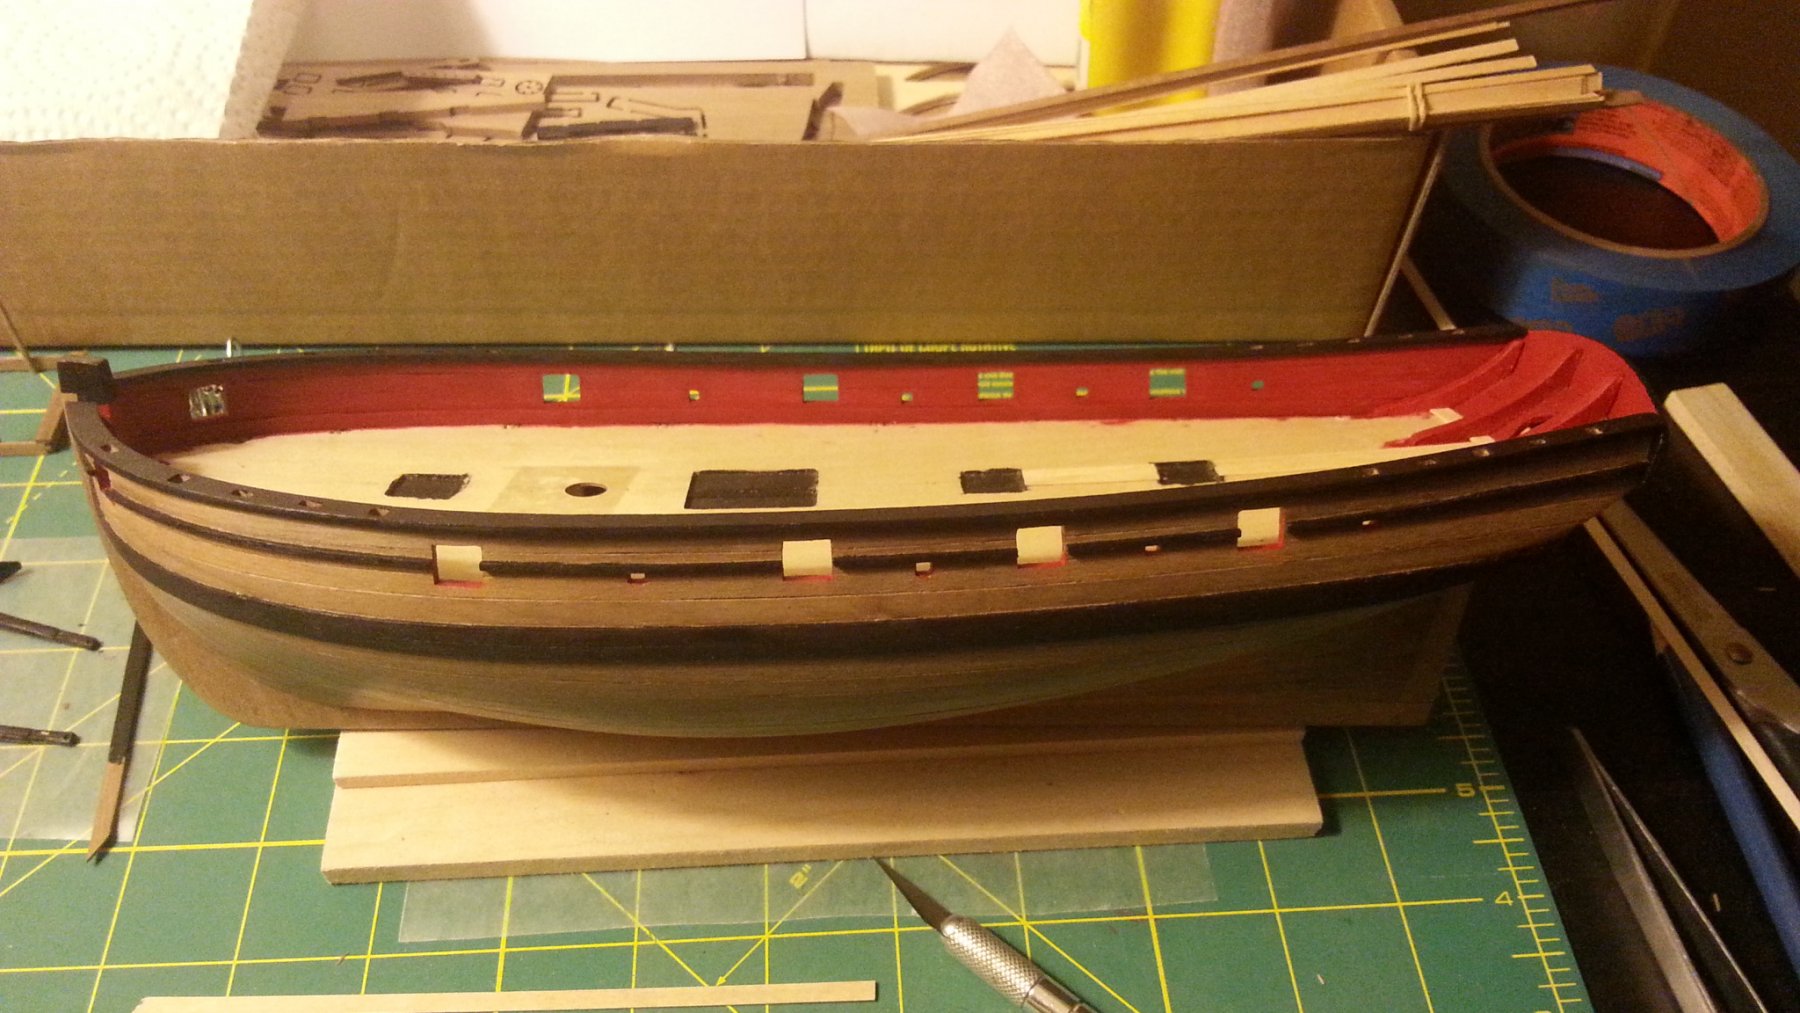
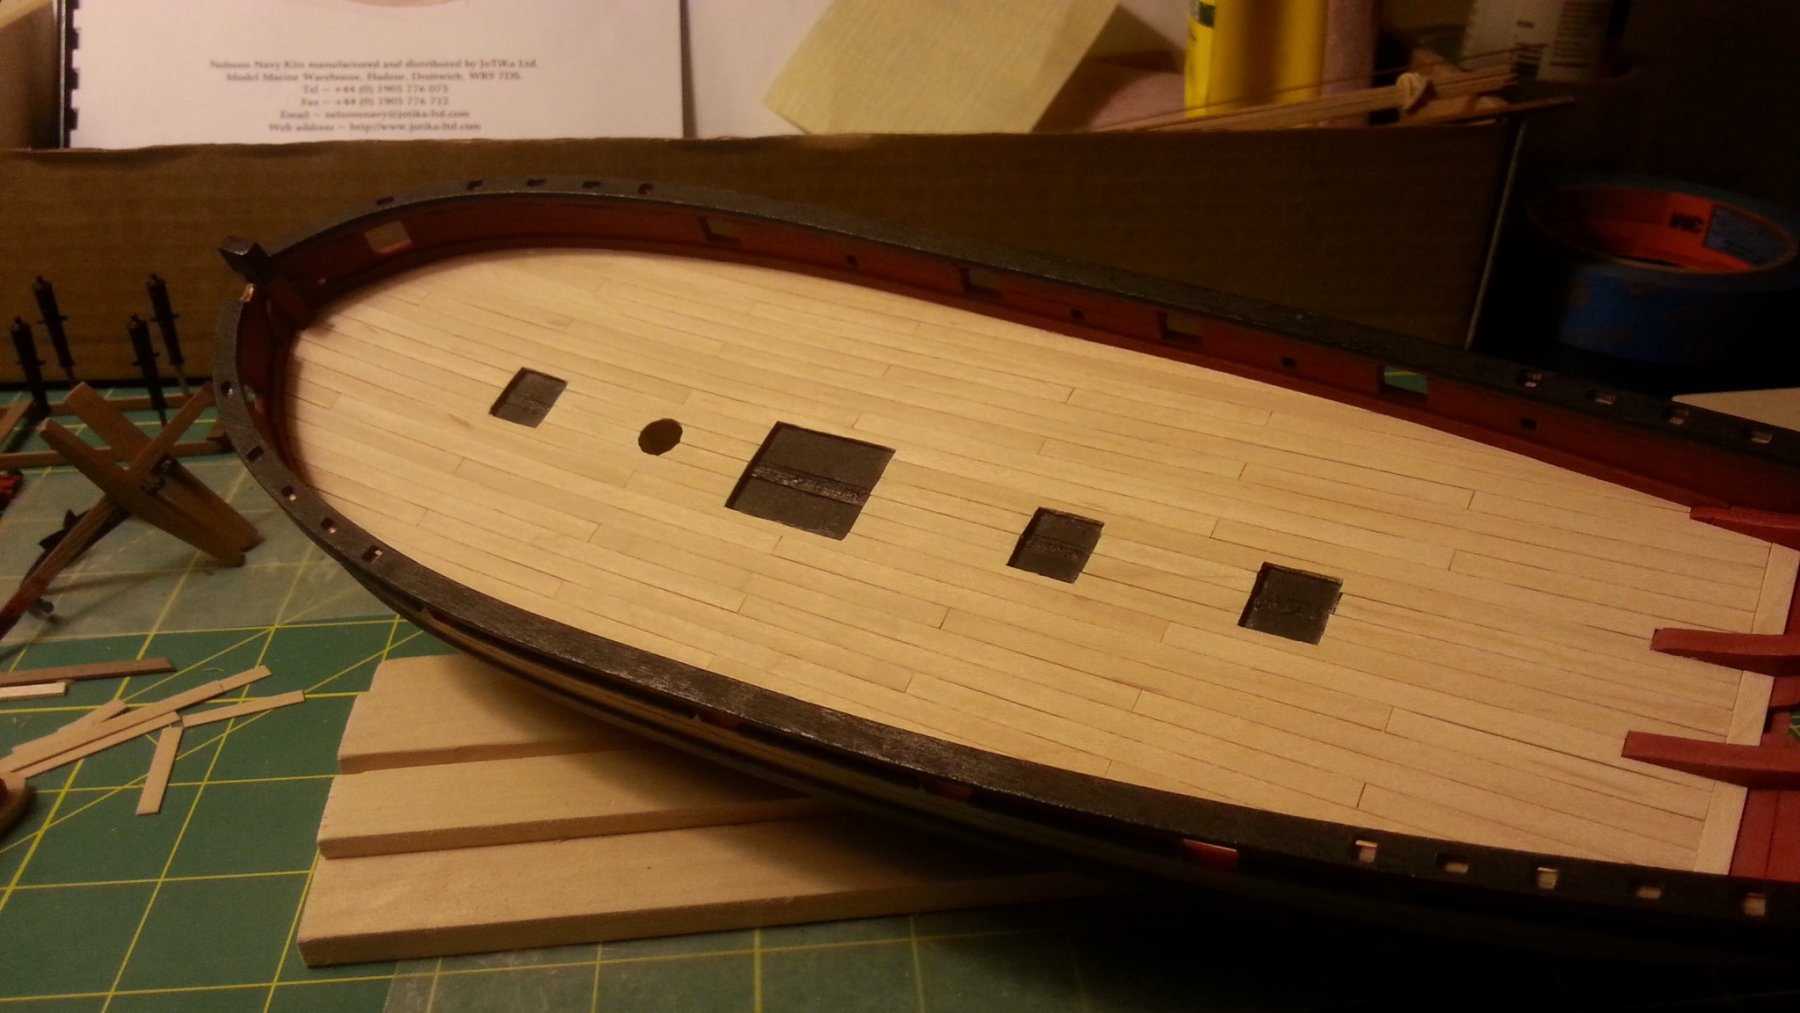
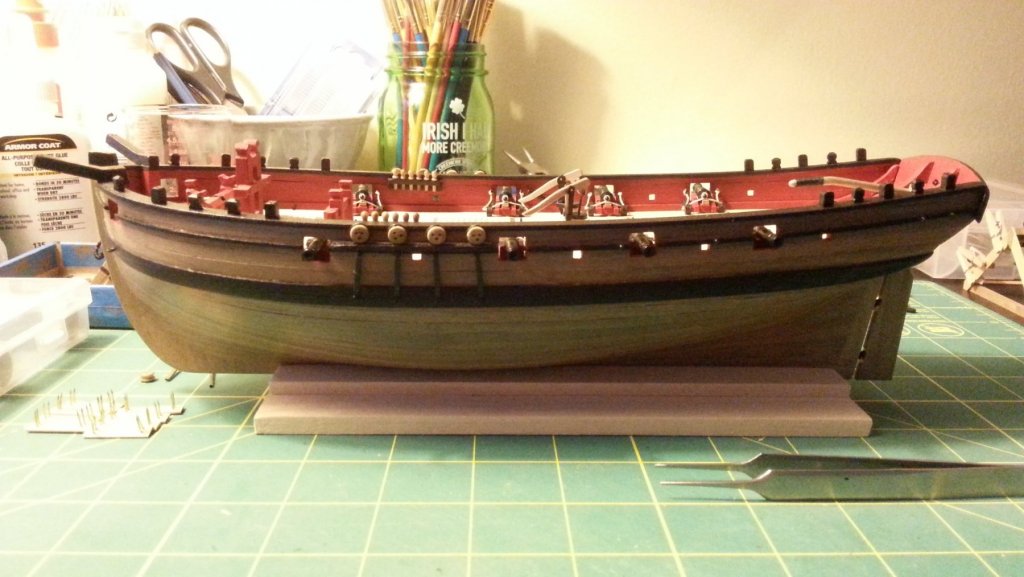
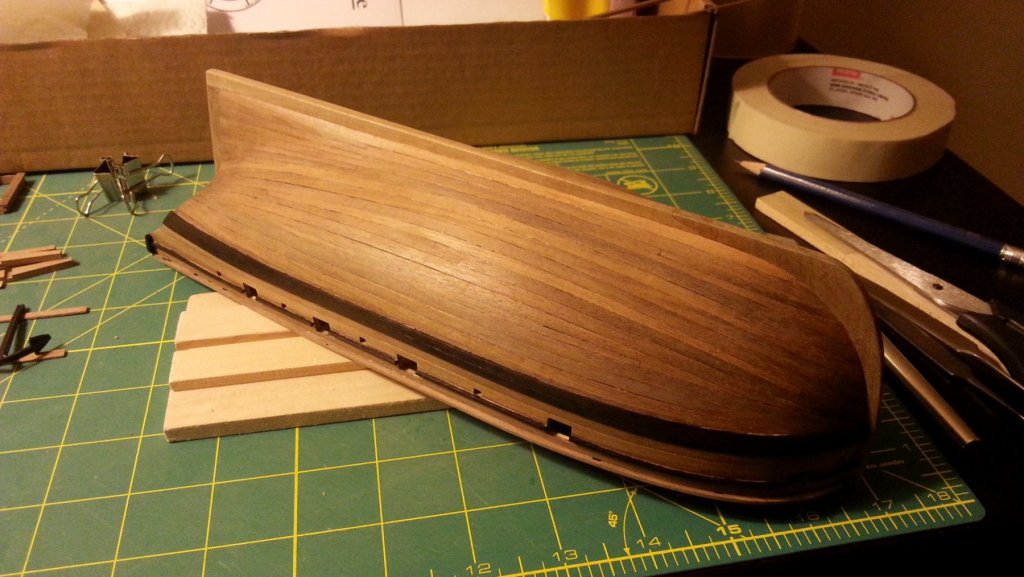
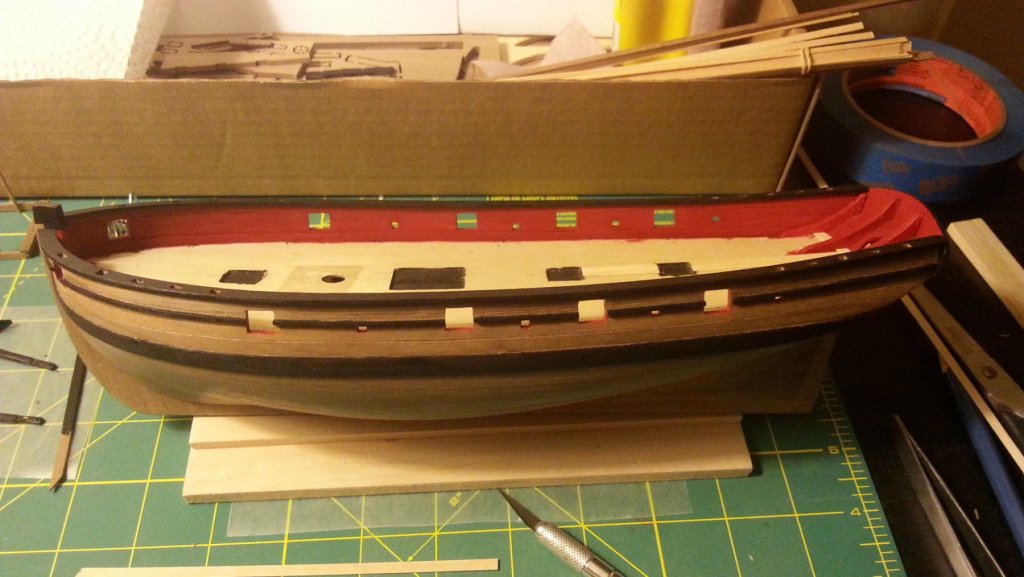
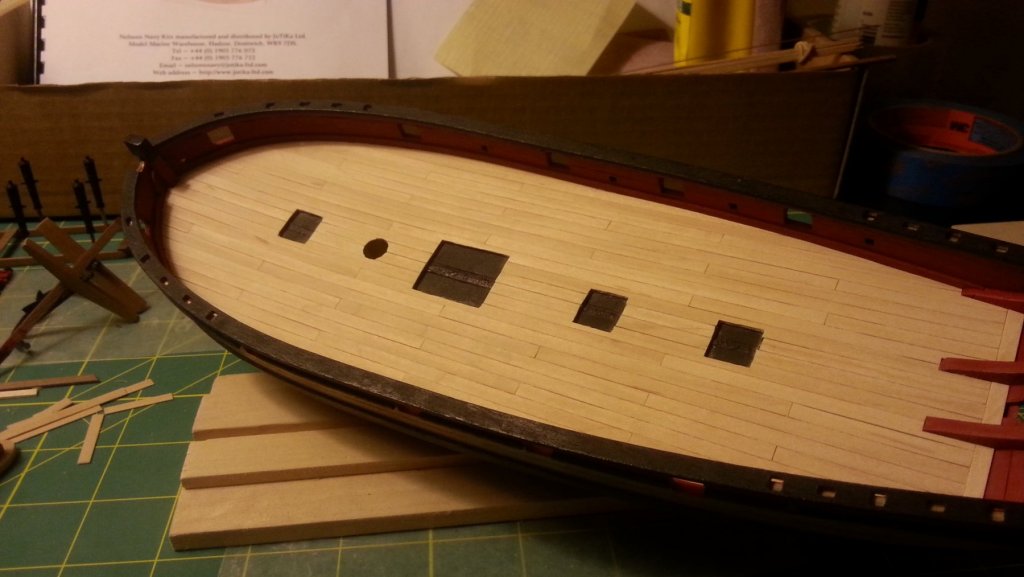
The wales The wales were a bit tricky to put on. I used a few spots of cyano glue to hold the lateral bend, I didn't know how else to do it. The grainy blurry pictures don't really show it well. I do plan on getting a new camera soon so we can really see how lumpy she is Caprail + Bulwark paint the Capping rail went on really easy and with good spacing on each side for a lip. I guess I did something right for it to fit like that! I added spricketing along the bulwarks because I liked what I saw on other builds. The paint is some random acrylic I bought a while back and it probably wasn't the greatest choice. Should have bought the admiralty ones. I gave my best try at Ochre red. Deck planking I guess I could have used a marker on the edges of the planks for caulking. I regret not doing it but the admiral said she liked it like this. I will definitely get a little more adventurous with my next build in this regard, maybe even tree nailing.

- 49 replies
-
- 11
-
-
- sherbourne
- caldercraft
- (and 1 more)
-
I just ordered my HMS Snake a few day ago, I will definitely be following you build!
- 1,144 replies
-
- 2
-
-
- snake
- caldercraft
- (and 1 more)