BenD
-
Posts
477 -
Joined
-
Last visited
Content Type
Profiles
Forums
Gallery
Events
Everything posted by BenD
-
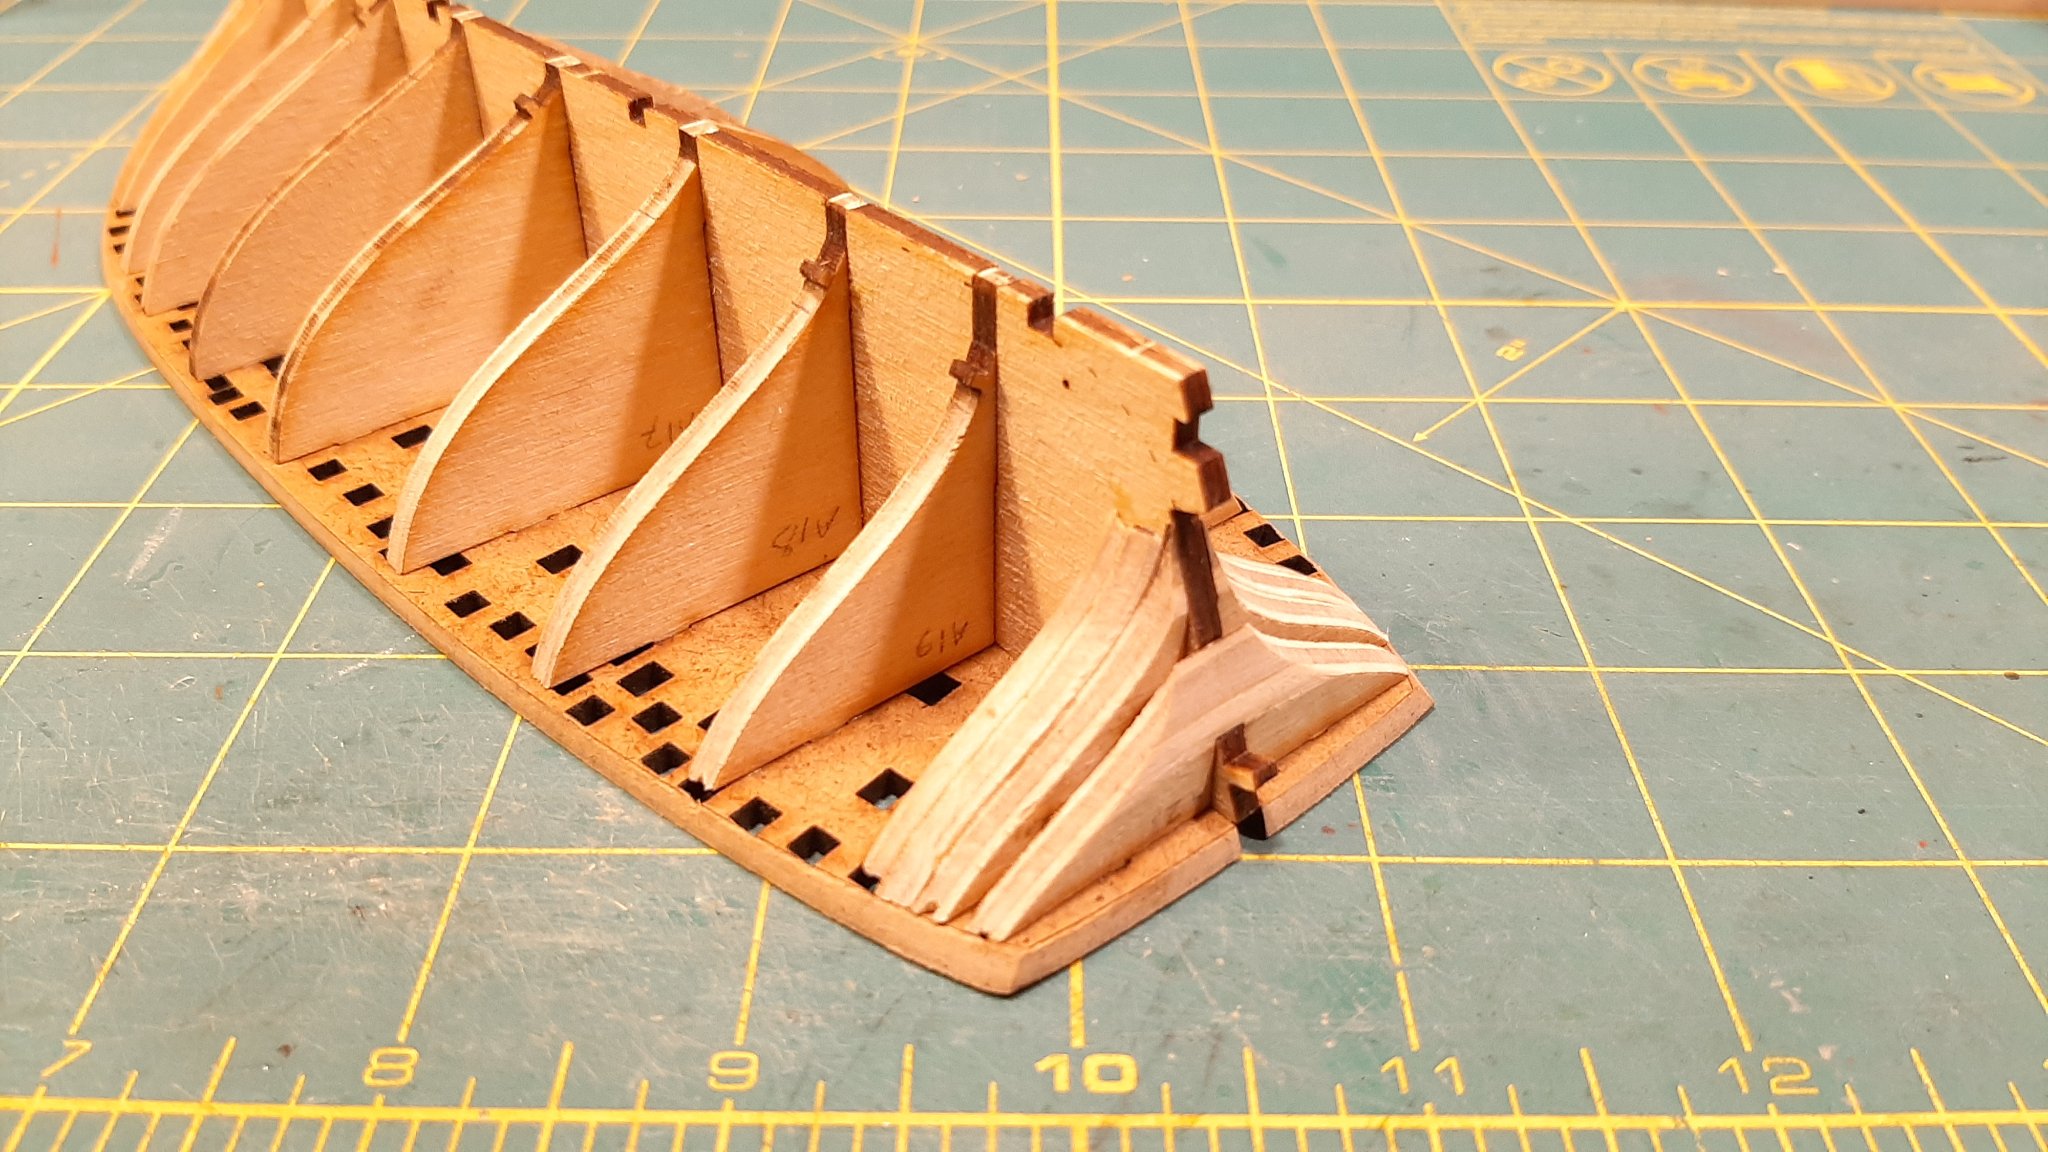
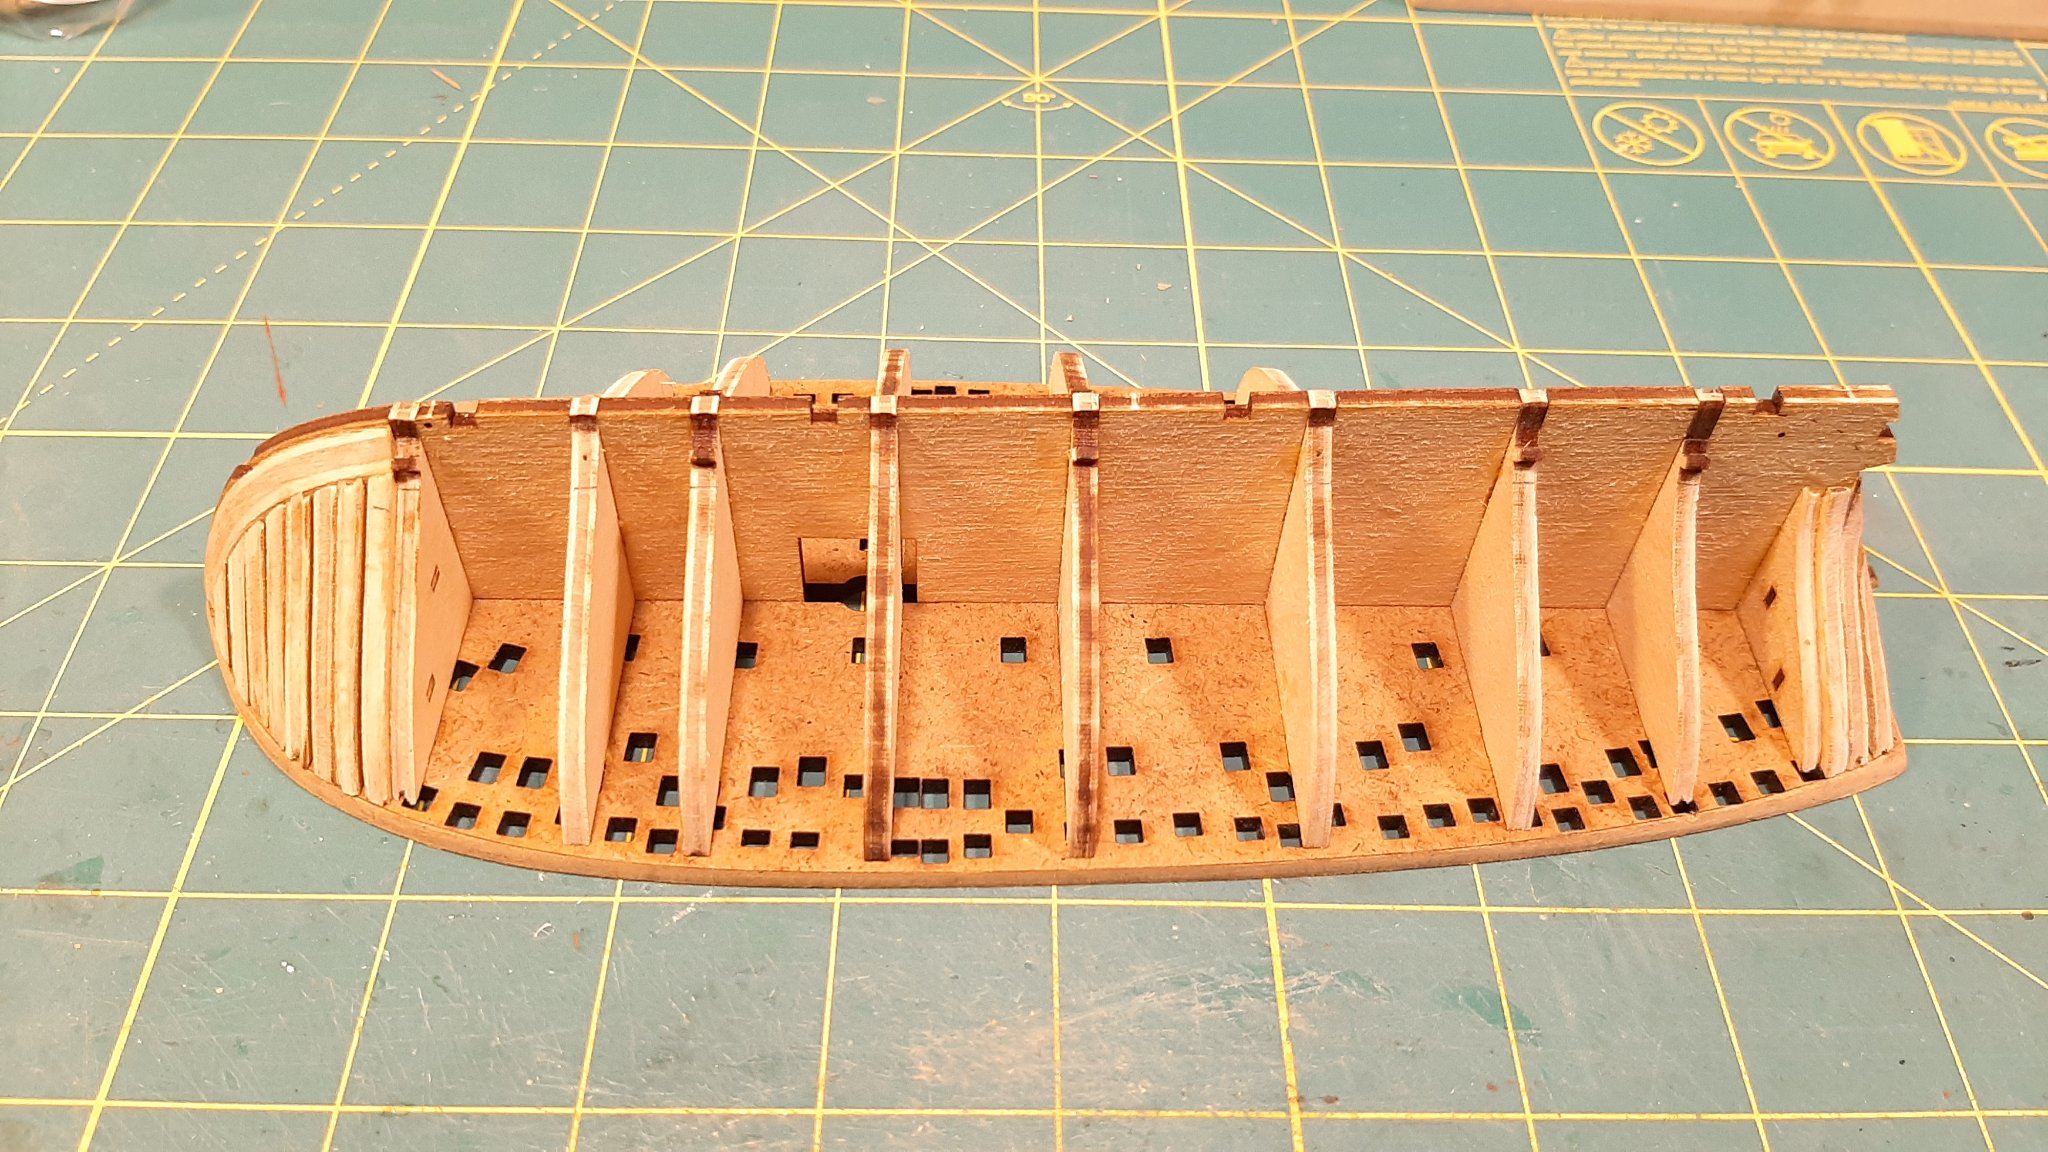
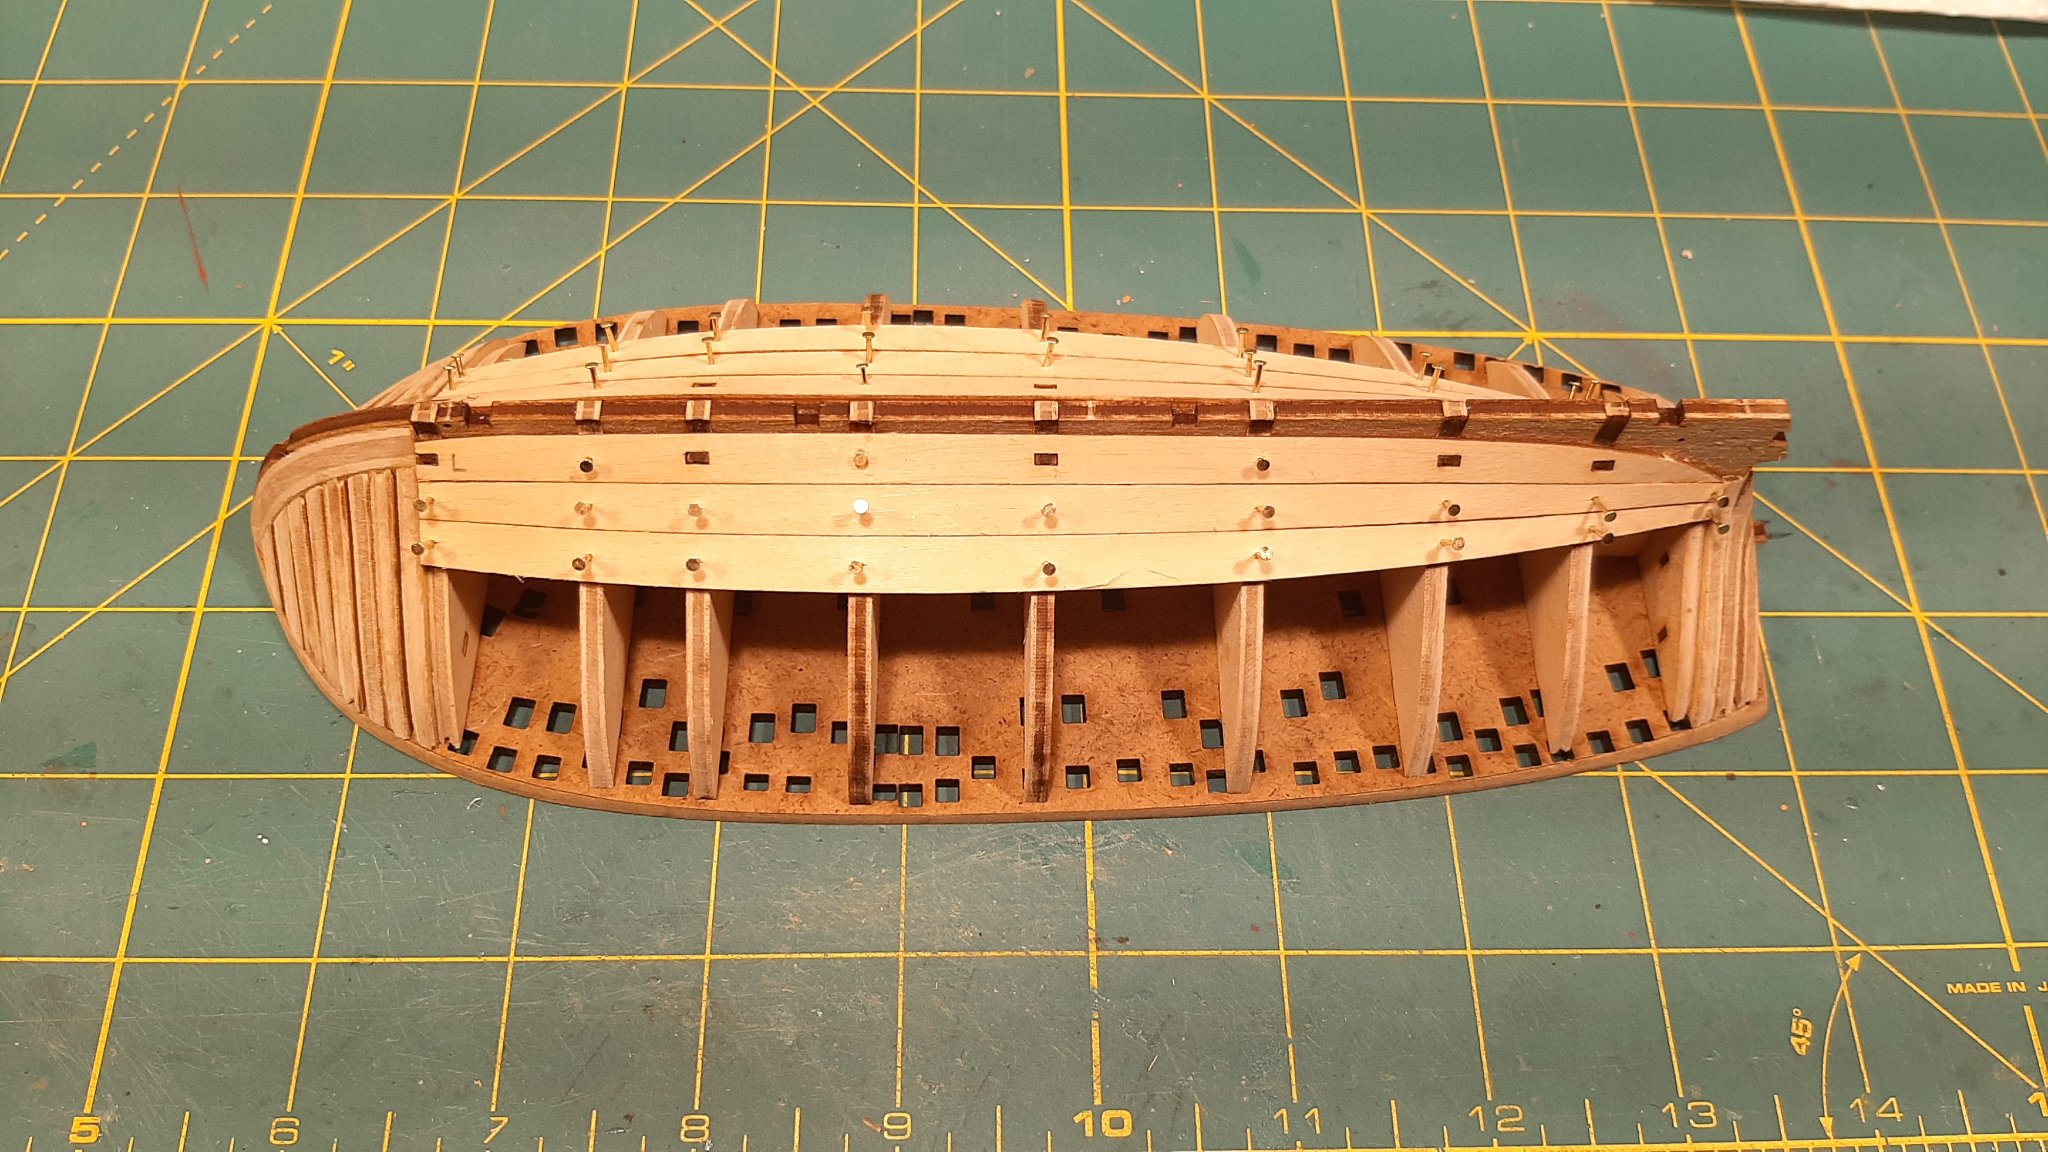
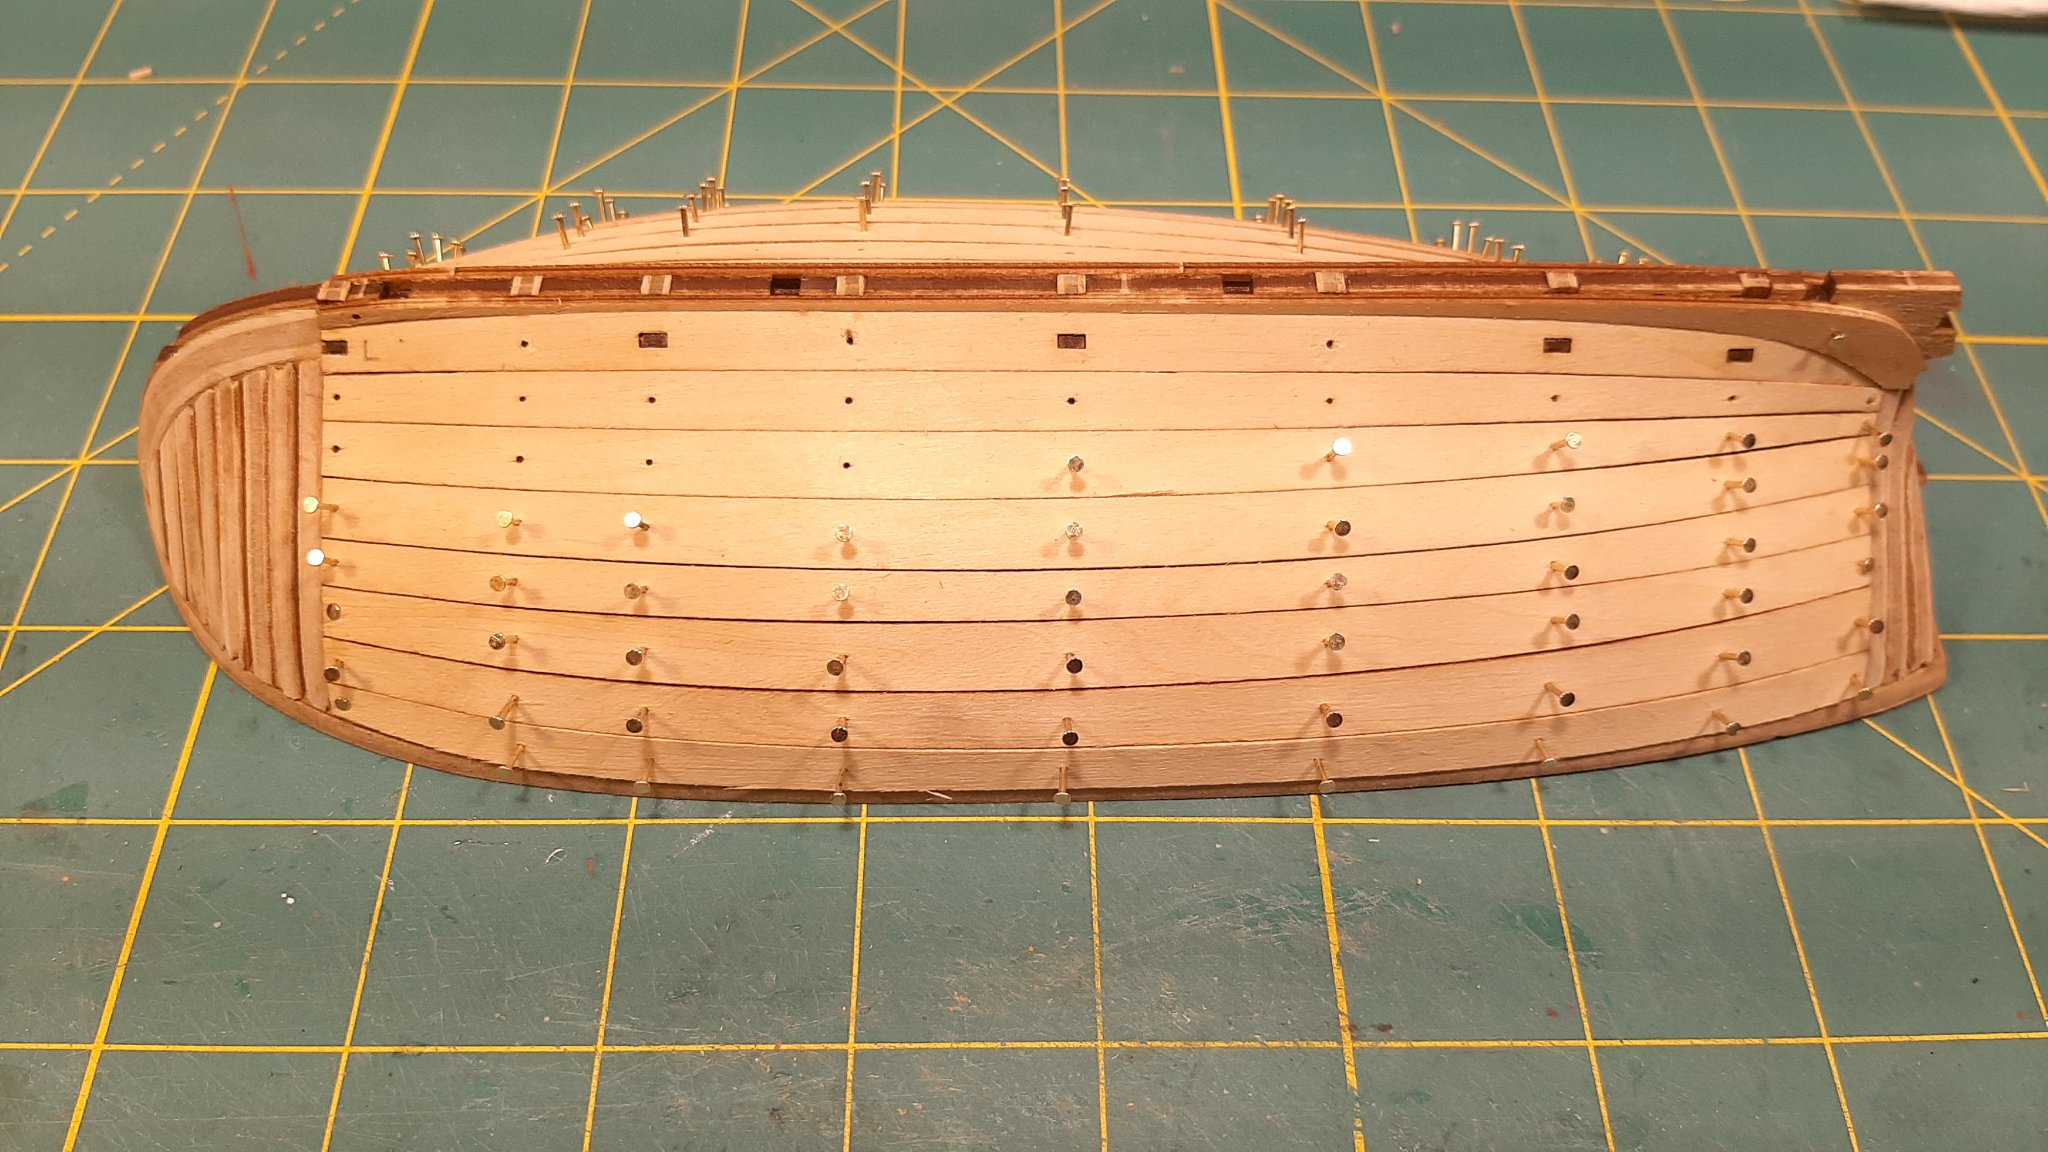
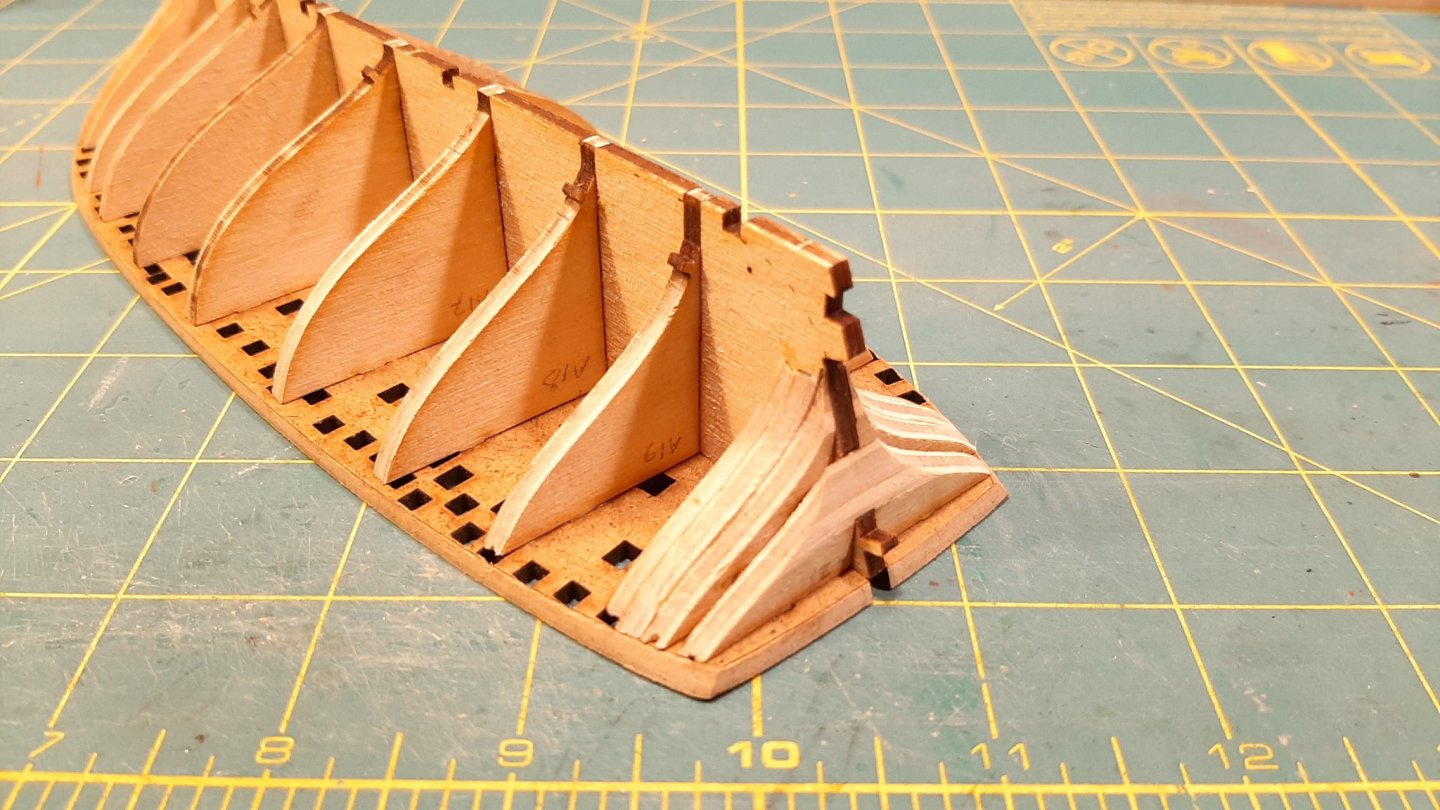
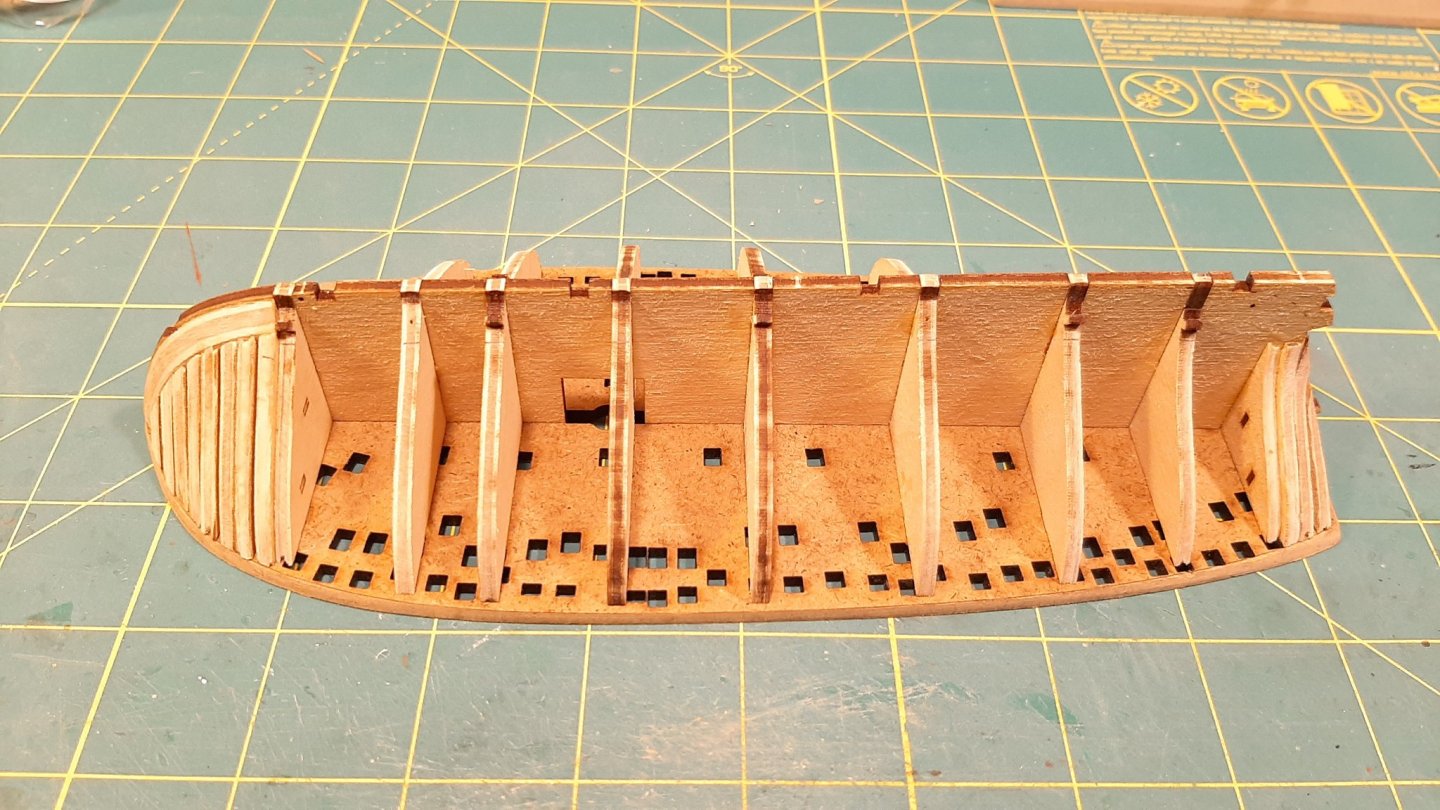
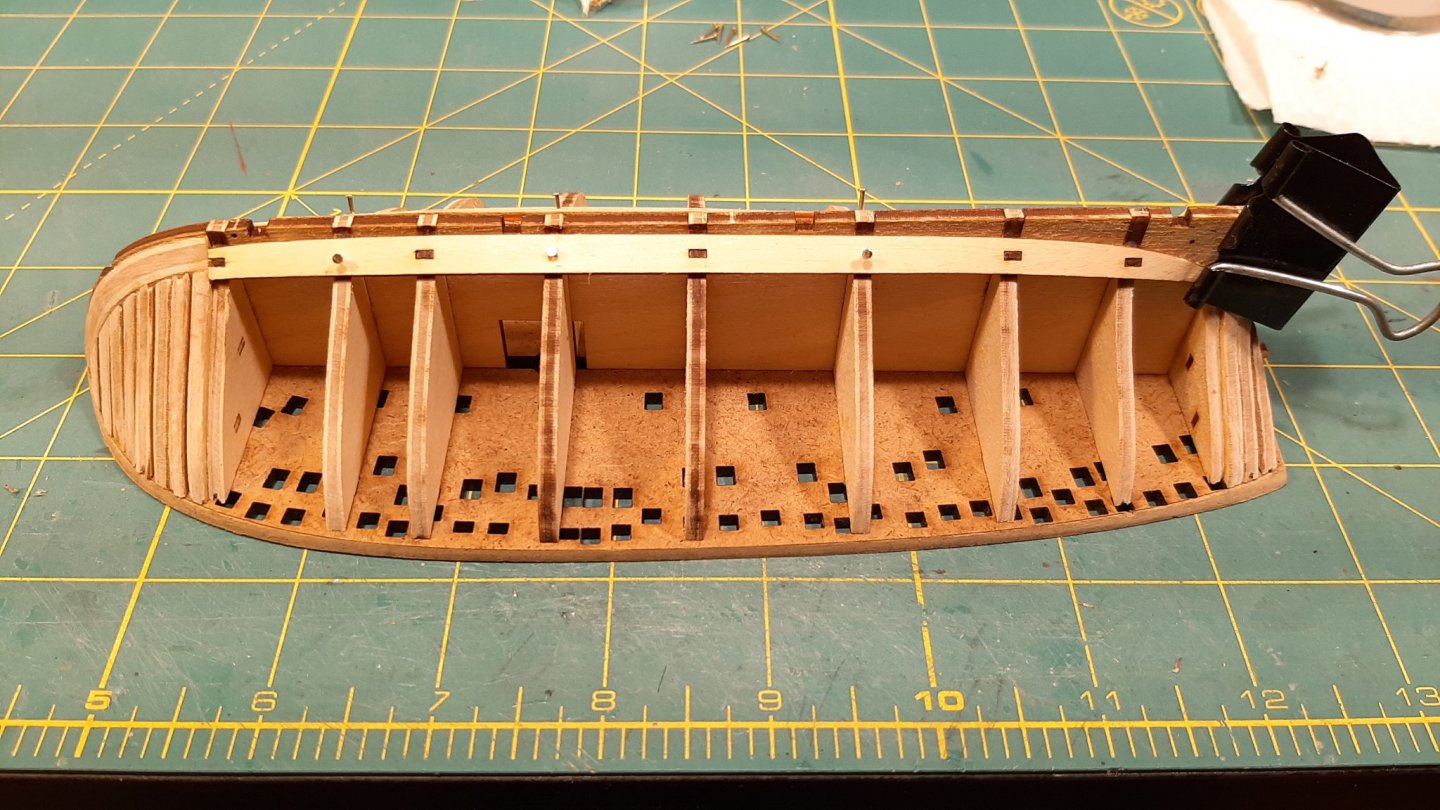
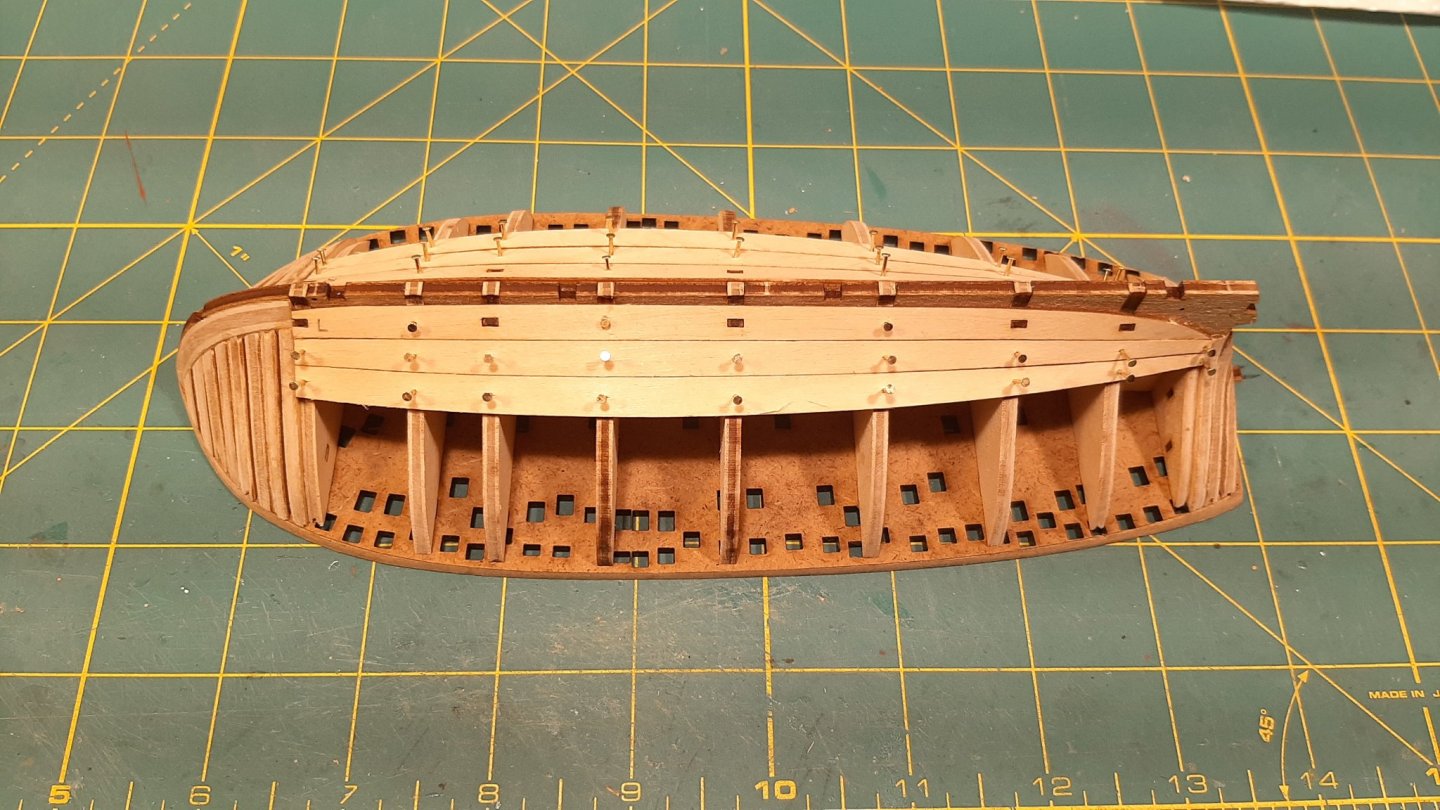
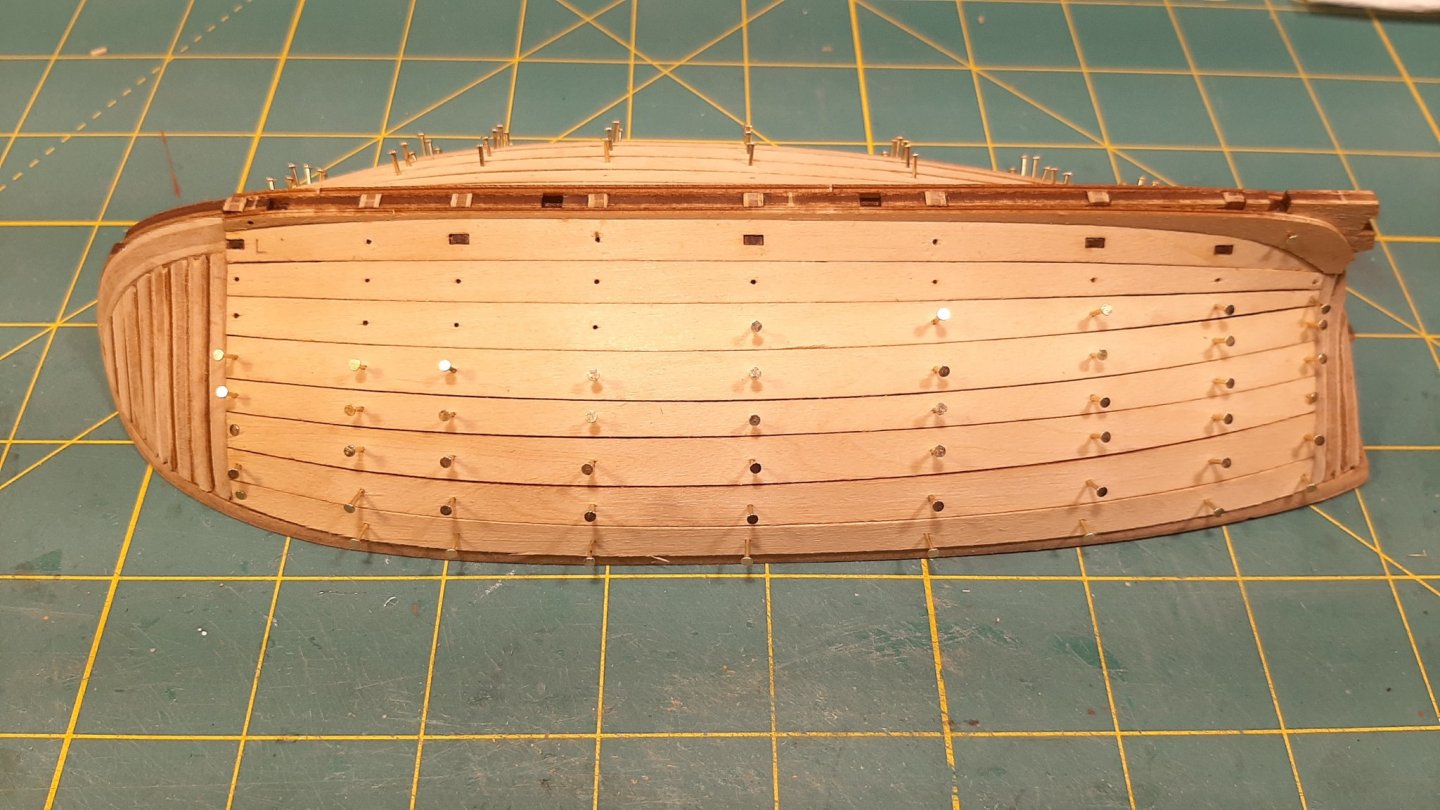
 welcome aboard WalrusGuy. This kit is flying together. Beveling bulkhead parts was a bit of a job and would have been easier with a Dremel tool. Finished the planking in one evening. No fuss, just one after the other. I must say that pre shaped planking is awesome to work with!
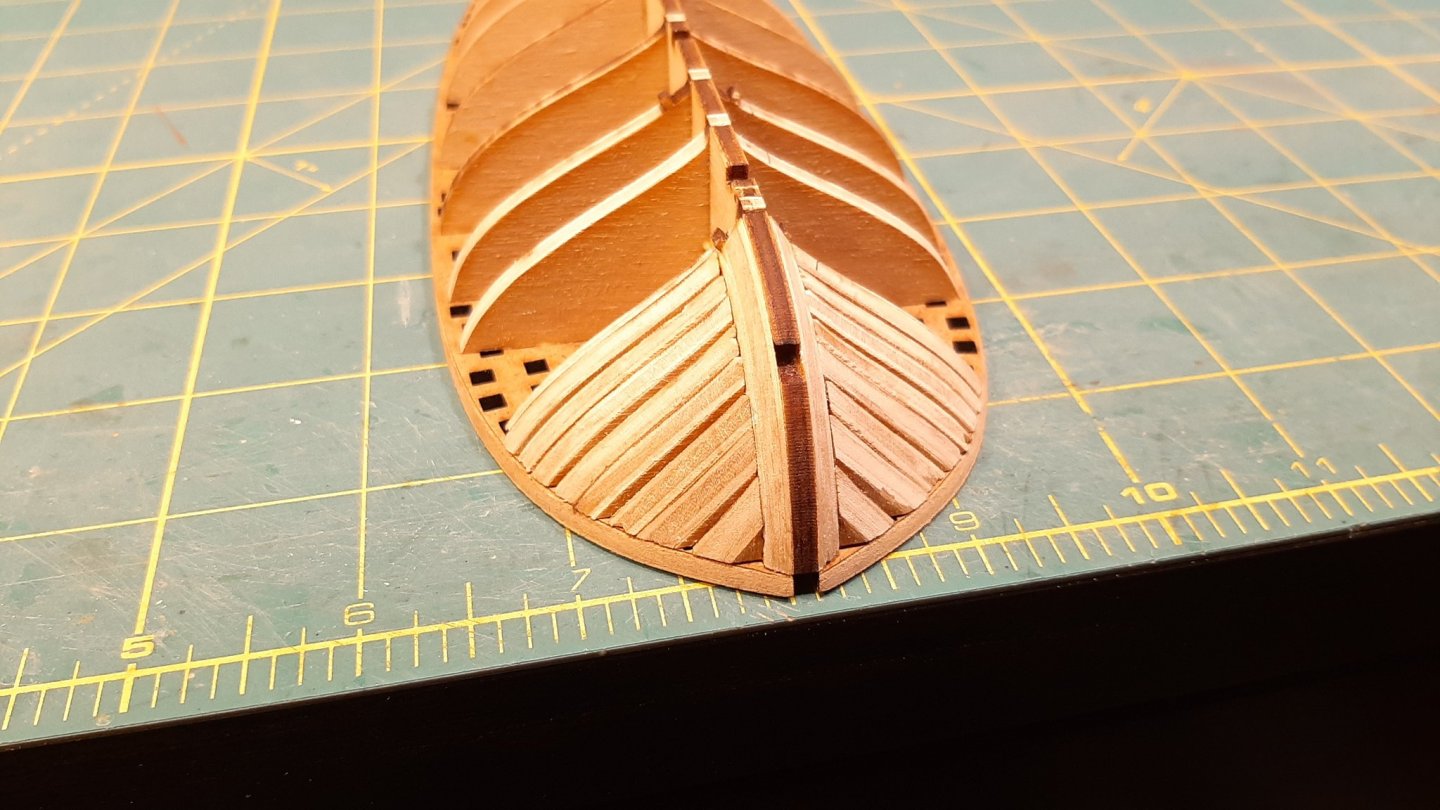
-
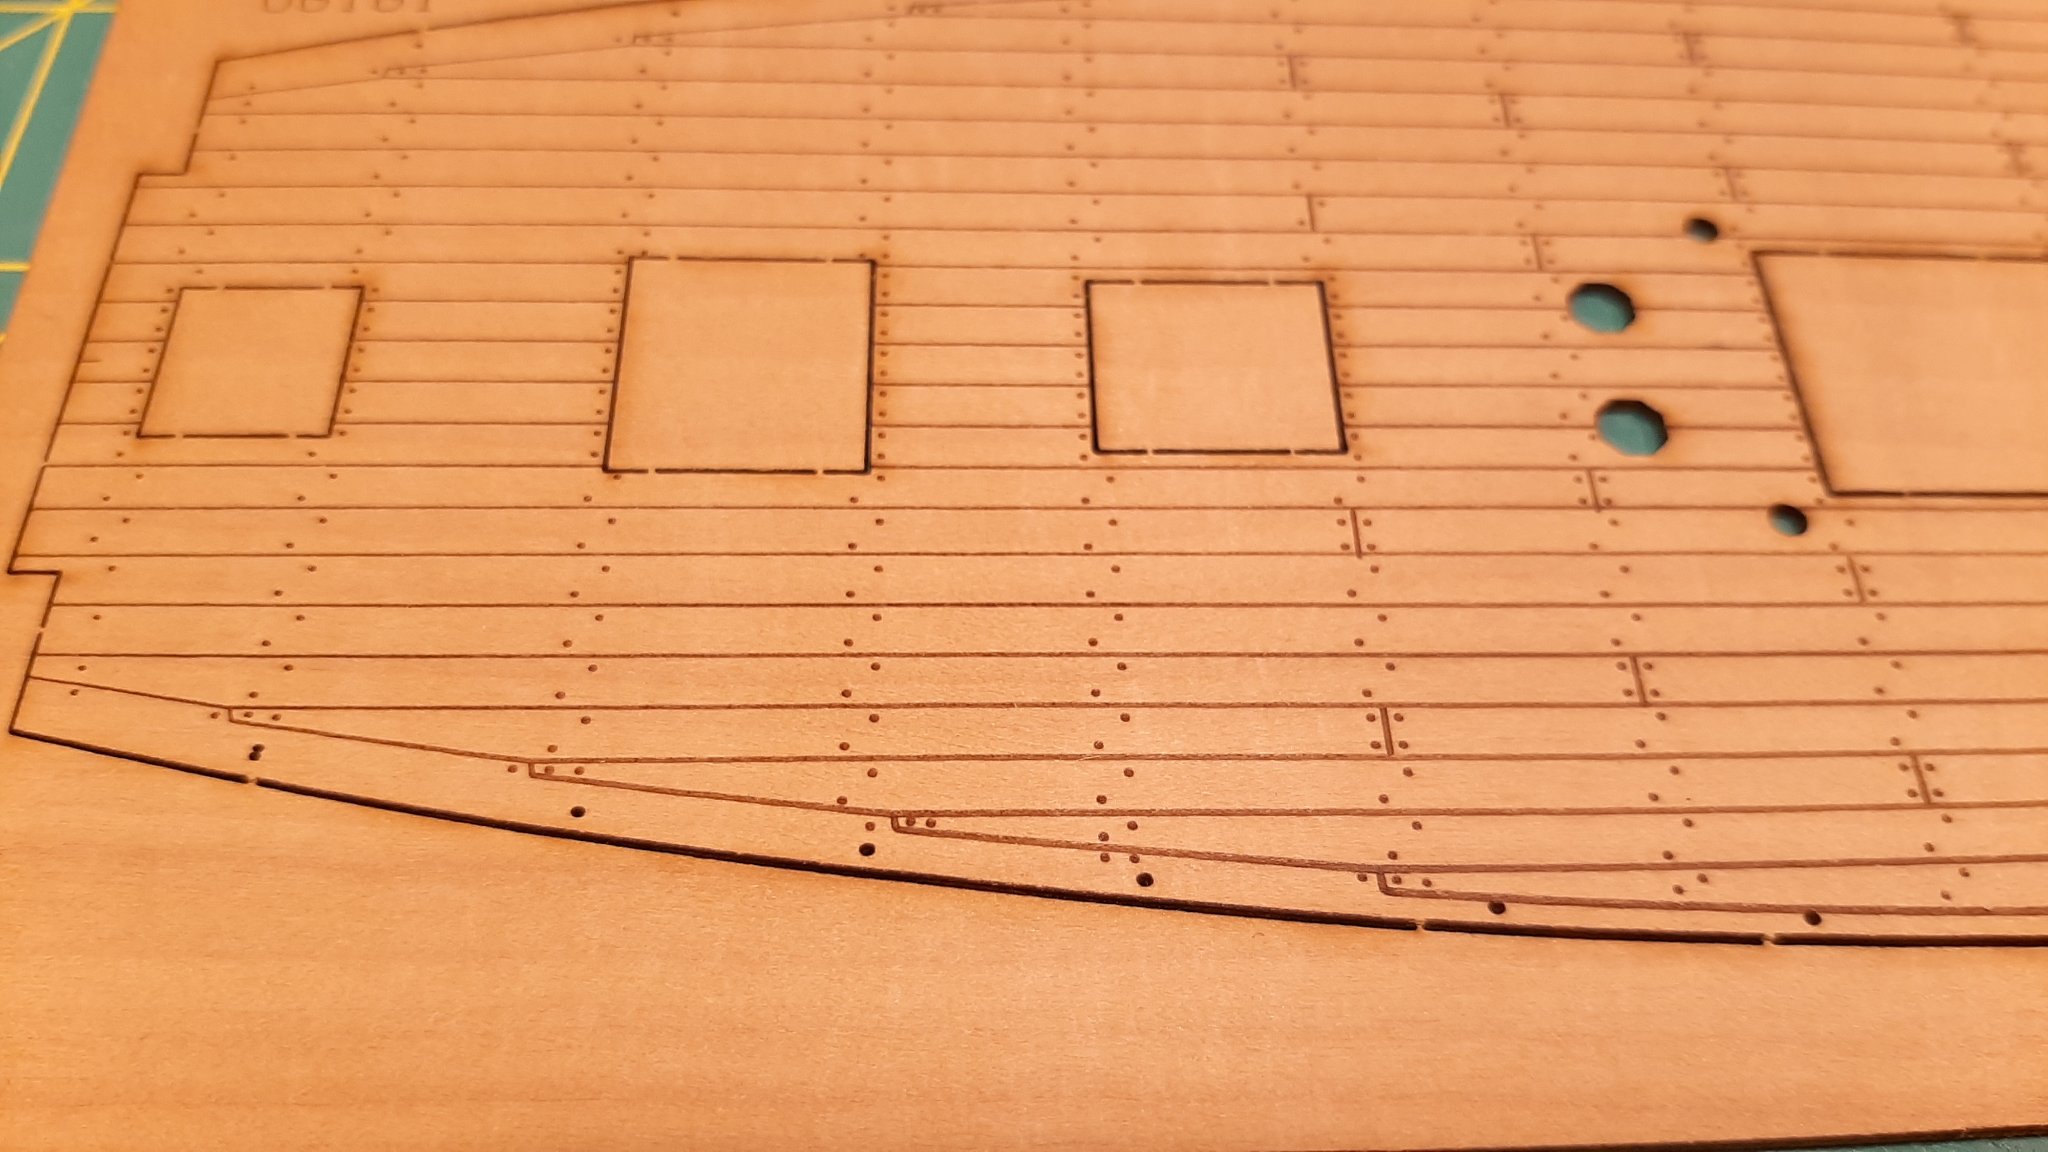
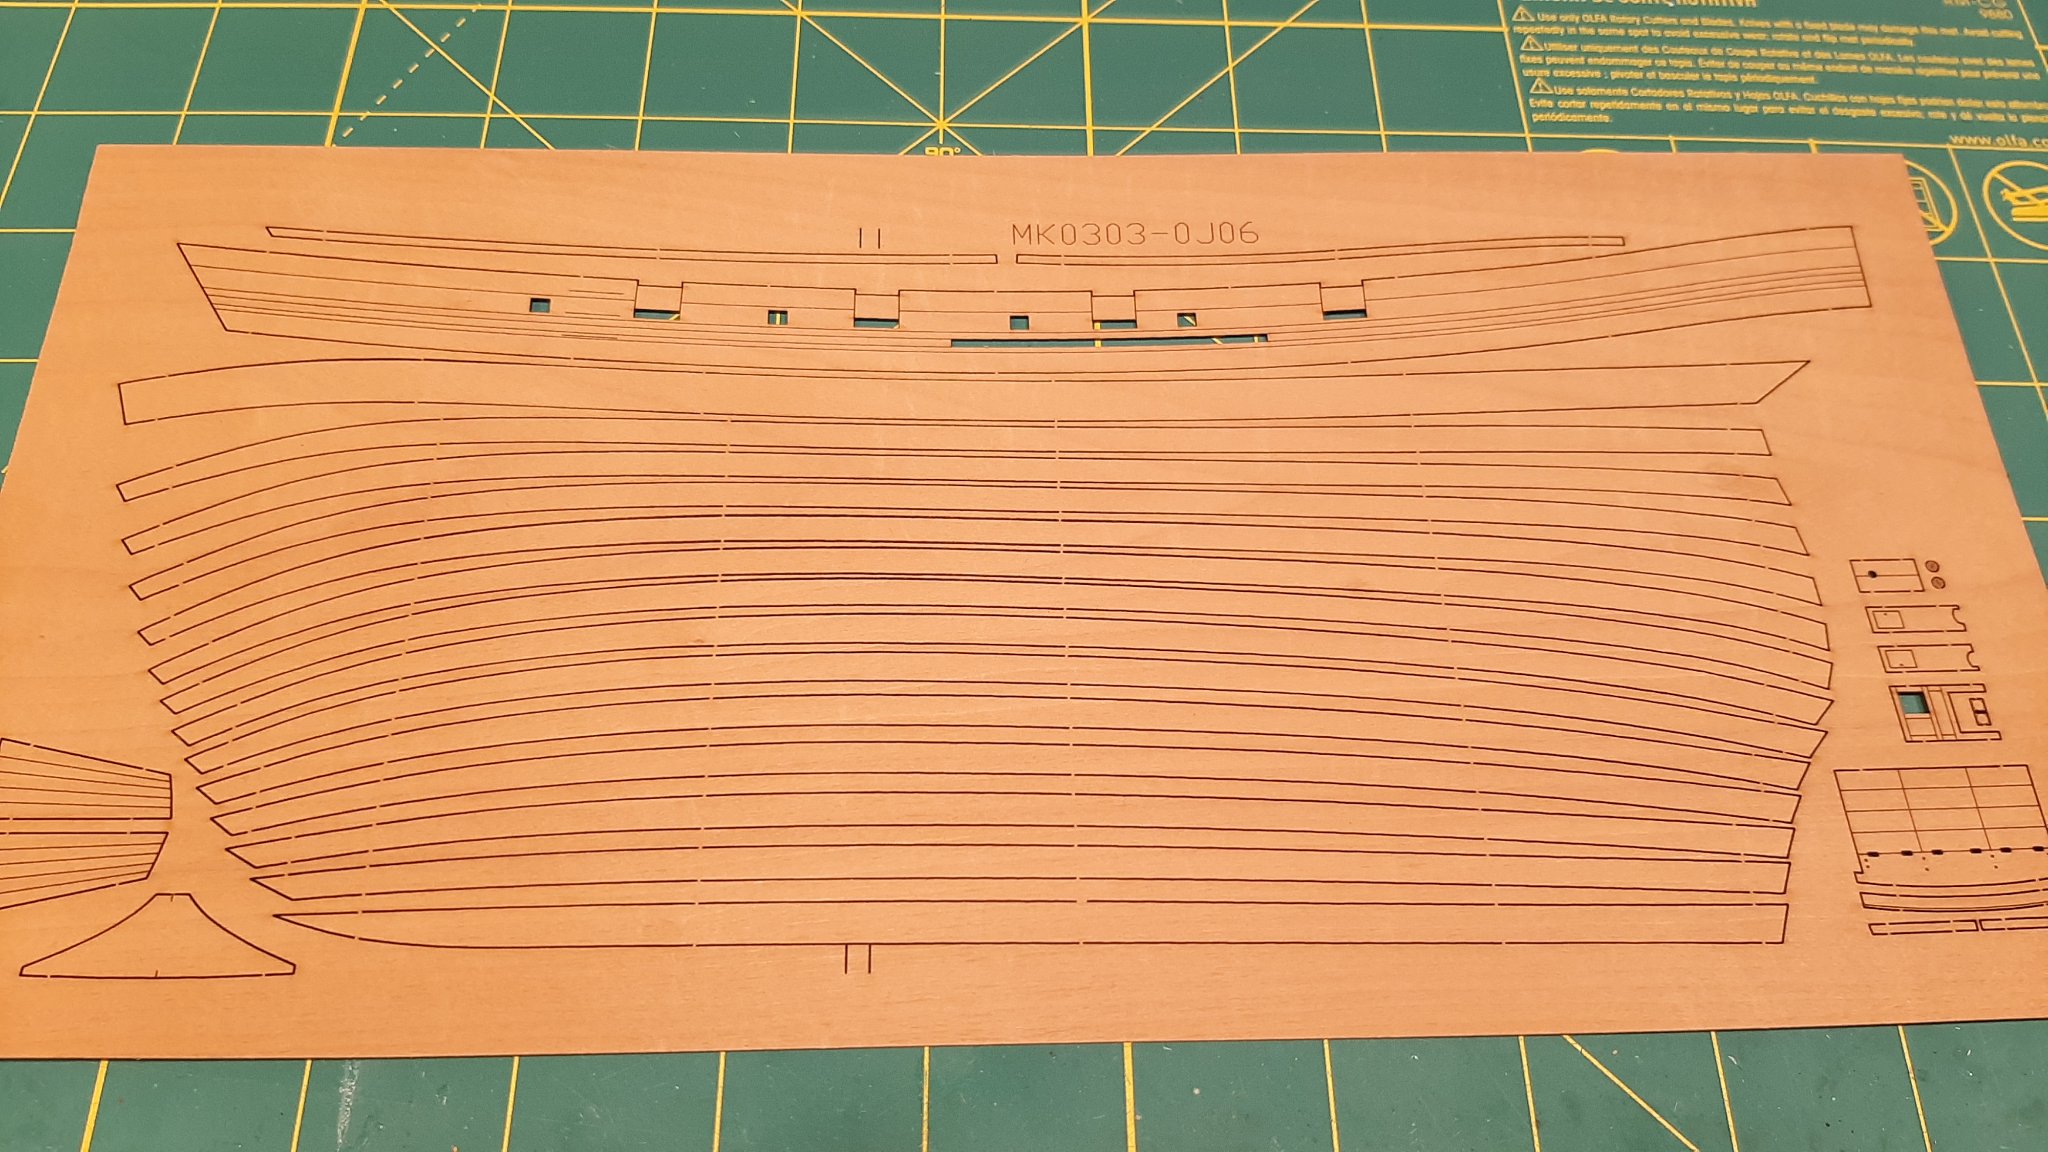
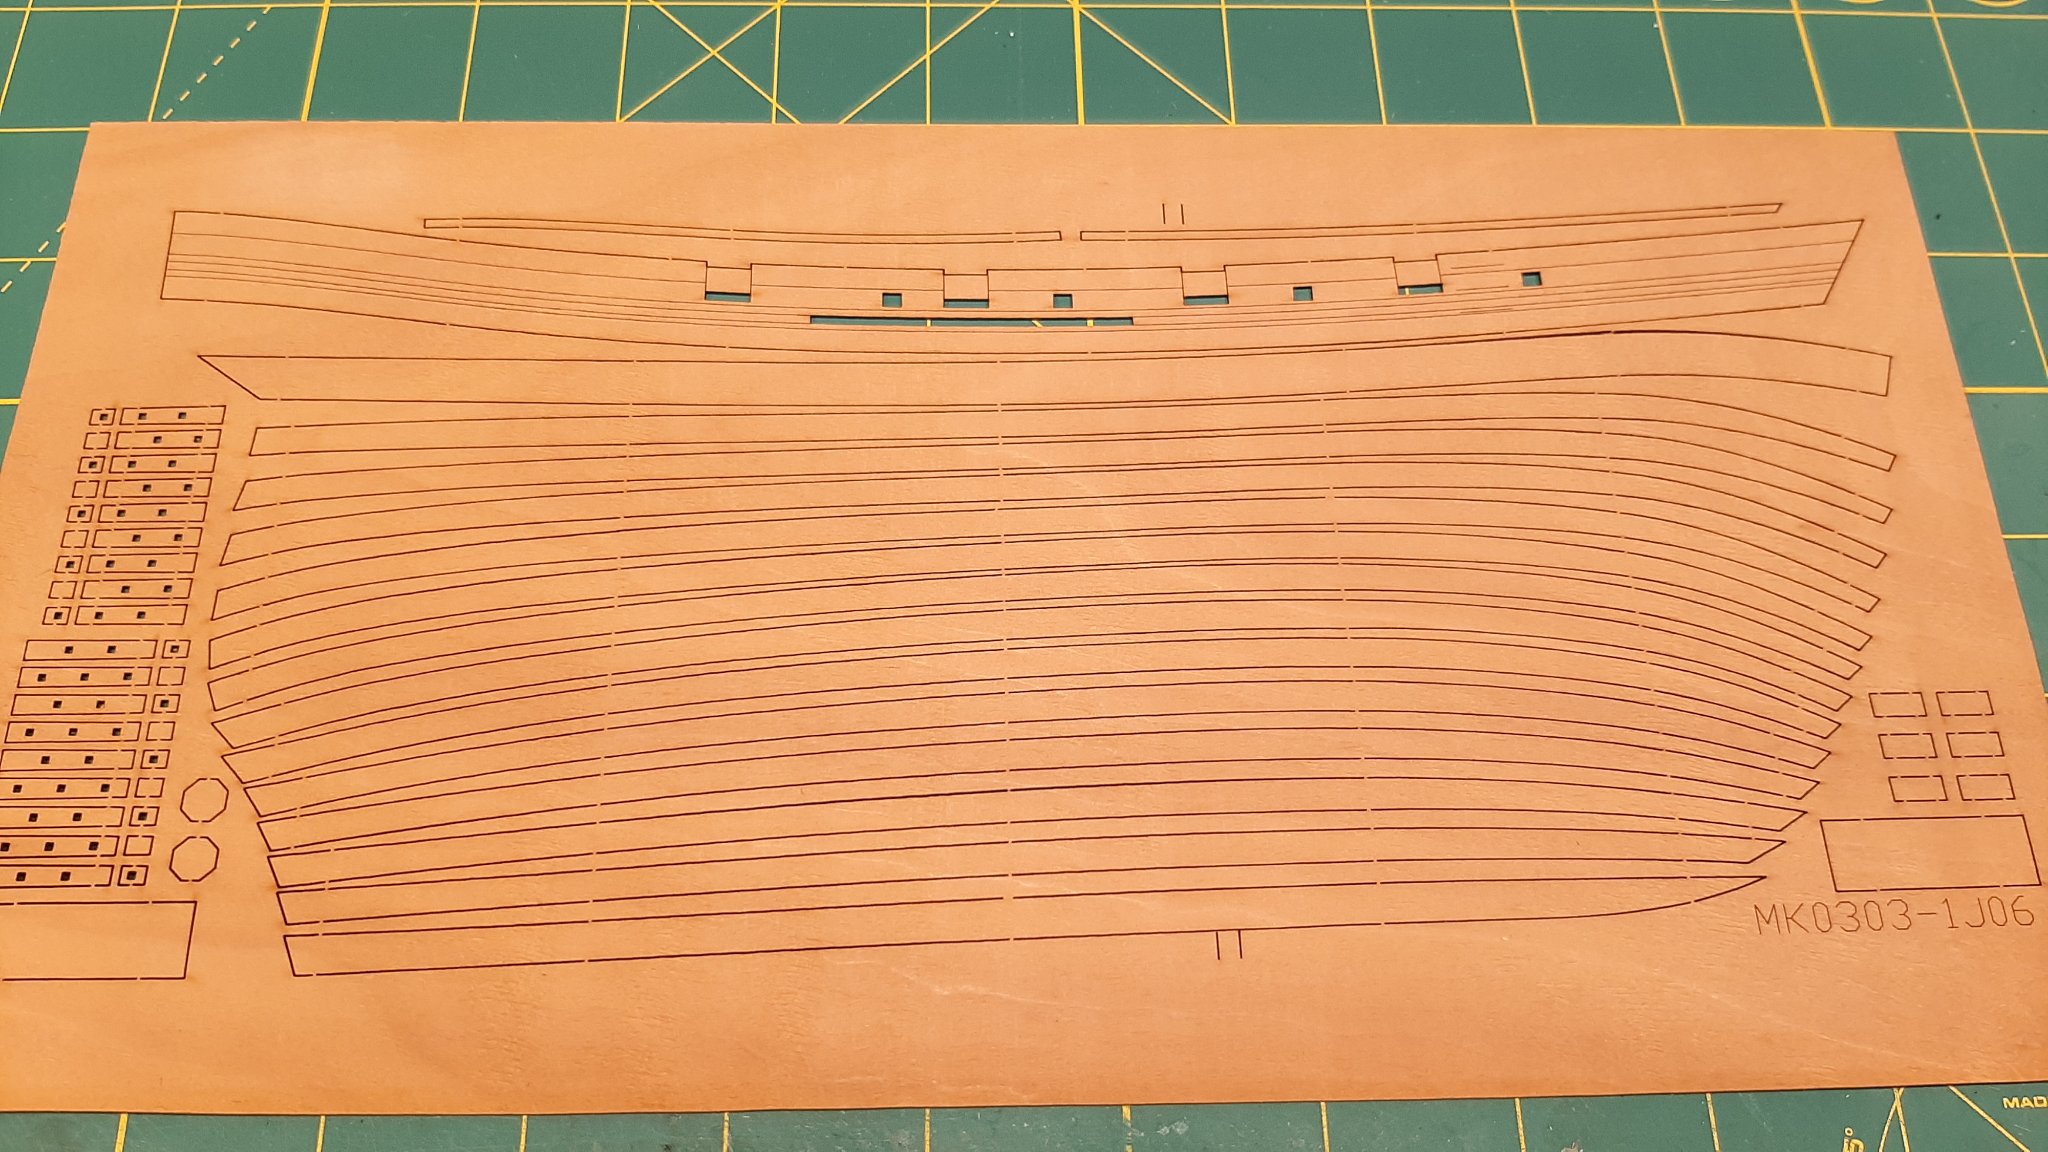
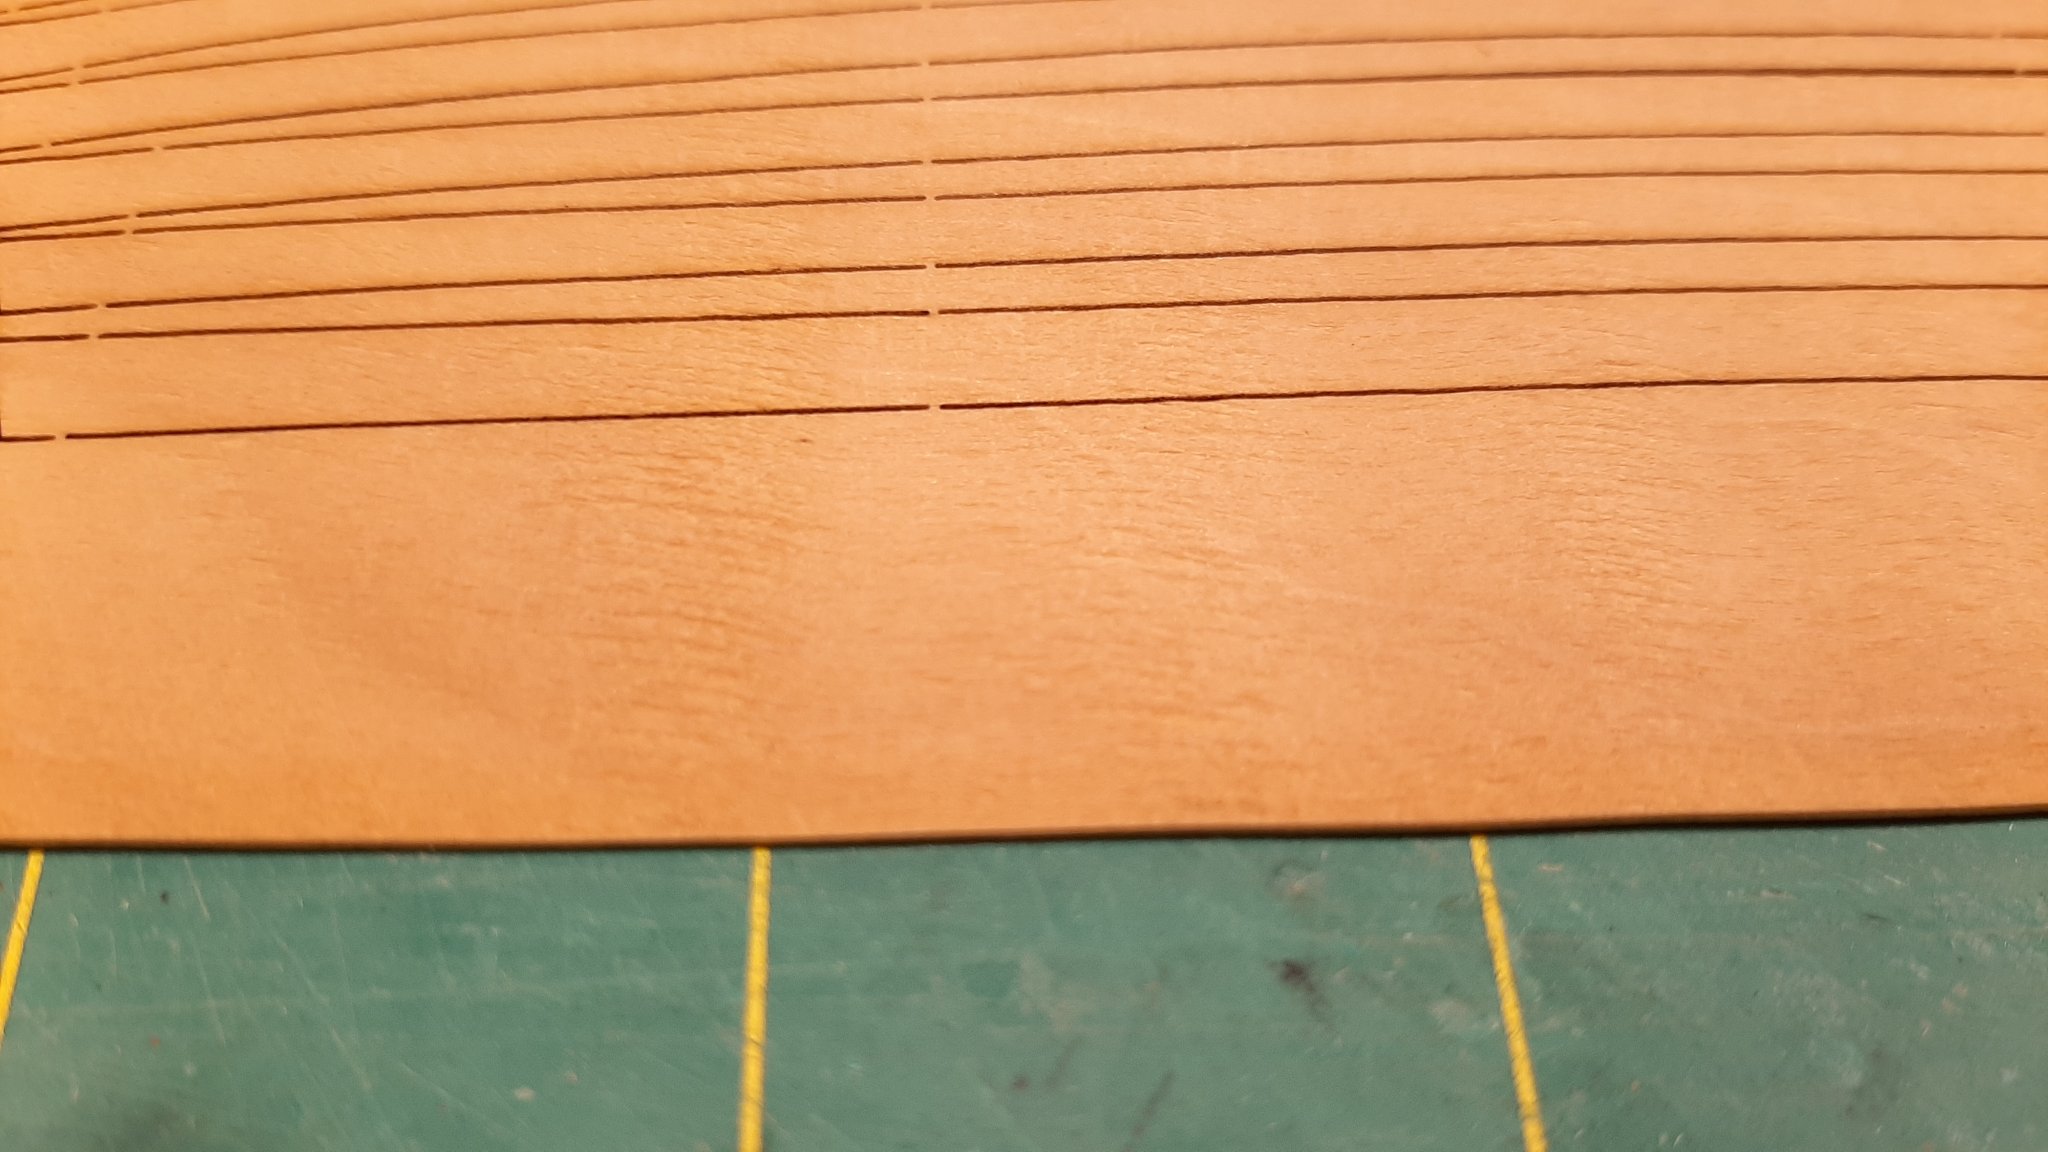
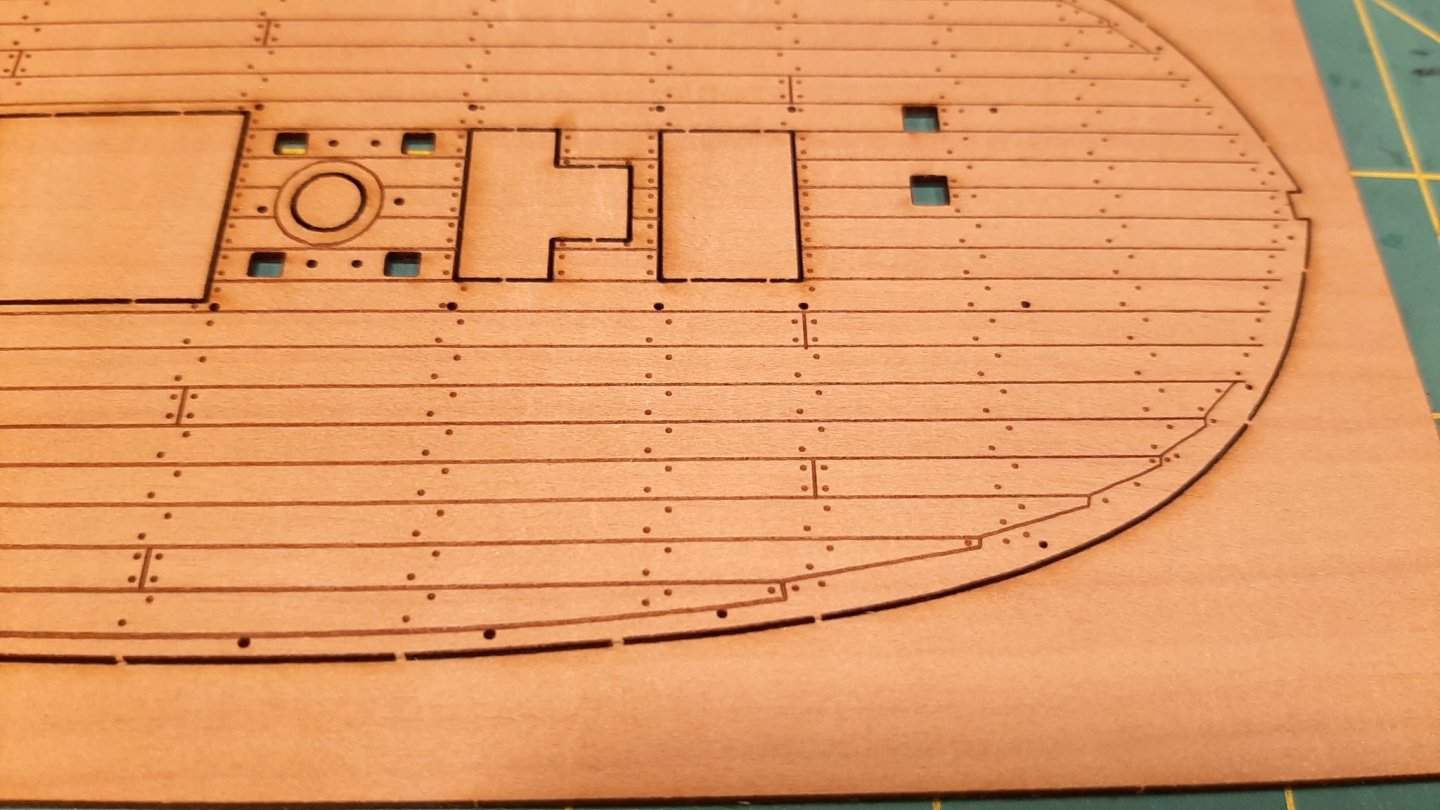
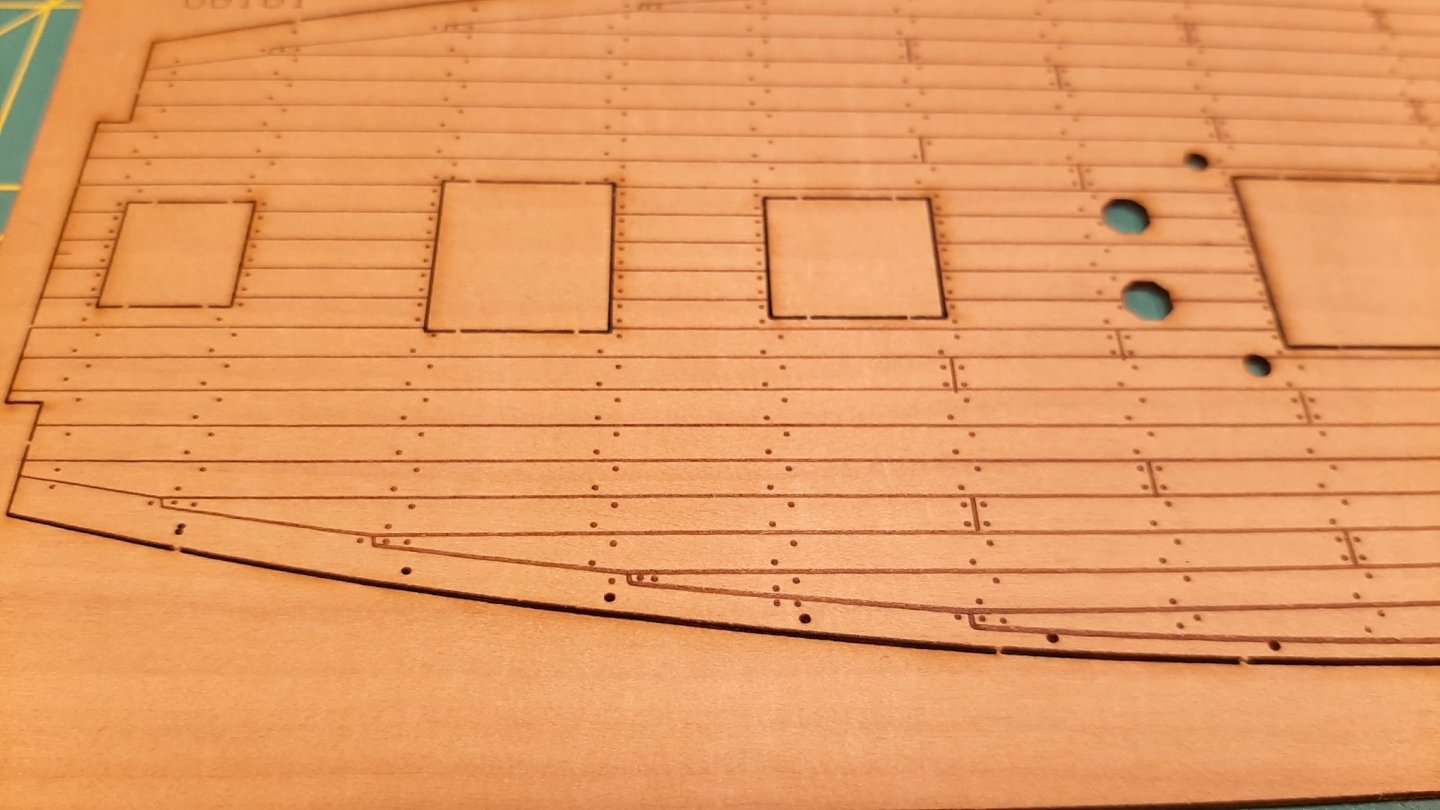
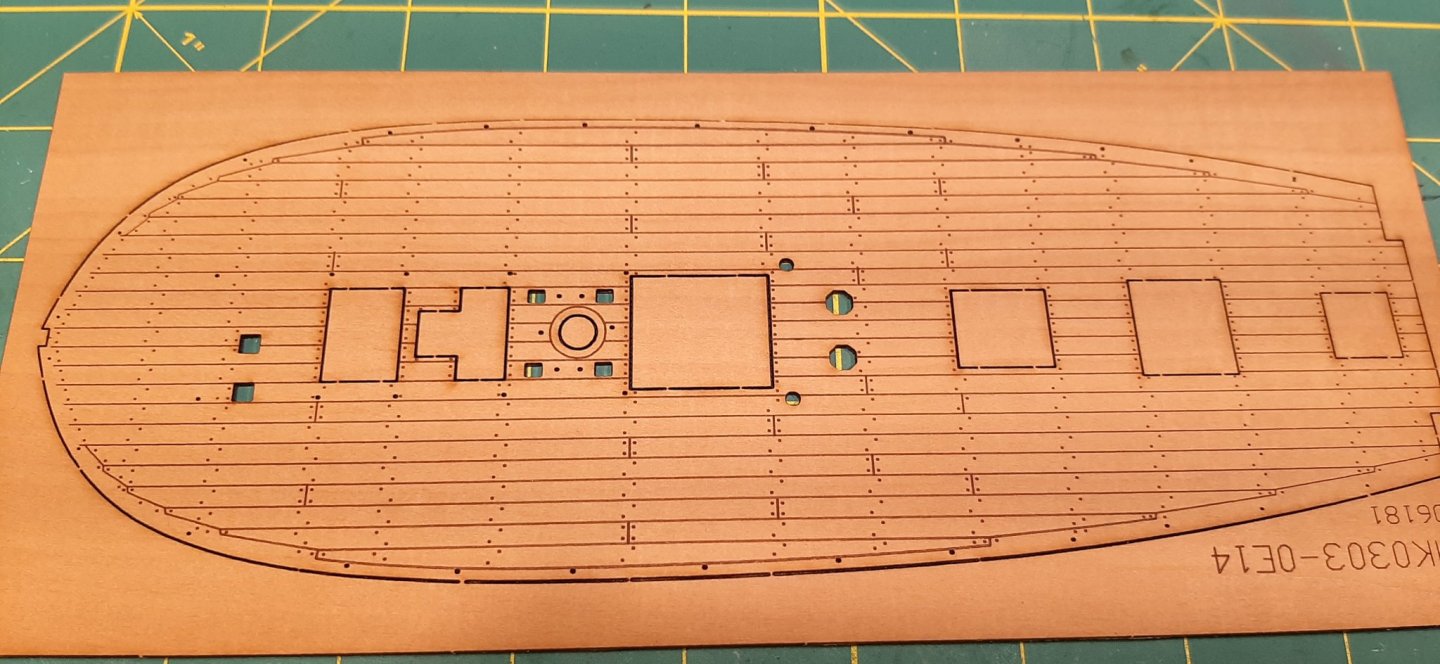
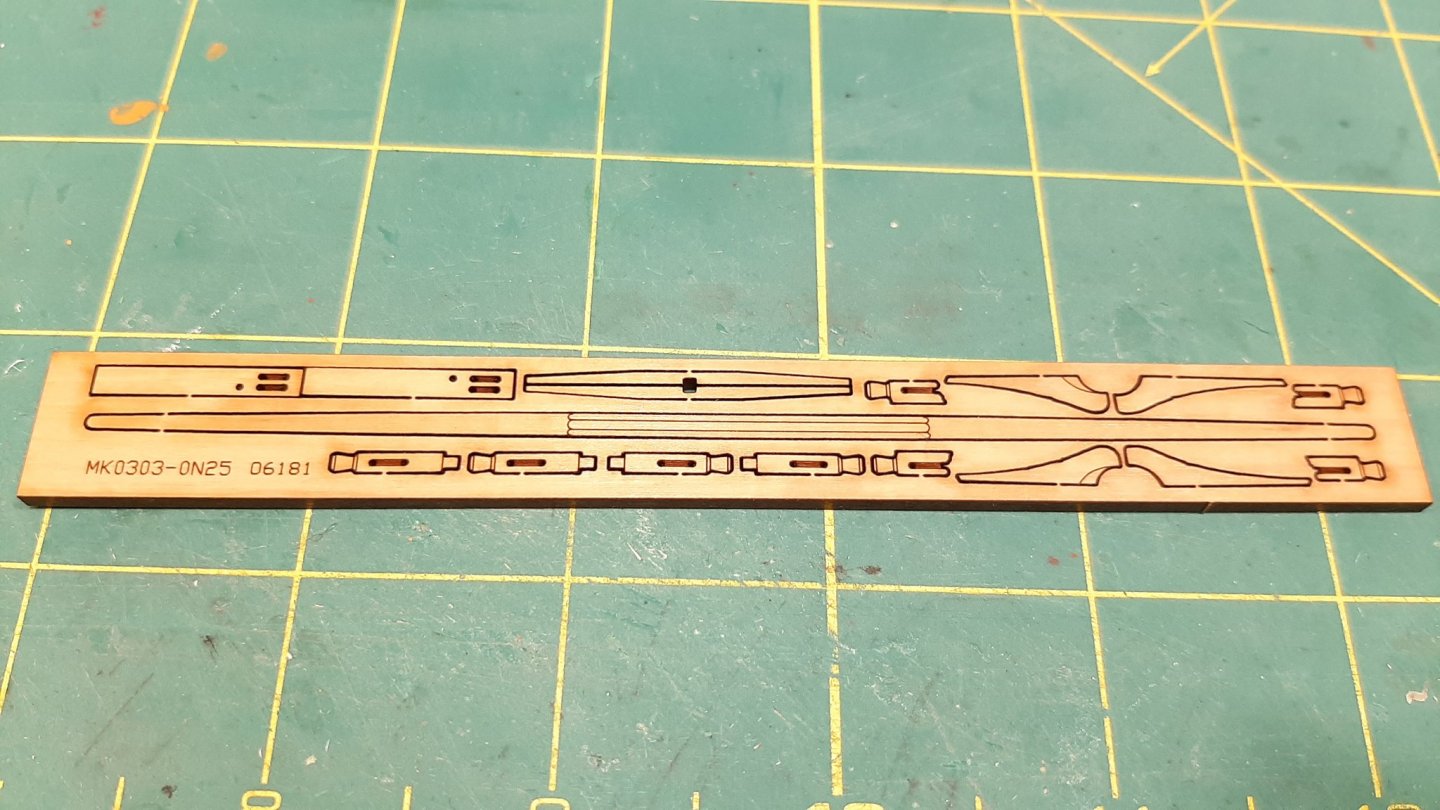
Some observations The ply deck has some off focus laser etching, it's probably because it is warped. I bought the kit from Crafty Sailor, etsinko is sending a replacement deck in maple! Honestly the deck should have been shipped in a lighter color to begin with so it all worked out. The kit only came with one anchor stock. This piece doesn't match the plans so I guess they were making edits for efficiency and they missed a stock. Not a problem as there is enough material to easily scratch one more. One of the boards for planking has some noticeable grain patterns on in with a bit of a dip in the material. The camera isn't picking it up very well. Maybe I'm just being picky and sanding will clean it right up.


-
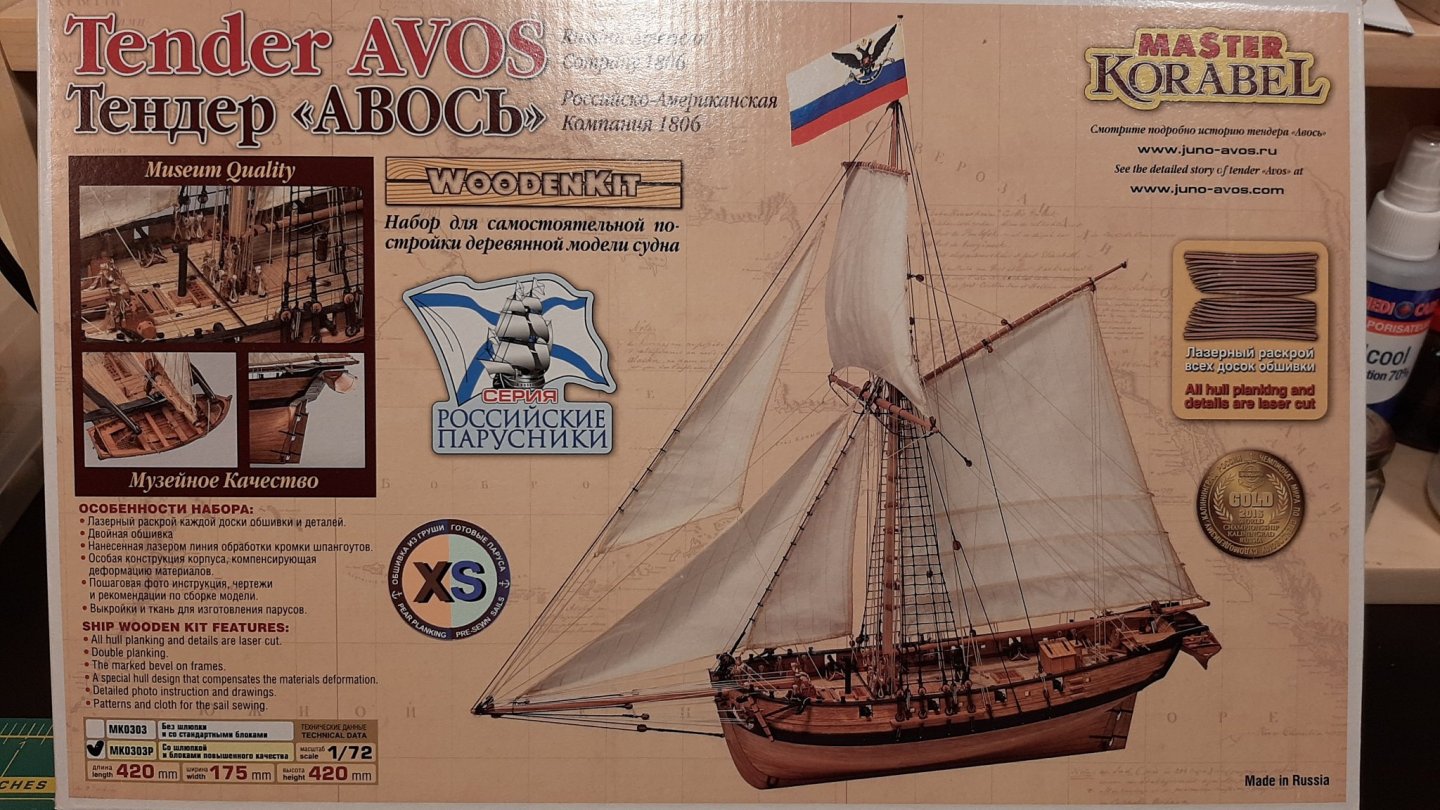
I decided to take a break from the HMS Snake and do something more straight forward with no kit bashing. I initially bought the Falconet kit 9th century Viking ship but I plowed through that in less than a month. I have been wanting to buy the Avos since it came out so I decided this would be a good time. By the time my Avos is done Chris Watton might have finished developing the HMS Sphinx and My Snake will never get finished. 😆 I just post a picture of the box for now, I don't plan on covering all the contents in the box as there is a thorough review buy James H.
-
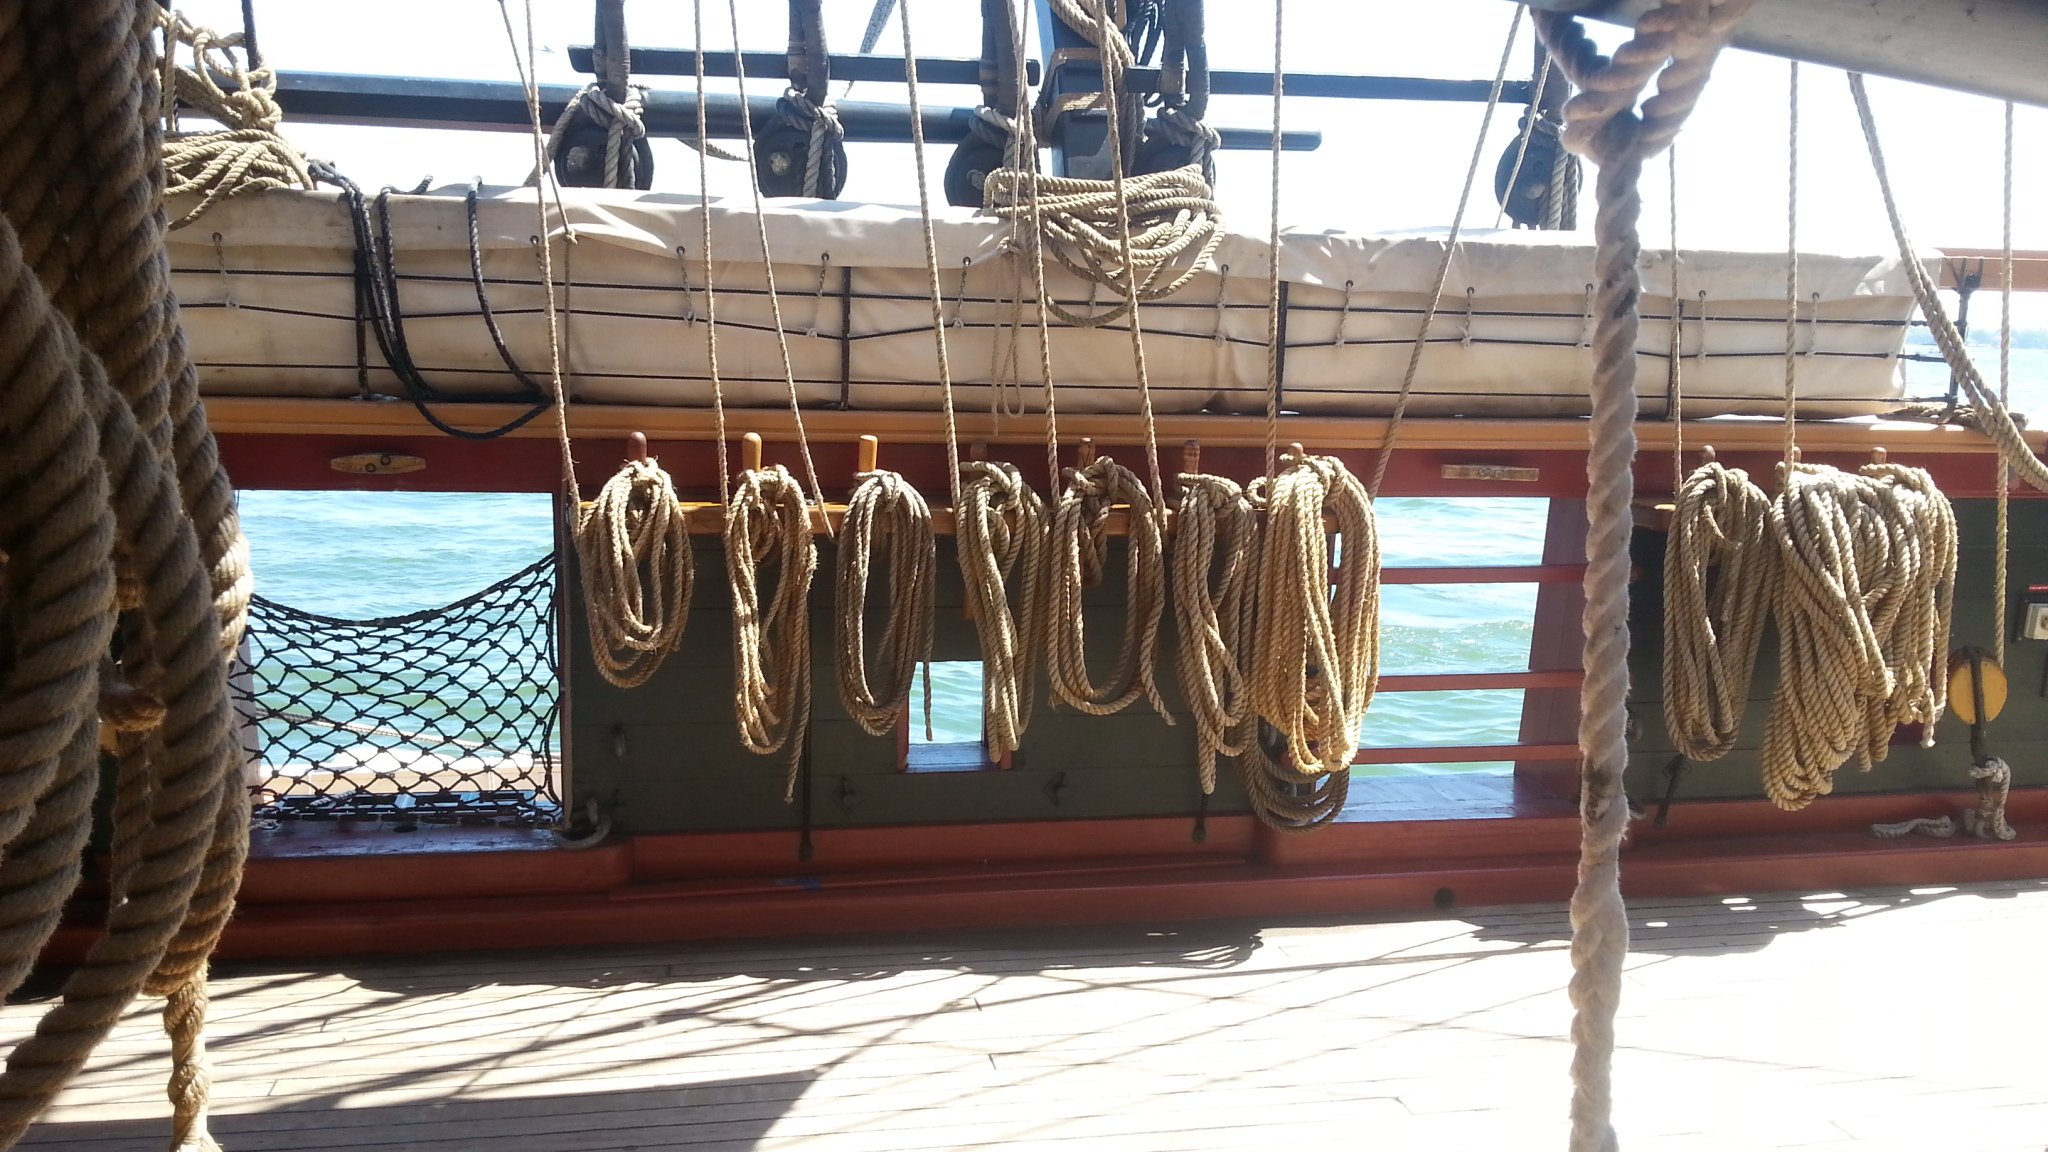
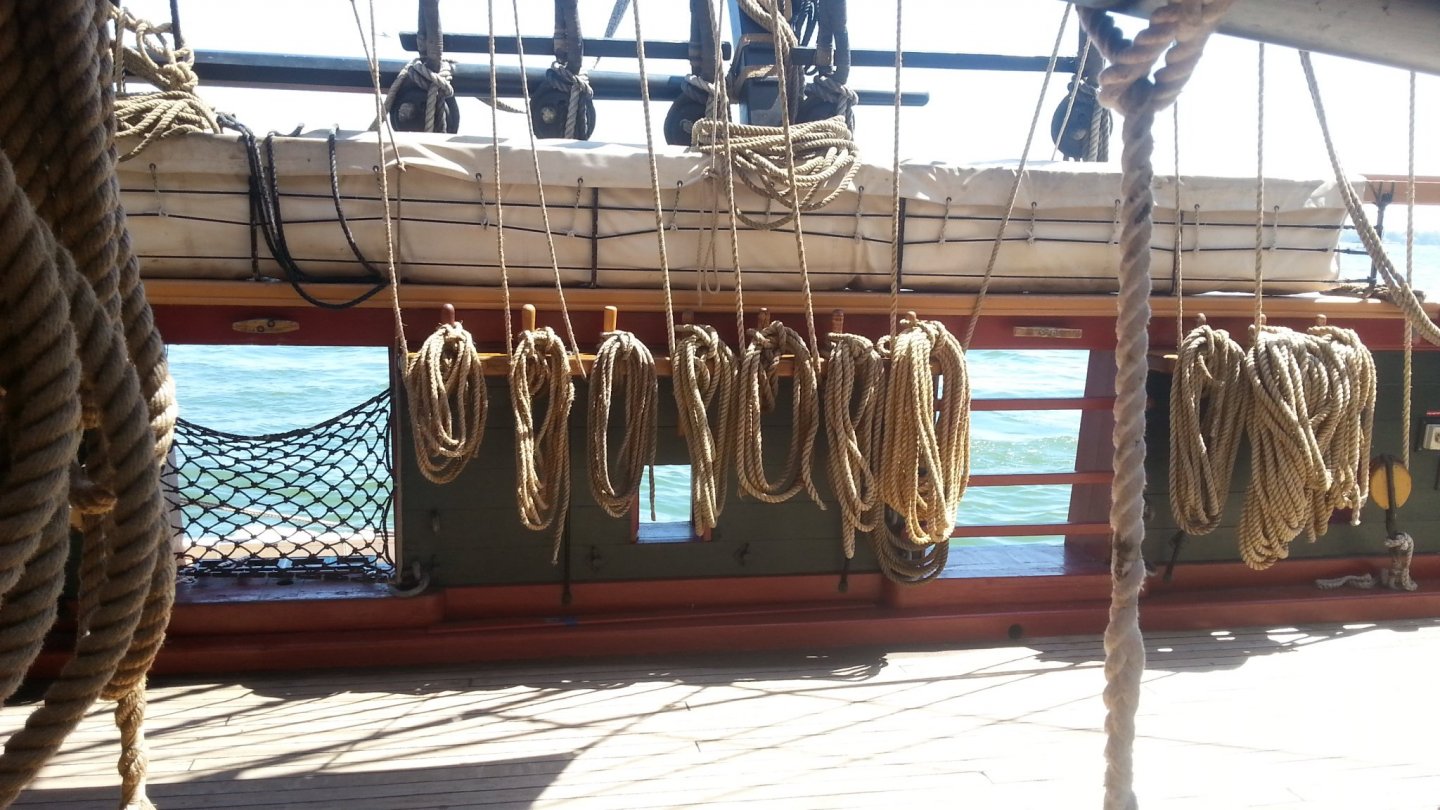
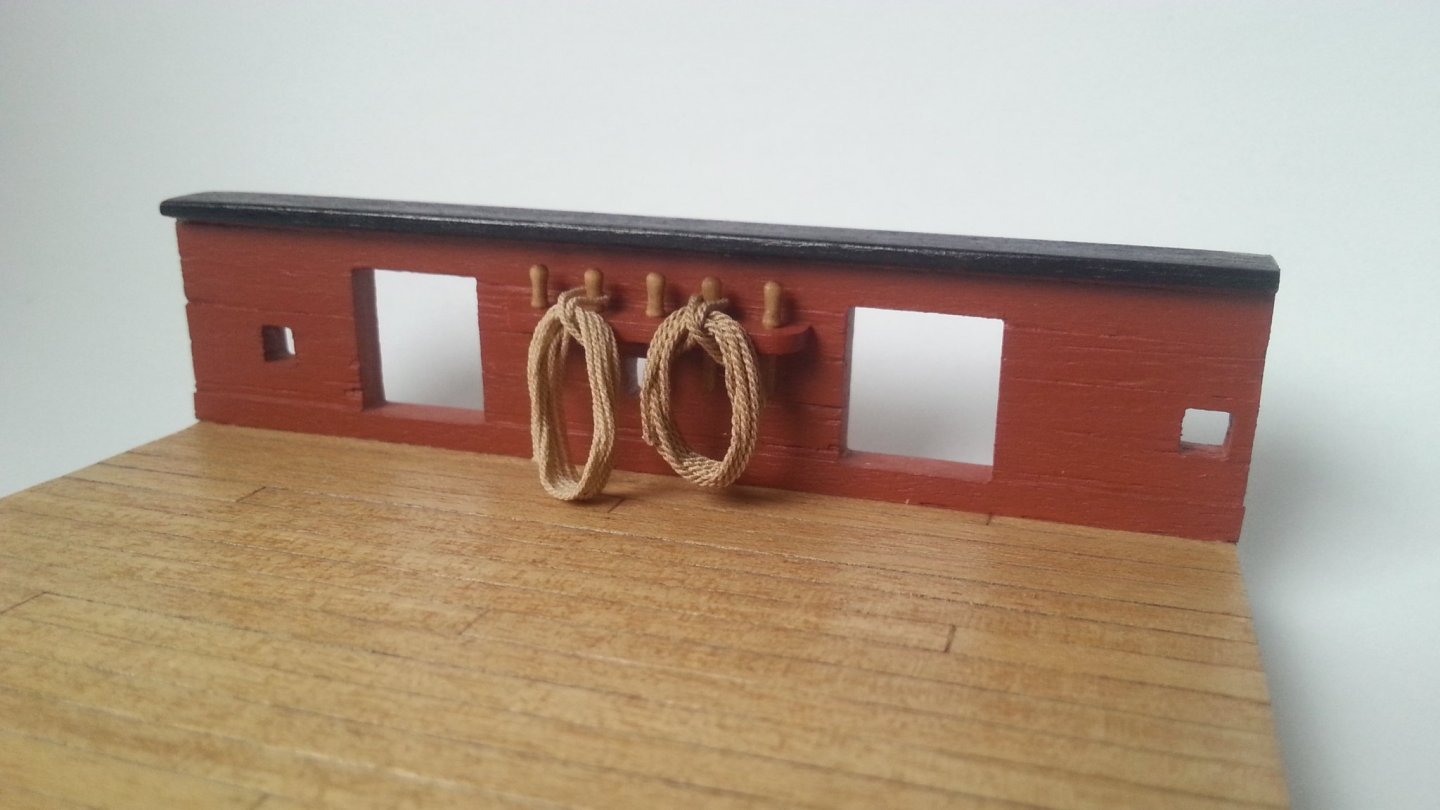
I'm gonna stop you right there, The rope police is here! I have a link to a video from Tom Lauria about making really nice belaying hanks. I also have a picture of some I made using this his method. I also have a picture I took of the Niagara that I used for reference. Your ship is one of my inspirations and I hope this helps! https://www.youtube.com/watch?v=bgWHqw4Pg8Q&list=PLnXLeuhOqKhLCIrq2IsF78Qv0UUuQmdYU&index=1&t=1s
- 800 replies
-
- 6
-

-
- snake
- caldercraft
- (and 1 more)
-
I most definitely agree. It comes out beautifully with oil or wipe on Polly. It's very flexible and resistant to chipping/cracking and generally a pleasure to work with.
-
The video was really cool, hypnotic with the music. Could serve useful for novice builders. I wish there were more like this.
-
HMS Snake by BenD - Caldercraft - 1:64
BenD replied to BenD's topic in - Kit build logs for subjects built from 1751 - 1800
Hey Mike, Take a closer look at the planking pictures and you will see I left the stern post off until the end of 2nd planking. The stern area should be sanded to about 3mm so that when you add both sides of 2nd planking you should get 5mm total thickness. Sand down the second planking and dry fit the stern post until you see that it fits. My stern area still has a bit of drop in it even with all that effort. Hope this helps. -
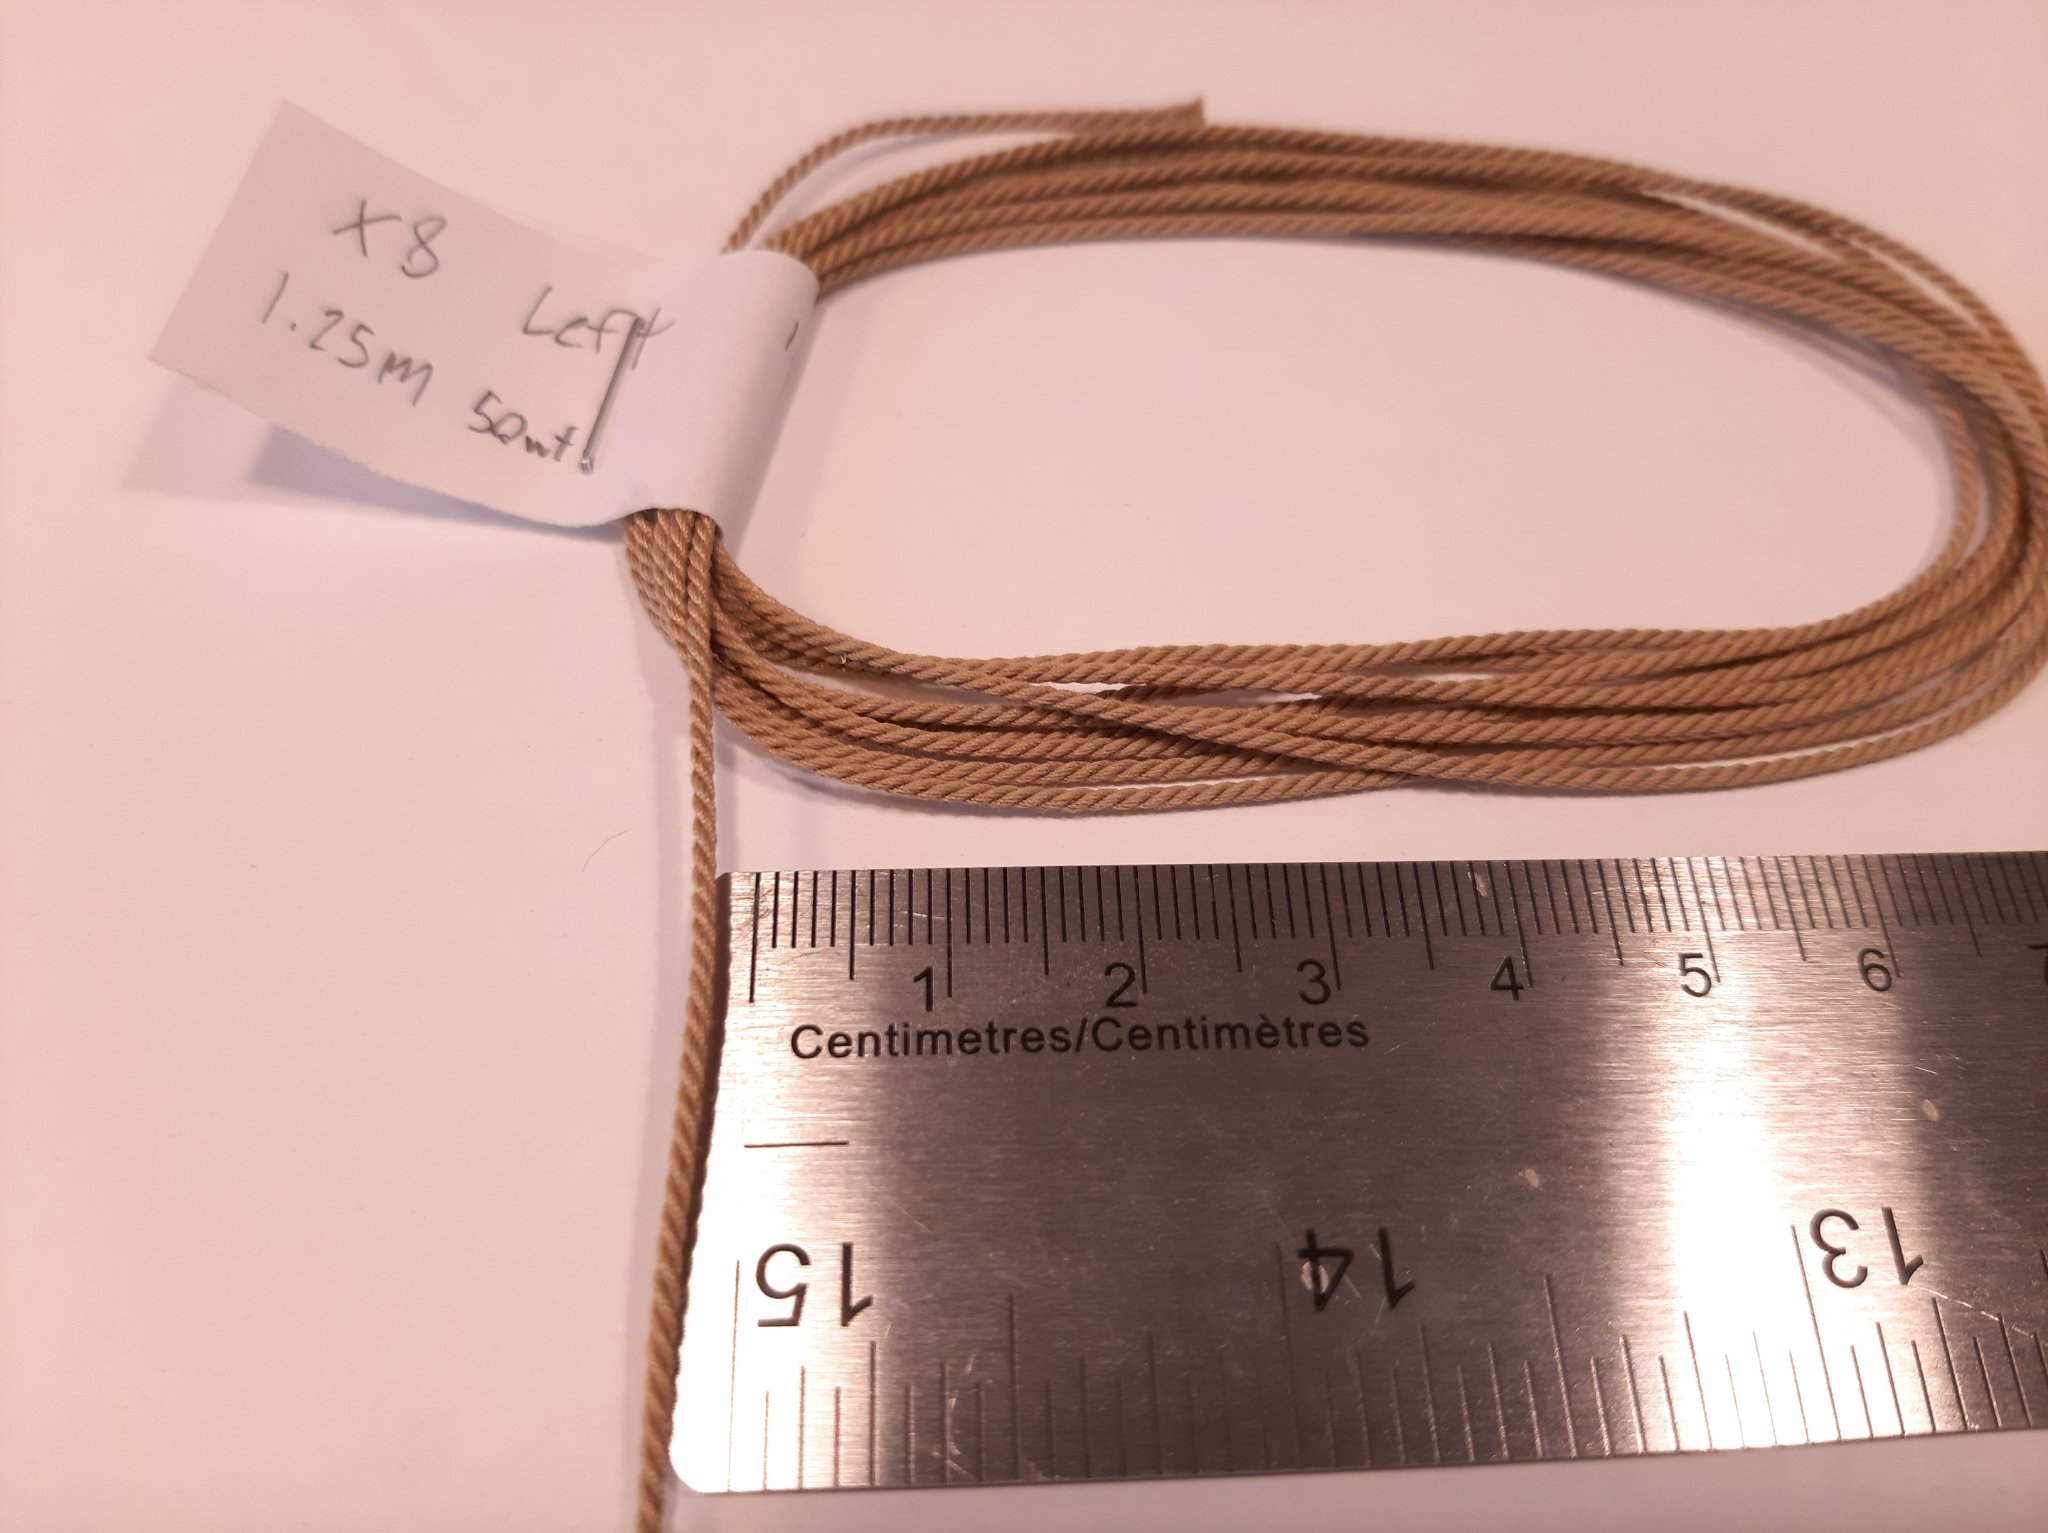
Aurifil is expensive but looks pretty good. Limited colors in 80wt though. here are some of my Aurifil samples. It looks better and behaves well when treated with watered down white pva.

-
Welcome to the snake club! There are a few finished Snakes on this forum but this kit is a challenge. I have been working on mine for 2 years, I'm burnt out. I'm moth balling it and working on some easier projects and will return to it at some point. It's a decent kit with mostly good materials but it's not very good for newer modelers. You did well on your longboat so I feel you may be ready. good luck! I'm going to hop into a Master Korabel kit, they seem to be more my skill level.
-
After working on the old Caldercraft kit you are going to find the Vangaurd kits just fall together. Laser cutting magic I tell you!
-
If the belaying pin was made out of Lignum Vitae it would sink. It is the most dense wood, as far as I know. The pins on a ship are not held down by anything but gravity or by a rope if a line has been belayed to it. It's meant like this so you can pull the pin and all the rope drops to the deck. You can react quicker to what ever sailing task is needed.
-
Yeah I was on your store and I just impulse bought the 9th century Slavic longship 1:72. It was too cool looking to pass up. The Avos, Phoenix, and the Polotsk are all equally enticing...
- 30 replies
-
- 1
-
-
- master korabel
- avos
- (and 1 more)
-
This looks amazing! I need to get my hands on a Master Korabel kit.
- 30 replies
-
- 2
-
-
- master korabel
- avos
- (and 1 more)
-
HMS Sphinx - 6th rate The excitement is palpable.
-
HMS Snake by BenD - Caldercraft - 1:64
BenD replied to BenD's topic in - Kit build logs for subjects built from 1751 - 1800
I've been working on all the deck features. Nothing is glued in yet as there is a lot more work to be done. Next up is the fore and aft platforms.
-
The chain plate loops are supposed to be closed. Using some wire and soldering your own is the best way to go about this. Soldering kits are pretty cheap, even a $30 kit can get this done easily. The Rudder looks good!
-
HMS Snake by BenD - Caldercraft - 1:64
BenD replied to BenD's topic in - Kit build logs for subjects built from 1751 - 1800
Sorry to hear about the Cancer Shellback. I hope you are well. This is a decent kit but everything on it needs a lot of work. I would still recommend the kit but be prepared to put in 500-800 hours of work. -
Your excellent work makes me want to throw my Sherbourne in the rubbish bin...
- 40 replies
-
- 1
-
-
- sherbourne
- caldercraft
- (and 1 more)
-
Overlapping might be the way to go. I didn't with my Caldercraft plates and the gaps got filled with copper polish. The polish I used turned slightly green. No cloth seemed to get it out.
-
HMS Snake by BenD - Caldercraft - 1:64
BenD replied to BenD's topic in - Kit build logs for subjects built from 1751 - 1800
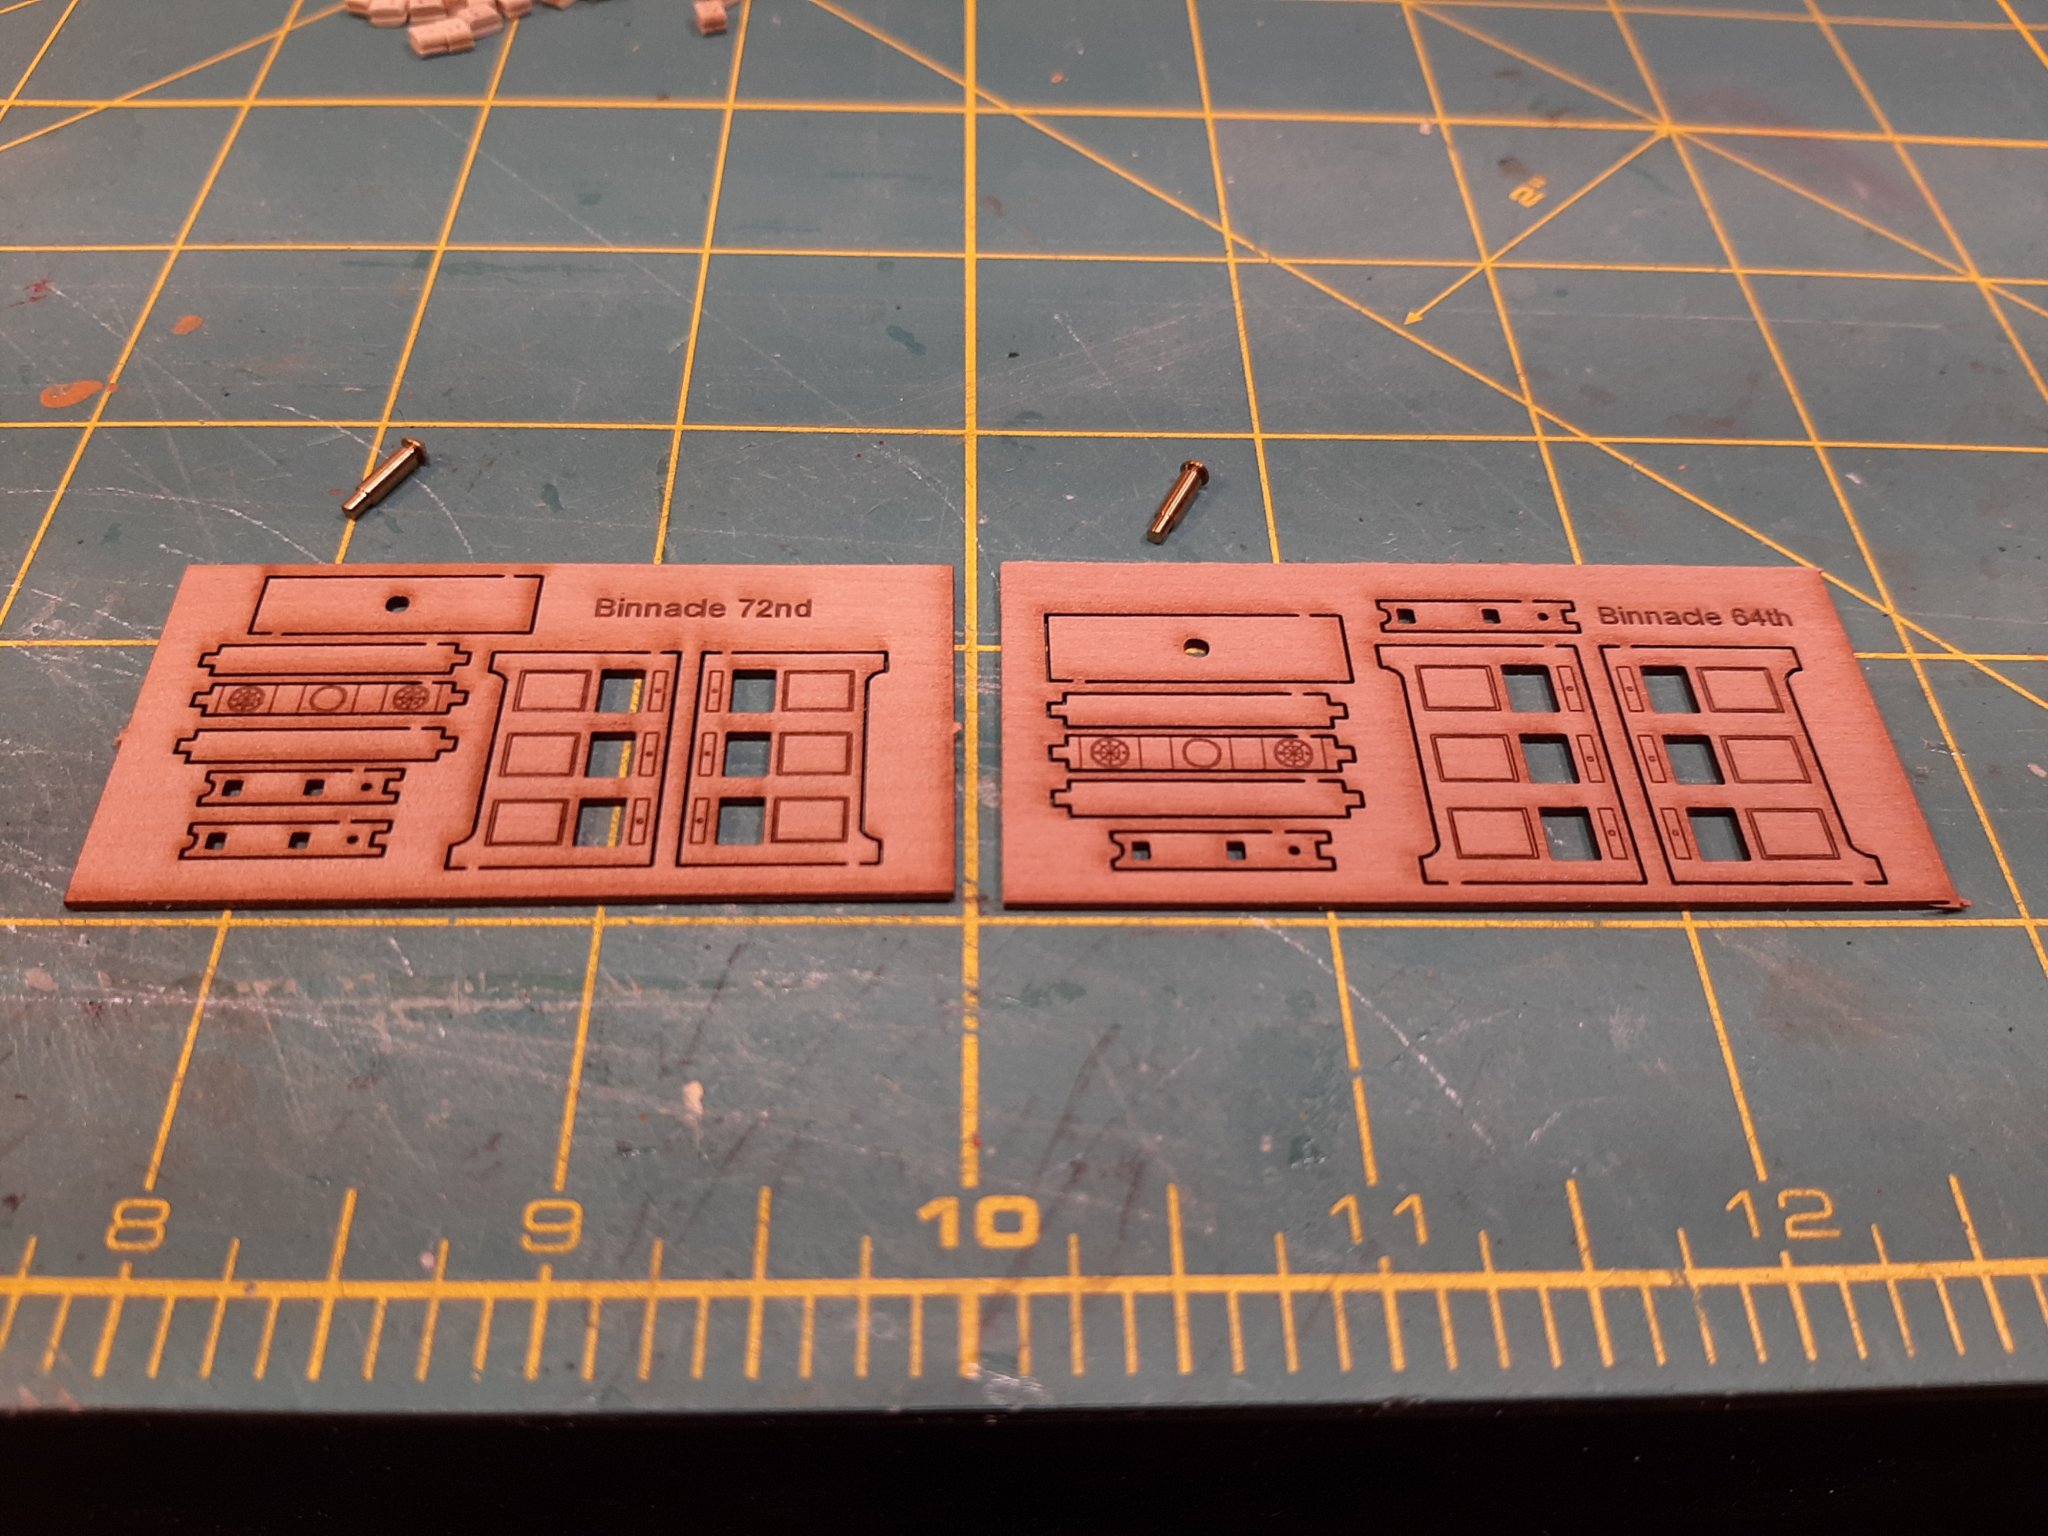
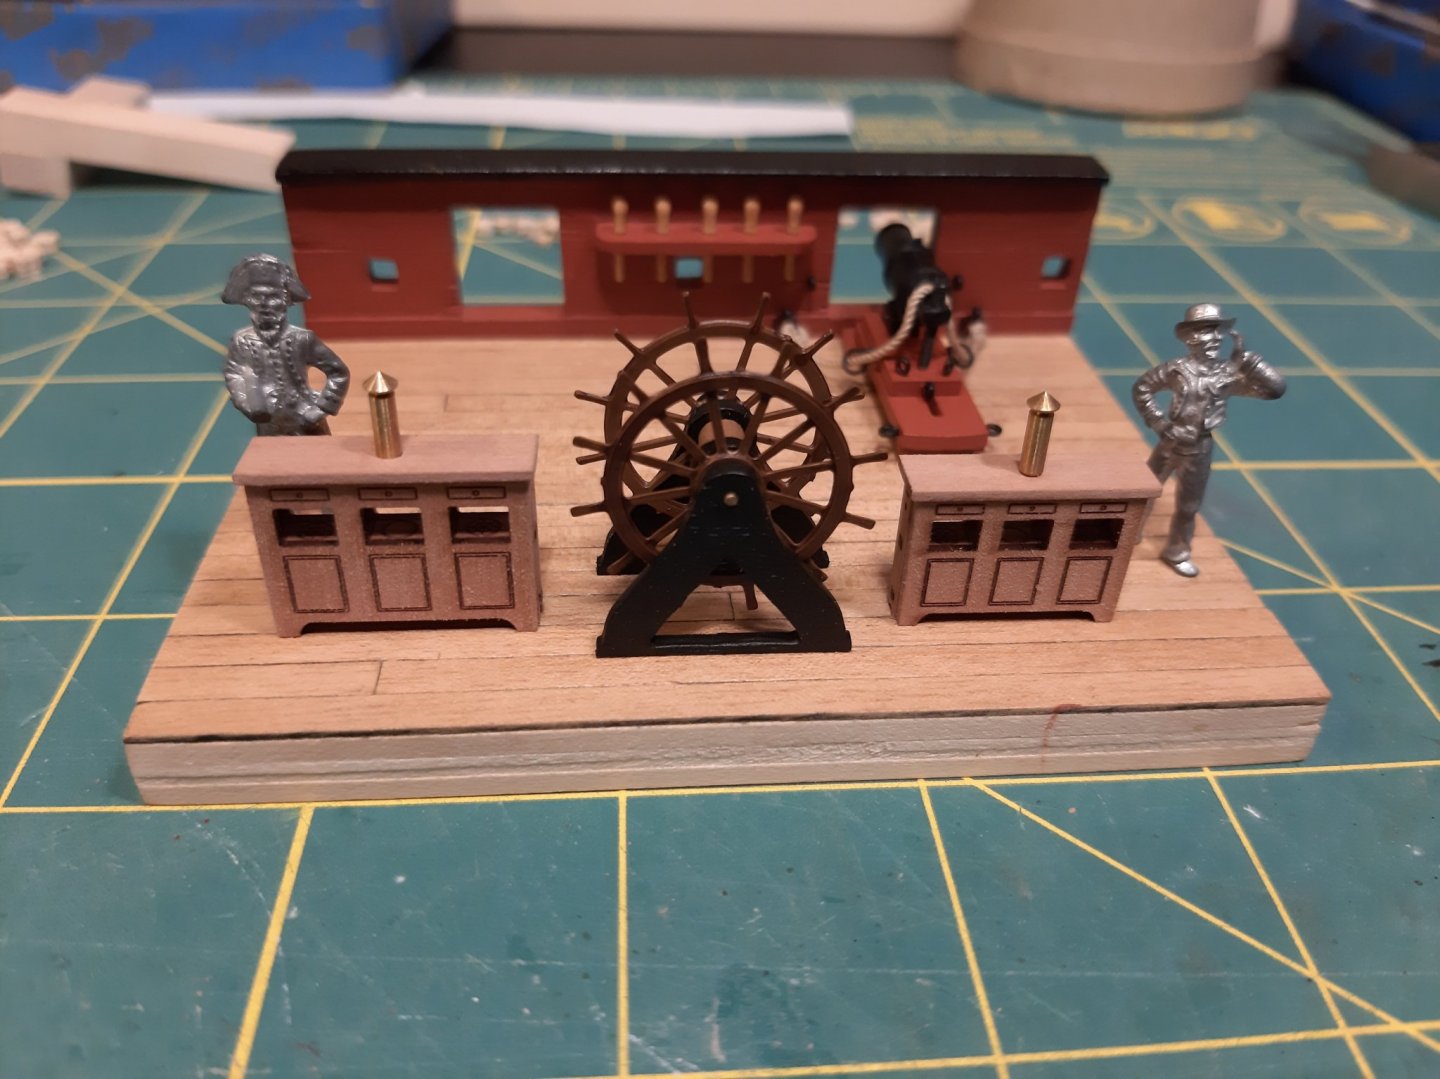
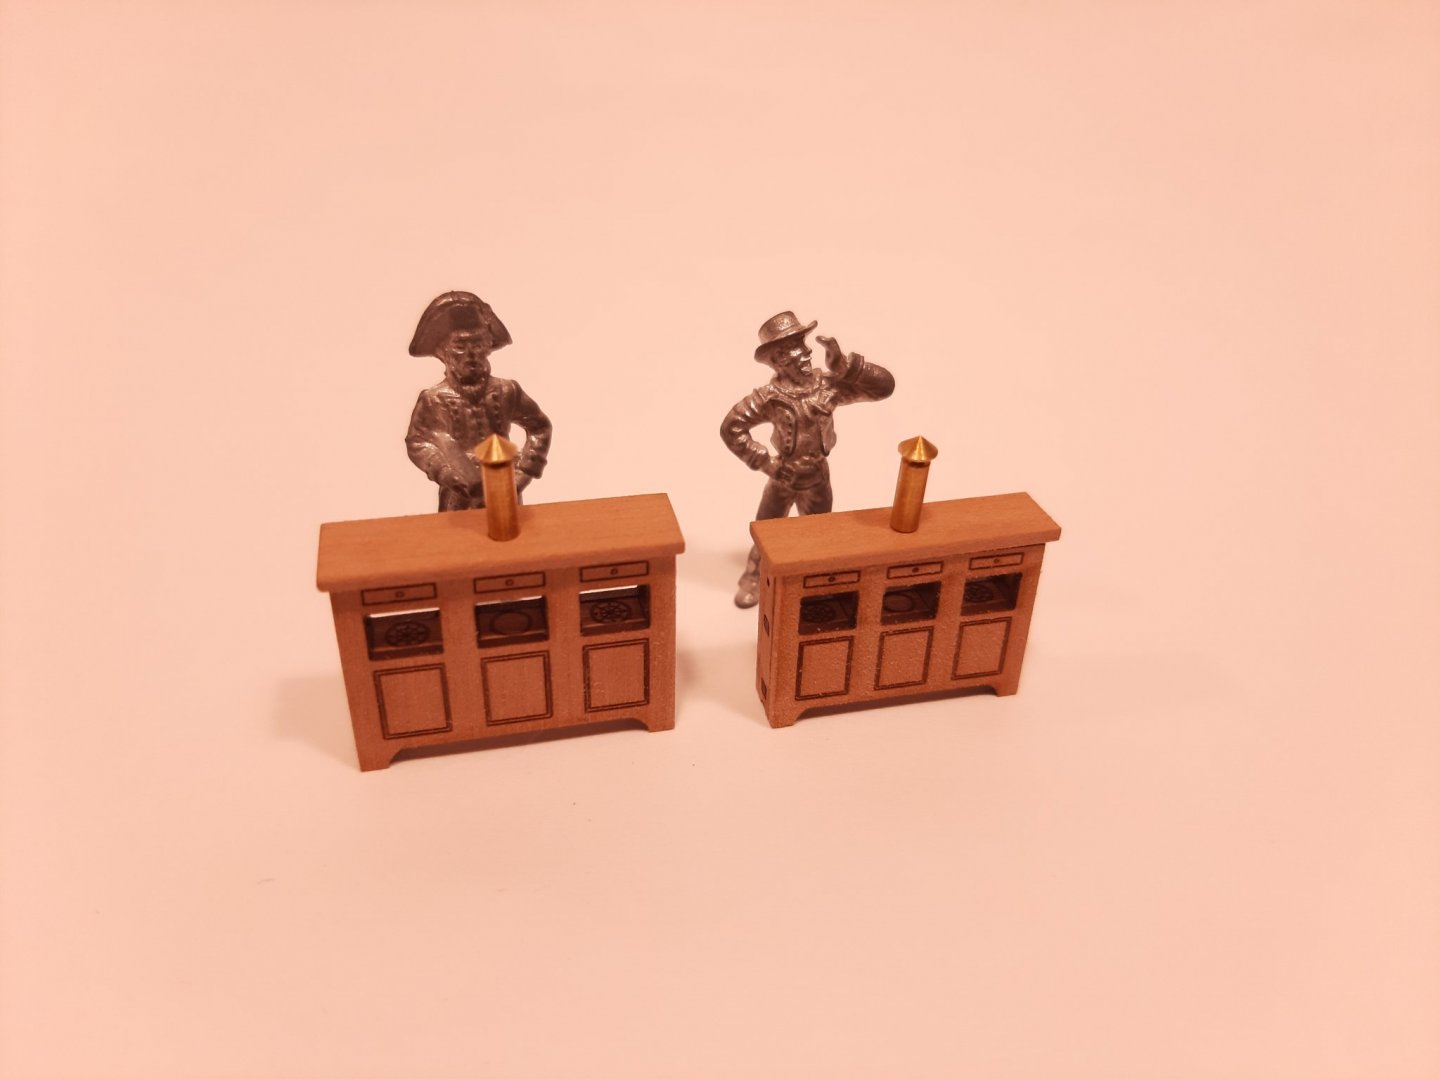
I just received some of Chris Wattons binnacles. They are really detailed for their size. I guess that's what you get when you buy a state of the art laser cuter. Both sizes could work but I think I'll have room for the 1.64th one. Honestly an 18 gun sloop of war probably wouldn't have one of these but it's going on anyway!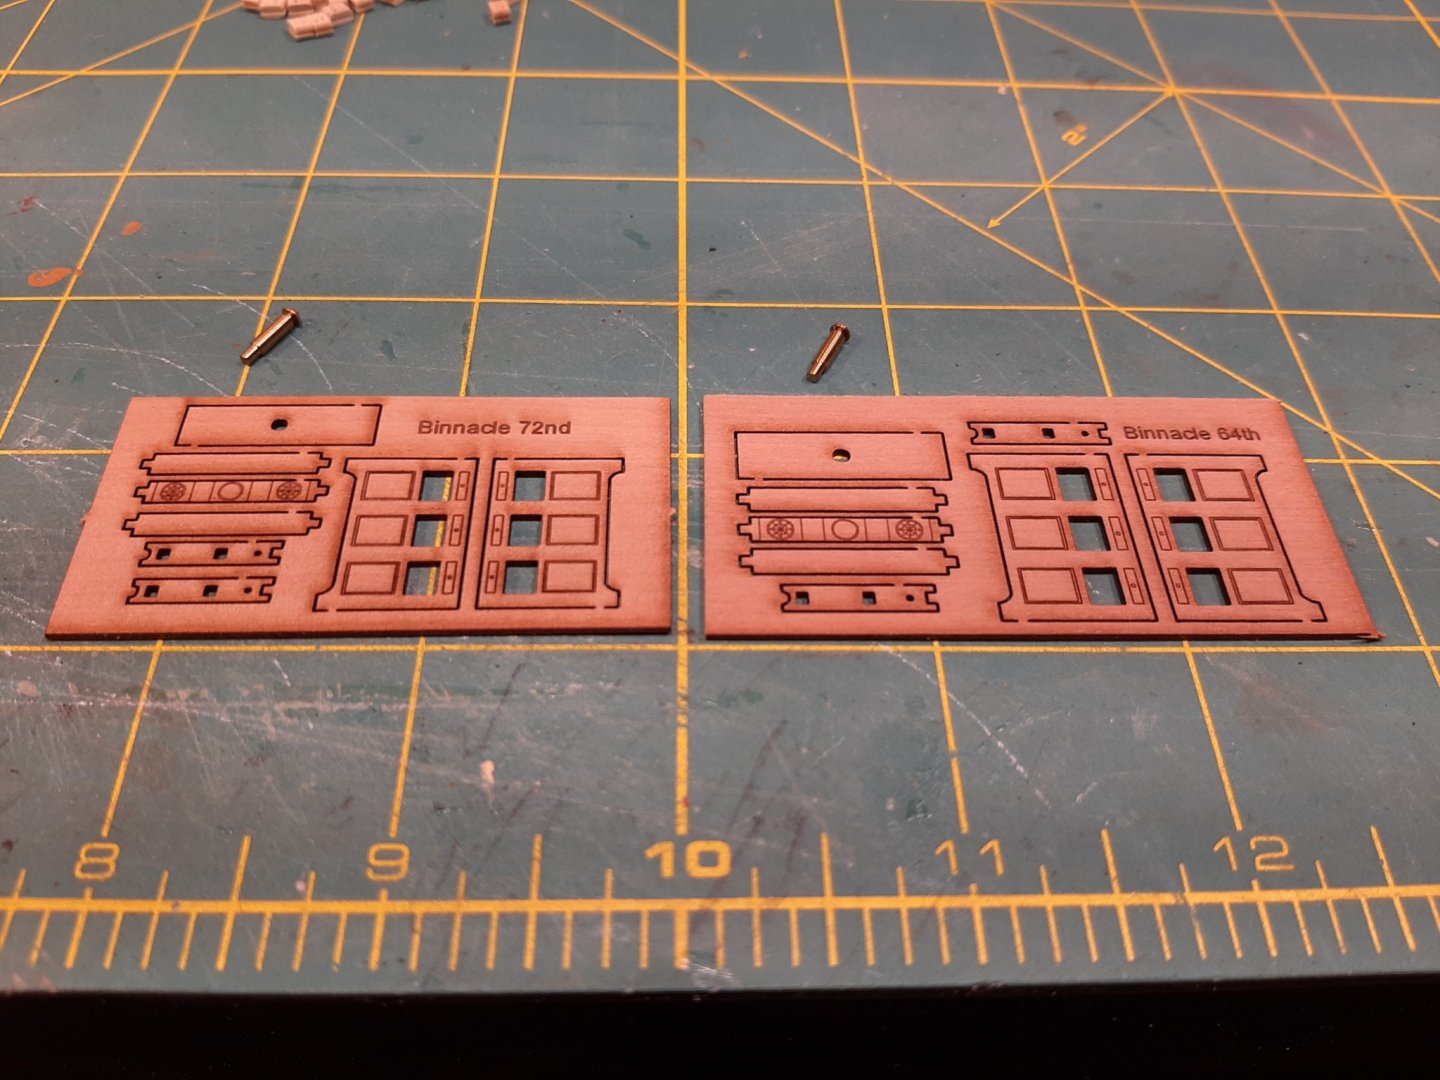
-
HMS Snake by BenD - Caldercraft - 1:64
BenD replied to BenD's topic in - Kit build logs for subjects built from 1751 - 1800
Thanks mugje! -
HMS Snake by BenD - Caldercraft - 1:64
BenD replied to BenD's topic in - Kit build logs for subjects built from 1751 - 1800
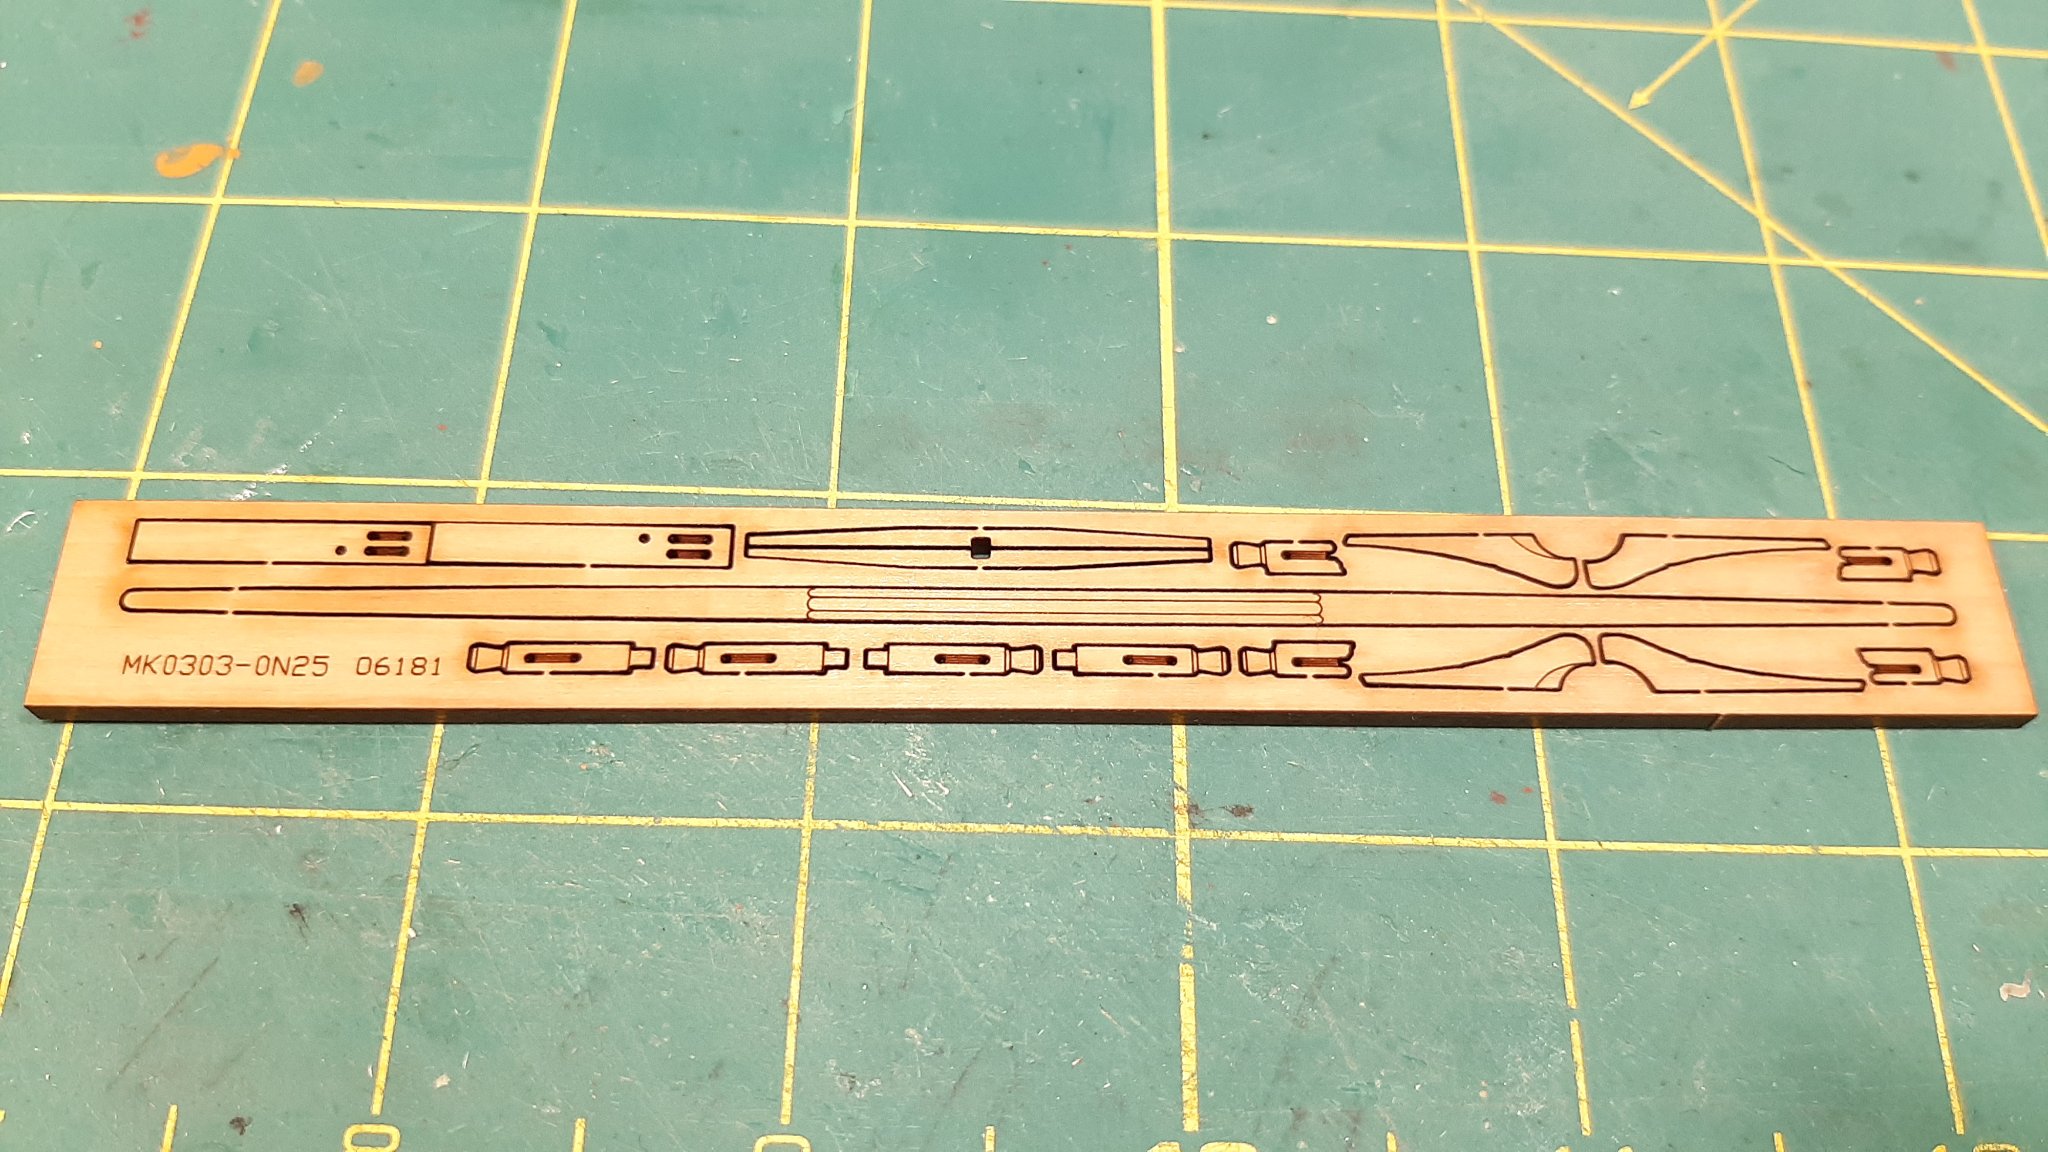
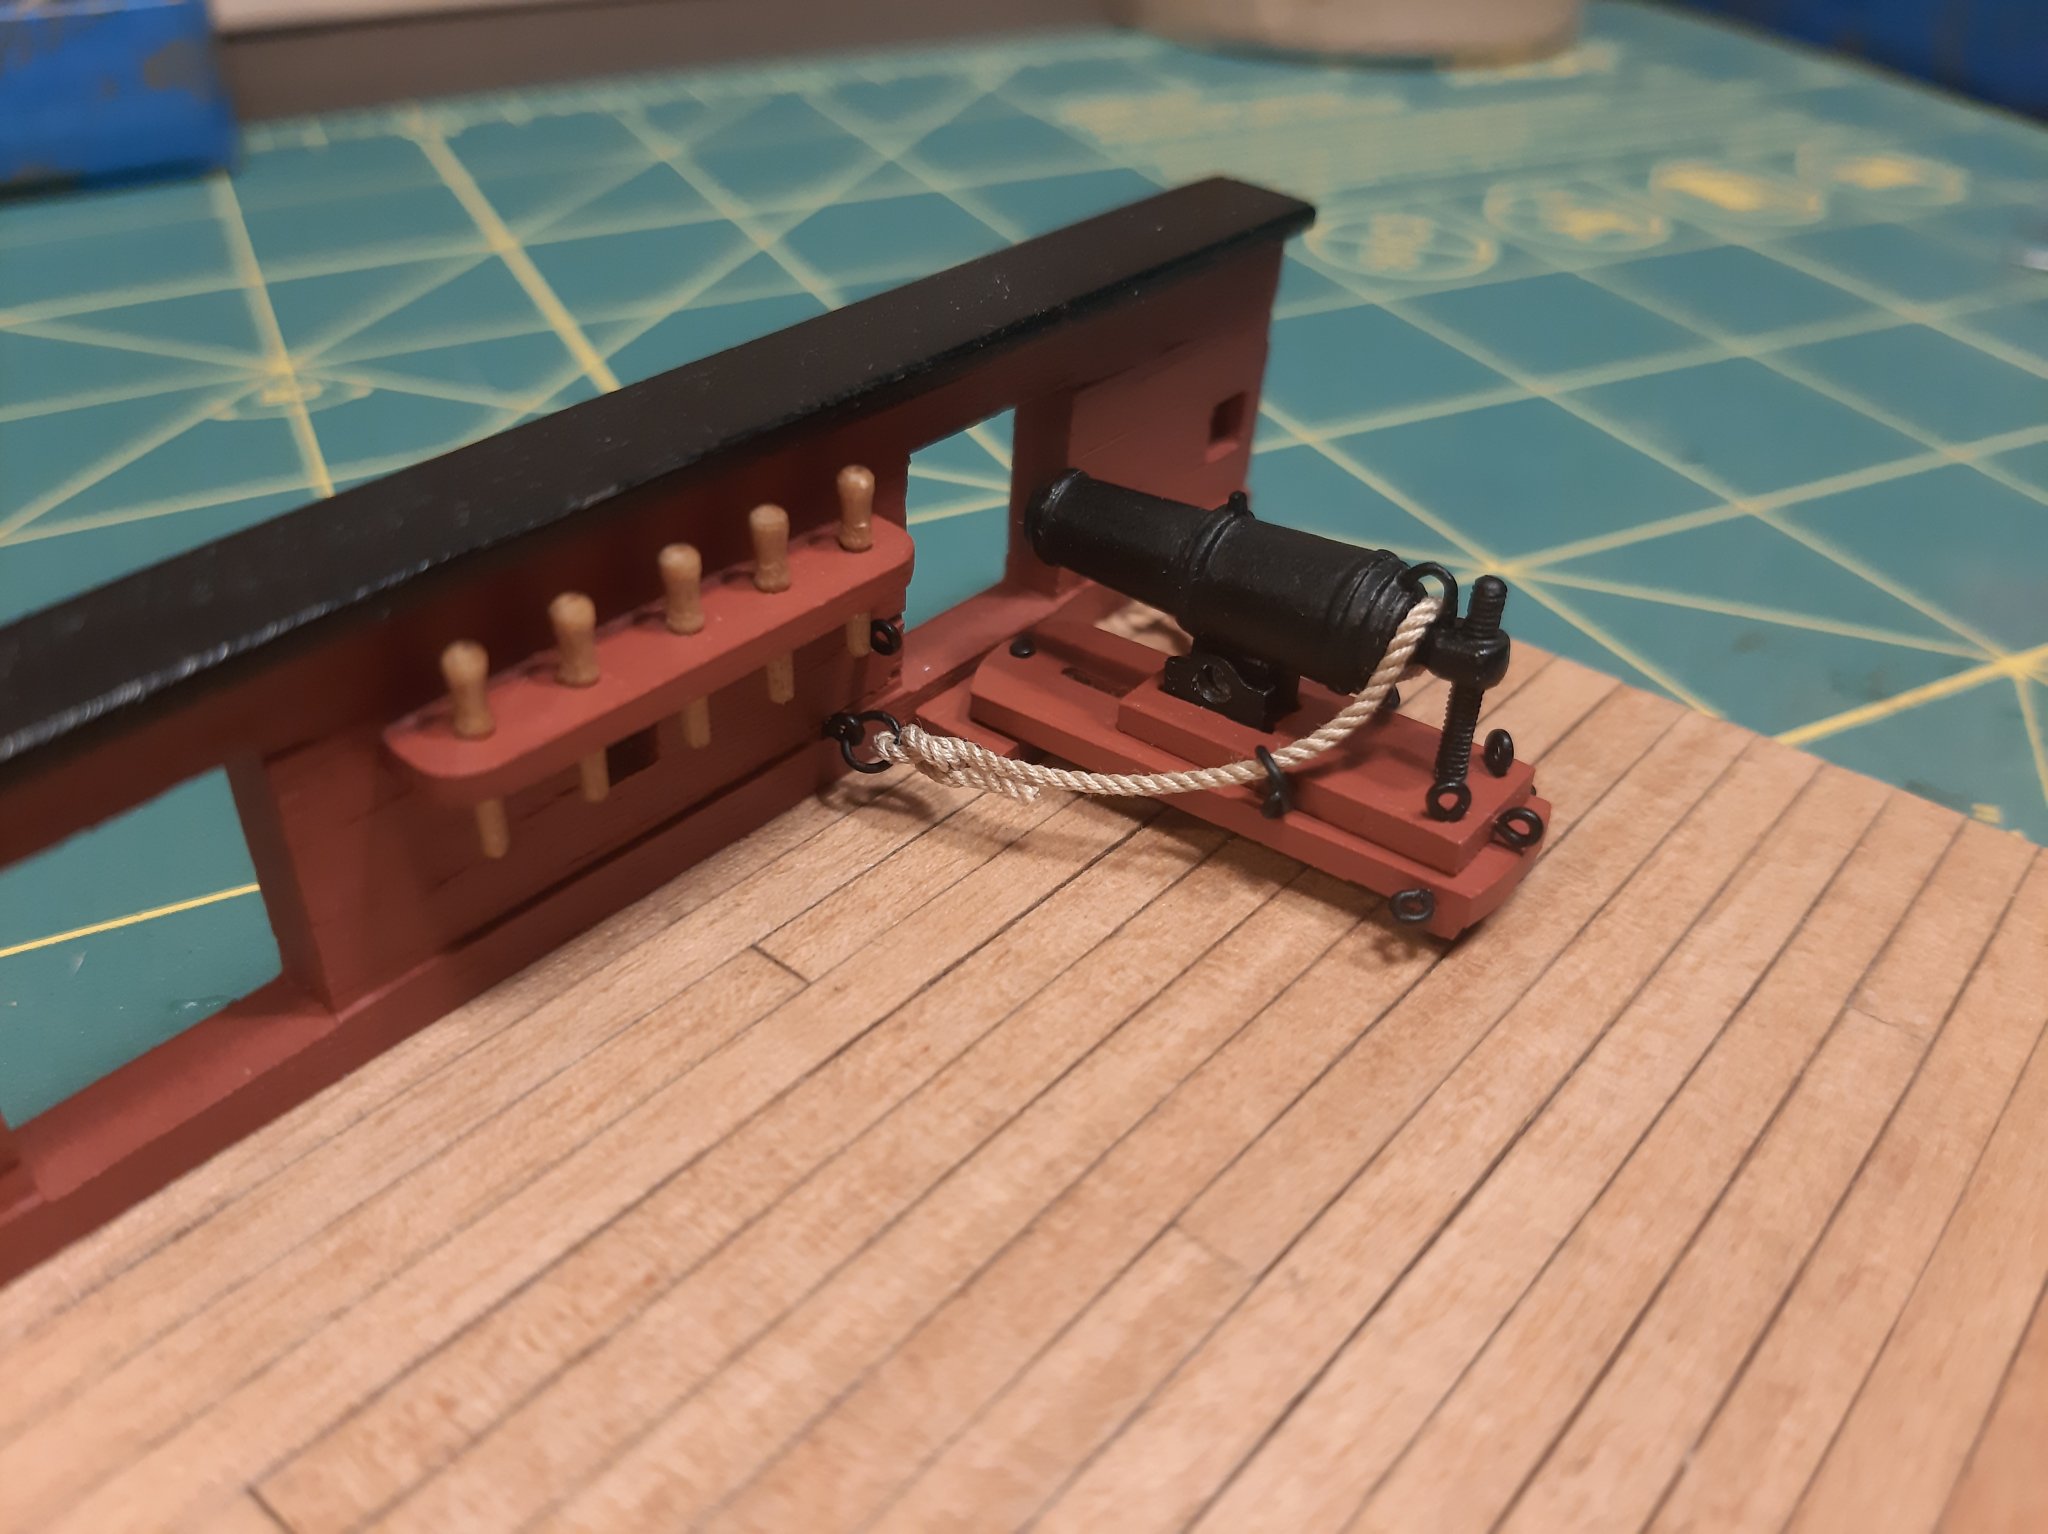
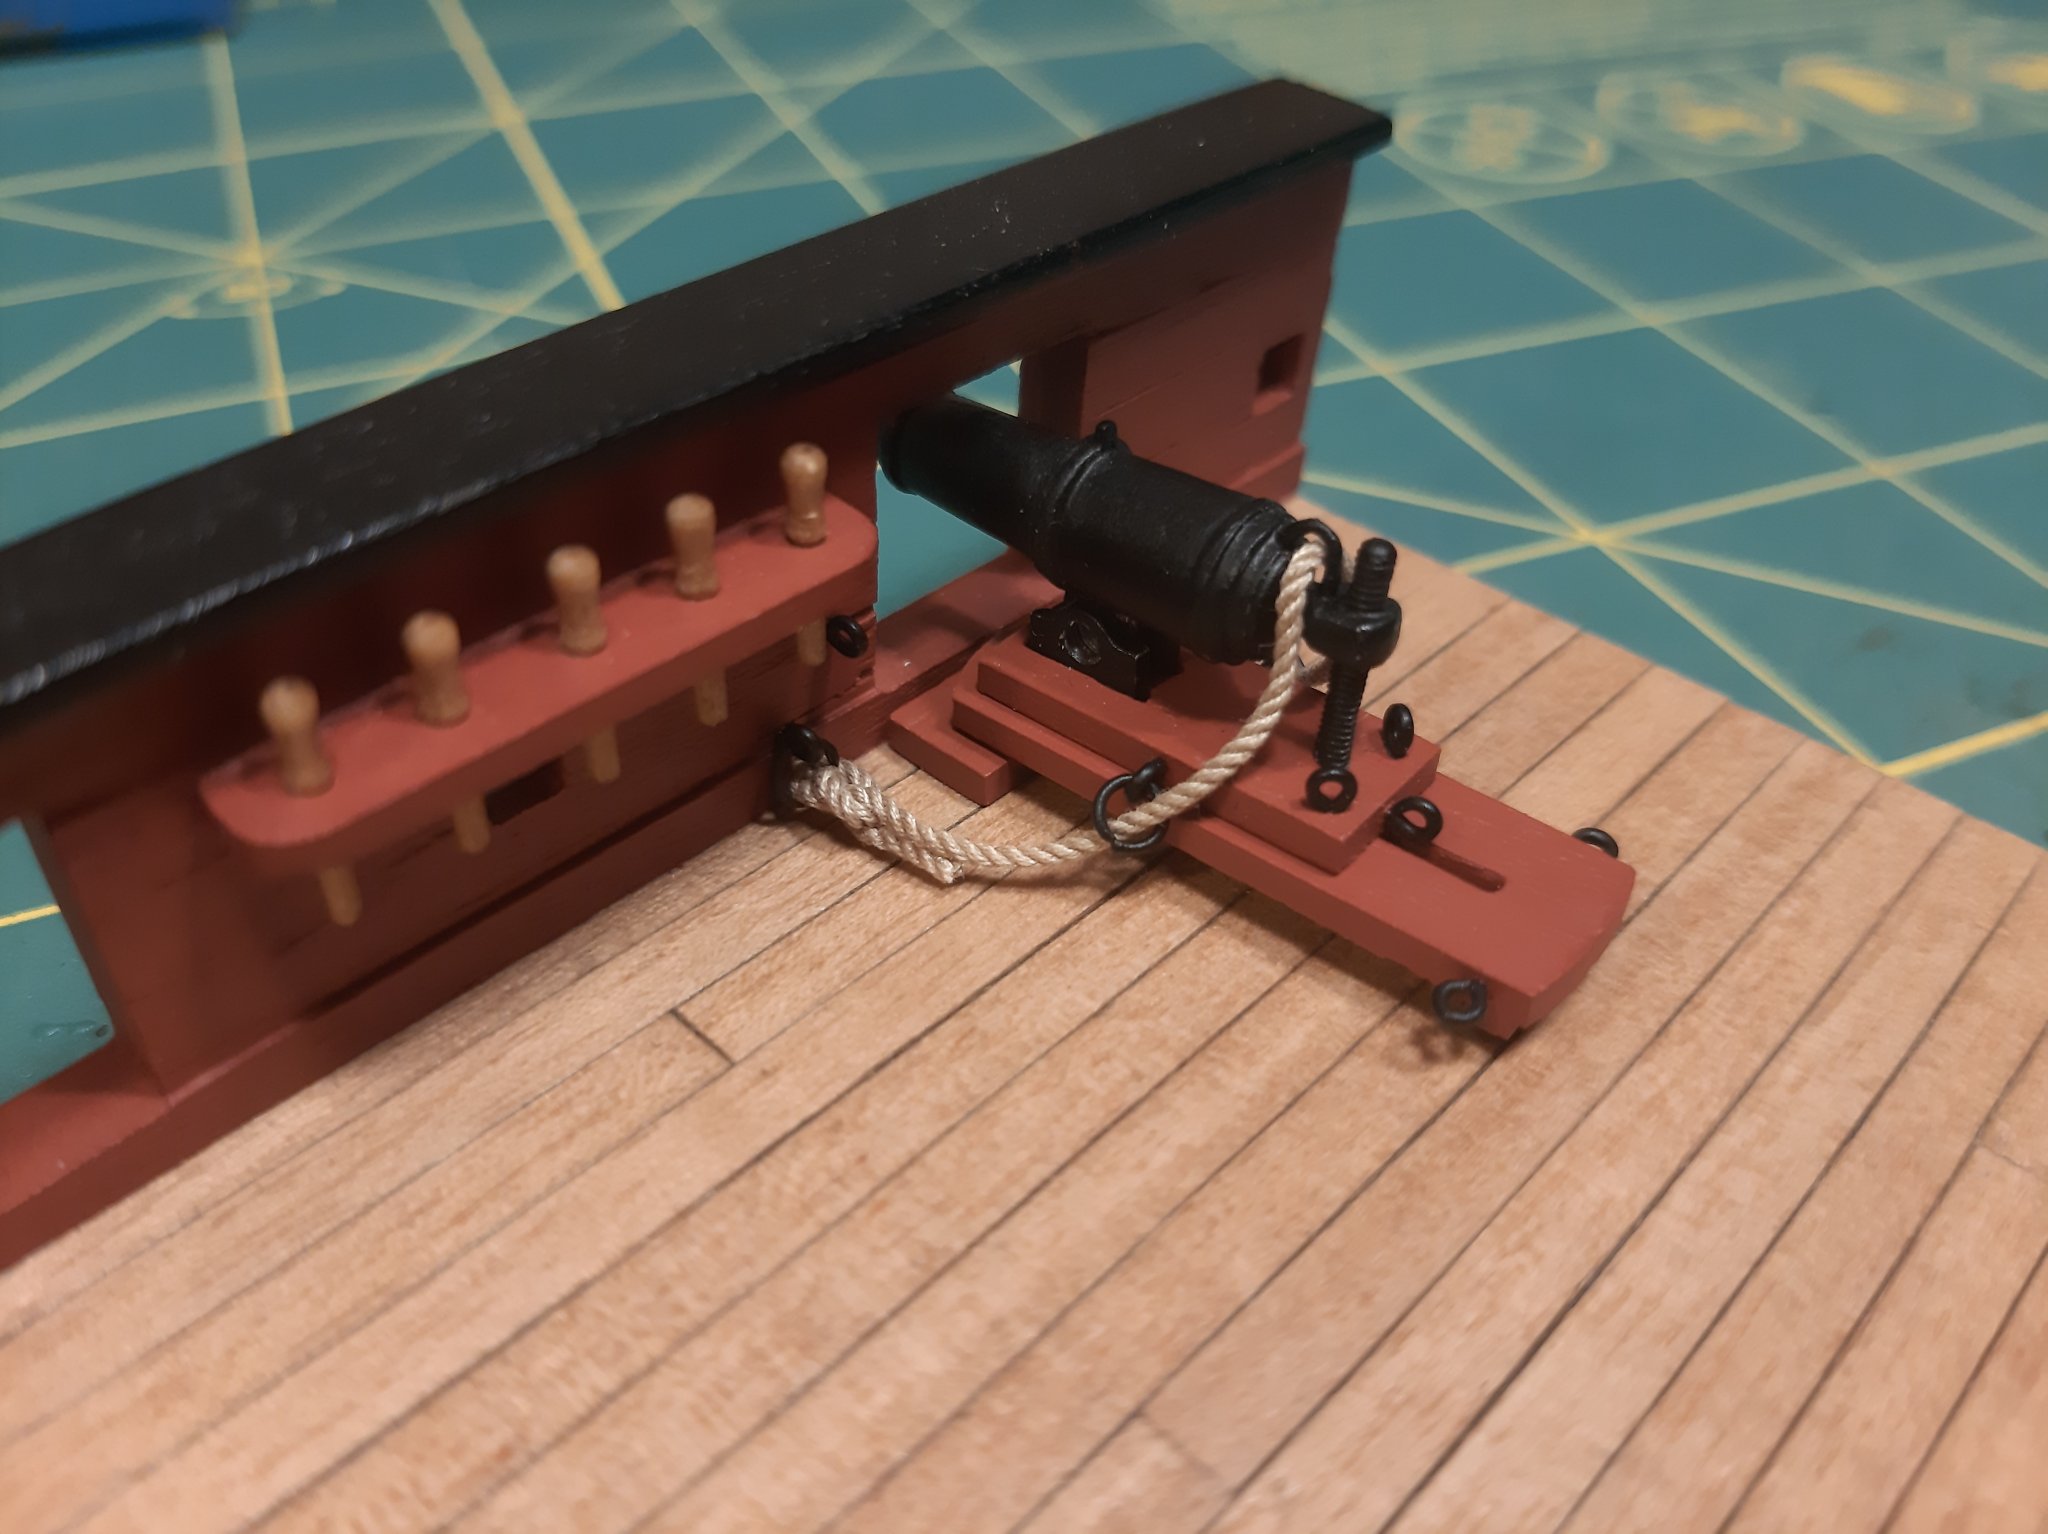
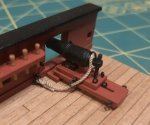
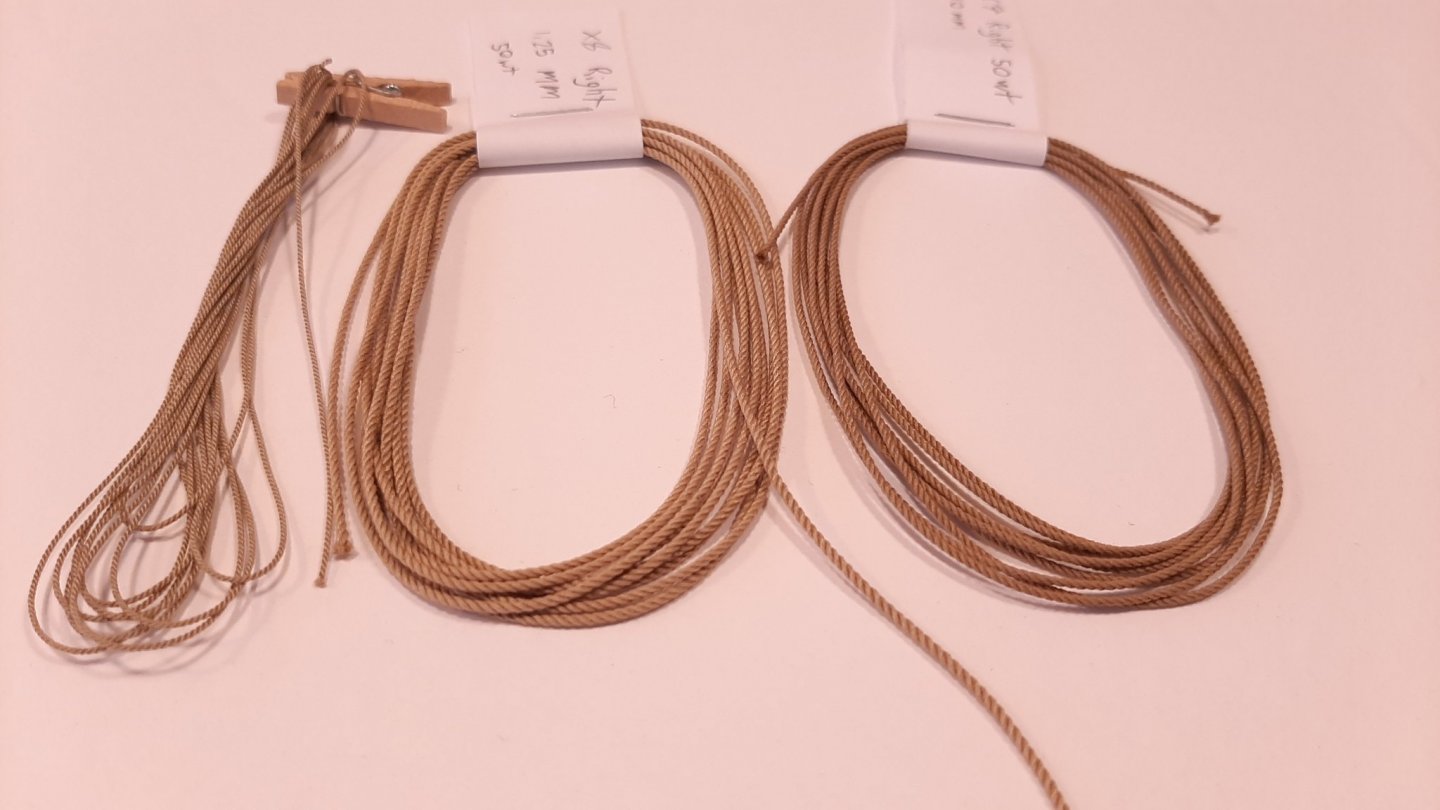
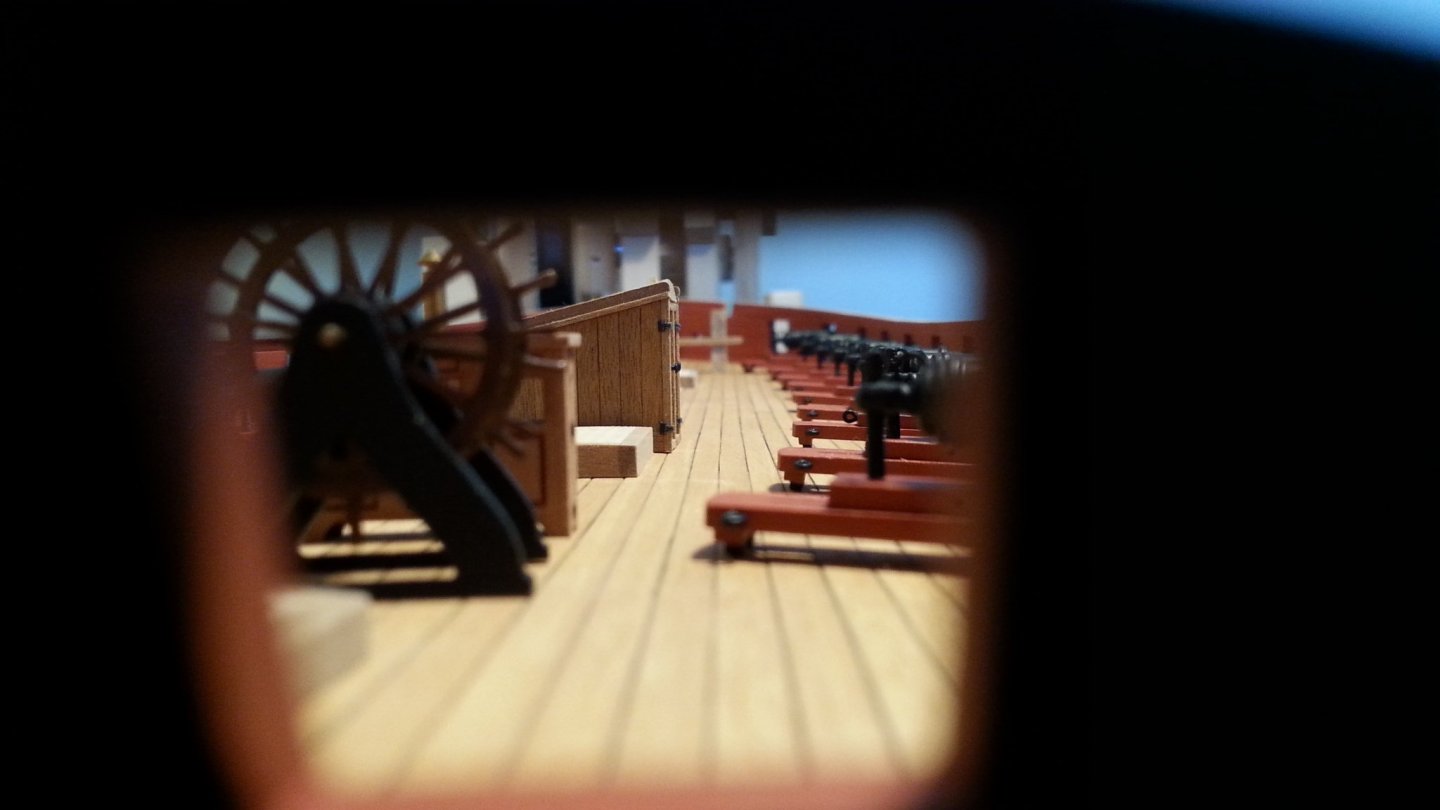
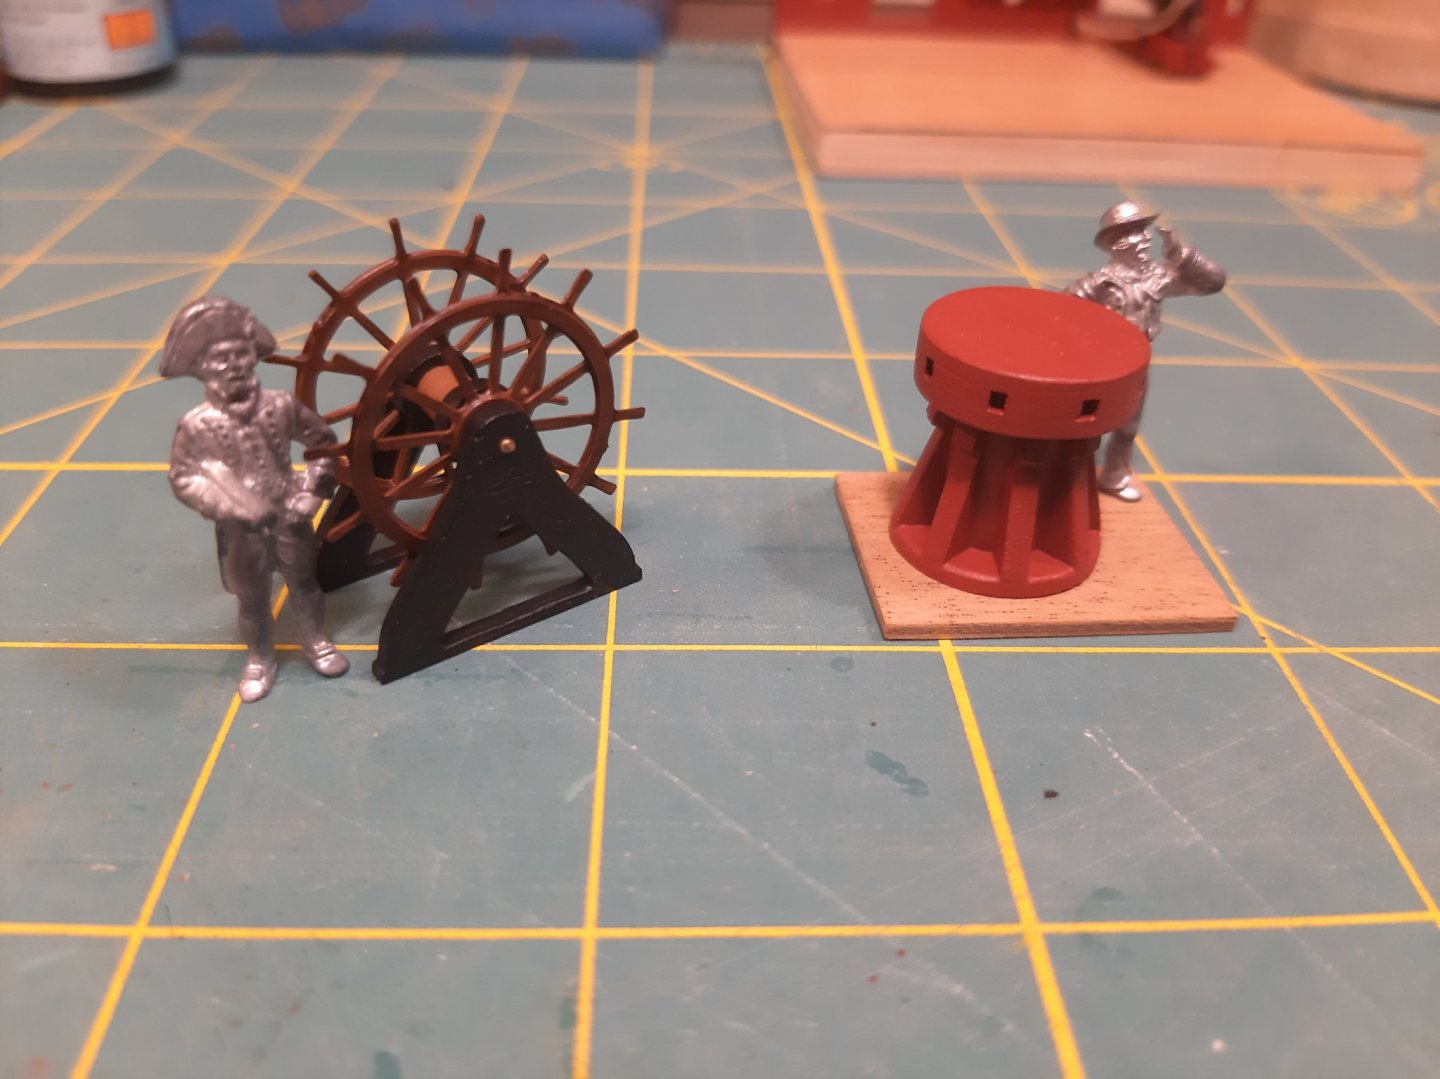
Carronades continued. I made some .95mm rope for the guns and think I may move up to 1.10mm and see if that looks closer to scale. The length needs to be increased also as you can see it can't haul in very far. Fiddling with all these tiny parts makes me nervous about adding outhaul tackle. Made the Ships wheel and capstan as a break from the guns. The wheel may be changed out in the future if I can find a reasonable replacement. The parts came off the sheet all hairy and chipped but they turned out okay regardless

-
The cost of making Royal George kits would be immense. 100 turned brass or resin Guns. boxwood planking for master version. Half a pallet of mdf only makes like 8 kits. Madness... I guess we should start saving
-
HMS Snake by BenD - Caldercraft - 1:64
BenD replied to BenD's topic in - Kit build logs for subjects built from 1751 - 1800
Used a brush. I added 5 ml of water to the Caldercraft paint pot to thin it out and did 3 light coats. They came out almost like airbrush, If you get really close you can see a bit of brush marks.