BenD
-
Posts
477 -
Joined
-
Last visited
Content Type
Profiles
Forums
Gallery
Events
Everything posted by BenD
-

HMS Snake by BenD - Caldercraft - 1:64
BenD replied to BenD's topic in - Kit build logs for subjects built from 1751 - 1800
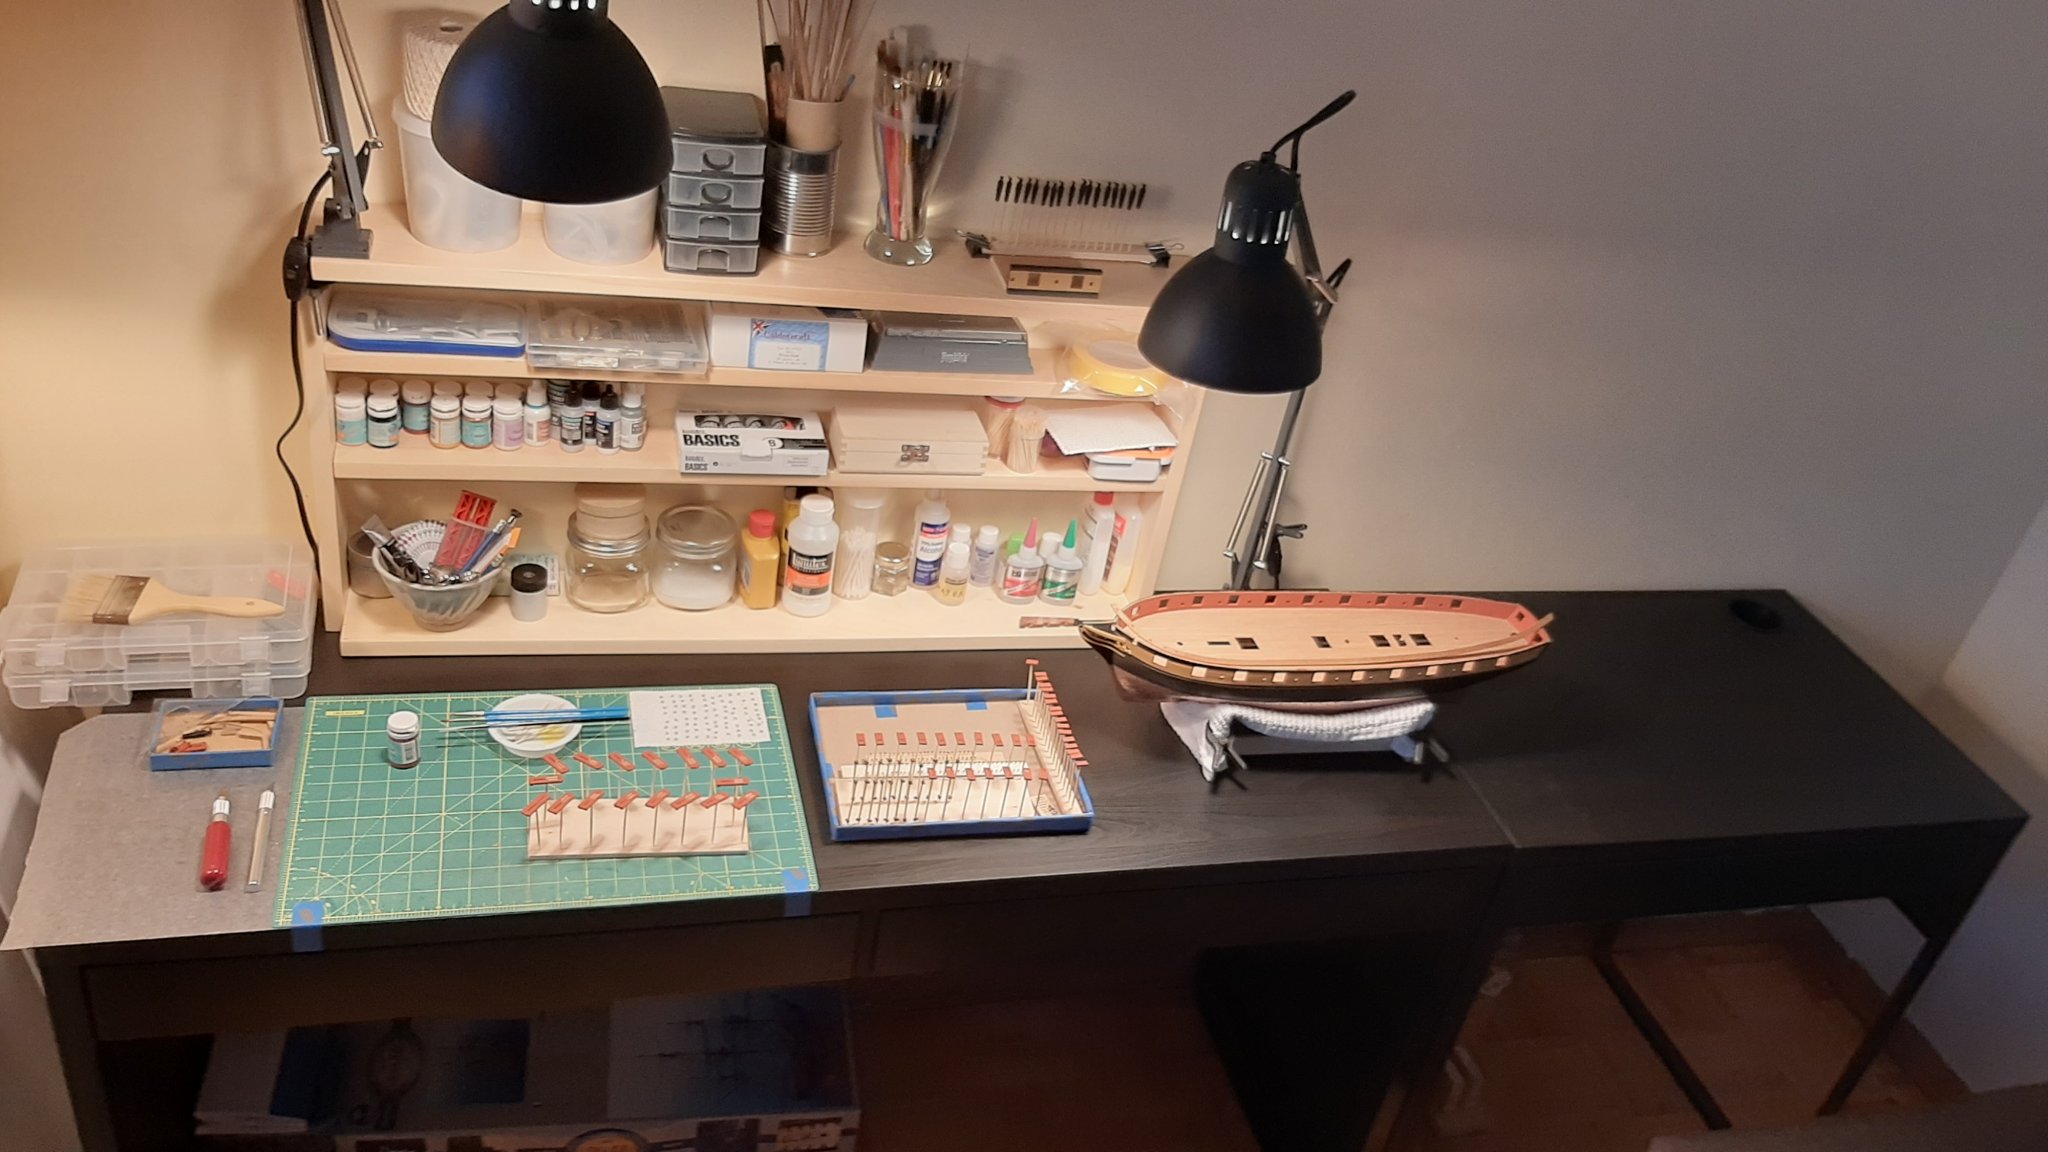
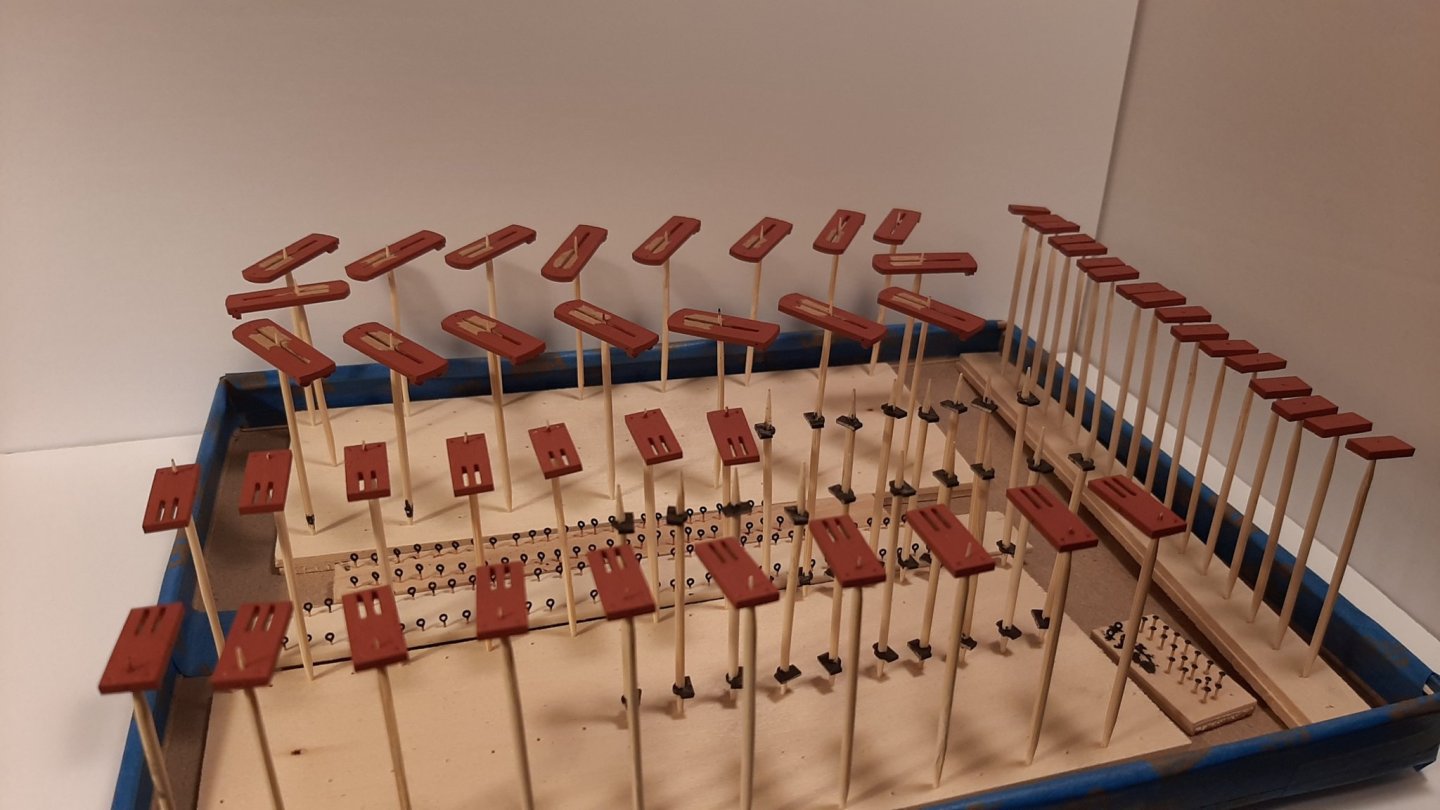
I upgraded my workstation once again. This time I got a new desk and some cheap Ikea lamps that can use 800 lumens bulbs. I now have more desk space than I know what to do with. So many hours have gone into prepping parts and painting for the Carronades. I can't even begin to imagine doing all the guns for a frigate or a ship of the line. Anyway I tried using a black deckblock to see If I liked the contrast or not, backed out of that pretty fast.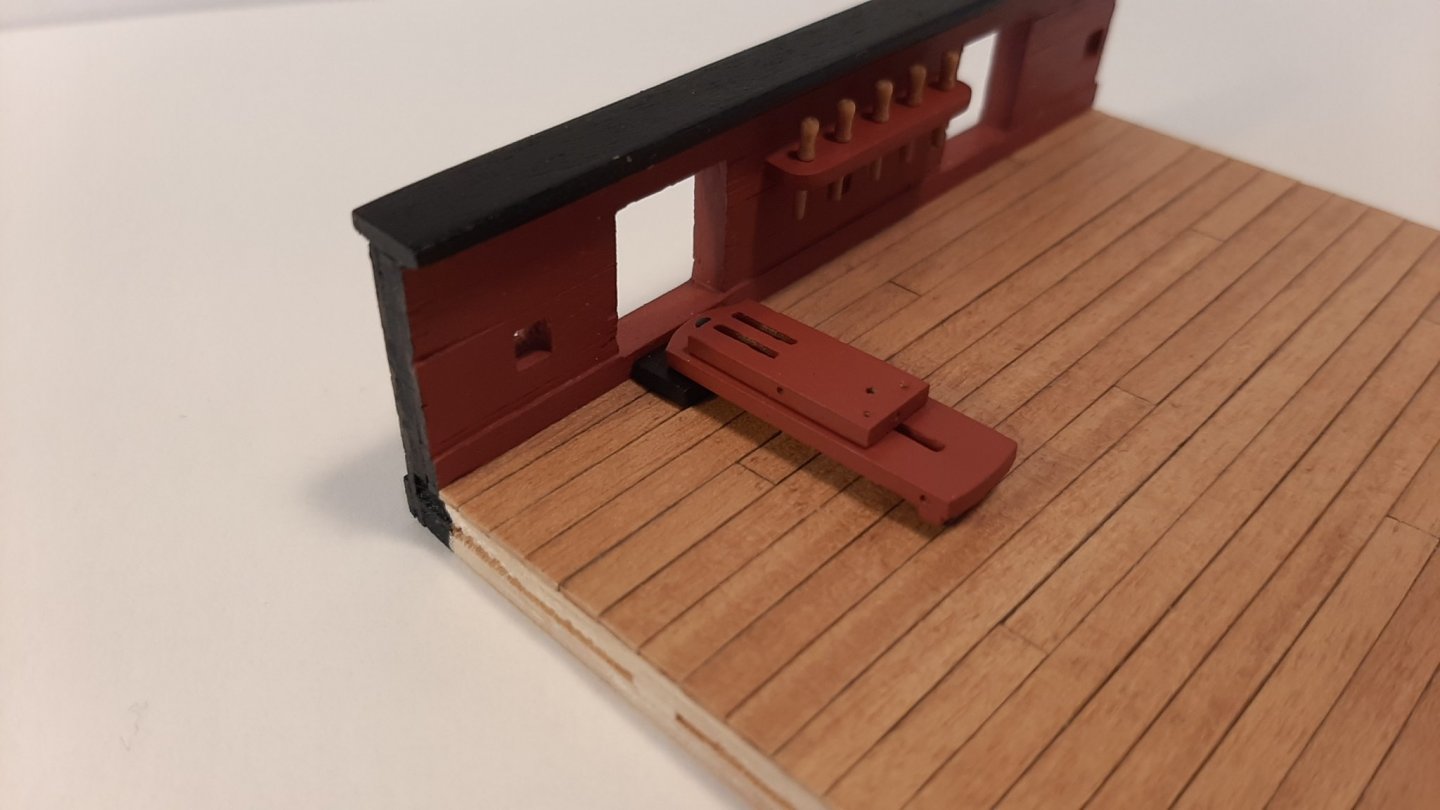

-
The 20 or 32 gun would be the logical progression of your kit lineup. No reason you can't develop the razee down the road.
-
I can't tell what ship the top three are but the Sphinx on the bottom looks like a 24 gun. It's the 1775 one right?
-
I agree with Gary that you could do a vote for the next kit if your really divided one what to do next. So far I know you want to do the Bellona, Leopard, and the Indefatigable. I'm looking for a frigate for my next build and I would be willing to drop $800 on a good one.
-
The 16 inch scroll saw is your best bet. I have one and I use it for so much more than model making. The other one has a rip fence and a miter gauge if you want to try that. I can't imagine they would be to terribly effective with this type of blade.
-
Thinking about painting? I personally like the natural wood you have going on. The ships wheel that comes with these kits are kinda crappy and flat. The one you bought is better. I just ordered some wheels myself, got 2 sizes. Thinking about rigging already? You can get a lot done with just a few knots like a slip knot or even an overhand knot. The real game changer for me was learning how to make lashings, I'll link a video from a really old guy on YouTube.
-
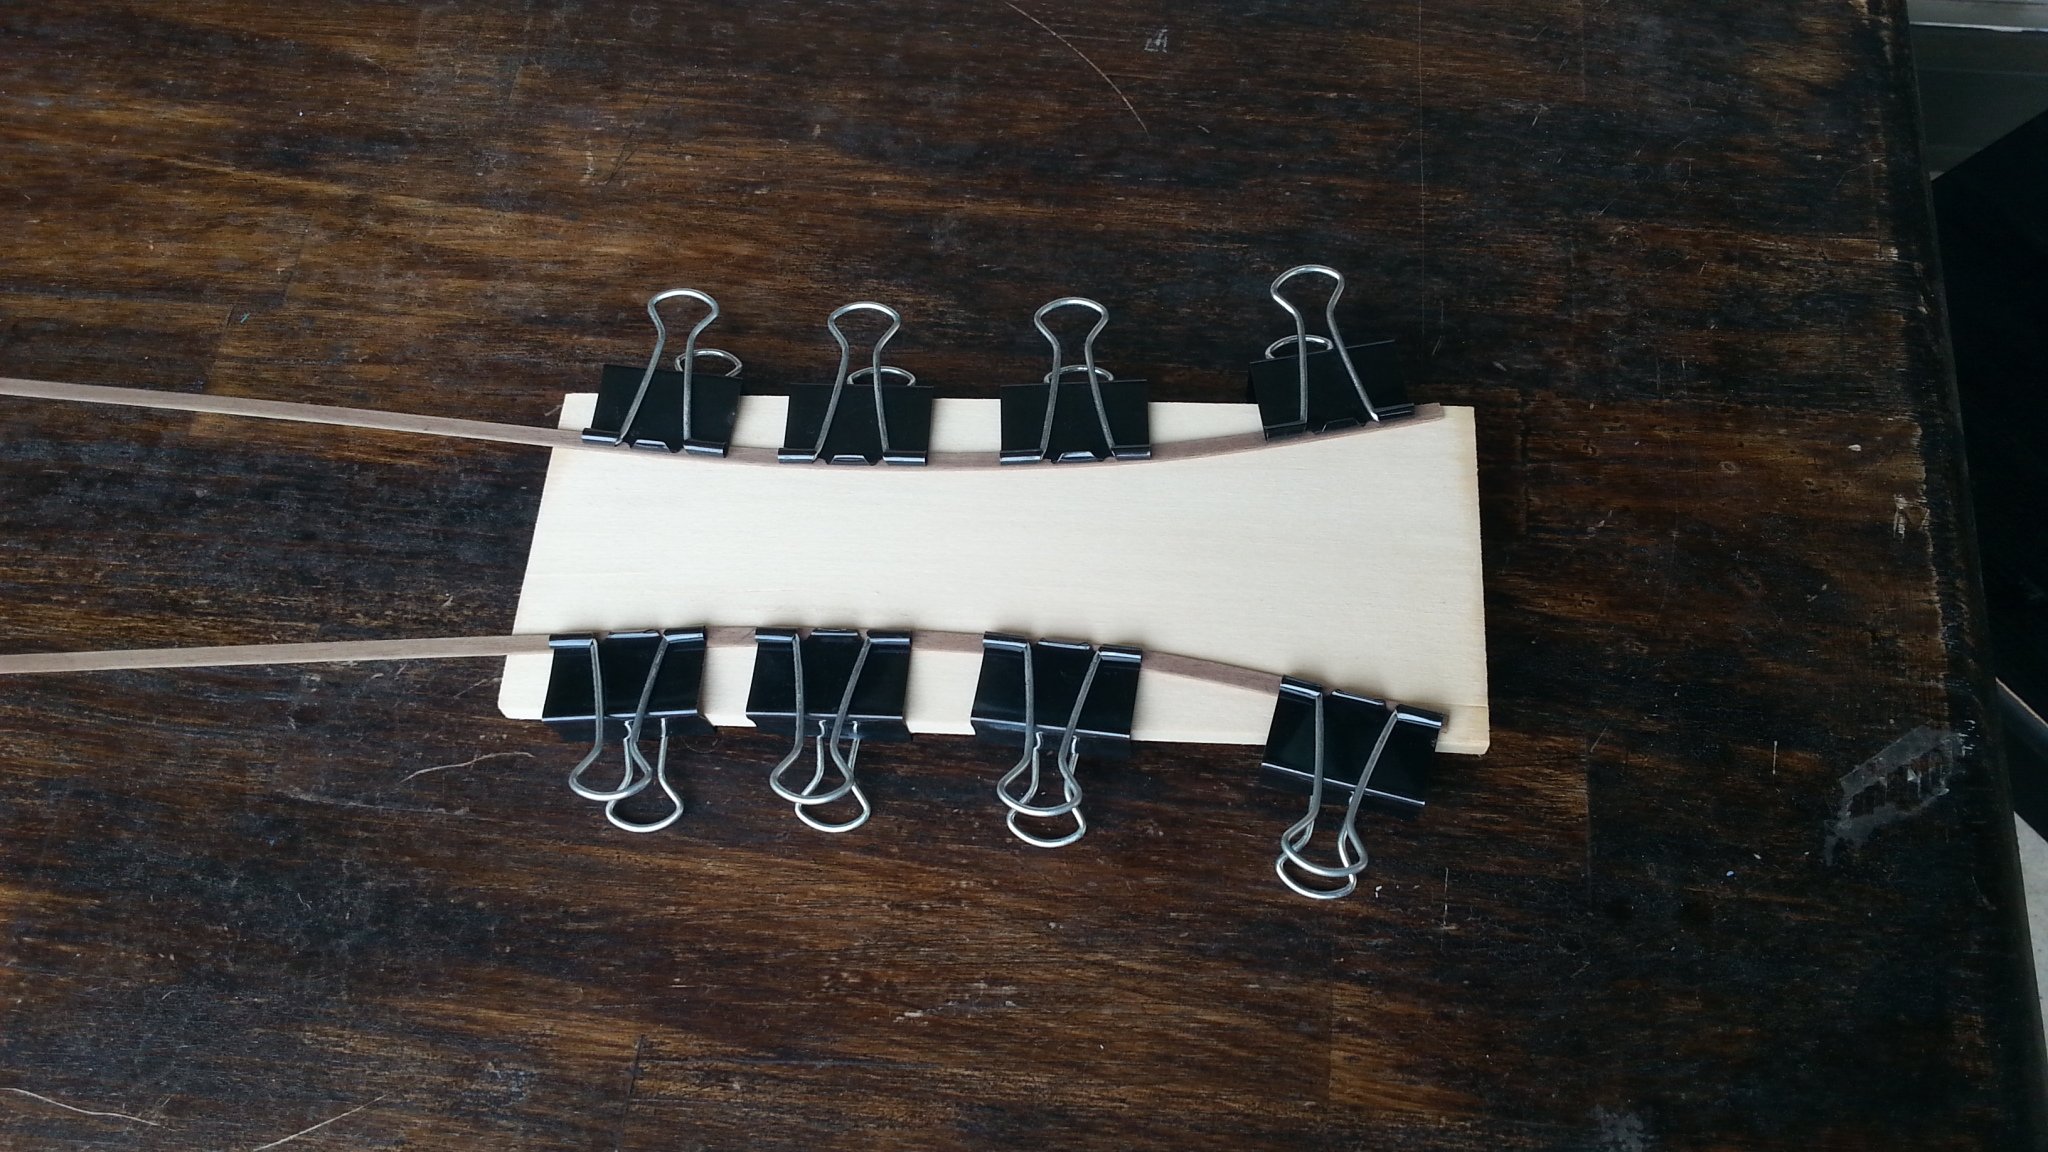
Chucks method does work. Clamp the strips then use a hair dryer instead of an iron and it wont get burned. This is how I did it and it worked really well.

-
That Cutter is going on my HMS Snake. Hey Chris, are you going to make other sizes of launches?
-
HMS Snake by BenD - Caldercraft - 1:64
BenD replied to BenD's topic in - Kit build logs for subjects built from 1751 - 1800
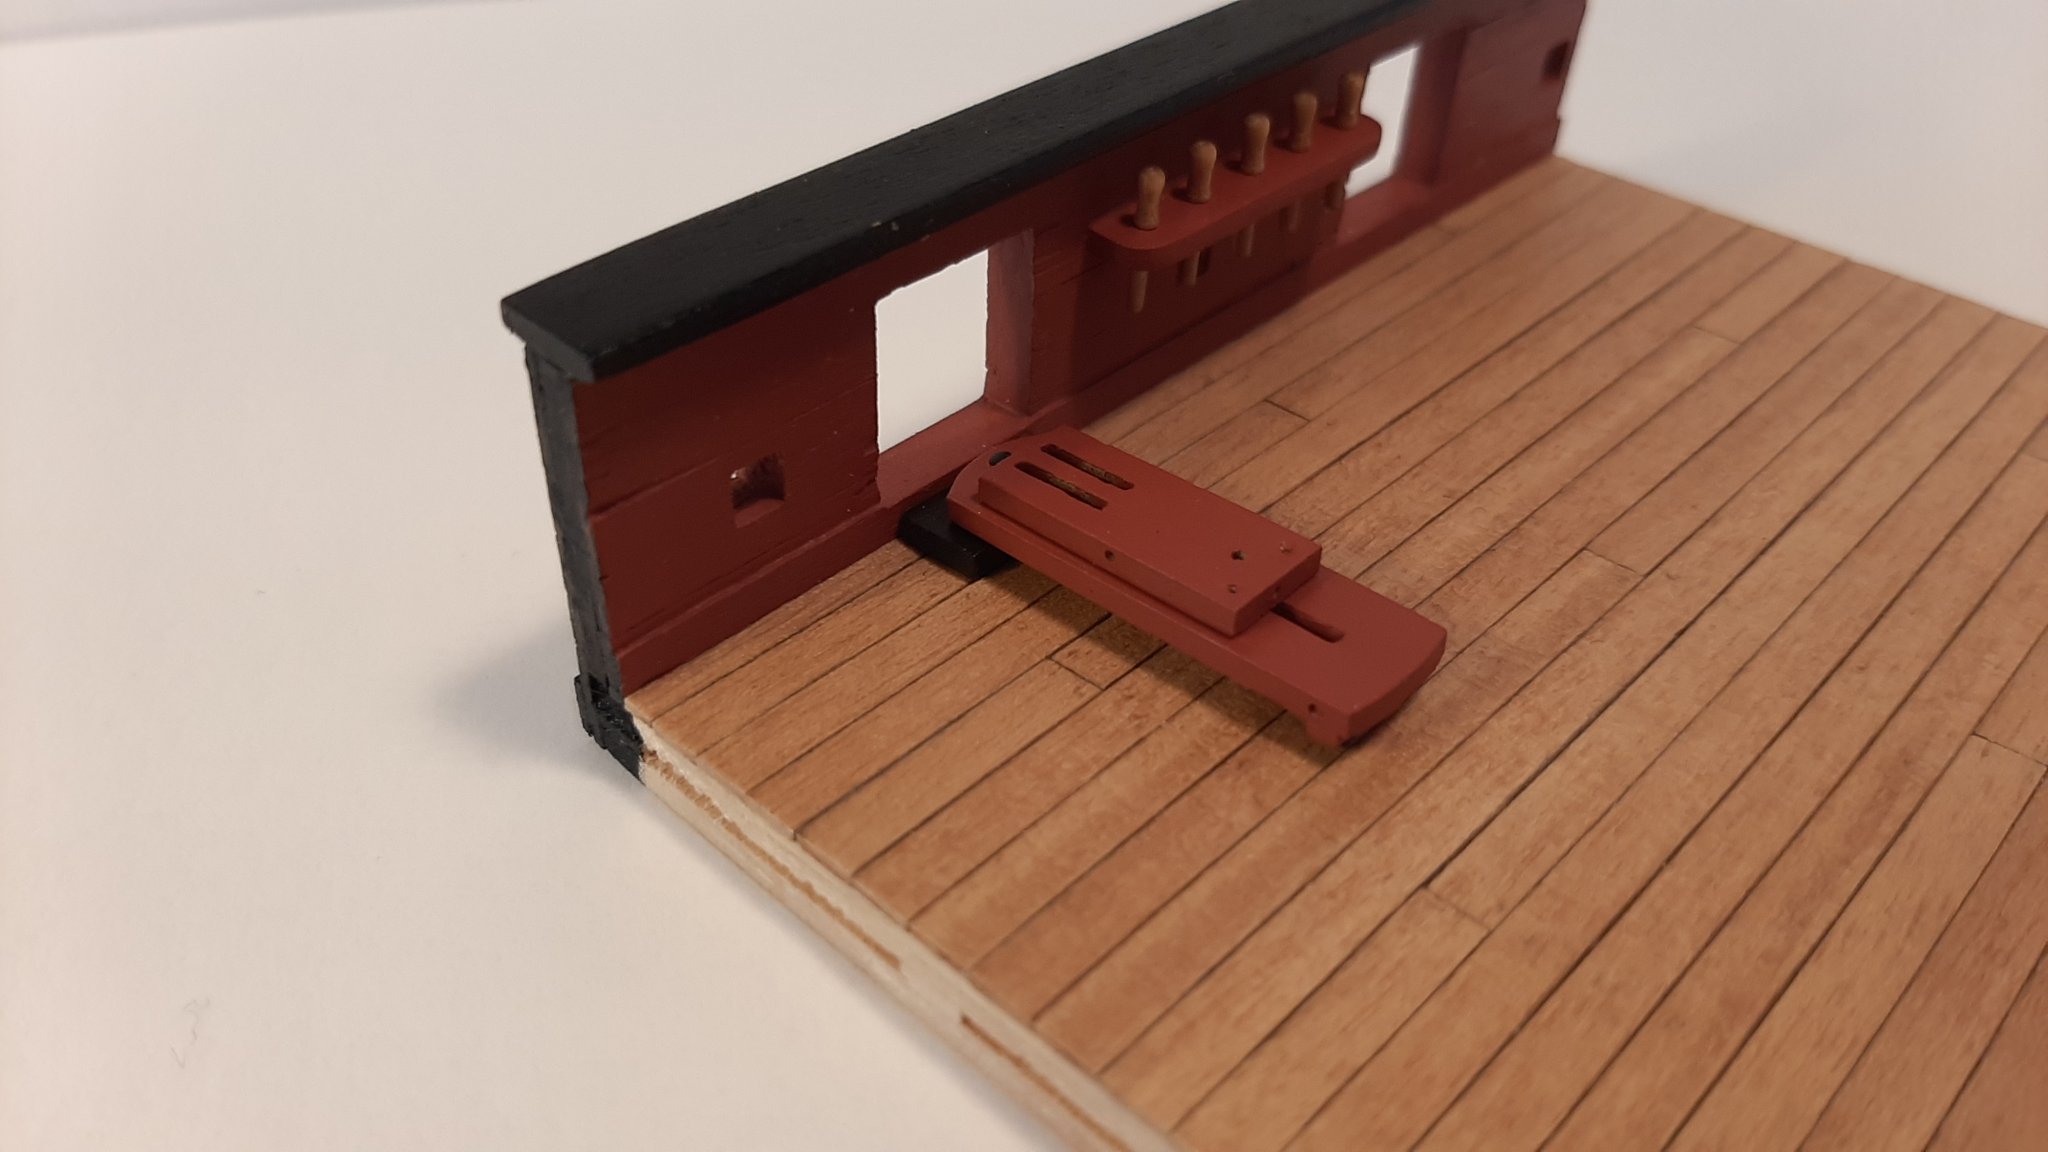
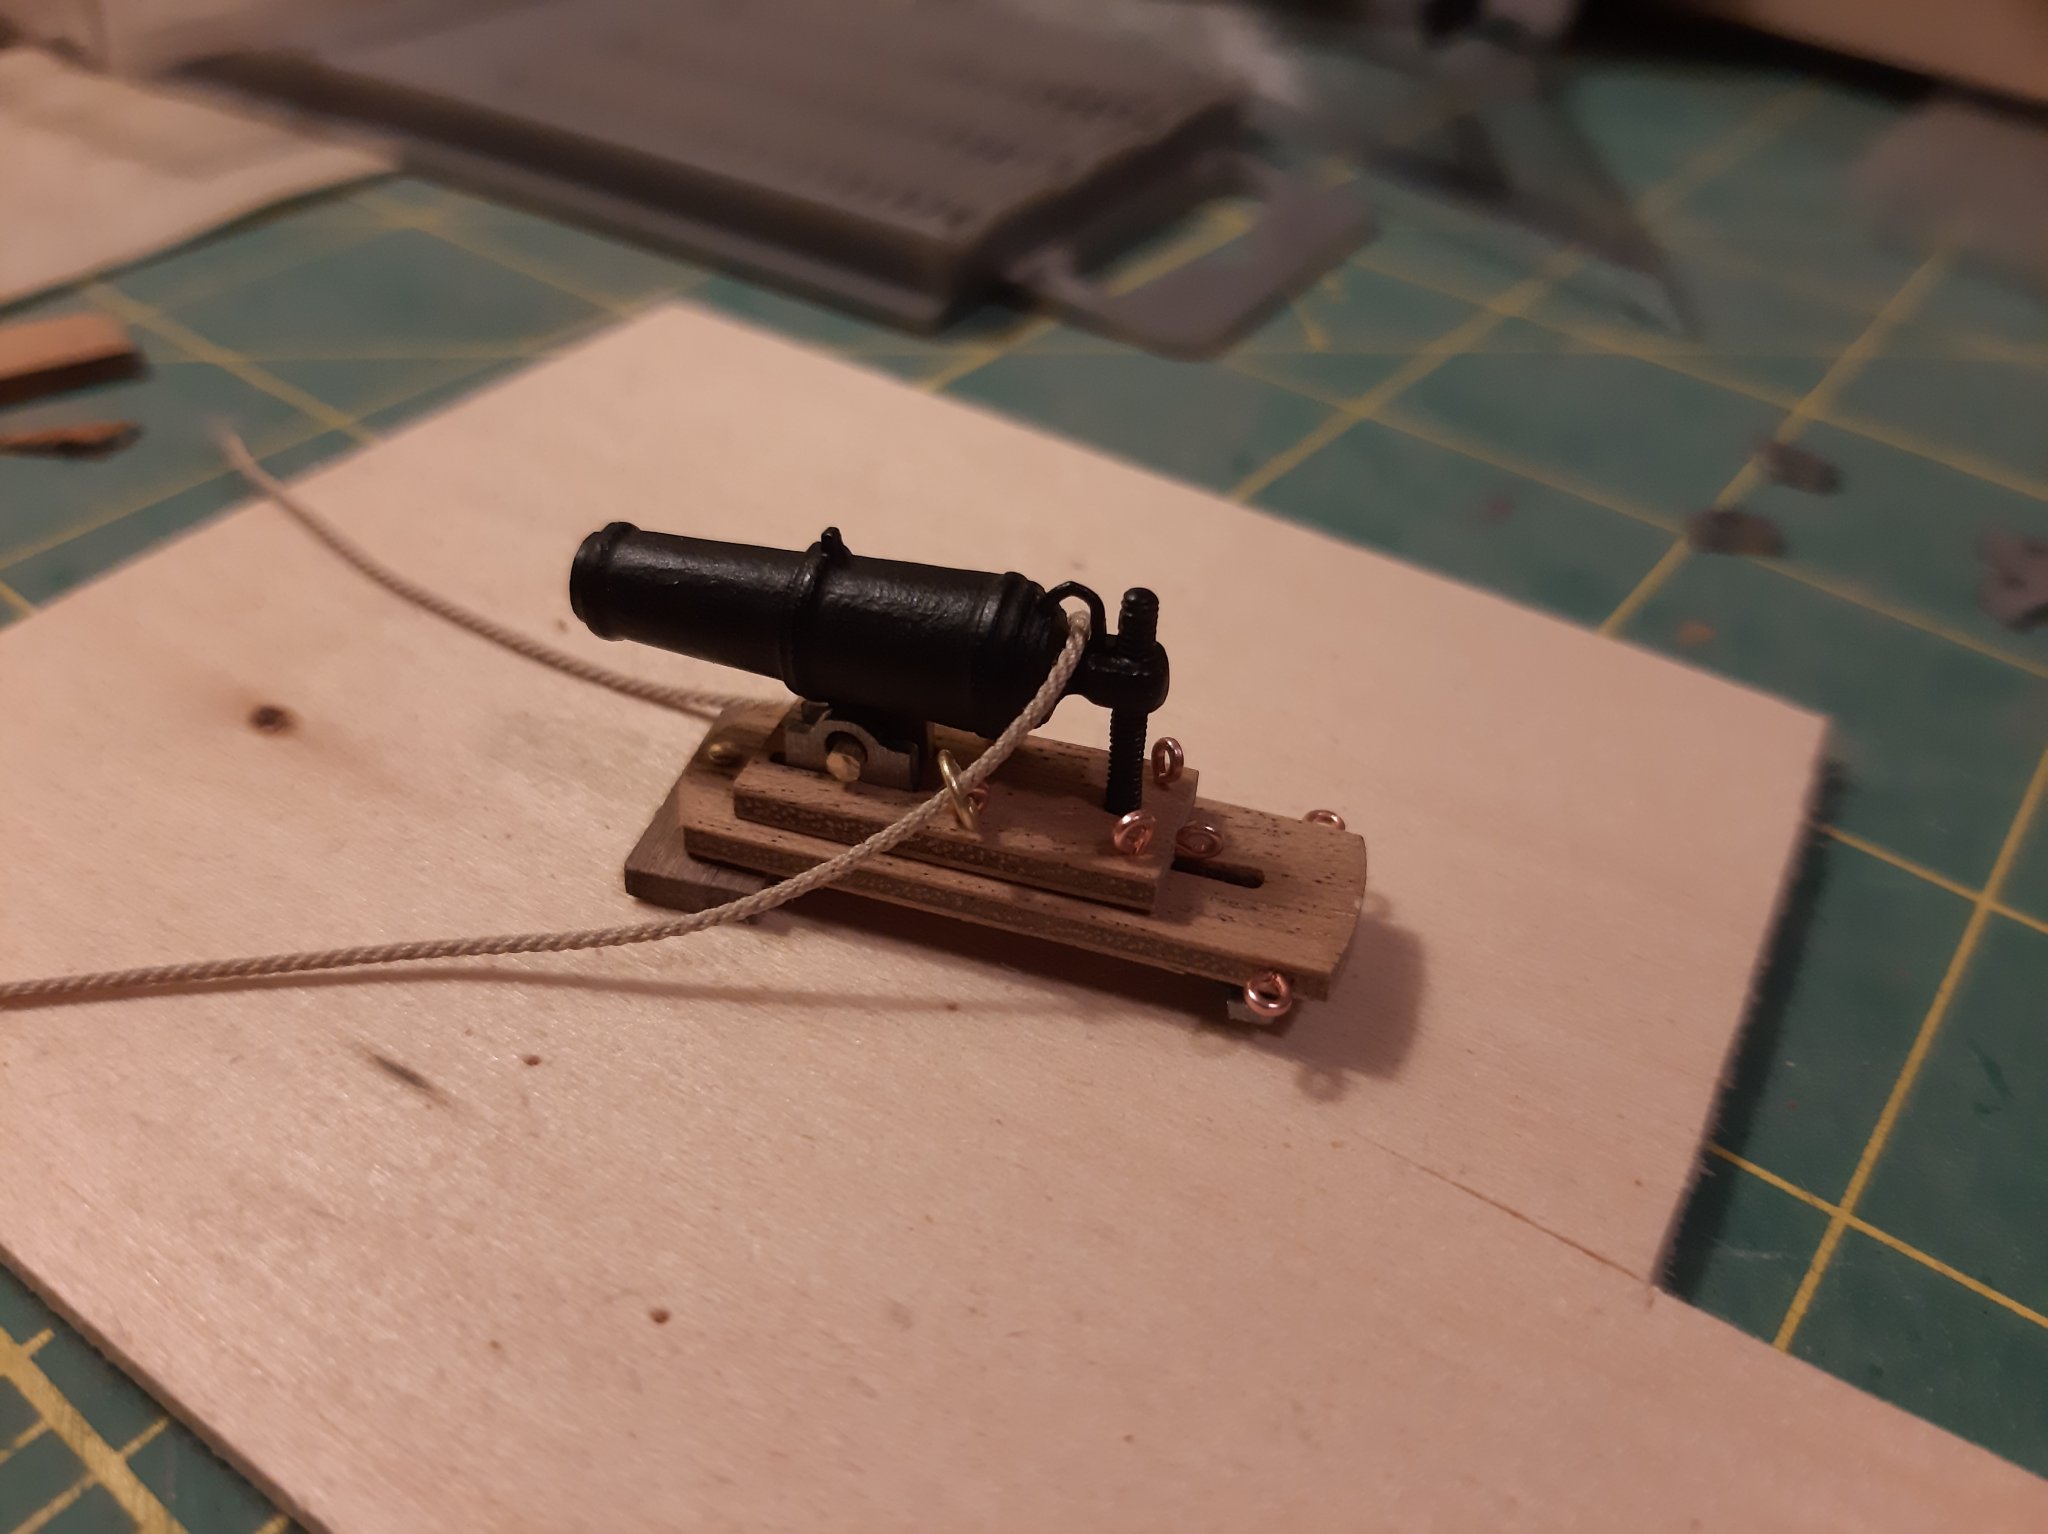
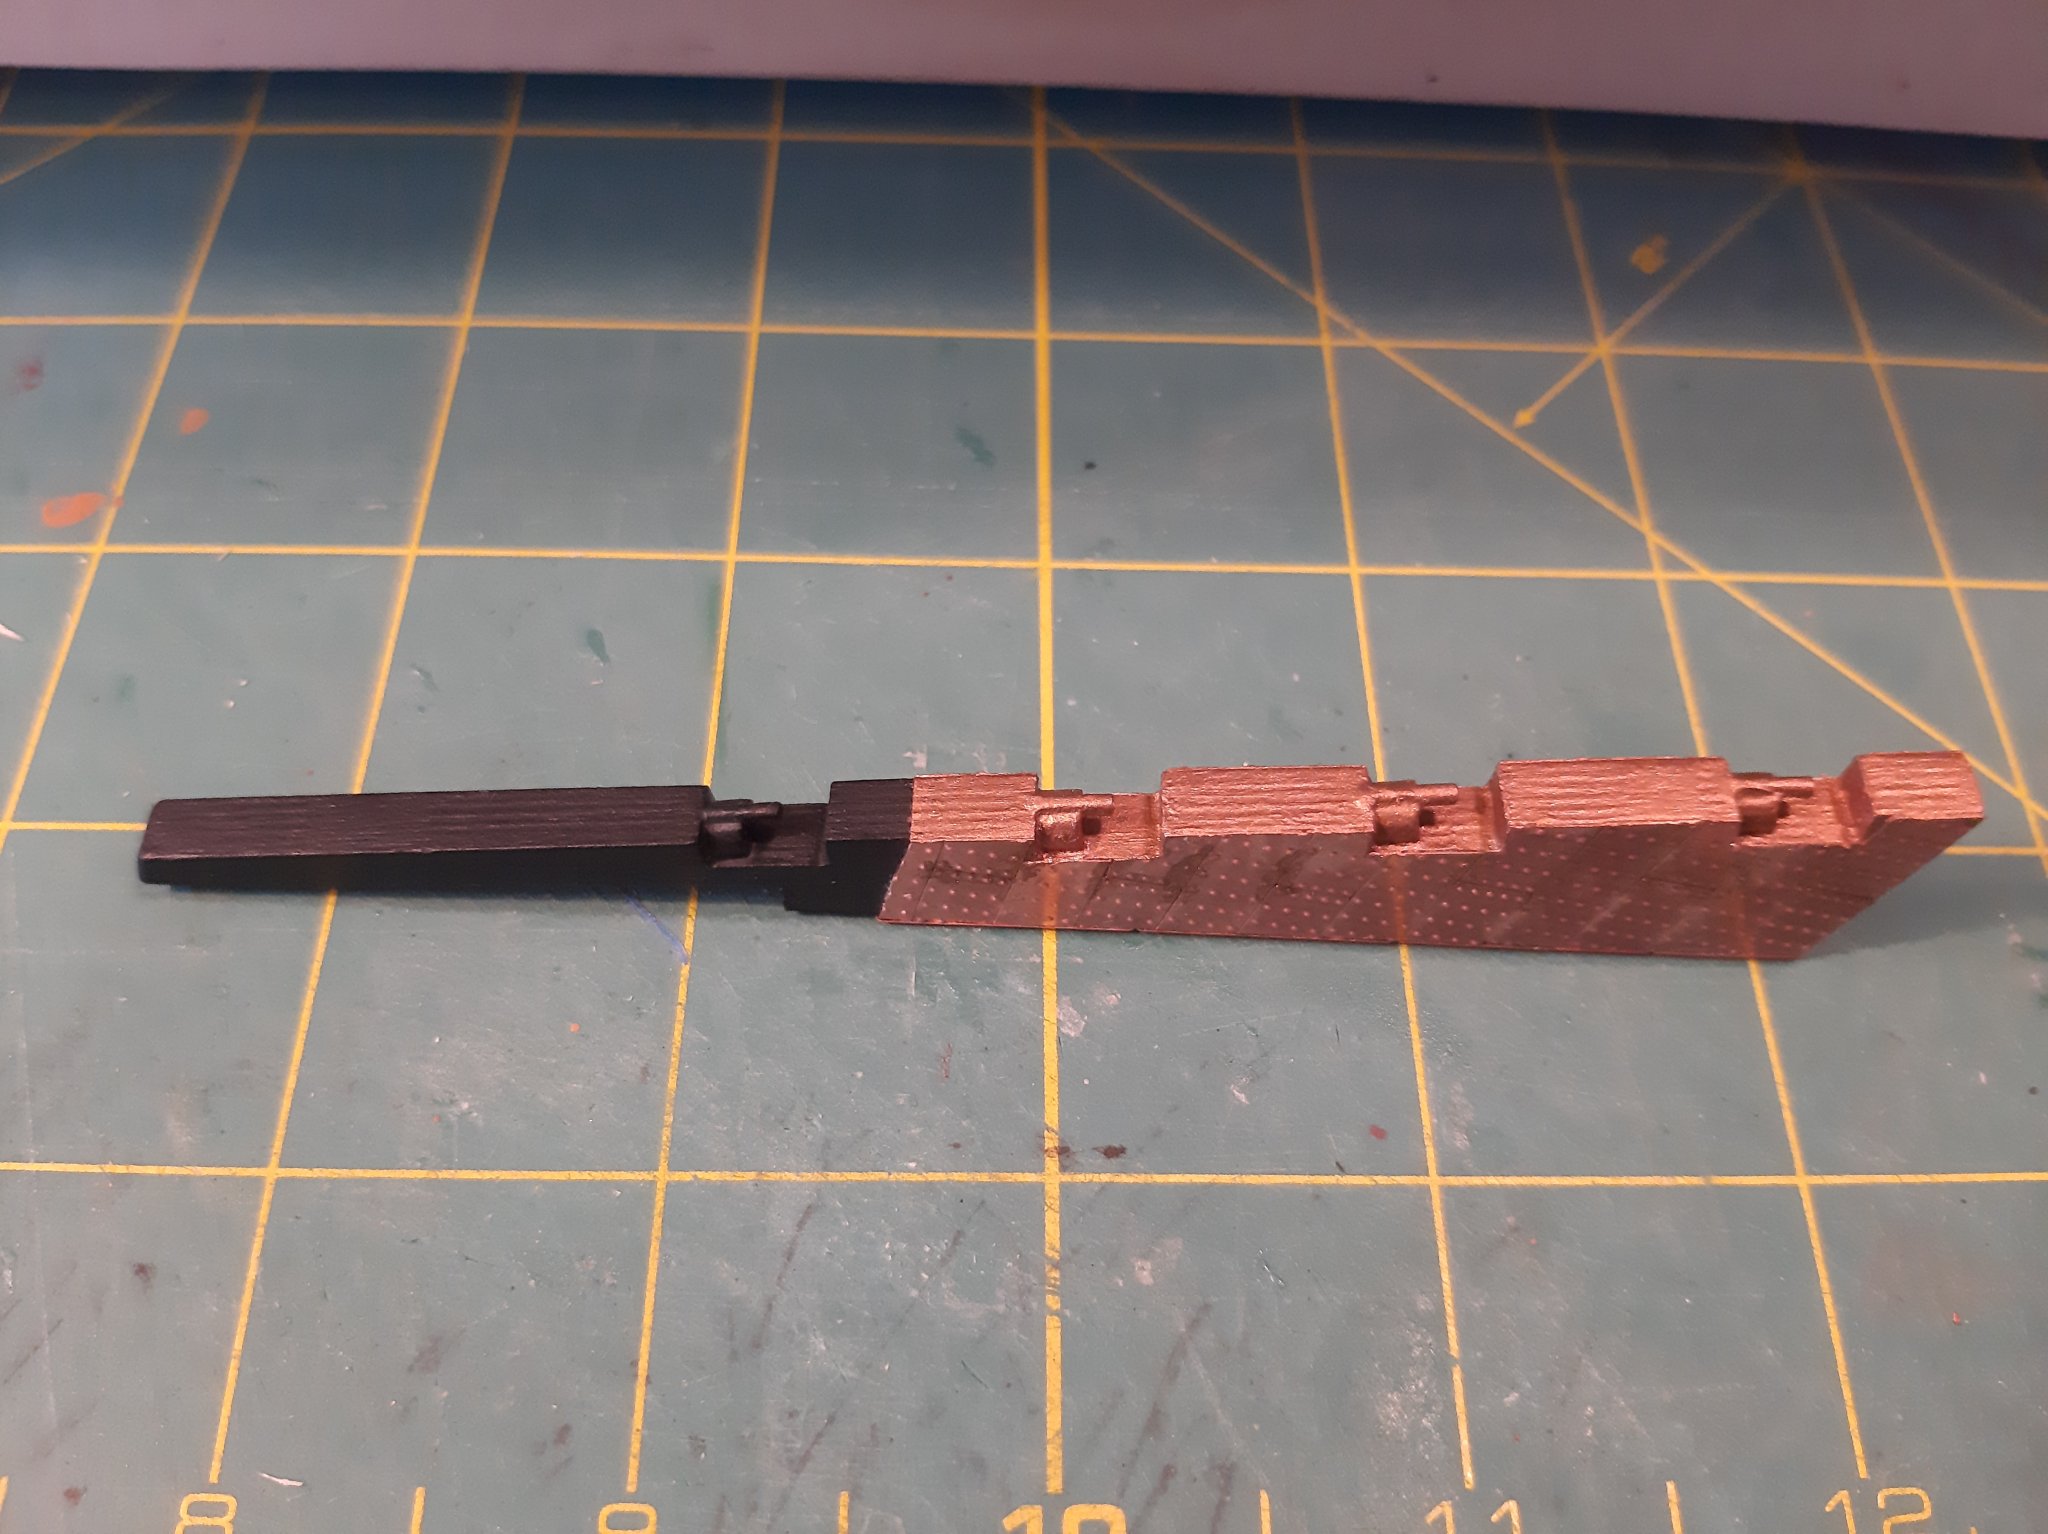
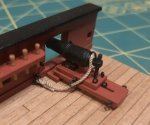
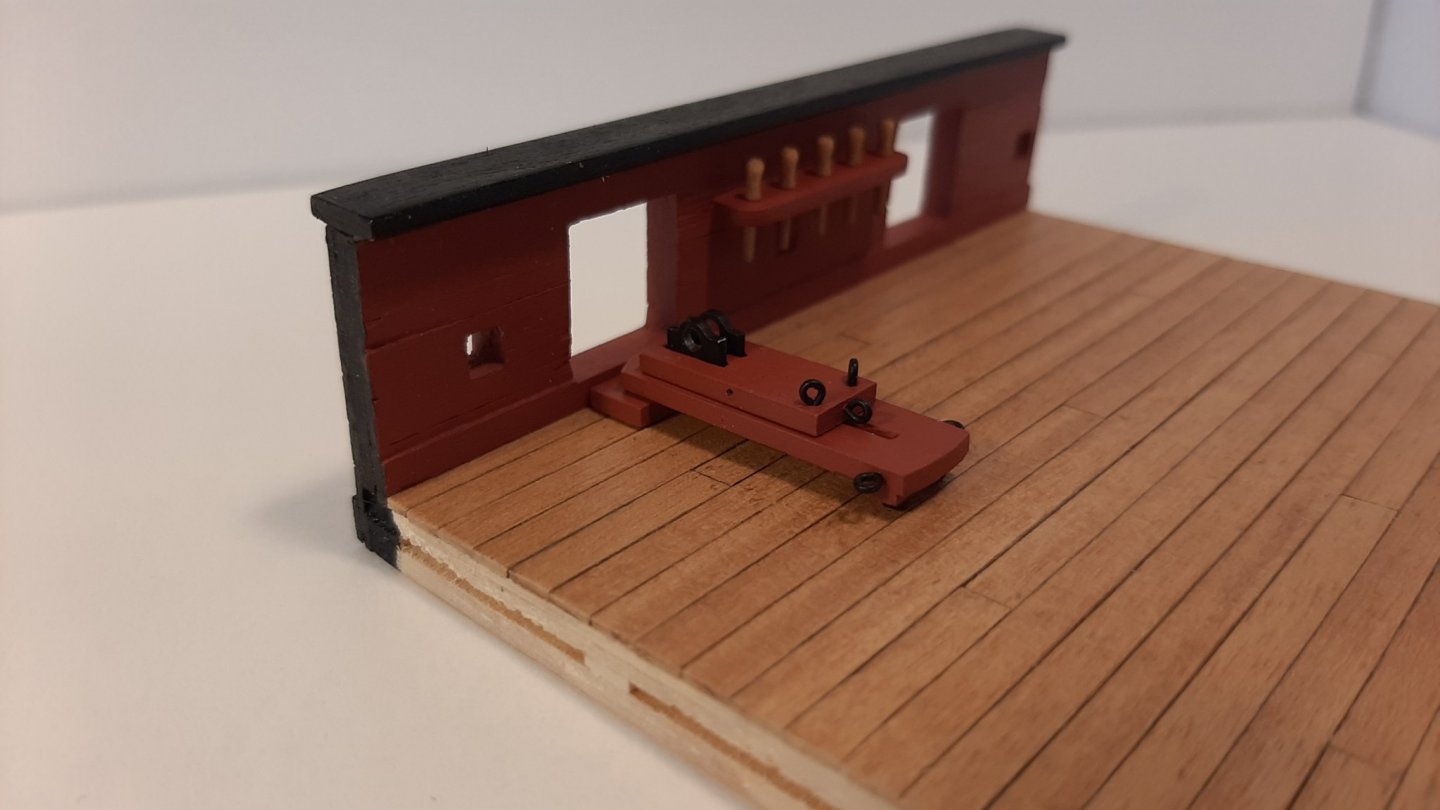
The Great Guns I'm working out the configuration for my Carronades. I've deviated from the kit a fair bit by adding eyelets for inhaul, outhaul, and taverse tackle. There is also the addition of the deck block and rings for the breach rope. The rope is .75mm and looks a bit small so I will make some 1mm and see where that goes. I may put the eyelets with the beach rope on the side instead of on top of the carriage. The 1.5mm wire given with the kit is to small for the Trunnion bracket which is 2mm in diameter. Add 2mm brass wire to basket... My Cornwallmodelboats order grows... Over all the guns are going to be an amalgamation of all the pictures and info I've been gathering. I will probably only rig the breach rope and the out haul tackle but it's nice to have the rest of the hardware add detail.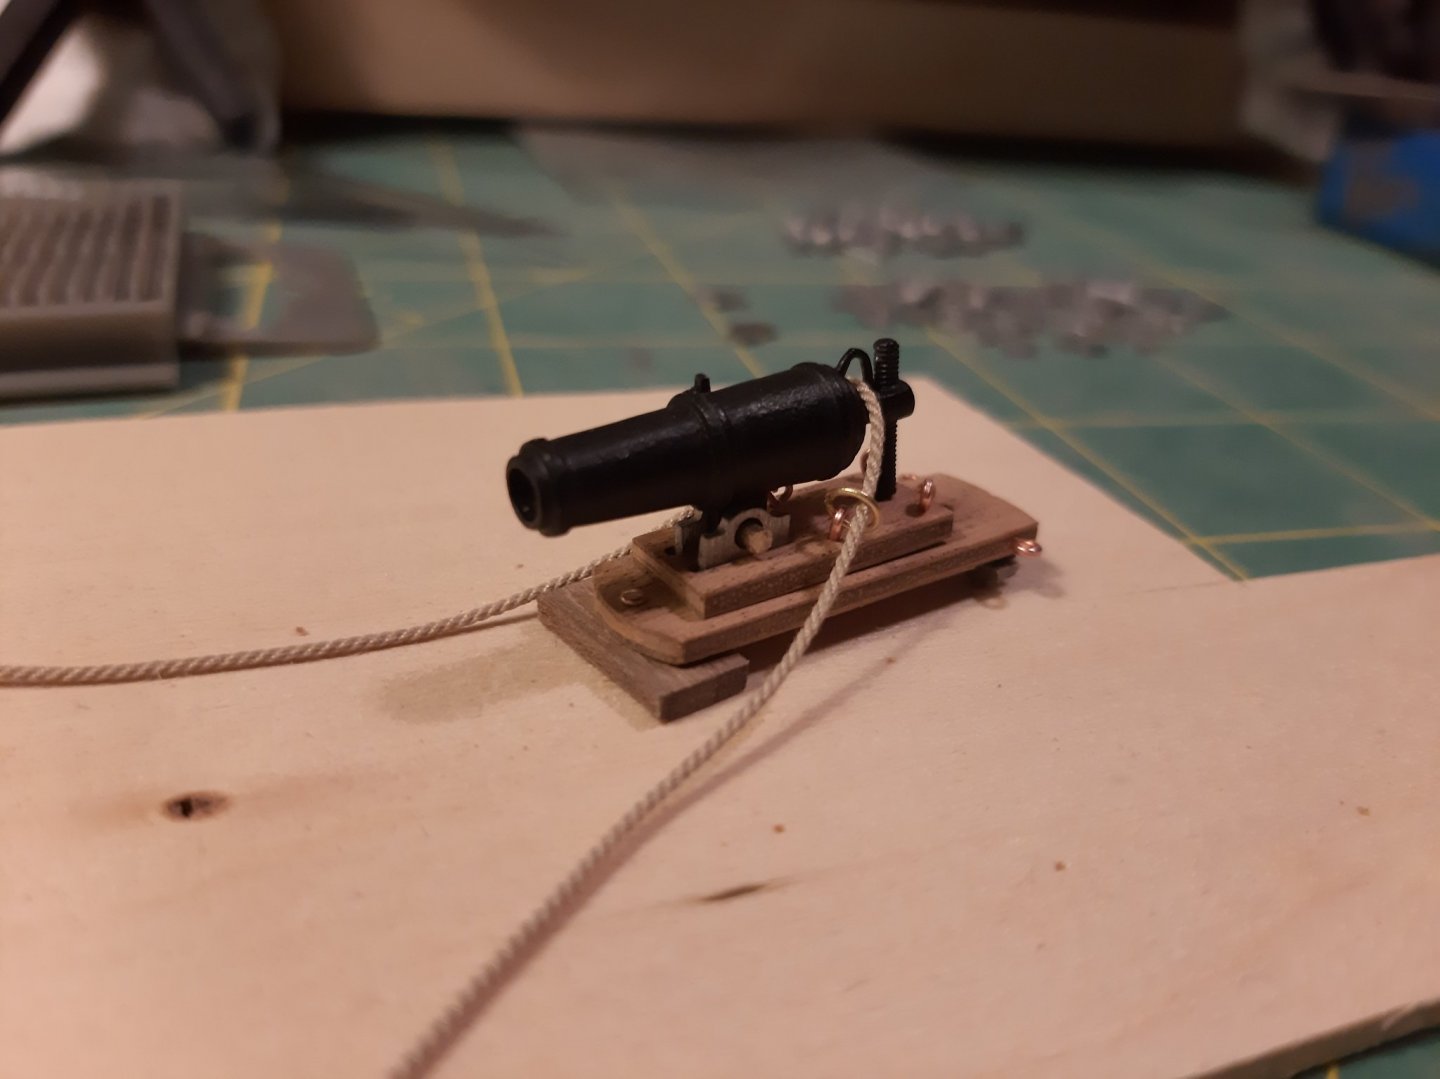

-
If you are looking for the HMS Sophie from the Patrick O'Brien Master and Commander book it is made up. Patrick based the story somewhat on the conquest of Thomas Cochrane in the Mediterranean commanding the HMS Speedy. That ship would be the closest thing but it doesn't have the tiny quarter deck like in the book. So I guess I would recommend the Speedy from Vanguard Models. Good materials, excellent instructions, but a bit pricey.
-
For the gun ports some needle files will sharpen that up. Cheap ones with do fine but diamond grit ones are pretty amazing. Or just get a fresh blade and carefully chip it away. The method I used for filling gaps is adding sanding dust to pva glue and rub it into the gaps. But honestly I don't see many gaps mate.
-
I just realized after all these years that I never put rudder straps on. Thanks for the likes and the praise guys!
- 49 replies
-
- 3
-

-

-
- sherbourne
- caldercraft
- (and 1 more)
-
Run a plank on the bulkheads to see if they are sanded enough. You want the planks to sit solidly on the bulkheads not just on one edge. Mask the stern post or pop it back off with some rubbing alcohol it will get damaged from the planking process for sure. The Sherbourne is a great starter kit!
- 46 replies
-
- 1
-
-
- caldercraft
- sherbourne
- (and 1 more)
-
HMS Snake by BenD - Caldercraft - 1:64
BenD replied to BenD's topic in - Kit build logs for subjects built from 1751 - 1800
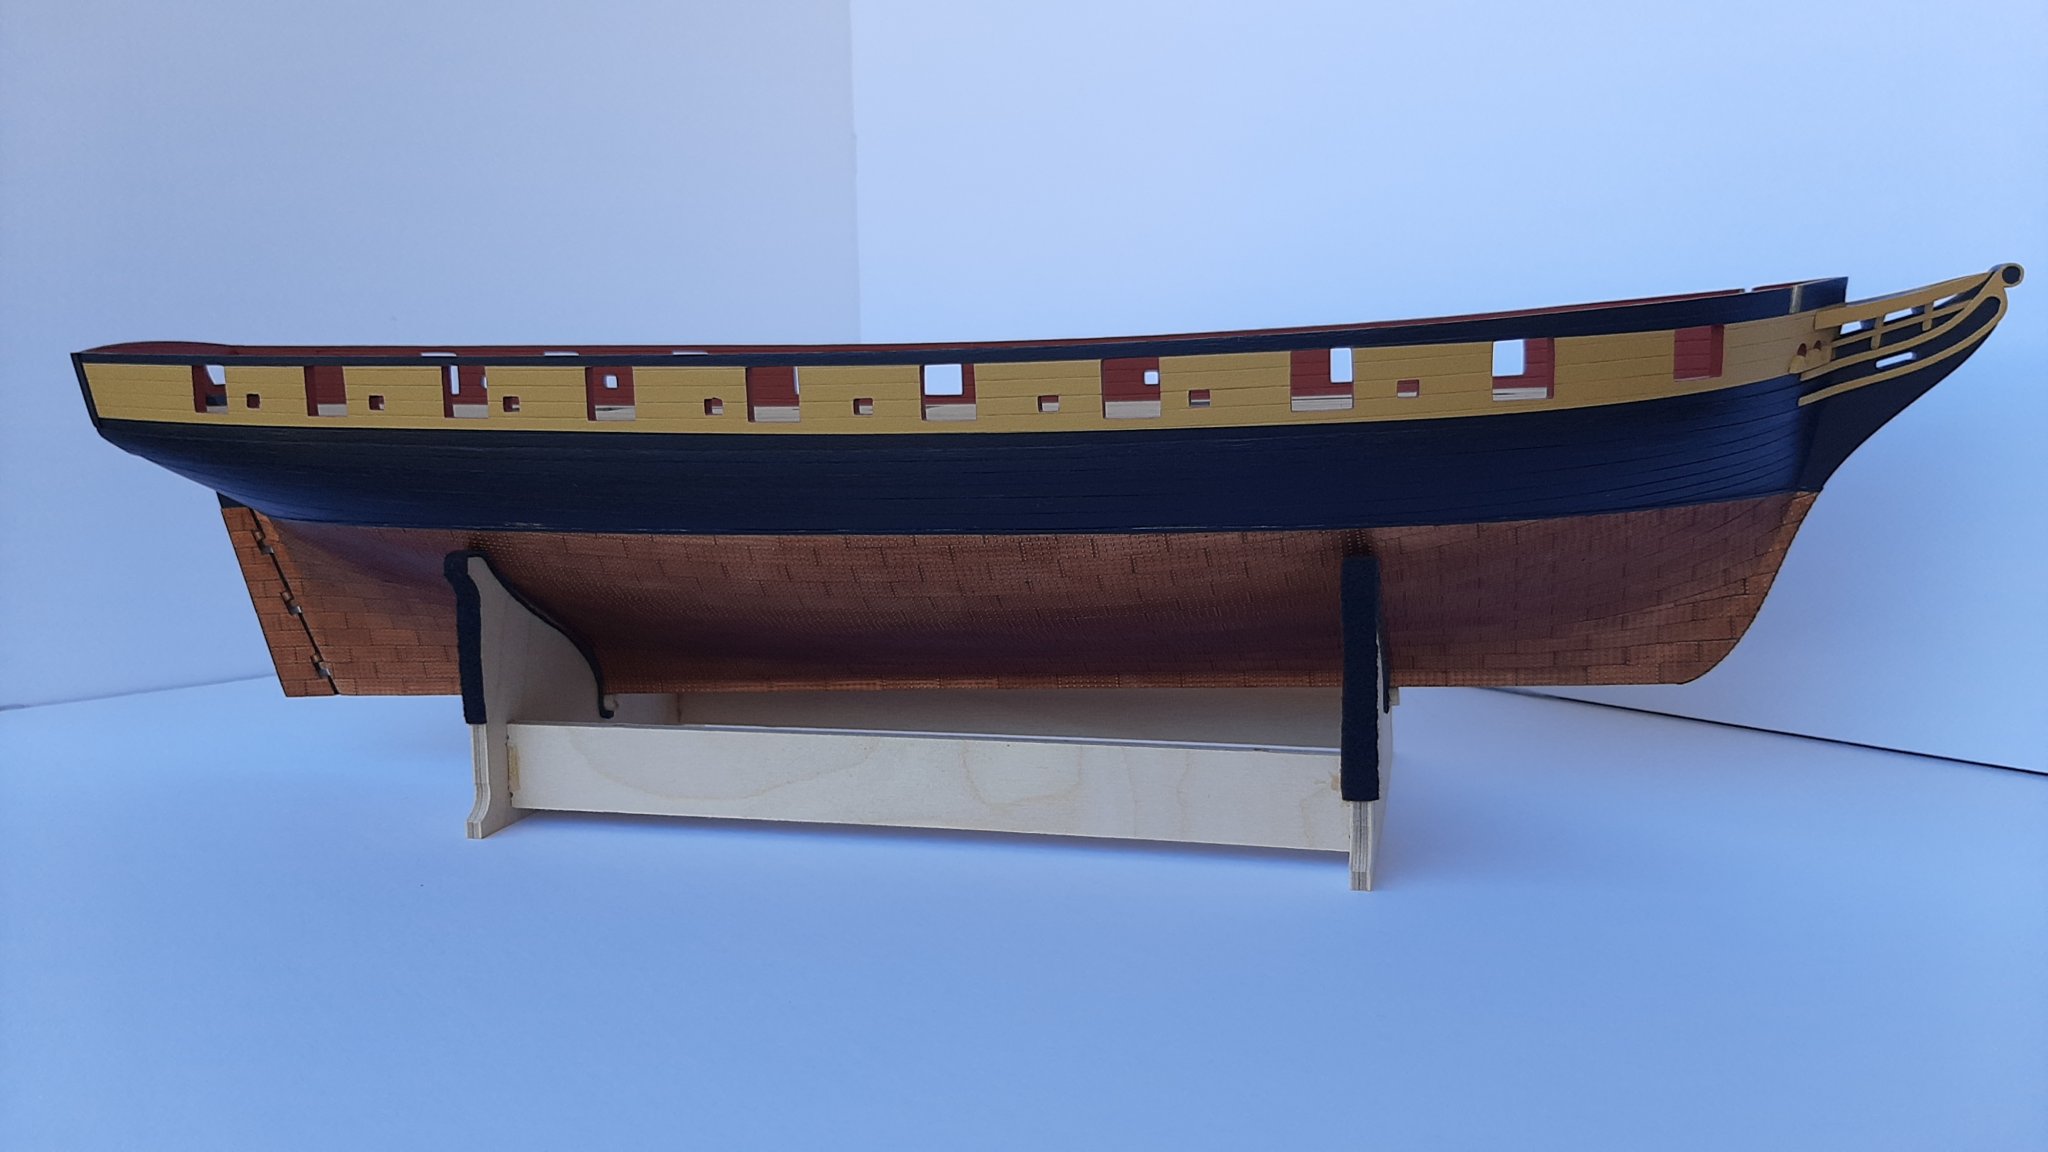
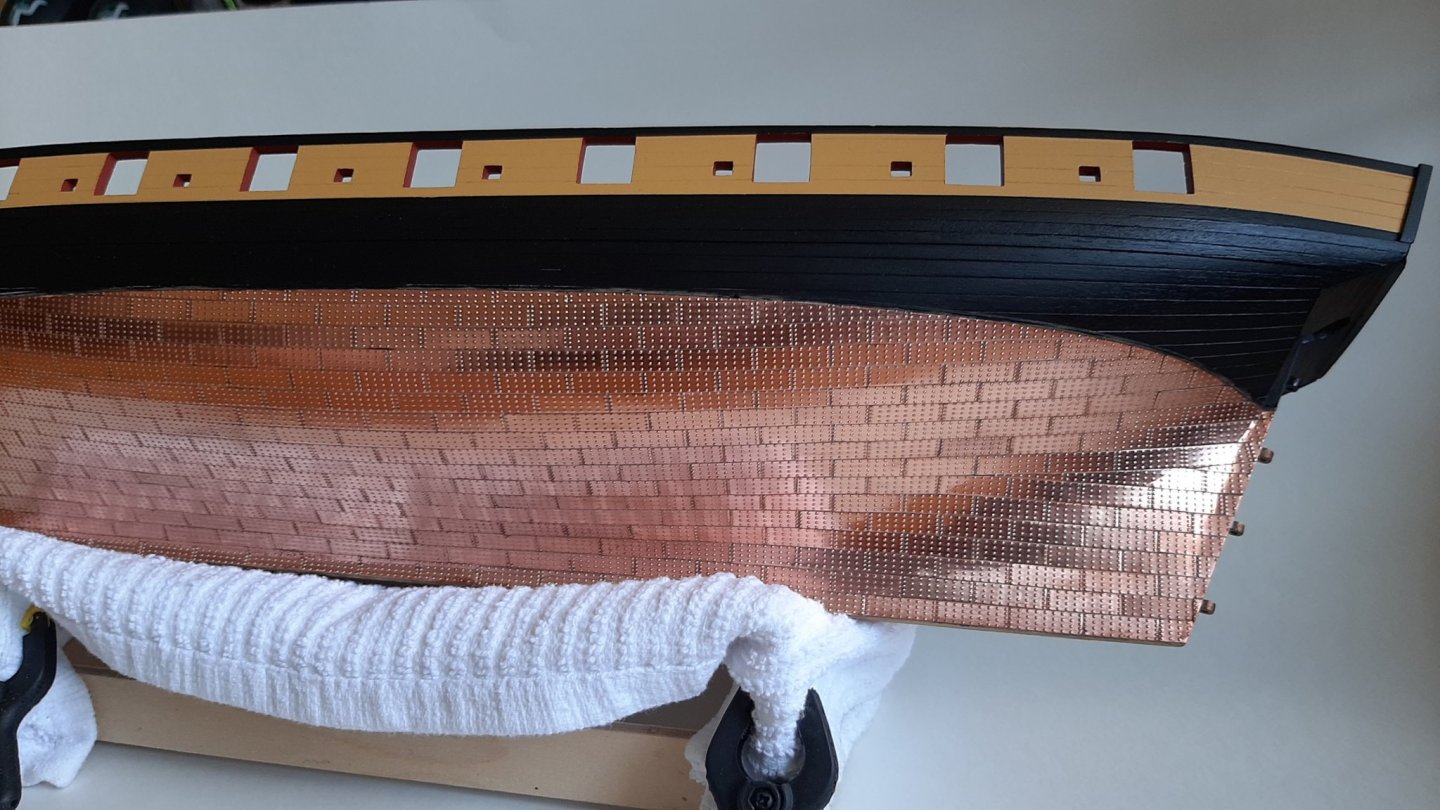
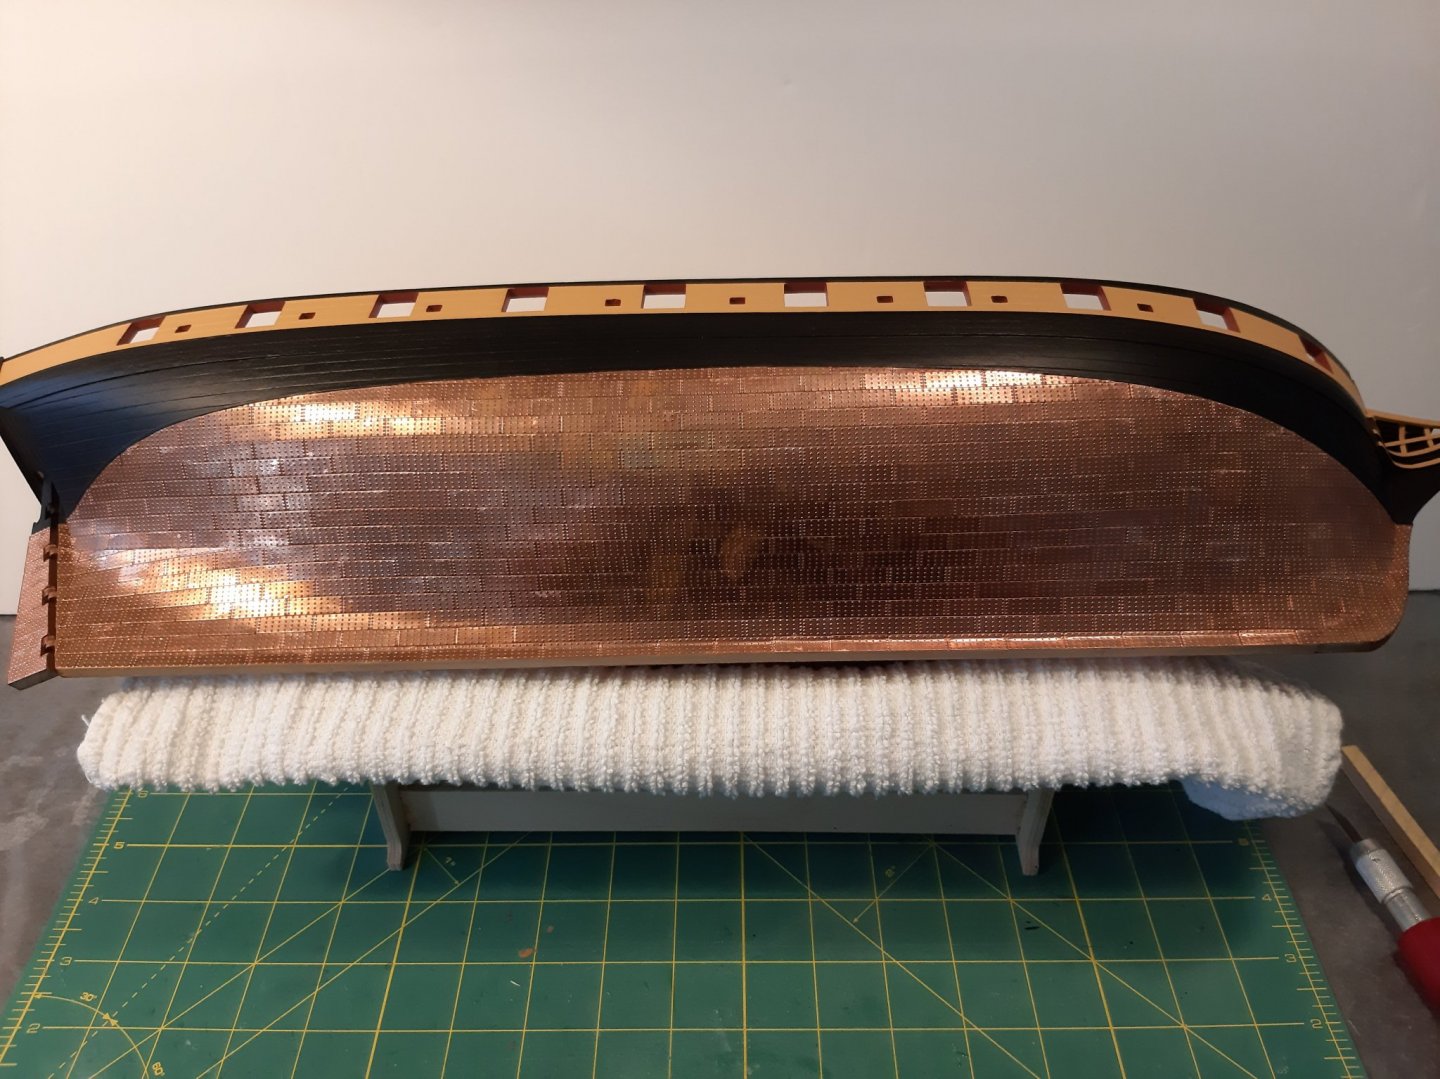
I was looking at the ship one morning and had a "OH God what have I done to her!" moment. The varnish on the copper was ugly and needed to be removed. 600 cotton swabs and a whole 500mL bottle of 99% Isopropyl alcohol did the job. Alcohol really does just melts acrylic varnish away. After removal I used some more polish and shes bright and new. The batens need some paint touch up's but aside from that I think I have redeemed her.

-
Another Jalouse build! She's looking good. Coppering isn't for everyone and I think it looks good with in white. Caldercraft needs to mill their wood better... My deck planks were awful too, ranging from 1.8mm - 3mm. Your deck turned out good at least.
- 18 replies
-
- 1
-
-
- caldercraft
- jalouse
- (and 1 more)
-
You're Cruising right along with coppering. Looking good!
-
looking good mate! Remember to clean the copper plates after every session if you have sweaty hands. I learned the hard way... Some of my tiles still have finger prints etched into the metal even after polishing.
-
HMS Snake by BenD - Caldercraft - 1:64
BenD replied to BenD's topic in - Kit build logs for subjects built from 1751 - 1800
Thank's for a validation Chris! I'm still may change it yet, but it is growing on me. I'm thinking maybe some black and green to the mix. -
HMS Snake by BenD - Caldercraft - 1:64
BenD replied to BenD's topic in - Kit build logs for subjects built from 1751 - 1800
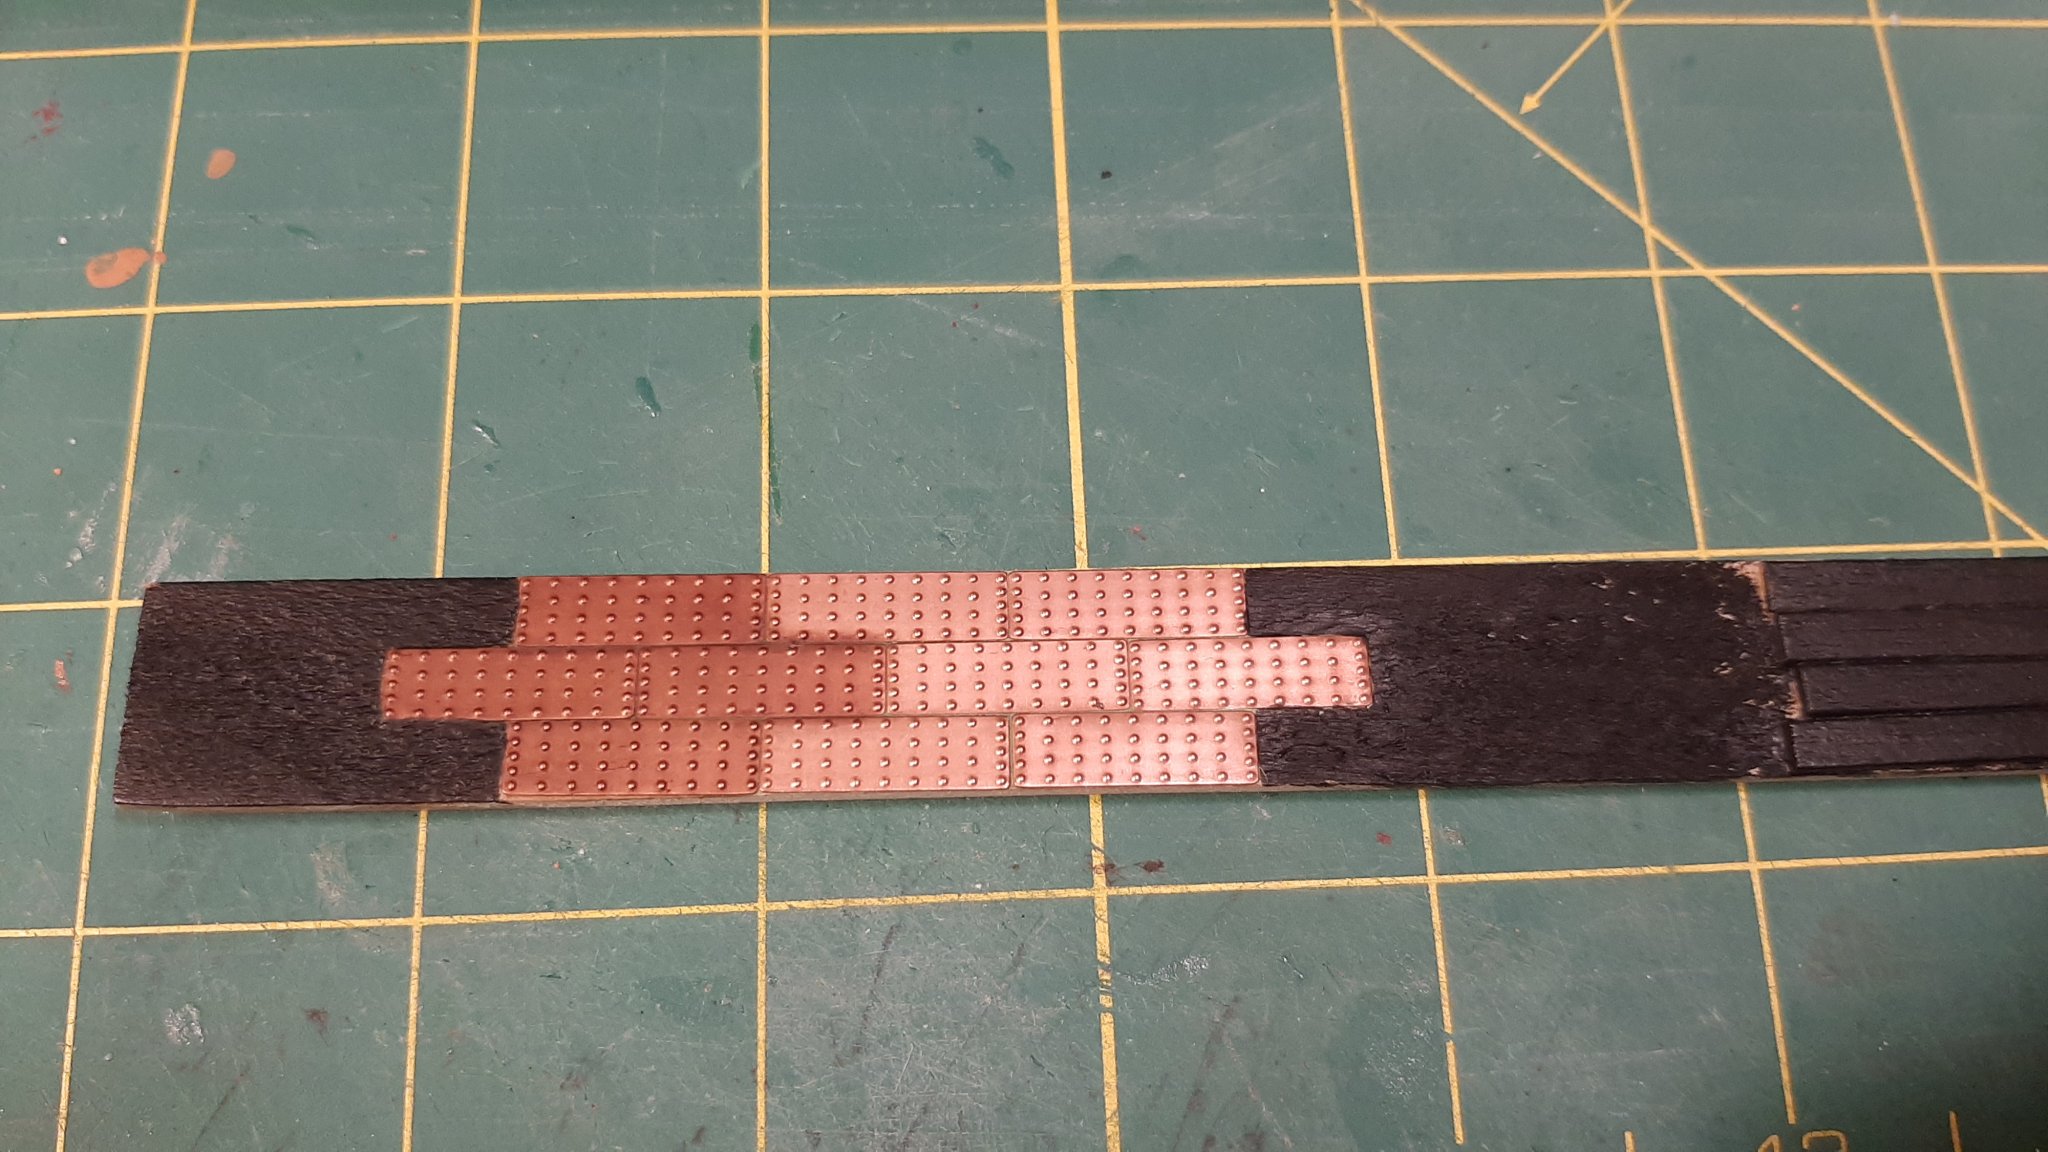
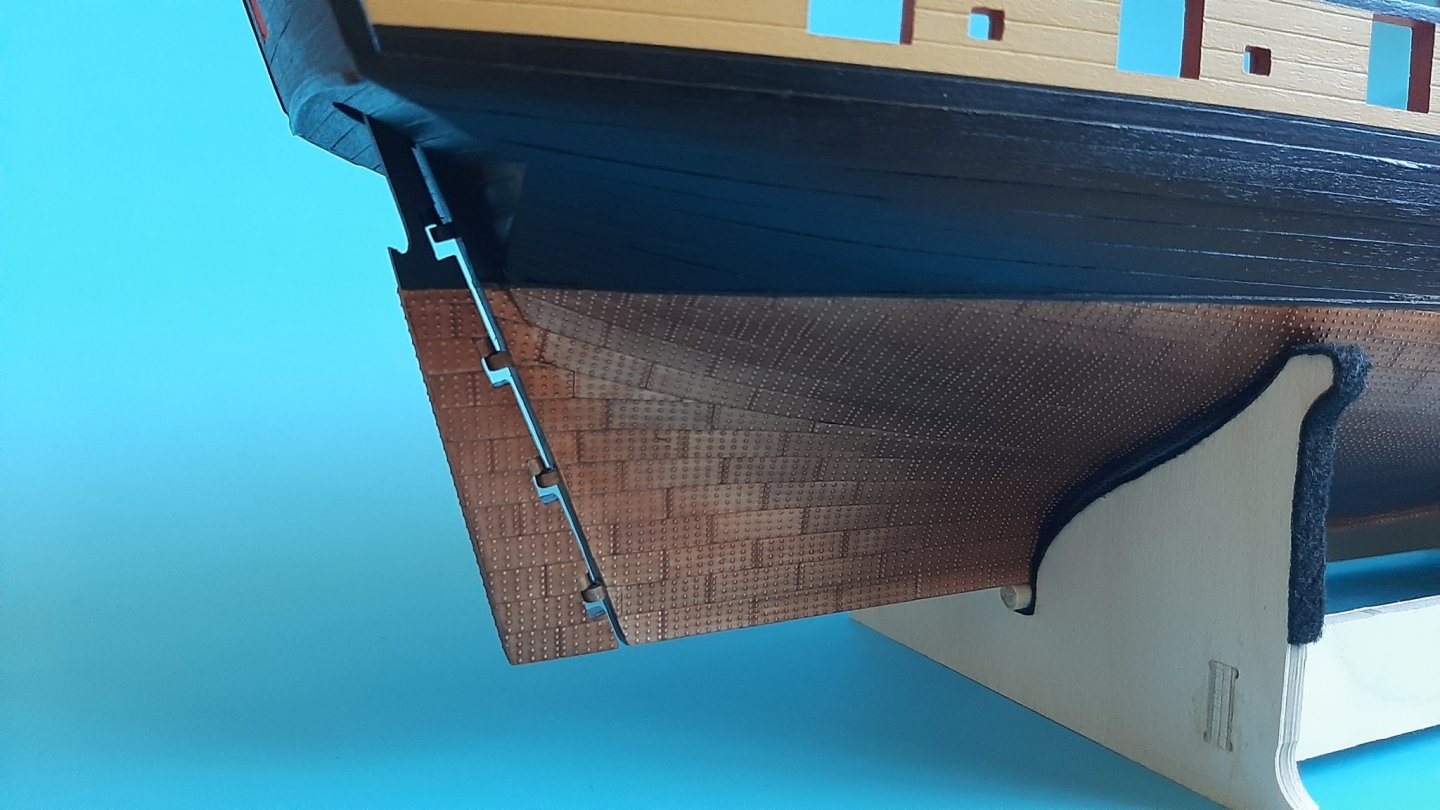
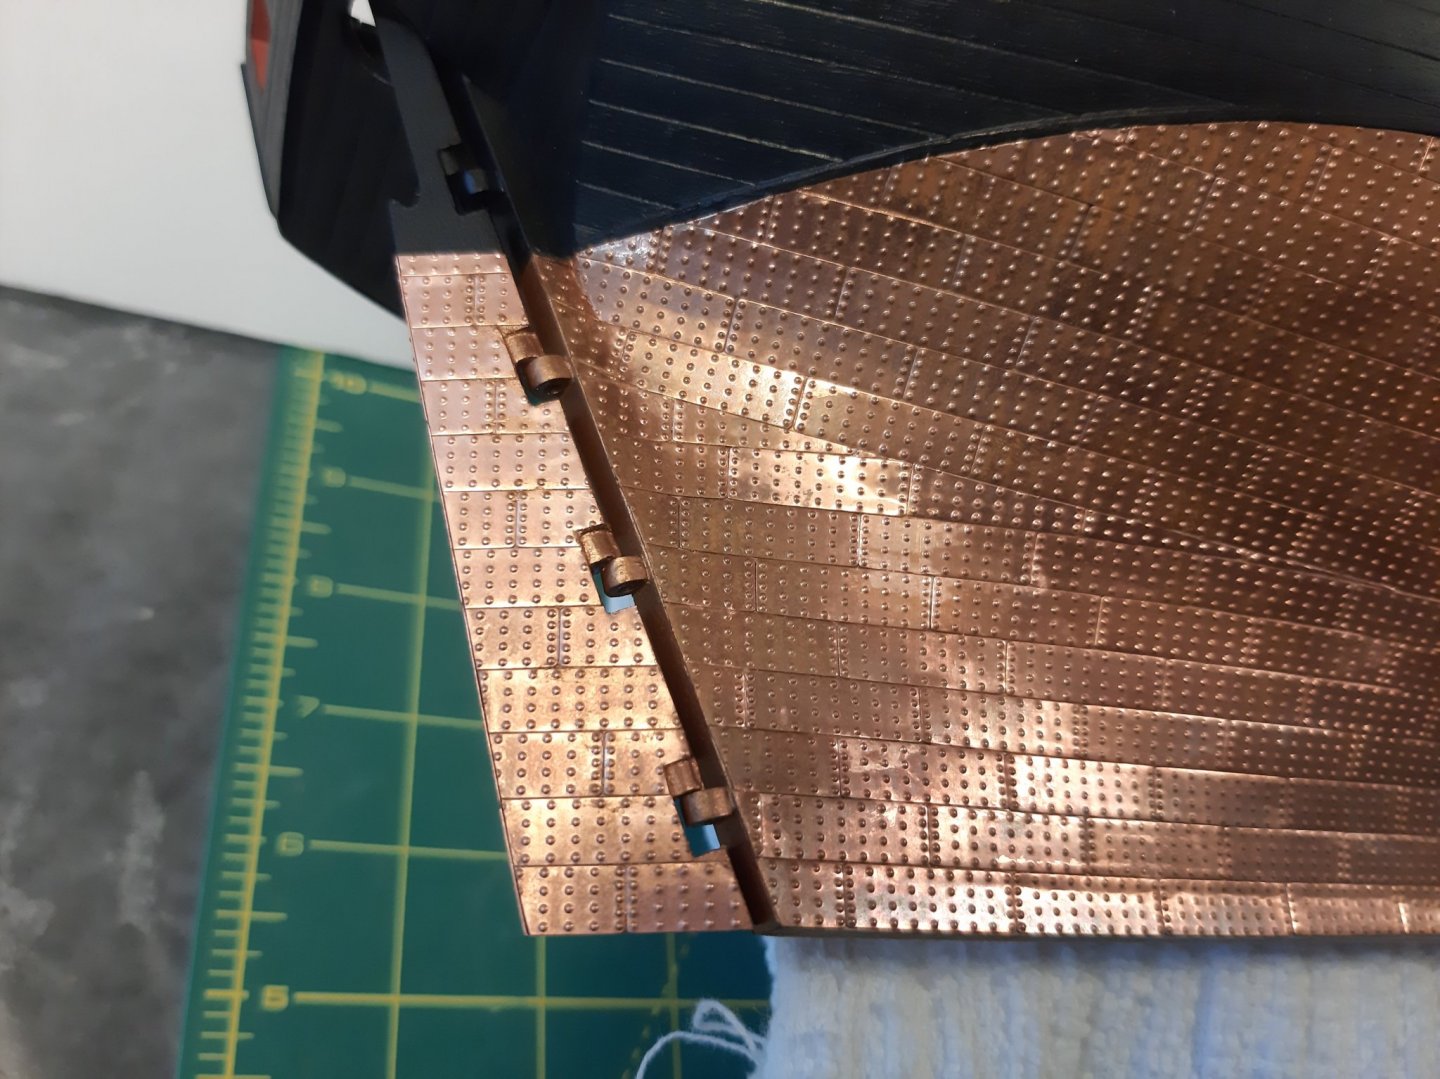
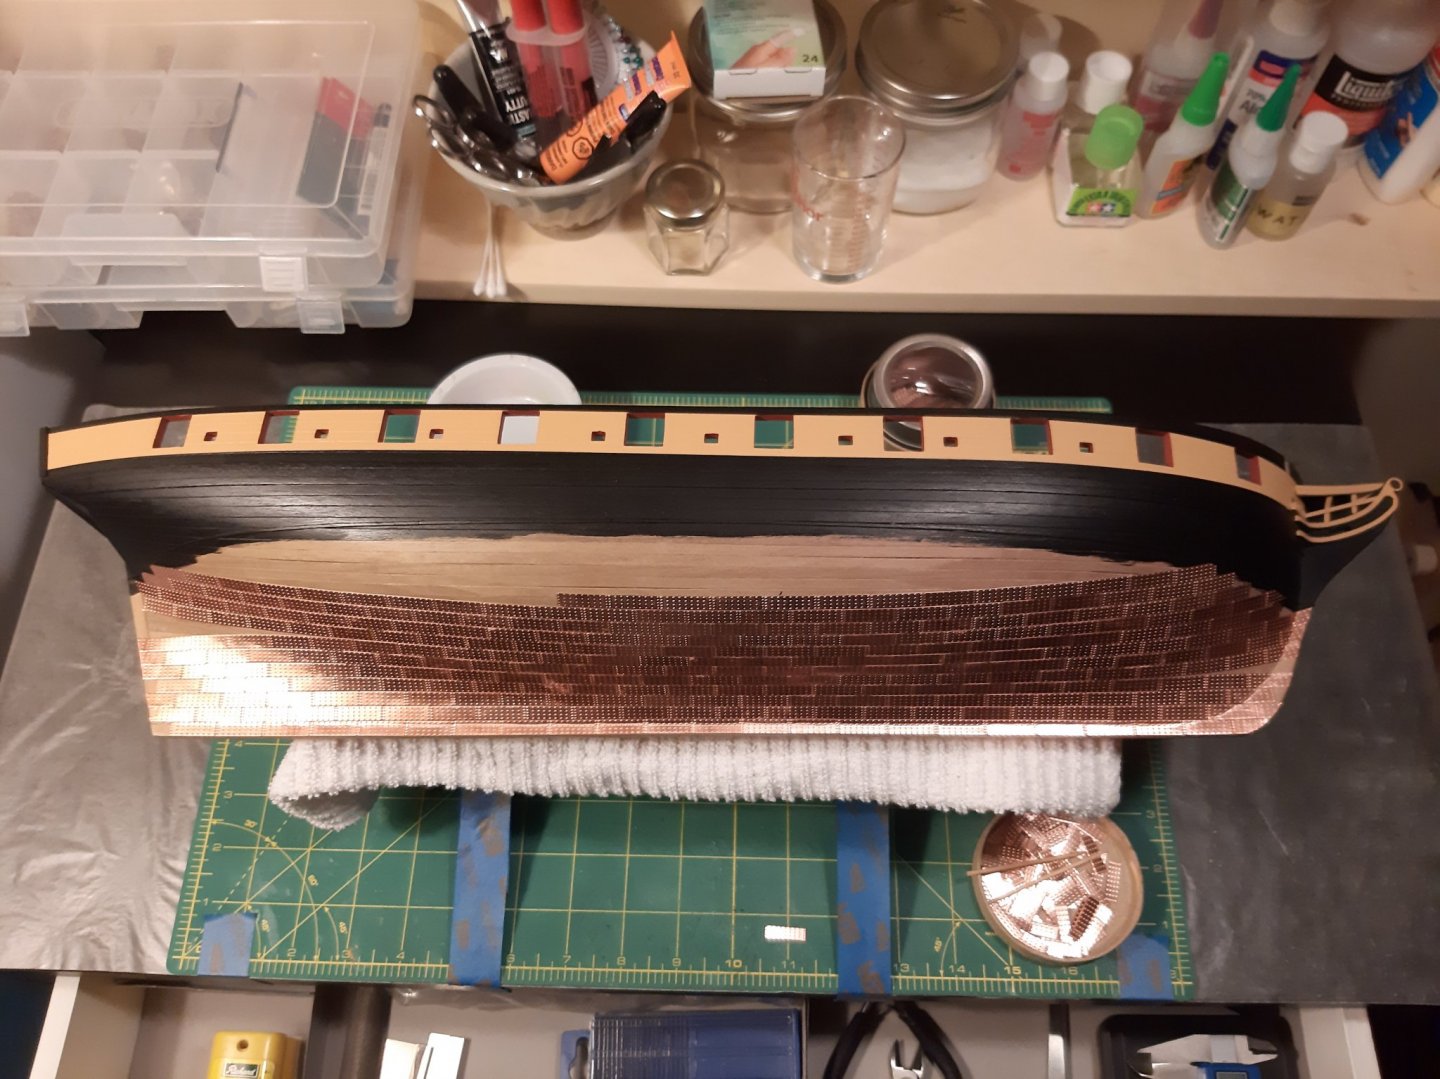
I've done something experimental and not sure how I feel about it. As you see in the picture below the tiles to the right are bright pink, that's what I was left with after cleaning. I couldn't bear to look at the ship in that state... I didn't even get a photo of it unfortunately. The tiles to the left are with a few coats of matt varnish with brown pigment to simulate slightly aged copper. It ended up looking like 5-10 year old penny without using chemicals plus it is sealed and will stay like this. Also it is protected from my profusely sweaty hands. what do you guys think?

-
HMS Snake by BenD - Caldercraft - 1:64
BenD replied to BenD's topic in - Kit build logs for subjects built from 1751 - 1800
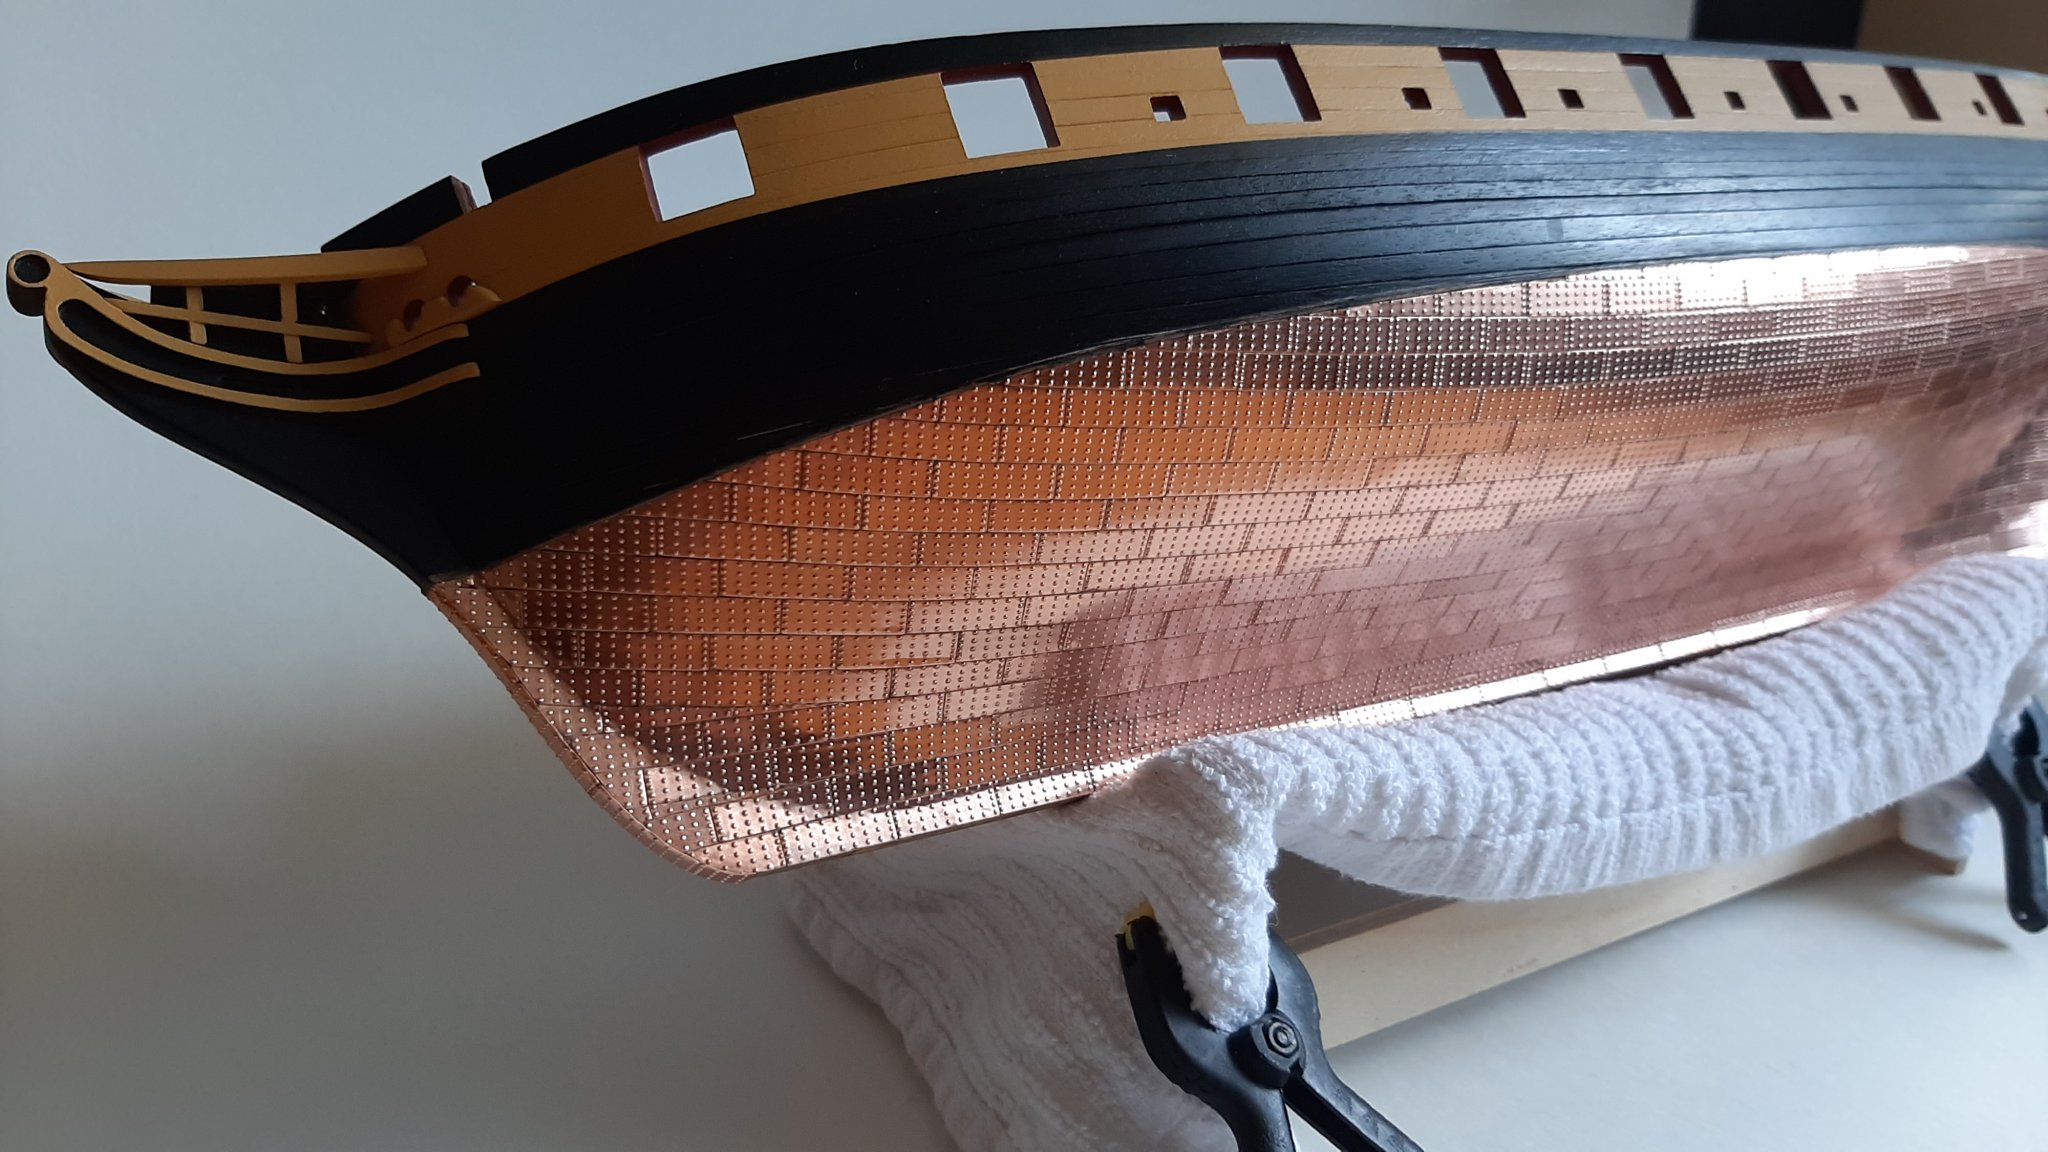
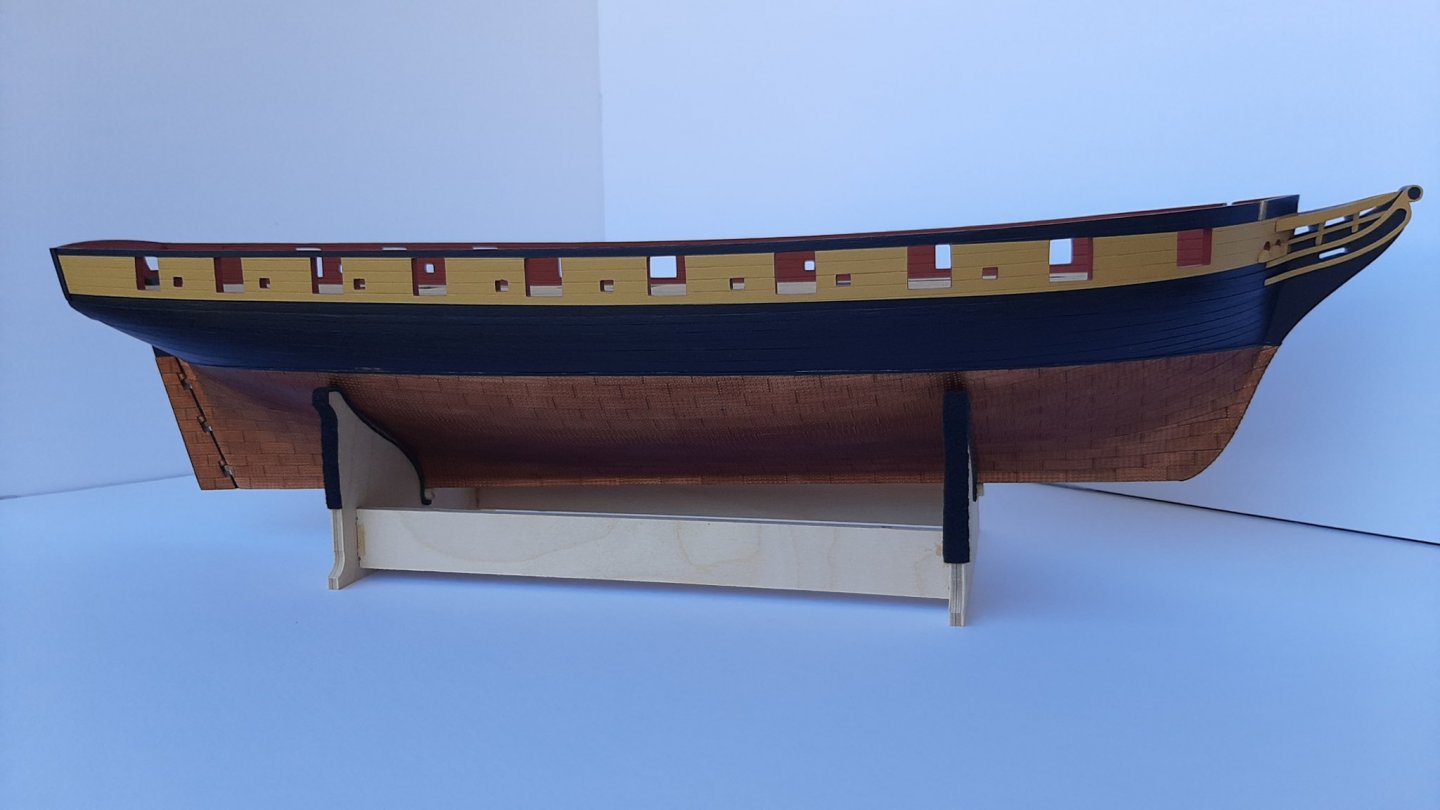
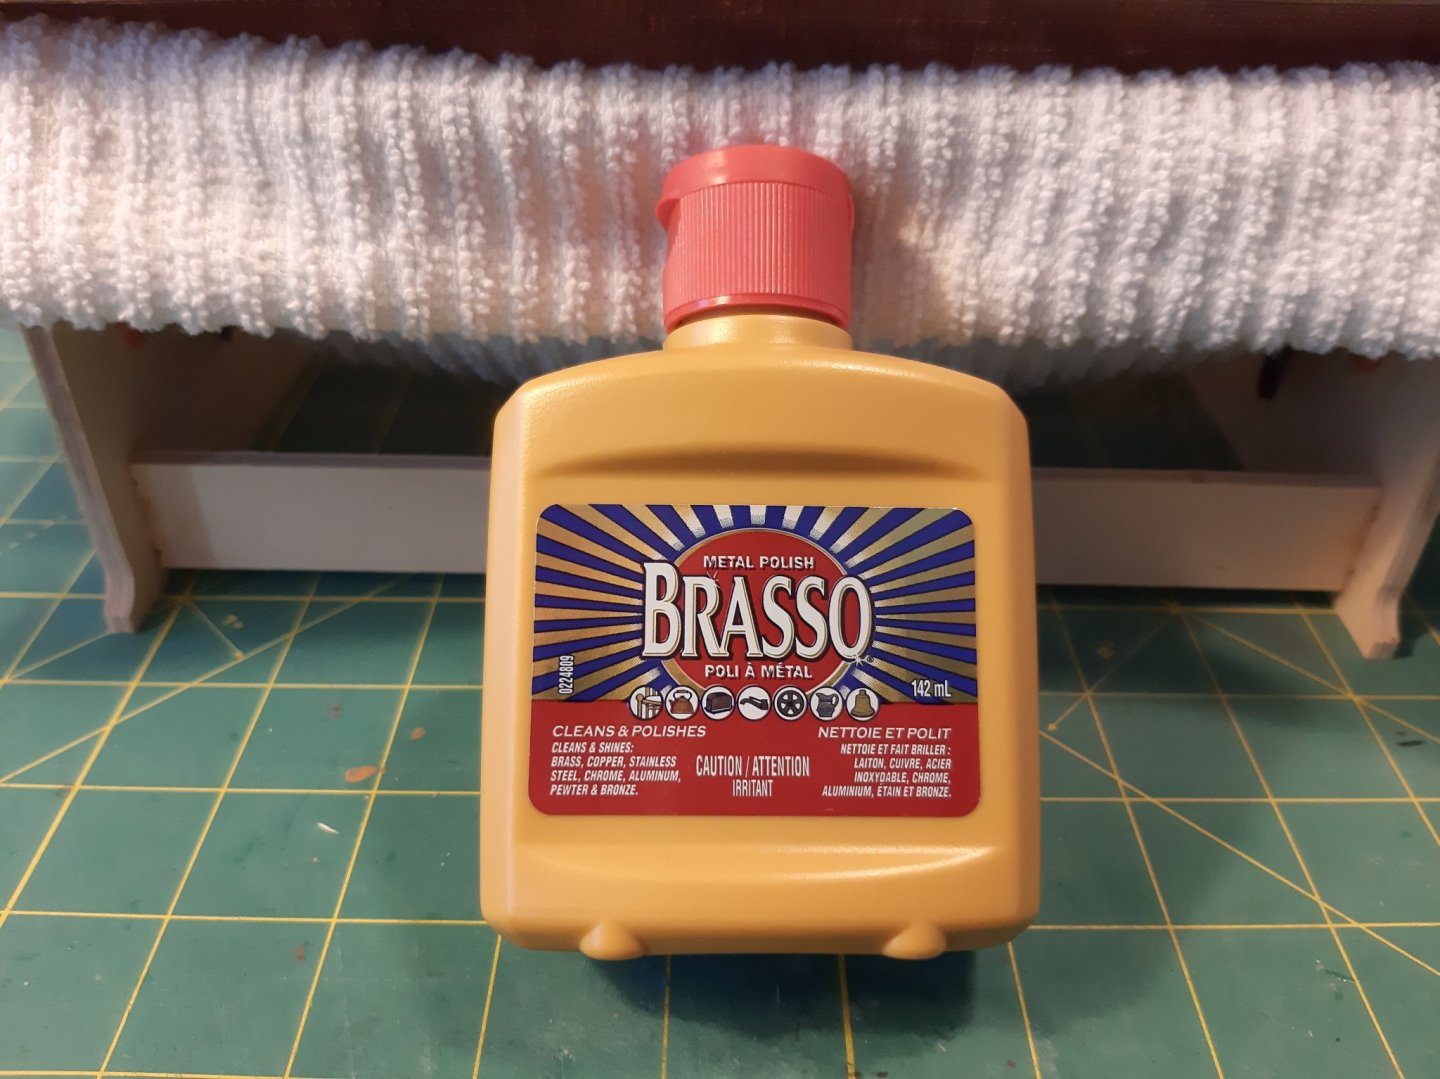
The Coppering is DONE! It was hard and I'm not completely happy with it but it just going to have to do. The humid summer weather has arrived and the finger smudges now stick out so it needs an application of polish. Brasso works well, but the question is do I varnish afterwards or not? I have a test strip of tiles I varnished 2 years ago and it holds up well and stays shiny. Or I could let it patina naturally.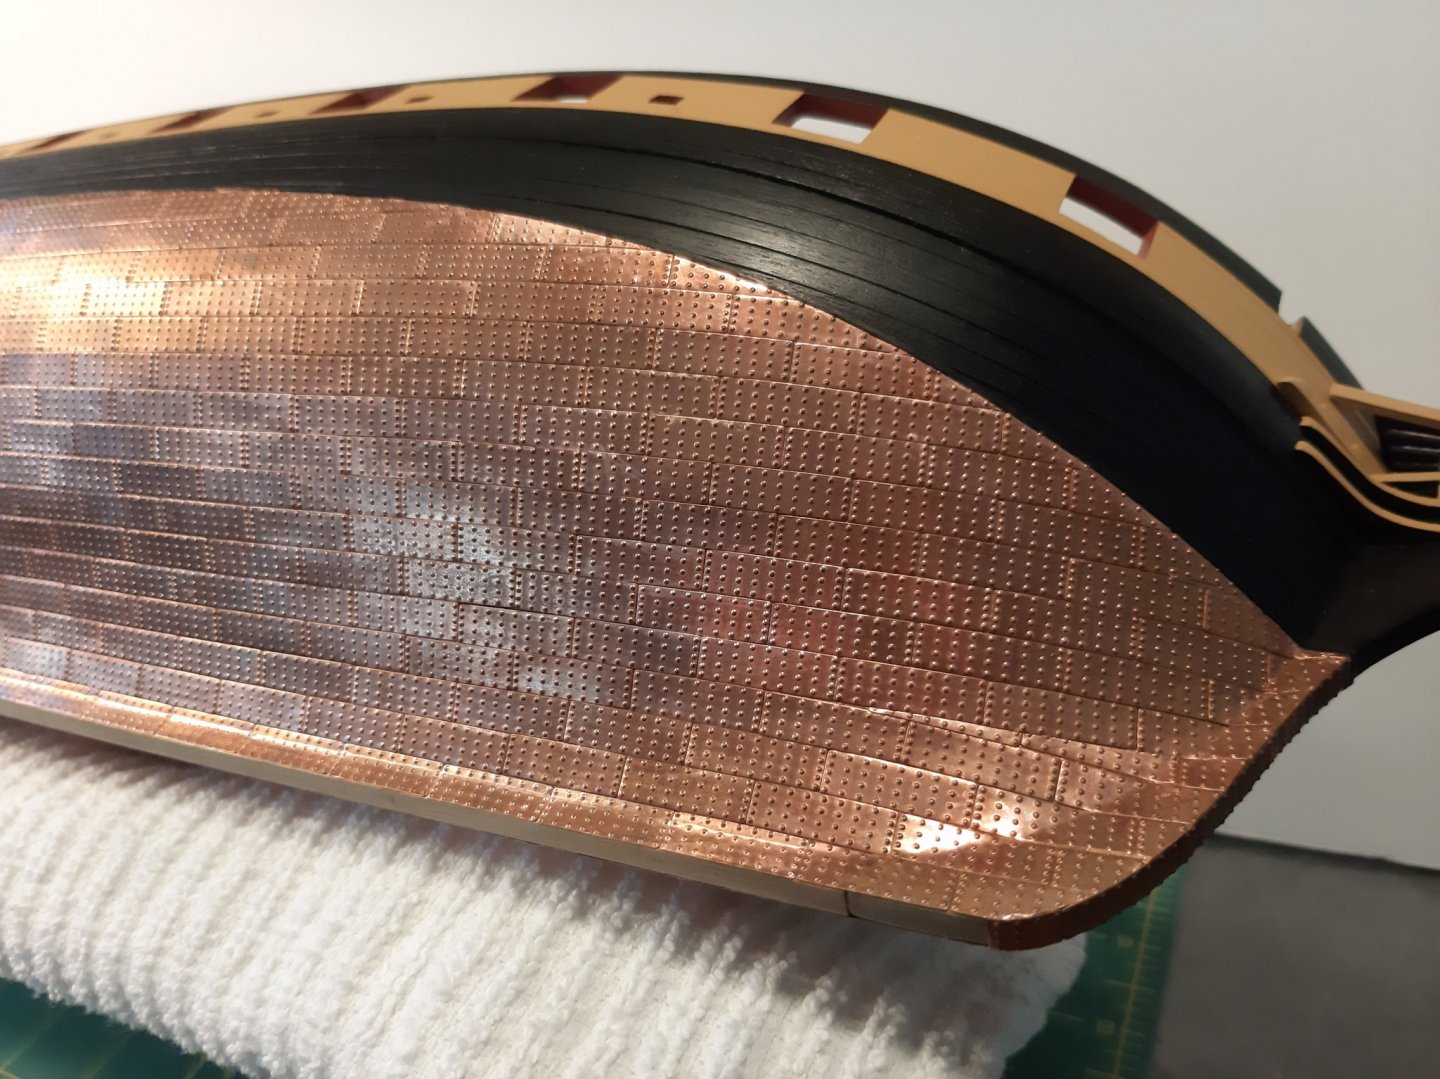


-
HMS Snake by BenD - Caldercraft - 1:64
BenD replied to BenD's topic in - Kit build logs for subjects built from 1751 - 1800
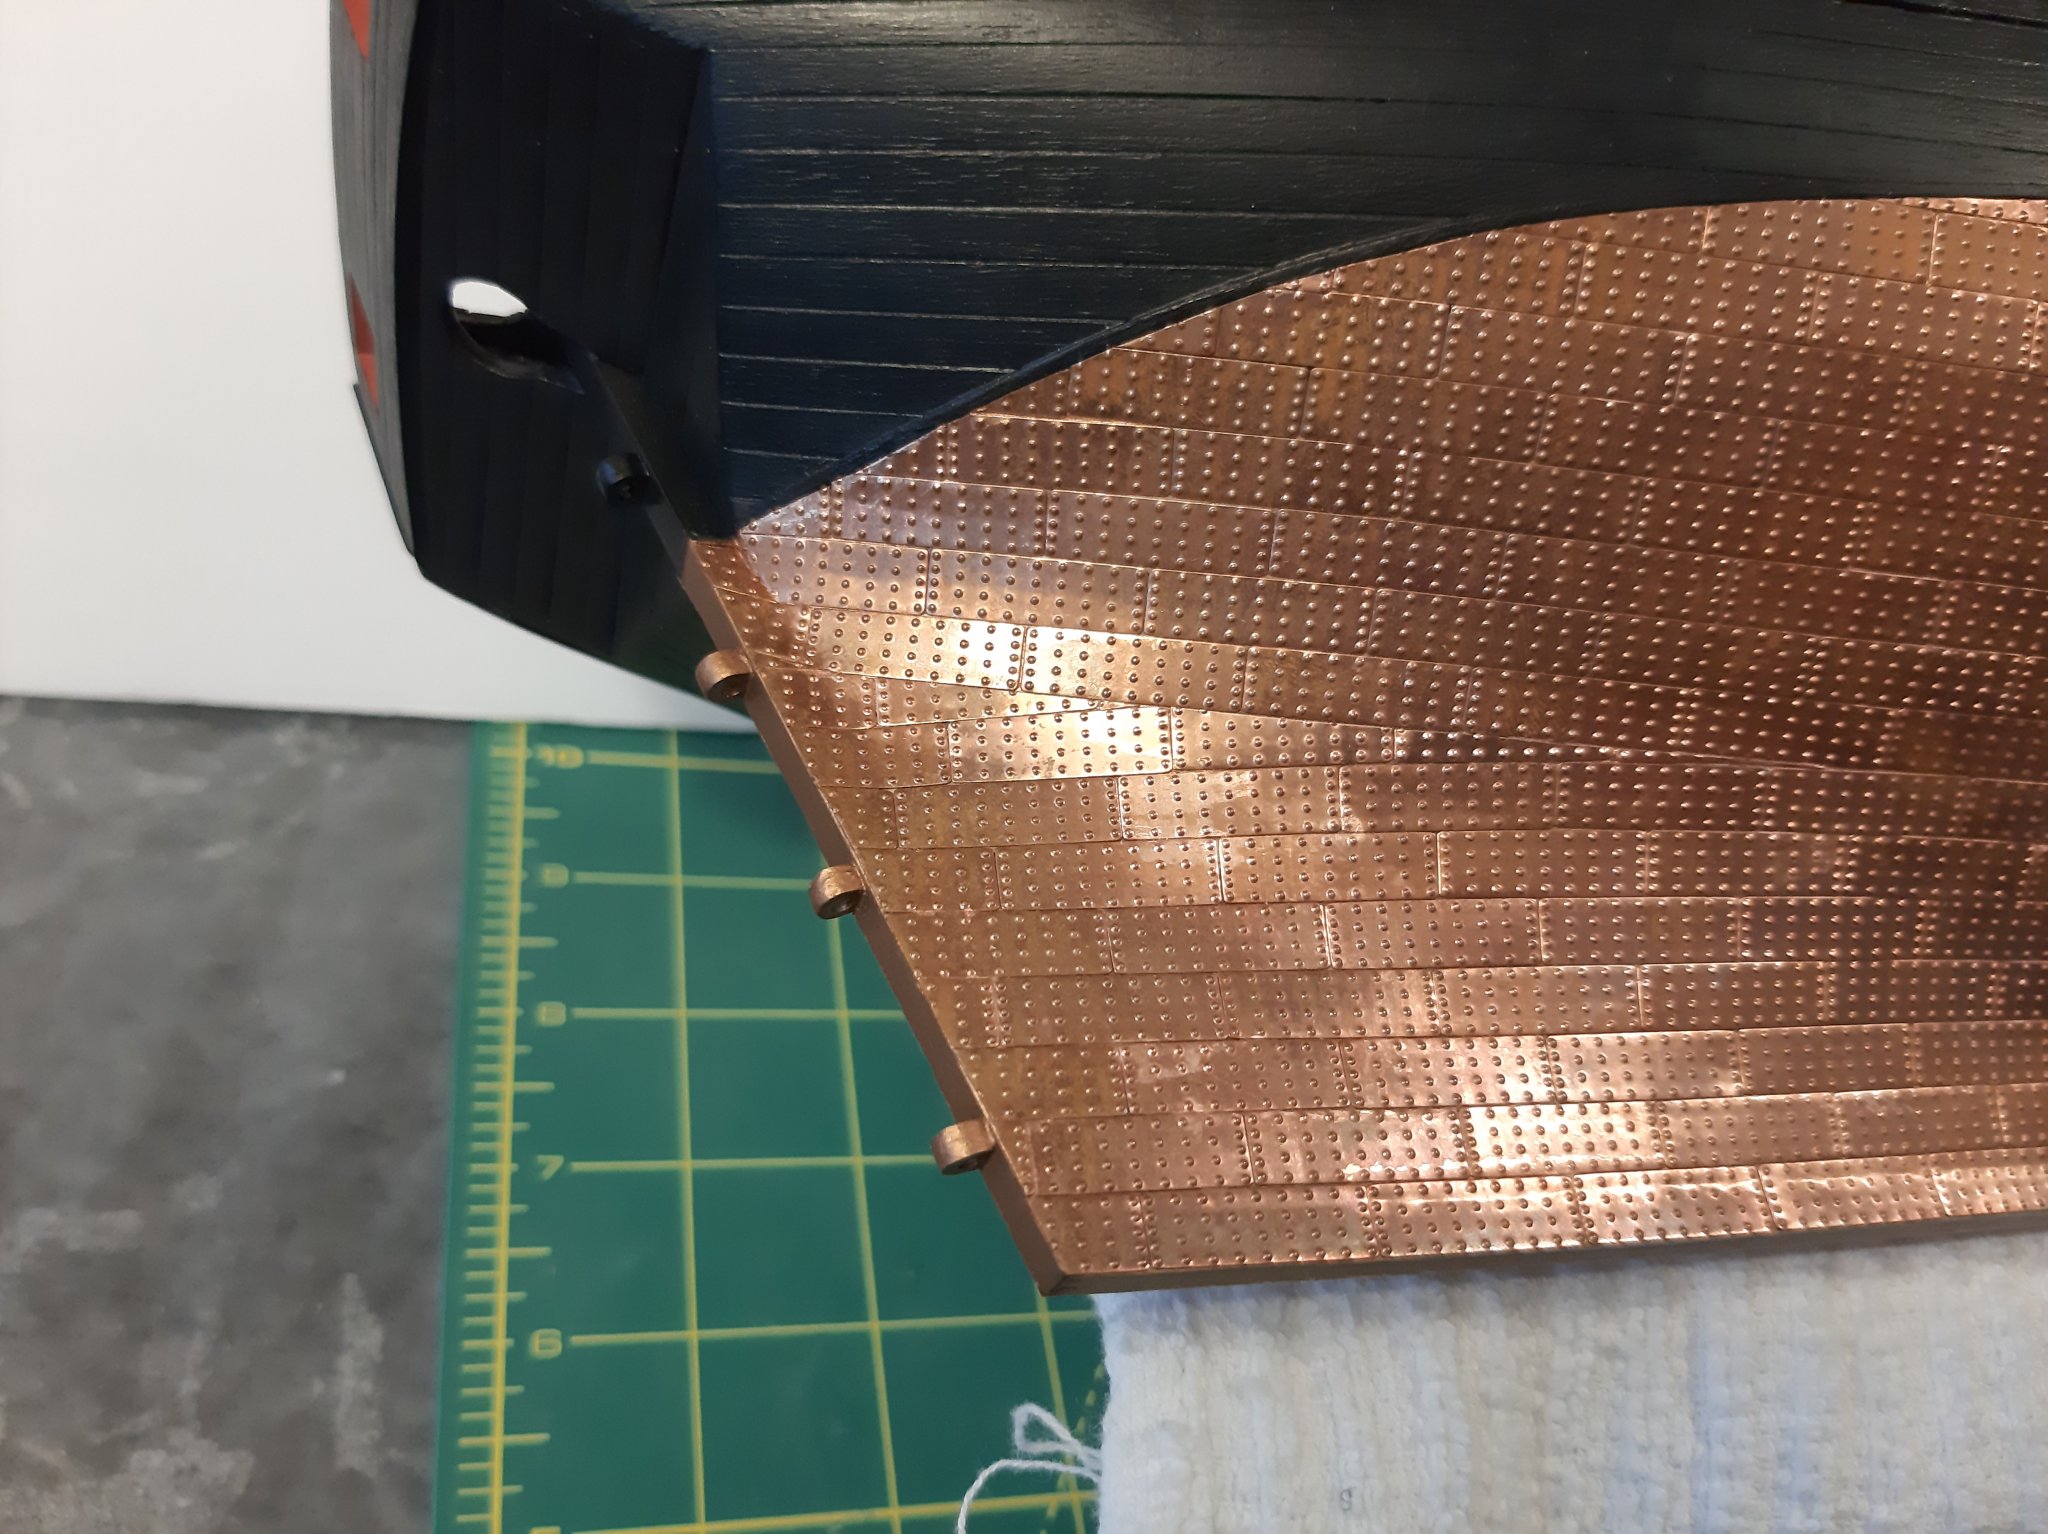
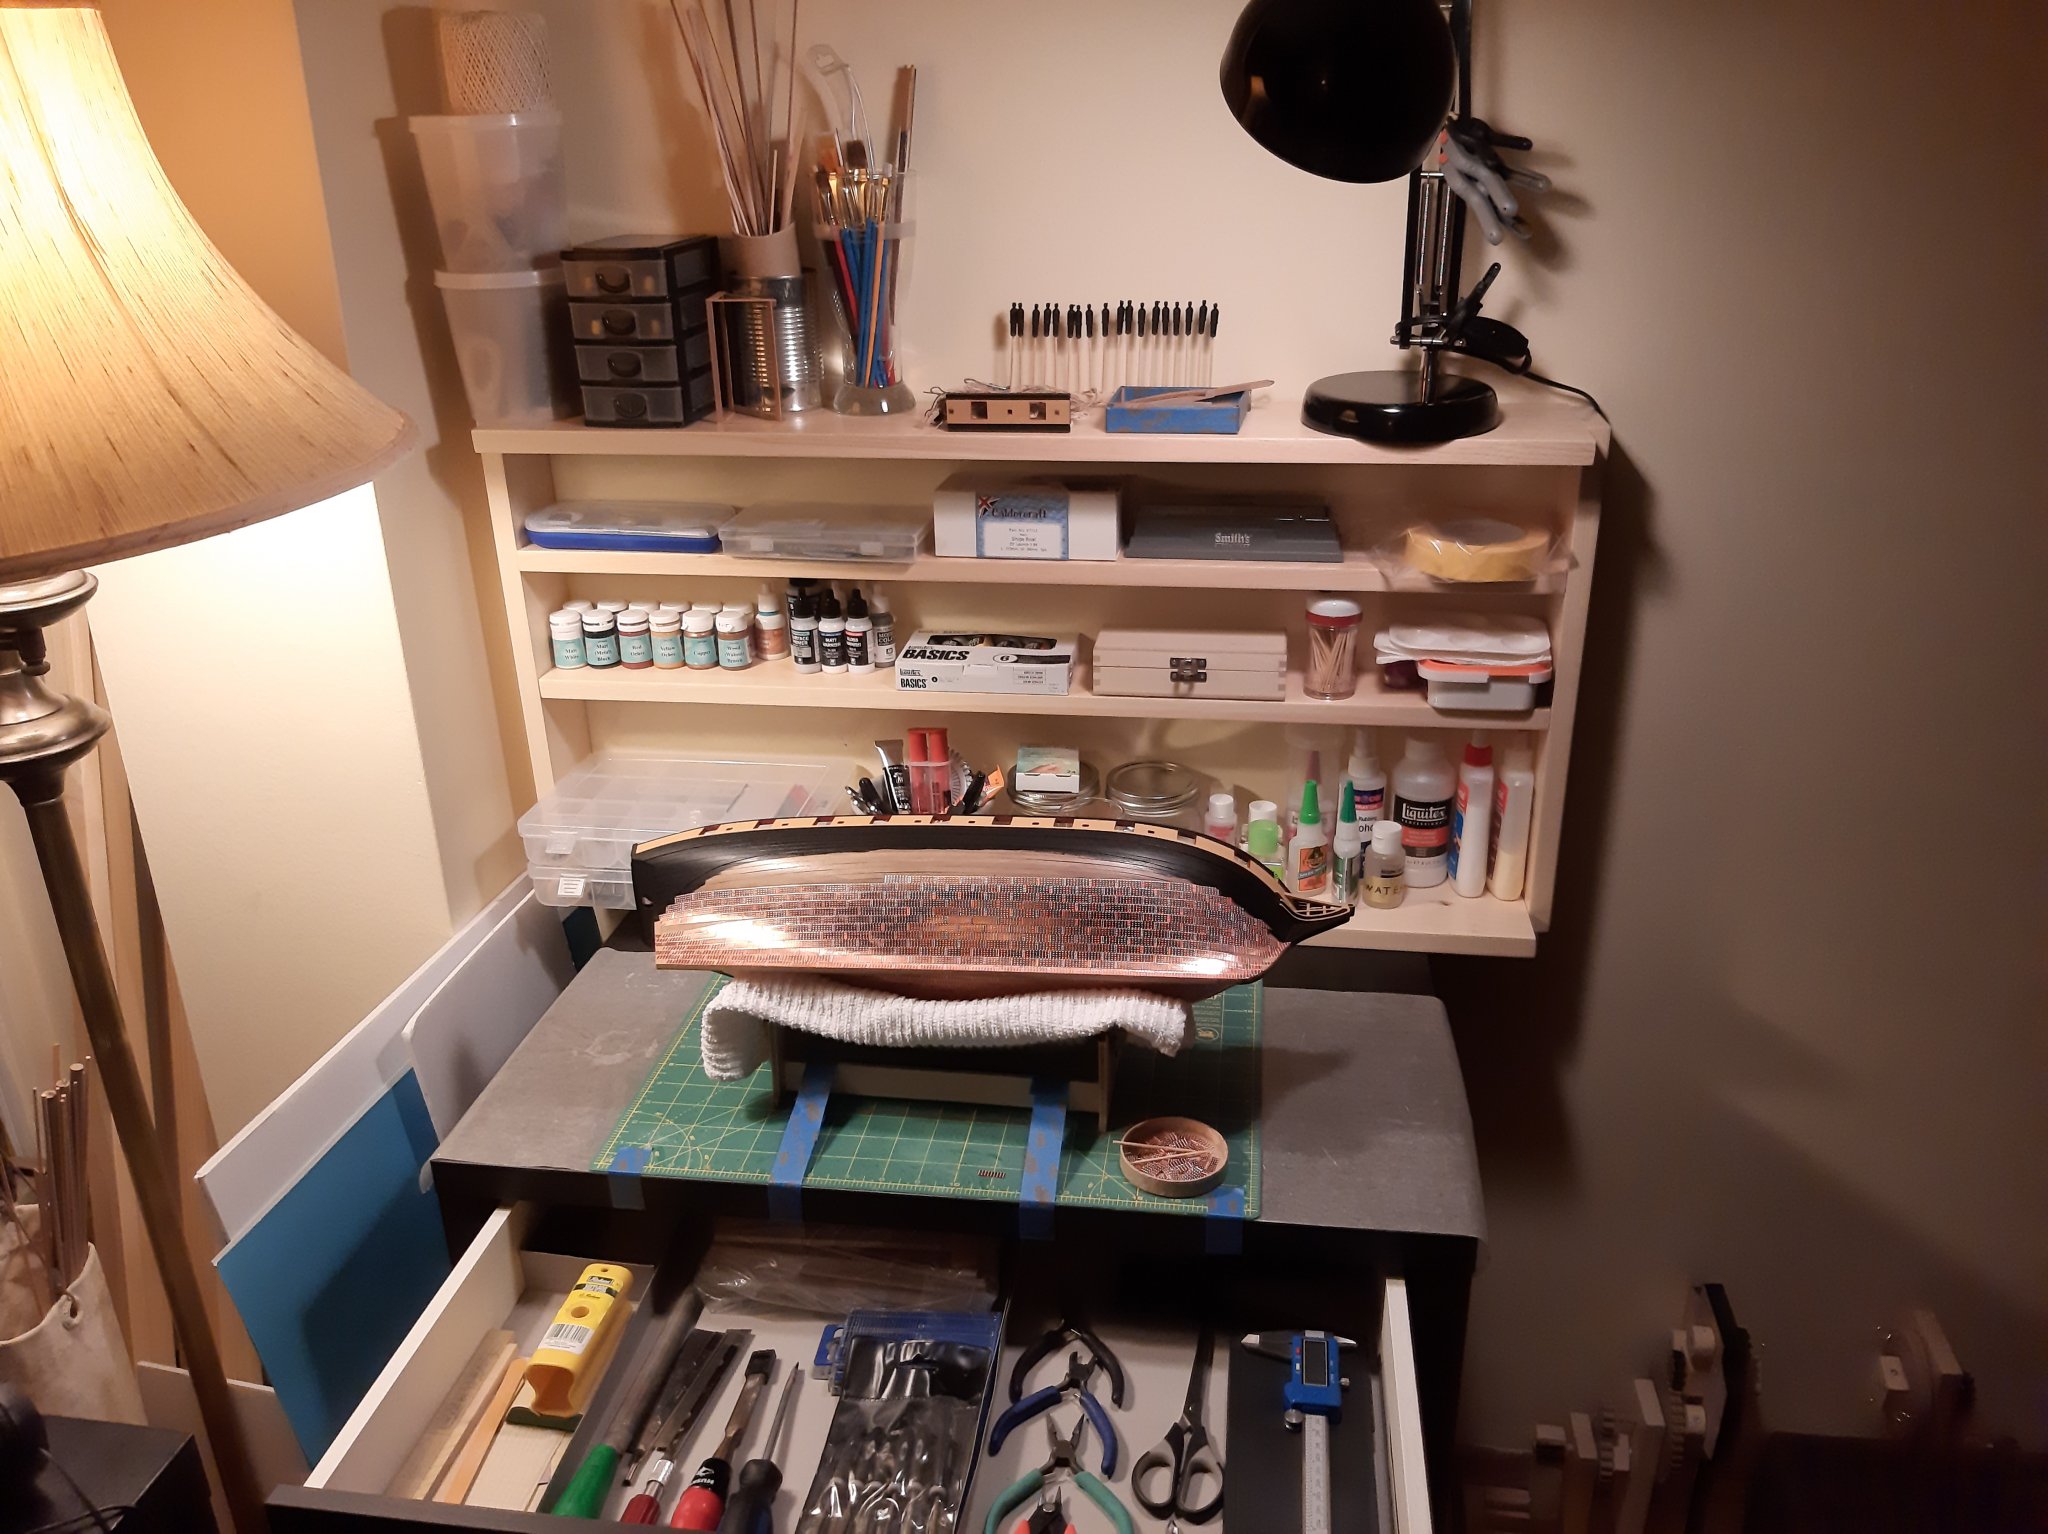
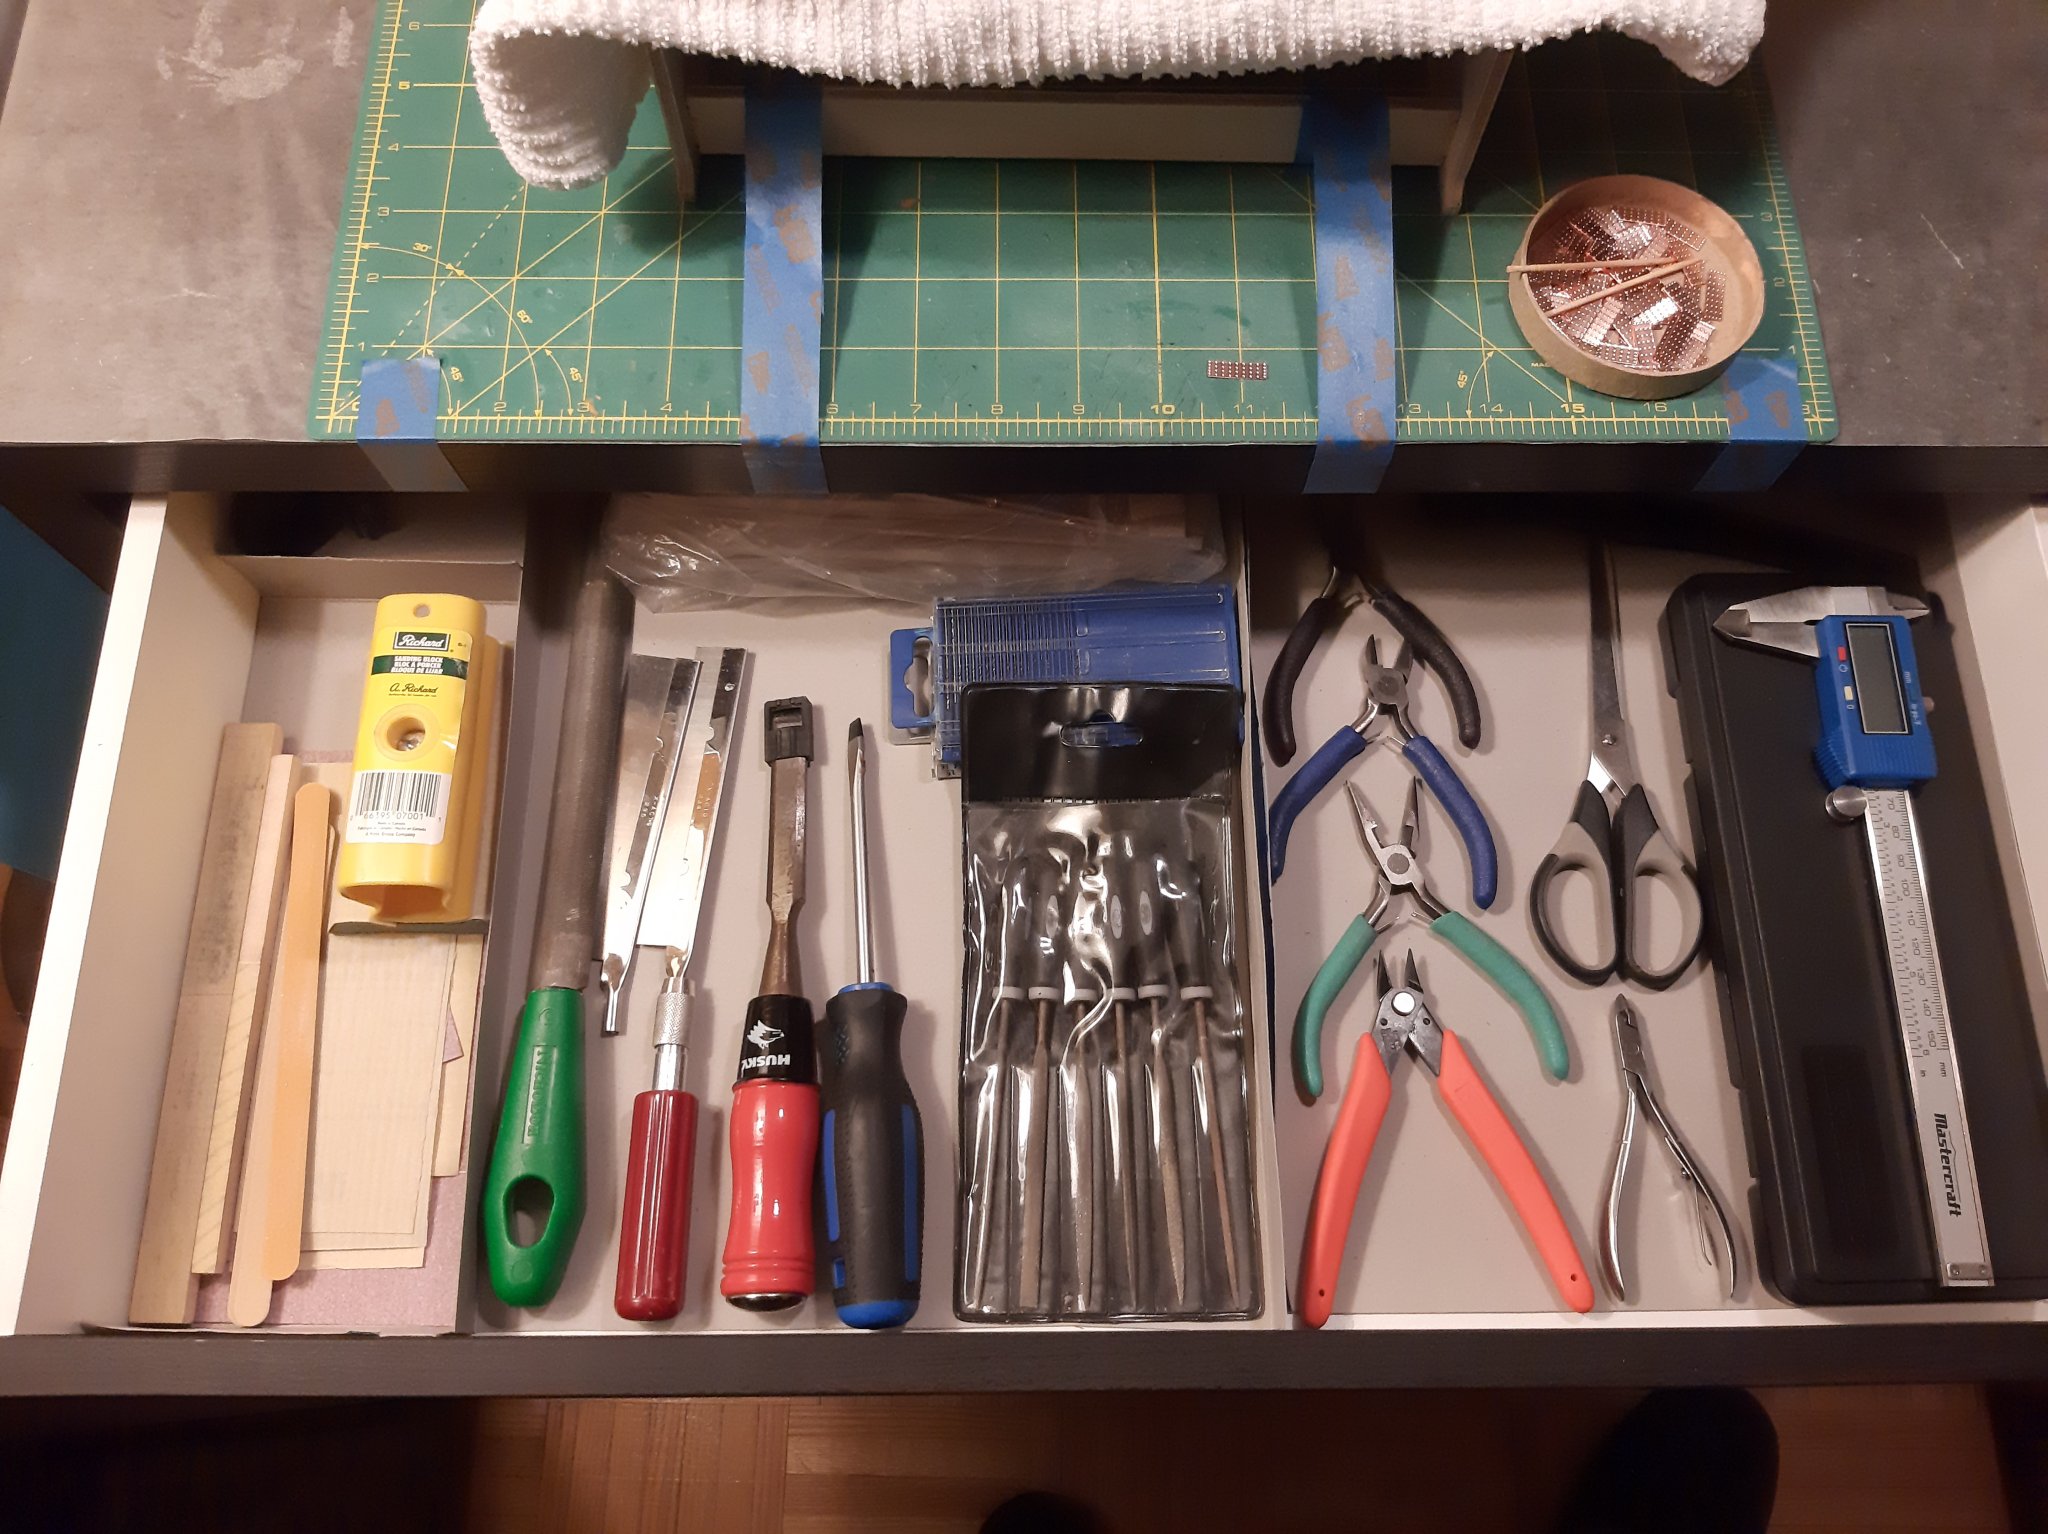
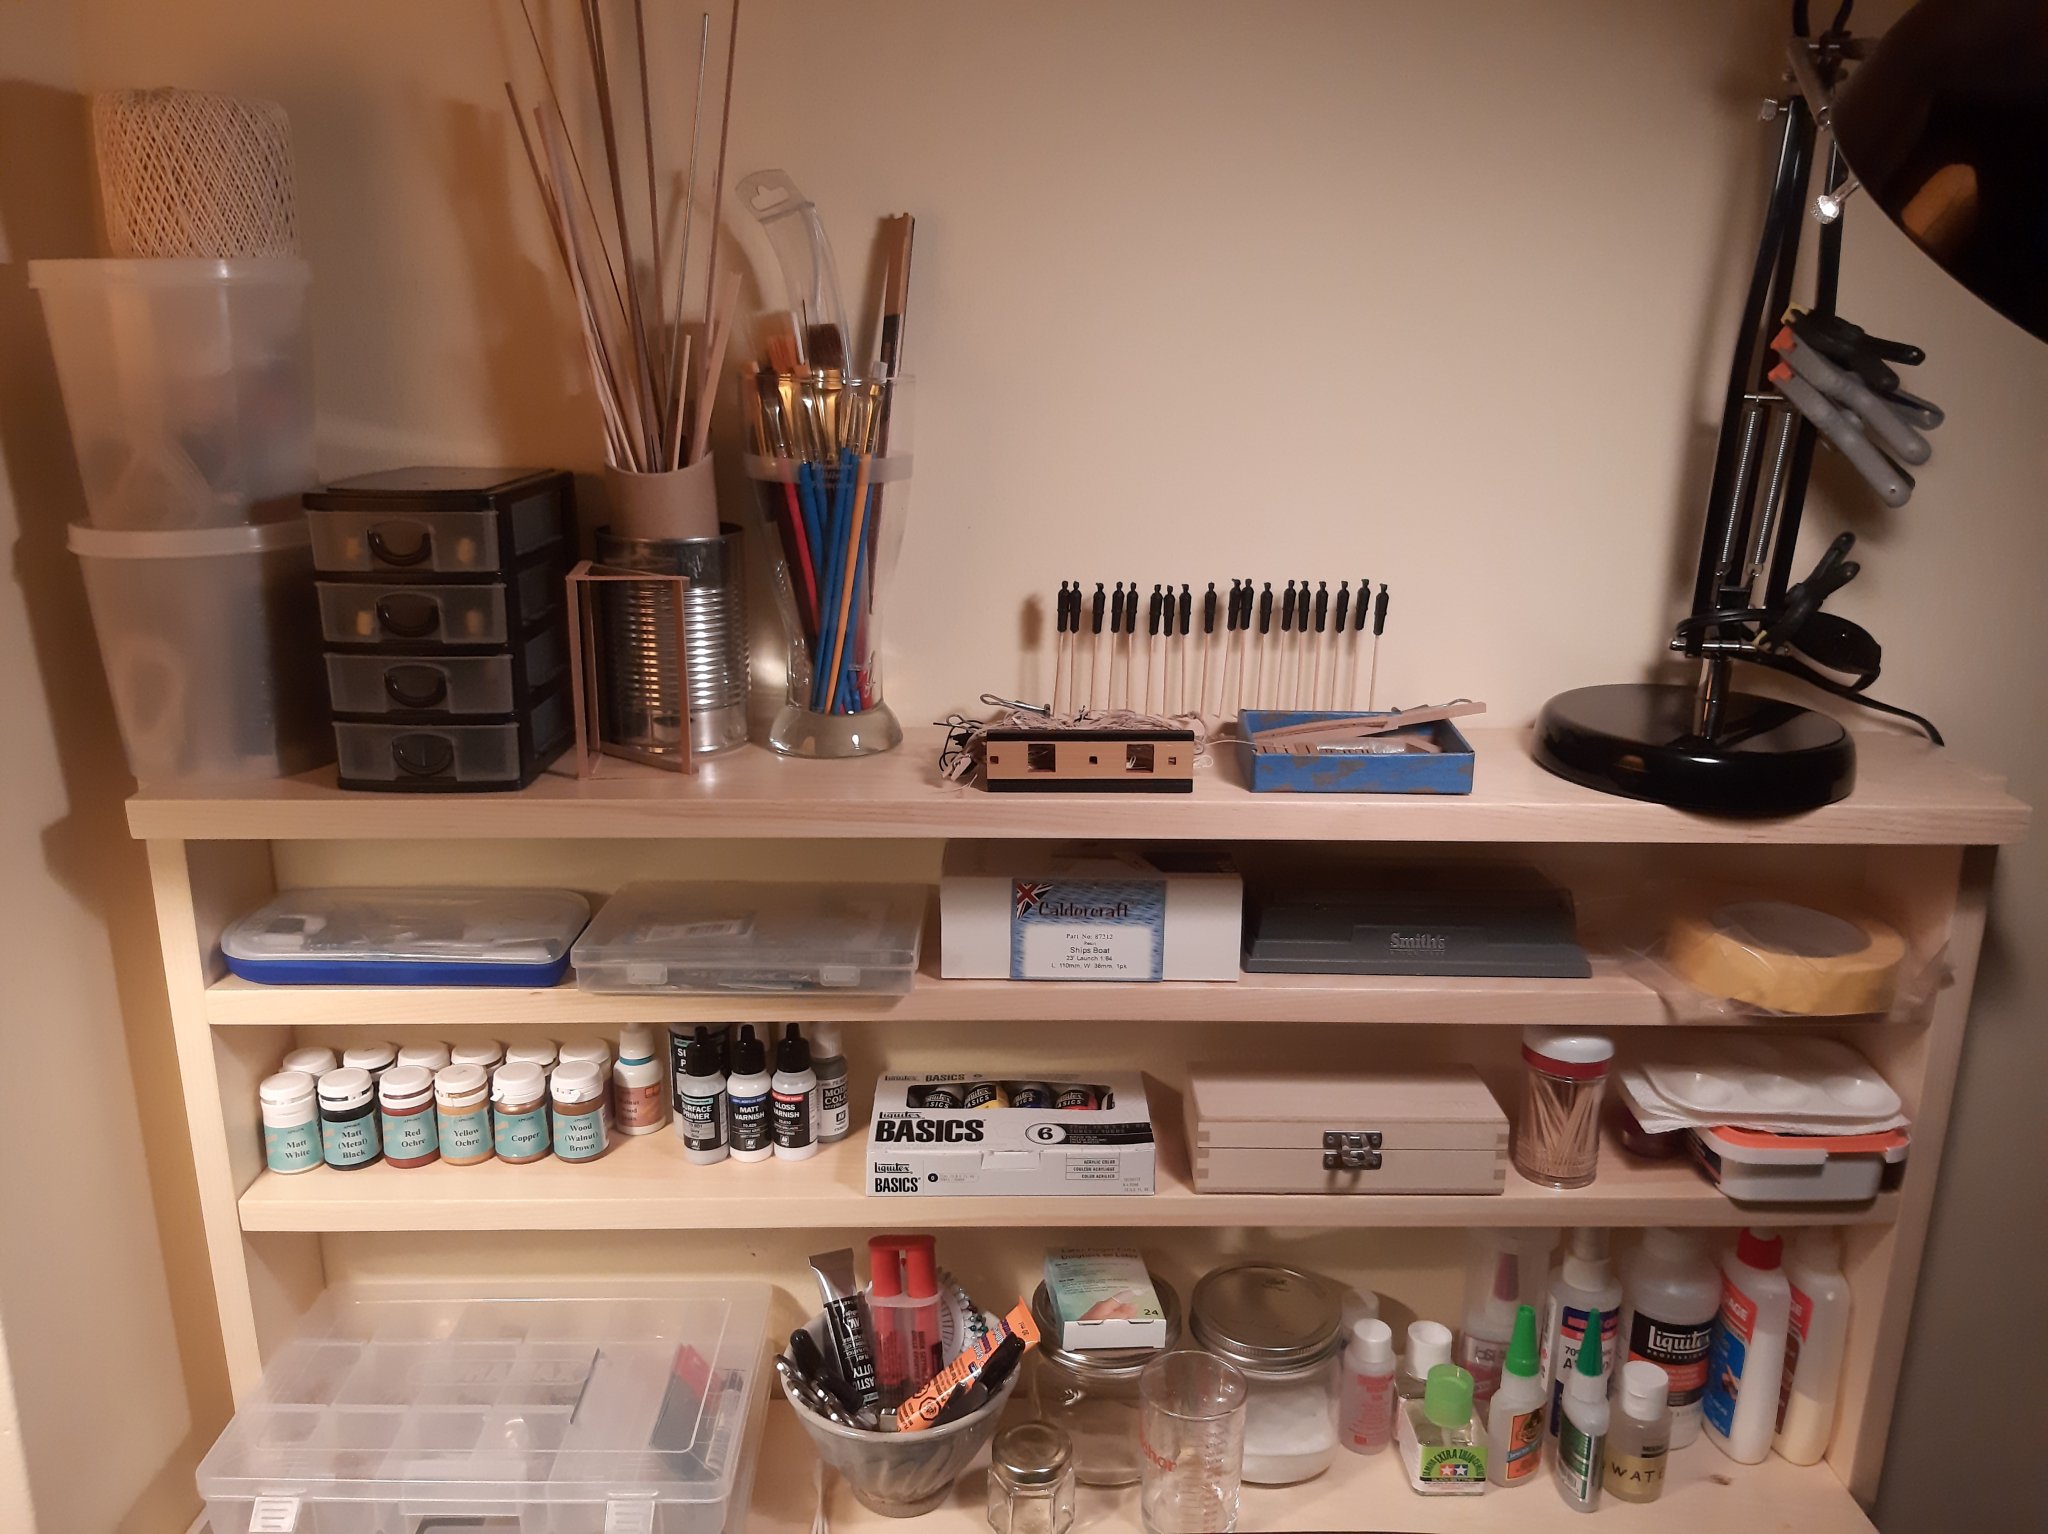
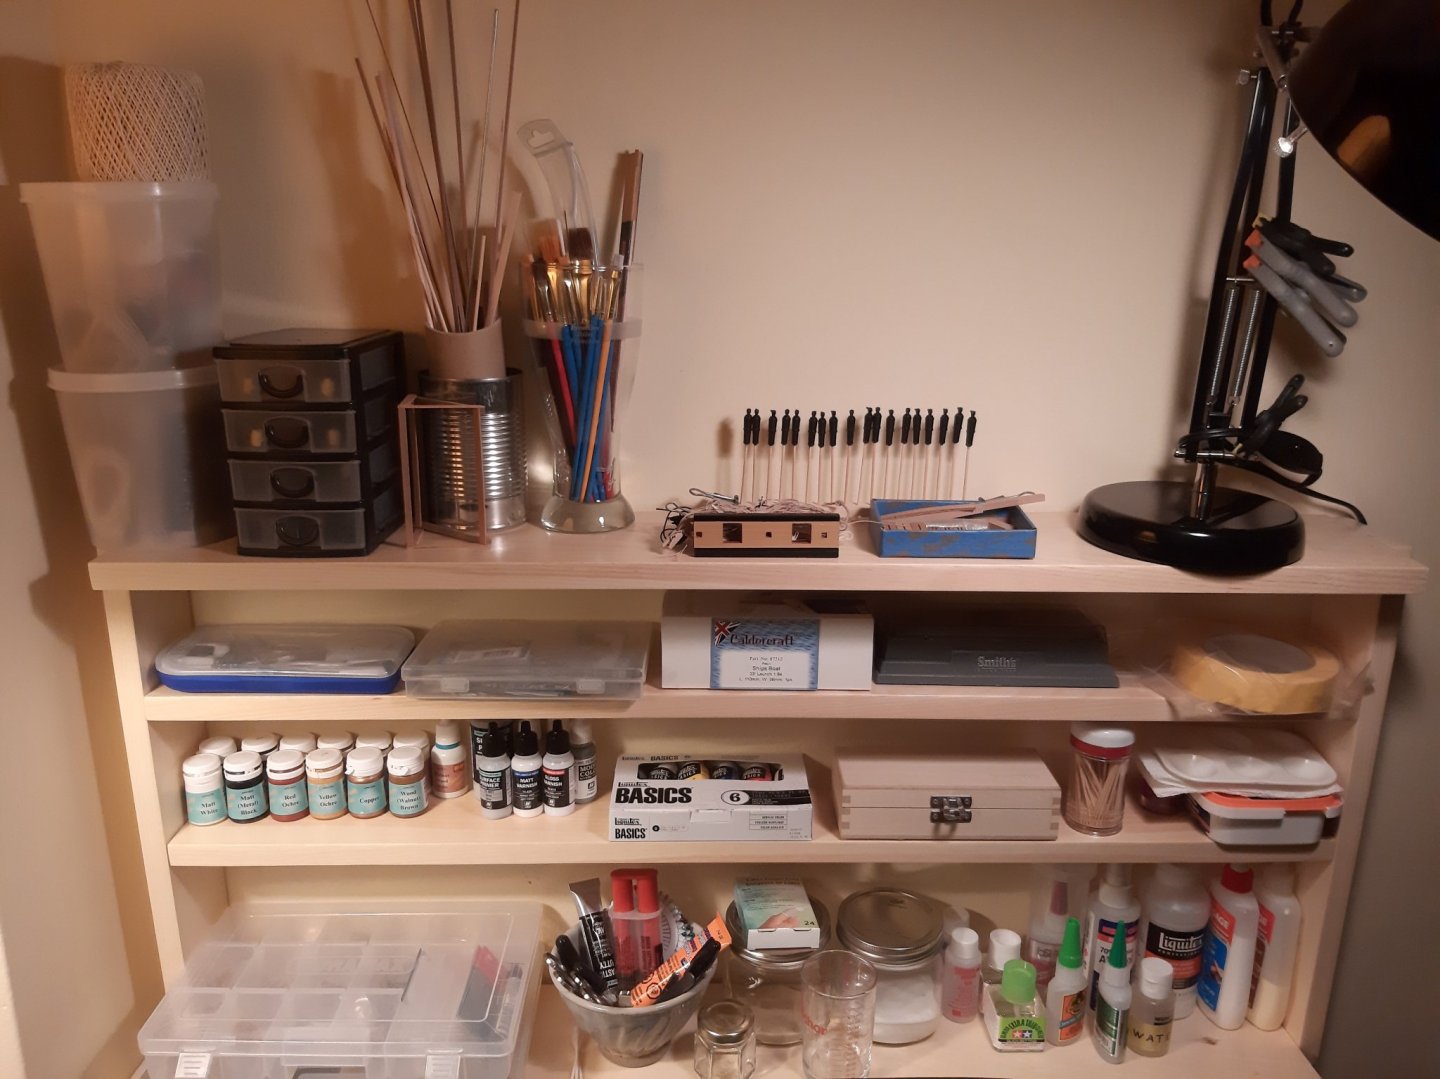
I decided to organize and upgrade the shipyard. I built a shelf with some cheap pine and organized my drawer. It really helps a workspace when there is some organization and everything has a place. The coppering is turning out ok for the most part. Having some CA debonder is a must for this job, it doesn't mater how good you get with glue application some will leak out of the seams and cause a mess.

-
This is looking real good. Starting to look shipshape ✔️ I'm still struggling with coppering the hull...
- 800 replies
-
- 1
-
-
- snake
- caldercraft
- (and 1 more)
-
Looking really good! what did you use for caulking on the deck planking?
-
Yeah these sponsors are legit. Some have active threads going in the community. Also start a build log, It's this communities bread and butter.
-
It will be Razeed 44 for sure. If I recall correctly Somewhere in Chris's thread he talked about having a 1/64 and 1/72 Sir. Edward Pellew ready for casting.