BenD
-
Posts
477 -
Joined
-
Last visited
Content Type
Profiles
Forums
Gallery
Events
Everything posted by BenD
-
 look's like Chris might have to put an extra sleeve over the box for shipping to the states... Were the delivery guys just kicking them down the road?!?
 -
Hey man, Don't beat yourself up. The instructions are weak. As long as you learn from mistakes, move forward, and keep at it. you'll get there. My Snake is not the best and My Sherbourne is pretty much a disgrace to the art. My first build the Amati Adventure will never see the light of day... that thing was a total embarrassment.
-
HMS Snake by BenD - Caldercraft - 1:64
BenD replied to BenD's topic in - Kit build logs for subjects built from 1751 - 1800
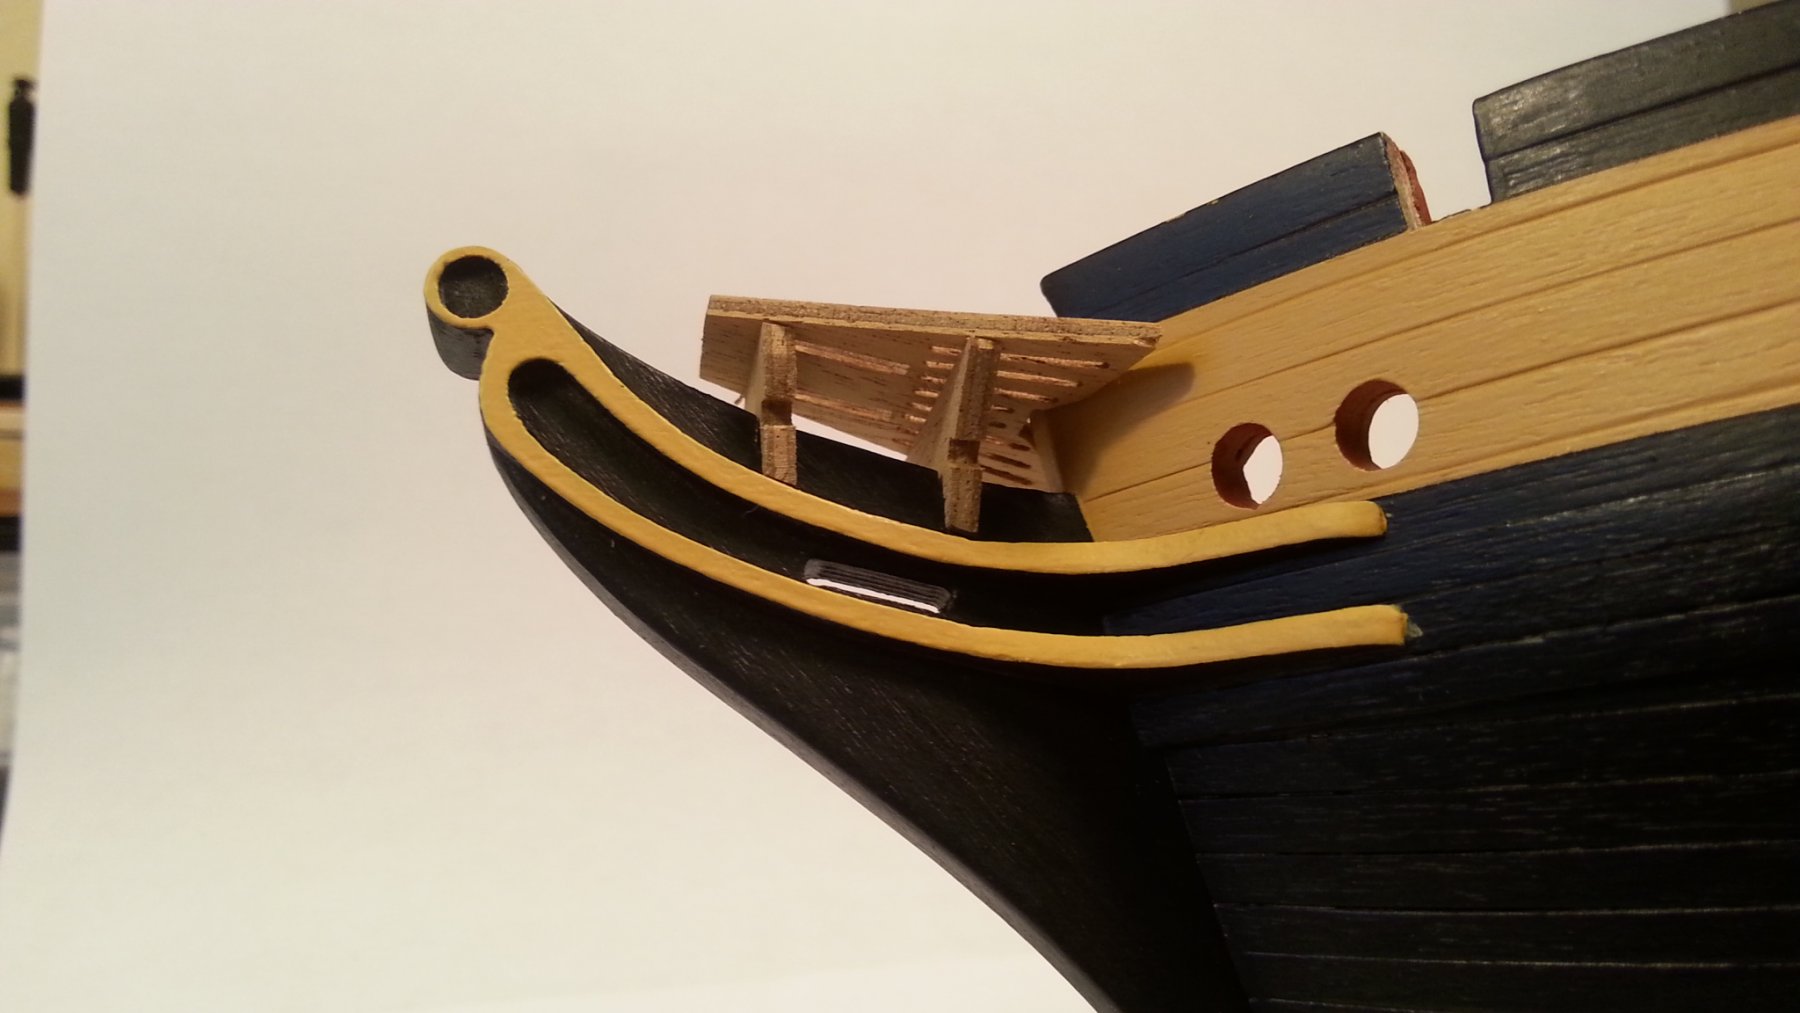
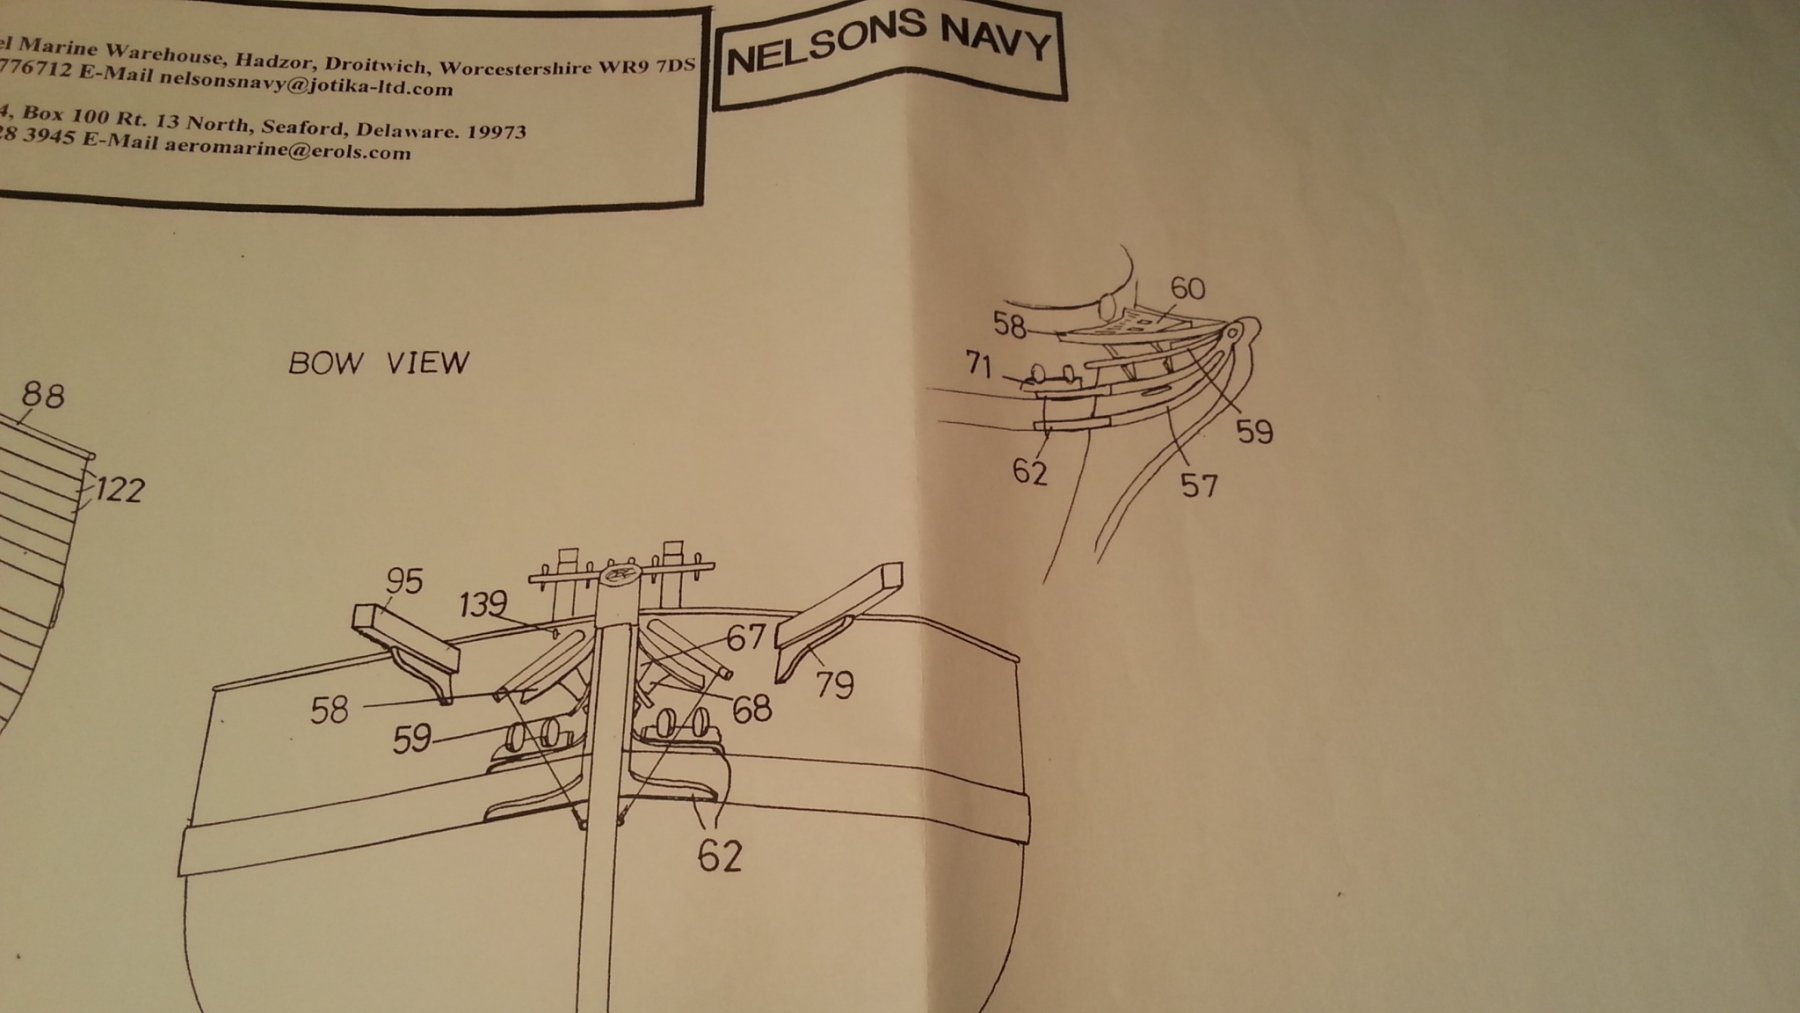
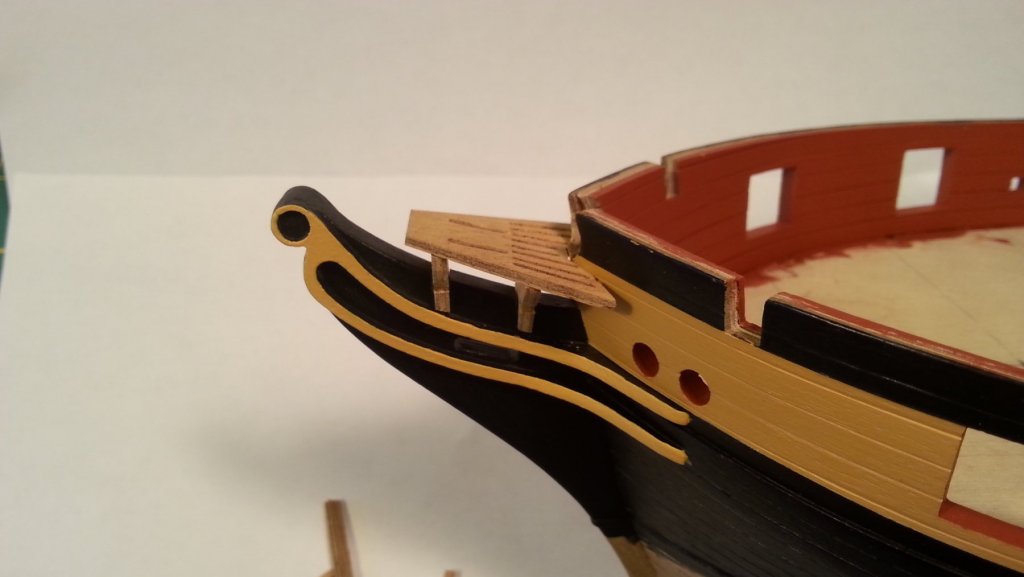
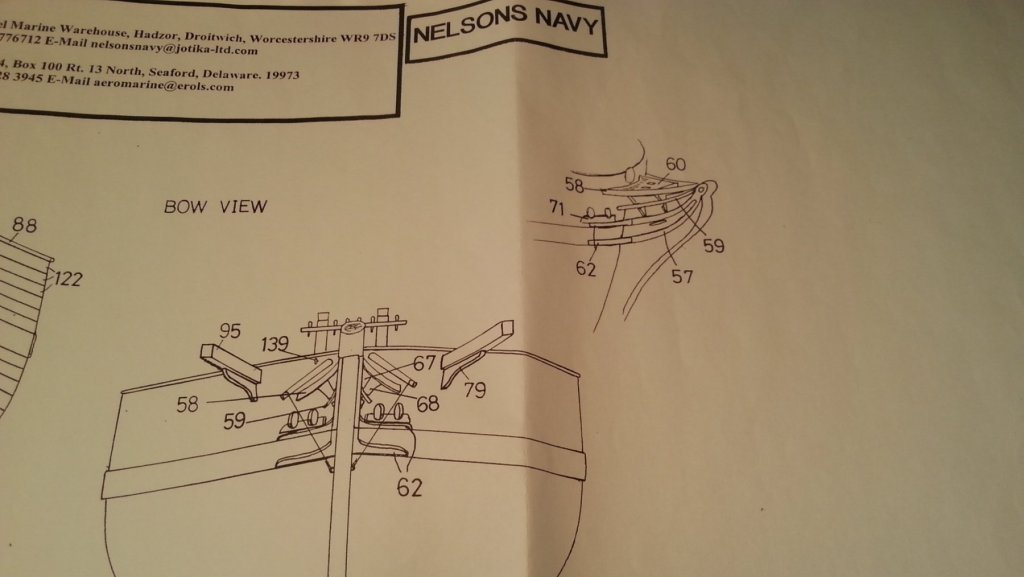
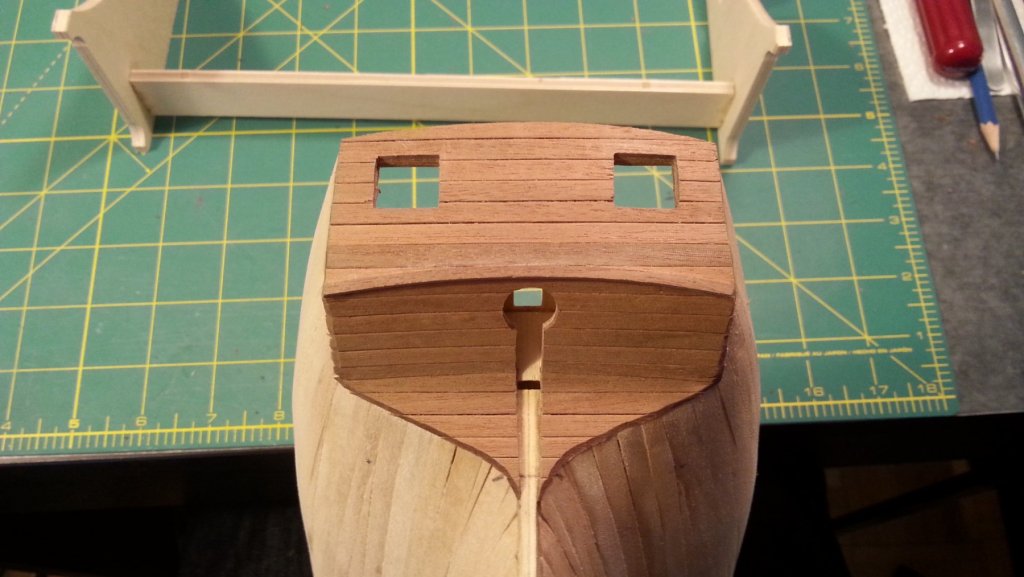
I've been working on the bow decorations for what feels like ages... The plans are kinda not helpful because they aren't consistent from picture to picture. So I'm kinda just sanding and fiddling around until everything seems to fit. I've got the cheeks on and it turned out way better than I could ever hope. The rest of the head and decorations are going to be a hard few hours. The slots for the Gammoning didn't line up at all so I widened them on part #60 just like the folks from other builds. I'm still looking at everyone else's builds to see how they fared. I'll do my best, If it turns out bad I can always scrape it all off and scratch build some new decorations.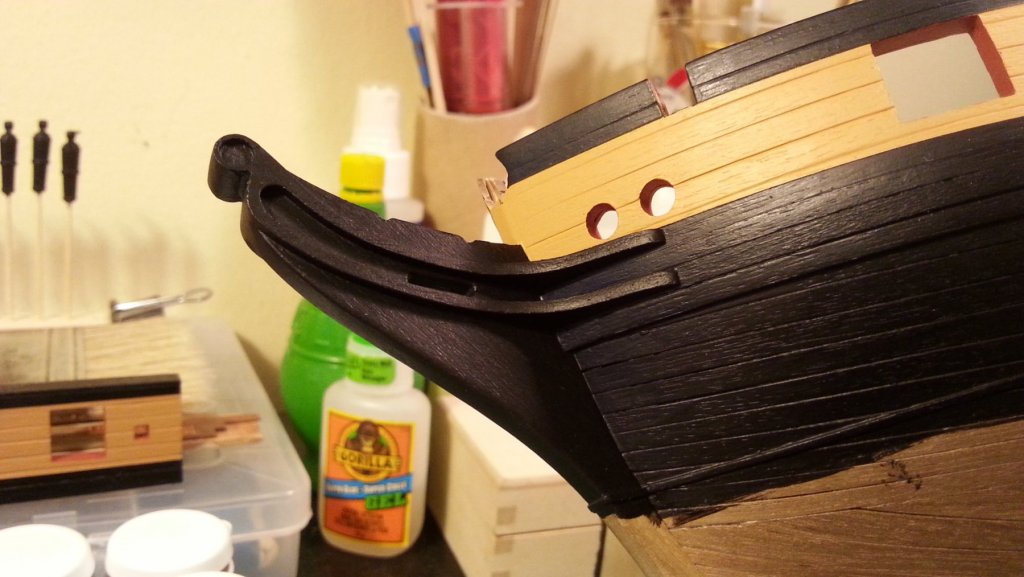


-
Now that look's top notch!!! Look's like I'm making a cutter for my next build. I think you might be quitting your day job. These thing's are going to sell.
-
HMS Snake by BenD - Caldercraft - 1:64
BenD replied to BenD's topic in - Kit build logs for subjects built from 1751 - 1800
I was going for this effect with the planking. Though mine turned out more noticeable...
-
HMS Snake by BenD - Caldercraft - 1:64
BenD replied to BenD's topic in - Kit build logs for subjects built from 1751 - 1800
Hey SpyGlass, I sanded the edges of the planks round so it would be noticeable. It's a little more exaggerated than I would have hoped but its something I noticed on the Victory when you stand even 15-20 meters away. -
HMS Snake by BenD - Caldercraft - 1:64
BenD replied to BenD's topic in - Kit build logs for subjects built from 1751 - 1800
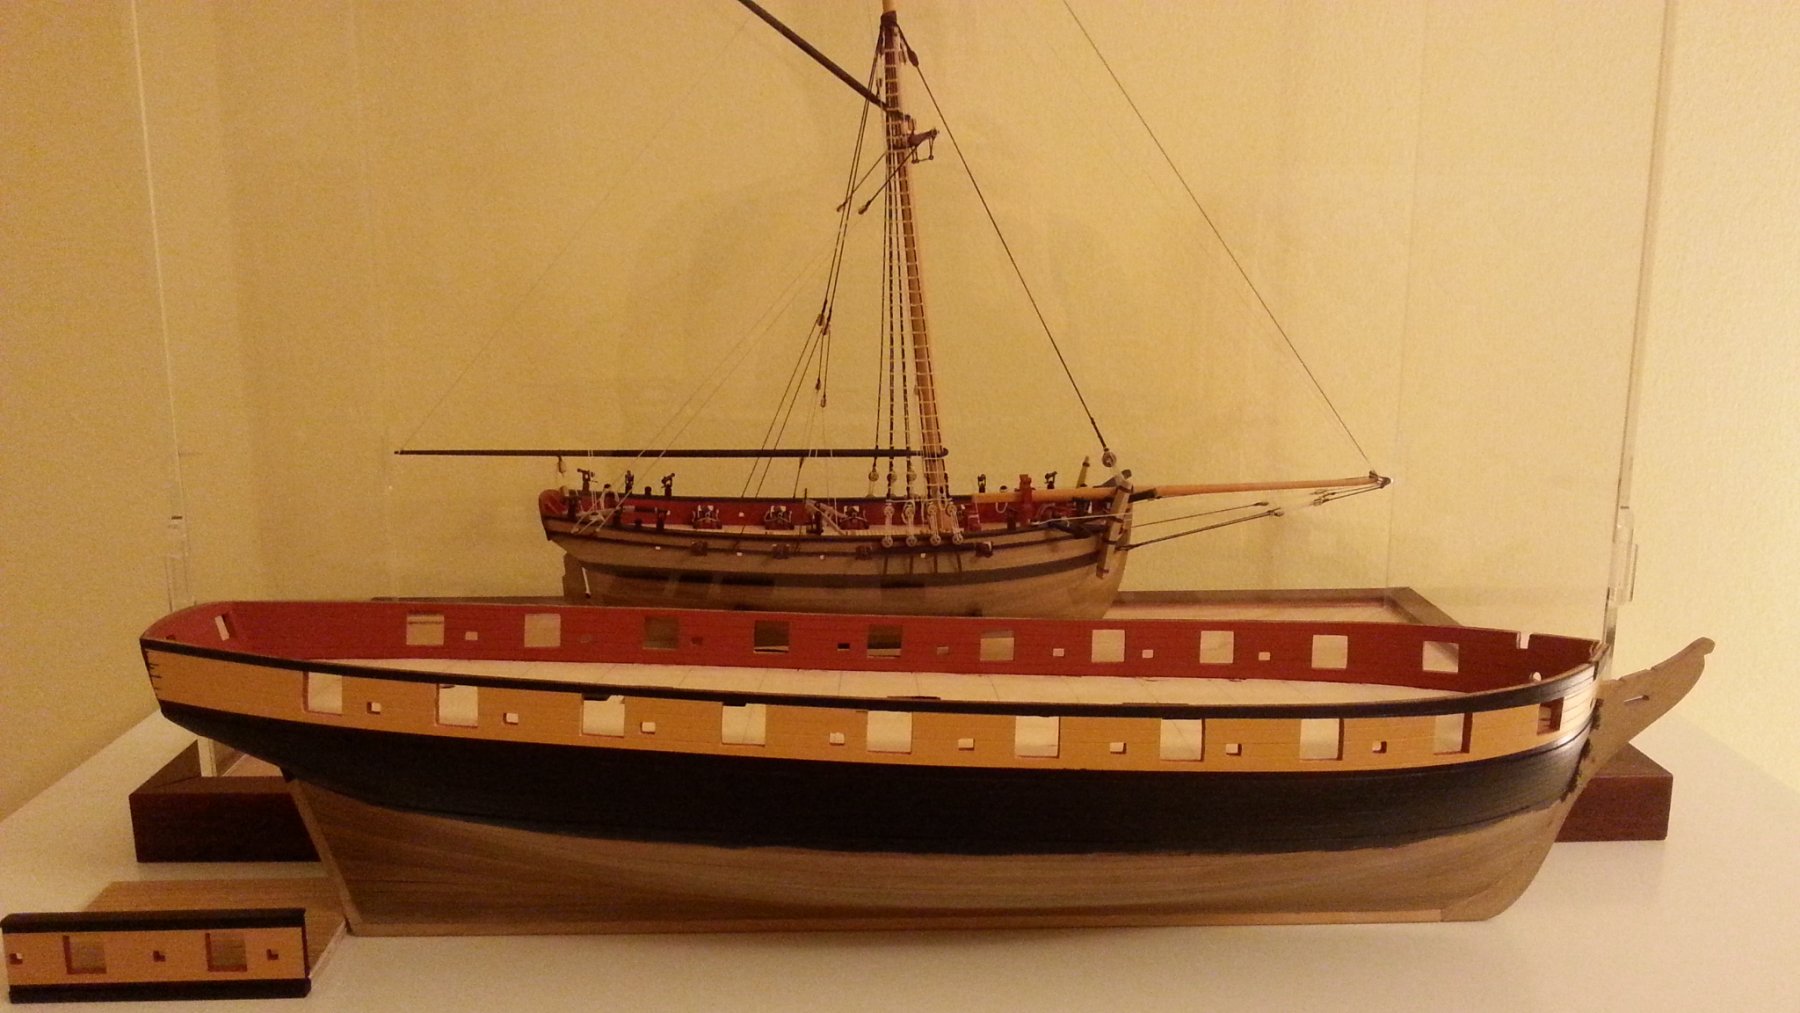
I didn't quite like the CalderCraft Yelow Ochre so much so I decided to edit the paint a little. I added a little matt white and a bit to much cadmium Yellow. I may have gone to far but I think it's growing on me. In the sunlight it's quite bright, probably not so historically accurate. It's not to late to re-paint so I'm going to sit back and ponder a while. In the sunlight with the right angle it almost looks white! She's quite large beside the Sherbourne.


-
HMS Snake by BenD - Caldercraft - 1:64
BenD replied to BenD's topic in - Kit build logs for subjects built from 1751 - 1800
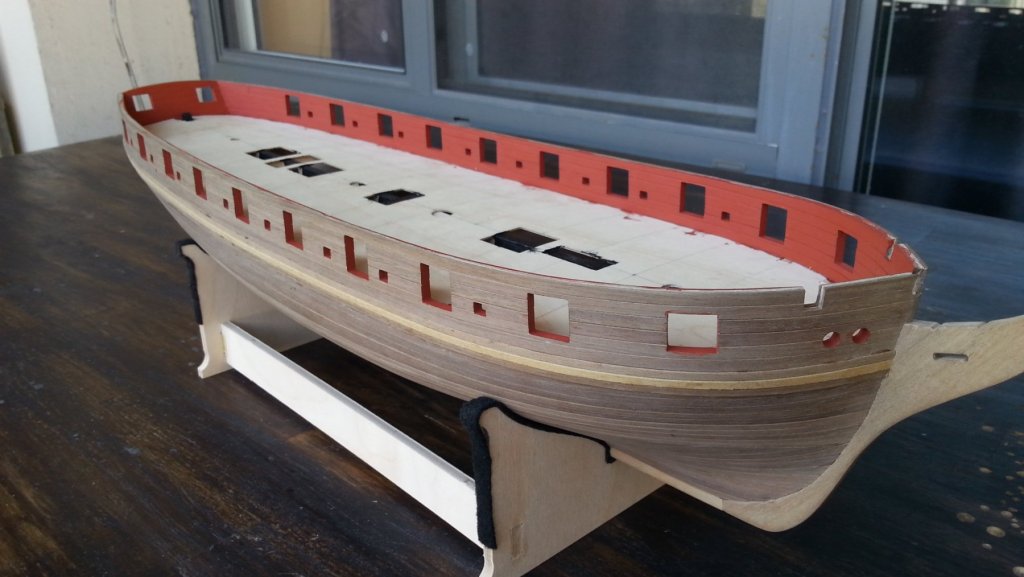
The inner planking is done. Cutting the sweeps and ports out... It was quite the job to say the least. The 4x1mm planks were good quality but walnut is just not easy to work with. The Red Ochre paint from Caldercraft is really nice to work with even with cheap pain brushes. My plan to have the planking show through the paint has worked out better than expected! I also put on the main wale. The 3x1mm planks were just awful wood and were slightly different sizes and colors, thank god they will be painted.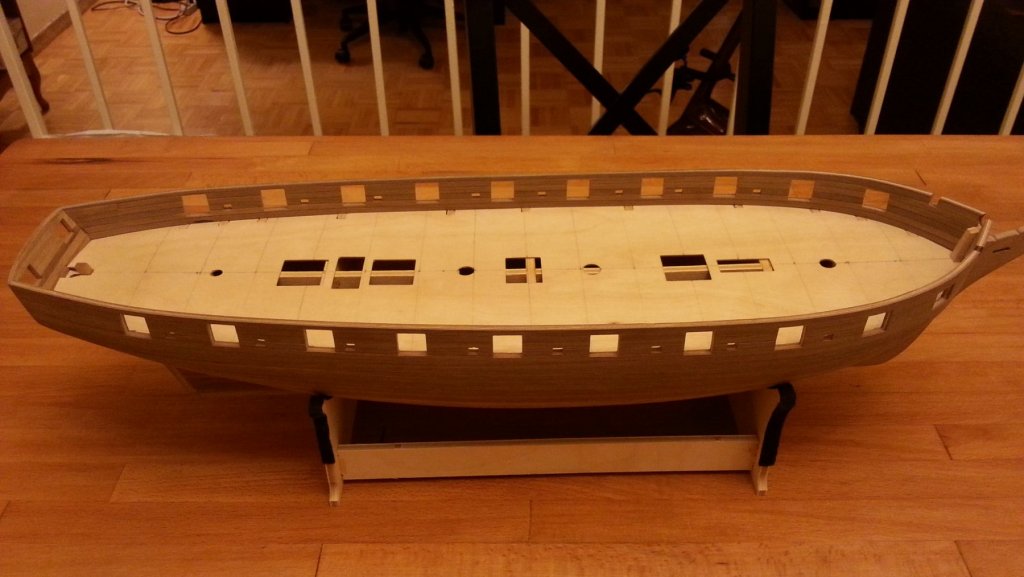

-
Hey Mispeltyoof. The the frames that are holding the Bulwarks on are to be pulled off after you're done planking the outer hull. I carefully scored the bottom of the frame tab near the deck and then cracked them out with a pair of pliers. It is a bit barbaric and leaves some hideous marks but that gets planked over anyway.
- 31 replies
-
- 1
-

-
- snake
- caldercraft
- (and 1 more)
-
HMS Snake by BenD - Caldercraft - 1:64
BenD replied to BenD's topic in - Kit build logs for subjects built from 1751 - 1800
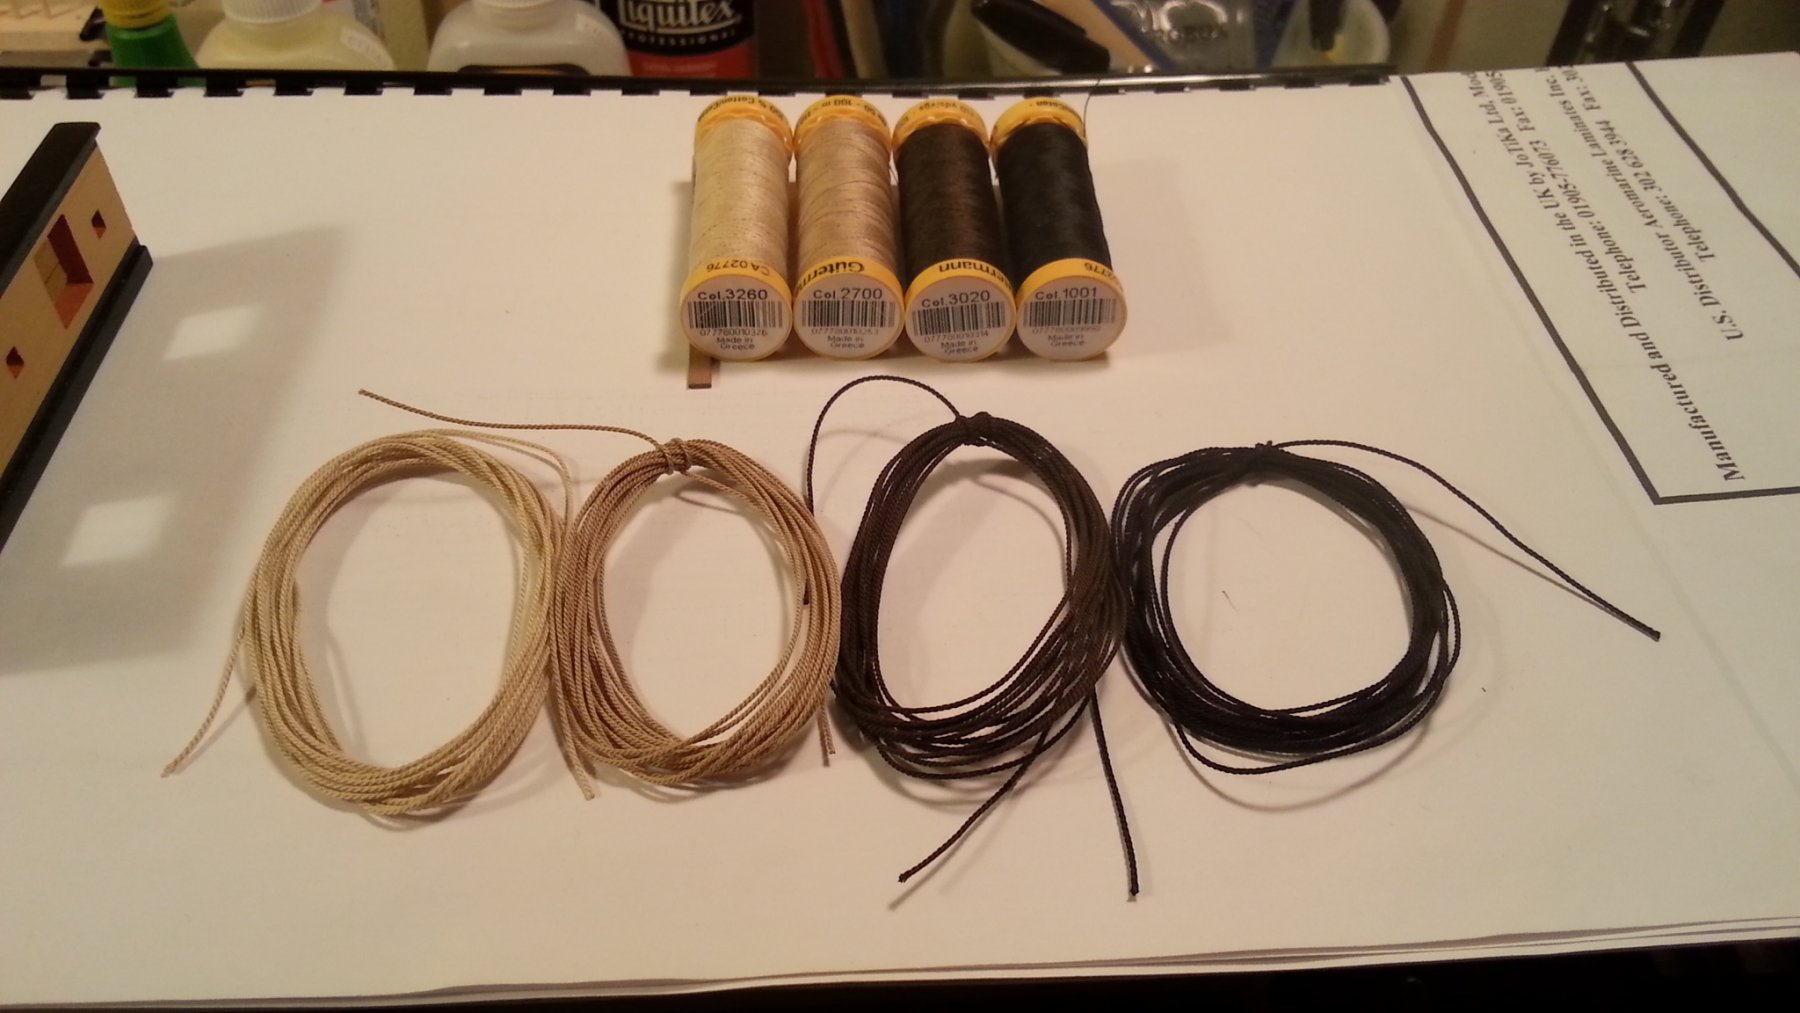
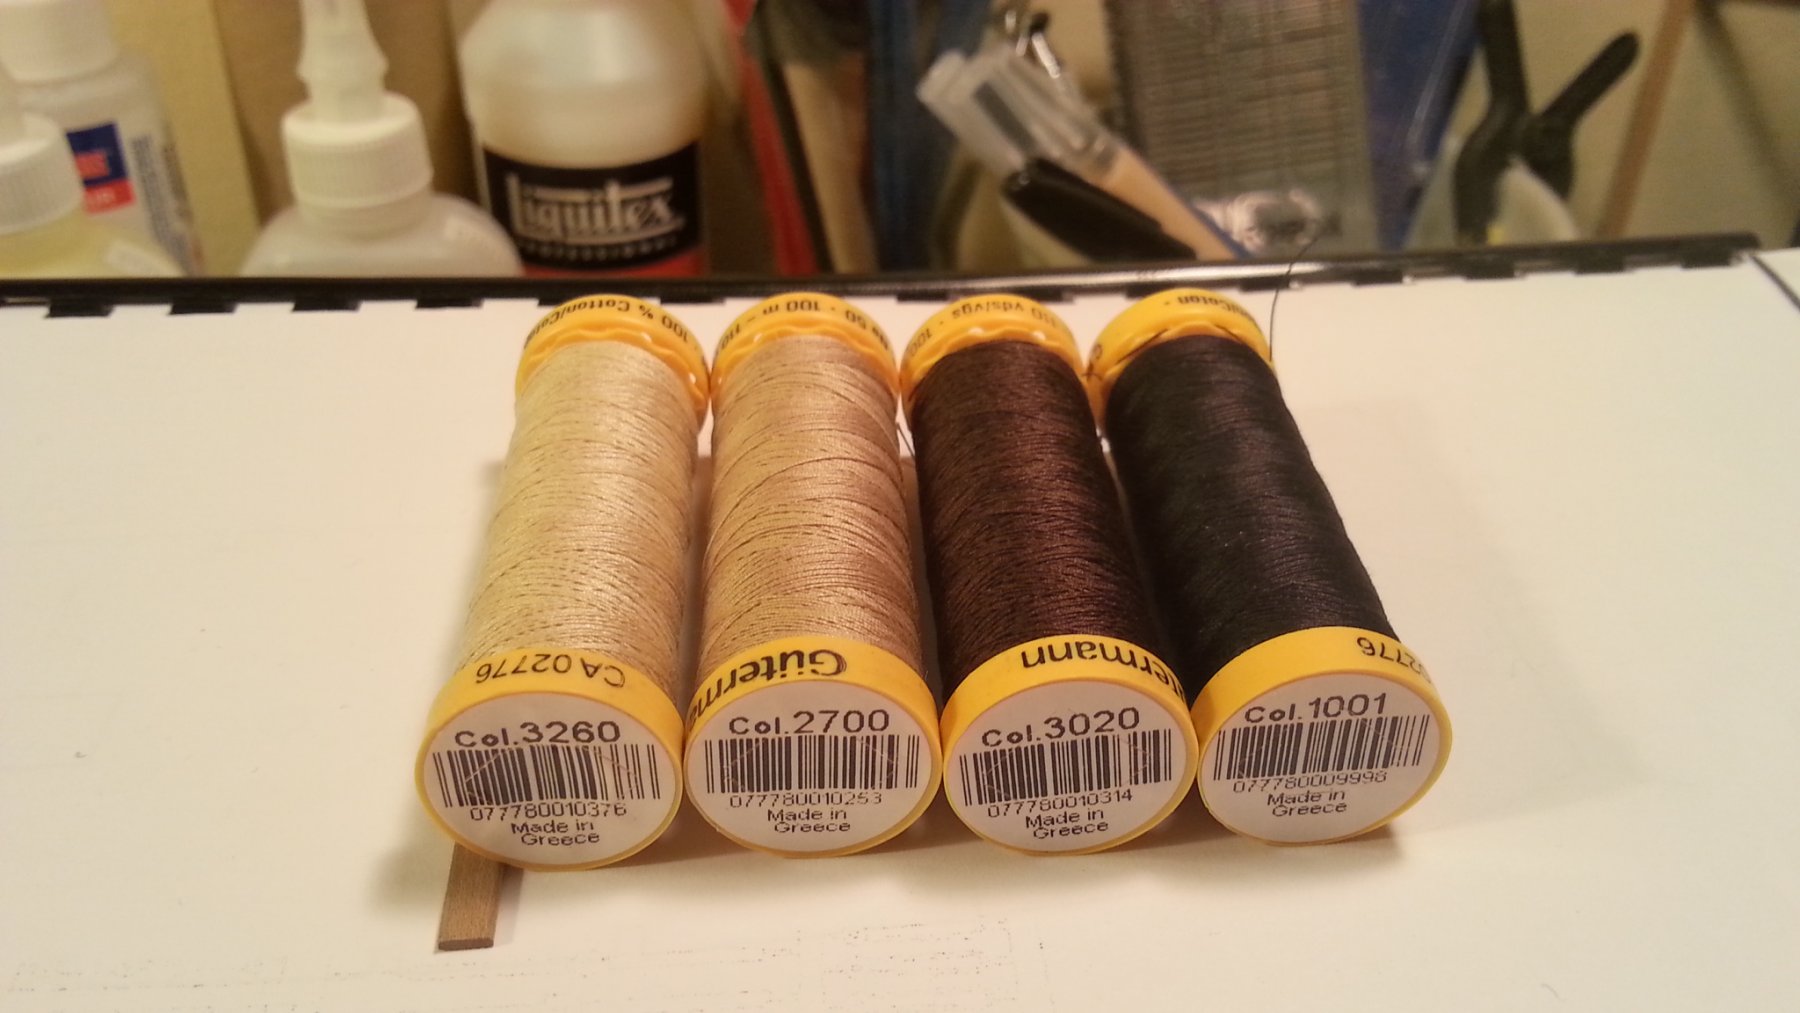
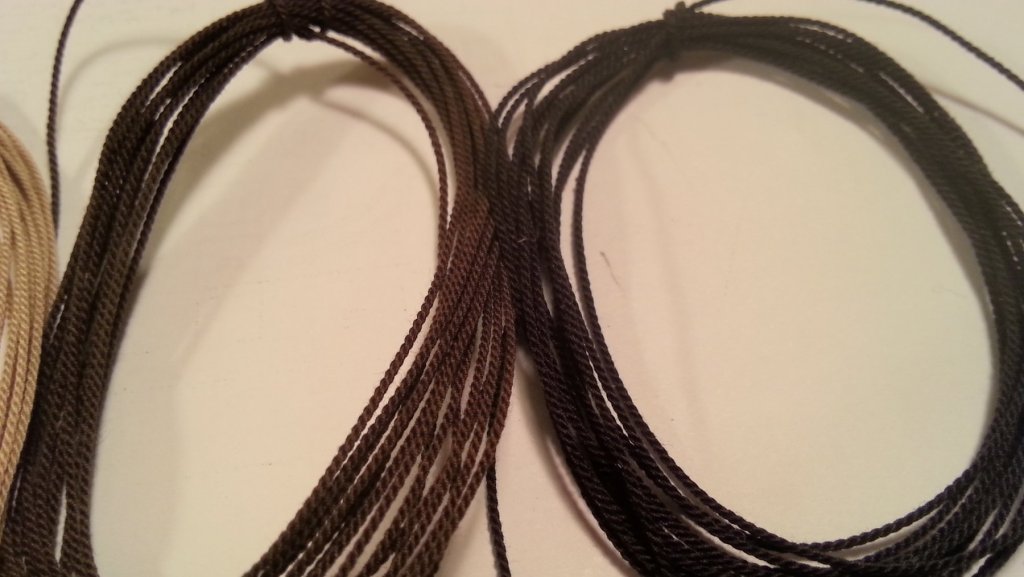
I've been working on rope making quite a lot and think Gutermann thread is the way to go. Most people seem to be using DMC Cabella cotton thread. It's mostly being discontinued in the right sizes so that's not really a long term option. Anyway I've narrowed it down to four colors, two for standing rigging and two for running rigging. I've been looking at a lot of pictures and just don't know what combination would be most accurate. Would standing rigging covered in pine Tar really not be black as some suggest? What color would running rigging actually be in that period?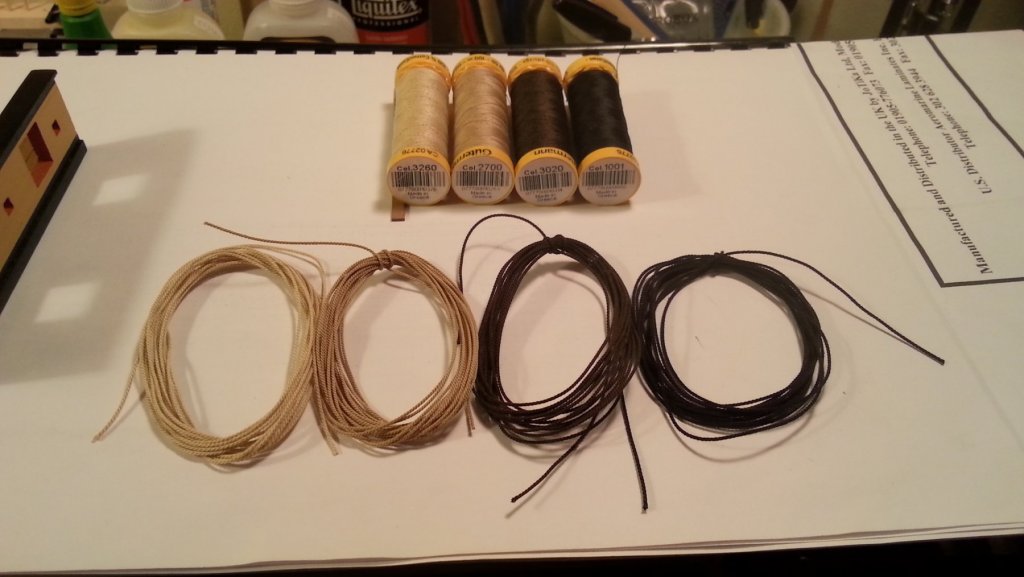


-
HMS Snake by BenD - Caldercraft - 1:64
BenD replied to BenD's topic in - Kit build logs for subjects built from 1751 - 1800
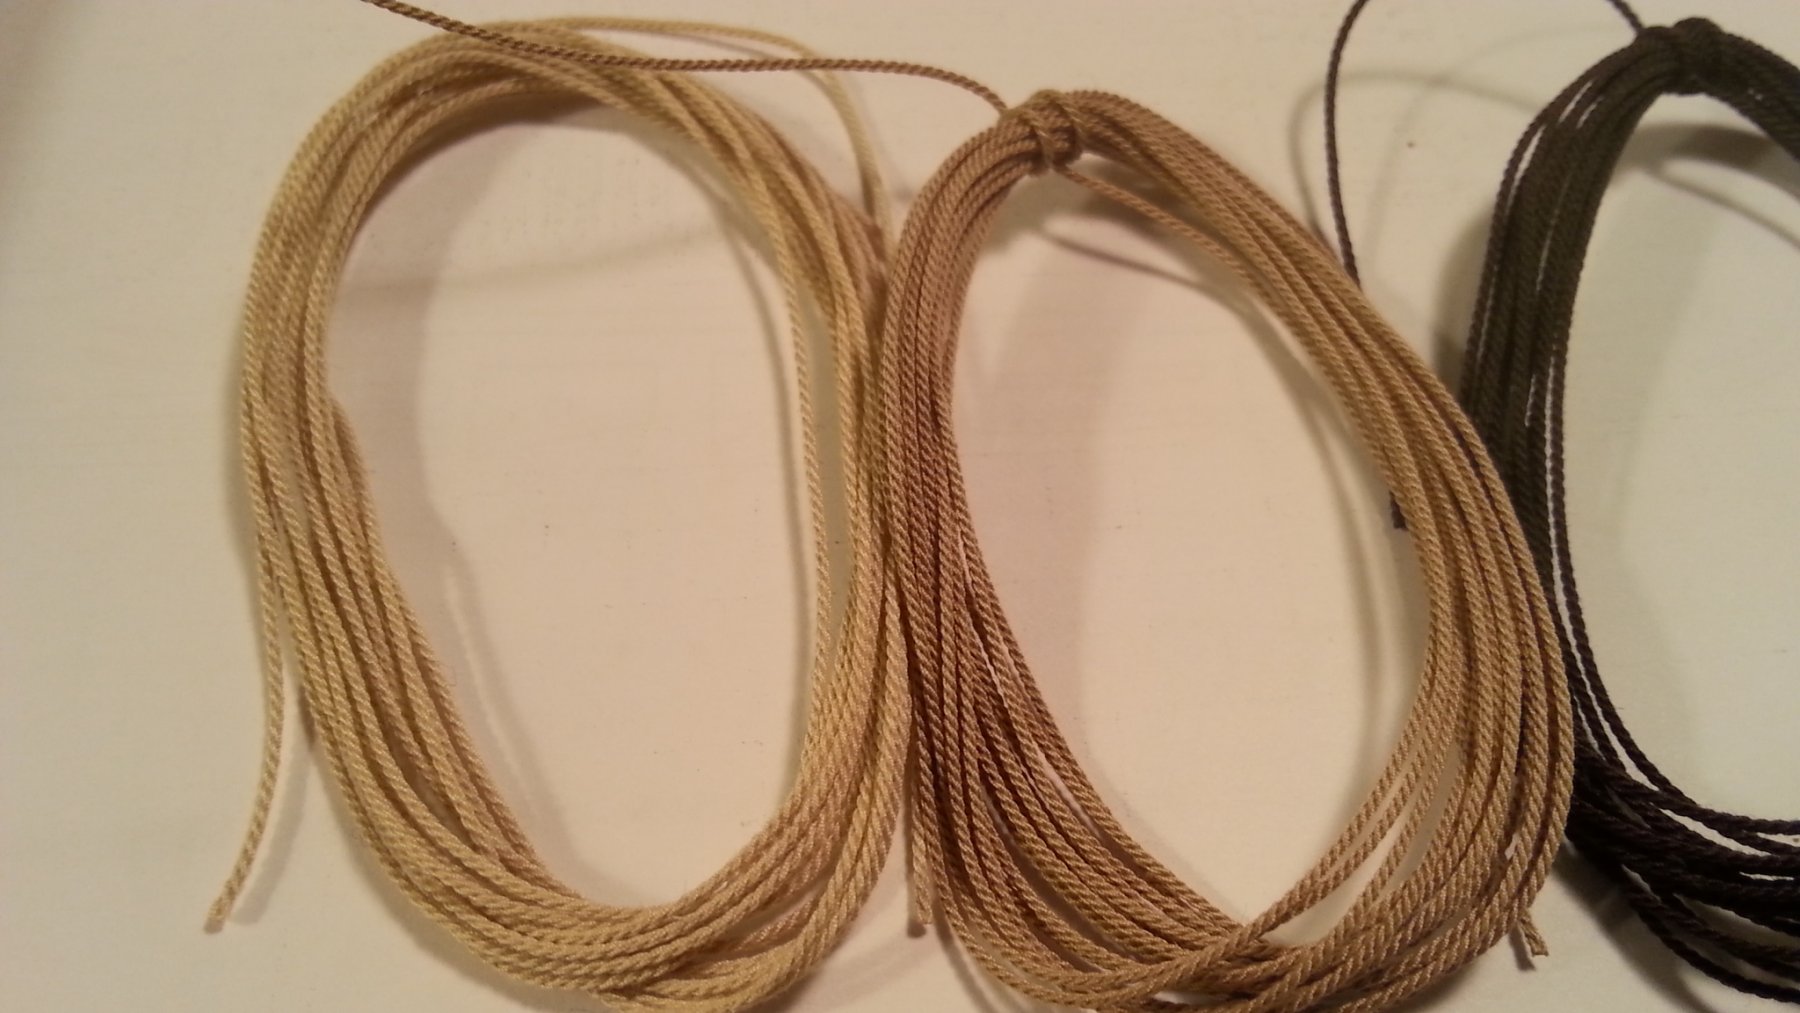
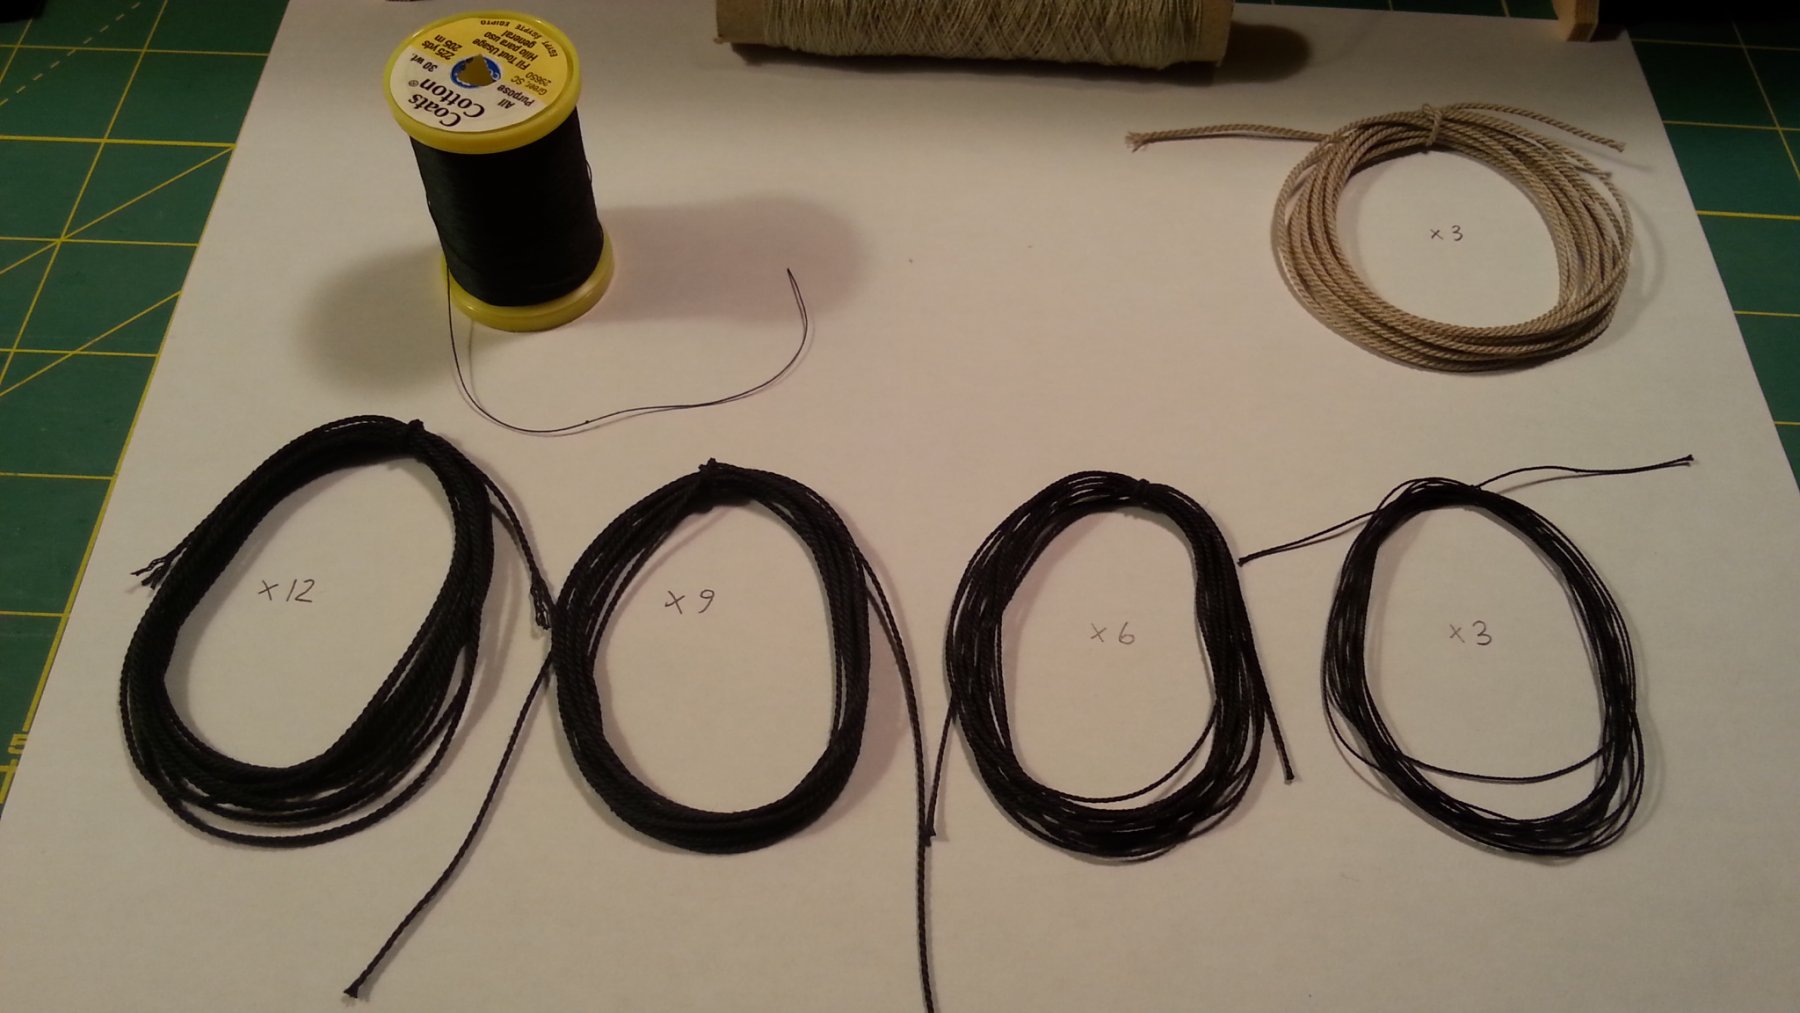
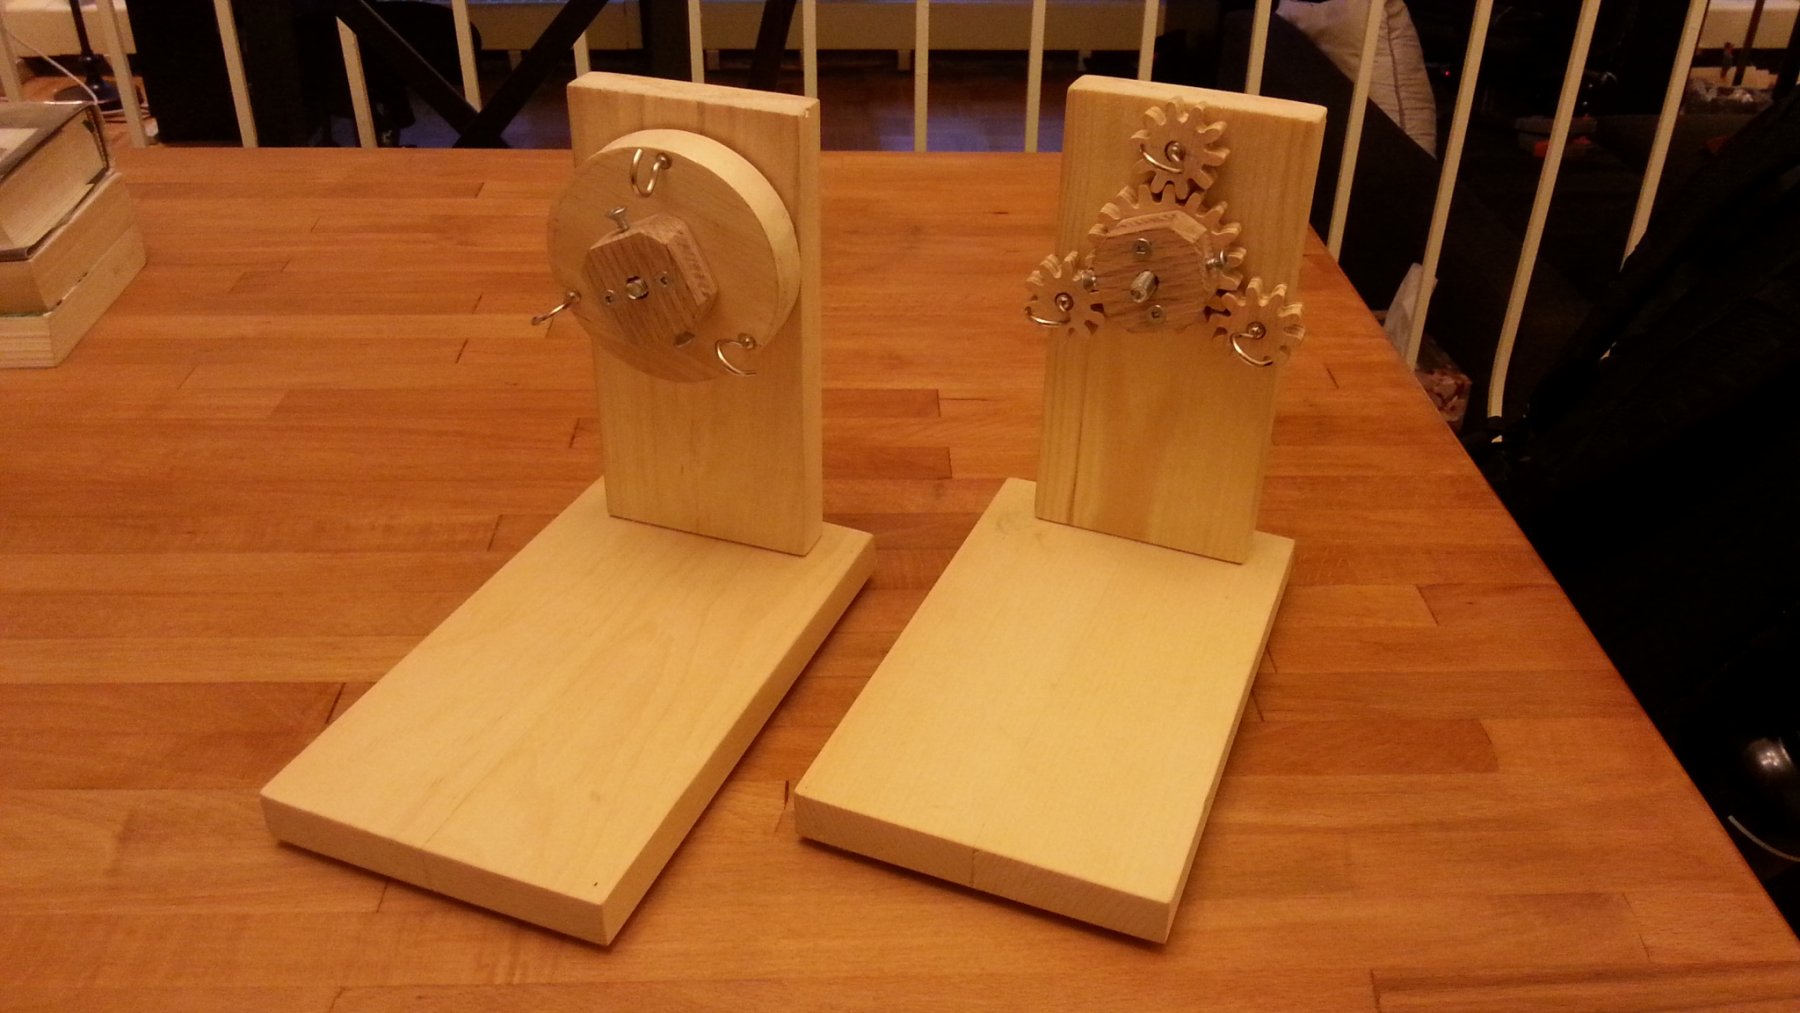
I made a ropewalk! It works pretty well so far. Making the gears was the hardest part of the build, everything else was strait forward. Below is Caldercrafts 0.25mm "Rope" and I made a pretty decent rope from just three strands. The black ropes look just as good as the tan one but my camera won't pick up the details . As you can see I wrote down how many strands are in each rope. Figuring out how thick they are is kinda tricky but I think -X12 1mm -X9 .8mm -X6 .6mm -X3 .3mm. Getting it just right so the ends don't explode is trial and error. I'm going to be obsessed with rope making until I perfect it.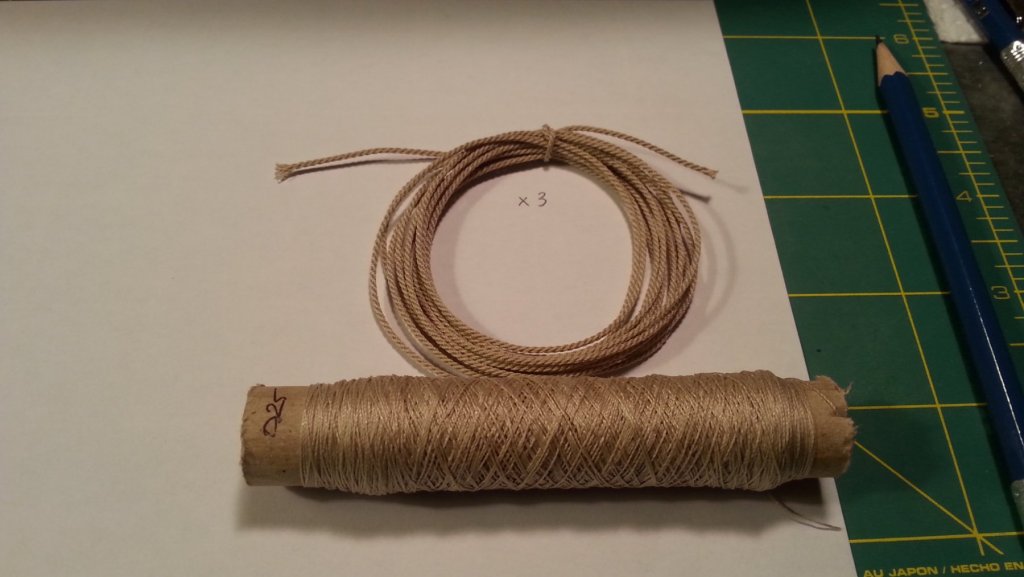


-
HMS Snake by BenD - Caldercraft - 1:64
BenD replied to BenD's topic in - Kit build logs for subjects built from 1751 - 1800
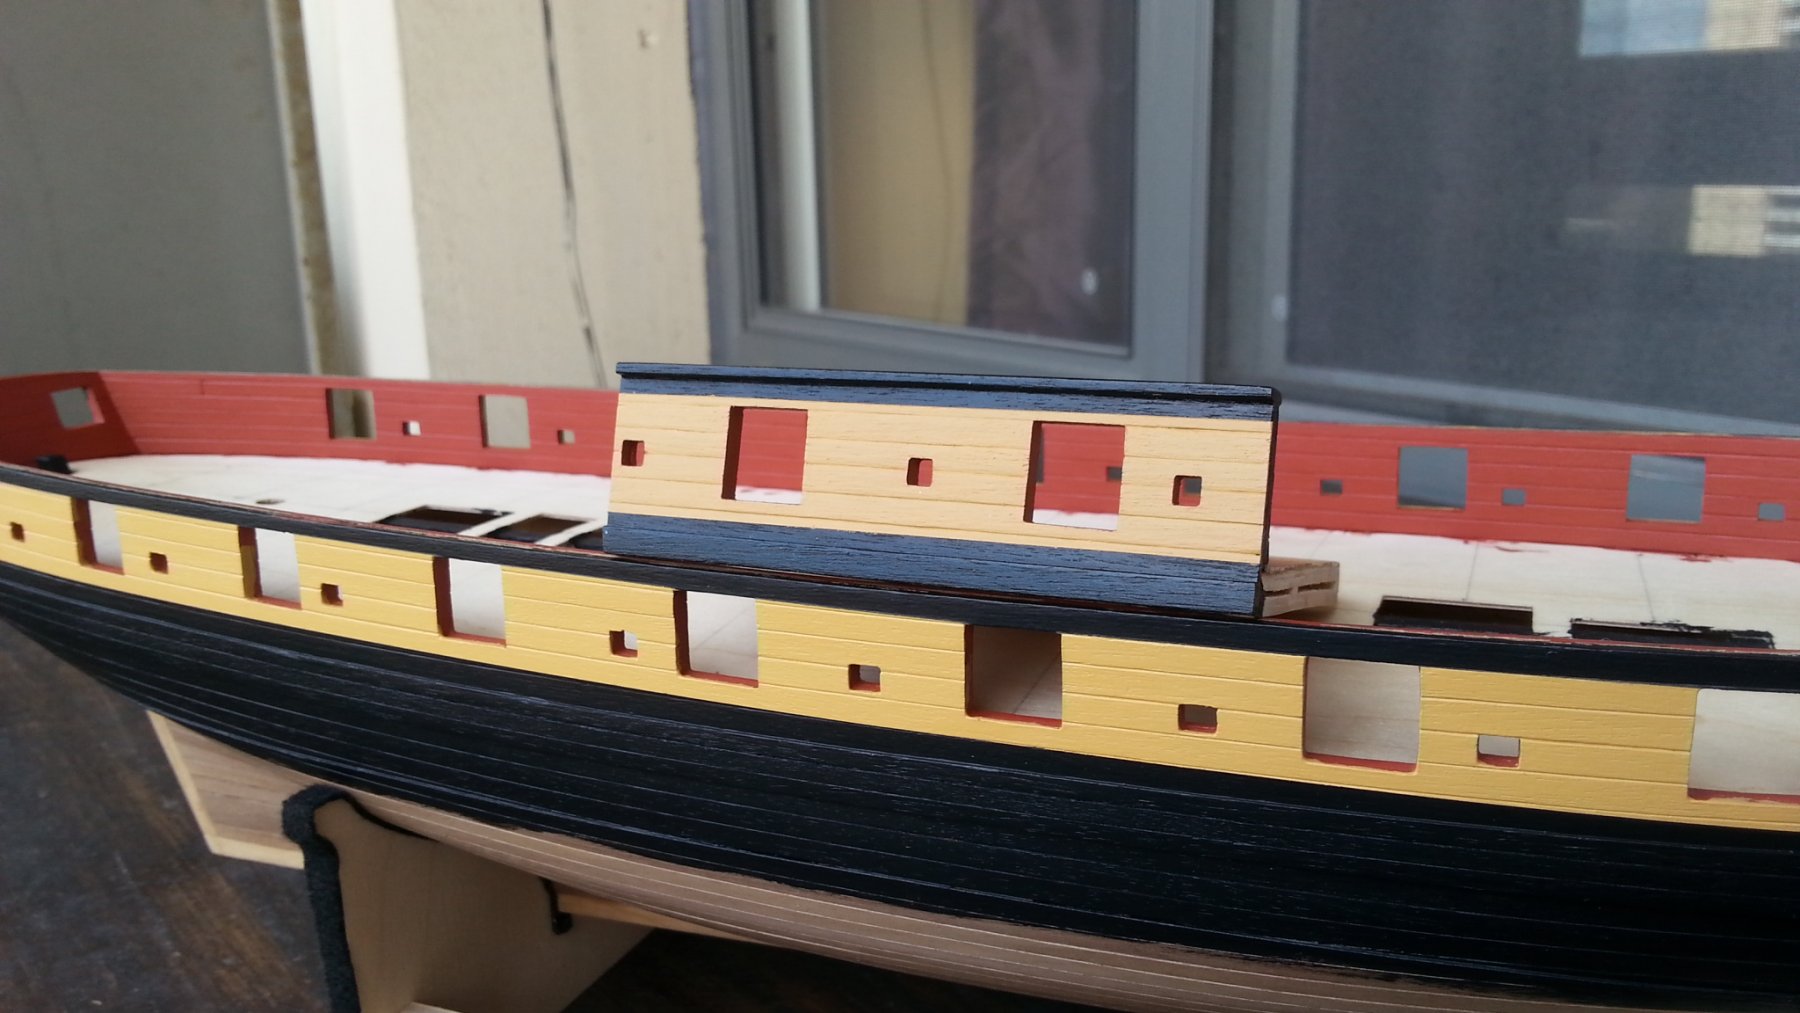
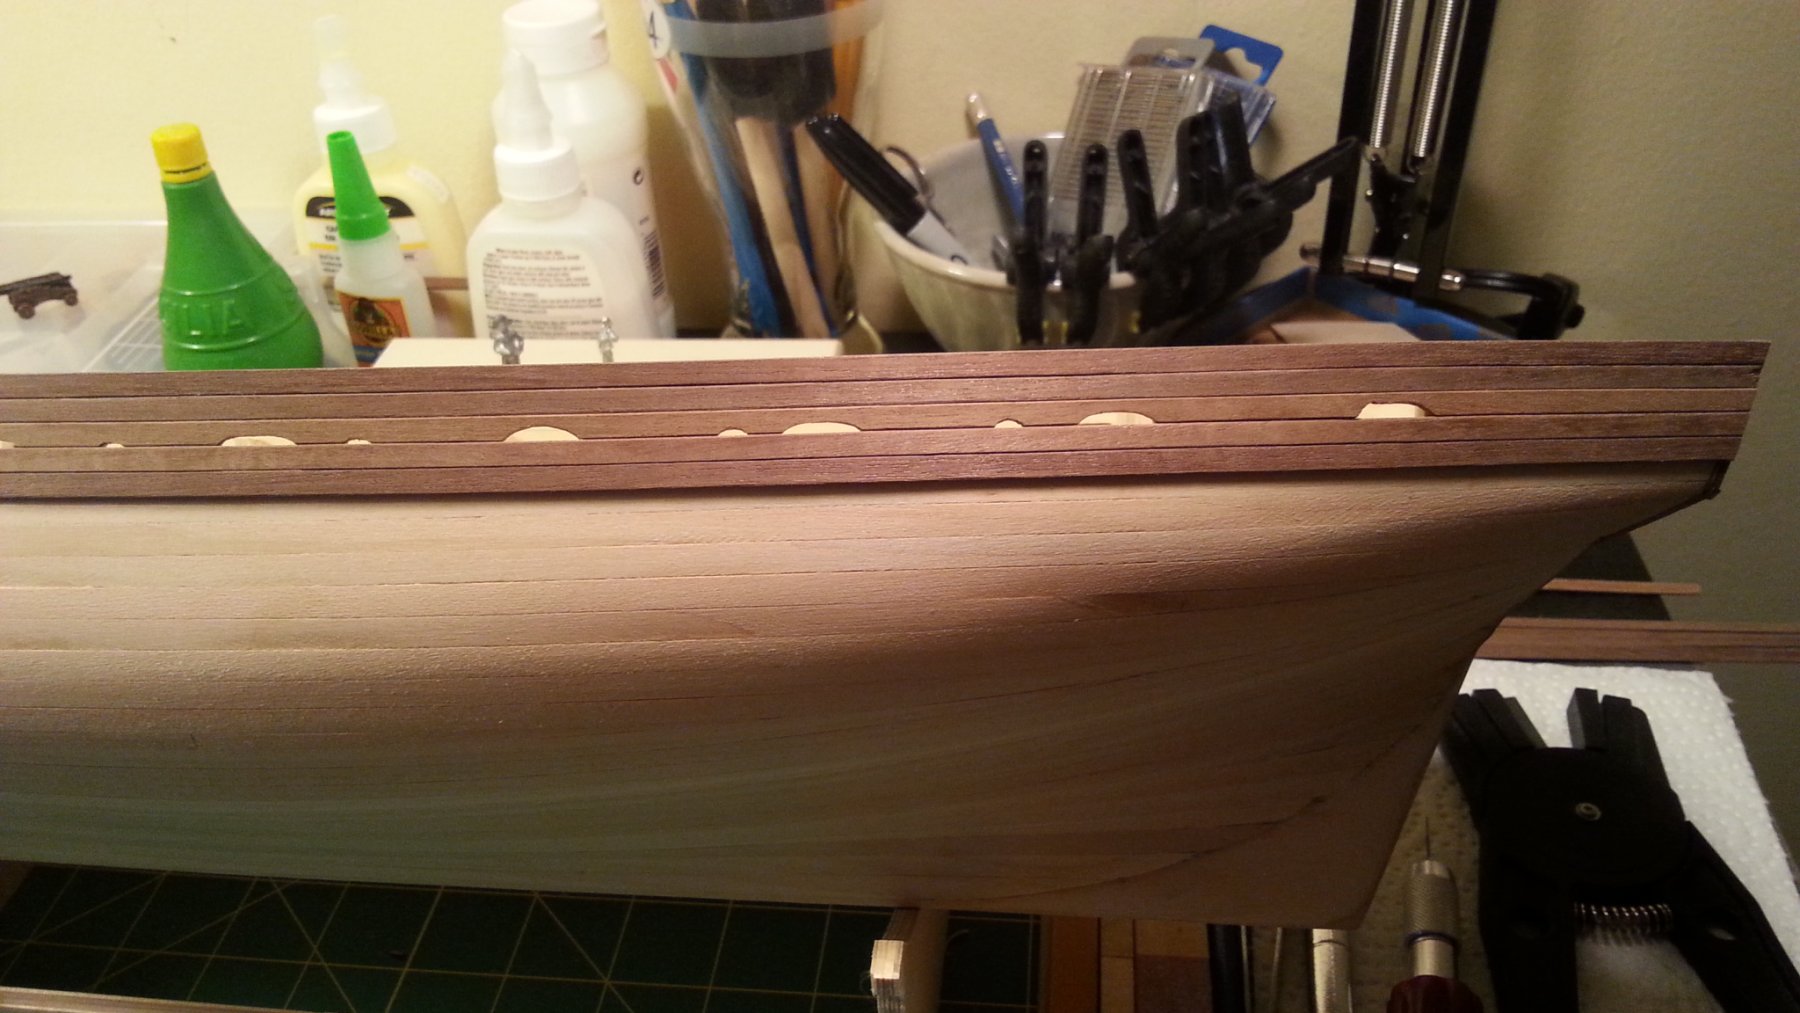
Trimming the gun ports is really hard, the walnut just wants to crack at every opportunity. Now I just have to plank the inside and trim that too!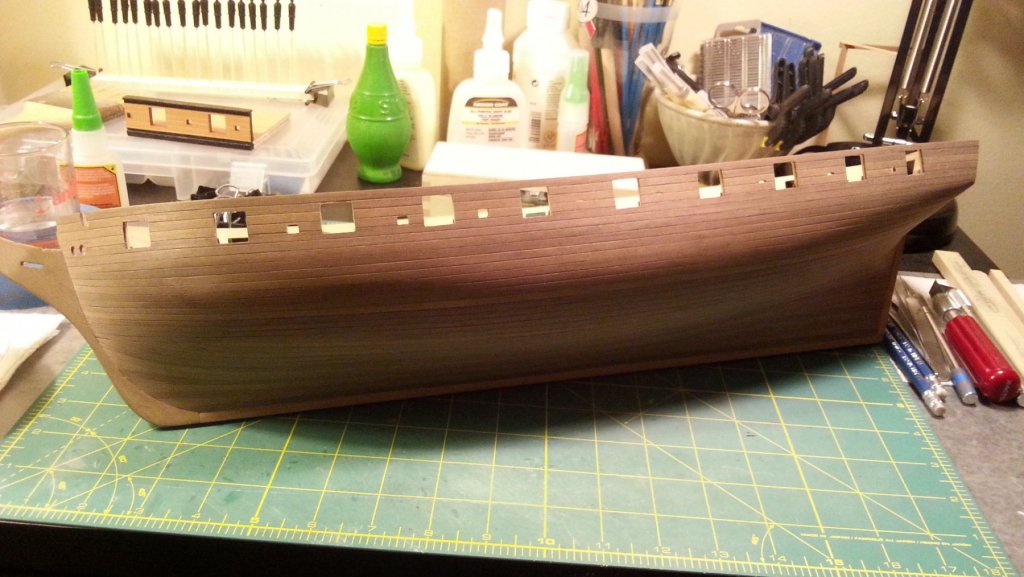
-
HMS Snake by BenD - Caldercraft - 1:64
BenD replied to BenD's topic in - Kit build logs for subjects built from 1751 - 1800
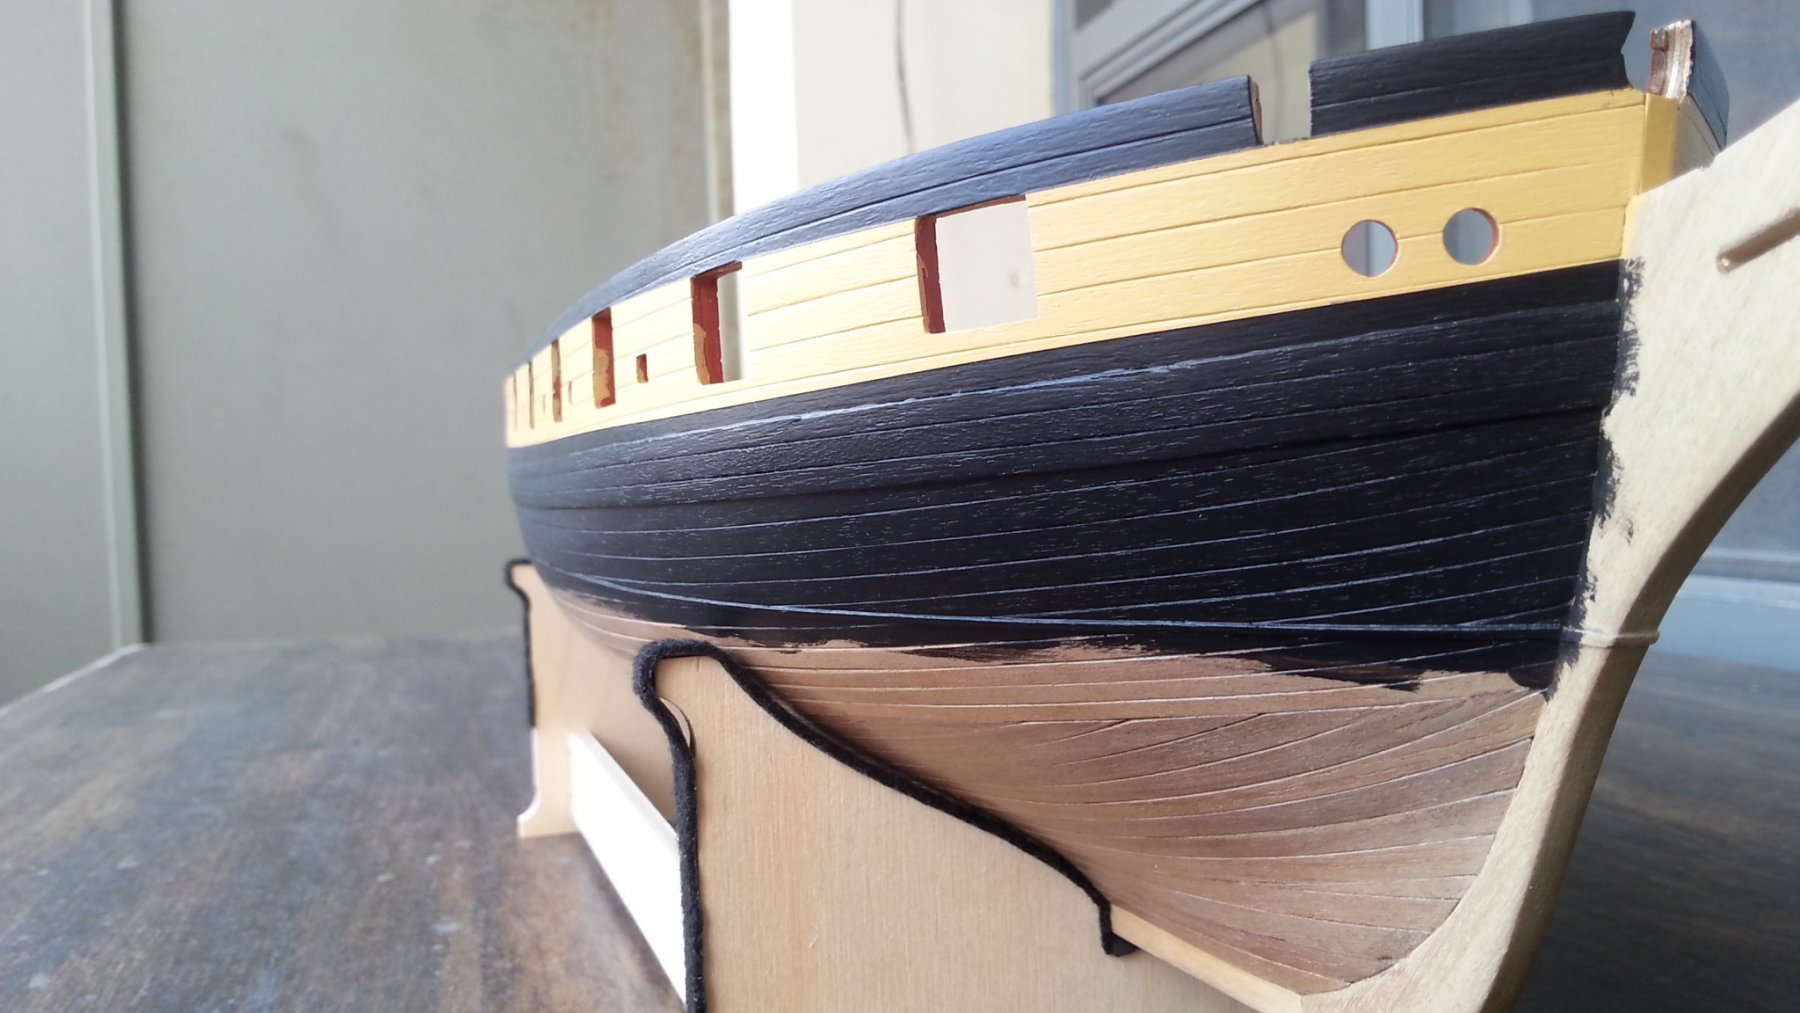
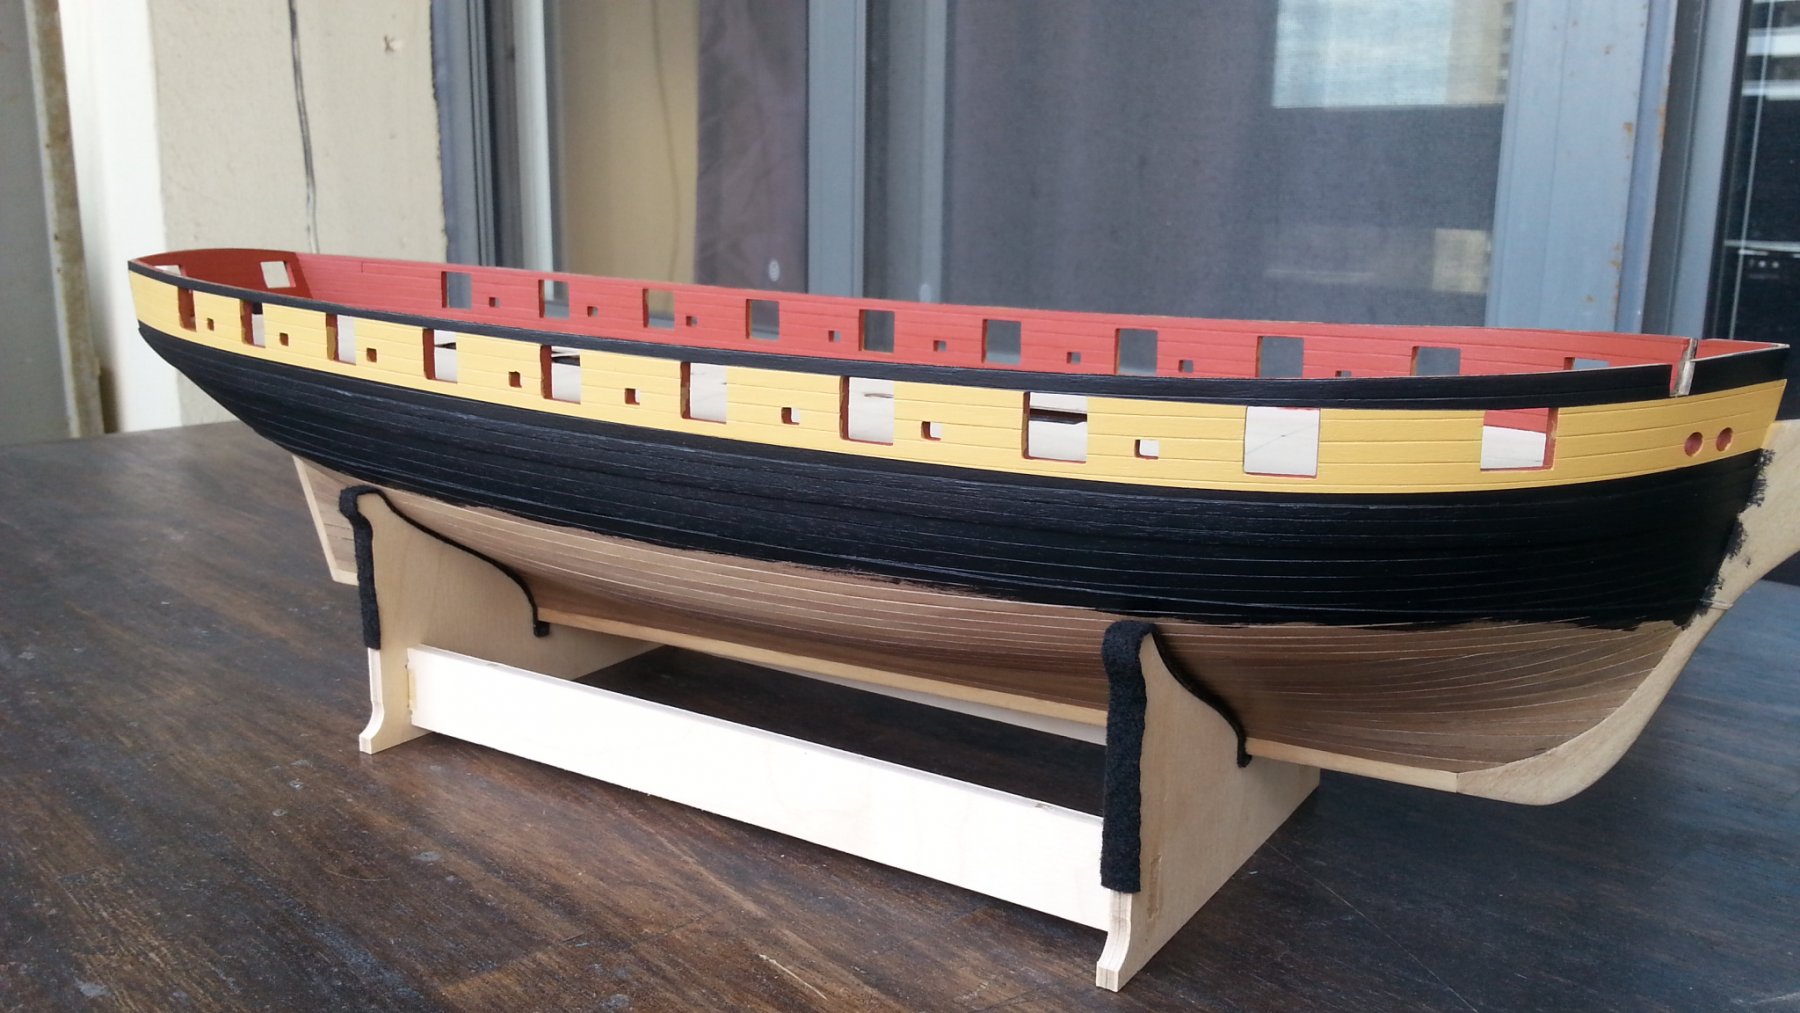
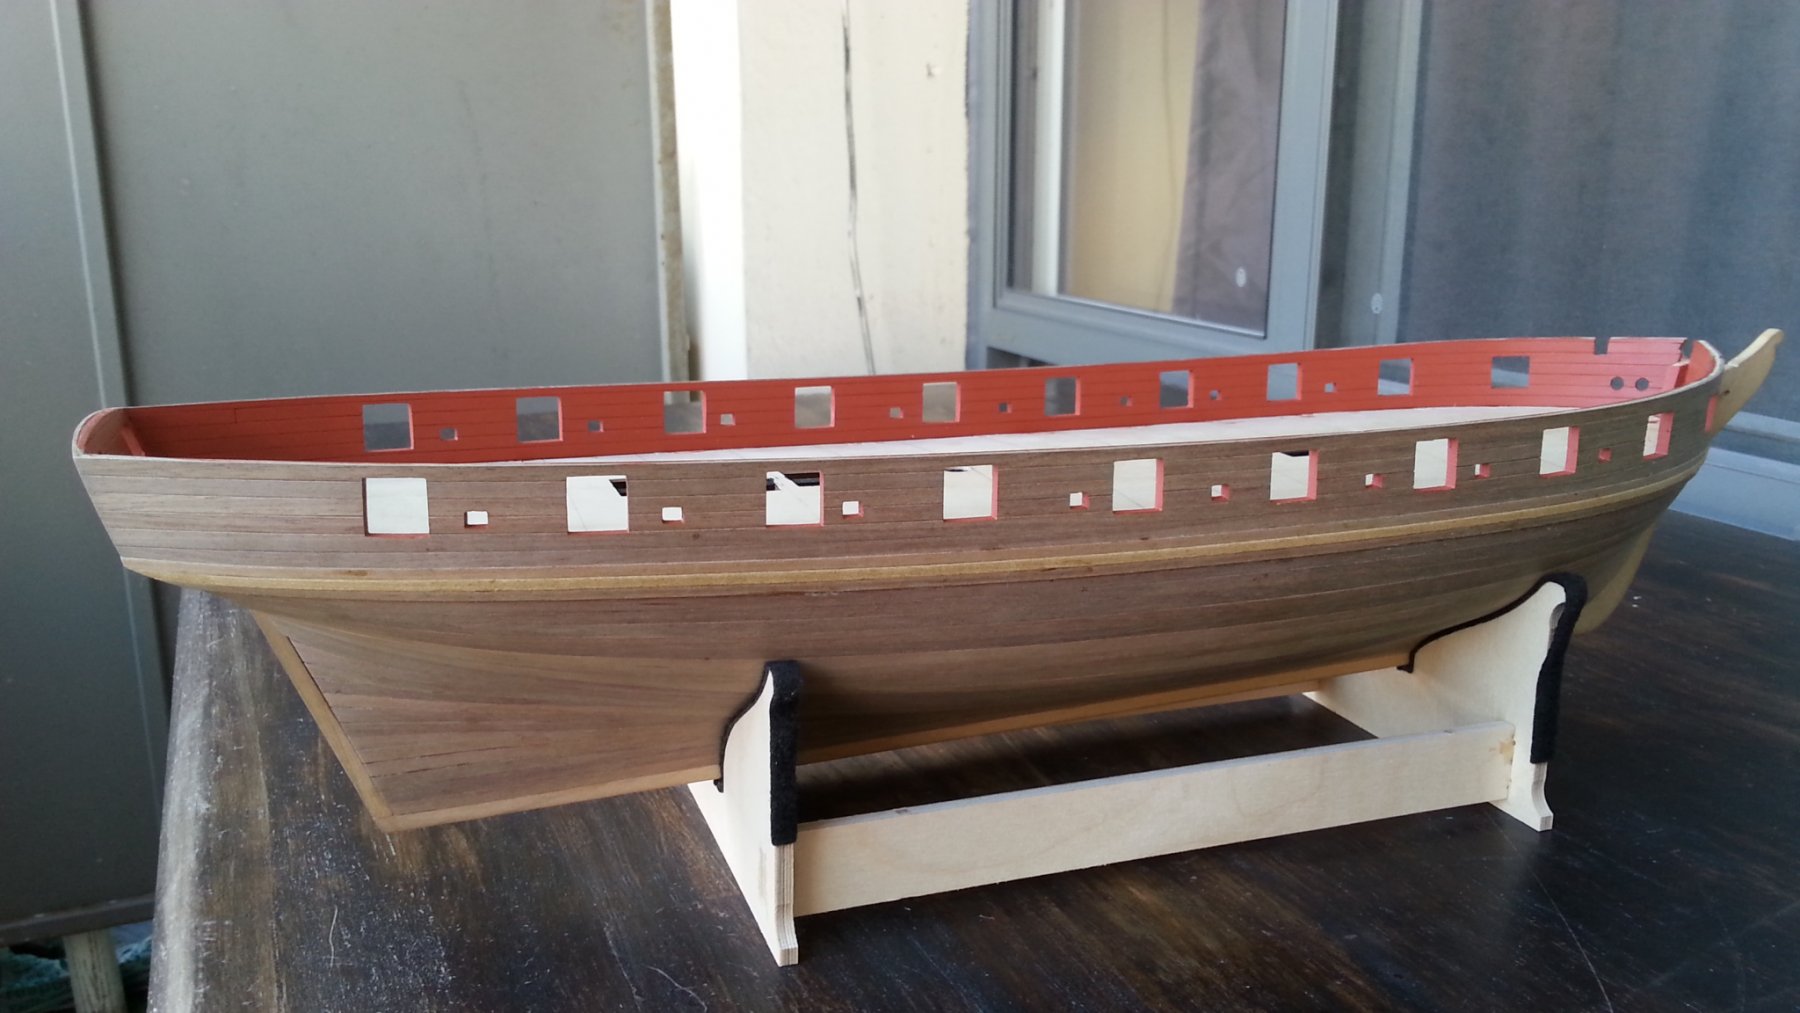
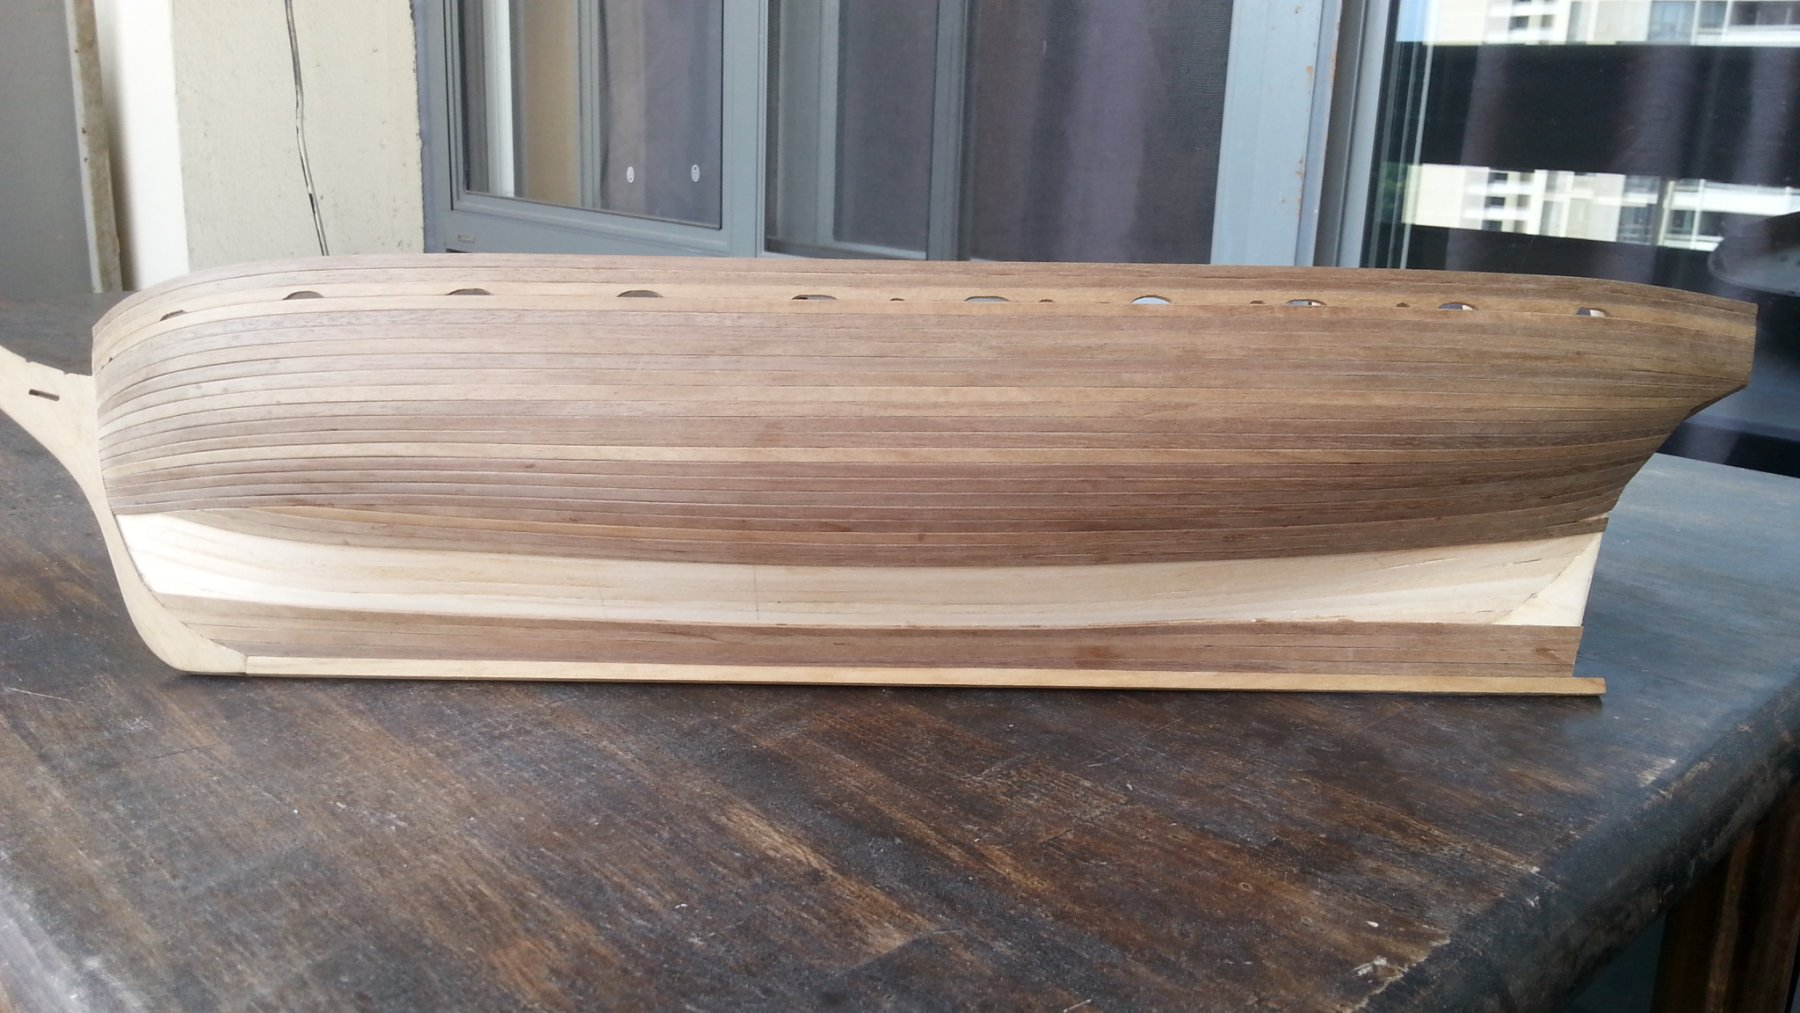
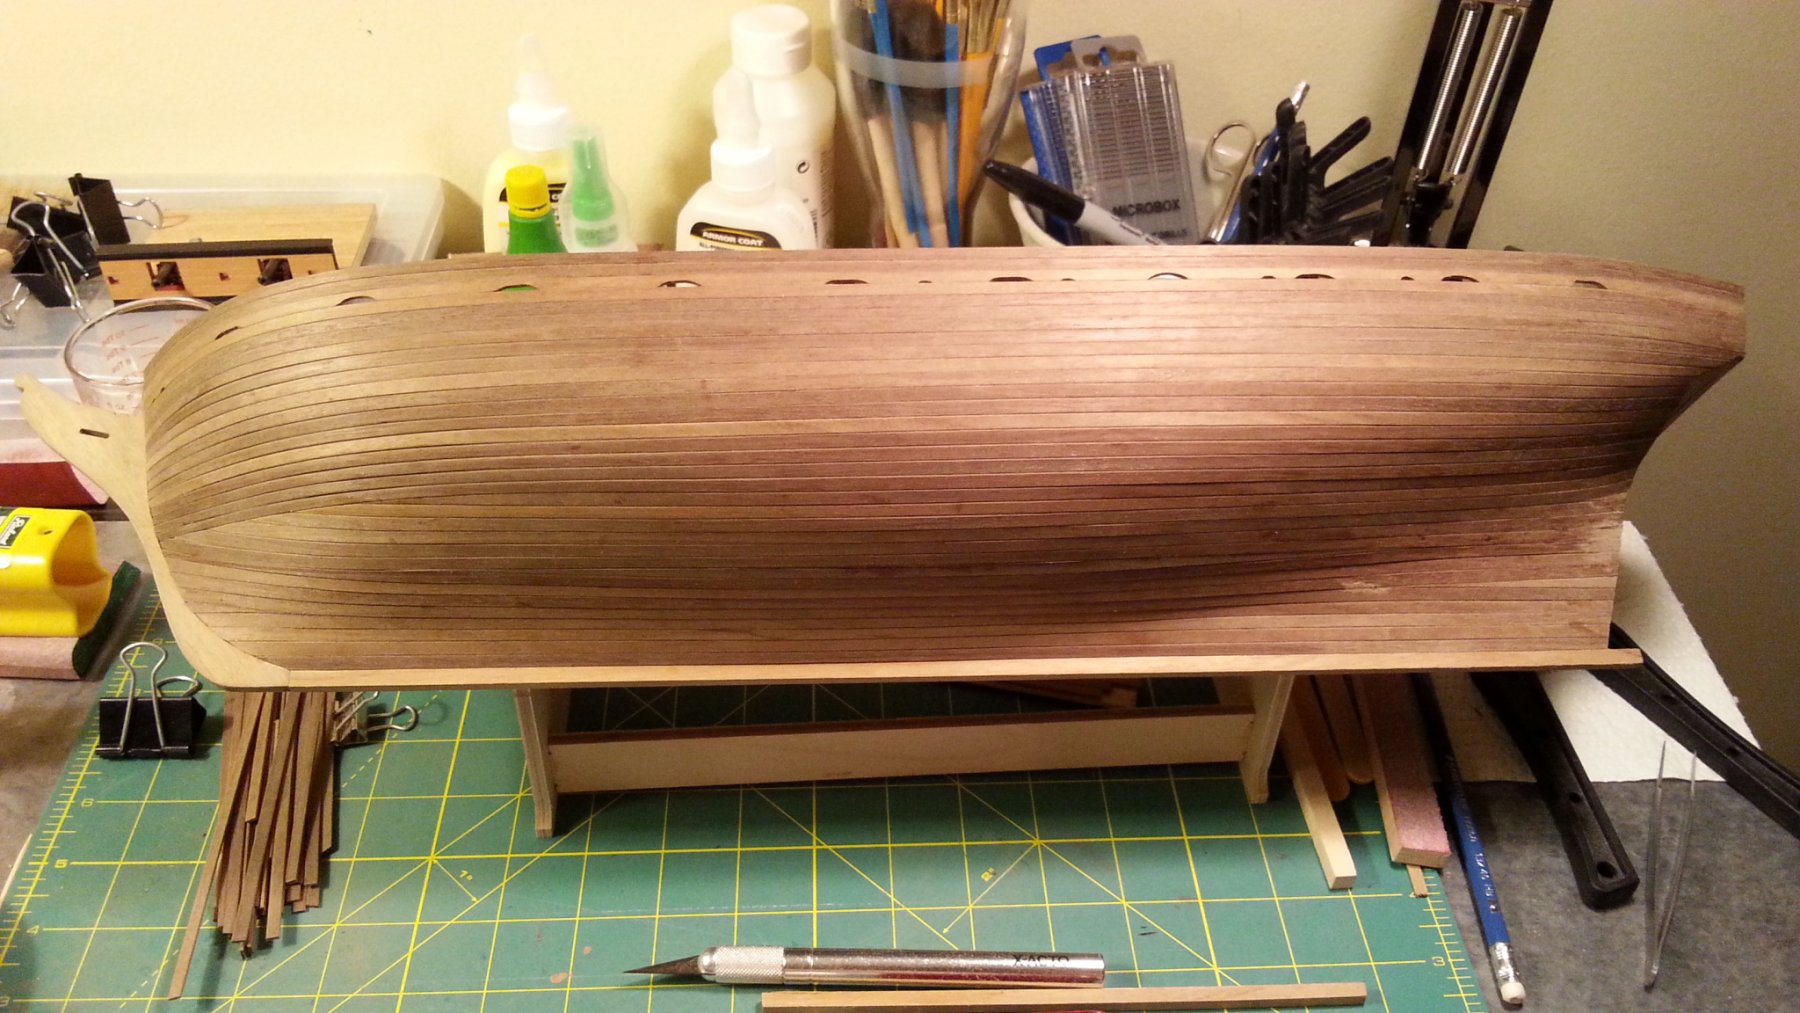
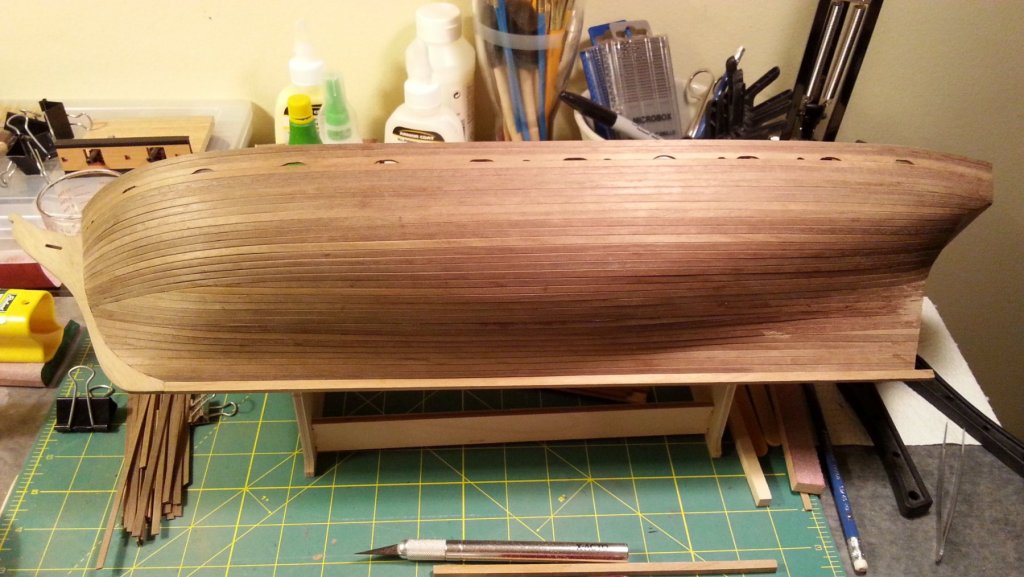
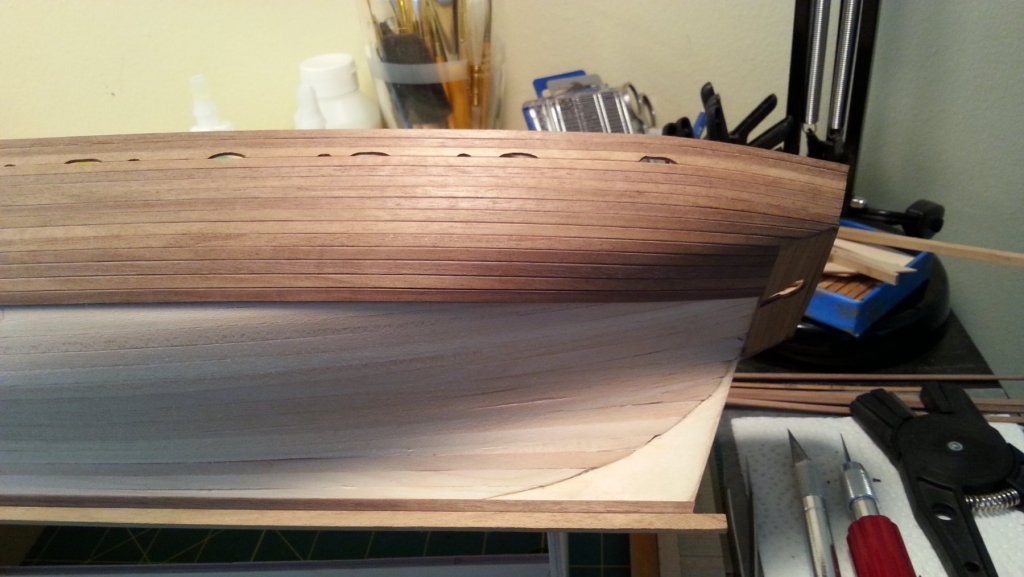
Second Planking complete! I stopped spiling the planks a little past the water line, then it all sped up a lot. The last picture is with some sanding. Turned out ok. Going to work on trimming the gunports next before planking the inside.

-
HMS Snake by BenD - Caldercraft - 1:64
BenD replied to BenD's topic in - Kit build logs for subjects built from 1751 - 1800
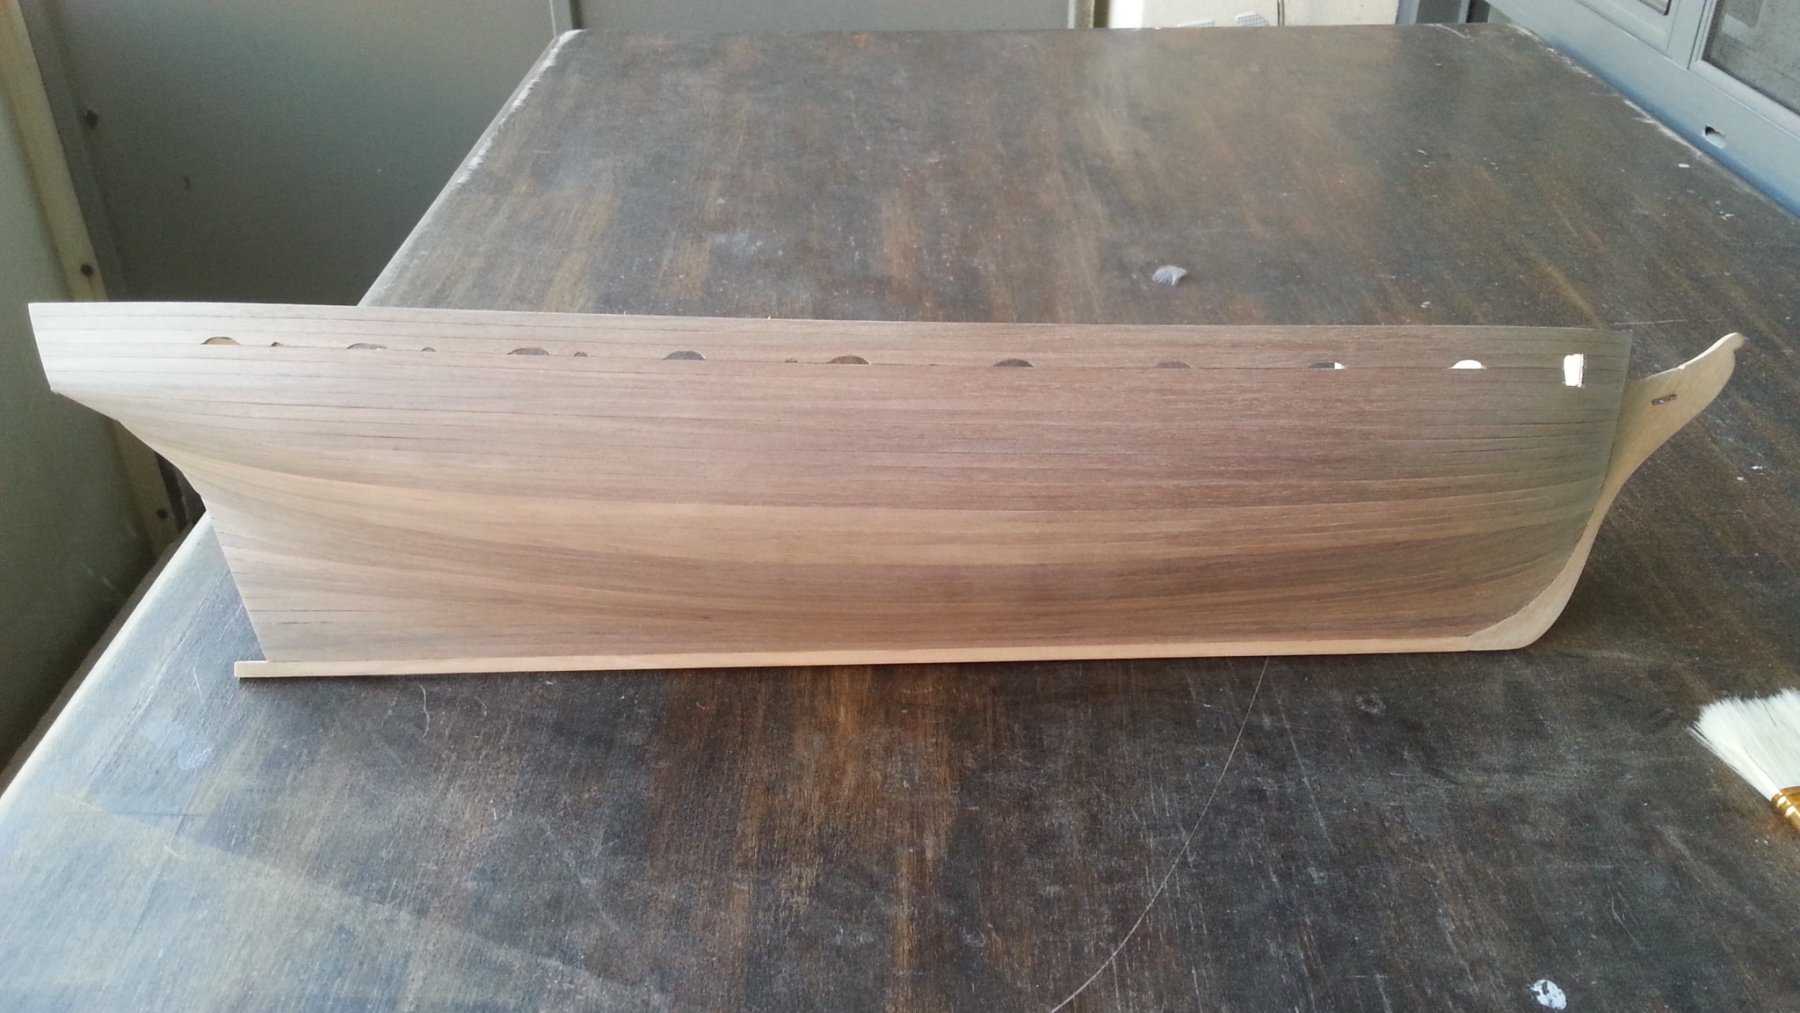
The planking continues... This planking method is taking a lot of time. It gives great results though. I'm probably not going to continue much past the water line because it will be coppered, I'll just just plank dirty style after that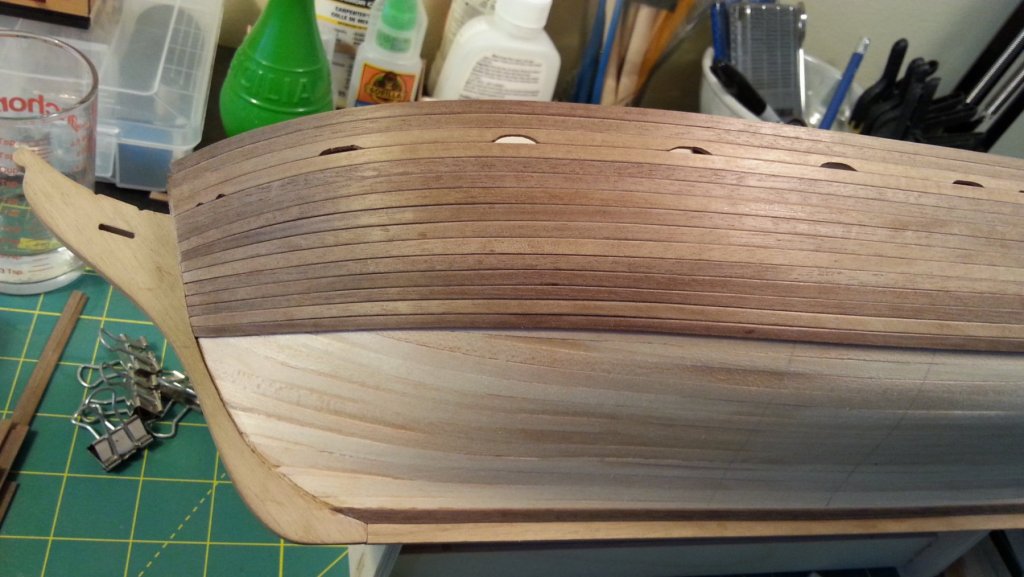
-
HMS Snake by BenD - Caldercraft - 1:64
BenD replied to BenD's topic in - Kit build logs for subjects built from 1751 - 1800
Thank's Jason. So I wasn't far off it seems. I'm going to end up using a pattern close to yours, it looks the best in my opinion. -
HMS Snake by BenD - Caldercraft - 1:64
BenD replied to BenD's topic in - Kit build logs for subjects built from 1751 - 1800
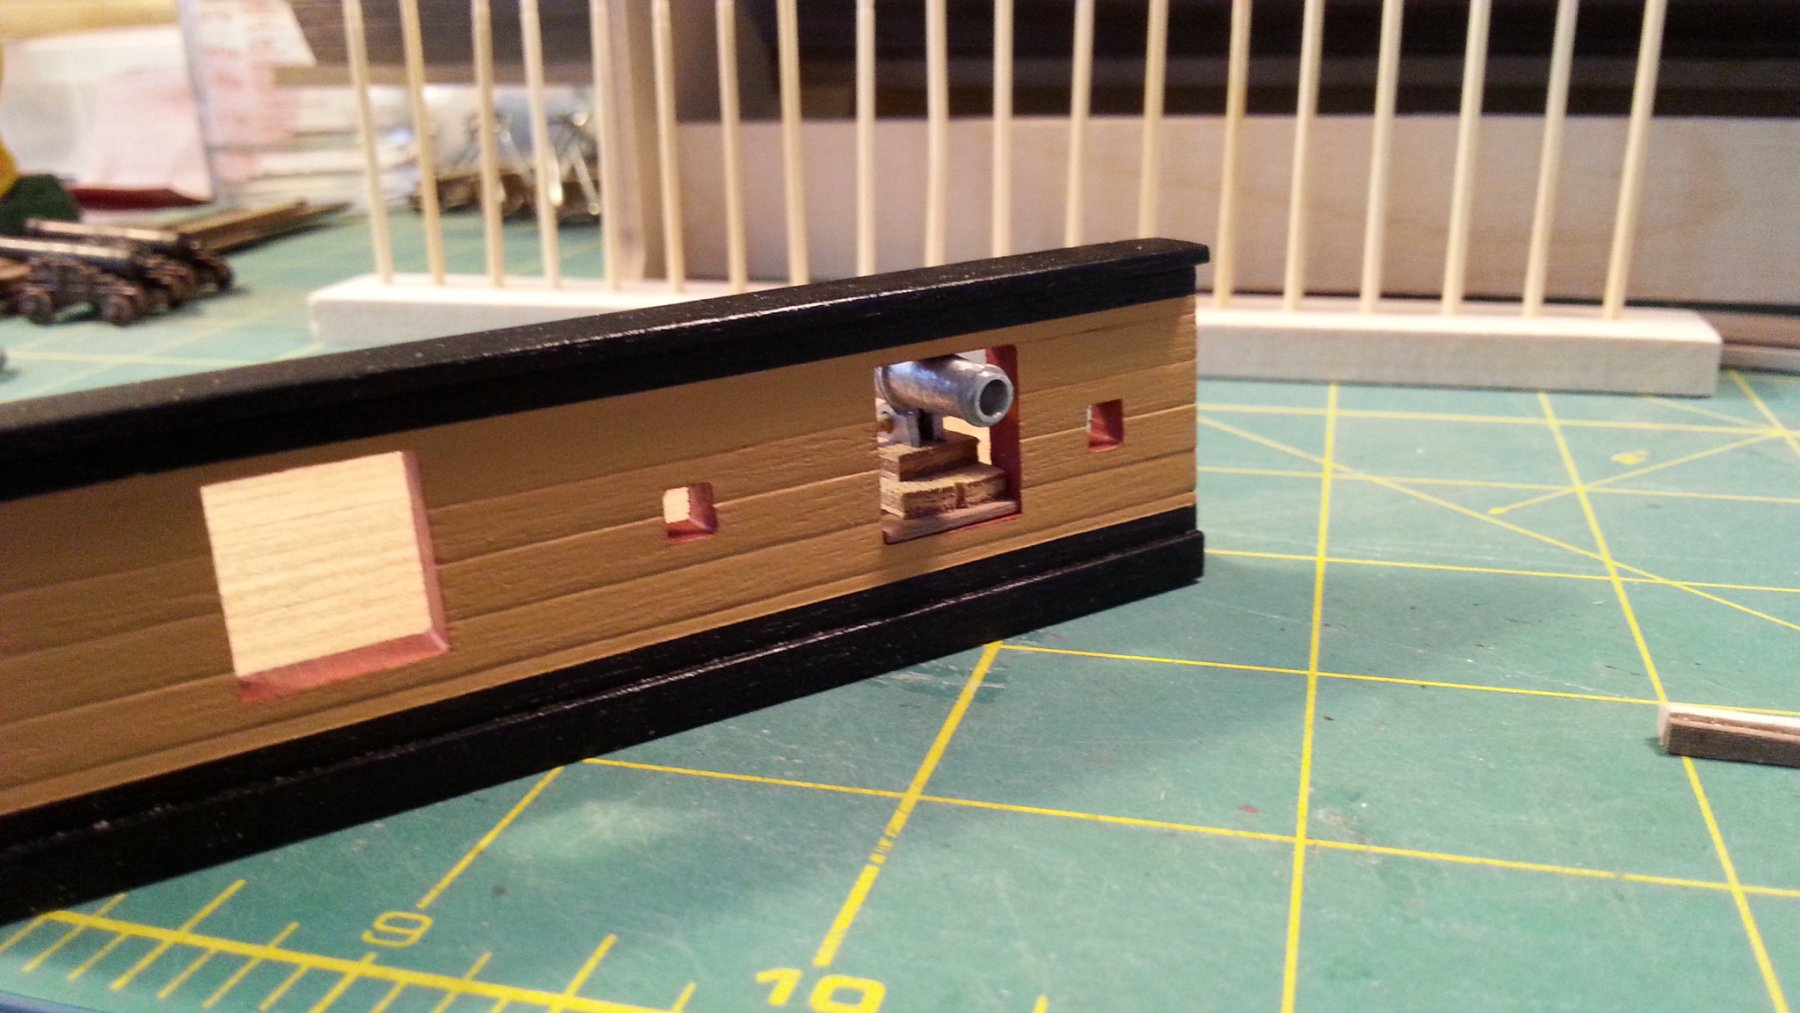
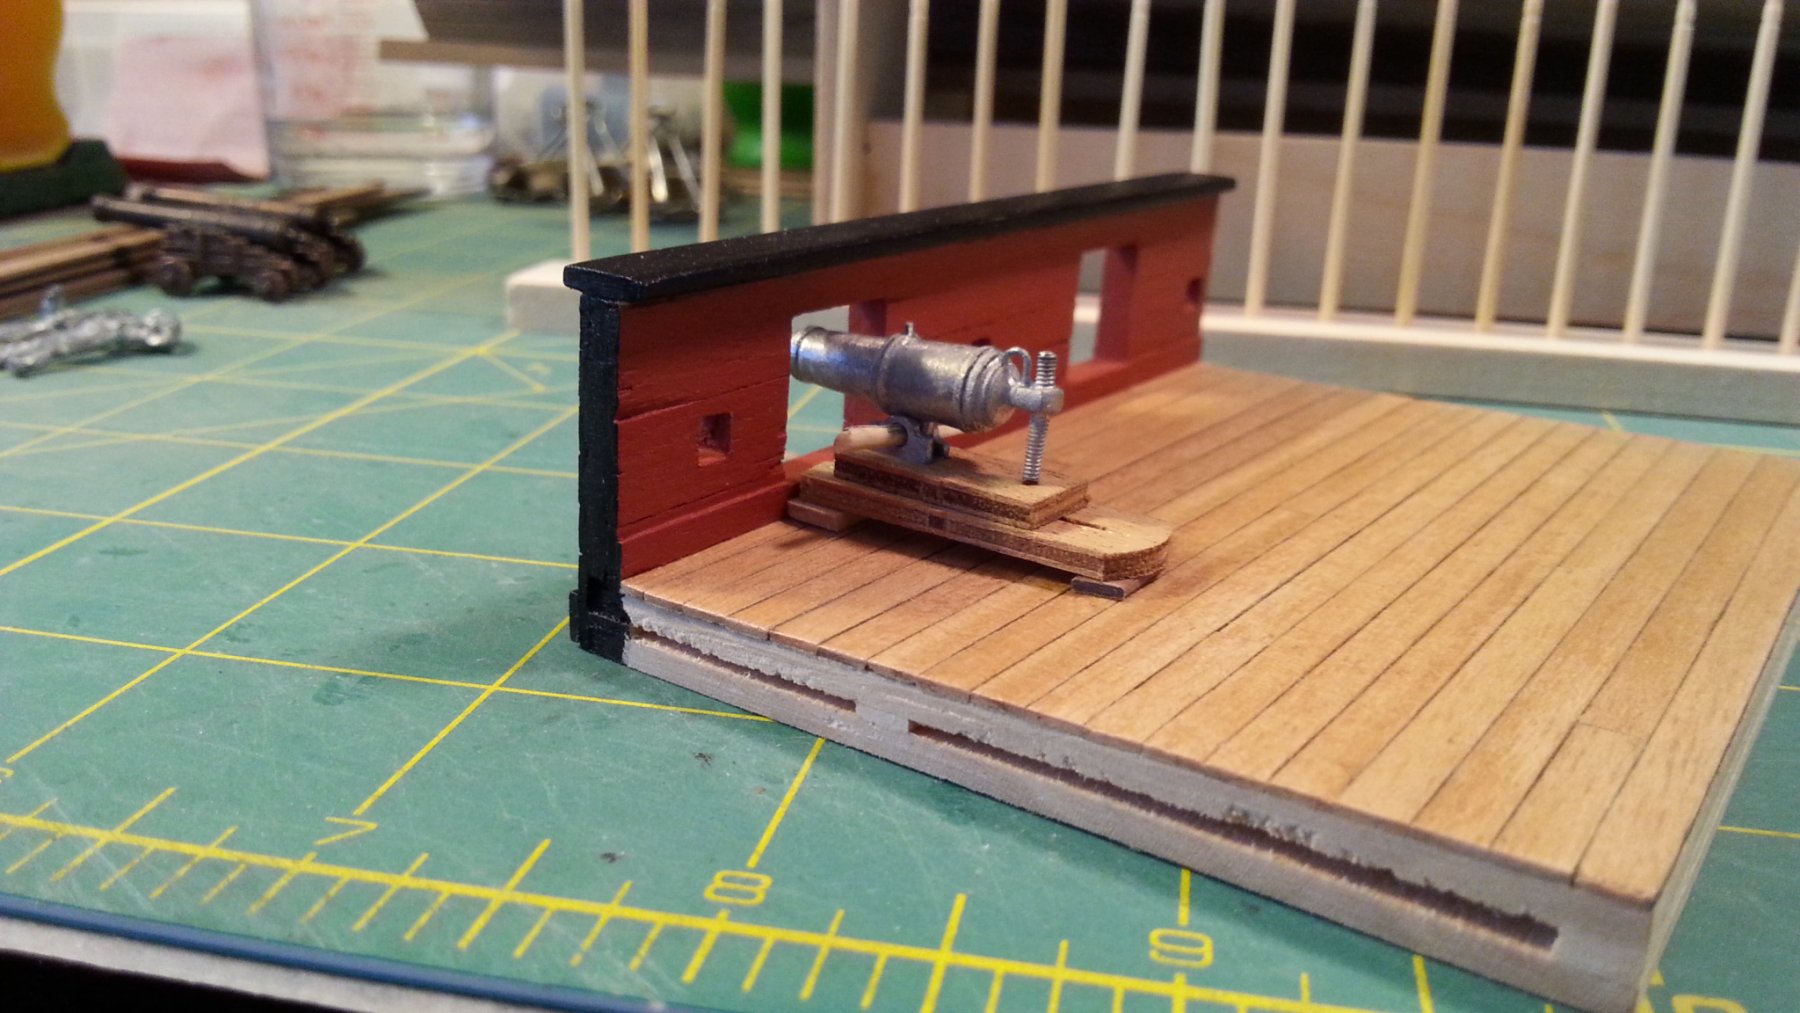
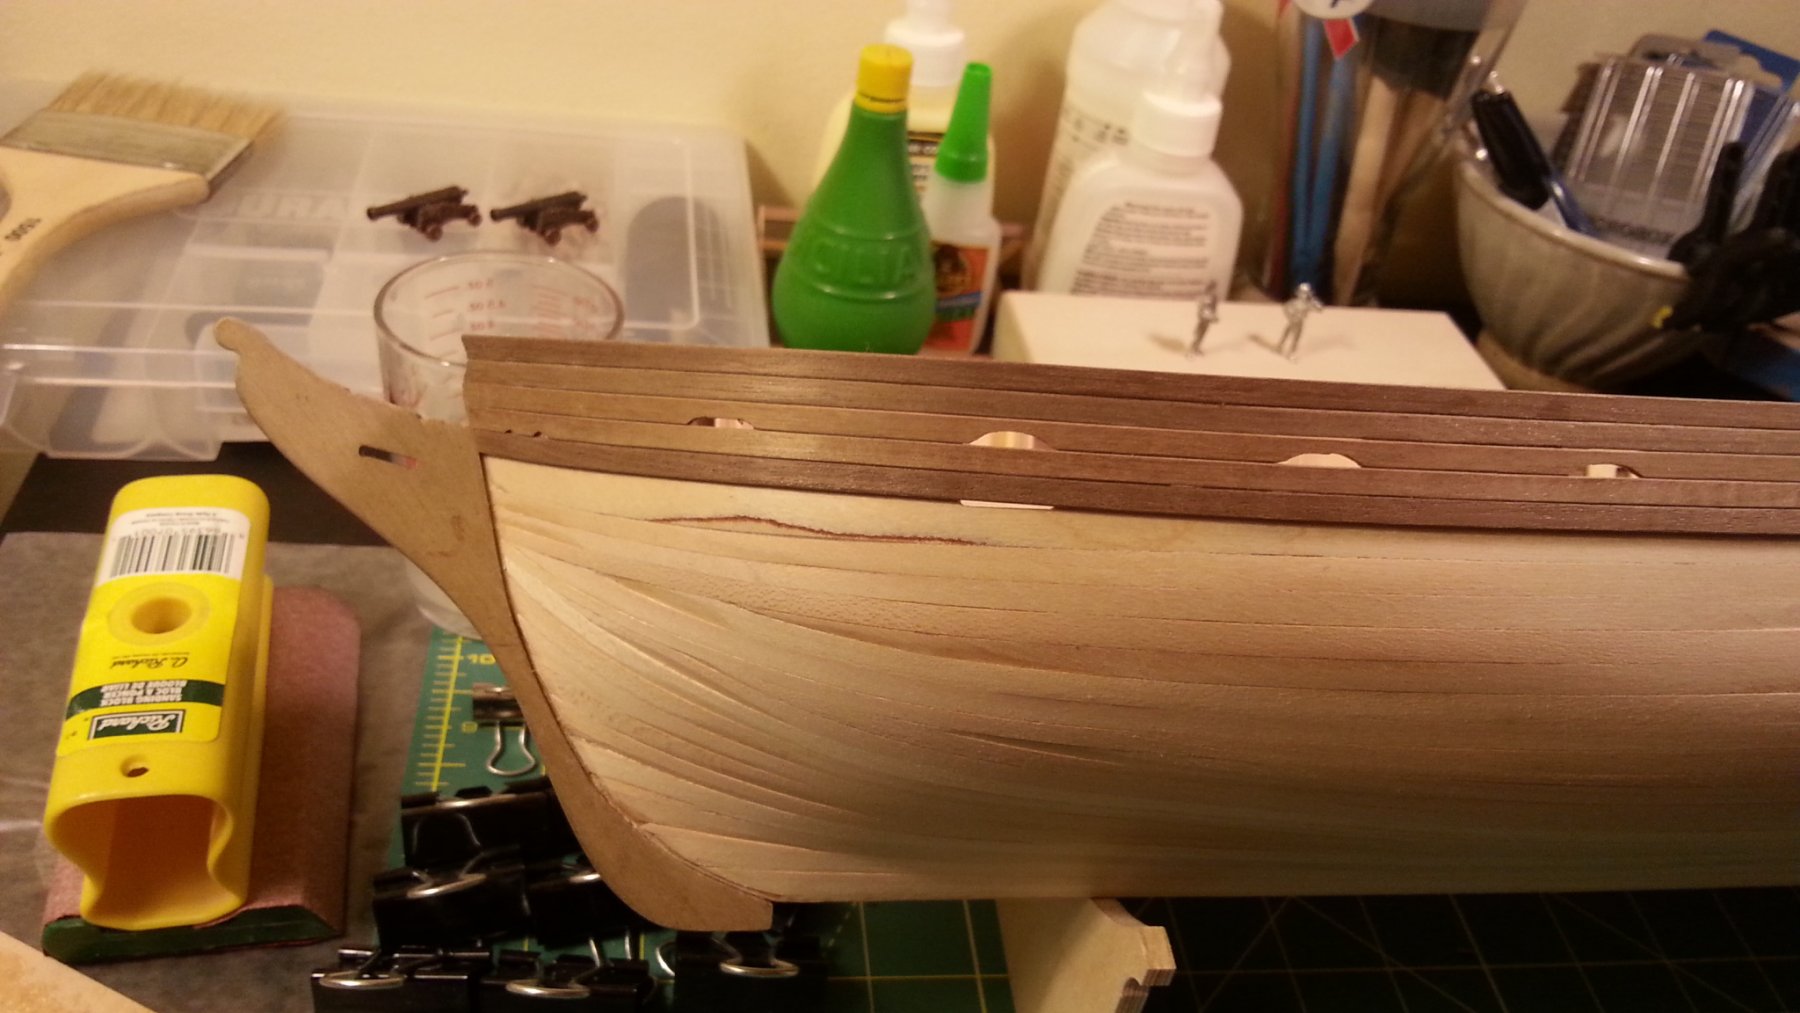
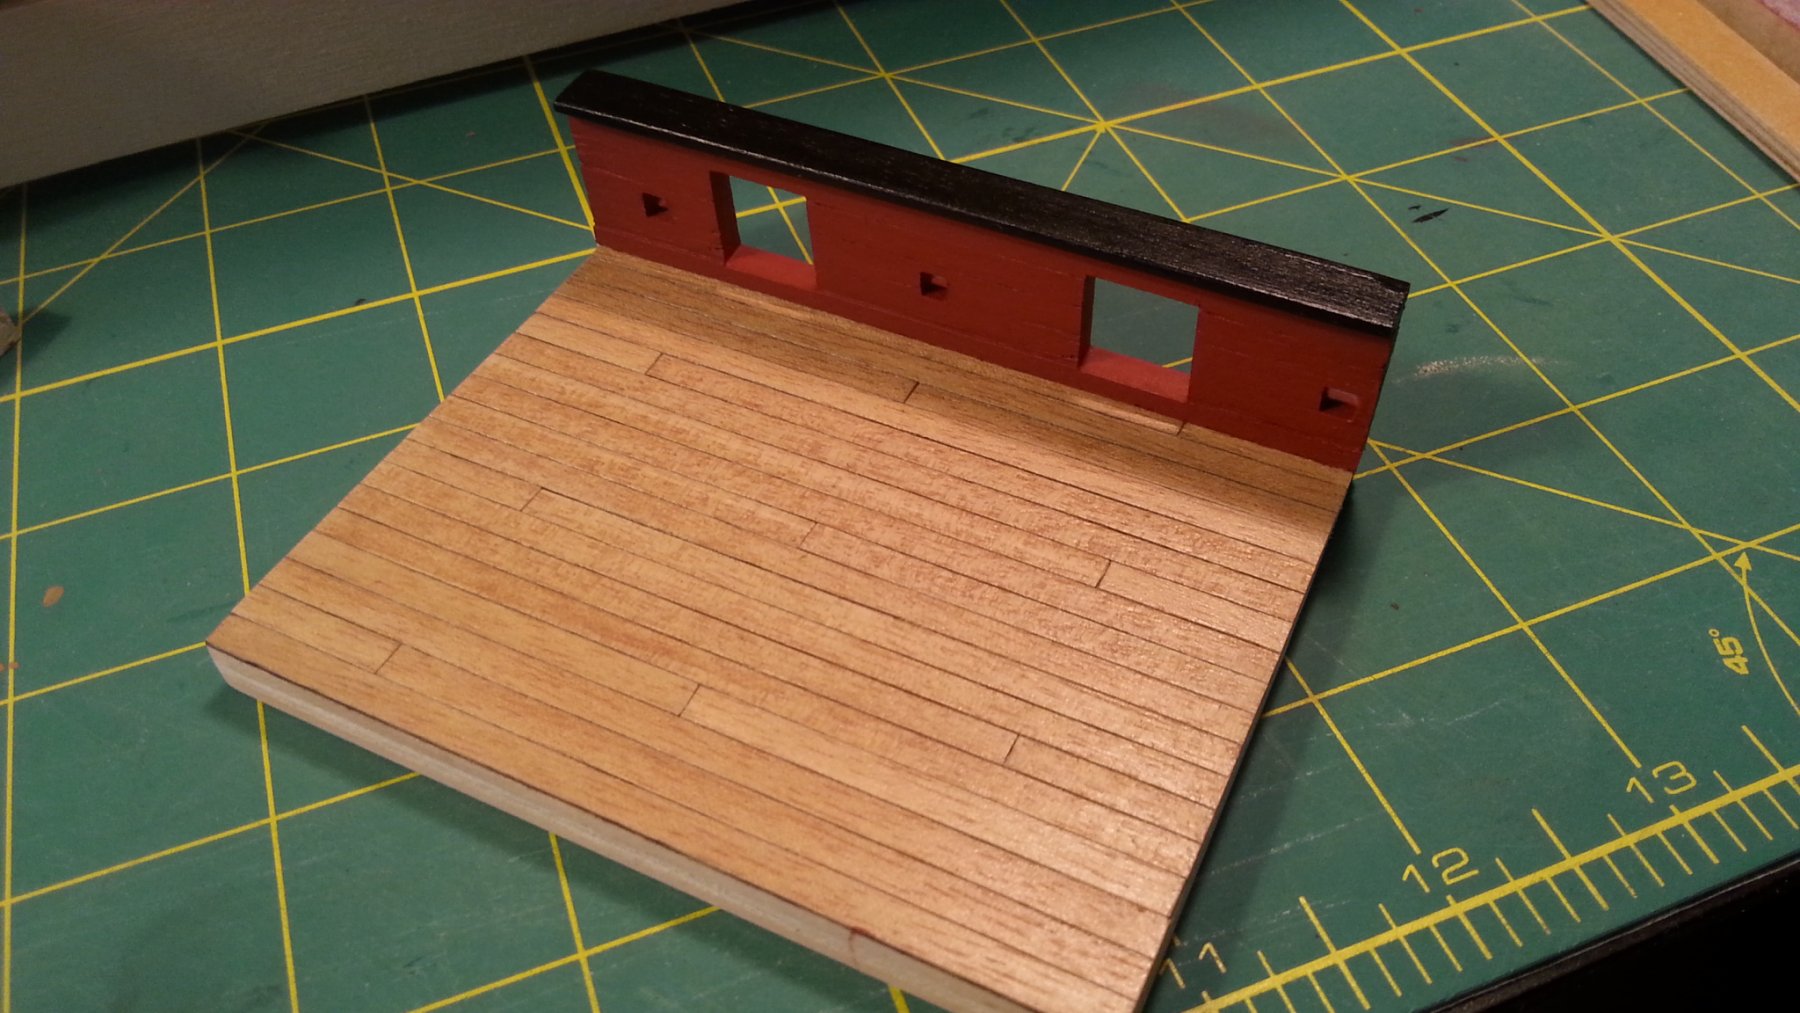
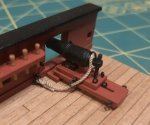
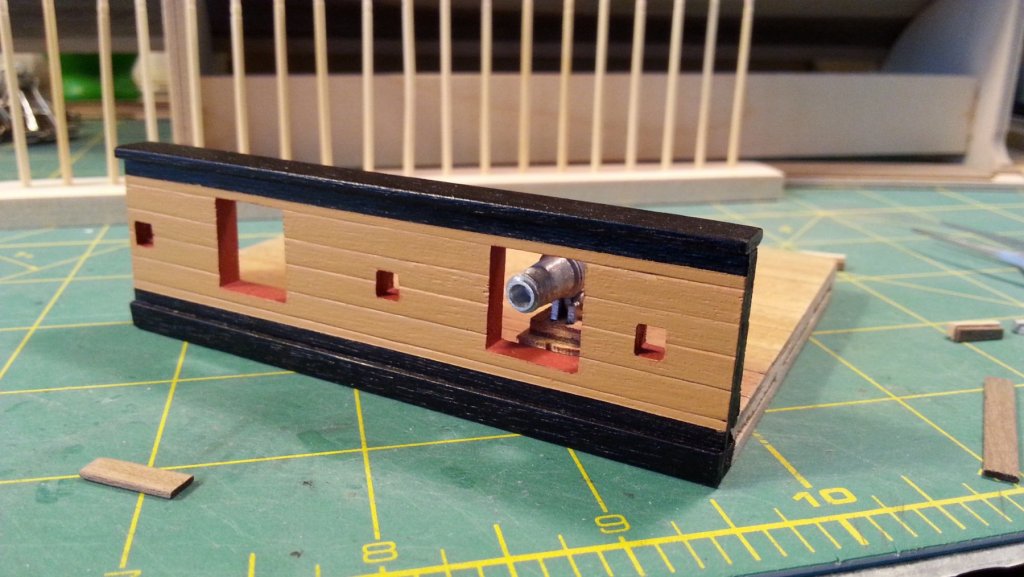
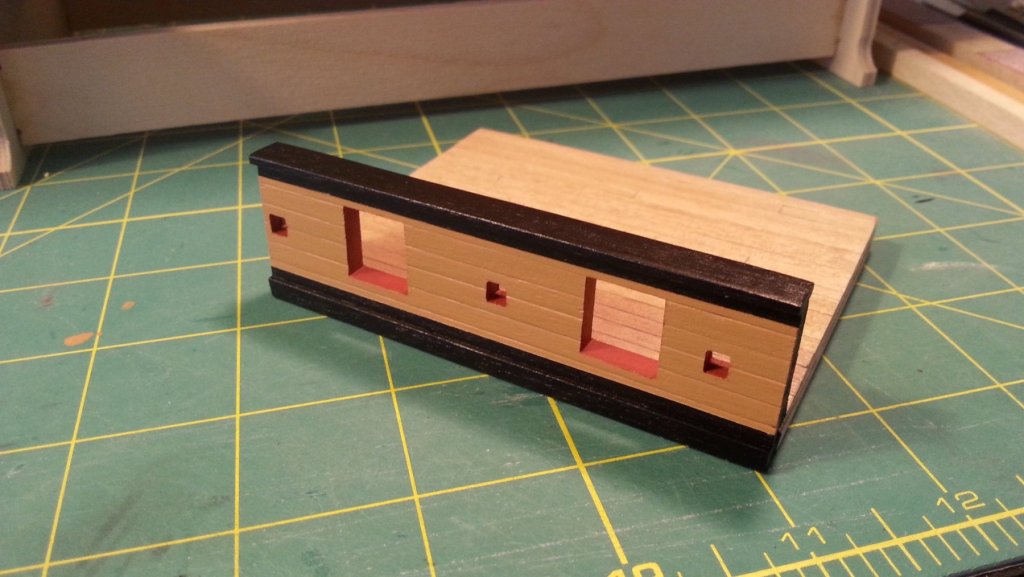
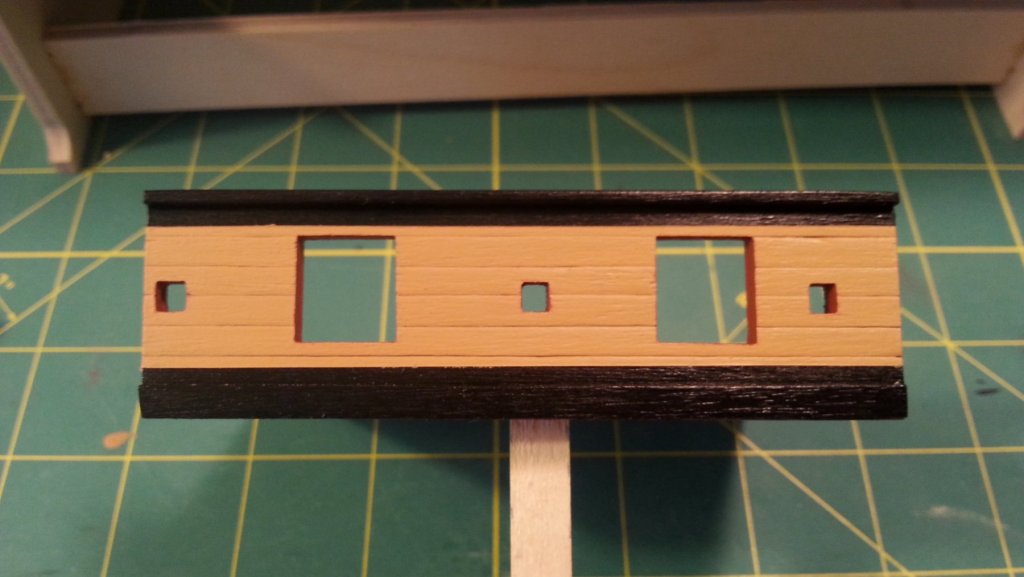
Back to the Carronade problem. As you can see the first two pictures are with the gun mounted on the gun port sill... the dam thing doesn't fit. The cutaway section's port is 1 mm short in respect to my ship. I could sand the bed down and sink the bracket but that would only give me 2-3 mm of extra space. I don't think 4 mm is going to fix this problem. Mounting the Carronade from the deck is probably the way to go. It instantly looks better and when I move the gun to my ship for comparison it looks even better. I will have to make some adjustments to the Beds and figure out what height to make the wheels but that's all fun to do anyway. I will add 1 mm of material to the bottom sill on the ship to make up for there not being a shelf there. Question! Where can I find info on the positioning for the Yellow Ochre band the Nelson checker? I've seen paintings and pictures but every ship seems to have something different going on. All of the builds on this site seem to have a different orientation for their band. I don't think what I have planed is very good or accurate.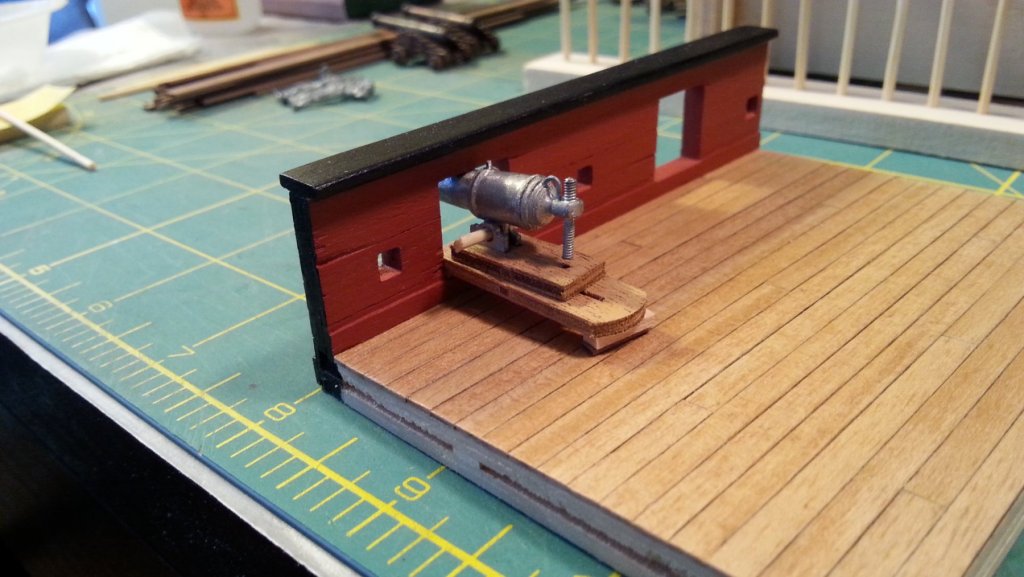


-
Working from the top down is normal practice. You're doing well so far!
-
Hey Chris, You can buy walnut wood filler or you can use the wood glue method. You just sand off a lot of walnut into wood glue until you have a thick walnut paste. It works quite well.
- 29 replies
-
- 1
-
-
- agamemnon
- caldercraft
- (and 1 more)
-
Yeah, Those gun's... they basically look real. Prodigious fine work all of it.
-
HMS Snake by BenD - Caldercraft - 1:64
BenD replied to BenD's topic in - Kit build logs for subjects built from 1751 - 1800
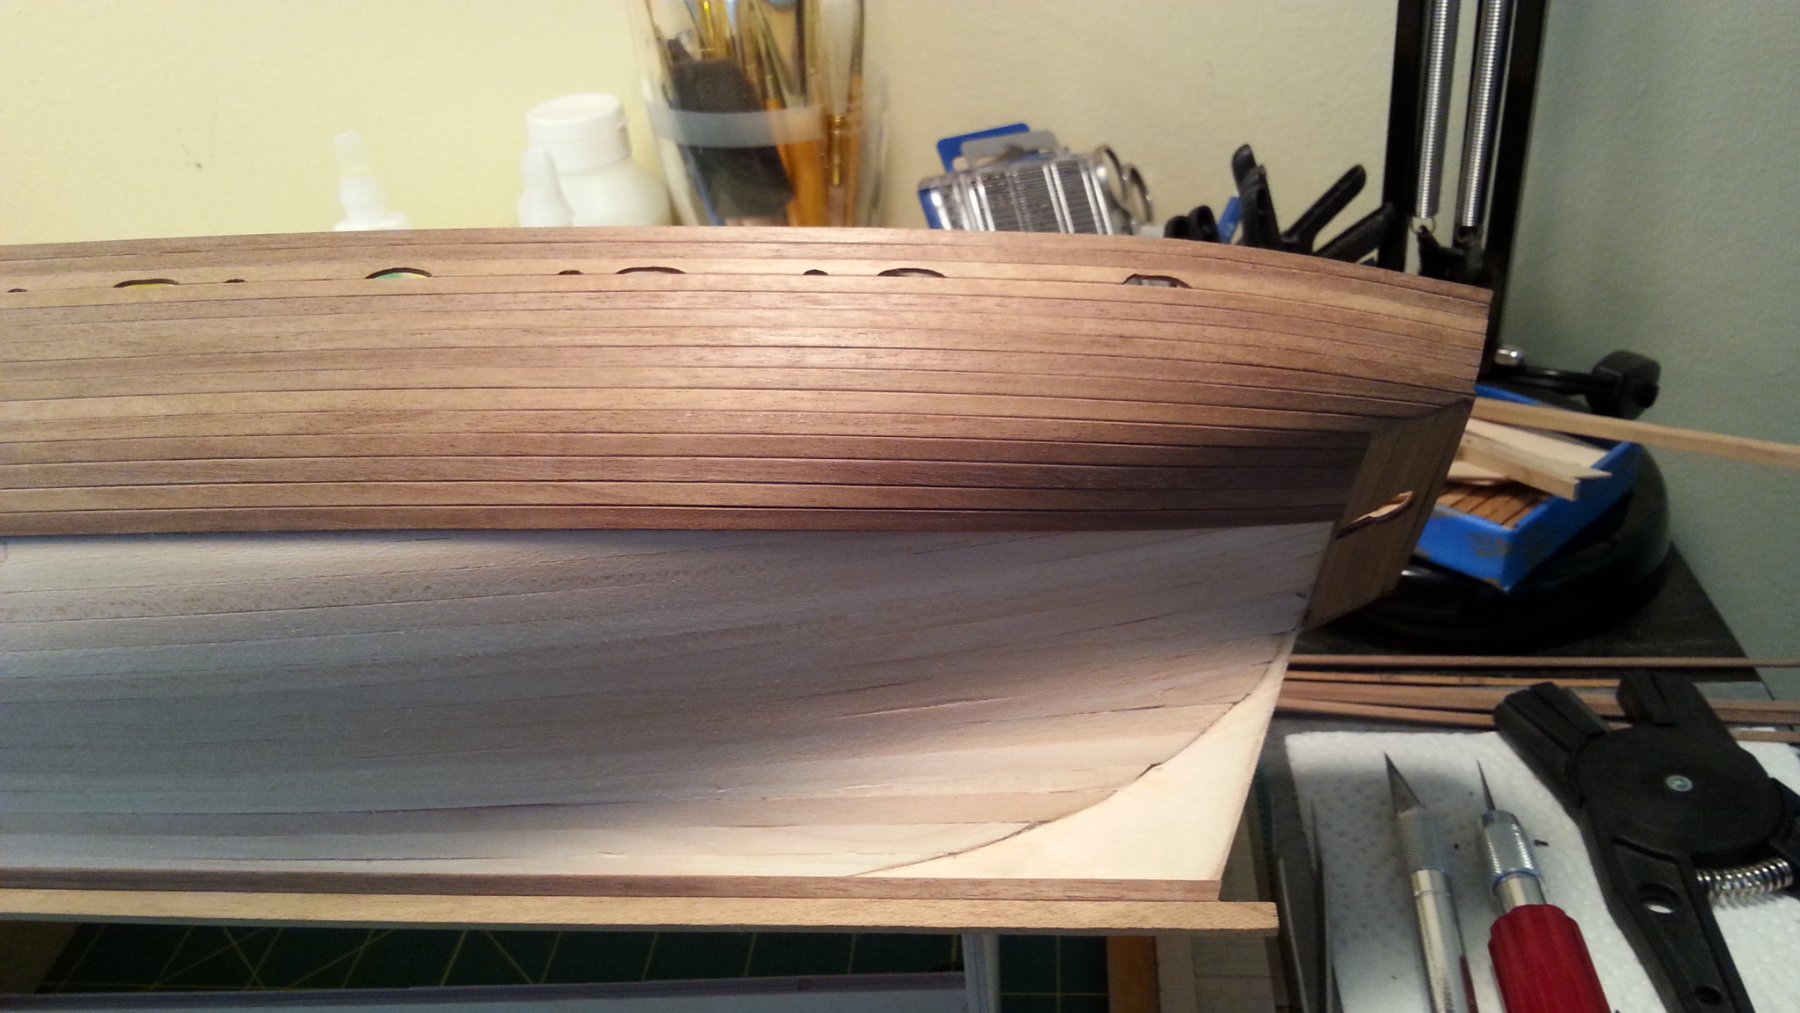
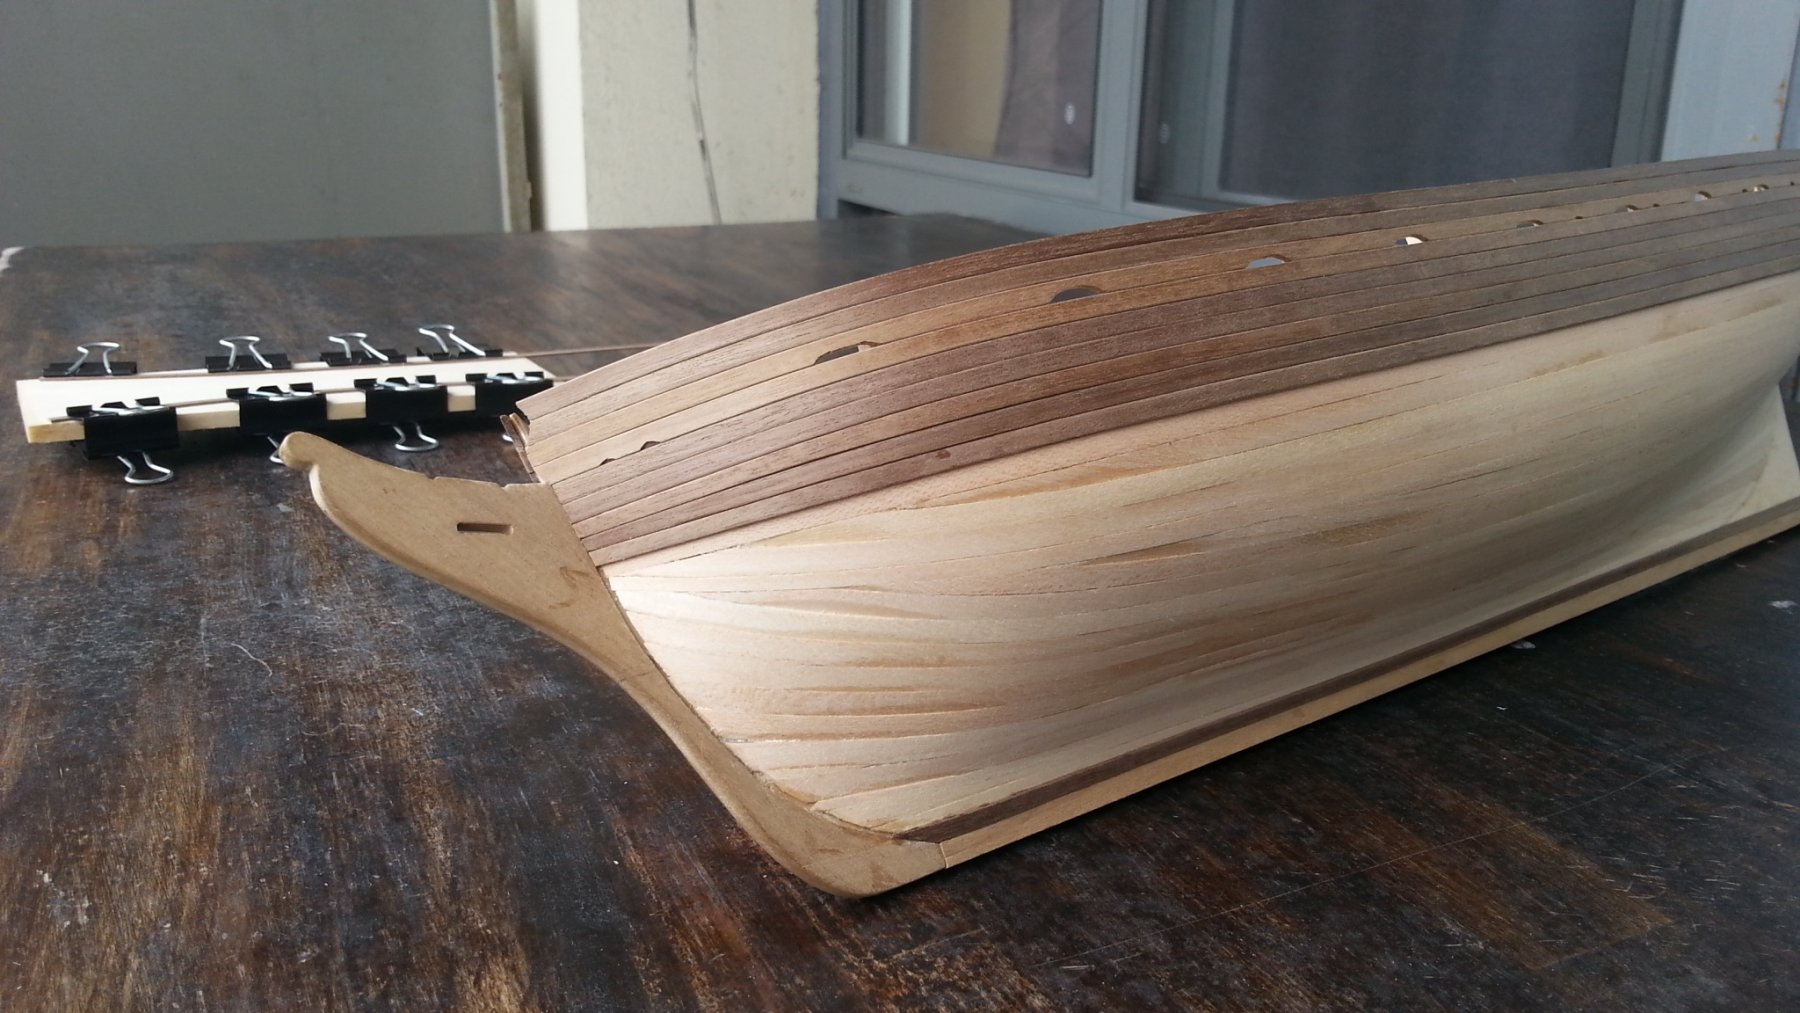
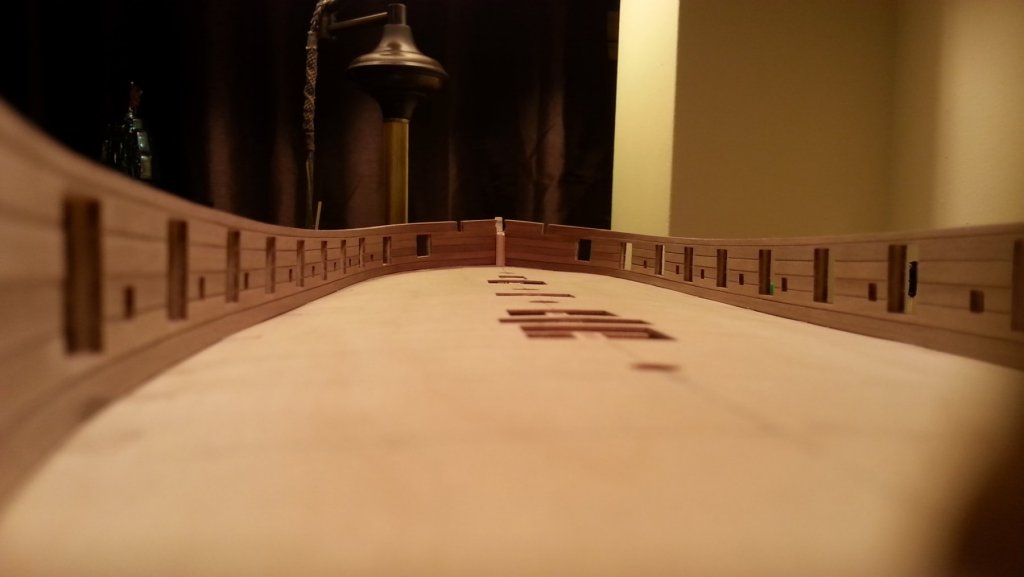
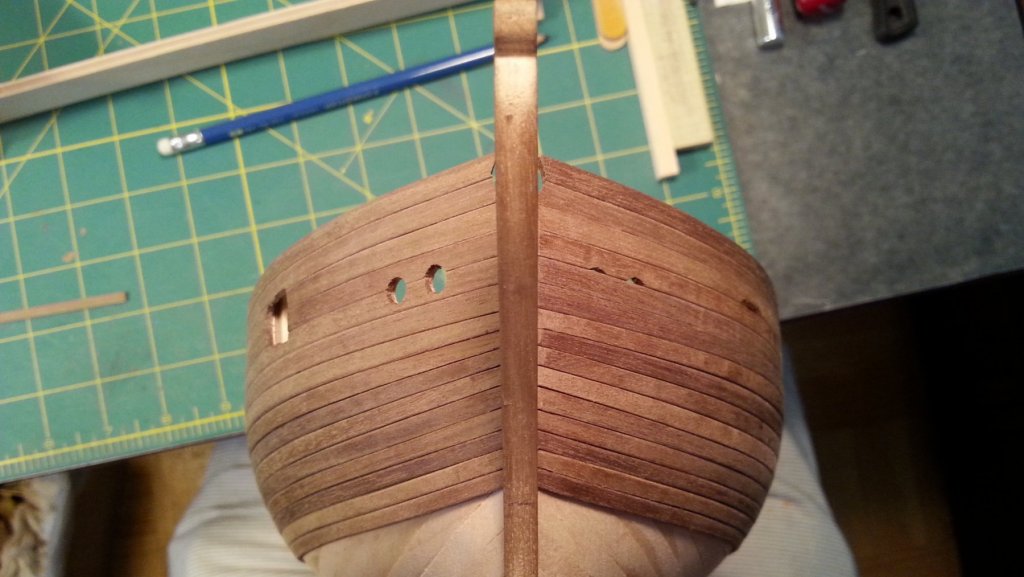
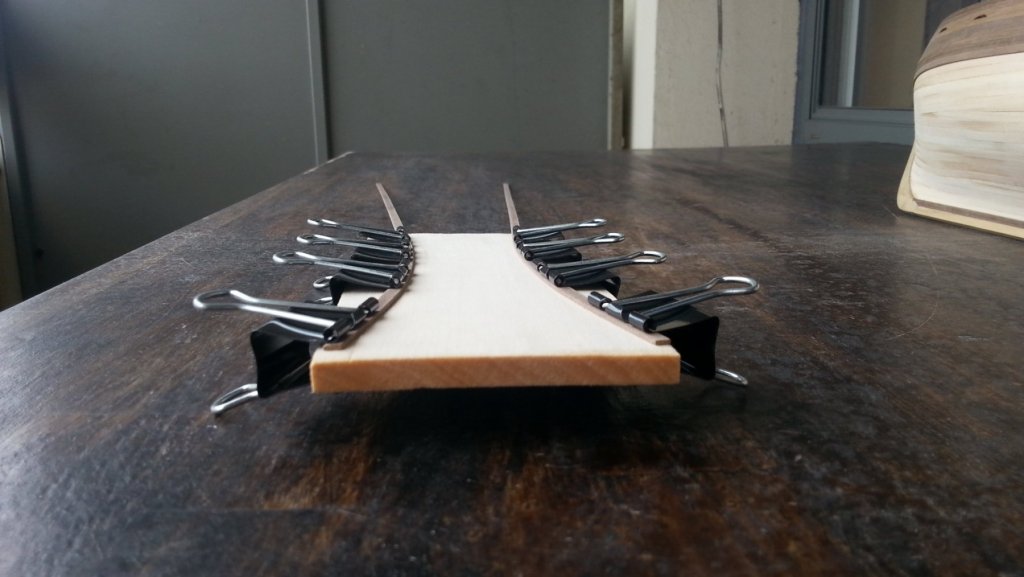
This setup right here is paying dividends! I set them up like this then use a blow dryer... 4 minutes later you have a laterally bent plank. this needs to be known by all. This is Chuck's method... Thank you man! The three last planks I put on were laterally bent. They went on without the slightest of issue and I hope it continues this way. The stern needs some work


-
HMS Snake by BenD - Caldercraft - 1:64
BenD replied to BenD's topic in - Kit build logs for subjects built from 1751 - 1800
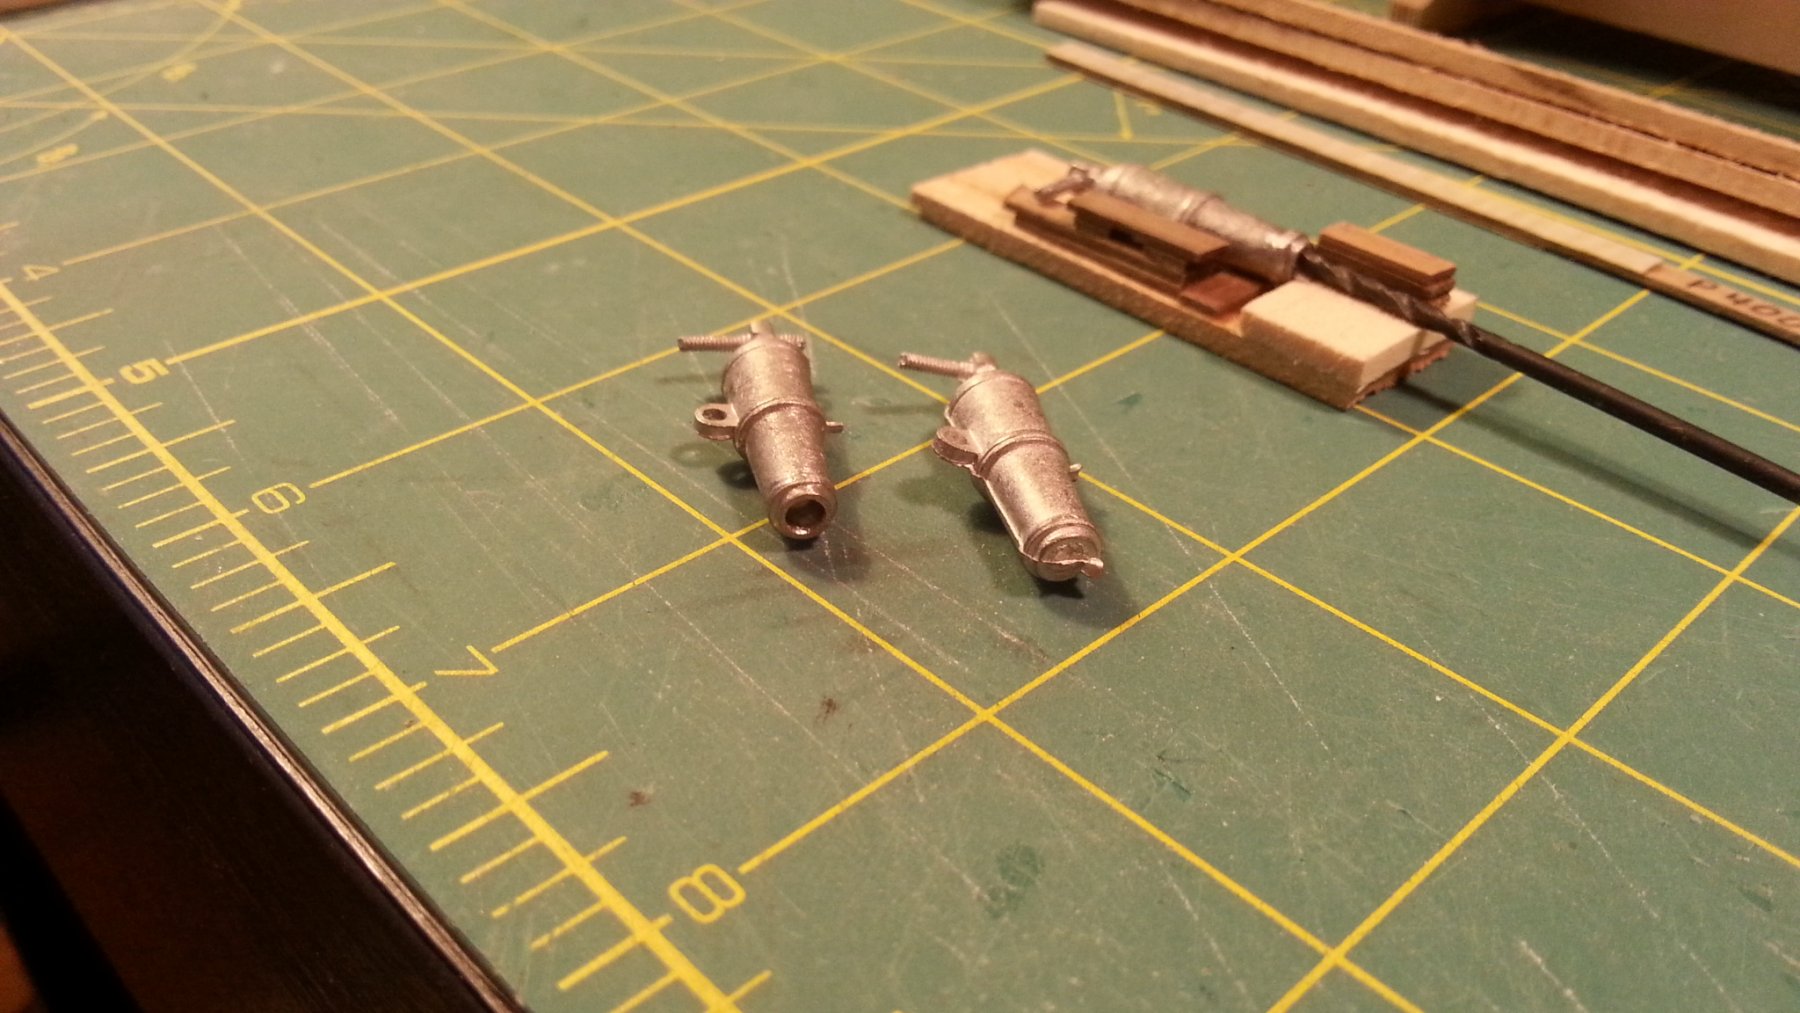
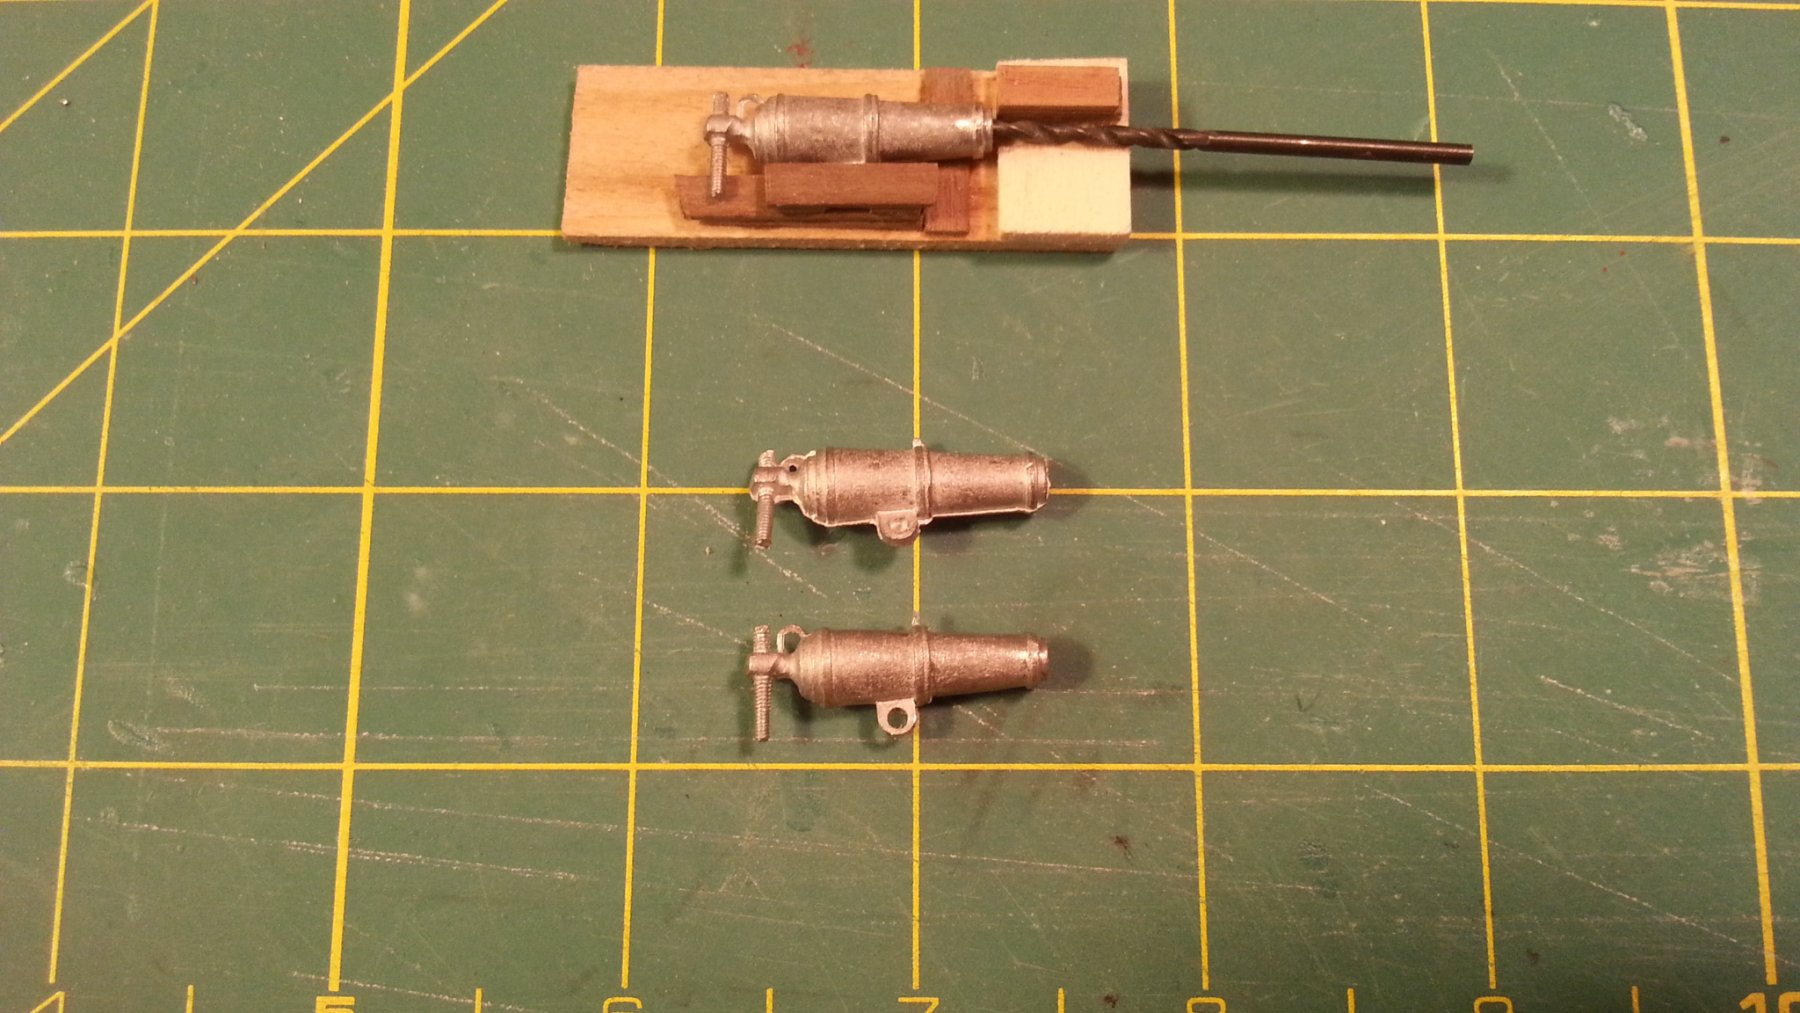
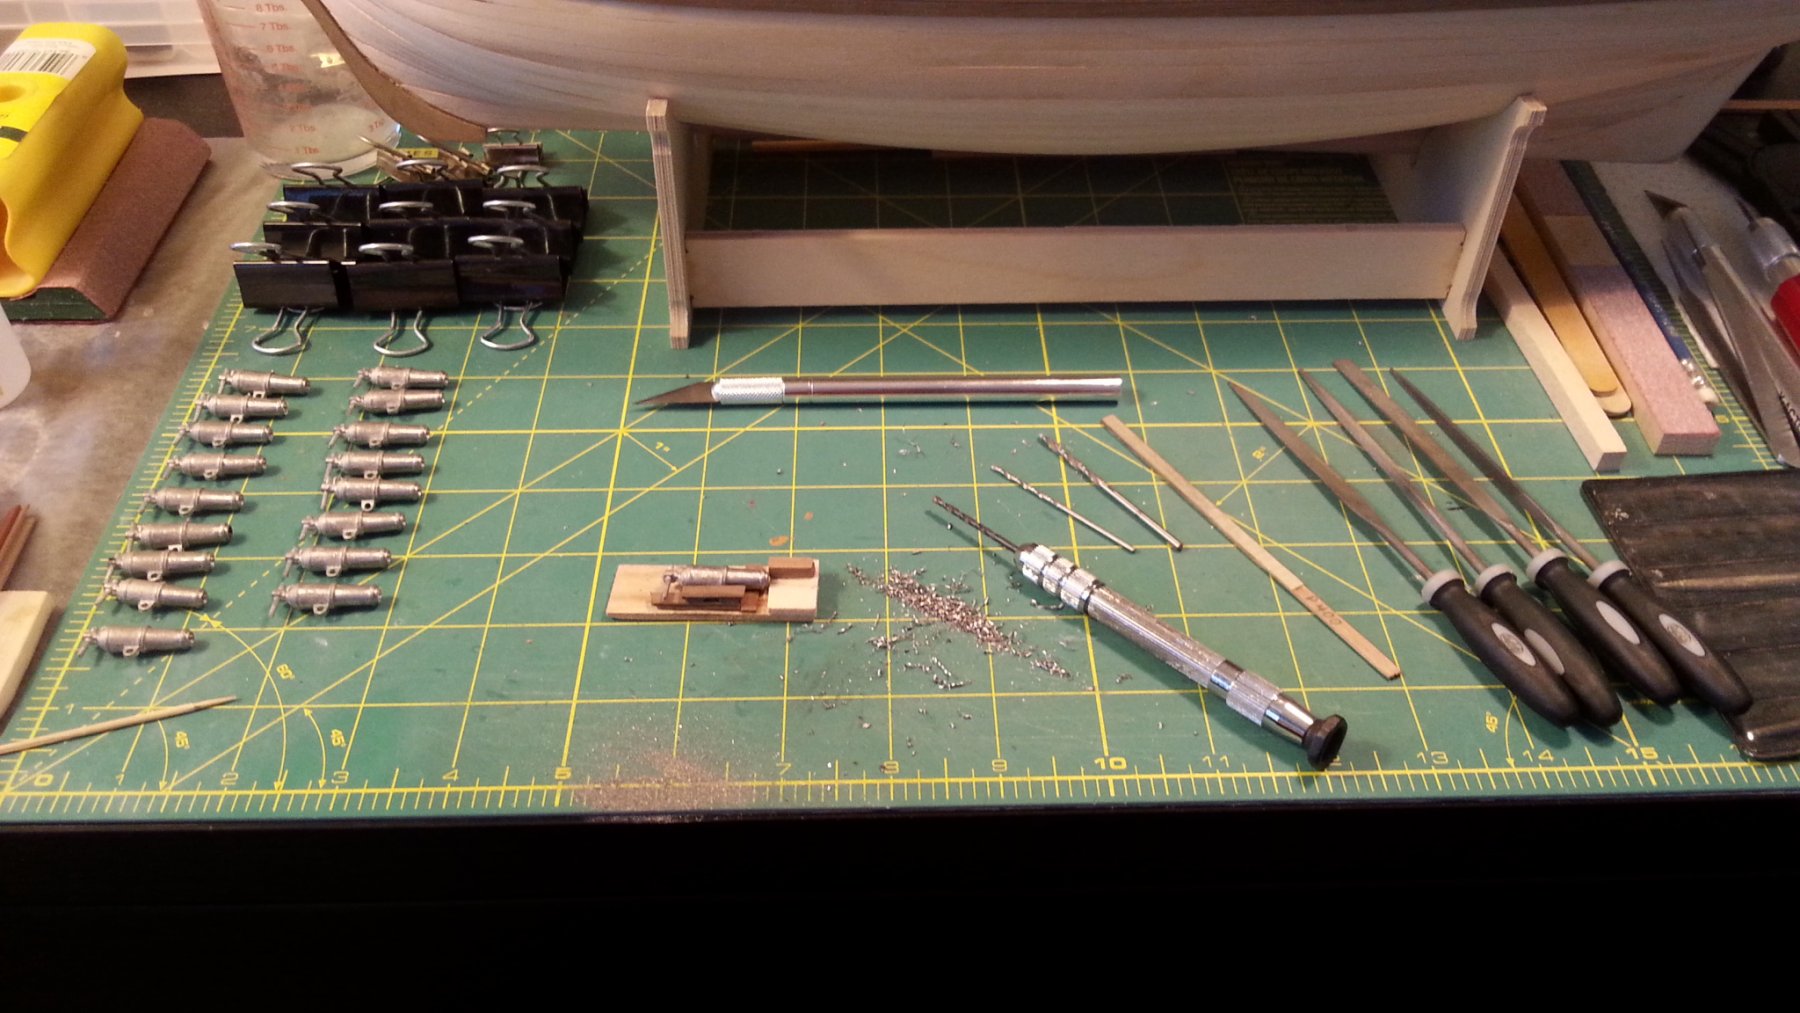
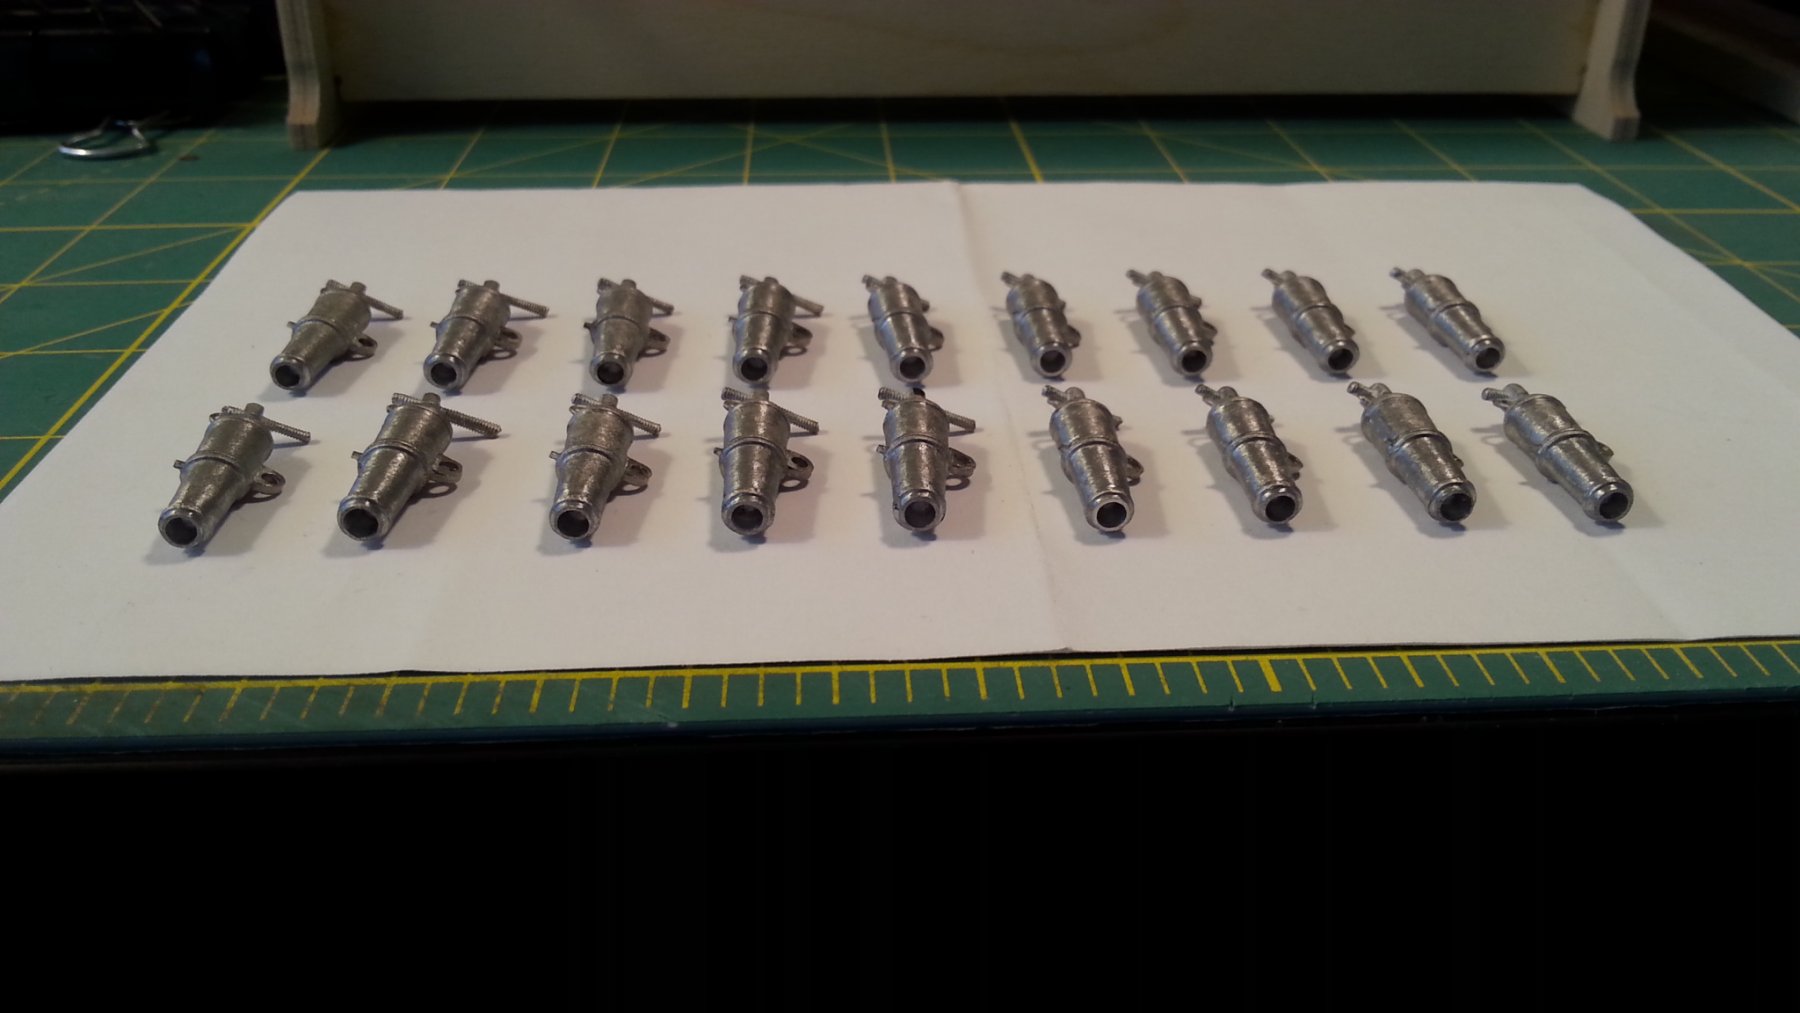
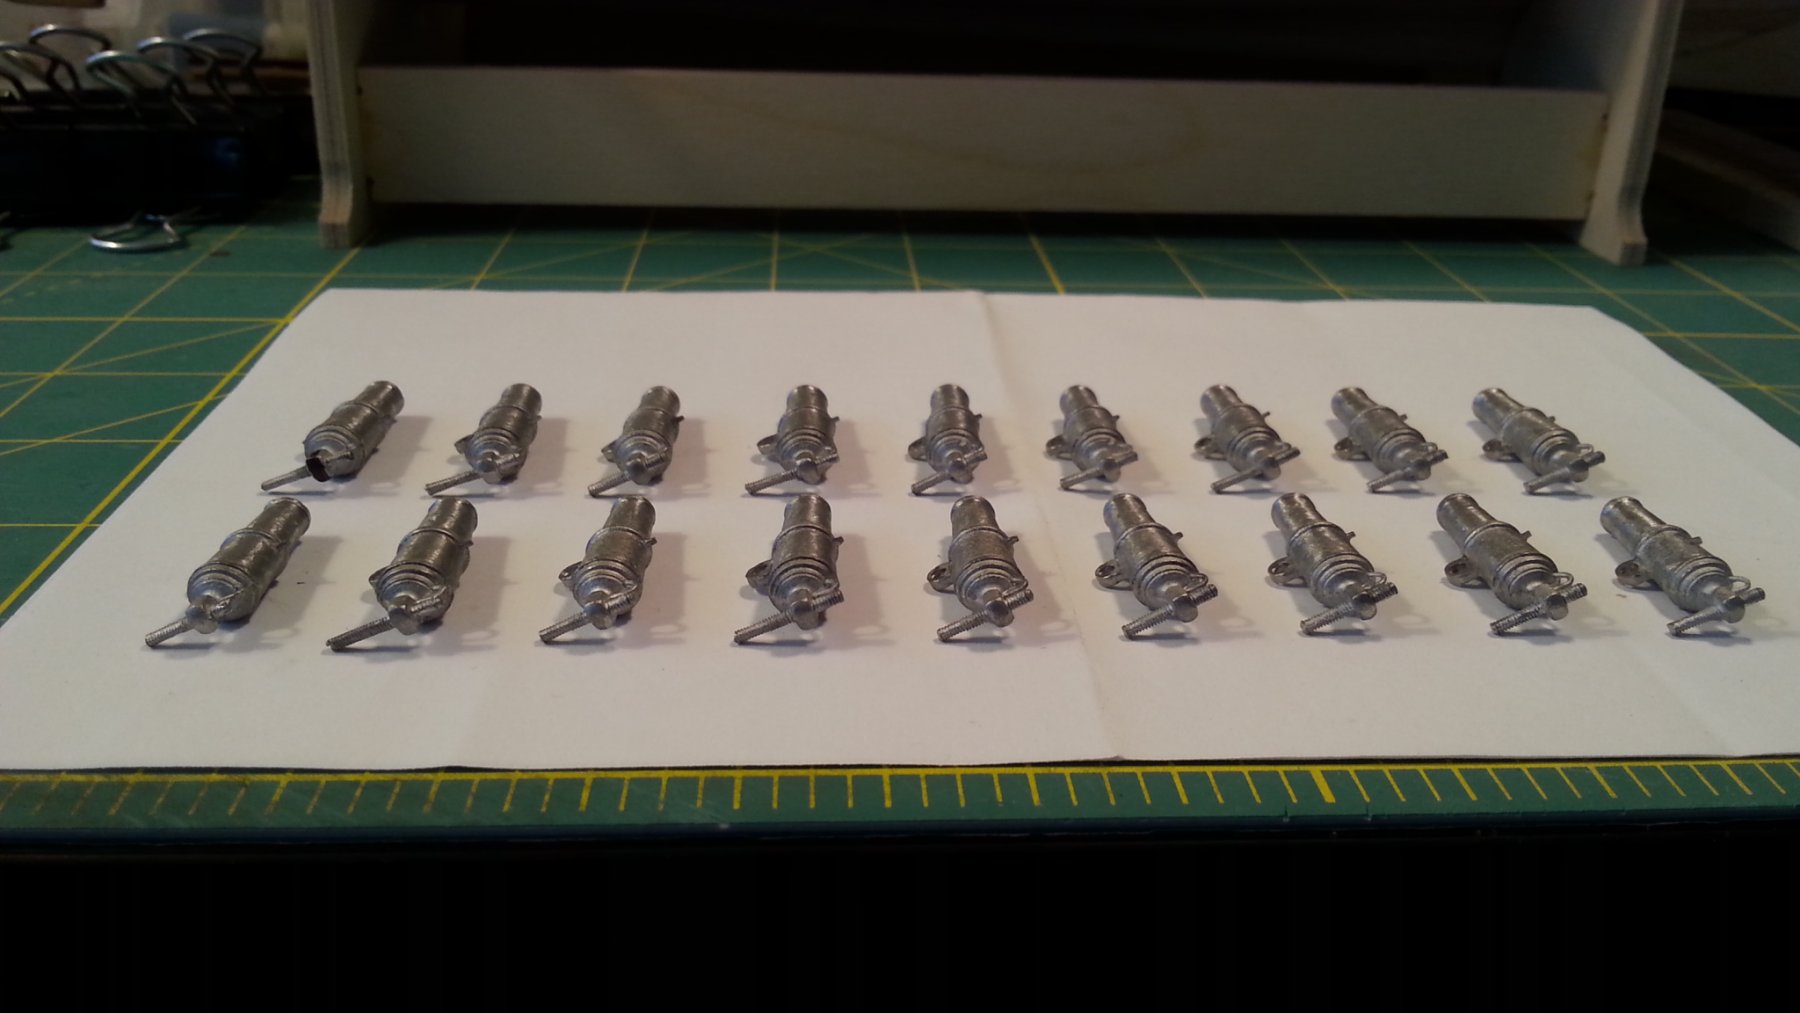
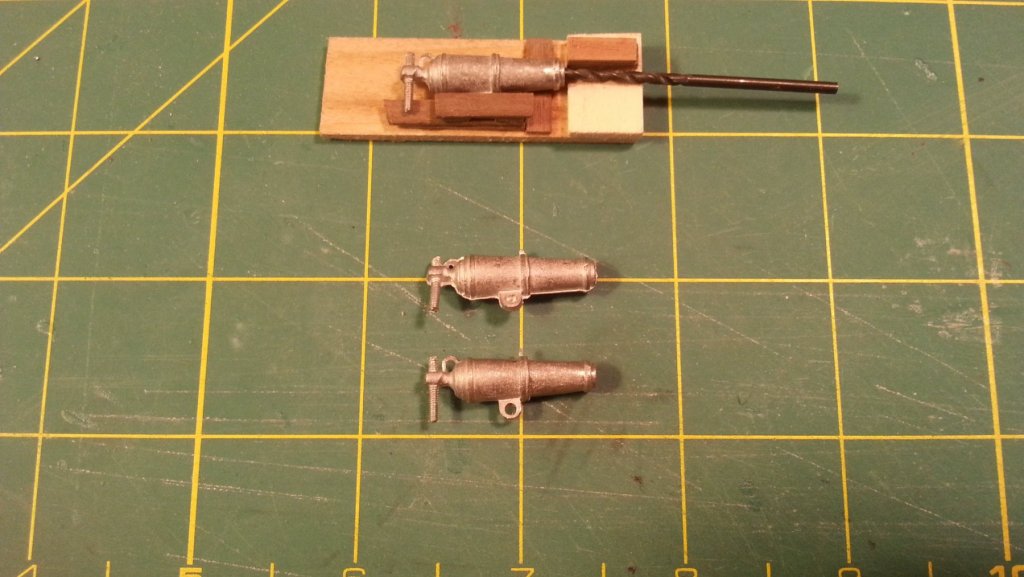
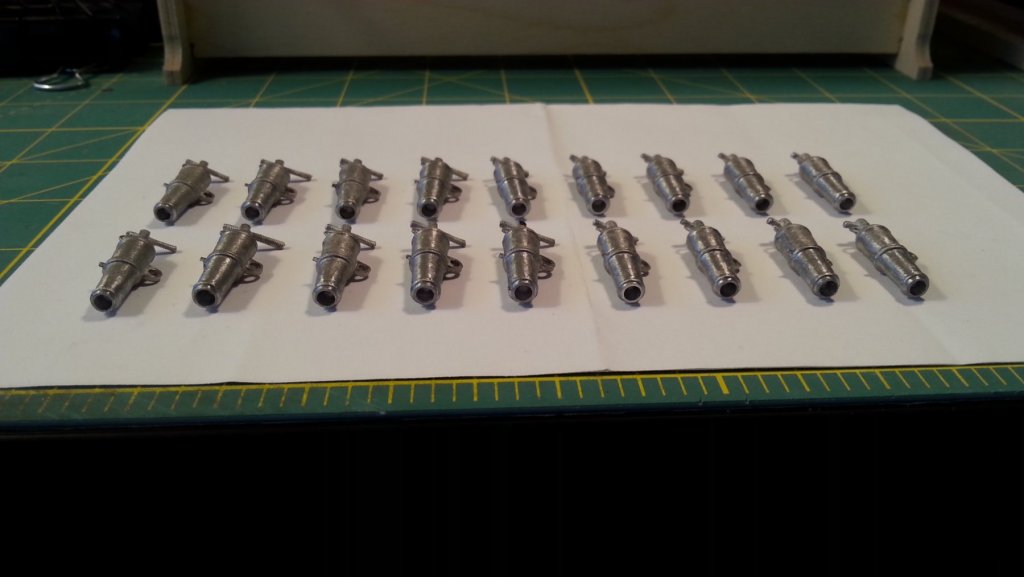
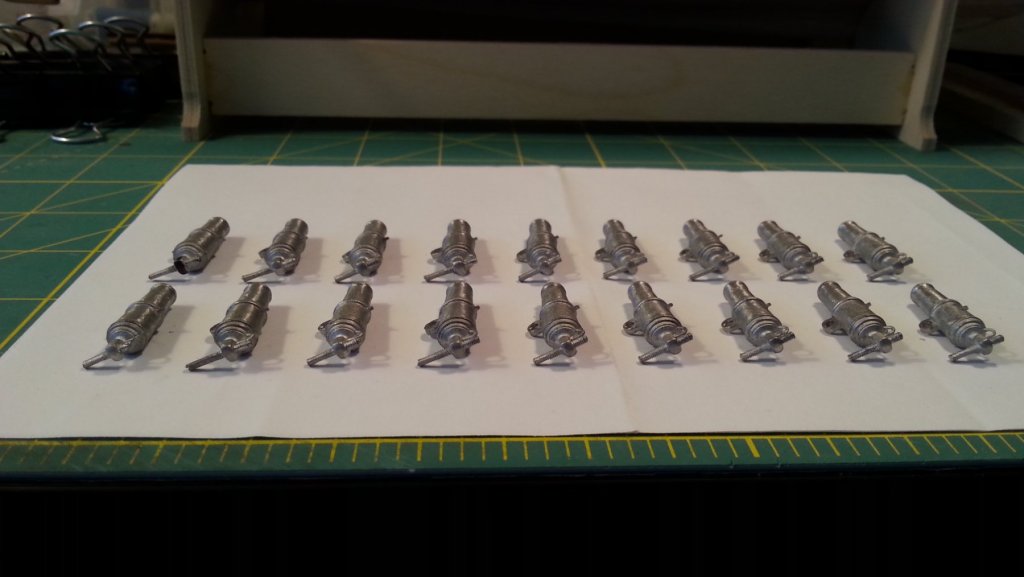
I took a break in the planking to work on the Carronades to see if they could be turned into something acceptable. They seem ok but I wont really know until I paint them. It took 30-40 minutes per gun to get them to this stage so about 10 hours total. I would have liked to buy the Caldercraft 32-pounders but it would end up being over $200.

-
HMS Snake by BenD - Caldercraft - 1:64
BenD replied to BenD's topic in - Kit build logs for subjects built from 1751 - 1800
The Second planking is coming along well enough. I've gone past the point where I can use clips to hold down the planks so its going to get harder. Also the lateral bending of the planks becomes a problem. My test section turned out alright. I tried to keep it as clean and consistent as possible but it's just really hard. My hats off to all of you with clean edges and good paint jobs I tried to make the planking and wood grain noticeable through the paint, lucky enough the Yellow Ochre was really thin. That's 6 coats!


-
HMS Snake by BenD - Caldercraft - 1:64
BenD replied to BenD's topic in - Kit build logs for subjects built from 1751 - 1800
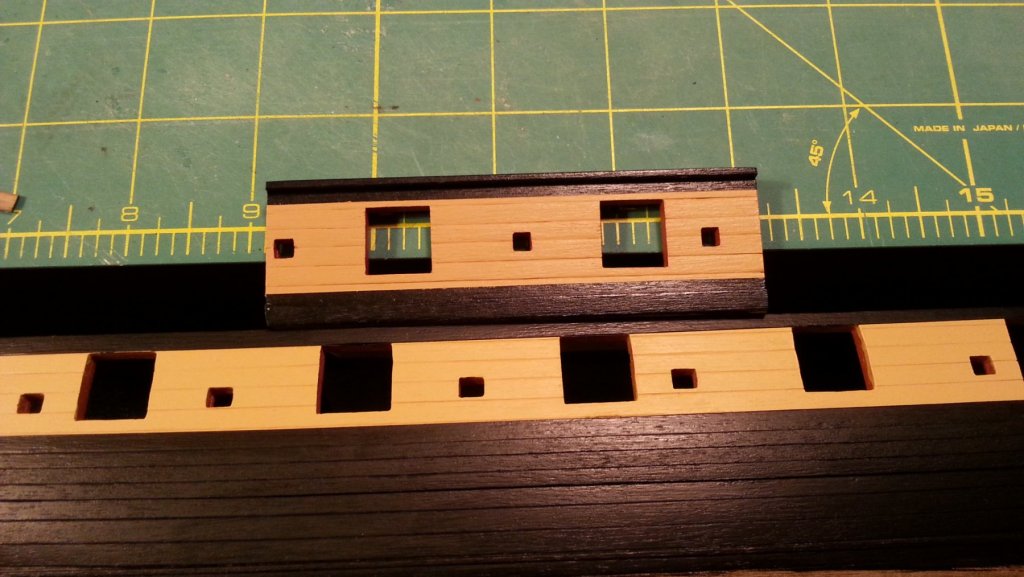
Second Planking I've started the second planking and added planking to the stern facia Part 55. The instructions show it not to be planked which I found strange. I planked the inboard for strength though the inboard will not be seen with the stern platform. Yes it looks rough right now as it's just after rough cutting, sanding will commence shortly. I used 1x4mm strip for the planking and a 2x2mm strip for a boarder between the facia and stern counter.
-
Yeah I'm working on snake too, I did the measurements and fitting the Carronade to to deck instead of the gun port cill is really the only way to go. I was wondering what material to use but you just answered the question for me, Lime wood strip. Good work, keep it up!
- 25 replies
-
- 1
-
-
- snake
- caldercraft
- (and 1 more)