BenD
-
Posts
477 -
Joined
-
Last visited
Content Type
Profiles
Forums
Gallery
Events
Everything posted by BenD
-

HMS Snake by BenD - Caldercraft - 1:64
BenD replied to BenD's topic in - Kit build logs for subjects built from 1751 - 1800
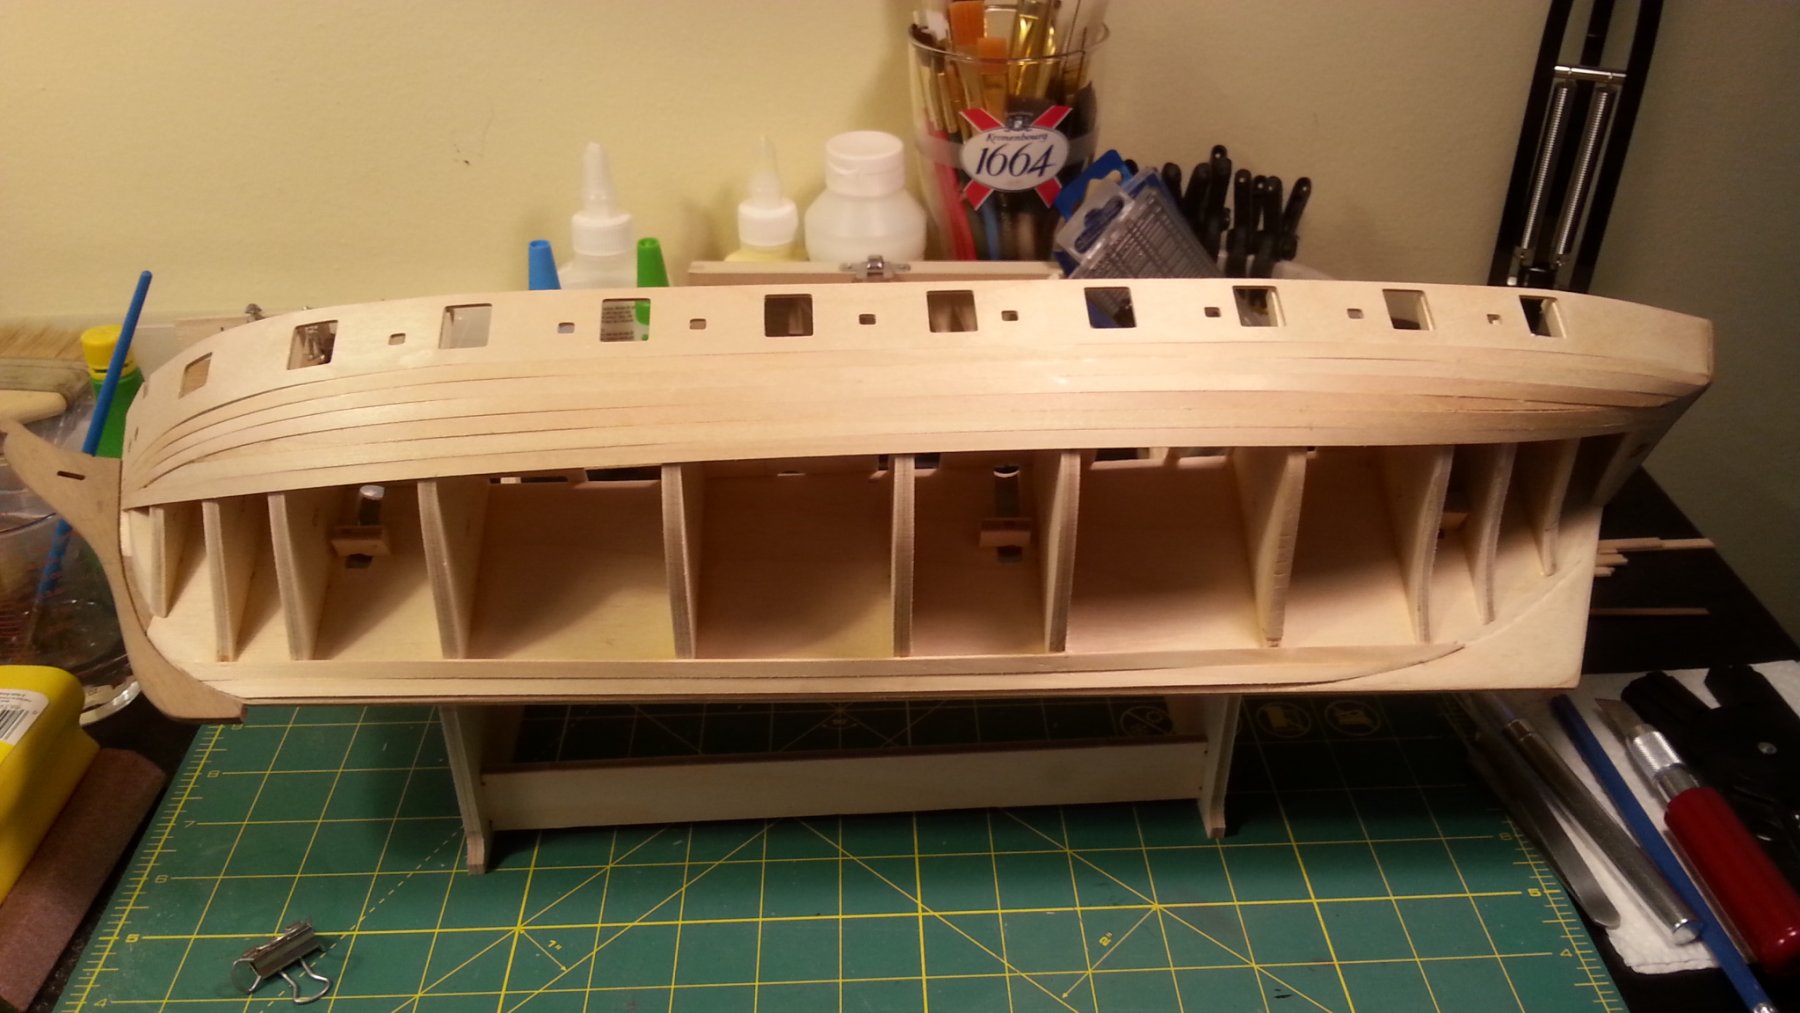
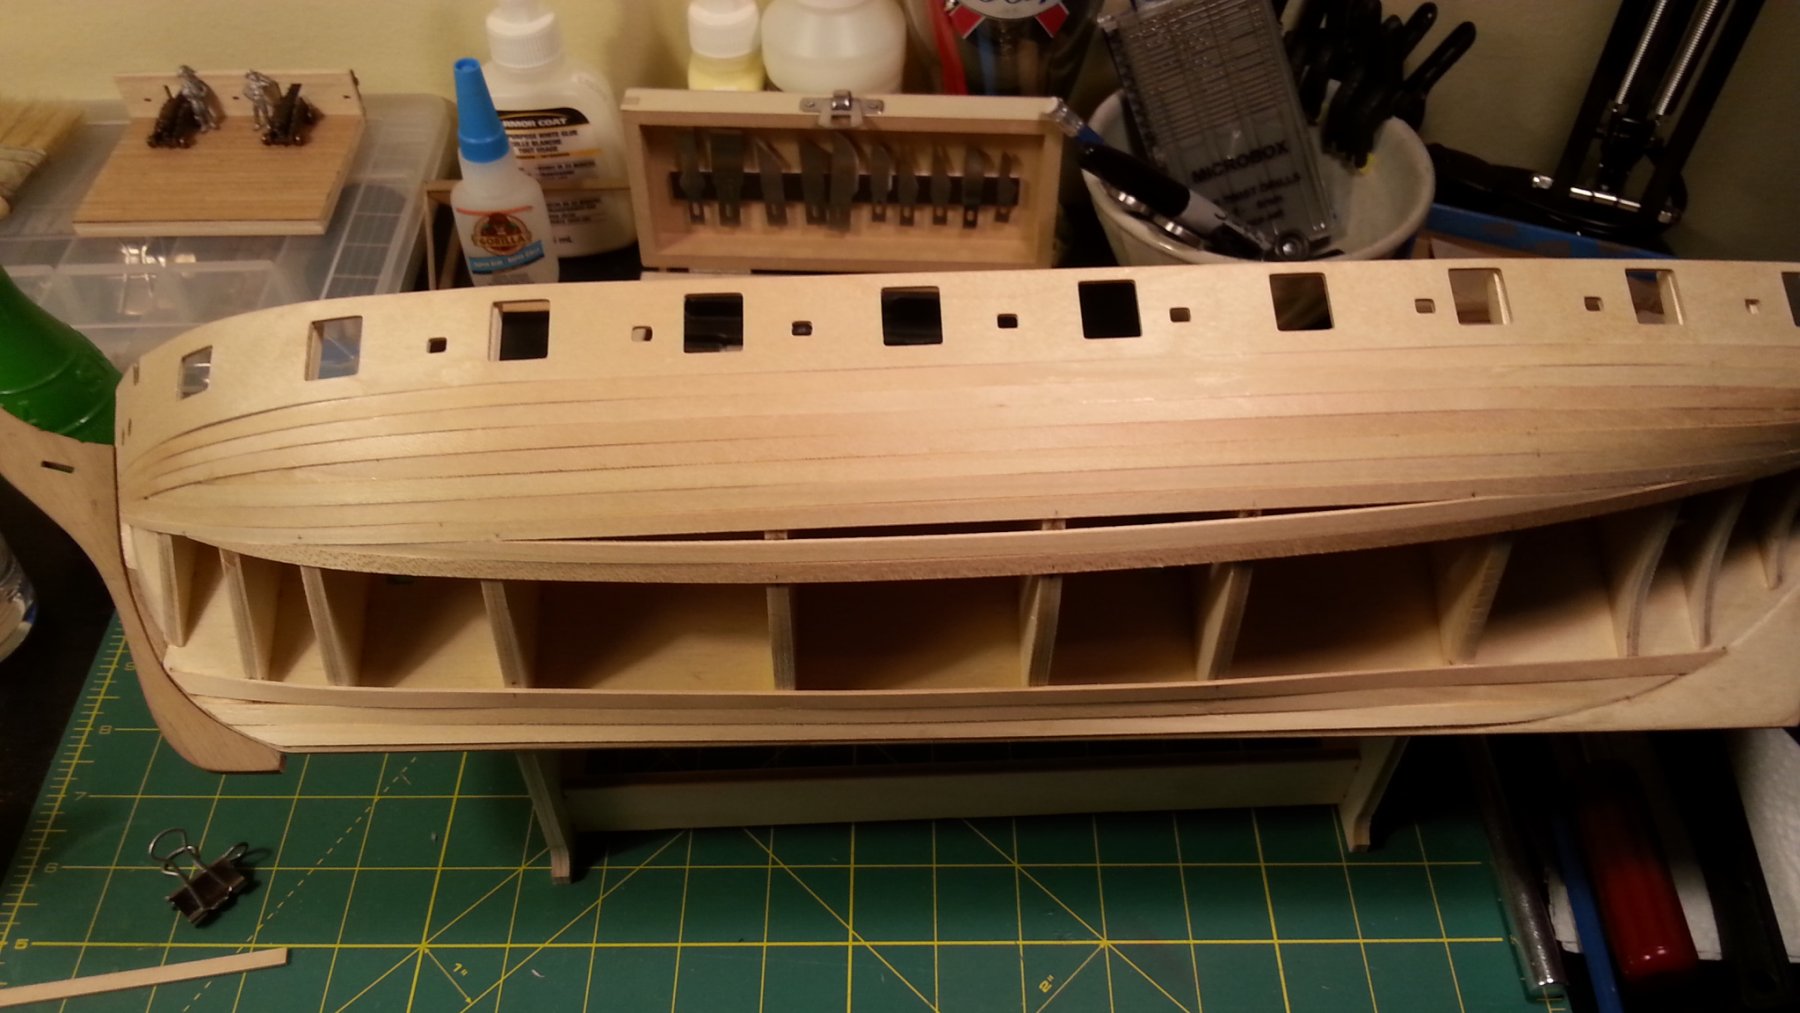
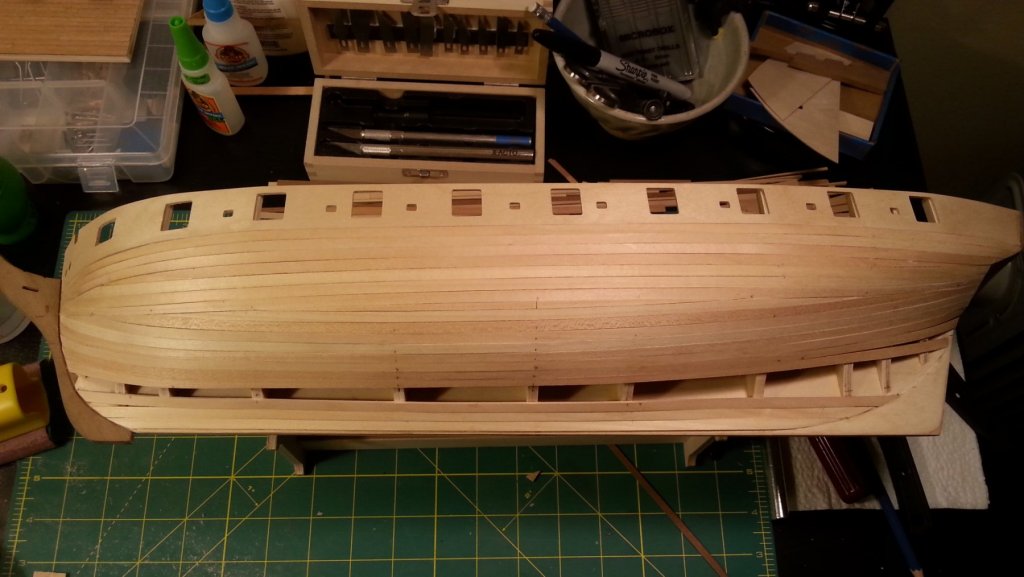
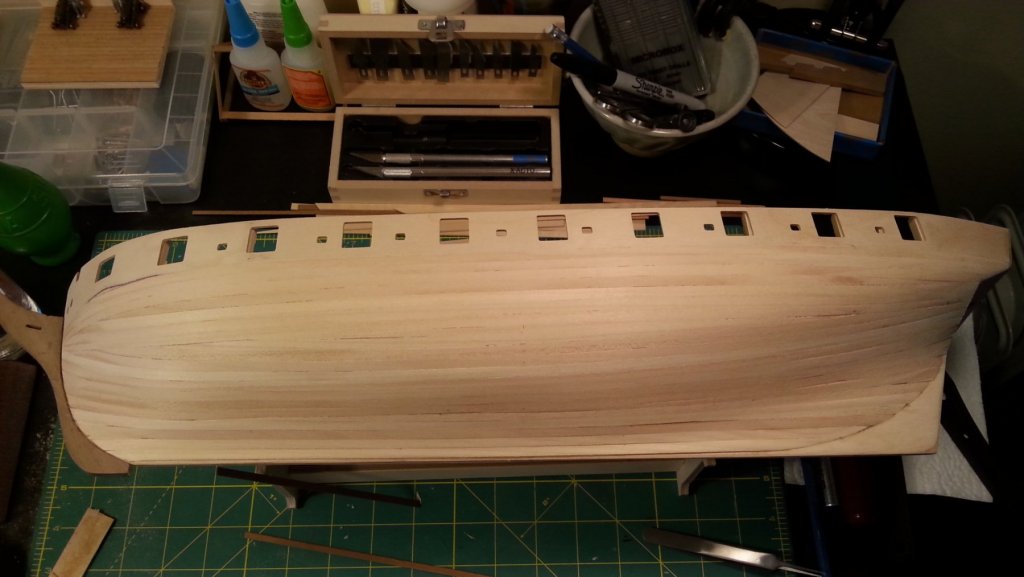
First planking complete After the first 3 planks I gave up on shaping and spilling. There is another layer of planking so none of this going to be seen on the finished model. I'm going to put lots of effort into the second planking at least until the water line as the coppering will cover bellow that point. One thing to point out is that if I didn't put shims on bulkhead No9 and 12 it would have turned out really lumpy the last picture is with a bit of sanding done. There is quite a lot more sanding to be done and I don't think I'll need very much filler. I have to say working with 1.5 mm lime wood was a bit difficult but it makes for a strong hull.
-
QUICK-FIND INDEXES to BUILD LOGS FOR KITS
BenD replied to Dan Vadas's topic in - Index of all kits by brand and subject
wow this is so cool, Thanks! -
HMS Snake by BenD - Caldercraft - 1:64
BenD replied to BenD's topic in - Kit build logs for subjects built from 1751 - 1800
Ahh yes thanks Rob! I had completely forgot about that manual. -
HMS Snake by BenD - Caldercraft - 1:64
BenD replied to BenD's topic in - Kit build logs for subjects built from 1751 - 1800
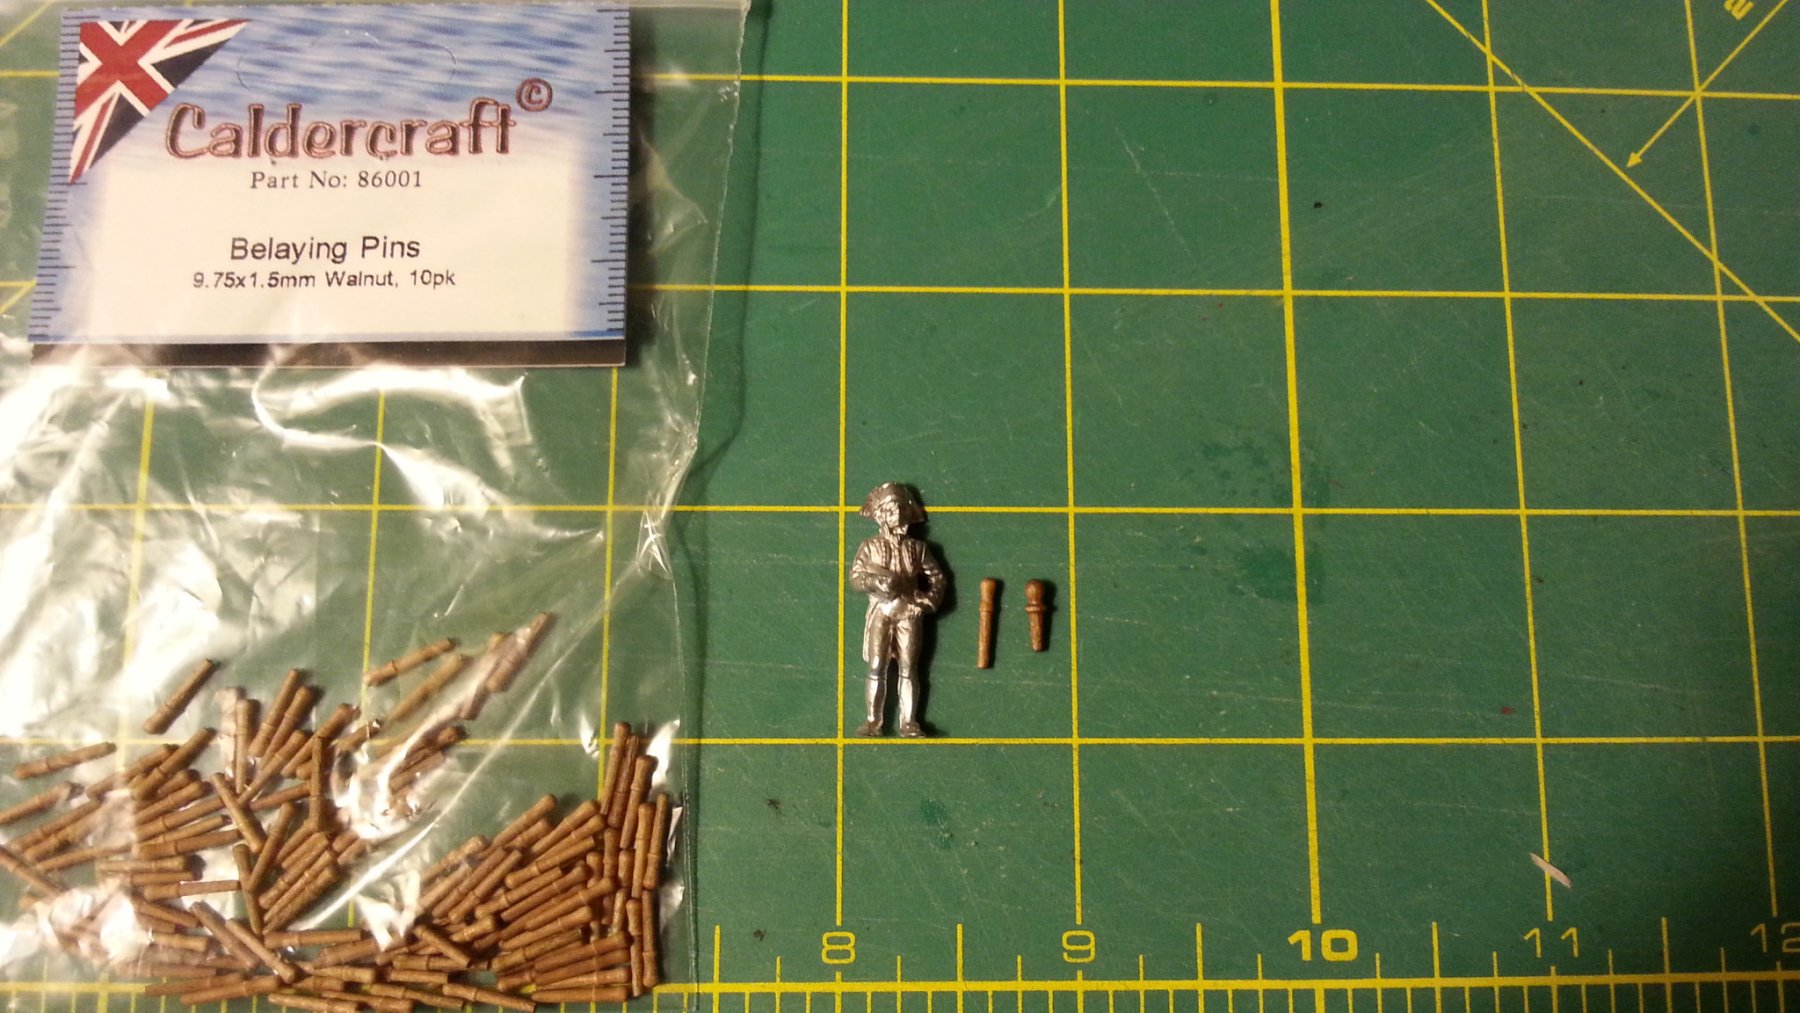
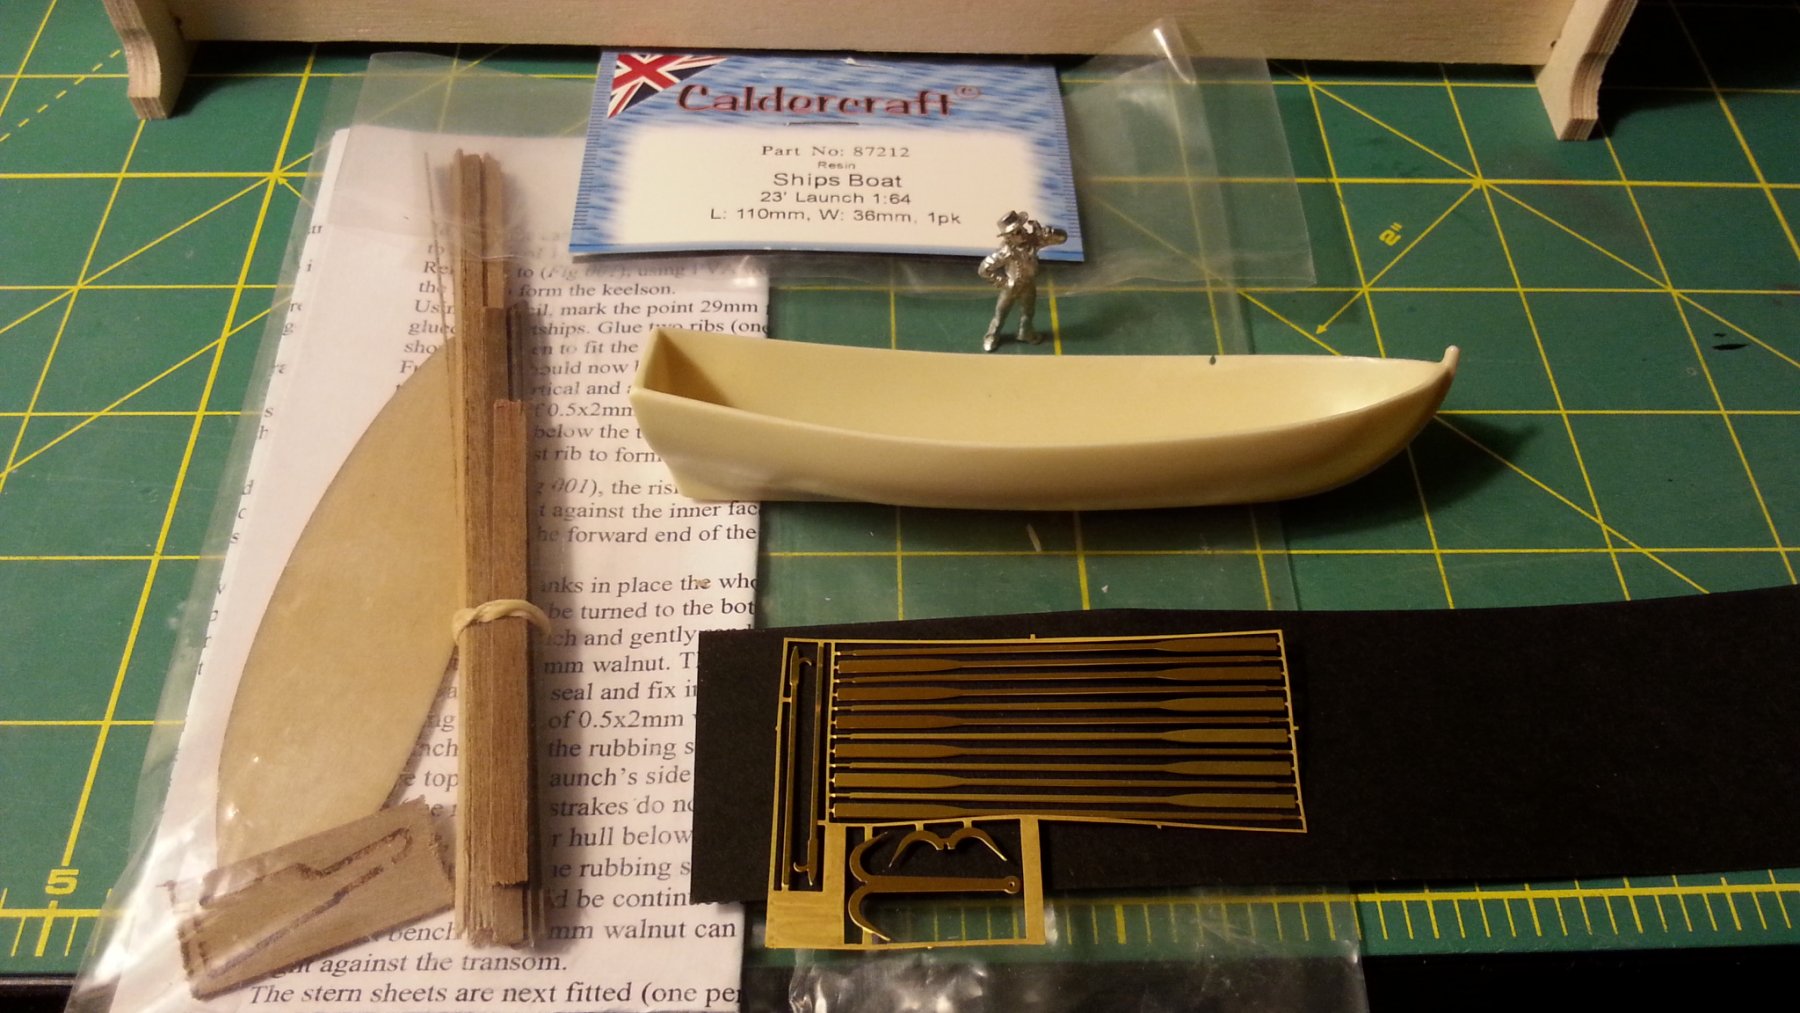
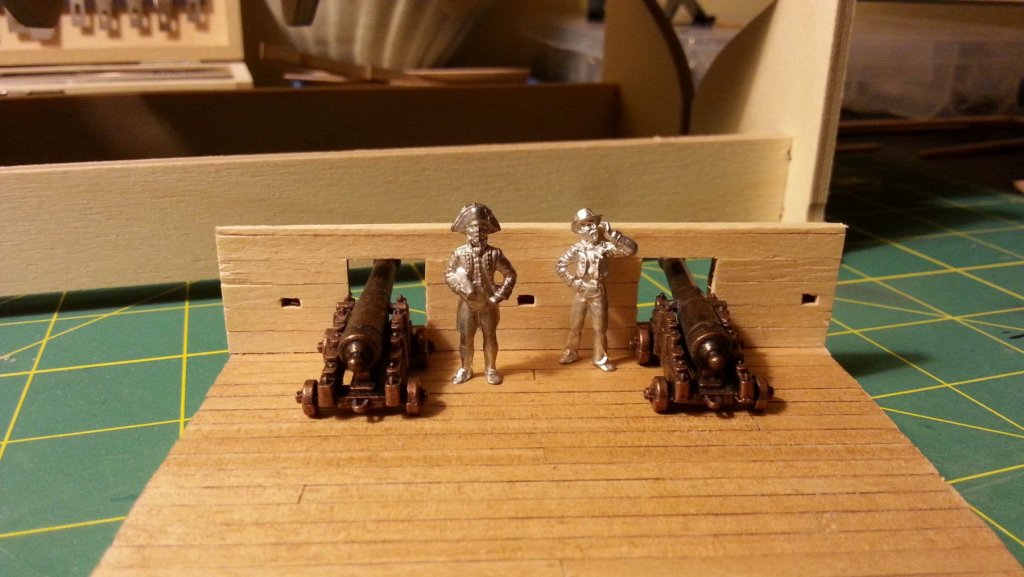
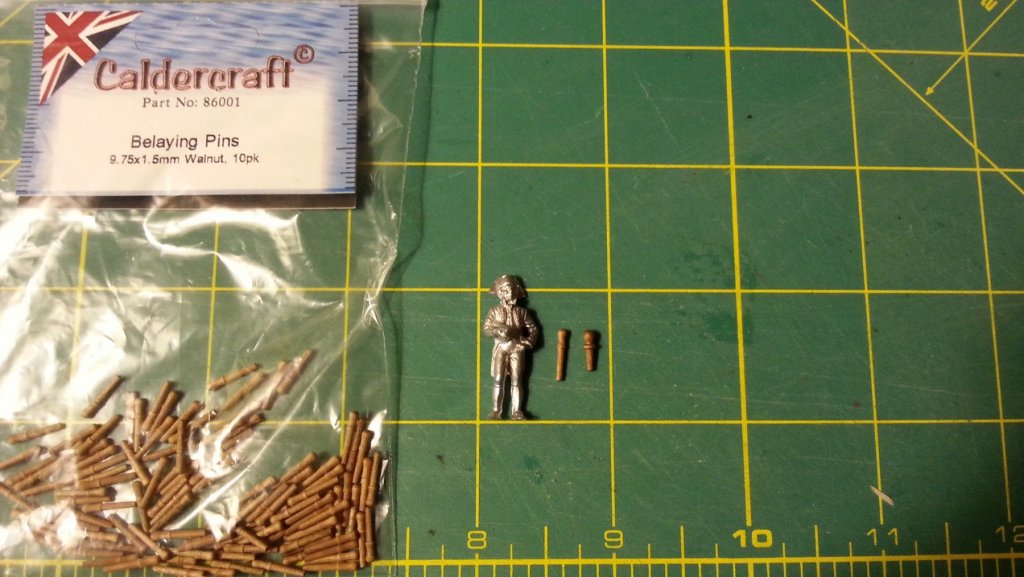
The planking has begun. I think it will soon become a hot mess but for now it looks ok. It's only the first planking so it doesn't have to be pretty. I never seem to learn anything from the resources on this site . I got a delivery from Cornwall model boats today! I received some sailors, Belaying pins, Rope, Blocks for the Carronades, And a Launch boat. The belaying pins look so much better, I can't believe Caldercraft didn't add them automatically given the price of the kit. The launch is going to be hard given the weak instructions, I'll give it another read I suppose. The Sailors are very neat! The Captain and his Boatswain... I think


-
Fantastic, What a ship!!! The Constitution is on my future build list for sure.
-
HMS Snake by BenD - Caldercraft - 1:64
BenD replied to BenD's topic in - Kit build logs for subjects built from 1751 - 1800
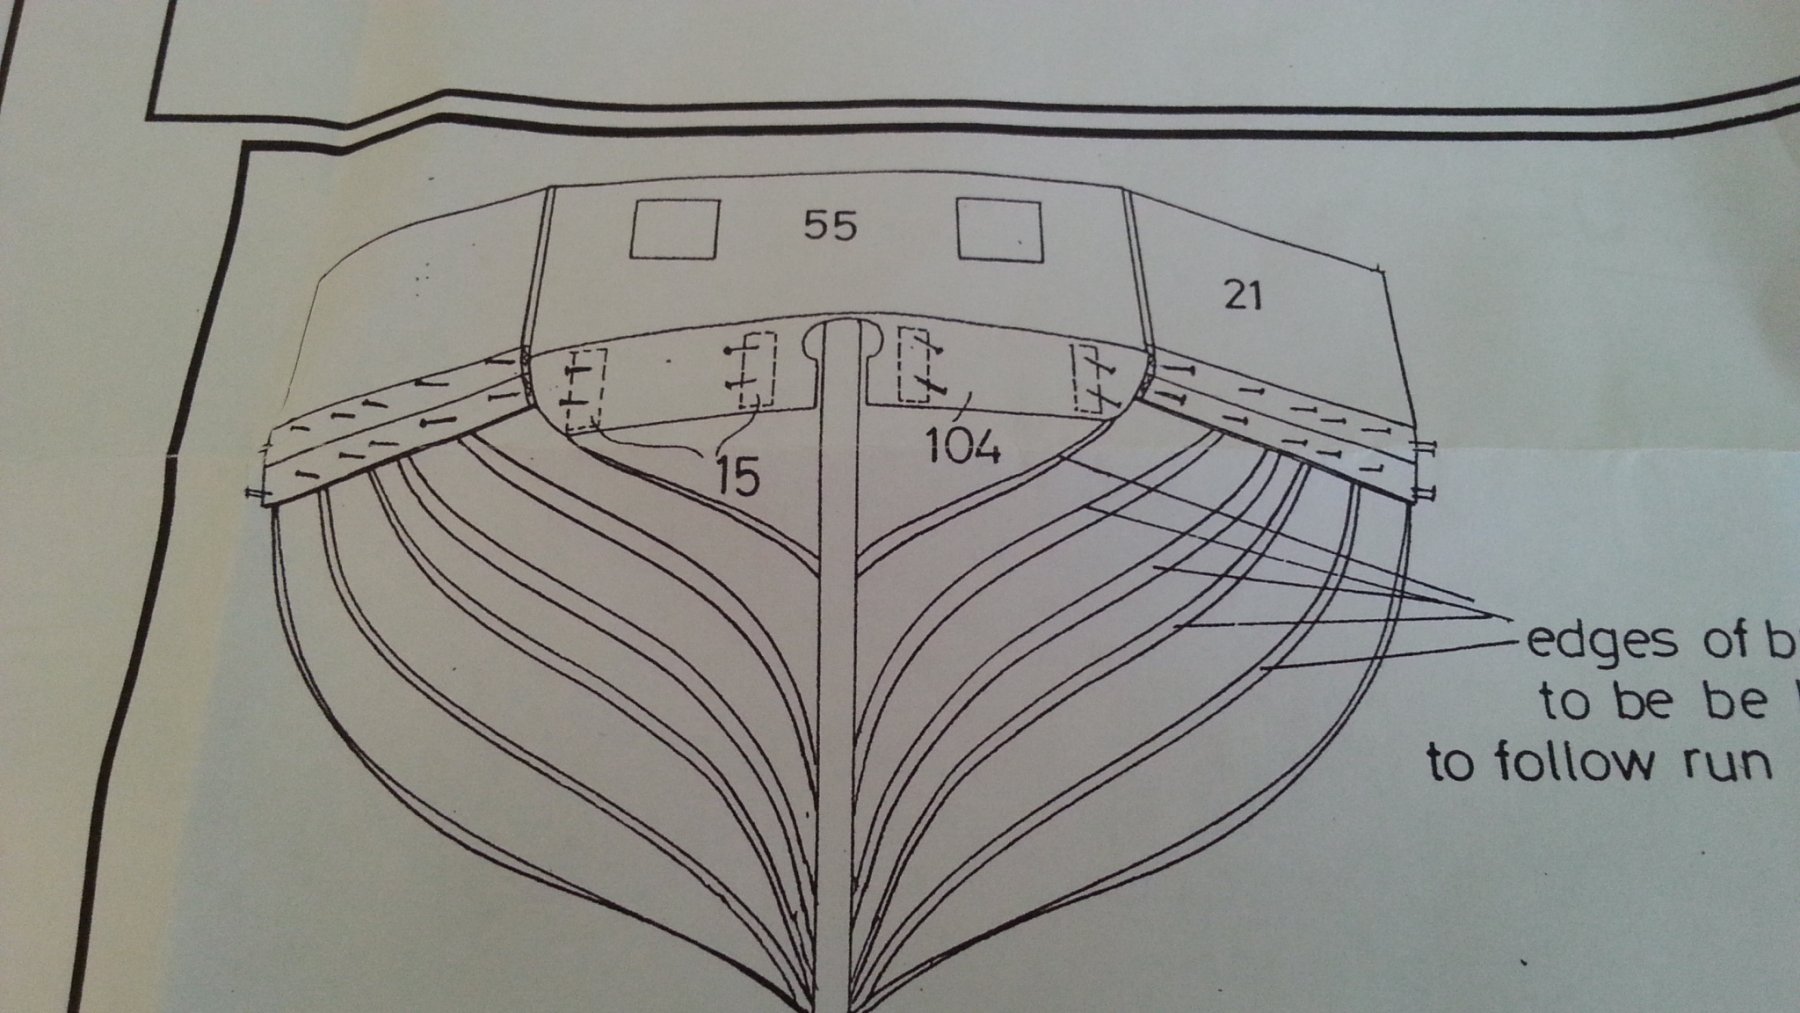
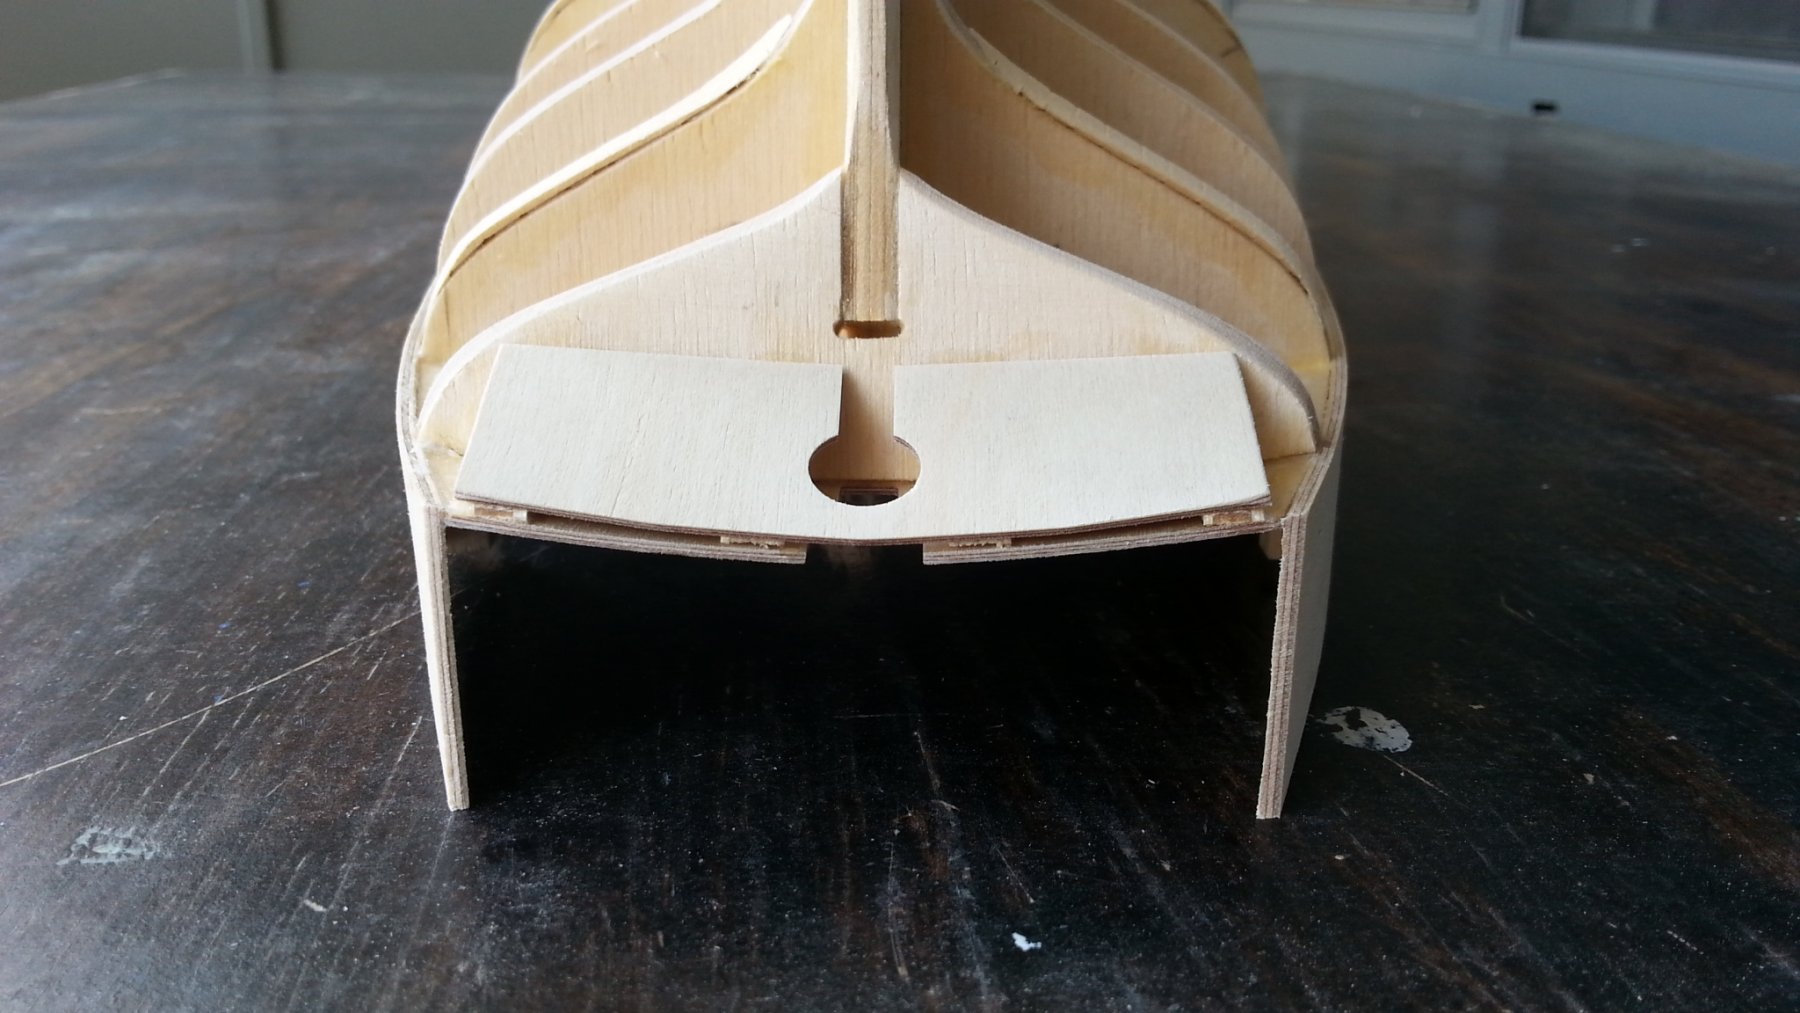
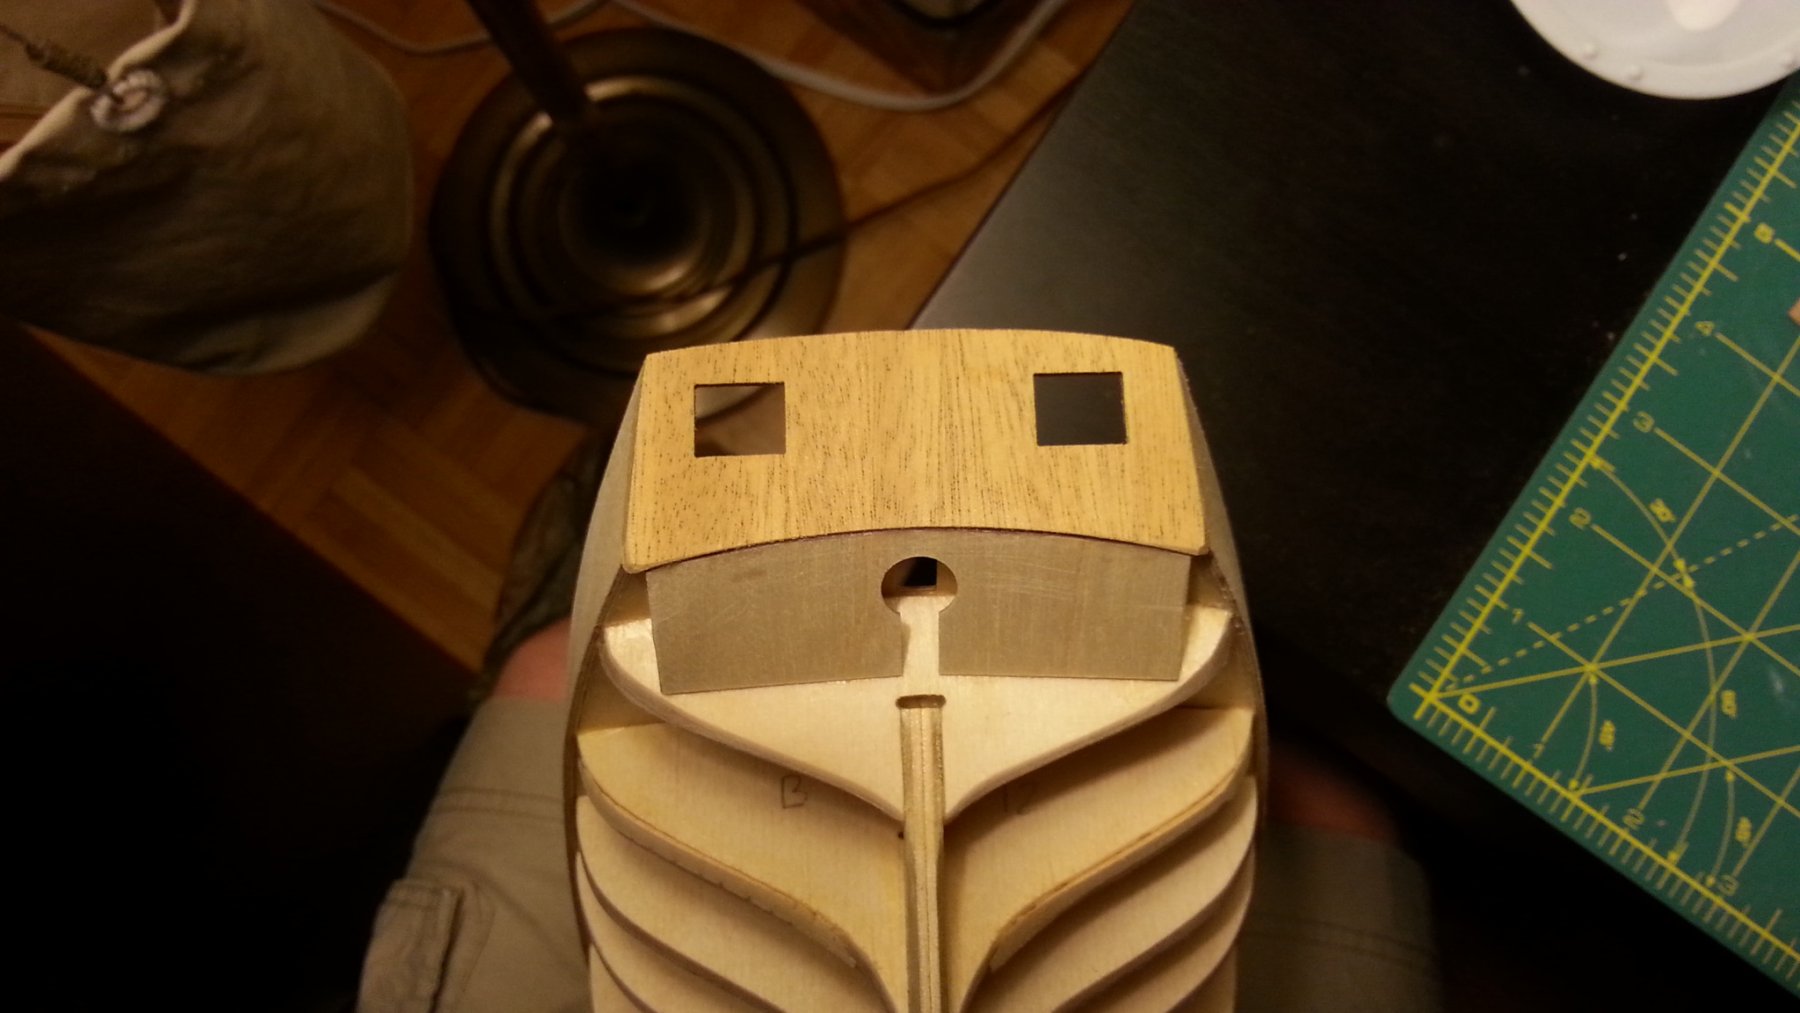
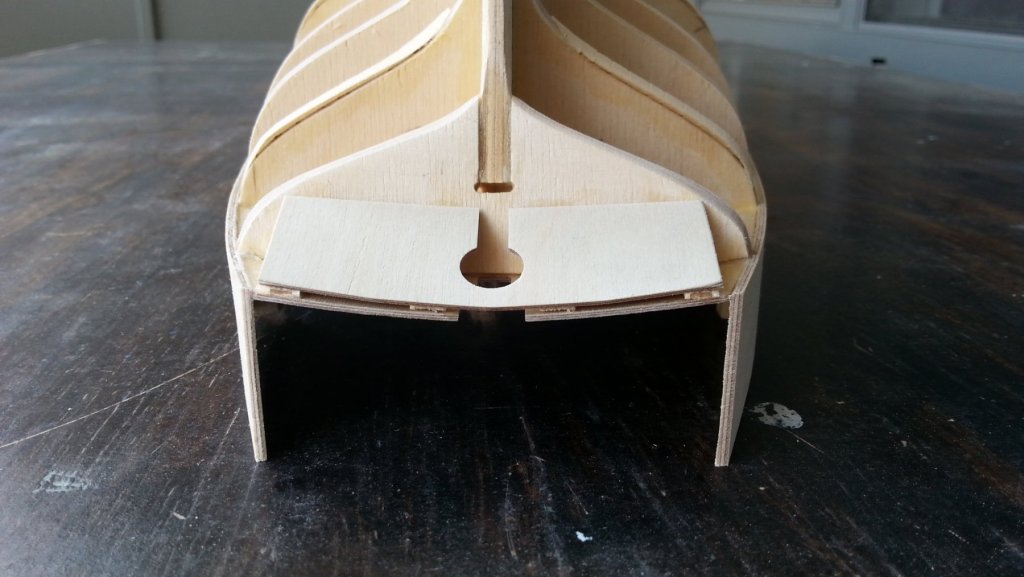
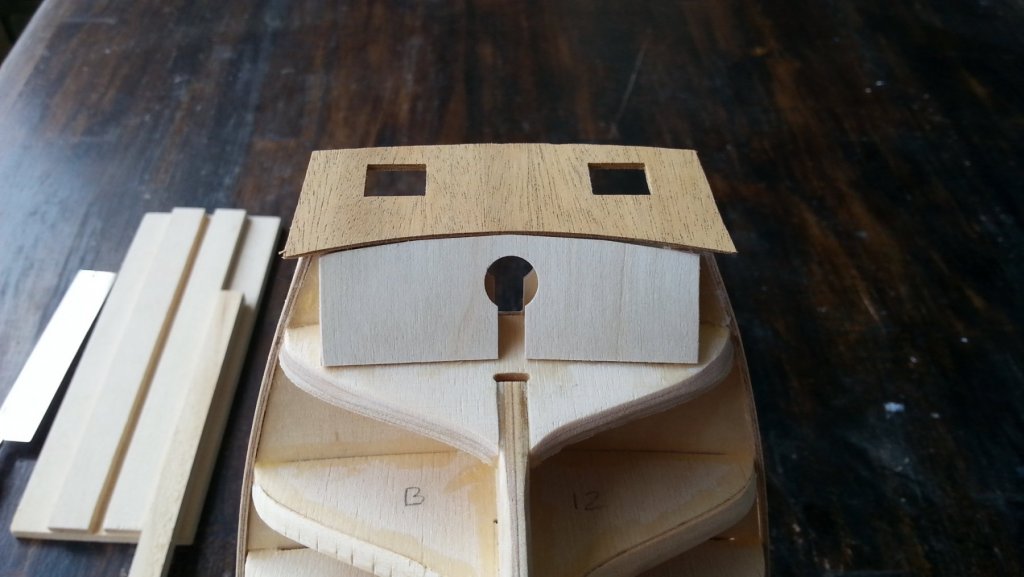
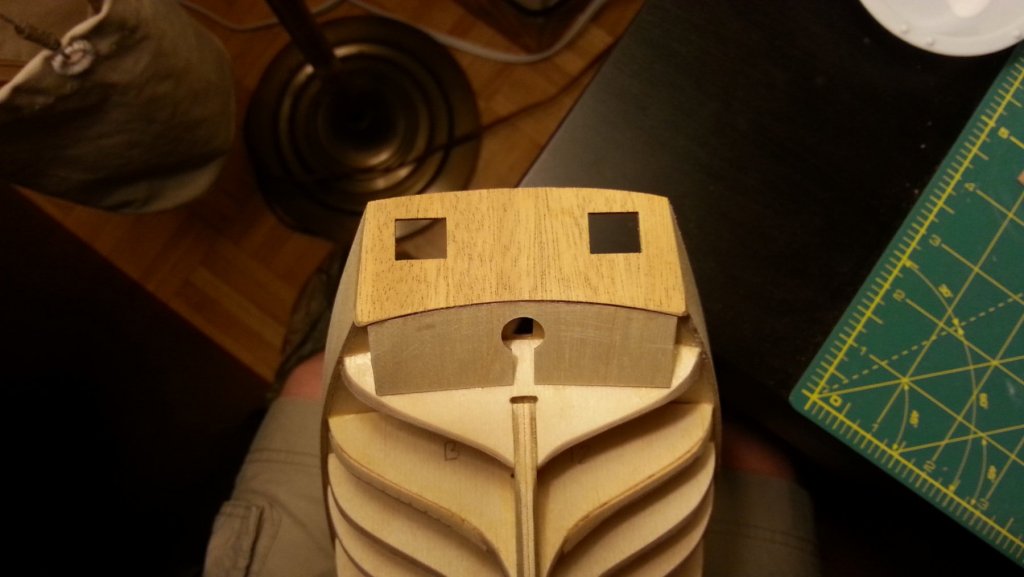
Part #55 Stern Facia and #104 stern counter don't match the plans at all. The Facia is fine because it can be cut and sanded to fit. The stern counter is not really what is shown in the plans but after looking at some other Snake builds on this site it seems that's what everyone gets. This is what I ended up with. I had to cut off about 3mm off both sides. On to planking!
-
US Brig Syren by Gahm - Model Shipways
BenD replied to Gahm's topic in - Kit build logs for subjects built from 1801 - 1850
This is some good work right here. I could only wish to have half this craftsmanship someday -
HMS Snake by BenD - Caldercraft - 1:64
BenD replied to BenD's topic in - Kit build logs for subjects built from 1751 - 1800
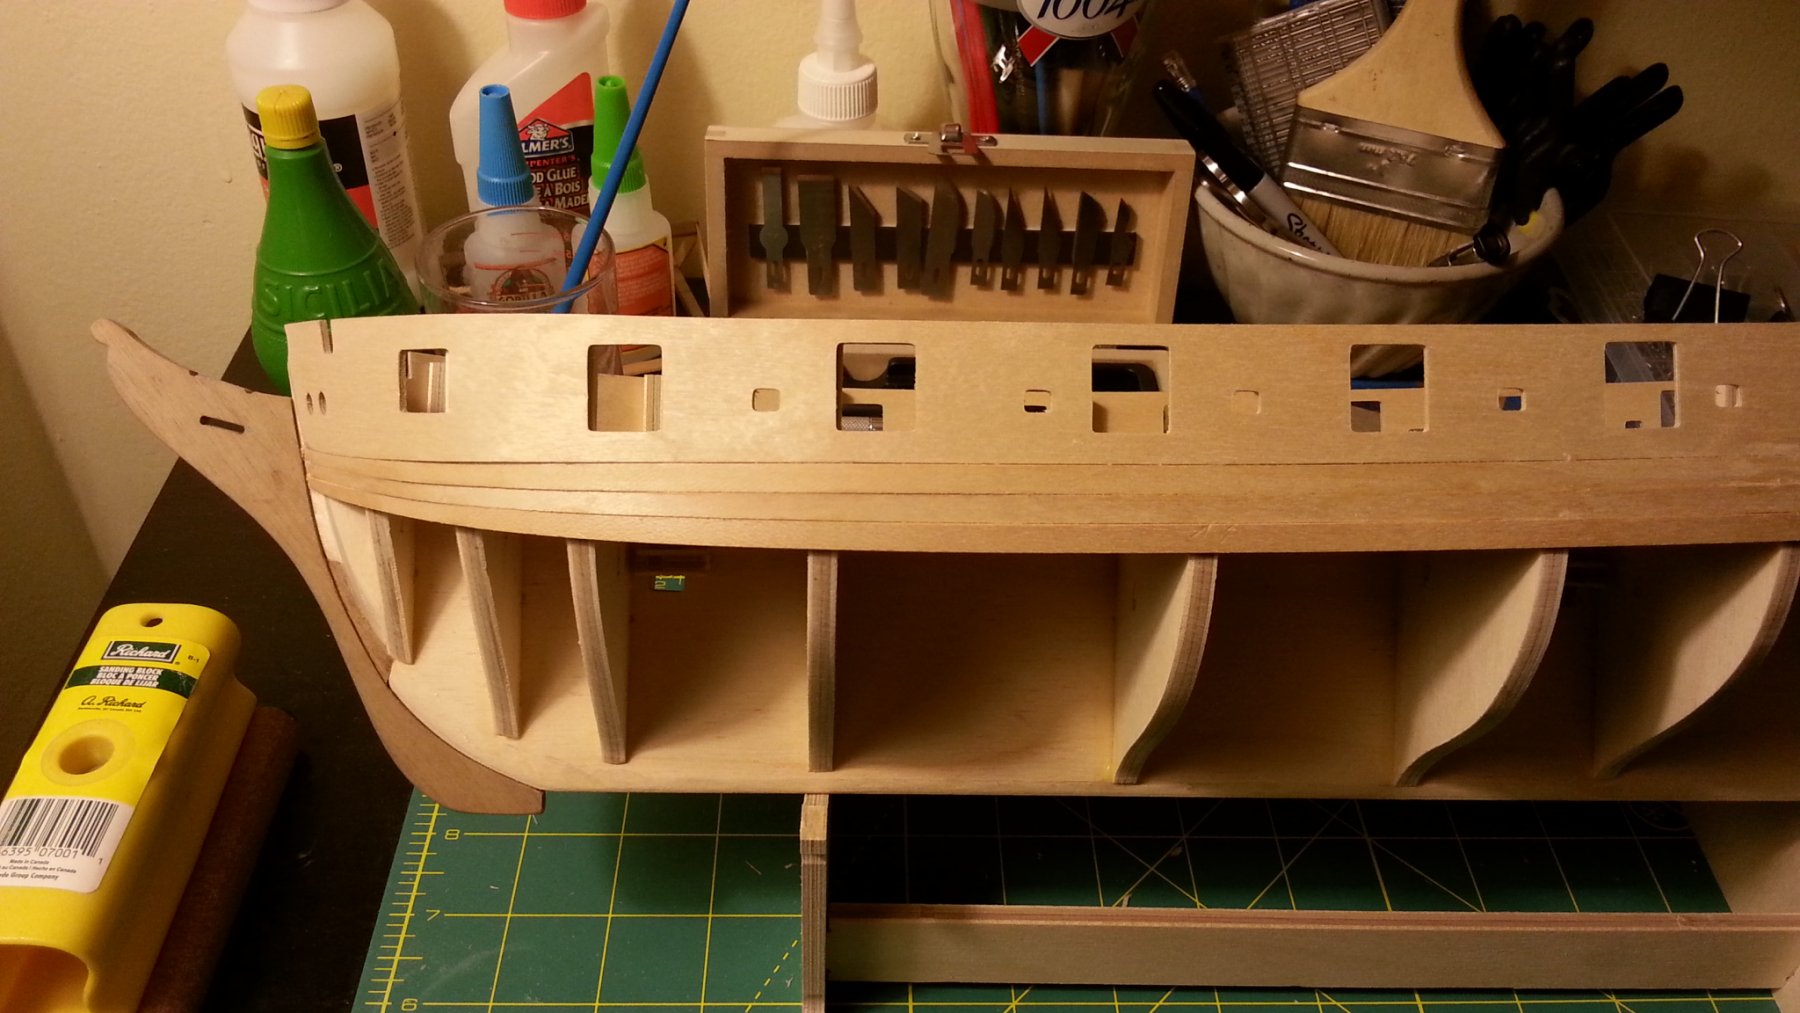
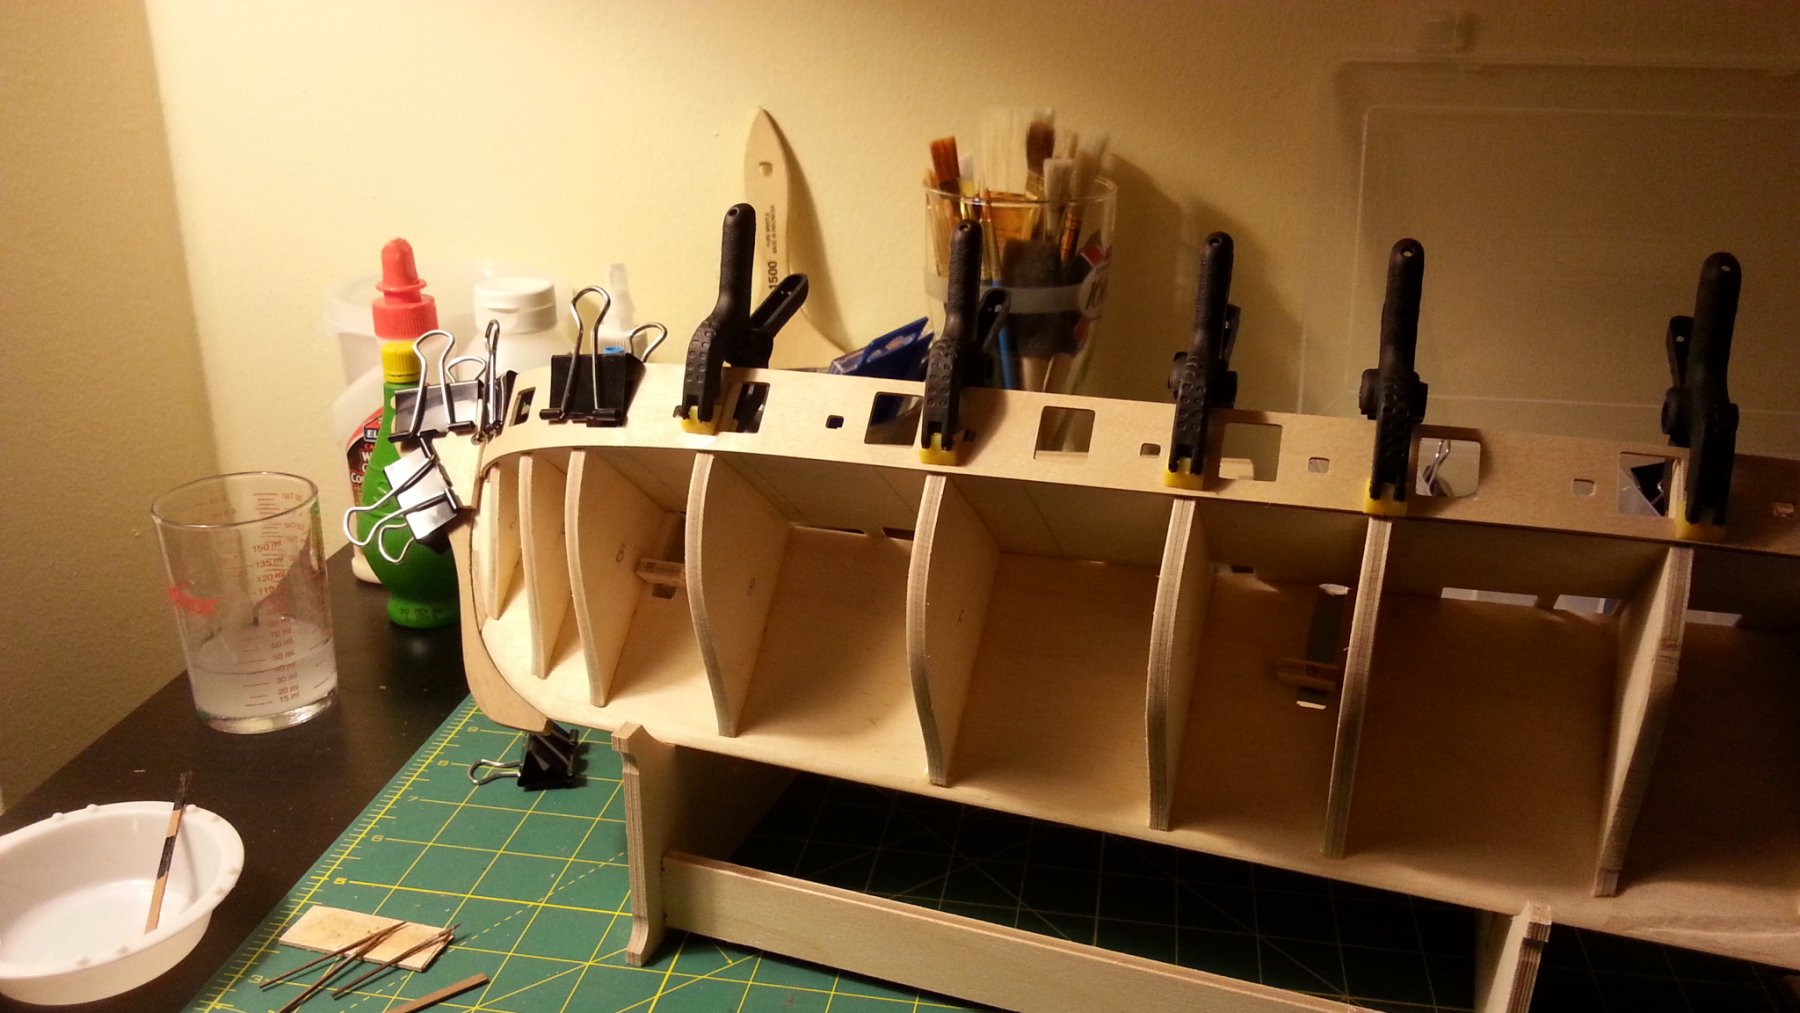
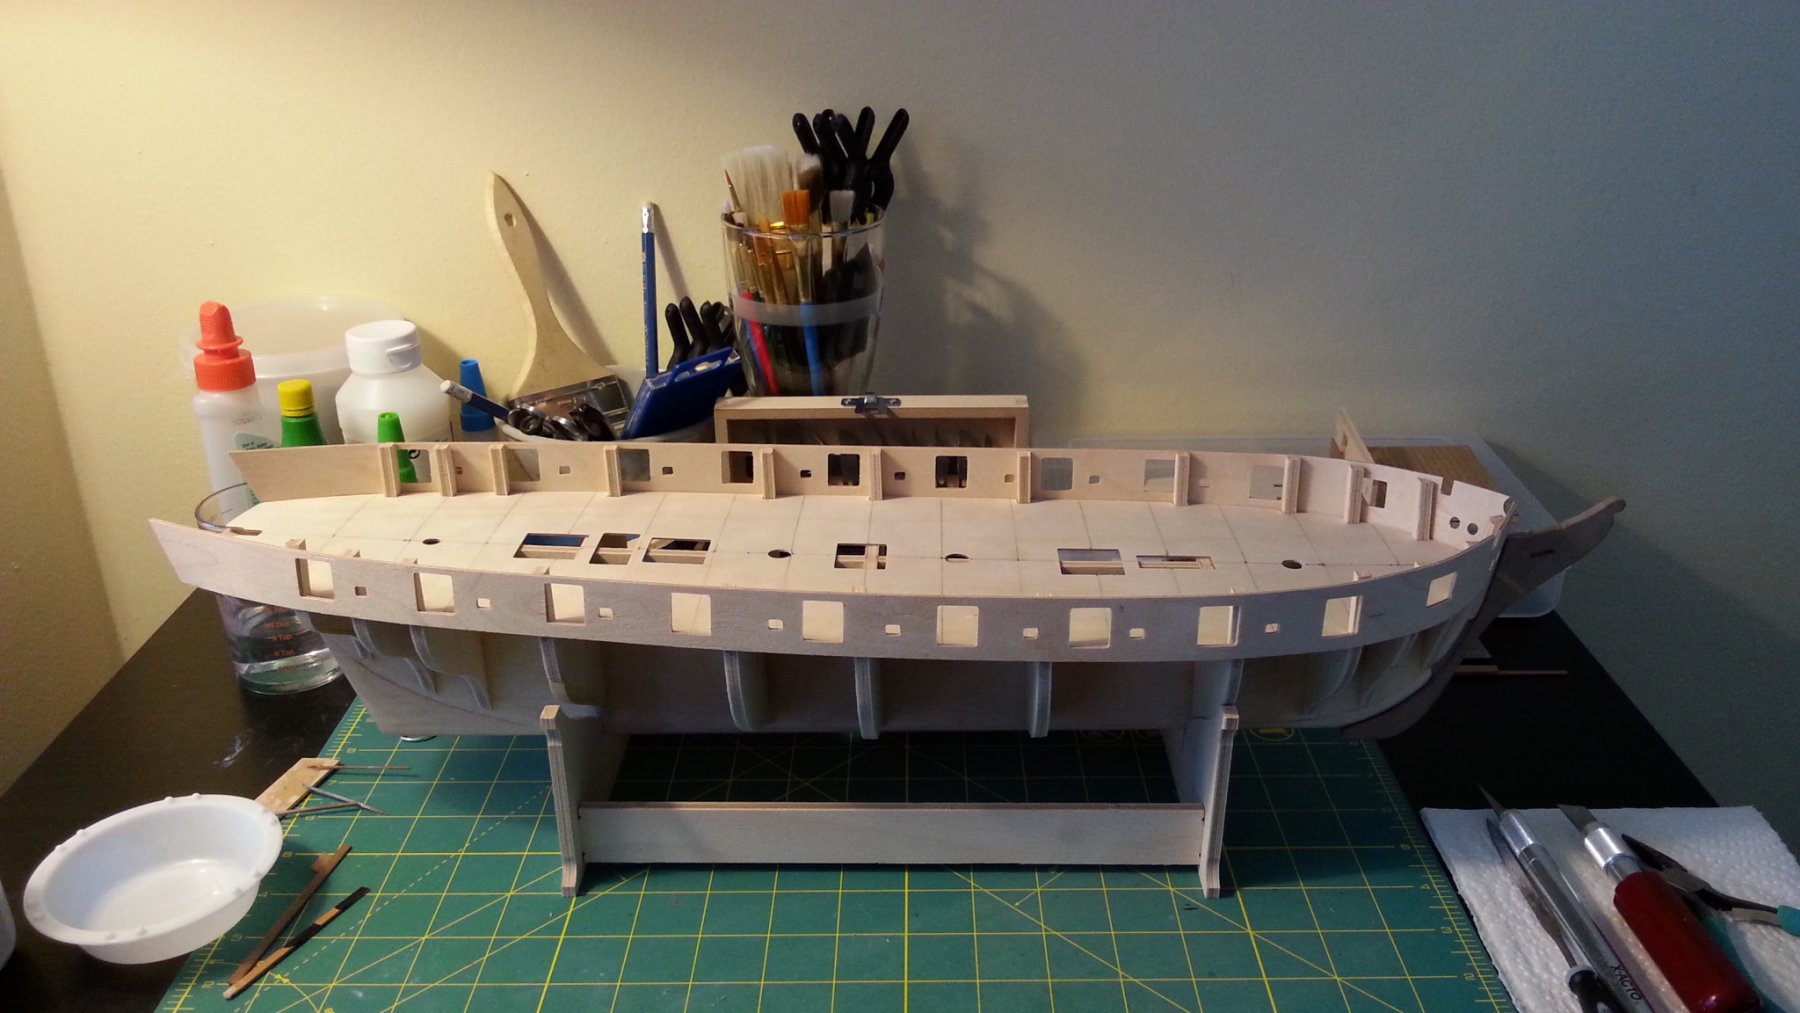
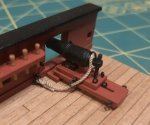
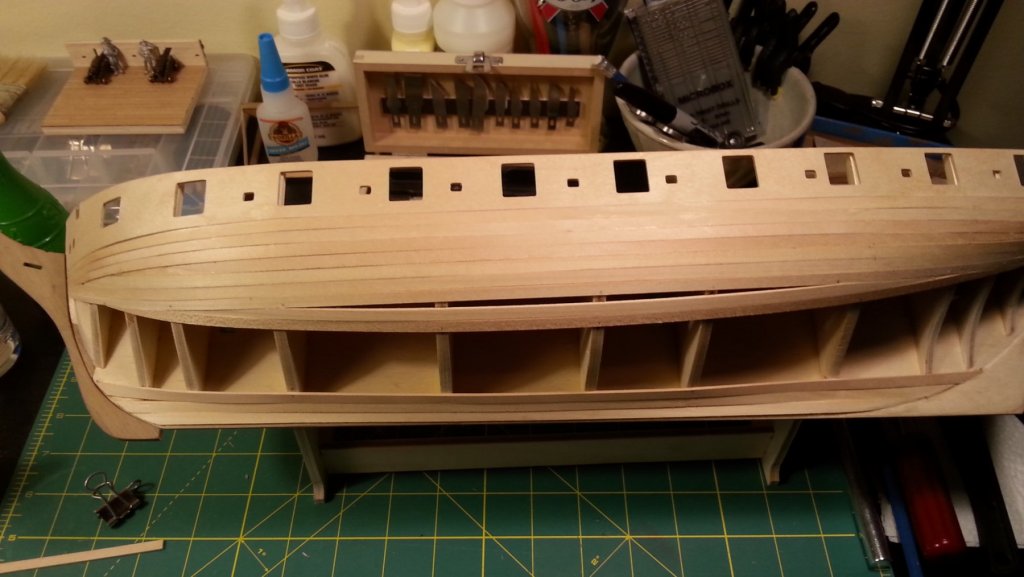
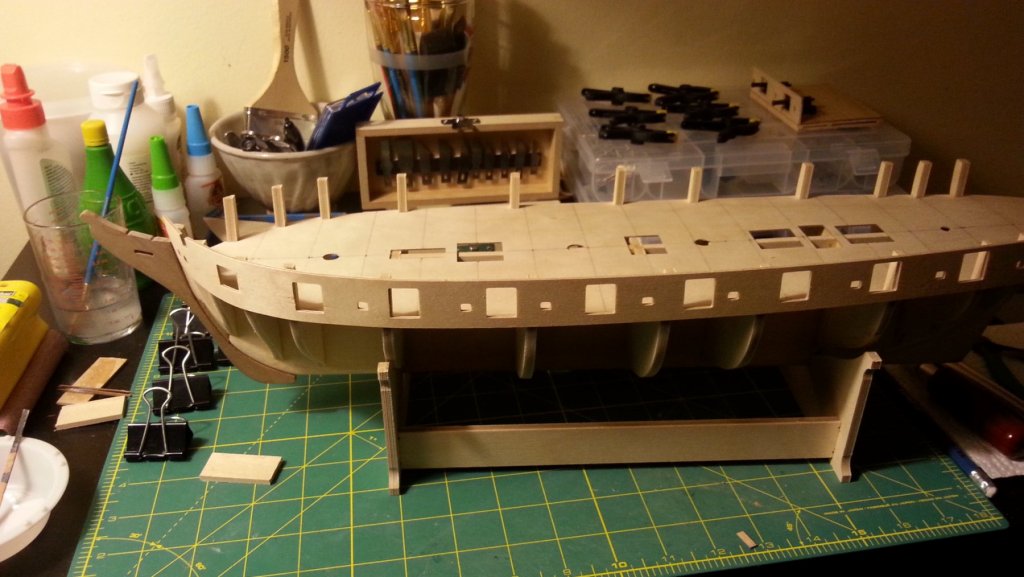
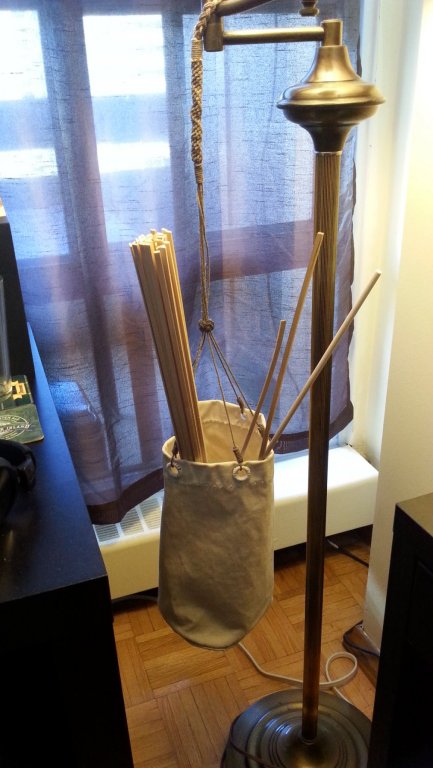
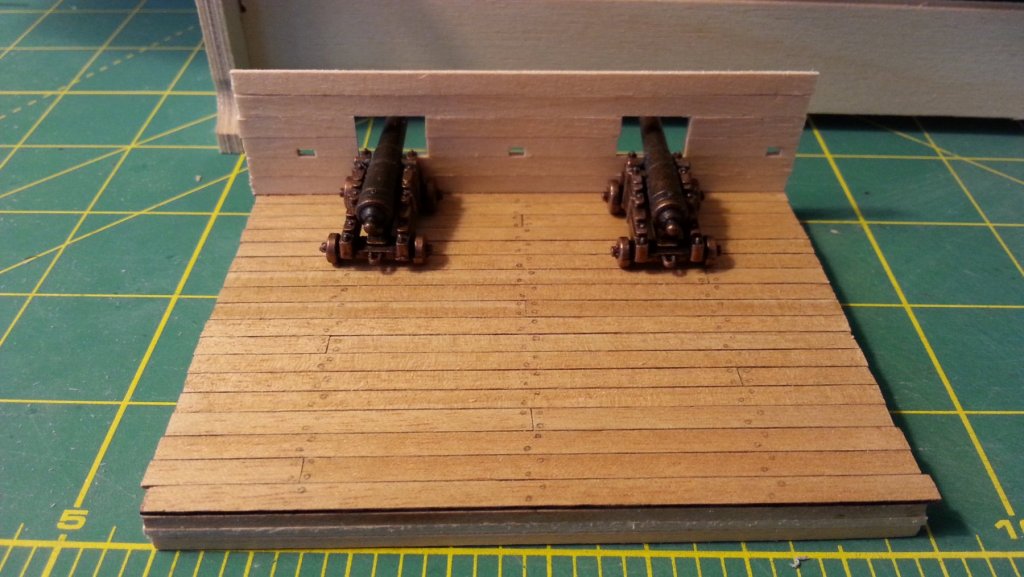
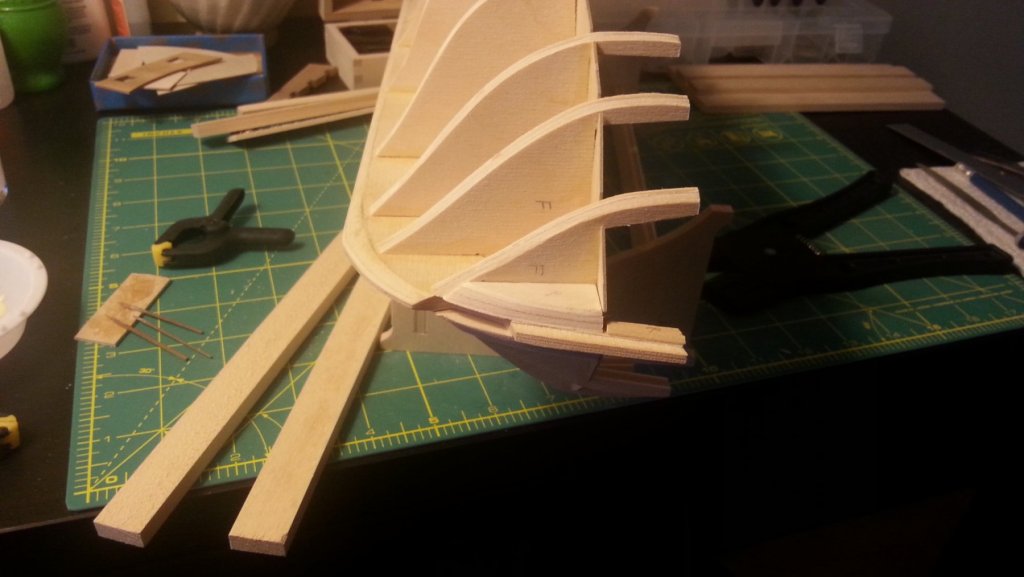
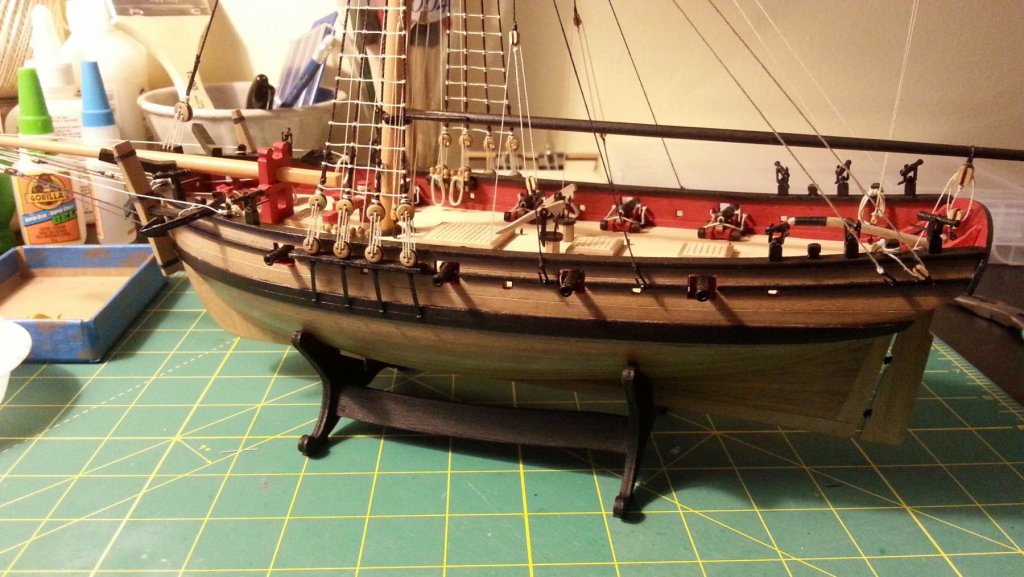
Bulwarks The bulwark strips are in place. I soaked them in warm water for 30 minutes then binder clipped the bow ends to a bowl and left overnight. The next day they fit on with very little bending. Instead of lathering glue all over them and attaching them in a rush I took a slower approach. I took my time and got all of the gun ports where I wanted and the bow fitted just right then I brushed wood glue along the critical areas. It seems to be quite strong for now at least. One side at a time. It was easier this way for sure, I could also match the next strip in shape. My Sherbourne's Bow was lopsided because I rushed... Both strips on and trying out the bow and stern platforms. I'm making a deck section of the ship for trying out varnish and paint. I tried some penciled on treenails, It looks awful up close but at a distance it looks ok. I may work on some jig for nicely aligned nailing. The cannons are from my first failure/unfinished disaster the Amati Adventure. I will be using it for setting up my Carronades before they are installed on-board the Snake. I'm using my sailors Ditty bag for holding planks and the like. I've been told it was made from sail canvas, it is really stiff and durable.

-
HMS Snake by BenD - Caldercraft - 1:64
BenD replied to BenD's topic in - Kit build logs for subjects built from 1751 - 1800
Thanks Jim! I've found a few builds in the site, Yours is on my list. I have yet to hit a real snag where I need advice, but this is definitely a more complex build. Questions will be coming at some point. -
That is a nice Cutter and no doubt about it! Bloody good work
-
HMS Snake by BenD - Caldercraft - 1:64
BenD replied to BenD's topic in - Kit build logs for subjects built from 1751 - 1800
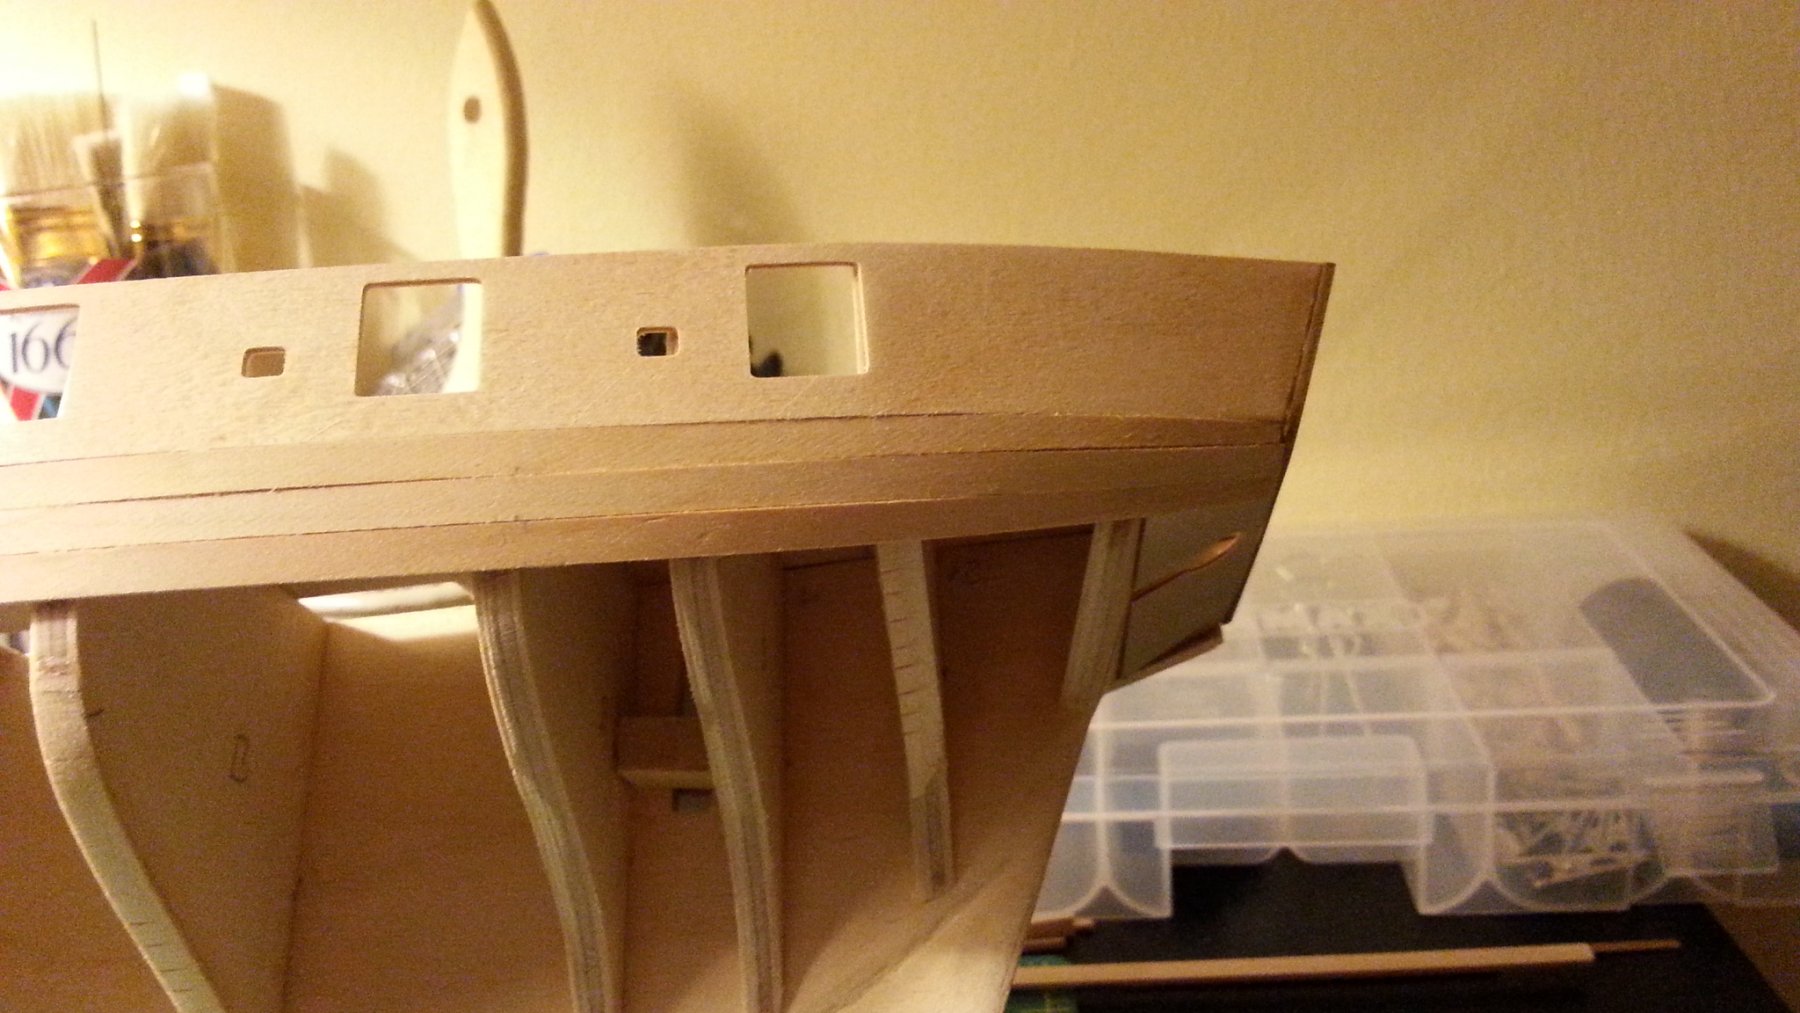
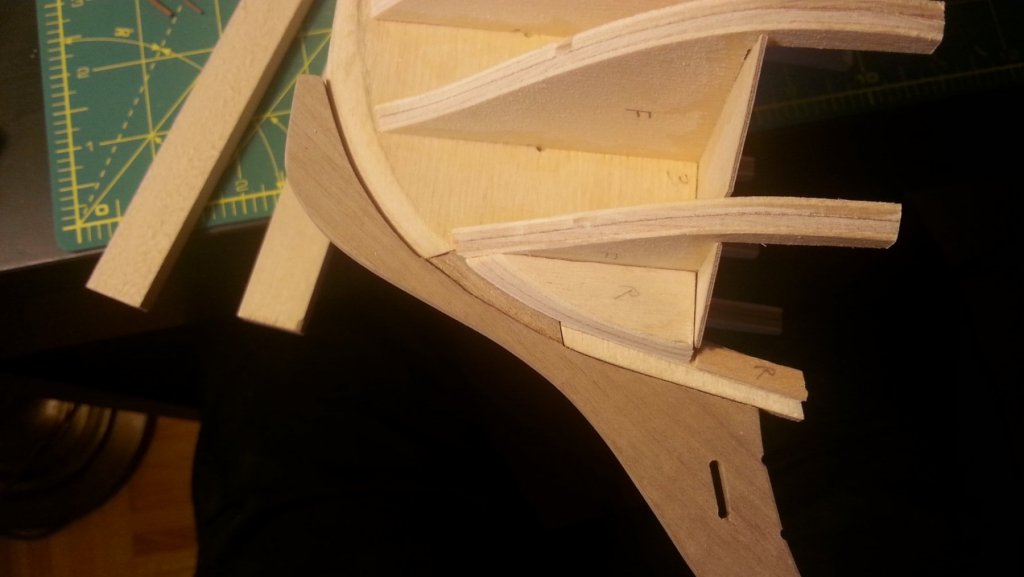
I had to add shims on bulkhead No9, both sides again so at least it wasn't because I glued it on crooked. I was fairing down the bulkheads for hours and no mater what way I ran the planks in this area had a dip so I raised it. I would hate to have a lumpy misshapen hull on my hands. I might skip using filler blocks at the bow and stern because every time I run the planks over the bulkheads it feels like it's taking the proper shape. The bulkheads are 5mm wide and the lime wood planks are 1.5mm thick, feels pretty solid to me.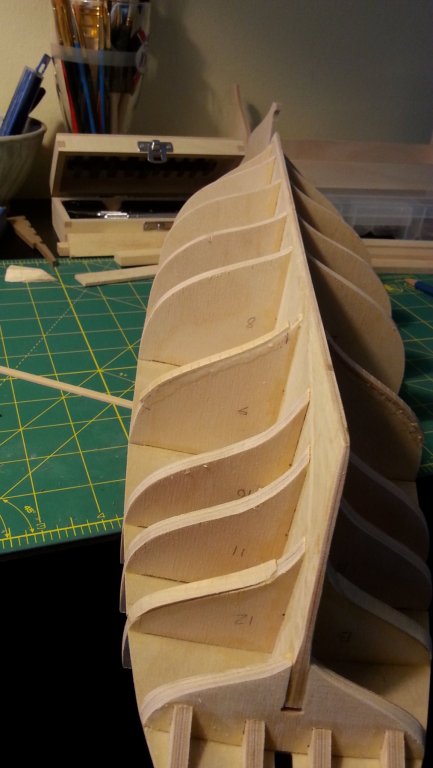
-
HMS Snake by BenD - Caldercraft - 1:64
BenD replied to BenD's topic in - Kit build logs for subjects built from 1751 - 1800
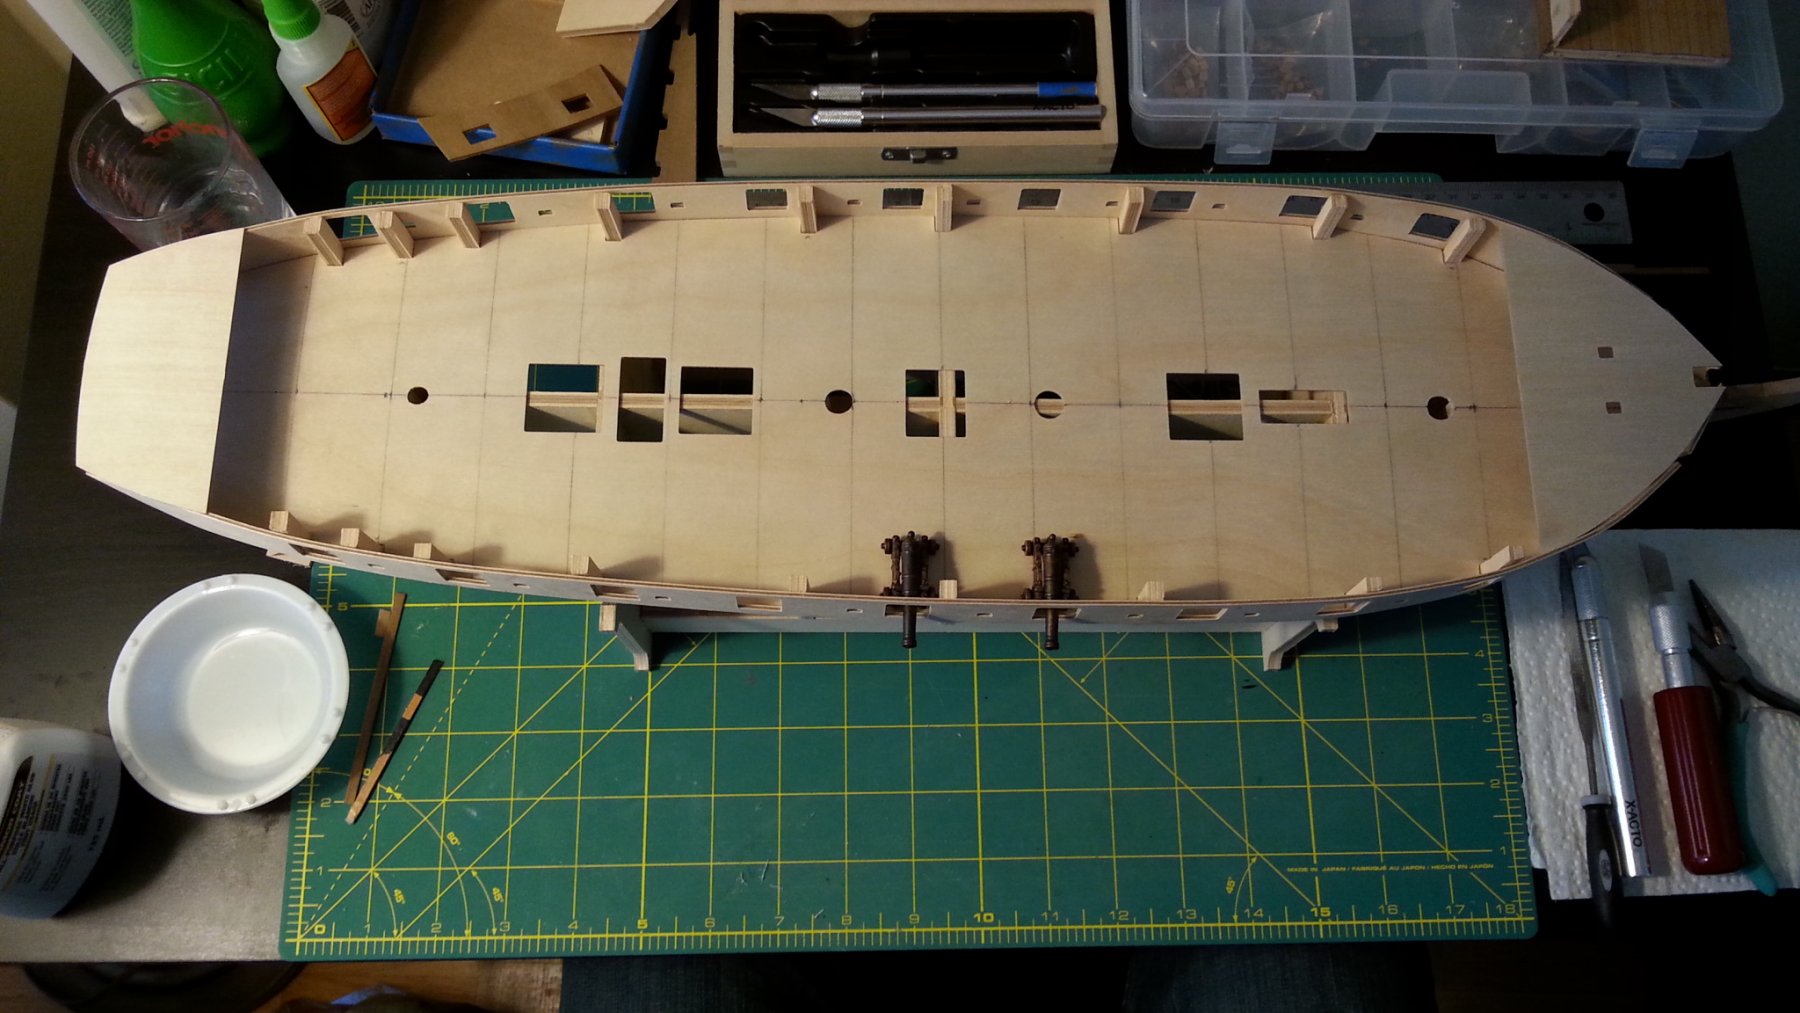
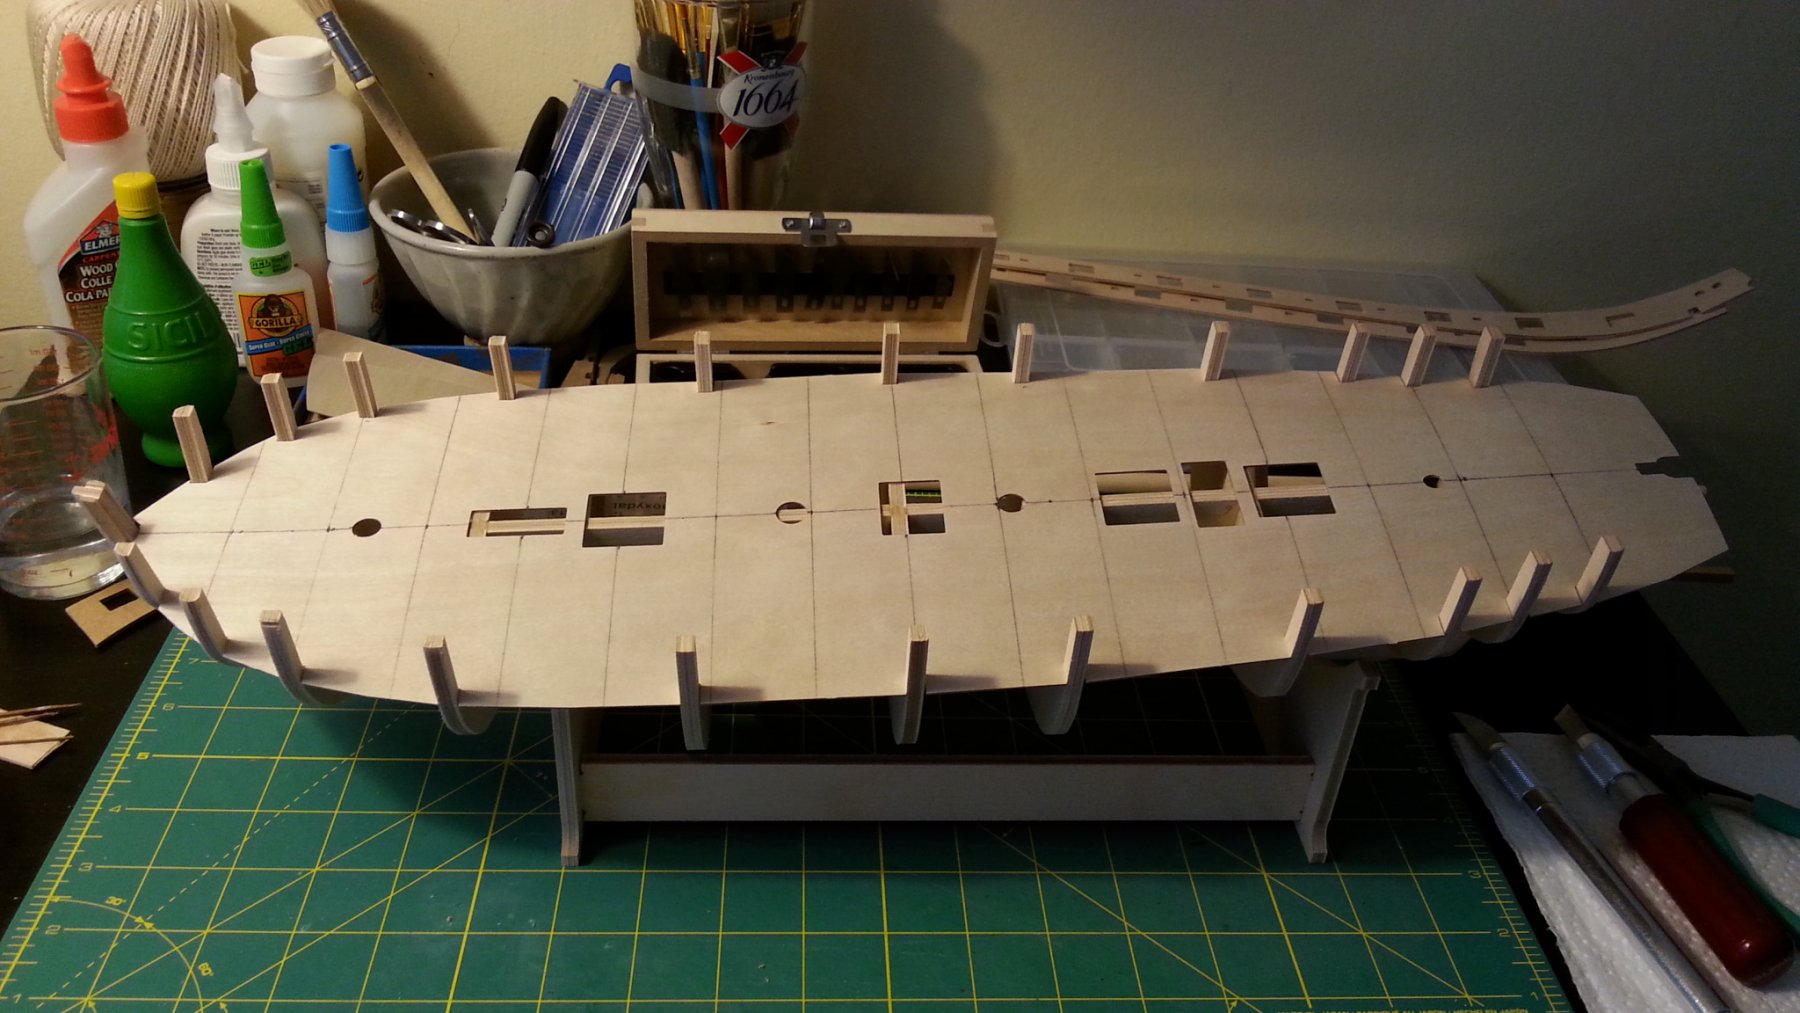
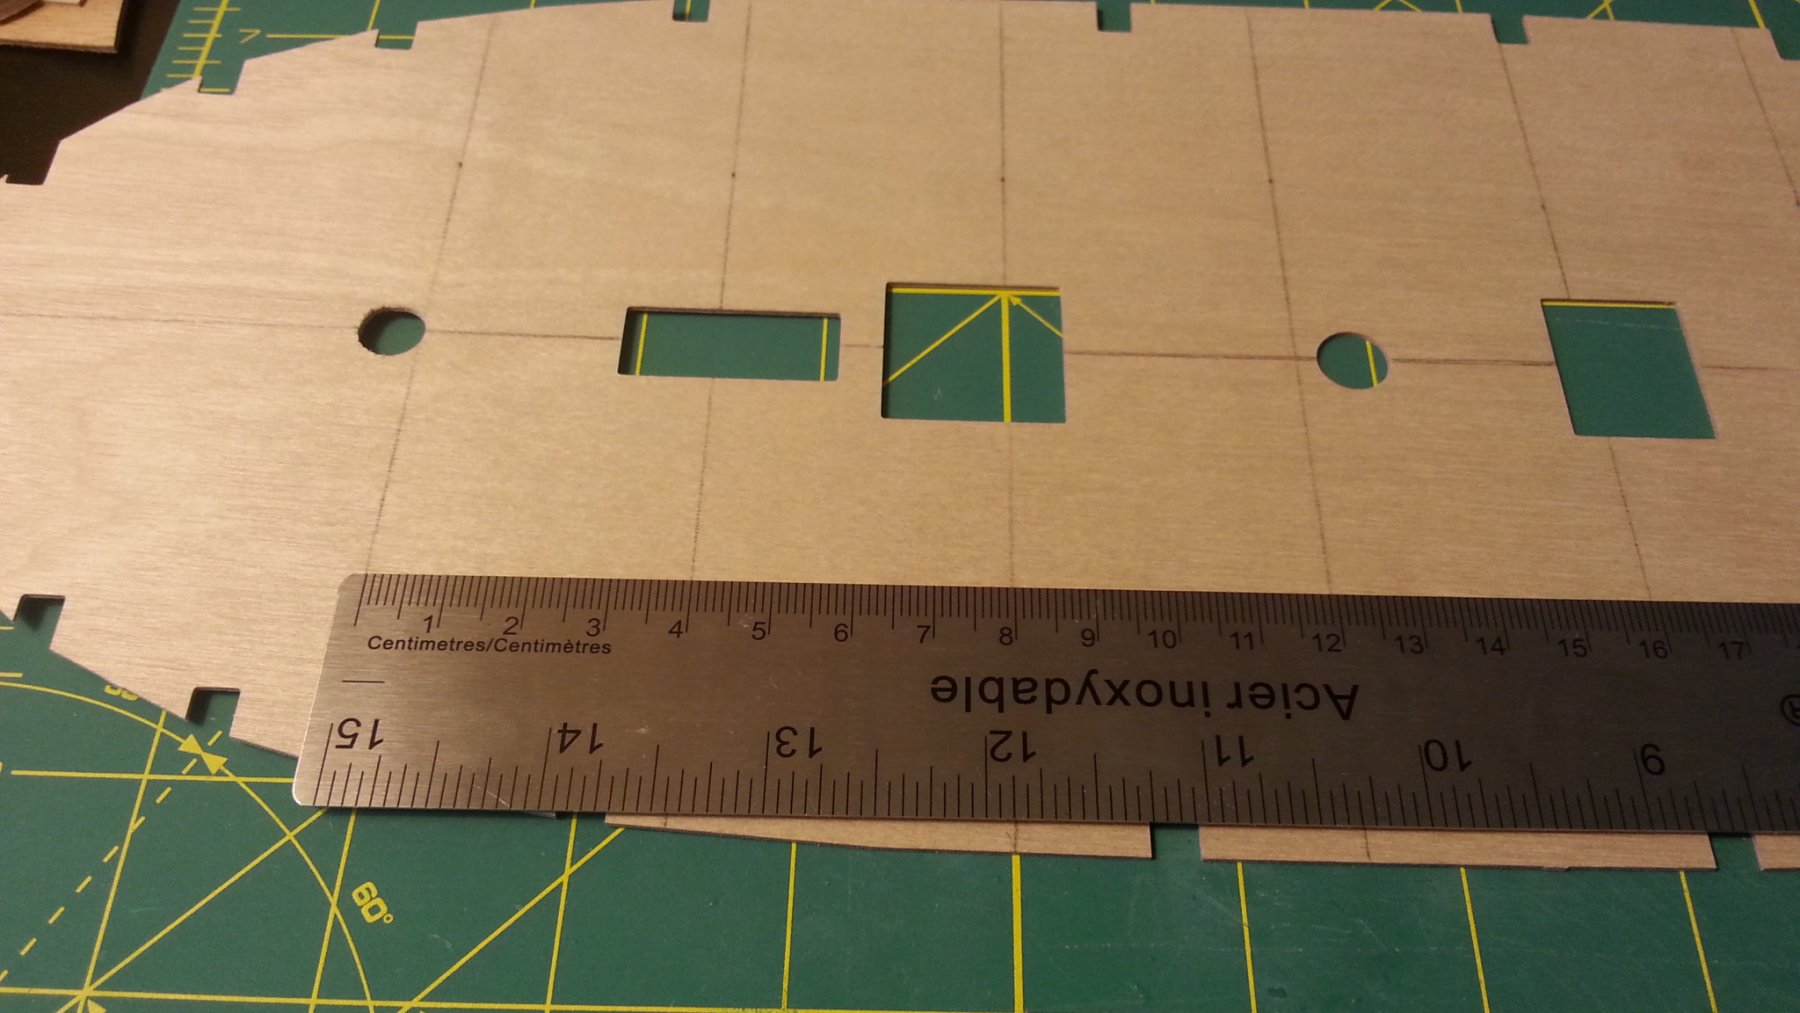
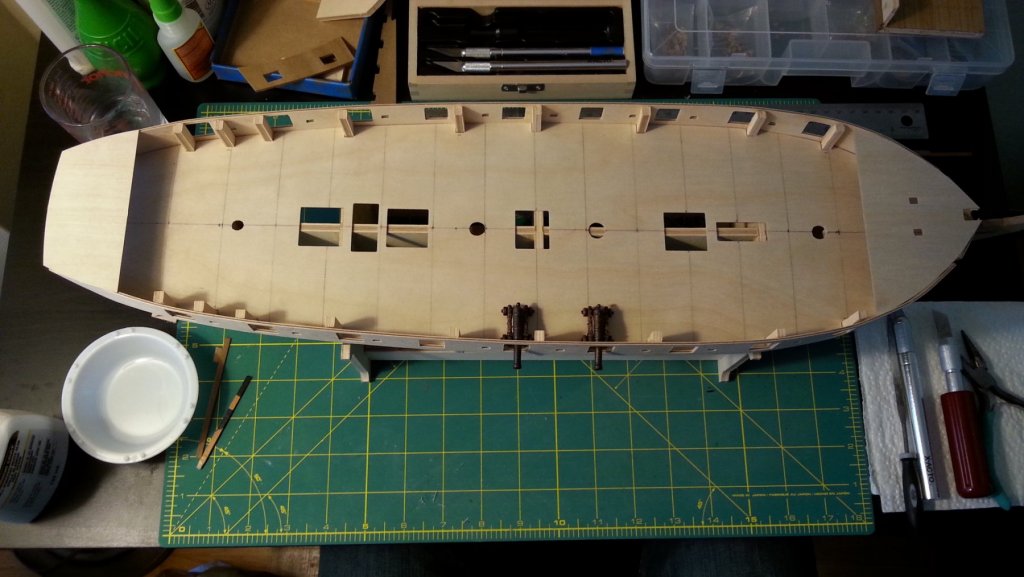
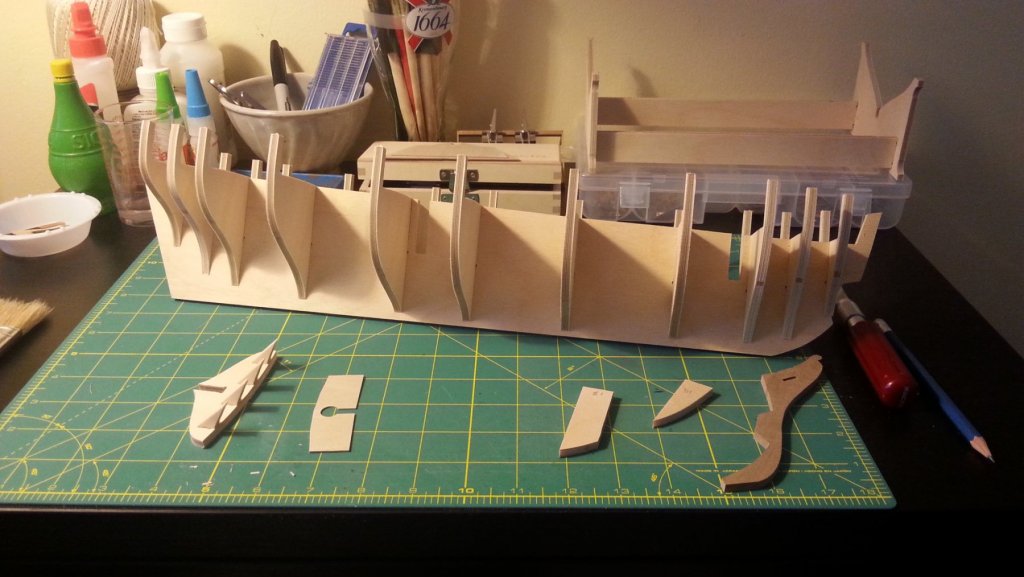
Deck plan finalized After looking over the snake plans and a few other brig deck plans it seems the beams were not equally spaced apart. For sanity sake I just chose to have 3cm spacing with a four butt planking layout so I can cut 15cm planks. some day when I'm scratch building I'll go all the way I promise. Chamfering I started fairing the bulkheads and I've found some spots that need shims. I'm going to take my time and make sure I have a nice run for every plank. You can see that No13 bulkhead was raised 1.5mm to fit properly and No12 still needs the shims. interesting. The plan is to fill in the first two bulkheads with basswood but without power tools it will be a lot of work. You can see where I added some lime wood strip on the top of the keel to aid positioning of the bulwark strips. It can come off after second planking if it gets in the way. Lots of sanding to be done!

-
It looks good to me. Not worth going all out just to cover it up later with copper plates/tape.
-
Ken, This is bloody fantastic! I think you sold me on chucks Rigging line and blocks, definitely going to look into that. Also I'm going to try furled sails like that on my HMS Snake for sure. I could only hope to build like this one day.
- 481 replies
-
- 2
-

-
- rattlesnake
- model shipways
- (and 1 more)
-
HMS Snake by BenD - Caldercraft - 1:64
BenD replied to BenD's topic in - Kit build logs for subjects built from 1751 - 1800
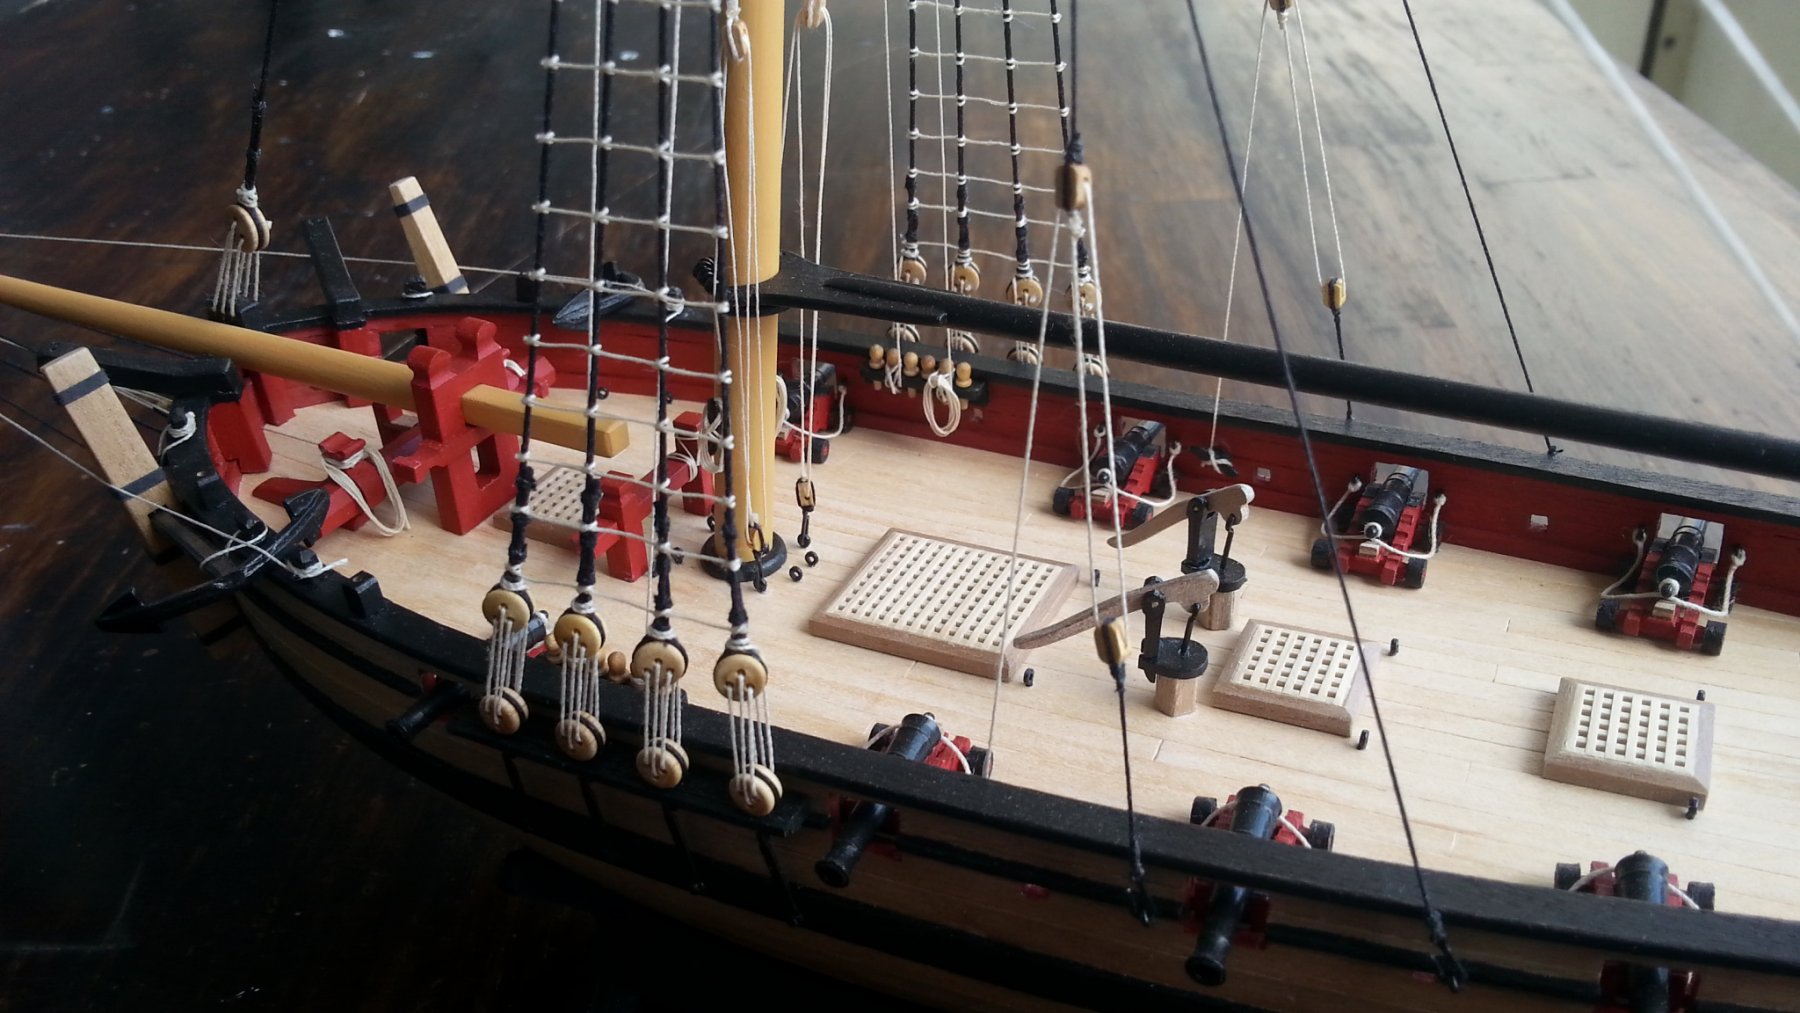
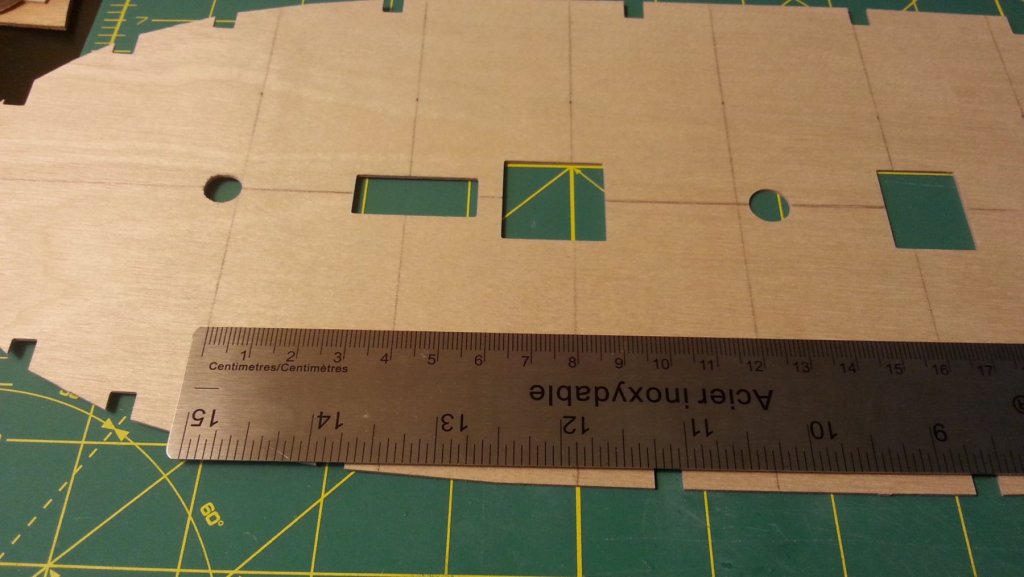
I have seem to come to a halt with planing out my deck. I have checked the Plans for the Snake (1798) on the Royal Museums Greenwich website and see that I might have made a mistake. On the plans highlighted in red are I think the crossbeams for supporting the deck, Correct me if I'm wrong. This is where the deck would end up butting and have treenailing. I counted 22, wouldn't that make the deck on a model look strange and a bit crowded? What I did originally was just picked a spot and measured every 4cm and put a line. Don't know what to do now...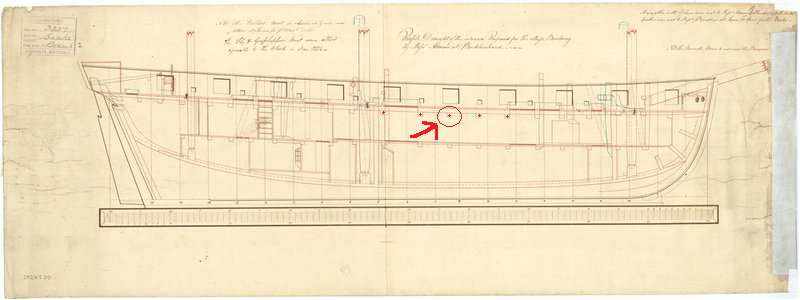
-
HMS Snake by BenD - Caldercraft - 1:64
BenD replied to BenD's topic in - Kit build logs for subjects built from 1751 - 1800
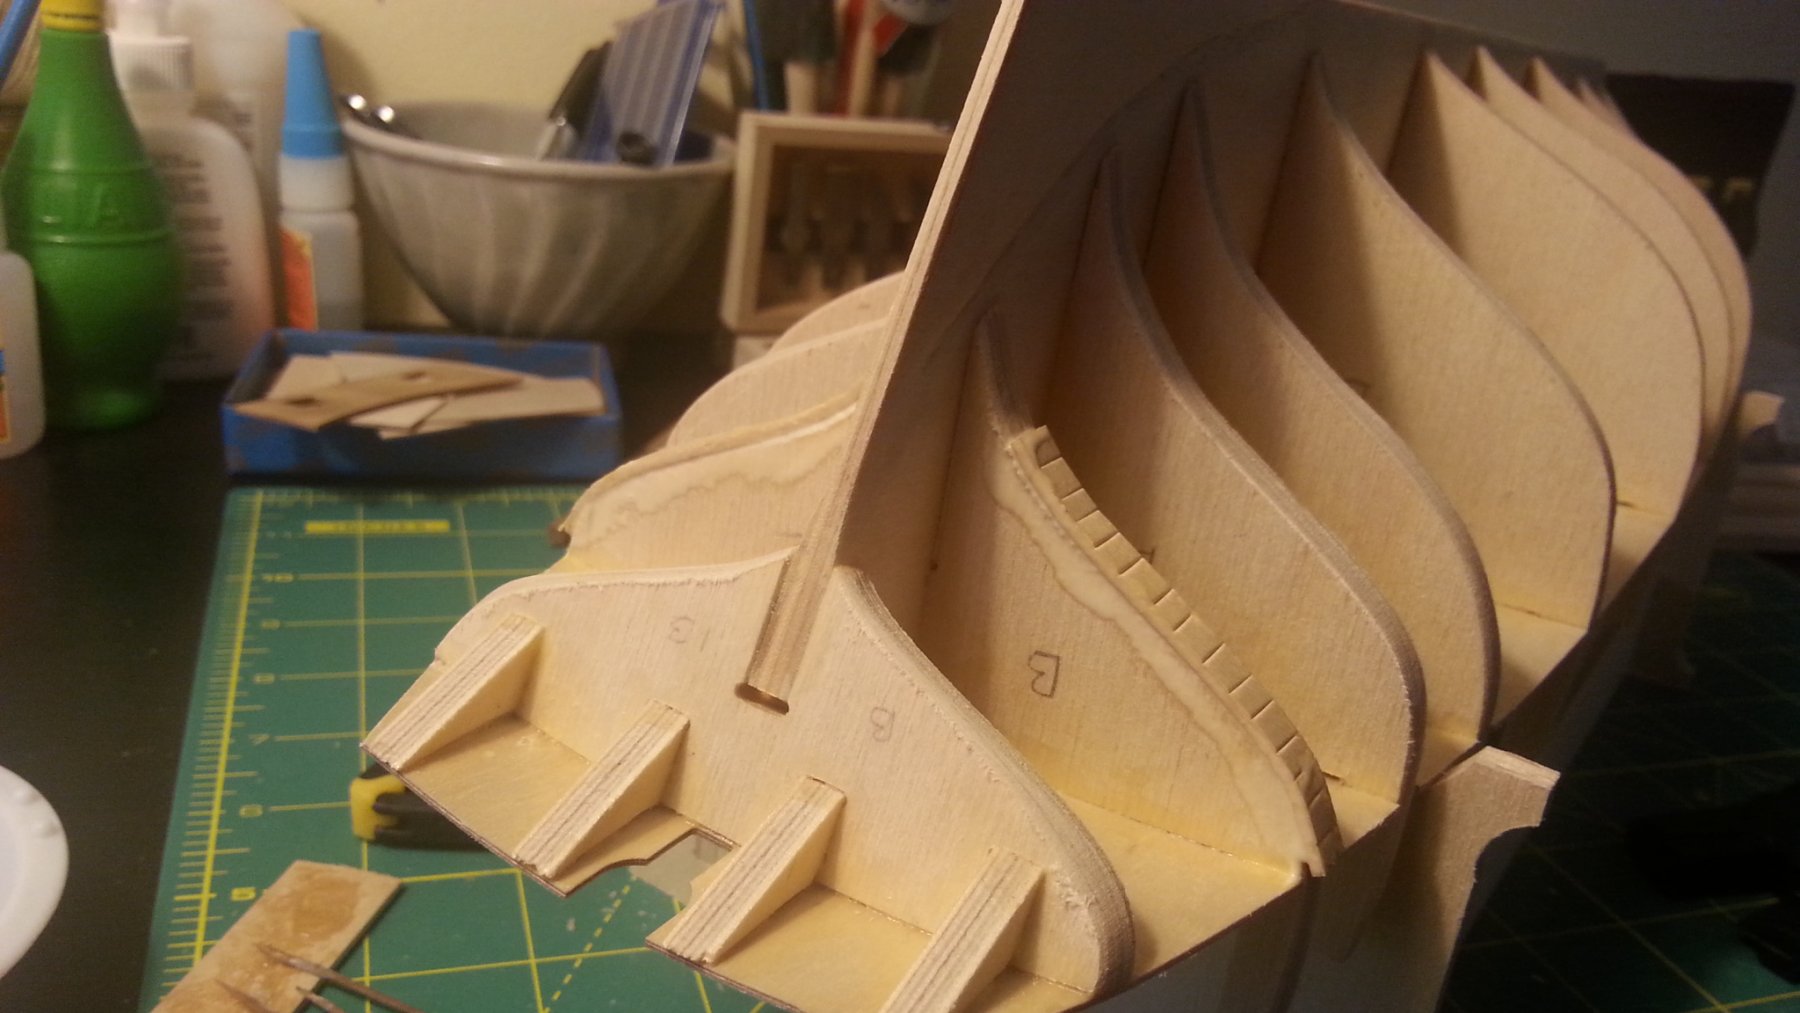
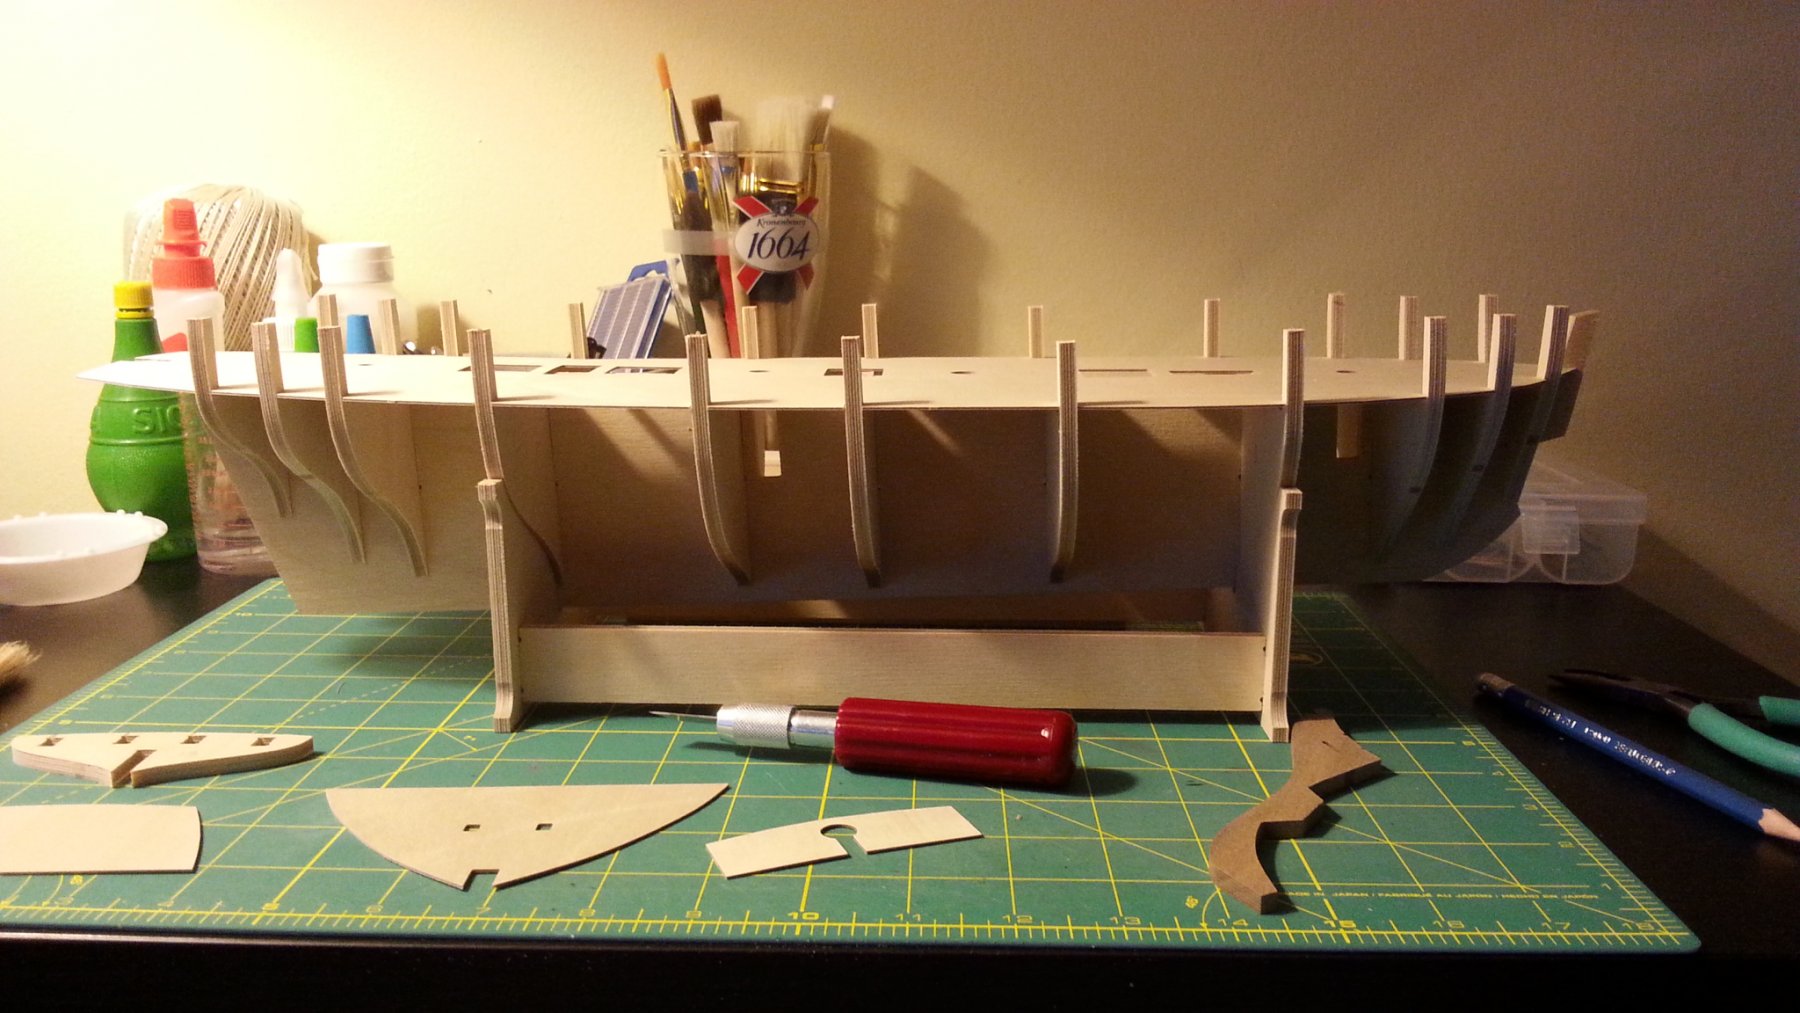
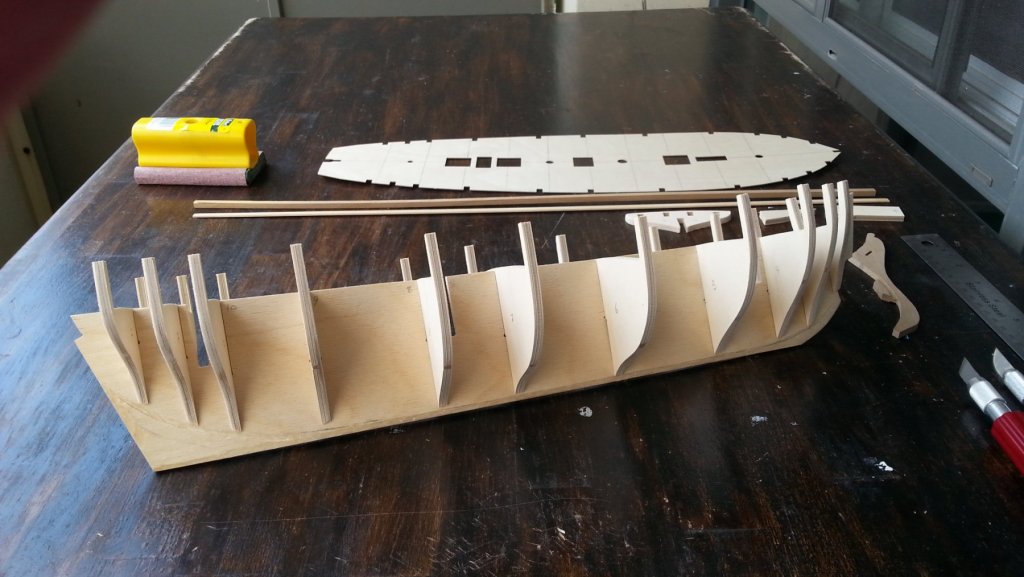
It Begins With my Sherbourne finished and out of the way I begin The Snake with some confidence. With some experience in the craft I hope to build up to the standards of the other Snake builders on this site. The bulkheads fit very well right out of the ply sheet. The plywood is really hard and surprisingly heavy, Feels like quality stuff right there! After dry fitting the deck I realized how large this ship really is going to be, My desk is almost to small. I'm also looking into getting a better light source. As you can see this monster is casting a huge shadow. Here is my outdoor/balcony work space that has plenty of light. It also is a good place for sanding and generally keeping the wood dust and shavings outside. Here I'm carving the rabbet and Bearding lines into the keel. The plans don't show this at all but I suppose in the end there will be lots of copper plates and paint covering these areas, Still I'm going to do it.
-
Thanks Sjors! Your HMS Agememnon was amazing. It's on my someday list and I hope to make one of similar beauty.
- 49 replies
-
- 1
-
-
- sherbourne
- caldercraft
- (and 1 more)
-
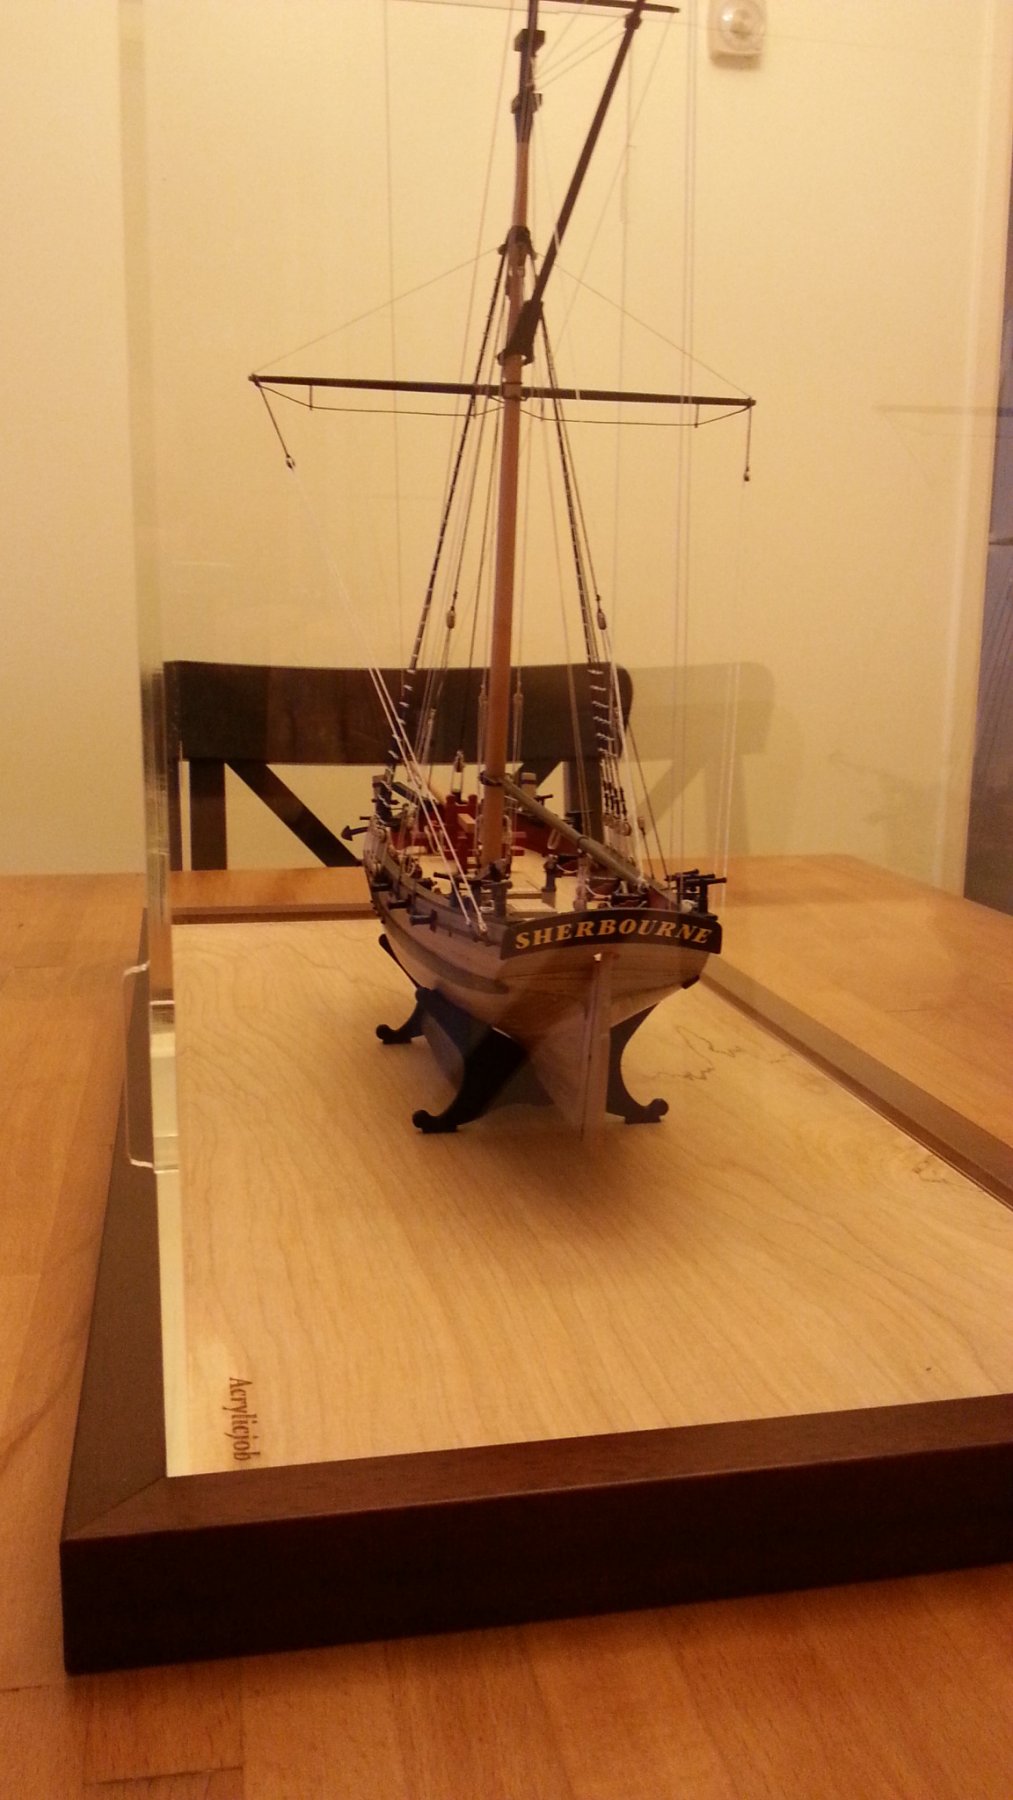
Hey GrantGooddale the base came with it, It is solid and really nice. I just checked there site and it gave me a quote of $170 US for your dimensions. Here is the link to the site https://www.acrylicjob.com/custom-order
-
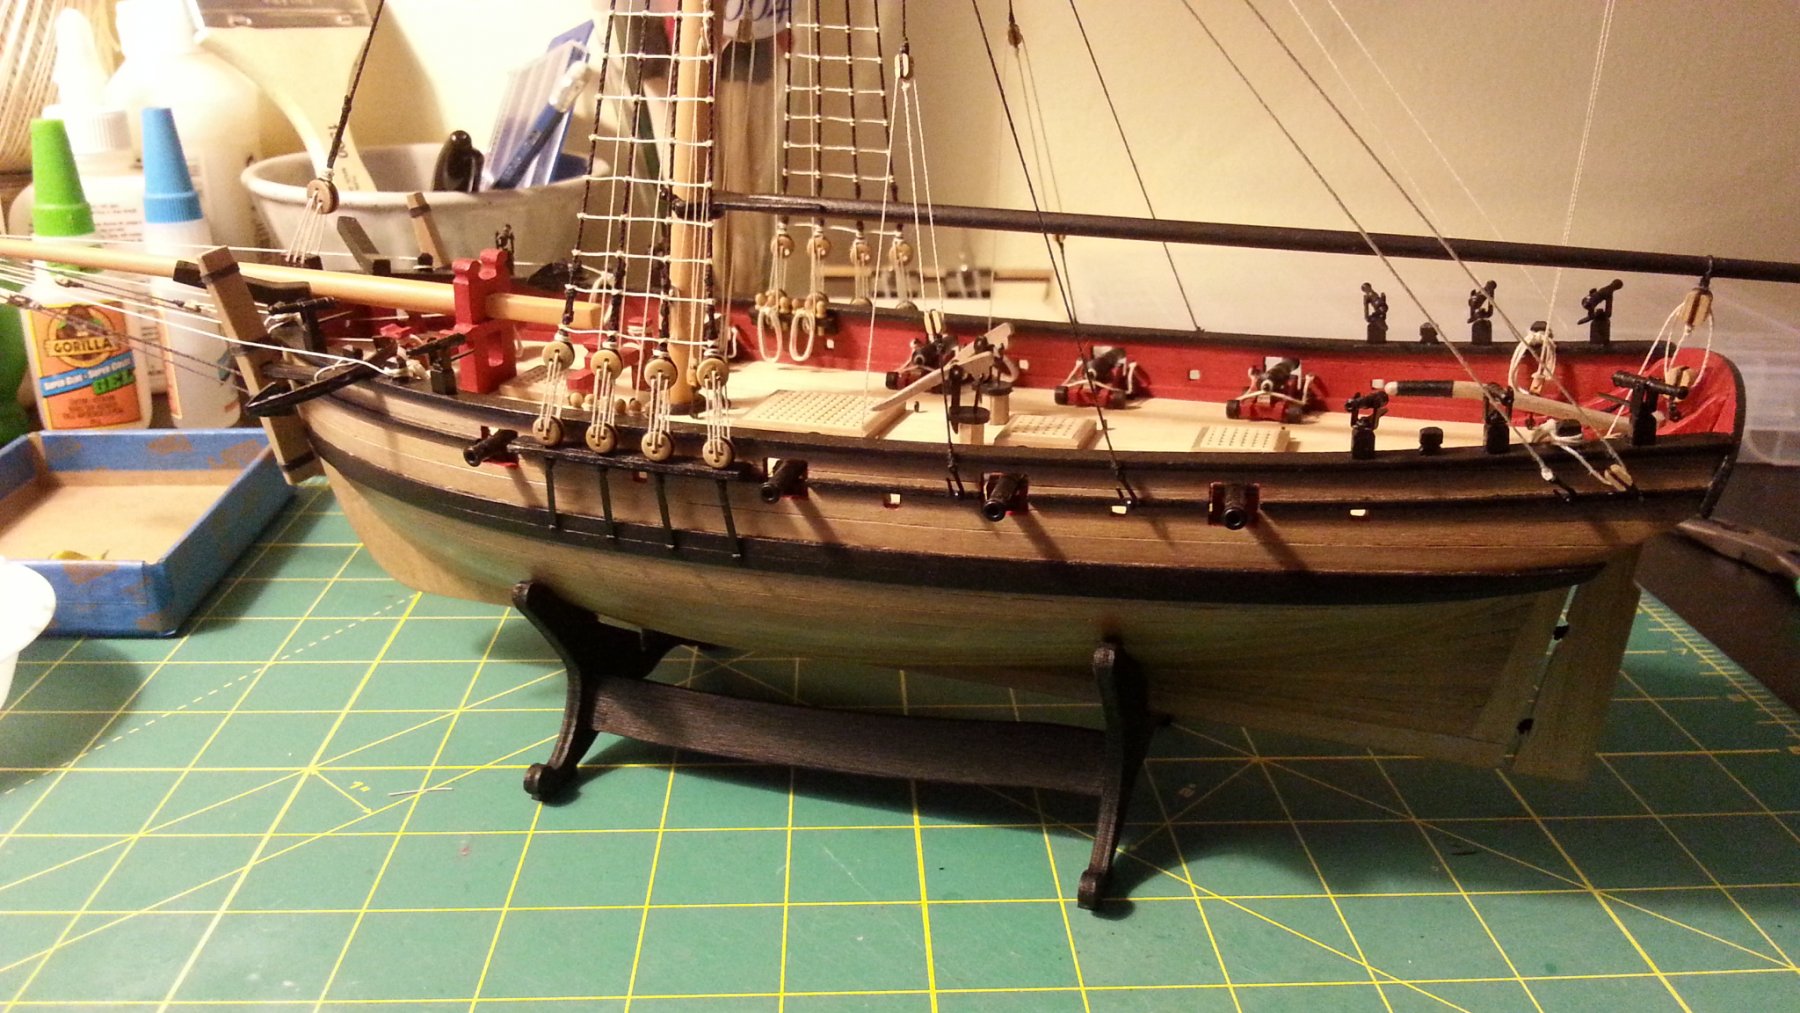
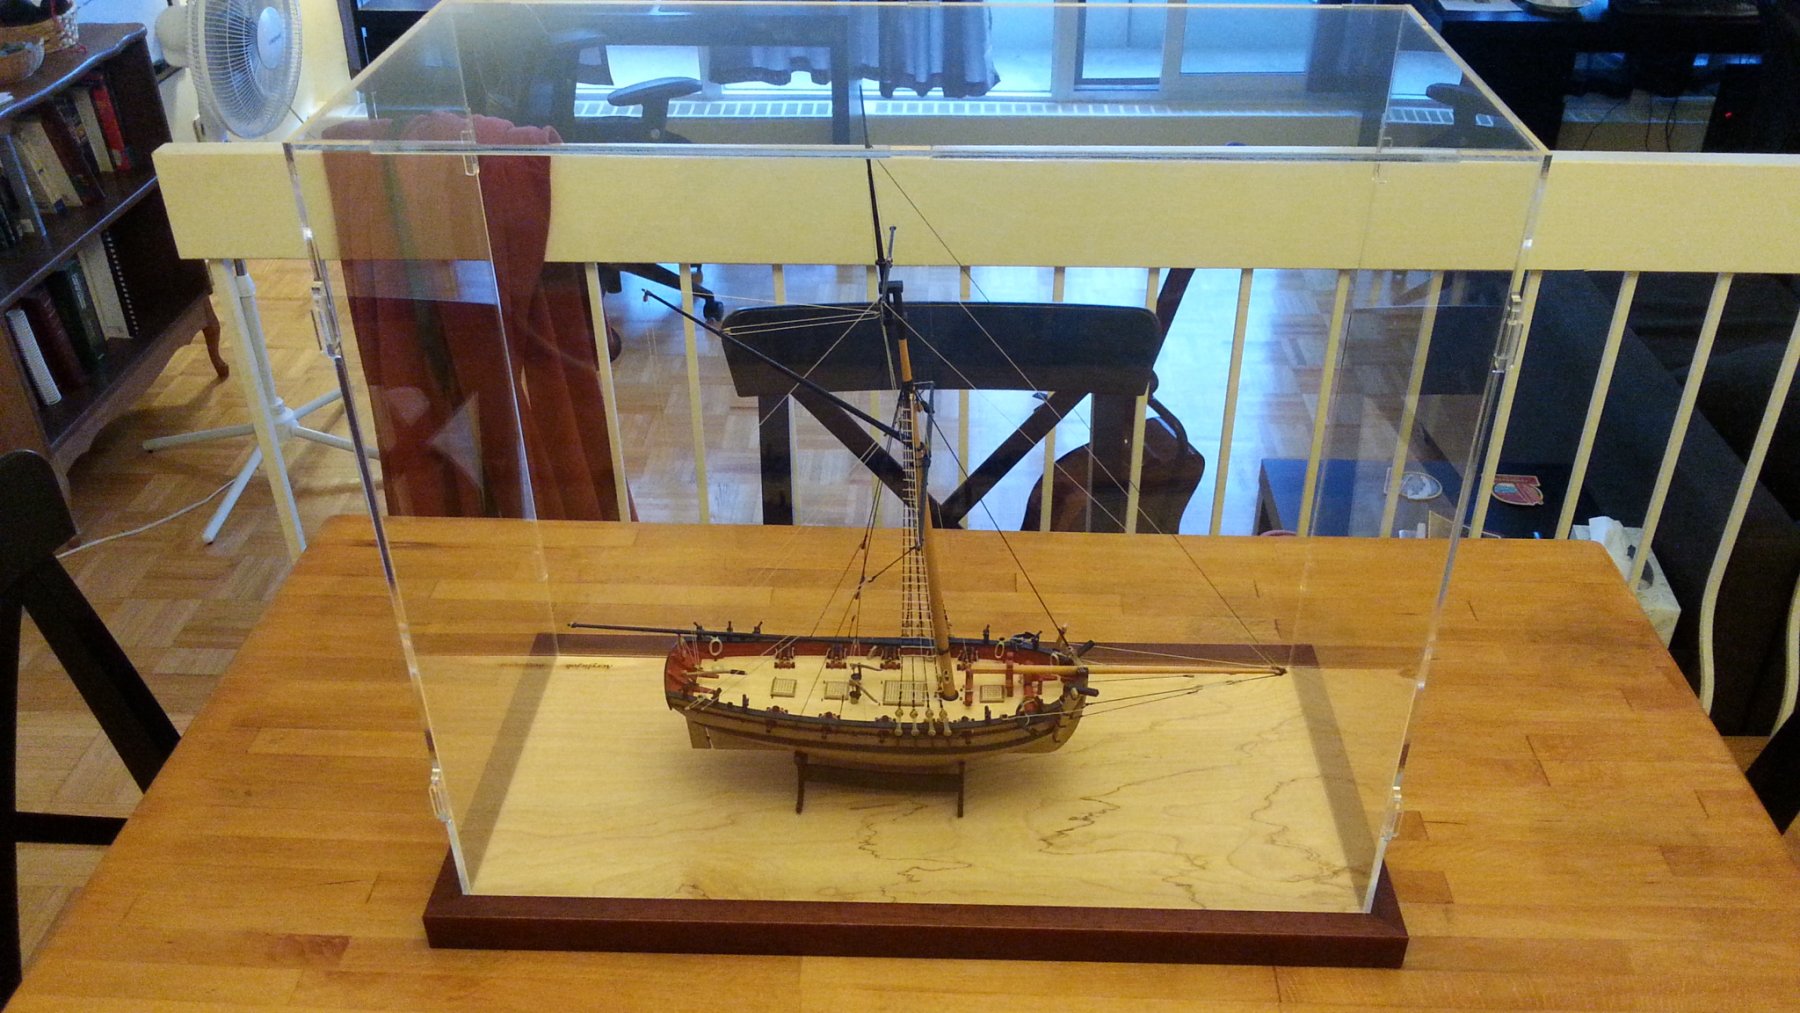
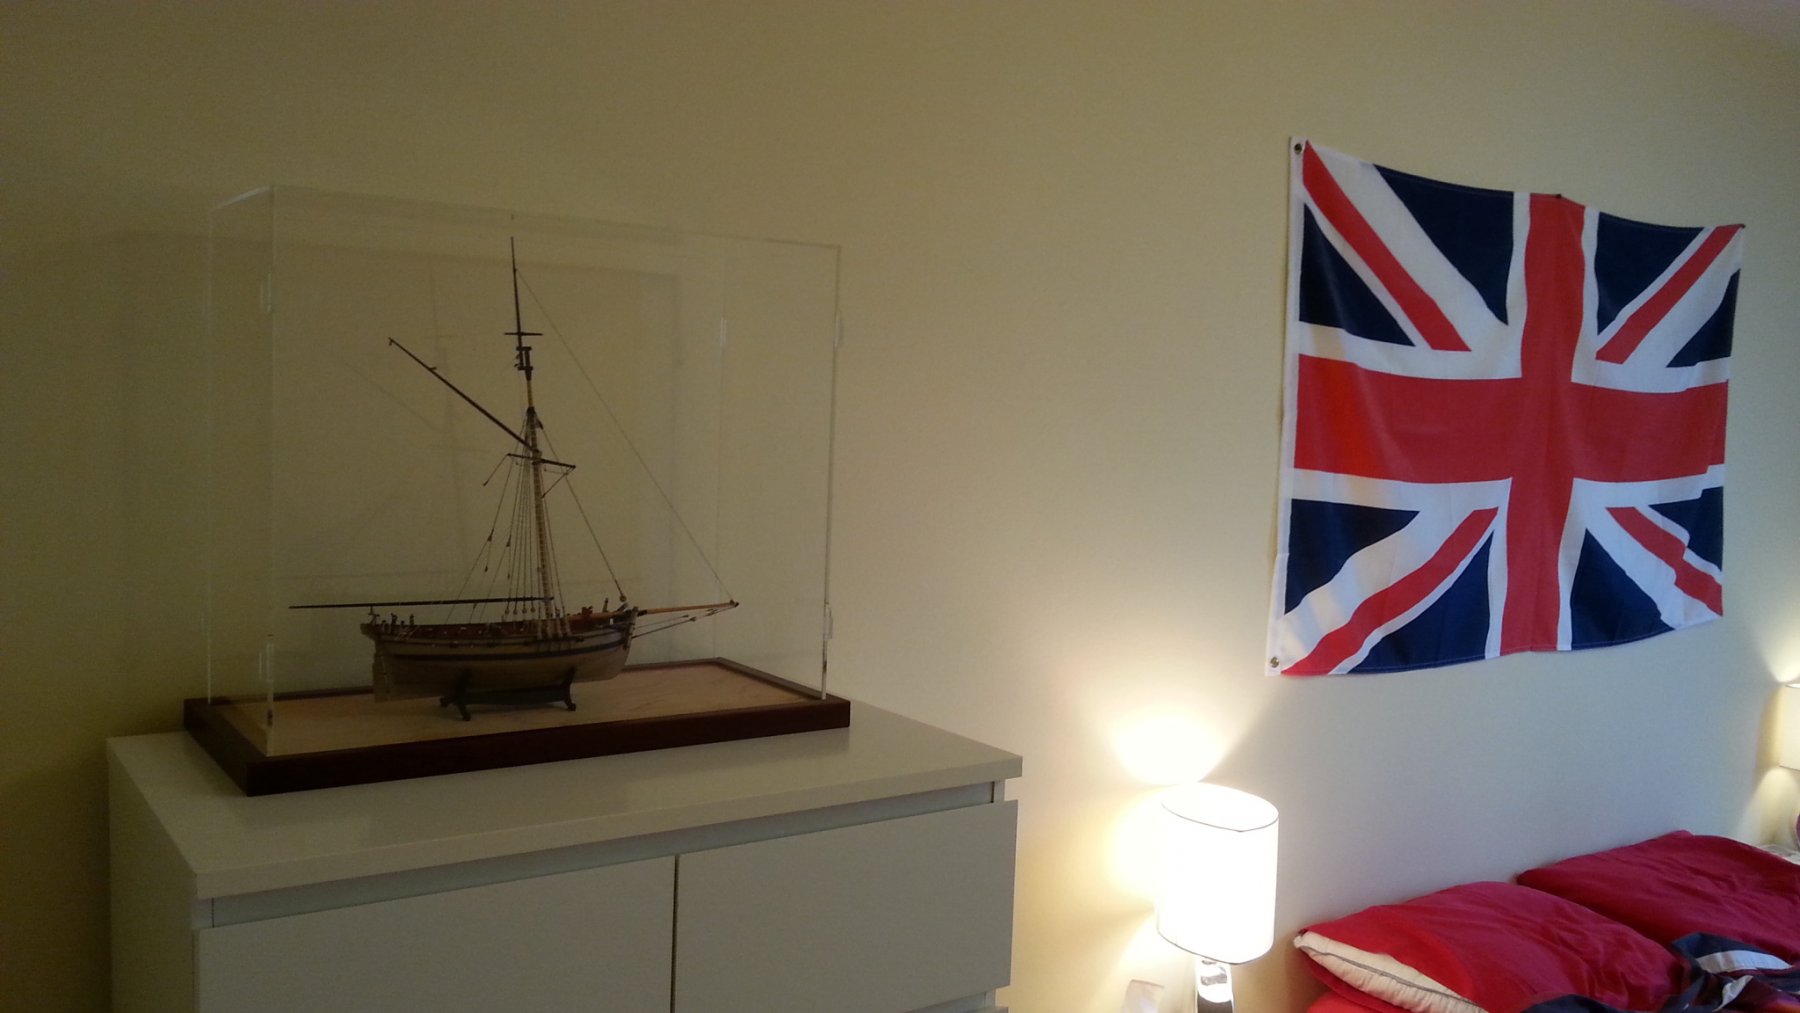
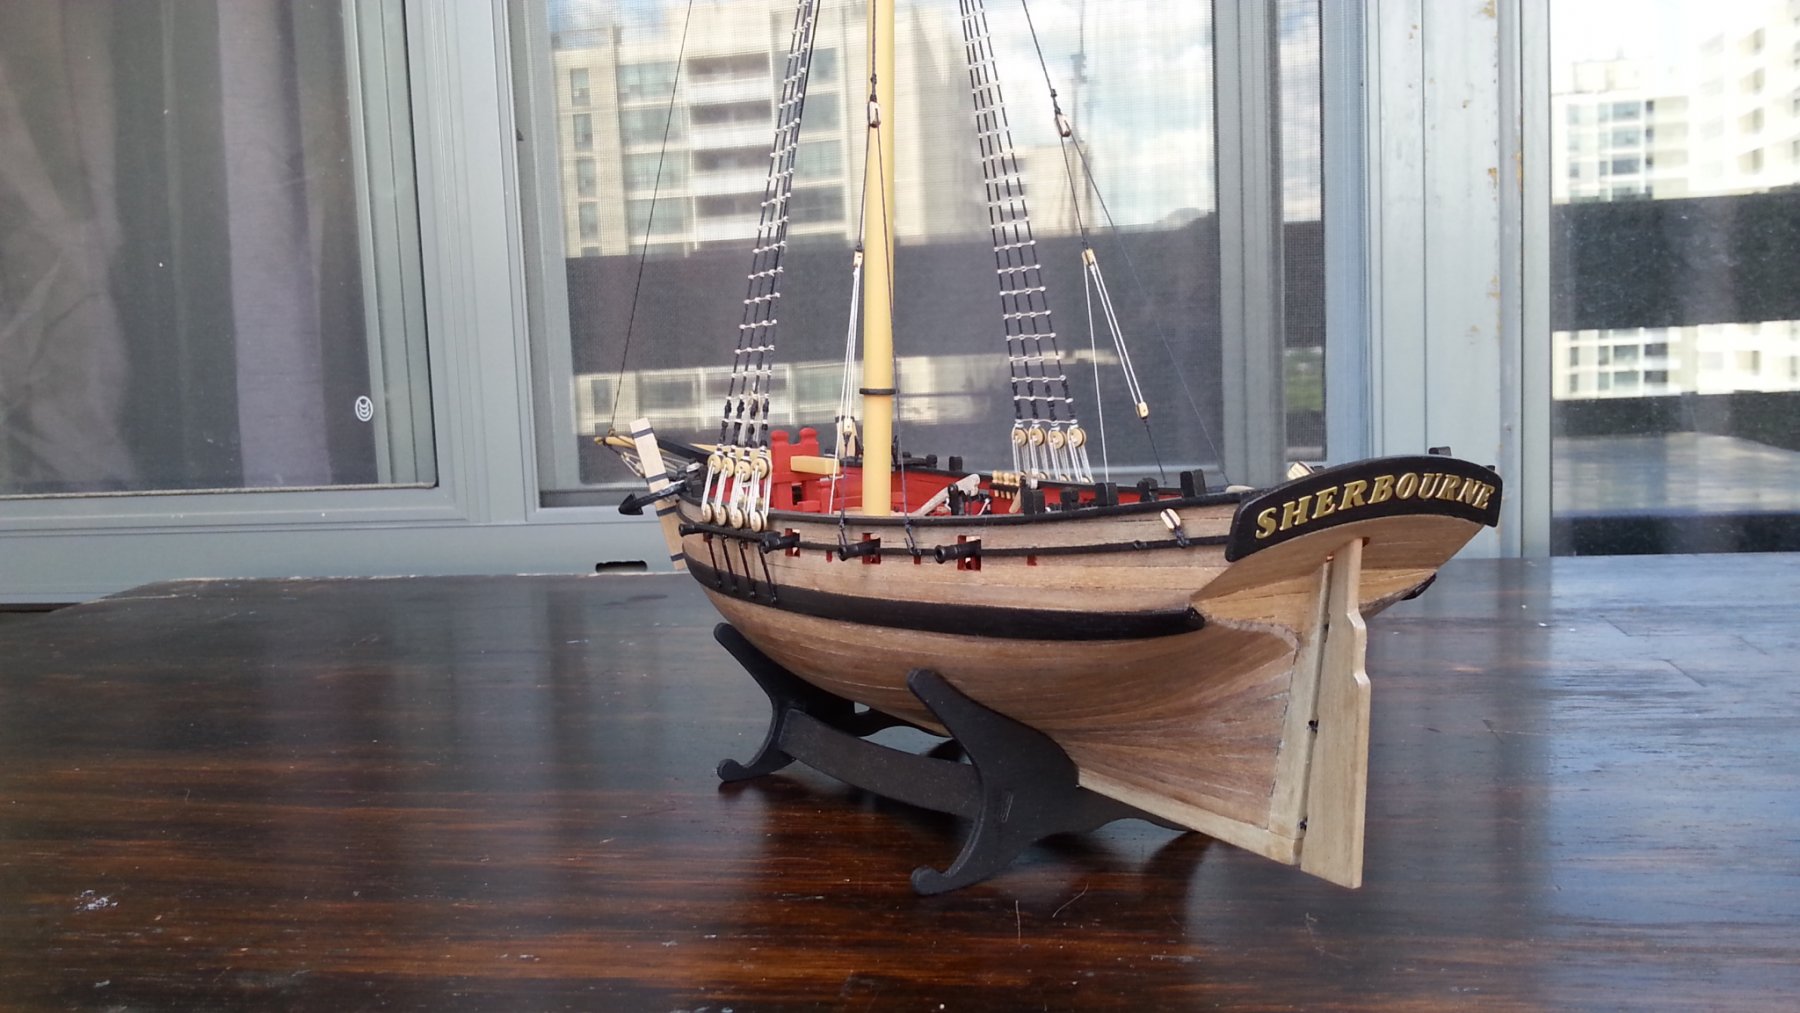
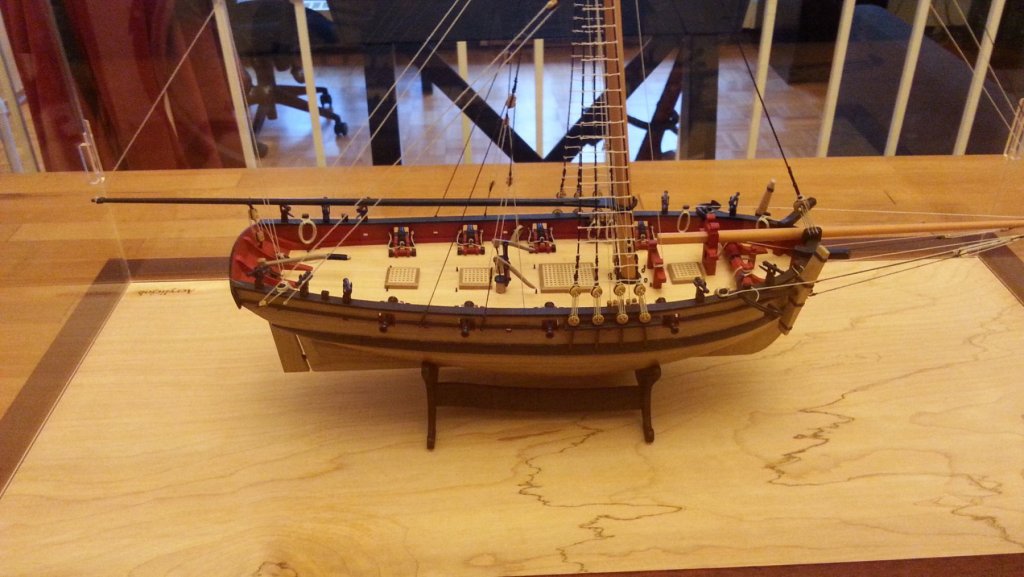
Finished ! The final moments on the desk. That's it she's done! Display Case I decided to buy a case instead of making one, mainly because what I was planing to make was going to be around the same price. This case is really nice, definitely worth the price of $250 CAD. It is from a company called AcrylicJob, they do custom cases of almost any size with plexiglass of several thicknesses. This one is 23L x 10W x 20H. I decided to display her in the bedroom since there was nothing on top of the dresser and my Union Jack needed some support. I'm not a very good Canadian it seems.


- 49 replies
-
- 10
-
-
- sherbourne
- caldercraft
- (and 1 more)
-
This is just terrible, I'm terribly sorry to see this happen. I would be red faced and about to put a hand through the wall. Almost every Syren build has had crumbling sterns from what I've seen. Model Shipways has to do something about their materials, it's deplorable...
-
That is a brilliant Idea for treenailing, It's looks realistic I think. Though it might be hard to not smudge it afterwards. Blocks between the bulkheads is a sure way to get a straight keel and a strong hull to work with. Good stuff keep it up!
-
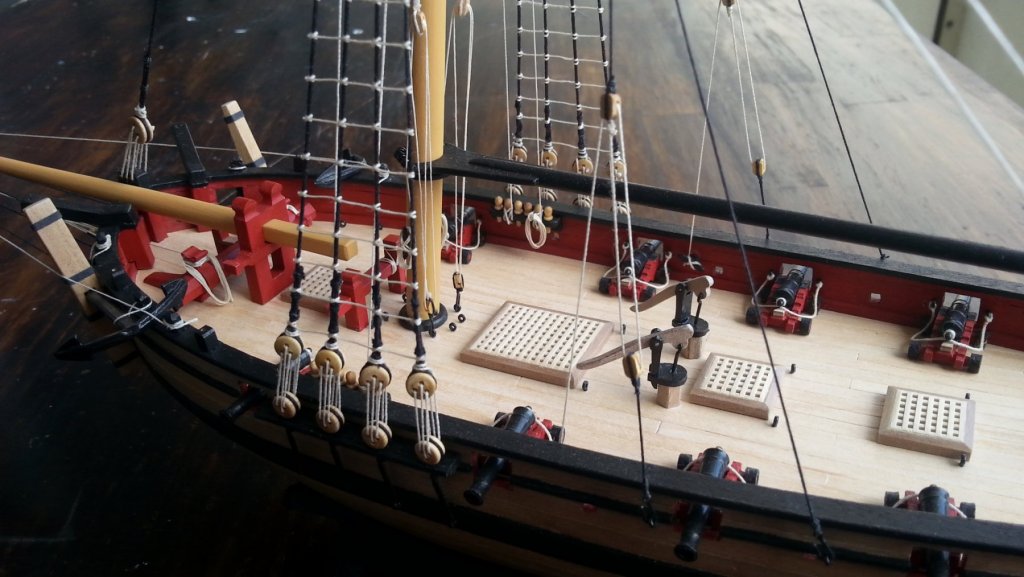
Rigging complete Now she's almost done, only need some rope coils and to attach the swivel guns. Some touch ups are needed like gluing down some of the fuzziness on the rigging with 50/50 Pva and doing a final dusting before being put in a display case. Rope coils I've been making lots of rope coils and not liking them. The one that I did manage to make and like is on the belaying rack right now. It's a bit small so I'll keep at it until a satisfactory result comes along.
- 49 replies
-
- 6
-
-
- sherbourne
- caldercraft
- (and 1 more)
-
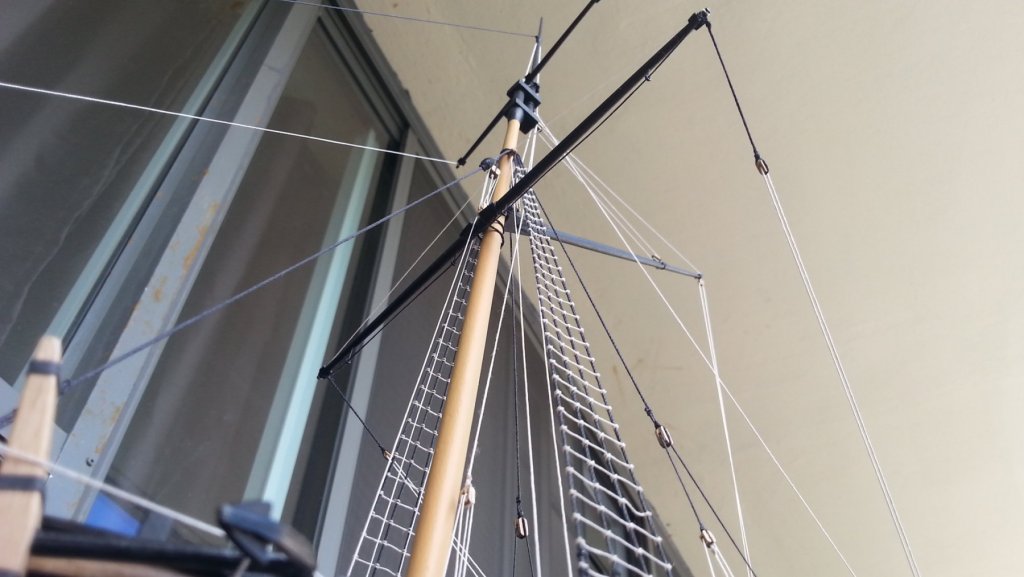
Thanks Sjors! Yeah that planking was and still is kind of a disaster but at least I learned a lot from it. The Satin Varnish helps distort the errors. The rigging looks the way it does because I have ripped up most of it at least once. The ratlines must have been a month or so of fussing. The rigging line supplied with the kit isn't the greatest either.
- 49 replies
-
- 1
-
-
- sherbourne
- caldercraft
- (and 1 more)
-
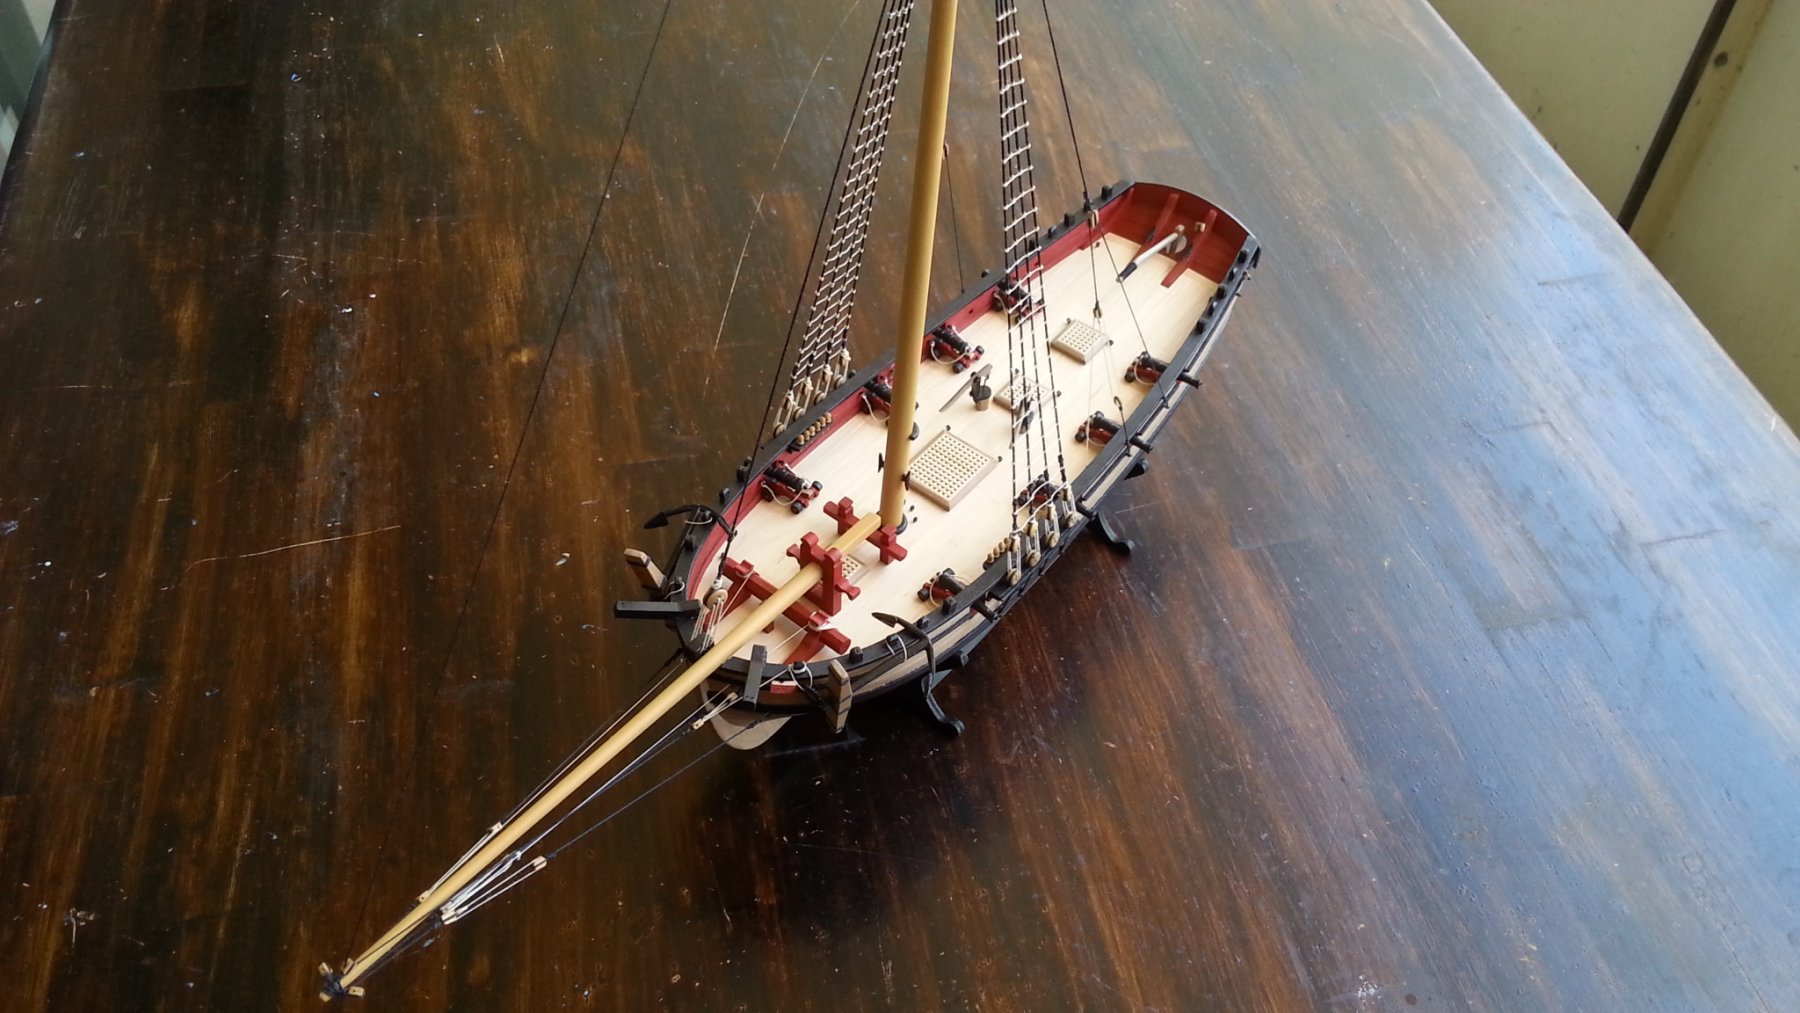
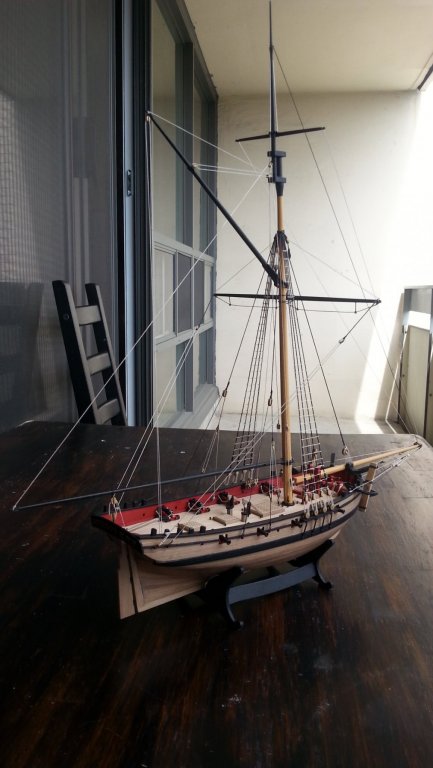
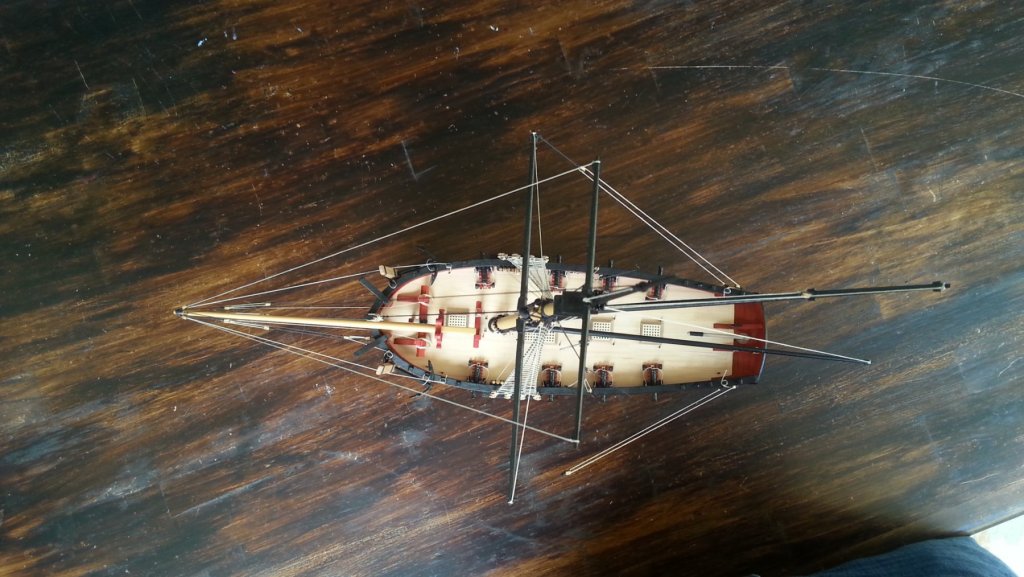
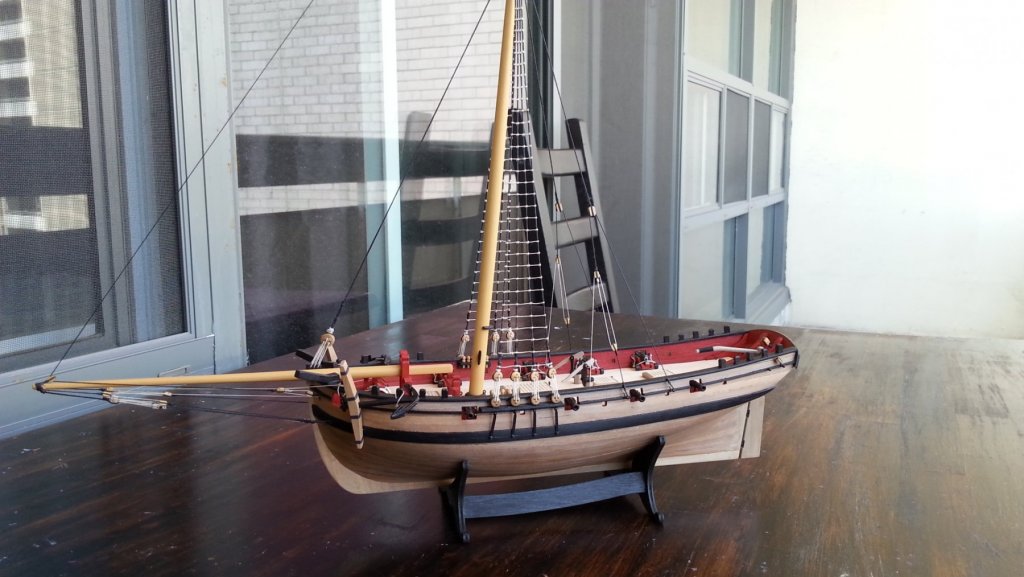
The ratlines are done and the booms and yards are about to be attached. She is coming along slowly but its almost done. The table is something I found in the trash, its going to be my second work station for the summer months.


- 49 replies
-
- 5
-
-
- sherbourne
- caldercraft
- (and 1 more)