


Rossi46
-
Posts
170 -
Joined
-
Last visited
Content Type
Profiles
Forums
Gallery
Events
Posts posted by Rossi46
-
-
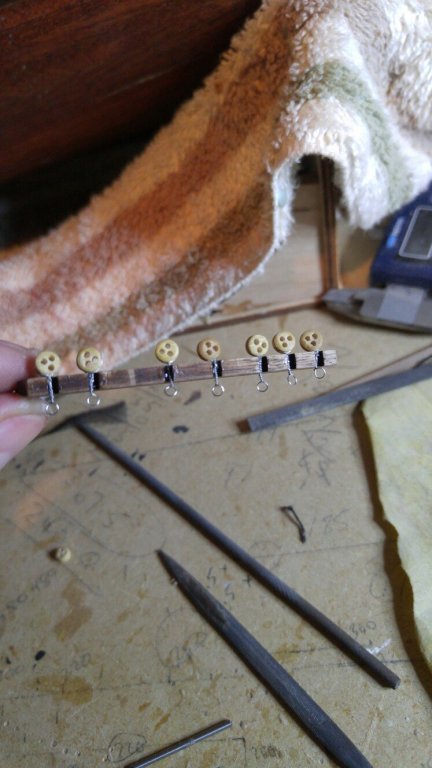
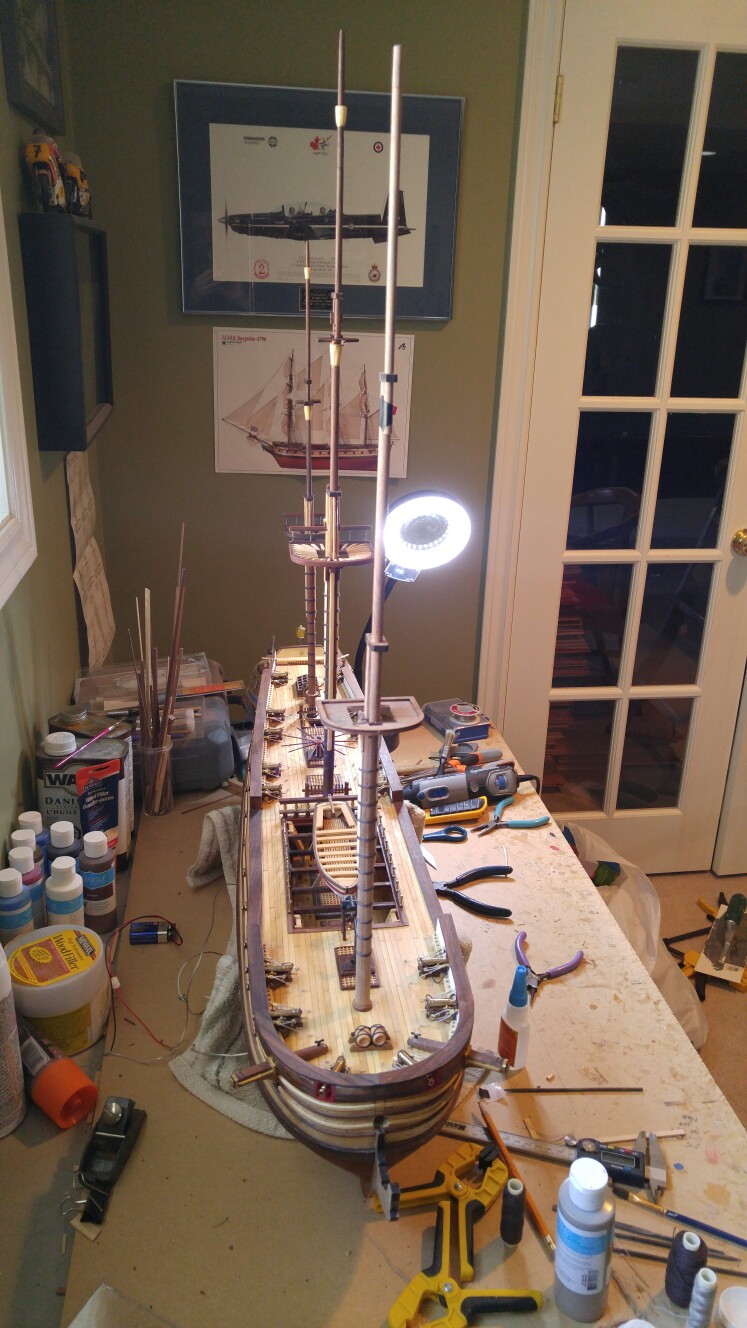
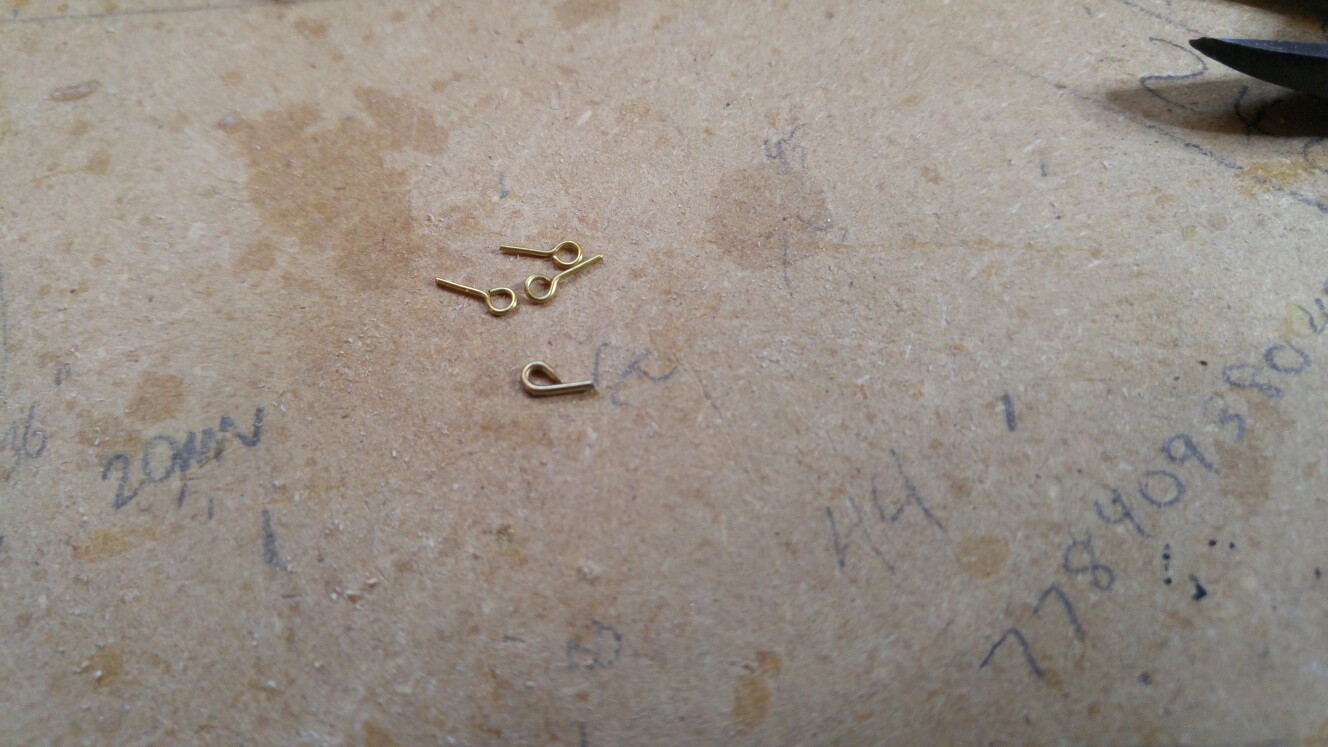
Starting on the shrouds for the main mast. I still have to complete the front mast but wanted to see what the rigging was like. For the deadeye placement i just set the length with the shrouds a couple mm short and used the lanyards to apply a bit of tension and the deadeyes moved into a level position. Much easier than i expected and no need for jigs. I seized the top of the shrouds about 5-6mm just to keep things nice and clean.

- Blighty, Bill Hime, billocrates and 4 others
-
 7
7
-
-
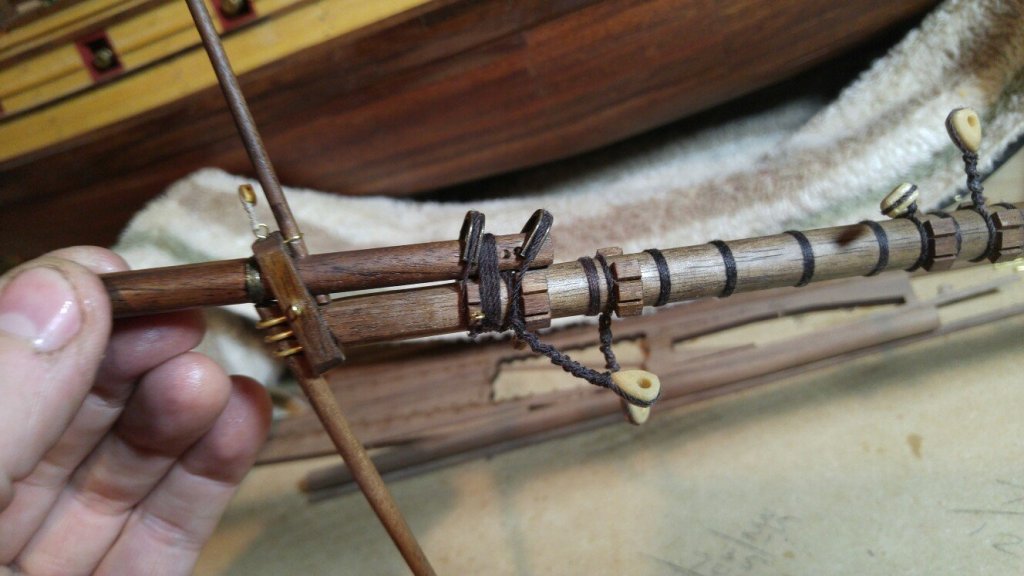
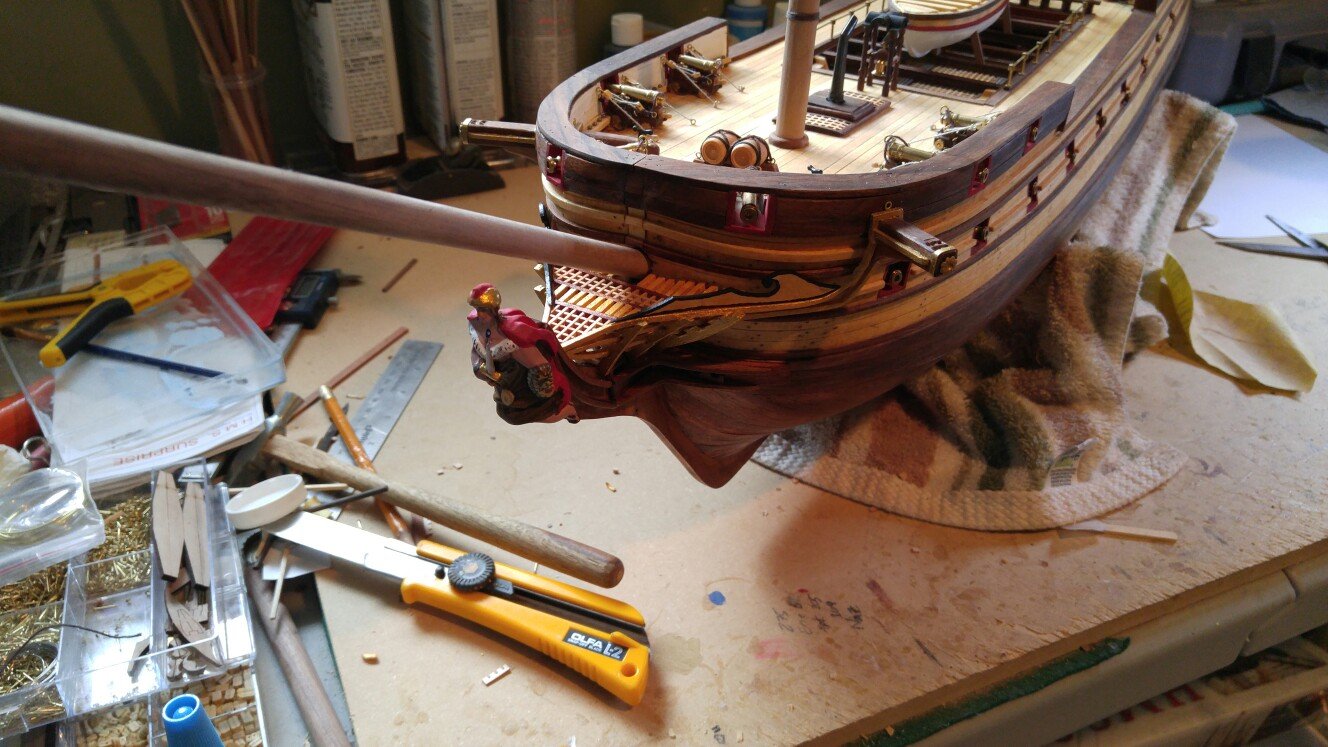
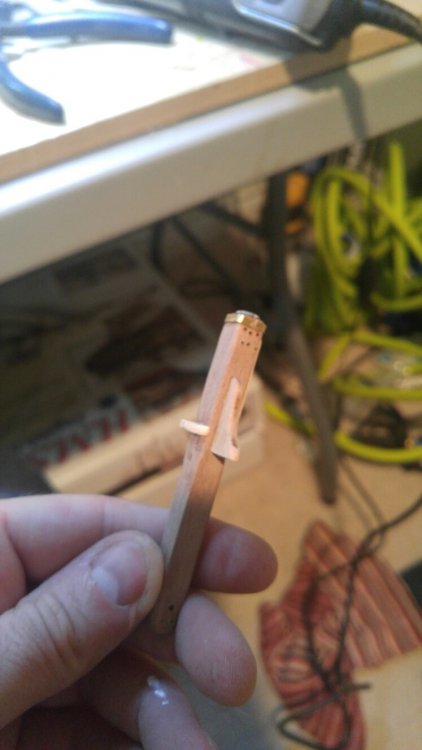
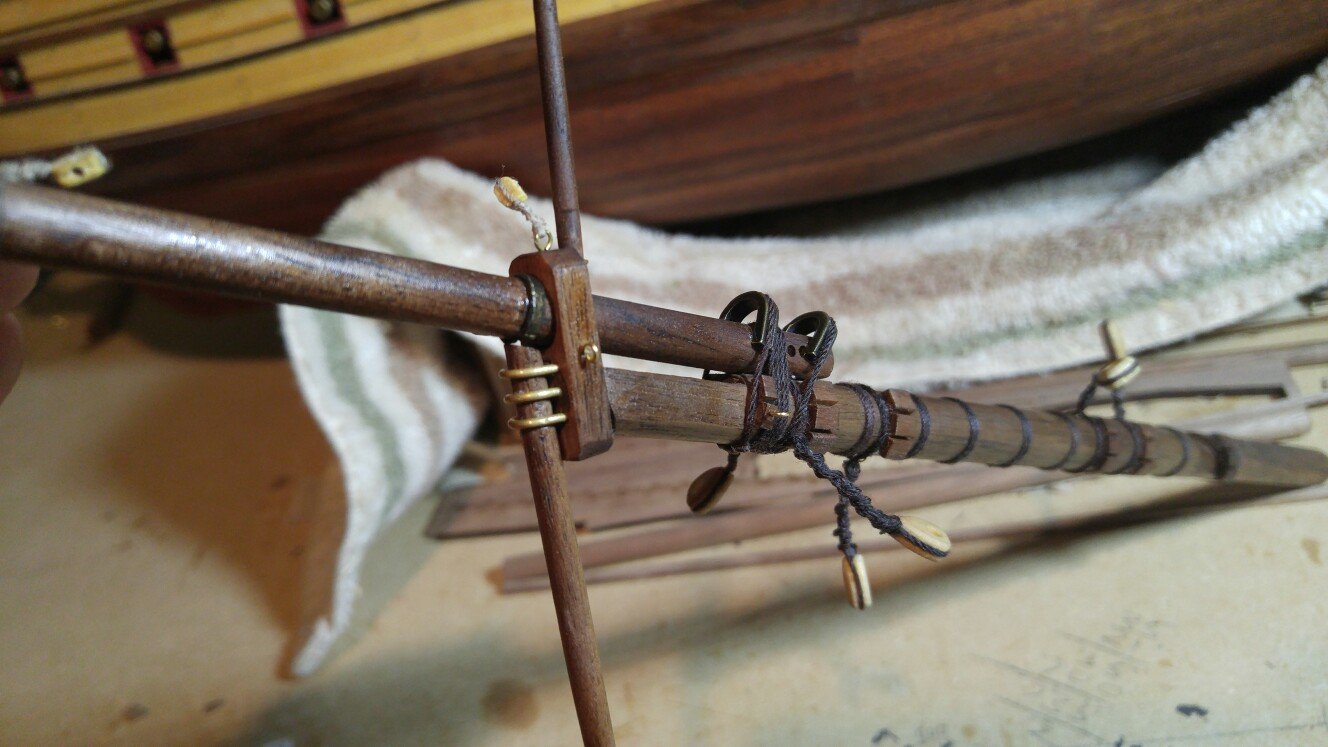
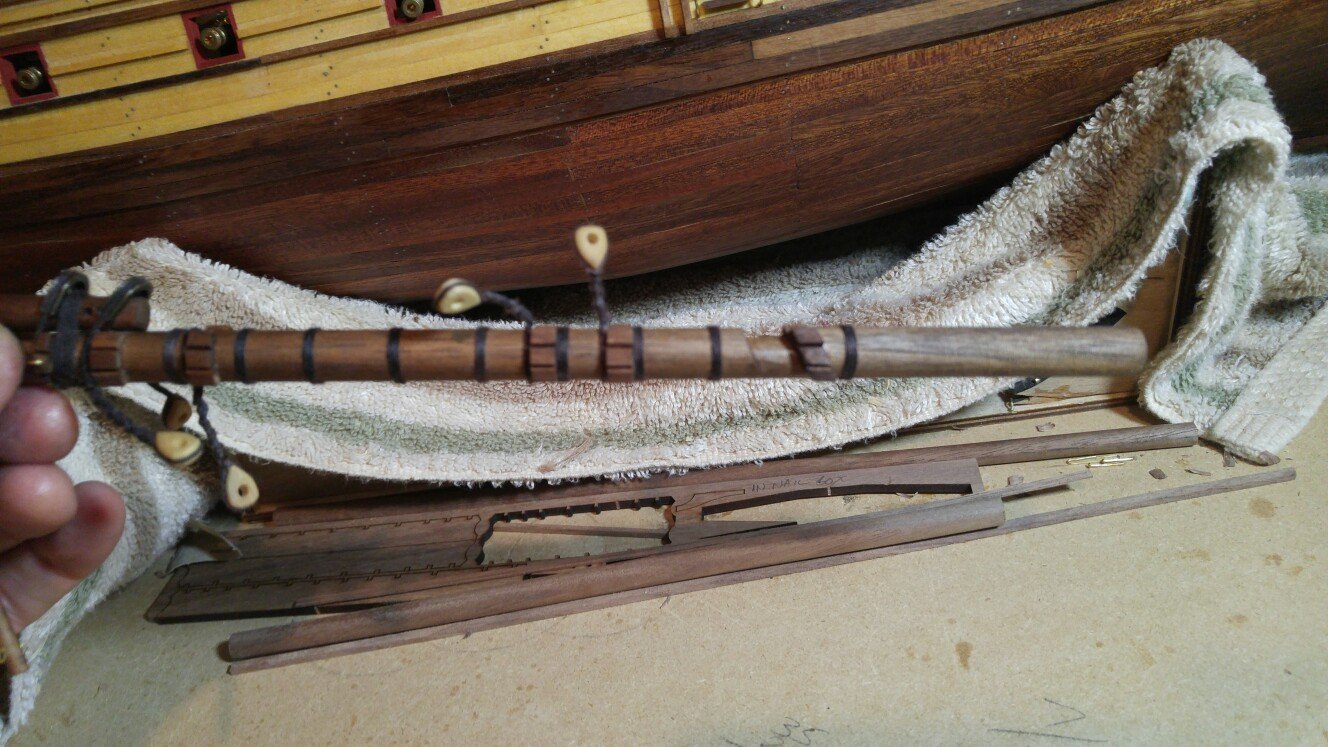
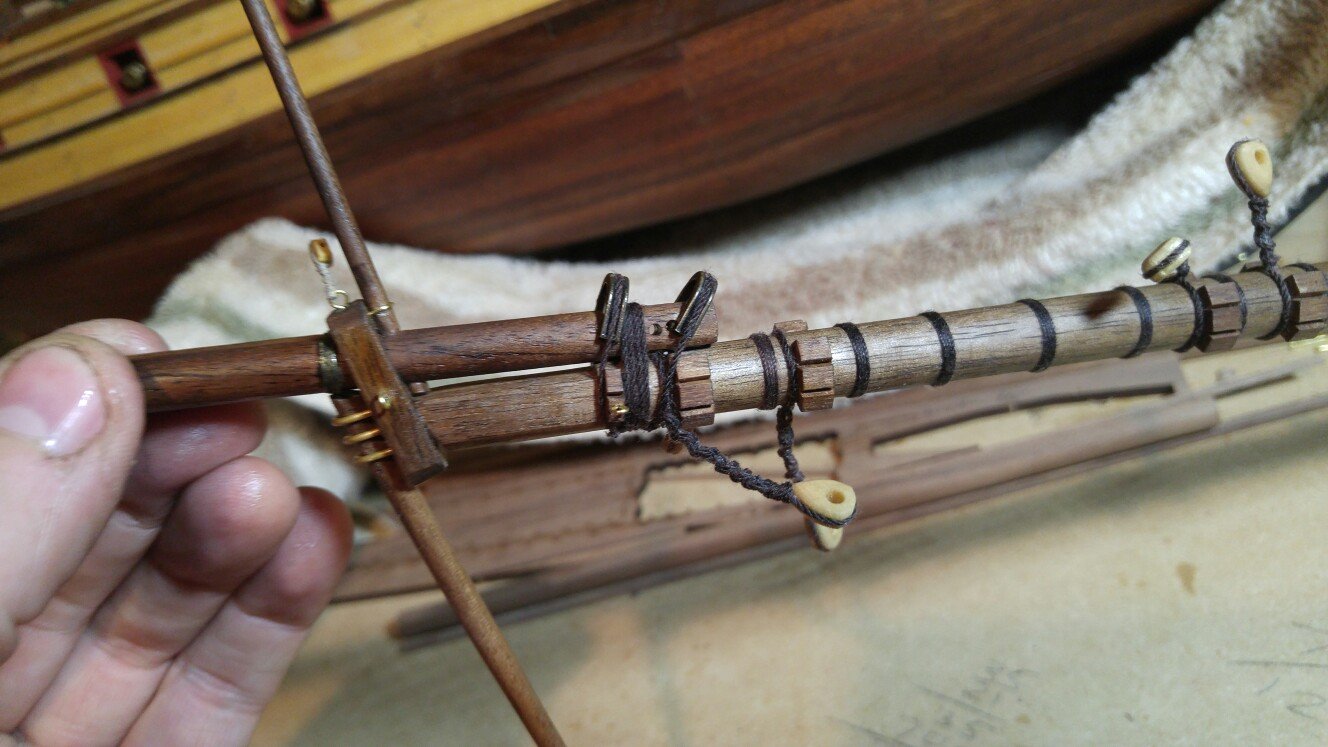
Completed the bowsprit this weekend. A challenging and rewarding section. Interpretting the instructions for blocks and holes etc...was a challenge but i think i got everything right. Hope the pics help other builders.


- Jack12477, billocrates, VACorsair and 3 others
-
6
-
Love it. Who would have thought it would turn out just like the old workhorse you were striving for.
- Mike Dowling, mtaylor and Jack12477
-
3
-
-
Looks great, thanks for sharing
-
-
Starting on the chainwales now. I used a drill bit in the work table to do the loop first then wrapped a long end around the round block and wound it aroind the short piece.

- billocrates, Jack12477 and coxswain
-
3
-
-
2 hours ago, Blighty said:
Checked out your ship this morning, looks fantastic, you have a lot more completed since last time I saw it. Great detail work.
Thanks, i need to update the log a bit.
- billocrates and mtaylor
-
2
-
-
-
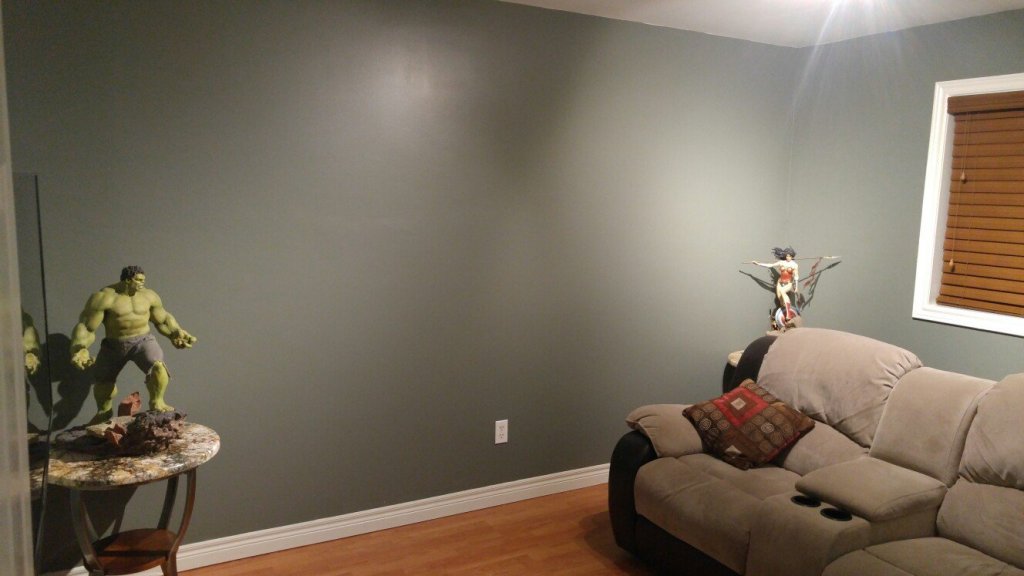
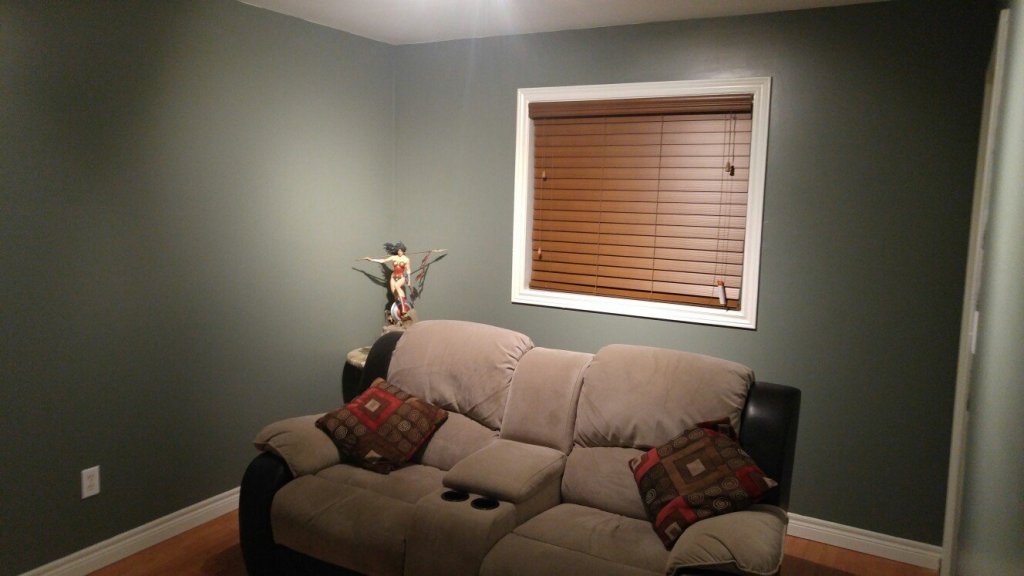
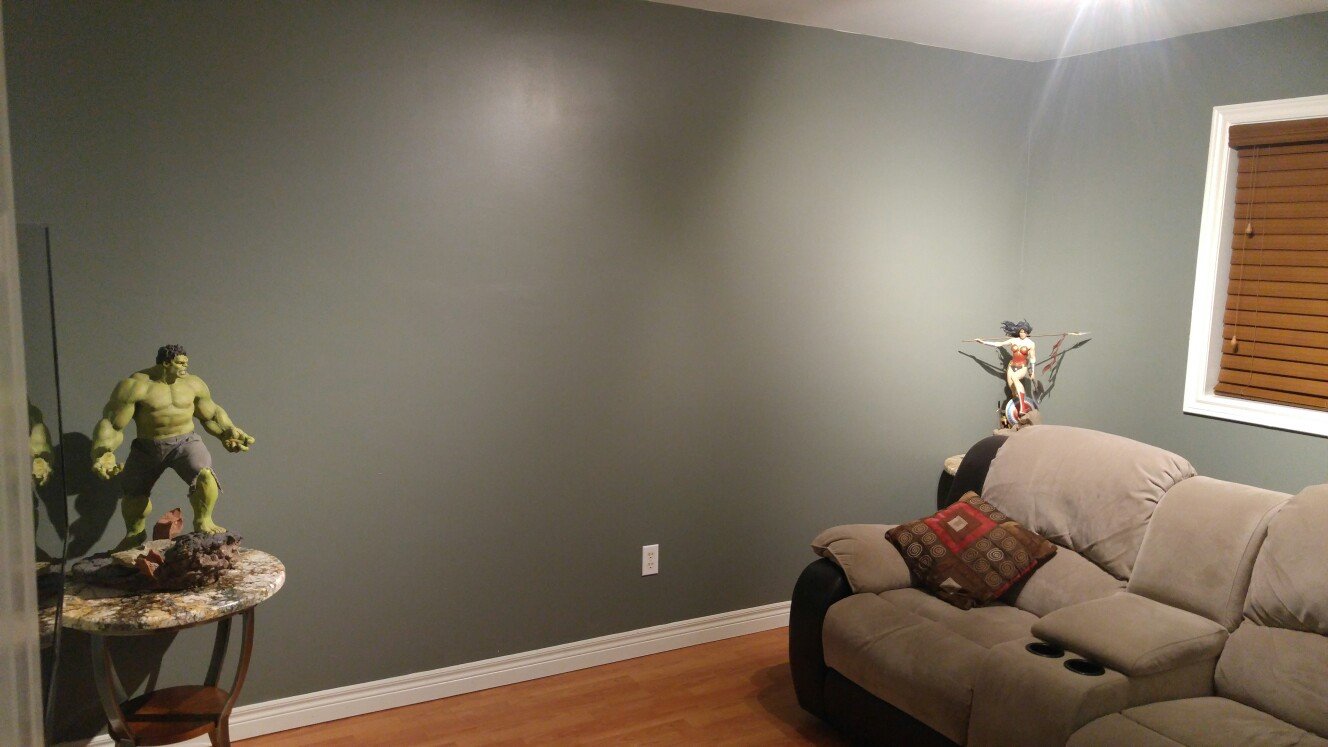
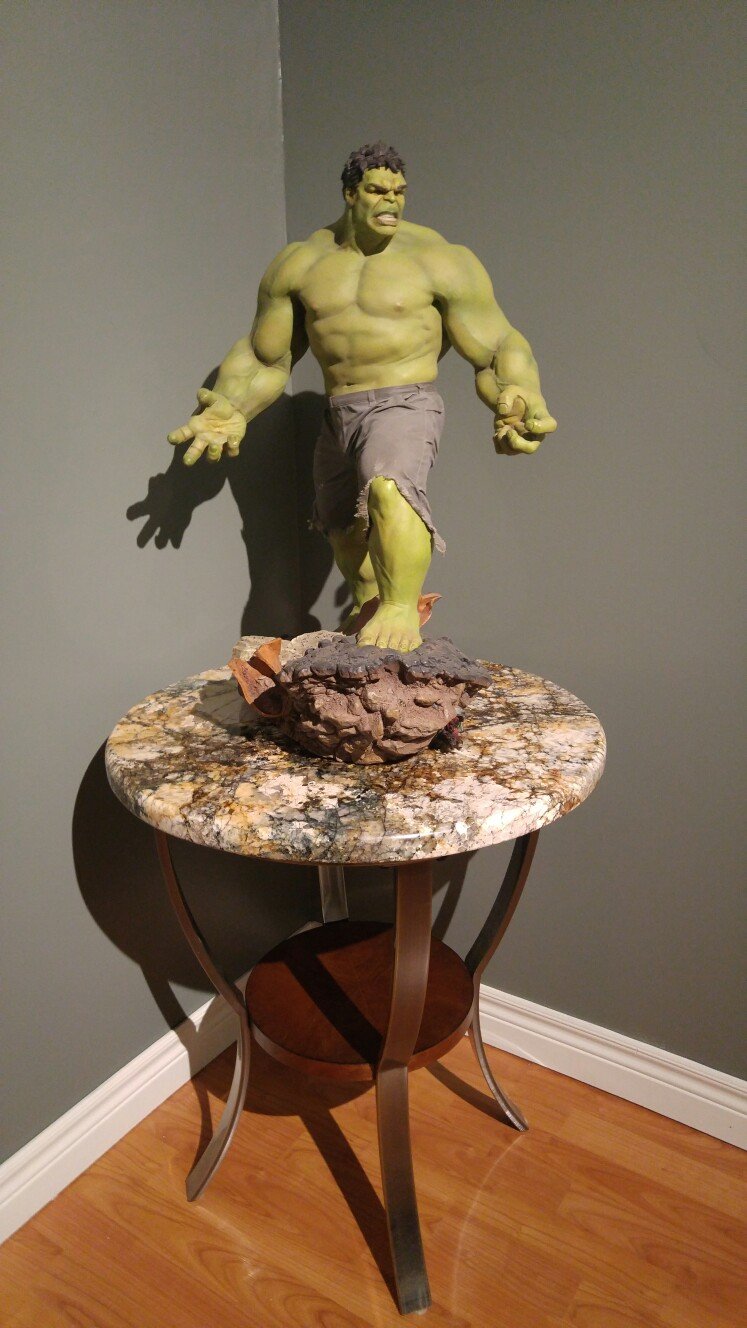
Ive find myself looking at the model quite often, just appreciating all the things you learn about these boats as you go, and of course the work that has gone into it. I cant wait to appreciate it, and the others to come😈, in the little hobby room we have repurposed.
This is the room and it will be dedicated to models. I plan on filling the walls with shelf mounted displays. The statues are temporarily giving the room a bit of character while i have no models to display... And no, im not in a hurry to mature lol.

- mtaylor, coxswain, billocrates and 2 others
-
5
-
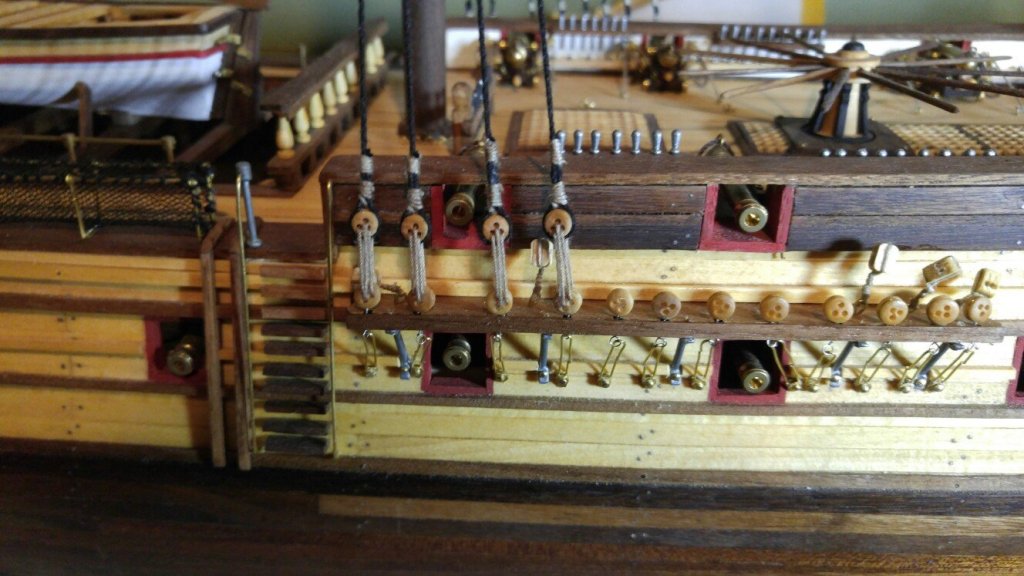
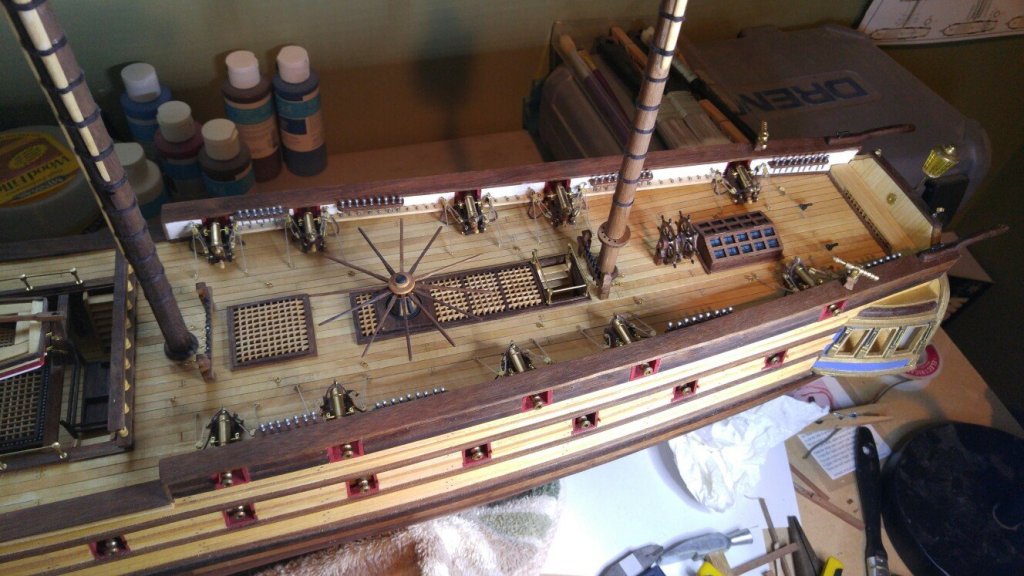
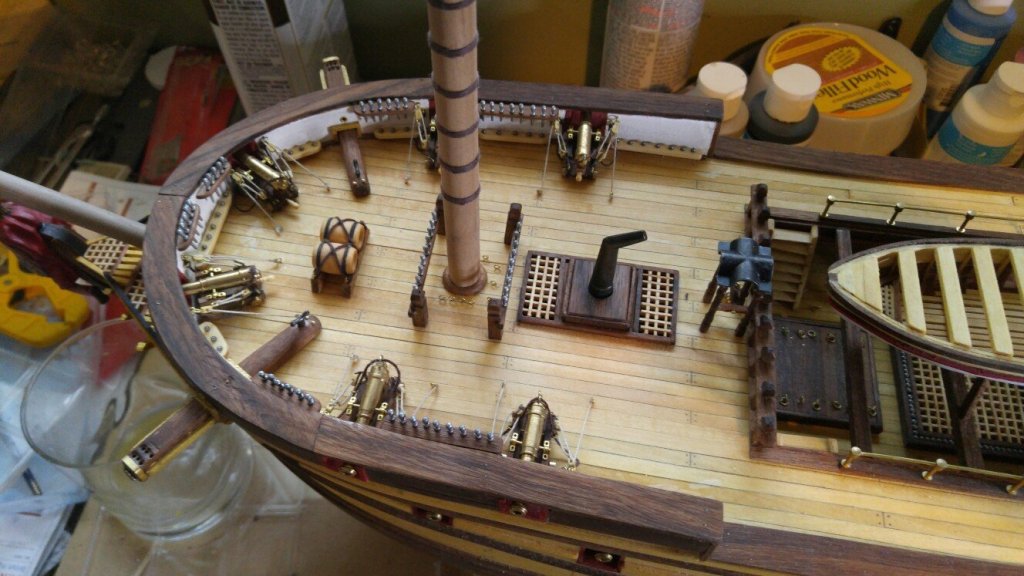
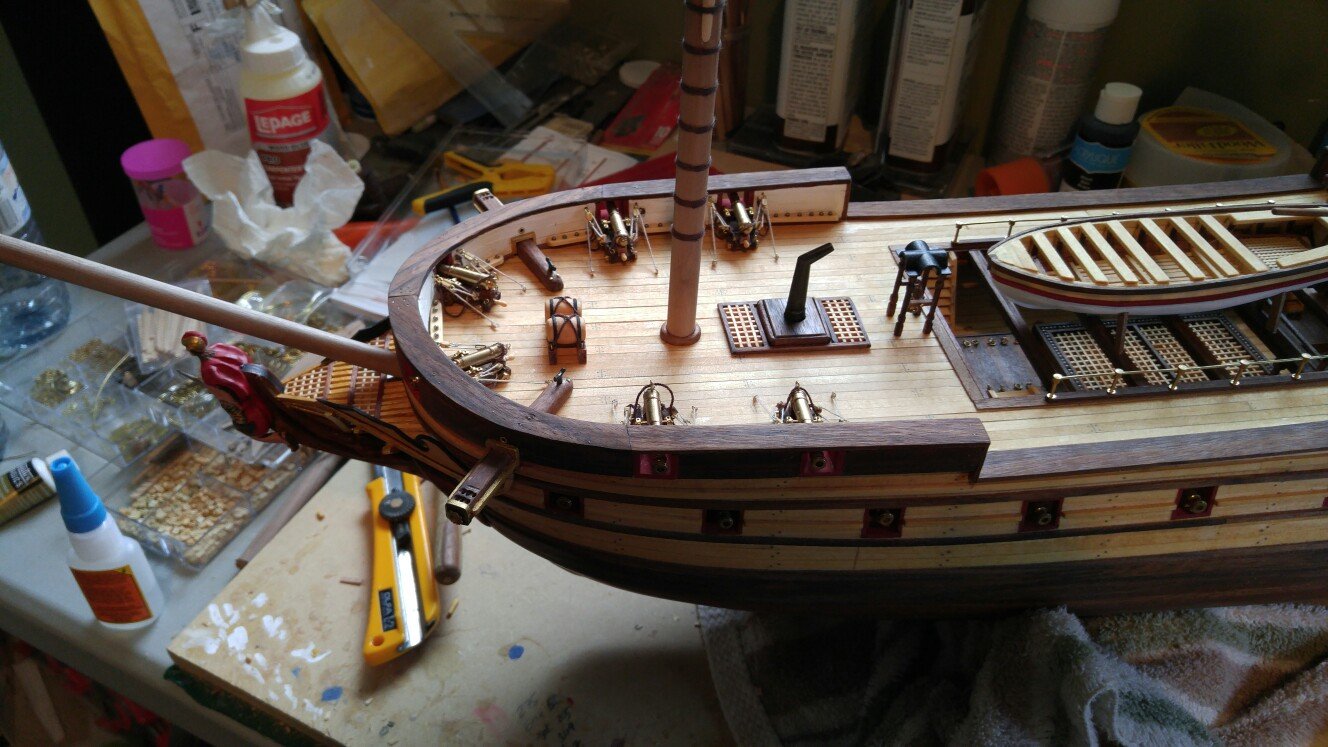
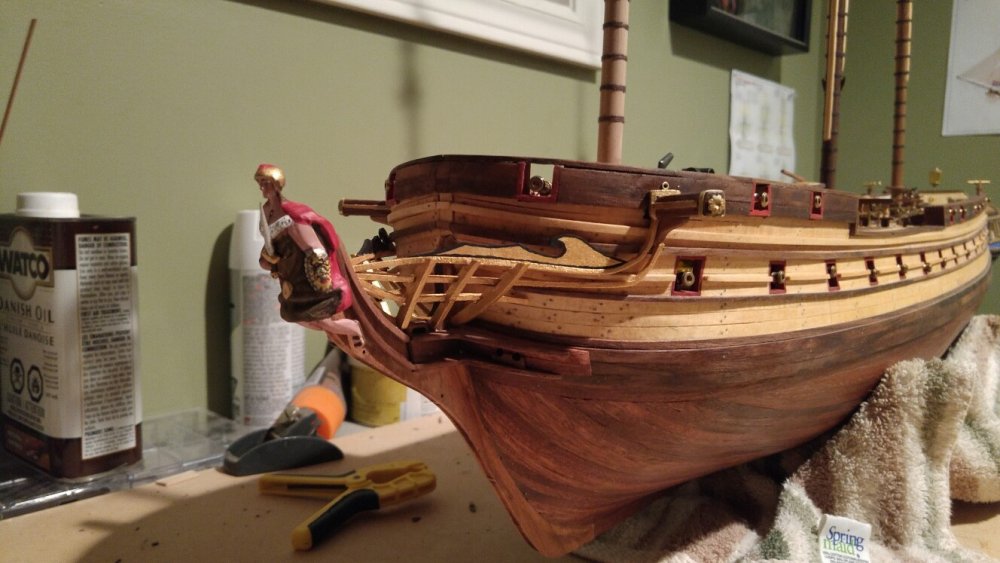
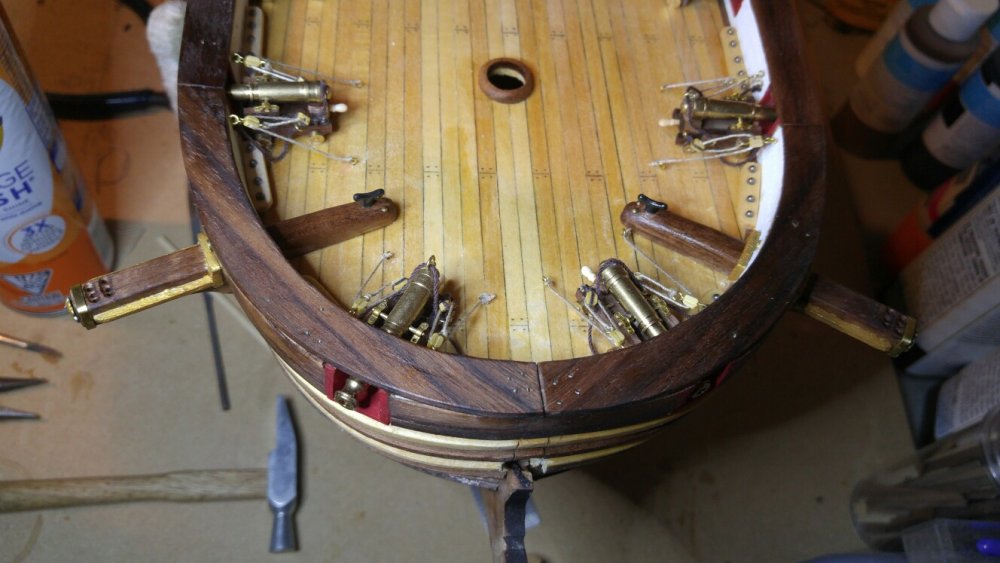
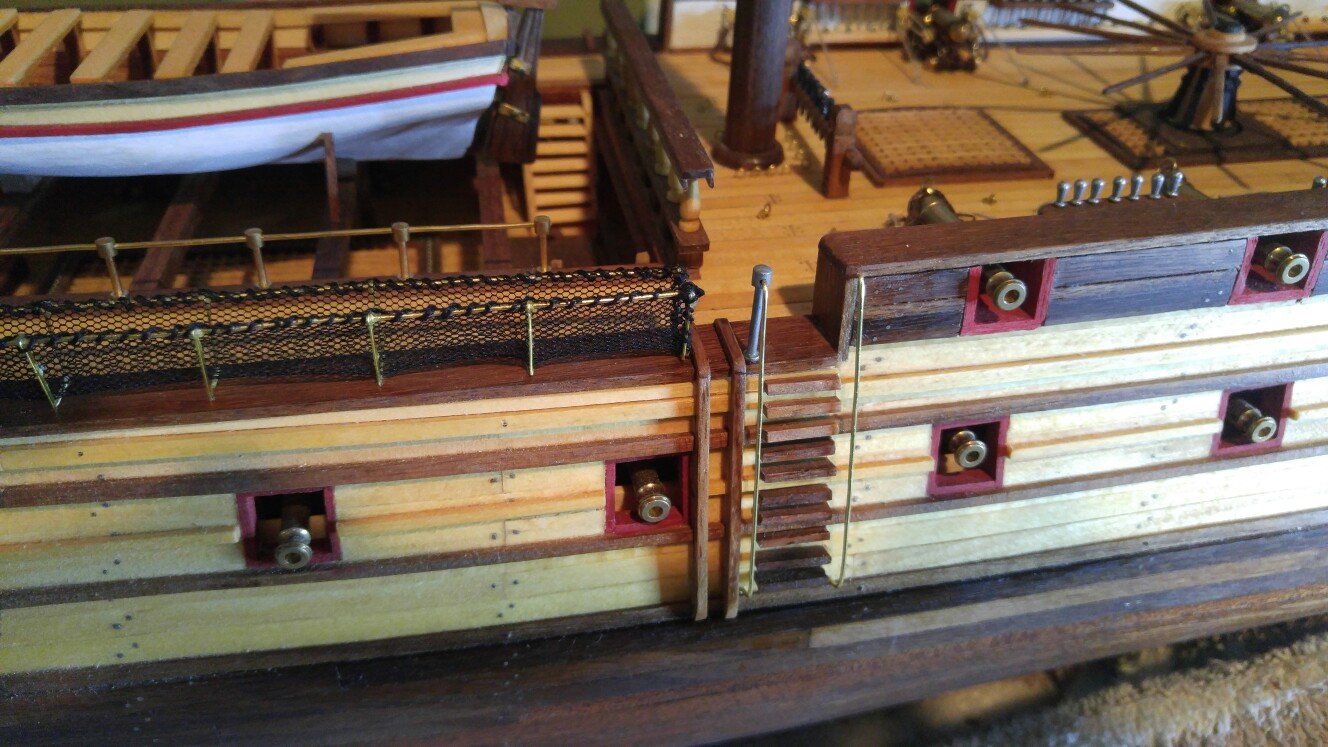
Completed more work on the deck, almost done other than some mesh fencing and a couple odds and ends. Almost ready to start the chainwales ?? I think they are called, for the ratlines. The deck is filling up nicely with lots of little bits and pieces to catch your eye.
- mtaylor, Blighty, billocrates and 1 other
-
4
-
-
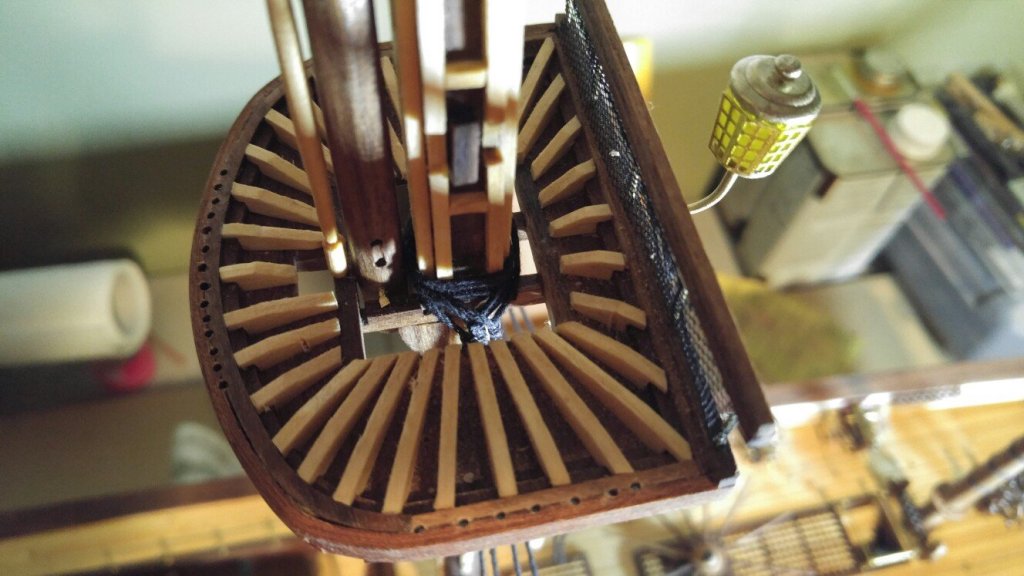
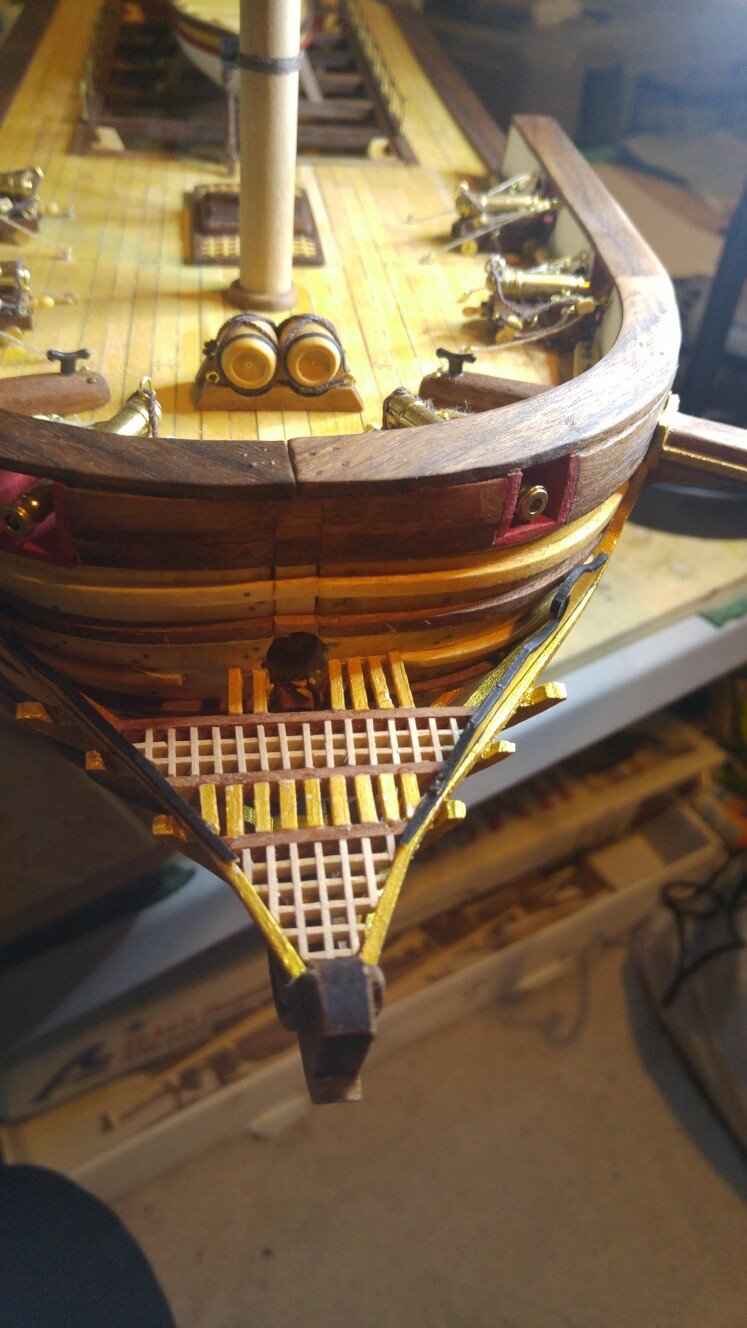
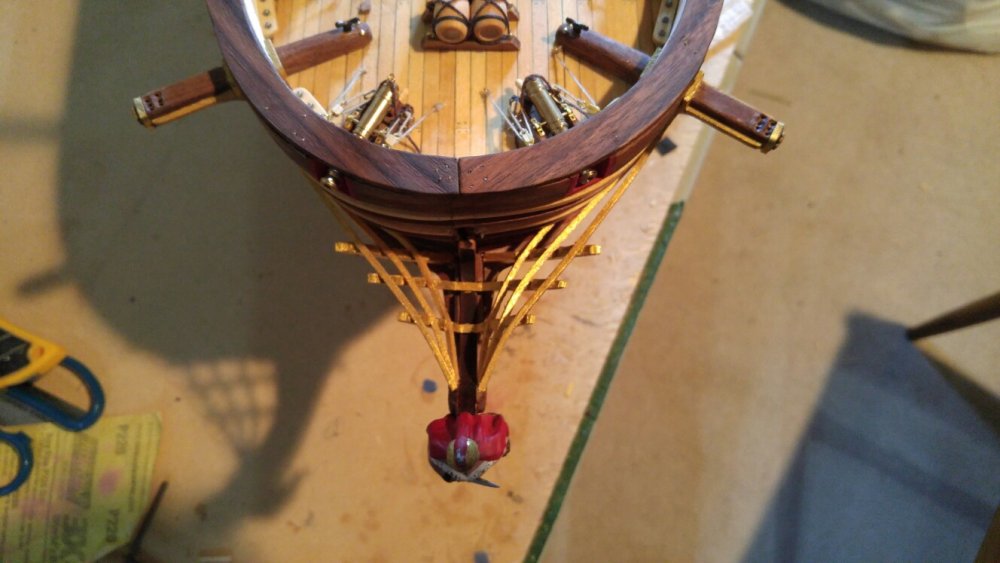
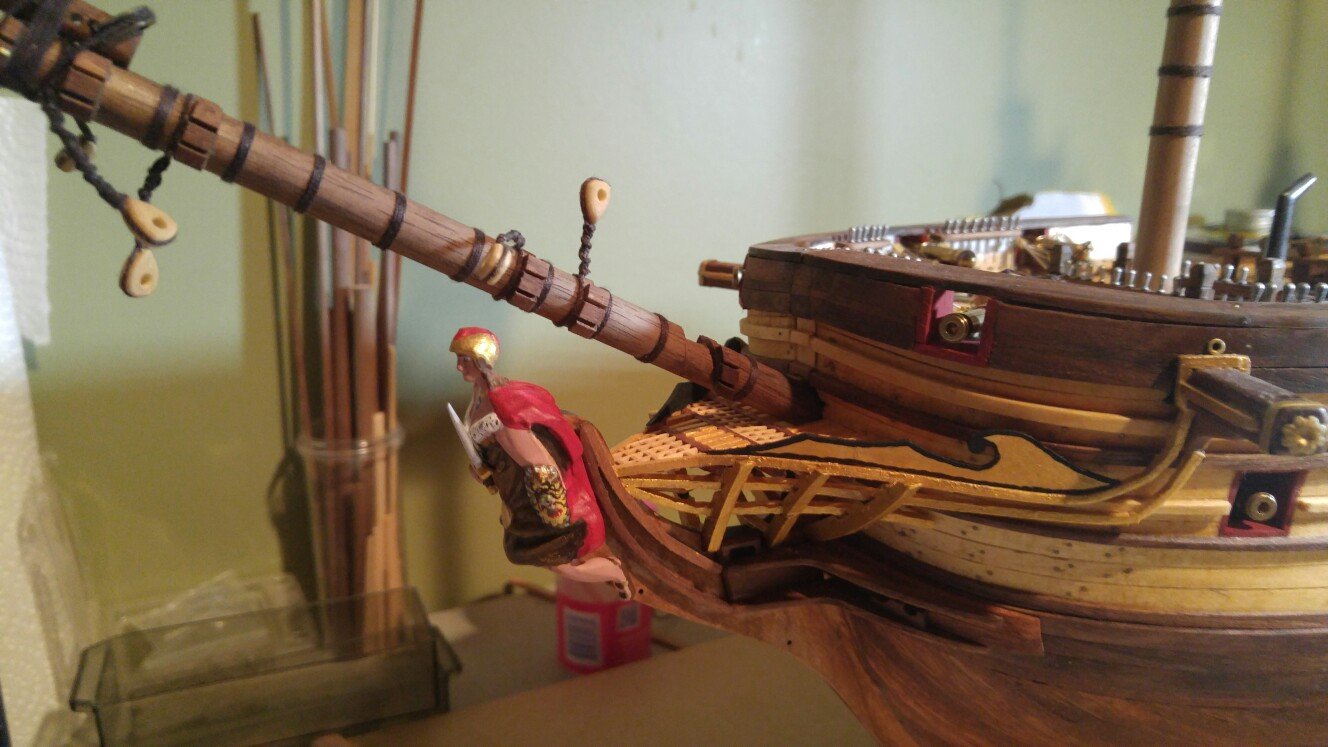
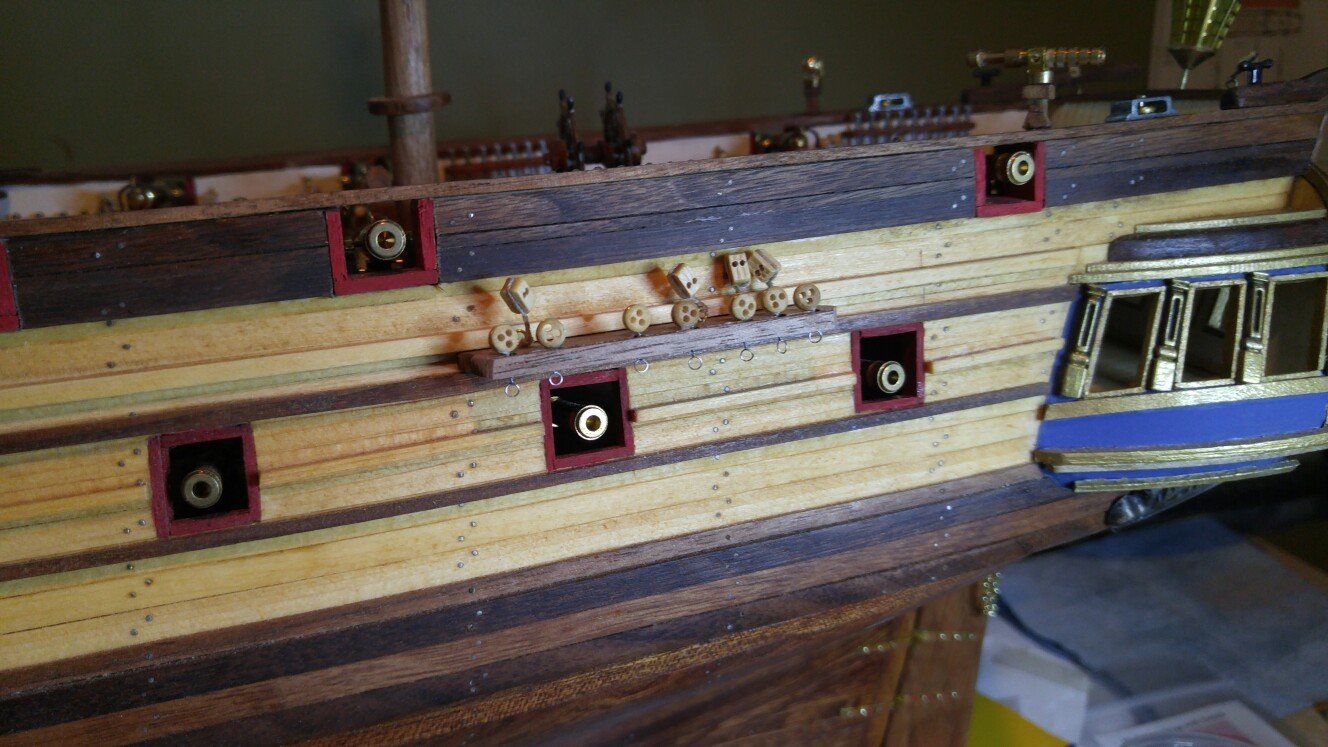
Did the bowsprit grating today. Pleased with how it turned out.

- Captain Poison, Altduck, mtaylor and 3 others
-
6
-
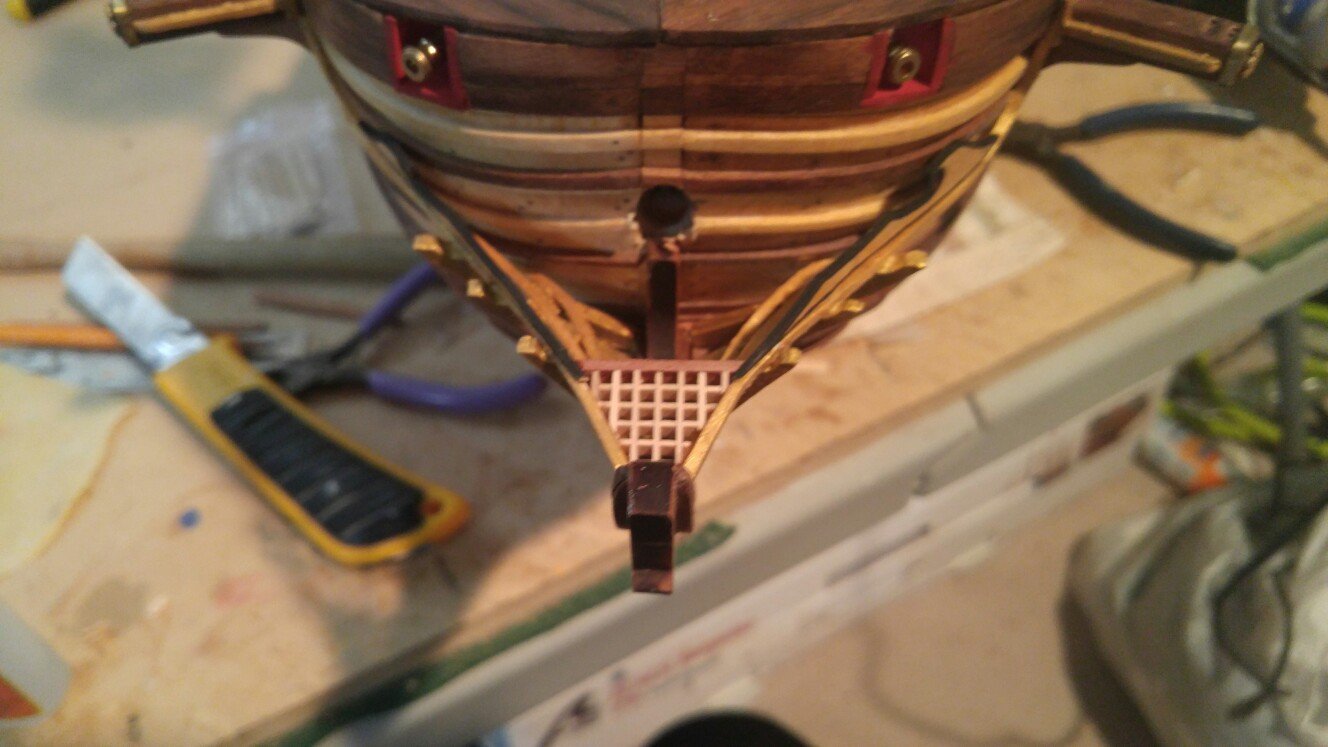
I think this pic is a close representation of mine and though the upsweep looks a little better in my opinion i may just leave it. Depends how easily i cam adjust ot tonight. The more i think about it the more im against a short fourth rail to achieve the upsweep look.
-1492283416.jpg.738afe90c64114cae0c64ccae08bac7d.jpg)
- billocrates, Altduck, mtaylor and 2 others
-
5
-
To help others doing this model ive attached another pic that better illustrates what russ pointed out. The top rail should at the very least go straight and preferably curve up a bit to look right. Mine curves down to match the middle one i did first. I dont think it matters functionally, but ill probably address it.🍻

- Altduck, Jack12477, billocrates and 1 other
-
4
-
I just looked at some images of completed boats on google. Those lines are supposed run near parallel with the bowsprit eventually arent they? So its off a bit. Ill add a tapered forth row to achieve it most likely as i wont be able to take it apart(super glue). Thanks for bringing it to my attention
- Altduck, billocrates and Jack12477
-
3
-
1 hour ago, russ said:
Your model is coming along really well. Nice work.
One thing you might want to look at. Look at the top headrail from the side. It seems to me that the headrail should curve upward a bit more than it does. The curves from the top view look good. However, check the view from the side and make sure you have the proper curves there as well.
Russ
Thanks russ. Do you mean the top of the three rails at the front? I do see mine attaches a few mm lower on the bow than the example in the book. Do you foresee that causing issues, or just a cosmetic/accuracy thing. To be honest i just ran the first one straight and matched the other two to that. I could add a fourth if that bit of up curve is necessary.
- Jack12477, billocrates, Altduck and 1 other
-
4
-
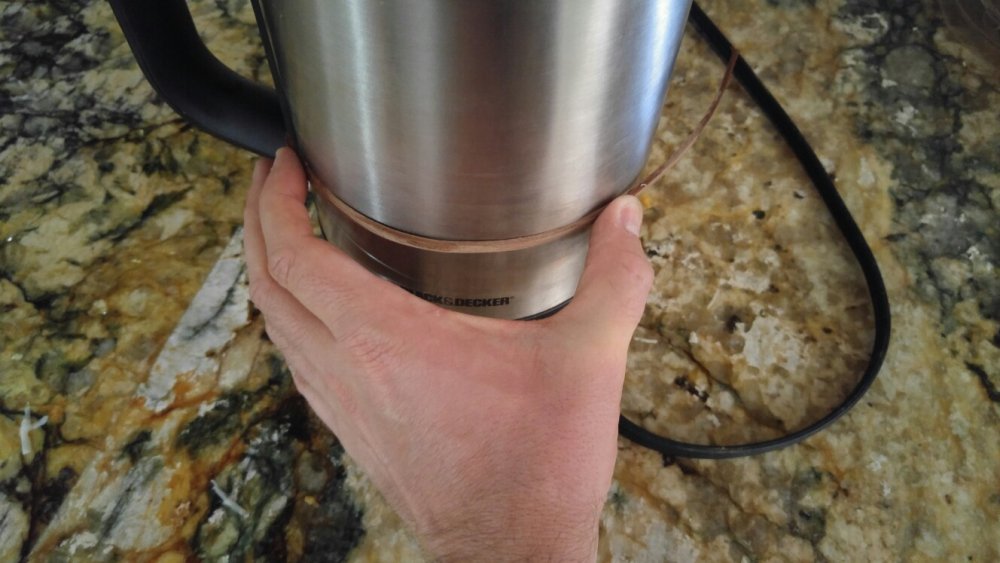
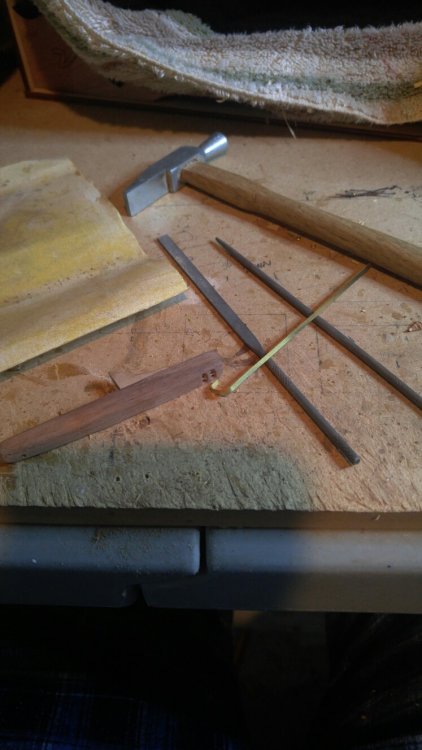
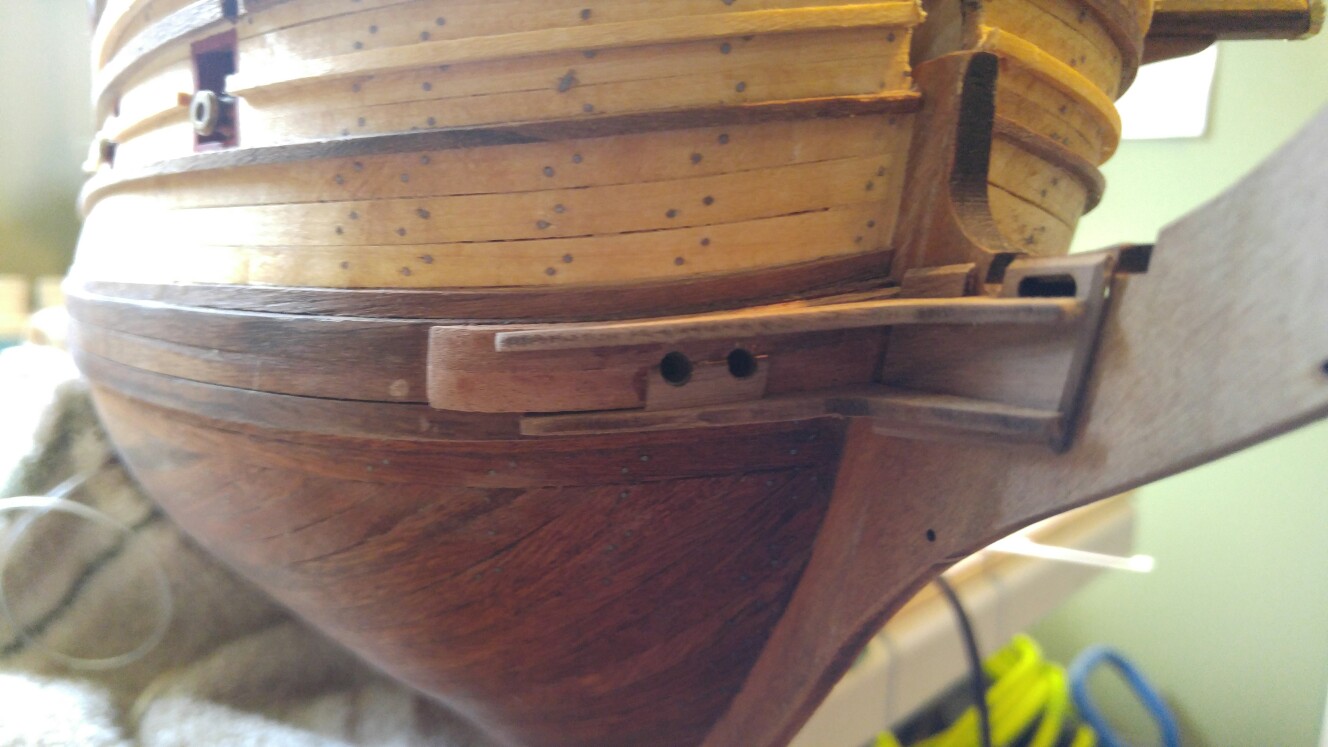
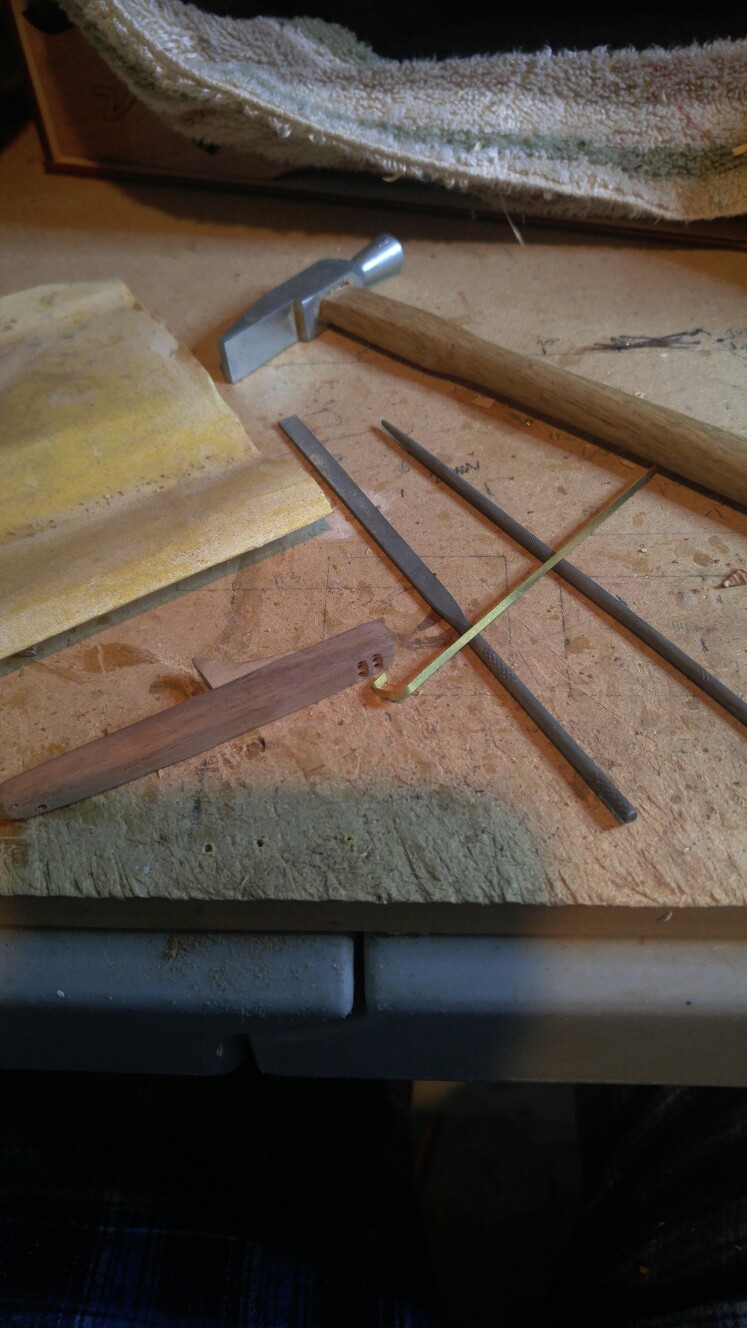
Decided to jump ahead to the bow fabrication as it didnt appear to cause a conflict with the work preceding it. My trusty kettle bender🍻 the big challenge as always is to maintain nice symmetry. The basswood bent easily, actually folded a little so i shaved and worked it a bit to try and maintain a nice flow to the lines. Each step has been a real pleasure and im sure this is the first of many builds. Rigging will be coming up soon


- Altduck, billocrates, Jack12477 and 3 others
-
6
-
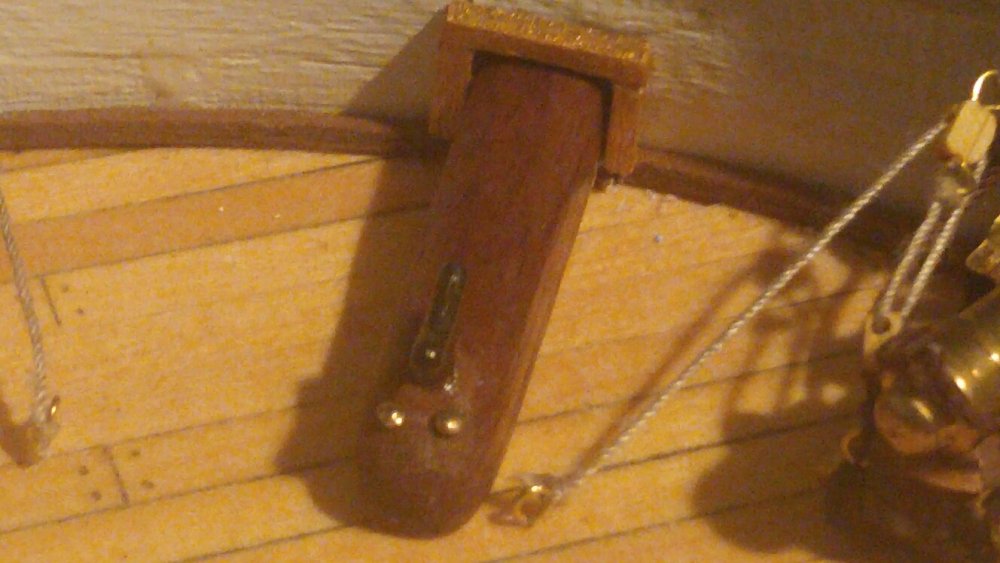
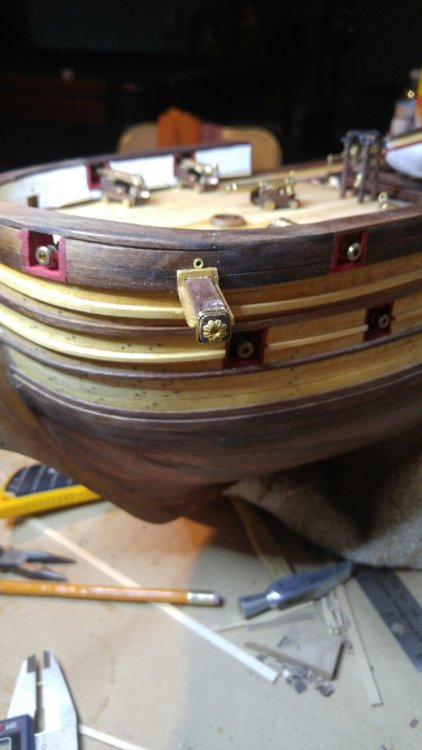
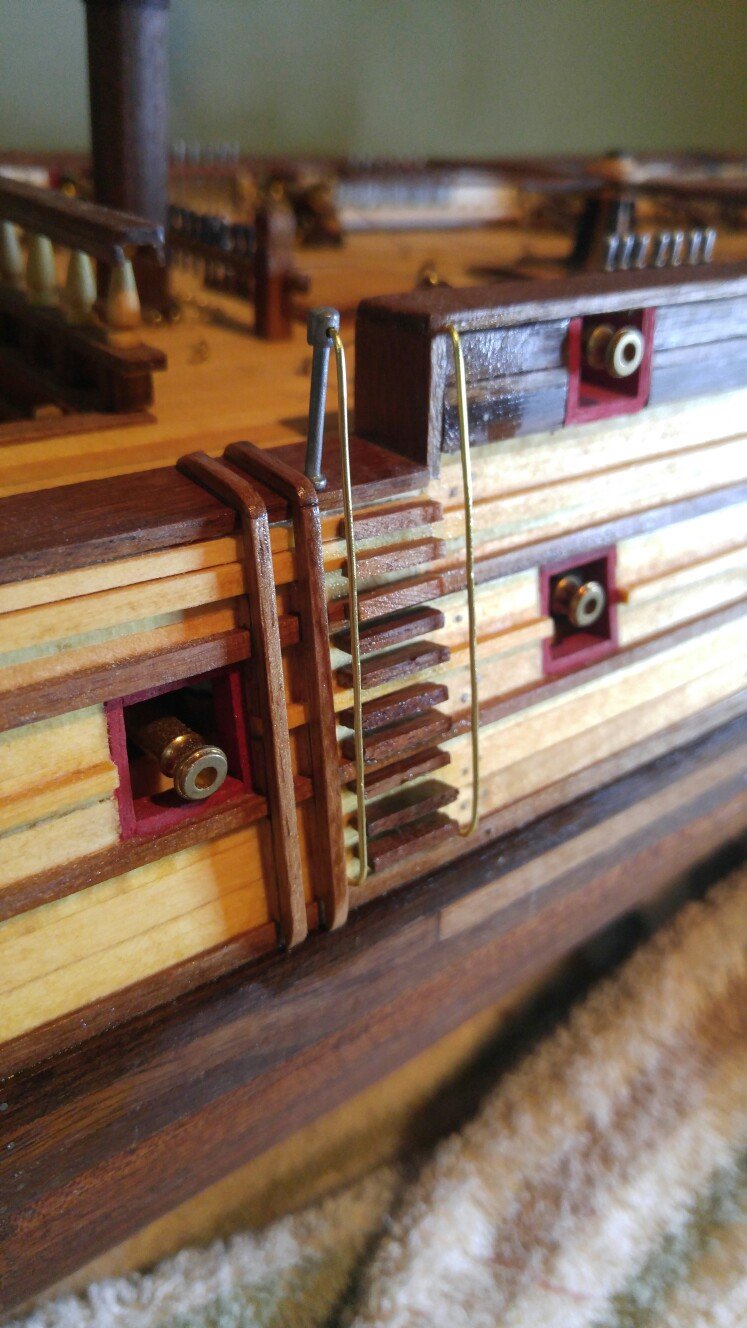
On to the anchor attachments. I wish i knew this step while doing the inside planking. I wouldve planked around them on the inside like i did the cannon portholes. It wasnt too bad though, just drilled out the square smaller and carefully worked out full size. Taking care not to damage the deck.
- mtaylor, billocrates, coxswain and 2 others
-
5
-
-
I received my next build from daniel dusek. Looks like its going to be a fun build. Just a couple of quick points. The wood looks like good quality, better that the hms surprise wood. Much o the parts are plastic, which might seem less desirable but they are super detailed, and will look far better painted. The sails arent finished like the surprise's. Lastly, daniel was fantastic to deal with and i would certainly list that as a reasn for buying dusek again. In due time, after current build, i will post a build log. If anyone can direct me to a build of the real that would be great. Cheers.


HMS Surprise by Rossi46 - FINISHED - Artesania Latina - Scale 1:48 - First Wooden Ship Build
in - Kit build logs for subjects built from 1751 - 1800
Posted
Thanks hipexec.