Hubac's Historian
-
Posts
2,950 -
Joined
-
Last visited
Content Type
Profiles
Forums
Gallery
Events
Everything posted by Hubac's Historian
-
 It was the same process as described above; carved a master from styrene, mount to plywood block, make a mould from latex, cast into mould.
 -
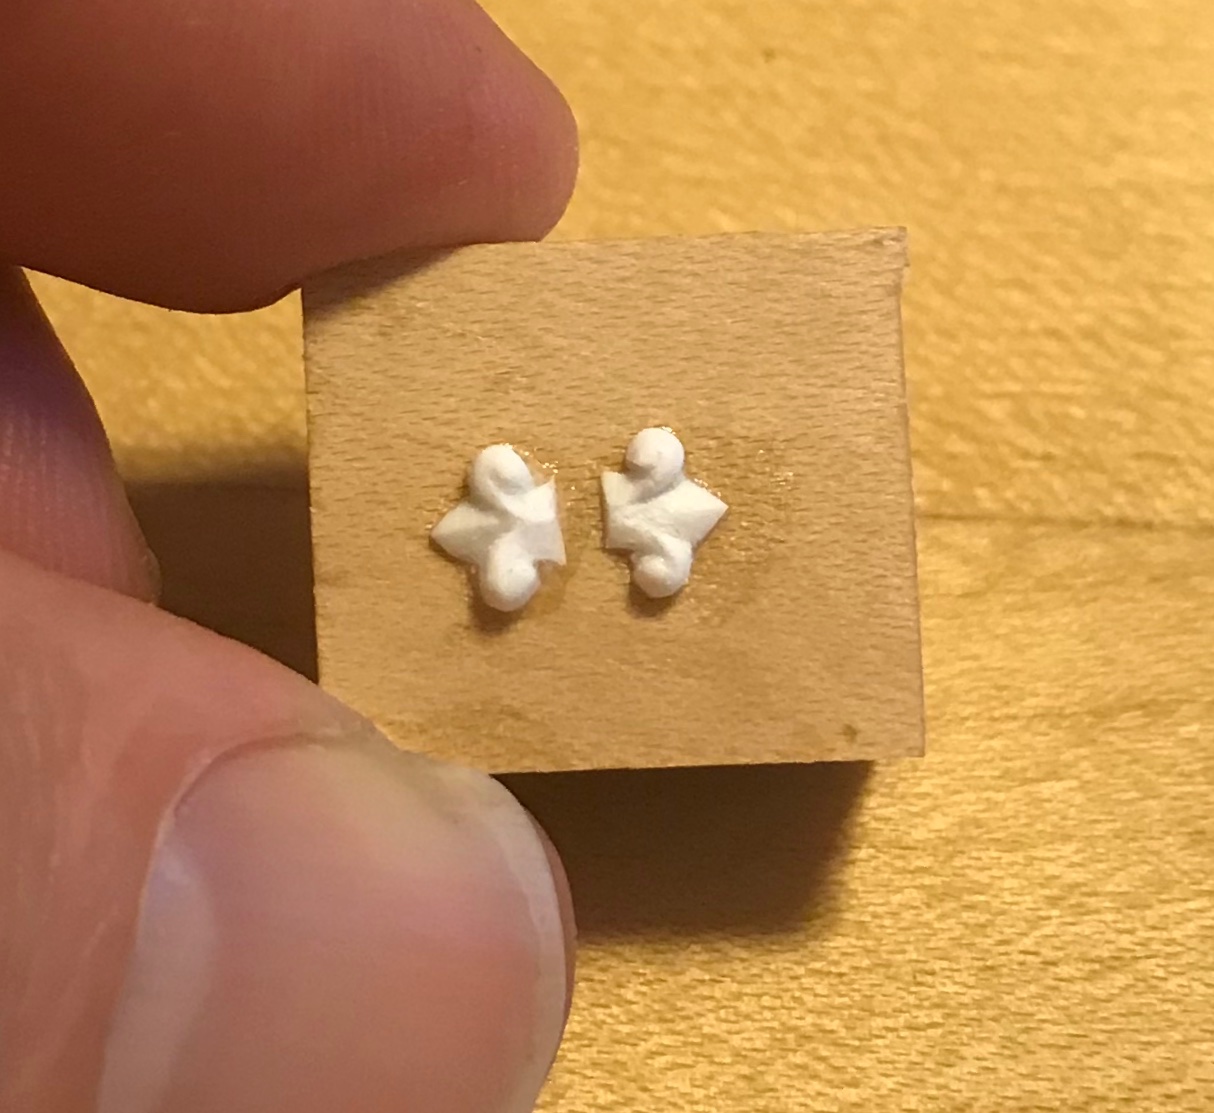
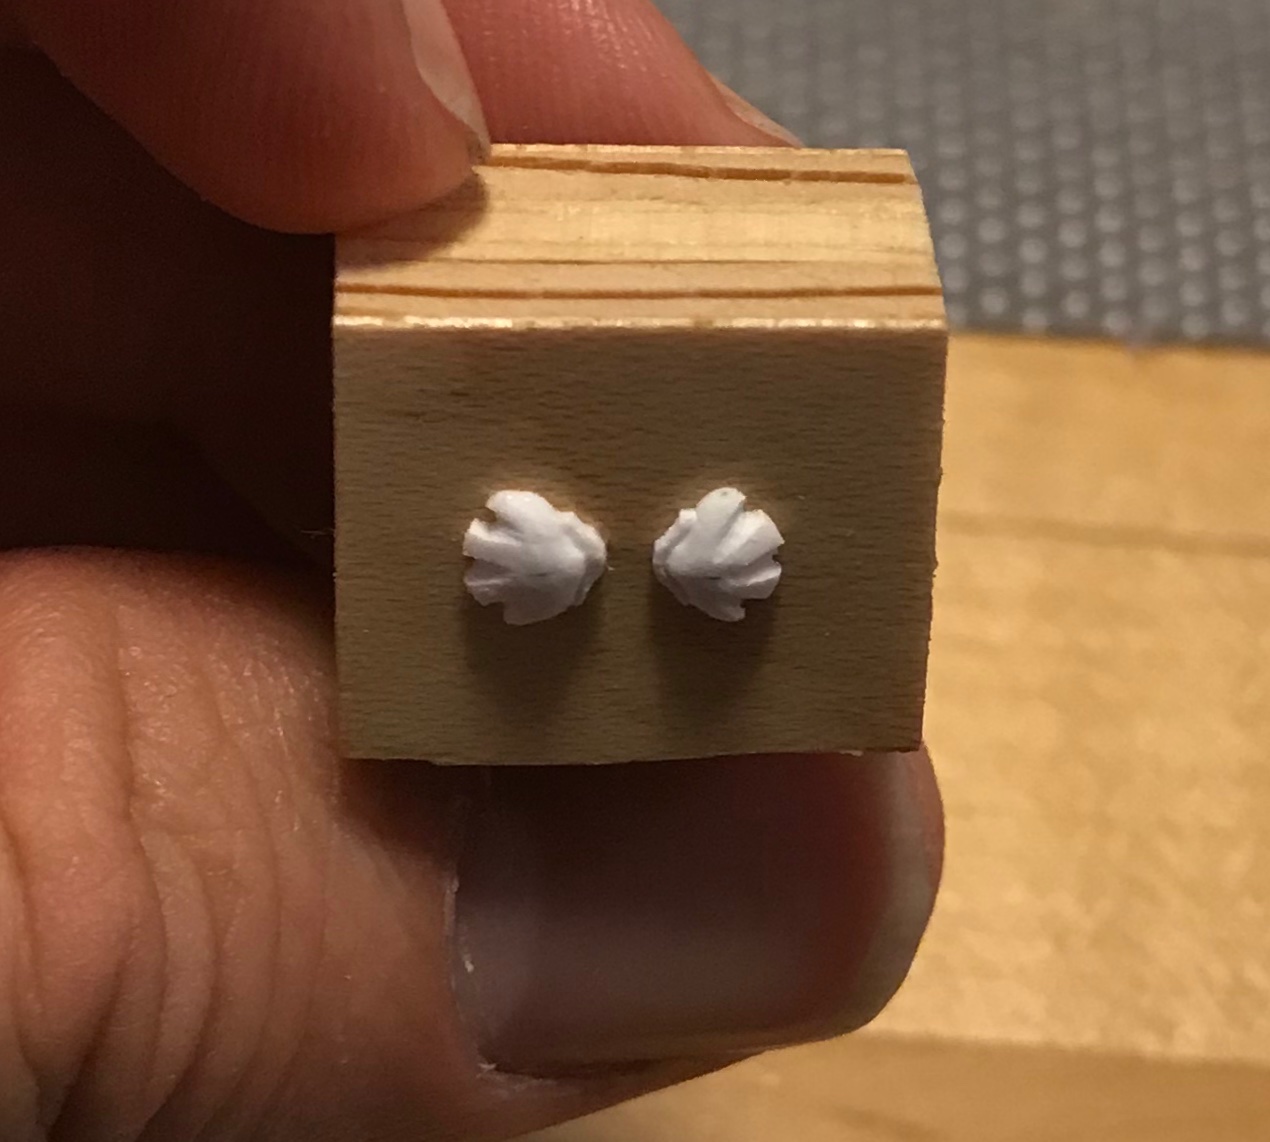
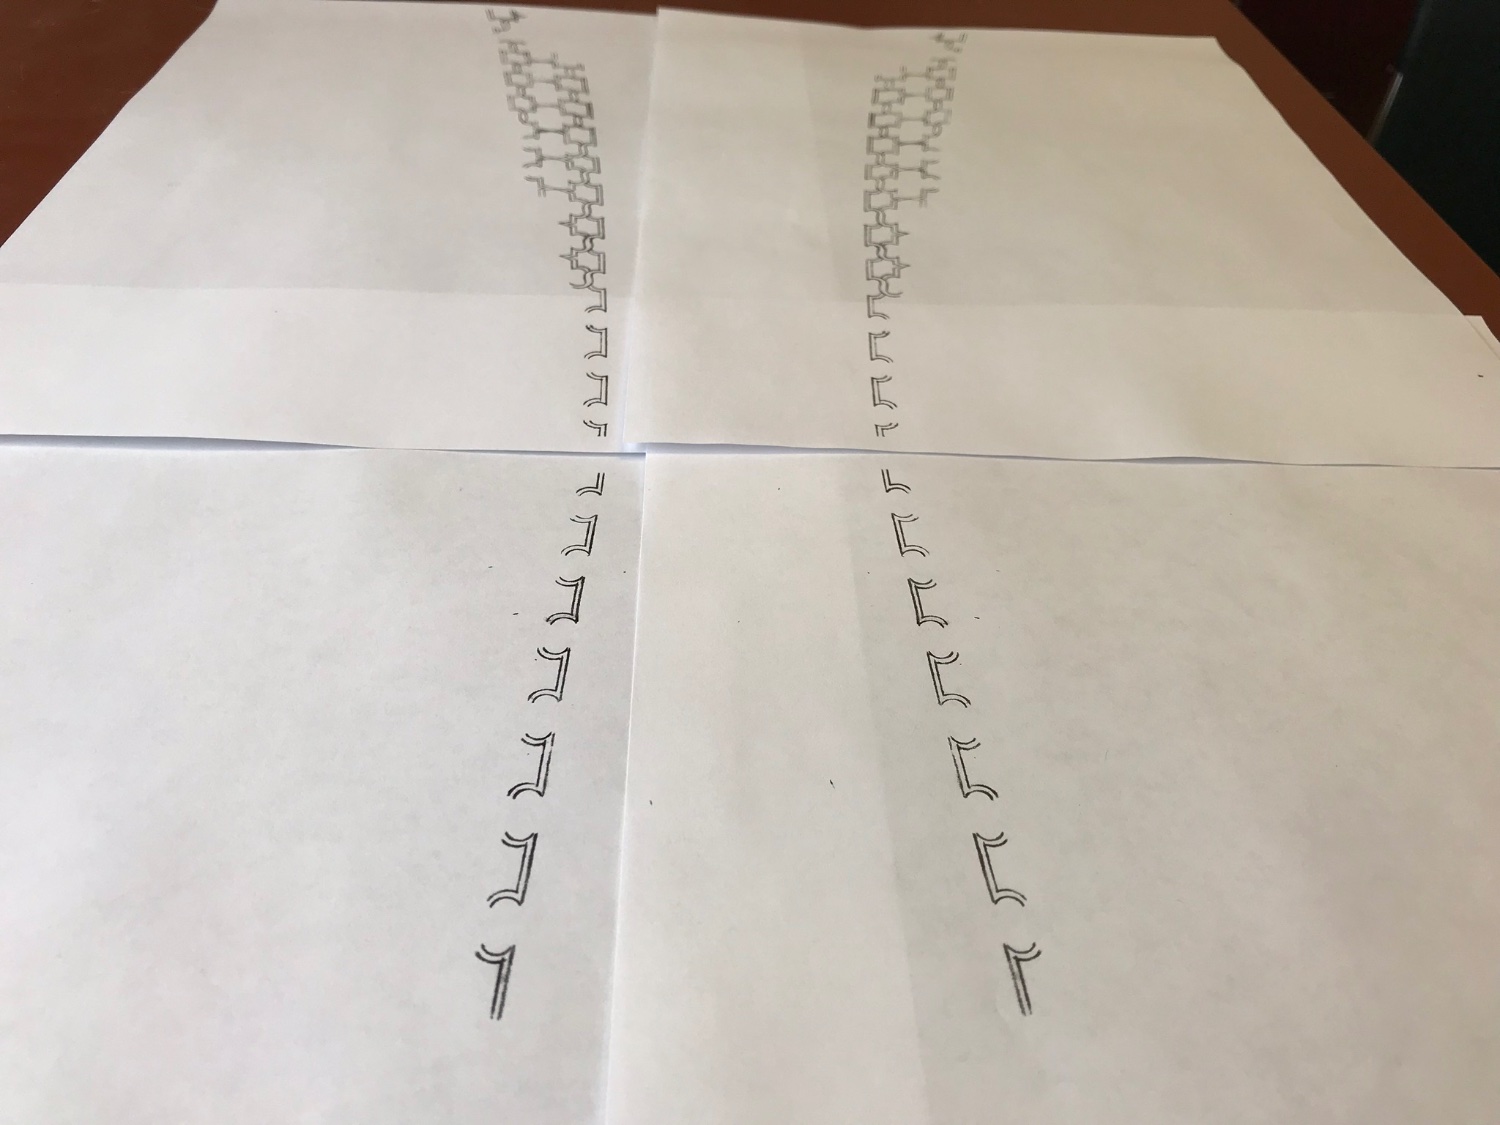
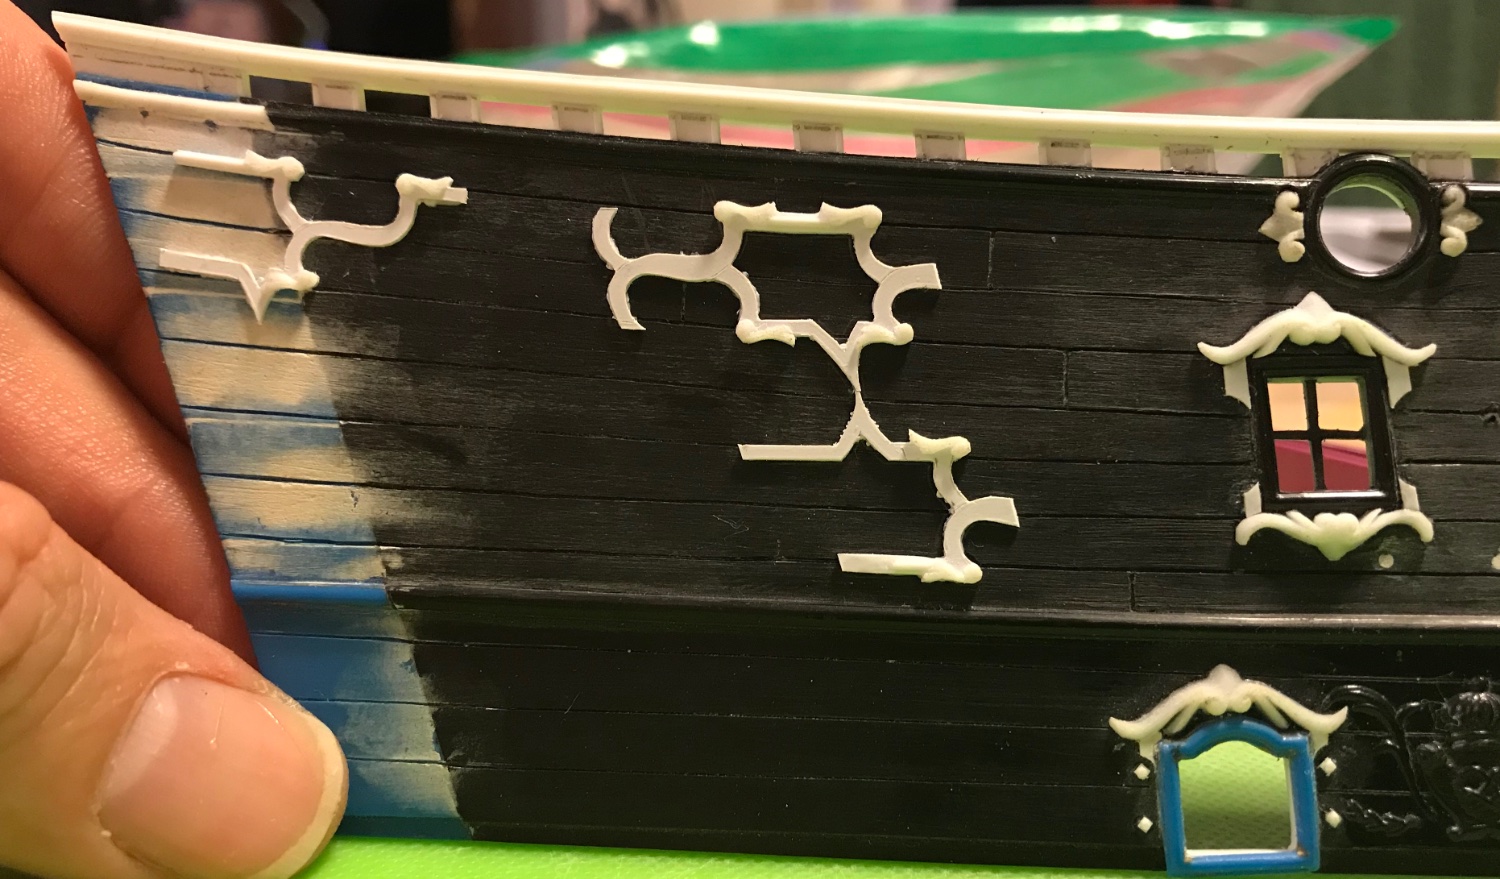
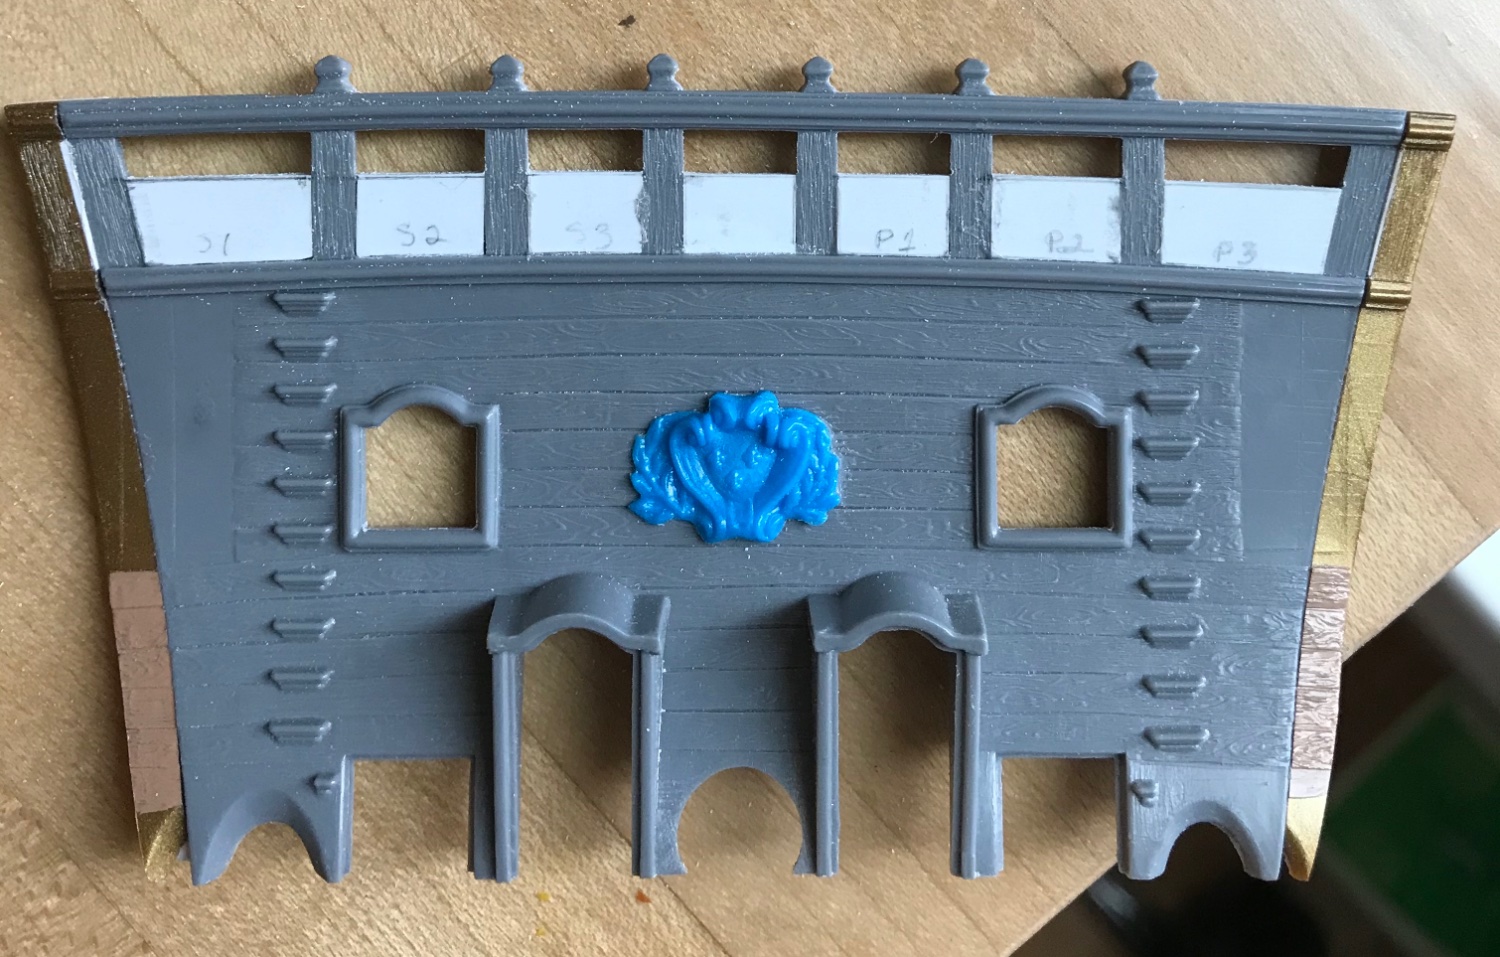
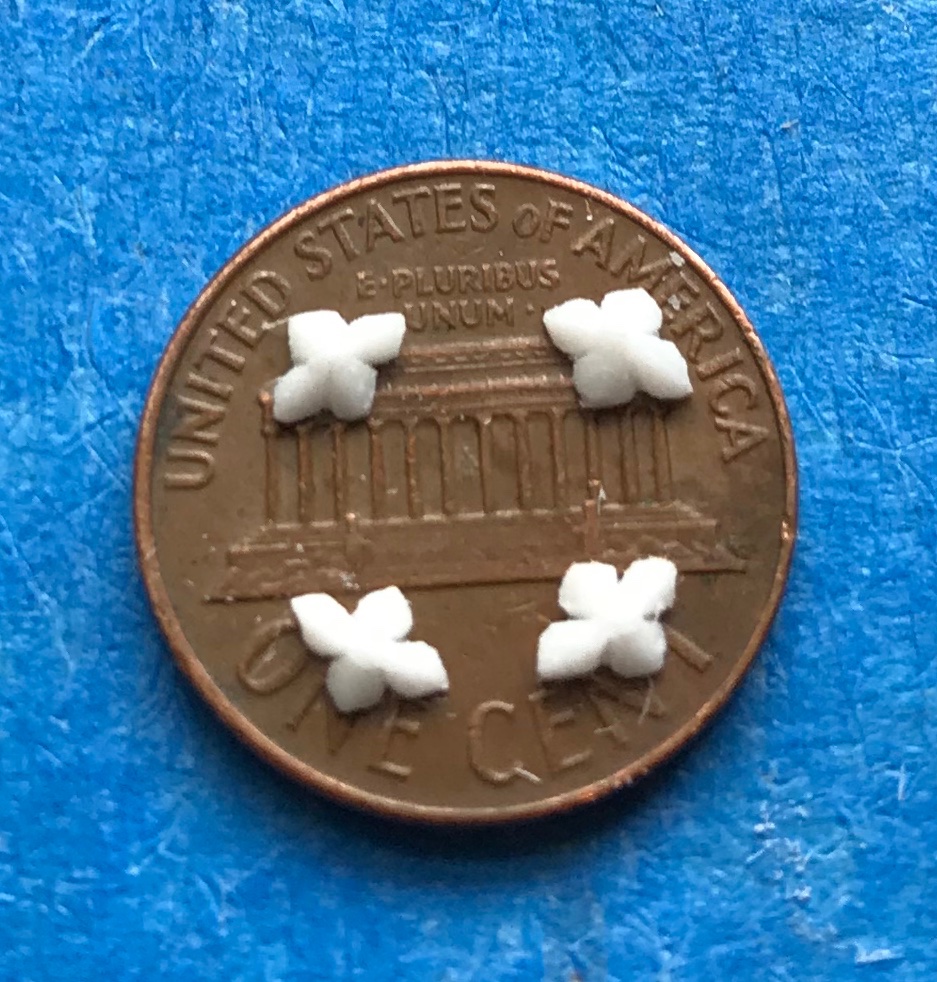
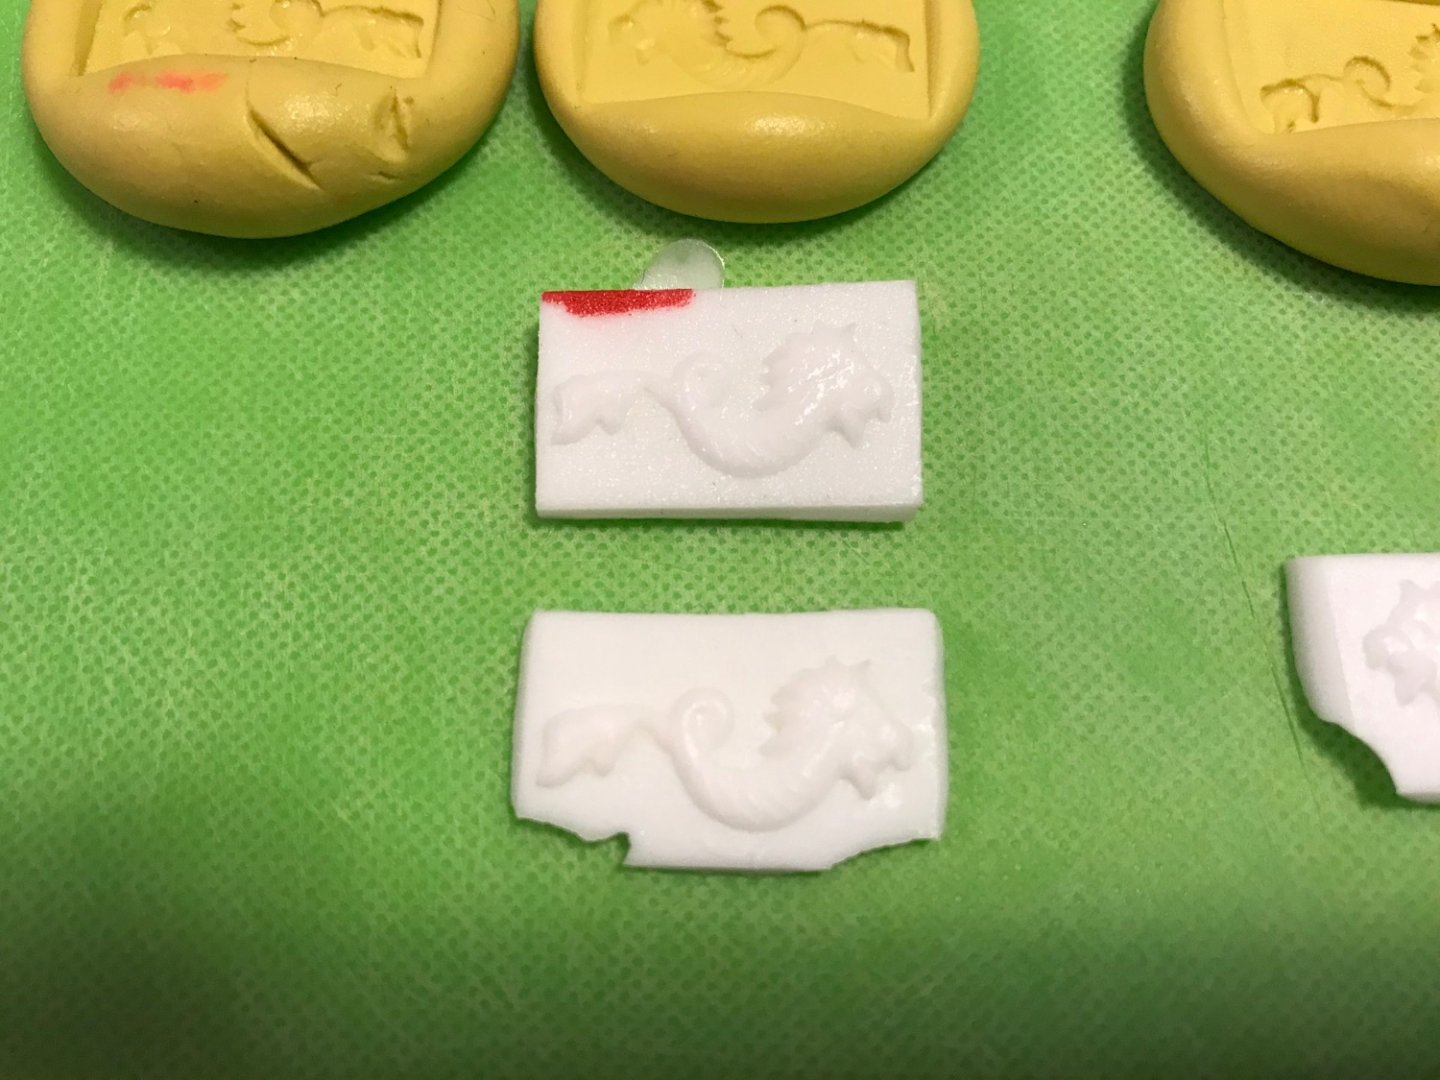
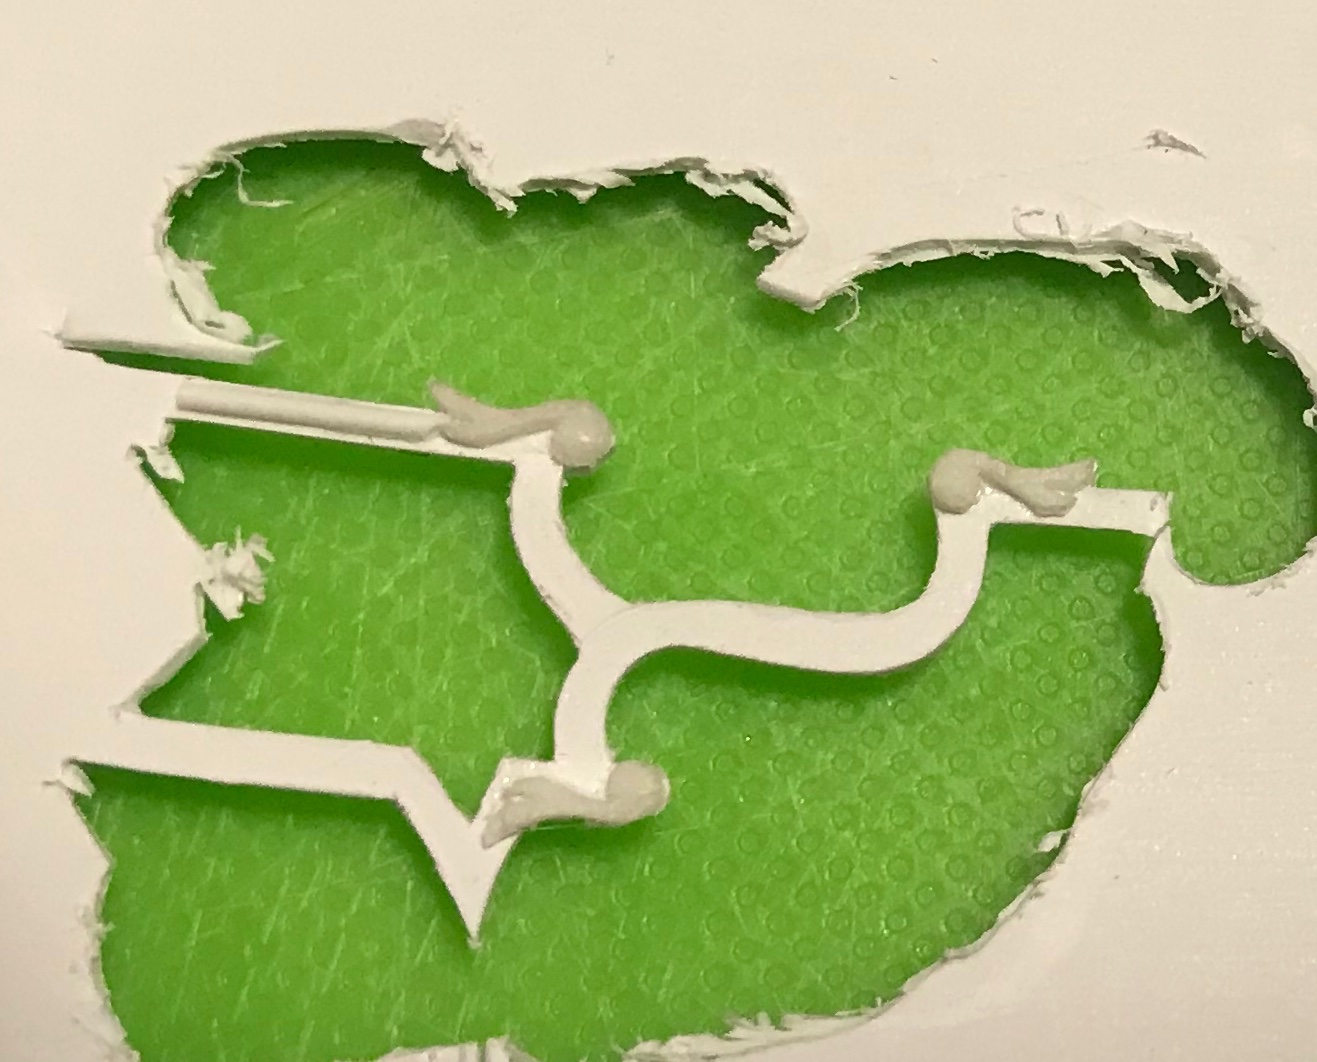
For all of the frieze ornamentation, I carved masters out of styrene and then mounted them to plywood blocks that I could then make casting moulds from with a latex mould medium. The castings themselves are a 2-part resin - Allumilite - that requires a lot if wasting to eliminate the background material, after casting. It was not an efficient process. However, it is the process I knew I could get great results with. I could never quite see bow to model carvings in Sculpy clay the way some so masterfully do. The frieze lattice was laid out on paper, transferred to .015 sheet plastic and ever so carefully cut out: It was a tremendous labor that was worth it, in the end, but I spent the better part of six months working at it - a lot of hours!


-
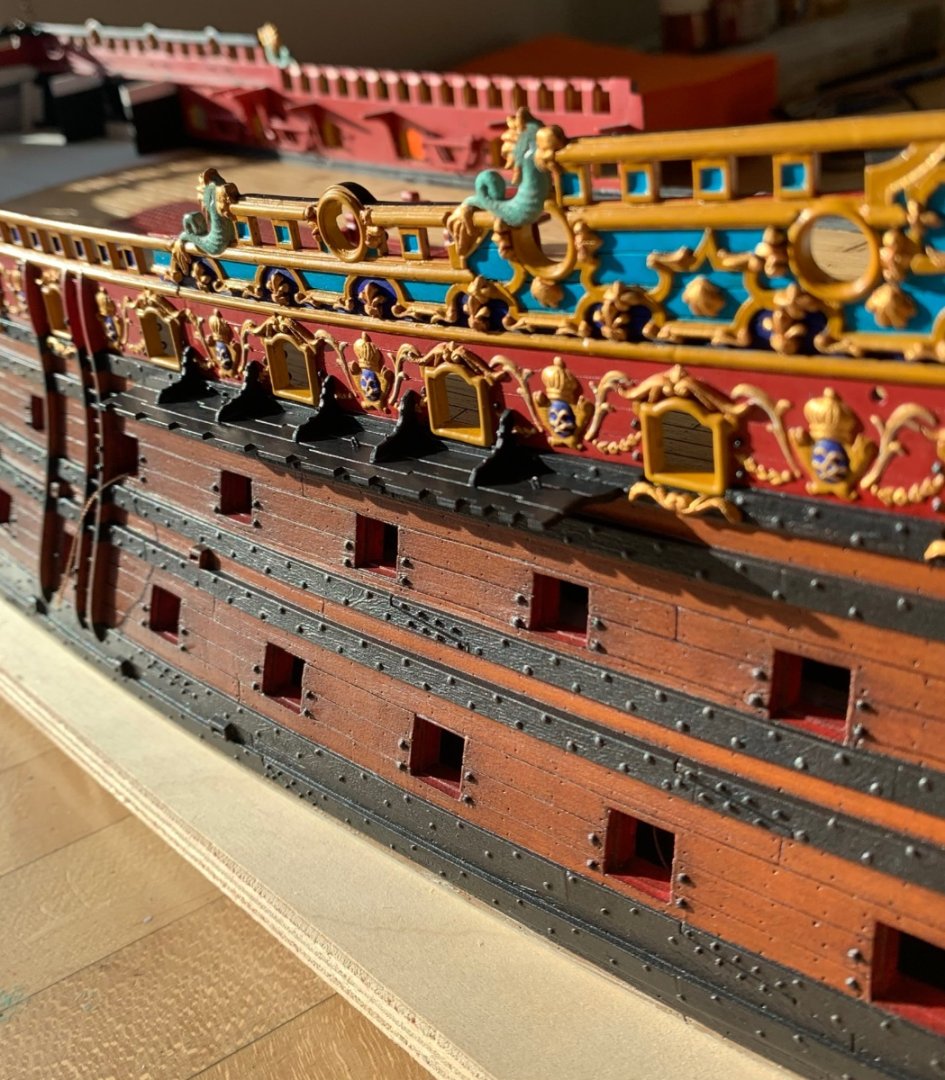
The “vertical white stripes” you are seeing on the exterior of the bulwarks are the continuation of the waist “skids,” or rub-rails that ease the raising or lowering of the ship’s boats past the wales. You can see the skids, here, on the left side of the picture:
- 1,503 replies
-
- 1
-

-
- Le Soleil Royal
- Heller
- (and 1 more)
-
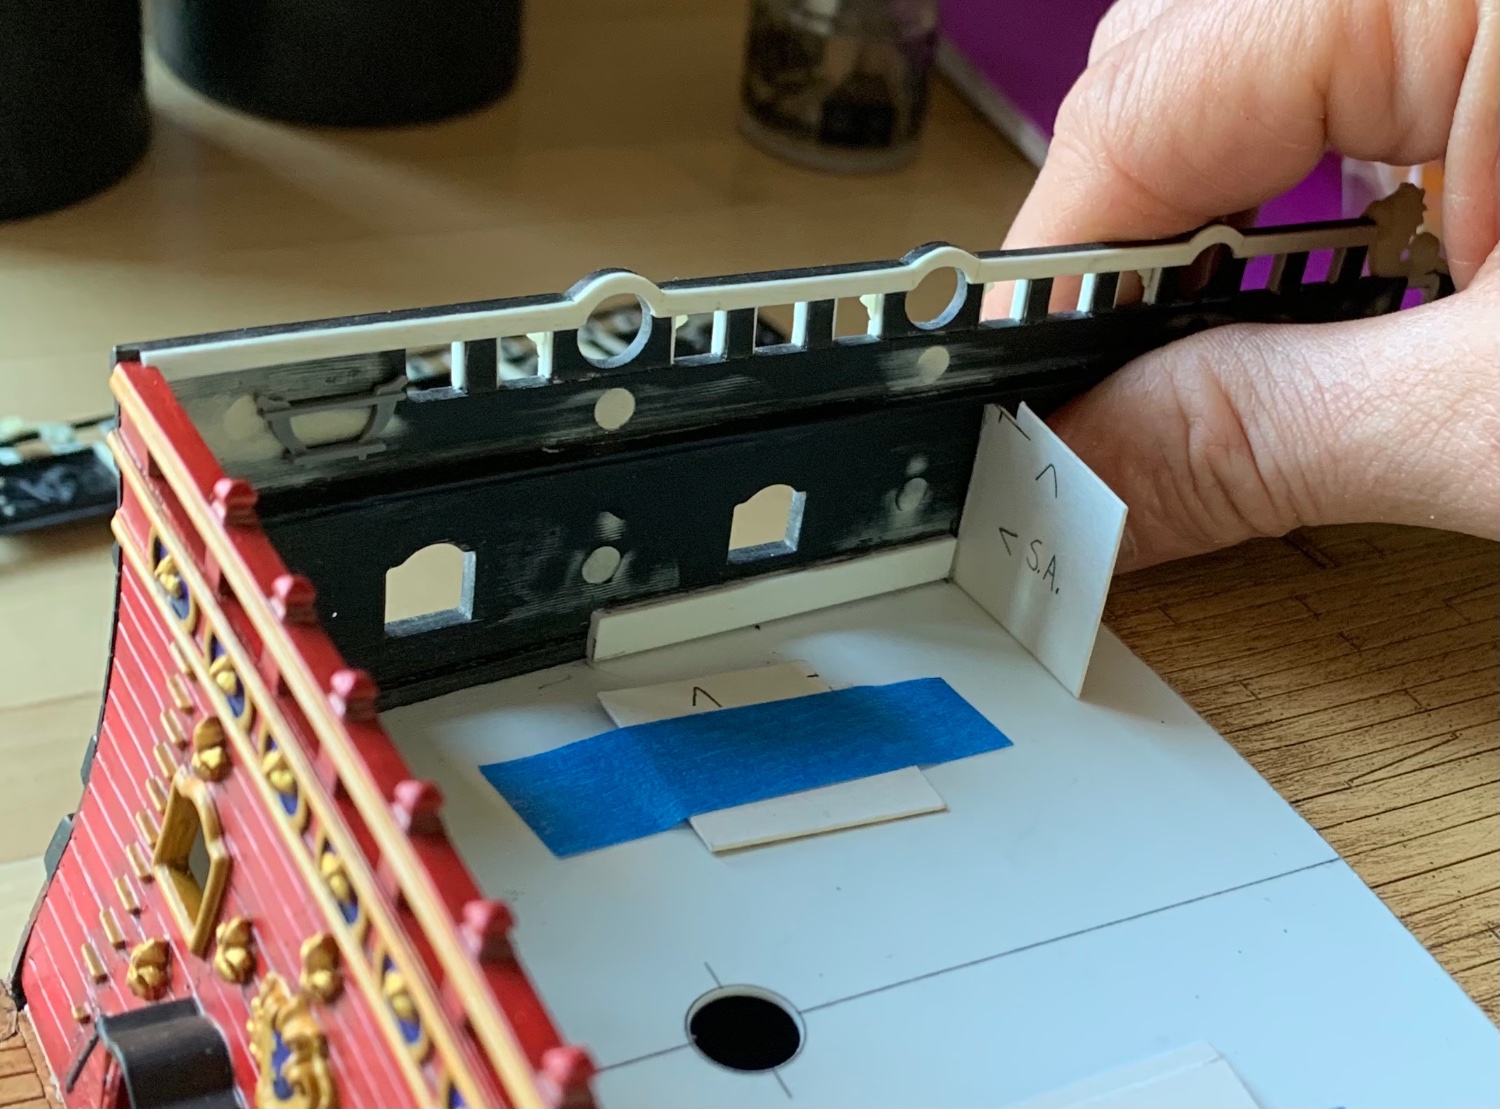
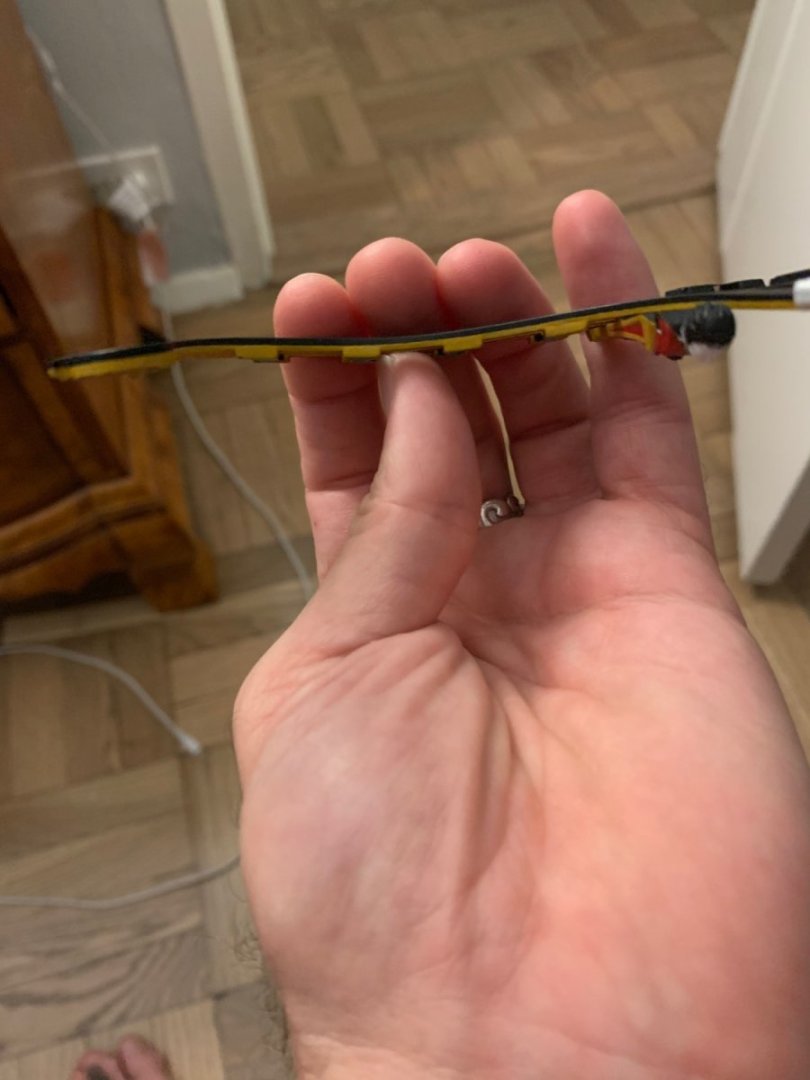
Not to be a total pain in the ***, but the Evergreen strip you are showing next to your caprail is easily twice the thickness you need it to be. Aim for .032 - .028; I’ve run out of what I used, but that’s a good approximate range. What you are seeing on the verticals (interior bulwarks), and vertically/horizontally on the exterior of the bulwarks is my attempt at visual trickery; on the standard Heller kit, the exposed timber heads, that make up the verticals of the railings, are much “taller” than they should be. My decision was to widen them, by adding styrene strip to the sides of the timberheads, but also to create a recessed panel that is visible from the outside of the bulwarks - those are the short horizontal strips. The intended effect is to focus the eye on the much smaller recessed panel, as opposed to the still too tall exposed timberheads. Making them a little wider enhances the effect. In truth, all timberhead railings should be shorter like the one I fabricated for the poop-royal rail: I did the same thing again, on the beakhead bulkhead railing - because it was easy to fill-in and do so: That’s what they should all look like. I’ve made compromises all along the way; adjust this to approximate THAT, while creating THIS to represent what it’s supposed to be. Proof of concept:


-
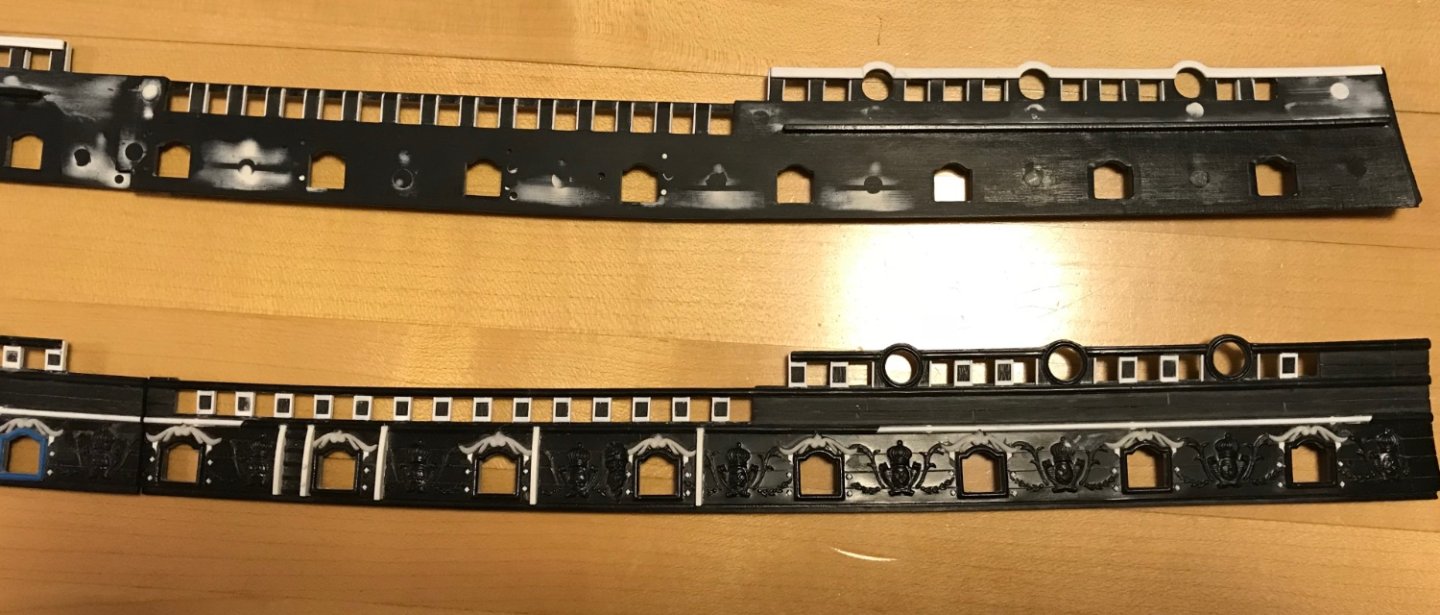
And, yes, the moulding of the kit has not changed at all from the mid-70’s when it was released. These parts are interchangeable.
-
This middle “narrow” section is what I mean by the waist section. It would be a mistake to add anything here because what it really represents are the exposed timberheads (that make up for the vertical members of all cap-railings), which then have an external sheer-strake nailed to them. As far as the kit is concerned, this isn’t exactly perfect proportionally, but it is correctly modeled as a detail, so I would leave that alone. Personally, I was only concerned with the sheer rails of the forecastle deck, the quarter, poop, and poop-royal decks.
-
That’s a pretty thorough accounting of what’s involved.
-
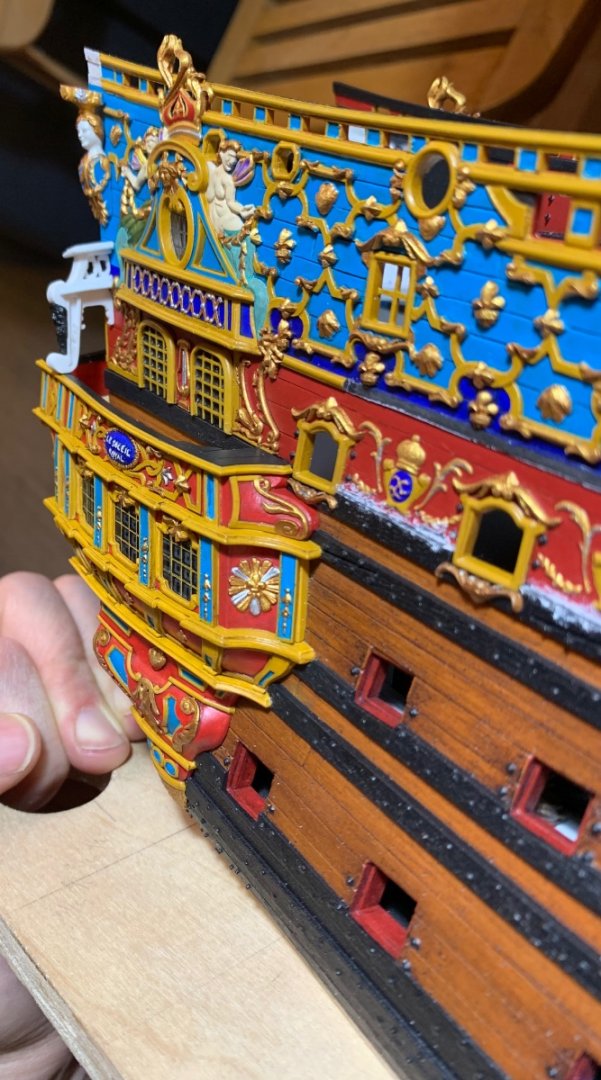
I agree with Ian on that one. What we’re referring to with Evergreen and the cap rails is to thicken the inside edge of the caprails so that they don’t look so thin. It’s the same idea is thickening the gunport openings with Evergreen. In the picture above, you can see the white Evergreen along the caprail. There it is again on the top bulwark pair. I did not do this in the waist railing, though.

-
Replacing the pins is a great idea. Yeah, I would go ahead and glue the upper bulwark halves together because you will have the beakhead bulkhead and stern plate in place for you to anchor the bulwarks to. If I recall correctly, you do need to install the beakhead and stern plate first. On my current version, I didn’t have a stern plate to anchor to, so I had to create a series of gussets that anchored to the deck and thus gave me the correct tumblehome for the aft bulwarks; this was very tricky, and frankly, a pain. The worst of it, though, was trying to fill/sand/paint the bulwark joint on the model. That was very difficult to do and still end up with a seamless paint touch-up. Lots of hours spent there! Since you can avoid all of that, you absolutely should.
-
Yeah, that isn’t too bad, but with a little patience you can close that gap to zero. The worst pieces are the forward bulwark pieces, which have to flex quite a bit to even get into position.
-
I am going to make a strong recommendation before you begin painting your upper bulwarks: take as much time as necessary to get a good fit of the UB’s to the rabbet just above the main deck. This is THE worst aspect of this build because it is so poorly fitting; SR is no Heller Victory, in this regard. Trust me - you do not want to do all this careful paint and gilding work, only to then have to handle those parts excessively to make them fit. The parts are always going to be under tension because they do not neatly conform to the X/Y curvatures of the hull. Not at all, really. On top of that, the rabbets are not clean, and to get a good bond, you’ll want to fair these with a small, hard block to which you double-stick some coarse sand-paper. Doing these things will REDUCE the amount of tricky putty work you must do, afterwards, although it will not completely eliminate it.
- 1,503 replies
-
- 2
-

-
- Le Soleil Royal
- Heller
- (and 1 more)
-
Main deck looks great, Bill! When I say that I cannibalized the kit quarter galleries, what I mean is that I pulled three small ornaments out of them to re-incorporate into the new quarters. My build-log is absurdly long, but somewhere in there details the full process of drawing the QGs, and fabricating them from wood and plastic.
-
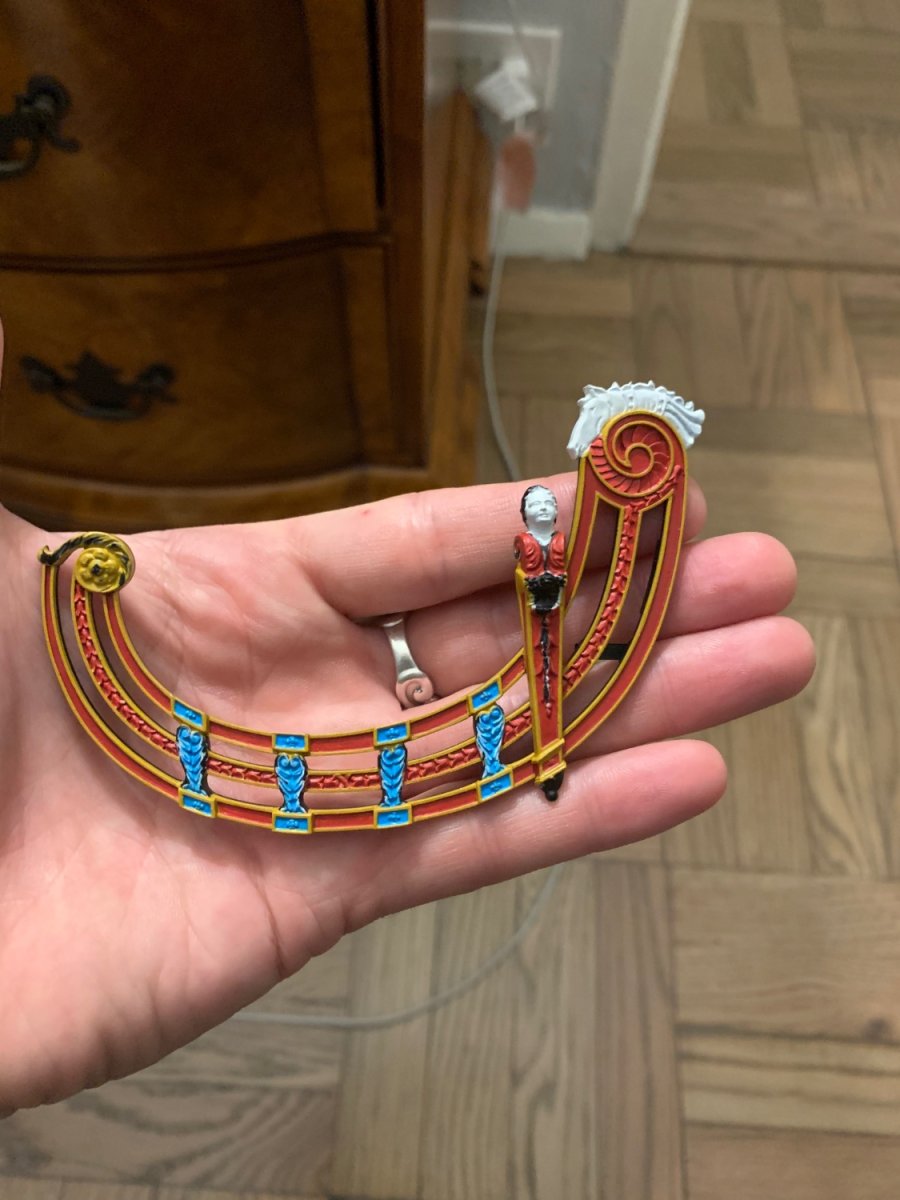
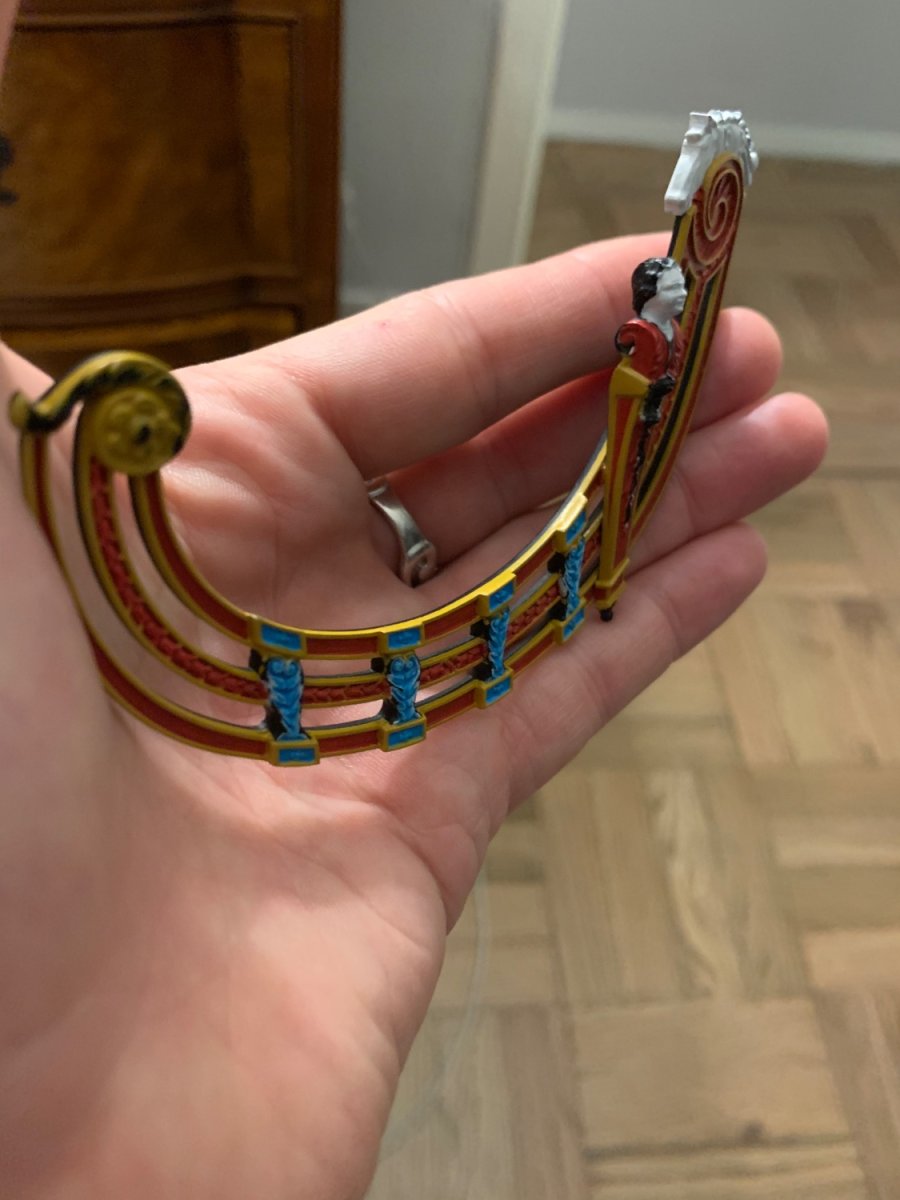
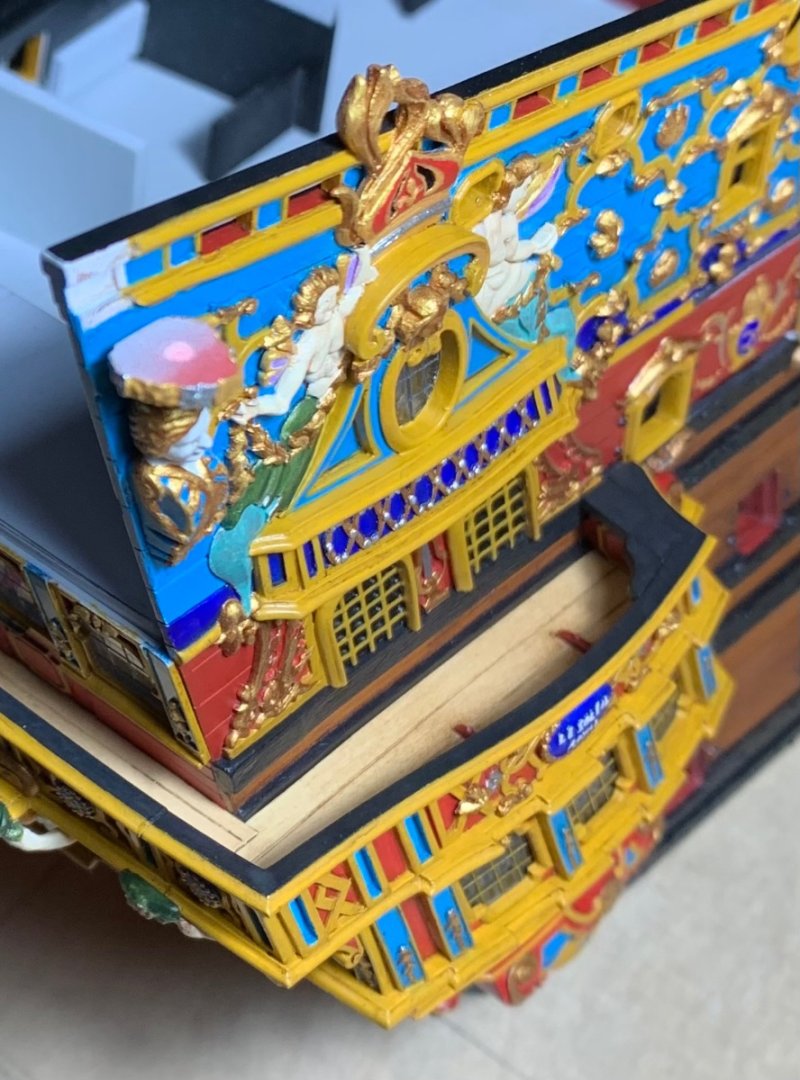
Well, I’ve got the ocher cut-in on the port side, and I’m a third of the way through the ocher, starboard. You can’t really tape these lines because of the limited access and curved shapes: There is still much to paint here. I have to grey-wash the horse and the cathead figure. I still haven’t muted the colors of the red and yellow ocher, and of course none of the gilt work has been done. Little by little, though, we are getting there.


- 2,444 replies
-
- 21
-
-
-
- heller
- soleil royal
- (and 9 more)
-
Well, not exactly. In the 1680’s, the prevailing trend was to enclose the lower, functional section of the quarter gallery; to have an open walkable balcony above that, that wrapped to a walkable middle balcony on the stern; and above that, was a shallow amortisement that gave the impression of a fully-rounded structure, but that was really more of a surface ornament: Also, by this time, the walkable lower stern balcony had been eliminated as it was easily susceptible to damage in heavy following seas.
- 1,503 replies
-
- 1
-
-
- Le Soleil Royal
- Heller
- (and 1 more)
-
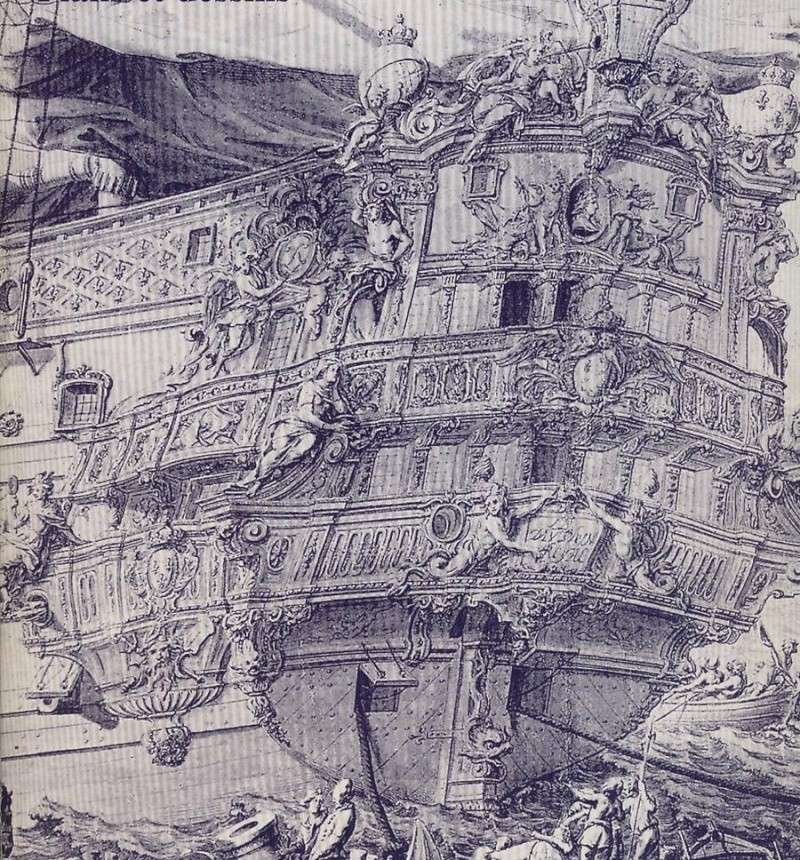
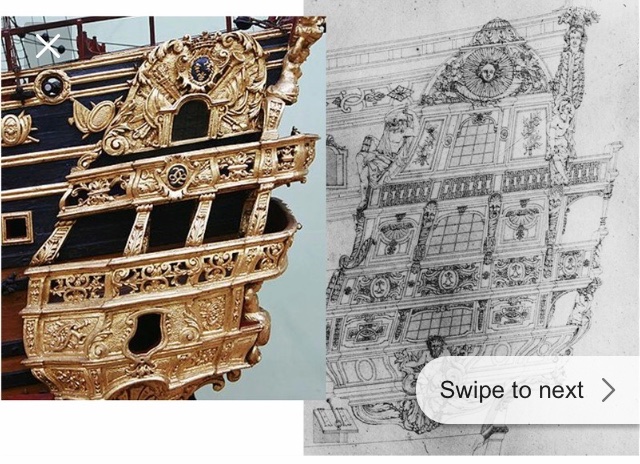
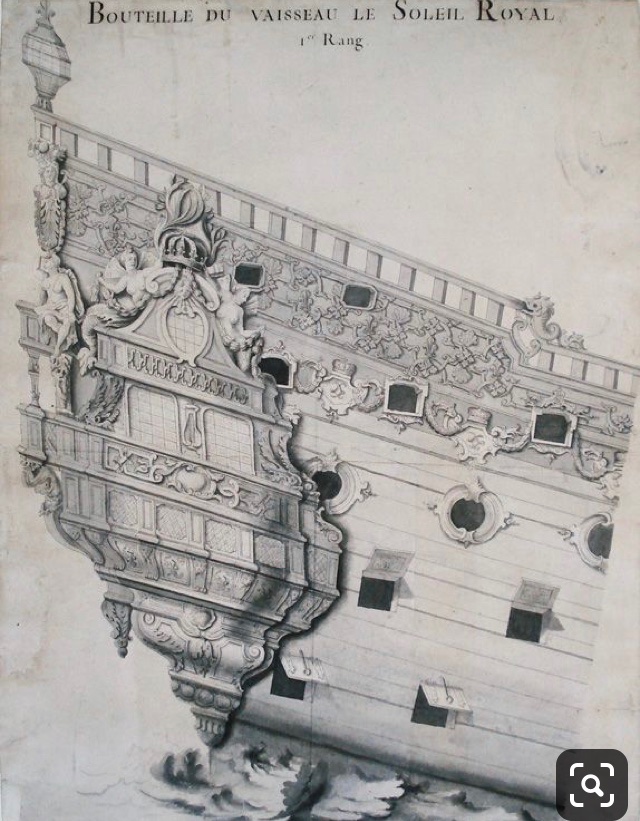
Well, Bill - the question of the galleries is a complicated one. It is my belief that, in many ways, Tanneron modeled SR after the better understood (perhaps) second SR from 1693. Heller, I propose, then made their prototype with closed galleries - perhaps using this drawing as a basis for that decision (right): Everything about this drawing is consistent with a French progression toward fully closed quarters, lower stern height, a more restrained and overall reduction in ornamentation. So, going back to Tanneron - the contextual evidence that remains from the late 1660’s/early 70’s suggests that he wanted to have his cake and eat it too. His model, in the Musee de la Marine, represents a kind of hybrid between what the ship may have looked like in 1670, and what SR2 may have looked like in 1693. I chose to discard (cannibalize, actually) the kit quarter galleries and instead make from scratch what I am pretty certain are the quarters and decor from the refit of 1688/89. I may be wrong about this, but at least it is an attempt to place the ship within a specific context. I have made certain specific variances, where it served me to maintain some of the Heller ornamentation, and I have taken some authorial license, but my interpretation is based directly on the above.
-
It depends on your preference. I chose not to arm any of my forward or stern chase ports because on this go-around I wanted to represent something more true to the times. If you don’t arm them, I’d just close the hatches.
-
If you are to arm these ports, Bill, the guns should be forward facing. The historic reality is that, in actual practice, when these ports were armed, they merely shifted the next adjacent broadside gun over to the chase port. The reason for this is exactly what you have illustrated; there is not enough recoil or working clearance to have these two guns rigged at the same time. Most of the time, these guns were not armed.
-
That’s an interesting thought on the block nubbies, Ian.
-
Yeah, it’s a crazy amount of blocks.
-
I believe those are length dimensions, although I have yet to buy replacement wooden blocks.
-
Yup, that is as the blocks have always been. What I don’t like about them is that there’s no channel to properly attach and seize the line to.
-
Just a general thought - you seem to be tearing through the project at a record pace. I realize you are at a place in life where you have more time available to you, but I wonder whether you are enjoying the journey that making this model entails. If so, then by all means rip-away at it. Don’t hesitate, though, to take extra time on the more detailed aspects of the build that are coming up, such as the upper bulwarks. A little extra time spent, here, pays enormous dividends at the end.
- 1,503 replies
-
- 1
-
-
- Le Soleil Royal
- Heller
- (and 1 more)