Hubac's Historian
-
Posts
3,315 -
Joined
-
Last visited
Content Type
Profiles
Forums
Gallery
Events
Everything posted by Hubac's Historian
-
 The CalderCraft Victory is still tops among the wooden kits, IMO.
 -
I see the appeal in a simplified dockyard style, but I find the sheer of the model to be a little stiff, and the transition from quarters to stern to be a little rough. Some may say I’m being unfair, but full lines plans exist for the ship. I don’t understand, in the computer age, why that is so difficult an ask for kit manufacturers. We know what the ship is supposed to look like! And, as often is the case - the masting and spar plan are a complete afterthought. $1,700? Not for me.
-
I’ll look that up. Thanks for the tip!
-
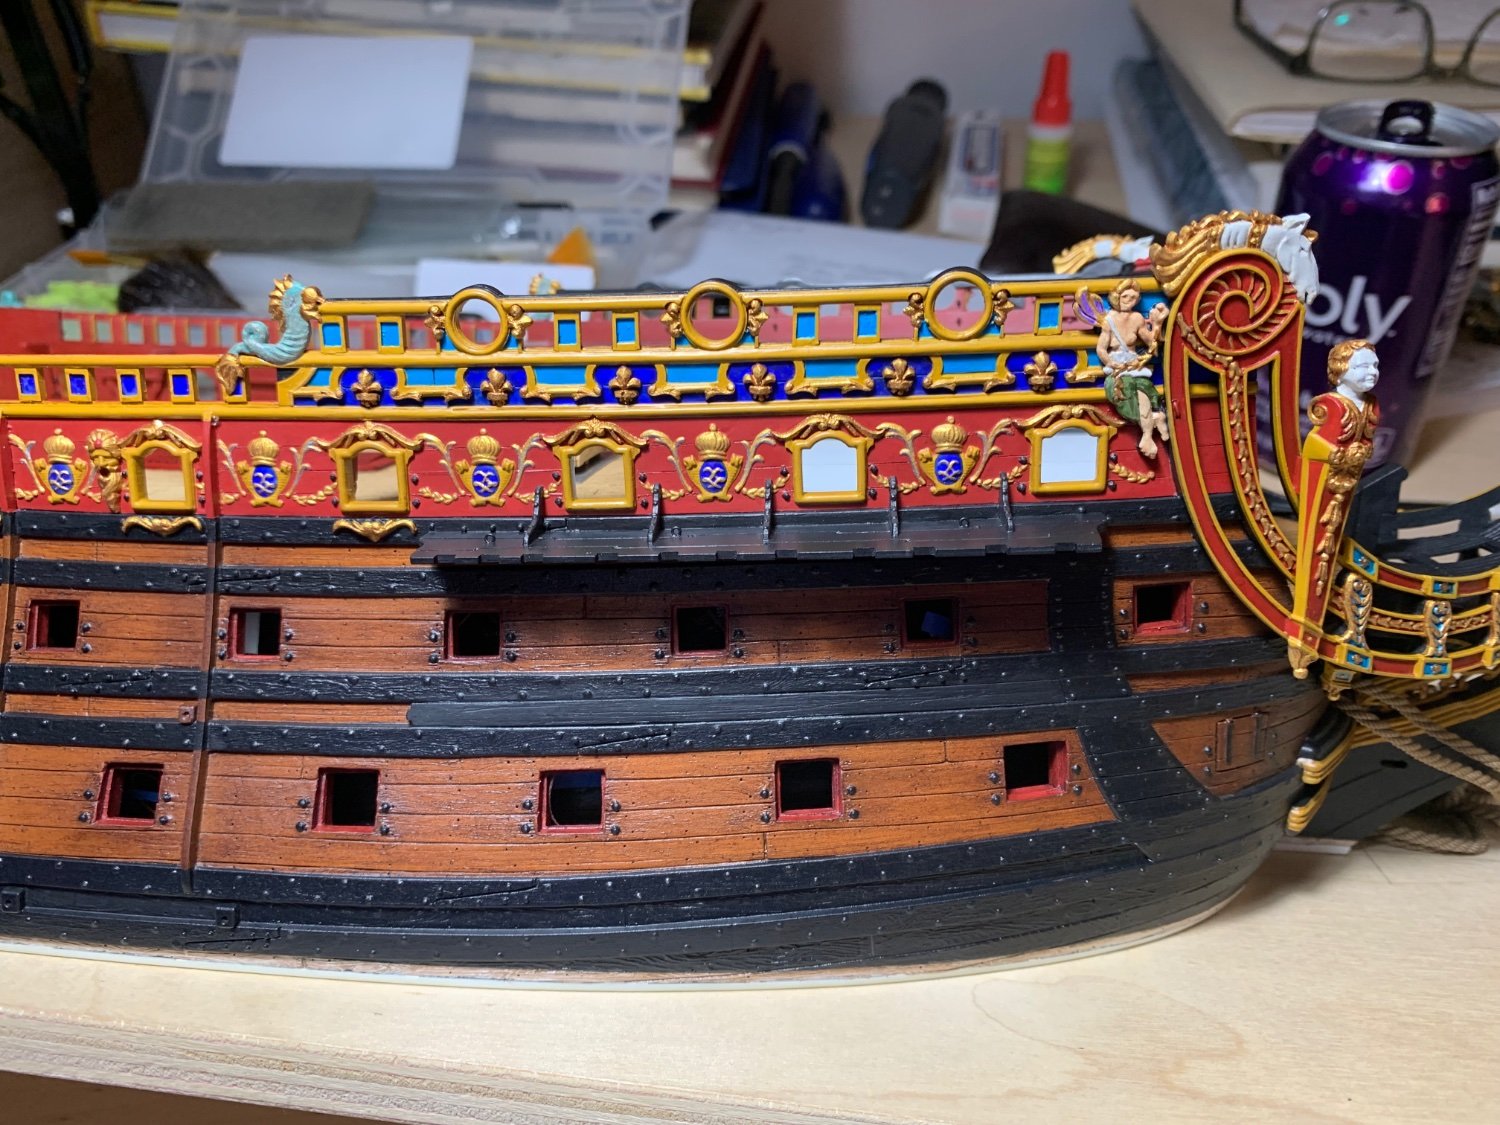
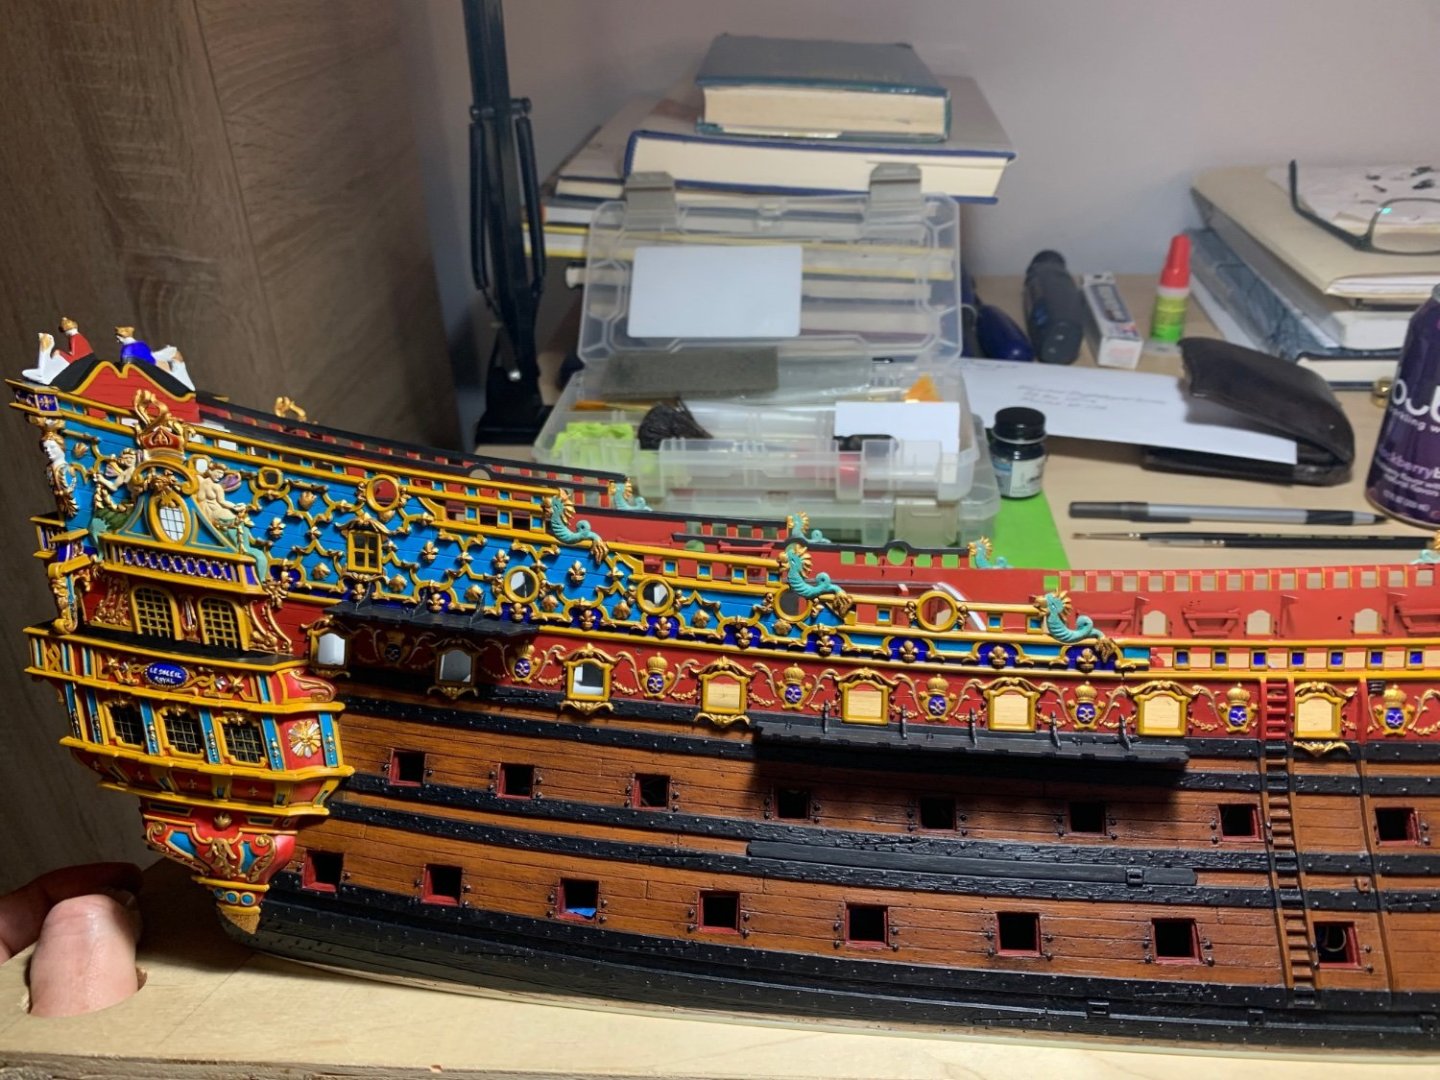
I continue to be fascinated by your process, and your logic for filling-in the blanks is clear and as close to unassailable as one can hope to get. I did not initially understand the framing of arms in your beakhead bulkhead, but now I feel silly for not seeing the connection to the way they are framed at the stern. I wish that I had also made the connection that the arms should always literally be crowned. Who’s jealous now? I can relate to the frustrating tedium of fitting the headrail support timbers. Despite making what I was sure were very close patterns, I still had to do several rounds of subtraction and addition to get everything to mate nicely together. I also realize, now, that I have made the job of gammoning more difficult for myself by glueing-in the headrails early, but I needed them in-place, in order to stabilize the cross timbers. Oh well! That is also a clever hack for making the beakhead grating look criss-crossed as it should be. Also, fitting the figurehead to the stem assembly is another challenging test of patience. I had three to choose from and all three had varying degrees of scoliosis. I like your solution to re-enforcing the lower transom and bringing the upper hull closer together. Using the stock parts really does beg for something appropriately architectural to hold the whole thing together. As great as the kit is, the warping issues in this area are challenging to deal with. A++ As I’ve said before, your particular coloration of the stern plate is just so perfectly balanced and really draws all of the many details to the eye. A+++
- 106 replies
-
- 6
-

-
- Soleil Royal
- Ship-of-the-line
- (and 2 more)
-
Your window framing is splendid, Siggi. Looking at the stern drawing, it is a curious thing that the central light of the upper tier is slightly wider than the light beneath it. Consequently, the flanking pilasters of this center light are out of alignment with the ones drawn beneath it. It seems deliberate, as drawn, but unusual in consideration of the underlying framing. What are your thoughts on this?
-
That’s interesting to bring it up a few shades. Looking great, Marc!
-
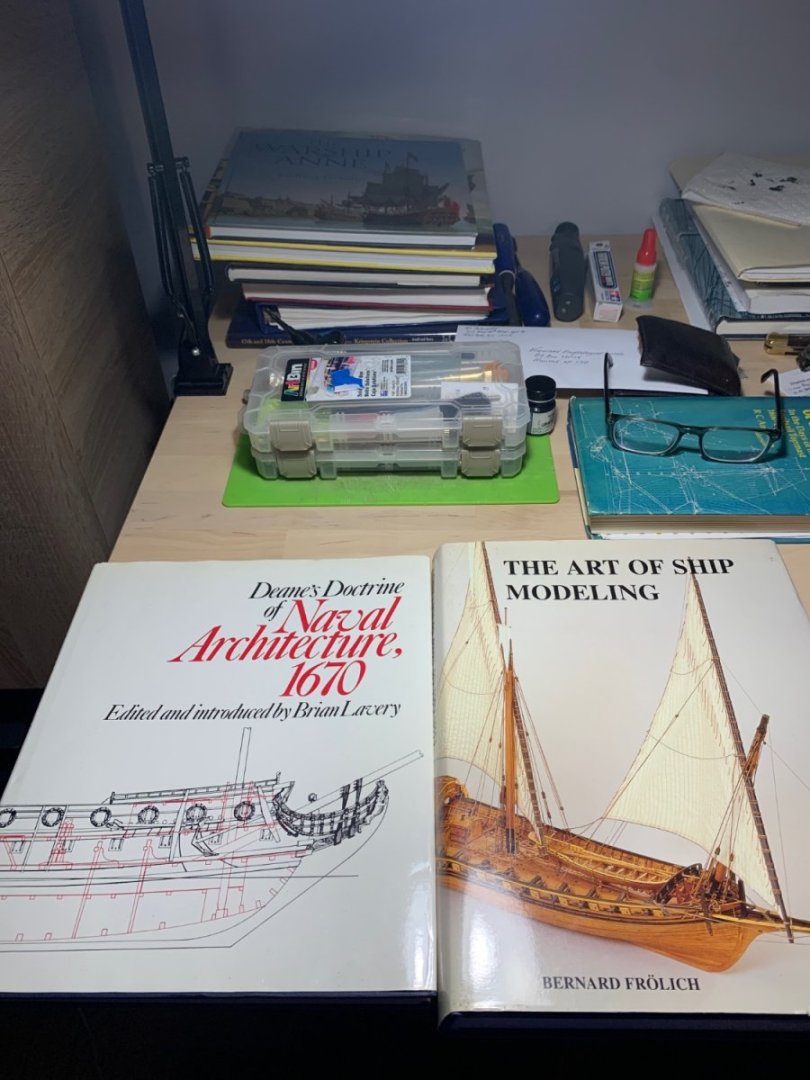
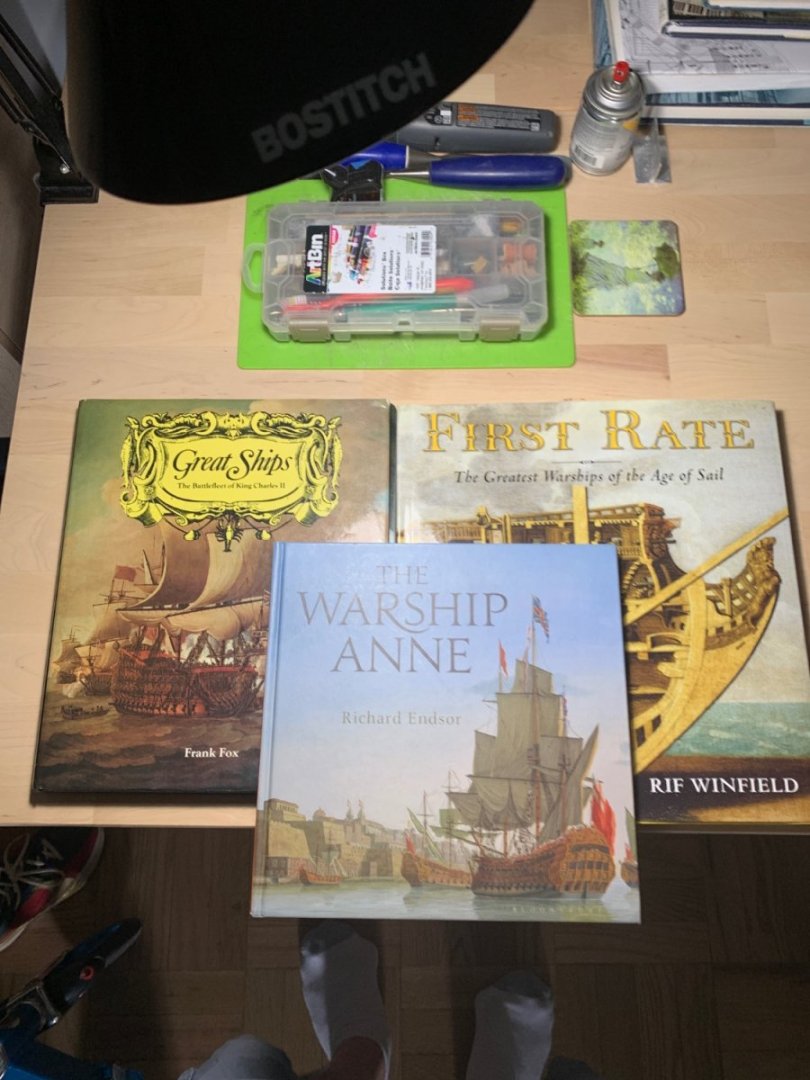
These days, this is what progress looks like for me: I added the filling pieces for the middle band of wales, so that I can properly mount the chain preventer plates. My J-O-B has transitioned to full-employment, lately, and I have completely lost the pockets of daytime to get small-work done. The evenings are mostly consumed with coaching sports teams, and emailing families about said sports teams, and generally being a husband and dad. All good, just BUSY. I don’t have a lot of modeling mojo left in me, to do good work, so I have mostly been reading. About rigging and other things ship-related. R.C. Anderson really is the foundational read for this epoch. As I go through it, I have been re-reading the rigging sequence of several of my favorite builds. The first is Paul Kattner’s intense kit-bash of the DeAgostini Vasa; as a first-time builder, his approach and technical mastery are just incredible. His log is extremely well-photographed throughout. Along the same lines is Michael’s (‘72 Nova) Airfix Vasa, which is just exquisitely well-done in an impossibly small scale. The third is Marsalv’s Le Gros Ventre, which is just a model that I love, through-and-through, and the rigging is truly excellent. Very honorable mention goes to Daniel’s Victory, which like Michael’s build is excellent for the technical tricks of making rigging look truly professional. These are peripheral time periods to my own, with their very specific contributions to the history of rigging, but the sequence of work in these builds is enormously helpful for understanding what is a very complicated process. I am, of course, well acquainted with Archjofo, and all I can say there is - dare to dream. A true Master Class. Now that I have some rigging vocabulary and understanding of what most of the lines do, it has become much easier to conceive of where my belay points should be. Just as with anything else, you can’t really build a rig until you can understand it and visualize it. We are getting there, though. As is my custom, I make frequent visits to The Strand, hunting for obscure, and out-of-print ship books. Most of the time, I come up empty. Occasionally, though, I find a gem! On my most recent trip, there was a veritable treasure trove! Winfield’s First Rate (have it) Lee’s Masting and Rigging (have it) An updated and comprehensively illustrated Pepy’s Navy (don’t have it, yet) And, then, these two: I will likely go back and poach the Pepy’s title on my next paycheck. The two I did pick up are invaluable for both my current and future projects. The Art of Ship Modeling has a very detailed accounting of the construction of Frolich’s L’Ambiteaux, and all of his subjects are beautifully photographed in hi-res. Lavery’s edition of Dean’s Doctrine is also beautifully illustrated and the math of Dean’s approach is very clearly explained. It isn’t a guidebook to reconstructing a French First-Rate of 1670, but it is useful for understanding the methods in vogue for that specific time period. Again, you can’t build it until you understand it. Lastly, John Ott clue’d me-in to the fact that an English only edition of Le Chevalier de Tourville was back in-print by Ancre for a very reasonable sum. I bought that too! From what I have gathered, here and there, the rigging and belay plans of this monograph are relatively easy to follow. Thank you, John! So, I just wanted to say “hello,” and thank you all for visiting. More to follow! Best, Marc

- 2,699 replies
-
- 28
-
-

-
- heller
- soleil royal
- (and 9 more)
-
The central ball at the top of the upper finishing (flanked by wings) appears to be crossed with a rope relief. The other grenades do appear to be cracking, as on detonation. It’s really pretty menacing imagery, and unique among French ships of this time period.
-
Siggi, when I look at this model on my home computer - as opposed to just on my phone - it explodes into focus! I just really love the coloration of the model, and the delicate balance between a slightly "grubby" white stuff and pristine top-sides. All of the moldings are so delicate and clearly defined. Your work looks every bit the part of a real ship. The low-relief carving is exquisite; in one of my often repeated rhetorical rants, I will say out loud: "just go and try to do it better!" I don't think it can be done.
-
With all respect for your client, I disagree about what is being represented beneath the lion mascaroons; a stylized mane is logical and probable. The pilasters on the headrails, on the other hand - those do appear to be flames. Same for the “grenades” of the forward headrail rosette, and the trailboard.
-
That you were able to use all of the kit spars without distortion, and have tension where there should be and slack where it’s appropriate is just an unbelievable accomplishment!
-
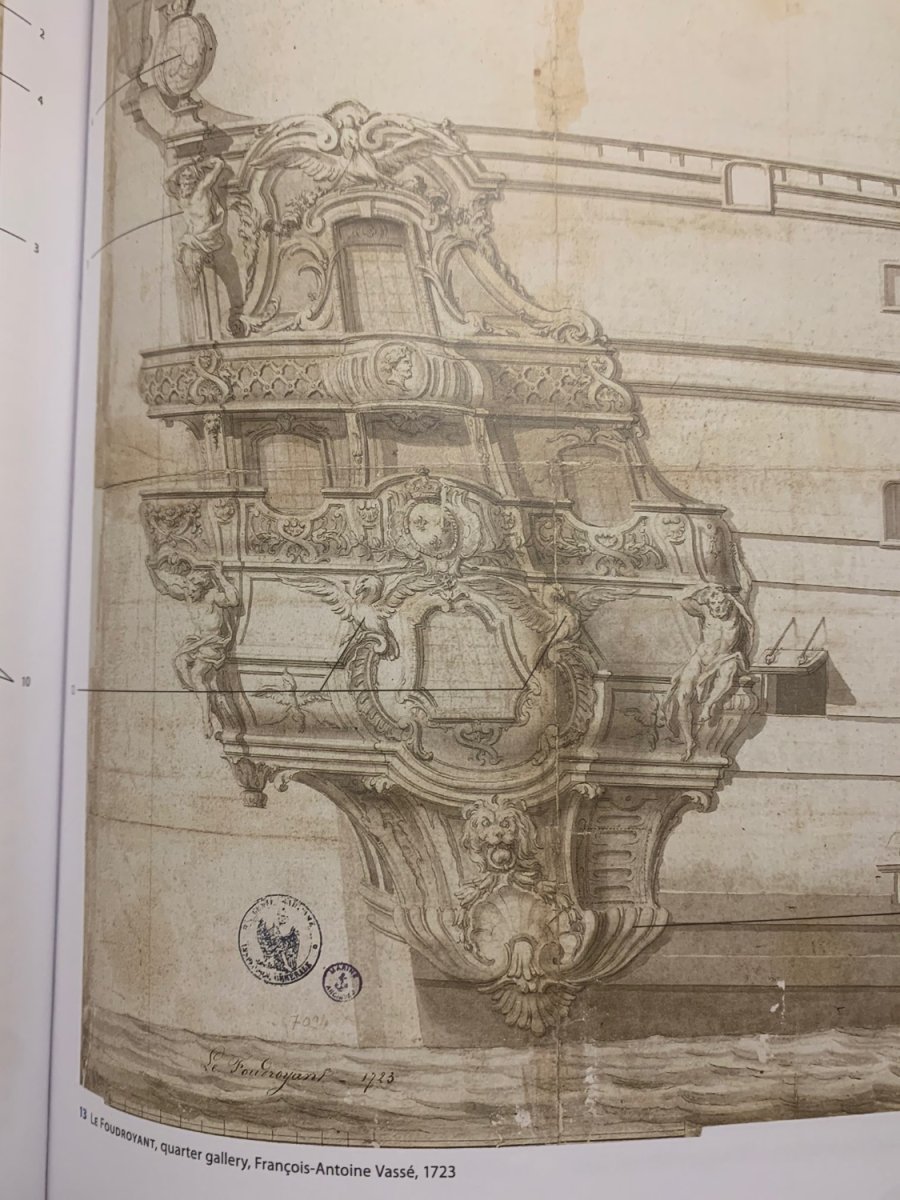
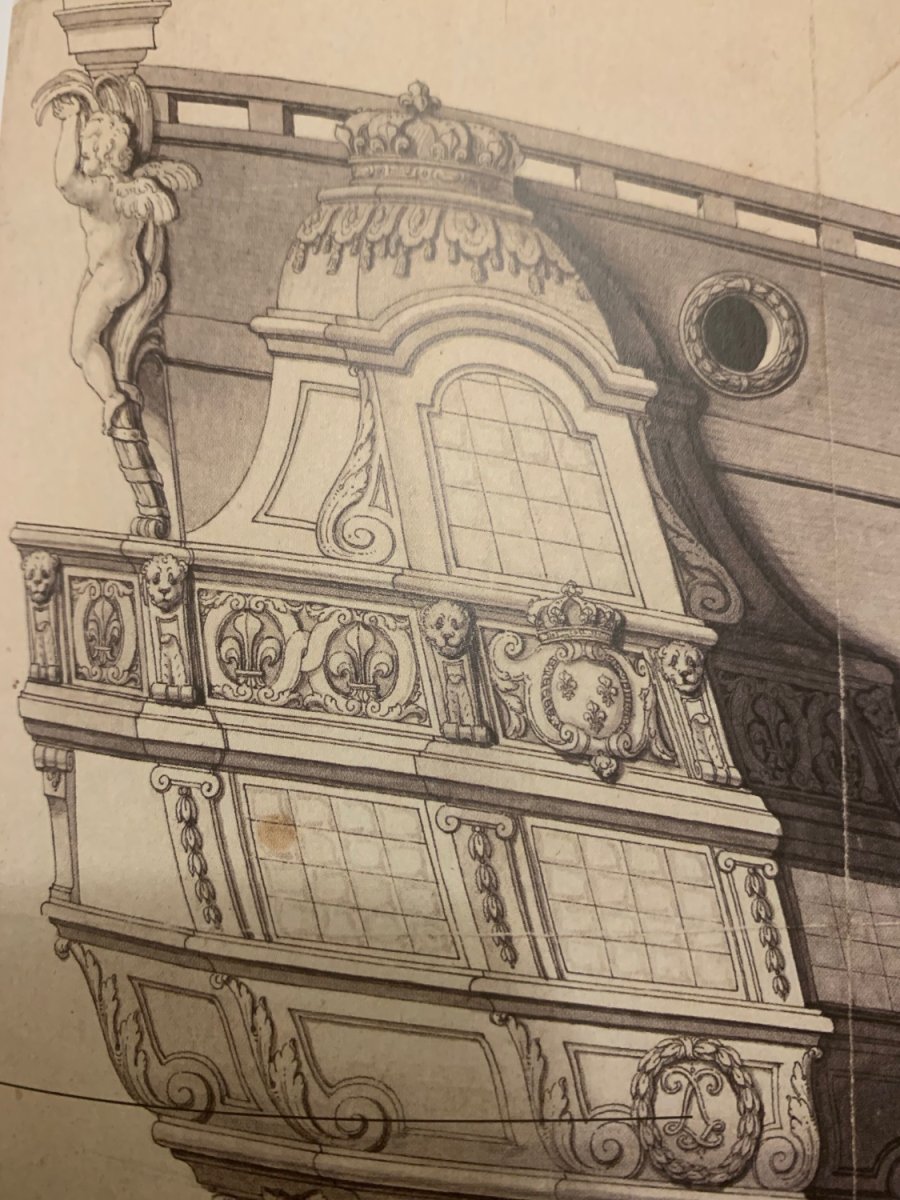
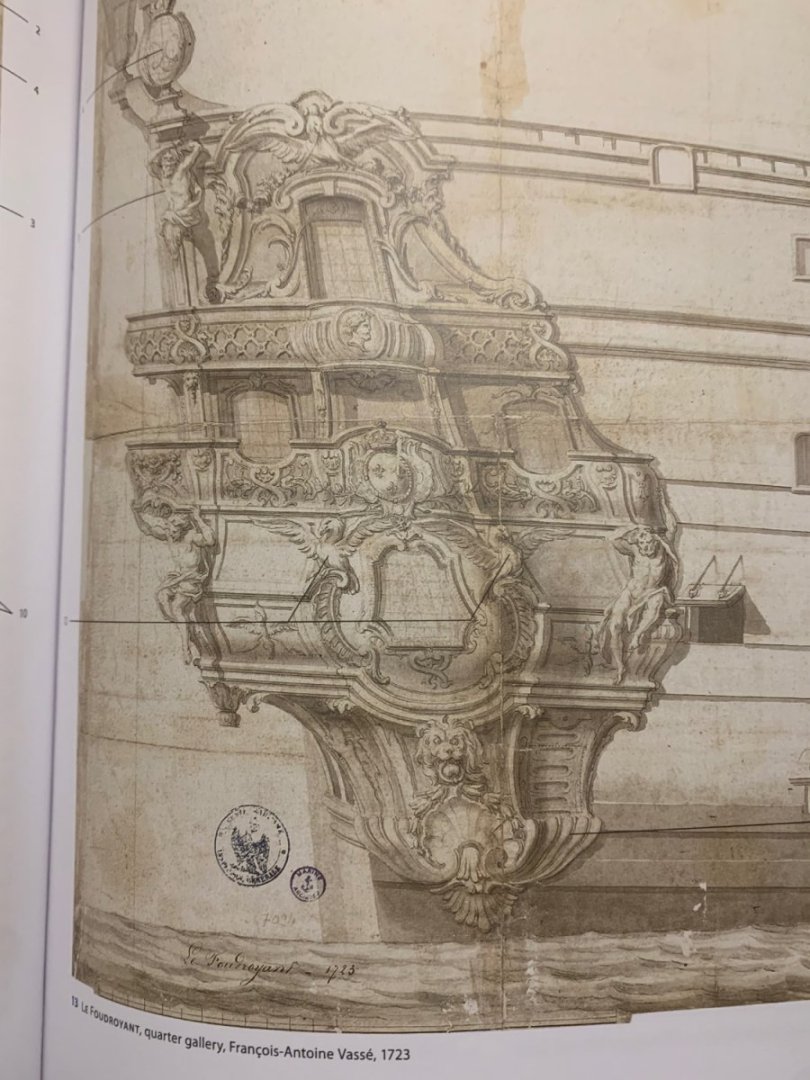
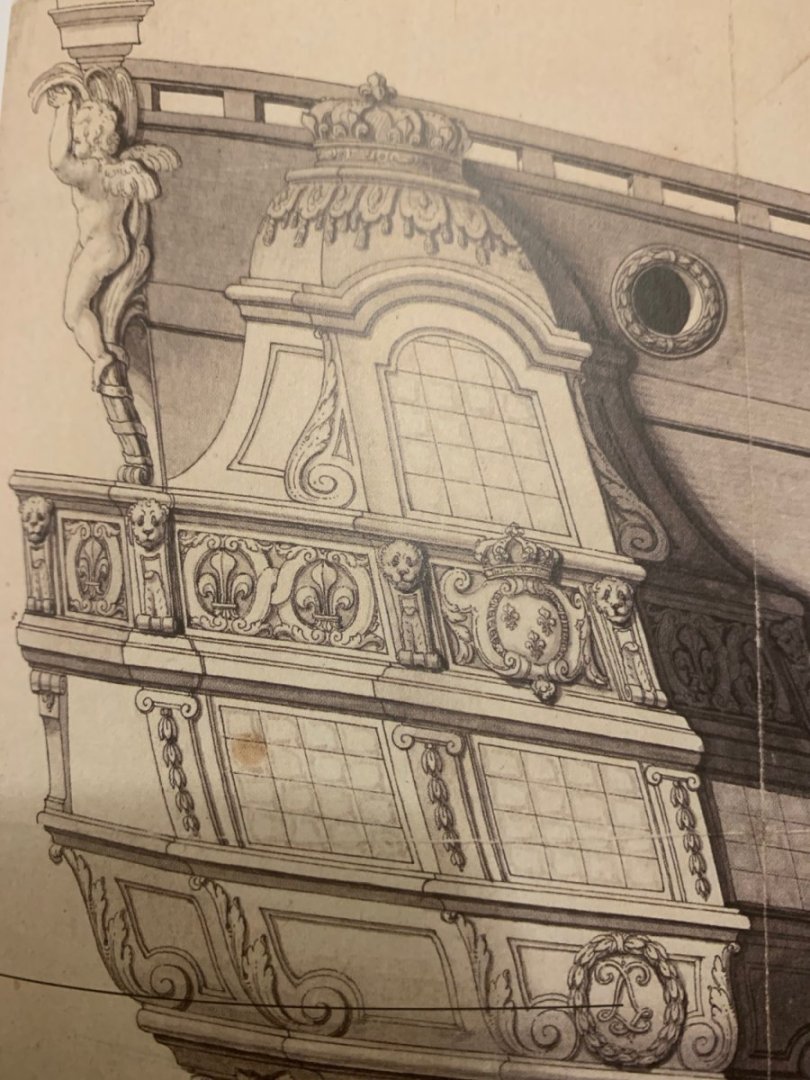
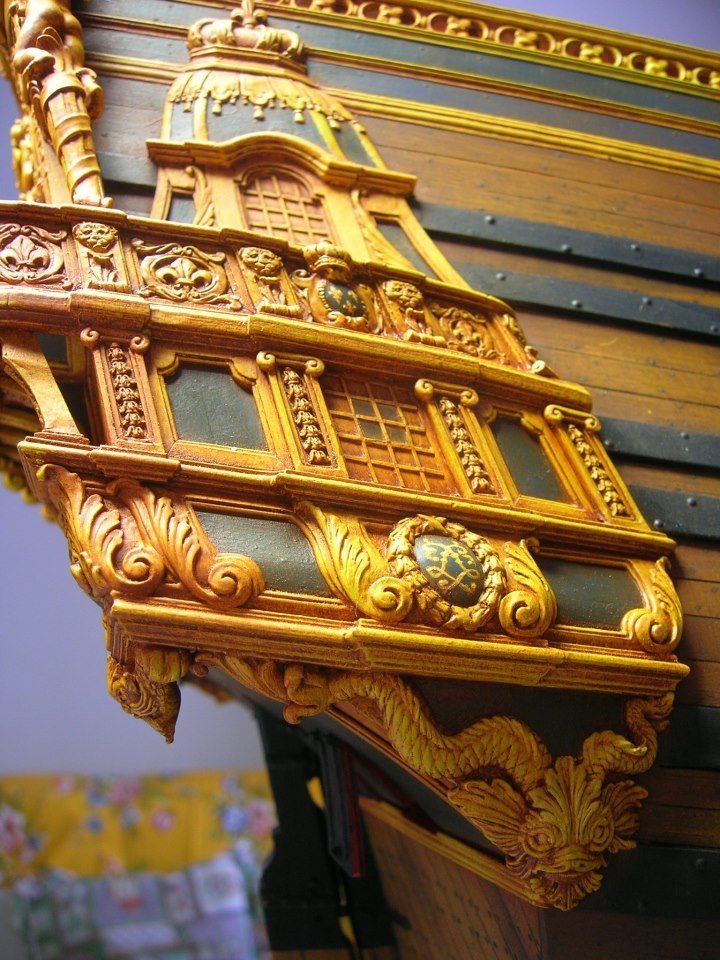
Because the birds on the gallery level are not springing from stylized fire, I am going to disagree and say that they are intended to represent eagles. This would be more consistent with the allegory of Zeus as exemplified by Le Foudroyant of 1723: As for the mascaroons on the upper gallery level, the identical figures appear on Berain’s draft for L’Ambiteaux: They are more clearly seen, here, and it seems they are supposed to represent lion’s faces. That seems, also, to be how our Italian friend interpreted them:
-
Yes, agreed - the final result is quite evocative!
-
I would like to add to John’s stellar collection, the following titles that are indispensable for the number and quality of VdV drawings: I particularly love Richard Endsor’s case study of the Anne. It is such a thoroughly detailed exposition of the translation from building contract to ship, interspersed with the service and refit history of the vessel. All titles that are well worth the money.
- 106 replies
-
- 6
-
-

-
- Soleil Royal
- Ship-of-the-line
- (and 2 more)
-
That is awesome, Kirill! Do topmast and t’gallant parrels terminate in ringbolts to the main and topmast tops?
-
Open question: at this scale, does anyone actually rig parrels around the yardarms, or do they merely represent them on the mast? I’m trying to figure out how to do thst with the shrouds in place.
-
Your son has a fine sense of proportion, Greg. That is a very pleasing leg to apron combination, the display certainly meets the high-standard of the model. My only thought on lighting is perhaps a small crane-neck lamp, aimed downward and in from the front face of the case. Perhaps you can find one that is battery powered, otherwise you would have to conceal the cord. You could hide the cord inside the wall, via a discrete grommet entry, but it doesn’t look like you have an outlet nearby for the cord to pop back out again.
-
I consider Puget on a par with the VdV’s because a number of the drawings attributed to him were also after the ships were constructed: The Monarque drawings, DR 1680, and RL 1692. As it relates to the VdV’s, I have to admit that it bugs me a little when people (not you, of course) discount their efforts as the whim and fancy of an artist. If you look at any number of ship sketches, you will see the faint erasures of the Elder’s process. He was very concerned with getting the aspect of the vessel and its artillery locations correct. They are among the few living witnesses with the 3D ability to interpret the proportions of these vessels correctly. I, personally, have no doubt of the photographic integrity of their drawings.
- 106 replies
-
- 3
-
-
- Soleil Royal
- Ship-of-the-line
- (and 2 more)
-
I understand now, thank you. So, out of curiosity, how do those revised topmast and t’gallant yard lengths compare with the stock yard dimensions?
-
Bill, I’m a little confused - are you only referring to the yards you have made for the foremast, or does your second paragraph mean to reference the main course yard (12.125”), and its accompanying topmast and t’gallant yards?