gsdpic
-
Posts
843 -
Joined
-
Last visited
Content Type
Profiles
Forums
Gallery
Events
Everything posted by gsdpic
-
Chairs! Let’s see your chairs.
gsdpic replied to Desertanimal's topic in Modeling tools and Workshop Equipment
I just use a generic office chair, but I recall seeing an interesting chair recently in the "What did you receive today" shore leave topic. Maybe @Moonbug can comment on his Vyper. -
Thanks for the review. Looks like a great kit, though all those decals look a bit scary. Great to see someone creating new kits of new, current race cars.
-
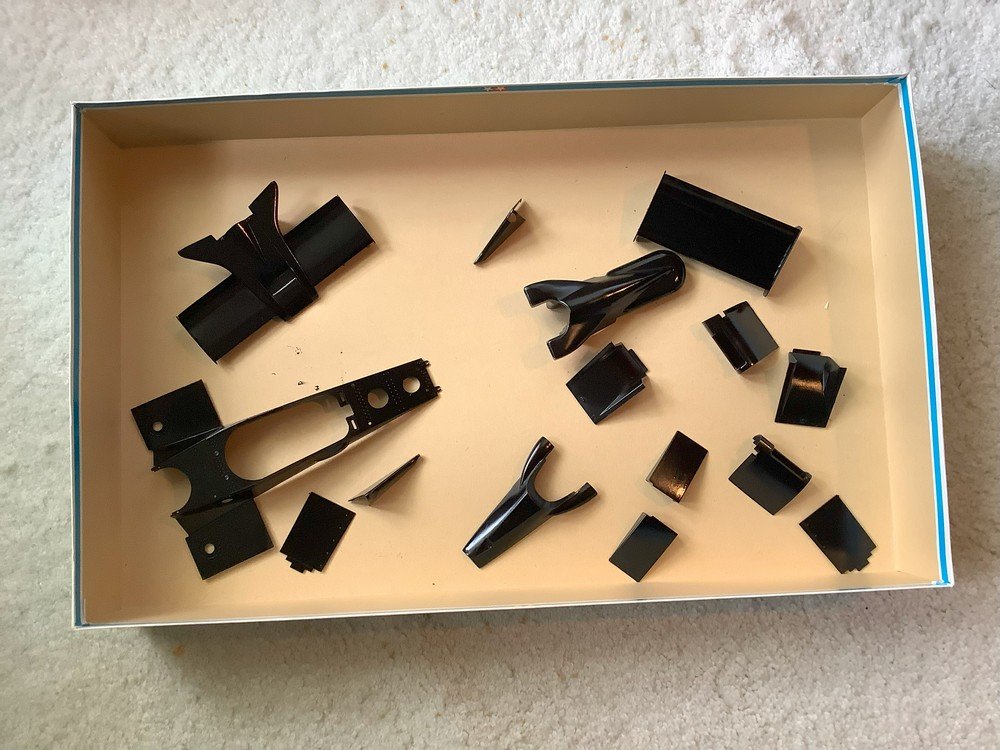
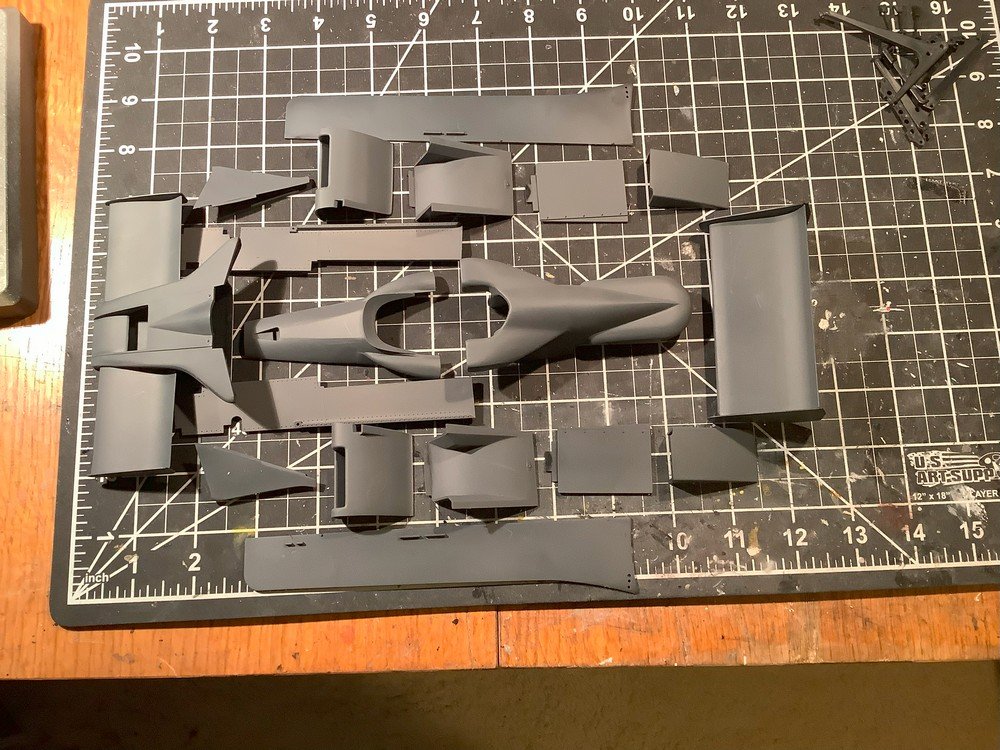
Thanks as always for the many likes. I am back from my little break and have been painting the body panels. I planned to use Tamiya LP-1 with the airbrush but then I realized I did not have as much of that on hand as I thought, but I had an old rattle can of Tamiya TS-14 gloss black from the days before I bought my first airbrush 3 or 4 years ago. It felt pretty full so I decided this might be a good opportunity to finish that can and toss it. I had not used one of those rattle cans in quite a while and it was definitely an adjustment. Compared to the airbrush it was like painting with a sledgehammer. For the most part it went ok, though I did get too much paint on the two side pieces, leading to some sags and runs. So once those thoroughly cure I will sand them down and respray. Some of the other parts have some minor flaws to be sanded and resprayed...for those minor flaws I will likely use the airbrush and the LP-1. Once those issues are patched up I will start applying the many decals and then clear coat everything. Anyway, here's a picture of most of the painted body panels. The two side panels with are not shown here.
- 62 replies
-
- 13
-

-
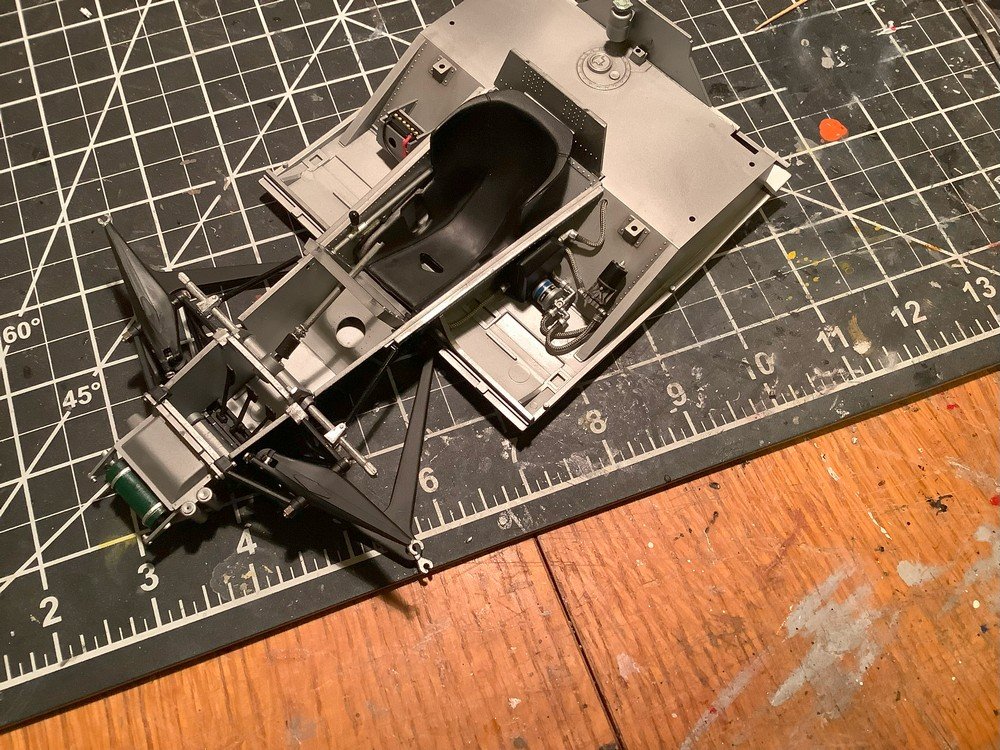
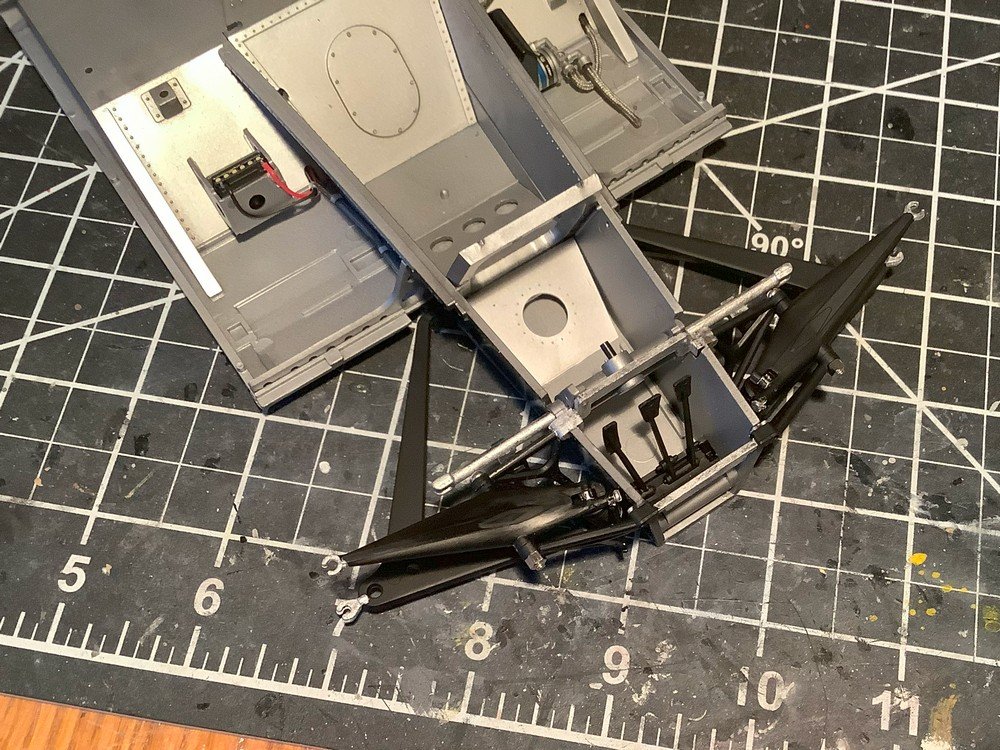
Thanks as always for the reactions, comments, or just looking in. Here's another very brief update, as I've added a few more details to the main tub, like the fuel pump and the front bulkhead, seat, shift lever, and steering column. I have a few more to do, mainly radiators and associated pipes, as well as some ideas for additional details, such as brake lines for the front brakes. But soon I will need the main upper body panel, so I need to get back to painting the body panels and then applying decals and clear coat. But first I have a 4-day weekend trip coming up, so I am taking a bit of a break from this build and from everything else.
- 62 replies
-
- 17
-
-
Looks great! The deck is so smooth and everything fits together so tight. Regarding the mast hoops.....I also was not crazy about the bright brass rings and made my own out of wood. I checked my build log but it looks like I did not explain the process. As I recall, I made a wooden tube using a bunch of shavings from a plane. I carefully planed some scrap bass wood trying to maximize the length and width of the shavings then glued them around a dowel that I had wrapped with either wax paper or foil. The shavings were already naturally curly so it was a simple matter to glue them around the dowel. Once the glue cured, I carefully sliced the tube as I slid it off of the dowel to create a bunch of hoops.
-
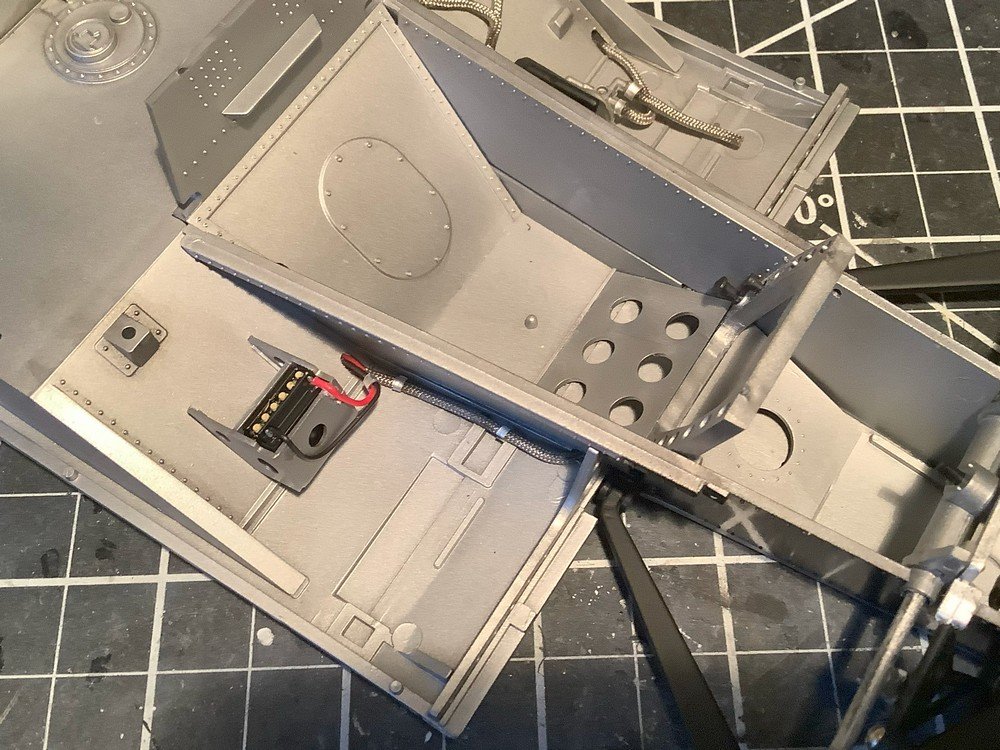
Thanks as always for the likes and comment. I've made a bit more progress with some of the equipment in the side pods and the front suspension, as shown below. I added the battery cables...none were supplied in the kit...and replaced the kits black vinyl hoses with braided metal ones. There's a fuel pump still to be placed in that left bay and the two loose lines will attach to it. but before that, the instructions have you work on the front bulkhead and various equipment attached to it...brake and clutch cylinders, radiator, fire extinguisher, etc. Here are some pictures....

- 62 replies
-
- 17
-
-

-
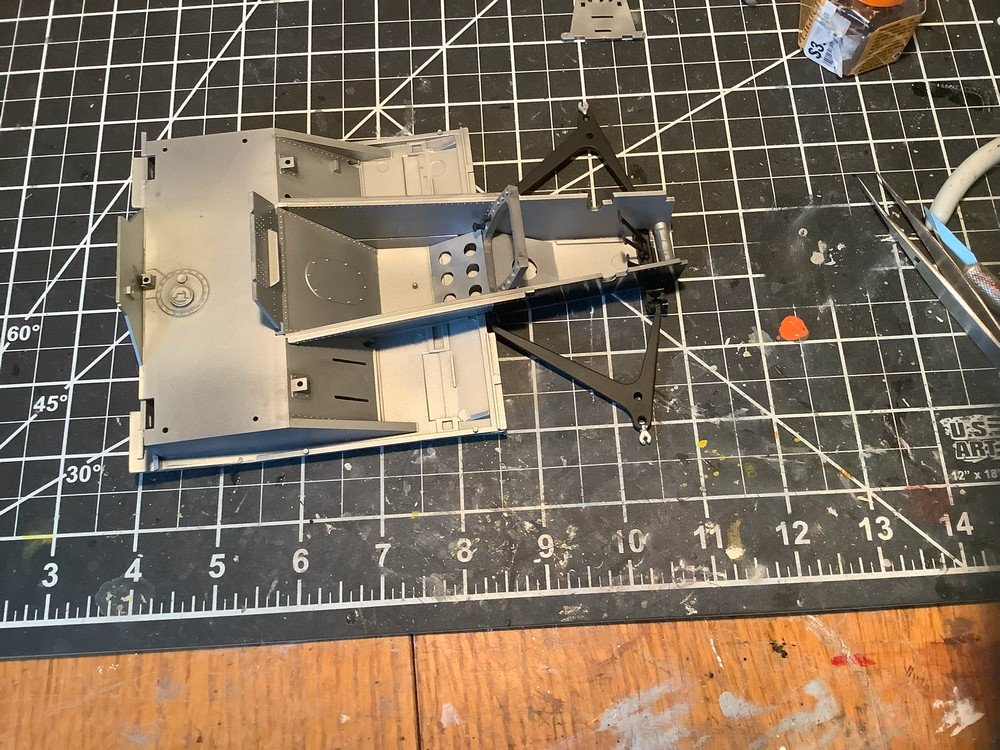
Thanks all for the likes and thanks CDW for the comment. The primer is Splash paints dark grey surfacer. I've started working on the main tub and the front suspension lower arms. This is pretty much steps 1 through 3 in the instructions. These bits generally went together well. the tub is painted with Alclad aluminum, the suspension with Tamiya LP-5 semi gloss black lacquer. I am not sure, but I think the lacquer semi gloss black is a bit flatter than the regular Tamiya acrylic X-18 semi gloss black.
- 62 replies
-
- 17
-
-
Keeping my head in the game.....
gsdpic replied to Egilman's topic in 3D-Printing and Laser-Cutting.
Very impressive project. I am envious of your CAD skills. A couple questions if I may... - Apologize if this was asked and answered, though I did not see it. Which CAD program are you using for this? I saw a reference to Rhino but it did not seem like that is what you are using for this project. - Maybe I am getting way ahead of things, but there are references to 3D printing. It seems you are making a very detailed virtual copy of the car. But I am curious about the process of how to use that for 3D printing. It seems to me (and I could be completely wrong) that 3D printing would require a very simplified set of subassemblies rather than this perfectly detailed virtual model. So can this very detailed model be used for 3D printing, or will it need to be simplified? -
I have finished priming, filling, and sanding the various body panels. A few of the seams or ejector pin marks are still visible if you know where to look but the worst, most obvious ones are pretty well fixed. I'll let these cure a bit more, maybe do some very light wet sanding with some high grit and then paint with the Tamiya LP-1 gloss black lacquer. Meanwhile, I'll start working on the main tub and front suspension. You can see a few of the suspension parts in the upper right.
- 62 replies
-
- 17
-
-
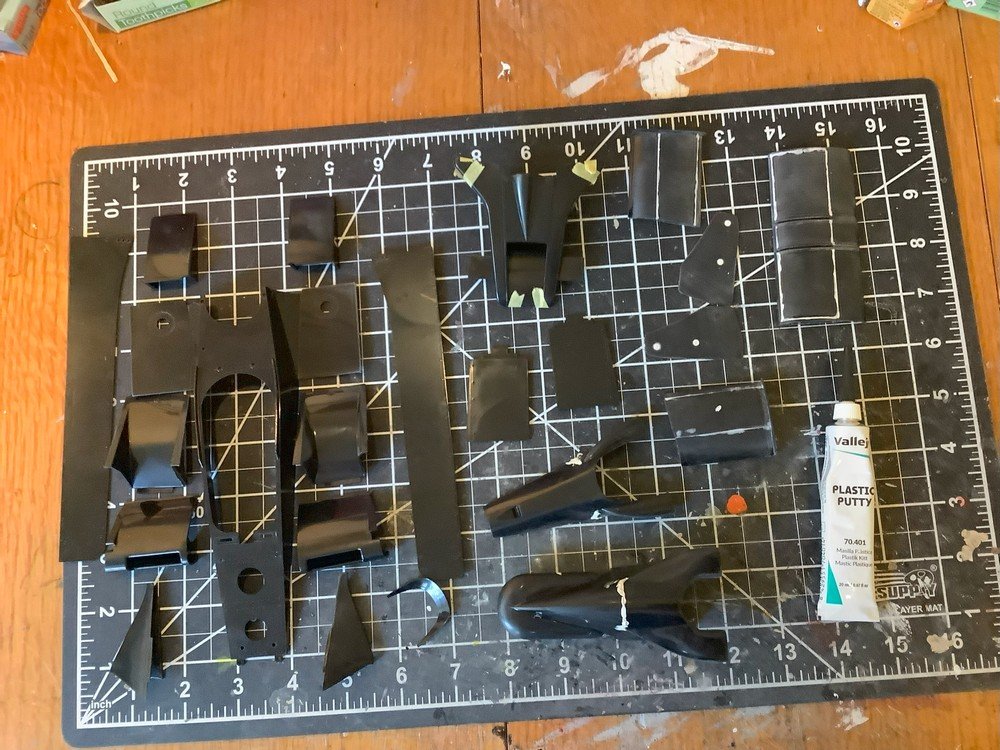
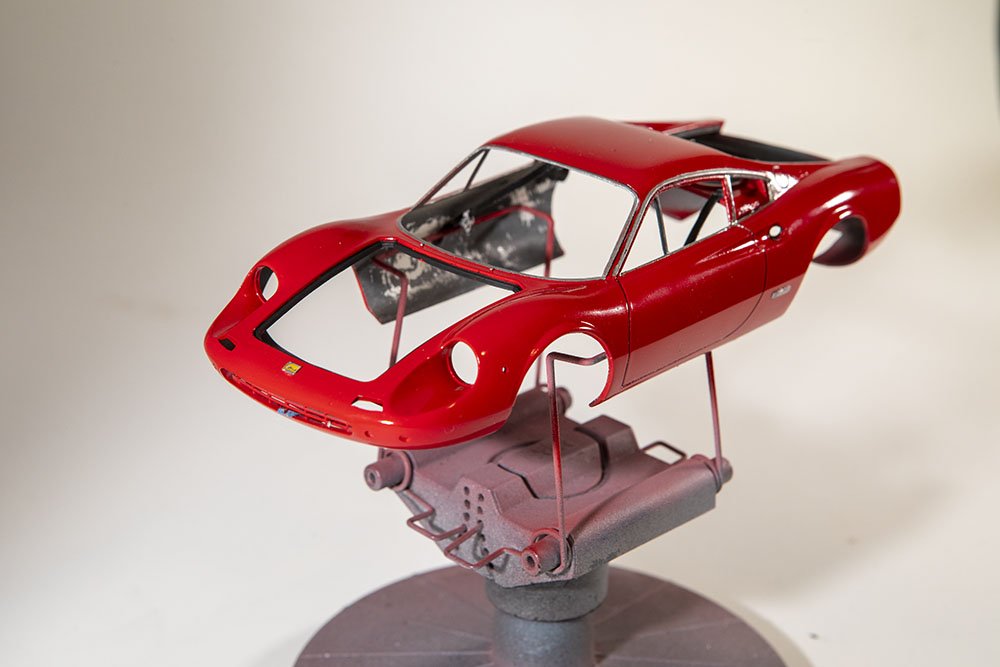
Thanks. The decals look pretty decent....far fresher looking than the ones with the Lotus 72D I built...though there are a couple little places where the color has flaked off. Fortunately they include decals for two different drivers/cars so there are plenty of extra decals to test out before deciding whether to use these or get third party decals. I've continued to work on filling/priming/sanding the body panels. I think I am very close to being done with that, though once I decide I am done I'll let the primer cure for an extra day or two just to be safe.
-
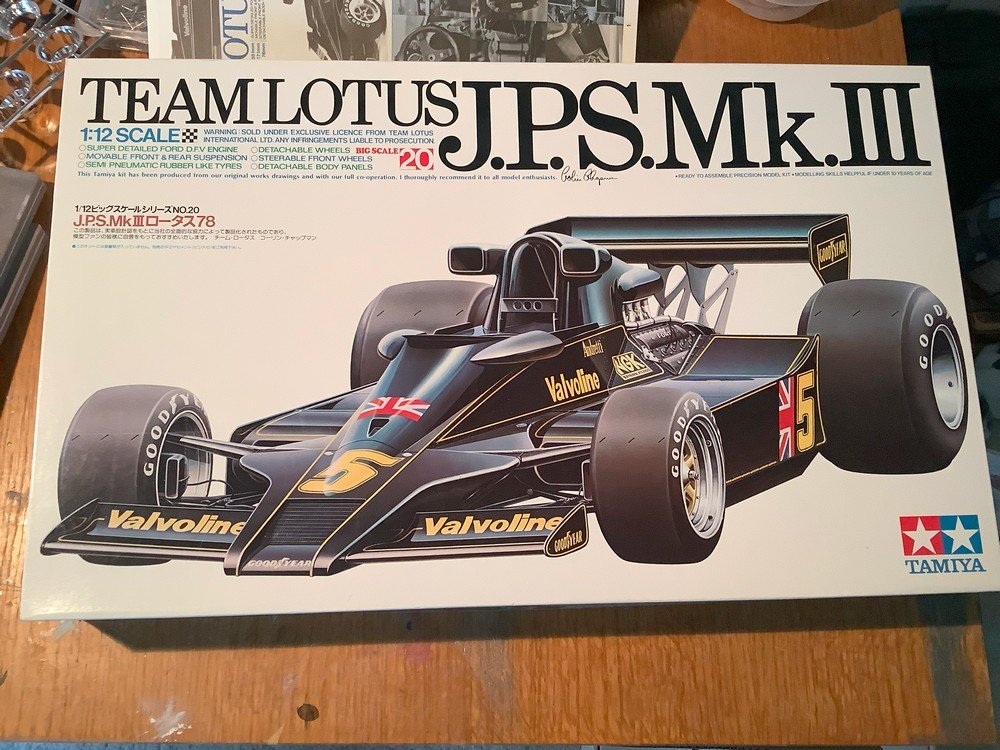
As mentioned in the second post, this is the 1977 version of the kit that includes the JPS decals. But according to the instructions, already at that time, tobacco advertising was not allowed in Germany and England, so building it without the JPS sponsorship is not historically inaccurate, you just say you built the one that raced in the German or British GP, as they removed the JPS logos for those two races.
-
Thanks all for the likes and comments and joining in. I continue to prep the various body parts and panels and wings. Some of these parts, especially on the front cowl area, the fit is surprisingly poor for a tamiya kit. I guess they've come a long way. Some of the parts are just about done, others I am waiting for the putty to dry so I can sand it smooth and others I am waiting for glue to dry before applying putty. Once all are good to go, I'll use the splash paints dark gray surfacer and then probably use Tamiya LP-1 gloss black lacquer. For the first time, I've been using the vallejo acrylic based plastic putty. It is much nicer to work with than the lacquer based tamiya putty though I think you need to let it dry longer before sanding. It is a little hard to see in the picture, but the tube has a built in pointy applicator which is very handy. It is also interesting to contrast this with the Lotus 49. Just about 10 years separate the two cars. The "body" of the lotus 49 was not much more than a simple oval tube, which is quite different from this one. The large increase in complexity in those 10 years is easily evident even in kit form; I estimate this kit has twice as many parts as the Lotus 49 kit.
- 62 replies
-
- 14
-
-
I guess the likes indicate a yes. I bought this kit a couple years back from ebay. This is the original version of the kit. In hindsight, I overpaid as you can now get the re-issued kit for about 125 bucks, with PE parts. Oops. At least the version I have includes the "John Player Special" decals as it was produced just around the time tobacco advertising was being banned in a few places, but not all over. The current kit is referred to only as the "type 78" on the box and I assume does not have the JPS decals, though they are available from third party suppliers. I've just started a bit on planning the build and started assembling some of the body parts in preparation for painting. As with other older Tamiya kits, I am expecting a few fit issues and there are also some rather nasty ejector pin marks to deal with. I'll likely build it mostly out of the box, with some third party seat belts, braided steel lines instead of the kit supplied rubber hoses, and maybe a few other things. And this will be the third time I build a Tamiya Ford DFV engine, as I have already built the Lotus 49 and Lotus 72D.
- 62 replies
-
- 12
-
-
Thanks for the additional comments. I meant to make more comments on the kit itself. Overall, it was good, especially considering the age. Generally stuff fit together well and it was well detailed. But as with other Fujimi kits I have built, there are always a few parts that they expect you to glue together without having much mating surface or any sort of locating pins or tabs. So there are always a few parts that are a challenge to figure out exactly where or how they should be positioned, or they are a challenge to figure out where or how to apply glue. There were also several instances where it seemed they made poor choices about how to attach the part to the sprue. This sometimes required extra delicate clean up of the part when removing it from the sprue. But, again, overall a good kit. I think I have 4 more Fujimi kits in my stash and hope they are all similar, but we'll see.
-
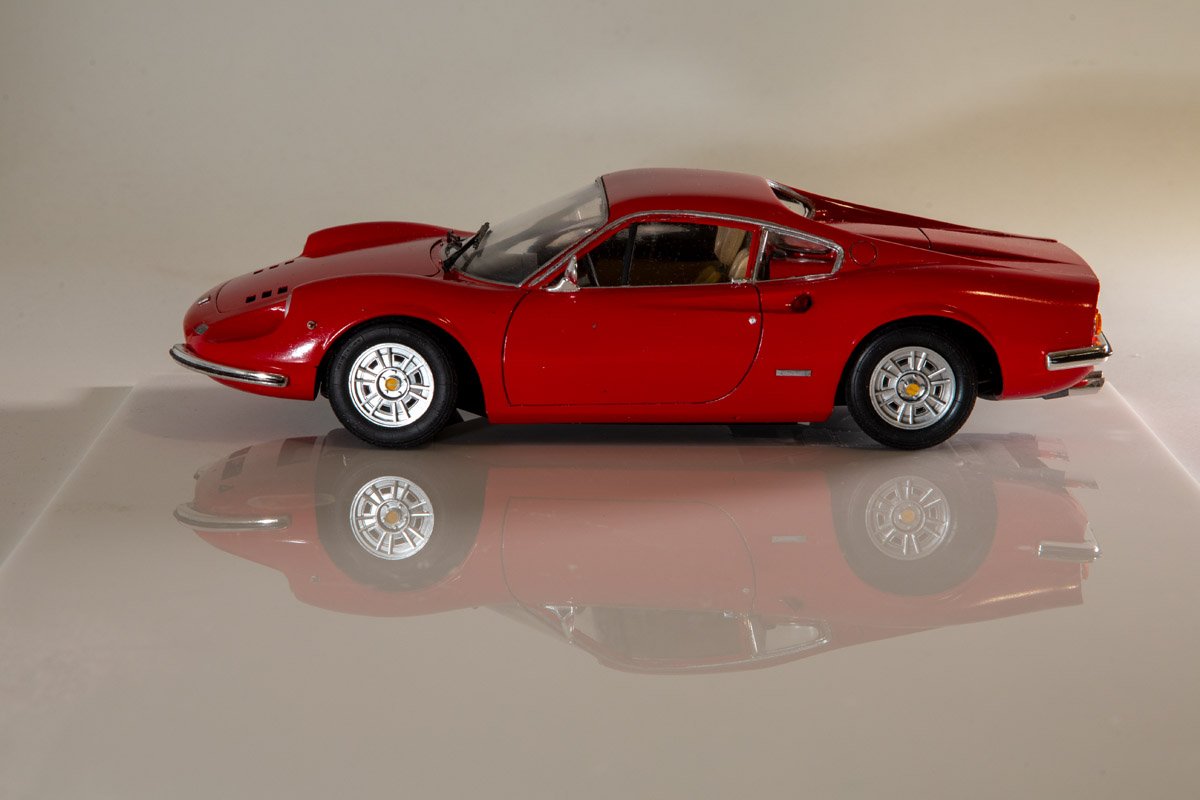
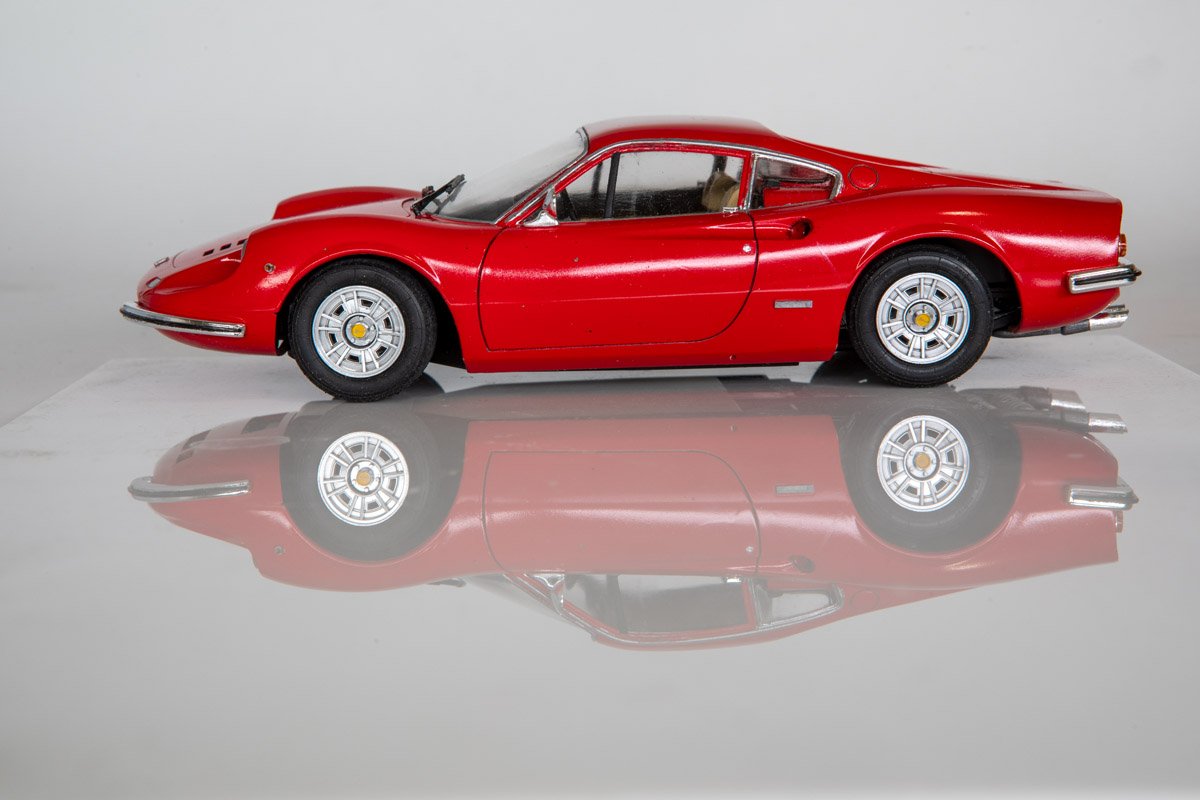
Thanks for the comments and to all the others for the likes and wows. Photography has been another hobby of mine for the last 20+ years, more integral to my life than model building most of that time. The reflections are just from sitting the model on a 8" x 12" piece of white or black glossy acrylic that I bought online specifically for that purpose.
-
Looks great. You're not afraid to get in close with the camera, and your work holds up to the tight views. Very nice!
- 282 replies
-
- 2
-
-

-
- Bluenose
- Model Shipways
- (and 1 more)
-
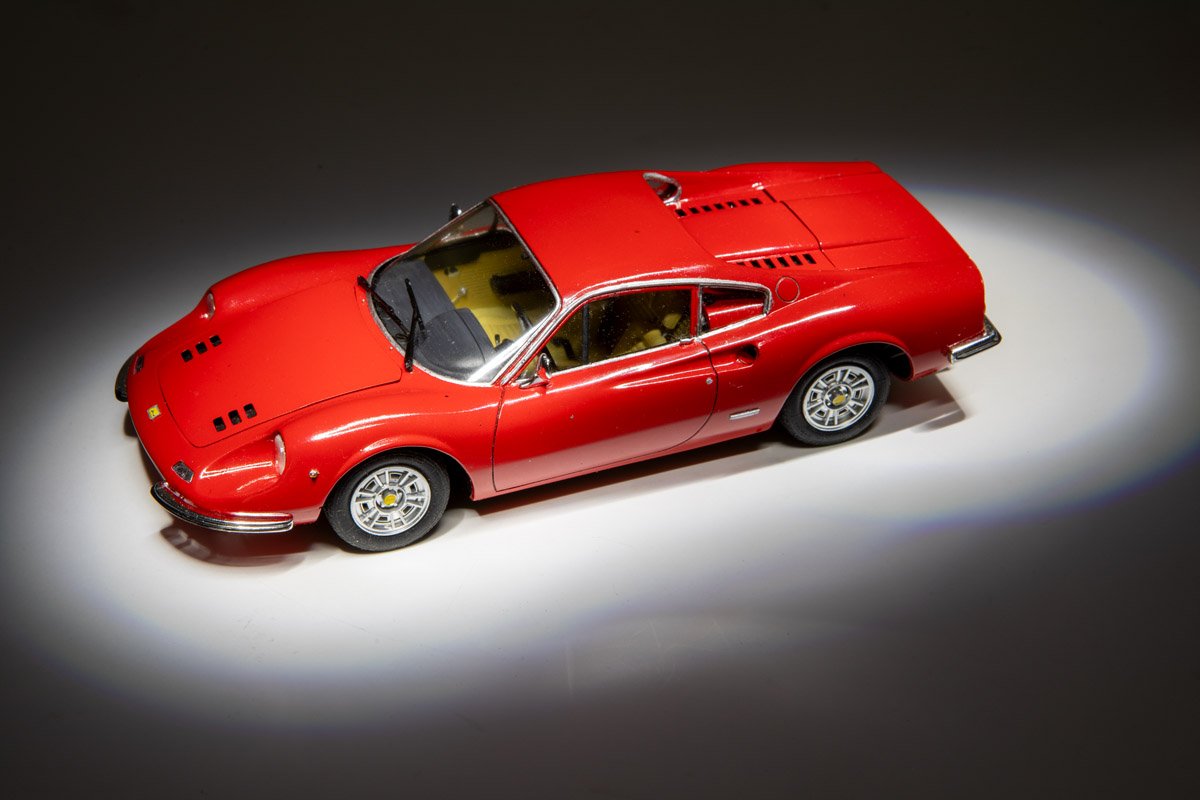
Thanks for the comments and the likes. As mentioned, I've taken a bunch more photos and added some of them below. I've joked before that I really only build models to have something else to take pictures of. The final construction did have some hurdles. First, getting the chassis into the body was a bit tricky. At first I was not even sure it was going to be possible but I found the right sequence of actions and twists and turns to get it together. Unfortunately, one of the small pins in the hinge for the rear trunk lid broke in the process. There was not anything in the trunk anyway, so I just glued it shut. Also, the hinge for the engine cover did not work well....I am not sure if I got the part that attaches to the cover too far from the edge or just what happened, but the engine cover only opens about a quarter inch. So, the extra detailing I did on the engine will never be seen. The front bonnet hinge works well though I now realize I forget to take any pictures with it propped open. Finally, the last dicey operation was attaching the wheels. They were attached with screws and it took some effort to screw them in (effectively tapping the hub with the screw as you screwed it in) and the wheels were just barely big enough to fit over the suspension bits. I was quite concerned that I'd break something just screwing the wheels on, but did not. However, you can see in one of the pictures that I have a lot of camber on the right rear wheel, and in fact the right front tire does not touch the ground. Oh well. Overall, I enjoyed this build and thought the kit was decent, especially considering it is nearly 40 years old. The decals were rather thin and fragile but there were very few of them to deal with. I feel like each time I get a little bit better with the finish on the body, though still far from perfect. I tend to get a decent finish and then I am afraid of doing any more sanding or polishing or whatever, concerned that I'll make things worse instead of better, so I say "good enough". Here are more pictures of the finished model. Thanks, as always for following along.

- 35 replies
-
- 16
-
-
-
Thanks for doing this build log. I've been curious about the MFH kits but never really looked into them, so will be interesting to see how it goes together. I am tempted by some of their 1/12th scale F1 cars.
-
Triumph 3HW by Tim Moore - Italeri - 1/9
gsdpic replied to Tim Moore's topic in Non-ship/categorised builds
I agree with shipman, the seat looks fantastic. The rest of the model ain't bad either -
Well I've done all the body detail painting and added all the little bits, and made it through some tricky steps without too much damage. I am calling this one done. I'll take a few more pictures tomorrow and write more about the tricky bits, but here is one of the finished car.

- 35 replies
-
- 12
-
-
-
Excellent progress, as always. To me, in the two historical photos, the "push bars" look different. In the first, lower-angle photo they appear attached to the front of the boat like you have modeled but in the second higher-angle photo, there looks to me to be more structure supporting them and they project forward of the front edge more than they appear to in the first photo.
-
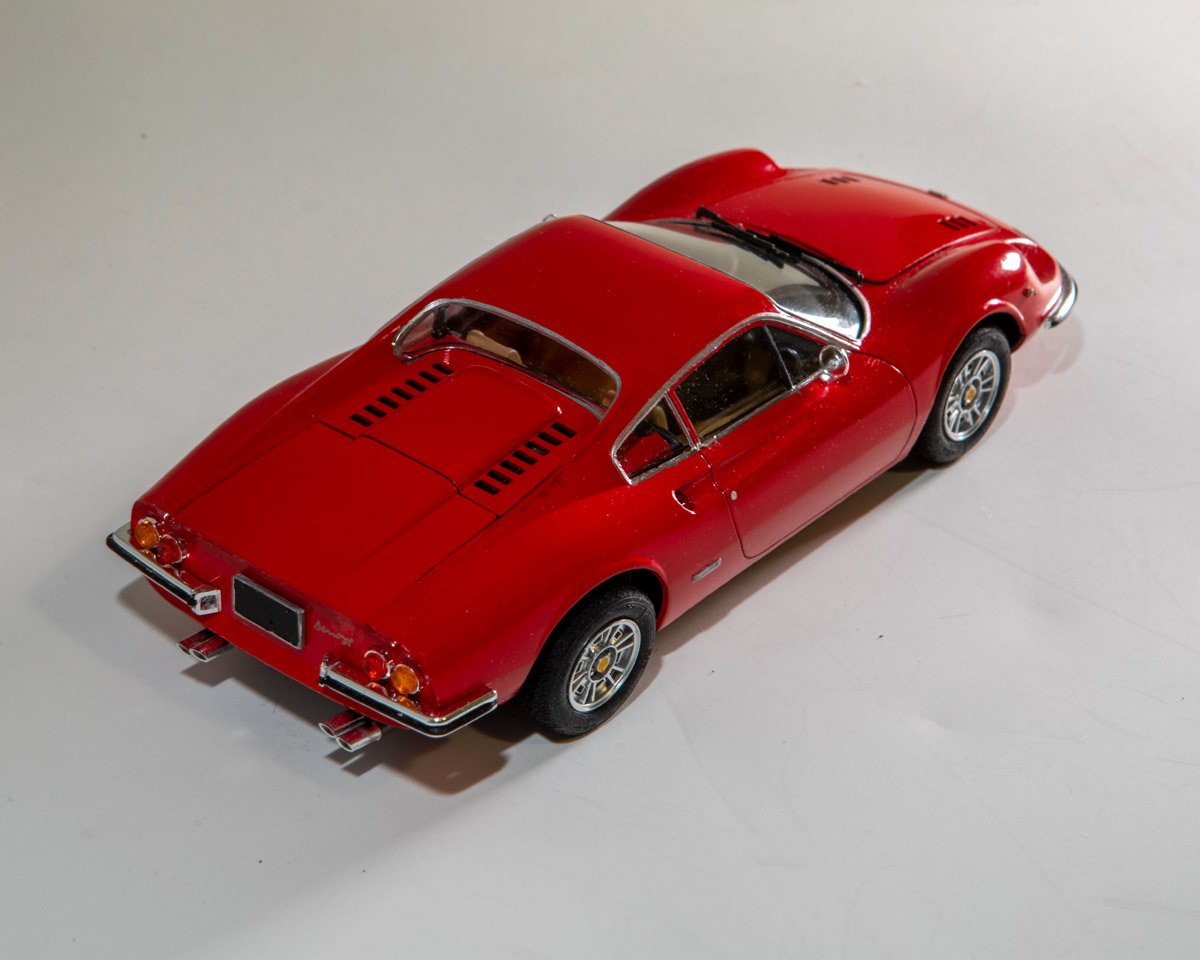
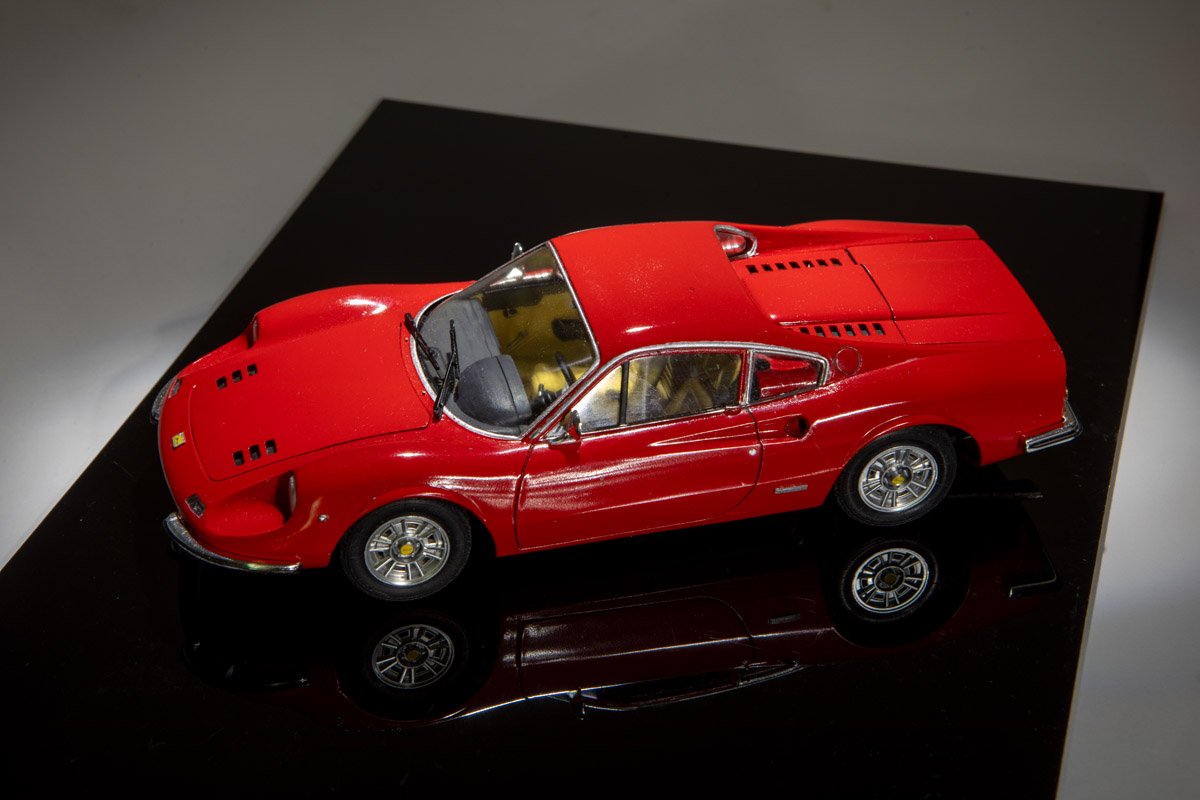
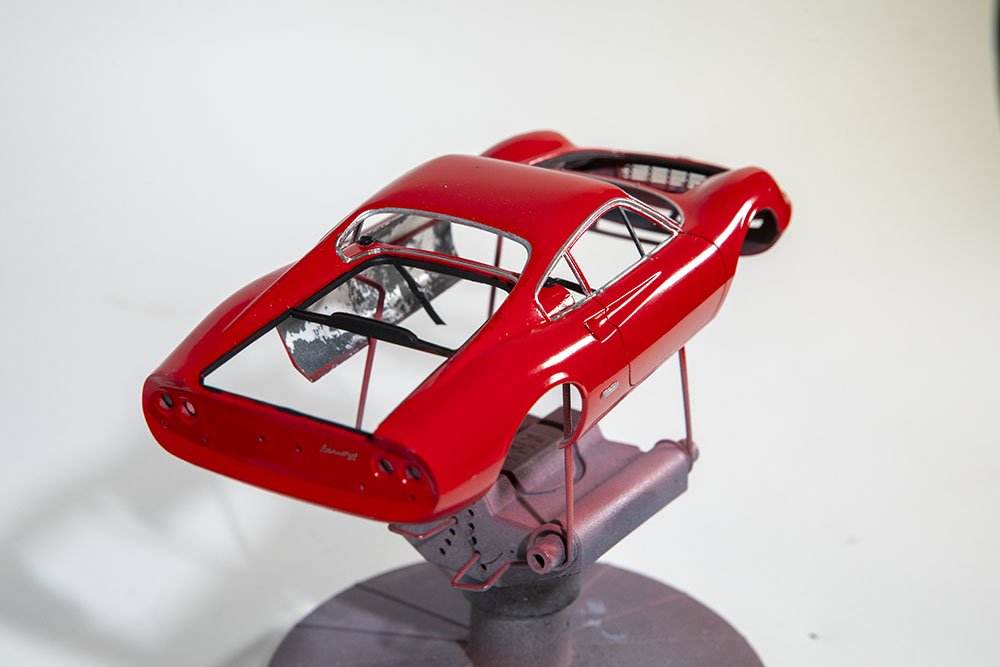
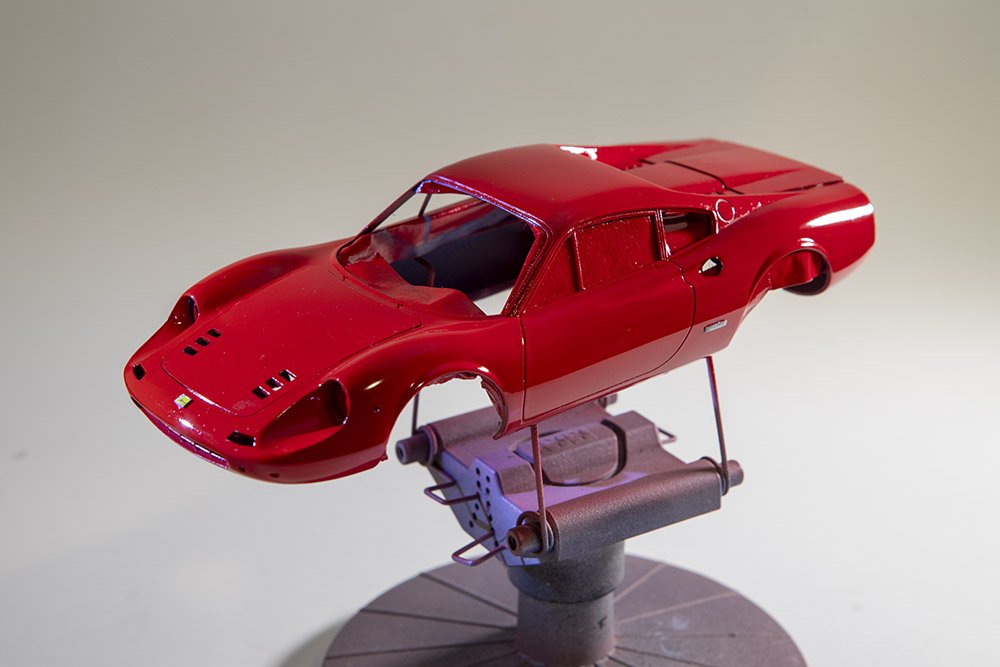
Thanks, CDW, and to the others for the likes. Have not had as much time the last week or so for this build, and I've been doing a lot of small but time consuming things on the build. So I'll just show a couple more pictures of the body which now has some detail paint....chrome trim around windows, flat black around the openings for the bonnet, trunk, engine cover. Oh, and I also fitted those bits on the vents. It went ok with some sanding down and some filler, but I really should have done that before painting the body.
- 35 replies
-
- 12
-
-
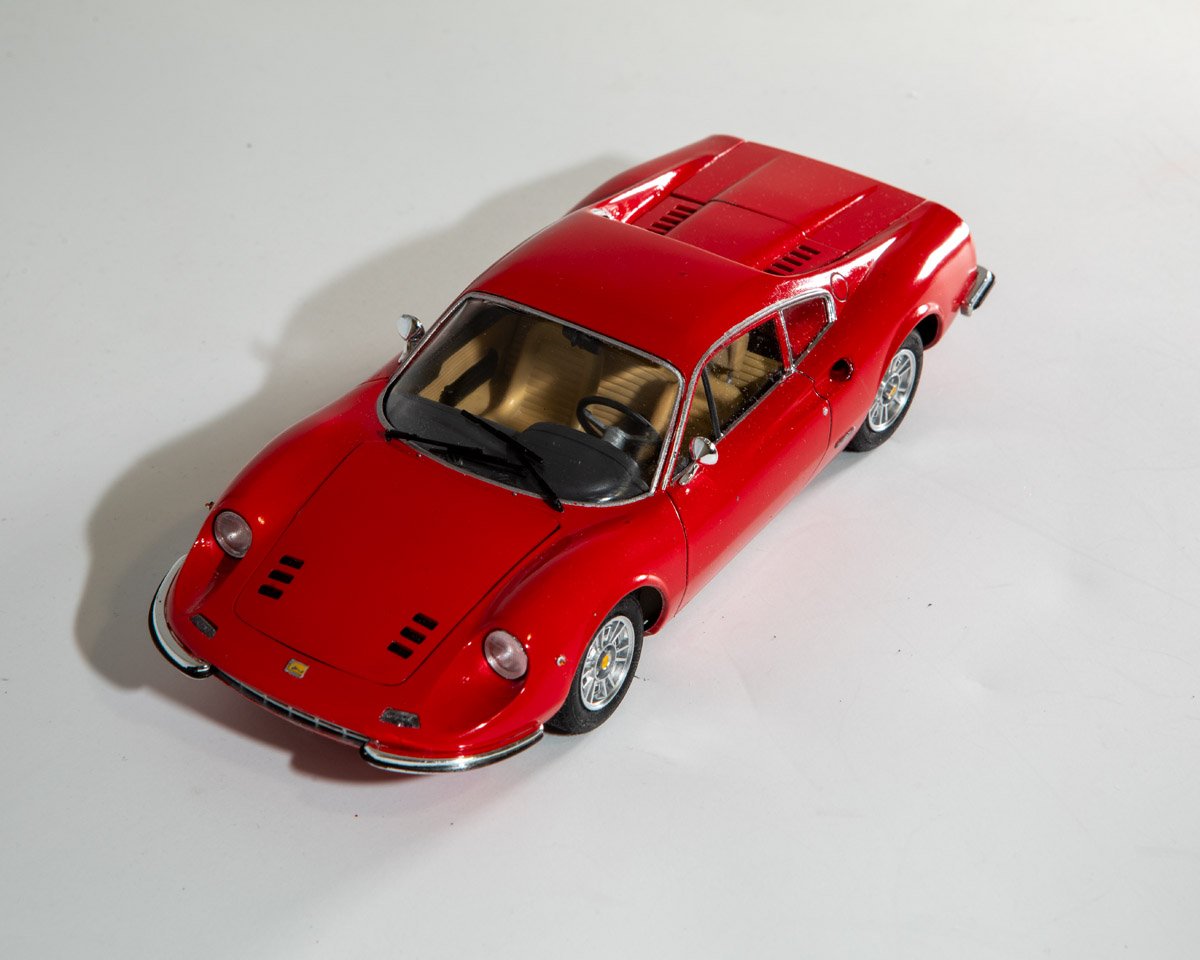
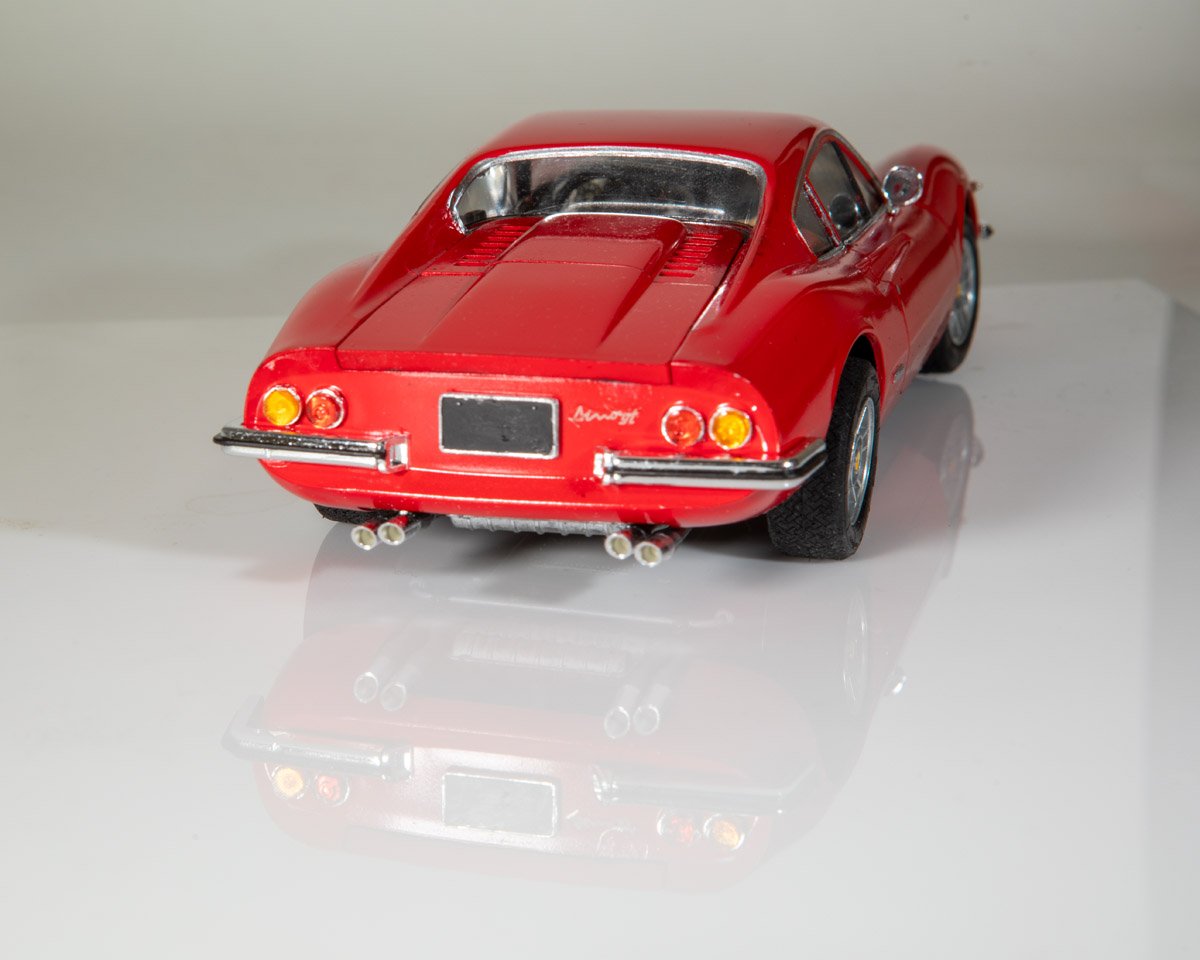
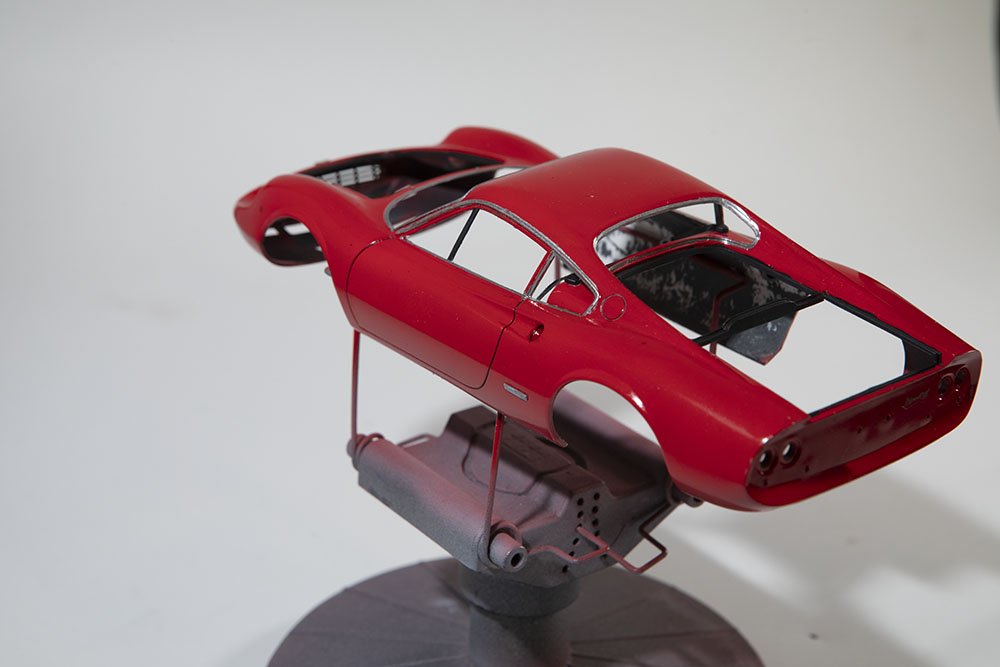
Thanks as always for the likes and comments. I generally agree that there is no unattractive Ferrari, though I do think that the Testarossa has not aged well. There's a guy in my neighborhood who has a Ferrari 360. I've chatted with him a couple times. He works for one of the big tech companies whose stock has done very, very well. He's had quite a menagerie of interesting cars over the last 7 or 8 years, in addition to that Ferrari. I put several coats of Tamiya X-22 clear thinned with mr color leveling thinner over the weekend. Trying to let it sit and cure for another day or two before I handle it, especially since it has been a bit humid and rainy here of late. The finish is not perfect but it is about as good as I have achieved. I have some detail painting to do, such as chrome trim around the windows, panel lines, etc. I'll use the molotow chrome marker for the chrome trim.
- 35 replies
-
- 13
-
-
Yep, those are the ones. Right now it is tough to tell just how misshapen the little tubes are. I painted the inside of the body with black primer and then taped it up while painting the outside, and still have that tape on so I cannot do a test fit. With luck I'll be able to just file them down a bit and maybe use some filler. I have a variety of strip styrene but nothing that is tube shaped. I'll remove the tape after the gloss coat and can tackle this then.