gsdpic
-
Posts
840 -
Joined
-
Last visited
Content Type
Profiles
Forums
Gallery
Events
Everything posted by gsdpic
-
Gap on flat bottom
gsdpic replied to WGibson's topic in Building, Framing, Planking and plating a ships hull and deck
Are you asking about the gaps between planks (as I believe Mark thought you were) or asking about the small gap at the edge of the subdeck? For the latter, is there any wider strip wood in the kit that could be used to make the edge planks just a little wider than the others in order to fully cover the subdeck? Or if you look ahead in the instructions, is the exact width of that subdeck critical? Maybe you could just shave off that little bit of extra subdeck to meet the planking. But, I am not familiar with the kit and do not know which deck on the boat this is, so that might cause big problems down the line if that deck must be the exact width of the provided subdeck. -
@Louie da fly I was just reading those instructions earlier today. For some reason, in the kit section, you need to navigate down into one of the date ranges and the instructions will be a pinned post in each section. For example.... https://modelshipworld.com/topic/24710-before-you-post-your-build-log-please-read-this-starting-and-naming-your-build-log/
-
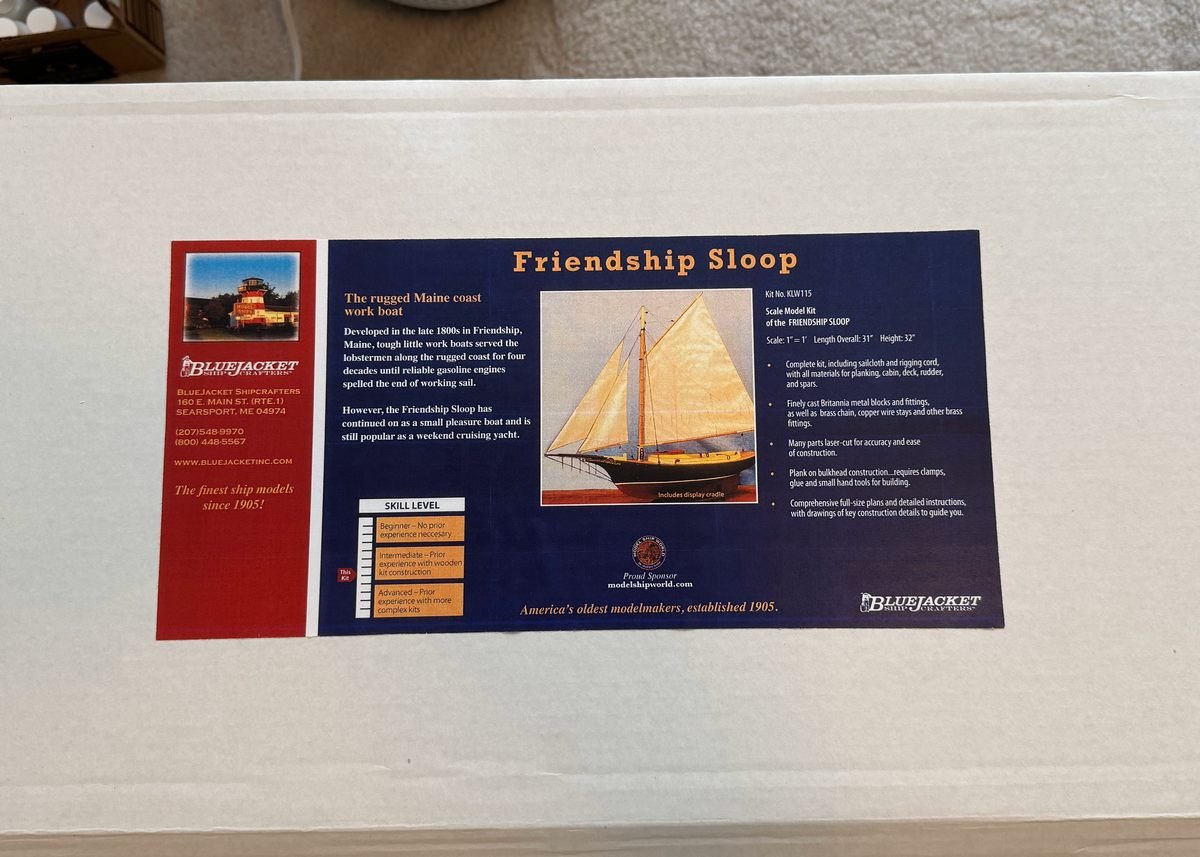
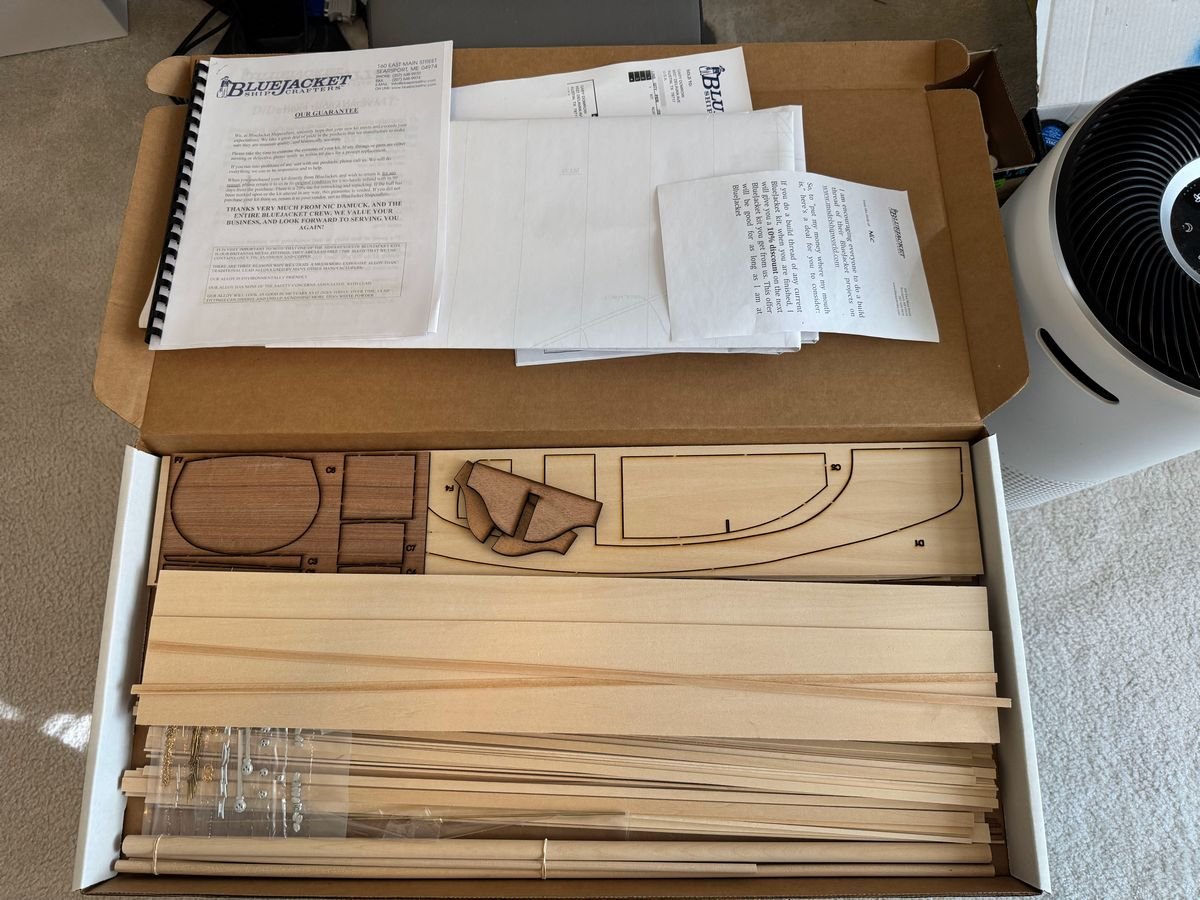
Hi all and welcome to my build log for the Bluejacket Friendship Sloop. Bluejacket has two similar kits in different scales; I am building the larger 1/12th scale (aka 1" = 1'). Over the last several years, since I completed my America build, I have been hanging out in the non-ship builds section of the forum, mostly building plastic cars. But I decided it was time to get back to things made out of wood that float, though I will not be starting immediately as I am finishing up the latest car project. I guess I do not yet have specific plans for this kit and probably should do more research on any possible enhancements that I wish to make. I will say though that generally I am more concerned about making something attractive than I am about making it perfectly realistic. My initial thought is to paint the top sides white or possibly off white/ivory and the bottom either dark green or dark red. I may replace deck planking with nicer wood and leave it bright or stained and varnished. I was a bit surprised that I have not found a finished build log of this kit. There are about a half dozen logs (both this kit and the smaller 1/2" = 1' kit) that were started, but none that I saw made it to completion. Several of them were started toward the end of the pandemic and noted that it was a first build. I guess as we got a bit back to normal, people lost interest in their new hobby. Most of those builds even got past the planking stage which I expect to be the most difficult part of this build, though perhaps there are some other demons lurking that I am not aware of at this time. Below are pictures of the box and one showing some of the contents. I did an inventory last night and discovered that the kit was missing some of the strip wood. I've sent an email to Bluejacket about that. The missing wood is for the deck so will not hinder me getting started. According to the sticker on the bottom of the box, the kit was packed up just a few days before Christmas....I guess someone was a bit distracted. Otherwise the contents of the kit seem to be of good quality, as I have come to expect from Bluejacket.
- 90 replies
-
- 5
-

-
- Friendship Sloop
- bluejacket shipcrafters
- (and 1 more)
-
I need to stop following @CDW and @DocRob, all this temptation. I just caved in and ordered the Eagle-Gurney-Weslake direct off of the MFH web site. I've had my eye on it a while but kept resisting the temptation. Hope my experience with them is as good as yours. Ok, sorry for the tangent....
-
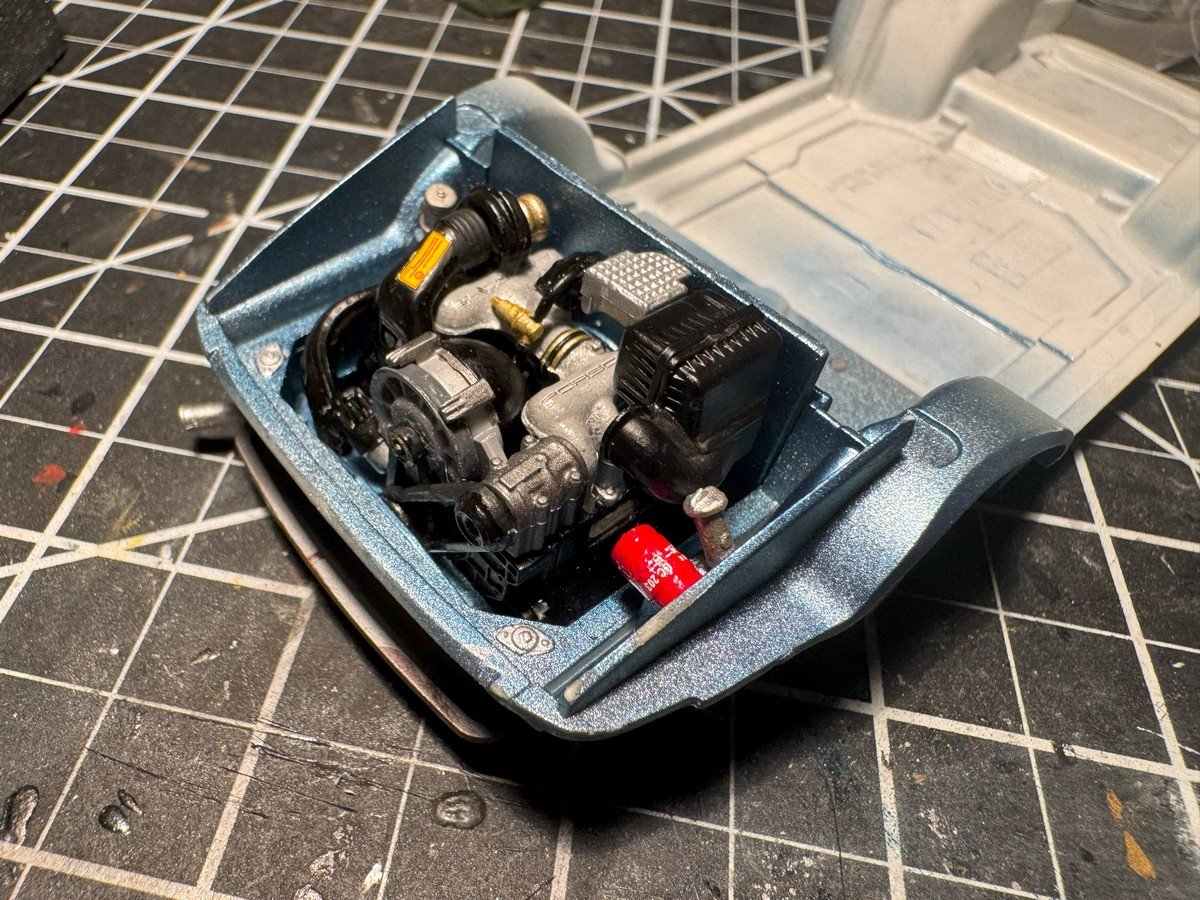
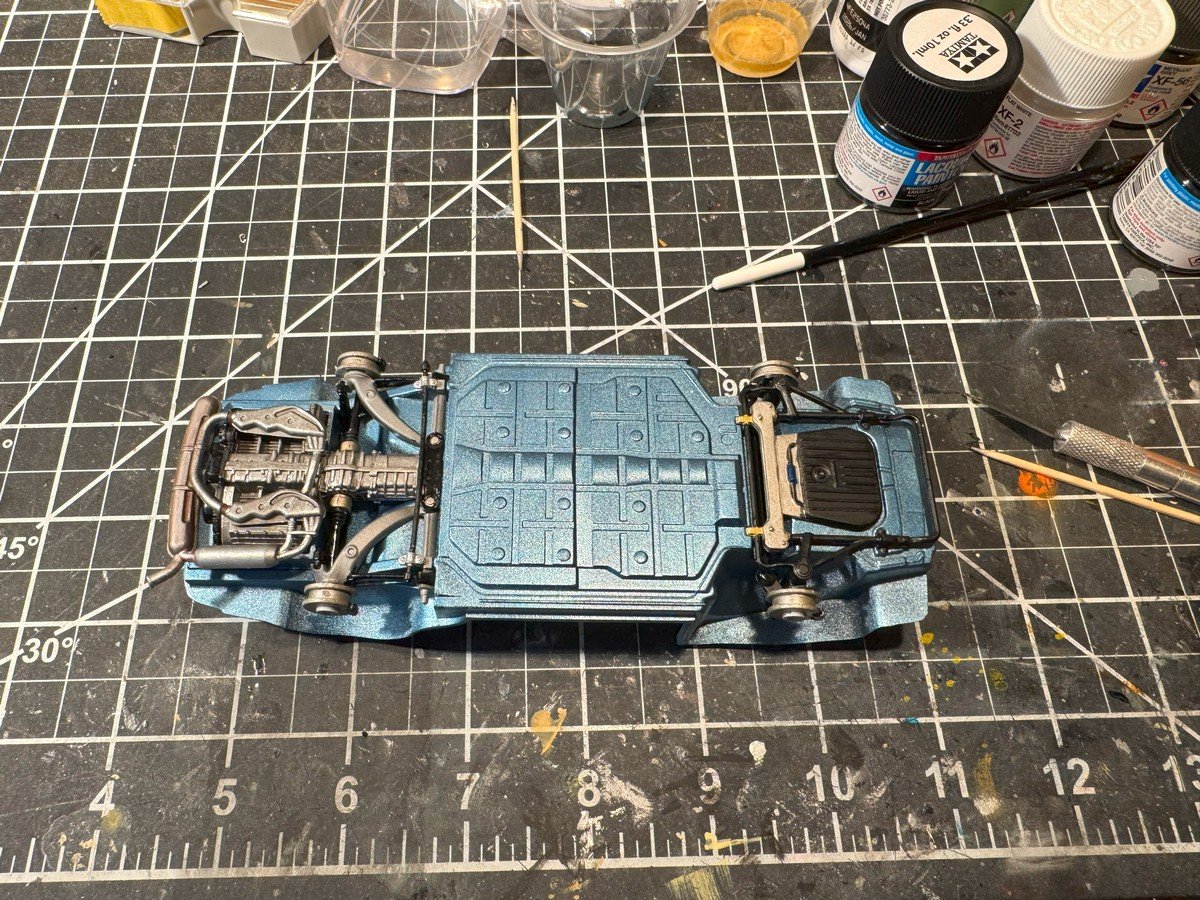
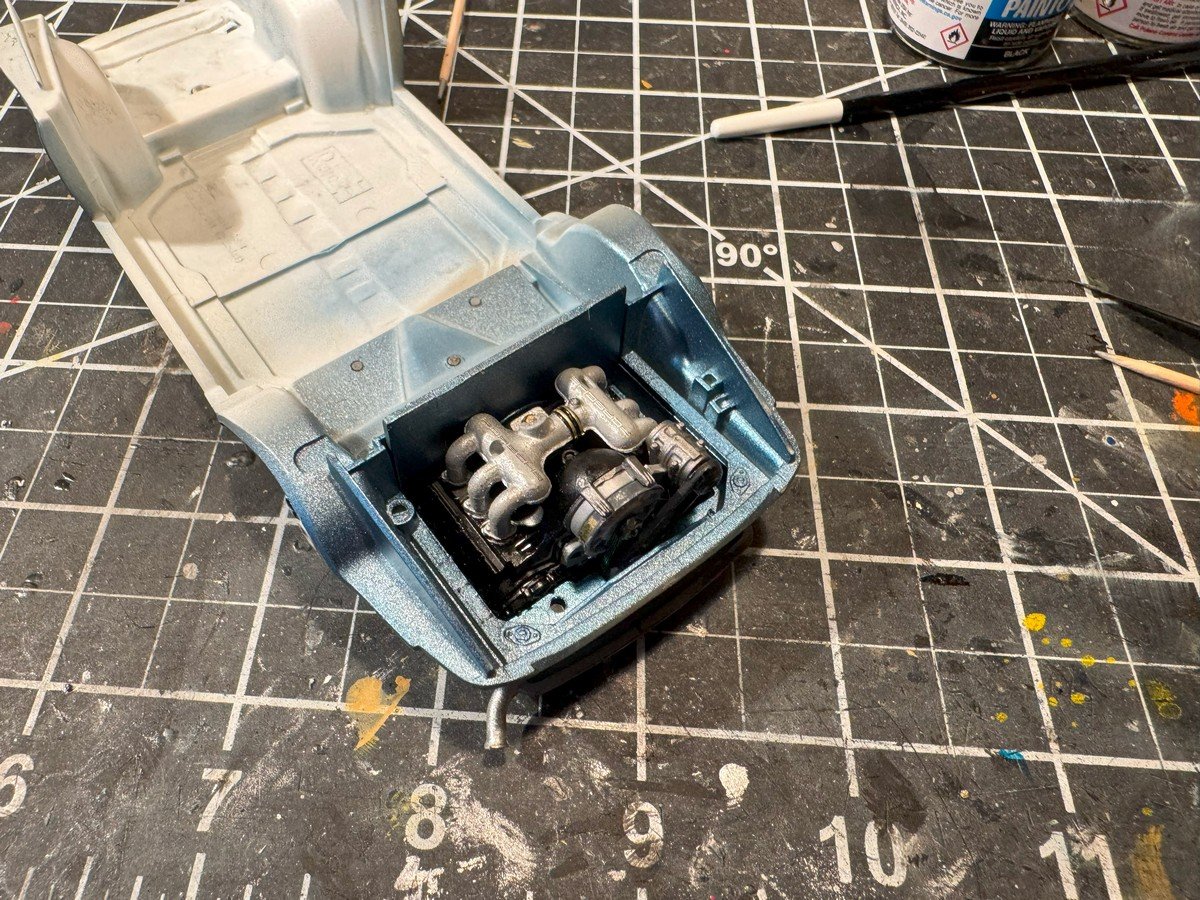
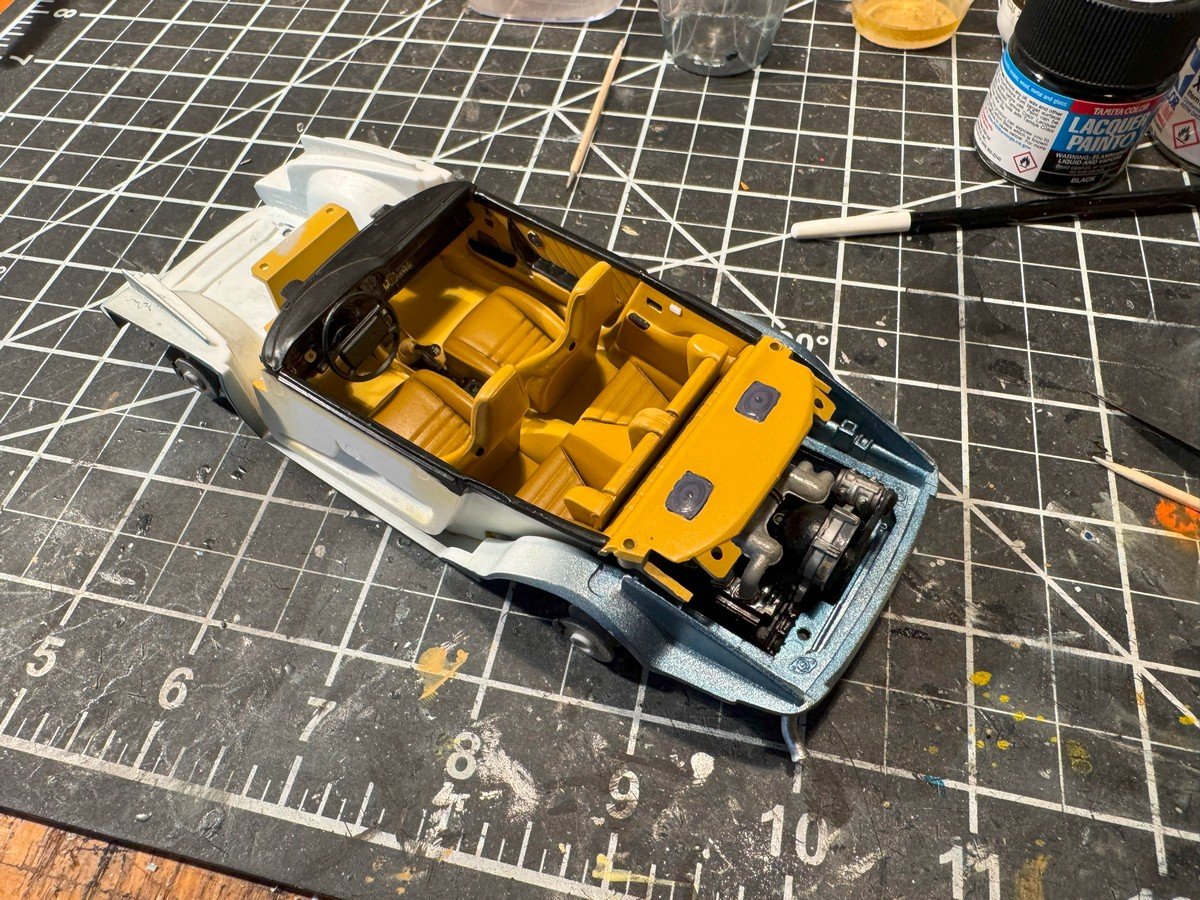
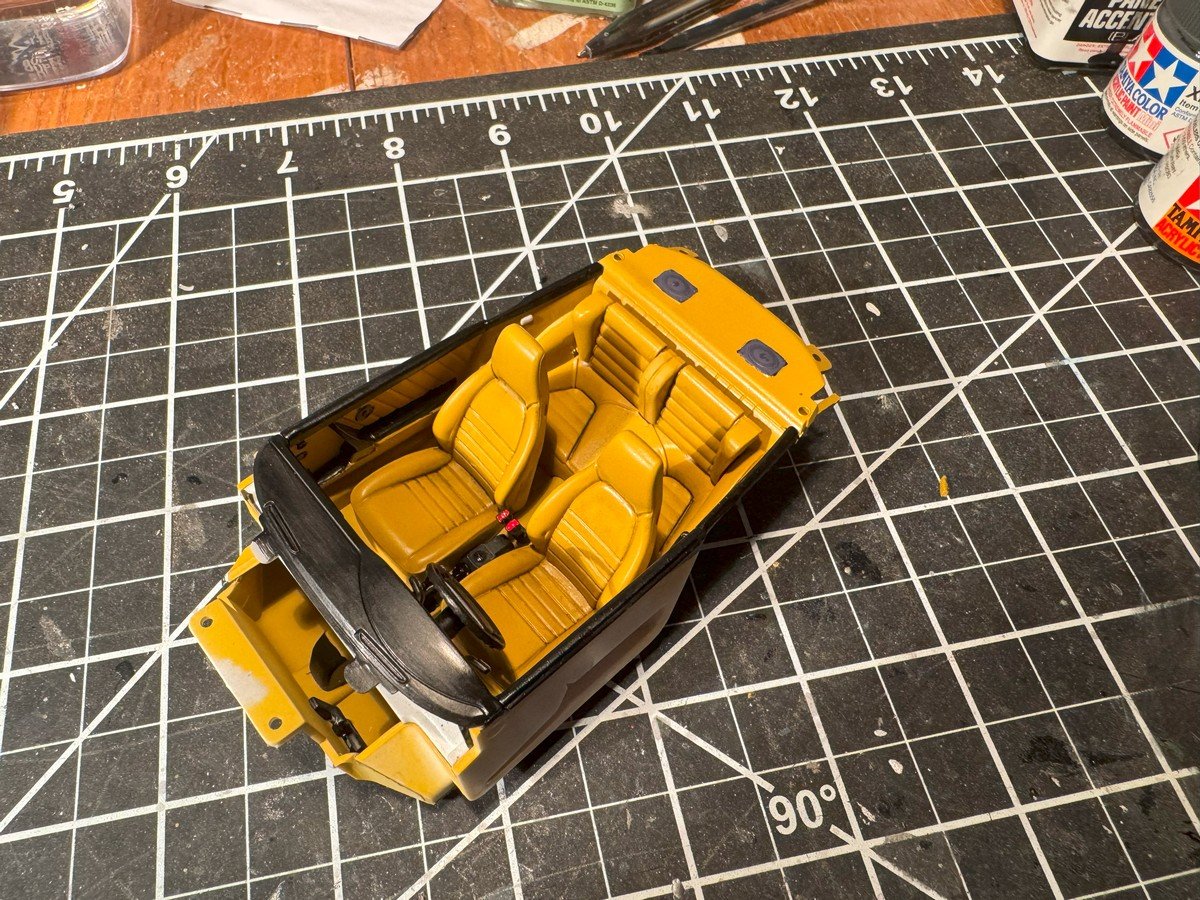
Thanks all for the likes. I've continued working, doing chassis/suspension bits. The chassis is painted with the body (enamel) paint but I really have not noticed significant difference in dry/cure time. I did also discover one body part that I failed to paint the first time around, so I painted that part and did a little touch up painting on some parts of the main body that were a bit thin. Below is a photo of the underside with the engine and most suspension bits in place, then two from above showing the engine in the engine bay, one with the interior dropped into place. There are a few more detail parts to be added to the engine. After that it is on to detailing the body. I'll likely put a couple coats of gloss clear on first, then paint some of the body details.
- 25 replies
-
- 14
-
-
That's a good question. I have seen on the spotmodel.com web site indications of MFH kits to be released soon but as you noted, there does not appear to be such info on the MFH web site. The particular example I am thinking of is the McLaren F1 GTR '95 LeMans winner. Apparently MFH released it originally in 2020 but it still just shows as "out of stock" on their web site, but spotmodel.com indicates that it will be rereleased and available again soon.
-
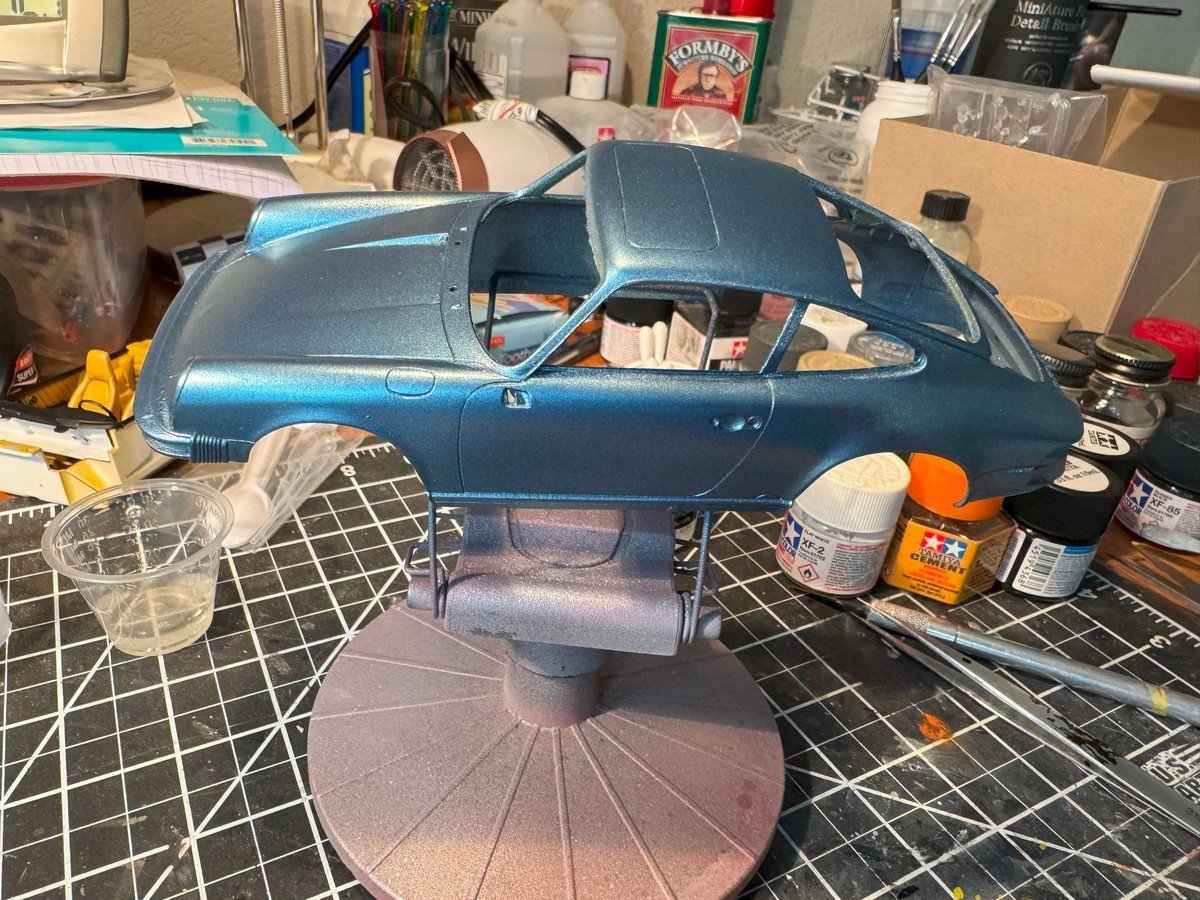
Thanks all for looking in and hitting the like button. Yesterday I received the primer and paint from scalefinishes.com and I primed those body and chassis parts that are body color. Then today I applied several coats of the body color....I did two light coats and two medium coats. The primer was ok...I think I like splash paints primer better....this stuff I managed to get some rough surfaces that I had to sand down a bit and respray. I think I maybe had the pressure too high even though I was in the recommended range. The paint I liked better. The metallic flakes seem to be very fine (less noticeable in real life than in the picture). As with any metallic, it is a bit tricky to get an even finish but I think I mostly succeeded. Even though I got the gloss enamel, it is not quite as glossy as I expected, perhaps due in part to the metallic nature of the paint. So, I might do a coat of X-22 down the line. Anyway, here's a picture of the painted body. Trying to not touch it for several days or a week. I don't think I'll be quite so careful with the chassis parts that are also painted in body color, so that I can resume building the chassis and suspension bits.
- 25 replies
-
- 11
-
-
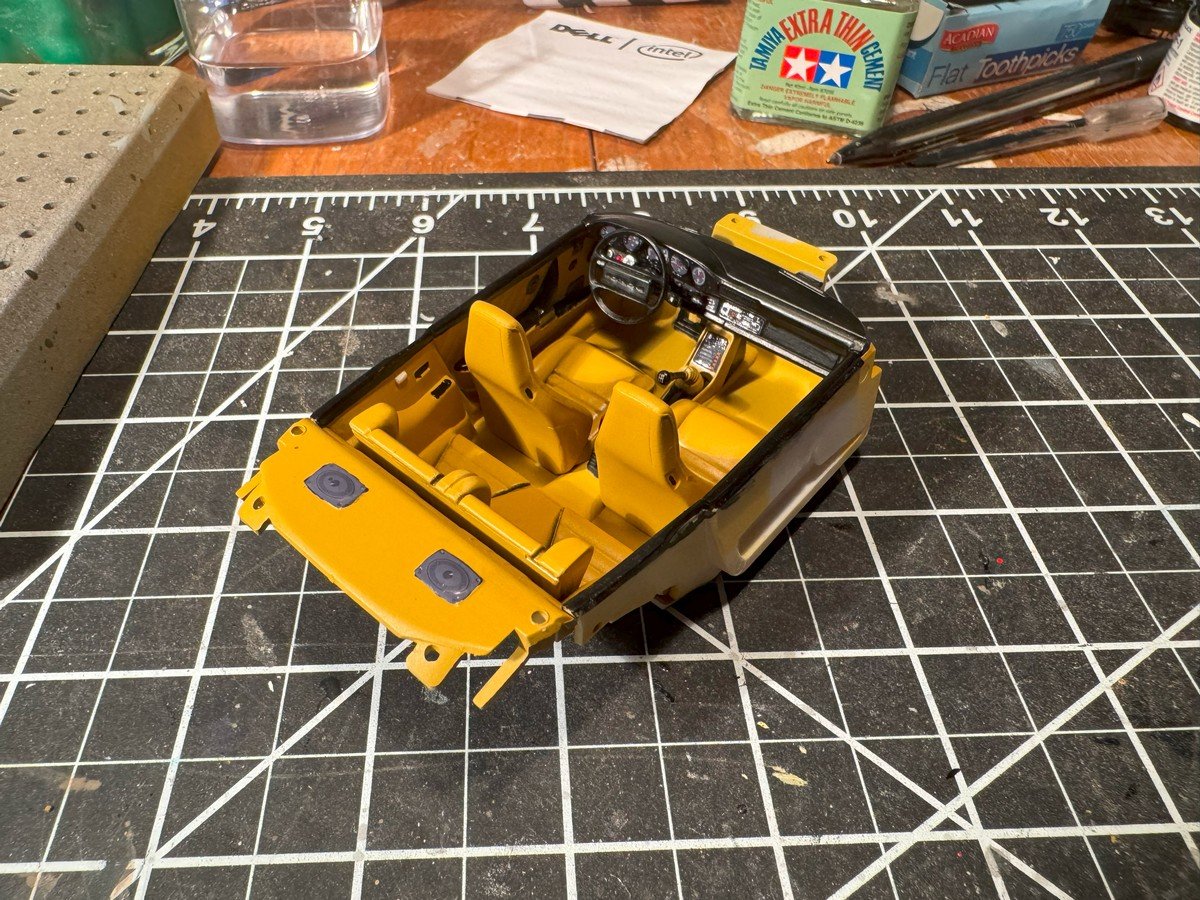
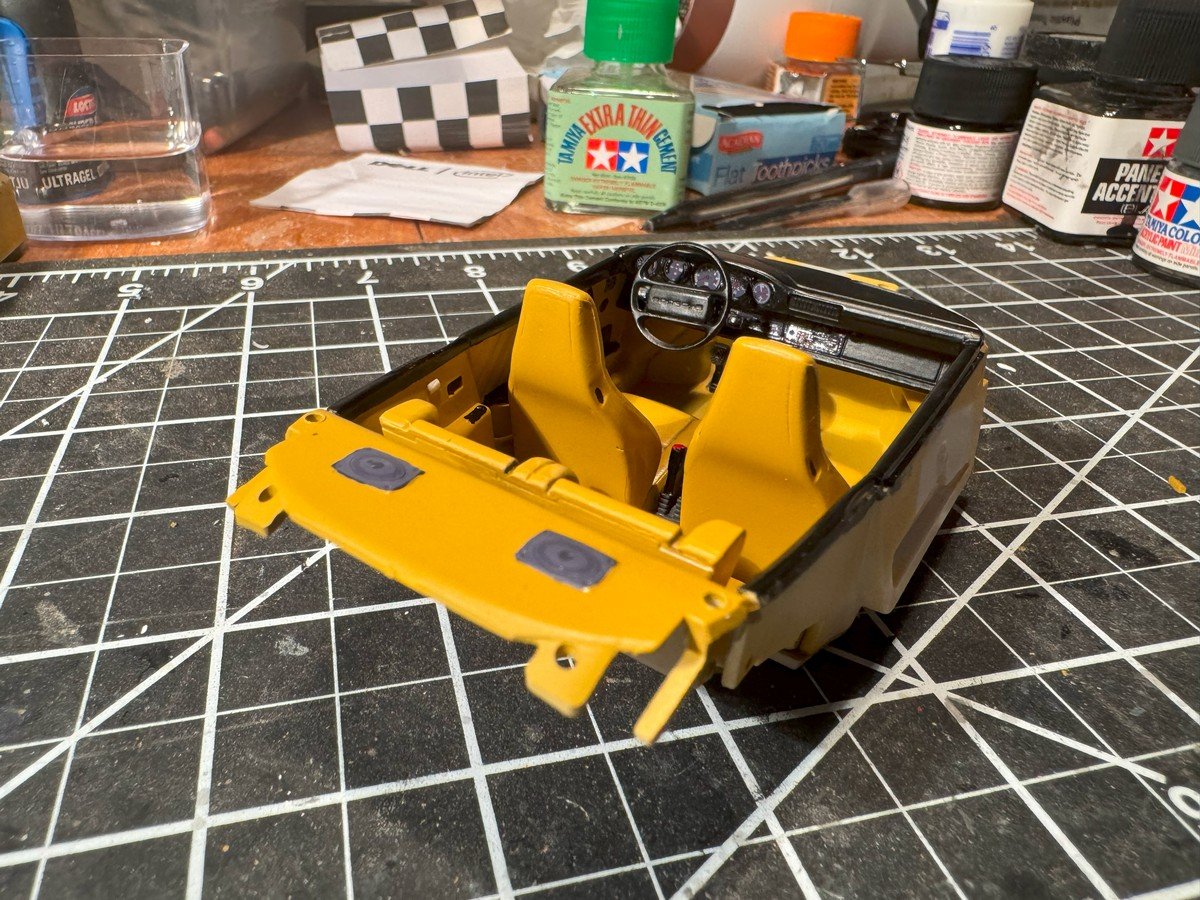
Thanks all for the likes and comments. I've now finished the interior, pictures below. The color was about a 2:1 mix of Tamiya XF-93 Light Brown and XF-3 Yellow. I think the iPhone photos crank up the saturation a bit...in real life it does not look quite so bright orange. It is hard to tell in the photos but I actually used the above mix for the carpet areas and then added a touch more of the brown to paint the leather areas plus I also applied a semi-gloss clear coat to just the leather areas, to try to differentiate the two surfaces a bit. The speakers in back and the instruments are all decals, they even have a tiny decal for the shift patter on the shifter. The decals seem very well printed but quite fragile....even the weaker decal setting solution appears to cause some issues sometimes. Still waiting on the paint for the body...USPS tracking says Monday. Not much more I can do other than perhaps paint some of the other suspension bits, brake disks, wheels, etc.
- 25 replies
-
- 13
-
-
Thanks, that was a decal supplied by the kit.
-
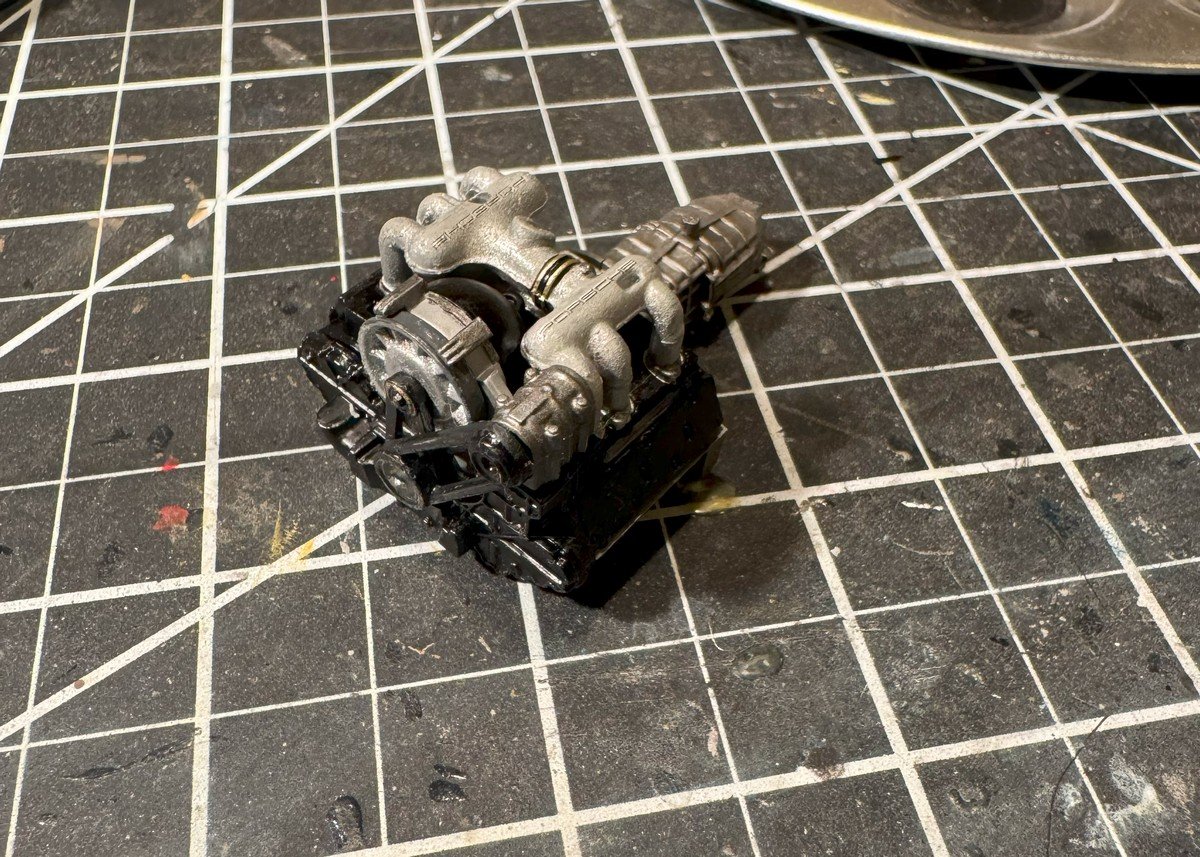
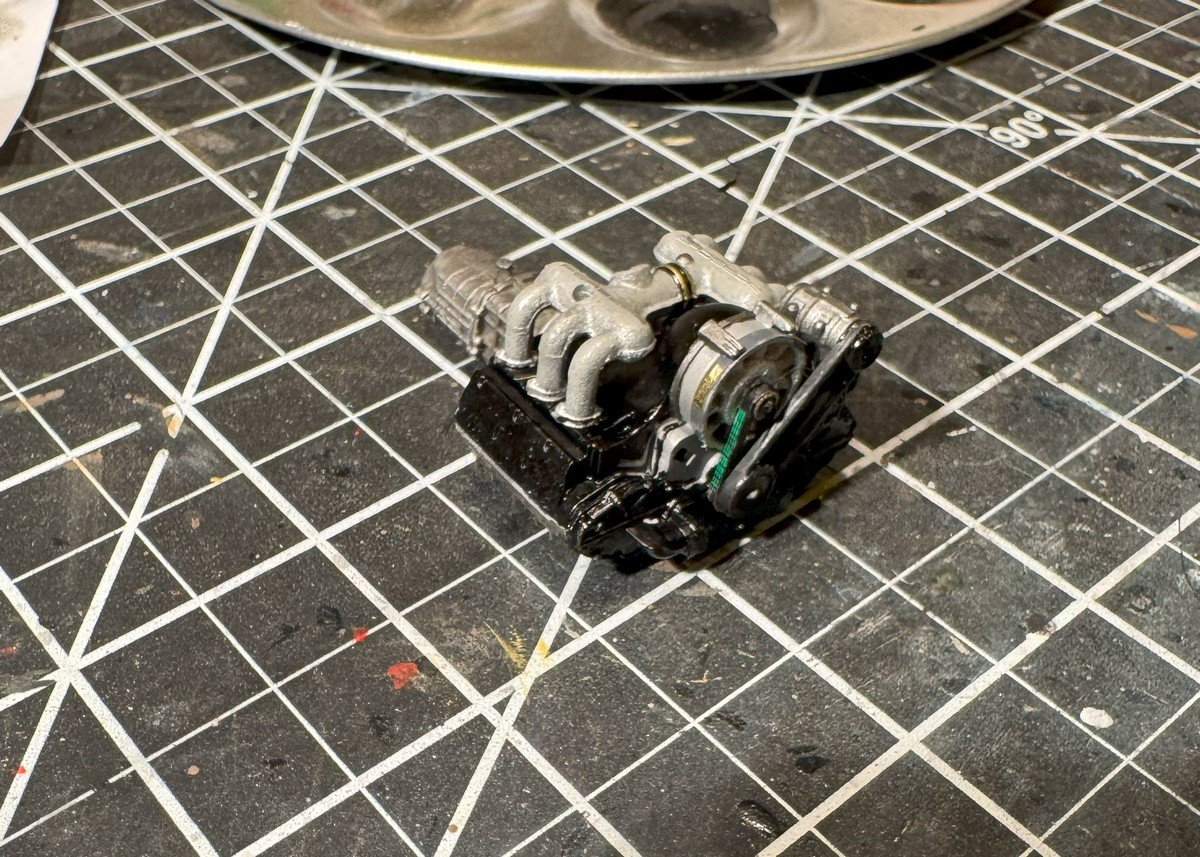
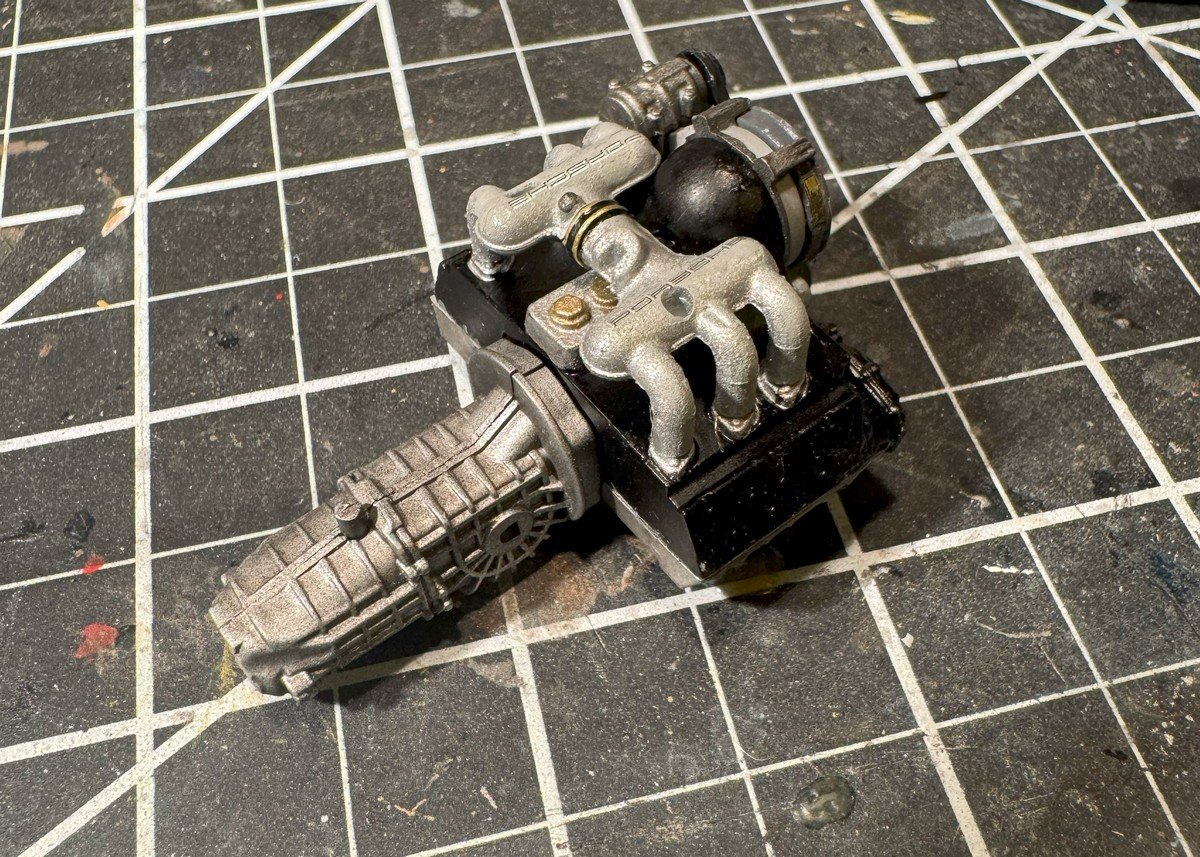
Yes, this body style was introduced in 1974 with a 2.7 liter engine. Every few years they bumped up the displacement a bit until the 3.2 in 1984. Thanks to the all for the comments and likes and interest in this build. I've built most of the engine, through step 4.5. There are a few more bits to add to the top and exhaust and axles to add to the bottom but that comes after the engine is mounted in the chassis. And, I need the body paint before I can do that. I'll likely skip ahead to work on the interior while I wait for the paint to be delivered and then wait for it to cure. The intake and transmission both look a bit more grainy in these pictures than they do in real life. Part of the problem is that my Tamiya XF-16 Flat Aluminum paint is a bit old and getting thick and clumpy.
- 25 replies
-
- 13
-
-
This is pretty much the car I will be trying to duplicate: https://bringatrailer.com/listing/1986-porsche-911-carrera-15/ There will be some minor differences. Mine will have.... - showroom new condition - center of wheels will be black like the box art, not completely polished - European spec lights and bumpers (the kit provides both European and US spec)
-
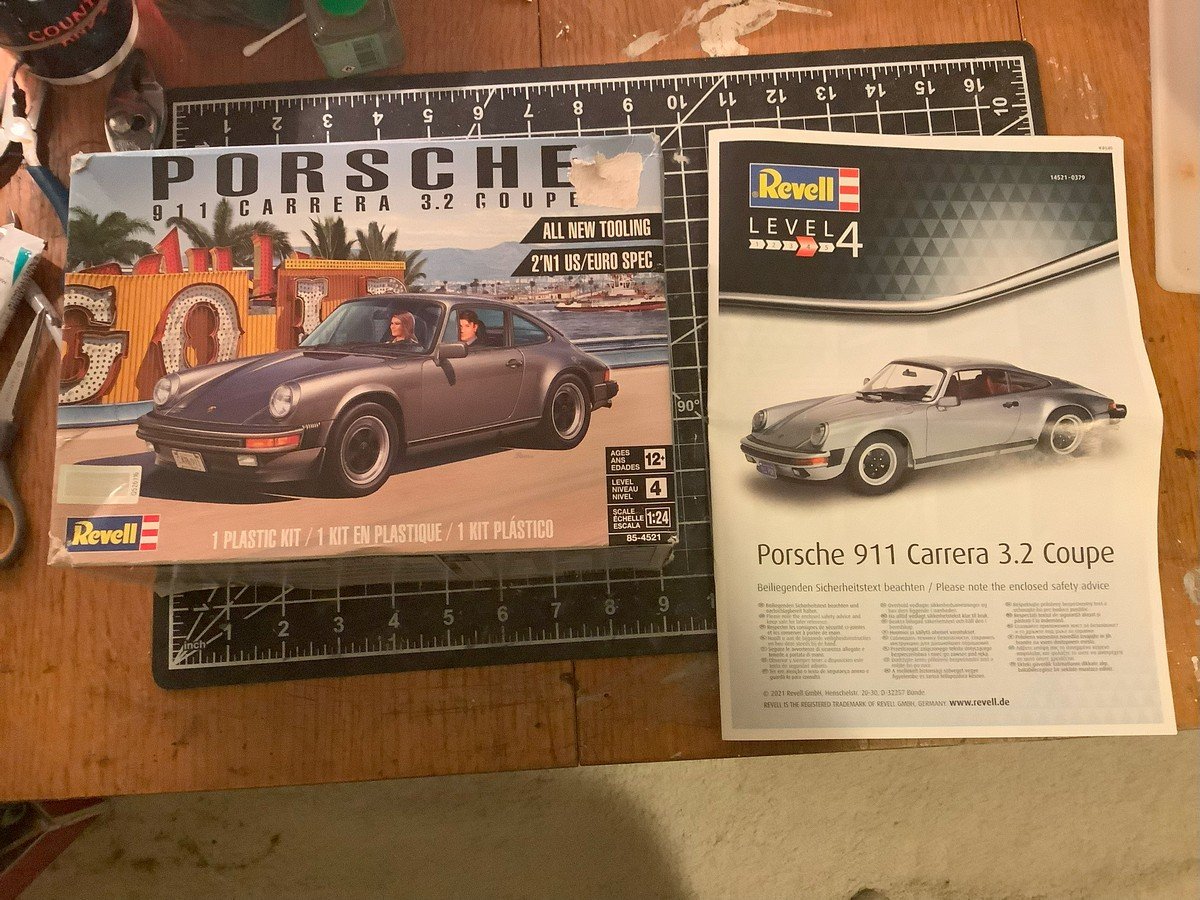
Happy New Year everyone. I start the new year with a new build, the Revell Porsche 911 Carrera 3.2 Coupe. That is the 911 from the late 1980's. I believe it was 1984 to 1989 that the "G Model" 911 was sold with the 3.2 engine, from my research. The kit itself is a re-issue I believe, but the box indicates "new tooling". Just from looking at the kit, I am pretty impressed. The molded details look good and there is very little flash and very few mold lines. The decals also appear to be nicely done with good alignment of the various colors. My plan is to paint the body a metallic blueish silver color, "Iris Blue Metallic". I have that paint on order from scalefinishes.com. I learned of them from @CDW and his build of the Carrera GT. I also ordered some of their primer. I've not used that paint before so we'll see how it goes. Otherwise, I am just getting started on the build. I've primed most of the sprues of parts that are not body color and started painting and assembling the engine. More photos of that when I get a little farther.
- 25 replies
-
- 12
-
-
You have too many projects going! But let me also wish you a happy, prosperous, and hopefully hurricane free 2025. I have had my eye on that 911 GT3 RS. I am sure I'll get it at some point but have so many things in my stash, so many others I want to get, and a couple on the way in the mail as I write this. I also have some paint on the way from scalefinishes.com thanks to you. I'll likely start a log for that project in the coming days.
-
Not sure I’ve seen a build log of this kit, will follow along.
-
Oh, another MarisStella Trabaccolo build to follow. I assume you've seen the one that @aliluke started.
-
Looks like you are off to a good start on this beauty. I'll follow along.
- 6 replies
-
- 1
-
-
- runabout
- riva aquarama
- (and 1 more)
-
Excellent result, despite the fight it put up. The carbon fiber decals, the finish on the exhaust, and the finish on the body all stand out to me. That's such an iconic livery from the days I actually followed F1. And of course any car driven by Senna is a little bit extra special.
-
Hello and welcome to MSW from a former and possibly future Hoosier. Grew up in Fort Wayne but have friends and family there and in Indy as well.
-
I saw the new constitution as well, as I am on their mailing list. They mention this is their first wooden ship kit. They are more known for the car models. There is a build log or two for their Shelby Cobra in the "non-ship/categorized builds" area. The cars are roughly the same price, though I assume they come from a different supplier than the constitution since the kits are so different. I've been tempted by one or two of the cars but it seems to be more just a process of assembling a bunch of bits with less opportunity to paint or customize or otherwise make it your own. Though I did see one build log on youtube where they stripped the paint from the metal body and painted it a different color....or at least they started to as I don't recall seeing the finished product.
-
Oh, I assumed you removed that door in the back, but it sounds like you are leaving it there. If so, then it makes more sense.
- 732 replies
-
- 5
-

-
-
- Lula
- sternwheeler
- (and 1 more)
-
Interesting project and thought behind the design. One question though.... In your drawing, you show some space behind the pilot house like on the Lula. But if you have moved the door from the back to the side, is that space back there really needed? If not, the pilot house could be moved back a bit. As it is now, it seems like it would be awkward to use the door. One would have to stand at the very front edge or corner of the platform to swing open the door and get in to the pilot house. Moving the pilot house back would leave more room to walk past the door before opening it.
- 732 replies
-
- 5
-
-
- Lula
- sternwheeler
- (and 1 more)
-
The ZHL kit is listed as double plank on bulkhead so not the same. Note that ZHL is also on the list of "banned" manufacturers.
-
Glad to see you back at the workbench. Hope life is getting closer to normal for you and all those in your area.
-
Excellent progress and I can see why you chose that particular picture as the basis for your carving, that is a good pose. I'll be interested to see how the carving goes. I've dabbled in a little bit of wood carving over the last year, carving a couple of dogs and a penguin.