


gsdpic
-
Posts
843 -
Joined
-
Last visited
Content Type
Profiles
Forums
Gallery
Events
Everything posted by gsdpic
-
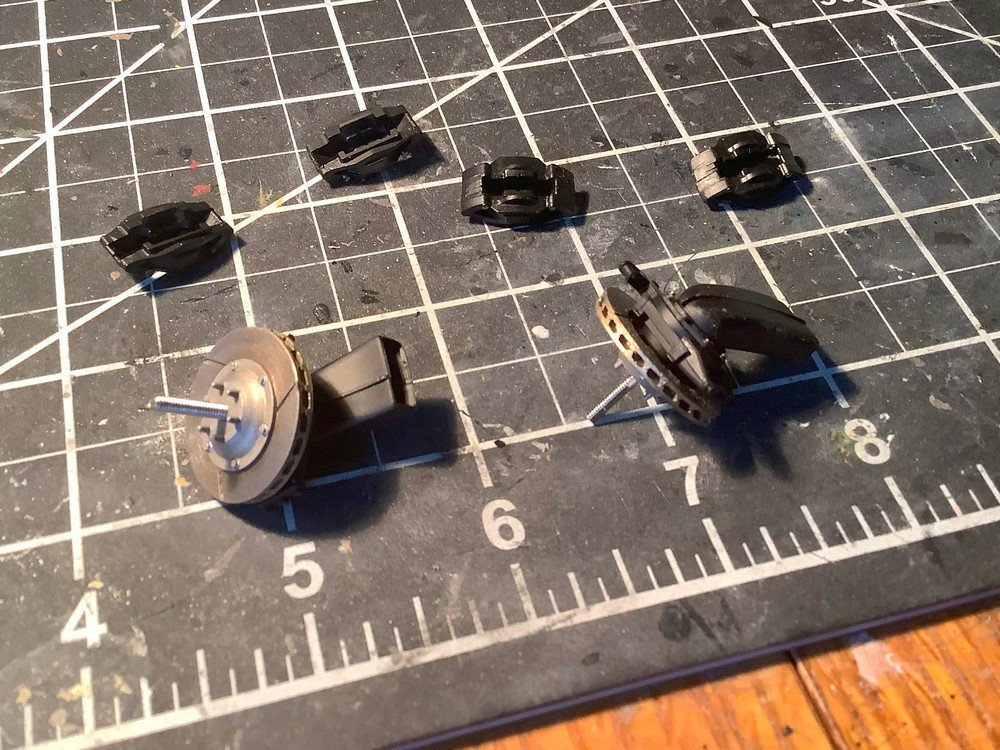
Thanks all for the well wishes. Fortunately I again had a fairly minor case. The only remaining symptoms are some coughing and some fatigue, though the nasal swab test still came back positive today, which was not a surprise since this is just the fifth day since symptoms started. Between naps and coughing fits, I have managed a little bit of work, painting and assembling the front hub assemblies and the brake calipers, though I still need to attach the latter to the former. All shown below. Both front and rear wheels have 2 calipers per wheel.
- 62 replies
-
- 11
-

-
And now....my second bout of COVID. That's what I get for climbing into a metal tube with ~200 of my "friends". At least it happened on the way back, not the way there. I'll probably take a few more days off. My symptoms are not too bad so far but I don't feel much like thinking and can just see having a coughing fit while manipulating some small, delicate parts.
-
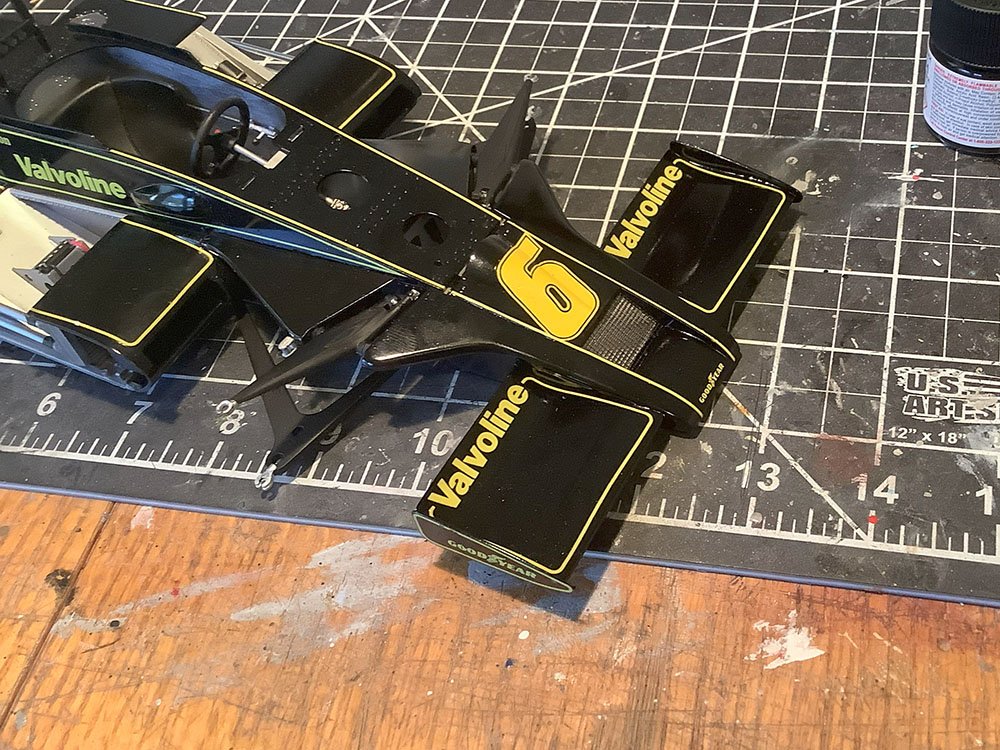
As mentioned, I have resumed work on this. The main thing I did was to put on the front pieces of the side pods and the faring behind the front suspension. You can see both in the pictures below. In the second picture, I put on the front wing to show how it hides the nuts discussed above. I still plan to paint those nuts though. I also realized while taking the pictures that I have yet to put the instrument panel on, as I want to do some additional detailing, as in some sort of wiring harness, for the instrument panel. And yes, after I complete the build I will wipe down the body to get rid of that big thumb print After this, I need to work on the front hub assemblies, with the brakes and brake ducts. After that, not much more to do. I still need to decide if I am going to dechrome the wheels and paint them with alclad. I probably will, as I did for the two previous Lotus F1 cars I built. But it is a little bit of a pain, especially the rear wheels. It is like trying to paint the inside of a pill bottle.
- 62 replies
-
- 12
-
-
Thanks, that is a good idea. They generally are not visible due to some faring around the suspension arms. But the front nose cone is intended to be removable, in which case at least the nuts in the front would be visible.
-
Thanks Mike for the compliment and all others for the likes and wows. I've been on a brief vacation but am back now so should resume work on the lotus this week.
-
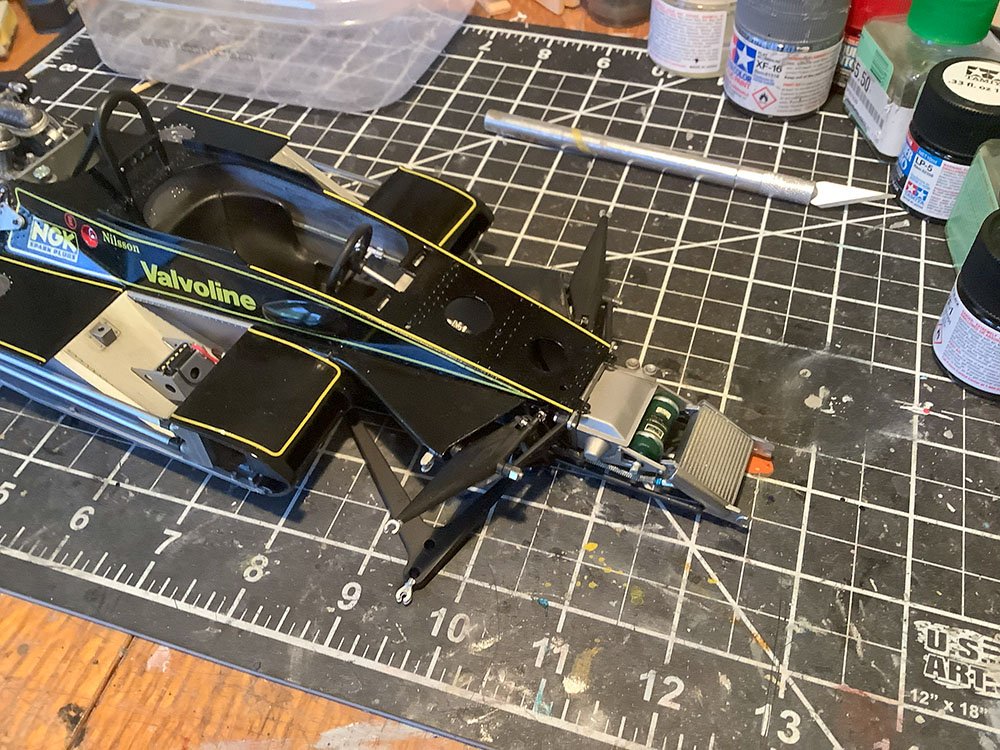
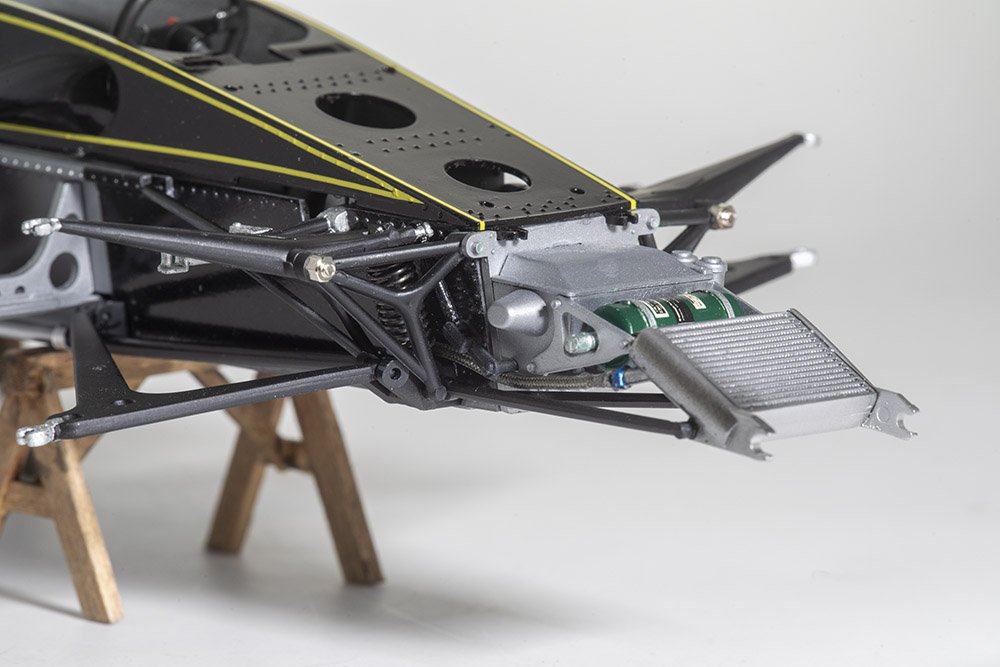
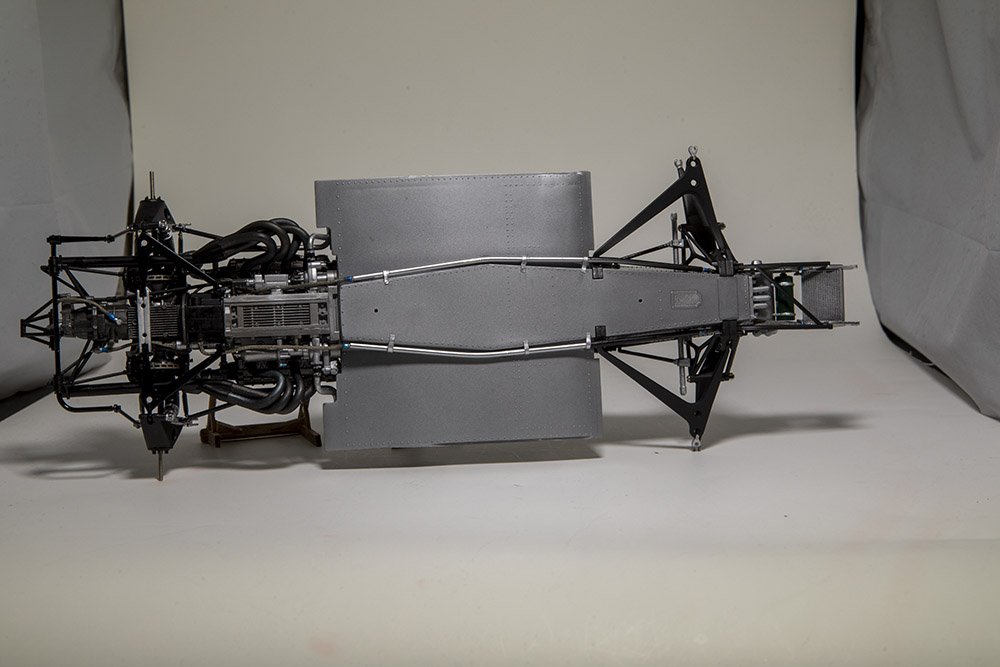
Thanks for the likes and comment. I thought I'd make another quick update, as I have made another addition/modification that I am quite happy with. The car has a radiator in the nose that serves as an oil cooler. Of course there needs to be a way for the oil to get between that radiator and the engine. The kit supplies black vinyl hose for this, though the instructions do not show many details about how it is routed, just the end points. I looked on the internet for relevant pictures, and I found what appeared to be a solid pipe, rather than a hose, for much of the run between the front and back of the car. However, I did not find too many pictures, especially of the under-the-car parts of this run, so still had to make some assumptions. I started by cutting two lengths of 3/32nd brass tube. I bent the tubes in two places to conform to the bottom of the car, put resin hose connectors in each end, painted the tube, black in the front and polished silver in the back, then used some CA to glue the tubes on to the car. I created some little brackets (out of wine cap foil) to hold those tubes, then used some braided line to connect the ends of the tubes to the proper locations on the radiator and on the engine. Excuse the background on the third picture below: this model is too large for my little DIY photo booth.
- 62 replies
-
- 14
-
-

-
Excellent progress as always! I also recall that the number of various types of blocks in the kit did not exactly match the plans. Fortunately I planned out ahead where I'd use which blocks and just substituted doubles for the throat halyards. The cap rail is looking great. I did far fewer segments. I am not sure though, I might have substituted some of my own wider wood strip so that I could do more with each piece. But your cap rail joinery is excellent. I assume you'll put tung oil on the cap rail like on the deck....that will really make it look nice.
-
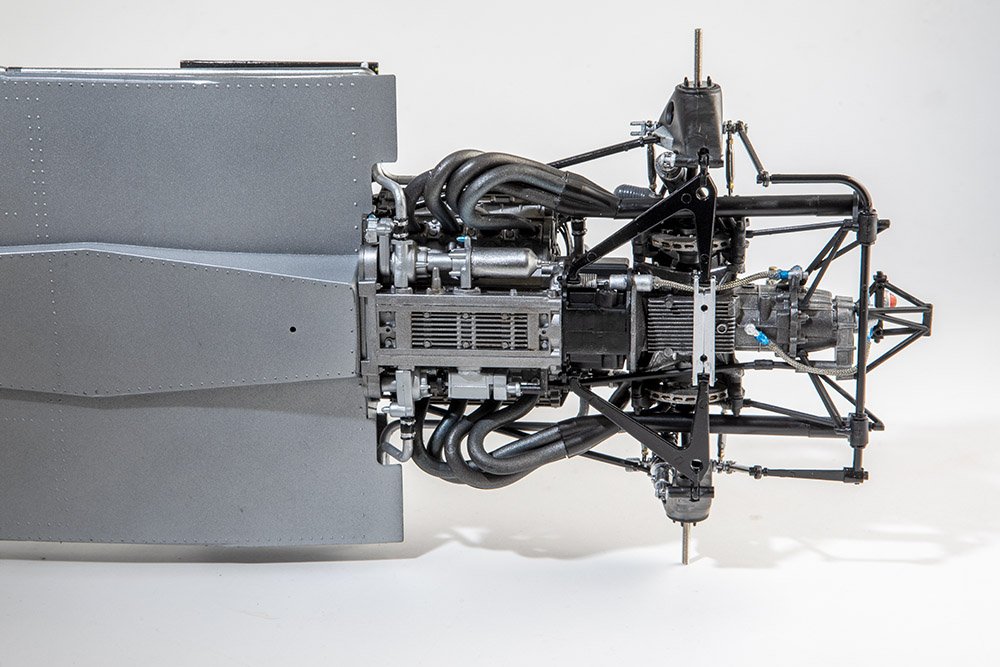
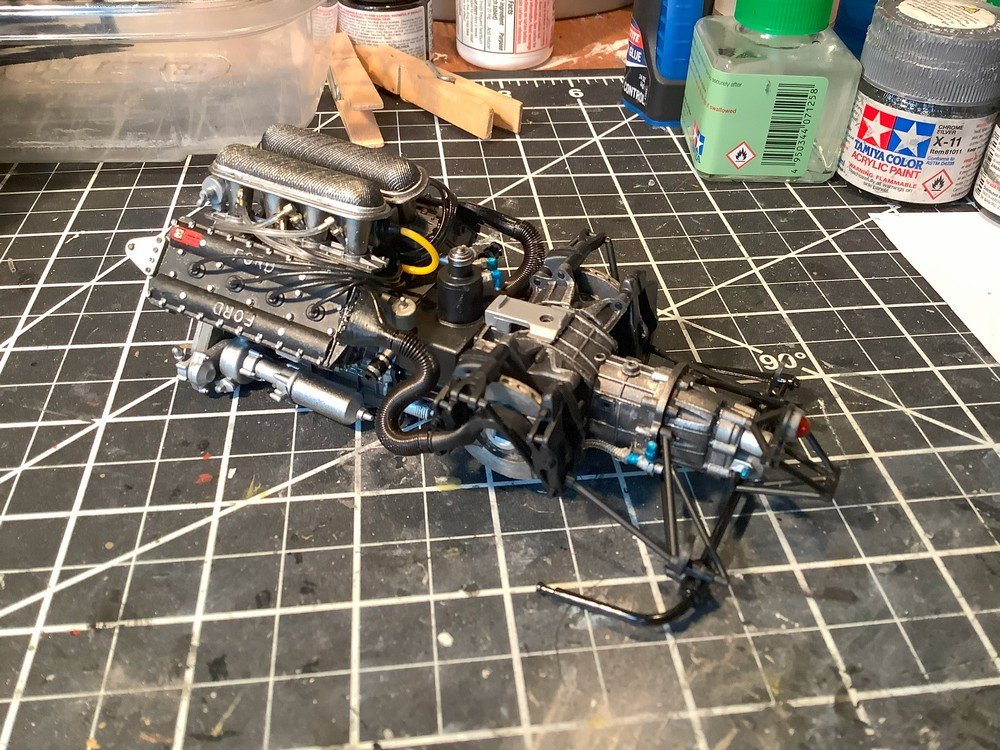
Thanks as always for the likes and comments or for just looking in. @DocRob I have the Ferrari 312B in my stash with its 12 cylinder engine. I imagine that exhaust will be more challenging....though maybe not since there are two collectors on each side, each with just 3 headers in them, so I'll be doing 4 sets of 3 pipes each instead of 2 sets of 4 pipes each on the DFV. I've now attached the engine to the tub. Once done, there were 4 coolant pipes to attach between the back of the tub and the engine and 2 suspension members from the back of the tub to the uprights. The latter were just a little bit tricky to get in place. You can see all of those pieces in the second picture below. I've also included below a picture of the under side of the car and engine. I meant to include a picture of the underside of the engine in the last post but failed to do so.
- 62 replies
-
- 17
-
-
-
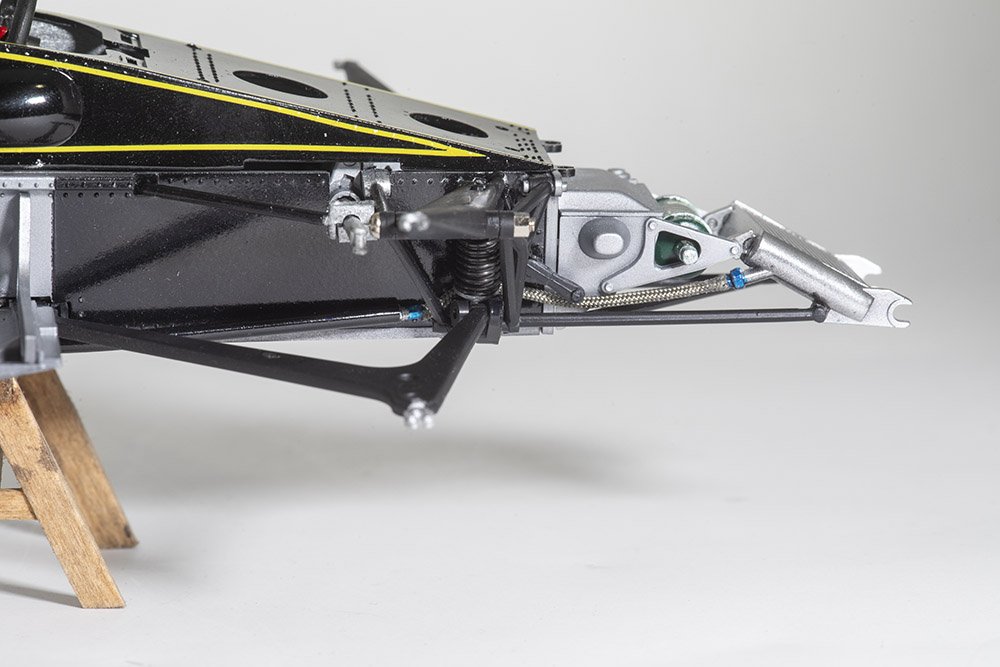
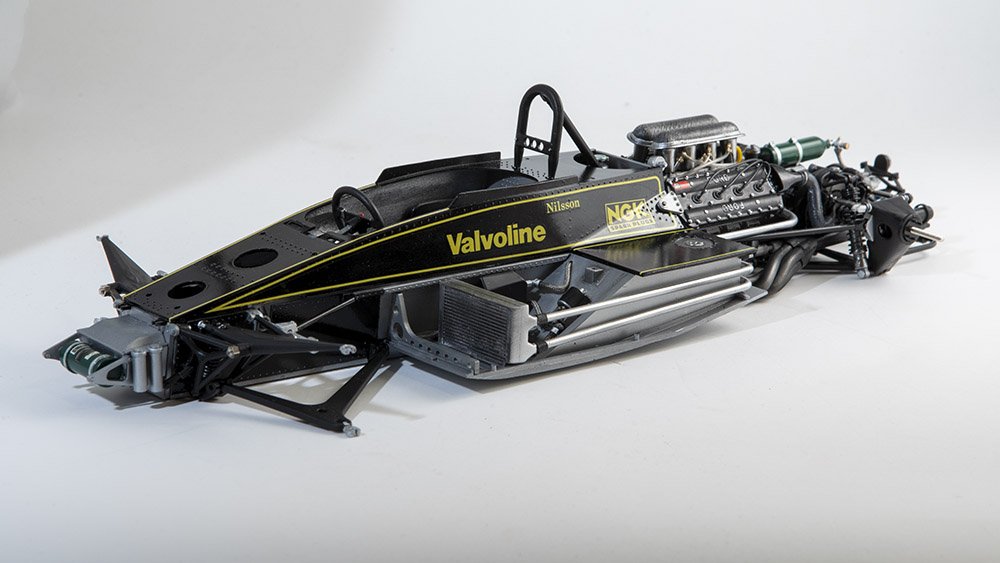
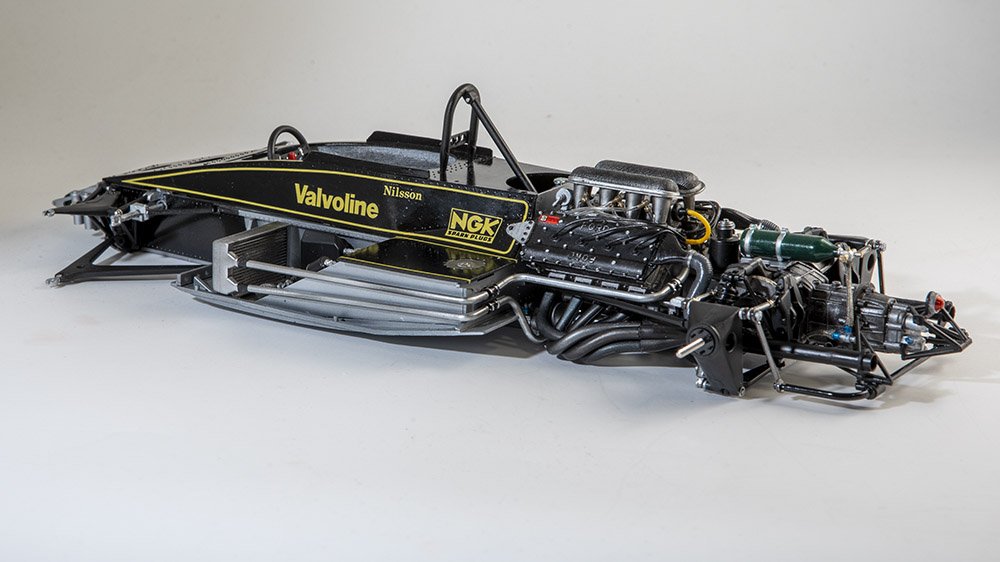
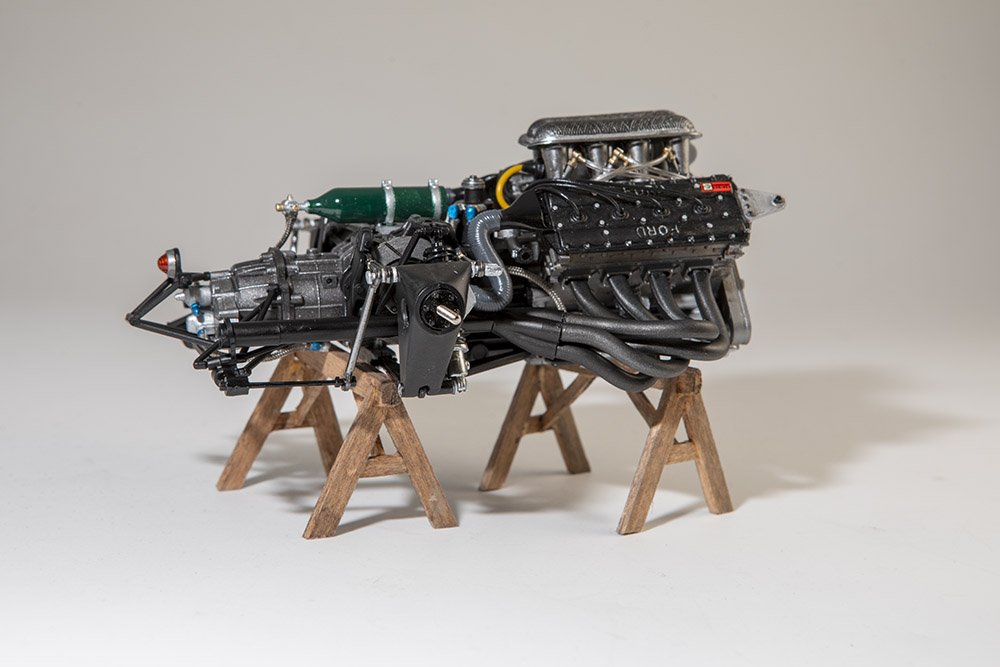
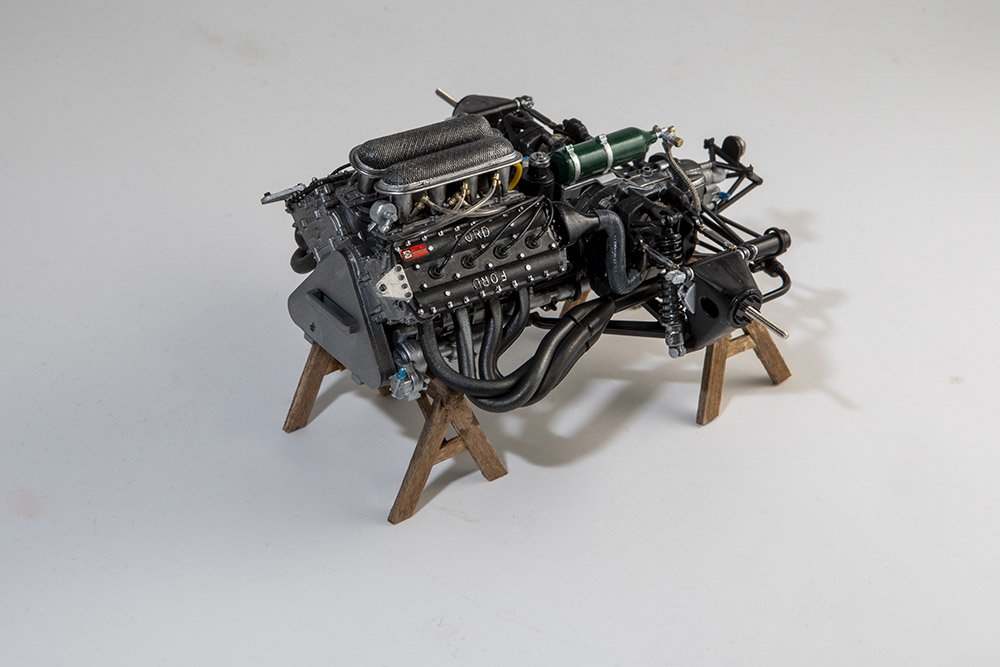
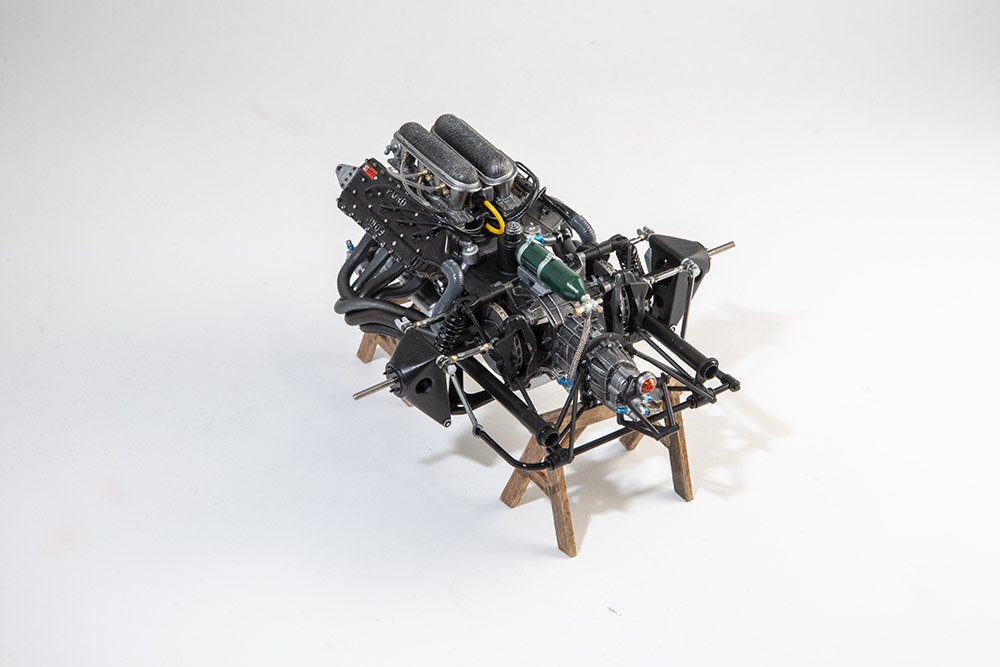
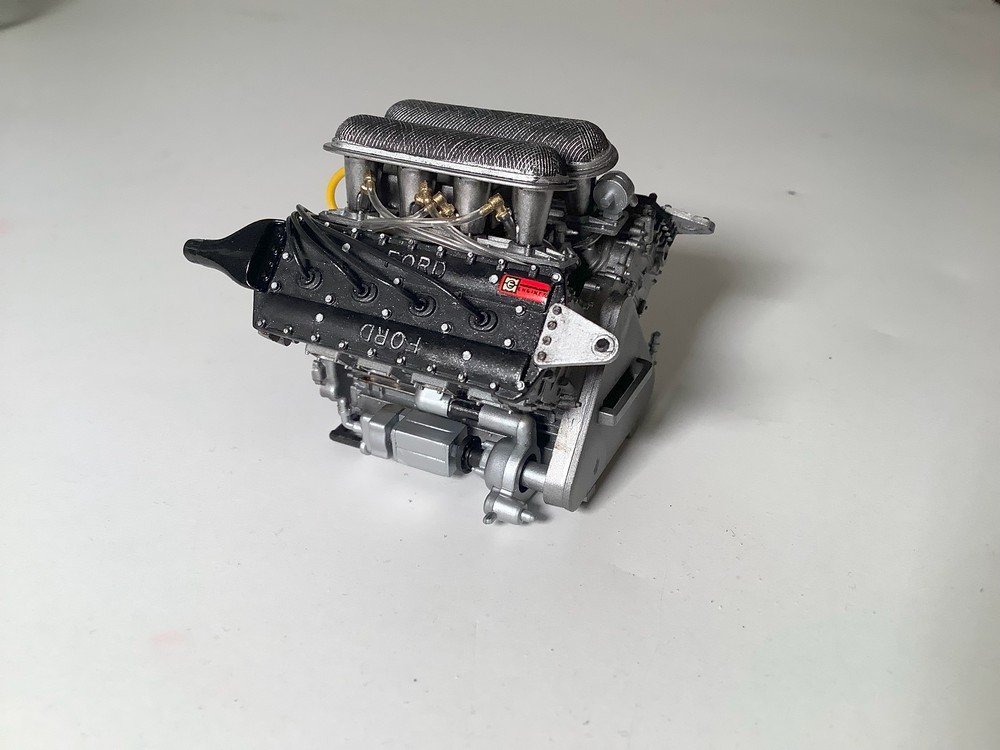
Thanks all for the likes and comments and especially @Egilman for the suggestion. I painted those springs with micro kristal clear and then with Tamiya XF-63 German Gray. The latter was supposed to be flat but over the kristal clear it still has some sheen. I tried a bit of micro flat on top but that did not change it much. Regardless, it looks much better than it did before in my opinion. Of course rereading his comment reminds me that I forgot to dig up the photo etch hose clamps I have to see if they could be added to good effect. I also added the exhausts and wrapped up the rest of the rear suspension, so with that the drive train is mostly done. There are a few more connections (both hard pipes and flexible braided lines) to be done when the engine is connected to the tub and there is an oil cooler with a few more braided lines that attaches to the supports for the rear wing. I may add a few more lines as well, such as some lines to the brake calipers. I've found some decent pictures of the back of this car so will look again at those for ideas. As usual, the exhaust was a bit tricky, though I tried a new trick that helped. I don't recall where I read/saw this trick. But I put just a small dot of white glue (actually the micro kristal clear again) on the 4-to-1 collector and in the engine block exhaust ports and let it get a bit tacky. I then put the exhaust headers in place and the kristal clear held them but still allowed a lot of maneuvering, which is needed for those exhausts. Oh, I guess I also used a dot or two of gel CA on the engine block port for a couple of the headers. Once all was in place, I added a droplet of the Tamiya extra thin cement to each of the gaps where the parts met, on both ends of the exhaust headers. But with this milestone I figured I would get out the "real" camera and the little photo booth and take some better pictures, instead of just the at-the-bench iPad pictures I've been uploading to this log thus far.
- 62 replies
-
- 16
-
-
-
1968 Pontiac Firebird by CDW - Revell - 1:25 Scale - PLASTIC
gsdpic replied to CDW's topic in Completed non-ship models
Beautiful! -
Thanks. I had thought about trying some PVA but had not thought of the micro kristal clear, which is very similar but a bit thicker. I have some of that stuff, used mostly for instrument panel gauges, so maybe I'll give it a try. I did shorten both springs by about an eighth of an inch and that also helped. Hmm, I also have some photo etch hose clamps that I could add to see if that looks good. Thanks, and yes on this model it is a solid part which I painted flat black then highlighted the screen texture by dry brushing some silver. I thought about trying to make a replacement out of some real metal screen material and also saw that MFH had some parts as well. But on this car, that screen ends up covered by the air scoop that is above/behind the cockpit so I did not bother.
-
Thanks, Gary, for the compliment and to everyone else for the likes. I continue to work on the drive train. I've attached the engine and gearbox, and done some of the bits that support the rear suspension, but there is more work to be done there. I am not crazy about the two springs that serve as the hoses between the air scopes and brake cooling duct. I might need to rethink that. I could at least shorten the spring and I think that would help but I am considering other options as well.
- 62 replies
-
- 14
-
-
-
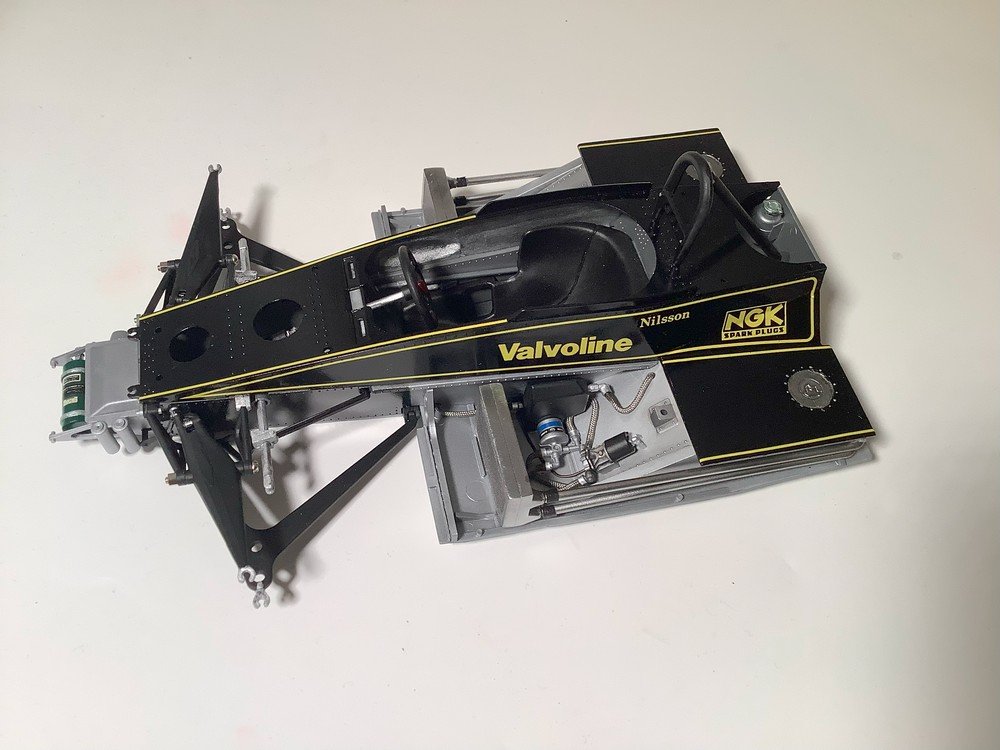
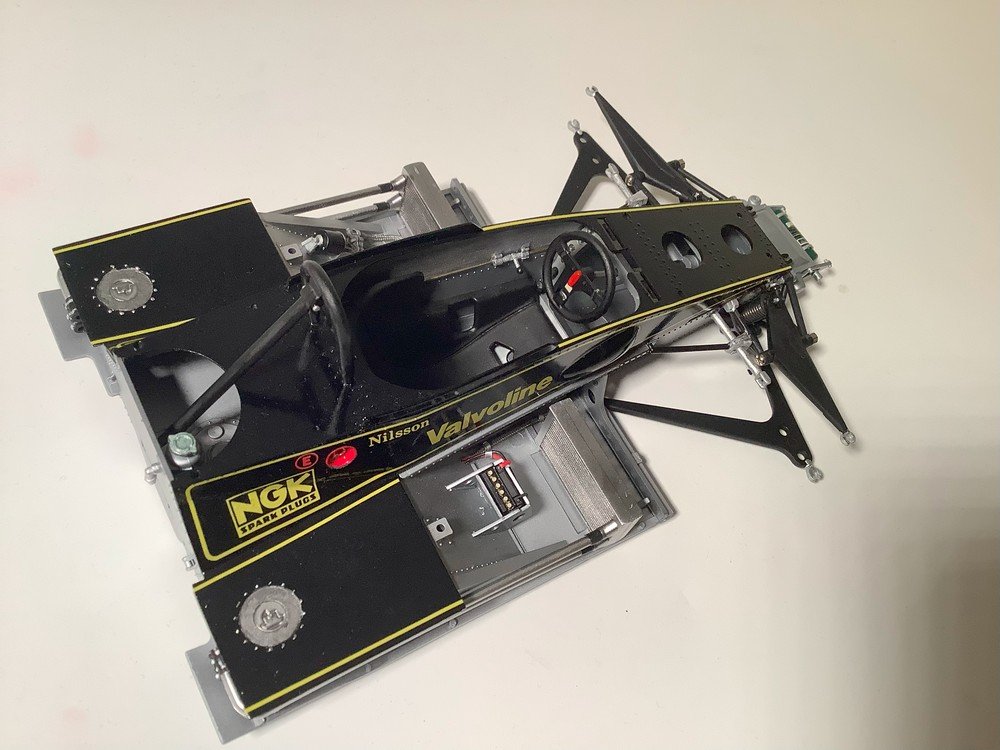
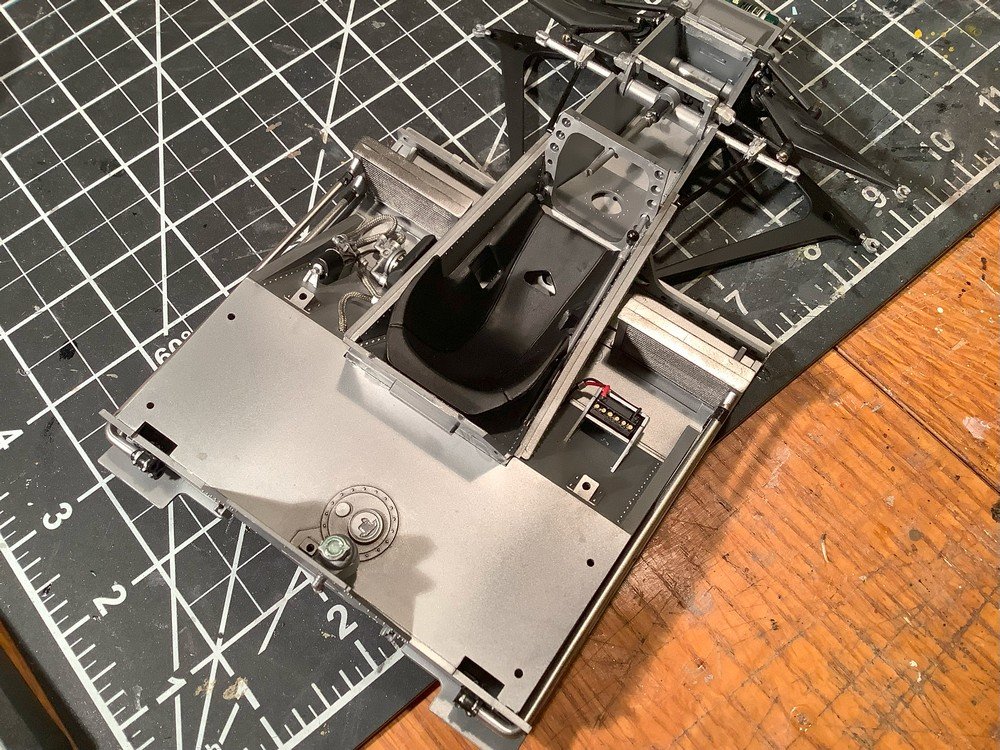
Thanks as always for the likes or for just looking in. I've reached, or almost reached, two different milestones. I have completed the main tub, except for instrument panel. I am thinking about adding some connections/wiring harness to the back of the panel and that is why I have not mounted it yet. On the second picture of the tub, in the cockpit you can see a small lever, I believe to adjust the suspension. That lever was not connected to anything so I added some thin brass rods running fore and aft. The yellow wire to the distributor was another addition based on a photo I saw. The kit suggested using the same black wire as for the spark plugs. Next up is to continue working on the gear box and all the rear suspension bits that are attached to it, as well as the exhaust.
- 62 replies
-
- 13
-
-
-
Thanks! I swear as I was doing this, I wondered to myself if distilled water would leave fewer water spots. Next time I'll try it. I also think I should wear gloves more frequently when handling the body parts to leave fewer finger prints.
-
Wow, that looks fantastic. The shovel that popped up in the last photo is a nice touch!
-
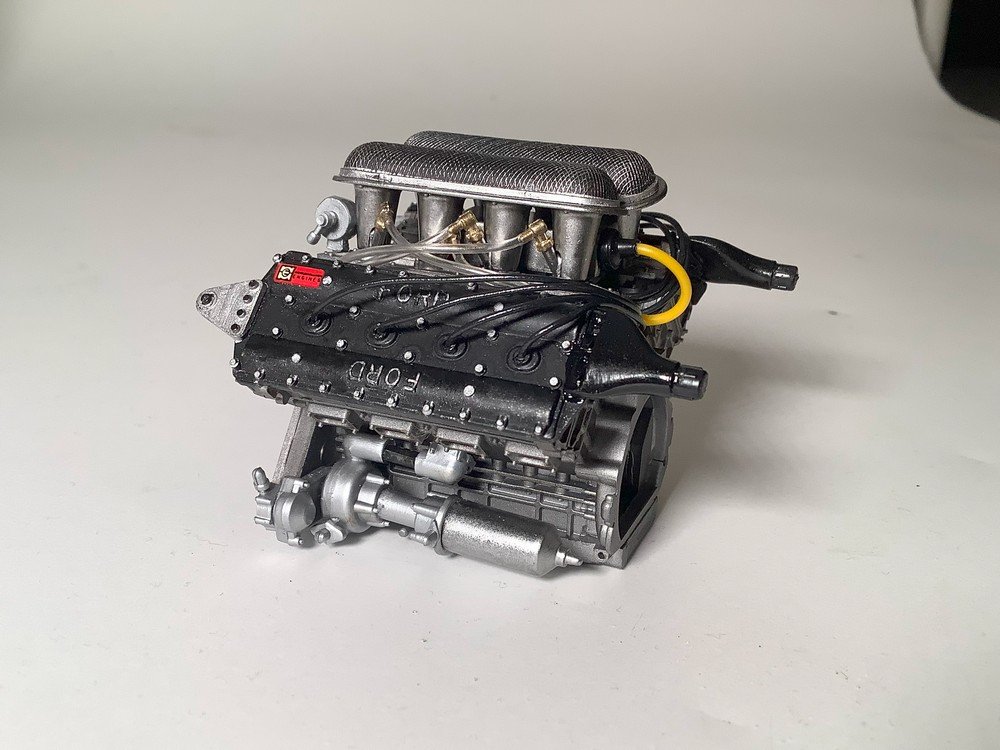
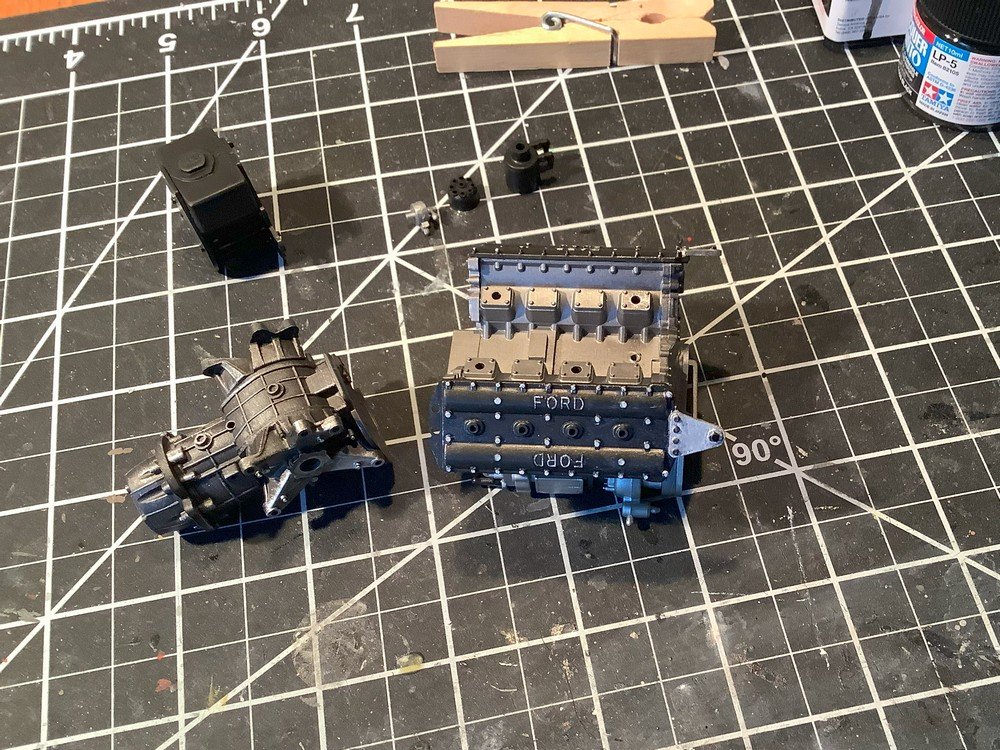
I've done several coats of X-22 gloss clear on all the body panels, they are looking good. I've also started working on the engine and gearbox, as shown below. I did hit one snag: on each side of the engine near the bottom are a series of 3 or 4 parts, oil or water pumps I believe. Somehow I lost one of the pieces that make up the mechanism on the right side of the engine. I was able to scratch build a piece to go in its place. Not an exact duplicate by any means but no one will notice.
- 62 replies
-
- 14
-
-
Welcome aboard, Dan. I assume that is Chapel Hill, North Carolina? Nice part of the country, I lived in Raleigh for about 8 years, many moons ago.
-
Well done, that is a fine looking model. You wrapped it up pretty quickly once you got back to work on it.
-
Thanks to everyone for the likes. I've now completed all the body panel decals. Next I will probably alternate between working on the engine and applying several layers of clear coat (Tamiya X-22 plus Mr color leveling thinner) to the body panels.
- 62 replies
-
- 13
-
-
Haha, I thought that would have resulted in tinting it more brown than usual Great progress, those ship's boats are tiny!
- 235 replies
-
- 5
-

-
-
- Banshee II
- Bottle
- (and 1 more)
-
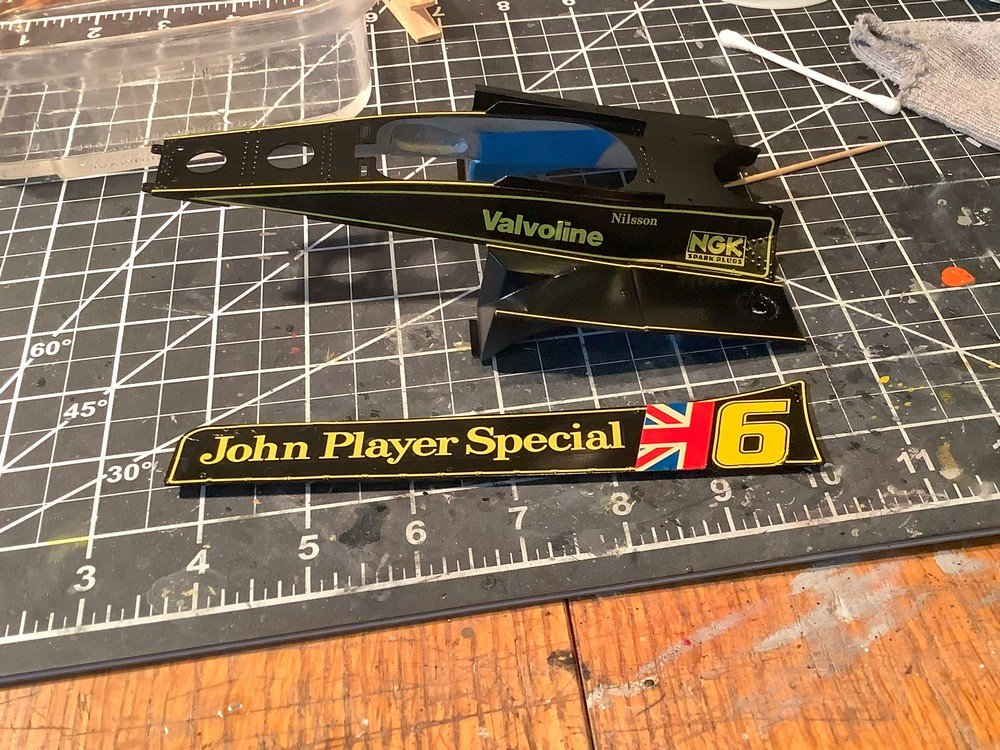
One thing about doing decals, it is easy to see the progress from one picture to the next. I felt like when I was working on the tub all the pictures started to look the same. I now have the decals on the left side of the car pretty much complete. In the picture below, the middle part of the side pod is just taped on. The stripe decals there were all one piece spanning two parts of the model. So I just taped it together for now. Once the decal is completely dry, I will carefully cut it and then untape the piece. I believe that piece is meant to remain unglued and removable to display the details within the side pod. I've also noticed that these old Tamiya decals do not like the decal setting solution, even the less strong micro-set. I have a few decals that have some permanent wrinkles. For now, I am just using water to wet the model surface before placing the decal and while maneuvering it into position. Now I just need to do these same 13 decals on the right side of the car, then the decals on the rear wing and a few other miscellaneous ones.
- 62 replies
-
- 13
-
-
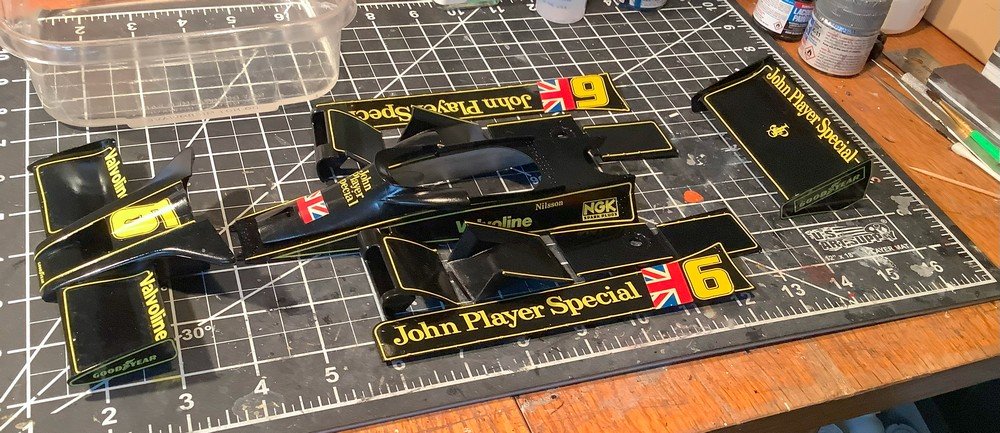
I've started on the nerve wracking decals. Those thin stripes on these lotus cars are tricky but so far it is going well. And yes, I decided to do the #6 Gunnar Nilsson car instead of the #5 Mario Andretti, just to be different. I think the front wing piece has all its decals on. The large piece in the middle is the one I need to complete in order to complete the tub and proceed with the next steps in the build (though I could detour to work on the engine if I need a break from decals). I think there are 10 more decals, 5 on each side, on that large middle piece. On the right are some little squeeze scissors. I got those as part of the micro-mark bundle for making your own inkjet printed decals. I thought it was sort of a gimmick, but now I have learned better. Those little scissors are great for cutting out decals. These older Tamiya decals seem to have a lot of clear decal material around the printed parts so at least on some of them I have been carefully cutting very close to the printed decal and that is much easier with these small squeeze scissors.

- 62 replies
-
- 14
-
-
Thanks for the comments and likes, as always. My break for the four day weekend trip turned into a much longer break, but I've done a bit more work in the last few days touching up the paint on the body panels and adding a few more details to the tub. The main thing I've added are the two radiators, each with two pipes going back toward the engine. I think that completes the tub, and I think I have the body panels in pretty good shape. So I guess next I will work on putting the decals on the body panels and then clear coating them.
- 62 replies
-
- 14
-
-
Looks good. Unfortunate that you had the little detour but I, for one, like the polished tank with pinstripes better than the original black and white.
-
@acaron41120 MSW sponsor Bluejacket has something they call silkspan. I've not purchased/used it, and not sure if it is 'true' silkspan to quote tmj. I just recalled seeing it on their web site. Here it is: https://www.bluejacketinc.com/shop/rails-and-sails/silkspan/r1300-18-x-24/ Perhaps @MrBlueJacket can comment on it.

