gsdpic
NRG Member-
Posts
843 -
Joined
-
Last visited
Content Type
Profiles
Forums
Gallery
Events
Everything posted by gsdpic
-
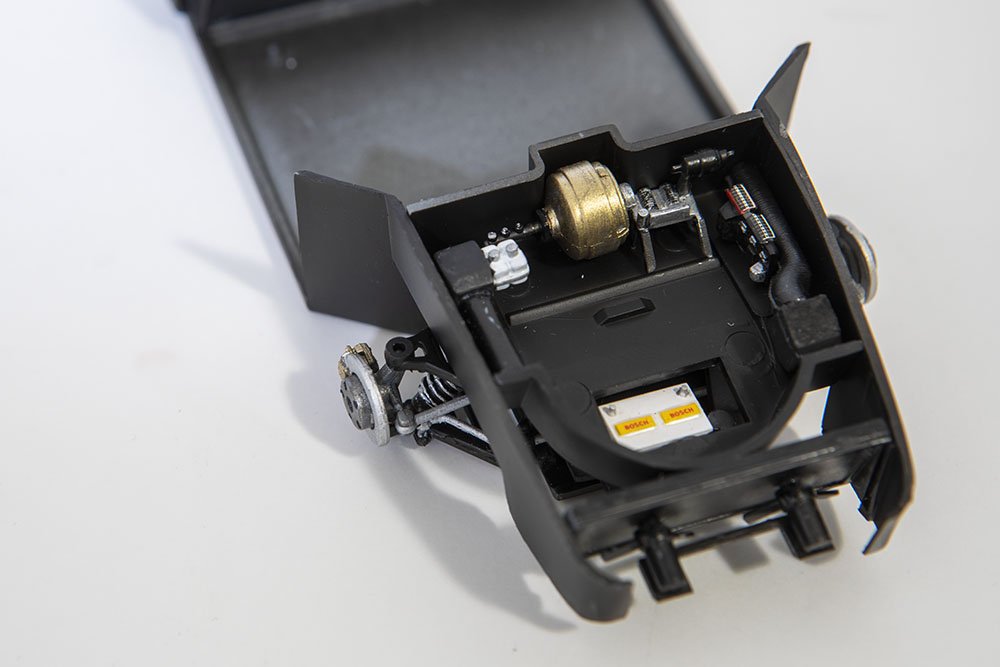
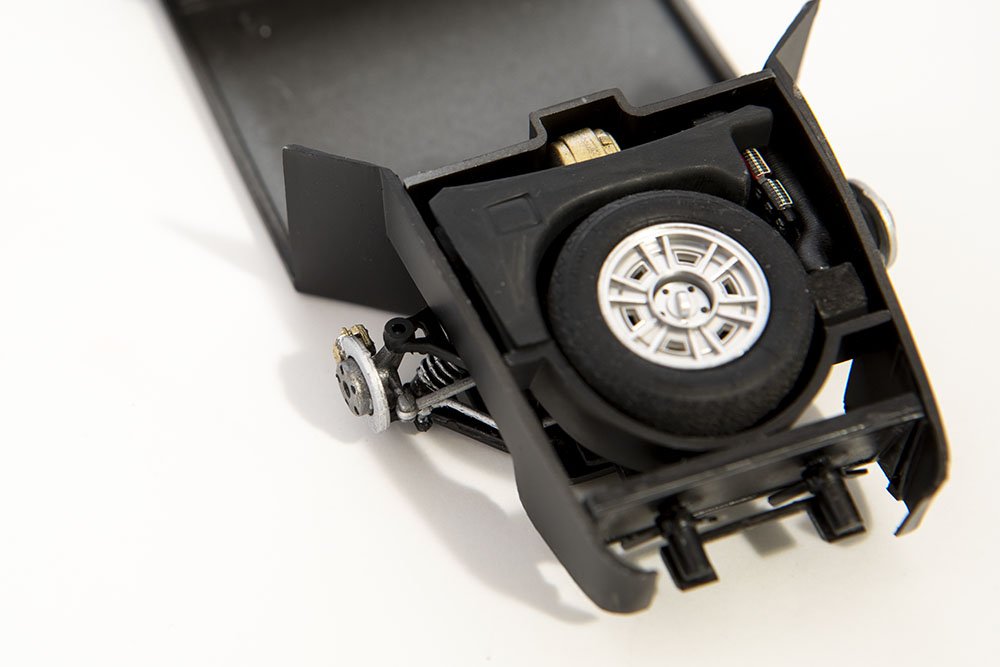
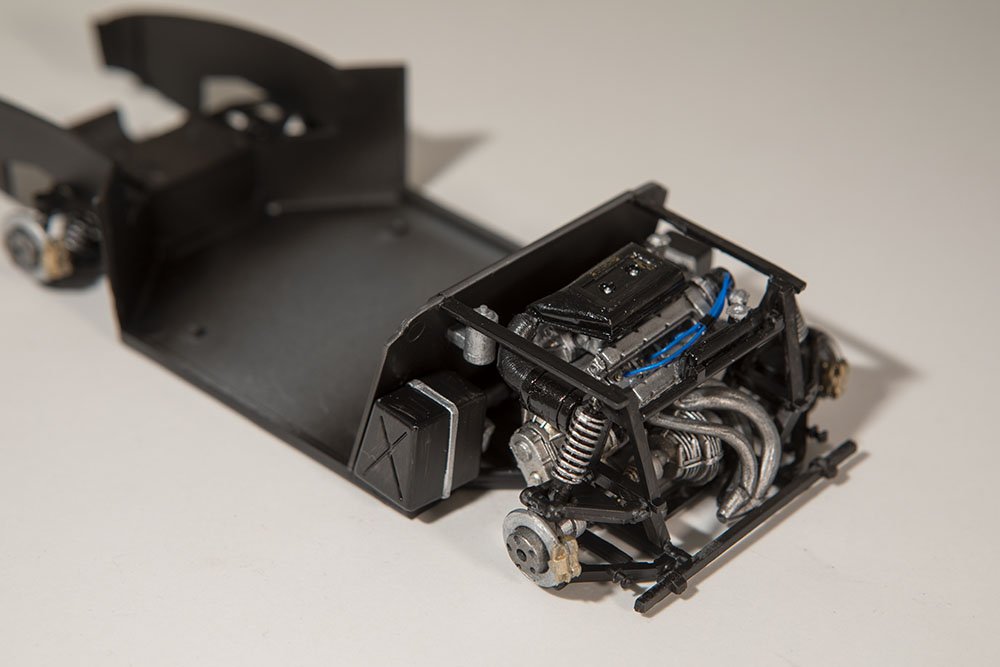
Thanks as always for the likes. I've finished the details under the front bonnet, shown in the first photo. I did not bother with any attempt to add detail, as most of the stuff is covered up by a plastic cover and the spare tire, as shown in the slightly blurry second photo. I just need to put the interior on the chassis and proceed with the body.
-
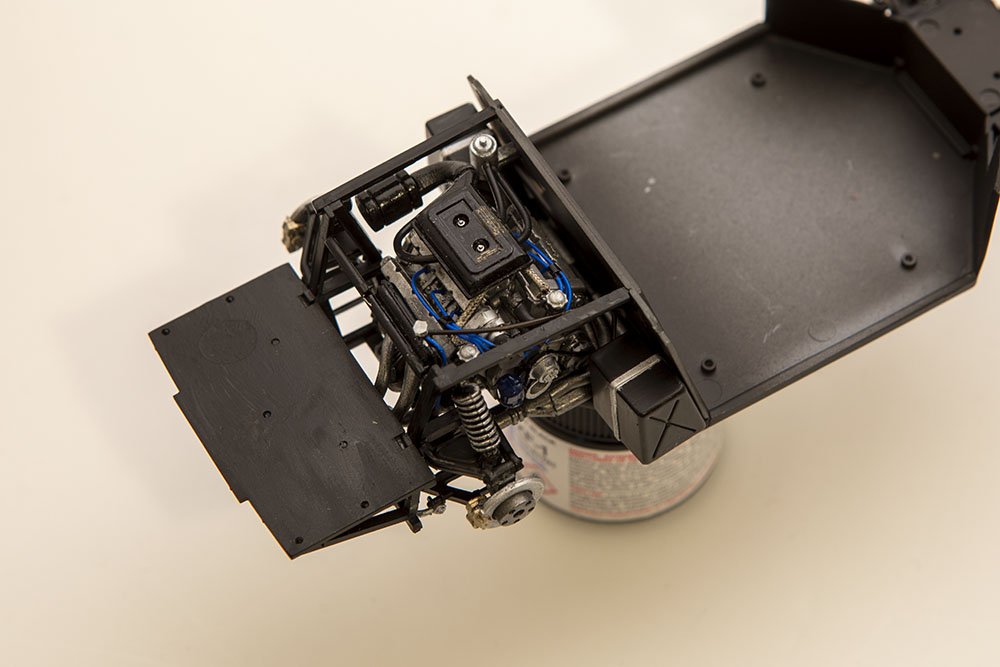
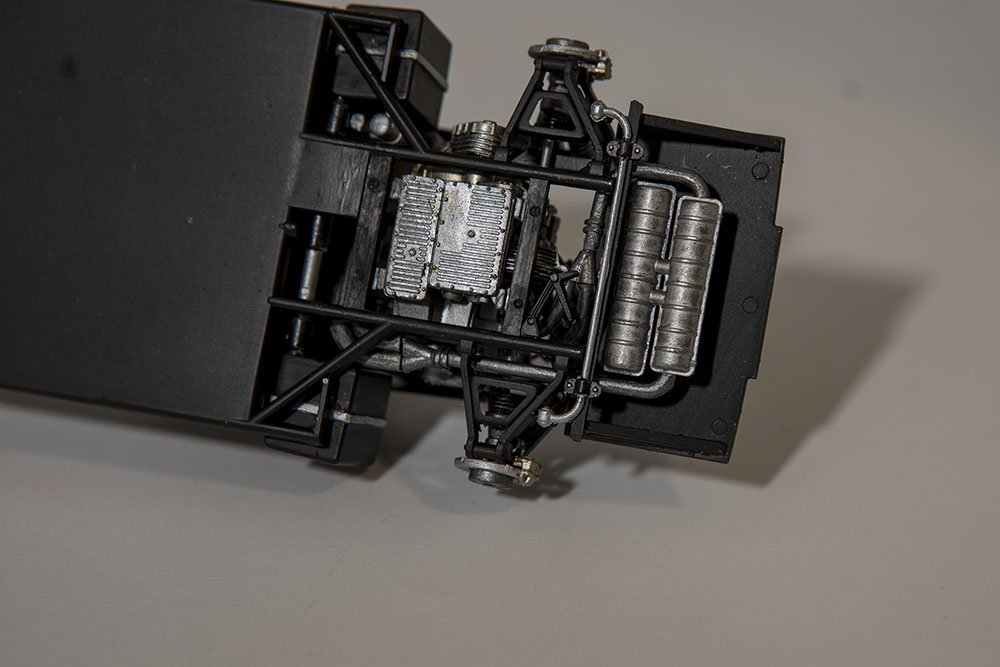
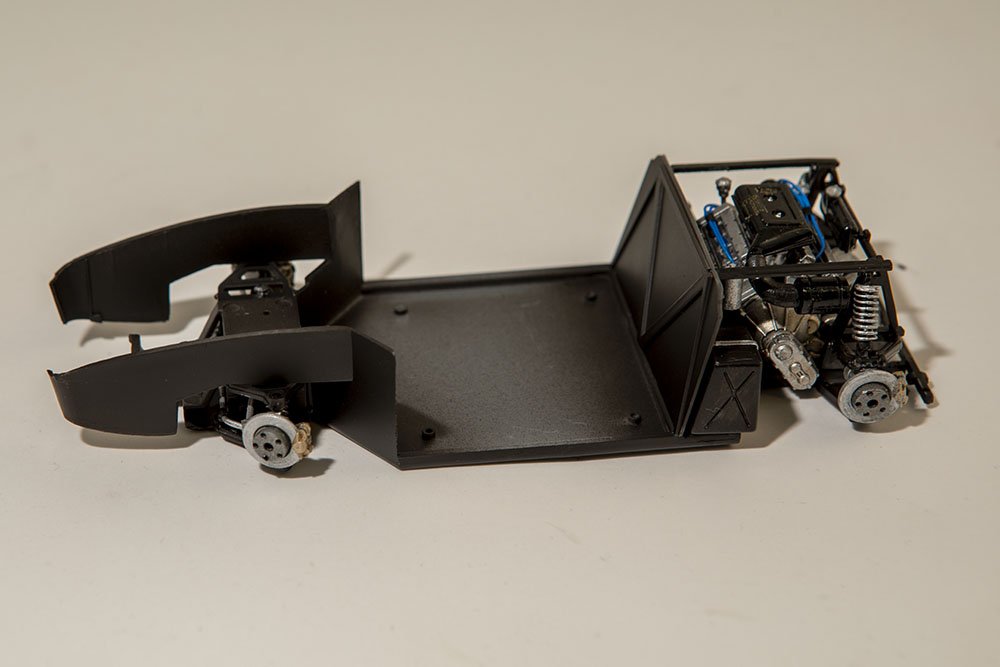
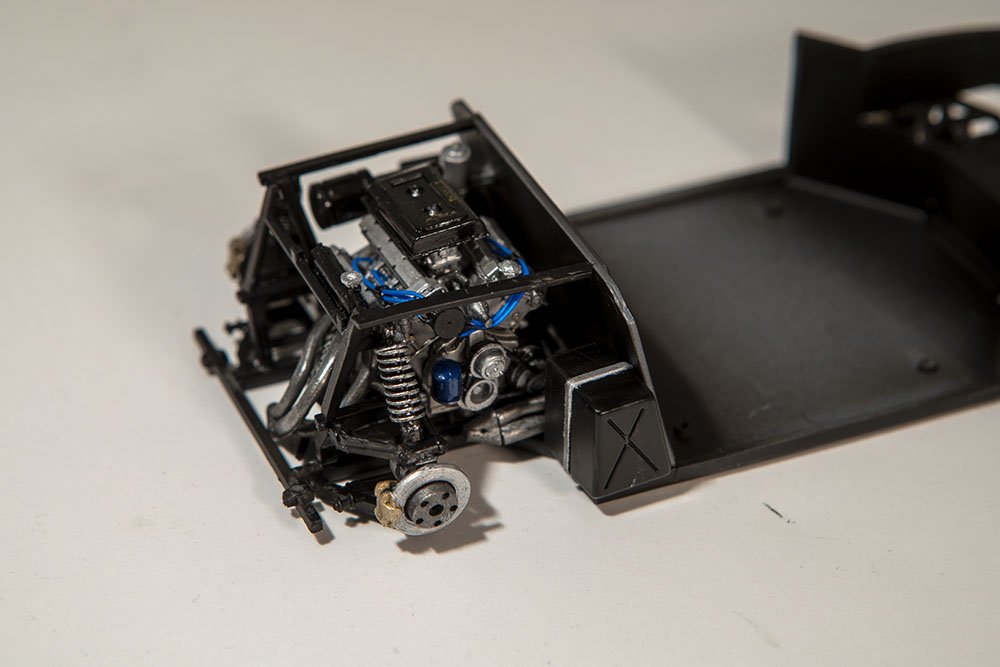
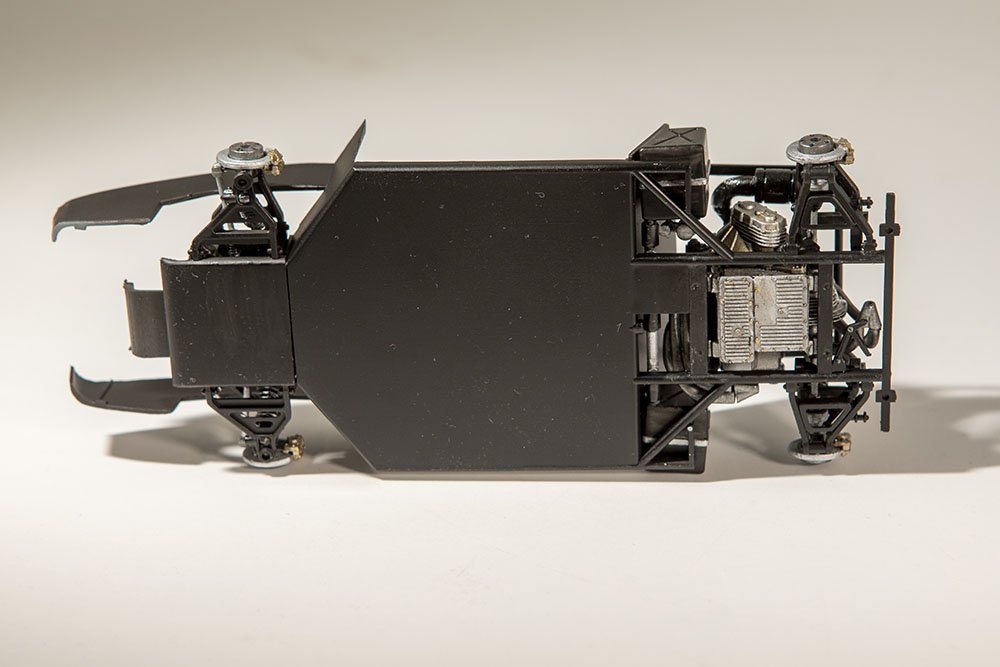
Two more quick shots of the chassis. First, I've added a few more hoses and tubes to the engine area, loosely based on pictures of the real thing. Though I must say that the kit supplied air box appears to be a bit undersized. Next picture is the underside showing the exhaust and mufflers. There are two more pipes to add that go from the front muffler out the back of the car but I will put those on after the body is in place to ensure they are lined up correctly. With that, the chassis is done. Next is the area under the front bonnet while continuing to work on the body paint and finish.
-
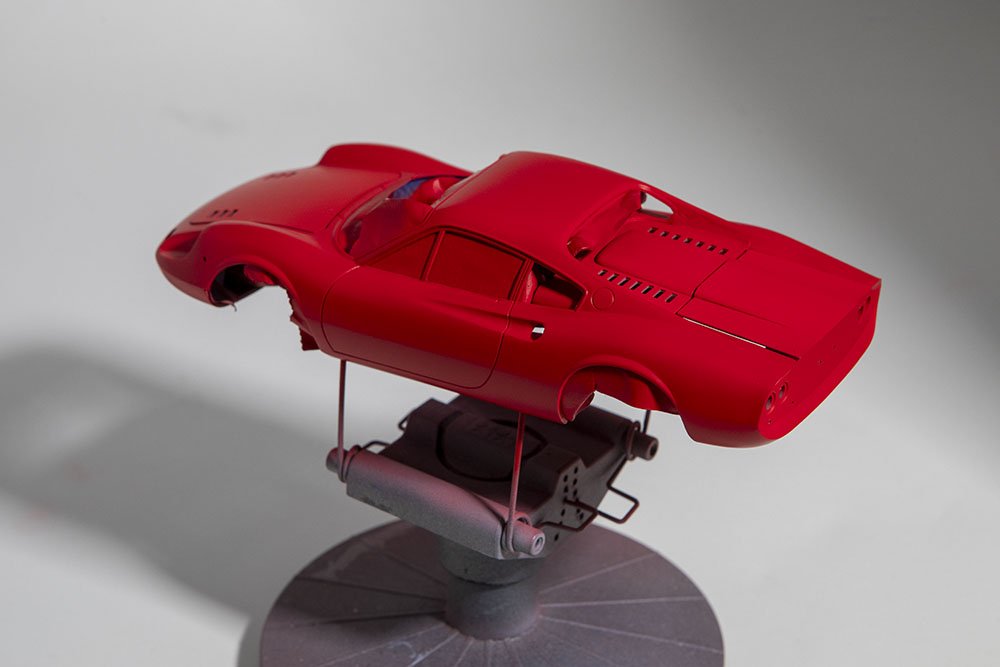
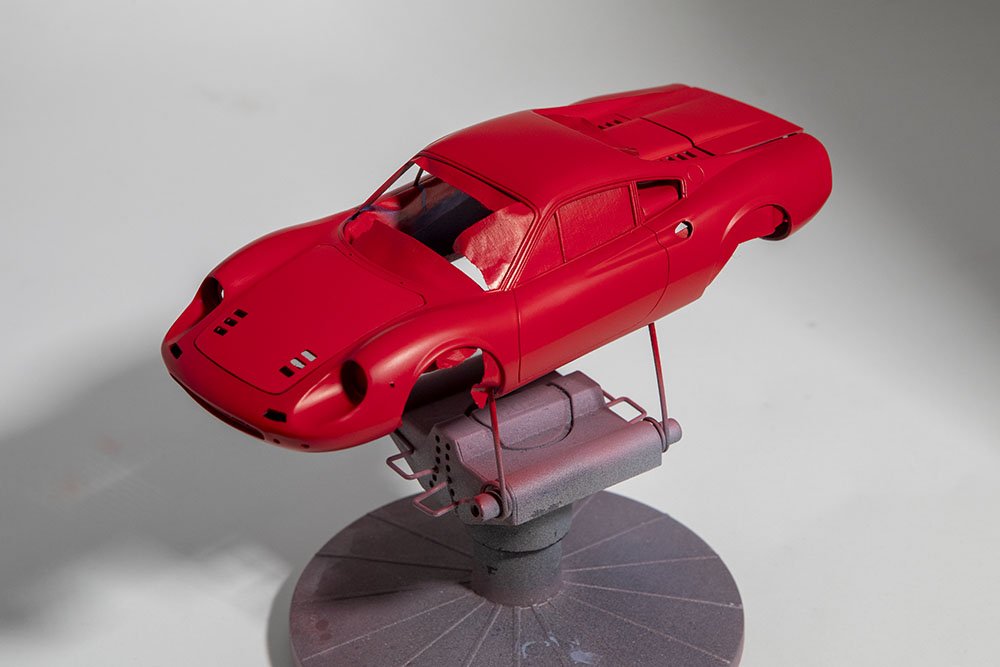
Thanks all for the likes, and for the comment, shipman. I agree the Dino is a sharp looking car. I've managed to get the exhaust and mufflers on, though did not take pictures of that yet. It was a bit of a struggle to get the stuff to all line up and while coercing things into place, one of the header pipes from the engine to the collector came loose. That was quite a pain to get it glued back in. I've also worked on painting the body, as seen below. I did a mist coat then a bit of a heavier coat on everything, then I glued in that piece that surrounds the engine compartment and worked on hiding the very obvious seam using some filler and sanding and priming. It is much better than it was but still partially visible. After that I put another coat of paint on the body but forgot to do the hood, trunk, and engine cover panels. When I placed them on the body for these pictures, there was a noticeable but slight color difference so obviously I need to go back and give those panels another coat as well. There is one issue that I have not figured out yet. There are two little tubular pieces that fit behind that vent just behind the door. Unfortunately on my kit, those pieces appear to be a bit malformed as if there was not quite enough plastic injected into the mold. Once I finish painting the body and remove all the tape from the inside, I will need to address that issue somehow. As mentioned, I am using Splash paints Rosso Corsa, which dries to a sort of satin finish. I'll gloss it all up with some Tamiya X-22.
-
Thanks to everyone for looking in and laughing at my lame Barbie joke. Hope I at least brought a smile to a few faces. I've now pretty much completed the chassis as supplied by the kit with the addition of the spark plug wires. I hope to add a few more wires and hoses around the engine based on pictures of the real thing, just to make it look a bit more realistic and a bit busier. The one remaining part of what I'll call the chassis is a sort of shelf unit in the back. The mufflers hang off of the underside of that shelf and then there are additional exhaust pipes to connect the headers to the muffler and then pipes out the back of the car. The kit also has a fully detailed compartment under the front bonnet, including spare tire, and that is next.
-
Free CAD program
gsdpic replied to Frank Burroughs's topic in CAD and 3D Modelling/Drafting Plans with Software
Blender is much more for artistic stuff, character animation, etc, in my experience. I did recently learn about a "CAD Sketcher" add on that is supposed to provide more CAD like capabilities to Blender but have no experience with it. I imagine the learning curve for Blender dwarfs the learning curve for something like FreeCAD. At one time I started on a few different online Blender courses from udemy and felt like I was just scratching the surface. One of those courses did specifically address designing things in Blender for 3d printing, so it is possible. -
Very nice update. Your joinery, especially considering it is bass wood, is very precise. You are justified to be very satisfied with the nibbling, it looks great. That is something I did not even attempt. And I like the way you have chosen to do the reveal on the deck. For reference, below is a picture I took of the America on display in the Bluejacket store from when I visited back in 2017. They did not reveal quite as much as you have.
-
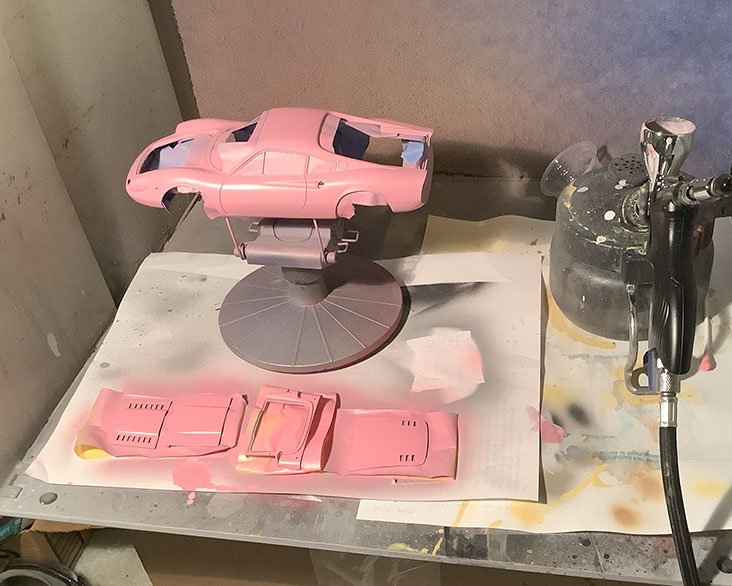
Thanks for the comments and for sharing experience with vallejo paints. I just used the "air" brand straight out of the bottle with no thinner or flow improver. And yes the colors are based on internet pictures of actual cars, showing the tan interior with the black dash and other accents. Now, perhaps mostly for comedic value, is the Dino with a few coats of pink base. I guess I could leave it like this and say it is a Barbie car.
-
@juhu as I recall there are no drawings in the plans of the individual frames. I am not sure if there were any sort of lines drawing on the plans. The frames did require a fair amount of tweaking to get things lined up but it was not insurmountable. But it perhaps was a bit more of an exercise of "that looks good, looks reasonable" and not an exercise of "that is the exact correct shape".
-
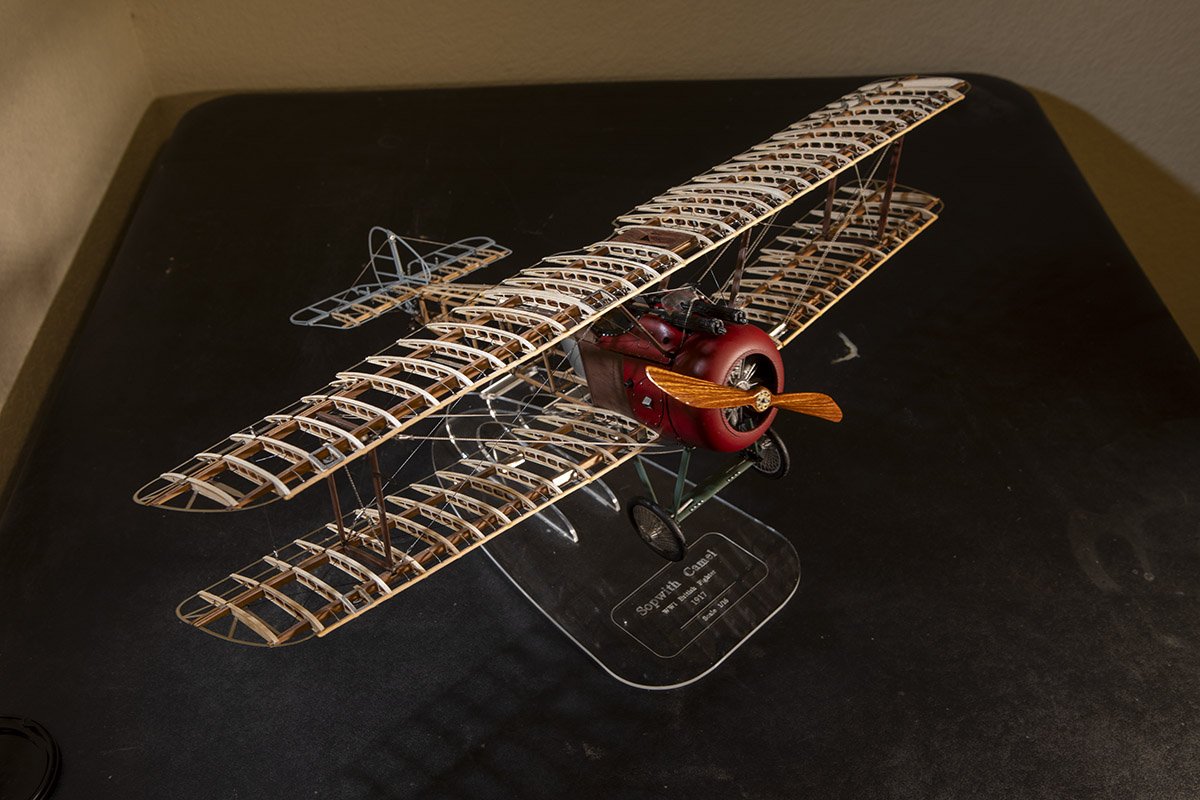
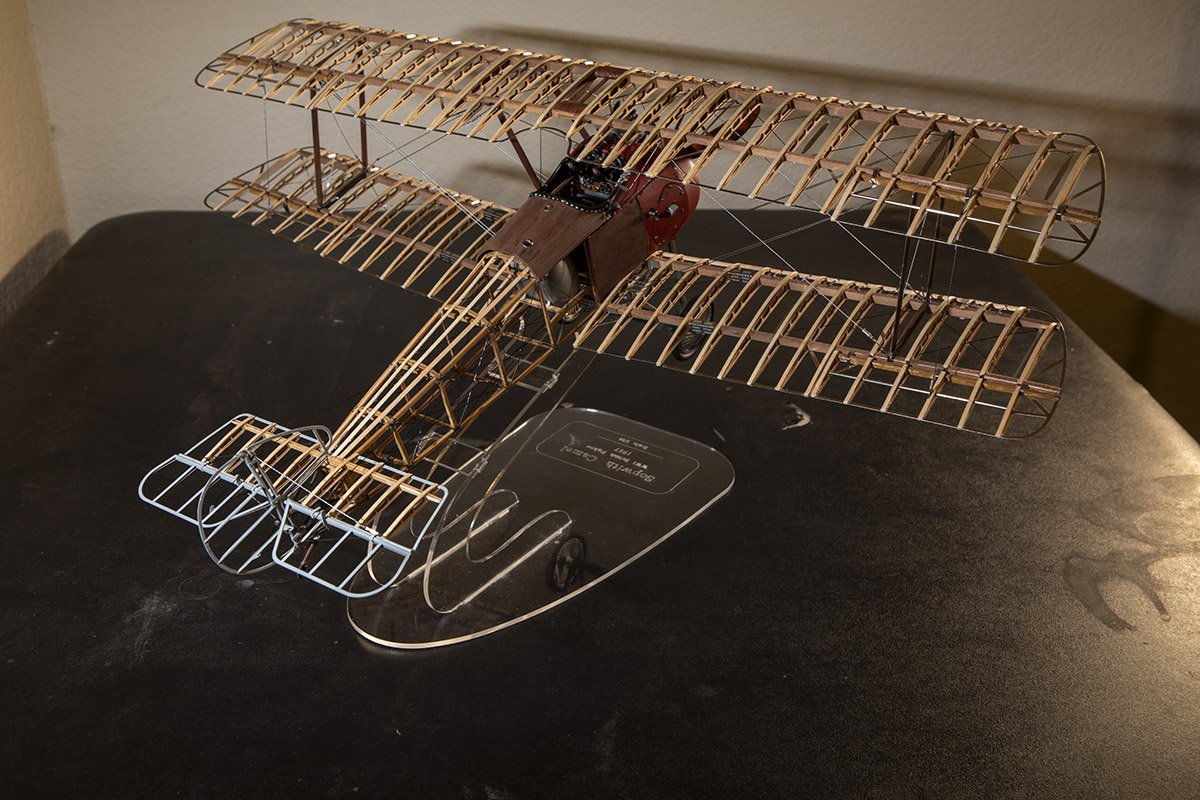
Thanks to Phil and Glen for the comments, and for anyone else who has clicked the like button since I last said thank you. Much to my surprise, the replacement parts for the missing stand parts arrived on Tuesday, so it took just 8 days for the mail from Spain to Austin, Tx. I was a little unsure about what glue to use and finally got over to Home Depot today and bought some Loctite for Plastics glue. It is two parts....you spread an "activator" on both surfaces, let that dry, then apply the glue to one surface and stick them together. Seemed to work quite well and did not haze the acrylic. Anyway, here are three more shots of the Camel on the stand provided in the kit. In the bottom picture, you can see two of the three little cross pieces between the upright pieces of the stand. Those are the pieces that were missing from the kit originally.
-
Wow, the cedar root really takes this project up a notch, especially with the branding that Ron pointed out. Wonderful result, I am sure this will make a treasured gift.
- 109 replies
-
- Ghost Ship
- Jenny
-
(and 2 more)
Tagged with:
-
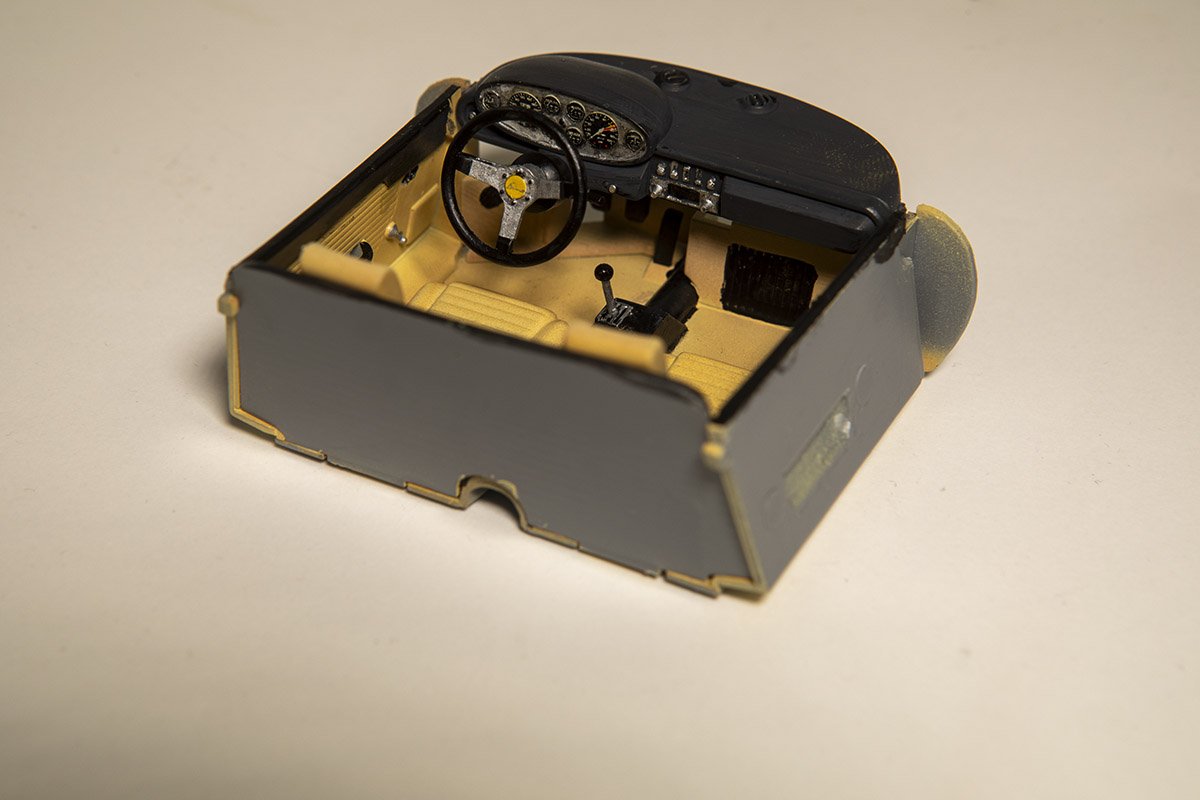
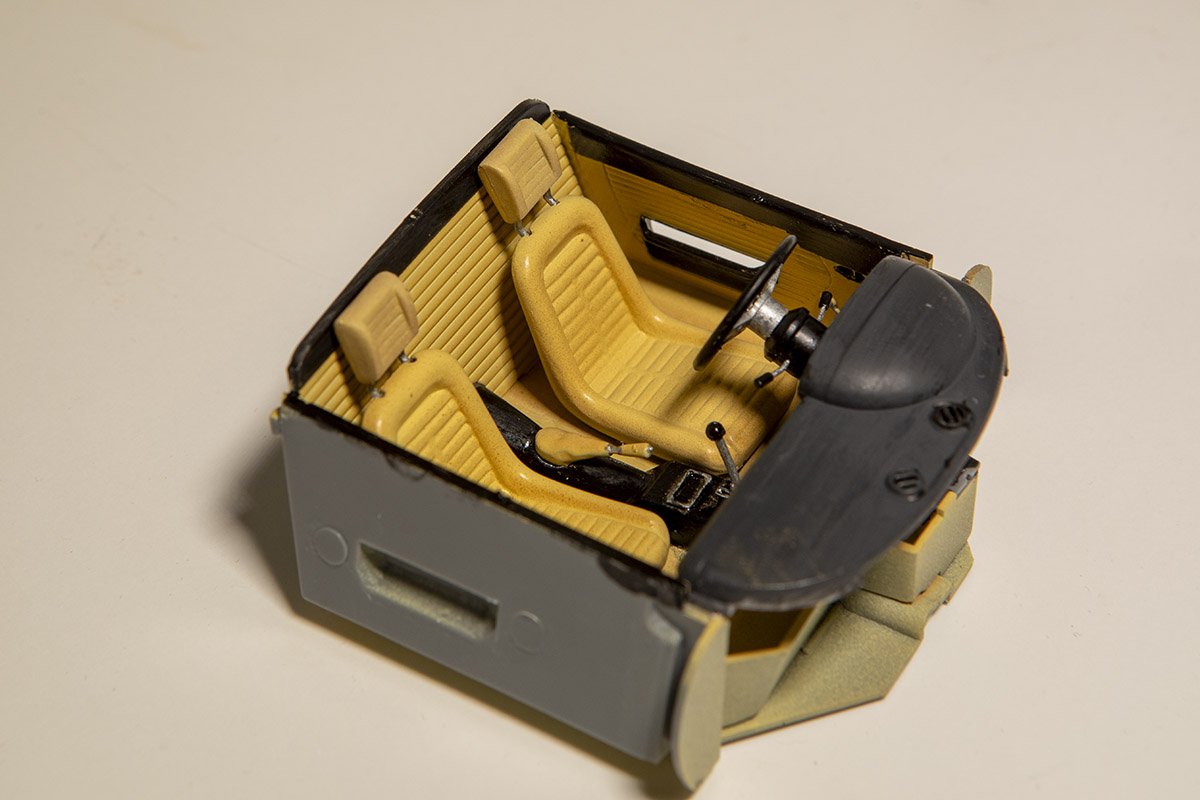
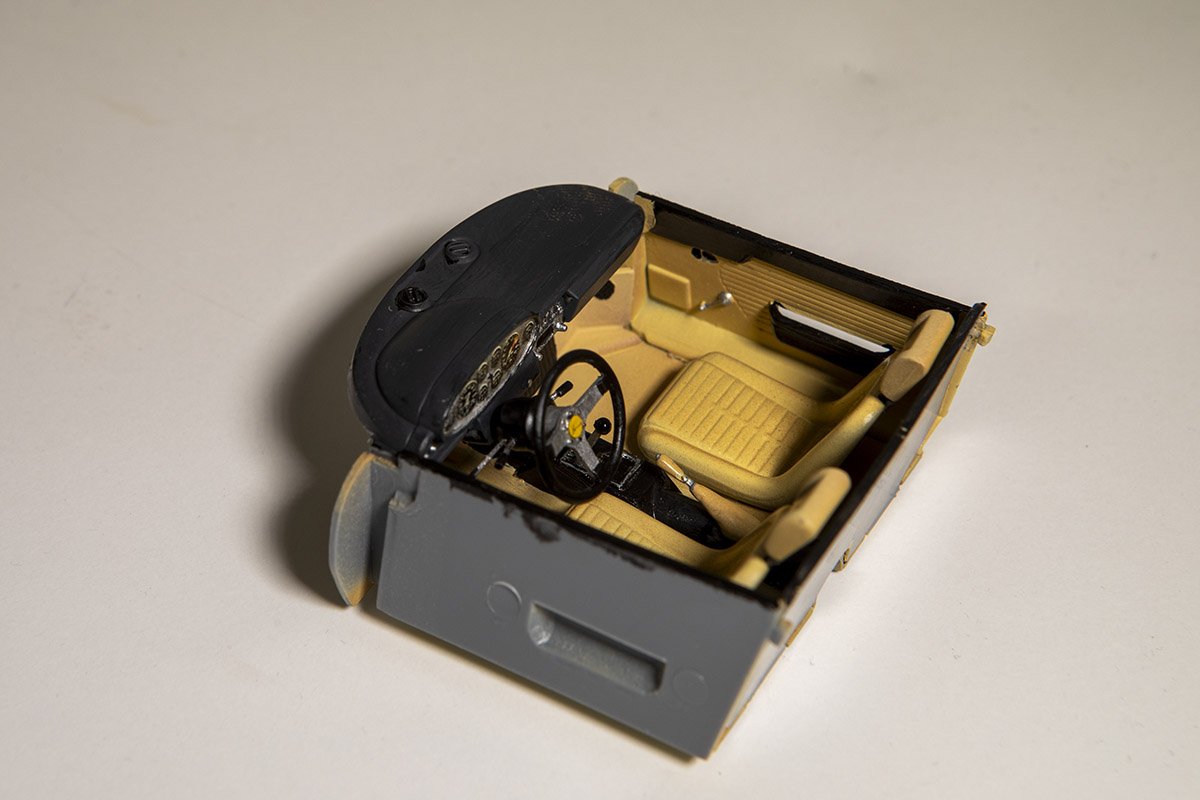
Thanks as always for taking a look and hitting the like button. I forgot to mention when I discussed painting the body that I also have the Splash Paints "Pink Base". So, I'll put a coat or two of that on top of the light gray primer, and then proceed with the Rossa Corsa red. That is the same sequence I followed for the Ferrari 330P4 that I built but did not log here. Prior to painting the outside of the body, I wanted to spray the headliner area. And since I was doing interior colors I decided to just go ahead and build the entire interior. For the interior, I used Vallejo Model Air beige, followed by a light mist of Tamiya "Dark Yellow" to tone down the beige a bit. I tried to apply a bit more of the dark yellow to the carpet and headliner areas. Then I also applied some microscale clear satin finish to the seats, doors, and back panel...basically anything that is leather instead of textiles...to try to show that difference. I bought the Vallejo paint for some other project a while back and never used it, so this was the first time using any vallejo paint. I liked it pretty well, though it did form a glob of partially dried paint in the built-in dropper and since I was lazy and dripped the paint directly into the airbrush, I ended up with that partially dried glob clogging the airbrush a bit, which was annoying but not not a big deal. Anyway, here are the pictures of the assembled interior. As usual I did not bother taking an in-process pictures.
-
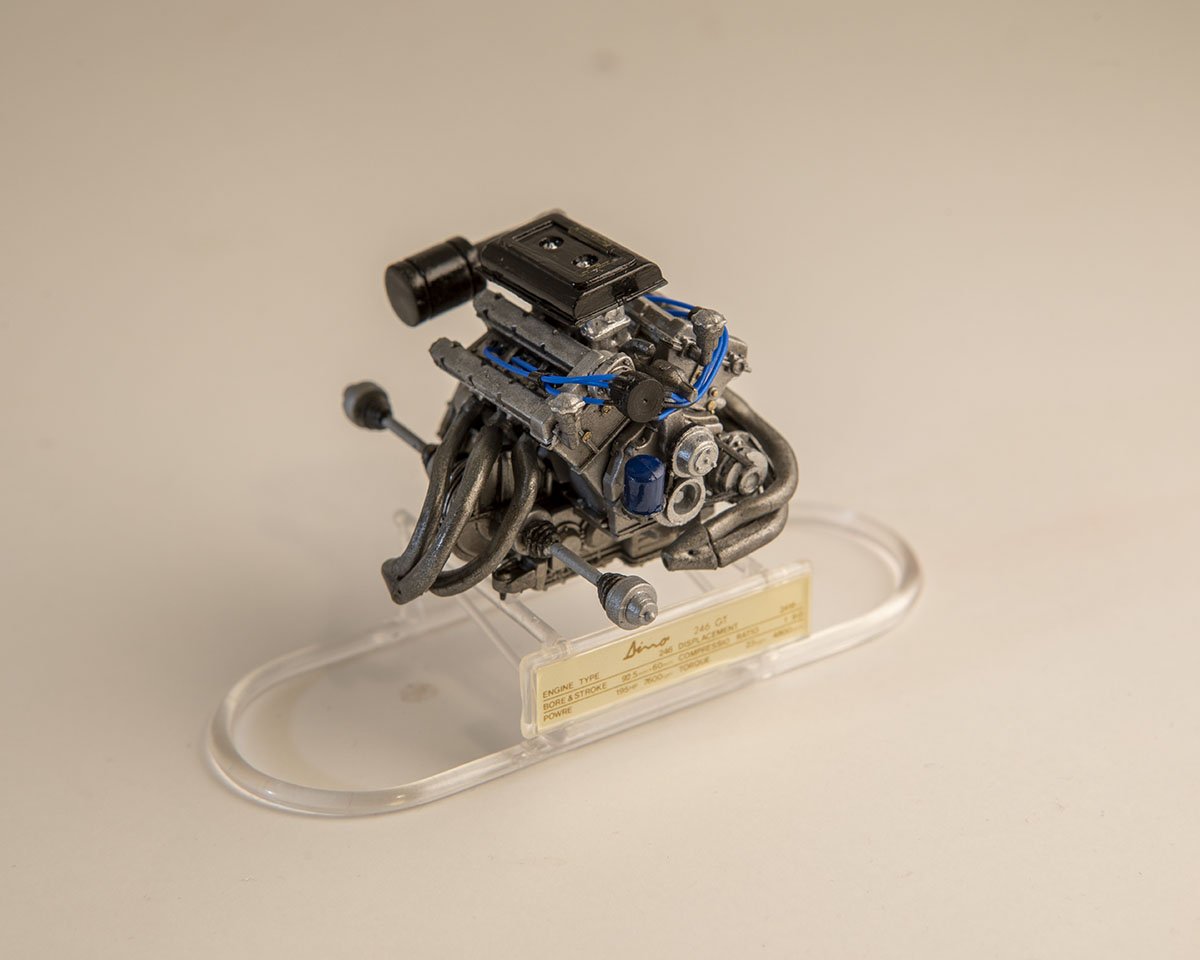
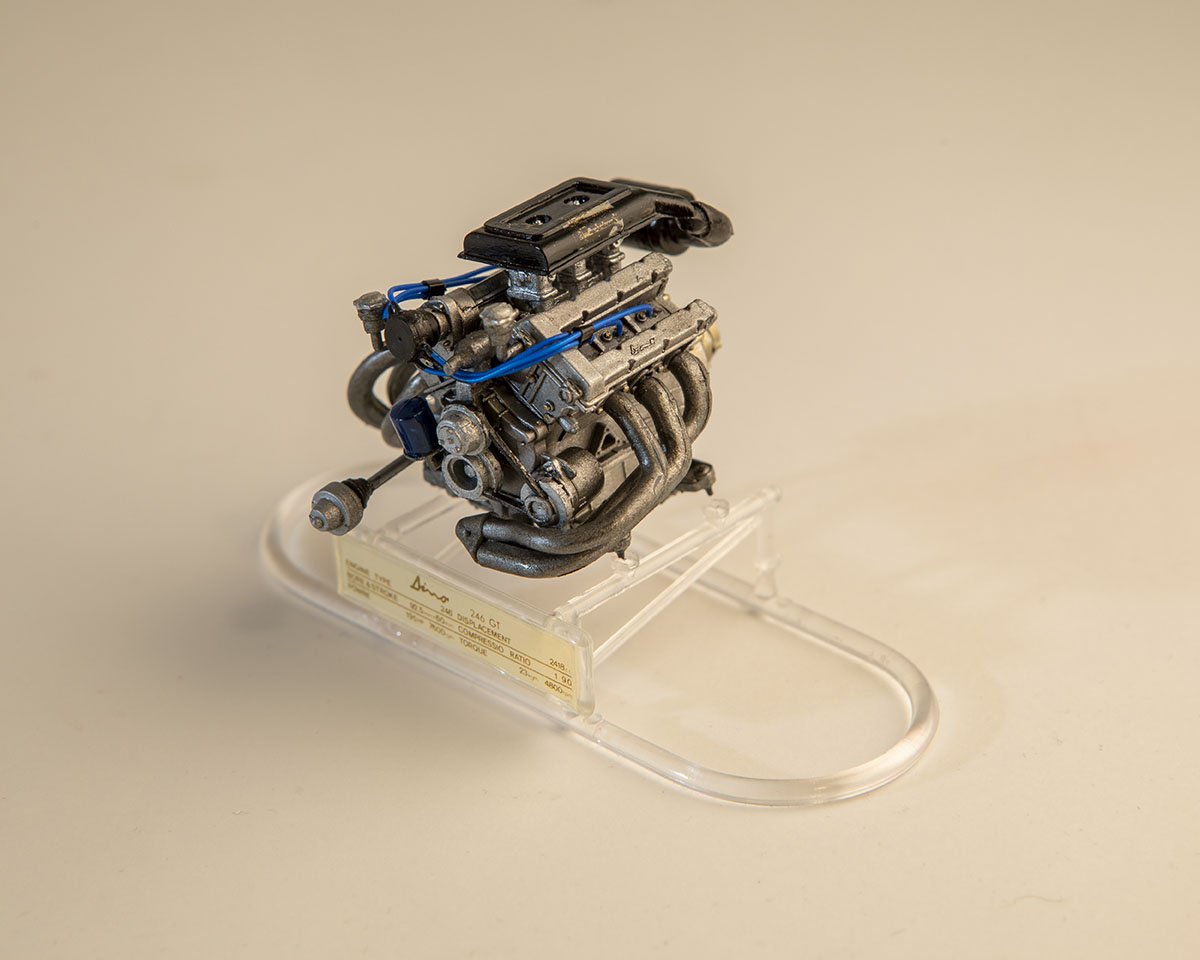
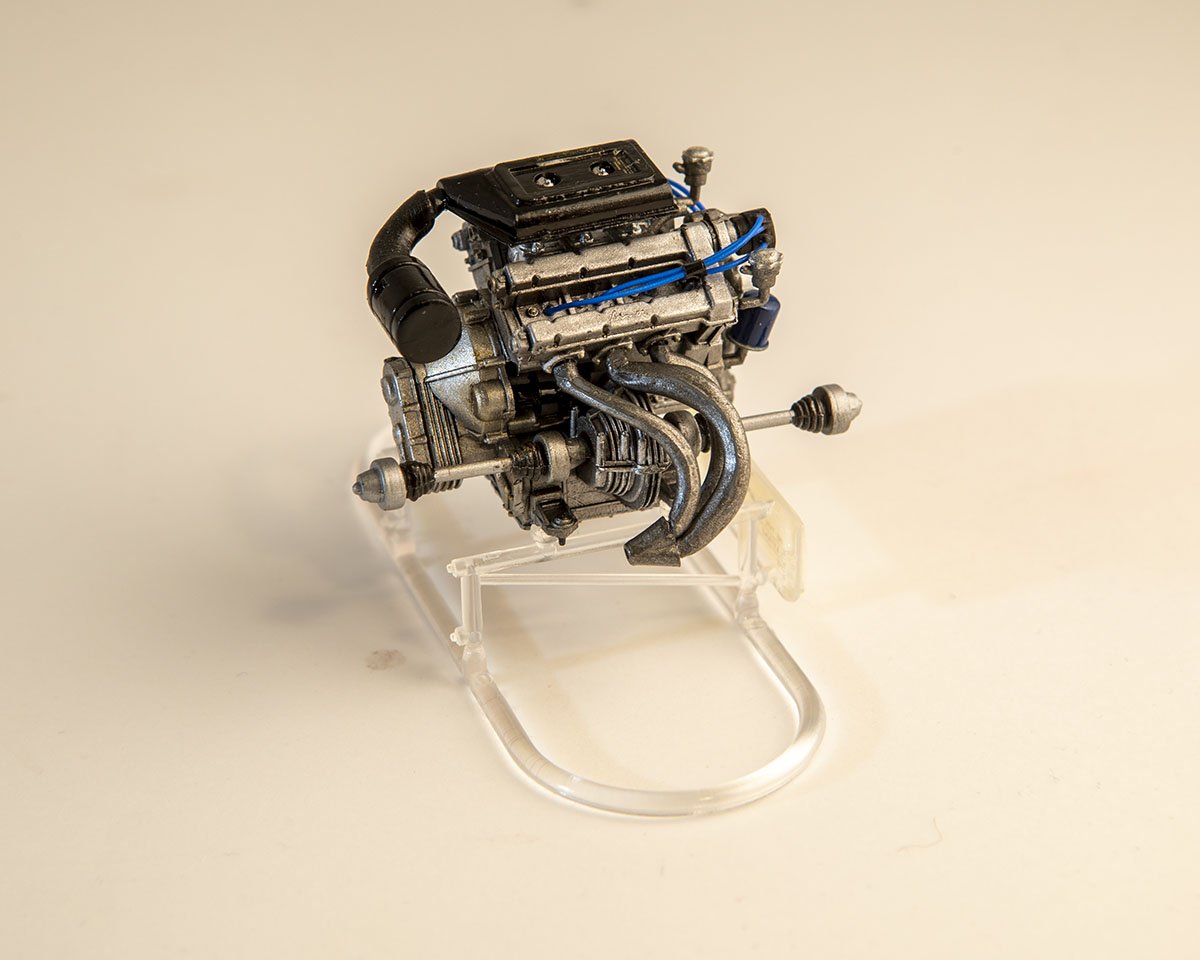
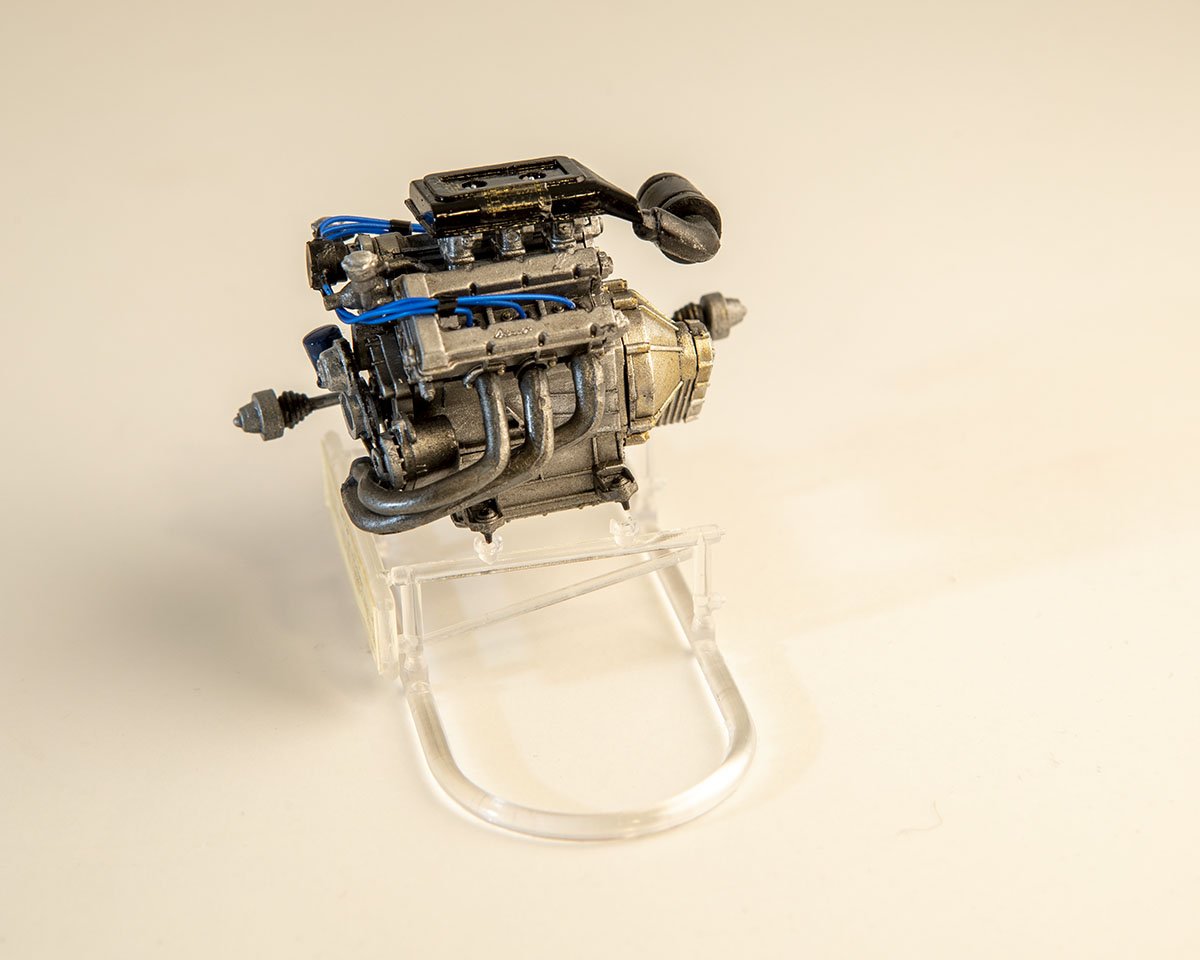
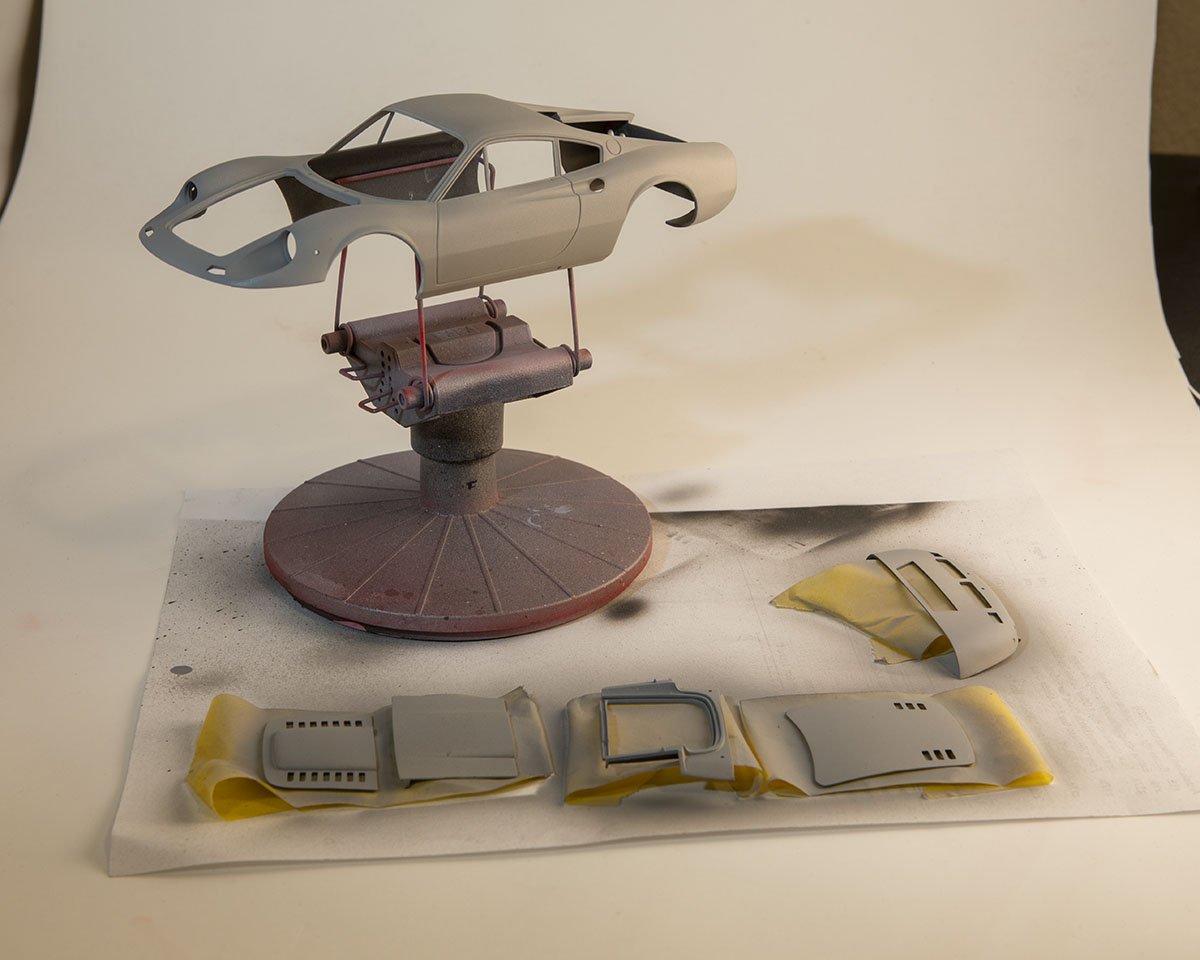
I have now finished the engine. As is often the case, the exhaust was a bit of a struggle and who knows if the ends of the headers are in the right place. I guess I'll find out later in the build. For the "enthusiast models", Fujimi includes a stand for the engine if you wish to display it outside the car. I used that stand for the photos but I intend to install the engine in the car. I will likely add more hoses and such when I do that. In the pictures you can see that I added spark plug wires. Yea, maybe they should have been red instead of blue but that is what I had. And yes that exhaust wraps around the front of the engine. The engine is transverse mounted and there are additional pipes to connect to mufflers that will be to the left of the engine as viewed in the first picture. I've also done more prep work on the body and various loose body panels. I first primed the "inside" with the alclad black primer/microfiller. That leaves a nice semi gloss black that I may not even paint over. I taped down the body panels to protect the black; for the body I did not bother taping over the black as most of it will not be visible, and then sprayed Splash paints light grey surfacer. I'll use Splash paints Rossa Corsa...I think I have enough left over for this car after using it on the Ferrari 330 P4 I built. The panel that is third from the left will be tricky as it spans the interior and exterior of the car. It is the frame around the engine compartment opening. If I glue it in first, I think it will be difficult to get coverage of the interior parts. But if I glue it in after painting, there will be an ugly visible seam. I think I will have to paint the interior part (to the right in the photo) first then glue the part in and user filler on the seam, then paint the rest of the body. I will also glue on the front underside (far right piece) before painting the body. But even before all of that, I plan to paint the interior headliner area and then mask the entire inner part of the body before spraying the red paint.
-
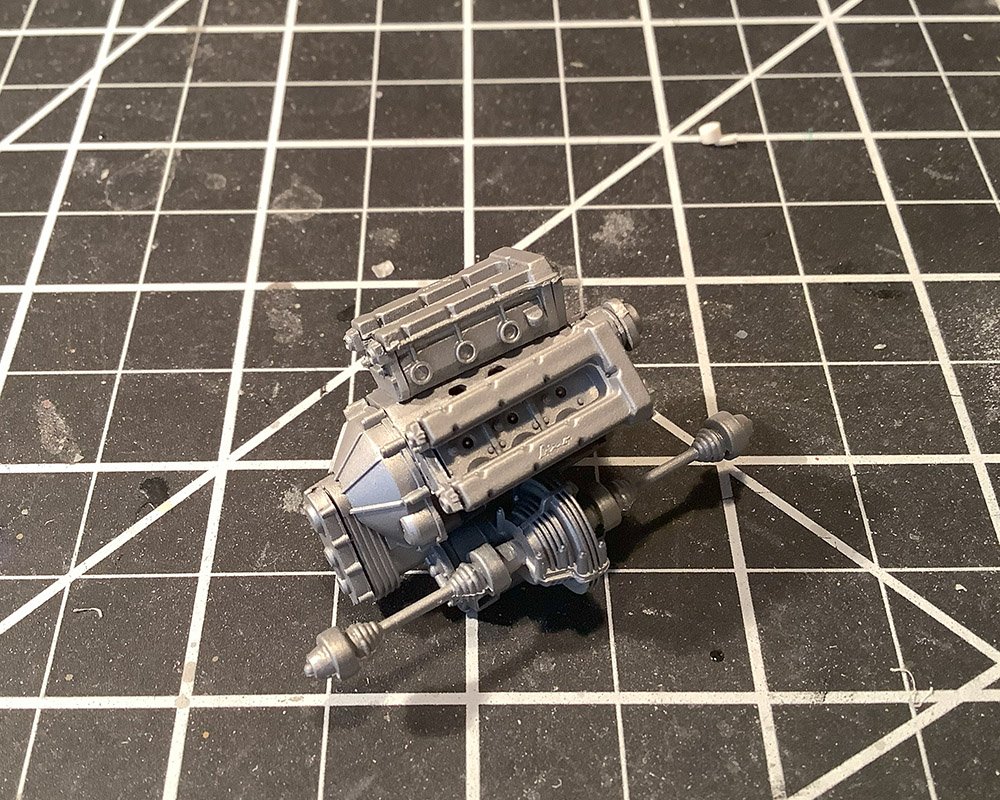
I have not seen that show in quite some time. I don't recall a Dino 246 gt episode but it certainly seems like the type of car that would appear there. In a sort of related and funny note, I was googling for reference images and stumbled on a blog from a father/son team who had a company that specialized in restoring Dinos. The company is now located in Spicewood, Tx, which is a small town/rural area about an hour west of here. Just seems like a very unlikely location for a Dino restoration company. But some of the blog entries spoke of a Dino 246 GT "barn find" in Llano, Tx which is another hour or two north west. I've started some assembly, with the major parts of the engine. It is a bit of an odd configuration as the engine seems to sit on top of the transmission. The Fujimi instructions indicated all these parts should be painted silver, so I put them together and used Alclad II Aluminum. But then looking at reference photos I see that at least in some cases the main engine block was painted black. Oh well. I will do some detail painting and add some darker wash and highlights to this, and then there are numerous smaller pieces, such as oil filter, distributor, fan belt, air intake, etc. to be painted and added as well. I've also started some prep on the body.
-
Jack....if you click on the magnifying glass in the upper right where it says "Search...." it will bring up the advanced search page. Then click on the "+ Search by tags" and type in "niagara" and click on "Search content" it will show all posts that have been tagged with "niagara". Many of those posts will be build logs for the kit you are building. You may be able to find what you are looking for in one of those build logs or find someone who has recently completed the step you are unsure about.
-
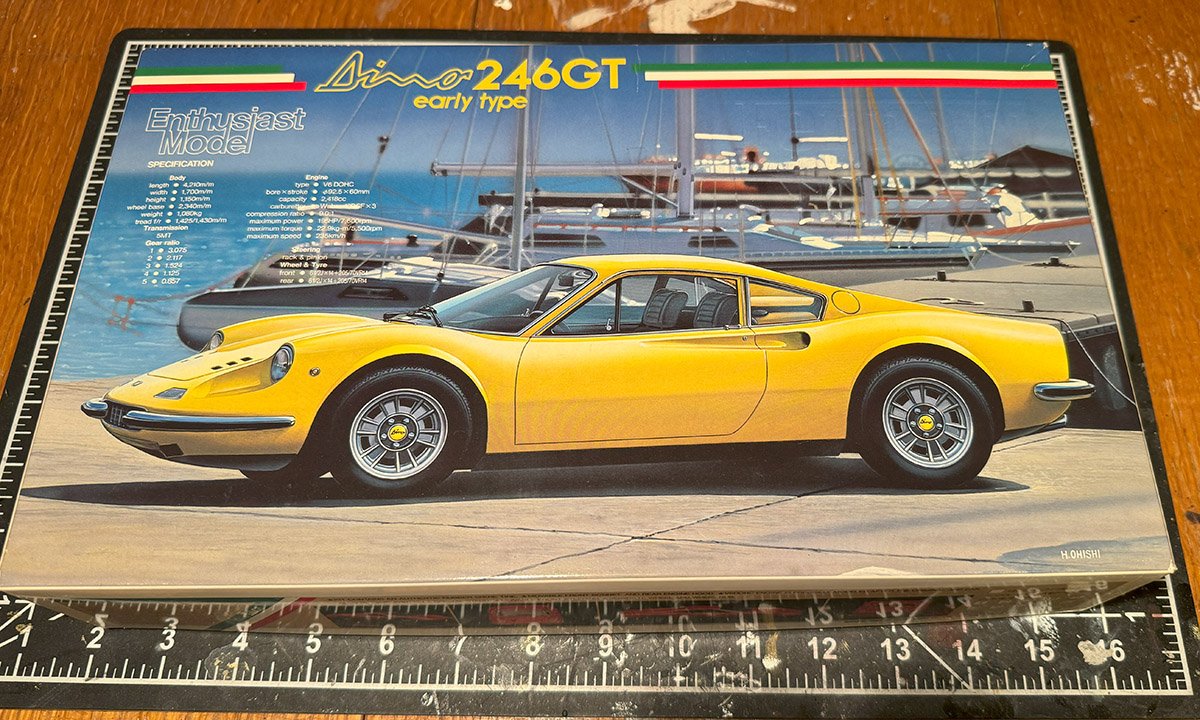
Inspired by @CDW's Ferrari 288 build and also by the way he immediately starts a new build after finishing the previous one, I present the start of my build log for the Fujimi Ferrari Dino 246gt. I actually also have the 288 in my stash but did not want to be too much of a copycat so I pulled out the 246gt. The Car: In the 1950s, 60s, and 70s, Ferrari had a sub-brand of cars named "Dino", after Enzo Ferrari's son Alfredo "Dino" Ferrari. Initially they produced only race cars for some of the lesser racing series with smaller, less powerful cars and engines. In the mid 1960s they displayed a concept car for a road car in the form of a mid-engined coupe. That concept car was well received and became the Dino 206gt. In those days the model number was derived from the engine size and type. The 206 indicated a 2.0 liter engine with 6 cylinders. Before long, they upgraded the engine to 2.4 liters, and so it became known as the 246gt. In the late 60s, this car competed with the then current Porsche 911 in terms of price and specs. The 246gt was sold from the late 60s into the early 70s, with a few minor modifications along the way. For example, the early cars had the "clapping hands" windshield wipers while later ones have parallel wipers. They also sold a spyder/targa version with a removable roof known as the 246gts. The Kit: The kit I acquired is the original version from 1986, according to scalemates.com. This is from Fujimi's "Enthusiast Model" line of kits, so it is quite detailed, including the engine, chassis, and interior, with over 200 parts. And they were not afraid to make small parts, some are literally pin head size. This early kit had some very attractive box art, as you can see below. You'll also note the "early type", indicating this is one of the early 246gt cars. Fujimi reboxed this kit many times over the years, and in later versions they included parts for both the early and later versions of the car. They also created a "curbside" version of this kit with far fewer parts but no engine detail. This kit includes opening front bonnet, engine cover, and trunk cover, giving at least a little bit more of a view of the details included in the kit. The body parts are molded in white plastic. The engine, chassis and interior parts are all gray plastic. There is a small fret of chrome parts, which I may or may not strip. The wheels are a very nice satin chrome and will be left as is. My Plans: While I like the yellow on the box art, I am more likely to paint it red, with a tan interior. As noted, the kit is already highly detailed but there may be a few more things I can add, such as spark plug wires. At least one bank of three cylinders on the v6 should be visible when opening the engine cover.
-
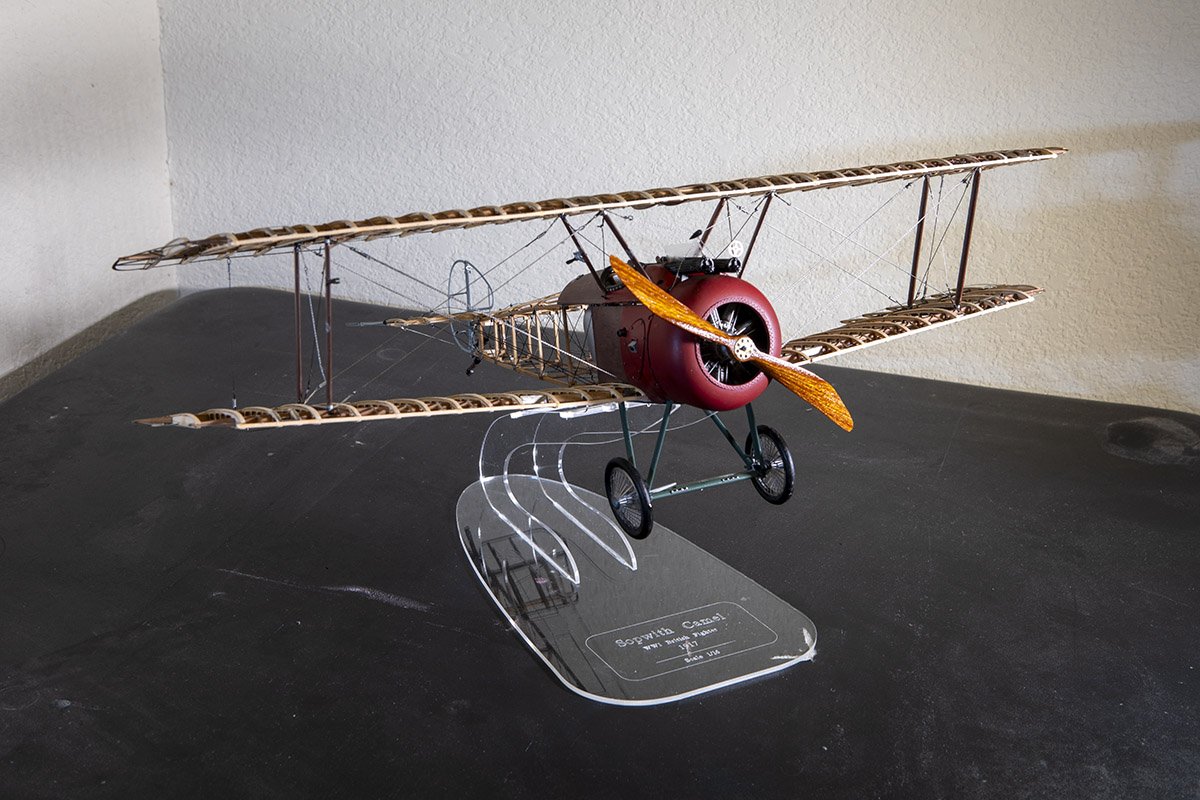
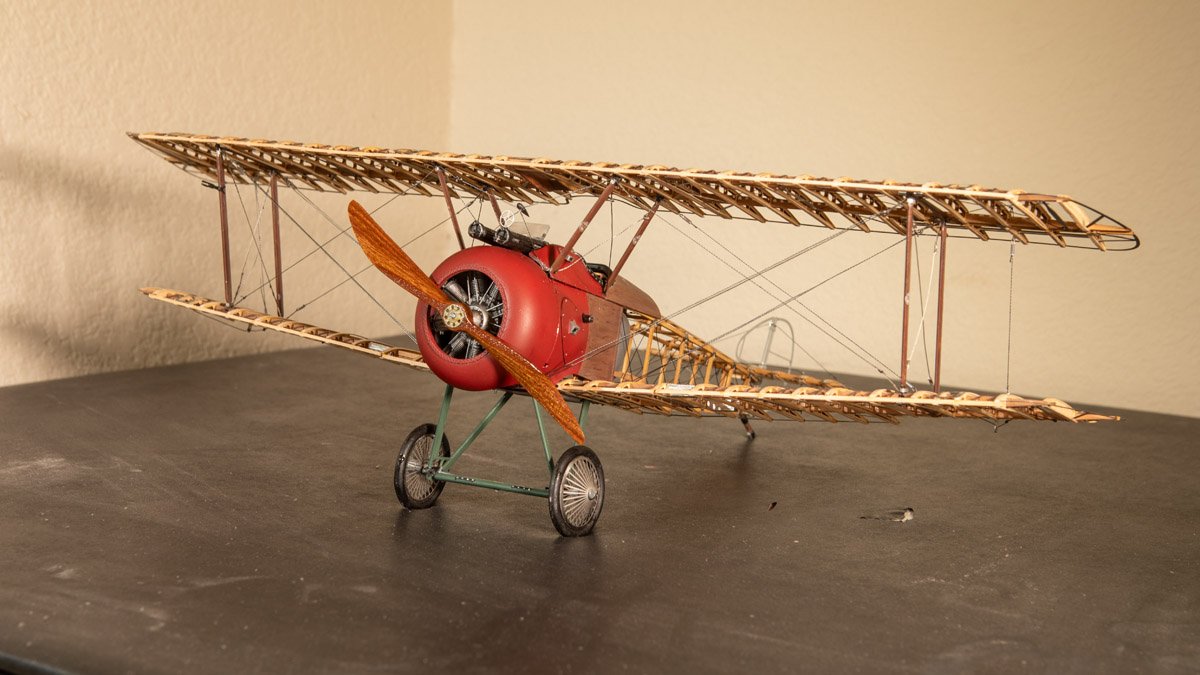
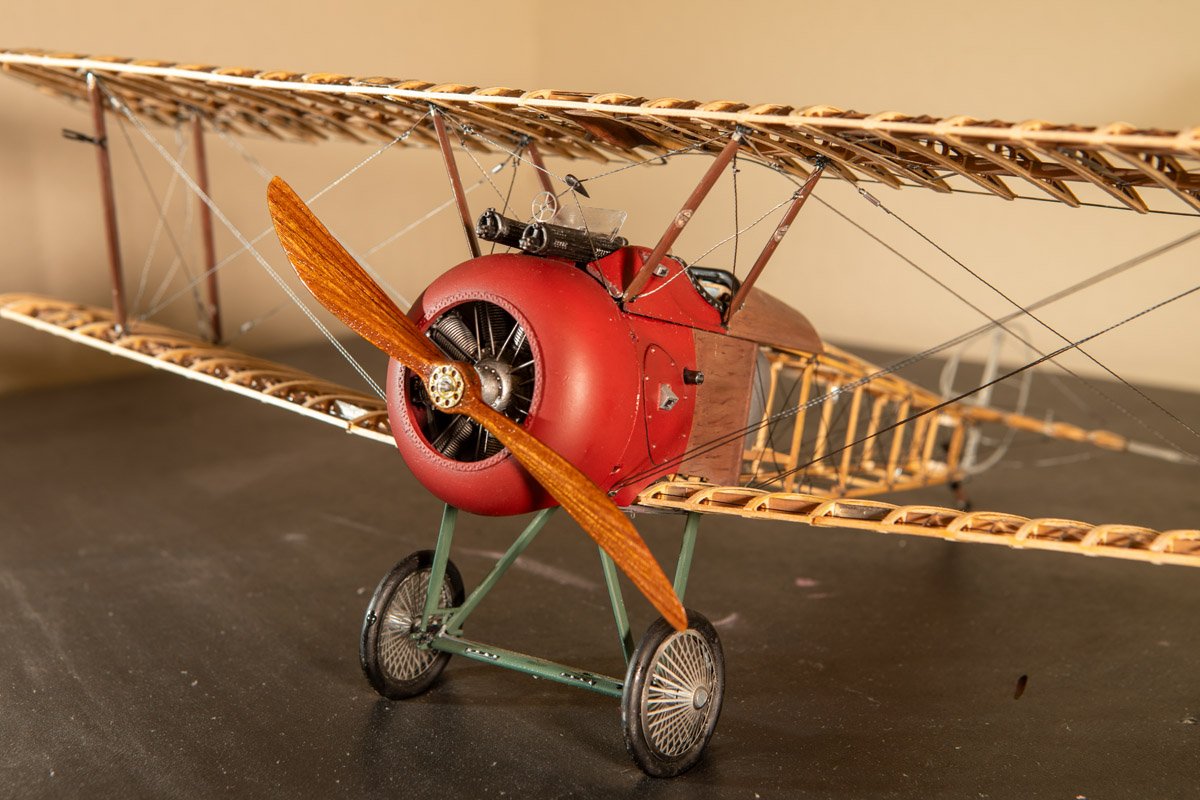
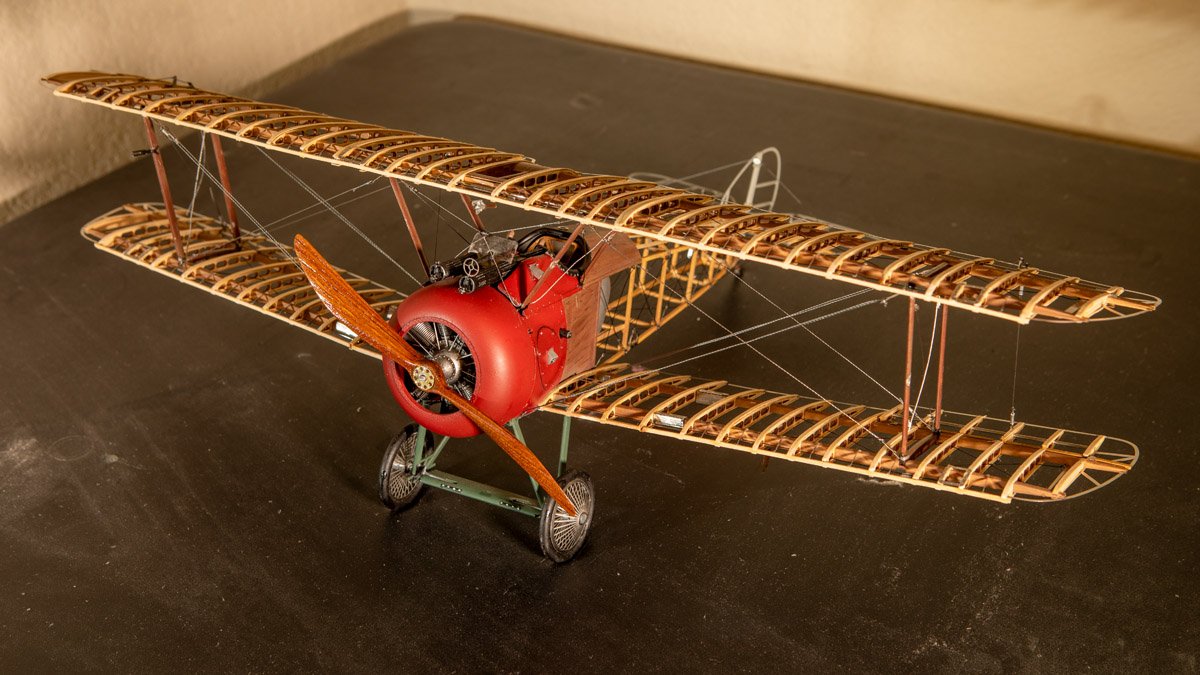
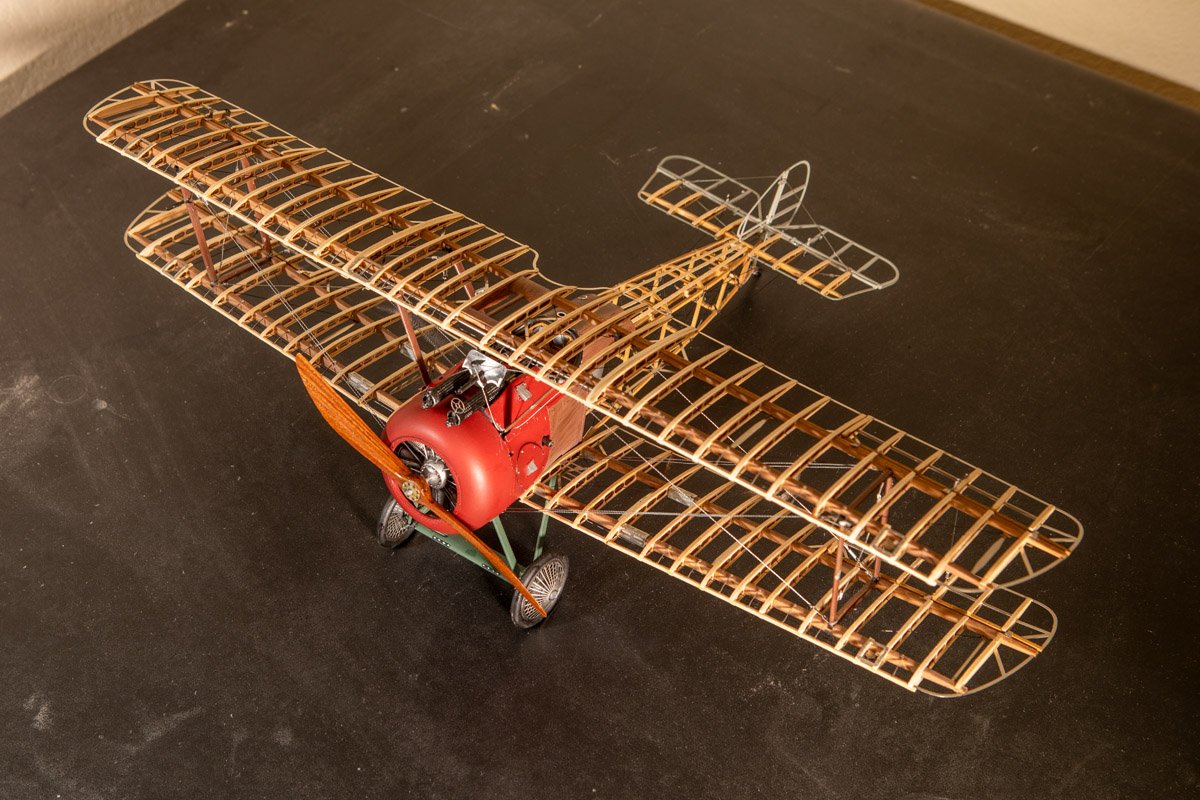
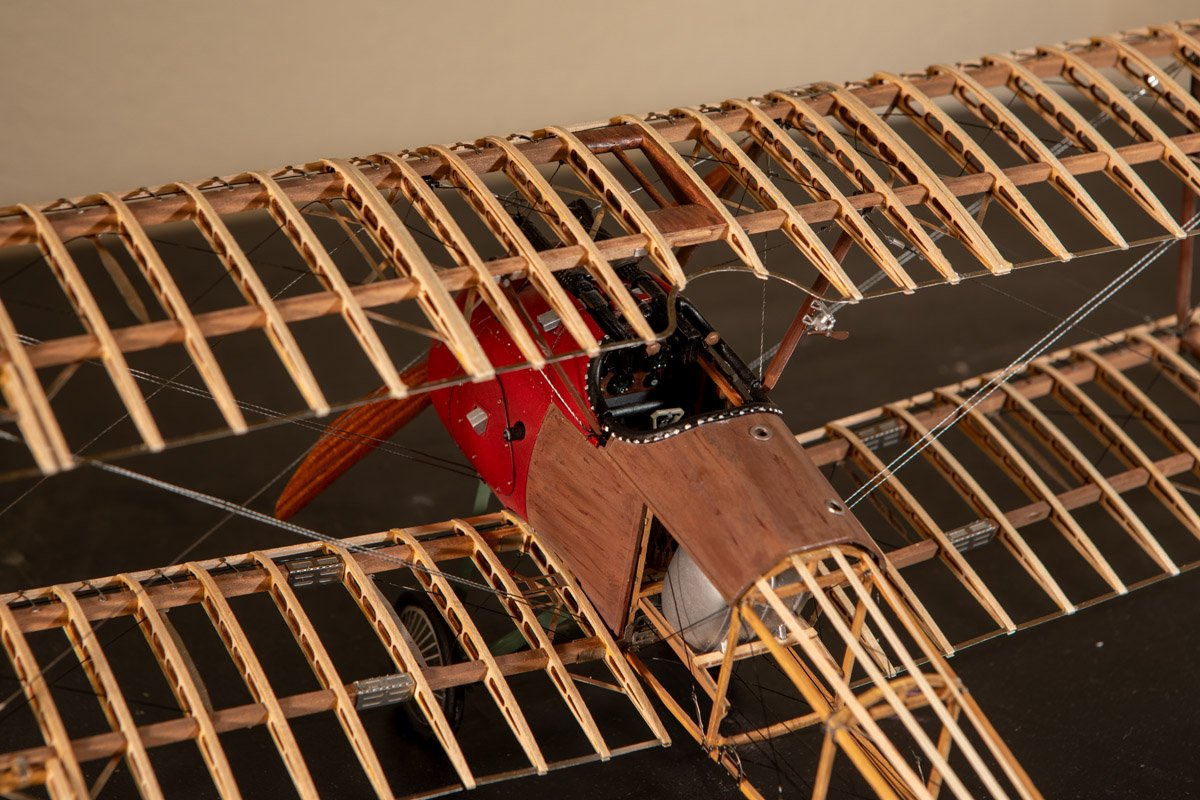
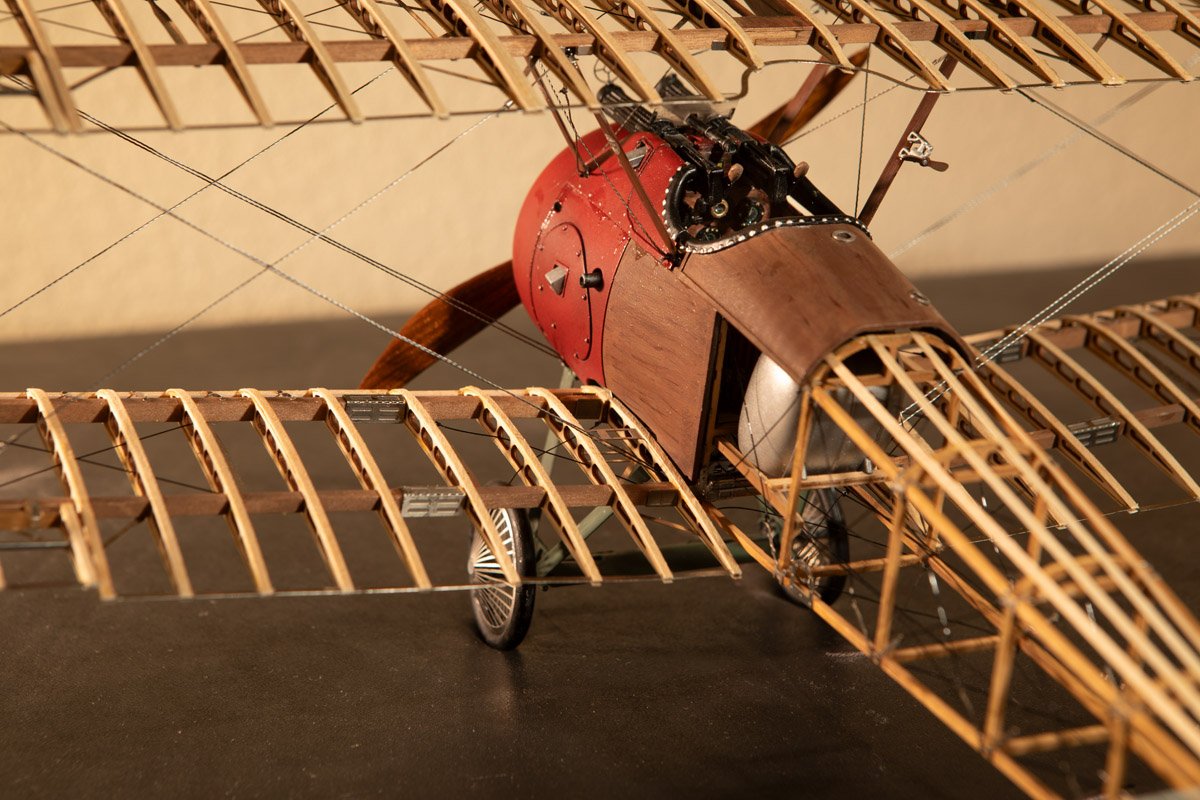
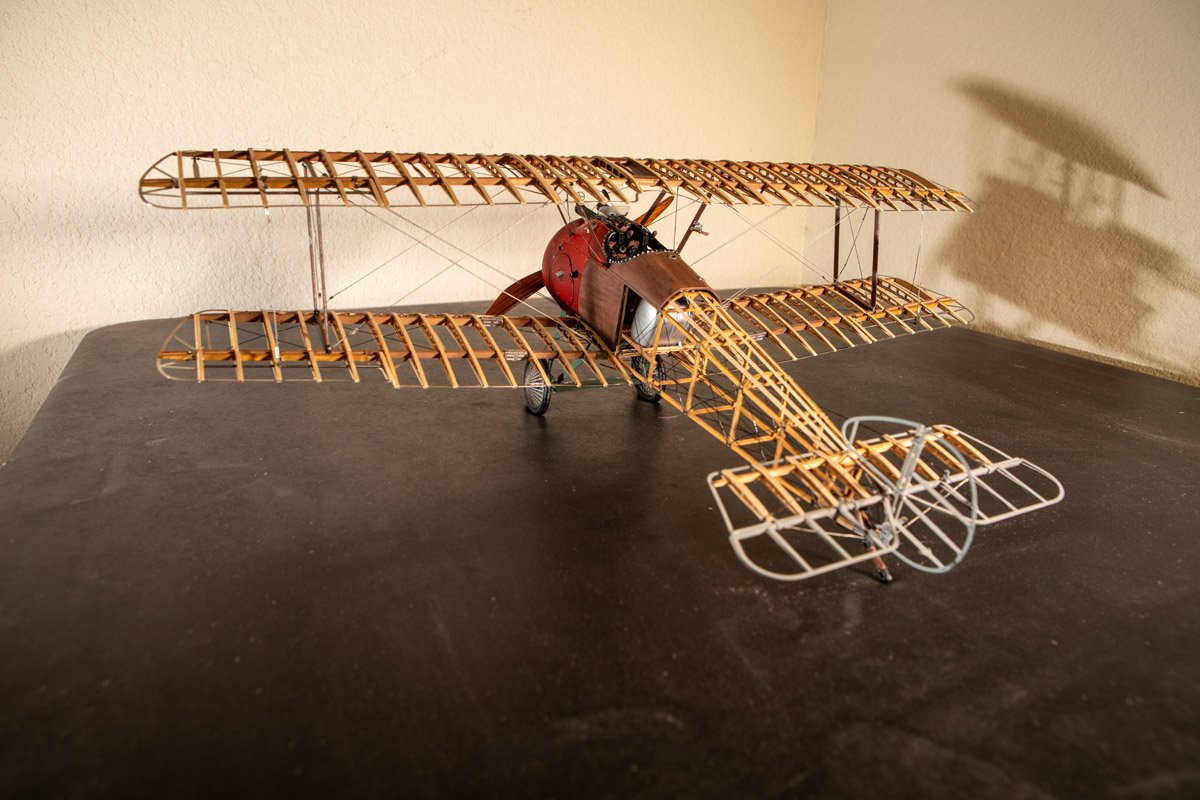
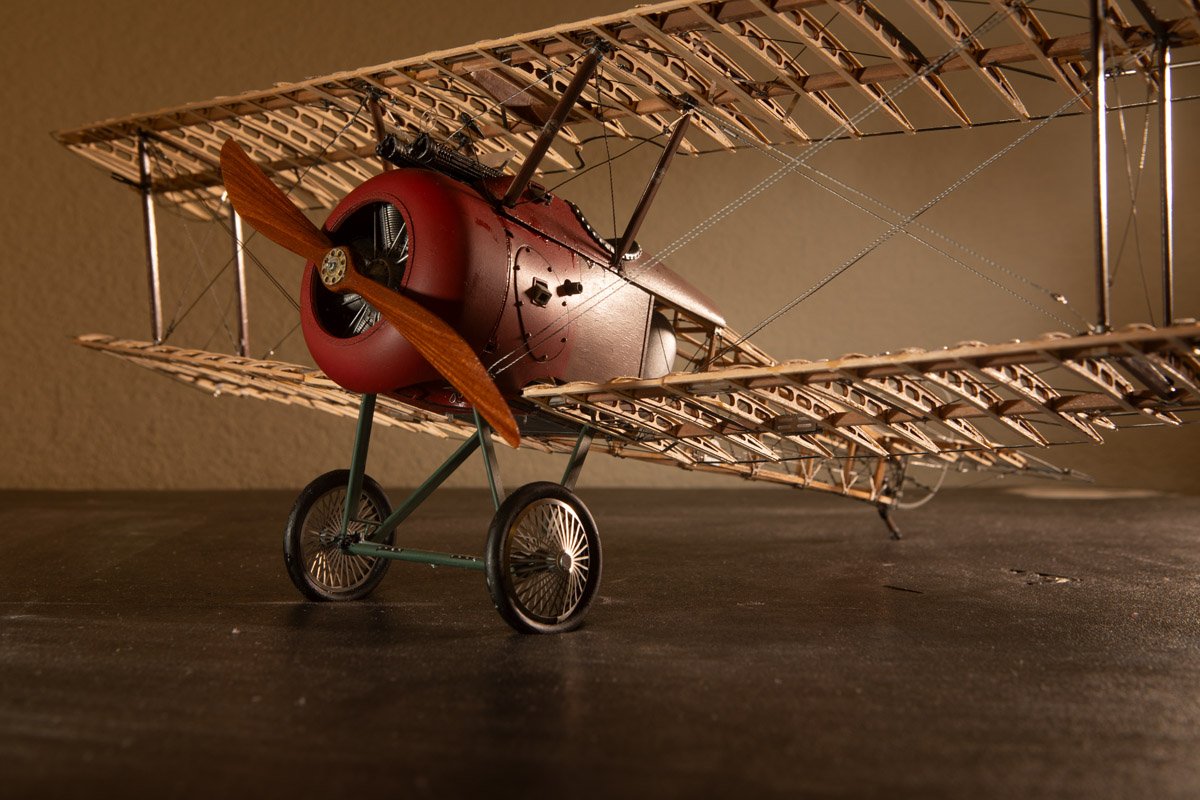
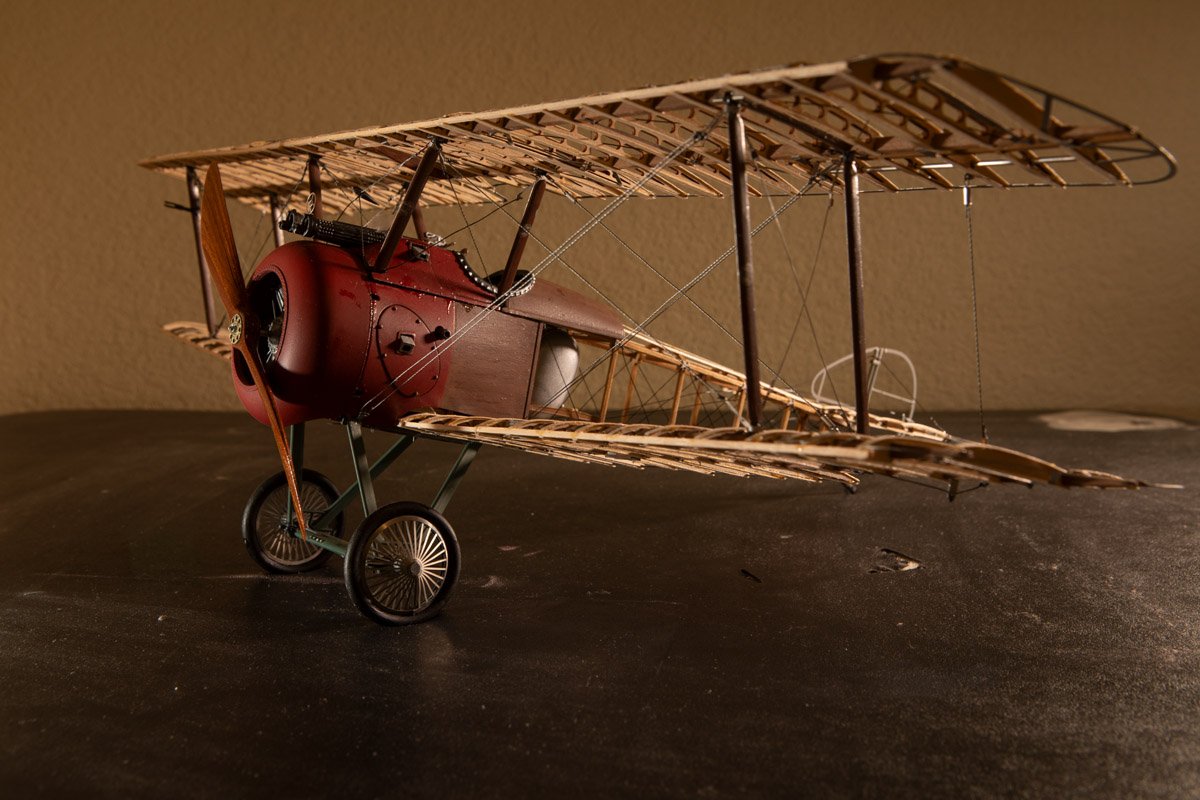
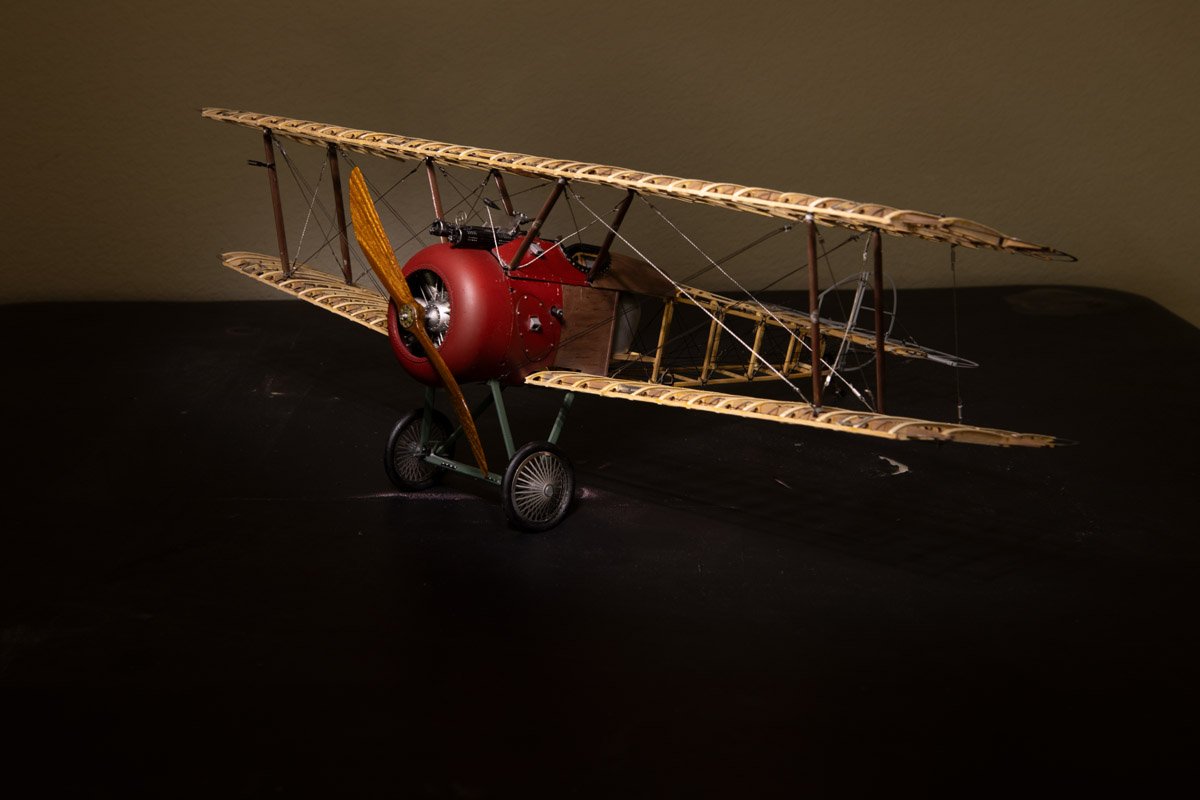
Finished I sort of limped over the finishing line but I am calling this one done. It was a bit of a roller coaster at times but I am pleased with the end results. I completed the rigging, at least as much as I plan to do. There was supposed to be some rigging on the landing gear as well but I am going to leave that off. Overall it was a very good kit with a lot of positives, but just a few really glaring negatives as well. And it definitely had some challenging aspects too....I accept at least some blame for any flaws in the final product. Initially I had thought about maybe creating some sort of diorama, or at least a base, something like @chadwijm6 created for his Sea King helicopter. I still could do that in the future, but for now I will just display it on the stand once I get the remaining stand parts that were missing from the original kit. As for the rigging, post #129 of @DocRob's AEG G.IV build log was a great help. I used a lot of those techniques, except with the stainless steel braided thread and slightly larger aluminum tube. I put a bit of CA on the end of the thread to hold it together, then passed the thread through the tube, then through the hole in the model, then back through the tube. I then put a drop of CA on the thread near the eyelet and slide the tube up to the eyelet and it worked like a charm. All that after trying several different types of thread or wire and several different methods of attaching it. That method was easy and also very effective so thanks to docrob for that post. Thanks also to everyone who has followed along and commented or at least hit the like button. And finally the pictures. This model is too large for my DIY photo stand/light box so I just put it on a somewhat beat up card table for its photo shoot.
-
Thanks Peter. A few months back, I ordered a few things that I could not find at any US-based store from spotmodel in Spain. Those took about 2 weeks to arrive, so that is my guess for these parts as well. But since it is just parts for the stand, I can finish the model and move on before they arrive.
-
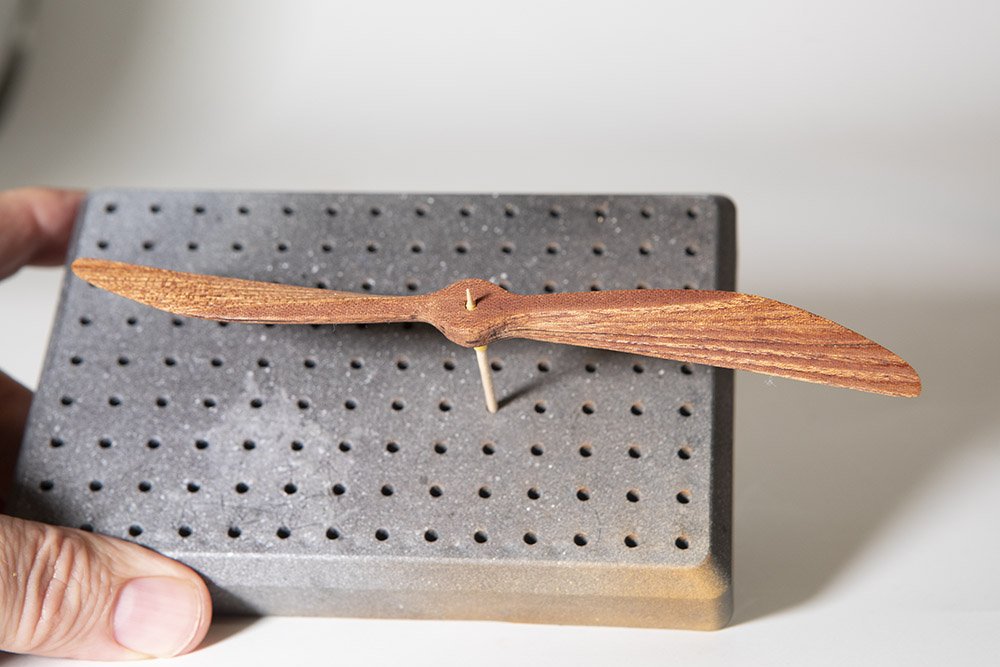
Just a couple quick notes. I've not yet tossed this thing in the bin but the temptation has been going up of late 😬 I decided I wanted a glossier finish for my propeller, so moving in that direction and brushed on some microscale clear gloss. Was also wondering about/tempted to try some thinned down Tamiya "Clear Yellow" to warm up the color a bit more. I started on the rigging with some of the rigging around the cockpit and it has been tricky. Not entirely pleased with the results but they are good enough, though in doing the rigging I also pulled loose one of the upper side metal cockpit parts. I decided to take a break from the rigging and assemble the acrylic stand, only to discover that three of the six pieces of the stand are missing. In the very first post of this log, with the unboxing photos, you can see the shrink wrapped stand with a large base and two curved upright pieces. There are supposed to be three additional smaller pieces that connect the two uprights. I went to the AL website and submitted a "parts request". We'll see how that goes. Looking at those photos, I also do not see the clear windscreen piece so I suspect it may have also been missing from the kit and not misplaced.
About us
Modelshipworld - Advancing Ship Modeling through Research
SSL Secured
Your security is important for us so this Website is SSL-Secured
NRG Mailing Address
Nautical Research Guild
237 South Lincoln Street
Westmont IL, 60559-1917
Model Ship World ® and the MSW logo are Registered Trademarks, and belong to the Nautical Research Guild (United States Patent and Trademark Office: No. 6,929,264 & No. 6,929,274, registered Dec. 20, 2022)
Helpful Links
About the NRG
If you enjoy building ship models that are historically accurate as well as beautiful, then The Nautical Research Guild (NRG) is just right for you.
The Guild is a non-profit educational organization whose mission is to “Advance Ship Modeling Through Research”. We provide support to our members in their efforts to raise the quality of their model ships.
The Nautical Research Guild has published our world-renowned quarterly magazine, The Nautical Research Journal, since 1955. The pages of the Journal are full of articles by accomplished ship modelers who show you how they create those exquisite details on their models, and by maritime historians who show you the correct details to build. The Journal is available in both print and digital editions. Go to the NRG web site (www.thenrg.org) to download a complimentary digital copy of the Journal. The NRG also publishes plan sets, books and compilations of back issues of the Journal and the former Ships in Scale and Model Ship Builder magazines.

