HOLIDAY DONATION DRIVE - SUPPORT MSW - DO YOUR PART TO KEEP THIS GREAT FORUM GOING! (Only 75 donations so far out of 49,000 members - C'mon guys!)
×


drobinson02199
-
Posts
1,073 -
Joined
-
Last visited
Content Type
Profiles
Forums
Gallery
Events
Everything posted by drobinson02199
-
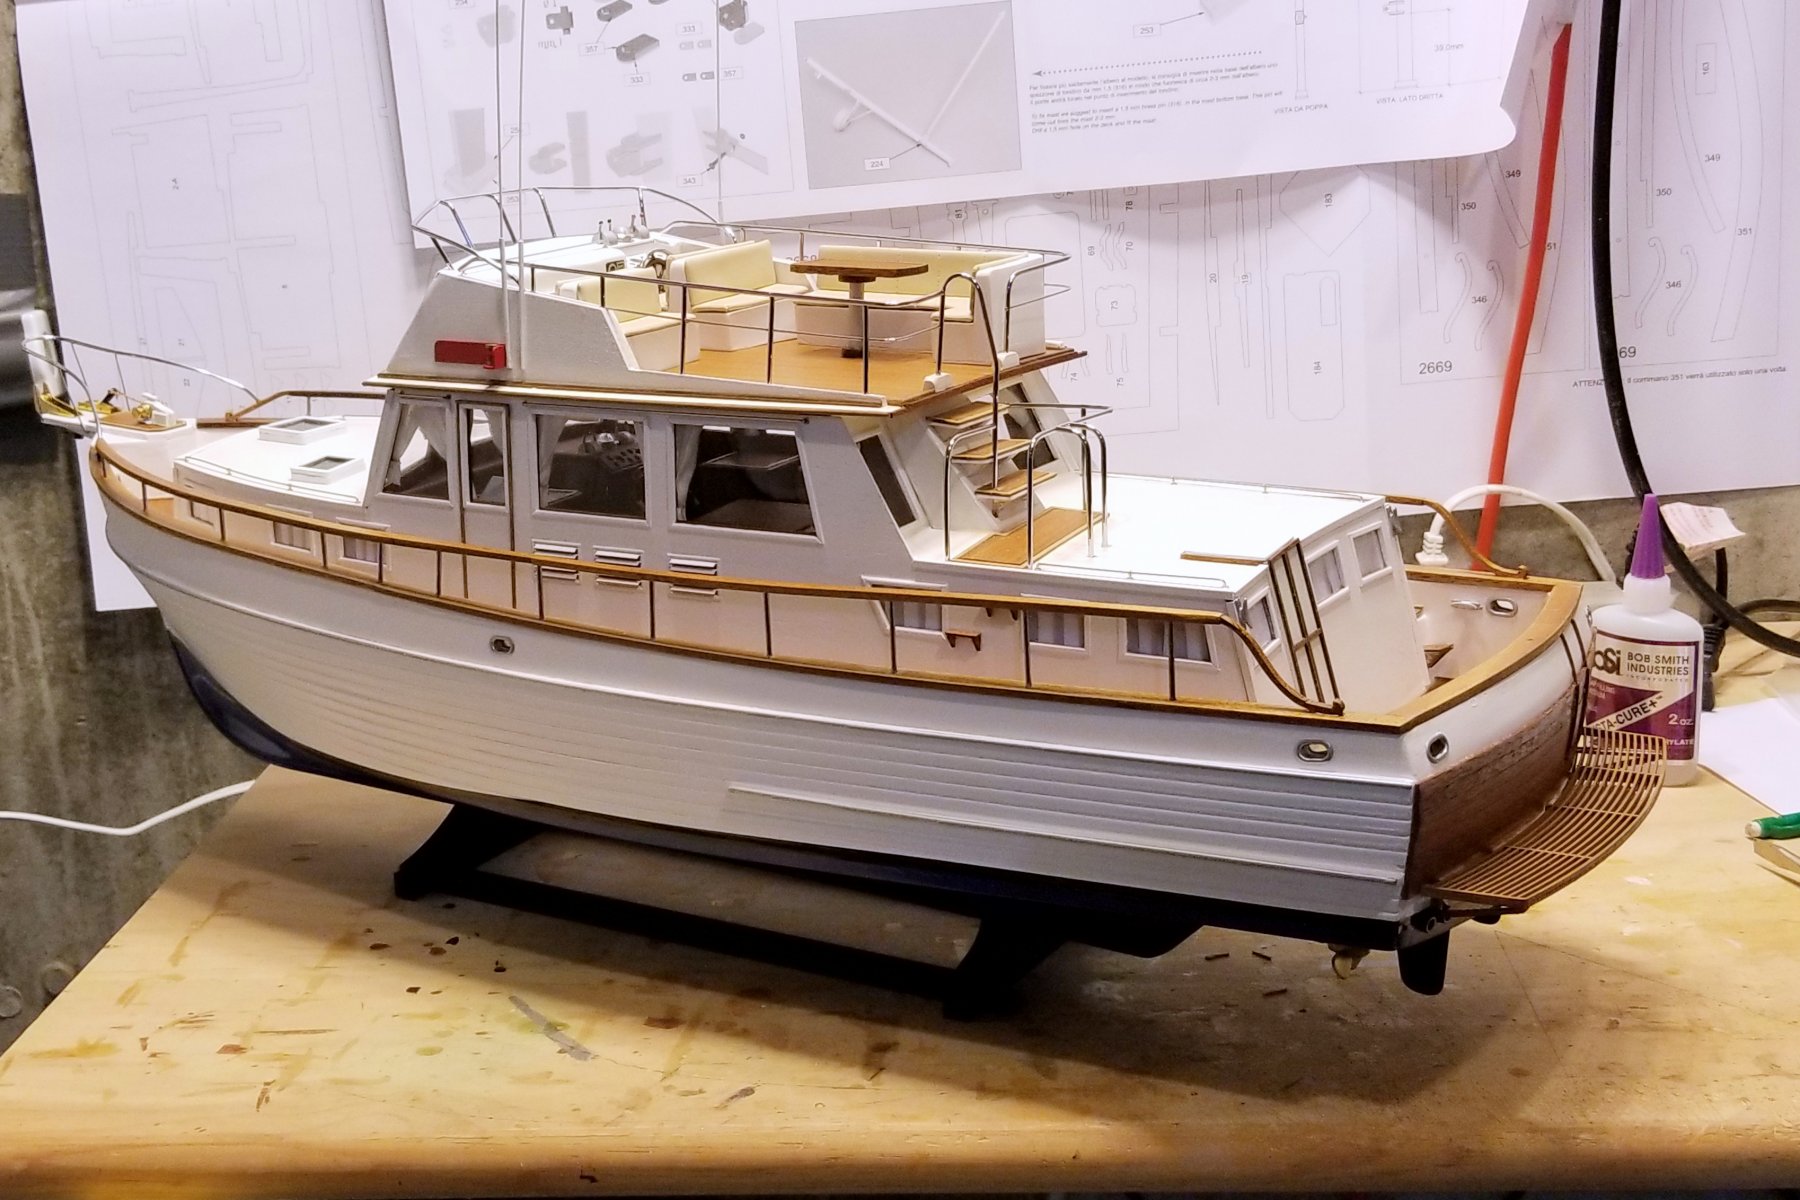
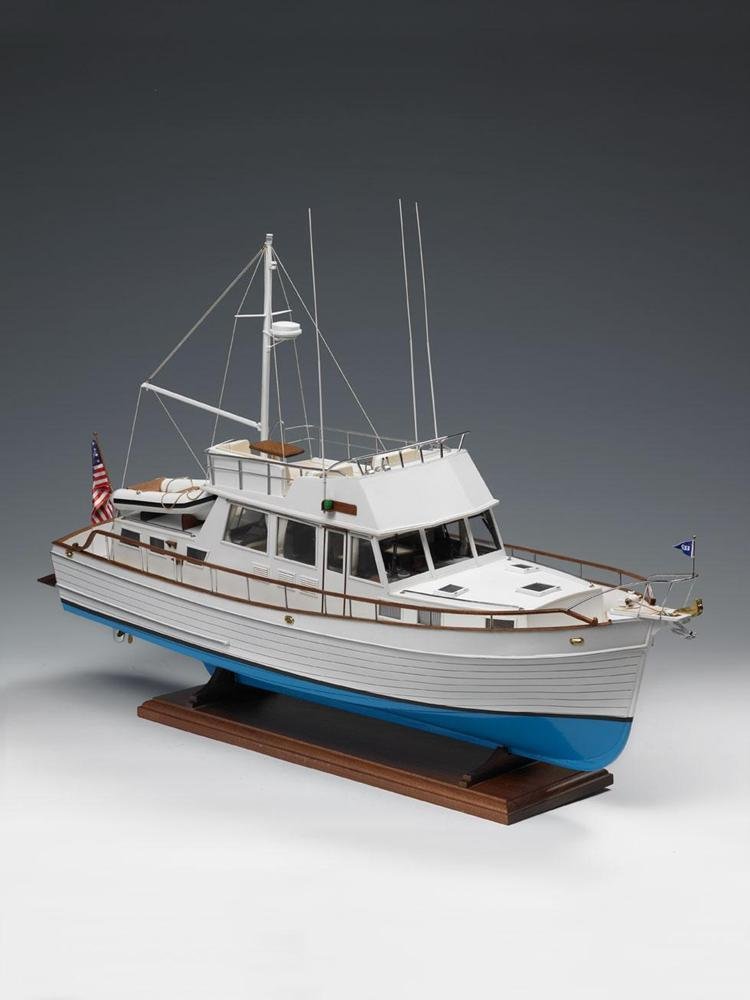
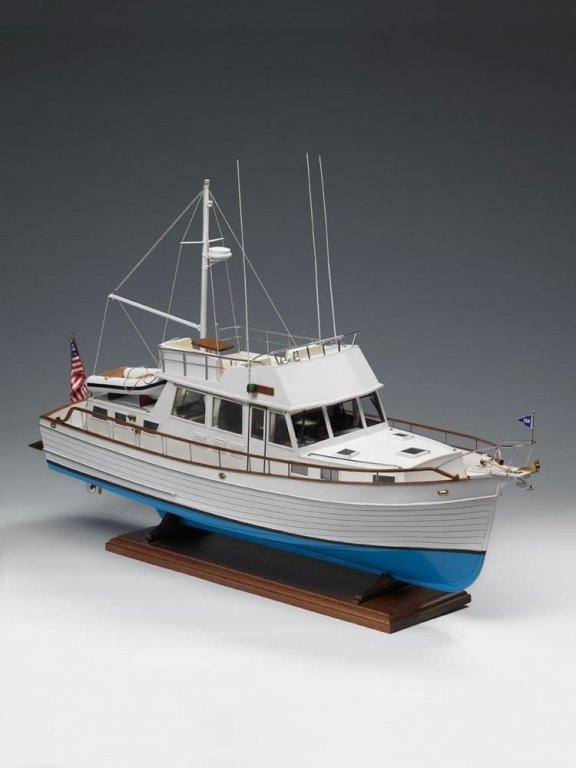
 Finished the boat today! I've posted a gallery of pictures in the Completed Models Gallery, but here's one of the finished boat. Thanks to all who followed along on this one. Regards, David
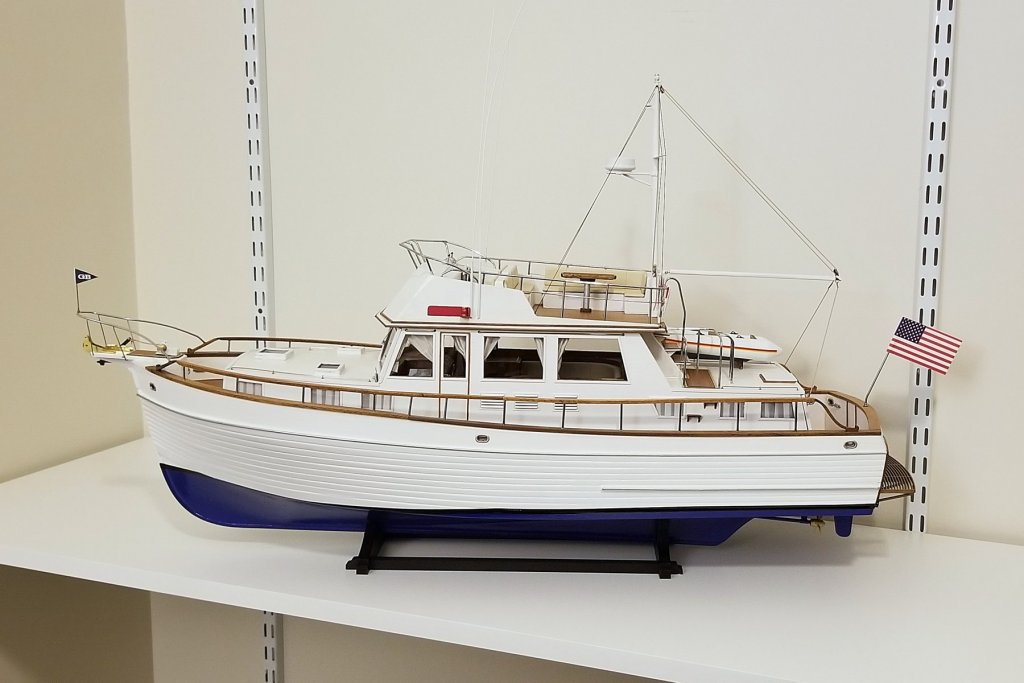
-
Chris: The workmanship on those stairs is really exquisite. It's almost a shame to put anything on them. Regards, David
-
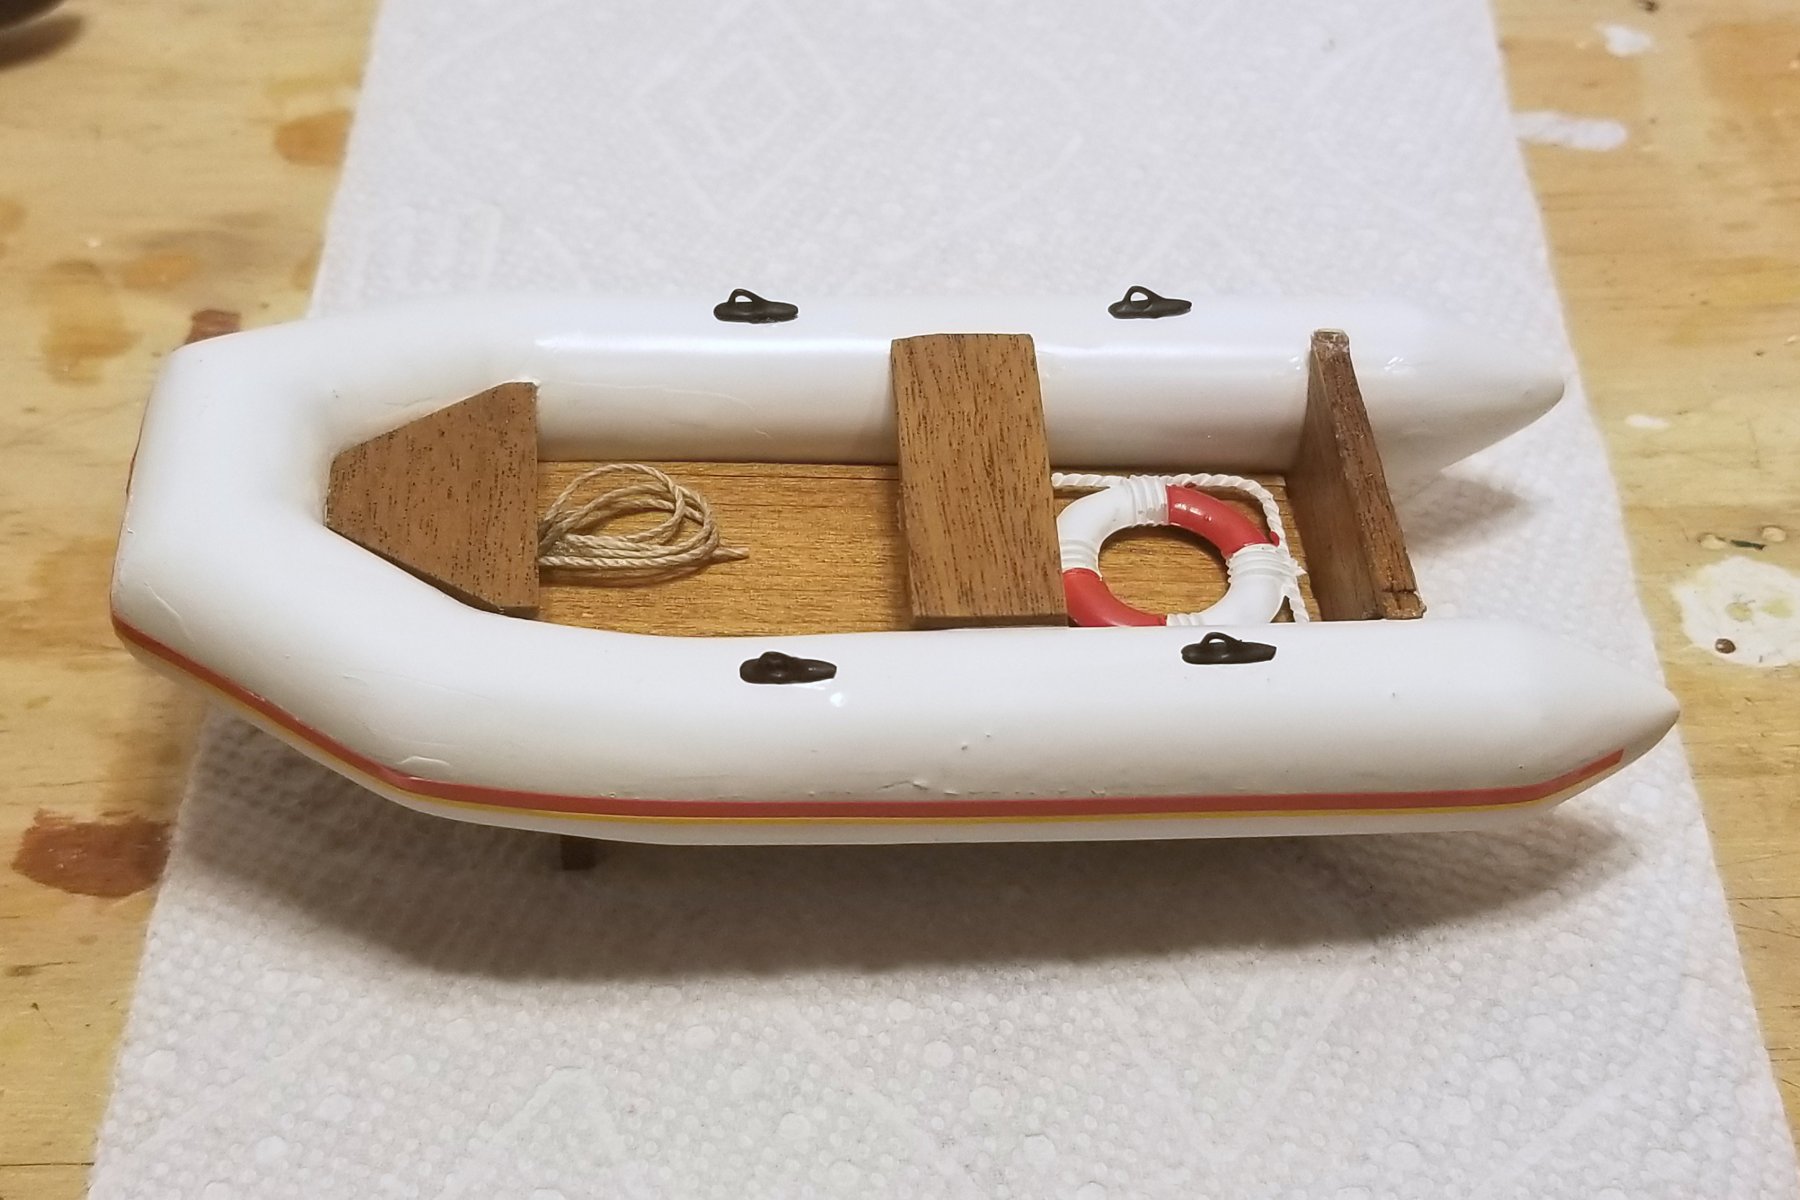
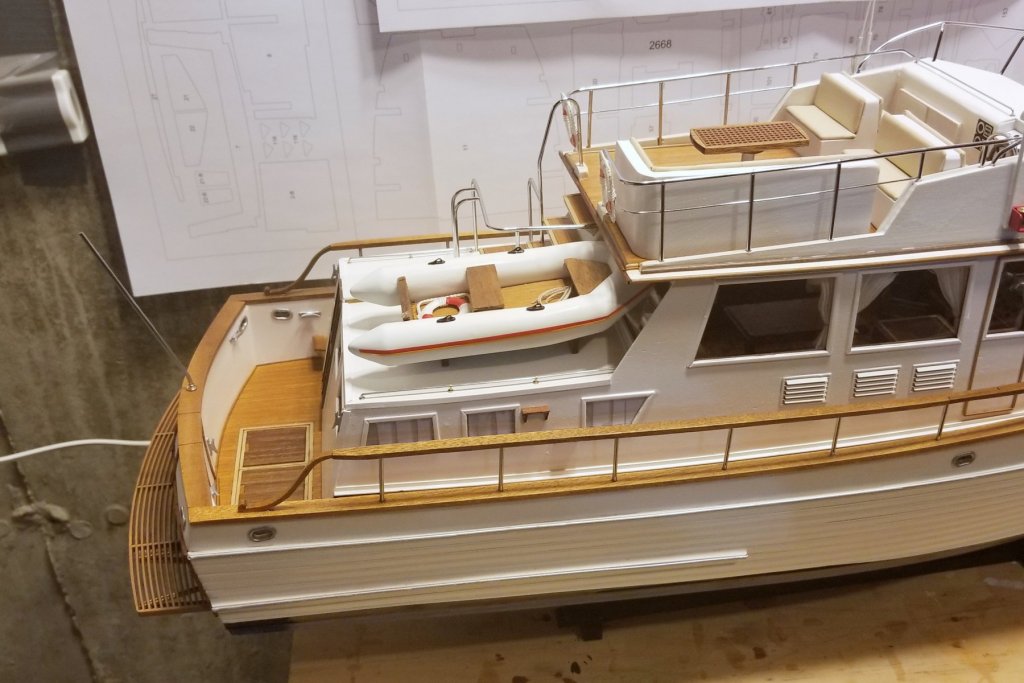
Tender is now completed -- and mounted on the boat. Regards, David

-
I meant to mention in my previous post: the instructions call for the cleats to be mounted on the inside of the hull before the decks go down (they are planked on separate pieces of plywood and then glued down). The problem with this is that doing so would get in the way of inserting the well deck. It might also be that the hawse hole covers in that well deck area would also create a problem. So I held off on those steps until I had installed the well deck. Regards, David
-
She's amazing! Your work in hiding the wires is wonderful. The mast lighting looks great. Regards, David
-
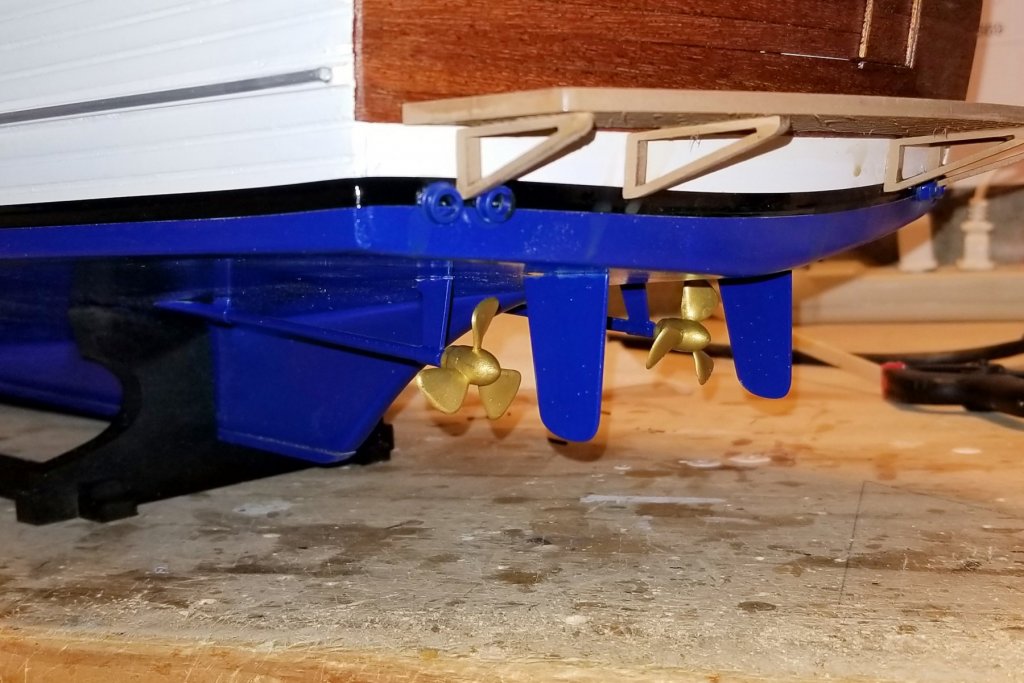
Getting close to the end now. Bow area and railing done Side decks installed (I'm not fast -- I did these on a pre-cut framework while I was painting the hull) Swim platform installed Shafts, rudders and props installed Cleats installed The lower superstructure is now permanently mounted and glued. The flying bridge is still removable and will stay that way. What's left: tender boat (which has some detail), and mast/boom (which looks like a detailed assembly). Regards, David


-
Chris: The kit gets all the credit. I just bumble along. Regards, David
-
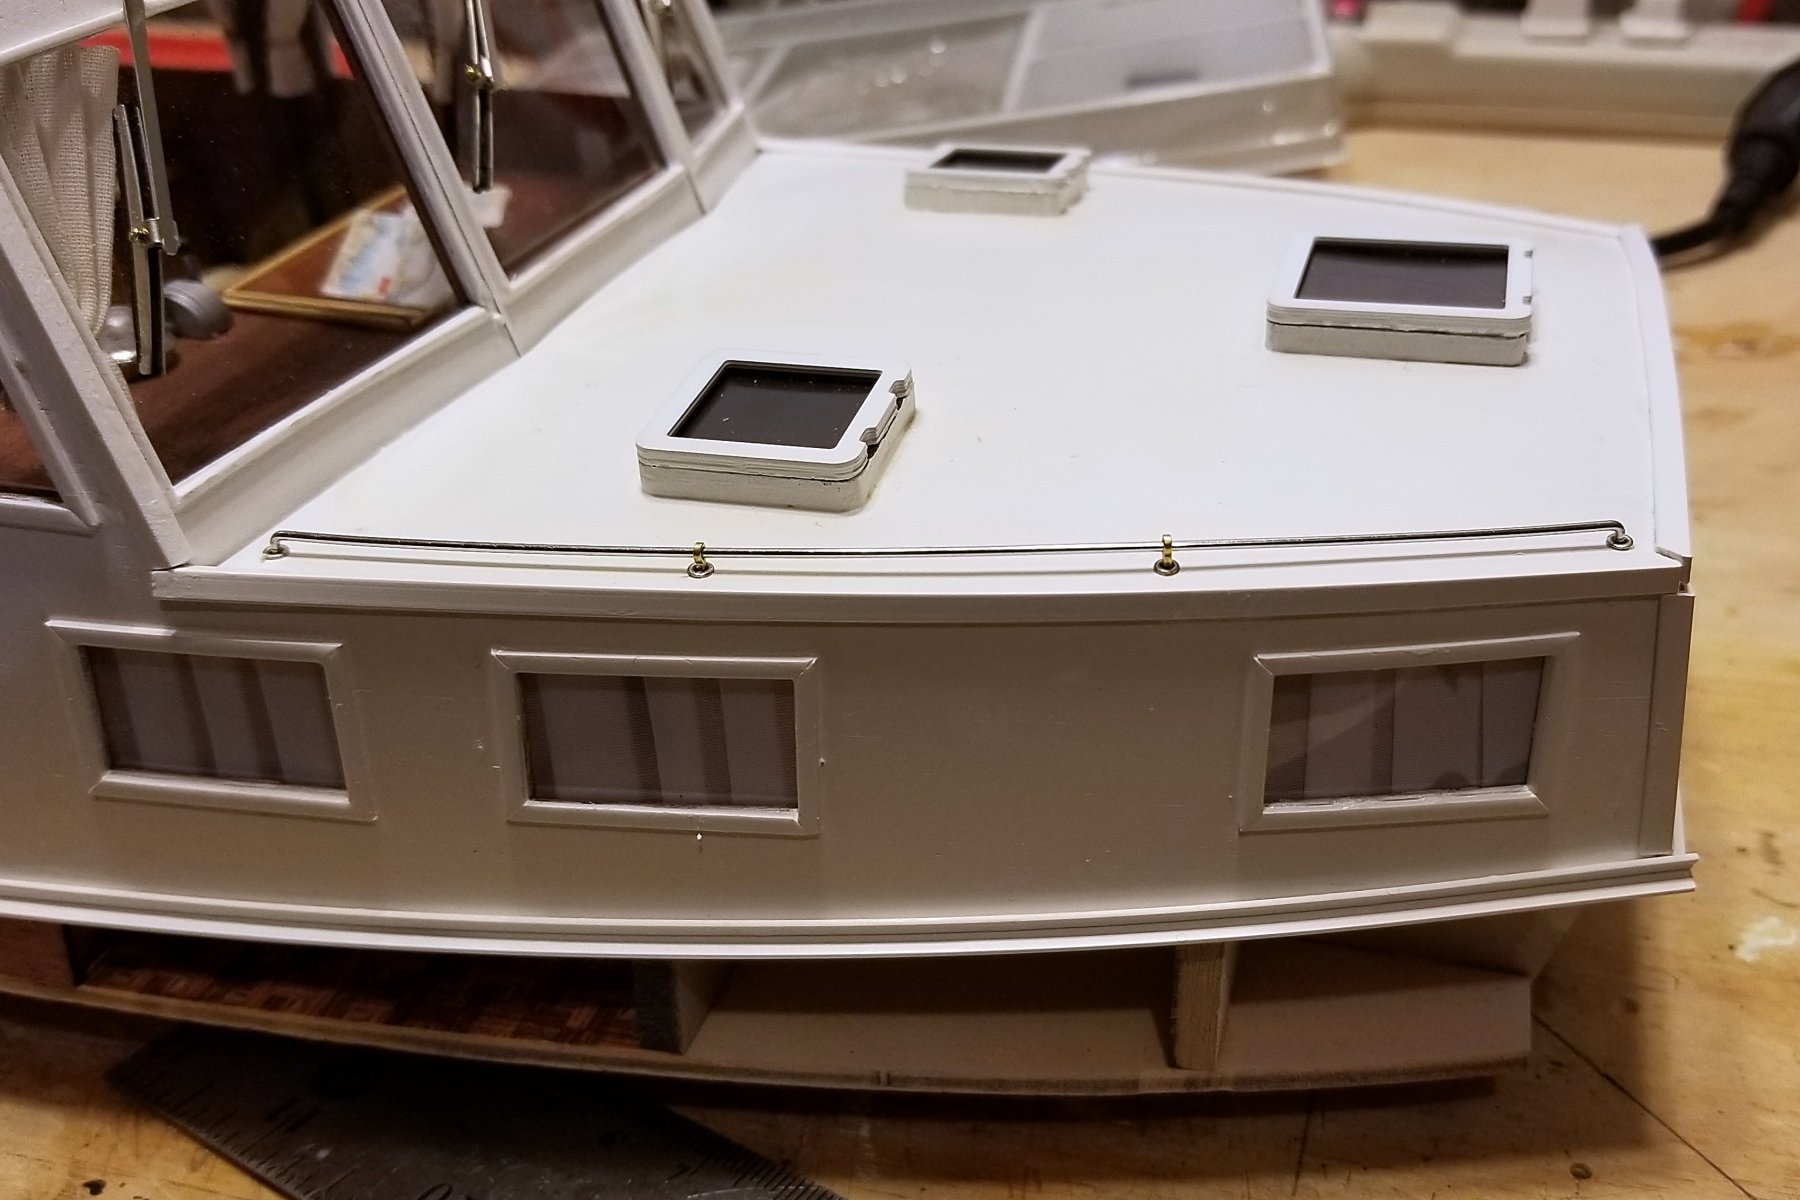
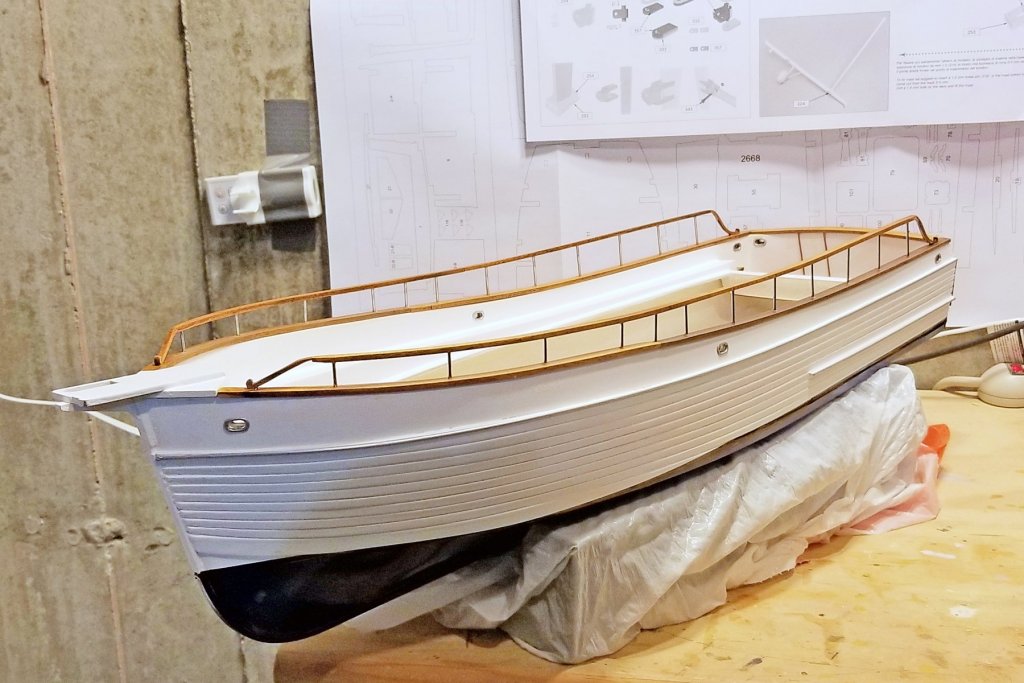
Now the side railings are installed, as well as the hawse hole covers and a bit more detail (rear door). I'm not sure how well the pictures show it, but there are "metal" bumpers running down the top side and lower wale. I have touch up to do on the top white part of the hull just below the rear gunwale, and elsewhere. So that discoloration will clean up. Regards, David
-
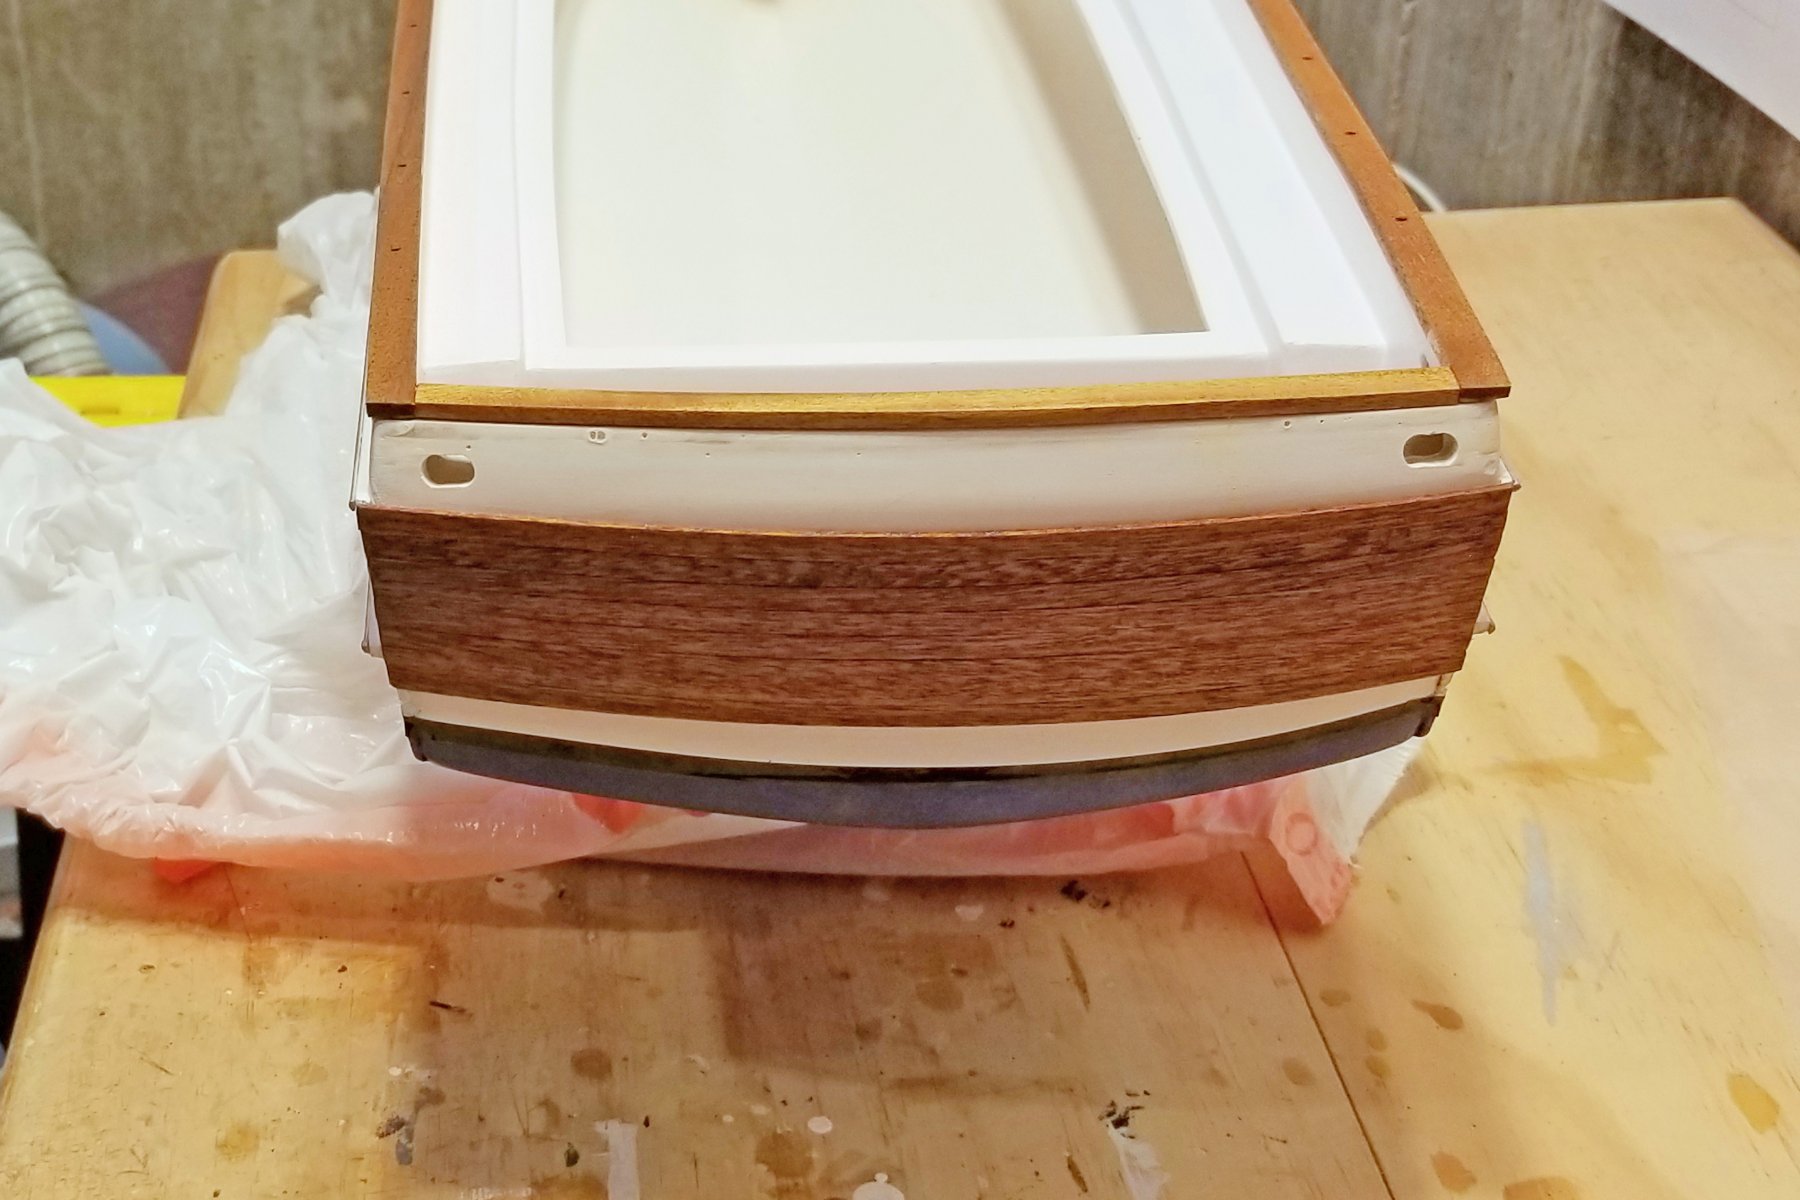
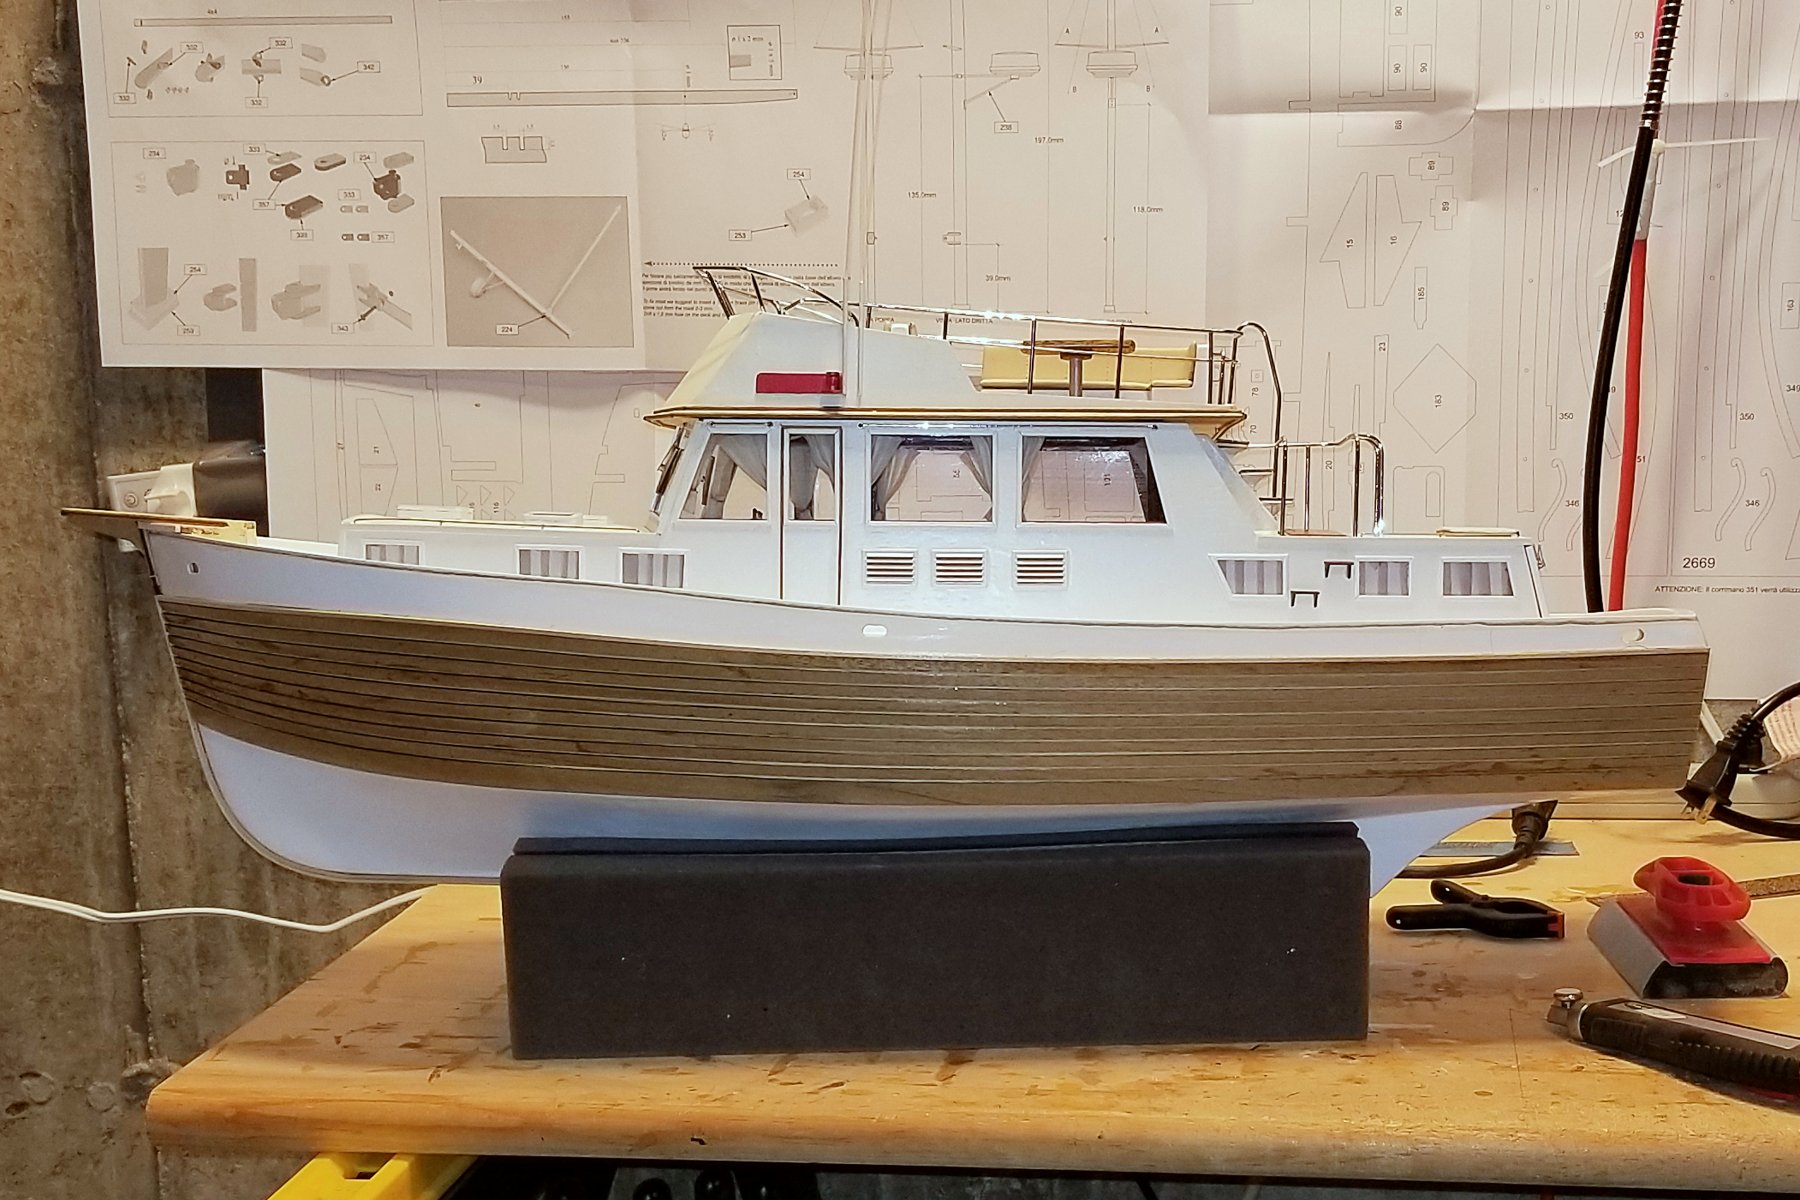
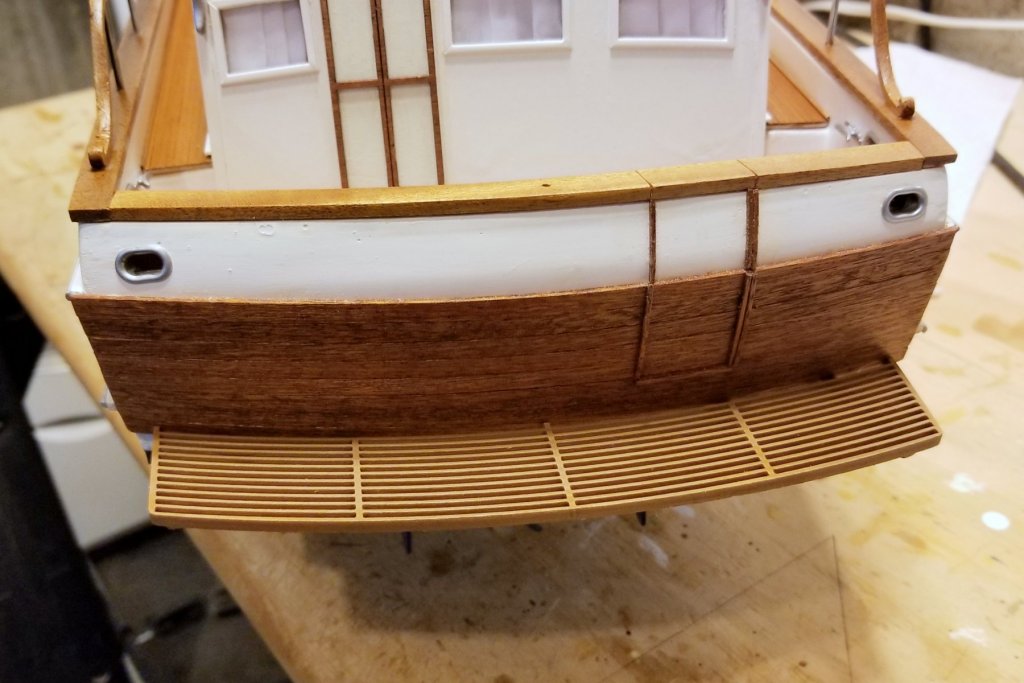
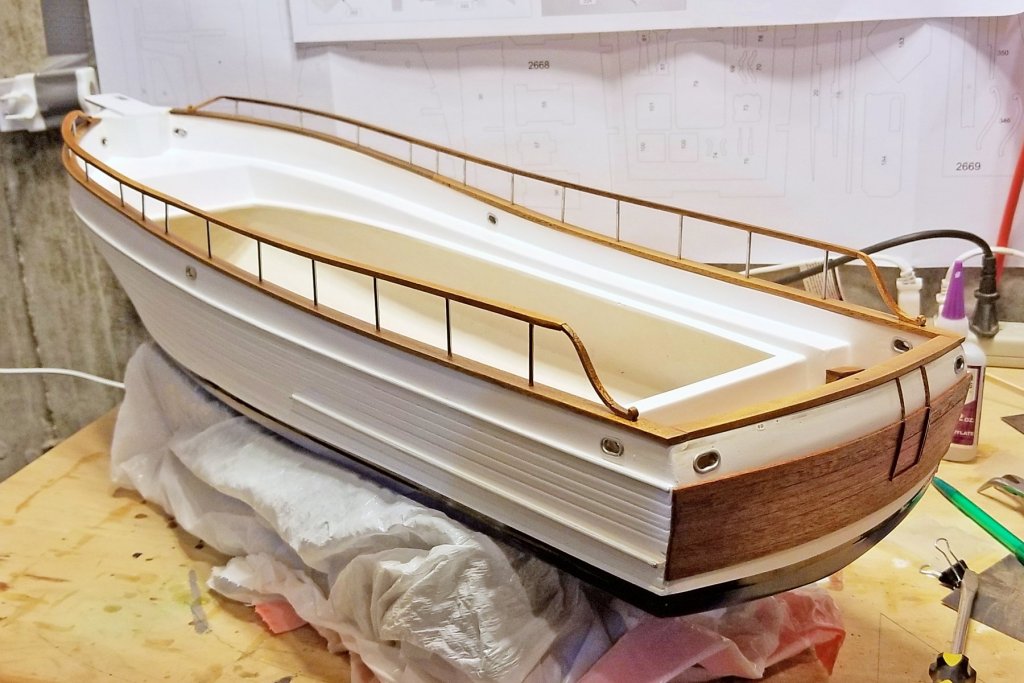
Mahogany gunwales and rear planking now installed. Regards, David


-
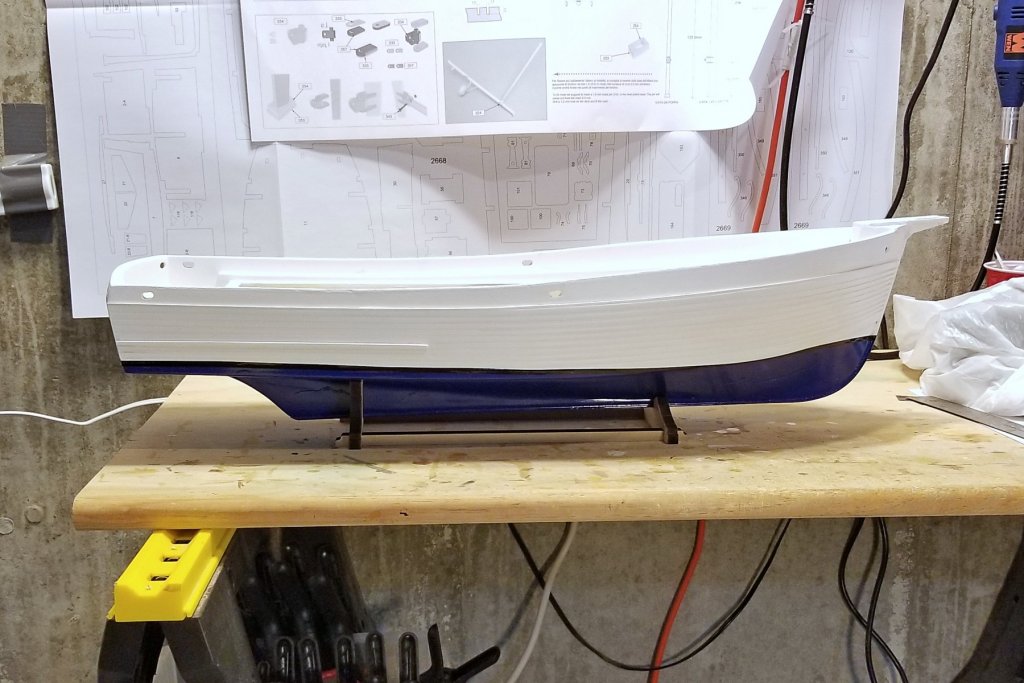
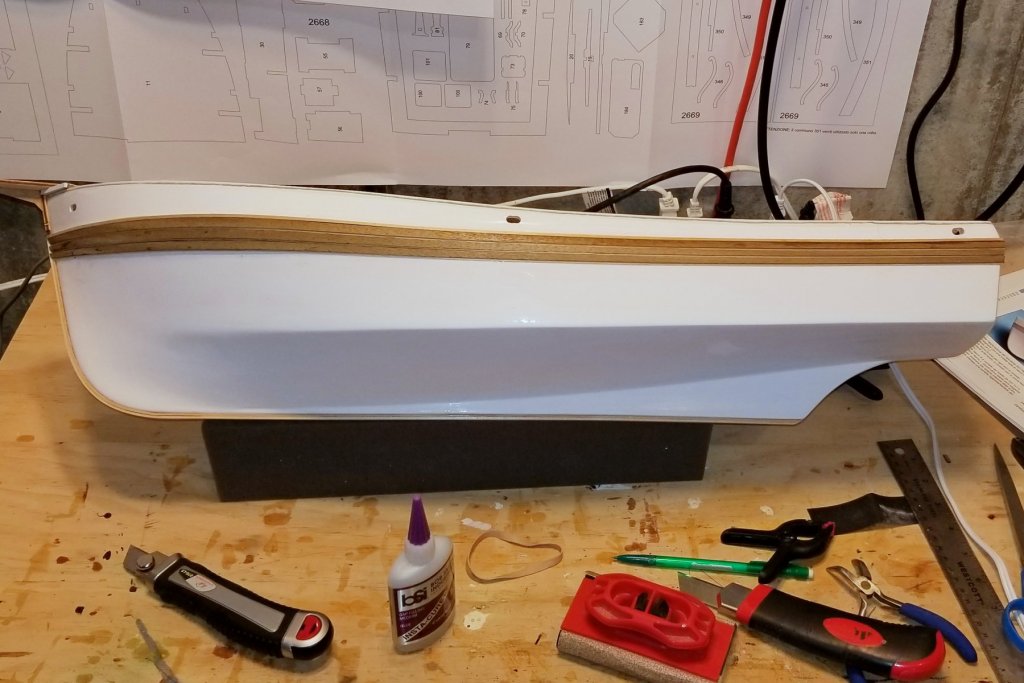
Bottom of hull painted and black stripe applied to waterline. As I mentioned earlier, I didn't like the light blue shown in the kit pictures, so I went with a royal blue instead. Regards, David
-
Now painting the hull. You can see what the unpainted hull looks like in my posts above. The first picture shows the hull after two coats of spray paint. The poor look is a result of two things: The spray paint doesn't penetrate well into the spaces between the larger planks. I wasn't confident that more coats would do it, and was concerned that if I sprayed too much or too close I'd get runs and drips. Much of the darker parts result from small gaps between the 1x1mm spacer strips and the planks. So to fill those gaps down inside the spaces, I troweled on wood filler across the whole hull, and then opened up the spaces again using spare 1x1mm wood strips as small shaping "trowels" to "re-sculpt" the spaces into the wood filler, followed by wiping down the hull to remove excess filler (and then cleaning up the spaces again). I then put on two coats of brushed-on paint to be sure the spaces were filled. Finally, about 3 more coats of spray paint/sanding plus some spot spray. The result is in the second picture. If I was going to do this again from scratch, I'd first do one coat of spray to reveal the gaps, then wood filler, then 1-2 coats of brushed on paint, then spray. Now I need to give this a full day to dry well, then tape the water line and spray the bottom of the hull blue. Regards, David

-
Zappto: Really cool with the lamps. Where did you run the wires down the mast? Regards, David
-
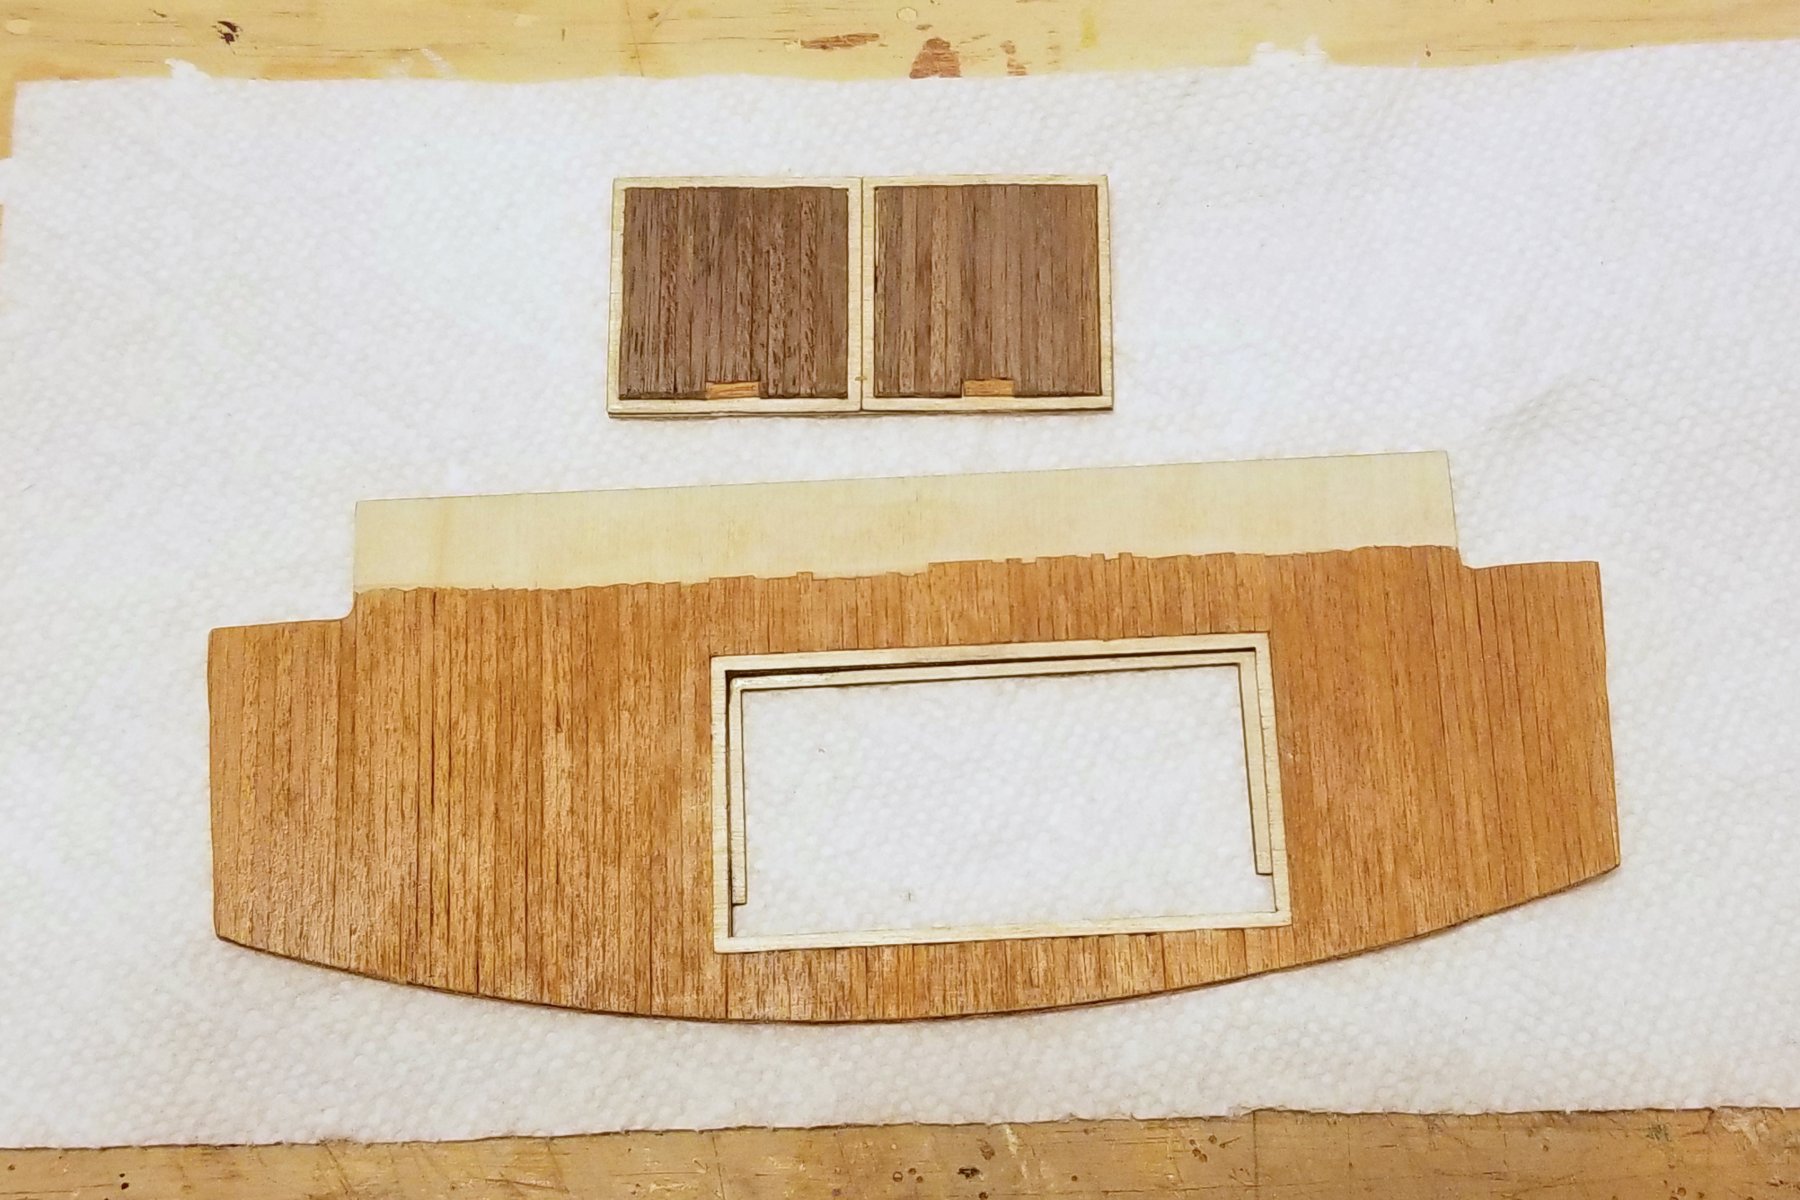
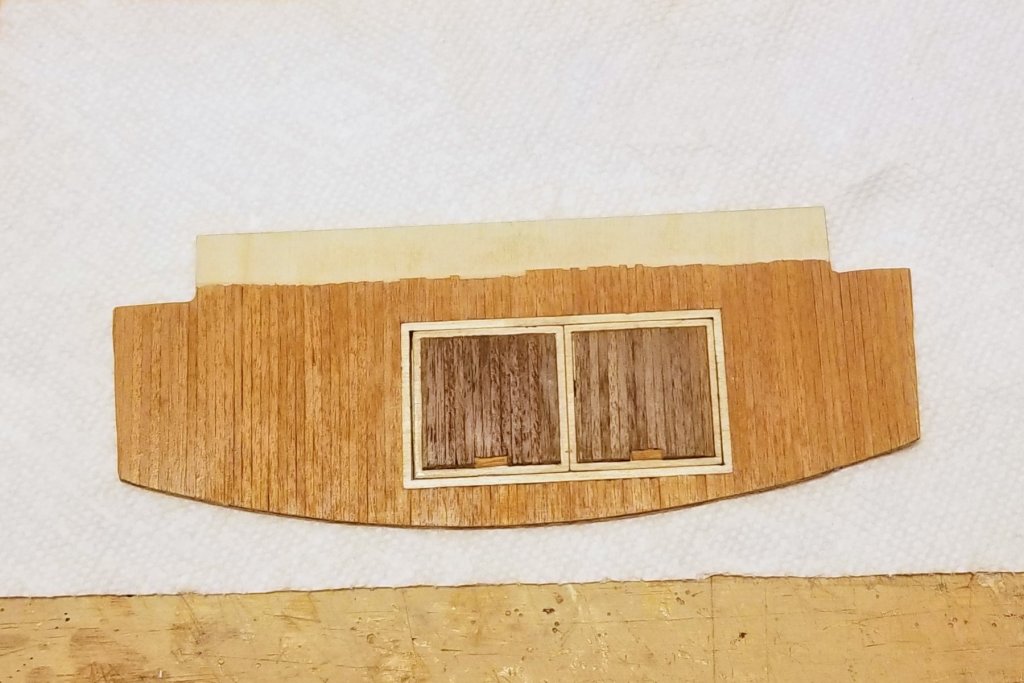
I backed my way into an adaptation. I have been nervously watching my supply of deck planking, looking ahead and pre-calculating total needs. I concluded that I would possibly run out just before finishing, and so looked for an option. That came in the form of using some 2x2 mm walnut for the hatch covers on the aft well deck. Now it turns out that of course I had plenty of planking at the end, and could have done the hatch covers in matching planking as shown in the manual -- but I think the walnut provides some interesting contrast. In the pictures below, you may wonder why the planking on the well deck doesn't run all the way to the rear. It doesn't have to, as the unplanked area won't be visible -- but it's another reflection of my "save planking" insecurity manifesting itself. The wood has received its first coat of varnish and isn't quite dry -- hence the uneven shine. Regards, David

-
Windows look terrific, Chris. Regards, David
-
Chris: Better -- here is the Bob Smith Industries (BSI) website address. http://www.bsi-inc.com/index.html If you click on the Industrial/Hobby link at the top, and then adhesives, look for the purple bottle called "insta cure". I use the 2oz size. It's not watery like their blue bottle (or like many CA glues that are hard to manage), and while the website promotes it as gap filling, I like it because it just stays where you put it and you don't have to join things right away (you have maybe 60 seconds). Usually sets in a minute or so. On the same website, there is a dealer locator with instructions for how to search outside the US, and I tried it and saw two Australia distributors on the first two pages. I get mine through Amazon. Hope this helps. Regards, David
-
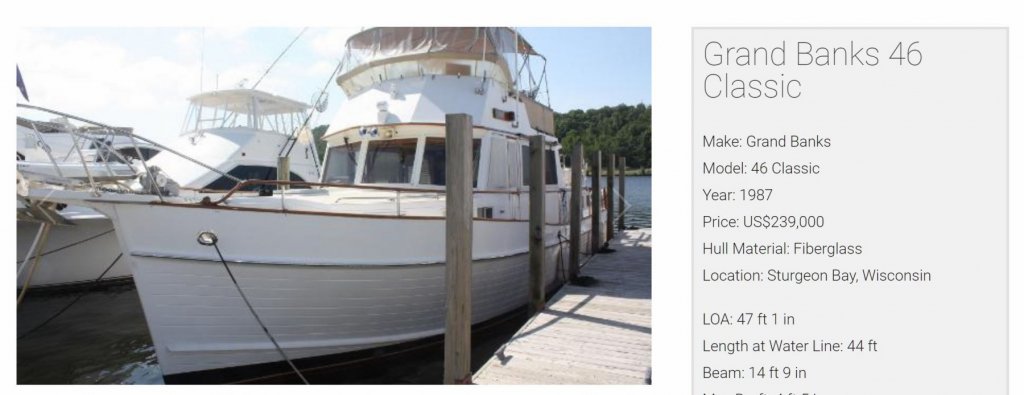
Chris: Thanks. What you see is all the exterior planking there is. It's just plain white fiberglass above, and blue painted below. Here's a picture from the Grand Banks website of an actual GB 46 for sale, and you can see that it's fiberglass above and below the planking. I used BSI medium CA glue (the gel kind), which is my default glue for everything now. Regards, David
-
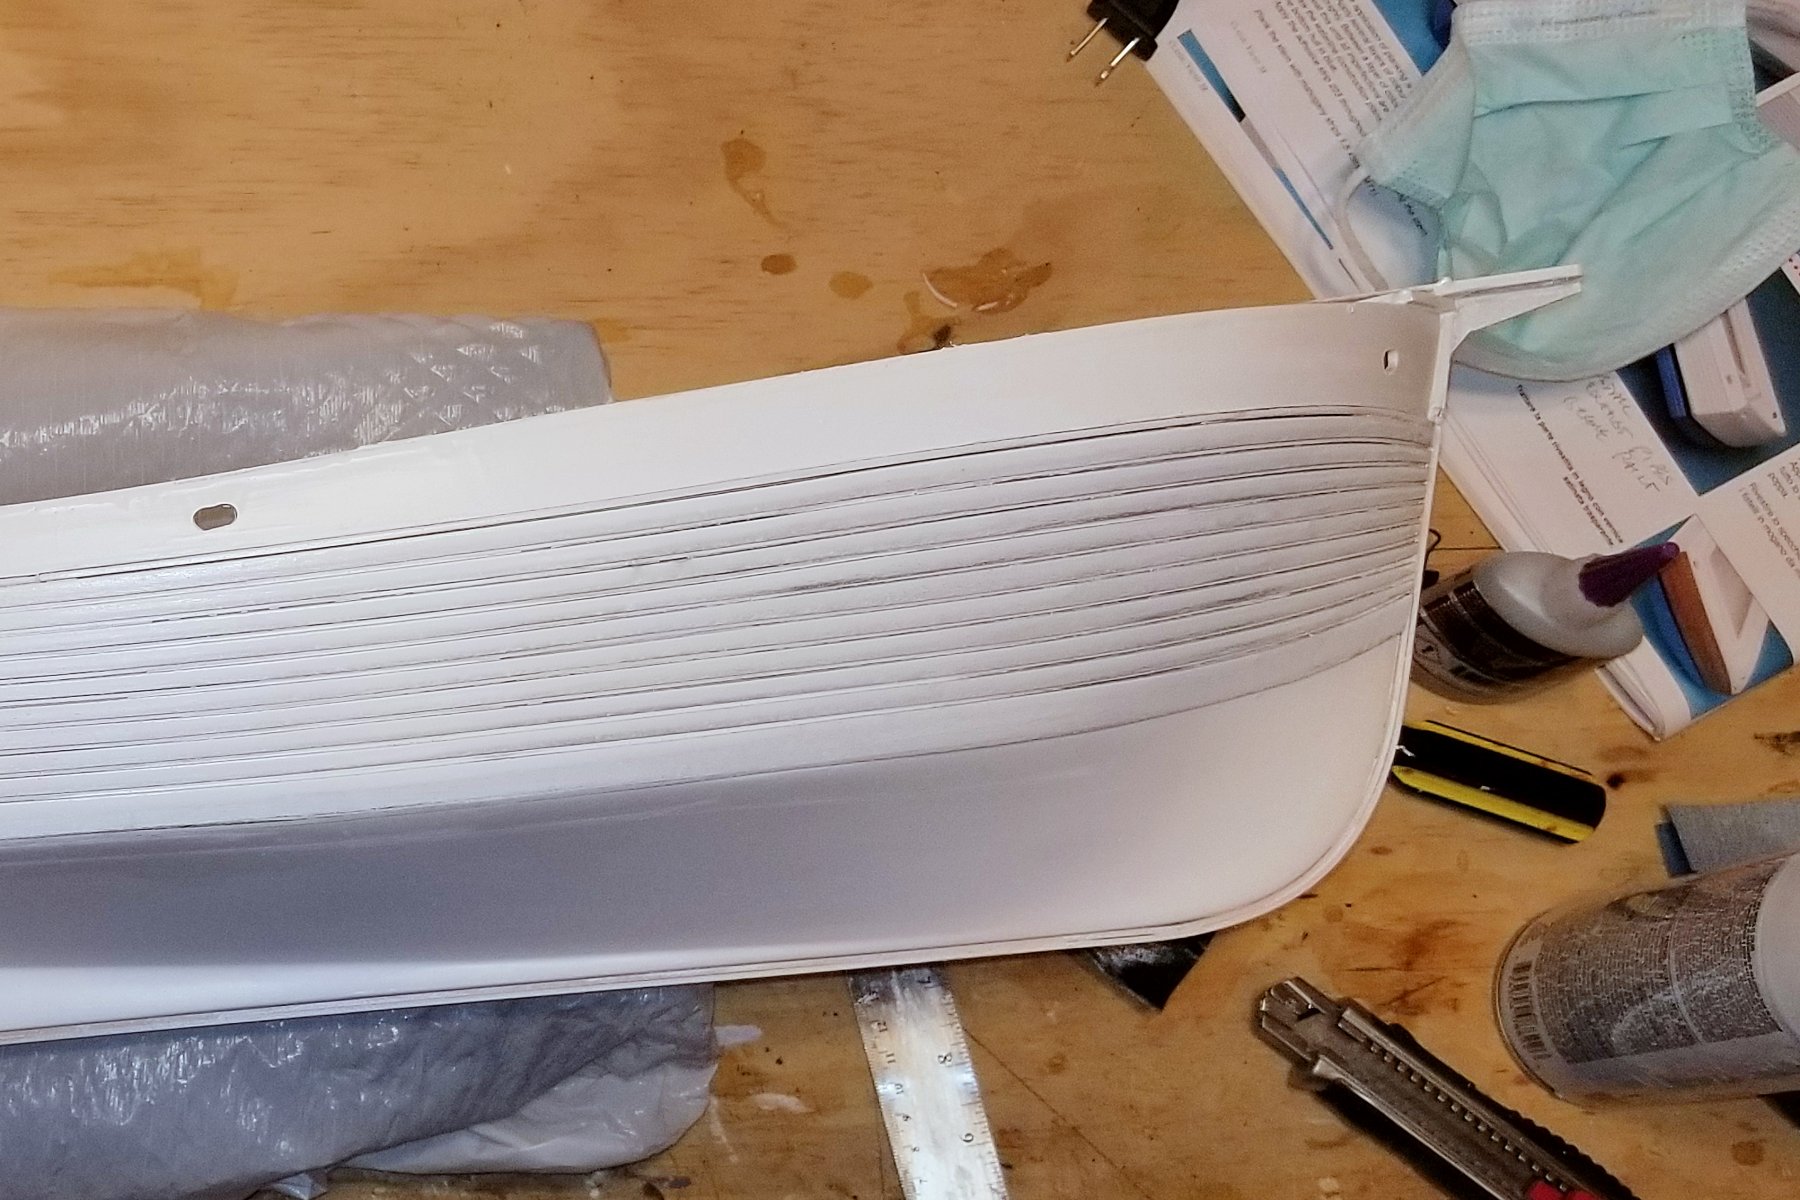
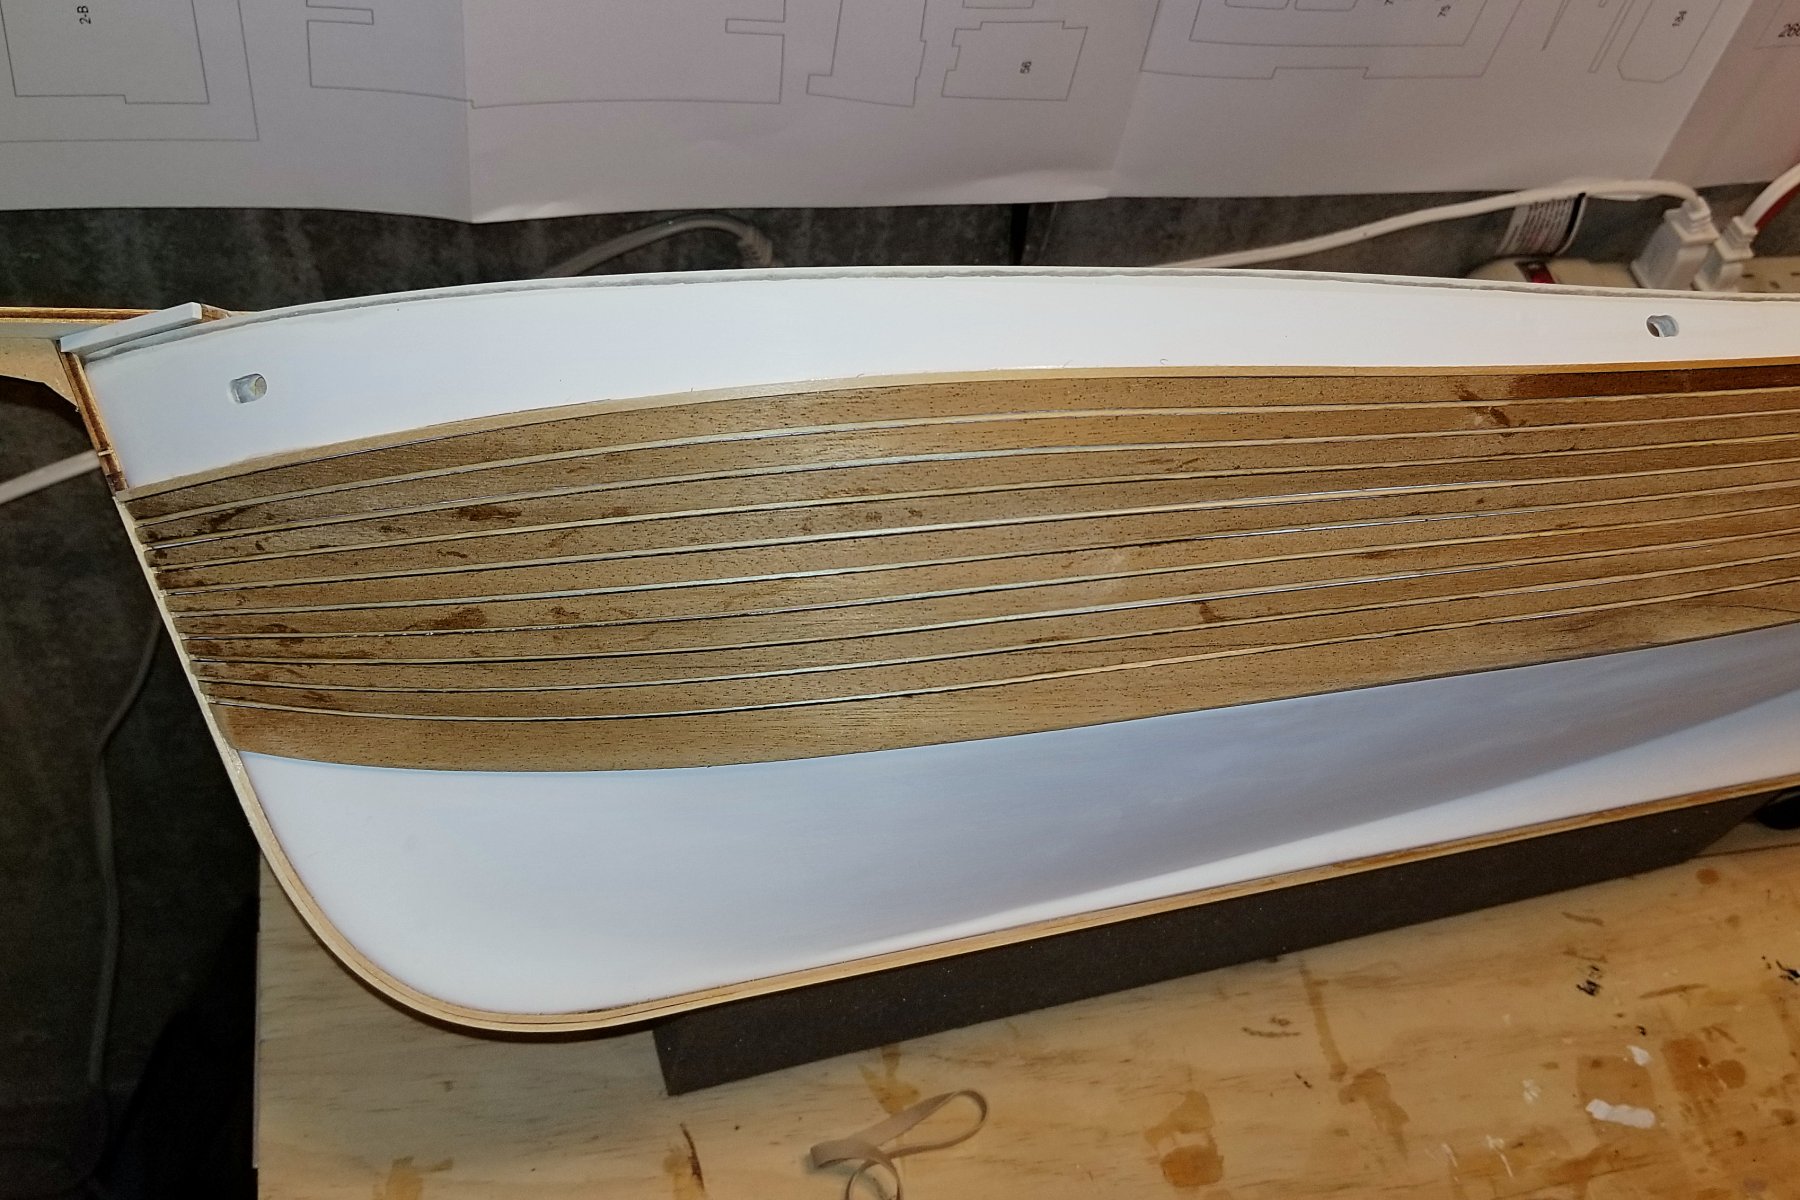
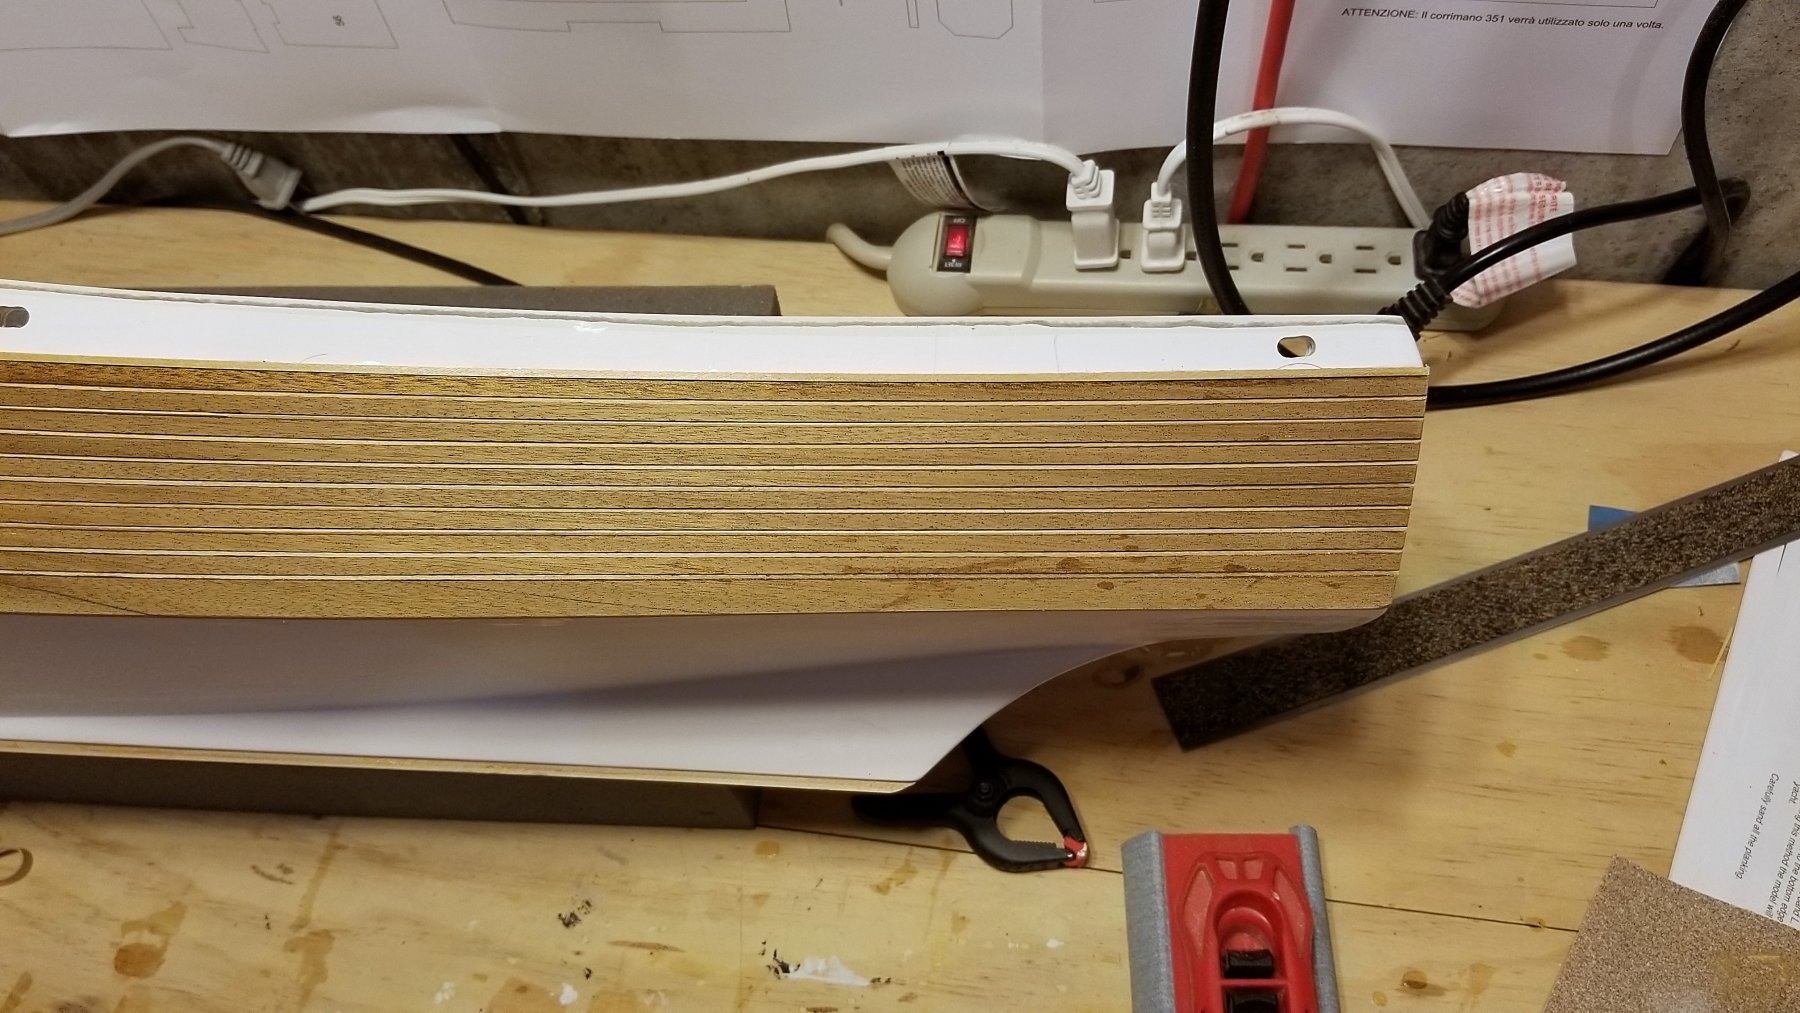
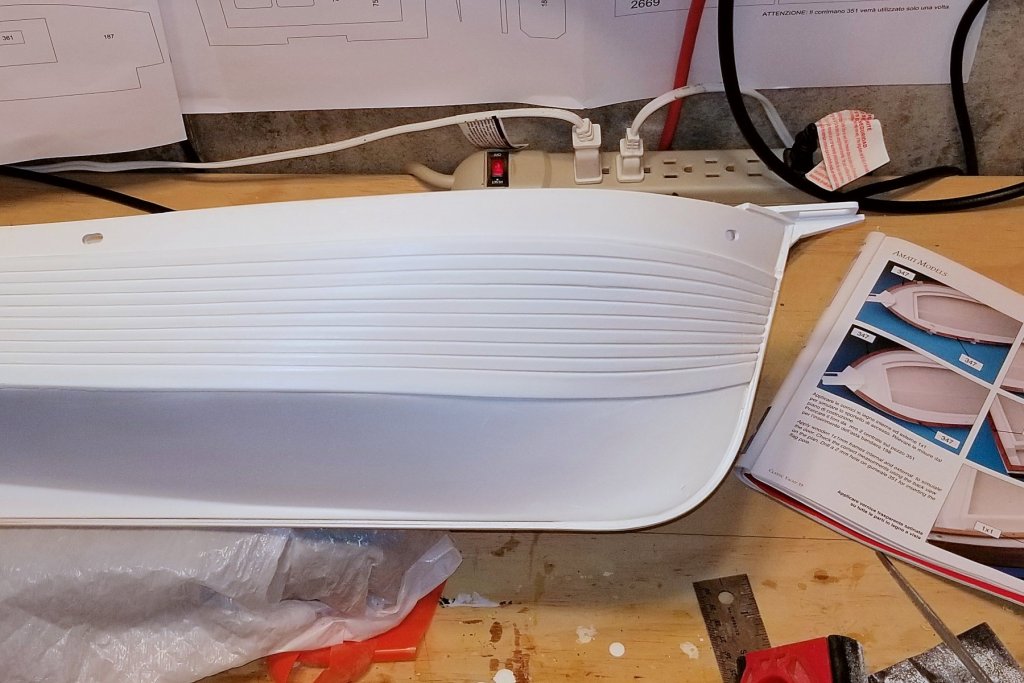
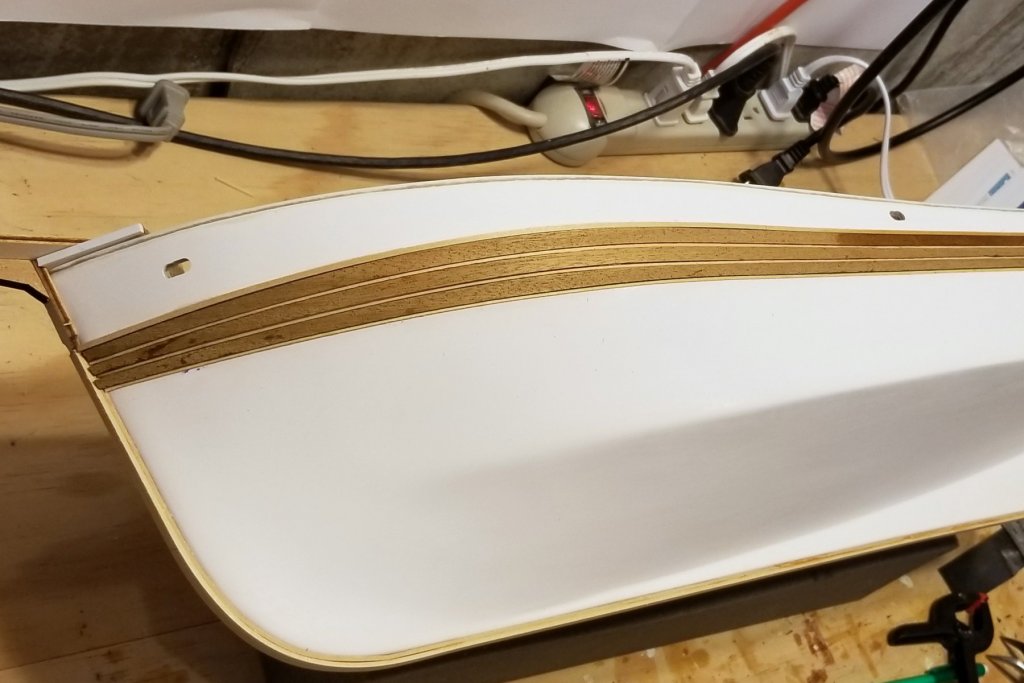
I have completed the planking on the port side of the hull. See pictures below. The laser cut planks are shaped to fit the hull curve perfectly, and create a really even look to the planking, even for someone as ham-handed as me. They also make for a fairly quick and easy planking. I'm not worried about the glue spots, as all of this is painted white. I have sanded for fit the bow, stern, and lower portion where it meets the hull, but haven't done any pre-painting finish sanding. It doesn't show well in the pictures, but the lighter lines between the planks are 1x1 mm strips, which gives even separation between the planks. Because this is a really rigid fiberglass hull, I didn't have to worry about alternating the planking on both sides. I also wanted to finish one side with the 1x1 mm strips I have left (they are really delicate, and I broke some unwrapping the bundle. More coming next week). So I'm out of 1x1 strips, which means I'm going to have to find something else to work on while I wait for the strips to come. Regards, David


-
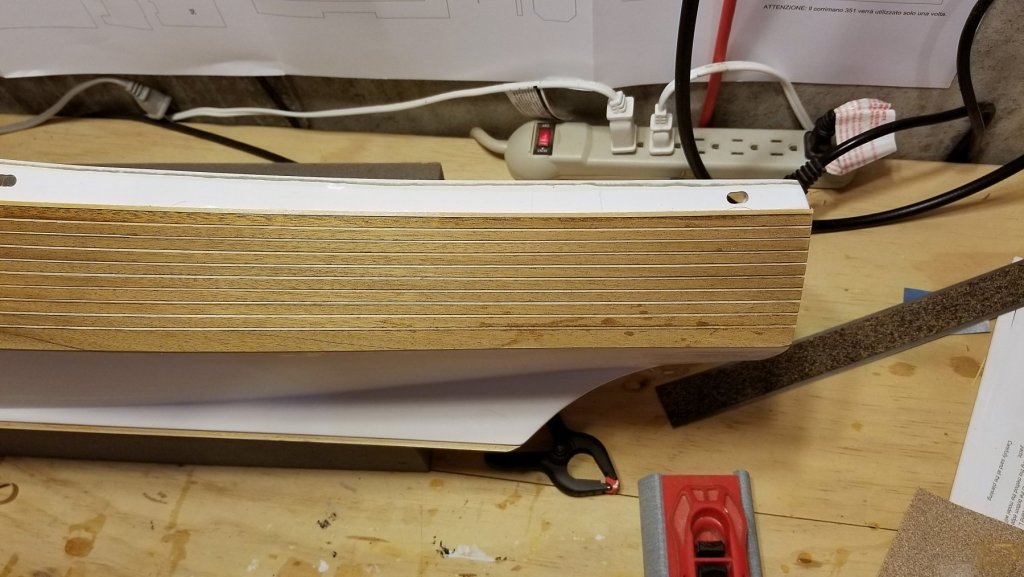
I have done three hull planking strakes on one side, and the laser cut planks work really well. There is a 2x2 mm wale at the top that follows set measurements from the top of the hull, then a plank, then a 1x1 mm spacer, then a plank, and so forth. There are 10 planks on a side, down to the mid-point of the hull, where the hull line turns under, and then it's smooth from there to the keel. When it's sanded and painted white it should look really nice. While the manual says "birch" for the laser cut planking sheets, there's no way this isn't walnut. It's 1.5 mm thick, so really nice quality. It kills me to paint over it (I love varnished hardwood), but the boat would look terrible if I just varnished it. The manual calls for the planking first, and then the keel, but I wanted good butt-joins between the planks and the keel, so I did the keel first. Regards, David

-
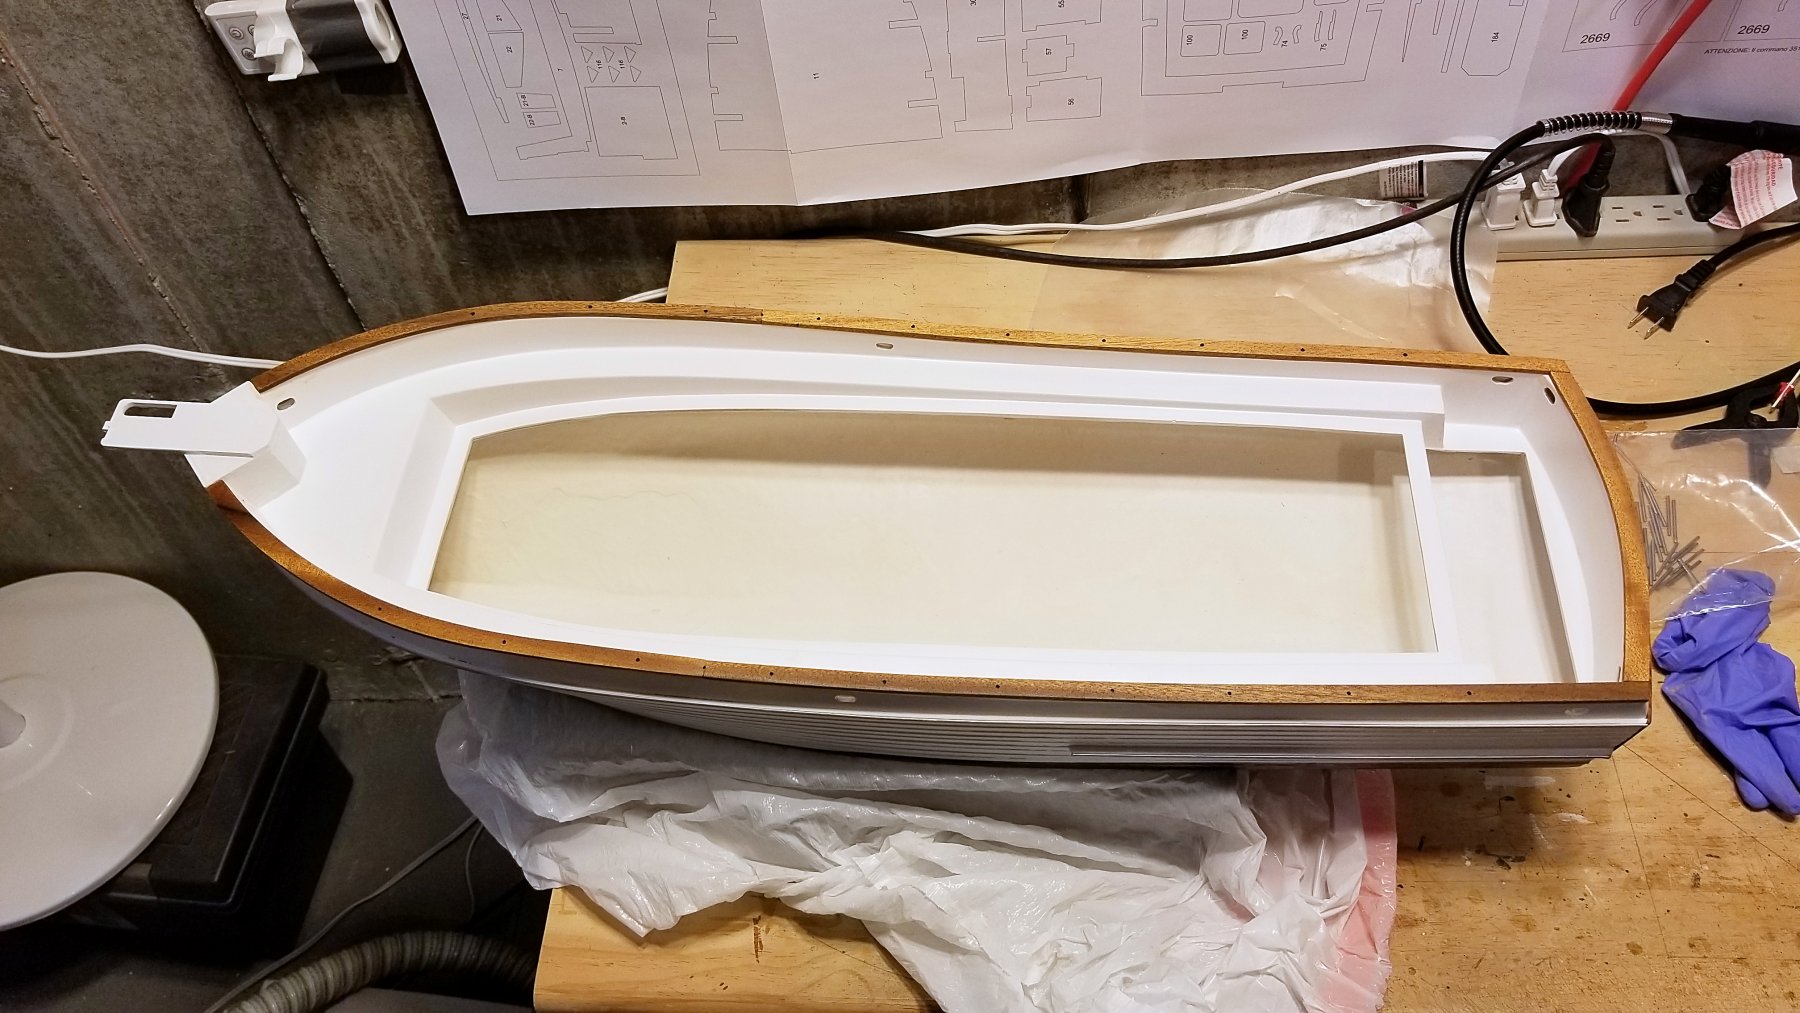
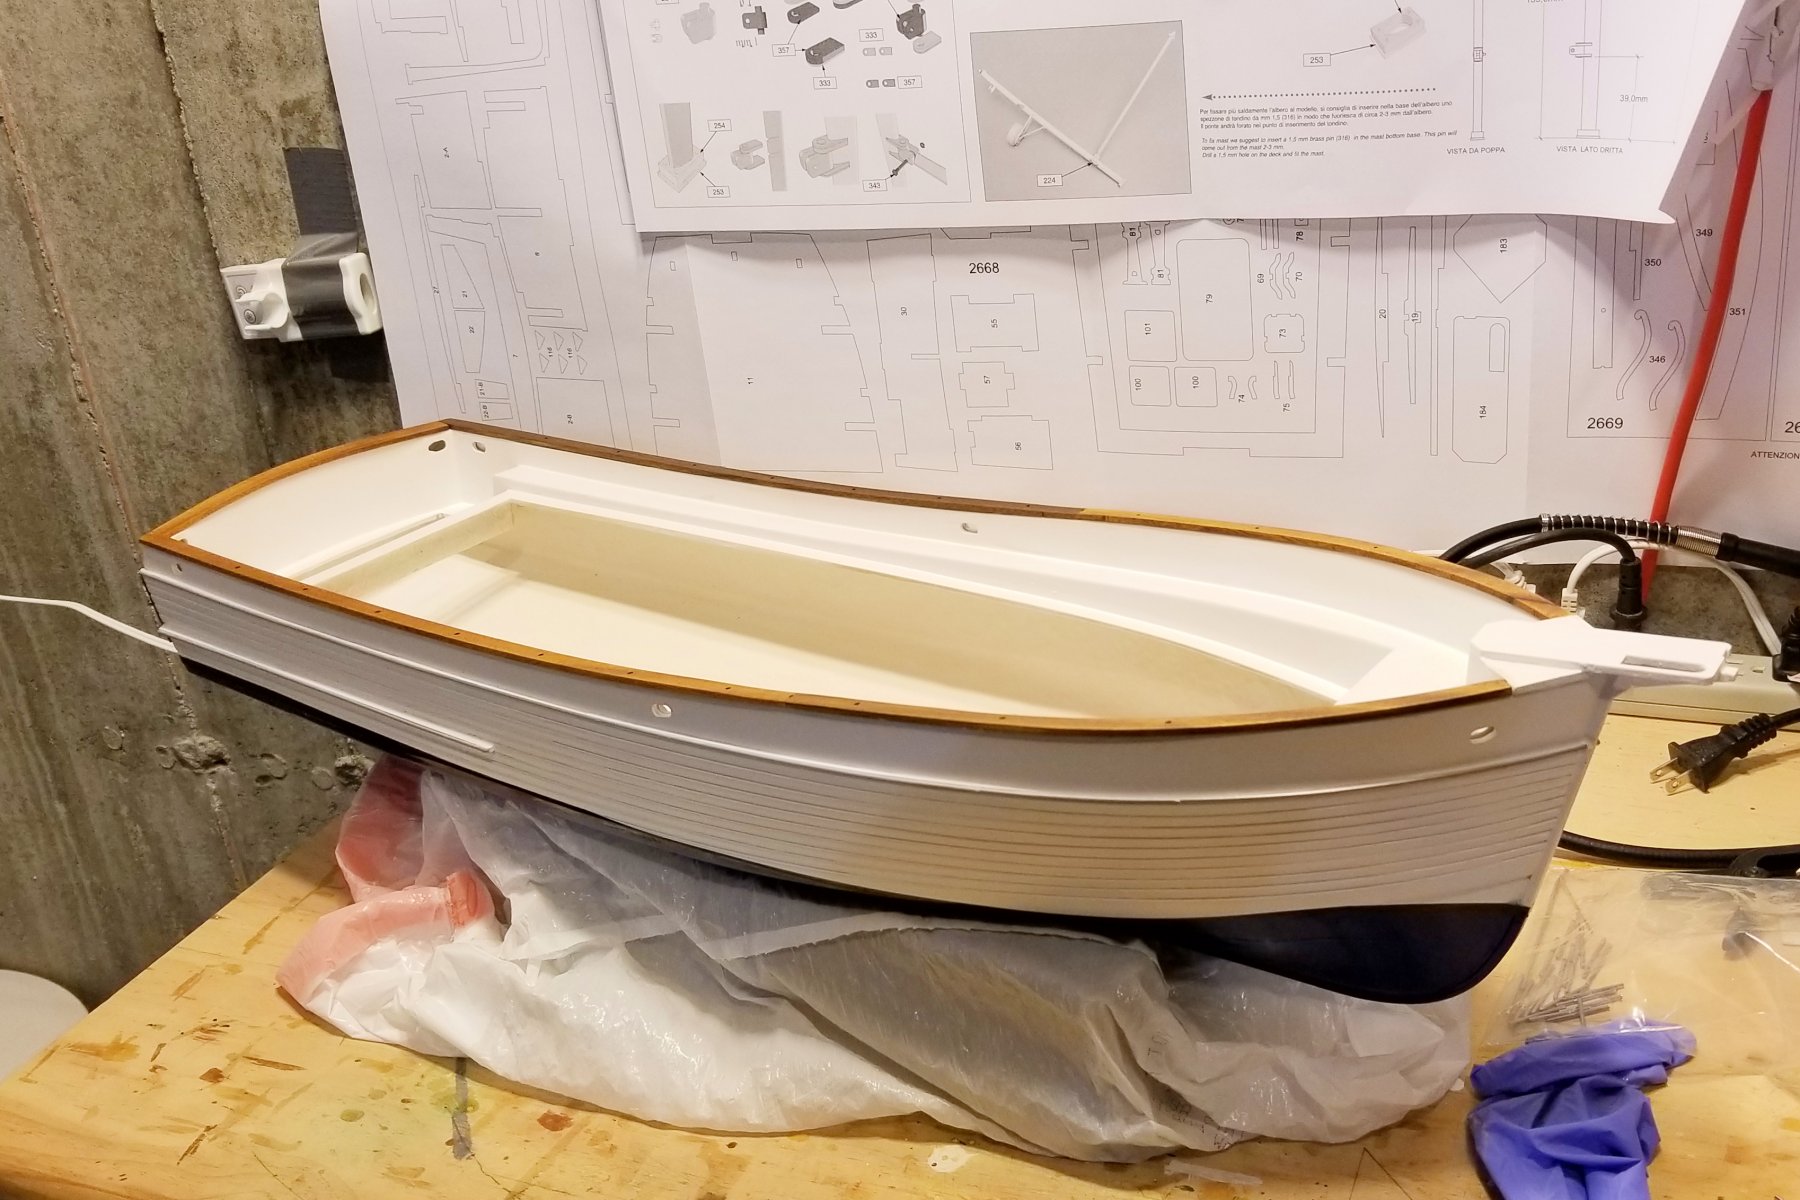
Chris: That blue is a bit too light for me, so I'm going to use a royal blue instead. I'm a fan of strong colors. Regards, David
-
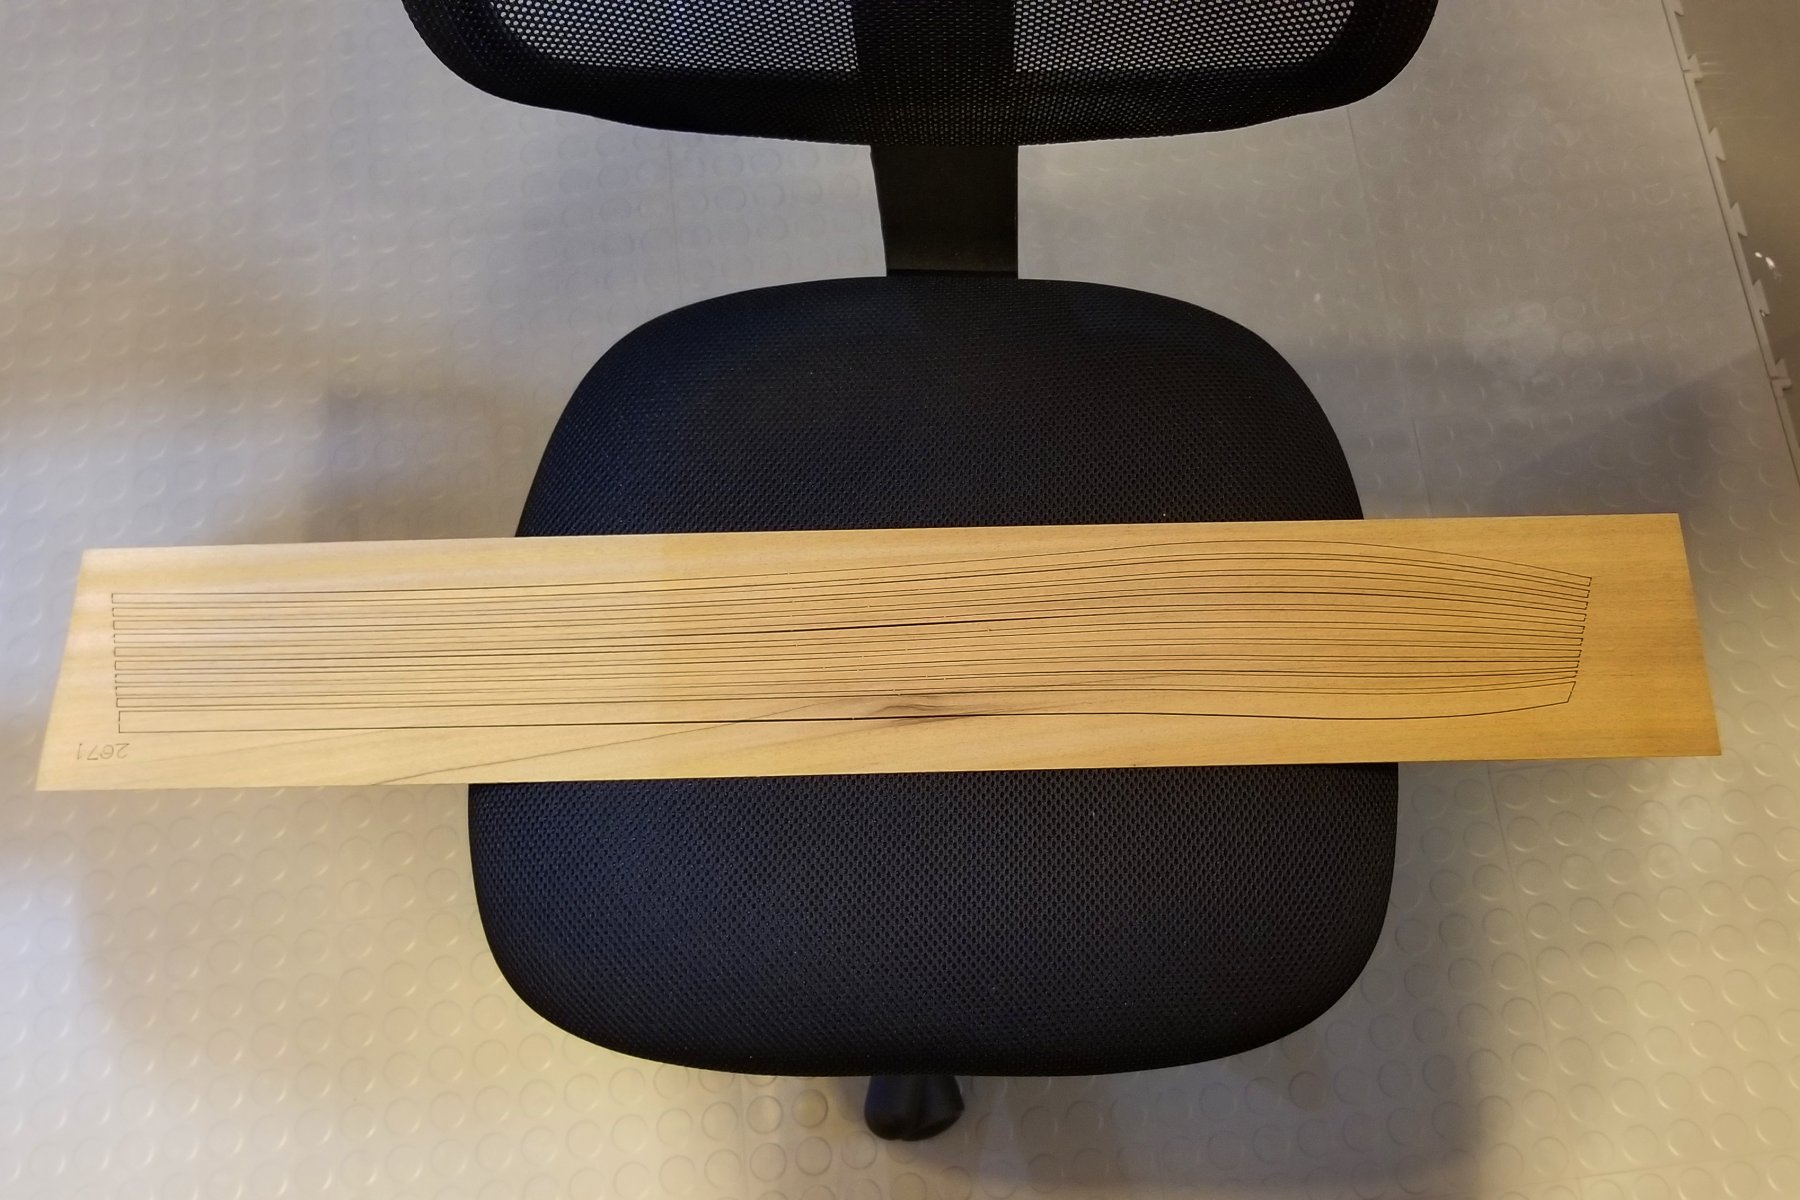
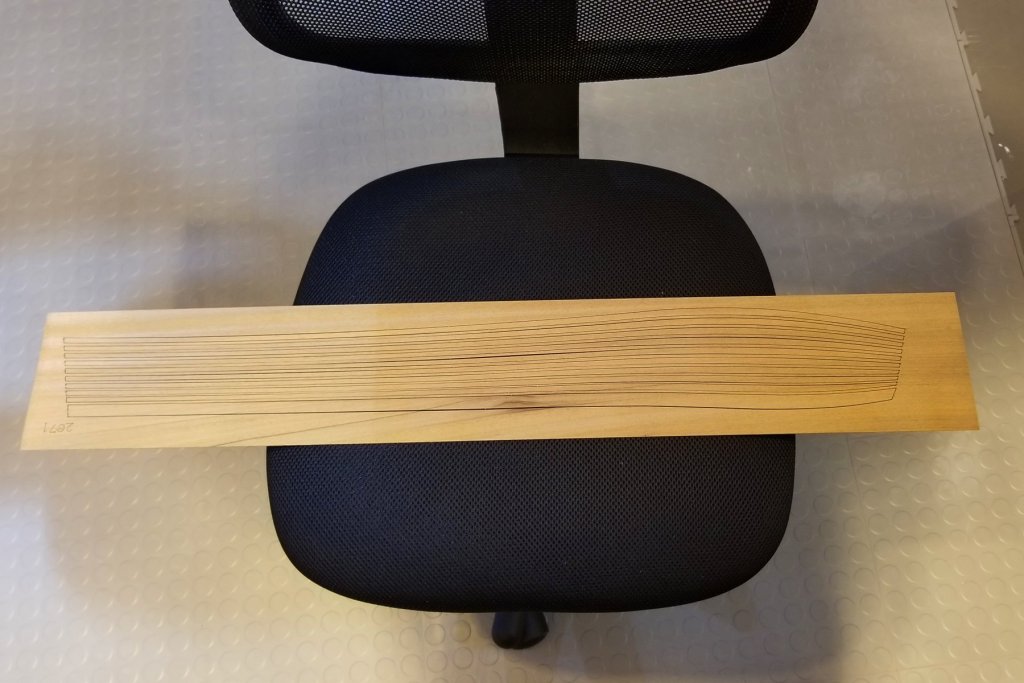
I haven't finished all of the detail work on the superstructure, but the manual wants me to turn to the hull now. It gets planked and painted. Interestingly, the hull planking is laser cut to fit. See picture below. I think they did this because if you look at the Amati stock photo that follows it, the plank lines are meant to stand out after painting and be smooth and even, so that requires precise plank shapes. So no sideways plank bending!!! Now I just need to not screw it up. Regards, David
-
Antony: Hadn't heard from you in a while -- glad to see you back. She is just beautiful. I am totally in awe of you having done this as a scratch build. The detail is amazing. Regards, David
- 99 replies
-
- 4
-

-
- turtle ship
- korean
- (and 1 more)
-
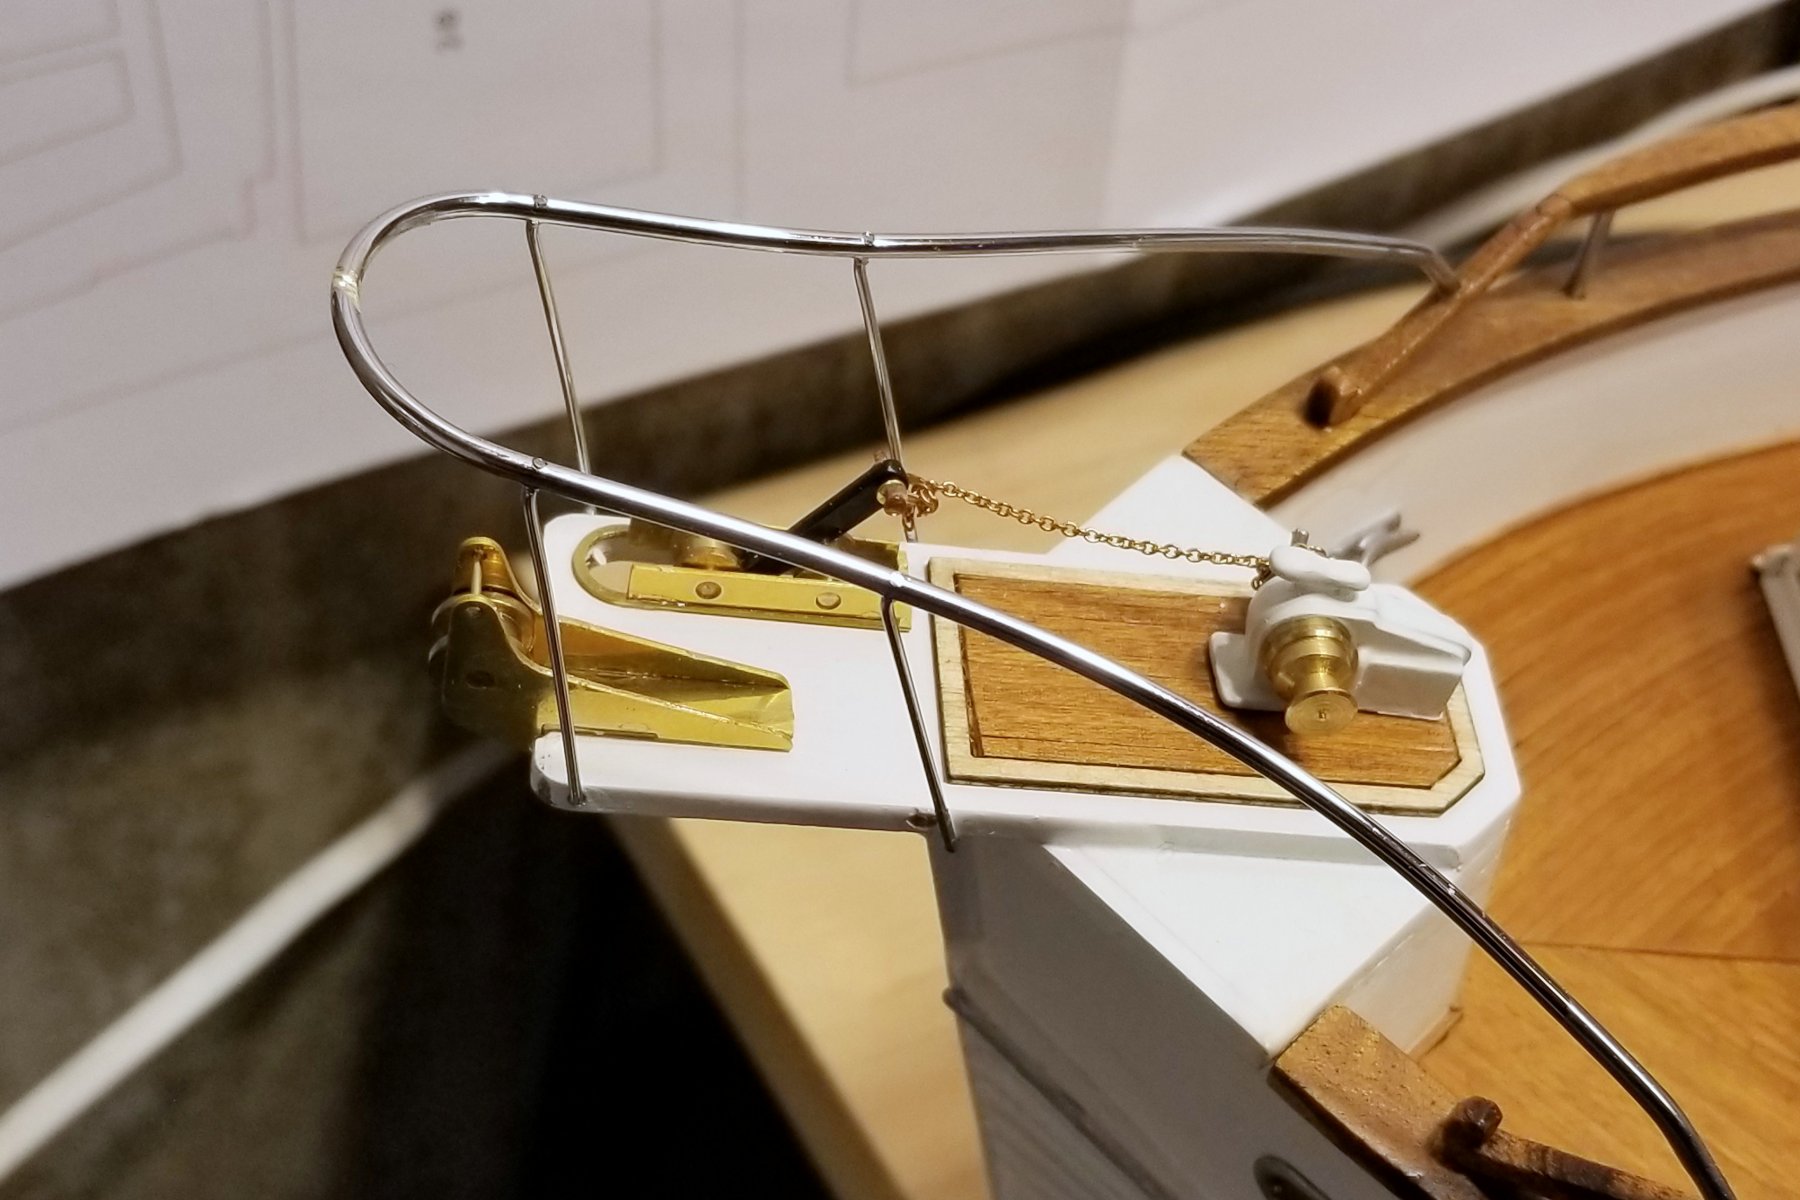
Chris: Thanks -- I am really enjoying this one. I'm not really close to the end. Still a lot of detail to do: example is the bow railing I just installed on one side -- shown in the picture below. There is also more detail on the boat, the planking of the hull exterior and painting, hull deck planking, and other finish. I'd say I'm somewhere between 1/2 and 2/3 done. Regards, David

-
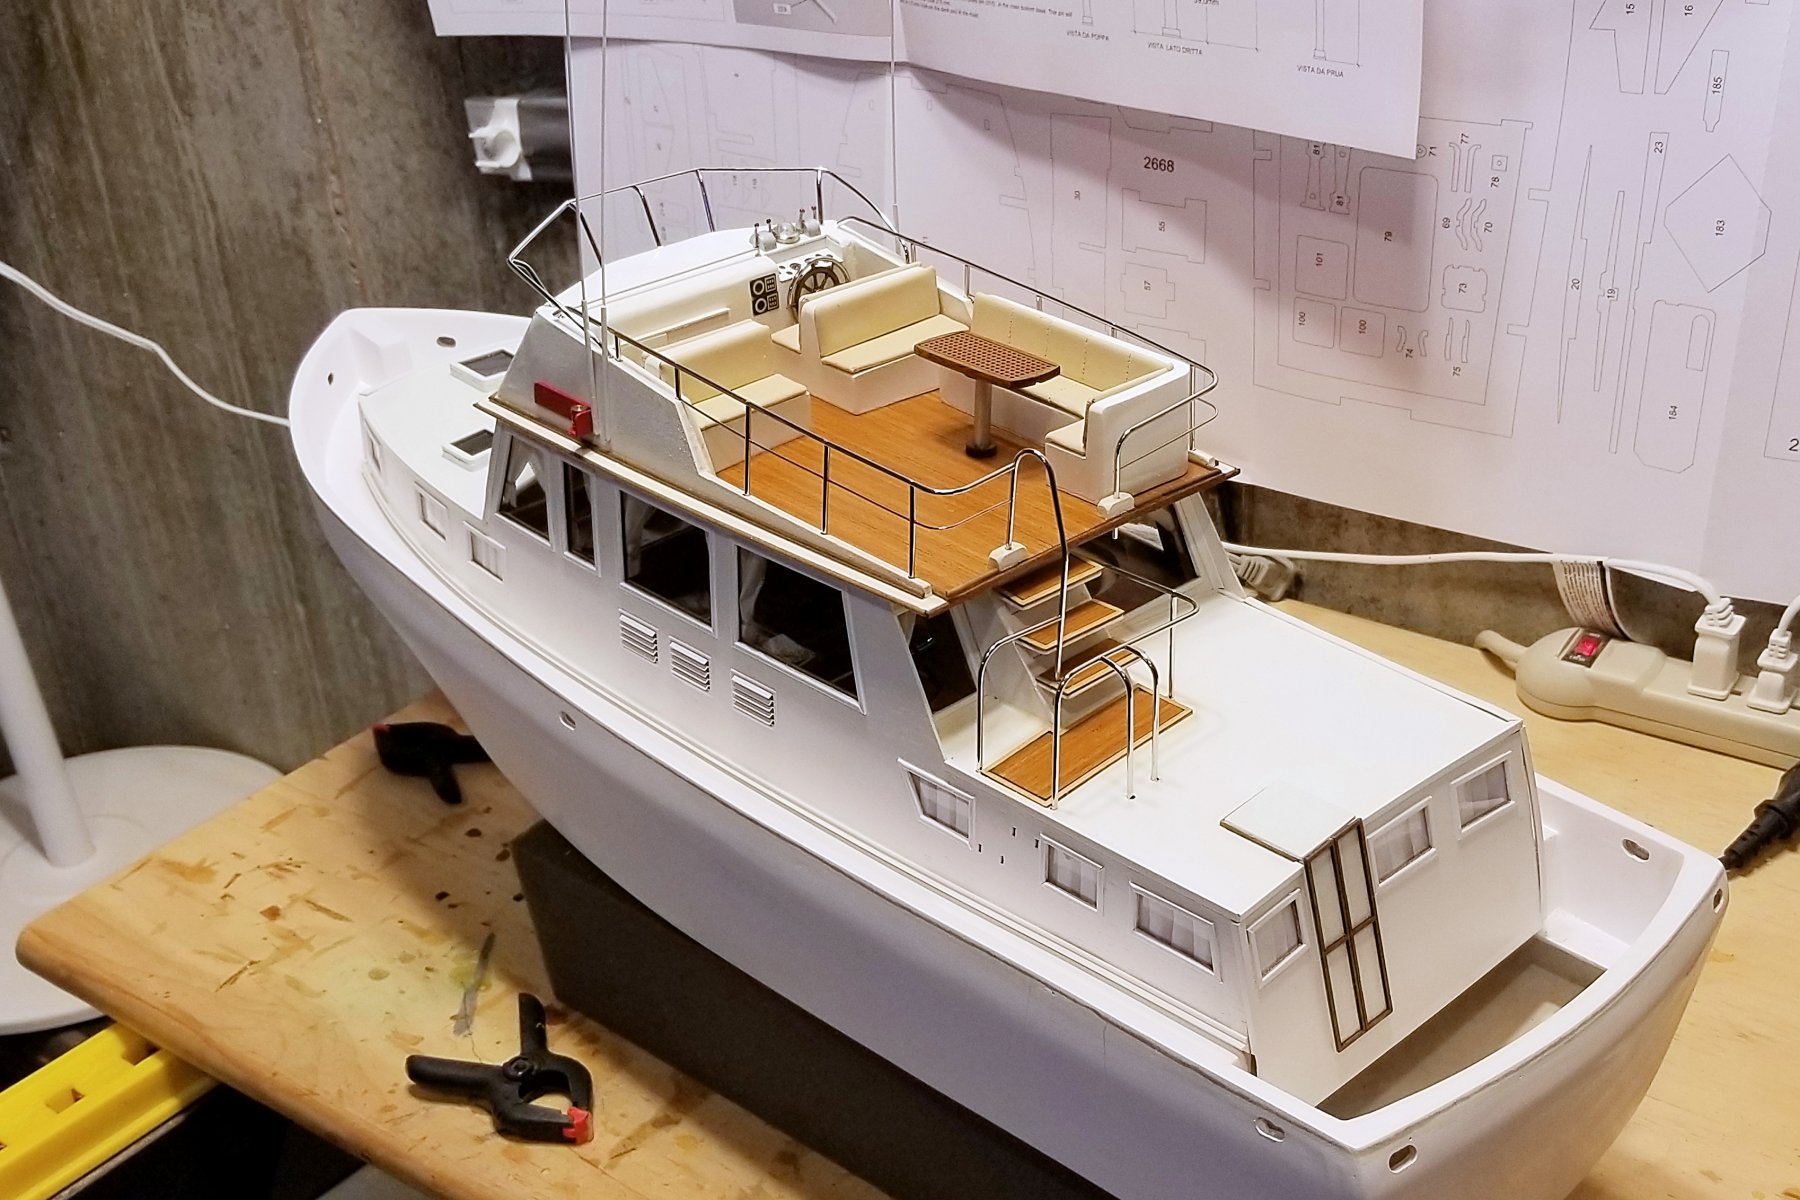
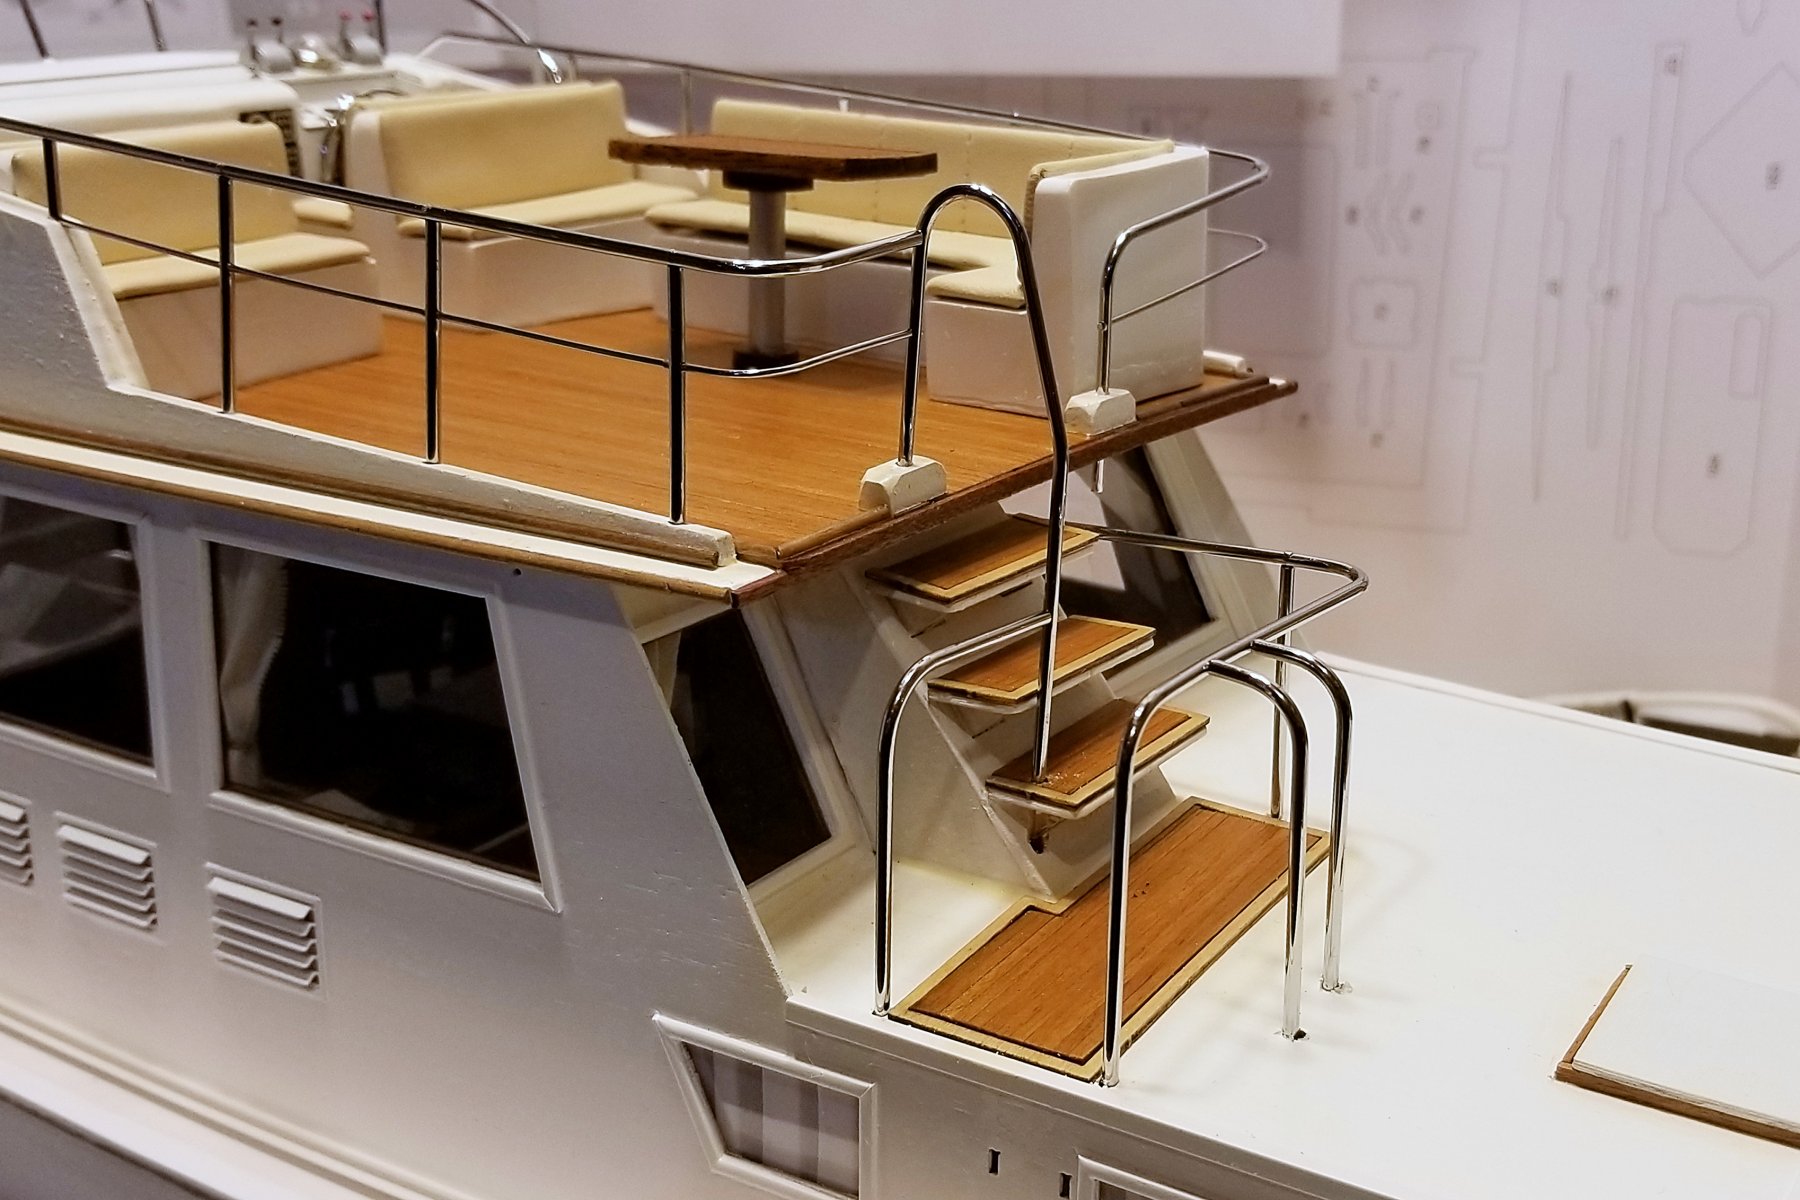
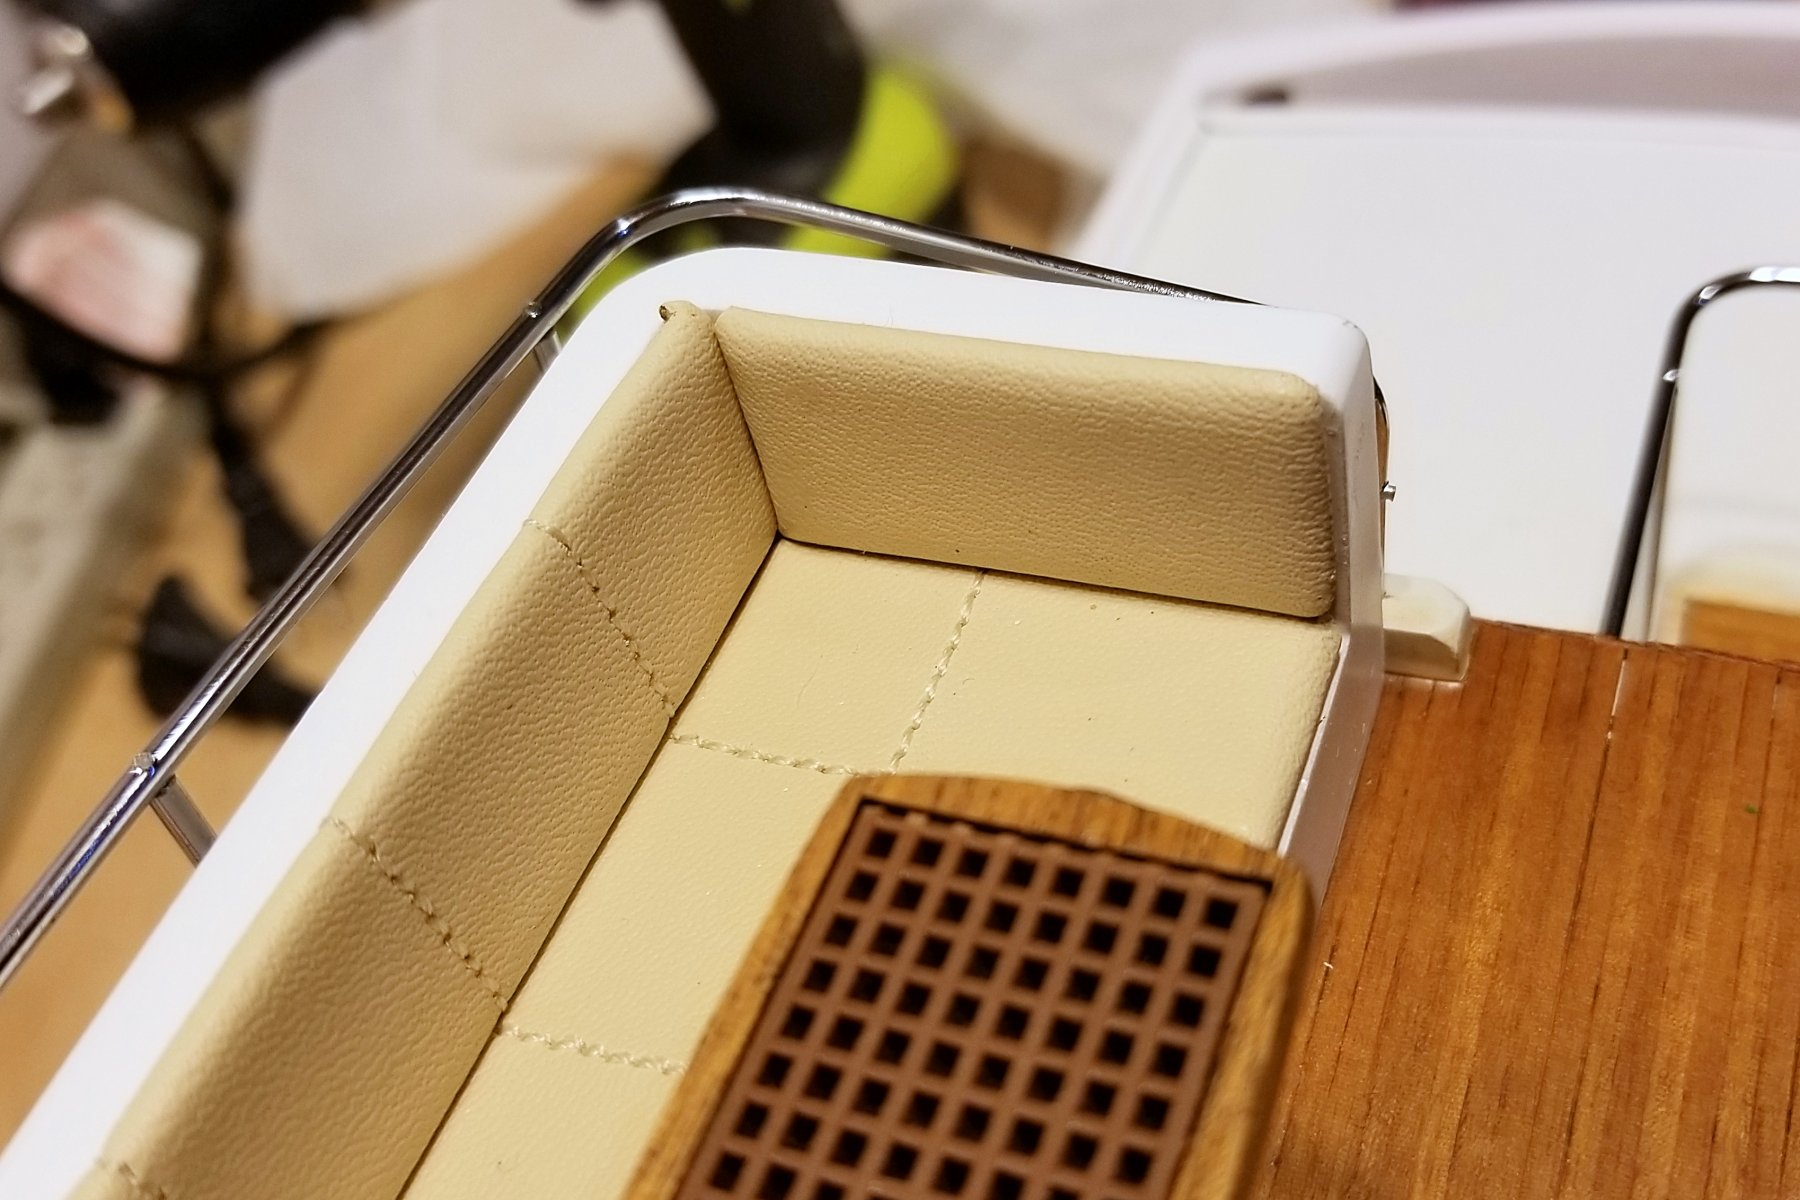
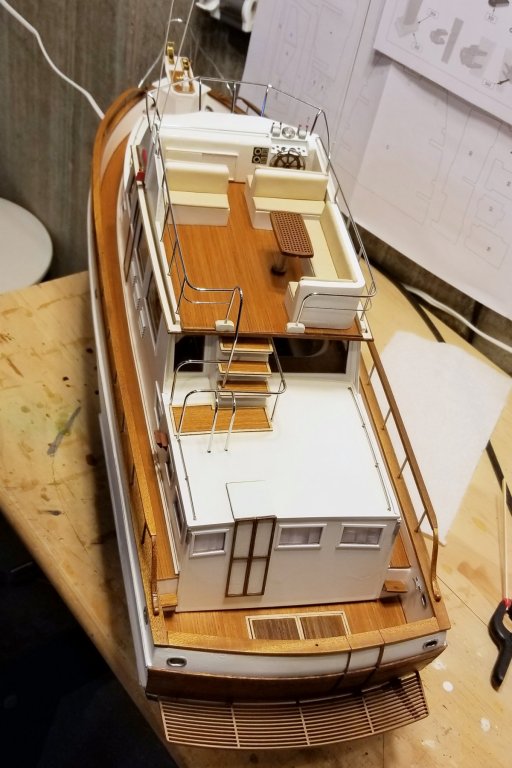
I finished the flying bridge fixtures and details today. Pictures below show the full flying bridge, the controls that duplicate the ones in the main cabin (as they would on the real boat), and the rear steps and railings. The flying bridge is still fully removable to see the main cabin interior. There is a closeup of the corner couch. The shorter seatback cushion was too long in the kit, so I had to undo the upholstery at one end, shorten it, and then re-cut and redo the upholstery. I think it came out well, and now I have another possible vocation in case my day job doesn't work out. Regards, David


-
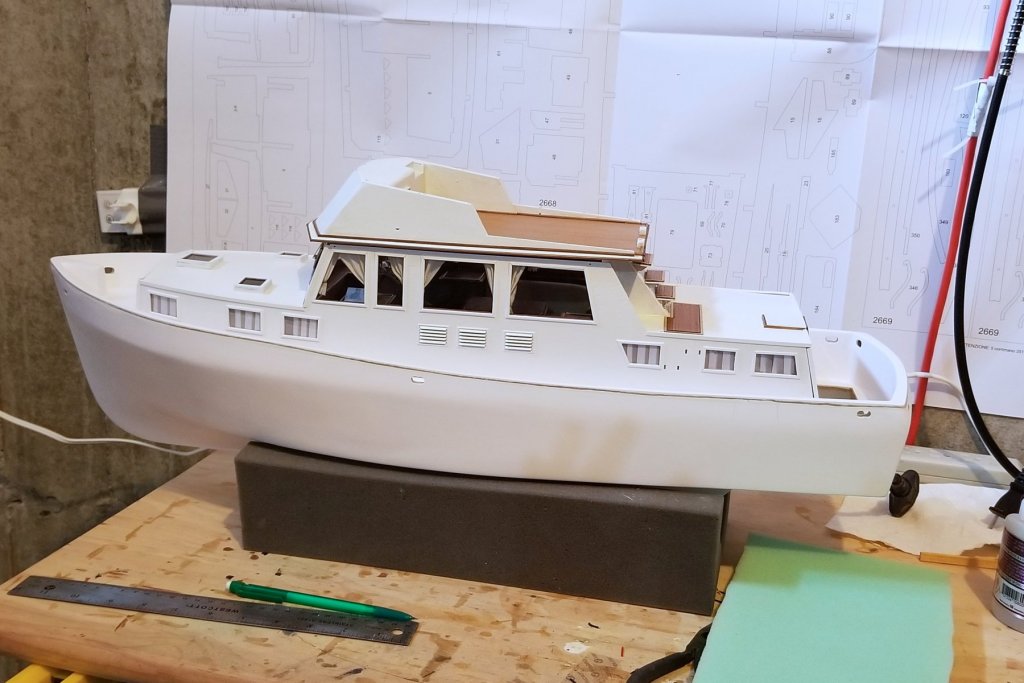
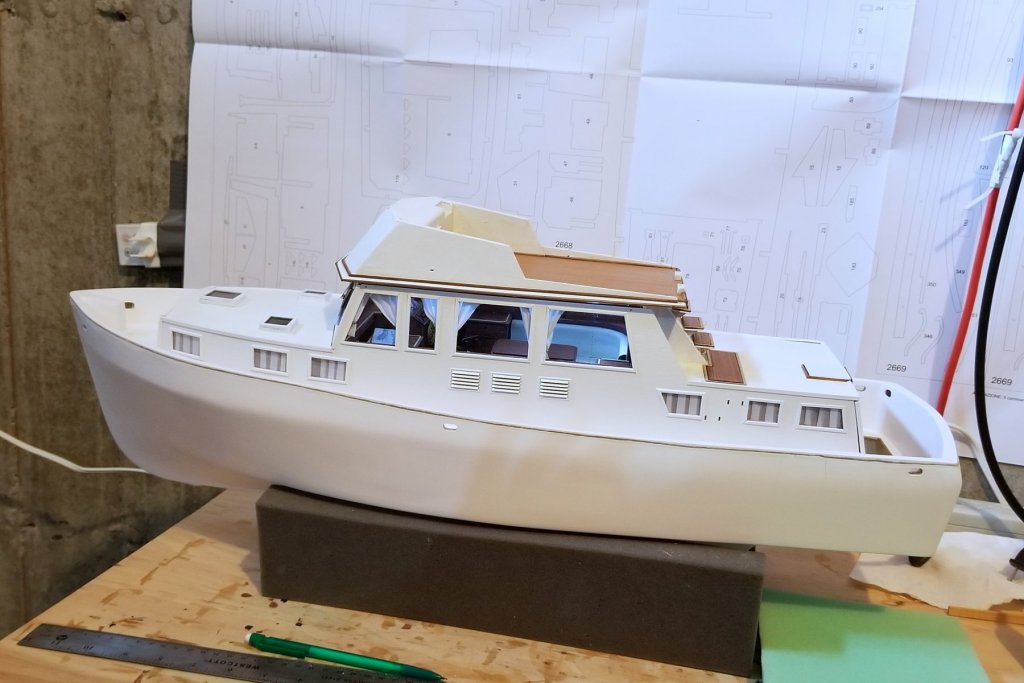
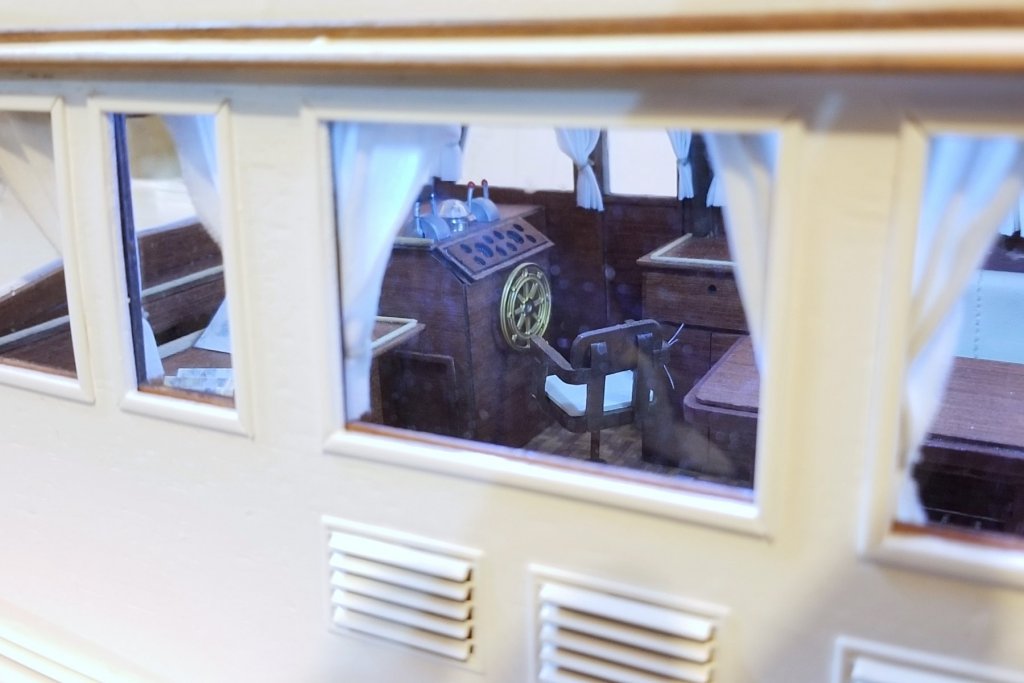
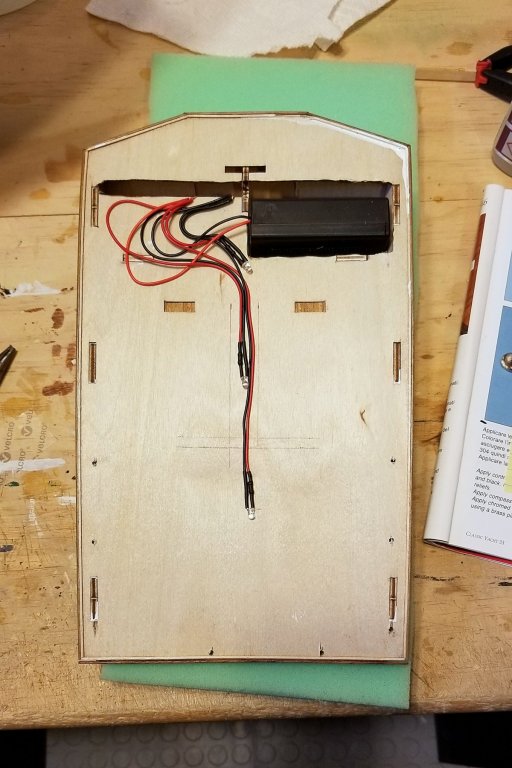
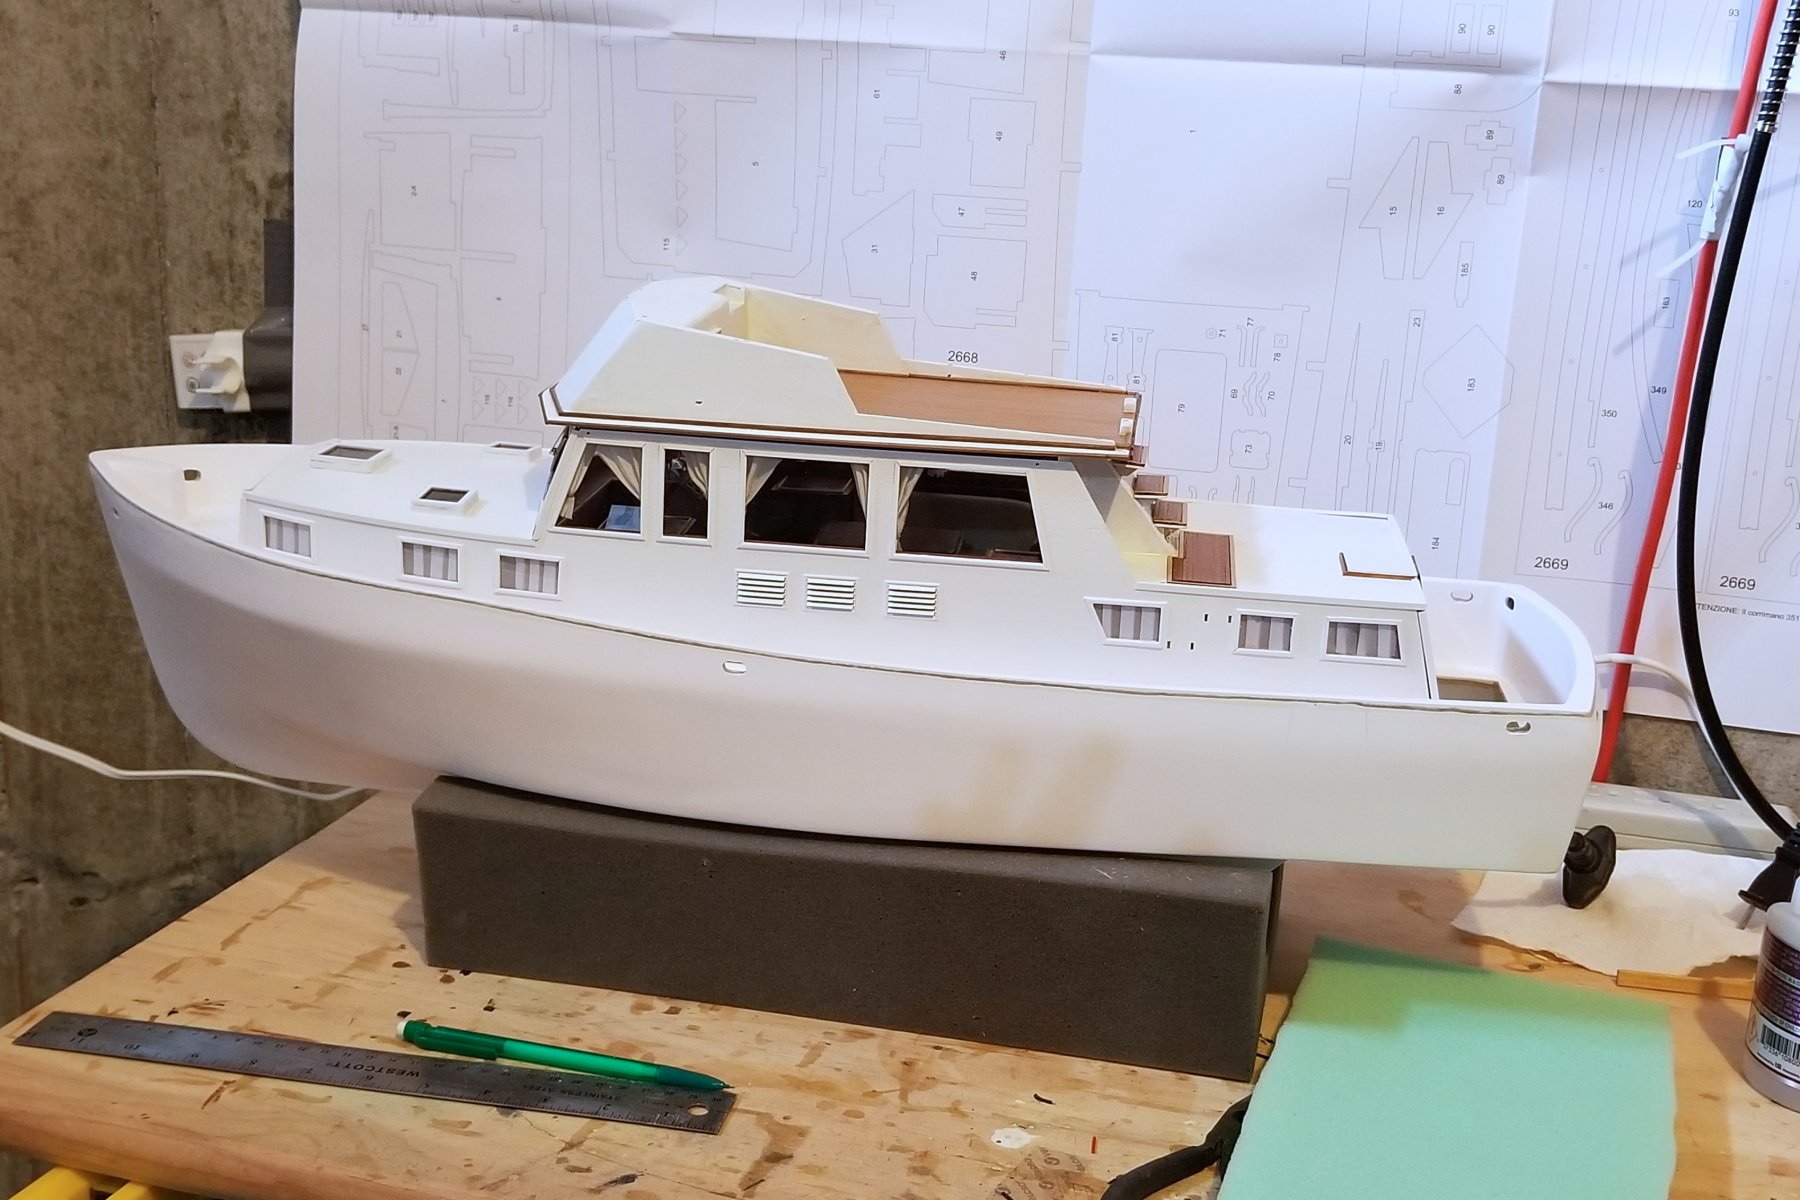
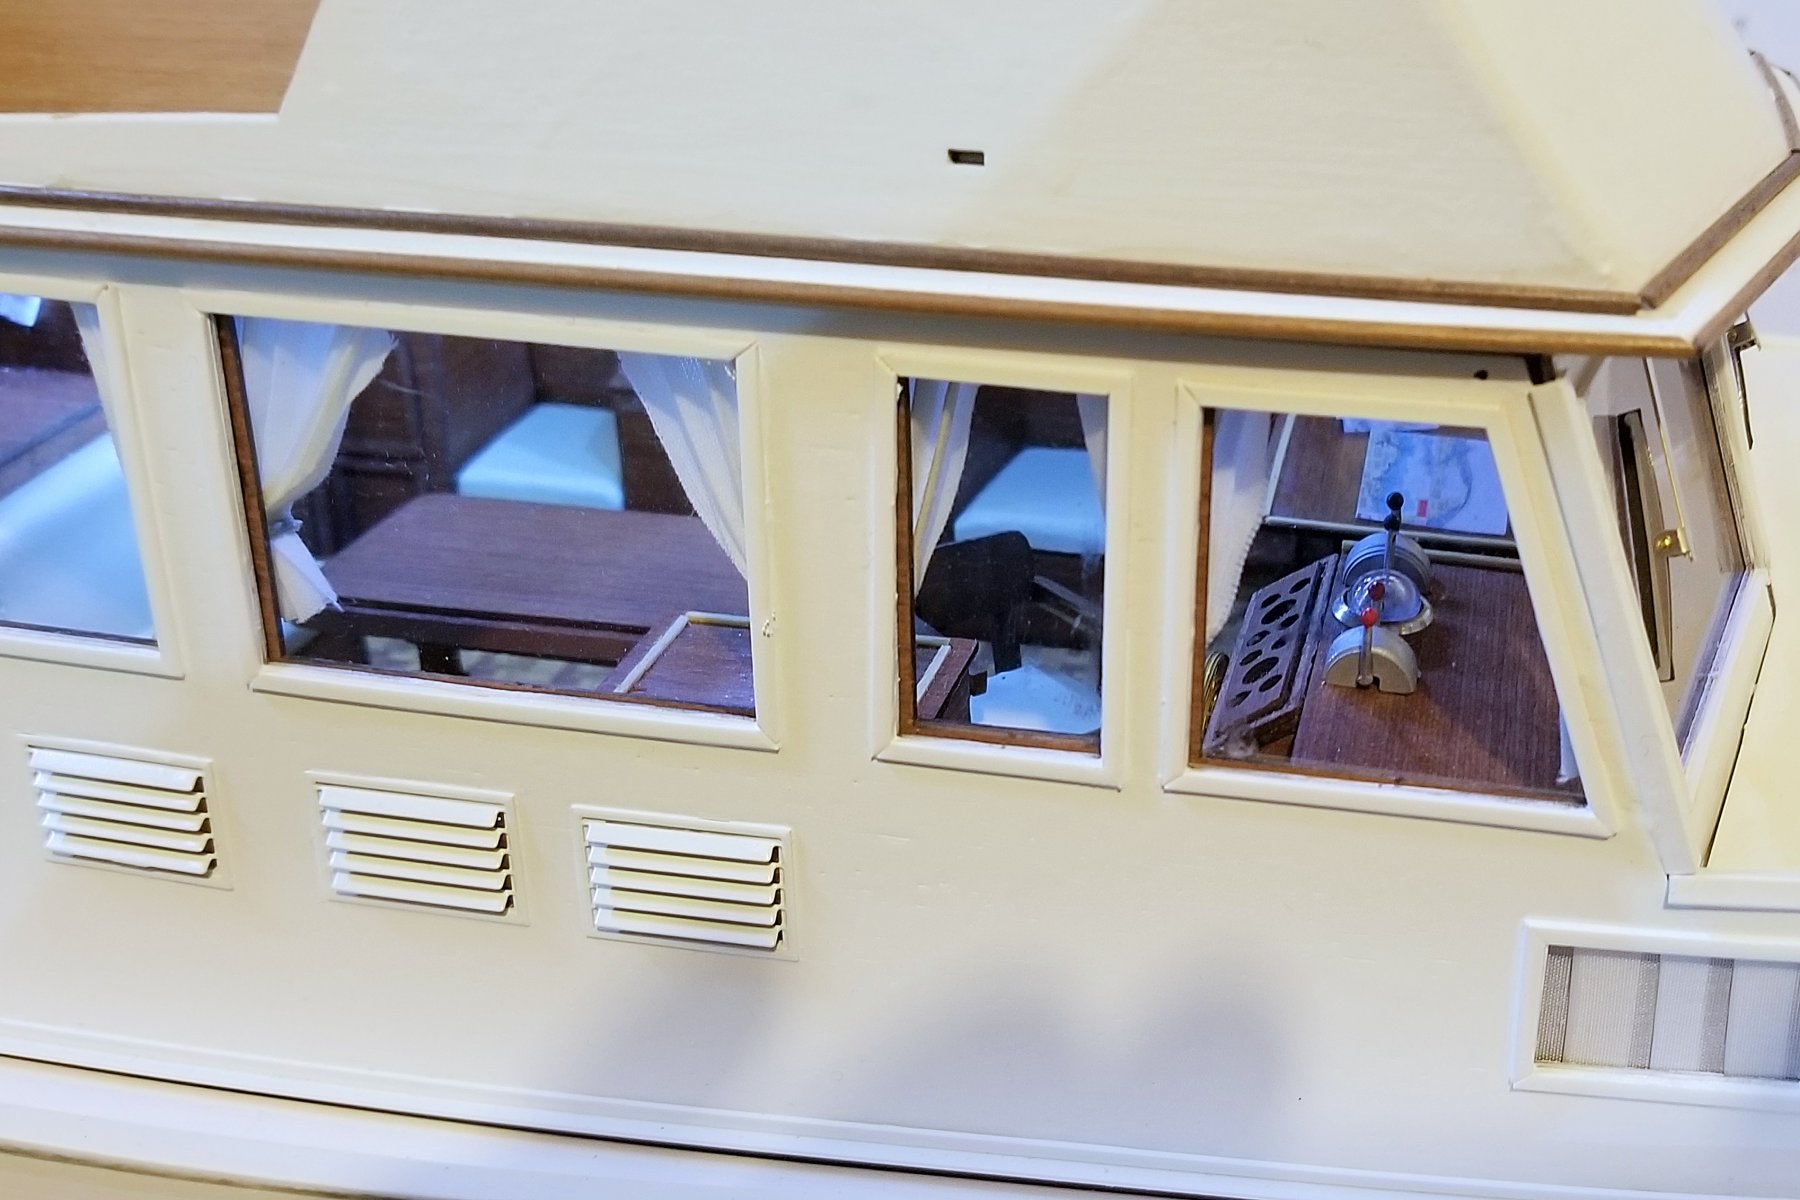
Back from vacation, and I fabricated some interior lighting for the boat (not part of the kit). Pics below show a full shot of the boat without, and then with, the lights on. Then three interiors taken through the windows with the lights on. Finally, the light and battery assembly on the bottom of the removable flying bridge. Regards, David