
DONATION DRIVE - SUPPORT MSW - DO YOUR PART TO KEEP THIS GREAT FORUM GOING!
×


Heronguy
-
Posts
863 -
Joined
-
Last visited
Content Type
Profiles
Forums
Gallery
Events
Everything posted by Heronguy
-
 I was looking at all the brass fittings for the masts and nets and trying to decode the plans and part list. Funny how I've got parts I can't find a use for and a few missing bits. It was a 2nd hand kit so I can understand the missing bits - makes me wonder though if the previous owner dumped a few little extra pieces in from another build??? I was also feeling like BB had done me a favour by providing tapered doweling for the masts and boom and gaffs but quickly discovered they were a couple of mm oversized anyways - not a problem though - just more sawdust. I can imagine finishing this build before all the snow is off the ground here.
 -
Yes and the old BB instructions leave one with a great deal of discretion. I keep falling back to the belief that the pieces in a KIT should fit. The reality creeps back in and I figure I'll have to make them fit or re-invent a solution. No counting sheep for me when I turn in - mind is filled with shipbuilding issues!
-
Joel, You've given me lots to think about with your post and picture. Although I'm new at this modelling business I'm already considering leaving the instructions and kit pieces when I see the solutions that others (you in this case) have developed. I'm pretty sure I'll get into trouble either way! I have the Syren kit waiting and in the meantime I've been reading then build instructions as i follow along the on build logs. This framing of the gun and oar ports as you've done and the Syren instructions propose does seem like the way to go both to strengthen the bulkheads as well as to avoid some of the difficulties I read other have had with the bulwark plywood. The risk I guess will be doing a good job of measuring to properly locate the ports. As as I said - stuff to think about! Thanks. Ps I reviewed your lexington log - helpful.
-
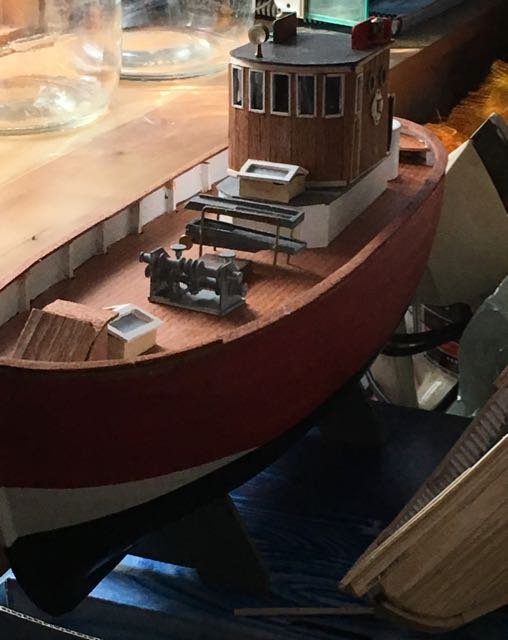
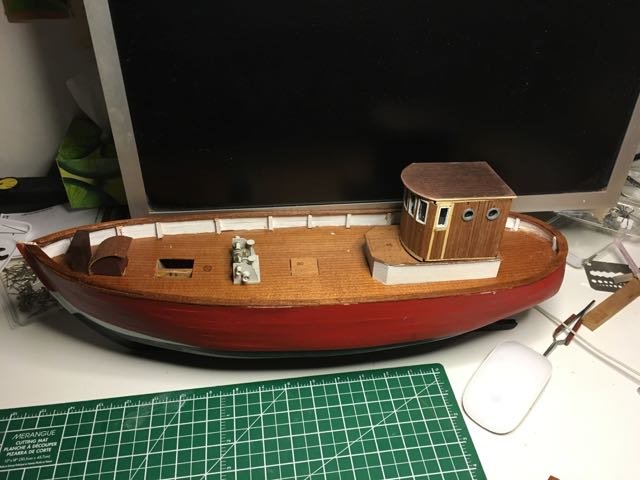
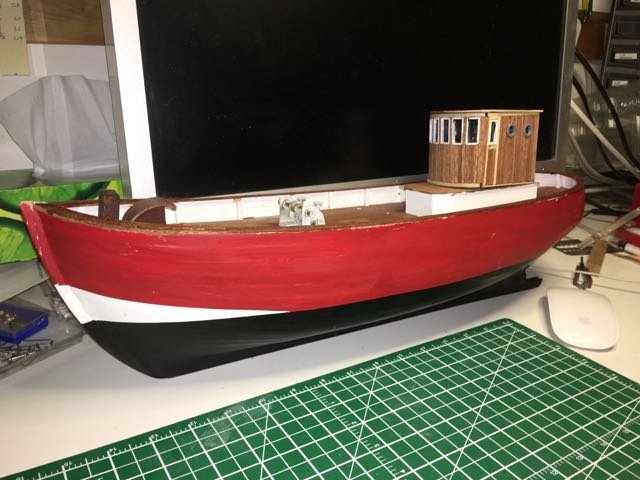
Pretty well all the deck stuff is built. Can't fasten anything down yet because I have to install the rudder and propeller (its in the mail!). Meanwhile I'm struggling to understand the rigging. Not enough info on the plan to be sure what is going on. It is pretty simple rigging on a fishing boat but getting the bits and pieces that I was given to serve the purposes required is turning out to be a challenge for me. Stay tuned.
-
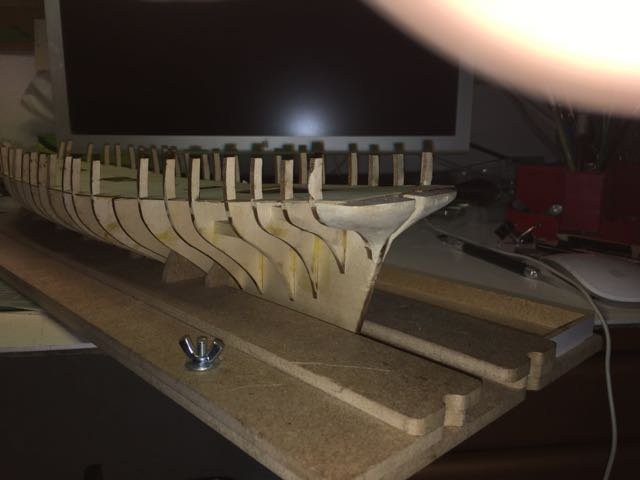
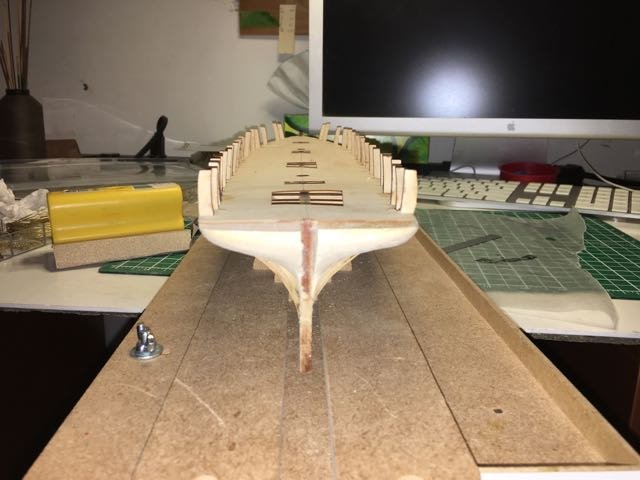
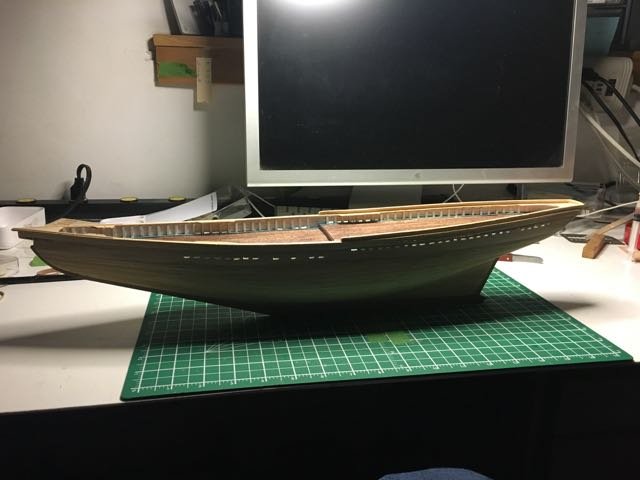
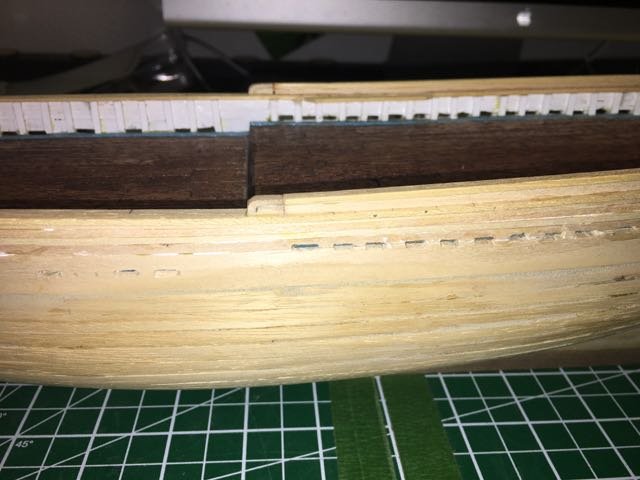
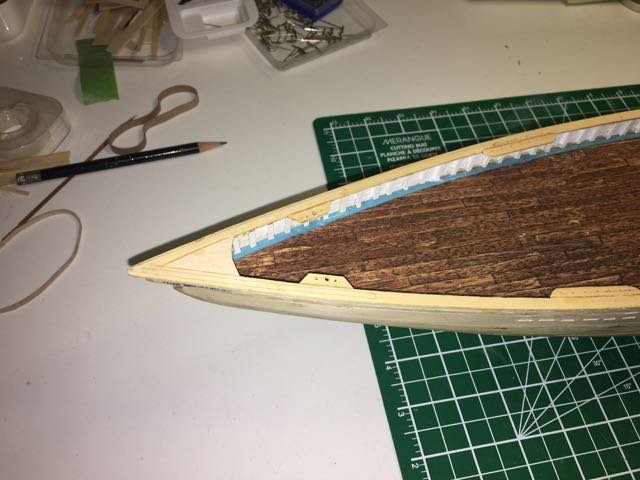
Thanks Pierre. I've pushed on with the bow and stern blocks and, other than dropping the hull and snapping four bulkhead extensions, I'm on to fairing the hull.


-
Good point about the duck's head Joel! I'll get a picture of the PdN in front of me. I tried marking the block and planning the cutting before glueing but I don't have any particularly effective way to hold the block while sawing - no decent bench vise or clamping surface. Also I have pretty poor 3D visualization skills to confidently get much material off the block even if I could hold it. This is my 2nd (ever) attempt at shaping a block and I blamed my original problems on "concrete wood". However this stuff was about the same - no excuse there. The good news is that the carving knife is really working well and I can probably finish the rough shaping in a hour as long the I can limit the blood loss through my thumb. It seem carvers have cute little leather thumb guards!
-
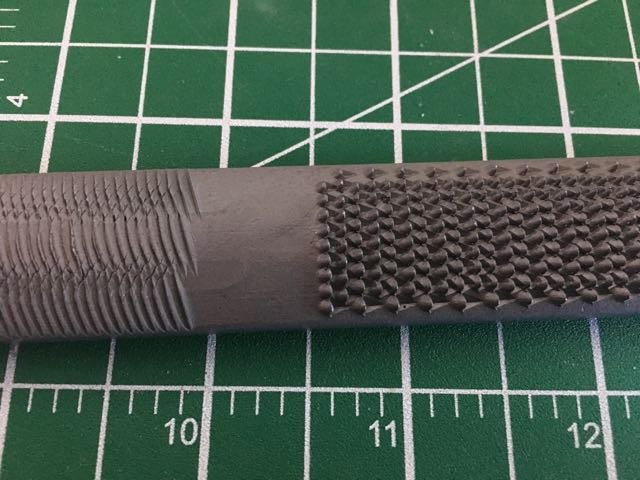
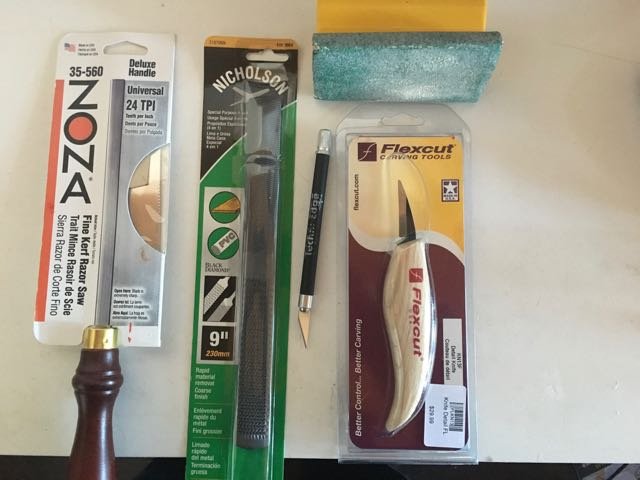
Preliminary results. The file was useless (partly I think because I have to cradle the hull in a pillow to prevent breaking it so the pressure on the file isn't applied to the wood) The razor saw is awkward and can't make deep cuts without binding. The sand paper is very slow at removing material - I'll us it for final shaping and smoothing. X-acto knife - ok but not great. And the winner is La La ... oops I mean the flexcut carving knife! Now I just have to hope the stern block end up looking like a bit of hull and not like a duck's head.
-
Thanks popeye, Pretty rough but I'm enjoying it. Not trying for the "distressed" look on purpose!
-
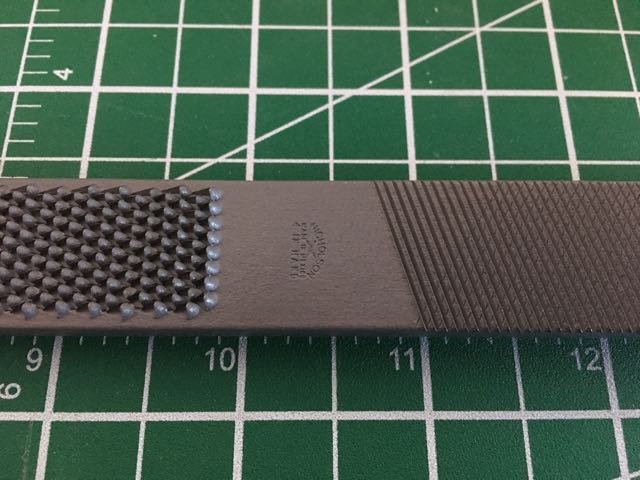
A trip into town netted an assortment of implements of destruction - we'll see if those pesky stern block can withstand all of these! The file is a mean looking thing with 4 rapid material removal options! The carving knife came highly recommended. Here's hoping
-
Rich, That does look tricky especially as you mentioned how fragile the pieces are just now. Wishing you the best of luck as you proceed. Just a thought - can you clamp across the tops of the stern extensions to provide some rigidity? I'm thinking a wood strip on each side with alligator clamps to hold them.
- 1,135 replies
-
- 4
-

-
- model shipways
- syren
- (and 2 more)
-
Walt, I was was lucky enough to pick this up from an estate sale - you may find one someday too! As your signature line says: Patience, patience; slow and easy makes the model. So I will whittle away at the stern blocks and they'll be done when they're done. It is a bit cathartic to vent occasionally though!
-
Merci Steve. Much to do before this will be done.
-
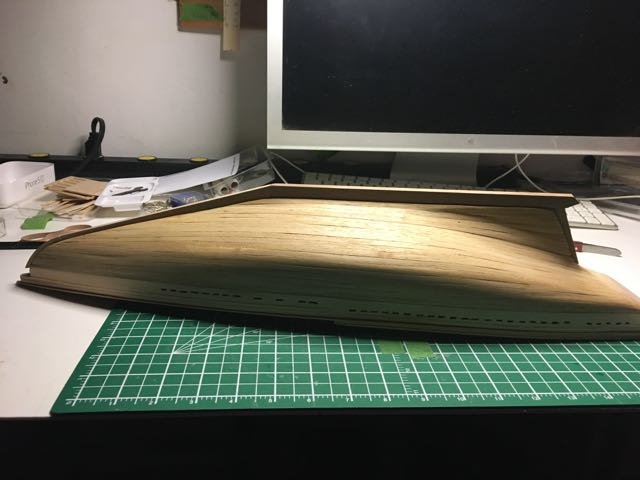
I despise stern filler blocks. There has to be a better way - doesn't there???? Razor saw doesn't work so it seems to be between x-acto blades, sandpaper, and files. None have proved very effective in reducing the mountain of balsa.

-
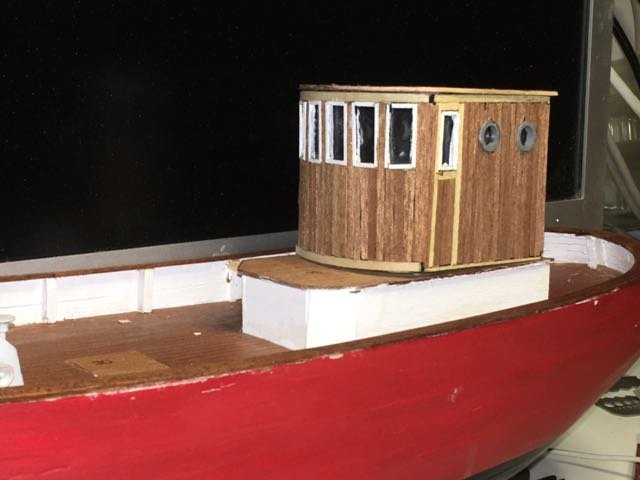
Trying out some of the deck furniture. Nothing is fixed in place yet and lots more little bits to work on!
-
Good save Derek. Don't you wish instructions were infallible - it would please me!
-
Finished part 4 of John's instructions! The modifications to the bulwarks, transom, stanchions, scuppers, taffrail, pin rails, chock rails are done. The stem and keel pieces have been installed. On to deck furniture and fittings.

-
I sure feel better when the planking is done for the same reason you've just encountered! You'll be there soon! Good luck for now.
-
Well handled planking - great start. I will join in your build and see where you take it.
-
I think it is going to go quite a bit more slowly now Joshua. Lots of fairing, figuring out the gun ports (did you notice Tim's suggestion?), all that planking ... I expect you'll be onto the rigging before I catch up! Though I'd be pleased if we ended up working in tandem at some point - two heads better than one. Keep working on the house - once my local spring comes it will get me away from my "shipyard".
-
Thanks Len. The Bluenose II is such a beautiful ship it improves the look all on its own. I really like its lines.
-
Thanks Tim. Yes, that explains it. I must admit to admiring your depth of interest and research into the ships you build. I'm so new to model building in general, and ships in particular, that I lean heavily on the instructions and on advice from others. I can (ok, have - if I'm honest) get myself into corners by making adjustments to the directions given to make change that made sense to me without really understanding the consequences. I'm wary of that now but hoping as experience accumulates I'll avoid some of those mistakes. My ultimate goal for the models I've started is not so much to have display pieces as it is to develop some new skills, learn a bit about these beasts that sailed, and convince my kids and friends that I'm not the complete klutz I seem to be ! All said - I appreciate advice and/or constructive criticism!
-
It going to be very pretty Pierre!
-
Nirvana, Happy to have you join. Buttered and salted?? Help yourself! I don't think there is a problem with the deckplate sent with the kit - everything lines up too well in other regards. I might have avoided the snapped off bits if I were just a bit less impatient and heavy handed. I'm using this new hobby as way to alter my "natural inclinations". Hopin' this old dog can learn a few new tricks.
-
Hi Tim, Welcome aboard. You mention problems with deckplate and gunport strips. I've read over your log (and the few other PdN logs available) looking for a heads up on problems I may encounter. Saw you mention the deckplate but not the gunports themselves in your build. (unless it is the interesting discussion on carronades ...). Any specific advice about fitting the gunport strips? Great to see you back to your Prince as well!