
MORE HANDBOOKS ARE ON THEIR WAY! We will let you know when they get here.
×


Heronguy
-
Posts
863 -
Joined
-
Last visited
Content Type
Profiles
Forums
Gallery
Events
Everything posted by Heronguy
-
 Hi Dave. Nice work! I've been struggling with brass bits over the last couple of weeks. I'm curious about how you do some of the fittings. What tools do you find useful. What size ( thickness) of brass strips you're using? For example the turnbuckle in the last photo looks like a brass tube you've cut out an opening in. The shackle is quite thick - was it easy to form? The bolt holding the shackle - how did you fashion that? Hope you don't mind the questions!
- 245 replies
-
- 2
-

-
- bluenose
- model shipways
- (and 1 more)
-
A new adventure for you! I'll enjoy watching this one from the very beginning! Enjoy!
-
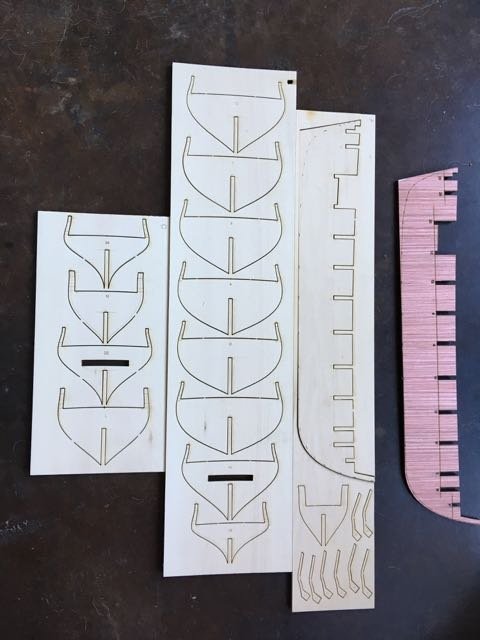
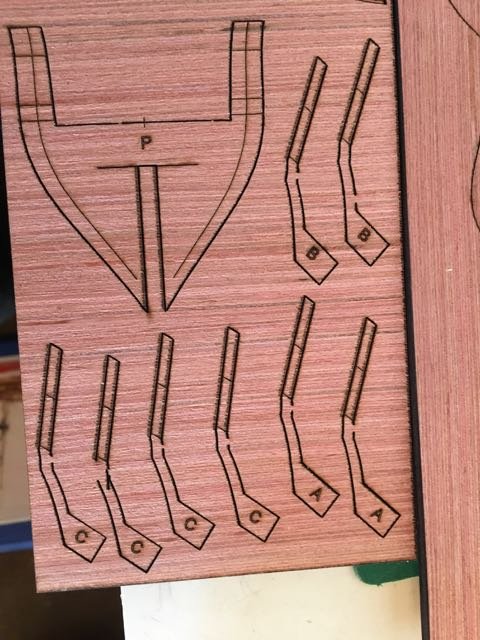
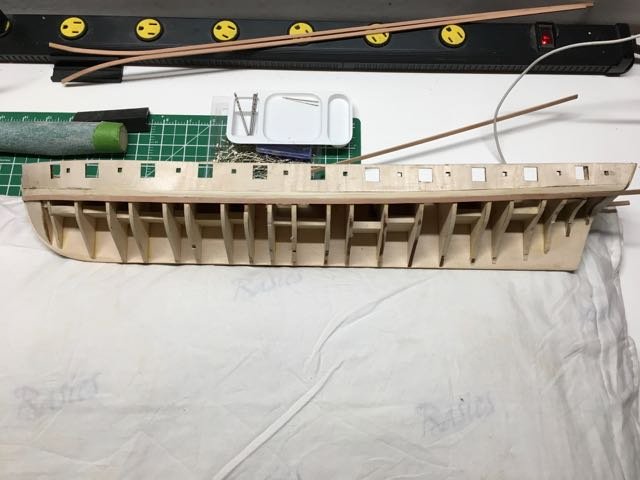
Hi David, I'd mentioned above that I too had requested replacement plywood from Model Expo. It arrived today and I'm happy to say it is much superior to the original in my kit. It is actually sheet basswood - not plywood. I've popped a couple of the pieces out of the sheet and they are nice an strong. I think they will work out very well. Now it's up to me isn't it? here's the new sheets next to the original bulkhead former.
-
This is an incredibly interesting place!
Heronguy replied to Dilbert55's topic in New member Introductions
Hiya Dilbert. I'd have loved to have had a ride in one of your corporate jets - did you keep one for yourself?? Welcome to MSW - I'll keep an eye out for your build log. -
According to Lennarth Petersson's "Rigging Period Fore-and-aft Craft" this is the accepted way! Similarily the shrouds are looped around as well - if an even number of shrouds on a side them the loop is seized to a pair of shrouds and if an odd number then one of them us handled like the stay shown below. Hope this is useful
.thumb.jpg.3c45cda587759826864205a00800b3c5.jpg)
-
Moving right along! Well done. Are you planking from both the keel up and the bulwarks down at the same time?
- 1,135 replies
-
- 3
-
-
- model shipways
- syren
- (and 2 more)
-
Thomas, An information packed post!. The work looks wonderful. I'm awaiting my replacement plywood for this kit so when I do start I'll have your build to motivate me!. I haven't used the Servomatic yet so I may be able to figure out how your mods play. I'll ask later if I still can't figure it out. Inspiring.
-
Hi David, I'm looking forward to your build. Sorry you've had problems due to the kit supplied plywood. I bought the kit a couple of months ago and it was sitting on the shelf awaiting it's turn. Based on your experience and a couple of others like Svein.erik I decided I should crack open the box and see what I was facing. Since the plywood looked like the material others were having trouble with I took out the bulkhead former and one of the bulkheads. On the 1st gentle drift the plywood on the bulkhead was already chipping away. The stern shaping pieces did not look well cut and I could imagine the frustration laying ahead trying to work with them. I emailed to Model Expo yesterday (sent to both the addresses suggested by Tigersteve and by Dubz). Within 20 minutes both Marc Mosco and John Garcia had replied and promised to send out replacement laser cut basswood sheets. I'll see what turns up but since I like the basswood bulkheads and bulkhead former that came with the Model Shipways Prince de Neufchatel that I'm currently building then I'll be quiet happy to accept the basswood replacements. (I can't quite imagine how the stern shaping pieces will be strong enough cross-grain without some help from me to reinforce them - TDB) I agree with the sentiments expressed that Model Expo could save a lot of trouble by ensuring that the wood they supply is of good quality however I am still very impressed with their response to mine and other's issues. I'm sure that kit manufacturing is a challenging business given the continual need to source material and parts from a variety of suppliers. I hope that they will do better on that.
-
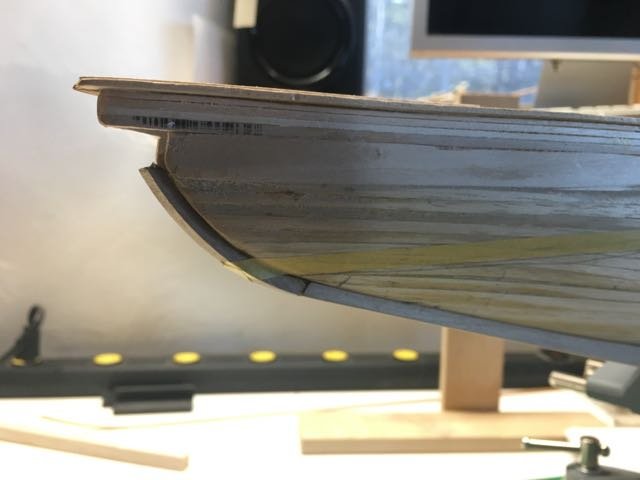
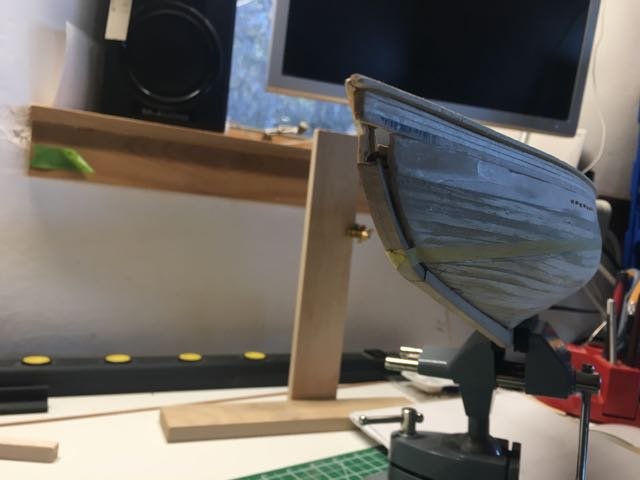
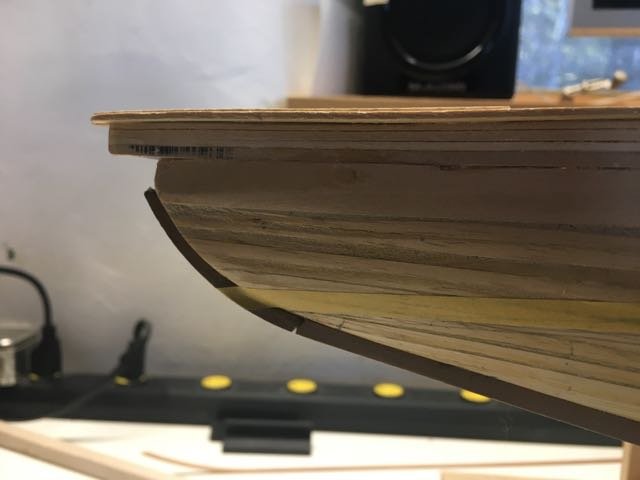
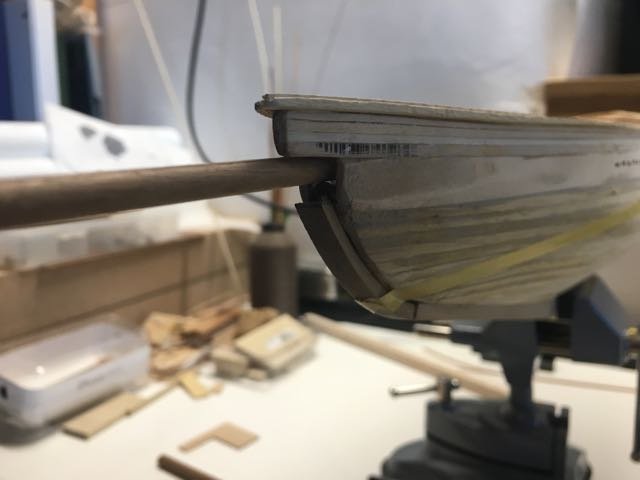
For what it is worth , this is what mine looks like at the moment. The last photo shows it with the 5mm dowel sticking through. I would think that you may need a bit of filler around you bowsprit once you have the bowsprit positioned. You might want to paint before installing bowsprit in which case maybe you can temporarily fit the dowel, do the filling and sanding, then paint and finally move on to installing the prepared bowsprit?
-
I've started the the hull planking. The printed instructions for the build offer an easy way out: However I'll try to improve my planking skills and plank as iff it is only going to be single-planked. I'm keen to find out how well the swiss pear handles so I will use it for this hull. Wish me luck!
-
Thanks Derek
-
Thanks - I'm enjoying it!
-
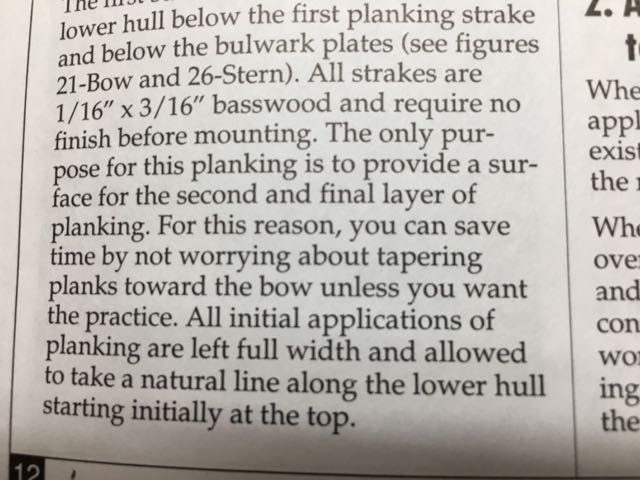
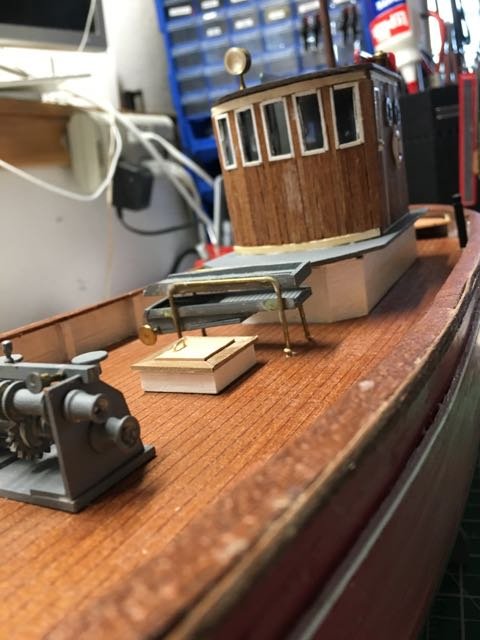
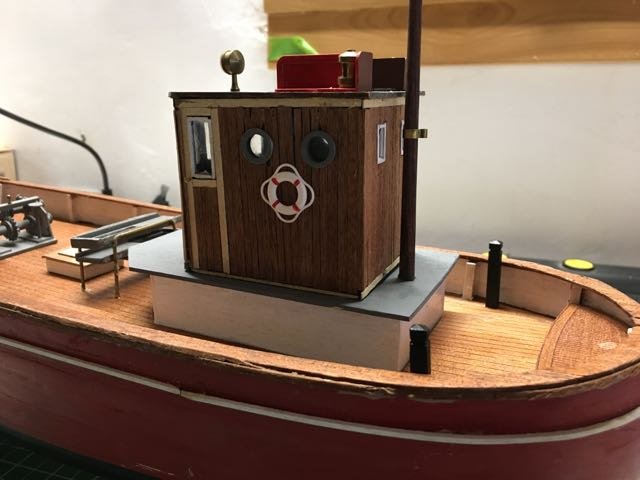
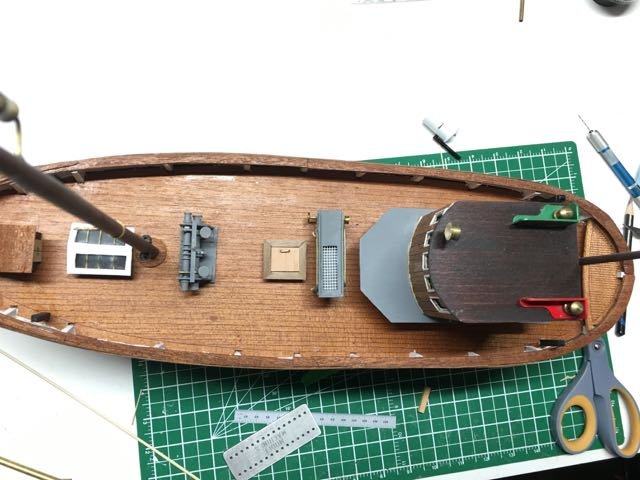
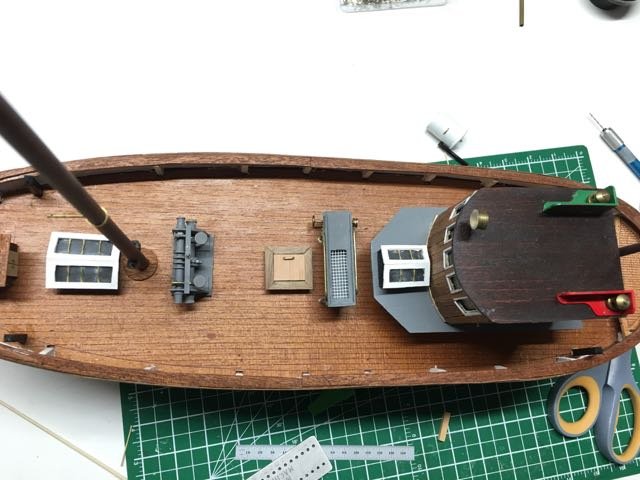
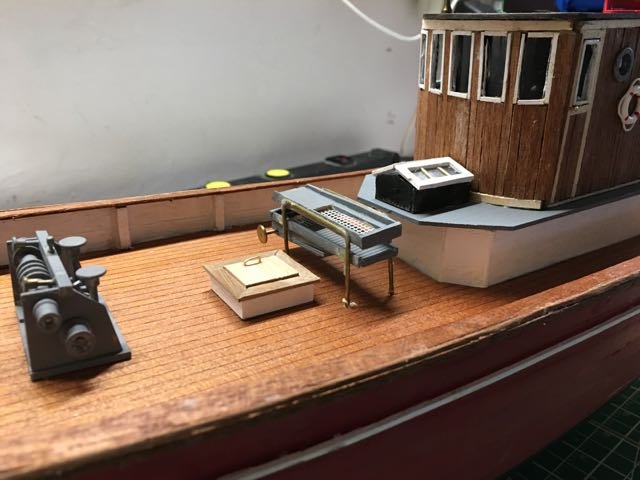
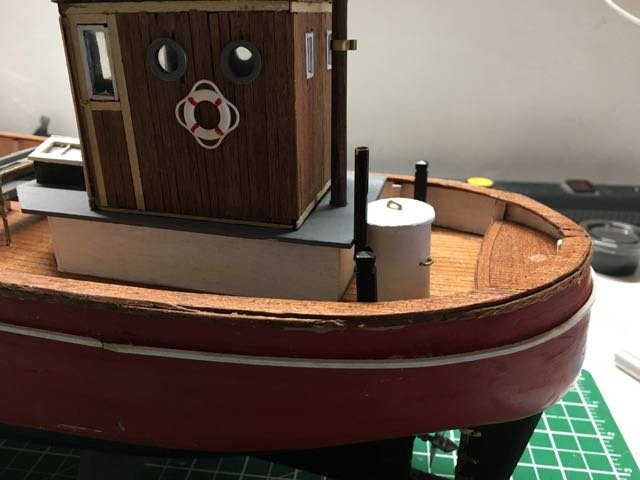
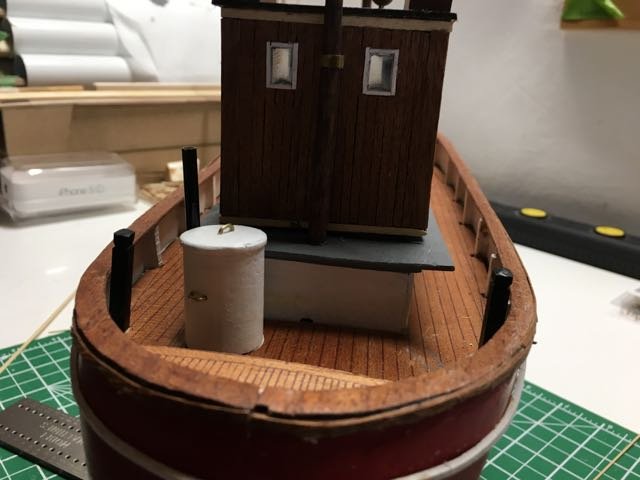
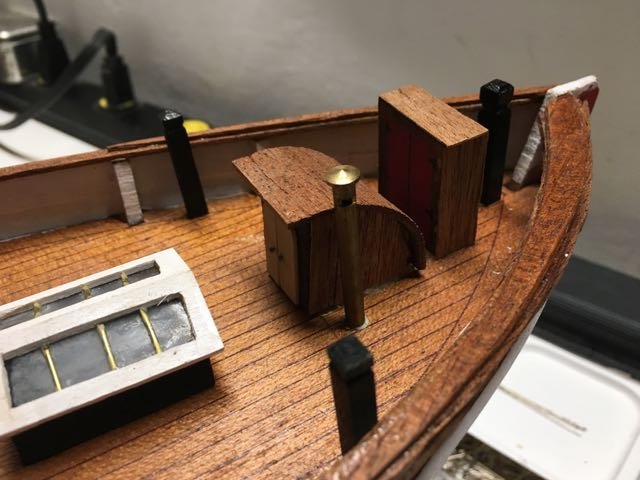
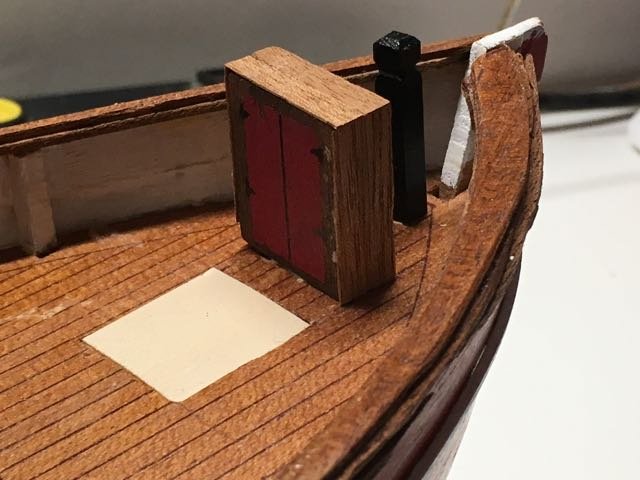
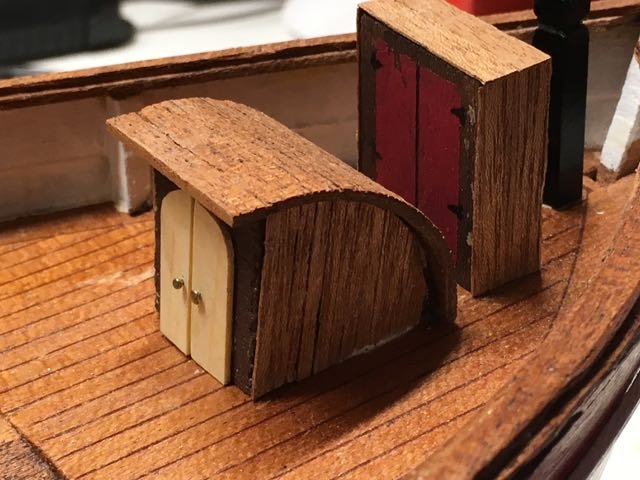
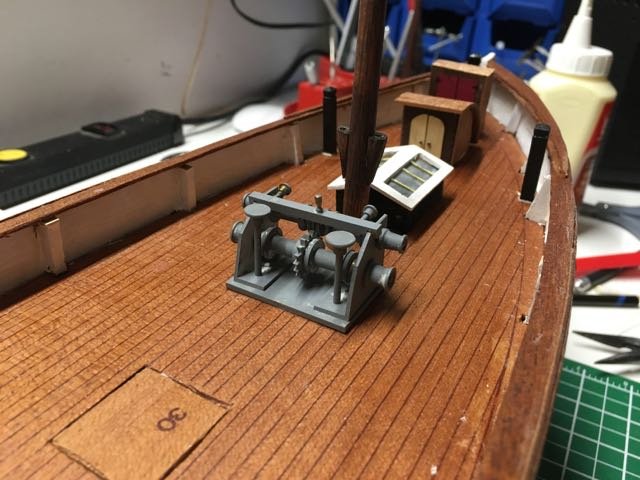
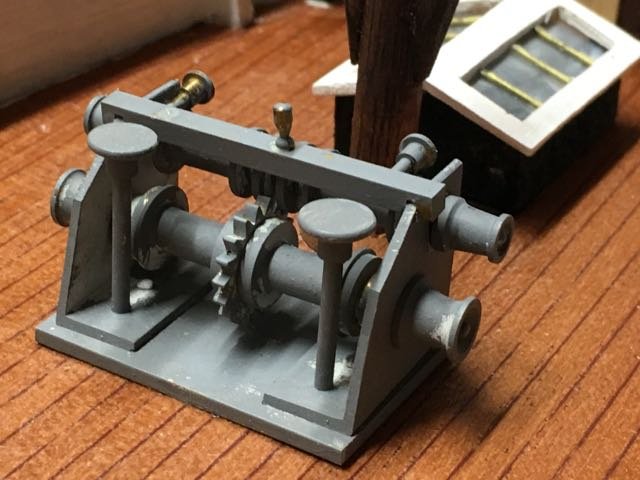
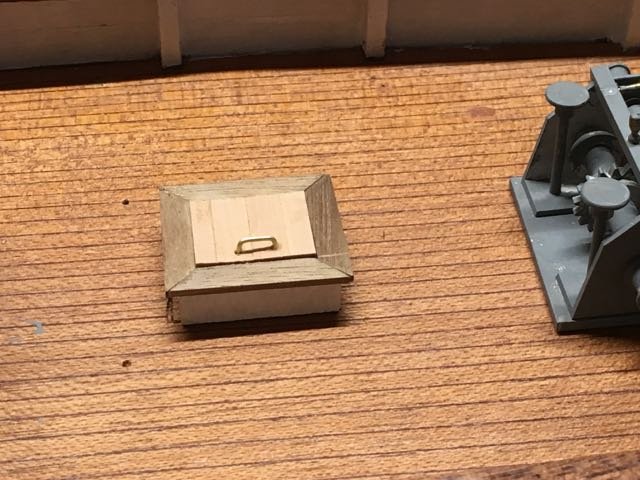
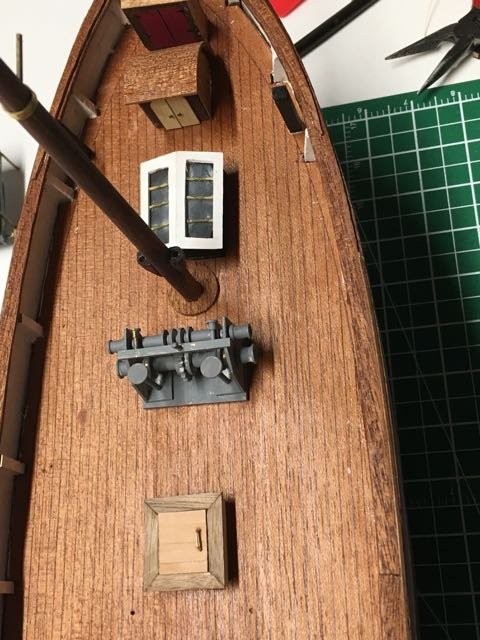
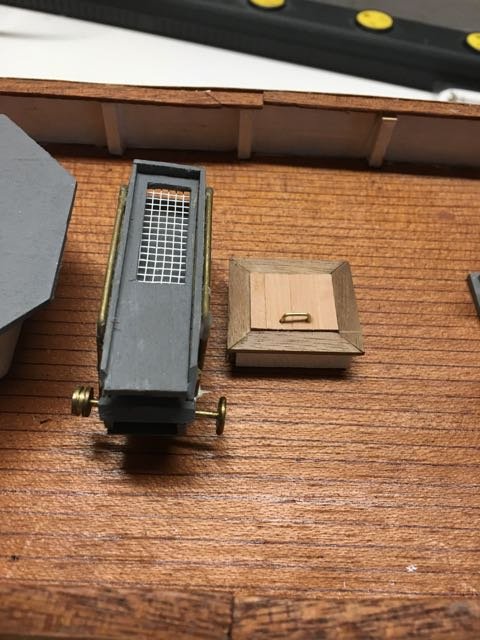
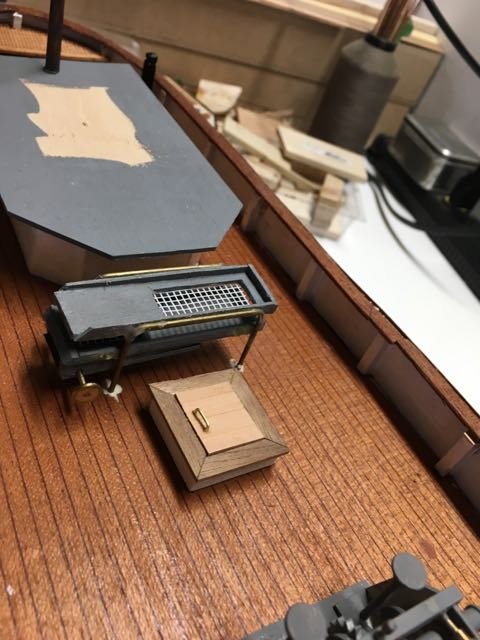
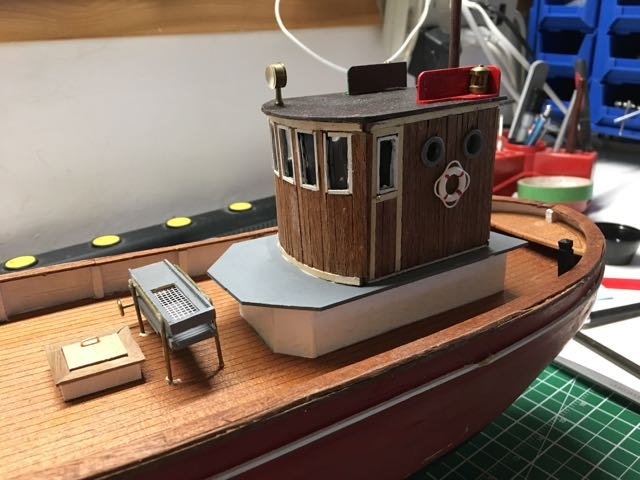
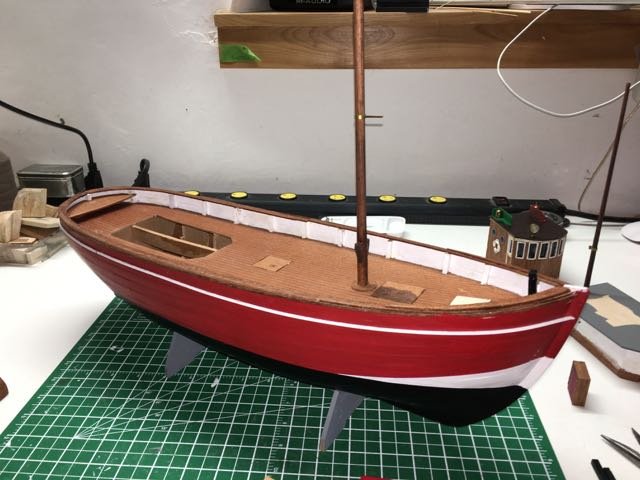
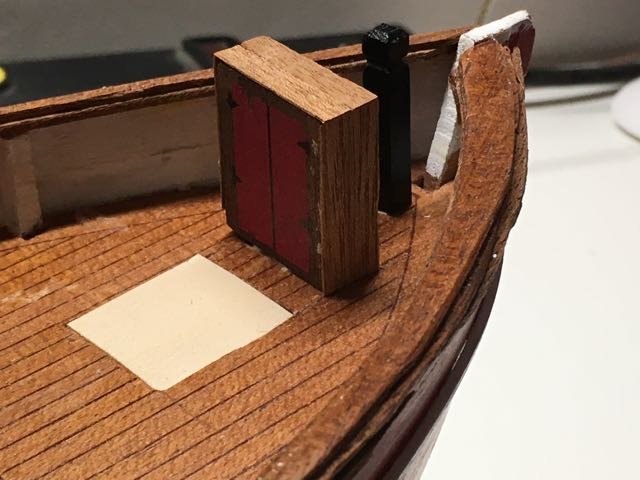
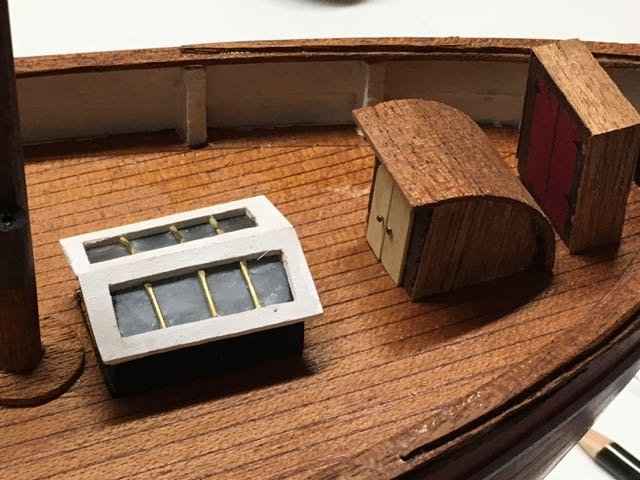
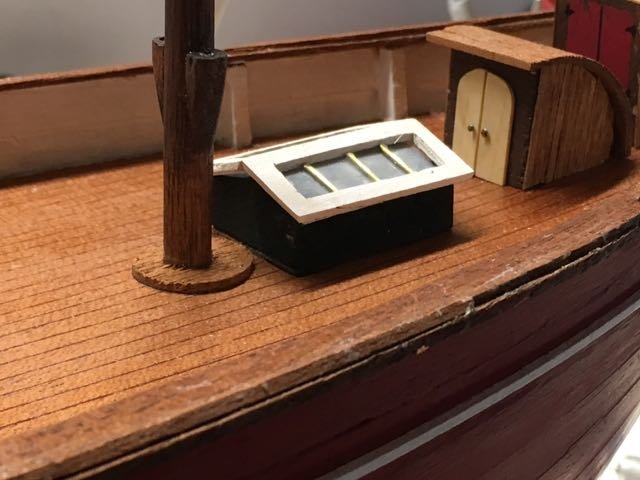
I admire the build logs that just keep showing seemingly continuous progress. No hesitation as each step is taken. There may be re-do's but progress still happens. On the other hand I seem to spend more time wondering what to do rather than doing it. A little frustrating. I'd like to be able to claim it was thoughtful contemplation of the process but if I'm honest it is really more like what we used to call "analysis paralysis". At some stage ya just gotta do something! So today I decided that it was time to commit to the deck furnishings. I added a rub rail - I think it looks better than the bare hull. Working from the bow end. Storage locker propane (I'm informed) Companionway. The doors are a bit of Alaska Yellow Cedar. The walls are 2nd planking from my Bluenose II kit. The roof is from the original kit. Skylight The winch comes as an assembled unit with the kit. The hatch was just a wooden block so I added a walnut frame around some swiss pear. (I remember when I got my 1st Macintosh about 30 years(!!!) ago - I felt compelled to use every font in each document just because I could. - Same thing with wood I guess - got use every species on the boat). The sorting table was the finicky bit for me. I had to glue it together 4 or 5 times. I'm not thrilled with the assembly this time but enough was enough. The wheelhouse was actually the 1st thing I built for the deck. I made several attempts at cutting pieces (the kit wood only lasted long enough to be a template). More planking with the Bluenose wood and some birch for trim. The curved front on the wheelhouse was a small challenge. Trying to frame the windows was also a bit trying. Another skylight on the cabin Then the steamer Finally a vent pipe at the fore companionway. Now I have to get back to the nets and rigging for the final chapter on this build.
-
The "missing" scuppers are there (that's a convoluted phrase!) because that's the way the actual ship is. A question I can't figure out is why they're "missing" on the Bluenose II.
-
Life does interfere with fun sometimes. You could consider your downtime as a rejuvenation! I'll wager you'll be finished in less that another year (you've already accomplished a lot) but who really cares how long it takes? Keep up the good work and keep up your positive attitude. We'll be watching with interest
- 245 replies
-
- 2
-
-
- bluenose
- model shipways
- (and 1 more)
-
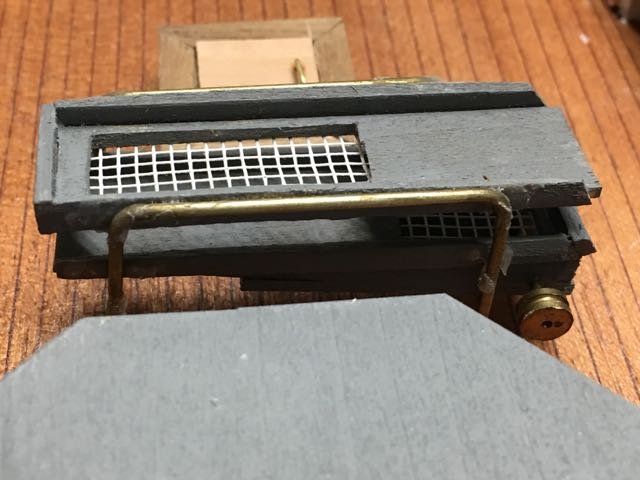
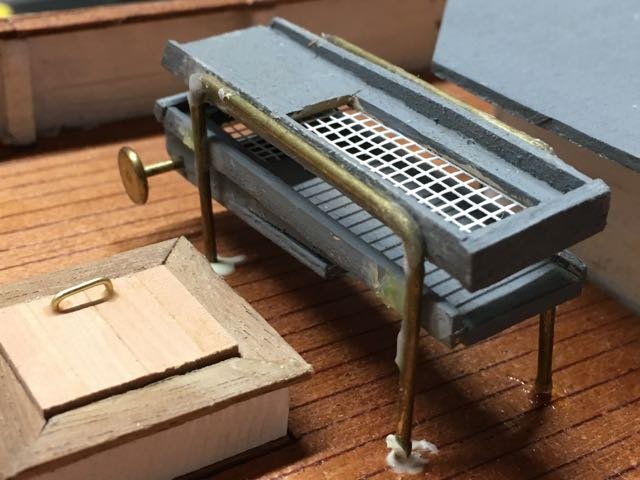
Finishing up some of the deck furniture for the next reveal.
-
I gave up on the dremel - pinvise for me. Funny little thing like pinning the pinrails caused me trouble too! I've been slowly working away on deck furnishings. You'll be progressing past me very soon so make good notes please!! You're doing great.
-
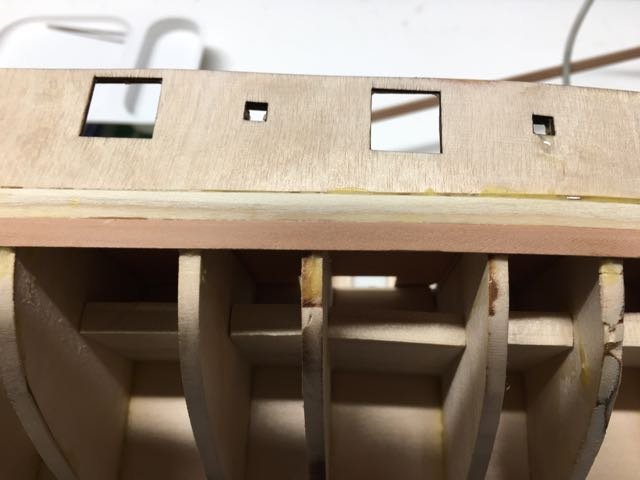
John's notes specify the stanchions for fore and aft pinrails. I used his suggestions as they put the shrouds in sensible positions for the masts. Fore deck pinrails between stanchions 10-15 (counting forward from the break), and aft pinrails between 2 and 8 (there was a typo in the instructions which said 2 and 6) counting back from the break. Good photo in part 6 of the notes that shows the aft pinrails and chainplates.
-
I believe the outboard part of the rail will be important when you cut channels for your chainplates. Unlike earlier ships I think these schooners passed the chainplates through the rail and then attached to the hull. Without the overlap there might be a weak area? As usual I defer to wiser commenters if this is not right!
-
Great start on the planking Rich. I feel like it is really going to be a ship once the skin starts to go on!
- 1,135 replies
-
- 3
-
-
- model shipways
- syren
- (and 2 more)
-
I feel your pain Derek. Hope it heals quickly.
-
Deck planking
Heronguy replied to bluenose2's topic in Building, Framing, Planking and plating a ships hull and deck
I'm not sure if it represents a change or I just annoyed them -
Way to go Derek. Looks good.
.jpg.9a0ae59f136aae5def79f9ef253e5926.jpg)