DONATION DRIVE - SUPPORT MSW - DO YOUR PART TO KEEP THIS GREAT FORUM GOING!
×


Heronguy
-
Posts
863 -
Joined
-
Last visited
Content Type
Profiles
Forums
Gallery
Events
Everything posted by Heronguy
-
 I get to be 1st follower - how nice! I think your transom mods for the doors and windows are a real positive! You don't have to do major kit bashing to make a real positive difference. Keep up the good work! I think I can learn from your build.
 -
David, This is something to be very proud of! Well done. I expect your Rattlesnake and your PdN will be outstanding!
- 117 replies
-
- 1
-

-
- constitution
- model shipways
- (and 1 more)
-
my plans were also on the really large format sheet - just filled the bottom quarter (actually probably bottom 1/3) of the sheet. I presumed it was just a matter of standard sizes of the paper its printed on.
-
Sorry to hear the problems you've faced. I must say I've been really looking forward to the build. But if parts don't match plans it becomes a different experience - not one for me yet.
-
I wonder if they had production problems in a particular window of time. My 2 bulkhead formers (because I received a basswood version to replay the crumbling plywood of the original kit I received) both match each other and match the 8-1/2x11 template sheets provided. However there is about a 1% discrepancy between those and the large plans provided. The large plans are only 99% of the actually size. That was hard to measure on the gauge Chuck mentions but I measured from bow bulkhead position to stern position 410 mm on the plans and 414mm on the actual bulkhead formers. My kit has a contents sheet date of January 2017 - it is pretty recent!
-
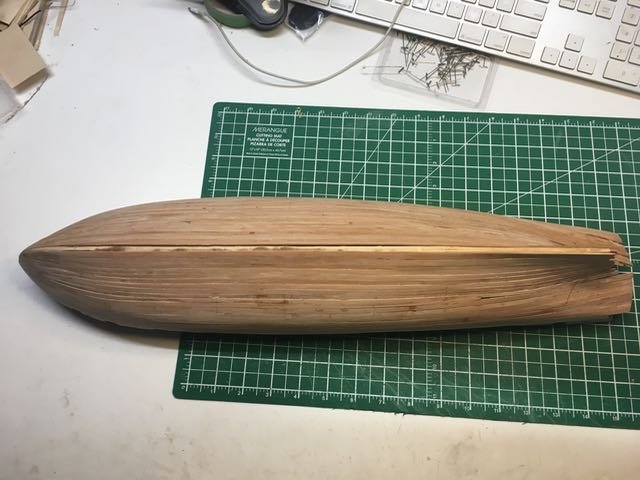
Don, too bad the planking job isn't really good enough for final presentation because it is lovely wood. Using it for this was a good opportunity for me to learn about the tools. I'll be using basswood for a Syren build in the future so I don't think I'll have enough firewood for next winter! Then of course are the longer models that have even more wood in the hulls - right? Steve, I hope it will sand up nicely. I'll be enjoying that process even more than I did with the Bluenose II hull. I think I'm partial to these sleeker hull shapes. I seem to gravitate towards them more than the bluff bowed ships of the line. This is the 1st time in my, admittedly short, modelling career that I don't have a build at the planking stage - maybe I need to start another kit
-
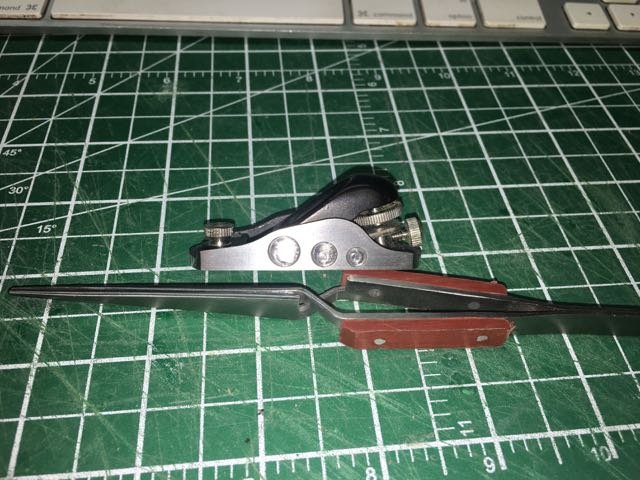
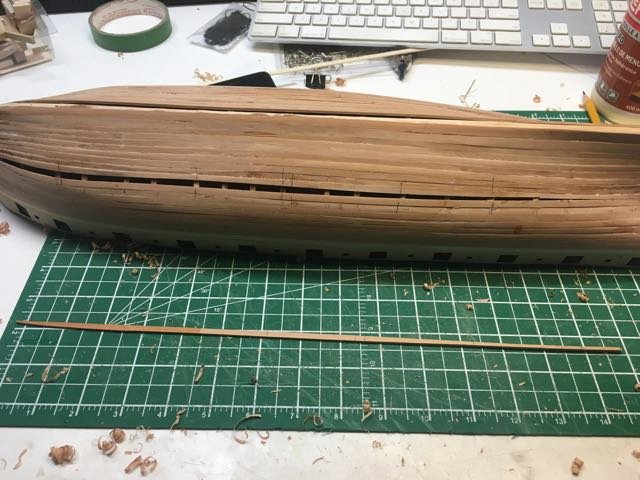
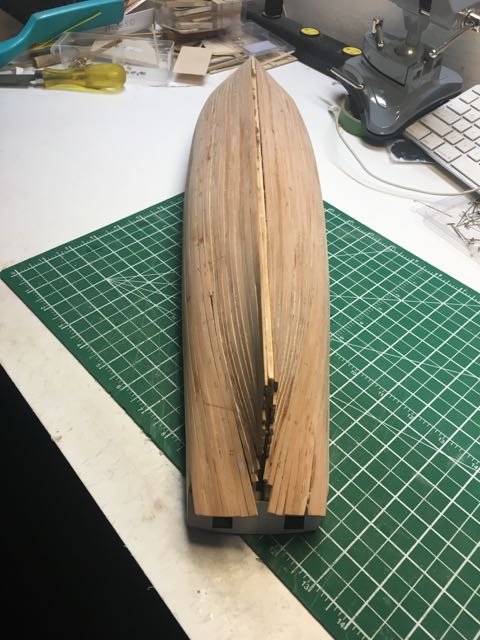
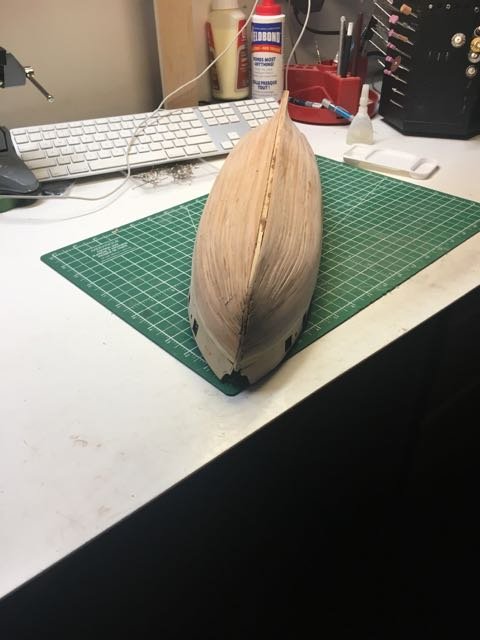
Happy day! The hull is planked. Still have to clean it up and finish the stern but the final strakes are in. This was also an experiment using the Swiss Pear for the planking. Compared with basswood, which I find too soft, the Swiss pear was delightful to work with. It is very smooth grained and it holds a edge really well. I'm fond of the appearance of the wood. It might not be most sensible for planking that will be covered - as it will in this build - but I enjoyed working with it. Planking this hull is reasonably simple. I tried two different approaches to tapering planks near the bow and eventually at the stern as well. First was to use the taper gauge on my Byrnes saw. That worked pretty well until I got nearer to completion of the planking and I had more "exotic" shapes to deal with (I still have a few kinks to work out on my planking skill set!) The second was to use the Veritas mini-plane. I didn't use it so much on earlier planking projects using basswood, but on the Swiss Pear it worked like a champ for me. Here's the last strake. And now the hull is planked.
-
YASB (yet another Syren build)! I'm delighted to follow along on your build!
-
Let me join the party. My Syren is calling me too! Bill, I hope you have lots of with this build!
-
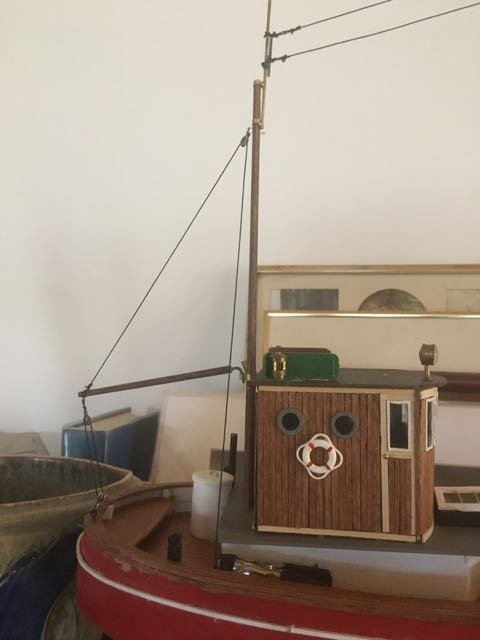
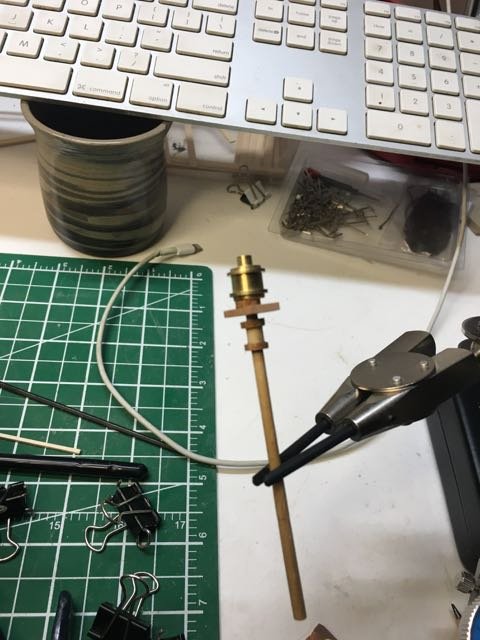
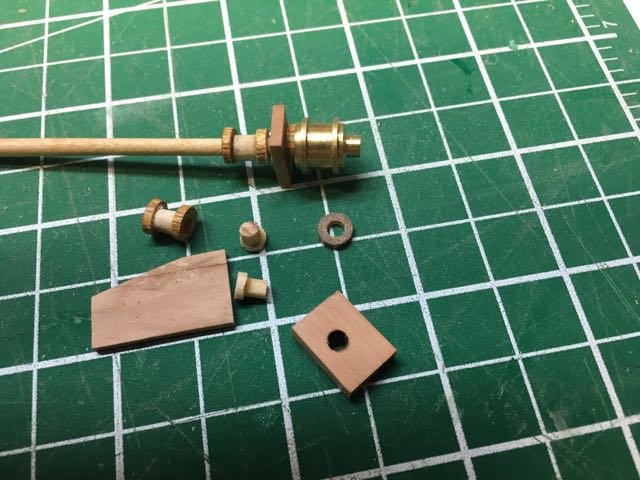
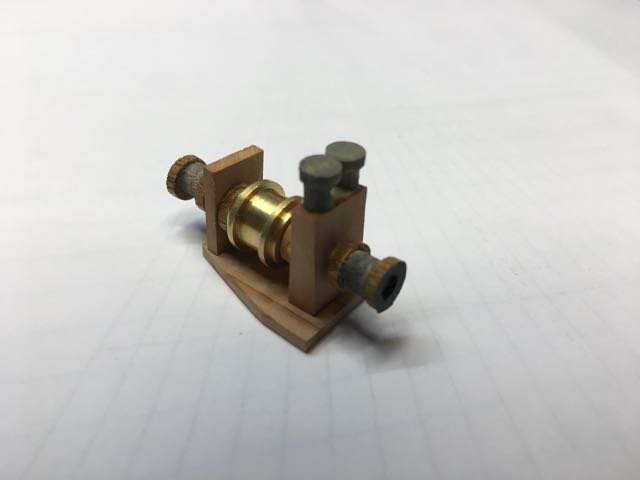
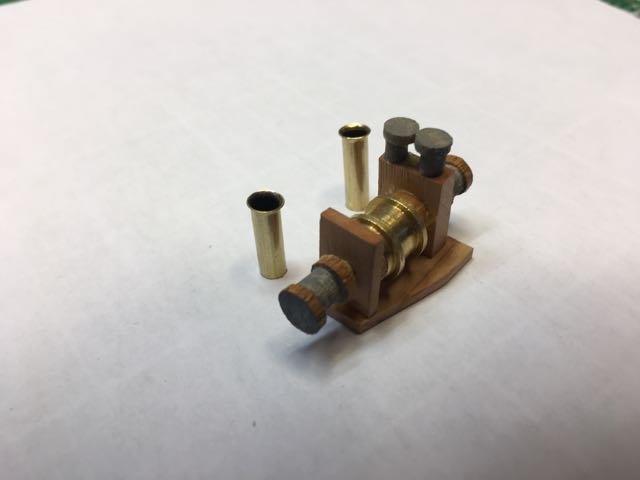
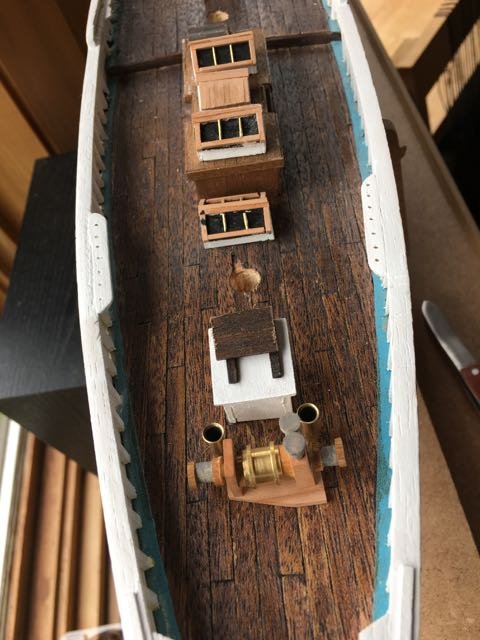
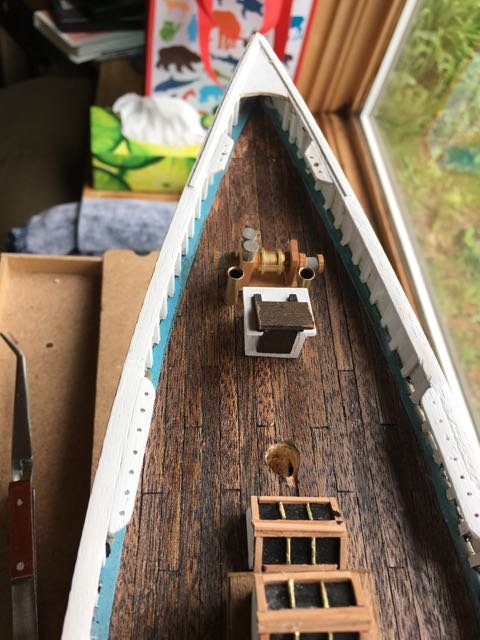
I've been puttering on building bits of the deck furniture. I'm still following John Earl's practicum (thanks John!!). Most fun (read challenge) so far has been the windlass (John's design is adapted from the Jenson diagrams. Here is a blog on the Bluenose II model that shows a more elaborate windlass and well as some discussion of the accuracy.) I think I've got what I want now. I still have to settle on the colour scheme. I don't feel like I have much natural skill at choosing colour scheme. On the other hand I do like the look of brass and wood. So far then the windlass is this: I've left the swiss pearwood untouched since it was also used on the skylights. The brass windlass barrel came with the kit. The two drums on the outsides are made from short sections of dowel (1/4" slices sandwiching a 3/16" centre). What I had on hand were different wood so I painted the centre grey. The bits and priced that make it up are here. I had trouble putting pieces together until I used the dowel to be the "backbone" on which everything was aligned and assembled. It also was a challenge create a large enough hole in the 1/4" dowel to accept the 5/32" axle on the brass drum. The wood likes to split when it can. When installed I'll include the chain pipes that direct the anchor chain below deck for storage. This appears not to be historically correct but I like brass on my model.
-
Hi Popeye. There was just not a large enough piece in the kit to cut out the 4 pattern pieces. I did one net for practice and have been hoping for a trip to town to hunt down some alternative but I've been too busy (or maybe lazy?) to make it there. I tried the soldering iron and rosin core solder but couldn't get a satisfactory joint. Silver solder sounds like a good alternative so I'm keen to try it out. So far in my modelling career (all six months of it) virtually every new challenge has required a new skill (and often a new tool). I'm havin' a good time with both!
-
Just 3 more strikes on each side to finish the 1st planking. I've got a fair bit of shaping to do on each of the planks to close up the hull so it is taking a bit of time.
-
Stalled on the nets while I find some replacement netting material. I tried to prepare the net booms but this required soldering on the chains to the brass fittings on the booms. Regular low temp soldering didn't hold so I decided to try my hand a silver soldering. I ordered a butane micro torch but received one DOA. It's in the mail being returned for replacement. Next update when it finally arrives.
-
Hiya Eddie. I'm going to start in on a MarisStella kit soon so I'm keen to see how things go for you on this one. (I know Don's got a couple of them under his belt) I like your keel holders!
-
I have a Syren on the shelf. I'm hoping for lots of insight from the Syren builds both for the PdN and subsequent Syren build. I'll be glad for advice anytime you have some to offer.
-
Nice looking boats. Great to see your build log active. I'll follow your work.
-
It is cool to be able to see into the hull in this kit. I guess that means that your deck planks are 1/16" thick like the hull planks? Presumably all the deck planks will be full lenght? Move'n right along!
-
Thanks Steve. What do they say? A journey of a 1000 miles starts with one step. I've a long way to go - hope the journey continues to be as satisfying as it has so far.
-
Thanks Rick. Reading through various build logs for a variety of ships has convinced me that there are lots of approaches to each step. So we each get lots of scope for choosing our own path through the various challenges that arise. I think that's one of the appeals of this hobby for me. I can't really imagine running out of challenges on this and future builds! I get to learn lots.
-
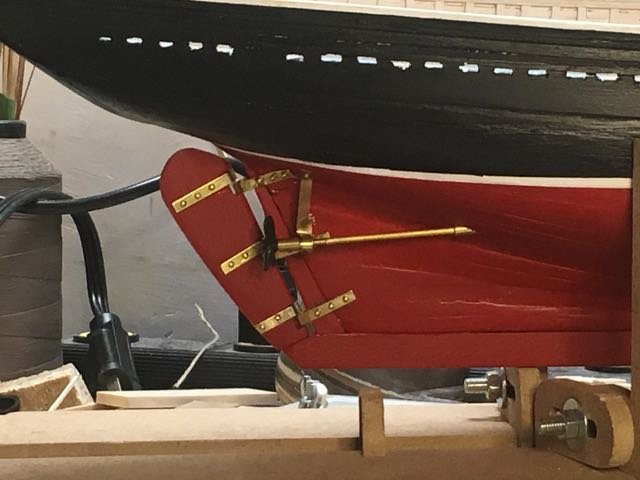
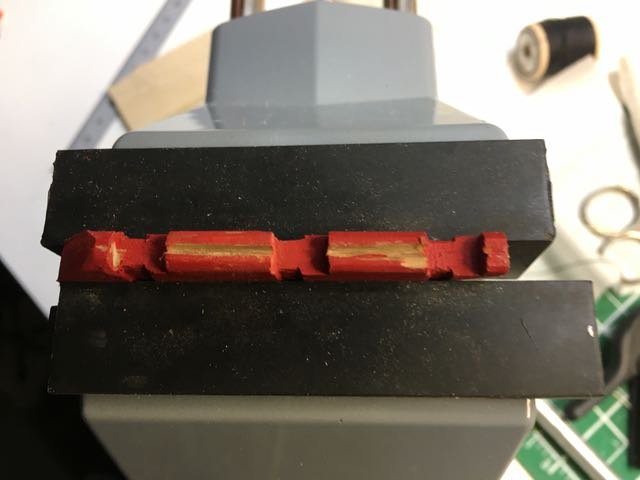
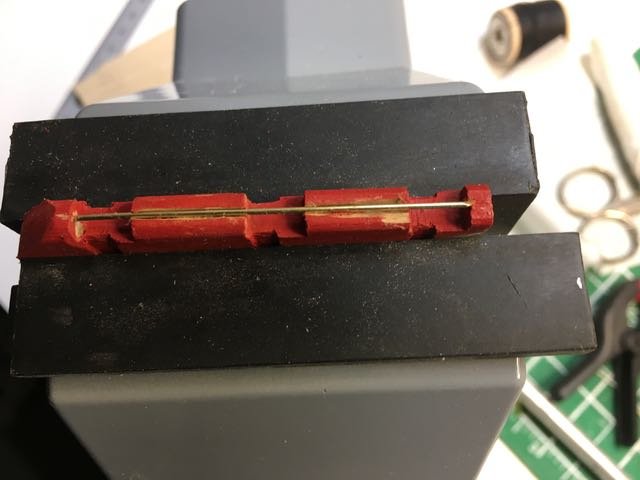
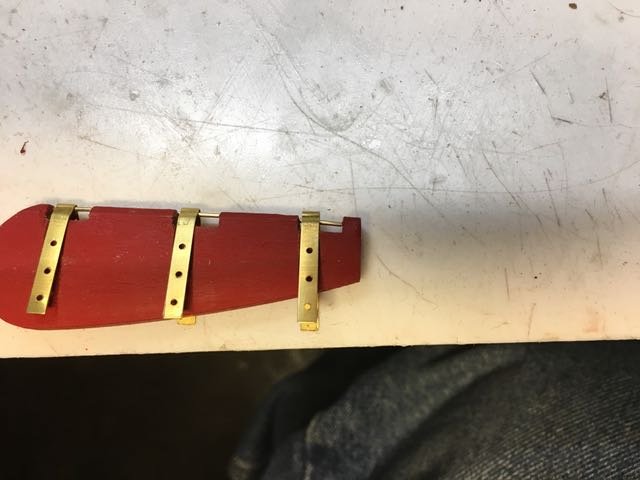
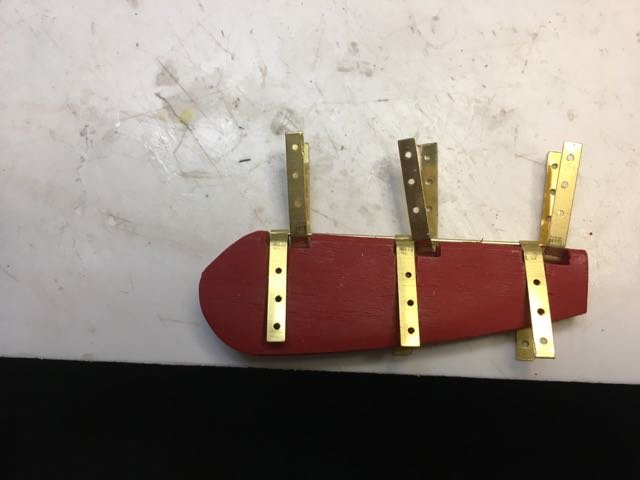
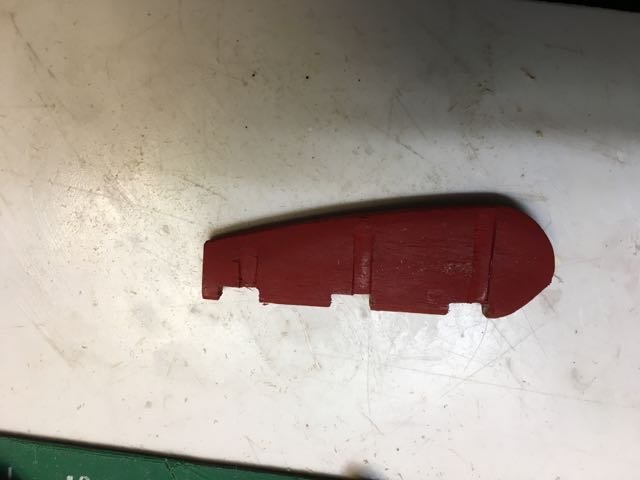
The final item for the bottom of the ship is the rudder. I puzzled for a while how to mount the gudgeons and pintle in the recessed area in the rudder then onto the stern post. I settled on slicing a groove and putting a piece of brass rod across all three gaps in the rudder. Once it was glued down and painted over it is ready for pinning the gudgeons to the rudder and hull.
-
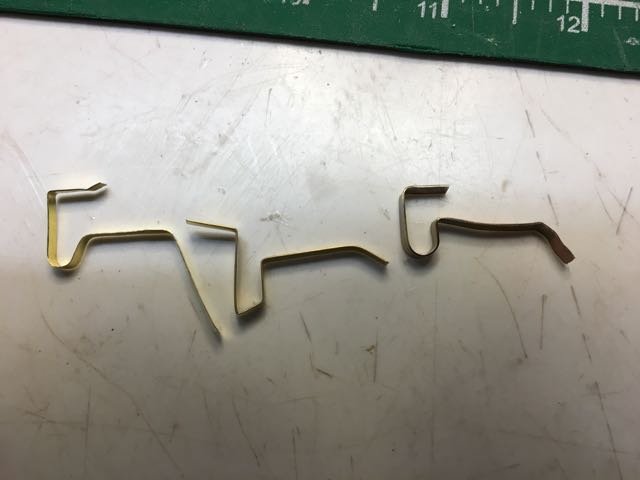
It turns out the prop supports had to go through a trial by fire! The leftmost piece was cut from a sheet of 0.005" brass. I just needed to try out the fit of the support and how it would attache to the hull. The middle was my attempt to bend the 1/64" (.016") kit supplied strip. It didn't want to bend in curves all. I annealed a wider strip of 1/64" brass, cut it in half with the Byrnes saw (with a nice zero-clearance insert and a fine blade) and discovered it bends just fine. I drilled a pair of holes and am ready to pin it to the hull.
-
Nice detailing Steve. I can imagine you are soon joining the ranks of talented Scratch Builders .
- 291 replies
-
- 3
-
-
- bounty
- billing boats
- (and 1 more)
-
Not much done this week but for the mizzen mast rigging (such as it is) except for a cleat for the halyard. Next will be the nets! I've cut out the net material for the first one. Now I need to sew the 2 halves together - oh joy!