
DONATION DRIVE - SUPPORT MSW - DO YOUR PART TO KEEP THIS GREAT FORUM GOING!
×


Heronguy
-
Posts
863 -
Joined
-
Last visited
Content Type
Profiles
Forums
Gallery
Events
Everything posted by Heronguy
-

Deck planking
Heronguy replied to bluenose2's topic in Building, Framing, Planking and plating a ships hull and deck
Hello Les, I ordered some swiss pear (and some other woods) from A&M Wood Specialty (amwoodinc.com) in Ontario. They shipped by UPS and it arrived very promptly. I would imagine delivery to the west wouldn't be too bad. I told them to send me 2 foot long sections - their swiss pear is 2 inch live edge. I've started milling the wood for planking purposes and I think it looks really good. You might consider them if there isn't a more convenient special wood supplier nearby. Only catch is that any order under $100 gets a $20 surcharge in addition to shipping. (It wasn't hard to get my order to total over $100) Good luck. -
Yeah, been there - I wimped out on the splitting of 5mm planks. I think you'll likely be ok if you ended up double planking deck as long as the waterway height is left as it is. Thats where the stanchions attach and where the scupper holes are located ... Still you'll be able to figure out how to get by on the 1st planking!
-
Yes, waterways 1st. This was a deviation that I made from John's instructions and it caused me trouble when it came to stanchions, bulwarks and scuppers. I detail my problems caused by my deviation in my build log. The AL instructions put waterways on top of the deck planking.
-
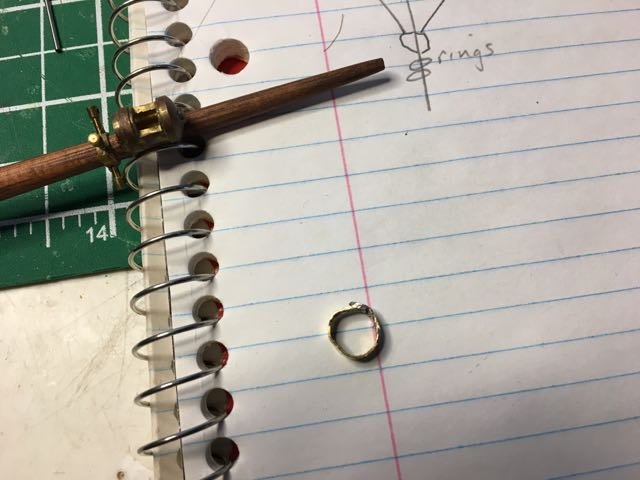
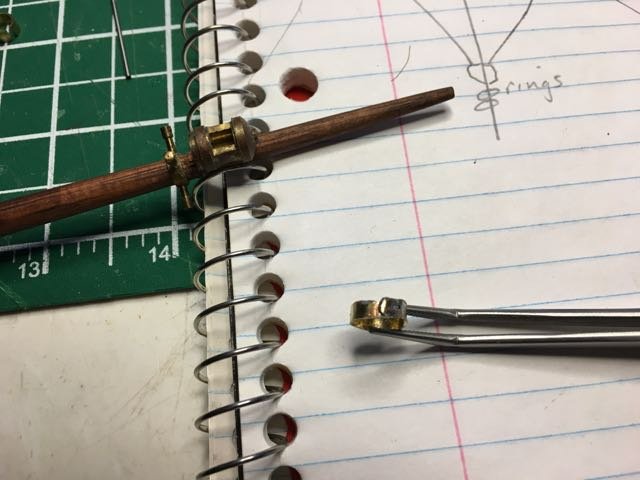
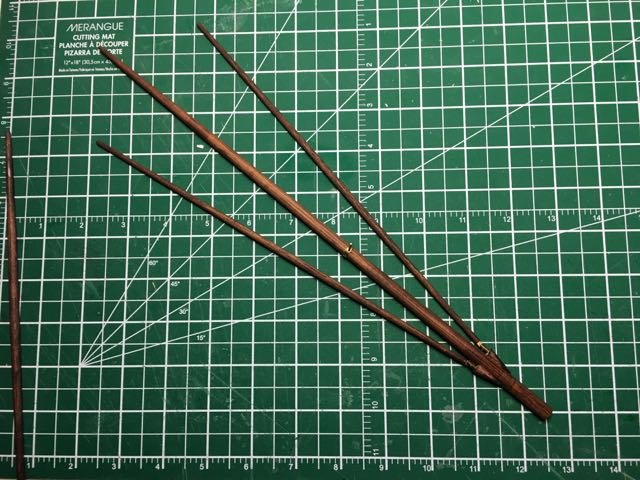
Thanks popeye. The goosenecks took several attempts to get to this stage. I'm happy enough with them to use these ones. I am missing a mast band so I tried to make one this morning. Not a very successful 1st try. This was a 0.5mm strap that I tried to bend around a 7mm diameter mandrel. I think I need to find thinner brass strips before I can make anything that looks half decent. I've been pouring over your photos on the CUX87 blog to try to help decode the various mast fitting and rigging in relation to my version of the kit. i'm glad you've got that stuff up there! I kept hoping everything will suddenly make sense to me but finally decided I just had to make some decisions and get on with it - its my boat after all!
-
I found something else to like about Billing Boats kits. The fittings are good quality and even after 2 or 3 decades you can get replacements! I was missing some of their brass eyebolts and their rigging screws. I ordered them on the 15th and they were in my mailbox on the 21st. Thanks Billings USA. Now I can assemble the masts.
-
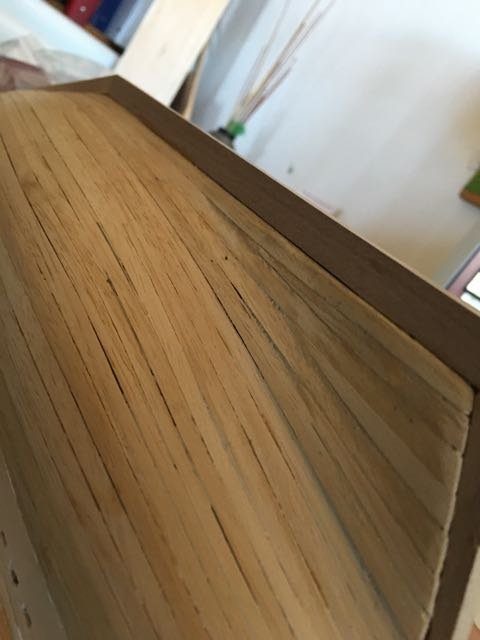
I had the same question when I got to that point. I went with your Pic 1 although the plank then twisted along the false keel to the stern. This photo might show it This is from the stern with the hull upside down. This is after the walnut keel has been added.
-
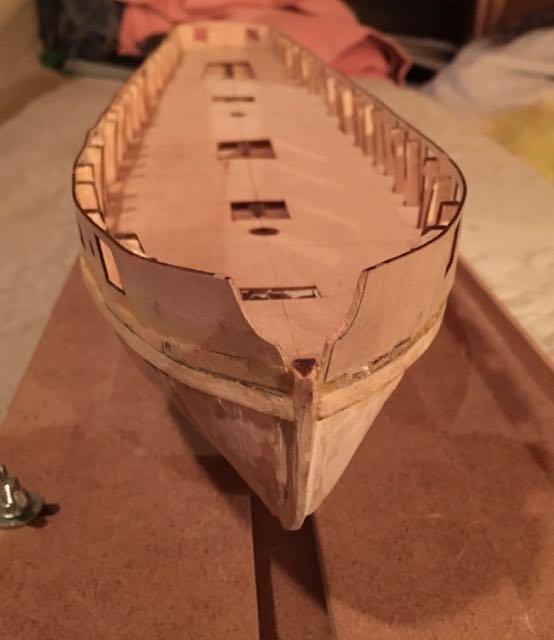
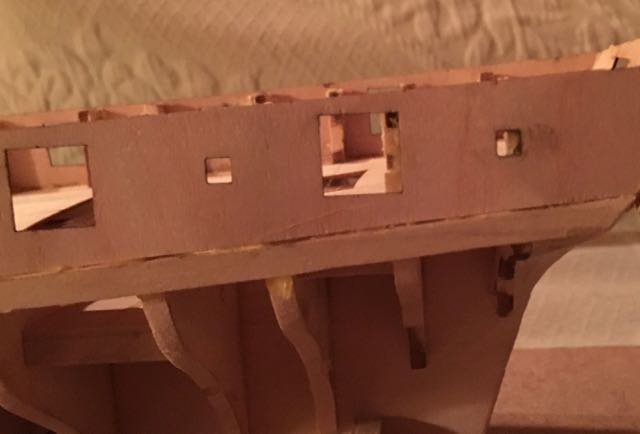
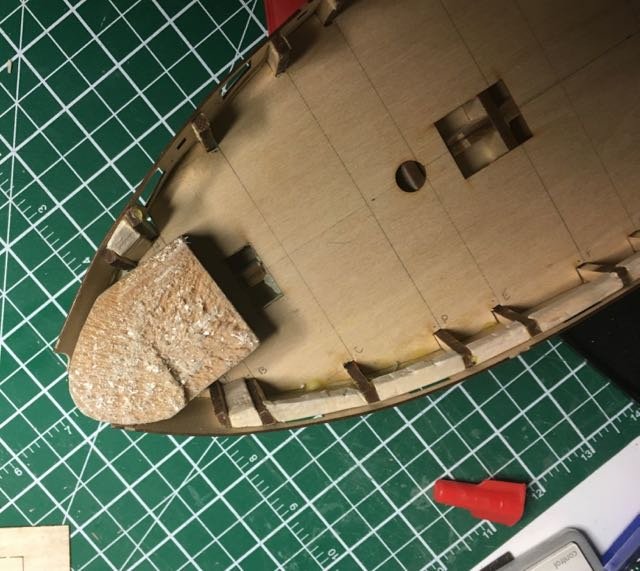
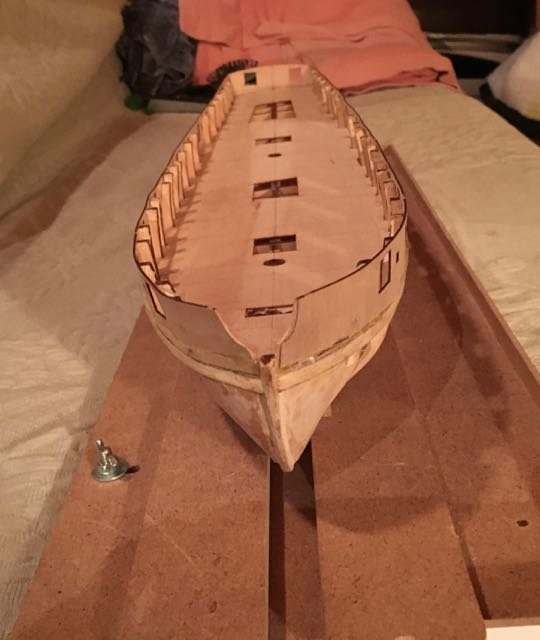
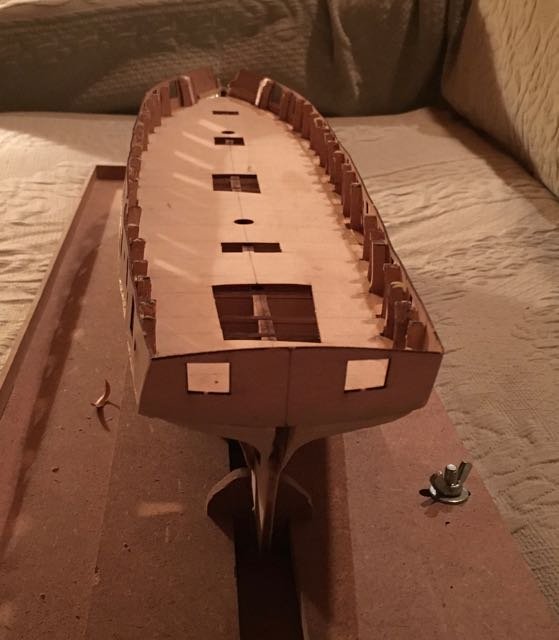
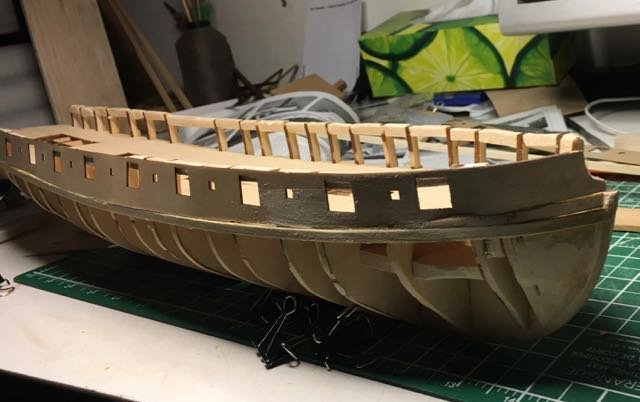
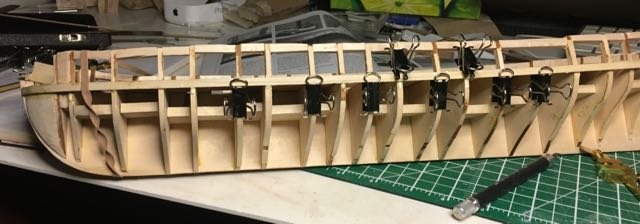
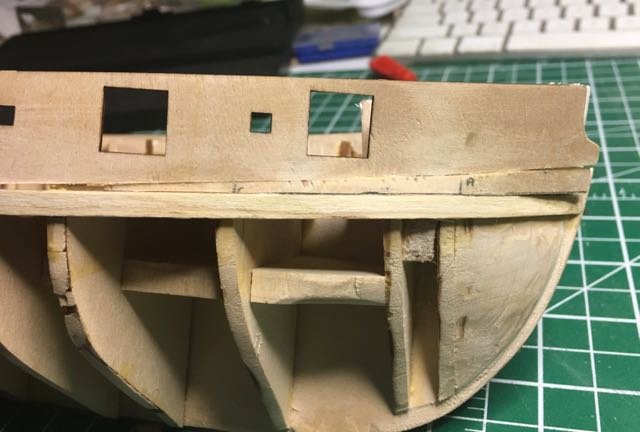
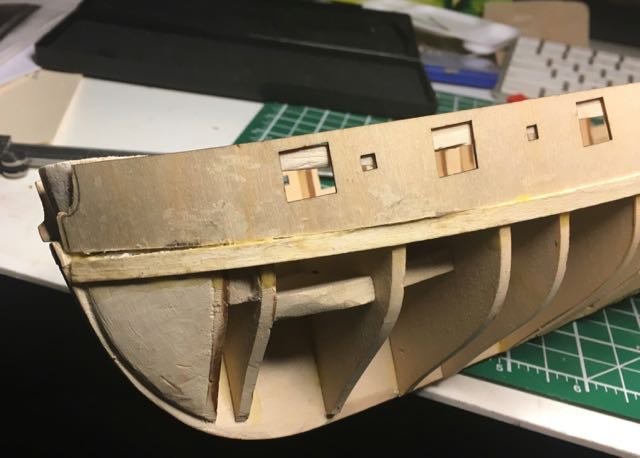
The balsa support rails were a fine idea. I was able to handle the model without the constant worry of snapping more extensions. I'll use this trick again! Despite the warnings about the plywood bulwark pieces and the problems they caused on other builds, I decided to try them out for myself. I installed the 1st strake - deck level - which defines the bottom of the bulwark. Clamping the starboard bulwark and carefully (but not quite carefully enough dear reader) I marked the plywood for trimming. The goof was at the bow where I trimmed way too much. The cute a small wedge to cover most of the gap. It will be covered later with planking. However getting the plywood firmly glued at the bow did require several attempts. I decided to install (temporarily) a balsa filler block at the bow. I shaped it to provide support for the glueing of the plywood to the hull. I proceeded more carefully with the port side. (nothing like trying to avoid the same mistake twice - you can always make new mistakes ) Then on to the transom. Another challenge finding how to clamp the transom for long enough to have the glue set. Finally ended up with some tape that holds it well enough. Took out all the balsa supports. So here's the results to date: One small problem that came with the kit I think is a small overlap between the last gun port and oar port and the bulkhead extensions. I don't think it will present any real difficulties. Slightly more troubling problem, and one I haven't resolved yet, is getting the bow bulwarks properly installed. It looks like too wide a gap. I wish there were more info on the plans so I could get the bow correct on some build (I've been stymied on all my builds so far! - can't figure it out yet!) K


-
The batten is just there as a guide. You can remove it as you proceed with the bottom of the hull. Your moving fast!!!!
-
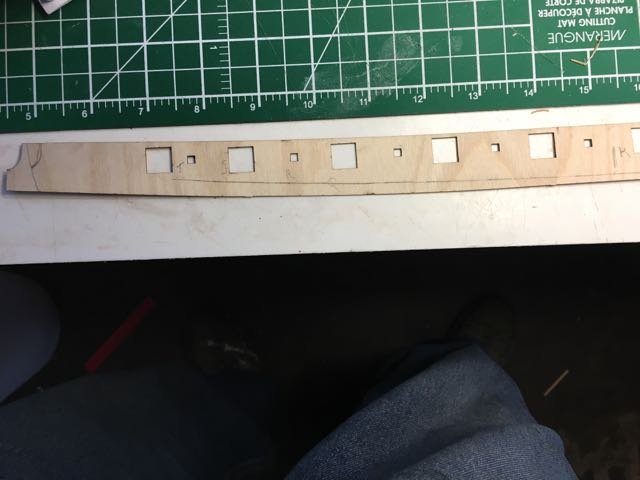
Just looking carefully at your photo of the planking batten I'm wondering ig it is actually 35 mm down on bulkhead #8 It looks like more to me when I compare to my own photo and to John's in the tutorial. remember you want to measure along the bulkhead. I use a strip of paper marker at 35mm and lay it along the bulkhead to mark the 35mm location. If your planking batten is too low it is not too late to move it. You'll have to remeasure at all the other bulkheads but it is quite recoverable!
-
I don't think things are as serious as you think. Is you concern that planks are breaking, or that things aren't looking parallel and filling the space to the planking batten? If it is breakage then you could simply get some basswood strips from your local hobby shop and keep on going (solving the breakage problem) The AL planks are 5mm so just get 3/16"x1/16" strips. They'll likely cost $0.30 or $0.40 each. I presume you'll be painting or second planking the model so wood differences won't matter. If the problem is the layout of the planks then remeasure at the bulkheads and recompute the tapering needed for the current belt. If I just don't understand the problem you're having then forget what I just said. If you don't understand my ramblings then ask again I'll try harder!!
-
You'll find it goes pretty quickly and when you have half the planks on you'll really feel like you've got a ship in your hands It looks like a great start.
-
It's looking really good. I think you're on track! I feel the same way about following the mods. It's an easy introduction into kit bashing. I learned a lot from my diversion especially when I tried to diverge from John's instructions too - oops. My advice is to read ahead - and in my case do that 2 or 3 times. keep up the good work!
-
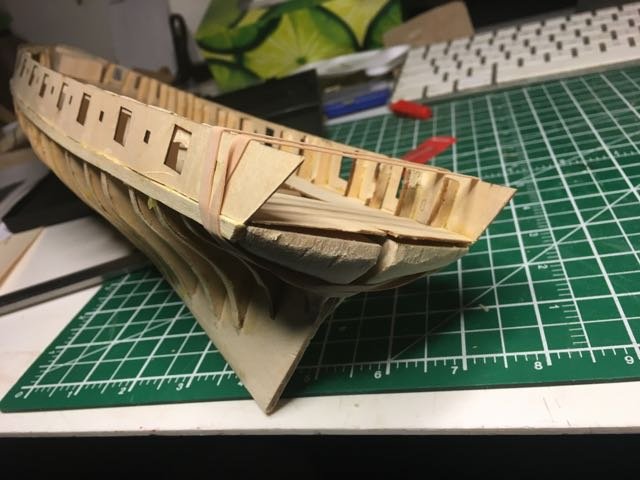
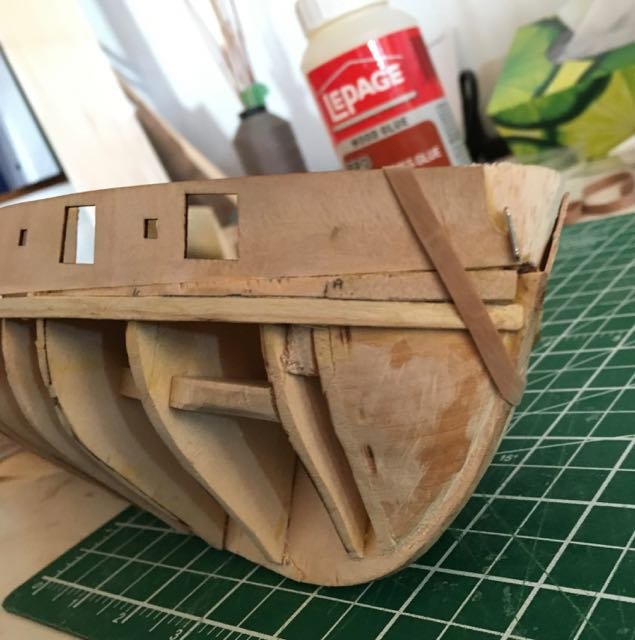
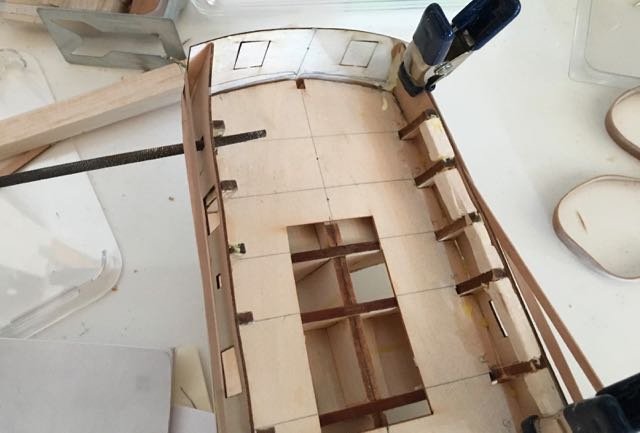
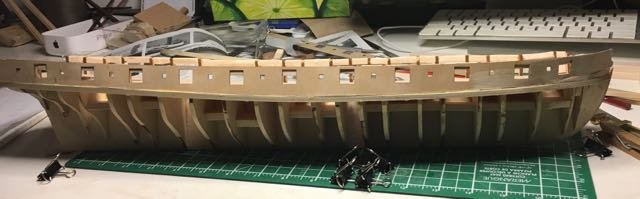
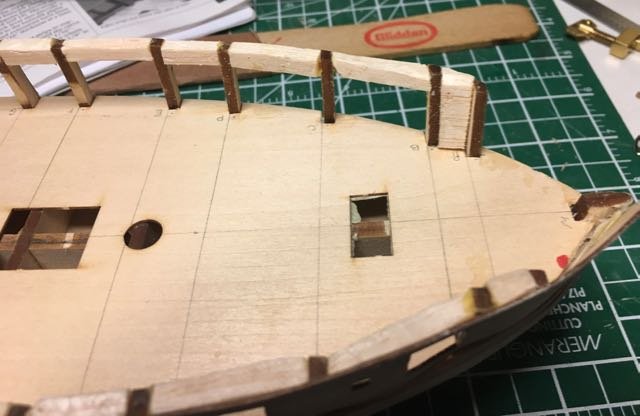
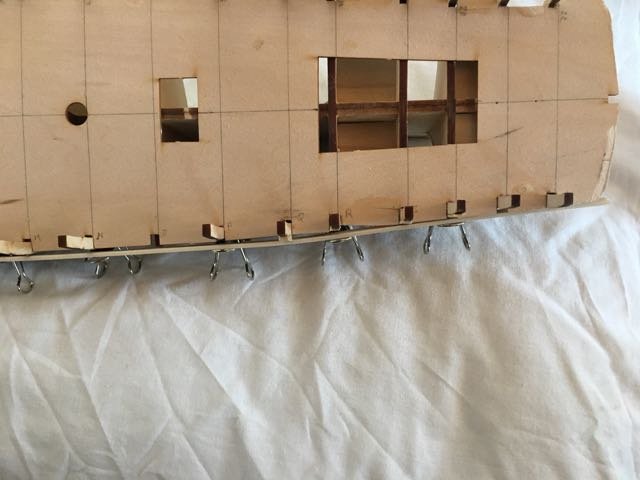
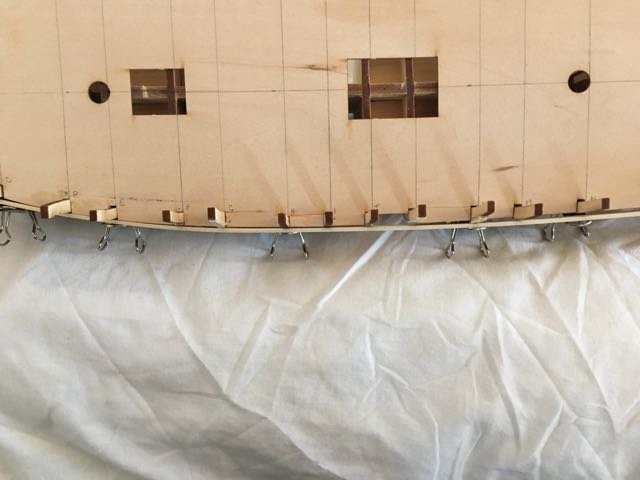
I've been slowly fairing the bulkheads although many have needed shims and that implies that the inboard edges of the bulkheads also don't align well as shown in the next two photos Worried about how likely I am to break off these fragile bulkhead extensions I decided to add a balsa fill between all the bulkheads. We'll see if this turns out to be useful but even if not, the balsa is very easy sand down or to remove entirely. I expect quite a bit more time working on the hull before I start planking. No hurry.
-
I just reviewed the details from John Earl's notes and I realize I was wrong - the line isn't straight up along the line of the false keel - Take a look at part 2 page 7 and part 3 page 5 to see what John does with he line of the transom. Be aware that if you follow his approach you'll have to make some additional modification to finish off the transom - you won't using the AL parts. I followed John's method.
-
Looking at the bottom photo as well I think you might need to do some more sanding - it looks prettyy "square" still Those end bulkheads (bow and stern) generally need a fair bit of an angle on them to provide lots of contact surface with the planks. I agree with you that the sanding phase is a pleasant one (unless you break the bulkheads! - my challenge on my current build).
-
John Earl talks about the transom on this kit. It requires quite a bit of sanding to get it to lie in a straight line following the false keel. I was surprised by how much I had to adjust it. I also o had to shim several bulkheads to get them to fair well. Doug
-
I think the blocks are a positive for sure. By the way, the cannons look very cool.
- 291 replies
-
- 2
-

-
- bounty
- billing boats
- (and 1 more)
-
Hi Steve, This is a question not a criticism. The blocks seem large - are they in scale with the cannon?
- 291 replies
-
- 2
-
-
- bounty
- billing boats
- (and 1 more)
-
Let the games begin! I'll follow with interest. It is a fine, fun build.
-
Hard to tell from the pictures - thanks for the detail. I'll go the planking route for sure. I'll see what I can do with the skylights - fiddly little structures. Cheers
-
Looks like a good start Blaine! I'm very interested in your build as the Syren is the next on my list and I can use all the wisdom these Syren Build logs can offer. Its great to know what works well and what is a challenge. I've never cut a rabbet either - glad your experience is good. May I follow your build?
-
Lovely work
-
Very nicely done Hof. I'm looking closely at your deck furniture for ideas as I'm just at that point now and am trying to decide on finishing and finishes. The natural wood colours look good. I wondered about planking the cabin tops - did you consider it? Also the walls of my cabin love k odd because of the tabs for assembling. Yours look fine - how did you finish them? All your rigging looks good - I can only hope mine will be half as well done! Thanks for sharing.
-
I had thought about the mizzenmast support issue. A bracket on the pilot house is a great idea thanks. im going to review your syborn and Mary Ann logs to look for more ideas.