
DONATION DRIVE - SUPPORT MSW - DO YOUR PART TO KEEP THIS GREAT FORUM GOING!
×


Heronguy
-
Posts
863 -
Joined
-
Last visited
Content Type
Profiles
Forums
Gallery
Events
Everything posted by Heronguy
-
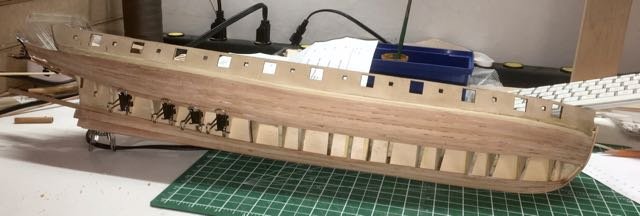
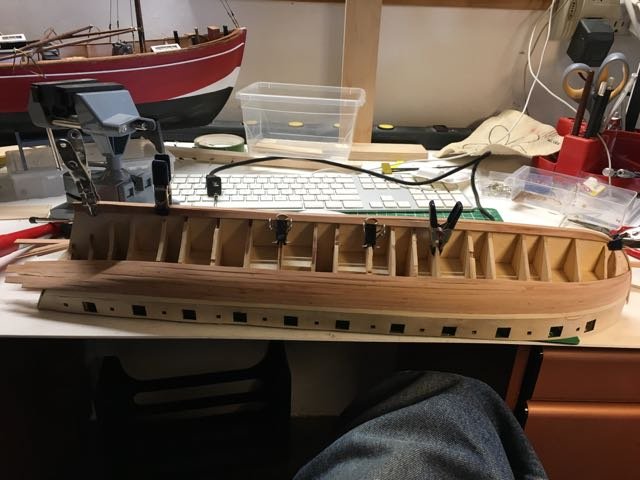
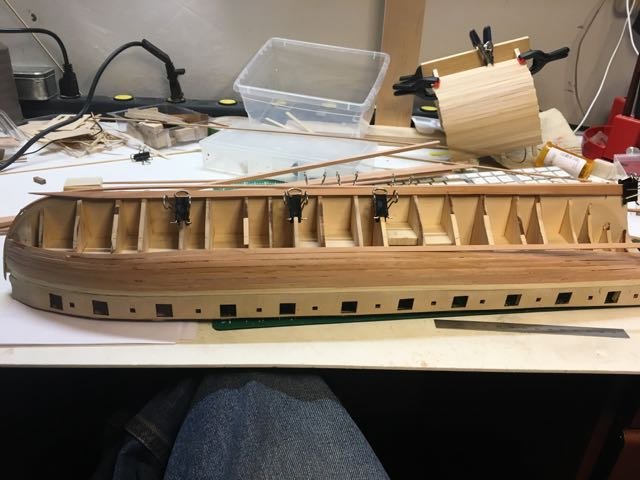
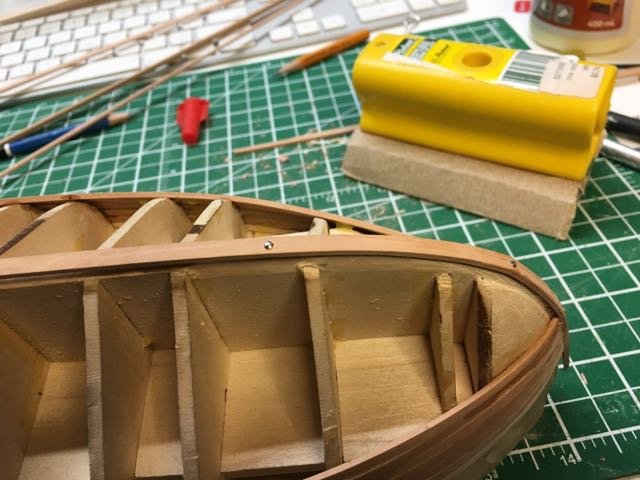
 Moving on with the planking. Now working from keel up as well as deck level down. I hope to meet in the middle!
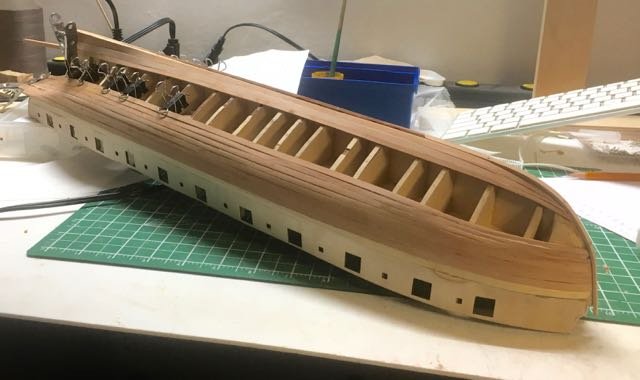
-
It'll work up near deck level at least. It's great to see your steady progress on the build - I wish my builds weren't so start and stop at this time of the year! I did cut the rabbet on my basswood bulkhead former. I also did with the the original plywood version that was replaced by the basswood. I thought that'd be a good warm up. I'll probably put the bulkheads on each of the 2 formers as well but unlikely I'd try to plank both hulls! Half of the stern forms that came came on the original plywood sheet literally disintegrated when I took them off the sheet!
-
Good joke David! Is your plywood hull form just being used for this task or will you be using it more?
-
Hi David, Have you looked at Rich's Syren build log (HIPEXEC) posts 70 to 82. They document his approach to using the 1/4" material. It'd be interesting to see if prebending 3/16" then trimming them for each pair of bulkhead extensions gives you a solution too. Why don't you give it a quick try?
-
It's great to see progress Derek. I feel similarly about photos - I often like the look of the real thing more than I like the photos I take. I think this especially true when we are planking hulls and decks as there isn't as much visually interesting in the frame so our eyes focus on any small irregularities (or worse - if we know of a small problem area and are drawn to look at it!) The photos of your work and your nibbing look pretty good to my eye. I didn't try the nibbing or the curved quarterdeck planking that I could have tackled - probably a cop out on my part. We learn by doing. Still fun isn't it?
-
I for one applaud your efforts and the detail you're providing. Your approaches and solutions help me (as a newcomer to modelling of any kind). I hadn't looked at your blog but will go take a gander! Keep up the good work.
- 245 replies
-
- 3
-

-
- bluenose
- model shipways
- (and 1 more)
-
definitely a learning boat!
-
Hi Dave, I'll take a stab at answering - oar ports!
- 1,135 replies
-
- 4
-
-
- model shipways
- syren
- (and 2 more)
-
Thanks for the detail - well done! Very interesting to see your techniques - I'll be seeing if I can use them on my Bluenose II
- 245 replies
-
- 4
-
-
- bluenose
- model shipways
- (and 1 more)
-
So close to close! I'll bet you can taste that sweet success! Nicely done!
- 1,135 replies
-
- 2
-
-
- model shipways
- syren
- (and 2 more)
-
Steve, I thought I'd share with you my latest "success" Remember the garboard strake I was complaining about? It turns out that if I just turned it over it worked the way I wanted!
-
i just hope when I eventually get to the Syren that some of this info will stick. Like sitting in the exam and knowing that you knew it before but not now.
-
PS - chapter 11 - page 48 describes the template for locating the mast holes etc
-
Hi David, Check Chapter 12 - page 54 2nd para of the instructions. That seems to be when the mast holes are drilled- presumably the filler bricks added already provide the extra support though balsa isn't the strongest. Page 62 talks about some additional support from a small elevates square section inside the fife rail.
-
Aargh! I had this idea that I would cut the stern shapers from some hardwood on the hope they'd be stronger as I've gather from several Syren build logs how fragile they are - probably wouldn't actually be any better would it???
- 1,135 replies
-
- 2
-
-
- model shipways
- syren
- (and 2 more)
-
You're doing well on the Sherbourne so I get the feeling you're ready for the Snake! It's one of the ships on my "wouldn't it be fun someday" list.
-
thanks Steve!
-
Hi Steve, Here was my 1st try at a garboard strake. Its ok a the stern - adds some width. At the bow it would of course be twisted and bent a bit to lie well against the bulkheads. Its obviously too pointy right now but if I leave it like that then it almost surely requires a stealer at the bow to finish smoothly There is no problem with the bow planks becoming too narrow as I have lots of bow space for the remaining 12 or 13 planks. Is your suggestion of the 2nd pin the one that is on the flat part of the keel - 3rd bulkhead? or that one on the curved part of the bow?
-
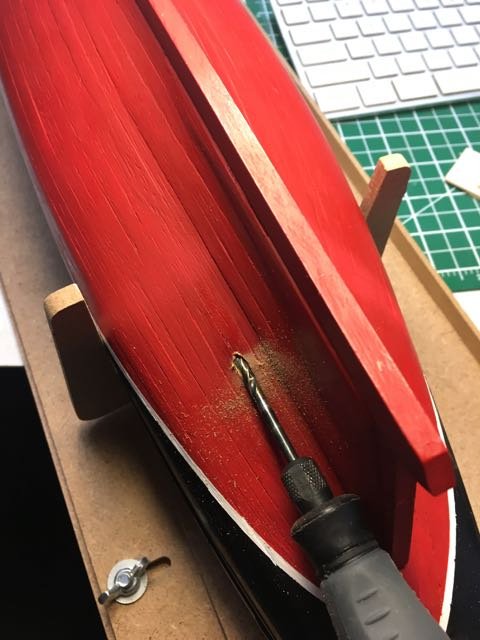
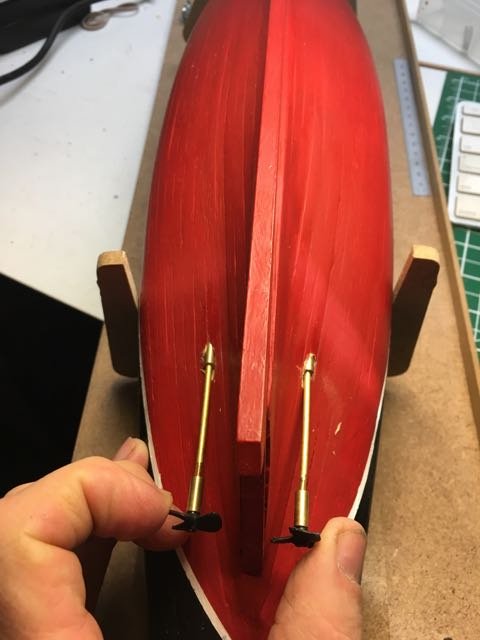
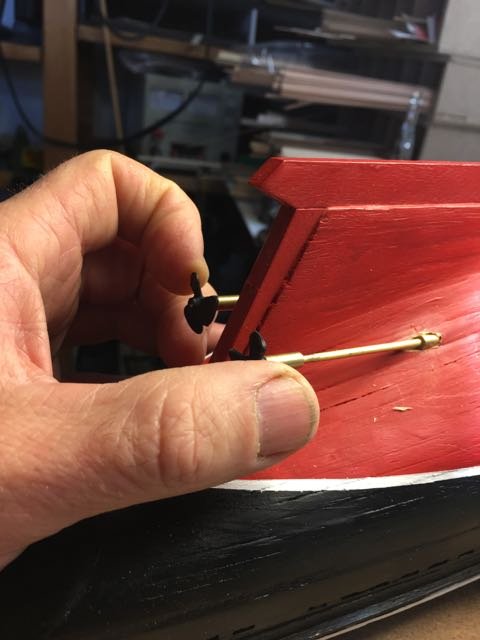
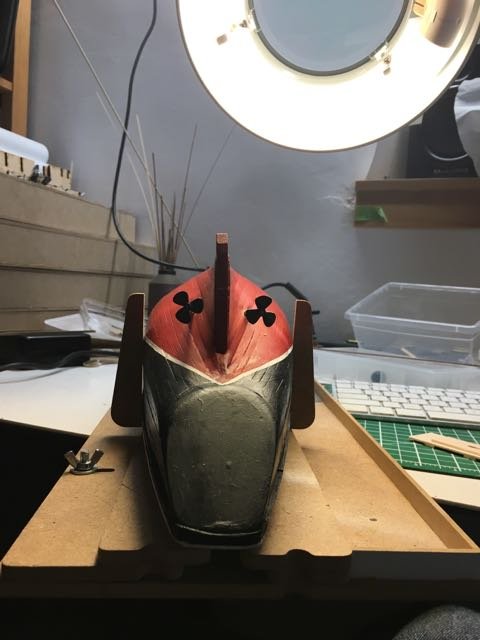
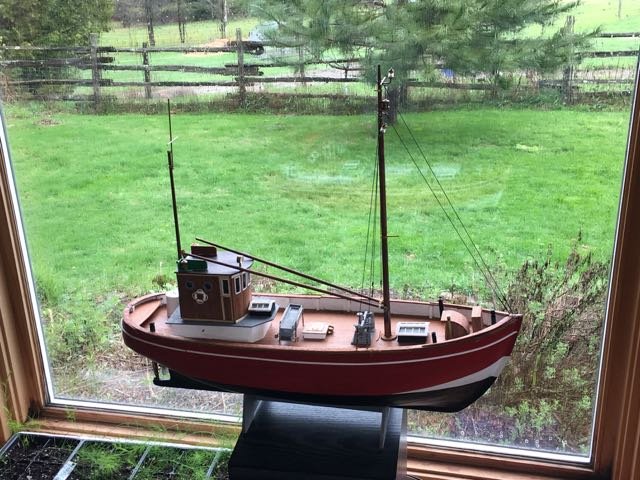
Agonizing over. I drilled the holes for the prop shafts and all seems to have worked out. Practice piece Started with small bit at right angles to the surface then rotated it into the correct alignment as the hole deepened. Then used progressively larger bits until the shaft bearing size was reached. Dry fit the props - satisfactory! Now I'll make the brass supports and attach everything permanently.

-
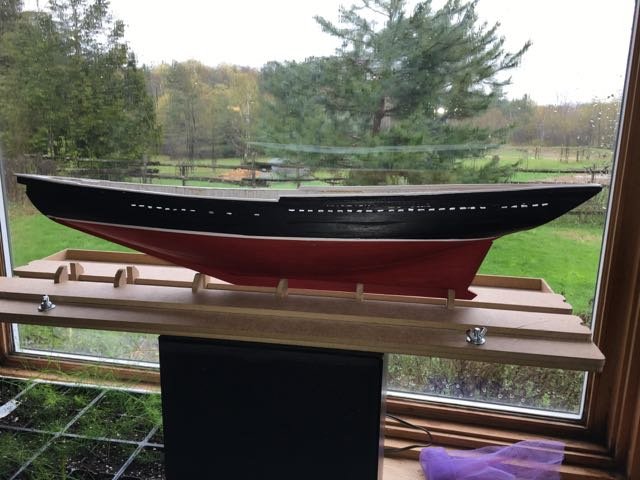
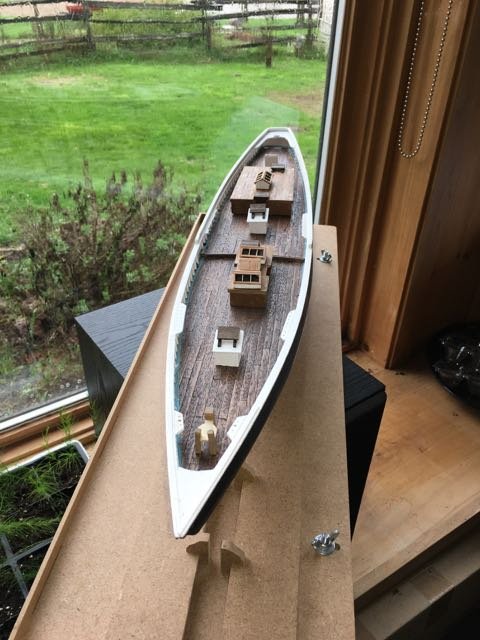
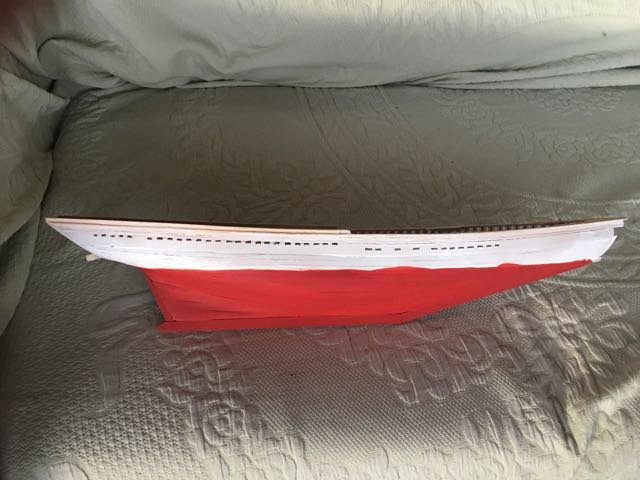
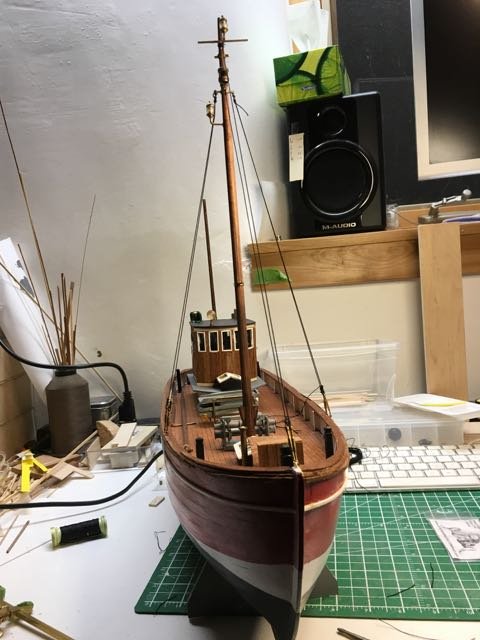
Time to post a small update on this build. I'm on the verge of drilling holes in the hull for the propeller shafts and I'm not happy about the prospect. I've bee practicing on some scrap. The problem (as I see it) is that the holes have to go in at a very shallow angle (almost parallel to the hull). Also, since there are 2 props on this ship they need to be very symmetrically placed to look good. I'm probably agonizing over something that will be fine but it is my ship after all! I'd be glad to practice on yours! I've adopted a very similar paint scheme for the hull as I used on the baby bluenose. Once the props and rudder are mounted I'll fasten down the deck furniture and get on with the rigging!

-
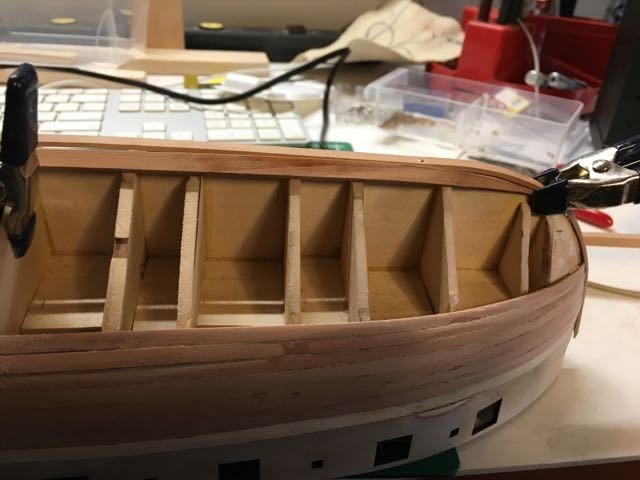
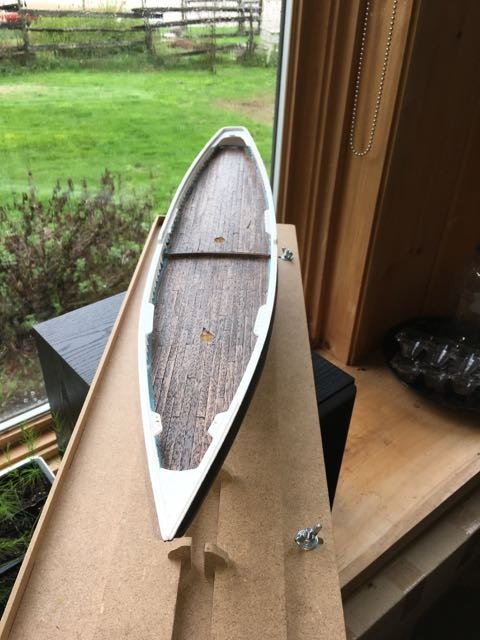
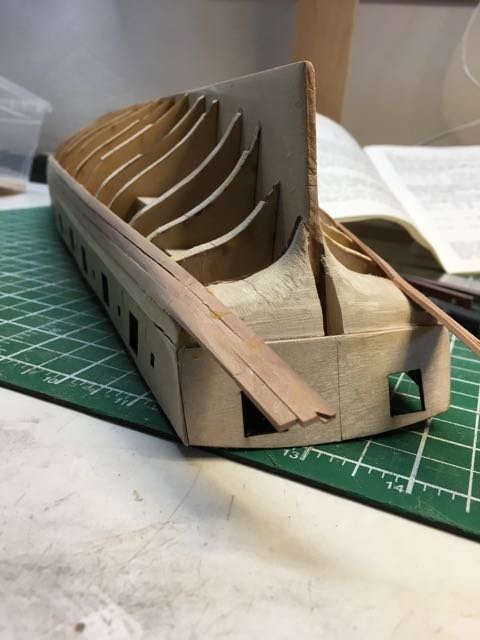
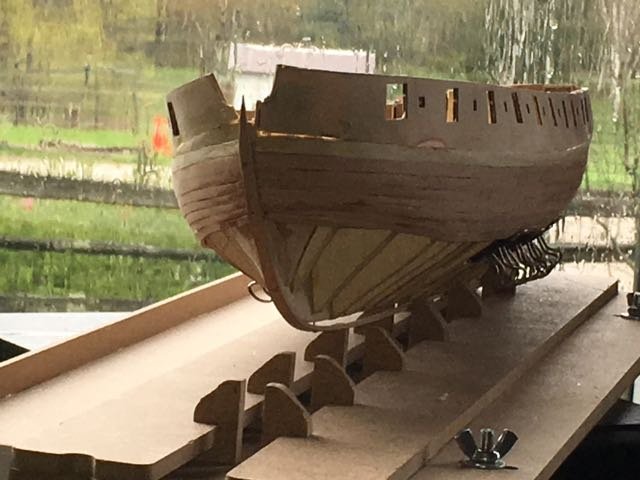
Thanks Joel - sorry for the long interval before responding. I've moved on with planking and am carefully ignoring the problem of how to tie the planked hull to the transom. I'm not very skilled at visualizing in 3D what the end result will be (bad pun). Still a long way to go on the planking. I cut some more pear strips yesterday - enough to finish the hull. I experimented with cutting wider strips (twice a s wide) to use for the garboard strake and the one above it. However I don't know how to shape it for this hull. When you look at planking references like Jim Roberts's it gives an (exaggerated) typical shape for the garboard strake - It doesn't make sense to me on this model. Also I'm unsure how far forward toward the bow the garboard strake should go. Since there was no suggestion in the kit instructions for forming a rabbet I started without one. Early on though I decided to attache strip along the bulkhead former - as it appears to be done on the Syren kit. That has helped a bit.

-
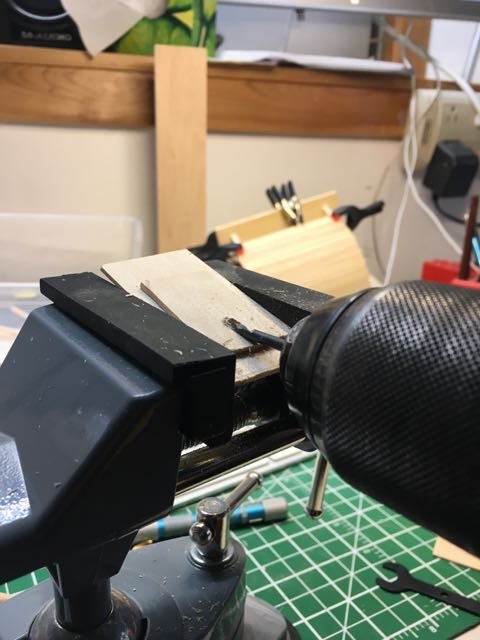
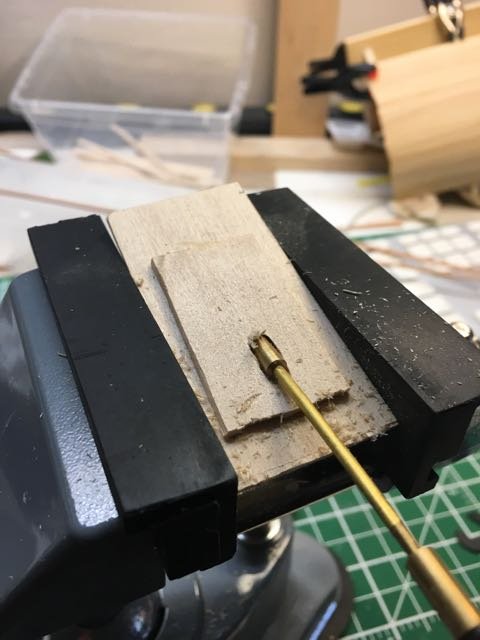
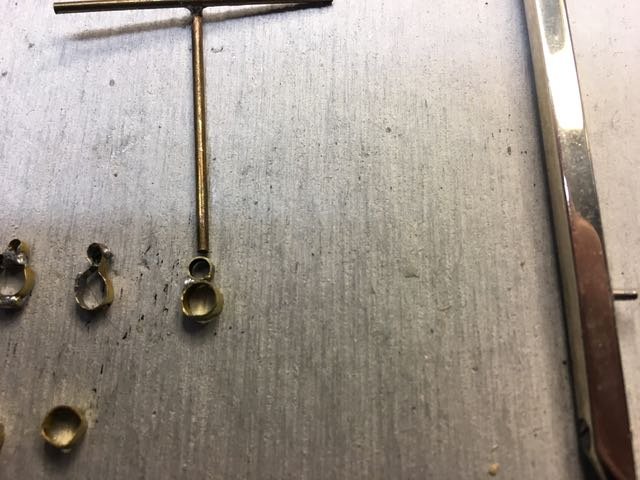
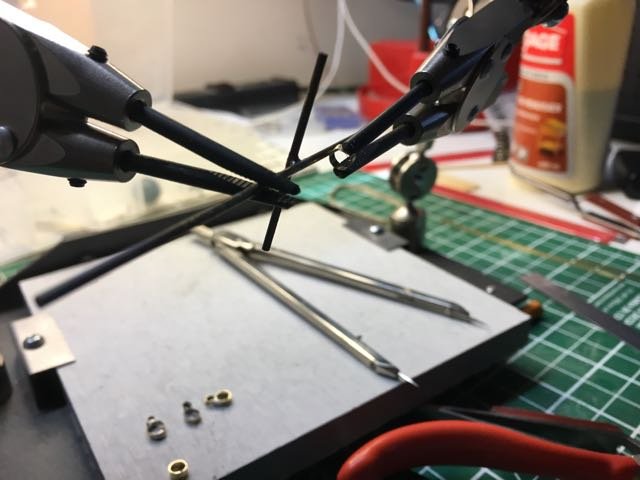
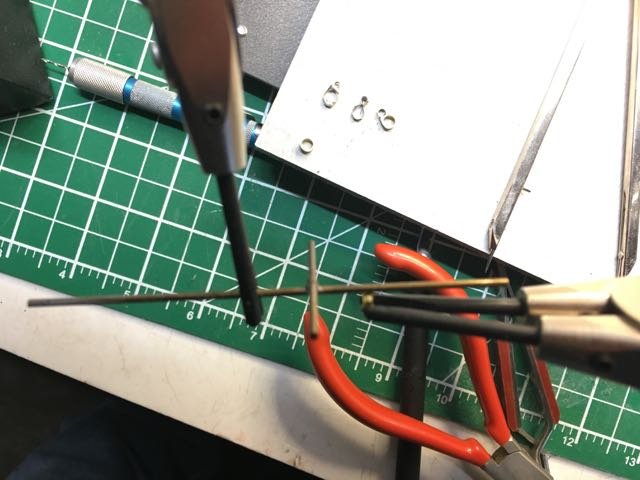
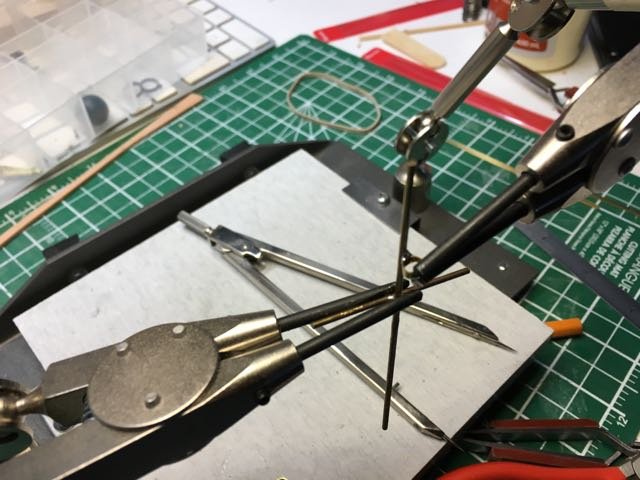
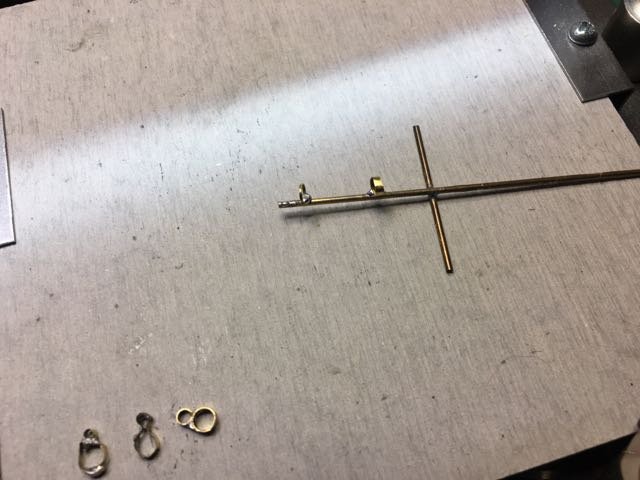
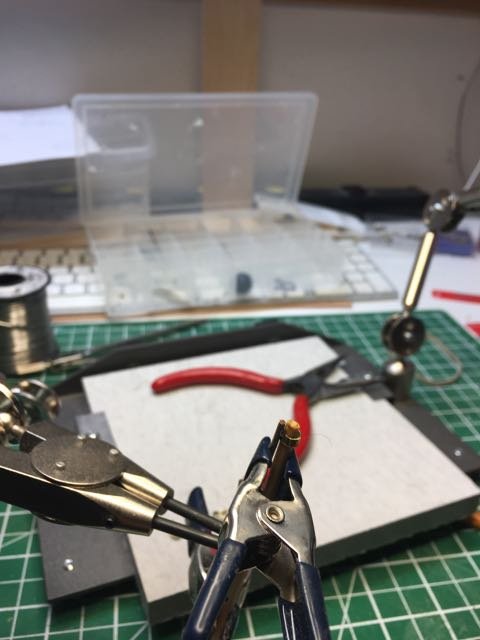
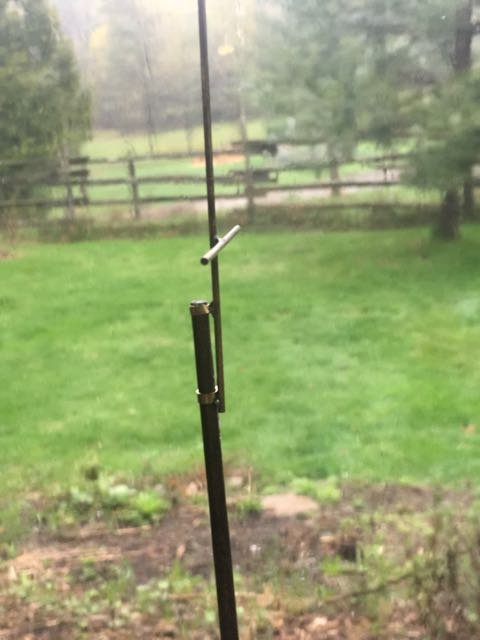
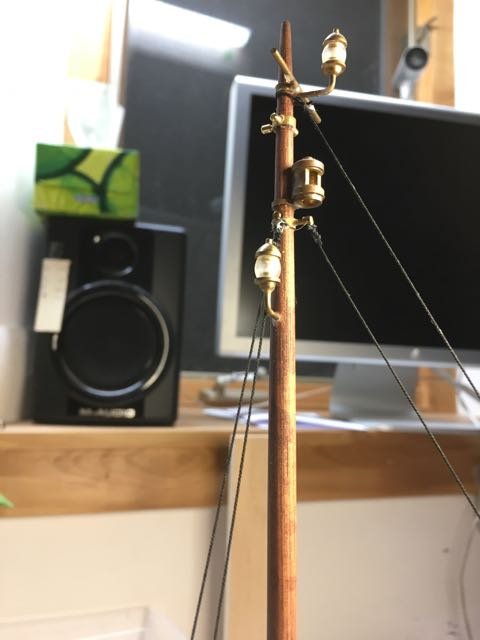
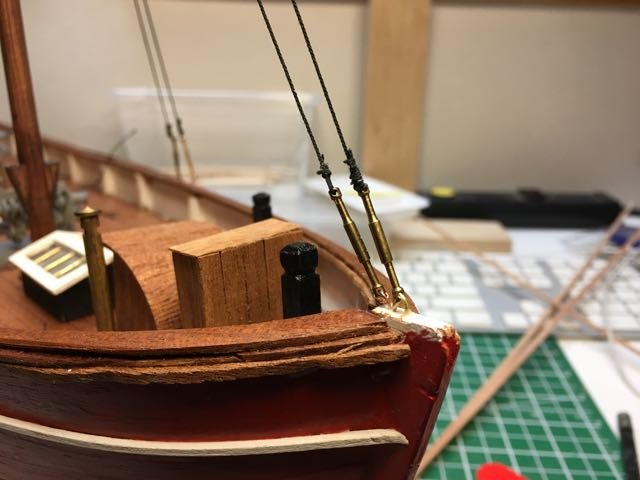
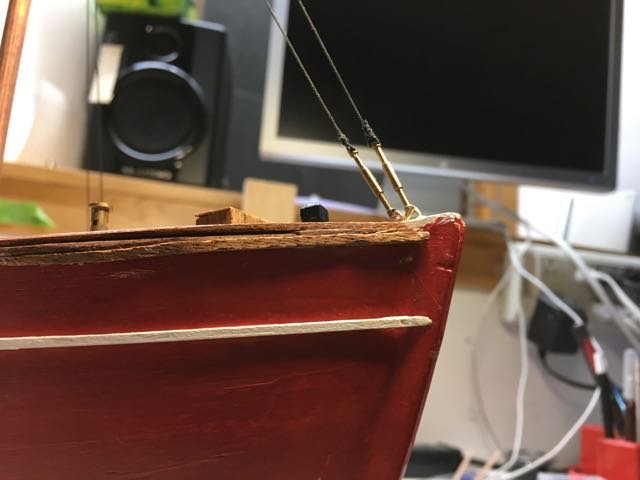
It's been a month since I posted. I decided that was long enough even though progress has been haltingly slow. This post is a way to keep a bit of momentum on the project. I needed some brass turnbuckles and eyebolts (were missing from my 2nd hand kit) as well as a propeller to replace the one I broke so I ordered from Billing Boats USA. Good service. The thread in the kit for rigging was not very inspiring so an order when into Syren Ship Company for some black rigging rope of a couple of sizes. Great service. Some rigging started: I've been fiddling with some brass bits. I needed to attach the radio mast (brass) to the mizzen mast. I tried superglue but the joint wasn't strong enough. I could have done epoxy but became motivated to try to make them from brass strips. It was less than satisfactory (post somewhere above here). A trip to the hobby store brought home some thin wall brass tubing in various diameters. The dremel slicing blade did a good job of cutting the rings off the tubing. Heated up the the soldering iron and got a more satisfactory construction. From left to right - 1st attempt with brass strips bent around a mandrel and then soldered. 2nd attempt a bit better. 3rd attempt using rings cut from tubing was satisfactory to me. Only problem was that the radio mast is skinny and the tubing wasn't. A DUH! moment when I realized that the radio mast itself was brass and could be soldered directly to the mast ring - I didn't need the double ring. I thought it'd be fun to try a really narrow band - the solder joint isn't strong enough! I've been wondering if I have to step up to sever soldering? Maybe I'll try that one day soon. Fixed up the second mast band and mounted it on the mizzen mast. I haven't decided if I need to anything to "hide" the solder which is silver-coloured rather that brass-coloured paint? Now I have to get back to rigging and then hanging the nets. The netting material provided in the kit is insufficient to make the nets in the plan. Off to the fabric store to try to find an alternative. It may be another month - or I may be back sooner.


-
Thanks for the details. I'll have to keep trying! I was feeling like I had an excuse for a milling machine until your last sentence
- 245 replies
-
- 3
-
-
- bluenose
- model shipways
- (and 1 more)
-
Not bad Derek. Yet another new skill!