


Heronguy
-
Posts
863 -
Joined
-
Last visited
Content Type
Profiles
Forums
Gallery
Events
Posts posted by Heronguy
-
-
-
Very nice - I'll look forward to your finale!
-
I'm going to miss watching when you are all done with the Mare! Such a great job and a useful build log to document your work. Back to the Bounty?
-
-
Thanks popeye,
My kit labels them 39 - that was supposed be my hint that they were installed later but I didn't get it at the time!
Happily filling and sanding just now. Feeling like the hull will turn out OK
-
-
Hey I need to do this. How did you take off the hull shape?
-
EJ - would you clarify one detail on your shroud description above? As I read it one rope length does both port and starboard shroud. If that's correct then is the rope just wound around the mast once? What's holding it on the mast at the start of the 1st shroud in the pair. The diagrams I've seen for shrouds seem to have both sides of the rope heading to the same side of the ship and the loop at the mast siezed to hold it there.
Sorry if this is a beginner question but I qualify!
-
Fun for the kids at the ambassador. Mine used to go there for friend's birthday parties at the pool and water slide.
They have a regular Sunday jam now at Bedford hall. You need to bring your own instrument normally.
I misread your post thinking you were in sharbot lake rather than Kingston. Oops. Kingston is a great town. I enjoyed living there for many years.
-
-
Hi Len, Thanks for the encouragement. I'm pushing along on the mainmast standing rigging. I decided to use some fine black linen yarn as I don't like the string that came with the kit. So I'll redo the foremast rigging too. More Practice!
I'm 45 minutes north of Kingston on a little hobby farm. So, I imagine it is your leftover weather we're getting now - ice pellets to be followed by freezing rain. Too much of that this winter already.
No rigging on your Chaperon either. Lots of other challenges though!
-
-
-
Thanks Cy!
Quite the experience with your Bluenose II. I'm glad it didn't turn you from model building! My wife and daughter are keen horseback riders and I've noticed that when a group of riders get together they always tell their "horror stories ". Now that I'm doing this hobby I'm understanding just how normal and useful that is!
The existence of this forum has already been crucial to my enjoyment of my new hobby. I'm glad it was here when I arrived.
Look forward to seeing your work as well.
-
Hi Cy,
When I decided to tryout this sport I thought it'd be best to start small and get some experience. The Billing Boats No 600 seemed to offer an easy intro - small 1:100 and split hull.
Happened upon a older Bluenose II kit from Artesania Latina shortly after I'd order BB kit. Great price so why not I thought. I thought the first one would be a throw away where I'd make my mistakes and then I'd build a keeper that I could show off (none of my family give me much credibility for handy work.
Once I had both kits in hand I thought it'd be brilliant to make them at the same time so what I discovered,on one I could apply right away on the second.
What I have discovered is that I'm quite capable of creating new mistakes on the 2nd!
I've grown up aware of the Bluenose (Canadian eh?) and I think it's a beautiful ship. I'm happy with both the kits (usually happy that is)
I feel a bit similarly about the Prince and the Syren - more similar than different; both gorgeous as well; what I learn from one will help with the other.
You're right though - I can't really lose whichever order I do them.
-
Fair enough CharlieZardoz. Thanks for the perspective. I'm kinda pleased to be in the position where I get to choose soon!
- mtaylor and CharlieZardoz
-
 2
2
-
-
Hi Doug:
Have you looked into solid wood hulls, such as the Blue Jacket kits out of Maine. In the 1970's there were located in Norwalk Conn. They have great kits and this is where I got my start. My first build was plank and it was difficult and discouraged me somewhat. After that I went to Blue Jacket kits and they have the Bluenose and many other great kits. Check them out on line...
I wrote a longer reply to your post but lost it before posting - here's the short version! Basically I enjoy planking, I want to get better at it but still like it. I'm of the impression that there is some carving involved in preparing solid wood hulls. Carving I'm not to keen on! I've been reading Philip Reed's books on modelling and am intimidated by the bulwark preparation on his solid hull miniatures. Maybe kits remove some of that???
-
Thank you very much but i dont think my boat looks good haha. There is allot of mistakes if i zoom in on areas:) the ratlines and shrouds are one of my mistakes. I didnt read the drawing well enough and thougt all the deadeyes would connect to my ratlines. Also some of the deadeyes twists all the time. And the seizing are just fakes. I took some photos on how i did it. I learnt it on a website somewhere. First i find something round that will fit the size of the ropes i will use. This time it was a small drill bit. I put some wax on it so the ca glue wont stick later on. Then i just twist the rope around it. Put a drop of ca glue on and cut of the ends. And drag it off the drillbit Then you have a fake seizing. To make the other rope that will go into fit inside just put a small drop of ca glue on the end and twist it . Then i will pass the hole in the fake seizing without problem. Just cut of the part that has ca glue on it after.
About the sails, i dont know myself. I want to put them on, but i think it looks nice without them aswell. So i just put it on my shelf for now. And when i have time and figure out how to make the sails i will probably put them on. But for now they stay in my box:)
Tried out the easy seizing you describe. I used a mandrel coated lightly with a bit of beeswax to wrap the thread around, weighted each end with a clamp, put on a dab of CA, gave it half a minutes to set, removed the clamps and then scraped it off the mandrel. Trimmed the ends before using the seizing. I did each seizing individually in case a longer wrapping became to hard to push off the mandrel.
Thanks for the help
-
-
Thanks for the suggestion Gemma. No planking on top of the balsa. I originally assumed it was just a filler block to be planked over but a closer look at plans convinced me otherwise.
It is not a single block. I actually used 1/2" square rods layer perpendicular on each layer. I thought about using a balsa sheet for the layers but it was quicker to use the rod. The advantage of the layers is that you can do some of the shaping when preparing the layers. I did a preliminary shaping on each layer after it was glued before adding the next layer. Worked for me.
-
Hi Rich,
I recall that at one time there had been an issue with the templates in the kit (probably solved now but...). This post was the only one I can find at the moment but I thought a saw a more recent one where chuck pointed to framing plans to download and print (and printer setting to avoid scaling). Just thought I should mention this in case it is still relevant.
-
Planking done, tidied up the stern bulwarks that I'd goofed on, and shaped the stern blocks. Here is what she looks like now.
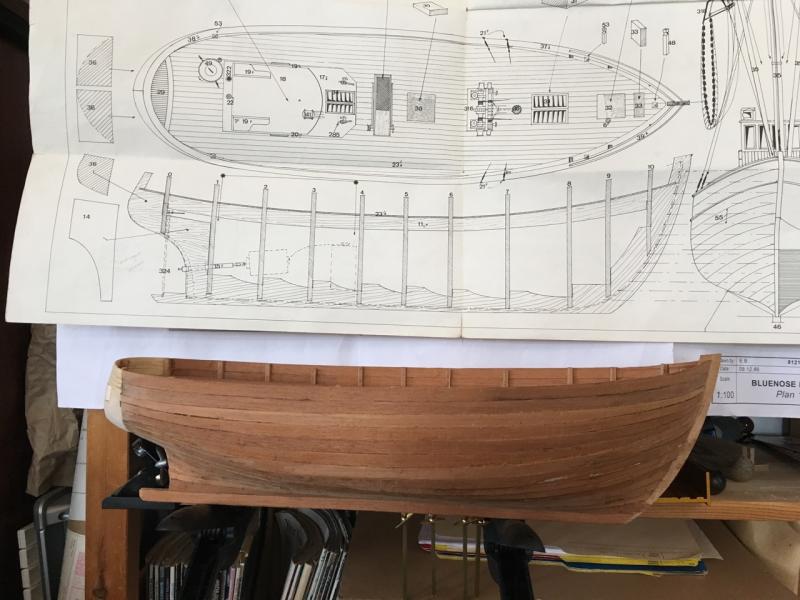
I thought the planking started out pretty well. However I must have been a little aggressive on narrowing the upper strakes at the bow as when I got to the lower hull I had to add a stealer at the bow.
I also think I should have figured out some way to form a rabbet at the bow. The problem came in when I got below the bulkhead closest to the bow. My strakes didn't continue the nice line of the upper ones. Another job for wood filler!
Definitely slipped up by installing the propeller before finishing the lower hull planking. It made that process much more awkward!
I used balsa wood to make the stern blocks. I really wanted the wood to be easy to shape and balsa fit that bill. I hope it will be robust enough when painted to withstand any little bumps I may inflict on it. I've heard other comments that suggest painting with a coat of CA to provide a tougher surface. Any other/better suggestions???
My plan for fixing the missing stern bulwarks didn't work out. I'd cut a wide piece out of the scrap wood from the parts sheet. It was easy enough to bend round the stern but due to the shape of the stern it wouldn't lie flat. My solution was to use some narrow basswood strips since each was cut appropriately to the length needed to accommodate the curve. I think that worked quite well. The only problem with it was due to poor fairing of the starboard stern bulkhead extension - the resulting curve in the stern is a bit flatter than I needed. Not a fatal flaw I think.
I'll move on to sanding and smoothing the hull. I'm still trying to figure out how to install the rudder (see post #19).
-
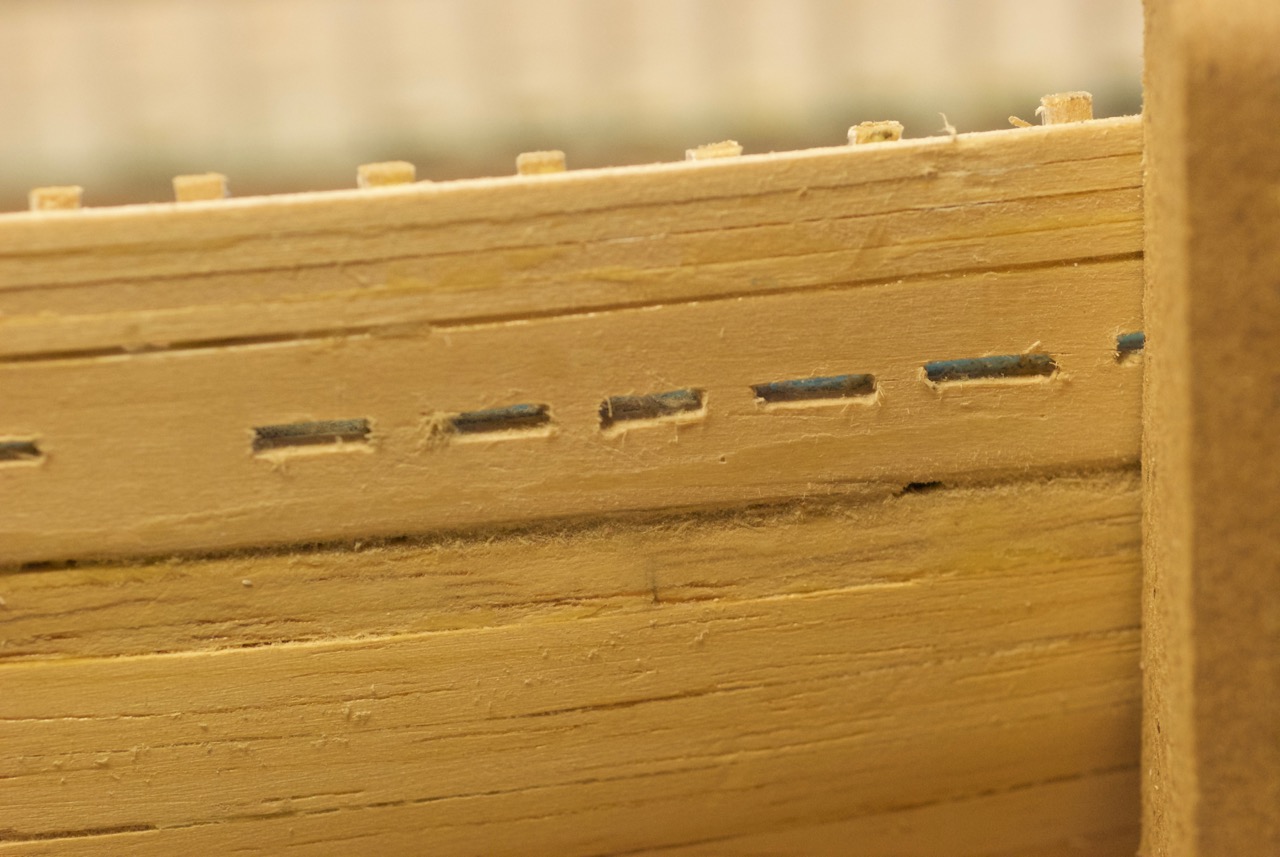
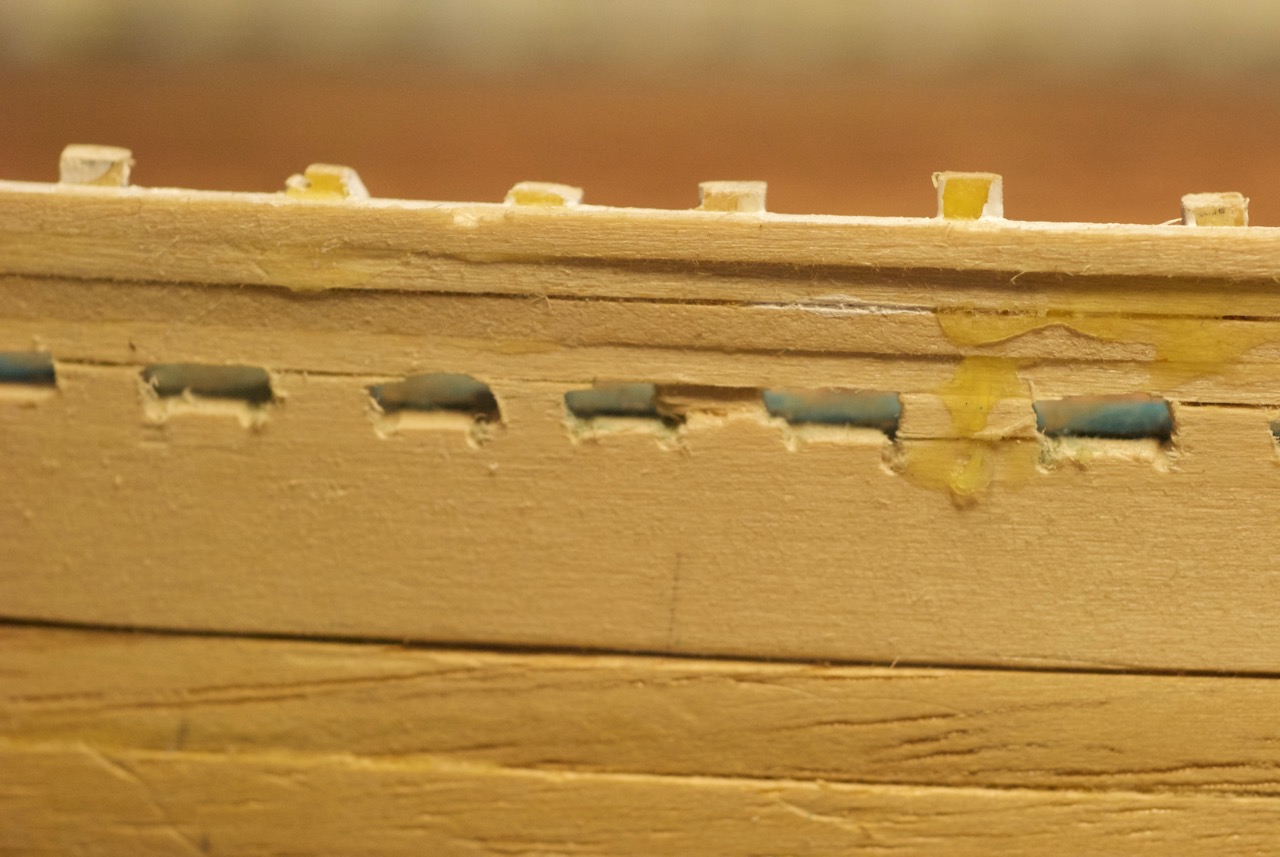
As I mentioned above regarding the bulwarks and waterway and the consequences to making changes without enough foresight, I have a new consequences to add.
The current step is to cutout the scuppers.
They were pretty easy to do on the foredeck (still some cleanup to do) because the bulwark piece at the foredeck is such that the scuppers are cut in the middle of the strake so there is lots of supporting wood around each hole.
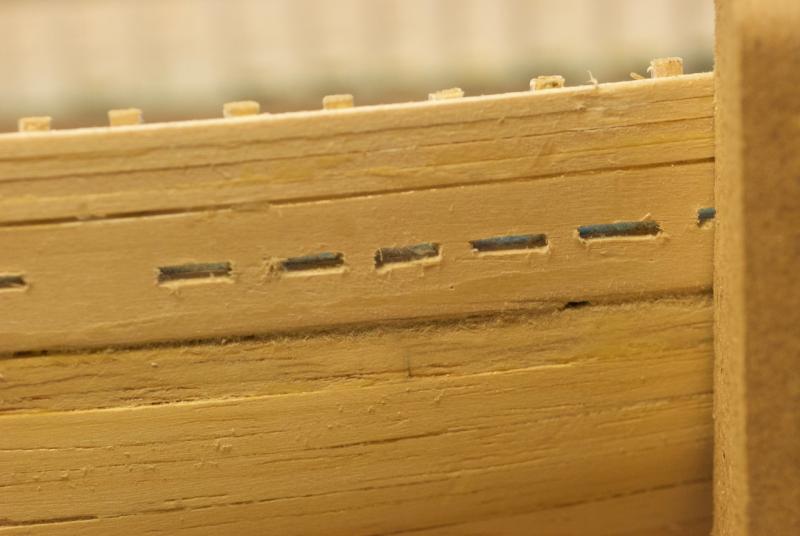
On the other hand, on the quarterdeck, because of the limited overlap in that strake, the scupper holes tended to splinter the wood and I lost the wood that was behind the stanchion. Lots of fixing to do here!
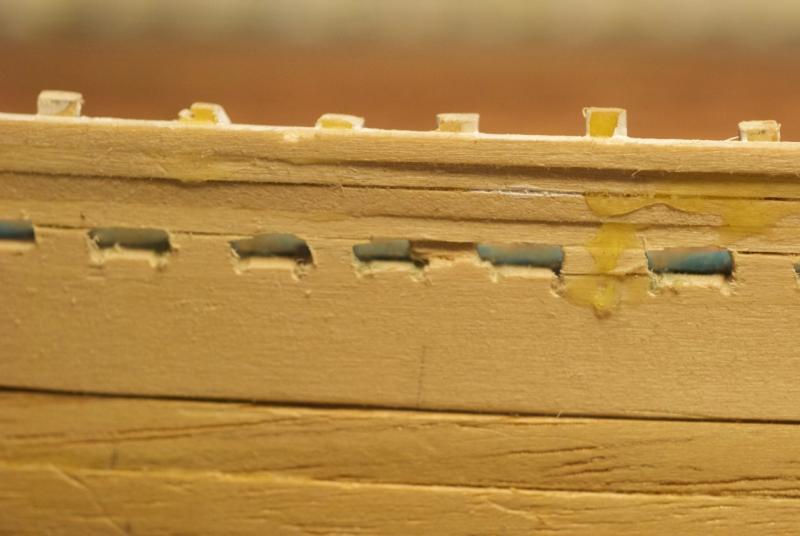
on a happier note she's looking more like a Bluenose II hull now!


Mare Nostrum by Worldway - FINISHED - Artesania Latina - Scale 1:35 - Fishing Trawler - First Wooden Ship Build
in - Kit build logs for subjects built from 1901 - Present Day
Posted
Congratulations Derek. One down, lots more to go!
A really great start on your modelling career. On to the Bluenose II!