


Heronguy
-
Posts
863 -
Joined
-
Last visited
Content Type
Profiles
Forums
Gallery
Events
Posts posted by Heronguy
-
-
-
Another good solution! I've got alternatives to try out. Thanks.
- Canute, mtaylor and thibaultron
-
 3
3
-
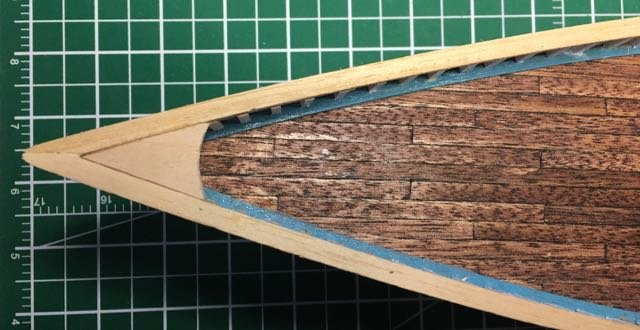
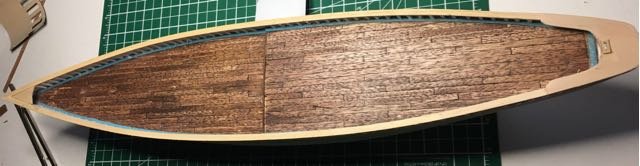
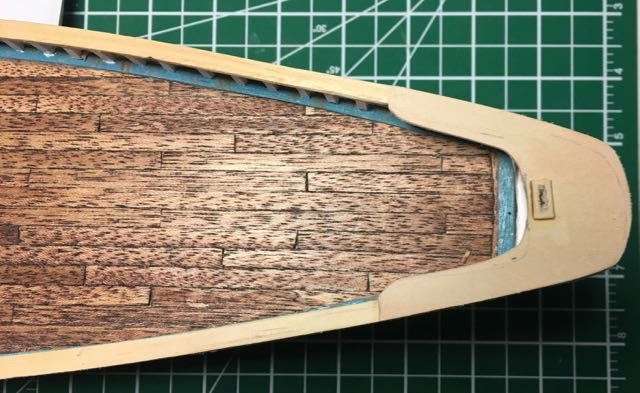
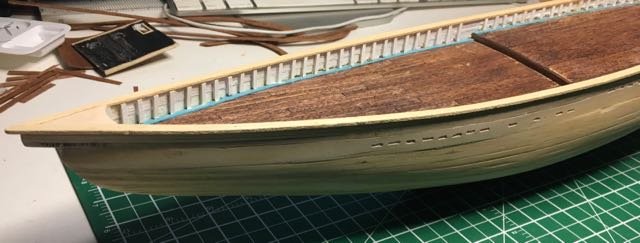
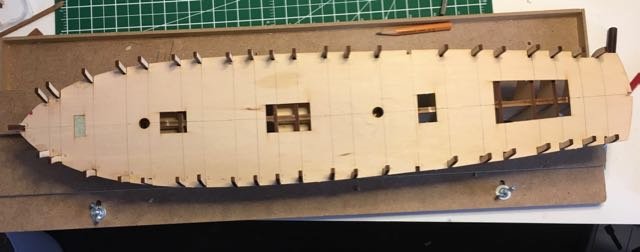
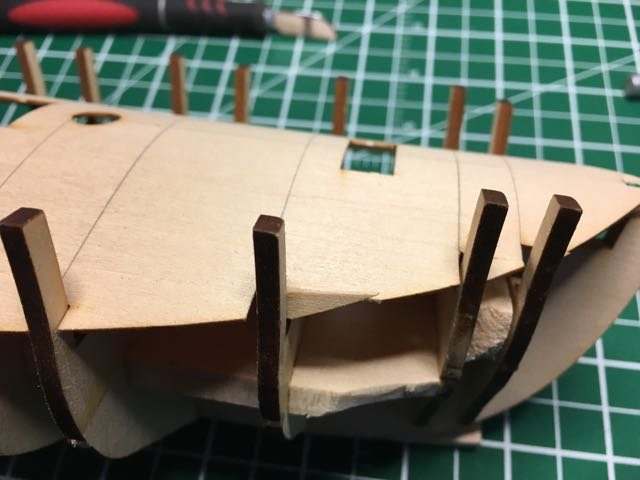
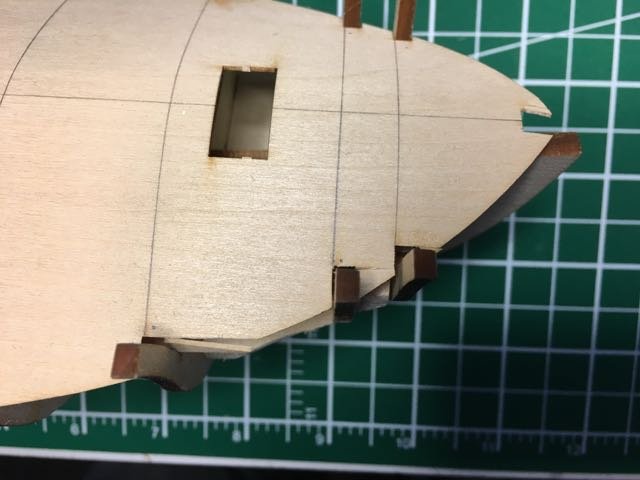
A little more progress on the build.
Added the poop cover, rail and breast hook.
- Dale Hallier, hexnut, piter56 and 5 others
-
8
-
Treat sanding as a chance for meditation. Be the wood. Feel the the grit ....
OK - at least your almost there!
- Nirvana, ca.shipwright, Bulwark and 5 others
-
8
-
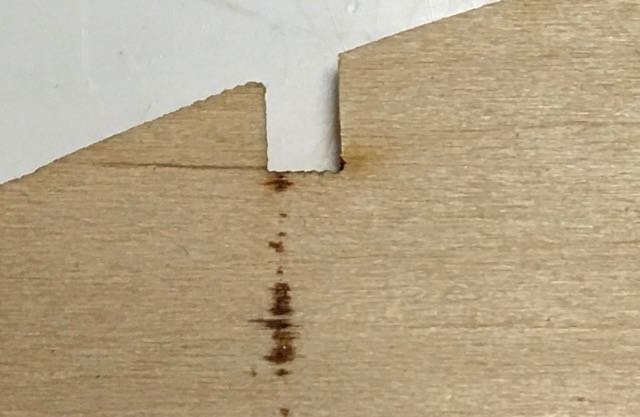
Some progress on the deckplate. I was tired of the thin basswood snapping off small sections so I strengthened the bow end (where it is most fragile).
To eliminate the excessive camber I had to lengthen almost all the cutouts for the bulkhead extensions. I found the easiest way was to use dividers to get the length between a pair of extensions,
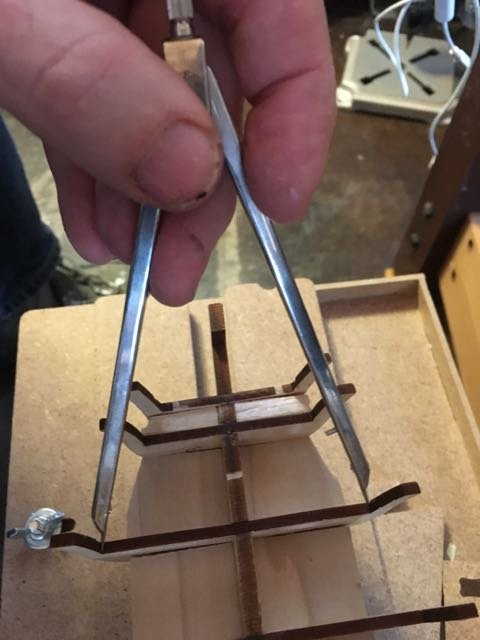
then check the deckplate
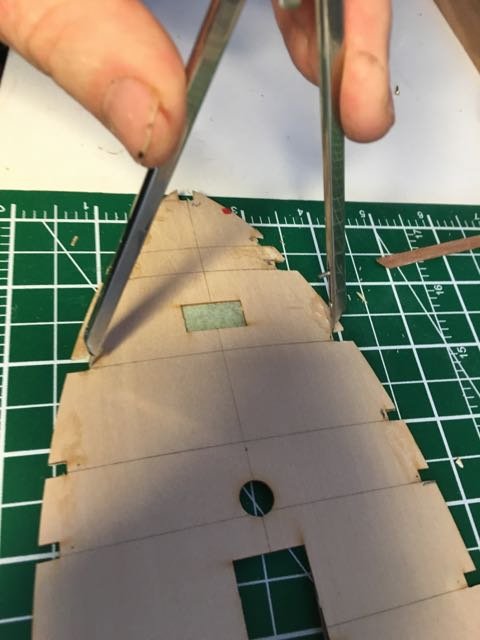
and trim it back as required - using the dividers on the deckplate to make sure that it was balanced on both sides of the centreline.
Refitting the deckplate (and snapping a bit more basswood where the fit of the extension was still a smidgen too tight!) and voila - deckplate fits!
Lesson learned: rather than fix one tight spot and hope that will be enough to get by, be consistent and thorough - measure and then fix.
-
-
-
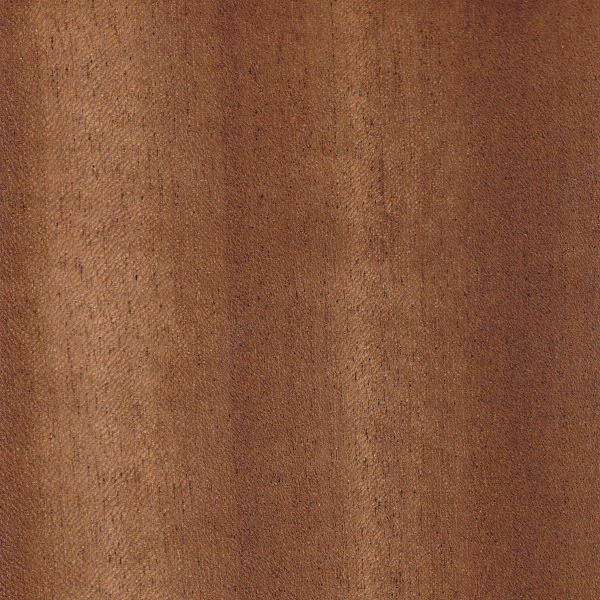
I wonder if we can trust parts lists or not? I'm sure the printed instructions might not be revised even if the manufacturer sourced a different variety of wood for some parts. The kit that initiated this thread listed the wood as Mazonia but when I look at the colour that the Wheeler doc shows I don't think my wood matches it. However a google image search for mansonia wood shows examples that are in fact much redder.
I'm going to take the safest way out and discard this bit of wood rather than keeping it around and wondering.
- thibaultron, mtaylor, Canute and 1 other
-
4
-
32 minutes ago, Jack12477 said:
Can't open the attached PDF file - get a message it is not available "to your account". Is this a protected file?
What's the issue with mansonia? Health issue? or ??? I've built a lot of Artesania Latina kits over the years and never encountered any obvious issues with any wood they supplied. But then I'm not sure which kits contained mansonia and which did not.
I've just pasted in the article so we don't have to figure out what's wrong.
Which wood is that? Are you sure? A warning tale by John Wheeler
Over the Christmas period I have re-started work on a project which has been on “hold” for a while – my Zuiderzee Botter. It was originally an Artisiana Latina kit, bought many years ago while on holiday in the Netherlands.
One of the problems of building from a kit – especially a kit where all of the instructions are in Dutch or German – is that you have to understand how the kit makers would approach the various challenges of creating their model. I went back to the parts list to find out which bit was which on the plans and found the parts numbers I was looking for – brilliant!
Next to the description I noticed a “material” column which had the word “Manzonia” next to my pieces. In fact, “Manzonia” was next to lots of pieces.
The word rang a bell. I looked at the pieces – the wood was gorgeous. I had bought and used wood just like it over many years. My first kit had called this wood ‘African Walnut’, but a quick look on the web told me that this wasn’t African Walnut – it was indeed Mansonia or Manzonia.
Mansonia (also called Bete or Ofun) is a dark greyish colour and is finely grained. It ‘works’ well and can be drilled and sanded to thin sections. It can be polished and looks very fine as masts and spars. Indeed, its colour and strength mean that it is almost designed for model making. But something still nagged – something that I had seen in the past...
I looked the wood up on the Internet Wood Database ( an invaluable resource). Under Allergies and Toxicity it said this:
Mansonia is on the short list as one of the worst wood species in terms of toxicity and commonness of allergic reactions. Mansonia has been reported as a sensitizer, and though the most usual reactions simply include eye and skin irritation, the wood dust can also produce a wide range of other effects, including nausea, giddiness, sneezing, headaches, nosebleeds, infected splinters, and asthma-like symptoms. Additionally, both the bark and heartwood have been found to contain cardiac poisons, which can cause heart disorders.
Now, I have asthma and I had found it really getting me down over the holiday. Indeed, instead of getting out and about, I had stayed indoors to do more modelling - which included cutting, and sanding pieces of mansonia. Even if there was only a slight chance that this dust had aggravated my condition, this was serious. I did not want a stay in hospital because of something I had done to myself...
I immediately removed all the mansonia scrap that I had built up and carefully wet-dusted and hoovered the entire room throwing away the hoover bag at the end.
I looked up modern kit contents to find out which woods are included today. No- one includes mansonia and it is difficult to buy it even over the internet. Presumably, no-one wants to take the risk of supplying it. But I know that I had bought extra pieces from a show only a couple of years ago – again wrongly labelled “Walnut”. (I also looked up other toxic
woods. Many of these (like Yew) are quite potent, but are unlikely to be used by model makers for various reasons.)
In other words, there are fairly large stocks of this wood still in circulation and if you have a personal stock of wood that you have collected for projects in the past, there is a good chance that you have some mansonia kicking around in there – especially because it has often been mis-labelled by suppliers.
While it can be worked safely, this does include precautions that most people would find impractical (facial respirators, professional quality dust removal, gloves, etc). It is interesting to note that the Health and Safety limits for hazardous wood dust is 5mg (5/1000ths of a gram) per cubic metre of air.
I am in the process of removing all mansonia from my model and rebuilding with other (safer) materials.
If you want to check whether you have mansonia in your stock, then the best guide is the colour. Mansonia is an even greyish colour with a close grain whereas walnut tends to be russet and brown with a greater variation of shades. (As always with natural products, there is variation and there are a range of types of walnut.)

There is a lot more information on toxic woods and how to deal with them at:
- Jack12477, Pierretessier, mtaylor and 3 others
-
6
-
Yep - that's one of John Wheeler's points too.
- thibaultron, Canute, Nirvana and 2 others
-
5
-
When I asked a question earlier I mentioned that the wood might be Manzonia (according to to the parts list in my older Artesania Latina Bluenose II kit) I received a message from John Garnish. I think there may be others who should hear about this wood.
John wrote:
Your post rang a warning bell. I am editor of the newsletter of our Society of Model Shipwrights, and one of our members recently sent methe attached note.
Mansonia sounds pretty nasty - you may like to look for an alternative, which could also be easier to work. Personally, I'm a great fan of apple and pear, but you could try cherry if you want some grain to show.
This note was was from John Wheeler a member of the Society of Model Shipwrights in UK
( Edit 8:35PM:: I've posted the contents below as an alternative)
I hope this information is useful. -
Got it Steve. Thank you. Now to find the stock!
- mtaylor, Canute, Steve 12345 and 1 other
-
4
-
21 minutes ago, vossiewulf said:
Make sure you look at existing tools - remember people have been making strips for inlay work for a few hundred years. Lie-Nielsen has a traditional inlay strip cutter and a thicknesser.

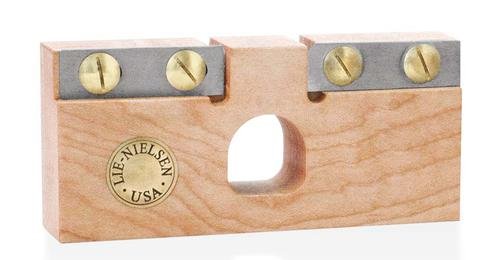
Japan Woodworker has a traditional Japanese inlay strip cutter as well:
Thanks for the info. I may not know how to use them but I do admire the beauty of these tools. I'll investigate further.
- mtaylor, thibaultron, Canute and 1 other
-
4
-
21 minutes ago, Steve 12345 said:
rather than buying veneer doug see if you can get stock machined to say 5mm by any width lets say 50mm and whatever length
if you then want 5mm by 0.5mm your proxxon saw will easily rip these with no splitting or if you want 3mm by 0.5 simply rip 3mm off your 5mm by 50mm strip then rip it down to .5
if you didn't live on the other side of the pond id gladly machine you some stock
So the trick is make the thinnest cut last?
I'm a bit slow today (always???) but I don't get the 3mm fix. If I have a 5mmx 50mm I can't cut it to 3mm x 50mm because the blade only cuts 12mm deep so I have to cut to 3mm x 5mm and then cut to the thickness I want (say .05mm) I won't be able to make too many strips off that block before it is too thin to handle - did I get that right?
- Steve 12345, thibaultron, mtaylor and 1 other
-
4
-
25 minutes ago, exwafoo said:
Sorry Doug,
Ships in Bottles. Keeps the dust off of the finished model.
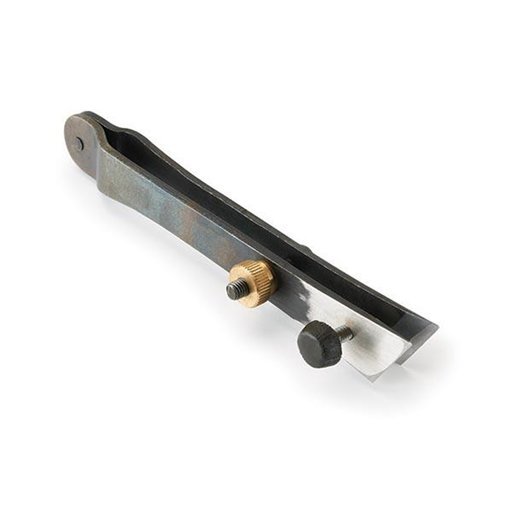
Adjustment is by slackening the nuts and bolt and moving the blade away/closer to the edge of the right angle strip, using a drill bit of, say, 1 mm as a gauge to set the gap so a 1 mm strip will be cut. Then tighten. May have to do this a couple of times to 'fine tune'. The blade rotates around the bolt so that depth of cut of a pass is adjusted by finger pressure. A couple of attempts will let you know how the wood cuts and how many passes are required to cut through. I've found 3 or 4 light cuts produces nice even strips.
The SIB shown has 1 mm decking of a light coloured veneer stained with oak stain. Sorry its a bit blurred.
Hope this helps
Alan
Brilliant! Thanks for the explanations!
- thibaultron, mtaylor and Canute
-
3
-
4 minutes ago, exwafoo said:
Doug,
I model SIBs, for the deck planking, I cut strips 1 mm wide from some light coloured veneer using a strip cutter I made a few years ago from a piece of aluminium right angle, nuts and bolts, and a single sided razor blade. Thickness of cut is set by using a drill bit as a gauge and a bit of trial and error. The only downside is that you need a straight edge on the veneer to start with and the cut strip is what the cutter is pressed against, but a bit of care and two or three light passes works OK. The square section on top of the blade is to allow a bit of pressure without getting a grove in a finger.
Cheers
Alan
Simple but elegant! I don't know if I have the the whole story - Do you have to adjust depth of the blade for each pass?
Of course the other problem is that I've never built anything even as straightforward as your cutter - I'll have to acquire the angle iron, etc
By the way, what are SIB's (I imagine I'll feel foolish when I find out!)
- thibaultron, Canute and mtaylor
-
3
-
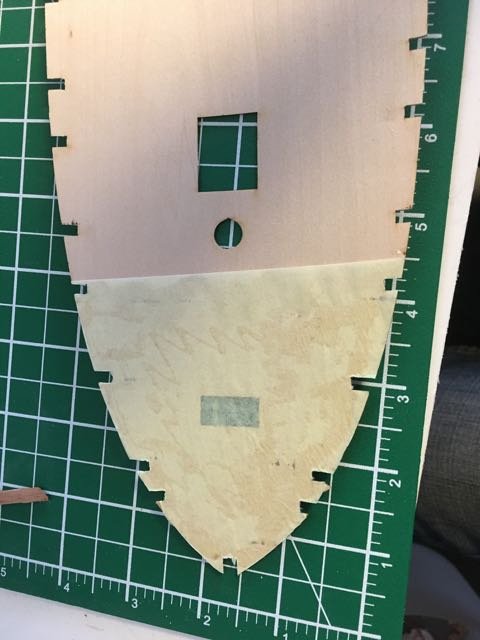
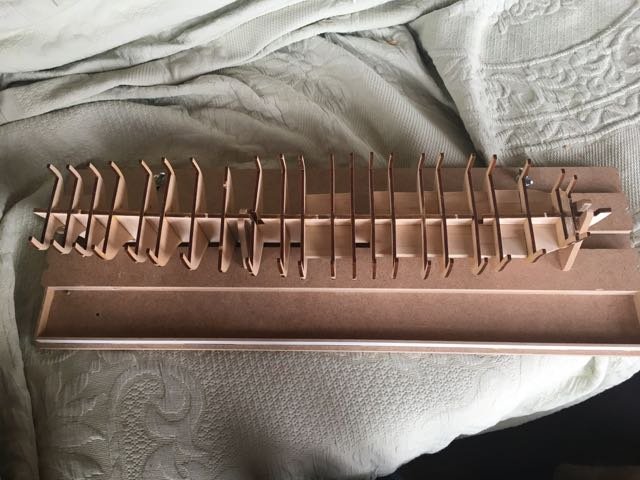
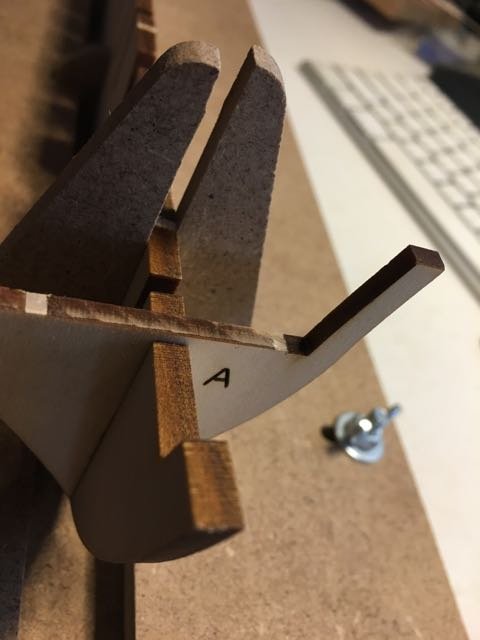
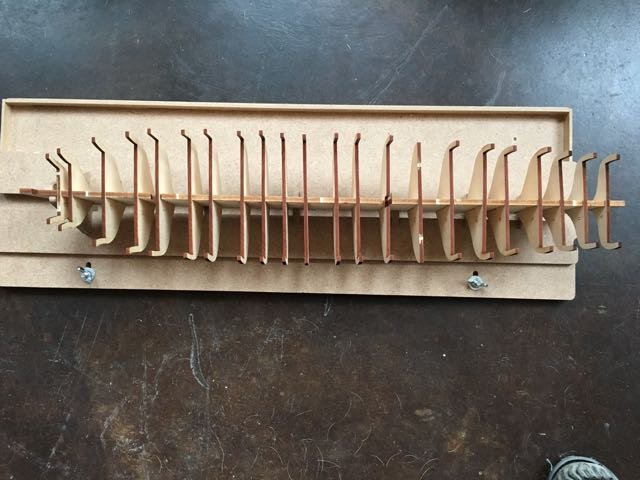
The deckplate!
Popped right out of the the laser cut sheet but boy is it thin - only 1/32". Delicate.
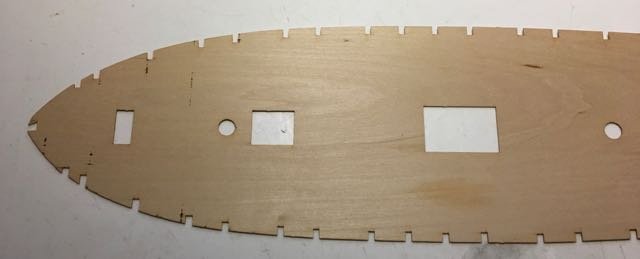
The last deckplate I had to deal with was twice as thick and 4 times as robust!
A couple of easy breaks:
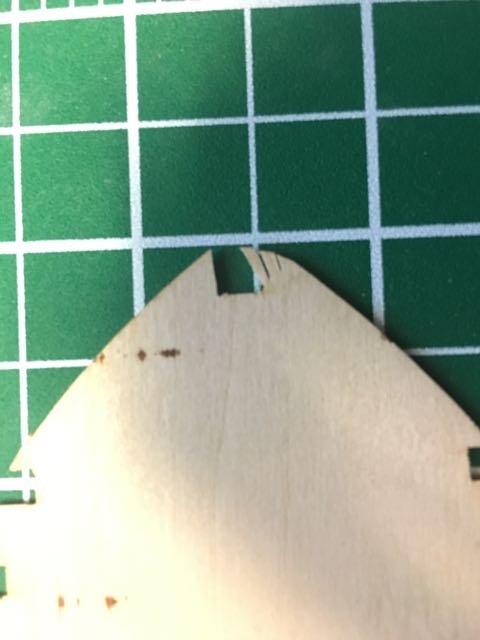
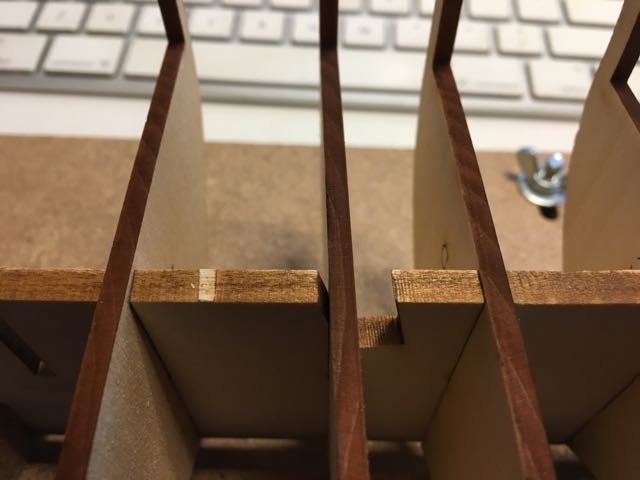
The alignment of the bulkheads wasn't too bad! Every bulkhead cut needed a bit of trimming - every one was too tight.
With a little work I discovered the advantage of thin deckplates - it bends:

Unfortunately the cuts aren't deep enough - and of course the deckplate is a bit delicate:
Back to thinking about how to proceed - drat.
- popeye the sailor, coxswain, Nirvana and 1 other
-
4
-
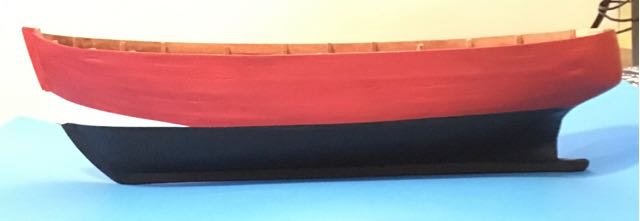
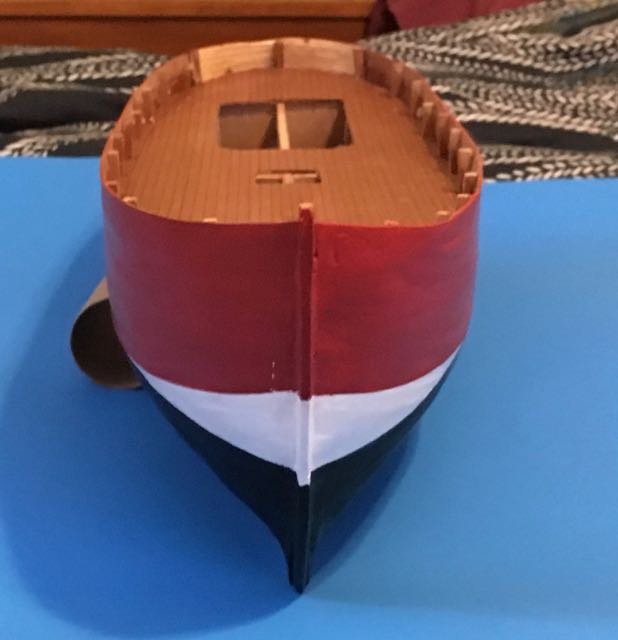
Moving on slowly. The hull is painted.
-
Welcome all.
Richard, I expect I will "own" lots of parts of the kit before long. (see my next post for an example)
30 minutes ago, Worldway said:That looks nice and straight. Good start. The beauty of wood is that any breaks can easily be fixed with glue. I had a good chuckle when you said you ripped one to the floor, the one with the least amount of wood. It's like dropping a buttered piece of toast, it always lands butter side down.
That's why I keep the floor so clean! Now if only I had w rubber floor in the shipyard.
-
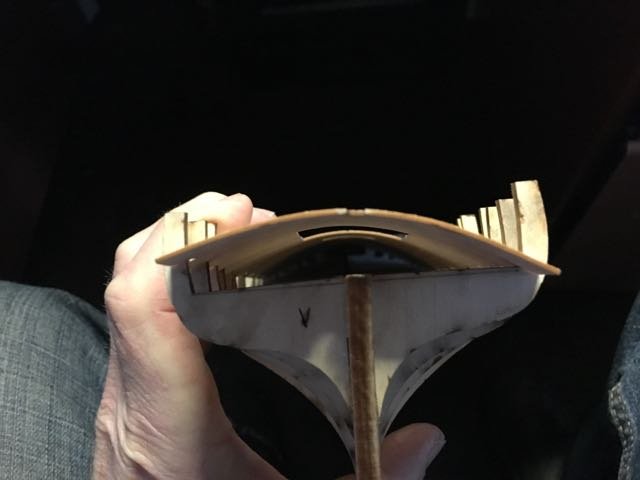
I love the look of the hull to come! But I've learned how much work I'll have to do to prepare the bulkheads for planking. And yet these bulkheads are so delicate! I know - why don't I put spacer between them to strengthen them!
So I started cutting spacers - I have the saw for it now so it seemed like the right answer. And the model maker seem to create only 2 different gaps between bulkheads 1" and 5/8" (US model - imperial measurements!)
But wait a minute! I've learned that is is a good idea to read/think/plan ahead. Since I tend to forget things pretty quickly that means re-reading instructions to remind myself what's coming. The instructions make a point of how the deckplate has an integral role in positioning the bulkhead extension in the correct spot. But my spacers are making the bulkheads more rigid to prevent them snapping - I wonder if there'll be a conflict. So I better check out the deckplate.
-
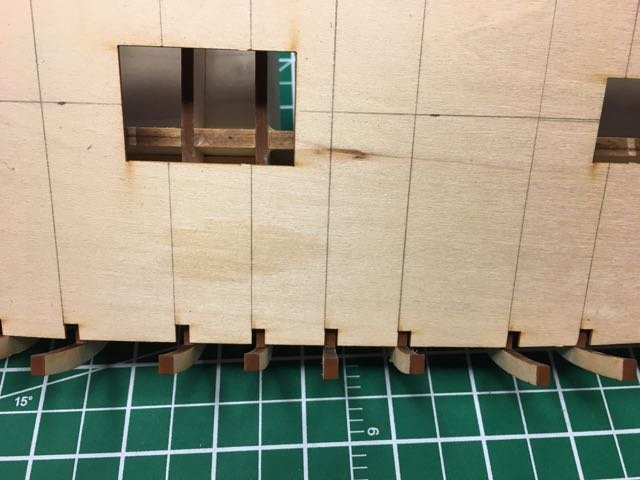
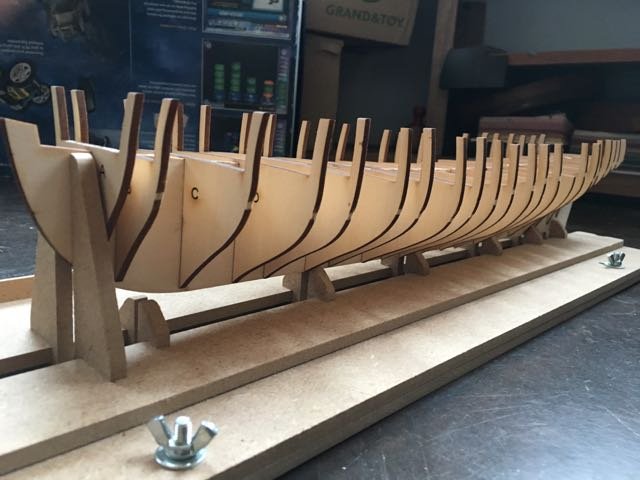
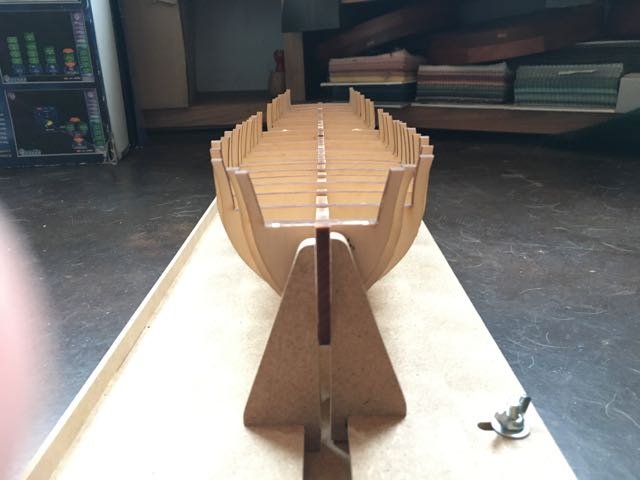
The keel and the bulkheads are solid basswood 3/16” thick for keel, 1/8” for bulkheads. Nicely laser cut and easy to remove keel. (It left lots of spare stock for the proxxon saw!)
The bulkheads were not quite as easy to remove from sheets and feel delicate. No fairing guides burned into o them as there are in the Syren kit.
Delicate is a good word for the bulkheads - I'm trying to be very careful but I ripped one onto the floor and and split in half - it was one of the bulkheads with an extra mast cutout so there wasn't much wood holding the two halves together - I had to drop that one!
Most of the bulkhead positions on the keel require a very light filing to take the bulkheads snugly but not bind them - broke another bulkhead before I got that right. Only a few slots were not deep enough to make the bulkheads flush with the top of the false keel.
The false keel has cutouts for the masts.
All in all it was quite a pleasure installing the bulkheads.
-
My excuse - such as it is - is that I'm out in the sticks and have no ready access to a woodworker supply store. When I tried to order a bit online they wanted to hit me with a small order handling fee that was more than the material cost! I demurred
")
However I may have to make a pilgrimage to build up a supply of material for future projects!
- thibaultron, mtaylor and Canute
-
3
-
I picked up this kit second hand and thought it would provide lots of fun and challenge. Although it is no longer available from Model Expo there are 4 or 5 build logs here on MSW.
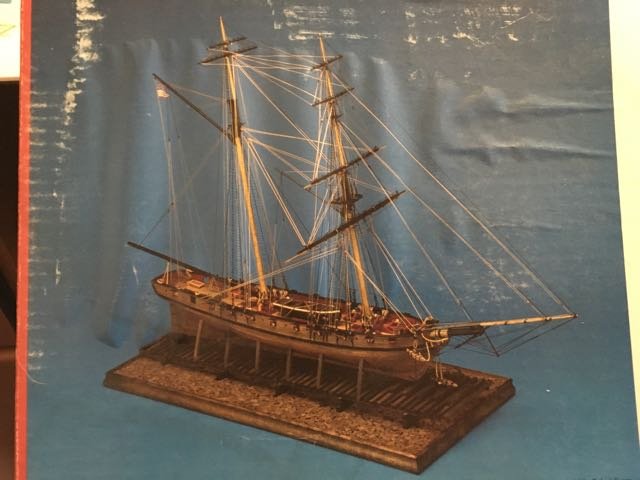
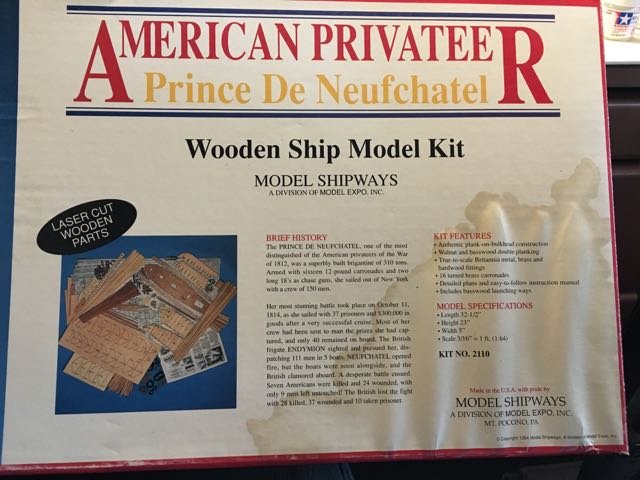
The PdN is also the subject of a book by Philip Reed - Period Ship Modelmaking - An Illustrated Masterclass.
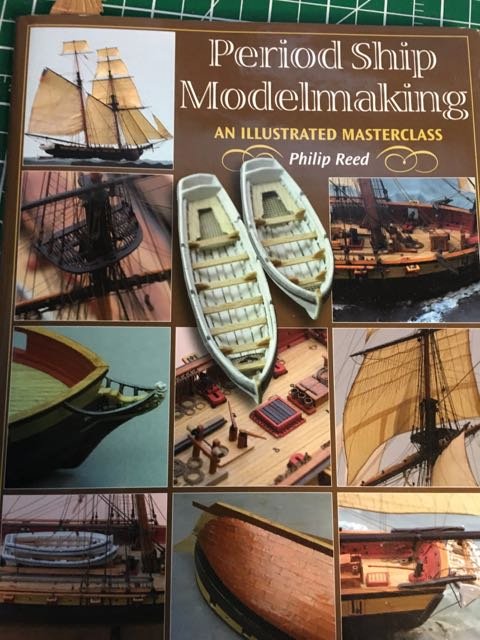
I'll dispense with the kit contents photos as you can find them on other build logs.
Wish me luck - I think I can use it!
-
Peter,
Hadn't thought of that! I'll also give that a try!
Doug
- mtaylor, Canute and thibaultron
-
3
HMS Victory by Steve 12345 - FINISHED - Mantua/Panart - 1/78
in - Kit build logs for subjects built from 1751 - 1800
Posted
You certainly demonstrate a talent Steve! You build a ship in under a year while I struggle to build four cabin walls in a month - and your results are excellent. Glad you're building and sharing your work! Keep at it but don't forget to sleep too!