


Heronguy
-
Posts
863 -
Joined
-
Last visited
Content Type
Profiles
Forums
Gallery
Events
Posts posted by Heronguy
-
-
Thanks Allan,
The appeal (to me) of the continuous line was just that it would even the tension across the 3 segments and prevent any from sagging if one was more taut then the others. I'm sure that tying the knots at this scale is not easy to do precisely. I was mostly curious about that one to know if the real ship would have had some reason for a continuous line (which would then have been another justification for my preference!).
Yes the rigging plan is quite simplified in keeping with the small scale and target audience. I decoded some of the rigging plan by looking at plans from a larger scale set of plans but it still left me those uncertainties. I acquired a small library of model building books but Chappelle's Fishing Schooner was not amongst them. Too bad.
Amazon's "Look Inside" showed me the detail that you were referring too (bail or crane or wye).
Doug
-
Hi Rich,
When you edit your profile you will find a place to edit your signature.
So,
1) Choose My Profile from your username on the left side of the 2nd Blue Bar at the top of any MSW window (where signet, notification ... are
2) That'll open a new window with a summary of your profile. On the upper right is a button for Edit my Profile. Press it.
3) In the new window on the left side are a bunch of profile sections. 5th one down in Signature. Press it and you're there!
Doug
-
I've ordered my Syren too. See you in the shipyard!
Doug
- Ryland Craze, Elijah, mtaylor and 4 others
-
 7
7
-
-
-
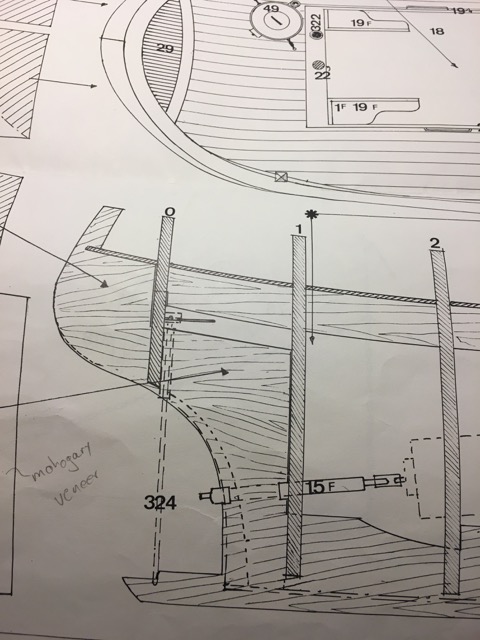
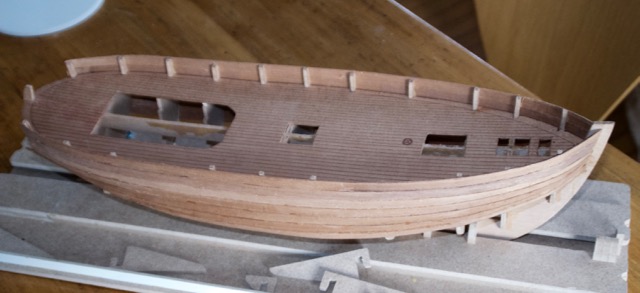
I'm just at the stage of rigging my scale 1:100 Bluenose II from Billing Boats. This will be the 1st rigging I've ever done. I'm trying to understand the "diagrammatic instructions" that came with the kit - the written instructions are effectively silent on this process. I've been reading Frank Mastini's "Ship Modelling Simplified". I like his suggestion to prepare as much of the rigging before stepping the masts. Much of the info in that chapter deals with more complicated rigging than is present on my model - one of the reasons I chose the Bluenose II for a 1st build. I also have a Artesania Latina Bluenose II kit and have been able to use their more detailed plans to help understand the Billing Boats model. I have Jenson's Bluenose II book for reference.
I'm starting to get a feel for the process but I have a couple of simple questions.
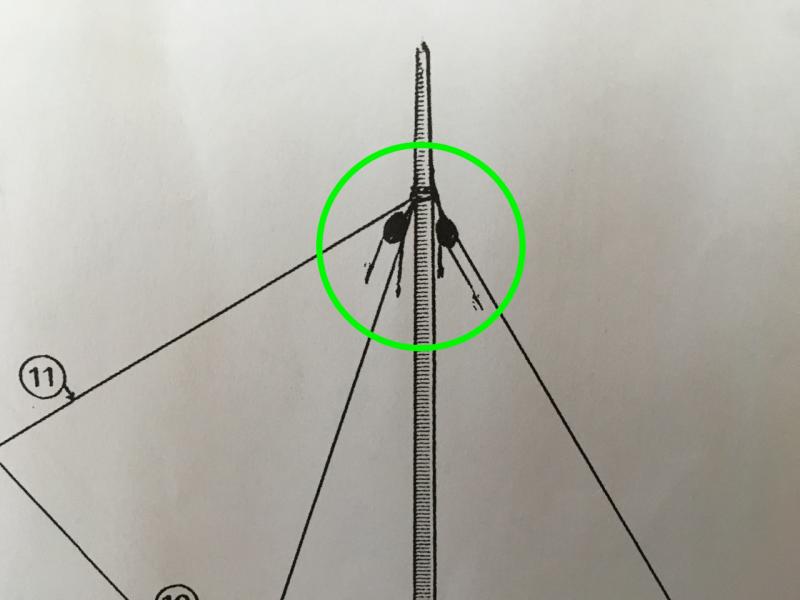
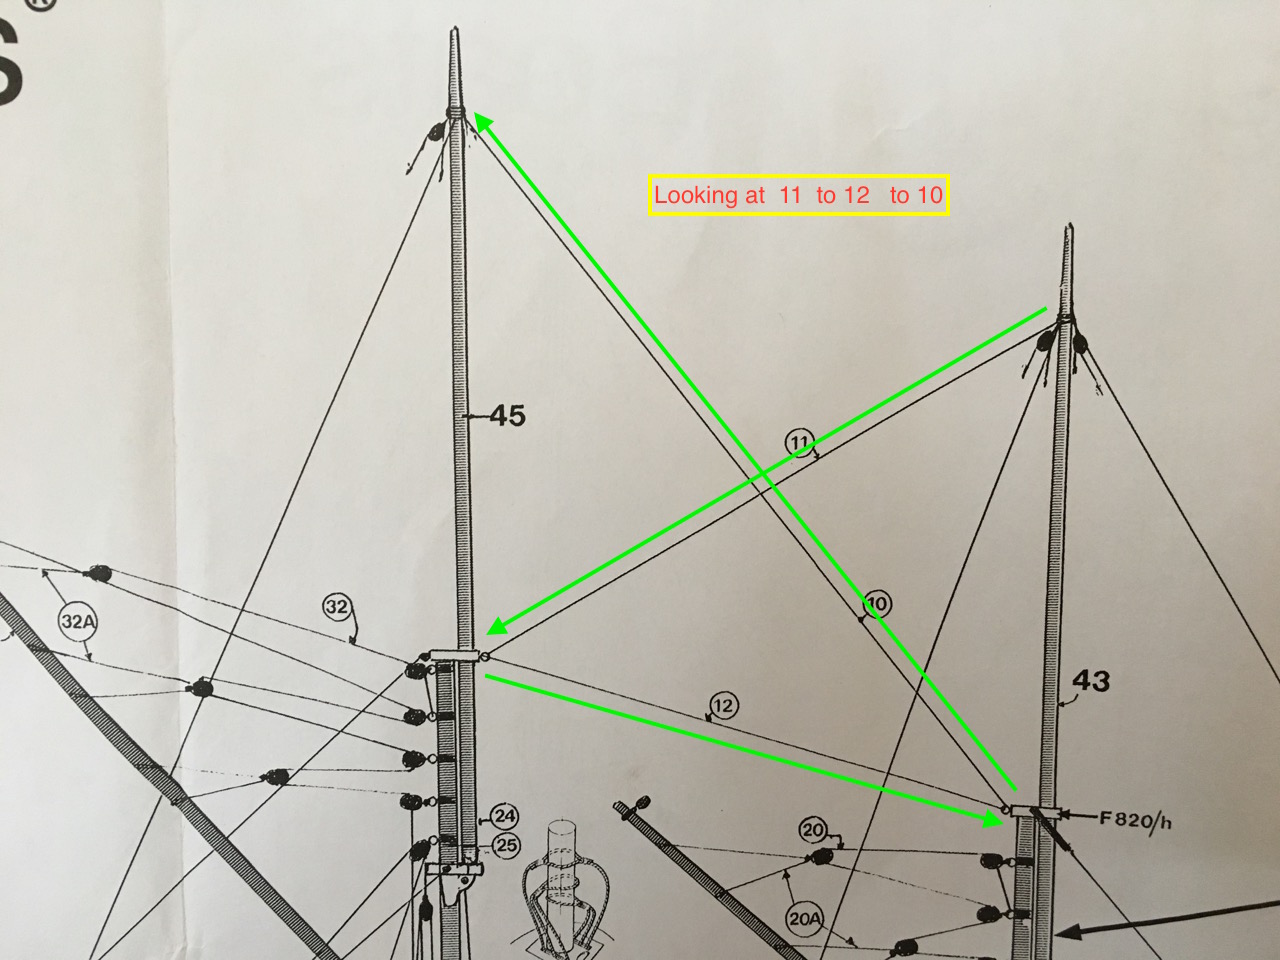
In this diagram I wonder if it reasonable to run this as one continuous line?
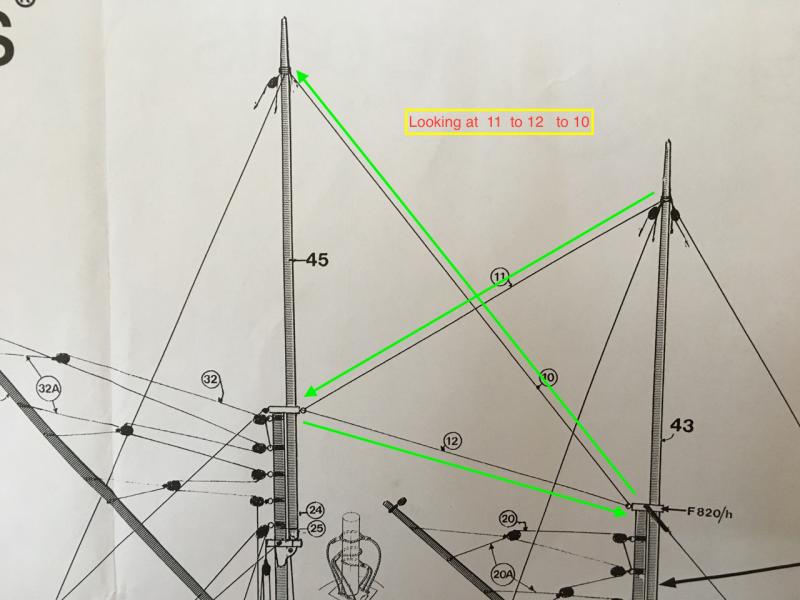
I finally decided this diagram was meant to show the standing rigging and that the blocks are just hanging there for eventual use in the running rigging. Since there are no eyes shown to attach the blocks to I presume they can just be tied to the mast.
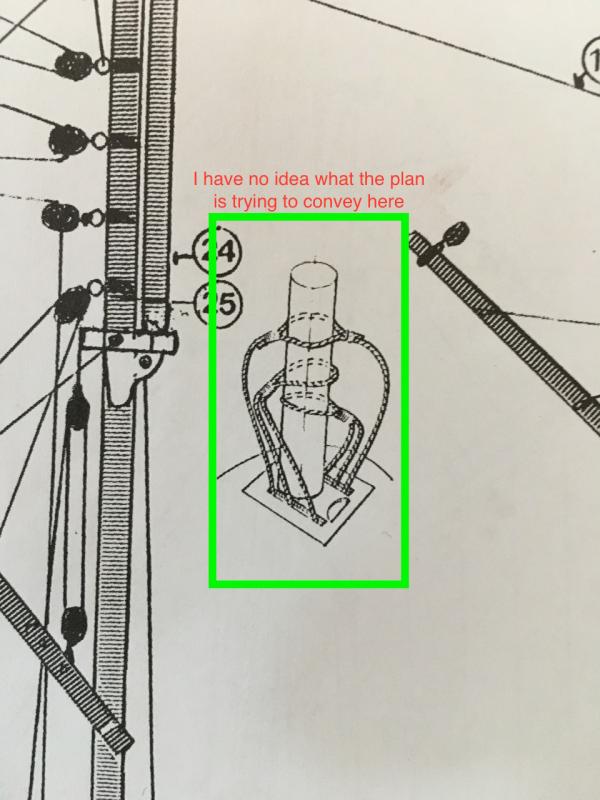
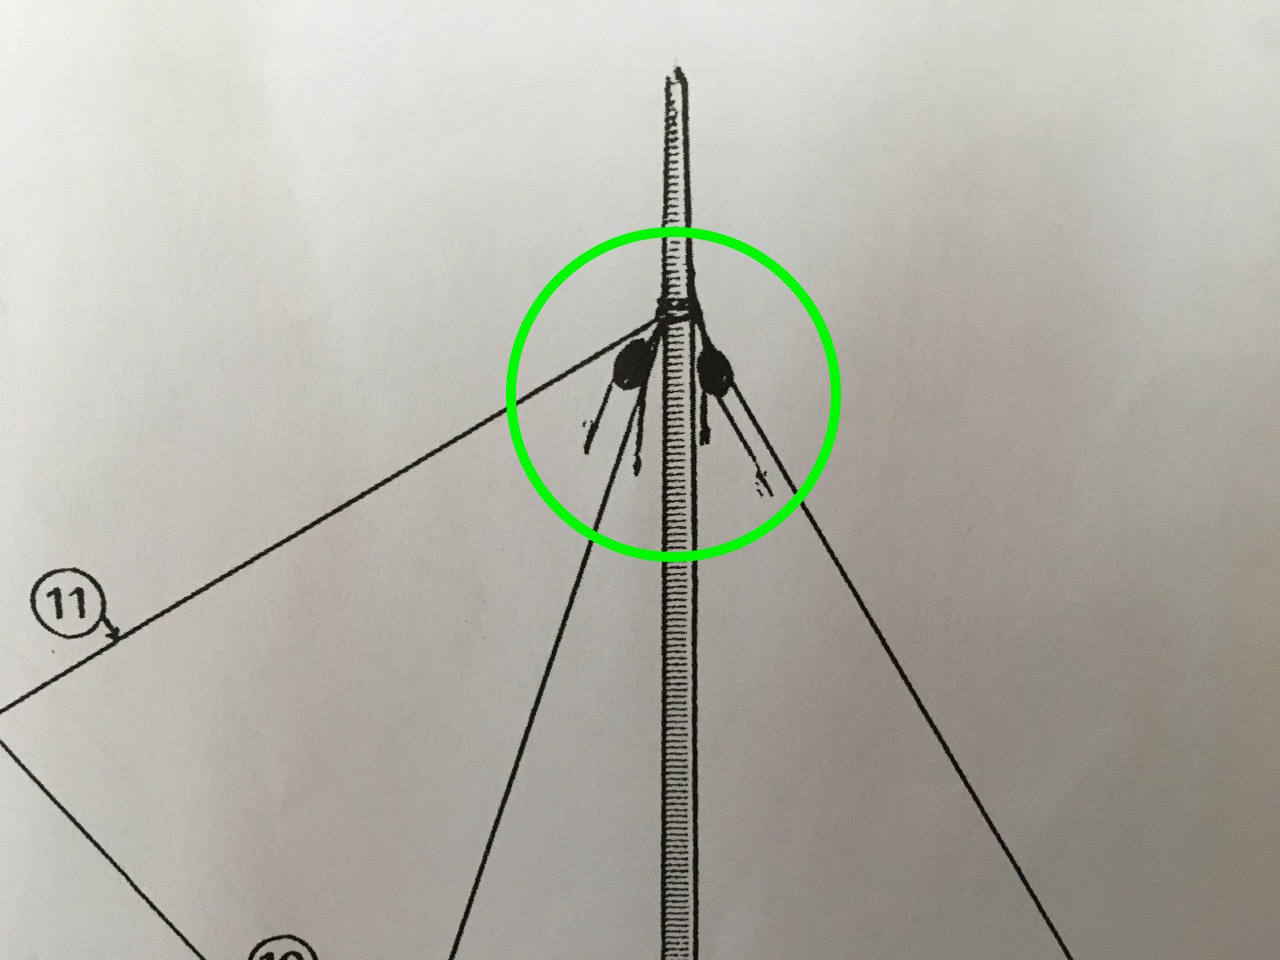
I have no idea what this inset diagram was meant to convey! It doesn't seem to correlate to anything on the plan.
-
Really great Fred. Your ship is moving along very quickly and looking terrific. I seem to anguish at every step I make on my own so your progress is motivating!
Doug
-
-
Thanks Len. I'm watching your Chaperon too.
Doug
-
-
Today was a day for finding some the problems but few of the solutions for this build. One could reasonably say that Krabby is making me a bit crabby today.
The current problem I'm trying deal with is preparing the rudder mount (the part is shown here)
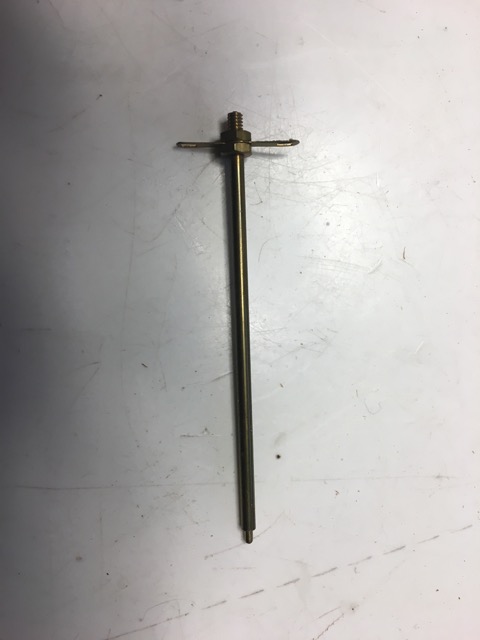
The plan shows the rudder post as:
My dilemma is how to drill this given the geometry of the false keel. I can't get a straight line with a drill (and I don't have a right angle adapter - do I need yet another tool???)
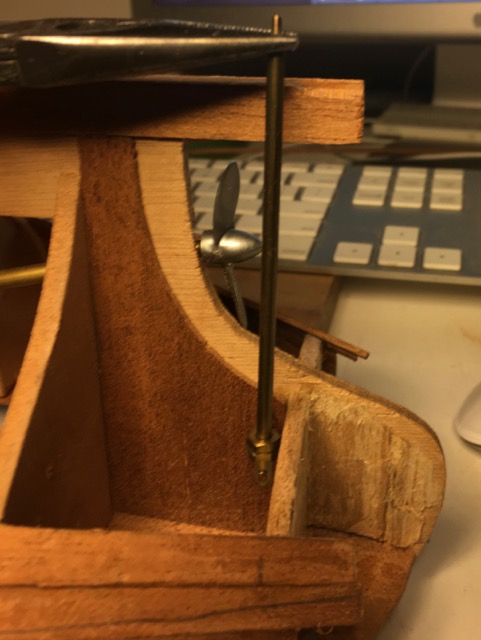
I suppose I could simply cut off 1/2 of the rudder post and drill a slightly skewed hole for it and glue it in. The boat was capable of being set up for RC control but I have no intention of doing that. But suppose I did want to - then how would I drill the hole. I suppose I could come in from the deck but that would leave a hole in the deck that isn't covered by any deck fittings.
I suppose the instructions might have pointed out that the hole could have been drilled very early in the build - but we're talking about BB instructions.
Any guidance would be appreciated!
Doug
-
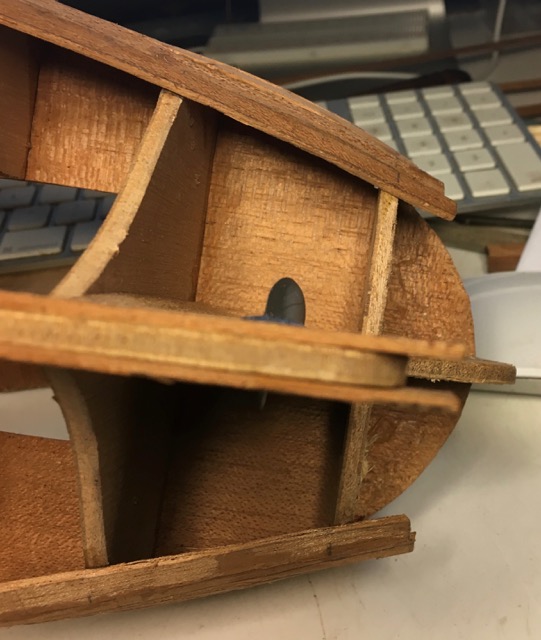
...
Scaled down the opening would probably swallow a forearm.
It is not a type of wood that is appropriate for scale modeling.
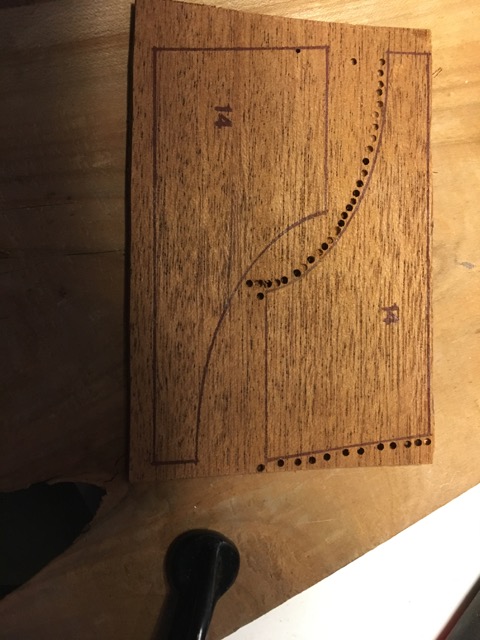
If the hole you're mentioning is the one in this photo I'd point out that that is just a scrap of cherry I was using to cut on. The kit piece is the one labelled 14
Doug
-
Tom and Jaager,
The same wood was used for planking the hull as well as all the deck furniture, rail caps and so on. I presumed it was mahogany but I don't really know anything about different woods yet. The material is somewhat tough but brittle - it is bendable though. The kit is an old Billing Boats kit for the Krabbenkutter.
At this point are you suggesting I ditch all the wood and remake all the pieces? (The planking is 1/2 done.)
Doug
-
-
Thanks to everyone for the tips.
What worked pretty well for me was:
Drill the set of closely spaced holes using the dremel with drill press accessory:
Finish the cuts with the x-acto knife (no rolling cutter to try yet)

Use the drum sander attachment n the dremel to get closer fit
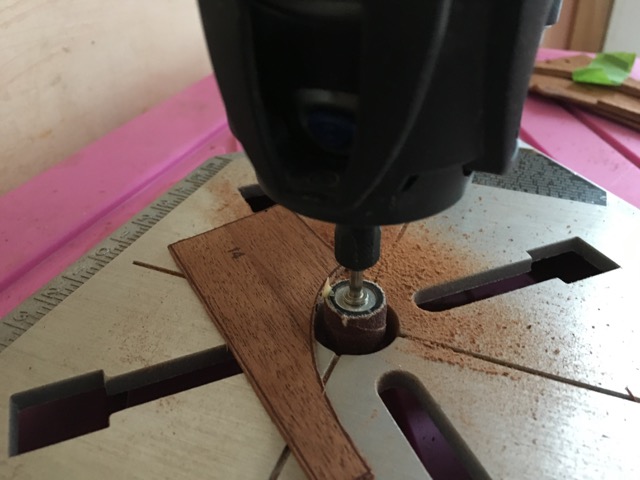
and finish sanding by hand.
I tried to use the jeweller's saw again but couldn't get good clamping on my desk and found it quicker to do the drilling technique.
Thanks again,
Doug
-
-
Hi Don,
Just found your build so I'll take my seat in the back row to see "how it's done"
Doug
-
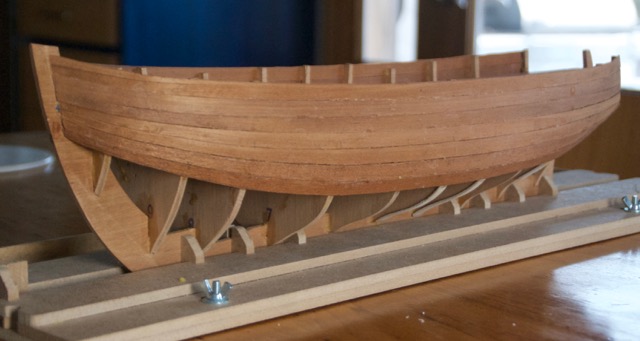
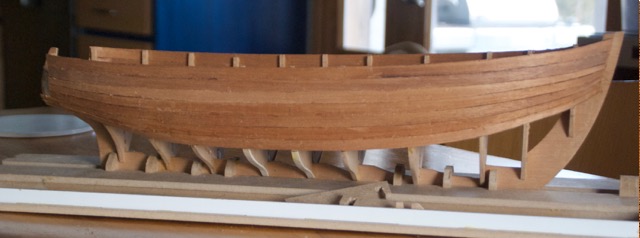
Krabby is starting to look like a boat. 1st planking belt finished. On to the next.

-
-
I hear you Steve. Maybe a spring project.
Doug
- Steve 12345, mtaylor and Canute
-
3
-
-
Thanks Rexy, I have hopes of adding tools as I can - my overwhelming problem at the moment is workspace. I just have a desk in our weaving studio and there is just no place for power tools - I even had to go to the entryway to use the dremel as the sawdust raised wasn't appreciated - go figure! Winter here so no place outside the house works for me!
Everest - good suggestion for the really narrow spots - thanks.
Doug
-
Thanks Pat and Don. I can try those 2 suggestions on the piece shown as there is lot of wood around that side of the piece. The before was nestled up really close to the one left. Presumably with the drum sanding attachment I'll still have to be really careful that the narrow pieces are supported. Here's hoping.
Doug
-
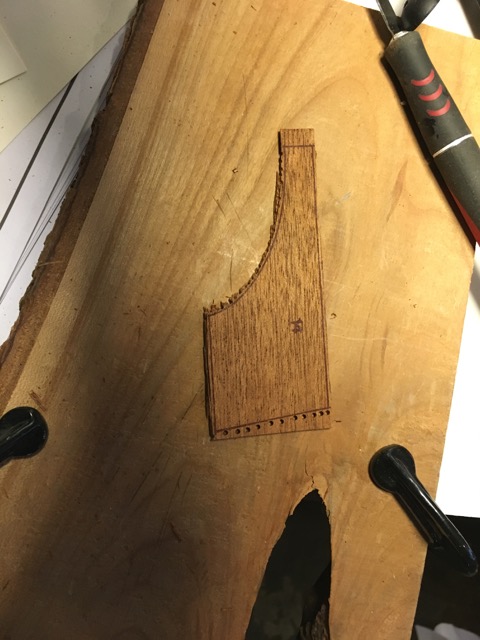
I'm working on an older kit - well before laser cut sheets were used - and have to cut out and sand various pieces for gunwales and such.
I've been cutting them out laboriously with x-acto knives. I'm ok as long as the pieces are along the grain or are large enough but I've had 2 or three splits on pieces like the one shown.

What are some of techniques that I should try?
Note: The only small power tool in my toolkit is a dremel. I've tried using a jewellers saw but it is hard to hold the part steady while sawing.
Doug
- ShevljaginP, mtaylor, Canute and 1 other
-
4

Guidance for interpreting plans
in Masting, rigging and sails
Posted
Thanks for the suggestions. I've spent the past hour researching your's and Allan's suggestions.
This is the "problem" with MSW - I spend more time learning about ships fittings than rigging them!! Good thing this is a hobby!!!!
Gratefully,
Doug