


Heronguy
-
Posts
863 -
Joined
-
Last visited
Content Type
Profiles
Forums
Gallery
Events
Posts posted by Heronguy
-
-
Thanks Wayne. I'm new enough at all this that I haven't yet settled on my own standards. There are lots of divergent opinions yet also lots of agreement on other matters in this world. It's fun to work through the options and see what feels right to me. I try to stay open to new ideas and methods. I've done no "kit-bashing" but am intrigued by the creativity that people show in their builds.
-
-
Thank you Joe. I will!
Kinda leaning PdN ward today. If I have to mod the components in the syren kit I can defer that til later? Maybe I'll change my mind again tomorrow
- Canute, mtaylor and CaptainSteve
-
 3
3
-
Thanks Pat. I'm looking forward to some of these "customizations". Onward for sure!
-
Just like most of the build logs I've been looking at for the Syren said, Yep....the bulkhead extensions are fragile! Yesterday one just kind of fell off? I glued it back on but I think I will touch each extensions where it joins the main piece with a drop of CA to help strengthen them. I read that fix in one of the build logs.
BTW Doug, my last build was a banned kit that had mostly no instructions, so since this Syren kit with its lush instructions, I am going to drown myself in these instructions....it's refreshing.
Rich, I'll be interested to see if the CA glue helps - let us know if you have any more snapped extensions!
Certainly agree that the inclusion of detailed build instructions makes this kit even more desirable. I'm hoping to learn lots from them while I build.
-
Hi Bruce, I wasn't thrilled with the deck furniture either but didn't have the resources (workshop, tools) to consider scratch building the parts to I just moved ahead with the kit fittings. I hope yours works out well - I'd love to see some pics of what you create!
-
Yes I am very much but I won't touch it until my Mare Nostrum is done. I have thought about starting it several times during my Nostrum build but have decided to wait. However, I have done inventory on the Bluenose kit parts and have ordered a couple of extra things required. I even have the plans sitting on the floor hoping to take the folds out of them.
Derek you have a lot more won't power than me! I'm afraid if I can I will!
- Worldway and Steve 12345
-
2
-
excellent doug I think you will find it very usefull I will try to post more pics of how to use safely and setup I fear I may be teaching granny to suck eggs but all table saws deserve respect even tiny ones
I hope so - I still haven't figured out dust control - I'll probably just freeze in the barn when I have something to cut

Post the pics - my worst experience with a table saw resulted in a broken finger from the kickback - not my finest hour! Hopefully I've learned a bit of respect that will keep me and the little guy on speaking terms.
-
Thanks Steve,
I'm slowly fixing the mistakes I've made so far and looking forward to making some forward progress. You've set the bar higher than I'll be aiming for this build but you're giving lots of ideas to think about.
P.S. I hope you're getting a commission from Proxxon - I just ordered their little saw. You did guarantee that it would improve my results!
-
I "borrowed" a needle threader from my daughter's sewing kit. I was skeptical that it would work but was very pleasantly surprised when it did. I liked it well enough to go and buy a couple more for spares (I tend to misplace tools so having a backup saves time hunting). (They cost about a buck each - my cheapest modelling tool purchase yet!) The only complaint I have is that sometimes you have to thread from the back and judging where the hole is is a bit of a skill to develop.
If anyone has figured out how to make a threader that works from the front when pushing a line through I'd be happy to get the details!
-
I agree with you Steve. The contrasting frame looks very sharp.
-
Moving right along Rich!
I just got my kit yesterday! I'm not sure when I'll actually start it but I'm doing the reading and following your build.
I have a couple of questions:
You mentioned that the bulkhead former got a little out of true and that you clamped it while adding the filler blocks as suggested in the instructions. Just curious when you said you checked after each filler that the bulkhead former was still true. Was that just an extra precaution or did you expect to make other adjustments?
Secondly - Do the filler blocks play a role in the planking of the deck or are they just for strengthening the hull? It appears in the manual that fillers are level with the top arc of the bulkheads but I didn't see any mention of matching the camber on the fillers.
-
Thanks Joel, Good point about cost-benefit on upgrades. I'm counting on help - I've got a lot to learn and I've just started. I'm enjoying the process!
Thanks Joe, I hope it is fair game to use your photo of PdN to illustrate the post. Yours was the 1st build log I read when I first got my PdN kit. Inspiring. Rigging is likely an issue though I'll have at least a little under my belt before I start either of these.
-
I'm in the happy situation of having both of these kits now. Both are from Model Shipways: the Syren kit just purchased from Model Expo and the PdN a kit purchased from an estate sale. The PdN kit has laser cut bulkheads so I'm guessing it is not terribly old (copyright date on the kit is 1994).
I'm a newbie who started last November and am working through 3 builds at the moment gaining some experience and (hopefully) skill as I do. I've promised myself I won't start either of these until I have at least one of the existing build completed but I hope that will happen over the next month.
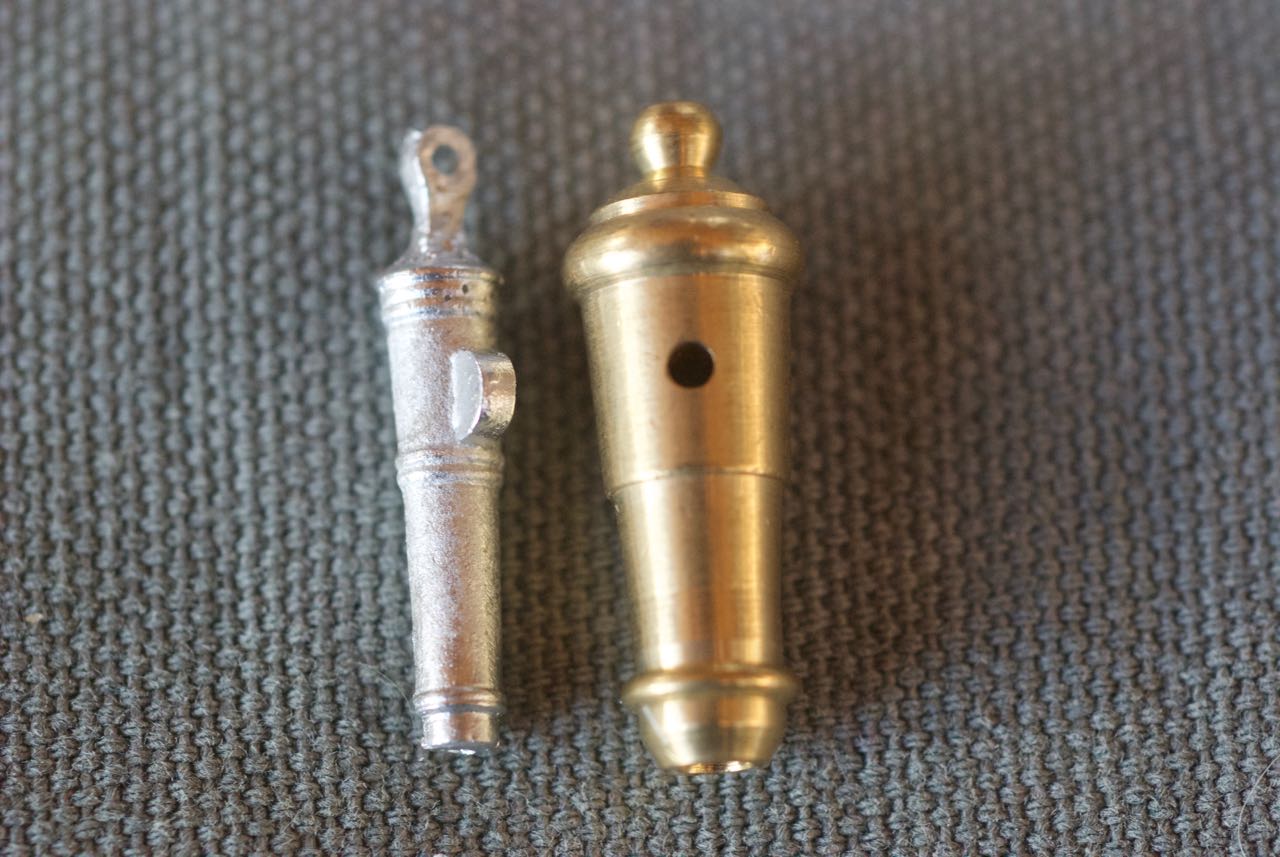
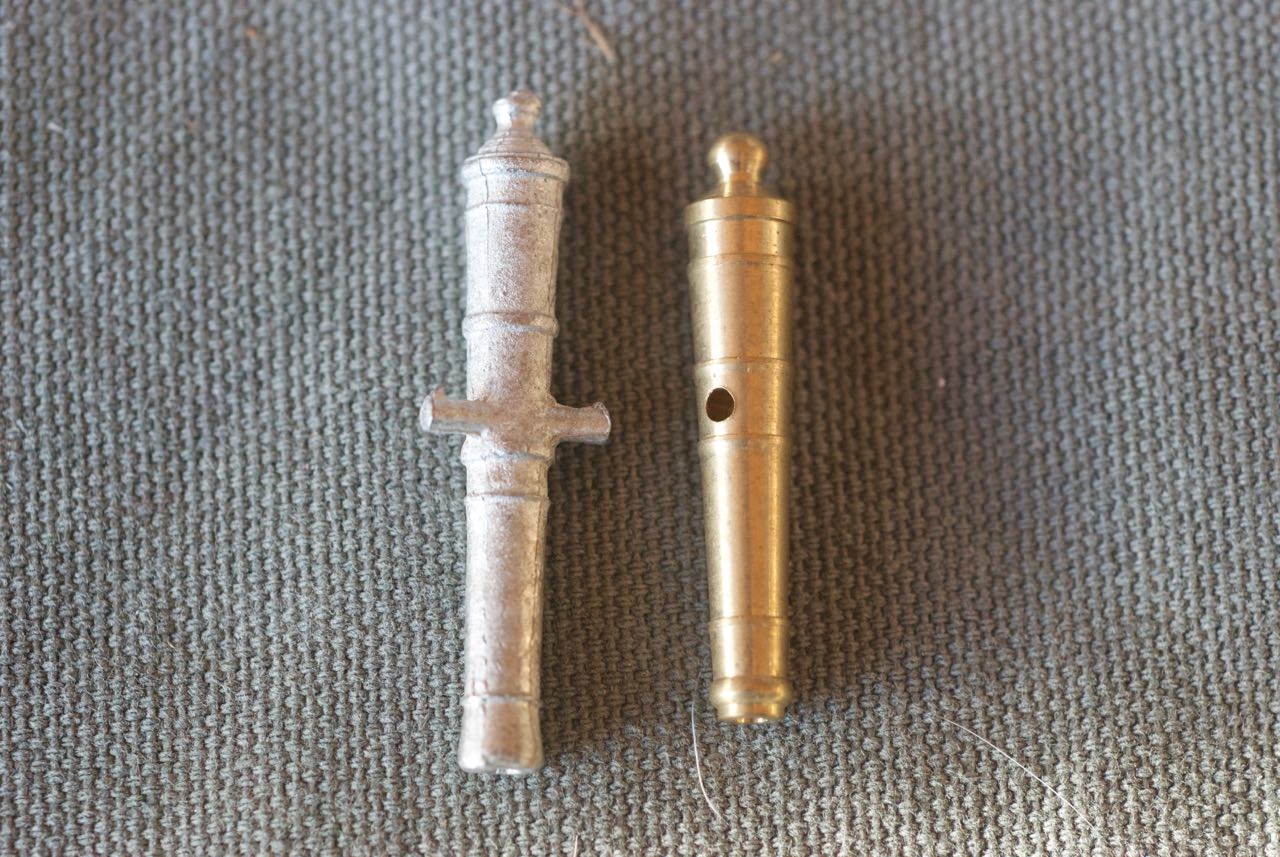
The ships are similar and of the same period. Whichever I build first will certainly help prepare me for the second! With the kits I note that scale may not be very correct. For example, the PdN's armament was 12 lb carronades while the Syren 's was 24lb carronades. The parts from the kits are:
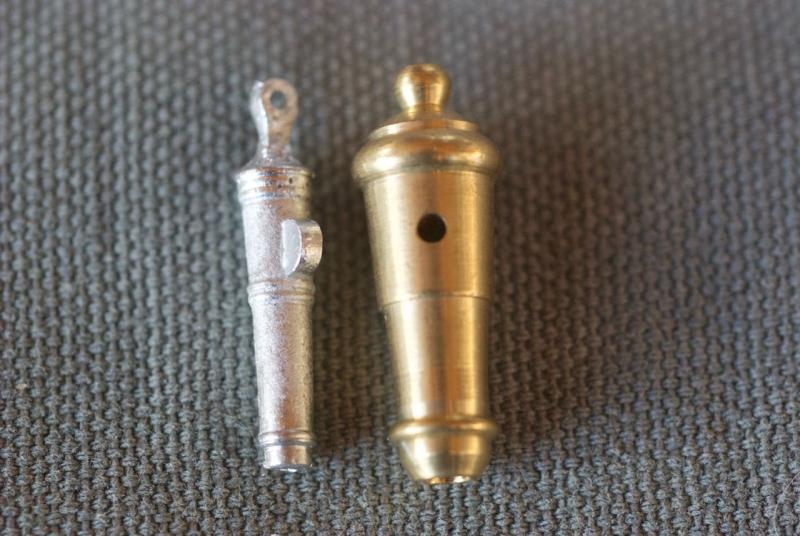
while the long guns on each ship are:

Which one to build first???
Syren pro:
Extensive illustrated instructions. (130 page manual with lots of good photos also online)
Several completed and current buildlogs.
Syren con:
Some are saying the bulkheads are a bit delicate
The fittings are and wood are not as high quality as the PdN (e.g. Britannia castings for carronades, figurehead)
Expense to upgrade fittings adds quite a bit to overall price.
PdN pro:
Better quality fittings (e.g brass carronades)) and wood (including some nice walnut strips for planking, wales etc etc)
Reasonably detailed instruction manual (30 pages with good diagrams and ok photos)
Phillip Reed book uses PdN for his Illustrated Masterclass
PdN cons:
Fewer buildlogs for comparison and advice
Would you care to weigh in on the pros and cons or offer any advice? I'm not going to anguish over this decision but would love to hear your thoughts.
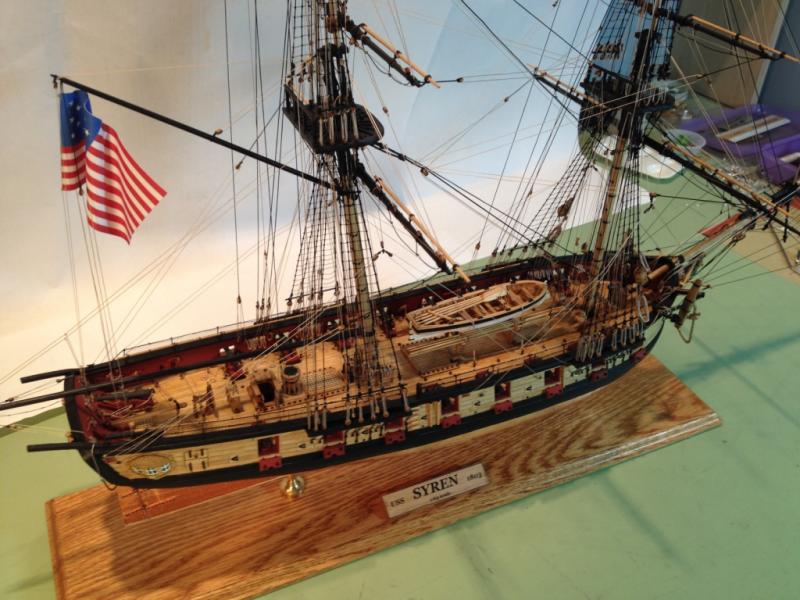
Syren - by _SaID_
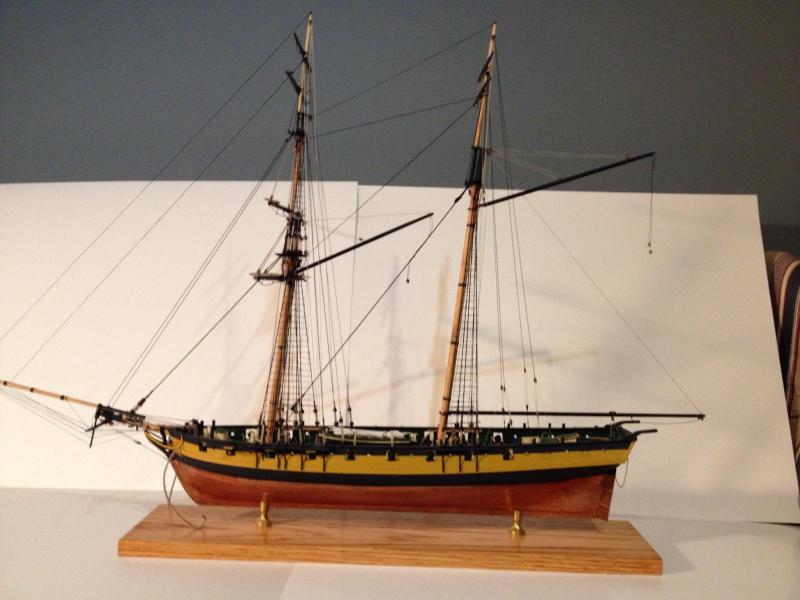
Prince de Neufchatel - by jwvolz
- mtaylor, Canute and CaptainSteve
-
3
-
-
Welcome aboard Bruce. Are you doing a build log - I'd be pleased to follow along!
-
Rich,
It is going to be really useful to hear of the various challenges with this kit. I take your comment about how tedious the prep work was as a indication to be patient when I get there too. Thanks.
Still waiting for delivery of my Syren kit. I'm watching yours with great interest!
-
If your in my neck of the woods some day you can build me a full scale cabin! I'd like that - a bit bigger and I'd have a place for my workshop!
- Steve 12345 and hof00
-
2
-
Steve,
I really like the cabin (and the whole boat!). Was the wood planking on the cabin part of the kit or did you swap it in. I like the grain in it.
I can learn a lot from your builds about the use of woods and finishes.
-
GemmaJF, We'll stand on each other shoulders to reach up (I'm a little confused by the visual of THAT but the sentiment makes sense to me). I've seen your contributions on other builds and forums too and I'm learning from you.
- GemmaJF, Steve 12345 and Blighty
-
3
-
And the seizing are just fakes. I took some photos on how i did it. I learnt it on a website somewhere. First i find something round that will fit the size of the ropes i will use. This time it was a small drill bit. I put some wax on it so the ca glue wont stick later on. Then i just twist the rope around it. Put a drop of ca glue on and cut of the ends. And drag it off the drillbit Then you have a fake seizing. To make the other rope that will go into fit inside just put a small drop of ca glue on the end and twist it . Then i will pass the hole in the fake seizing without problem. Just cut of the part that has ca glue on it after.
Brilliant - I've got to try that! Trying to steady the deadeye, while using thread to wrap around the shroud using tweezers, tying a knot... just doesn't seem to work for me!!
I guess we are our own worst critics - I see so much beautiful work on this site that it makes me feel out of place. However reading the various logs and hearing the same misgivings from other modellers, and getting the odd positive comment on my own logs is a good antidote to that feeling. Thanks Frankberge!
-
Nice job so far! I reckognise many of the questions you are asking as i also wondered about the same stuff when i made mine. And i also see solutions you have done that i should have done to
 if you are wondering about anything just ask, im not sure if i will be of any help as i cheated and did allot of mistakes on this boat but who knows maybe i can be of some help anyway:) i dont have any photos of my ship on this site but i will put one out here on your thread if thats ok?
Your's looks great! The finishing on it looks so much better than I expect to achieve. Your rigging is so much neater as well. The seizing of the shrouds at the deadeyes has been one of the things I have't got close to being happy with. Also the ratlines look better with the extra shrouds than I think they will on just 3 shrouds especially since the spacing between my shrouds is a bit uneven.
Thanks for the offer of advice - I'll be happy to take you up on that!
Scott's post above asked about my intention for mounting the sails - what was your thought process on that question?
-
Great job. Keep up the good work. Looks good. I see you have the rings for the sail on your mast, you must be adding sails?.
Thanks Scott. I was originally planning to add the sails - Trying to go the full monty on this build to gain as much experience as I could. I've been reconsidering that plan as I am finding the rigging on this little guy a bit frustrating. However to keep options open I put the rings on before I stepped the foremast. (they are a soft plastic so I could easily snip them off. Is it customary to remove the rings on a model that doesn't have sails?
-
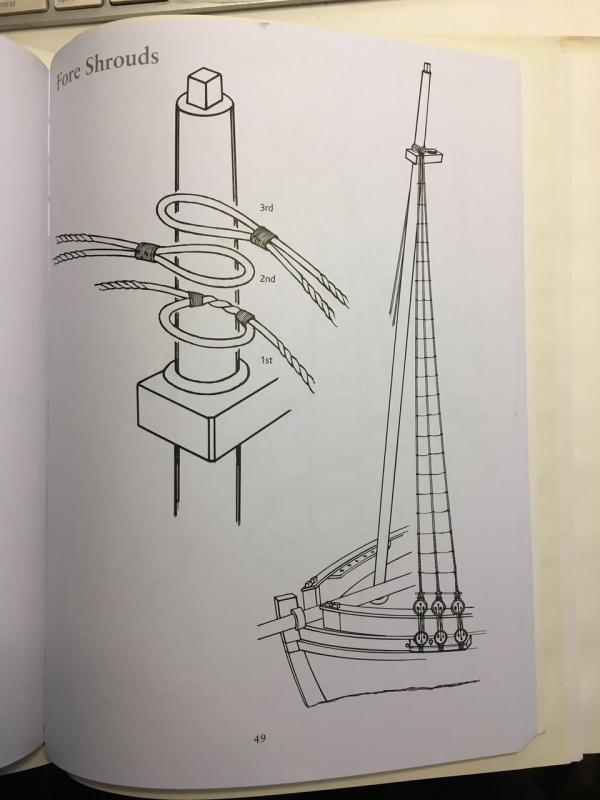
Just curious Doug on my victory I done my shrouds in pairs on each side as I perceived Lenard Peterson period ship rigging book how come you have an odd number of shroud lines on each side
Just curious Doug on my victory I done my shrouds in pairs on each side as I perceived Lenard Peterson period ship rigging book how come you have an odd number of shroud lines on each side
Hi Steve,
I was expecting an even number as well. A small section of the rigging plan is shown in this post. The 3rd image in that post shows how the odd number of shrouds are rigged on the mast.
Looking at my plans for the larger Bluenose II - it shows 4 shrouds at the foremast and 5 for the main mast.
Lennarth Petersson 2nd book Rigging Period Fore-and-aft Craft has this diagram for the French Lugger
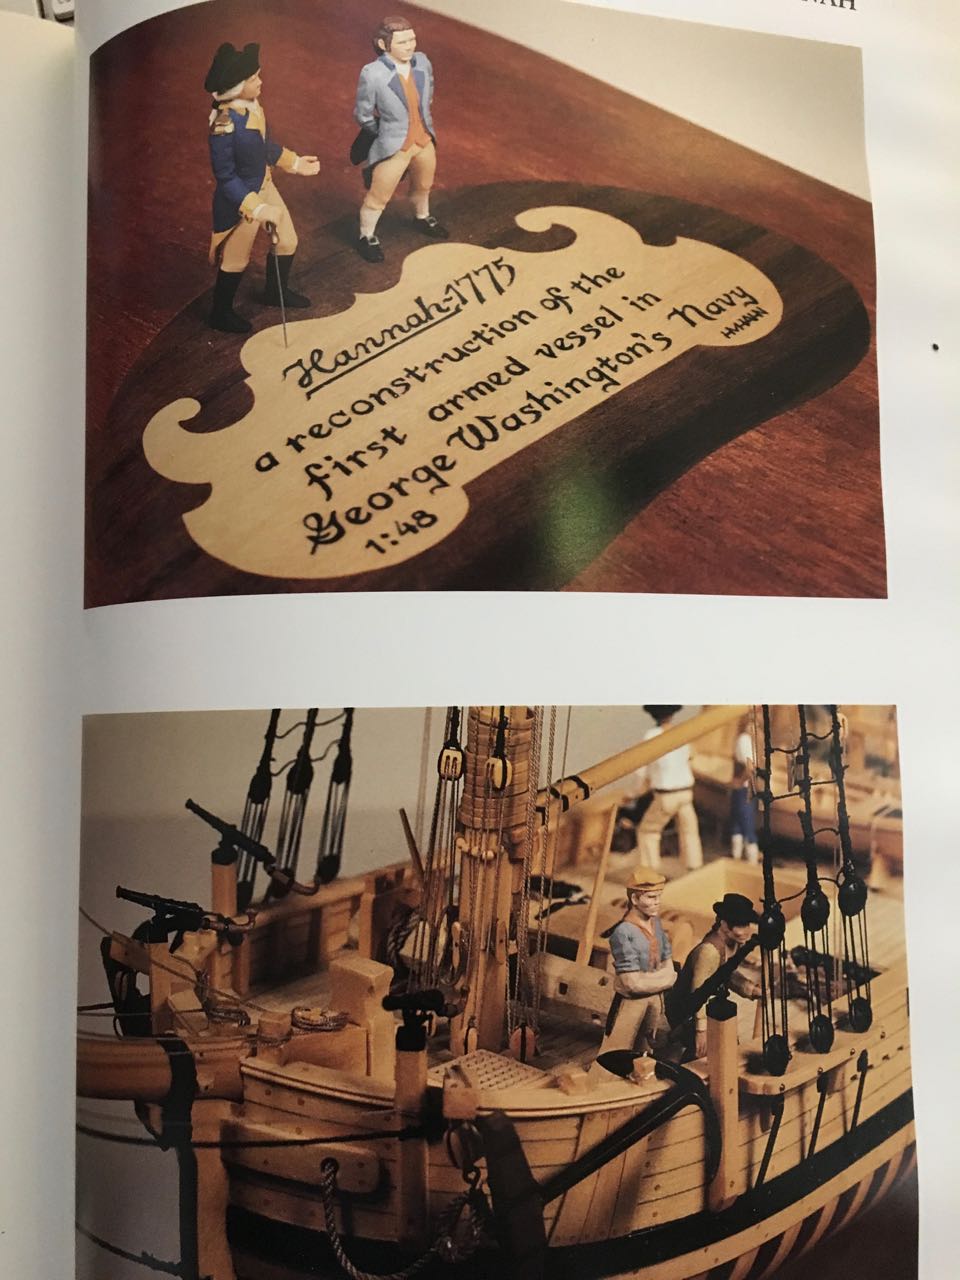
And finally - leafing through Harold Hahn's The Colonial Schooner 1763-1775 I came across this photo
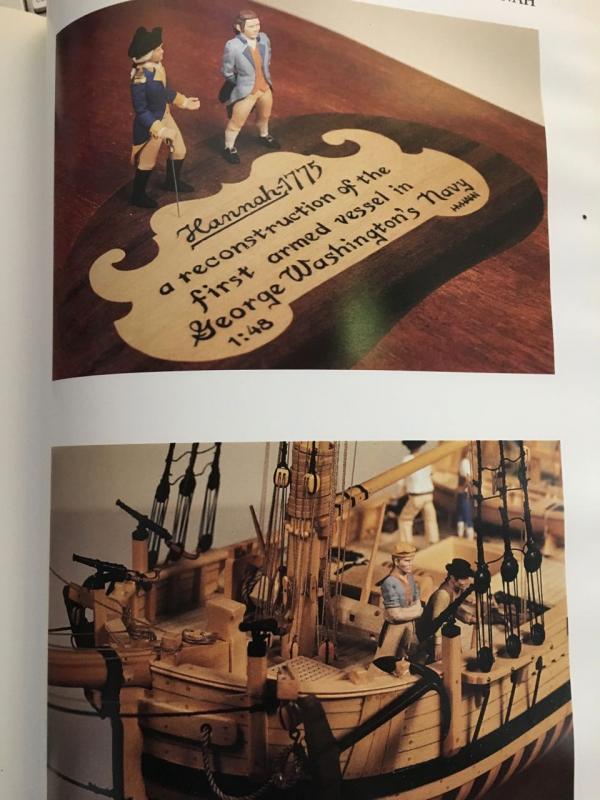
I love this sport - I keep learning things!


Prince de Neufchatel versus US Brig Syren
in Wood ship model kits
Posted · Edited by Heronguy
Hi Tim,
I've read your build log with interest. The depth of your research and your determination to right some wrongs in the kit are well beyond my level. I'm enjoying the craft of building the kit but am not yet knowledgable about the ships in general. My sailing experience was limited to a half dozen seasons on crewing on a Soling and a Tanzer 26 at yacht club races. I picked up a second hand Laser when my kids were teens (sad end to that boat in a windstorm here 3 years ago!). Remarkably little beyond halyard, shroud, boomvang, jib and mainsail from my sailing days is helpful as I grapple with terminology of jibbooms and bobstays and yards and stunsail etc etc. So much arcane language to parse.
Your cons 4 and 5 worry me slightly (challenges to overcome!). Your pros are all comforting. (Your prose is clear too!)
Thanks.