


Heronguy
-
Posts
863 -
Joined
-
Last visited
Content Type
Profiles
Forums
Gallery
Events
Everything posted by Heronguy
-
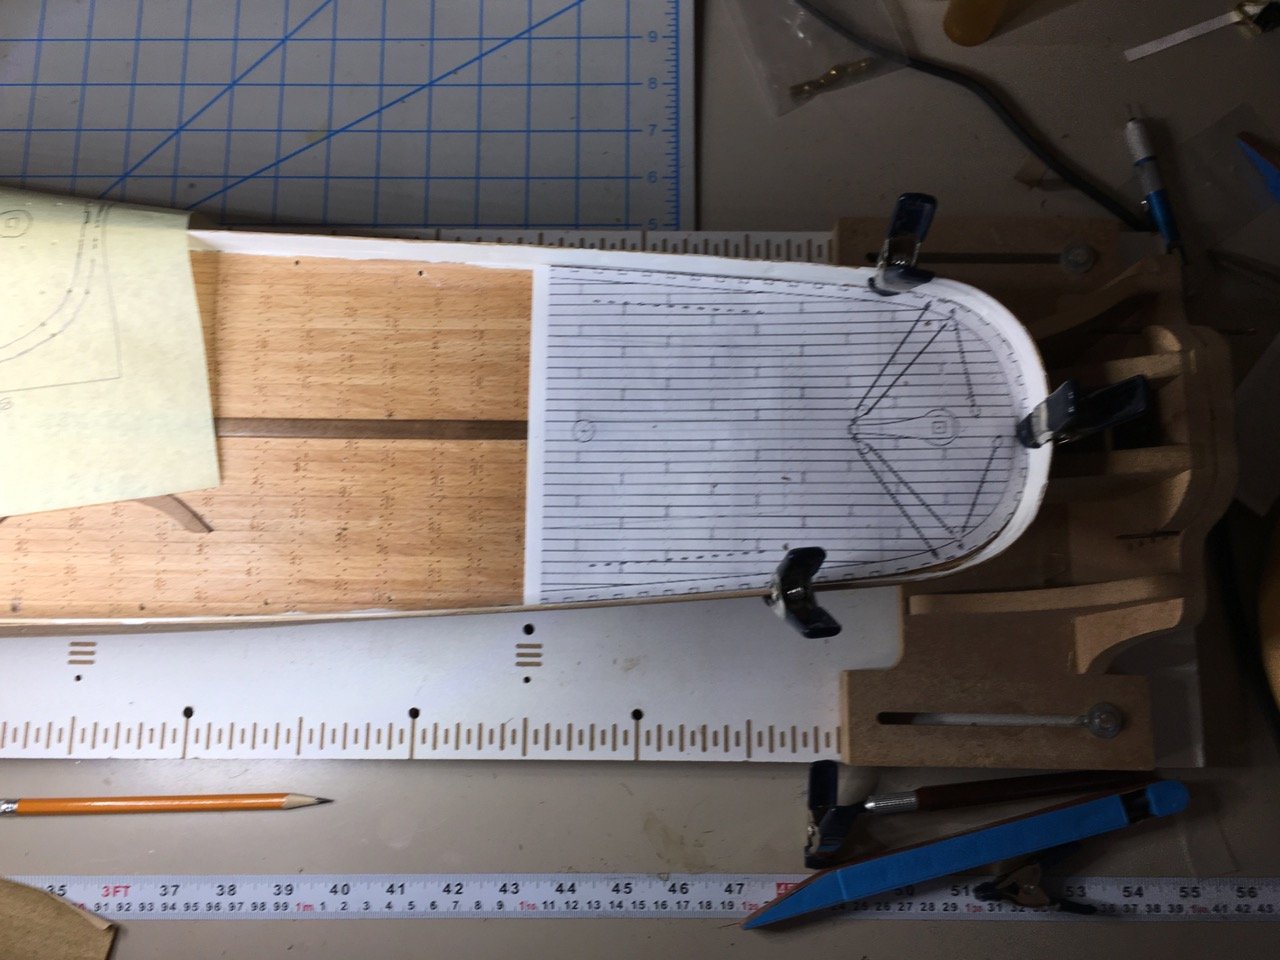
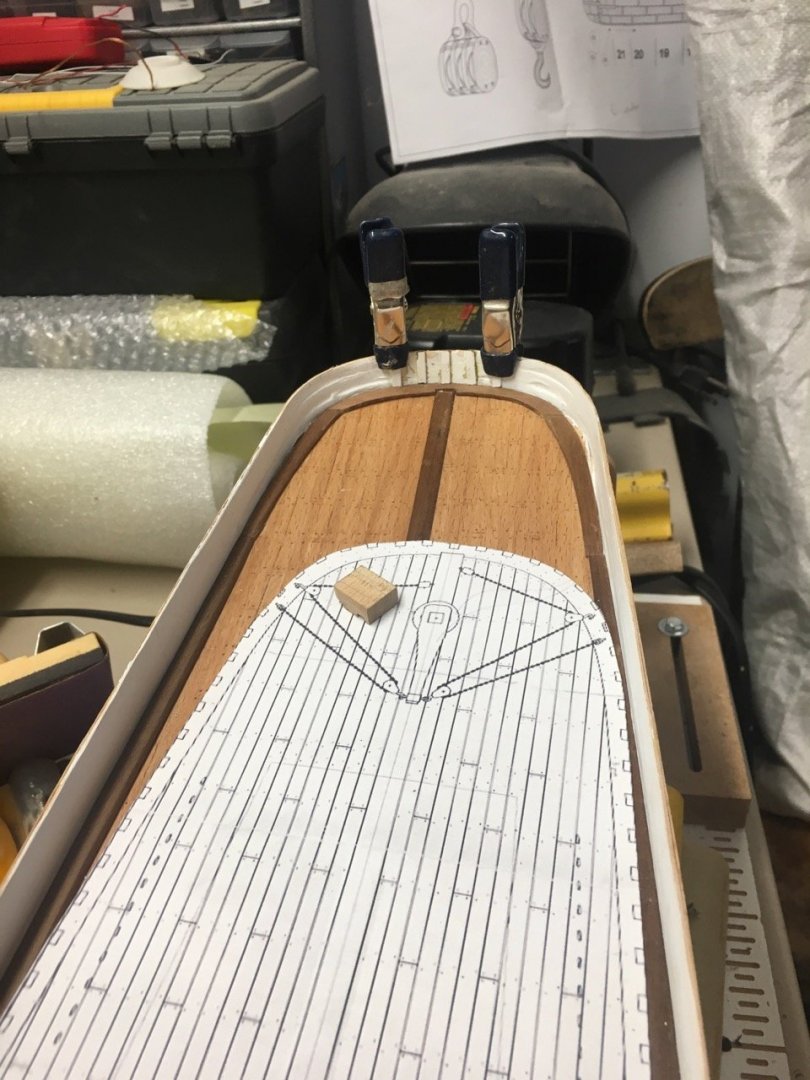
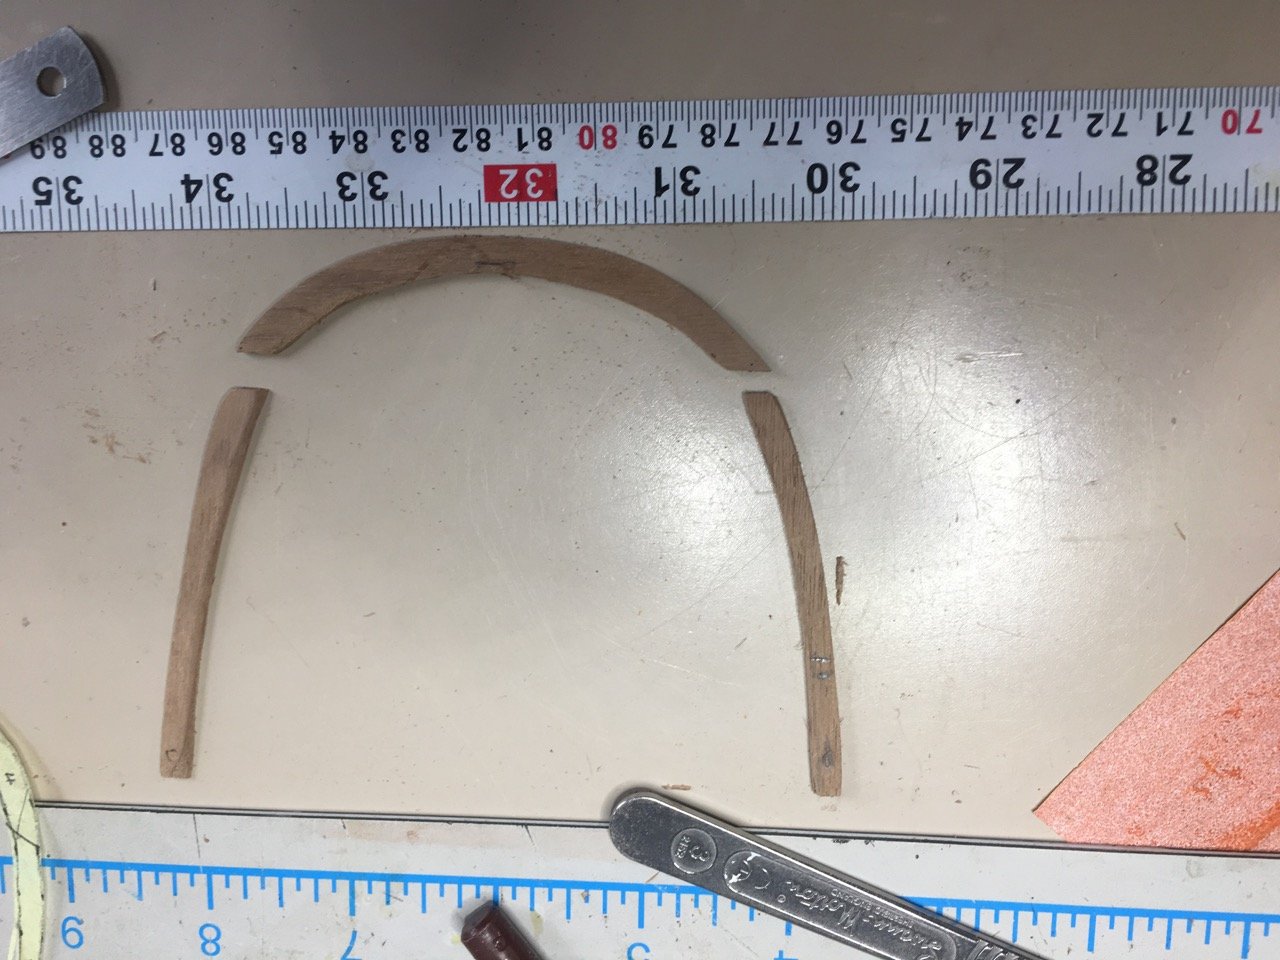
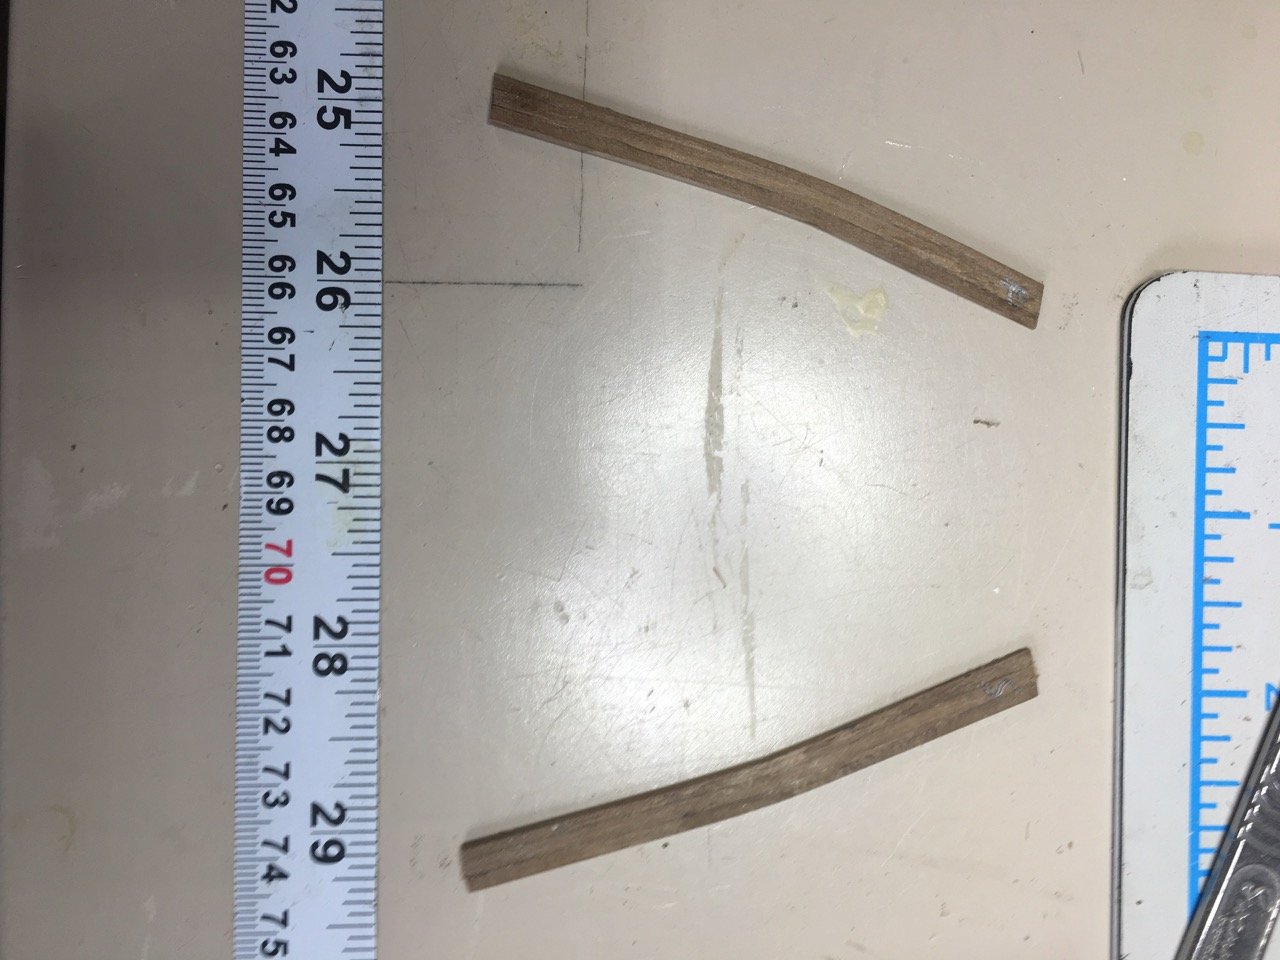
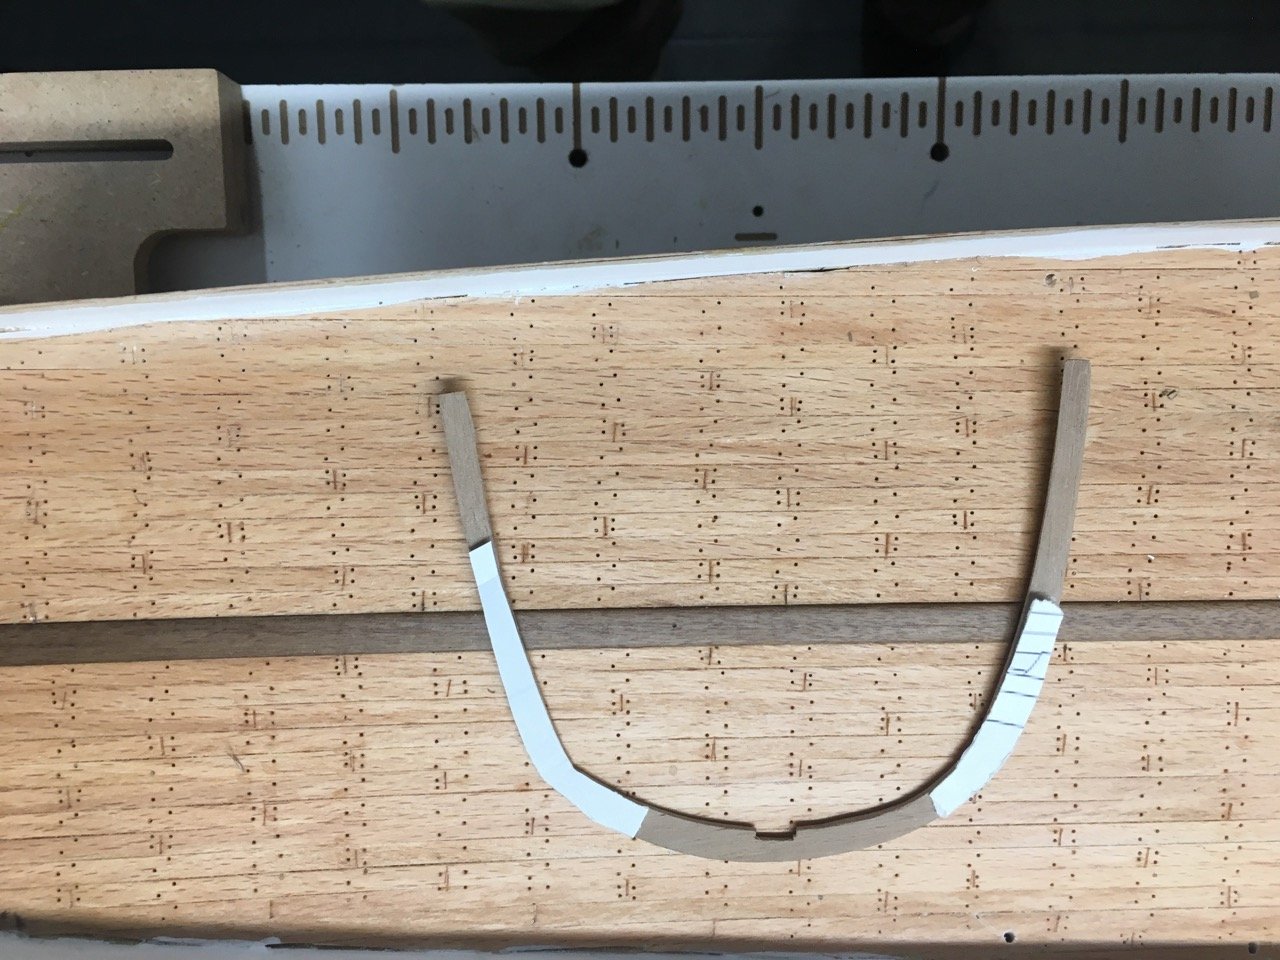
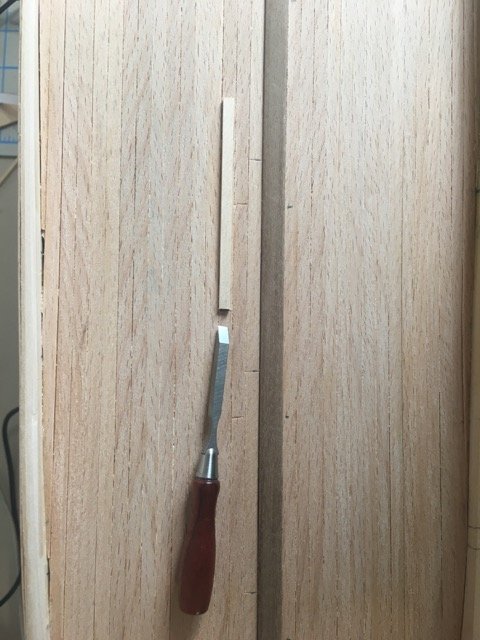
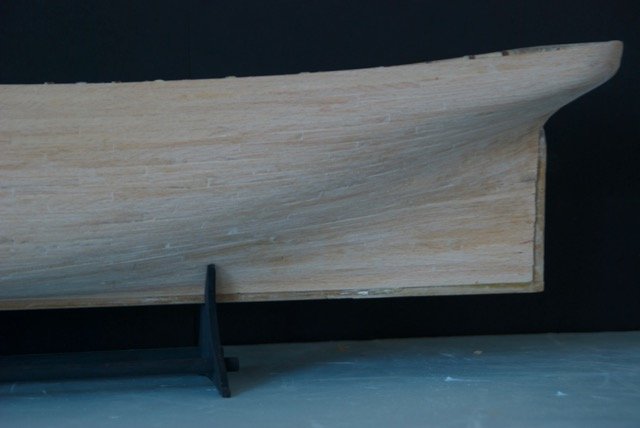
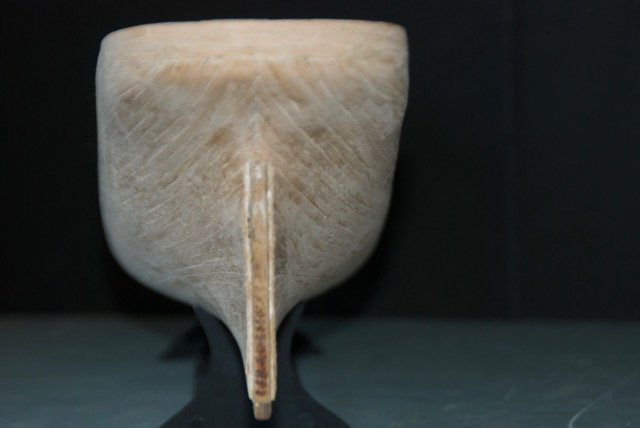
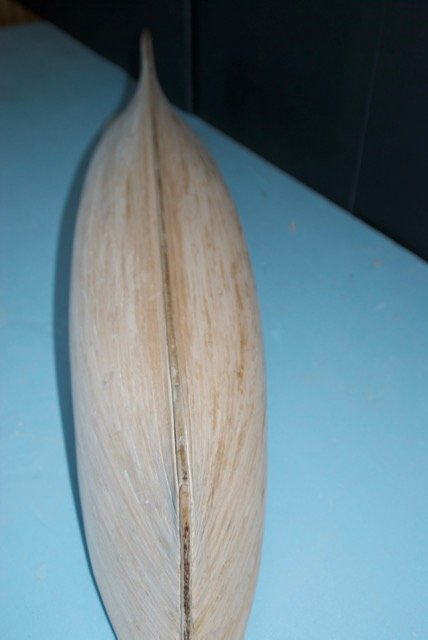
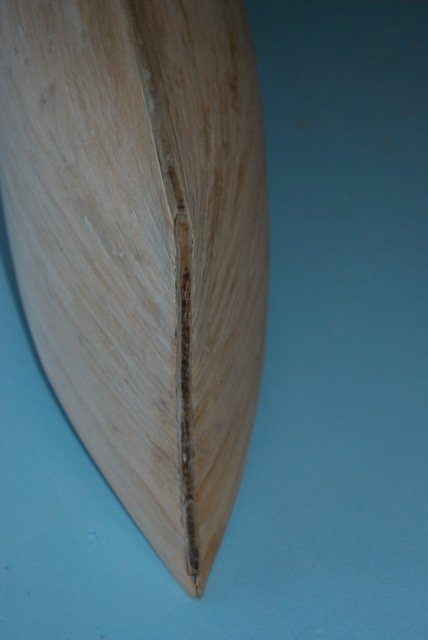
 Last autumn's work! The waterway is made from a walnut strip. Edge bending the strip at the bow and the stern did not work for me! For the gentle bow curve I cut some narrower strips, bent each of them, and then glued them together. The same approach was not feasible for the stern due to the sharp curvature. Instead I milled a small walnut sheet from which I could cut out a curved section using a print of the deck plan as a template. I cut three sections to there would not be weak cross-grain section Precision smooth curve was a challenge for me but it turns out this section will be under a grating so will not be visible for close inspection and I think I can count on my own memory soon forgetting that I left it like this! Next step is to add the top timbers.
- 79 replies
-
- 3
-

-
- marisstella
- barque
- (and 1 more)
-
The calipers say 17/64” (.264” .666mm). Yes the ply is a bit rough and was g1s grade. Your comments make me consider heading to a bigger centre to purchase better plywood. I can chalk this one up to a practice sheet! I am at least comfortable with my little scroll saw.
-
Just lucky I guess. Local building supply store. Nothing there dimensioned in metric so that doesn’t likely explain it either.
-
The last 2 pages in the Chapter One notes from Chuck show his board and supports - you can estimate sizes from that.
-
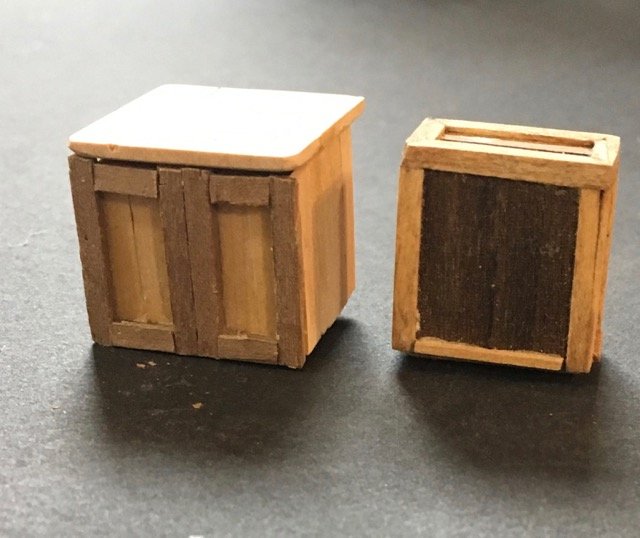
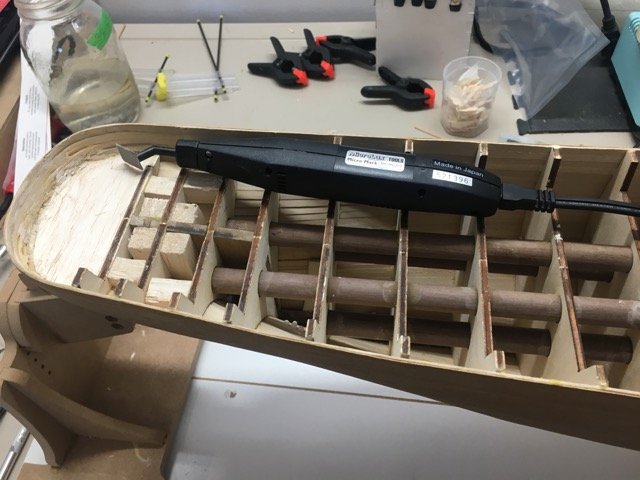
Plans have been printed and the the 1st dust created. I was expecting to need to purchase a scroll saw for this build but noticed a post here (can't find it to give credit) that the dremel motosaw did the trick for the bulkhead former and bulkheads. So... These are cut from some inexpensive plywood as a test. I don't have easy access to Baltic Birch ply for the bulkhead former so I may go ahead with this wood. I will recut the bulkhead with the exterior ply running vertically to reduce the amount of chipping at the pointy parts. This plywood is a bit more than 1/4" so I've had to make the slots in the bulkheads and BF a bit wider to fit. It turns out it is easier to cut close to the correct size 1st and not try to widen the slots after. I kinda botched the efforts on THAT process so I'll recut the BF. All part of the learning!
.jpg.2a963132243d33befc751cd3af99fdc9.jpg)
.thumb.jpg.be9f615a9da39a6709eafad707bb5e2e.jpg)
.thumb.jpg.83c19c05d647249156f02dc6e74cd8f7.jpg)
-
With trepidation I'm starting this project. I will be attempting to scratch build the components although I'm likely to take advantage of special mini-kits like lanterns and carvings. I have most of the tools I need for a scratch build but not much useful experience! I'm happy to follow the suggestion and stick with cedar for the build. I have too many unfinished projects to warrant starting another. However this one pulled me in both by the promise of learning some new skills and by the (probably optimistic) belief that I can multitask several builds at different stages completion. It is also motivation to be part of a group project. Chuck's willingness to mentor the group is a great plus. Cha Gheill
-
You are off to a good start. I'm working (well actually not working) on one of the older versions of the AL kit. It is interesting to me to see the kit difference in the fittings
-
I think a sleeve over the box or a stiffener on the inside perimeter of the box would go a long way to preserving your shipments from enthusiastic package handlers. My box a only minor efforts from the shippers! (They really should take more care)
-
Bad luck Kurt! The box mine came in was just slightly bent but all the contents (nicely padded in bubblewrap) are intact.
-
Delivery from UPS Not bad service from UPS and great work by Chris and Steve
-
Good to see you back Pierre. Looking forward to seeing your progress again. Doug
-
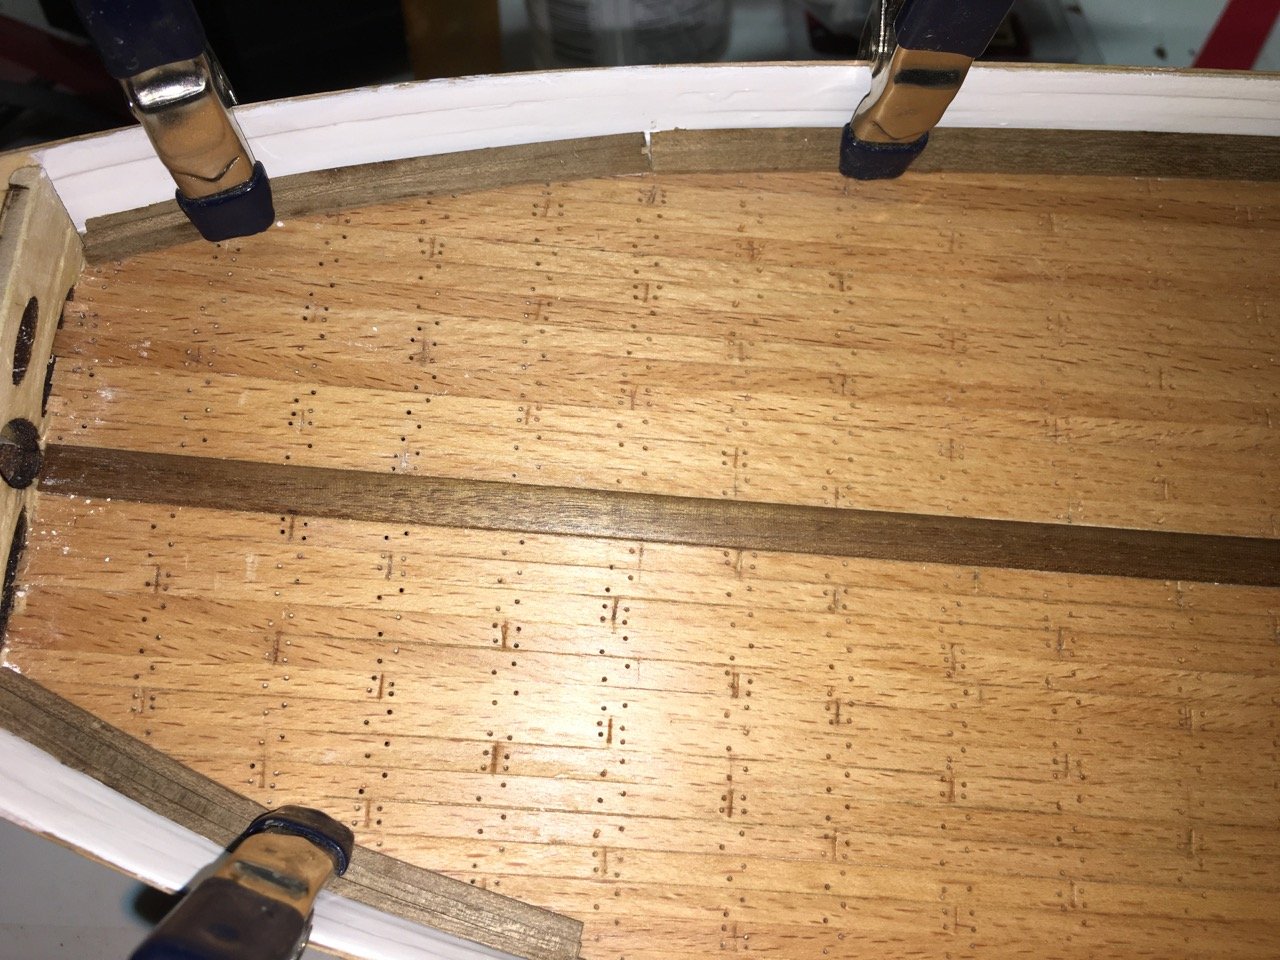
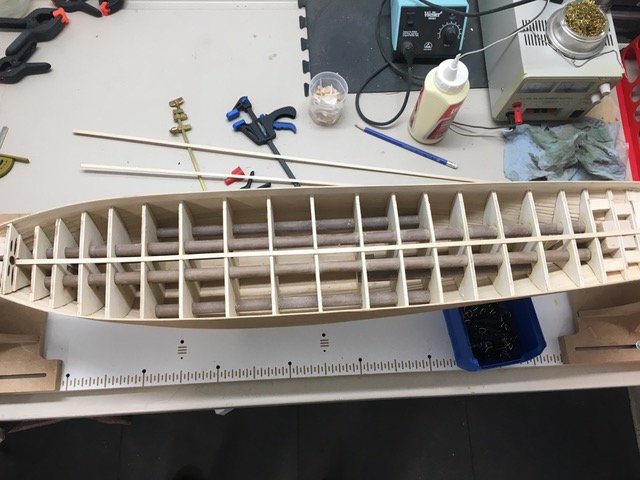
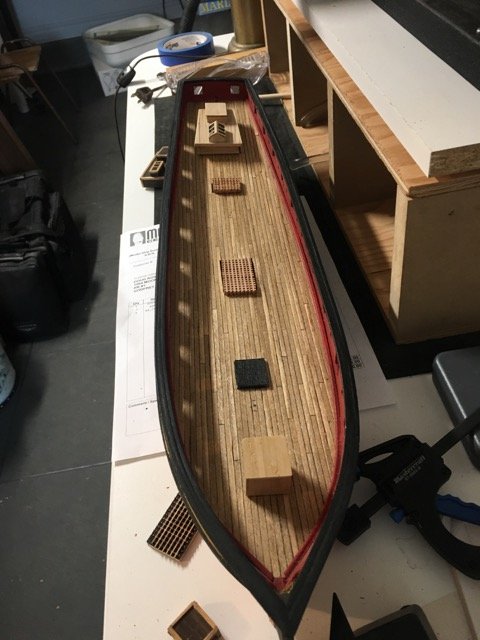
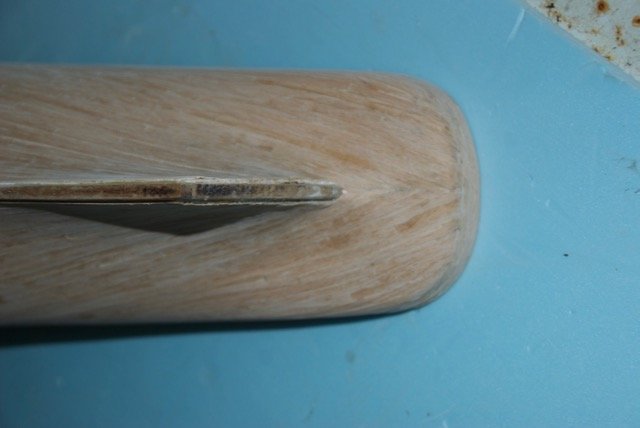
Planked and 2nd planked the deck Since I didn't scribe the planks before mounting them I had to resort to a chisel to create the plank joints. Then tried to drill trenails. A pin vis resulted in broken bits so I tried using the sensitive drill attachment on the mill. That worked pretty well but couldn't do the whole deck. I ended up using a small rotary tool to finished the drilling. Far from a precision job but it seems to look OK.
- 79 replies
-
- 7
-
-
- marisstella
- barque
- (and 1 more)
-
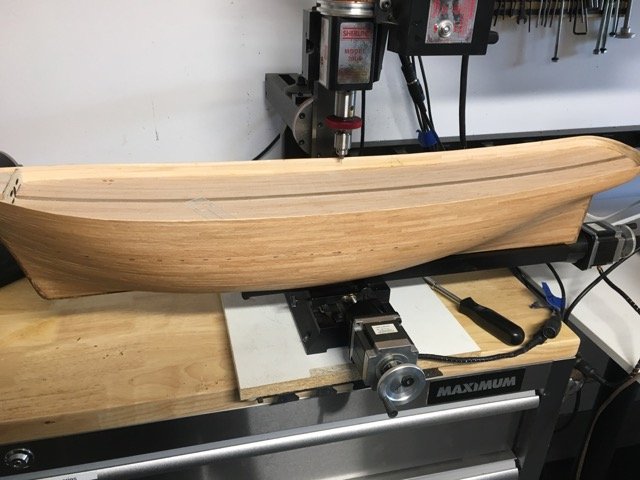
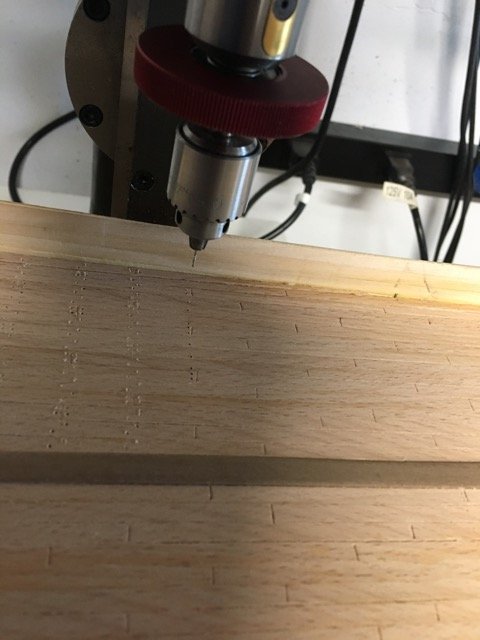
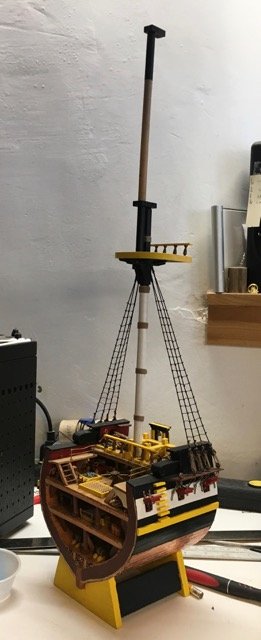
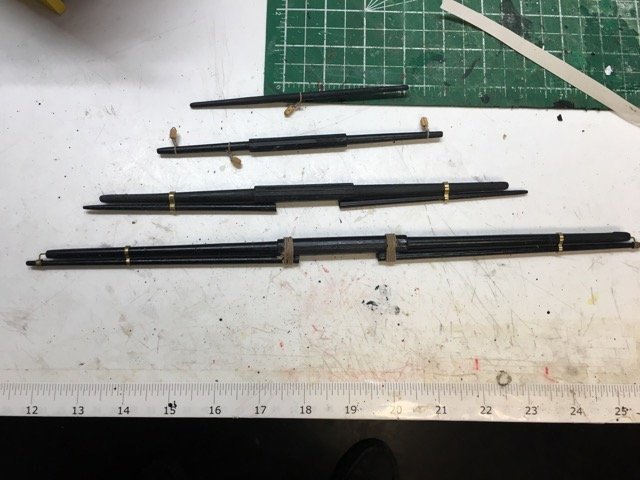
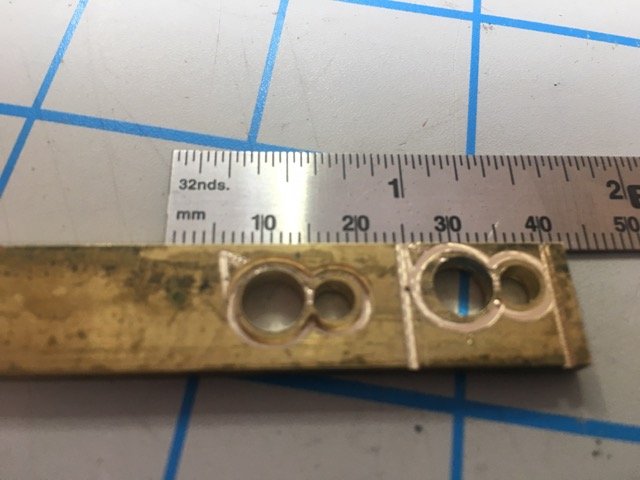
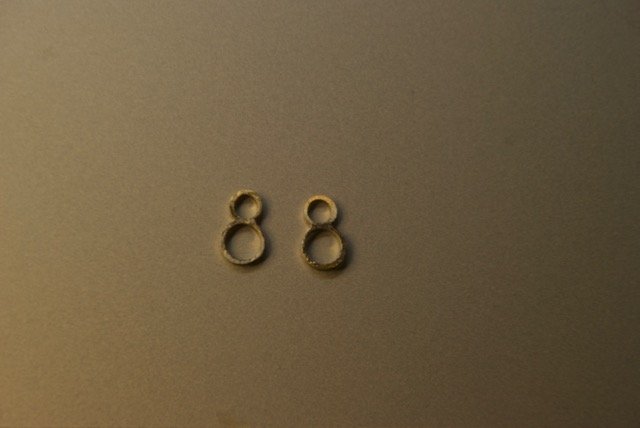
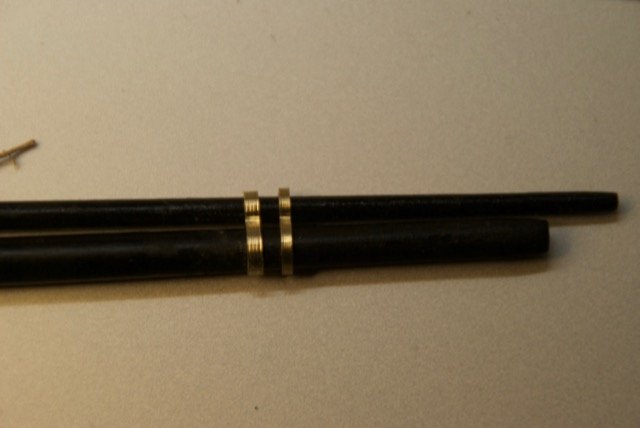
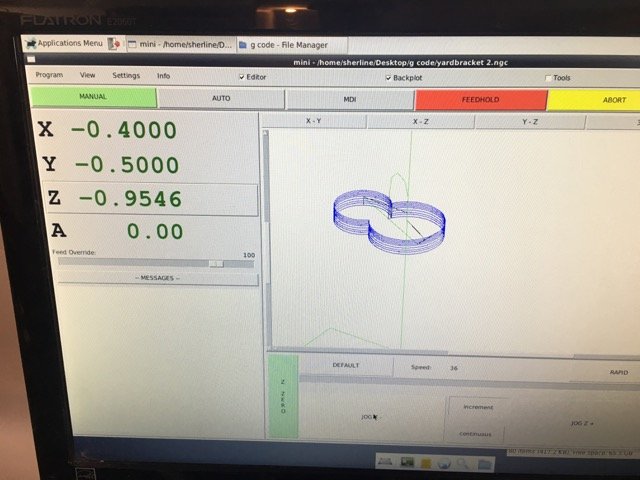
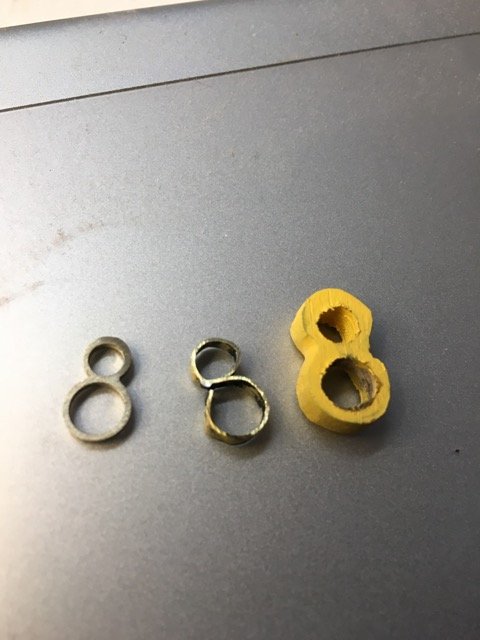
The Essex has been adorning a corner of my desk for the past few months. Some progress since my last post but not really much time has gone into it. The rigging of the yards left me unsure how to proceed so I've been just enjoying what is there. Time to start up again! The most fun getting here has been the "outrigger eyelets" (Aeropicolla term) perhaps more correctly called the "studding sail boom irons" (Mondfeld) or "boom brackets" (Takakjian). I tried 3 different approaches - the wood from the kit, a brass strip bent into shape and soldered, and a brass bar milled on a Sherline CNC mill. The results were: The CNC milling was a nice little learning project; Programmed the g-code to mill the outside the bracket Ran the program on a thick piece of stock cutting only part way through the stock. Drilled the inside holes, then milled off the underside of the stock to free the bracket. I tried I couple of different thicknesses to choose a pleasing appearance. Then ran the milling program 3 more times to make the rest of the brackets required.
- 99 replies
-
- 5
-
-
- essex
- cross-section
- (and 1 more)
-
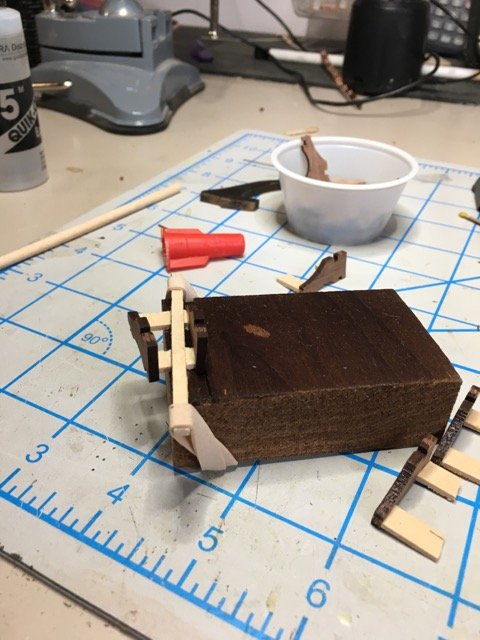
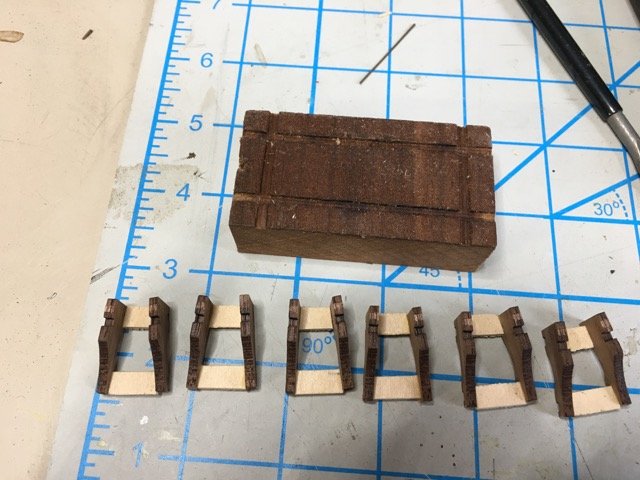
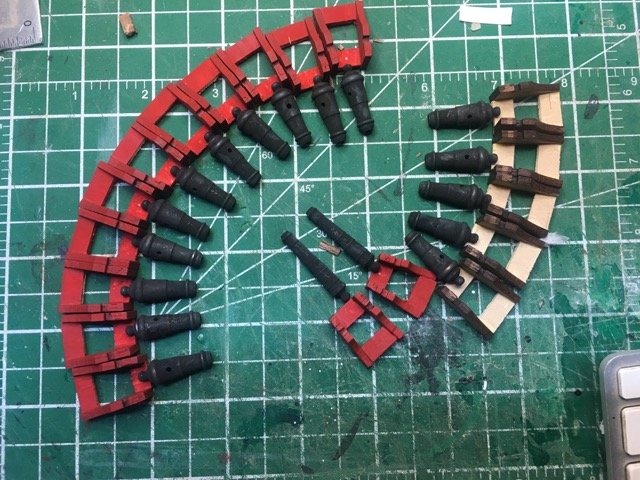
On to building the armaments. I will use the kit supplied carronades and carriages A simple jig to hold the carriage sides was made by slightly widening the kerf from the table saw. The brass carronades and long guns were blackened with Casey "Brass Black" Assembly to follow.
-
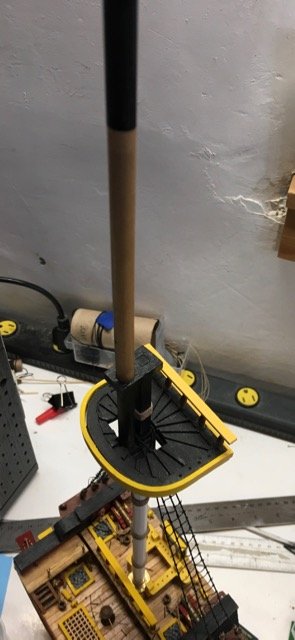
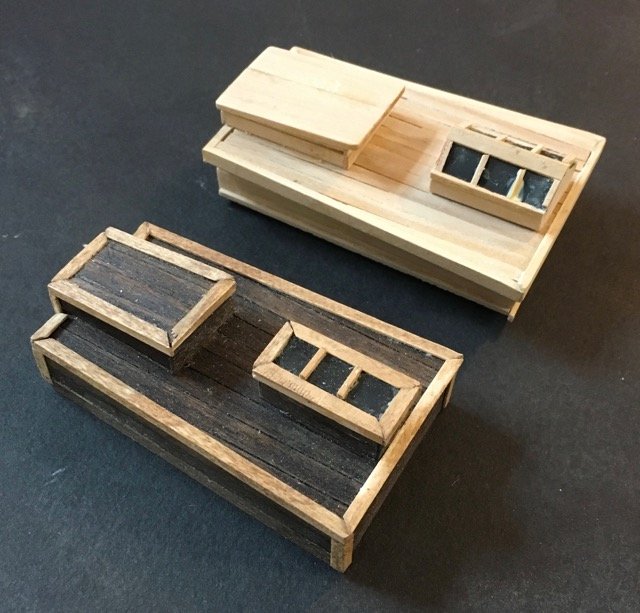
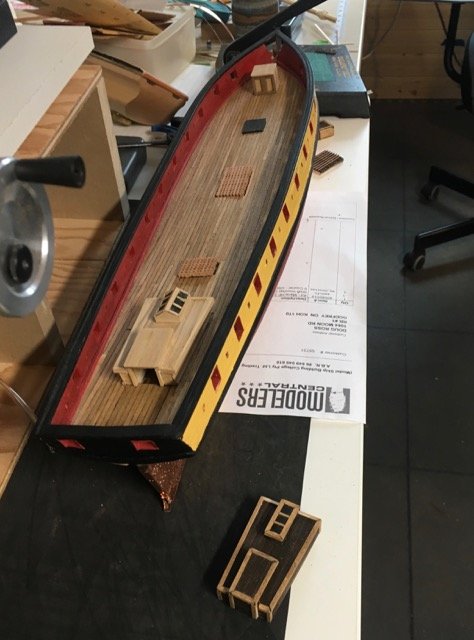
It has been a long hot summer and most if it has been away from the shipyard. Nevertheless there has been a bit of progress. I've finally committed to a companionway and main cabin design. Of the two implementations: I chose: The cabin and companionway and well as the hatches were made from boxwood milled here. In addition I mounted the hull on the launchways.
-
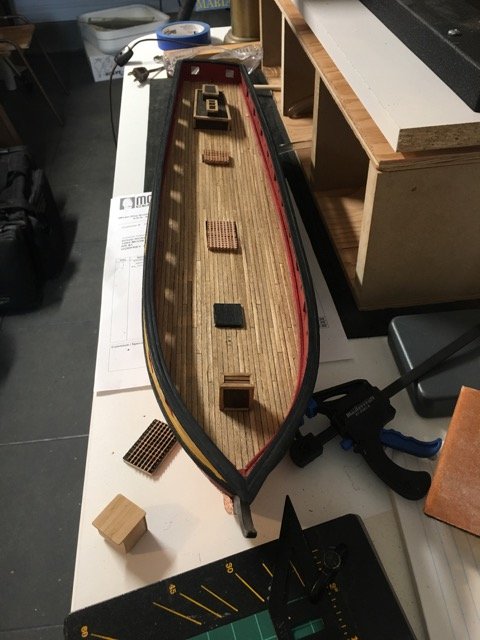
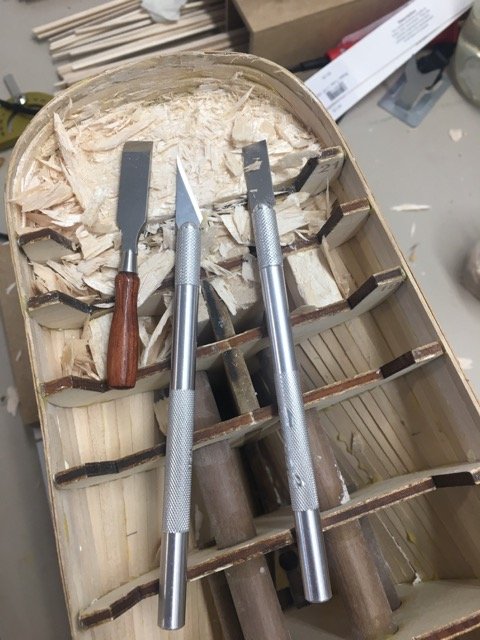
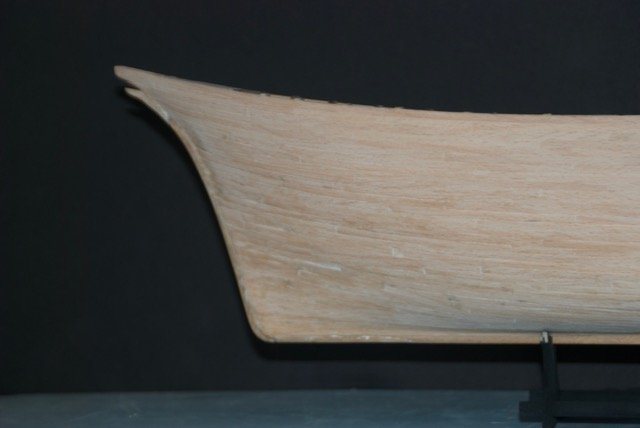
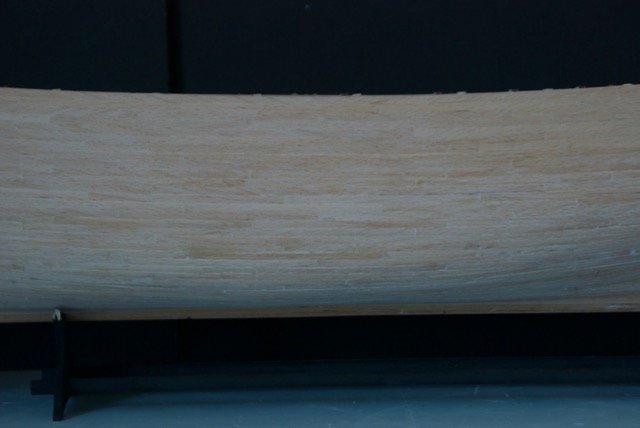
Don, I'm looking forward to planking now that my fear of an earlier mistake has diminished. I was concerned that the stern section wasn't deep enough to allow for the deck. Now that the balsa block has been carved out I'm happy to say that it is OK.
- 79 replies
-
- 4
-
-
- marisstella
- barque
- (and 1 more)
-
Funny about that popeye - I feel cross-eyed! In any event planking a deck seems very different than planking a hull.
- 79 replies
-
- 1
-
-
- marisstella
- barque
- (and 1 more)
-
Linen yarn is available for ropewalk stock
Heronguy replied to Jaager's topic in Masting, rigging and sails
Thanks Chuck. Good explanation. I'm certainly using Syren rope as my benchmark to determine when I eventually get it right! It's kinda fun trying. Being a bit of a technophile it is appealing to me to tryout these various tools. -
Fair enough - thanks for the information. I won't bother climbing onto the roof to get more height.
-
Linen yarn is available for ropewalk stock
Heronguy replied to Jaager's topic in Masting, rigging and sails
Thanks - new to the process and still learning. I have over-twisted on a few attempts so I'm probably over-compensating somewhat. When you refer to "tensions" are you saying each strand having equal tension or are you suggesting additional weight to increase tension on all the strands? I'm presuming the latter. -
I'm curious how long a rope you are making horizontally. With the vertical installation in my shop I'm limited to about 6'; that's more than enough for any one line I've ever needed on a model but is obviously much shorter than what one purchases. (e.g 5m from Alexey or 20ft from Syren). The main advantage I see to longer lengths is less waste as it is cut for use.
-
Linen yarn is available for ropewalk stock
Heronguy replied to Jaager's topic in Masting, rigging and sails
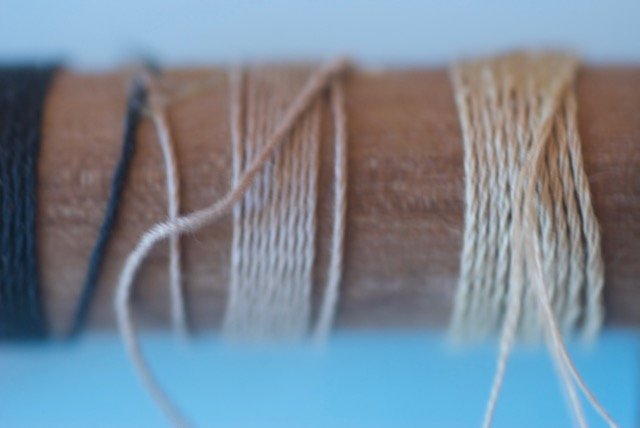
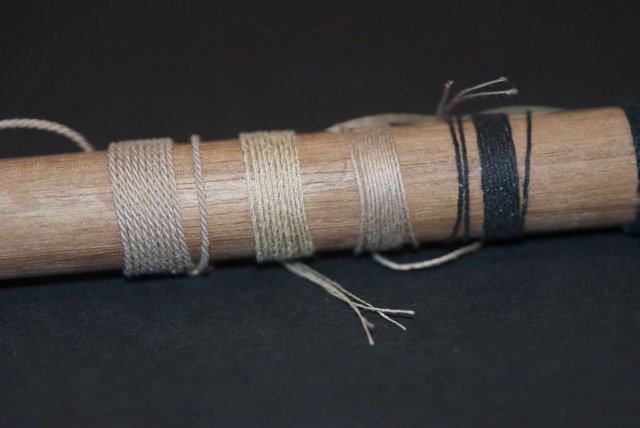
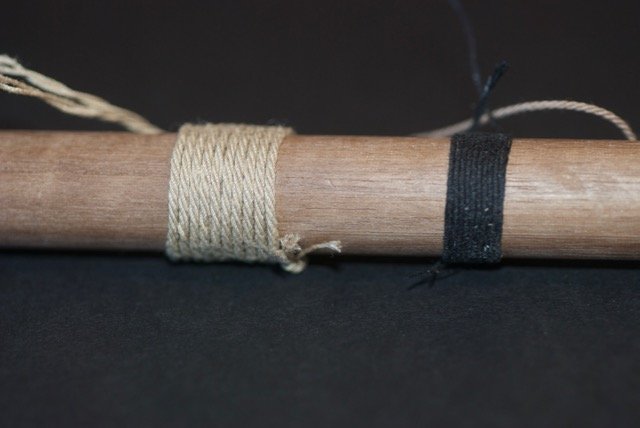
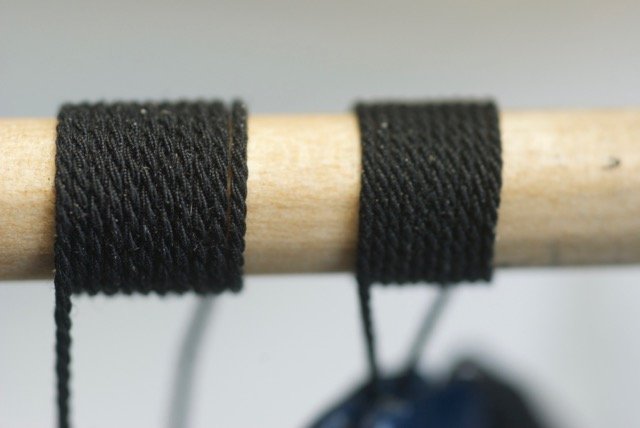
it's taken a long time to get back to the rope making experiments. I have done a few trials both to learn the tools and to evaluate the ropes that I can make with the yarns at hand. I'm using a Domanoff Planetary Ropewalk for the fine yarns and then the Domanoff Prosak v3 for the heavier rope (made from the strands that came off the Planetary). The threads I've tried out are the 90/2 lace linen, 60/2 lace linen, and some ne50 Cotton. The cotton tread is Gutermann ne50 packaged for quilting machine in 800 meter spools. The cost was under $10CDN The ropewalks allow 3 or 4 strand ropes at each stage (with or without centre-core) I've started to make a table of resulting rope sizes in various configurations but have not done an exhaustive list. I was disappointed in the 60/2 black linen as it was quite dull in appearance and somewhat "slubby". Oddly enough the 90/2 linen (tan) and 60/2 linen (tan) both produced good rope. The cotton rope was also quite good. The smallest rope I've made has been 0.015" the largest 0.047" Here some of the ropes shown coiled on a dowel to measure diameters I'm using some of the cotton rope 3 strands of (ne50 3 strand) .8mm (.032") for my Essex Cross-section shrouds. It is on the left - the rope on the right is .025" from Syren Ship Model Company ( the closest size that I have).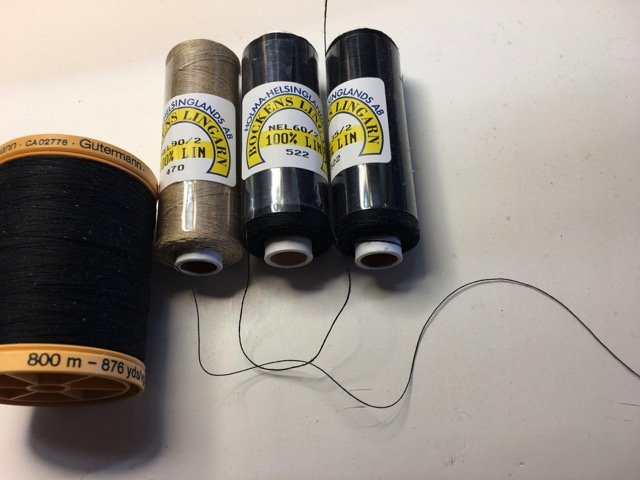

-
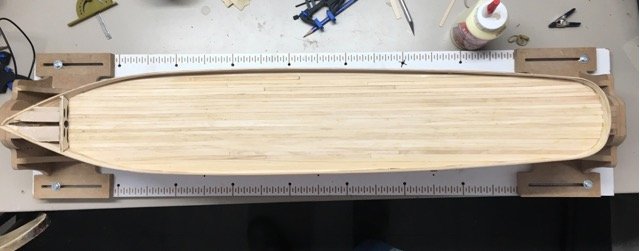
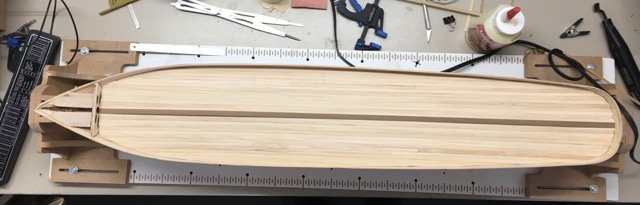
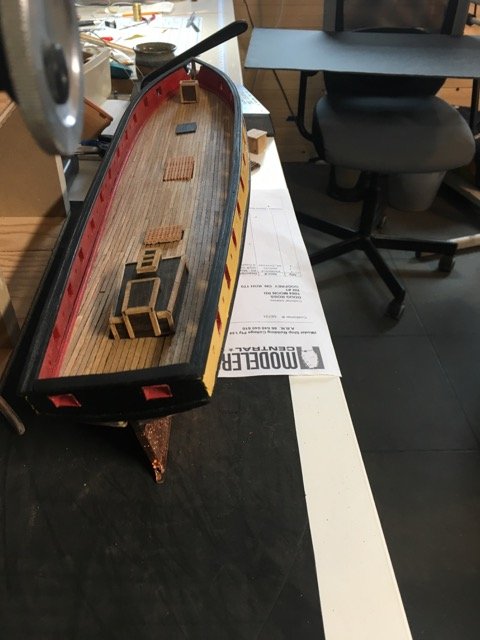
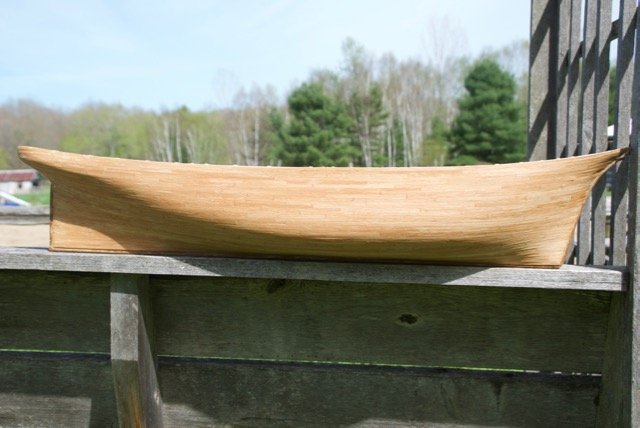
The 2nd planking is done and there is lots of it. I've enjoyed the exercise but I'm pleased to be on to a new step. And like others who have gone before me I wanted to see what the hull would look like with a coat of wipe-on-poly My intention is to follow build instructions and paint above the waterline and copper below so we won't see the beech wood in a while.

- 79 replies
-
- 10
-
-
- marisstella
- barque
- (and 1 more)
-
Peter, it is developing beautifully. An inspiration for me. Well done.
- 242 replies
-
- 3
-
-
- syren
- model shipways
- (and 1 more)
-
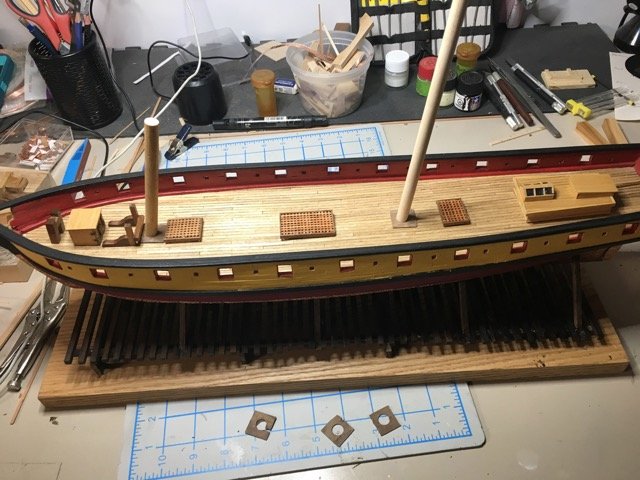
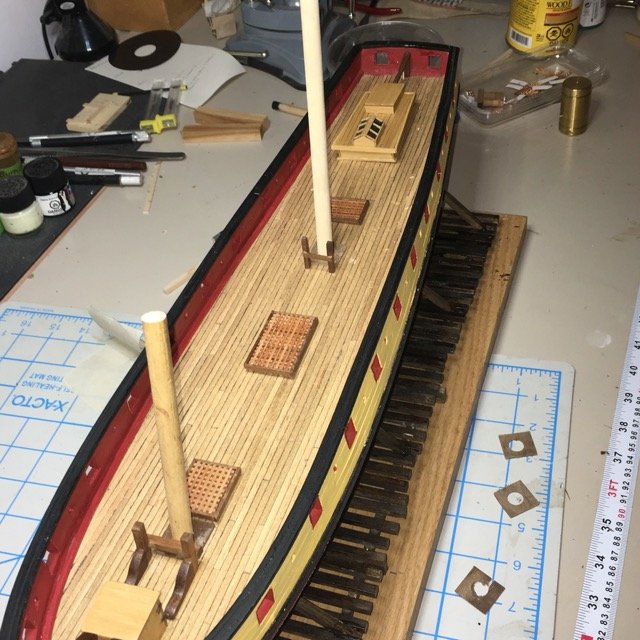
I haven't yet developed any affection for deck fittings but then again most of my model ship building has involved planking hulls! I really have to move on to the rest of the ship! I gather you enjoy fitting out the decks, your builds always have pretty cool fittings - something to learn from.

.jpg.1256f9f95e26b7cbafa011f1dd07079a.jpg)
.jpg.58a09dcbc8f33f6736b860ee2e1a8546.jpg)