Heronguy
-
Posts
863 -
Joined
-
Last visited
Content Type
Profiles
Forums
Gallery
Events
Everything posted by Heronguy
-
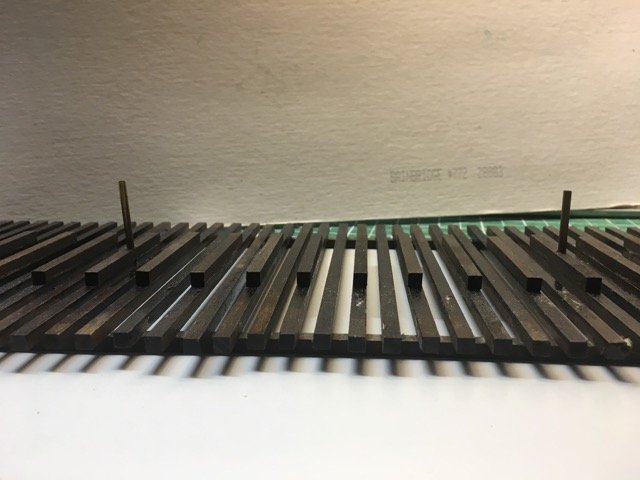
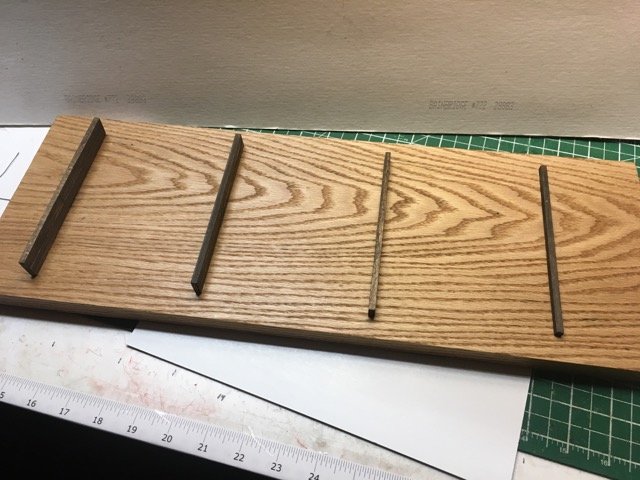
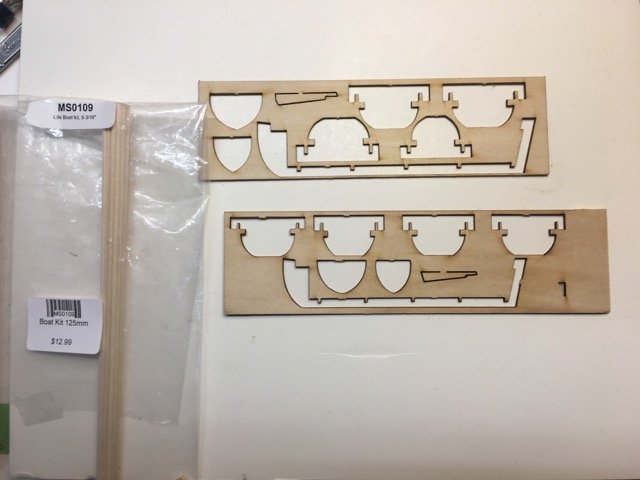
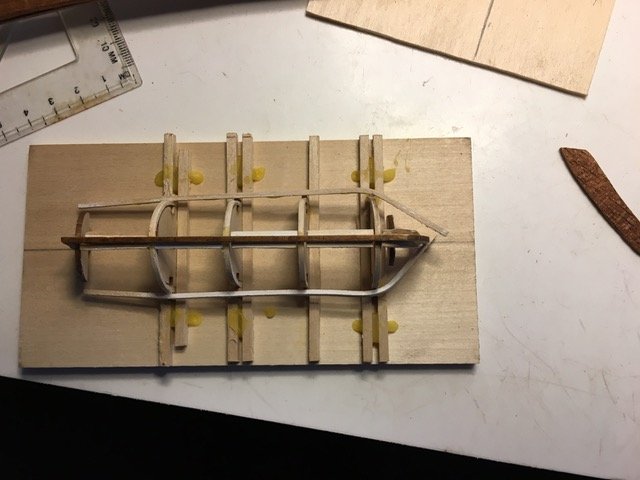
 Almost exactly a year ago I decided to build the little ship's boat that comes with the kit (I wasn't going to start for main ship's build but want'ed to play). I got part way on that fiddly little boat but ran into some challenges. One for PdN builders to be aware of I documented in a PM to @Azzoun. It has to do with the spacing of the rib formers on the keel. He posted it the info here. Although I pushed on with the boat build for a while I had great trouble getting decent results. Partly it was a problem trying to bend the 1/16" square basswood but mostly it was my lack of experience and patience. I put the little boat on the shelf. Unfortunately (or not?) things don't always stay on shelves where you put them. The little boat skeleton was broken in a fall so I put it further back on the shelf where is has stayed for months. Thinking I would abandon it I saw that Model Expo sold the kits for these little boats as stand-alone projects. Since my assembly instructions called it a 5-Incn Typical Ship's Boat I order the 5" version from ME. Here is a comparison of the 2 laser cut sheets for the original (top of photo - from my PdN kit), and the one just received (bottom one on photo) here is a comparison of the 2 partially assembled I think this is a clear demonstration of the expansion of the universe. - the new 5" boat is much larger that the old one - what other explanation could there be! Advice for little boat builders. If you're building the one from your kit firstly measure the spacing of the rib formers on the keel before building the jig. Secondly look carefully at rib former #1 (it's labelled) to make sure that it is smaller that the other 3 - mine isn't and it makes it impossible to plank the hull. Thirdly if your rib former #1 is the correct size realize that using the building jig which makes the top of these formers (top when the boat is in floating orientation - bottom in construction orientation) level will leave a gap preventing you from attaching the rib to the keel without some shimming. Fourthly, consider throwing out the basswood 1/16" square stock and using some wood that takes bends more easily (I'm using walnut). Fifthly, don't expect to get the lovely sheer line shown on the plans since the building jig makes the run from rib 2 to 4 level (probably not big issue). I'm going to build the bigger one before I decide if the smaller one can be salvaged by some changes to rib former #1. Otherwise it will be back to ME for the 4-1/4 inch boat which I believe is the size in the PdN kit
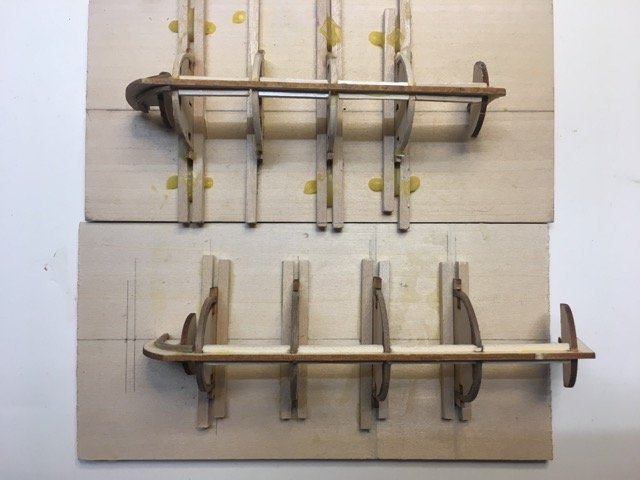

-
<delete>
-
Linen yarn is available for ropewalk stock
Heronguy replied to Jaager's topic in Masting, rigging and sails
I have a ropewalk on order and was looking for yarn for experimenting. I have a supply of fine linen and cotton yarns from our home weaving studio. The finest is labelled 28/2 which yields 7200 meters/kilo. I checked our sources for weaving yarns and discovered 90/2 (27,200 m/kg) , 60/2 (18,000 m/kg) and 35/2 (10,600 m/kg) lace linen in black and in natural. These are sold in small spools of about 250 m for around $8. One source is Vavastuga located in Massachusetts. Once I receive the ropewalk and the lace yarn I will do a few experiments and post some results. -
Bob, I'm excited to see her in your hands! I will enjoy watching and learning.
- 359 replies
-
- 6
-

-
- prince de neufchatel
- model shipways
- (and 1 more)
-
Thanks for the encouragement David, Peter and Richard. Erik - I wonder how you found out this works? A Thomas Edison approach?
-
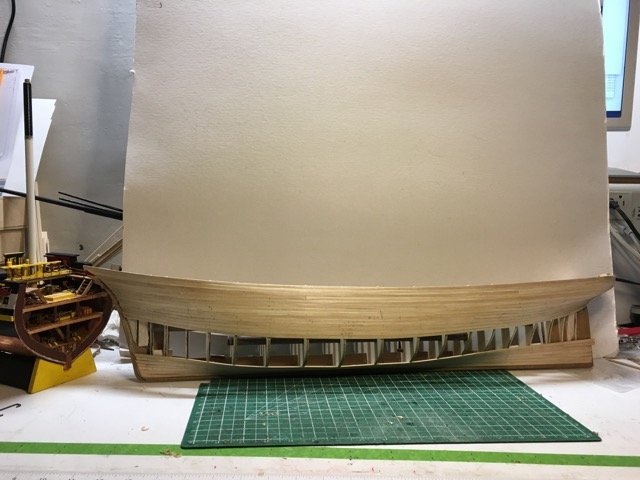
Thank you Russ. I do like this hull as it is closing in. Part of what attracted me to the kit in the 1st place!
- 79 replies
-
- 2
-
-
- marisstella
- barque
- (and 1 more)
-
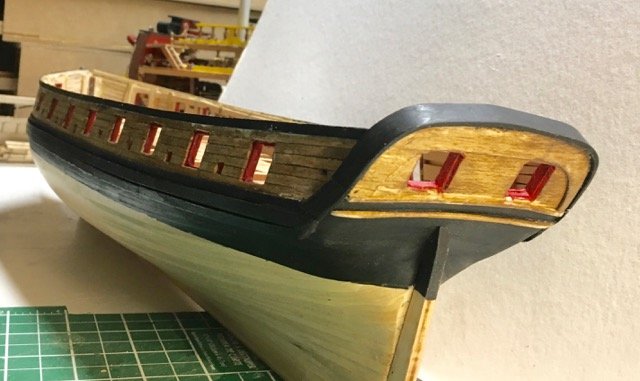
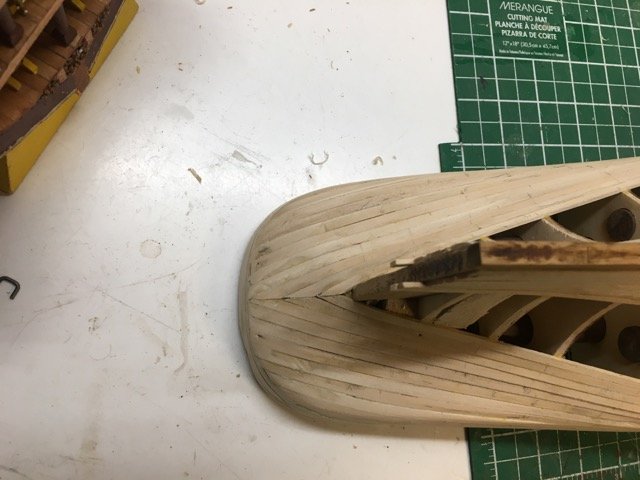
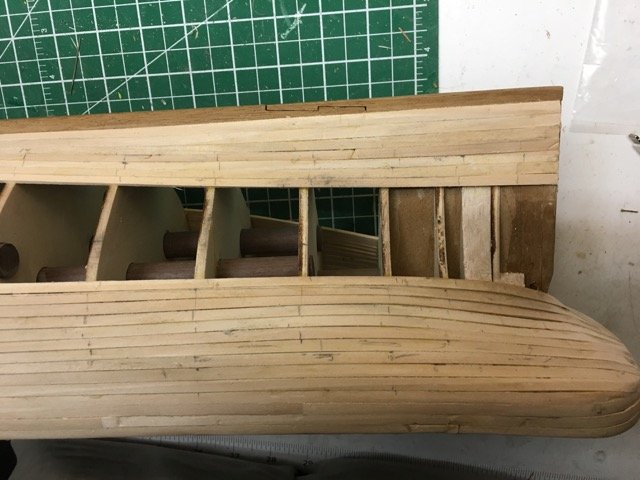
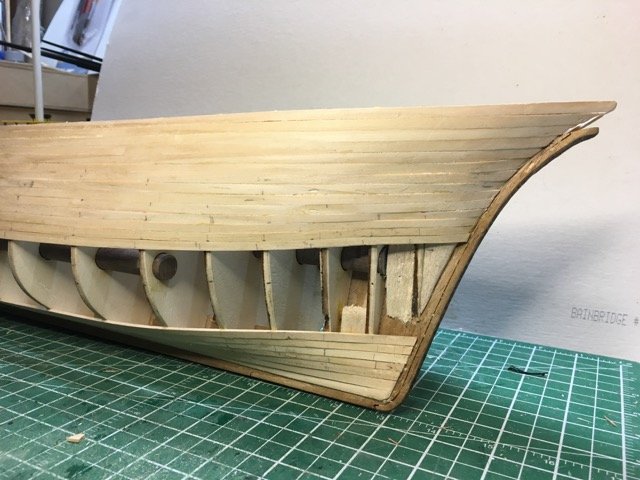
I finally decided to attach the stern cap rail and fashion pieces. This has been a difficult step for me and the results are OK but not completely to my satisfaction.
-
A minor milestone. I've completed the planking of the curvy part at the stern. Easy sailing from here other than the tighter space which will make clamping a bit harder. So far this has been one of my easier hulls to plank.
- 79 replies
-
- 8
-
-
- marisstella
- barque
- (and 1 more)
-
Hi Jamco, it is nice to see the Ontario contingent is getting larger! Will this be your 1st build on MSW and your 1st wooden ship kit? Whichever it is, enjoy!
-
Congratulations on another fine model David. I'm looking forward to your PdN build now!
-
Thanks Jack
-
Hello Jack, I’m enjoying watching you build. Everything is coming together beautifully. I have one question about your simplified planking technique. I see in the last photo that you allow the plank to stop at its natural width whether or not it is ona bulkhead. I see what appears to be a small support under one of the planks. Do you add a support under each of these places before you attach the triangular filler plank?
-
Nice work David. You've made pretty quick work of this restoration. You'll soon have it in the gallery!
-
Good idea Mike. I could have done that except that the dowel provided in the kit was not long enough ( though easy enough to get a longer piece next time I get to town.) I am using sandpaper and a hand held drill i.e. both hands busy.
- 99 replies
-
- 1
-
-
- essex
- cross-section
- (and 1 more)
-
I have a question of technique. I have started to shape the spars and have an issue with the yards. I need to taper both ends. I've done one end by chucking the dowel in a drill and sanding it down. Now I'd like to flip it around and taper the other end. Problem - if I put it in the drill chuck the nicely tapered and will be marred (crushed). Looking for techniques to accomplish tapering on that 2nd end. Thoughts: 1 - sand by hand instead of drill - this is the fallback solution but I'm a bit lazy and don't want to do all the hand sanding. 2 - wrap the end to be chucked to prevent crushing the nicely tapered 1st end - I tried this using tape - no good, and then by wrapping some brass sheet around the dowel - still crushed. 3 - try to find a collet that can fit in the drill chuck and can take the dowel and hold it firmly - the dowel is tapered to the collet doest grip it well. 4 - buy a lathe that allows the yard to be inserted so the appropriate collet is holding the middle of the yard where it isn't tapered - my preferred solution except that it is expensive and would introduce a longish delay. 5 - ask MSW gurus how else to approach the problem I'm going to try #5 1st and failing that #1 for now and #4 eventually (got lots more yards to taper over the next few years!) How about it - any suggestions?
- 99 replies
-
- 1
-
-
- essex
- cross-section
- (and 1 more)
-
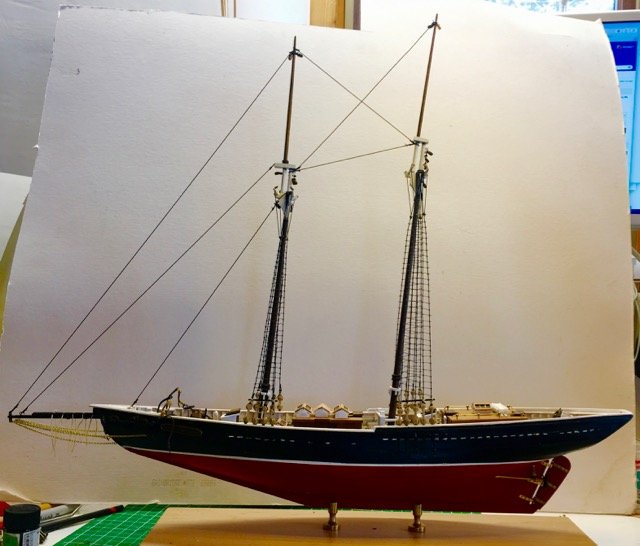
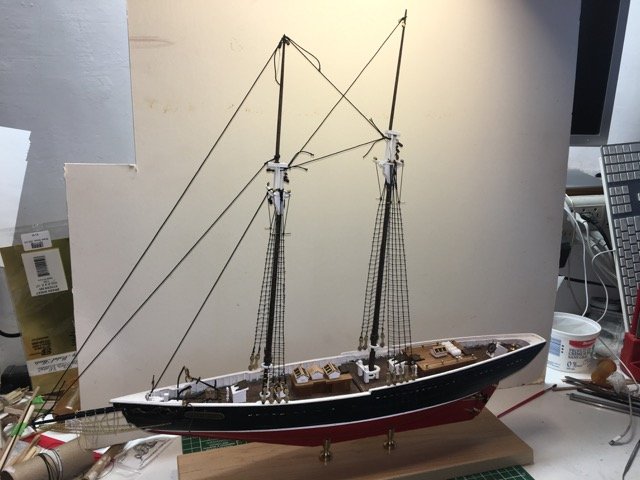
On with some rigging. I figured that stays should be pretty substantial so I rigged with some .035" rope. but decided it looked way too heavy so I cut them off and redid them with some .025. Much more to my liking.
-
How about starting with a 1,5x50mm sheet and cutting out the shape you need? I'm half serious Don.
-
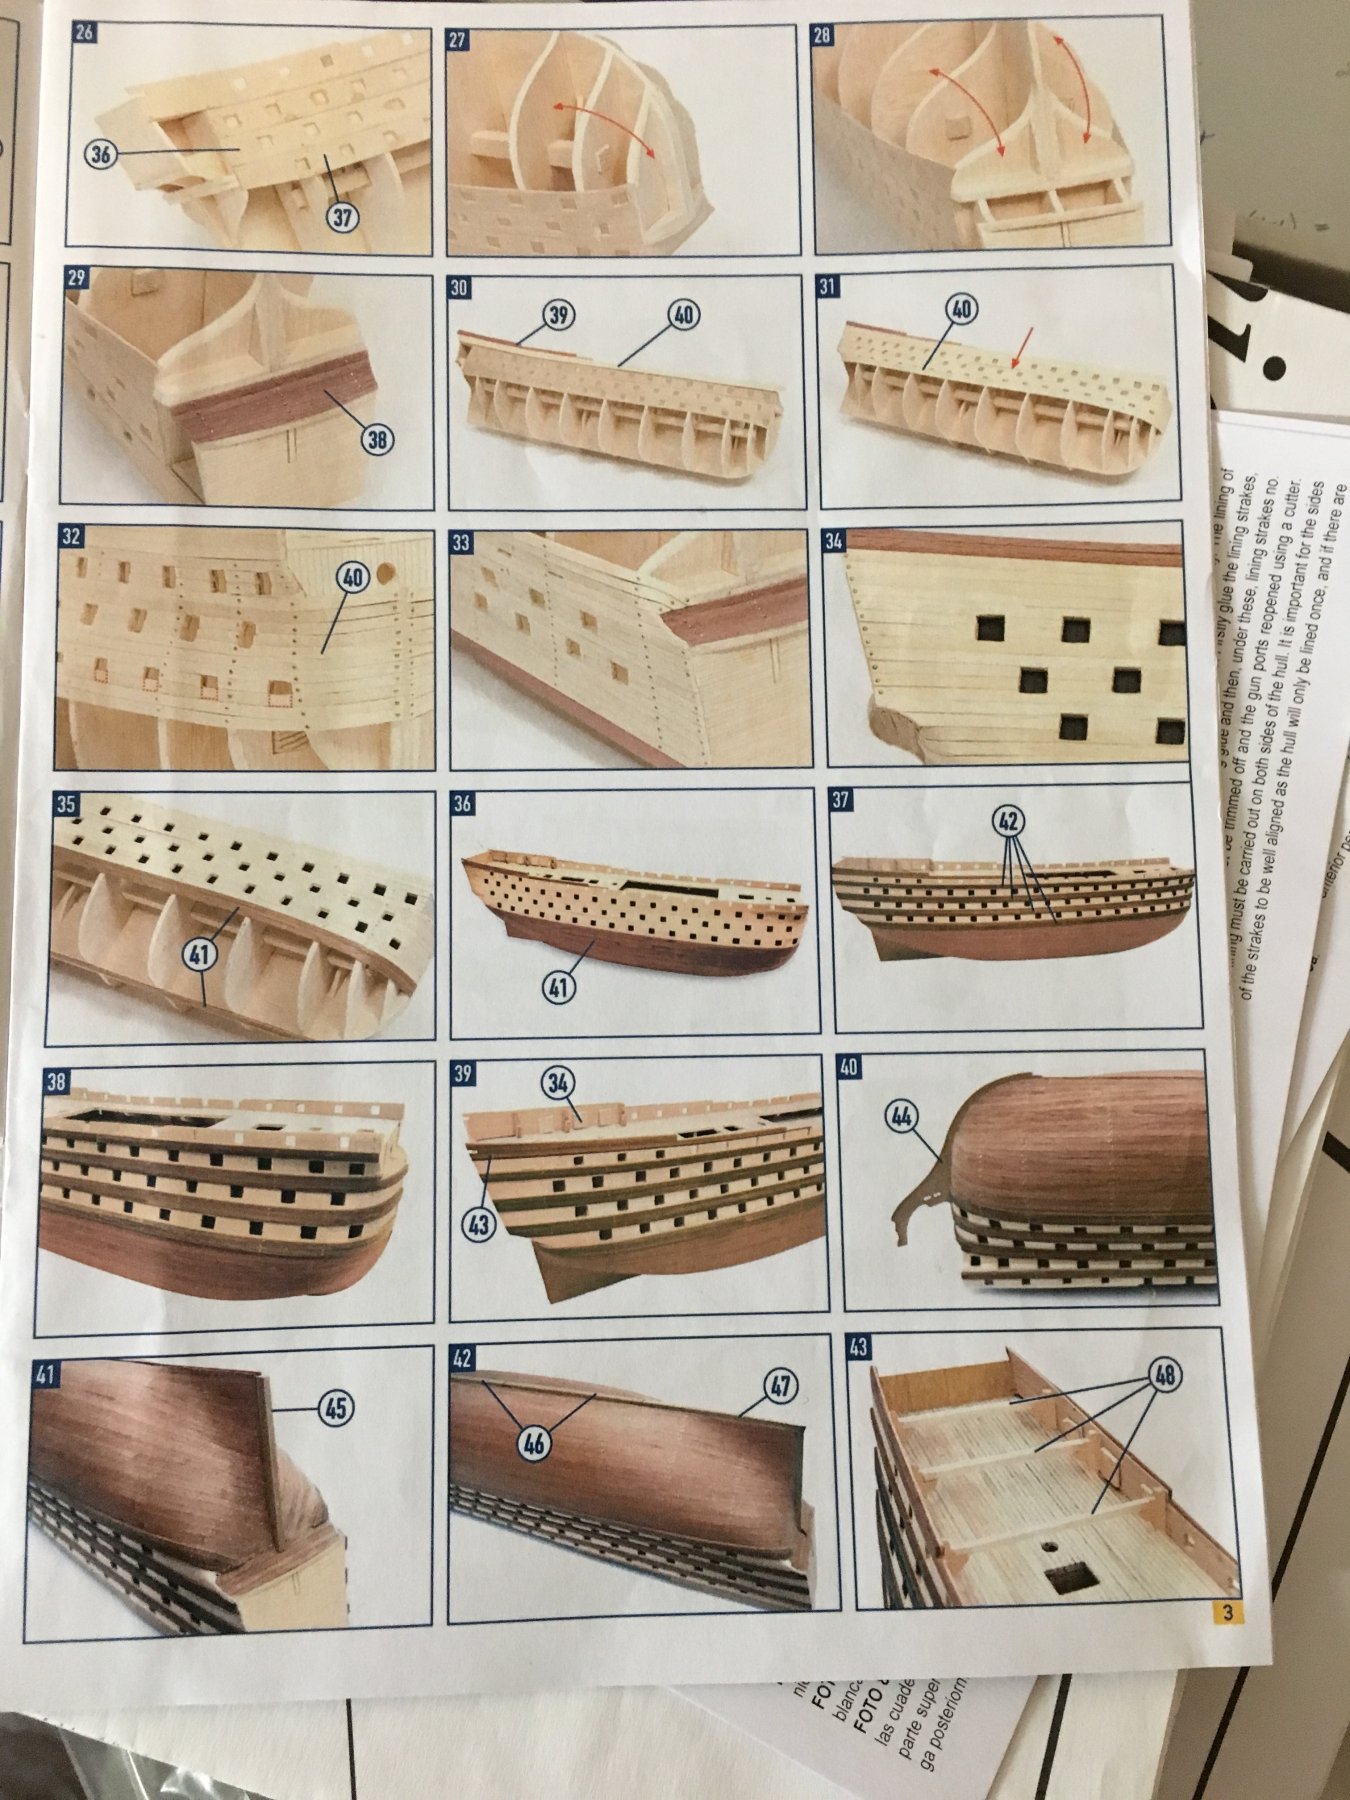
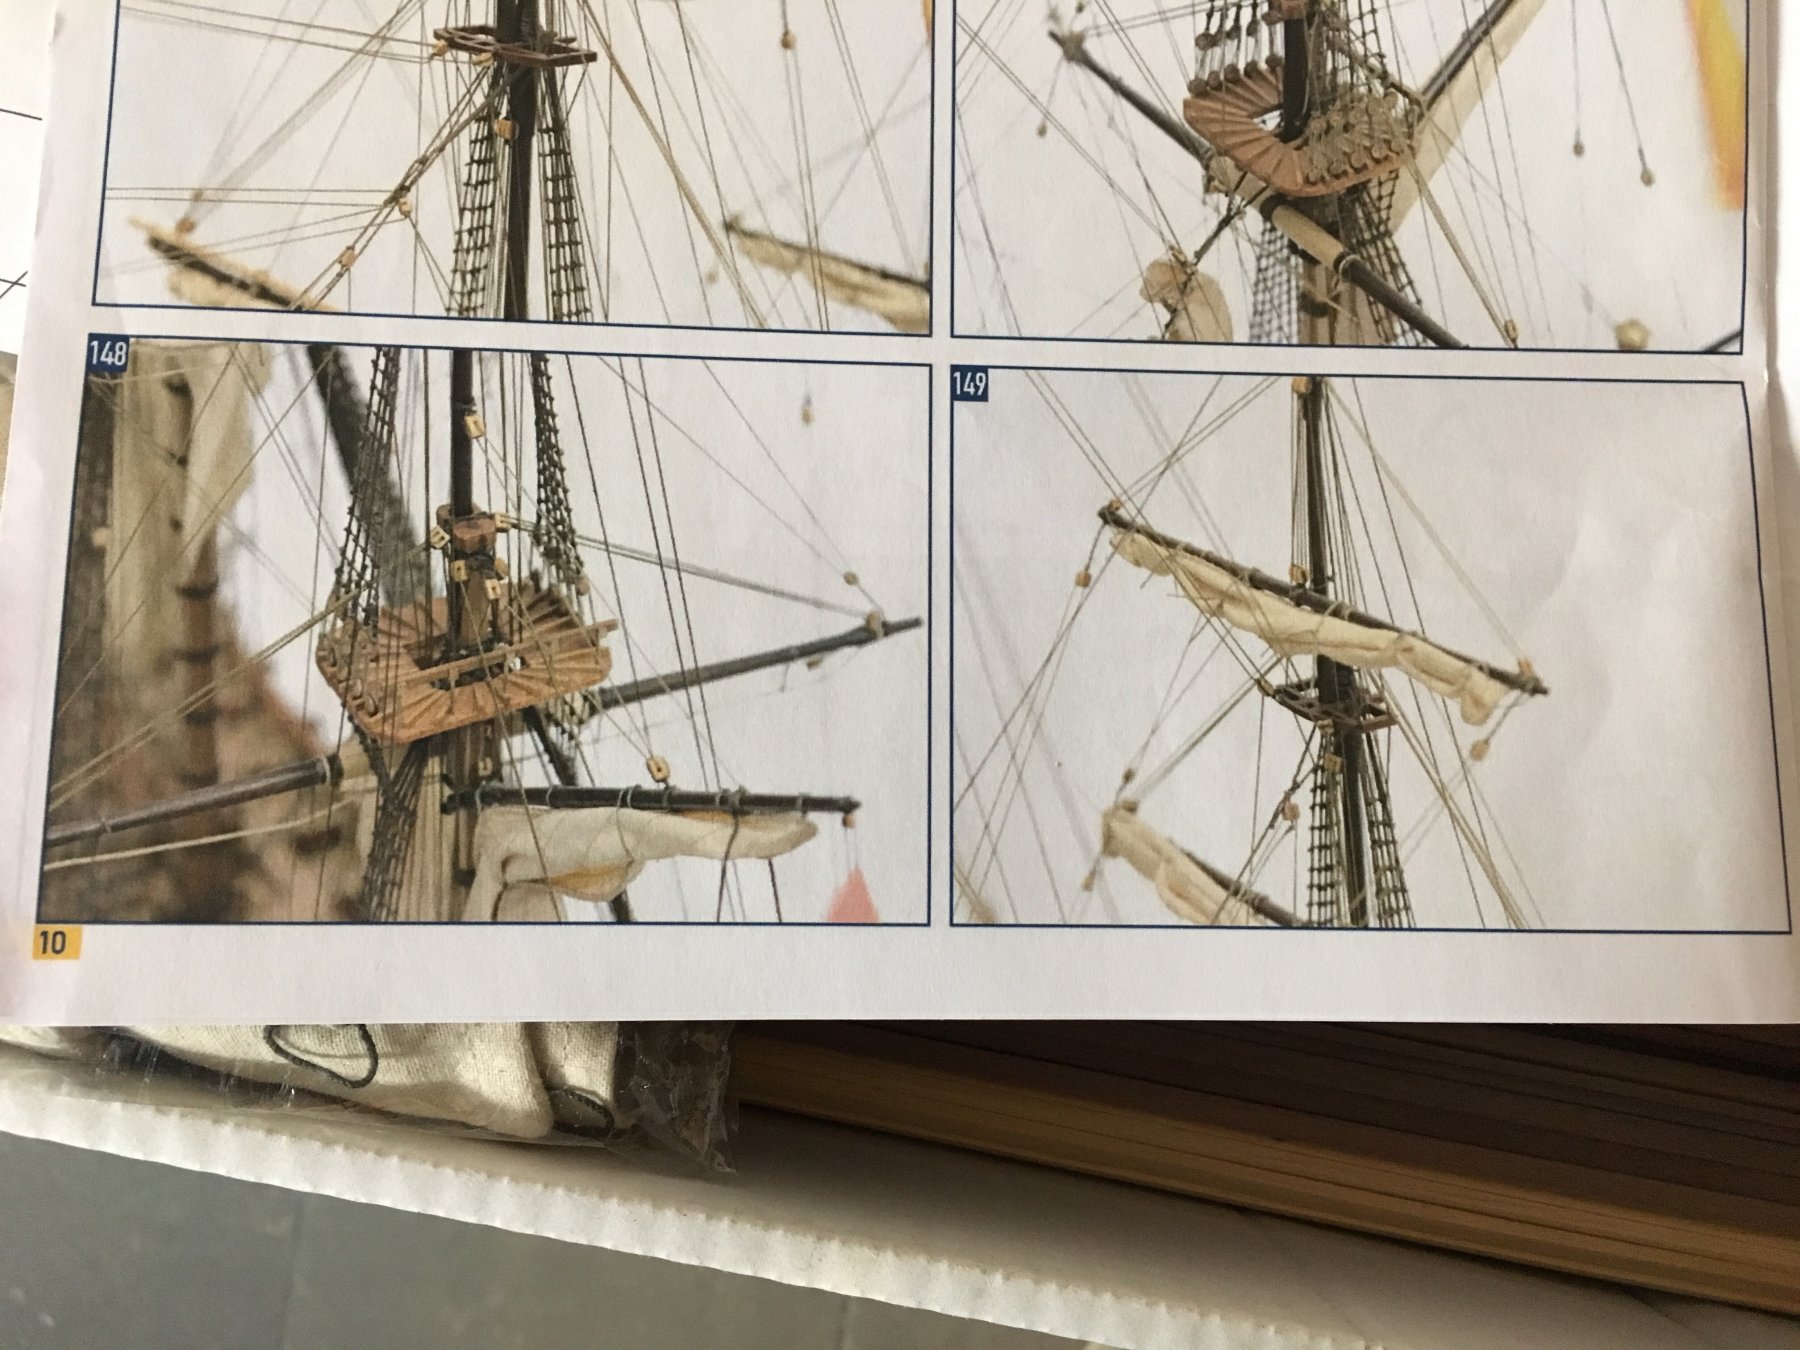
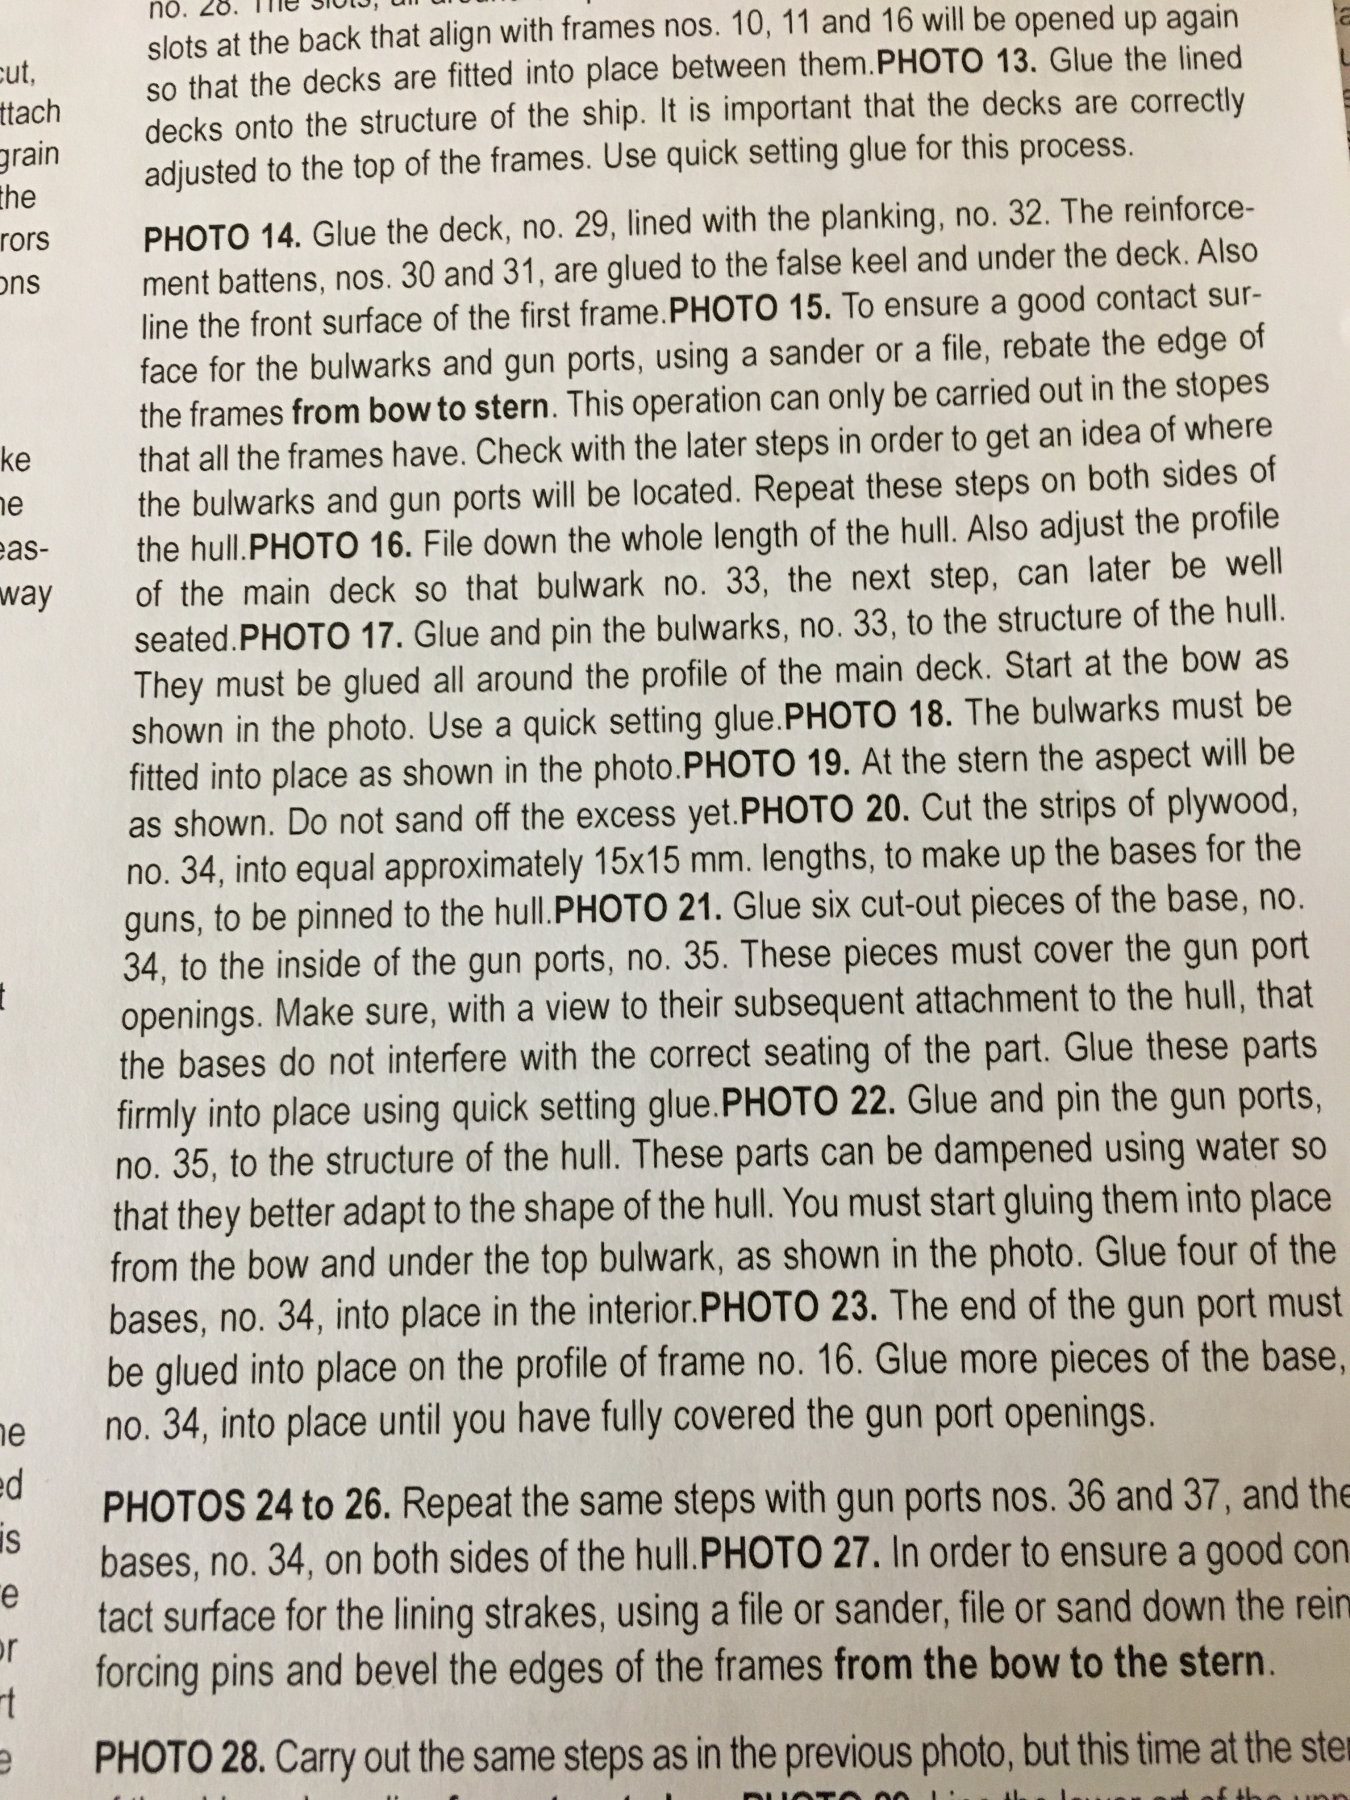
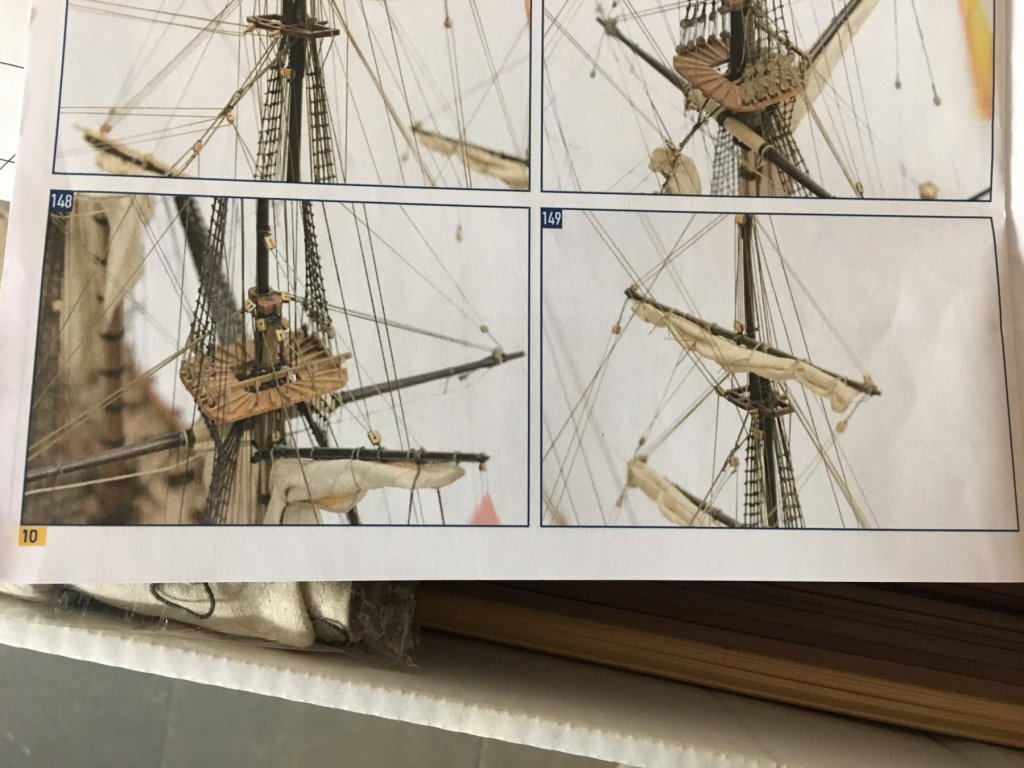
I have the santisima trinidad kit on the shelf. The plans seem comprehensive full scale with part numbers . The instructions are in the form of a pictorial step-by-step (in colour) and a 3 page English instruction keyed to the photos.


-
Good for you Don! By the way are you working your way through the entire MarisStella catalog? Are you going to do a build log for little Pasara? I'd vote yes for one.
-
The deck looks like a dance floor! Beautiful and smooth. You're going to miss the planking - admit it
-
Looks like you'v conquered the bending! Nice work. Isn't it great to get advice and support - always gives me the confidence to keep at it when someone like you or Don offer advice.
- 204 replies
-
- 2
-
-
- trajta
- marisstella
- (and 1 more)
-
Your recent posting in @mikiek's Trajta log was quite timely - where I clamped the pear I have some small indentations. Following your method I'll do a slight soak/steam to see if the dents will pop up before I have to do any sanding. Thanks!
-
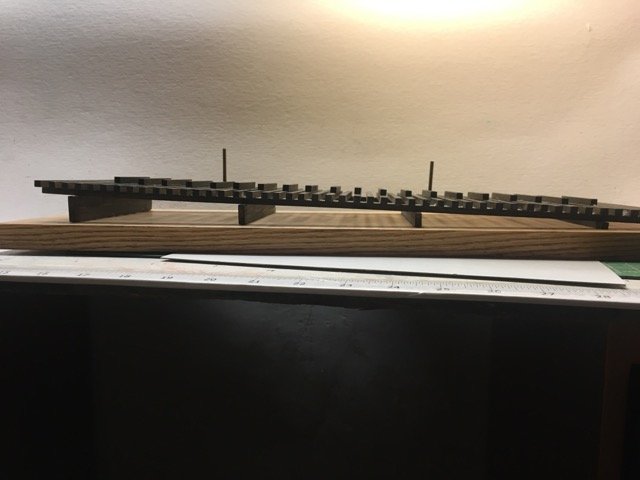
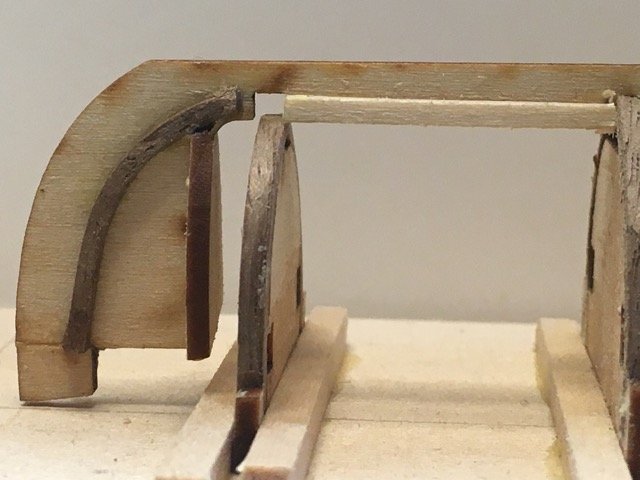
I've been remarkably slow in getting this launchway built. I blame the weather. The plans for this require a board with a set of timbers to create the incline. Then the timber frame is built with additional keel supports every 2nd timber. The ship will be held in place with a pair of brass rods inserted into the keel. Not shown are the support timbers that will eventually (appear to) support the hull laterally. They'y won't be added until the hull is ready to be permanently fixed to the stand. I've opted not to embellish the stand to make it look like the ground around the launch way. I'm not totally confident in the strength of this as a stand but if necessary I can add some additional support to make sure the timbers don't become unglued by stress. Part of the problem with weak joints to date may have been that the shed where I assembled it first was not heated and perhaps the glue was too cool to set well. I'll see how the regaled timbers survive some handling.