


Heronguy
-
Posts
863 -
Joined
-
Last visited
Content Type
Profiles
Forums
Gallery
Events
Everything posted by Heronguy
-
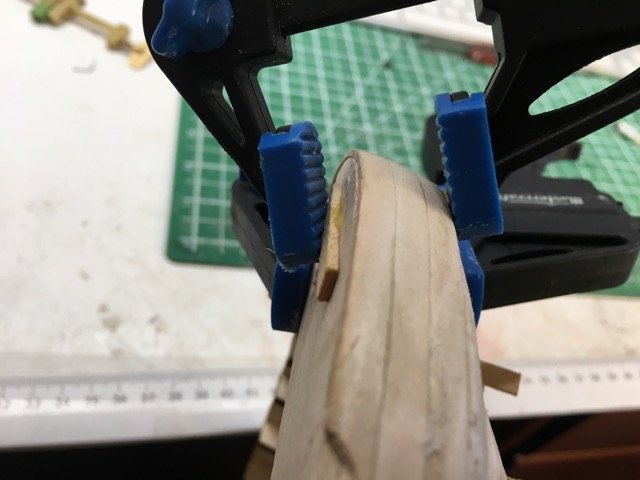
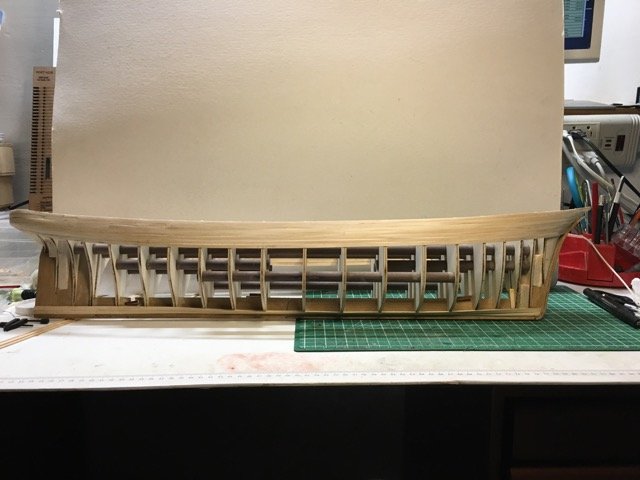
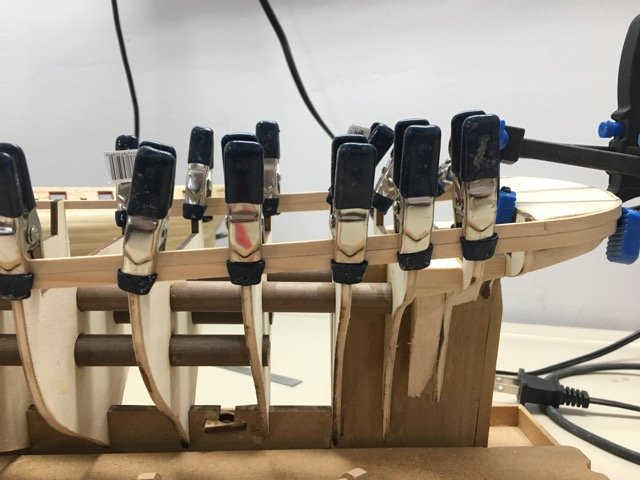
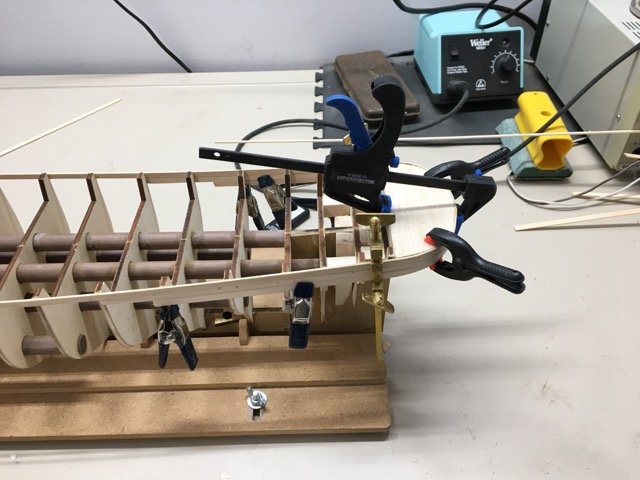
 After placing 4 or 5 strakes it appeared to me that at the stem the planks should be repositioned slightly. I released the planks at the stem, sanded them down and reglued them with some extra clamping provided by yours truly. Looks better now. The stern requires a bit of a bend as well as a 90º twist. Clamping as always is a challenge on these spots. I found I could slightly ameliorate the problem by adding scrap of wood on the top side of the balsa stern filler. This are will be removed later in the build to there was no harm in doing this. Worked quite well. The current state including the garboard strake and the broad strake above it. So far all but the last strake added have been full width strips. The hull is quite easy to plank as for the remaining strakes the tapering required in nowhere more that 1mm off the 5mm strips.
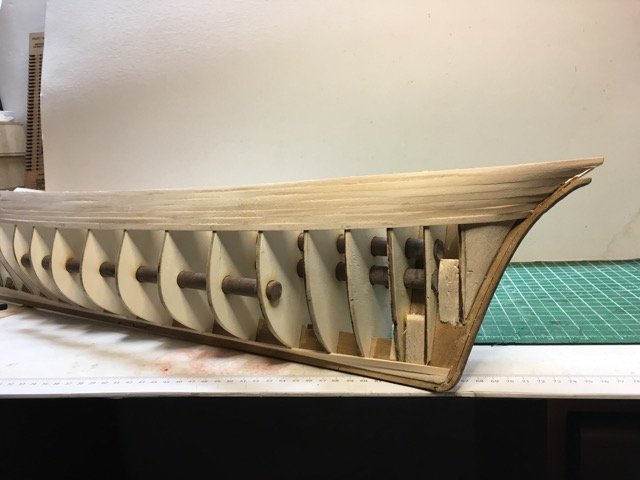
.jpg.c012025d9cfe2a8fcfeff42a9d23879c.jpg)

- 79 replies
-
- 7
-

-
- marisstella
- barque
- (and 1 more)
-
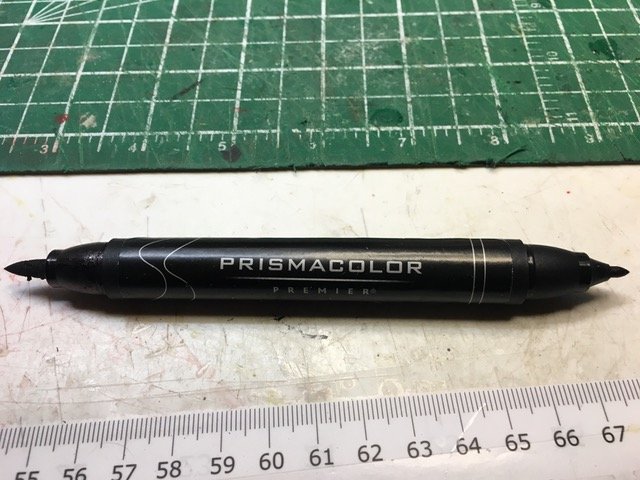
John, For what it's worth I used a marker on one edge of my Syren planking. I have used pencil and didn't like the mess of the powdered graphite getting all over. This marker has 2 different tips - I used the bigger one and ran an edge of the a strip before I cut it to length for each plank. You have to be careful at the ends as it will wick up if you're a bit heavy with the marker. Here it is on the Syren - note the "golden oak" stain!
- 90 replies
-
- 2
-
-
- syren
- model shipways
- (and 1 more)
-
Model Shipway Ratline tool
Heronguy replied to fnkershner's topic in Modeling tools and Workshop Equipment
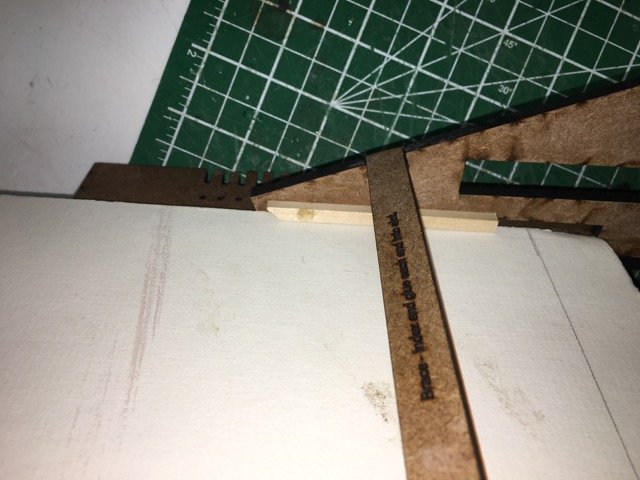
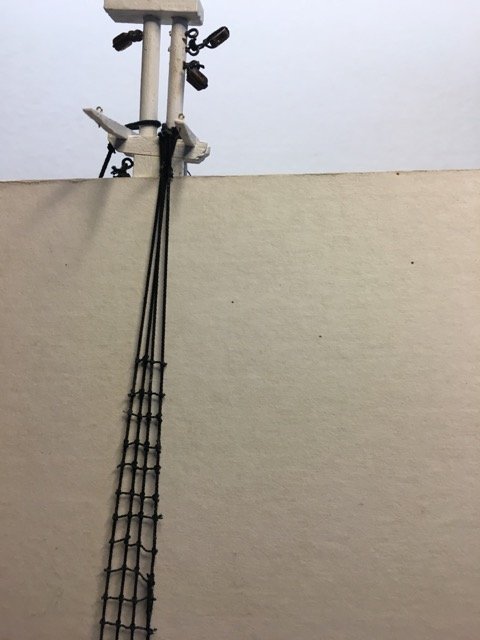
To summarize my experience: Ratliner was slower and used more ratline rope than OnShip. While the actual rattling is very similar in both methods I had more trouble getting the knots on the OnShip method to be as firm and to stay snug until the dilute glue was applied. Here the Ratliner seems to help me. The mounting of the shroud units on the main mast was not difficult. Alternating between port and starboard loops as they were placed over the mast did not create any problem. I did not have any problem with the shape of the ratlines as I tightened the shrouds individually. I made an error in mounting the starboard shroud unit and put it on backwards. When I discovered it I determined that from an appearance perspective was fine so I have not corrected that mistake. A second problem exists with the the port shroud unit. For reasons I have not "sussed out" the ratlines are not parallel with the top rail. I might perform a redo at some point but it is not the worst mistake in the build! Overall I'm happy with the tool. I can imagine doing fine without it and if time were of the essence then ratline OnShip would be OK as well. The use of the Ratliner is likely my choice for my next ratline task because I found the ergonomics better and I appreciated the ease of clove hitching when the end(s) are held on the frame rather than loose. Trying to get a thirdhand positioned near the shrouds in the OnShip method does not appeal to me. One very simple modification I have made is to add a guid to the frame for holding the white card behind the rattling area.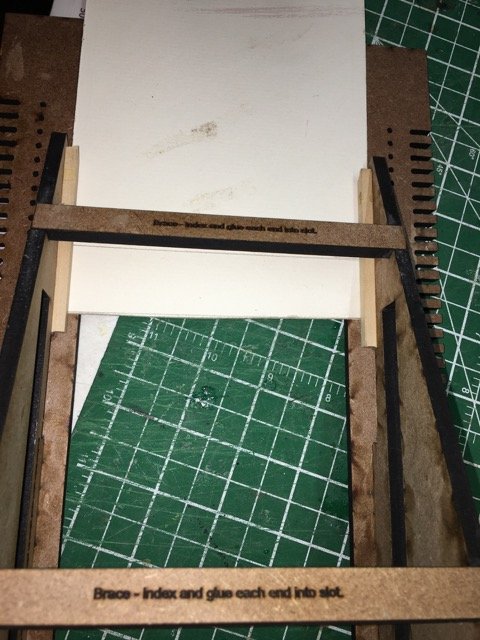
-
Model Shipway Ratline tool
Heronguy replied to fnkershner's topic in Modeling tools and Workshop Equipment
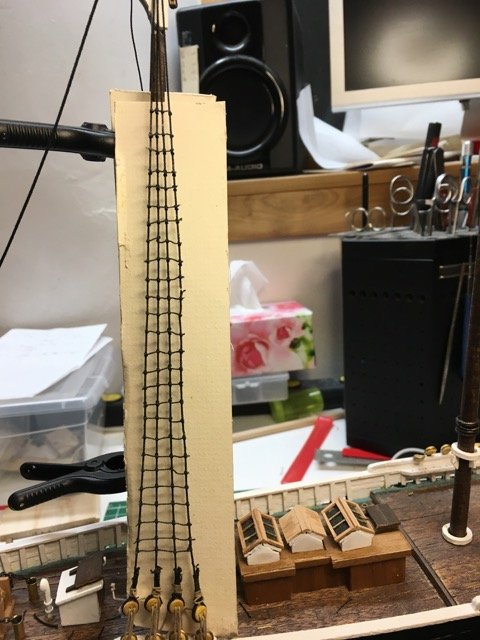
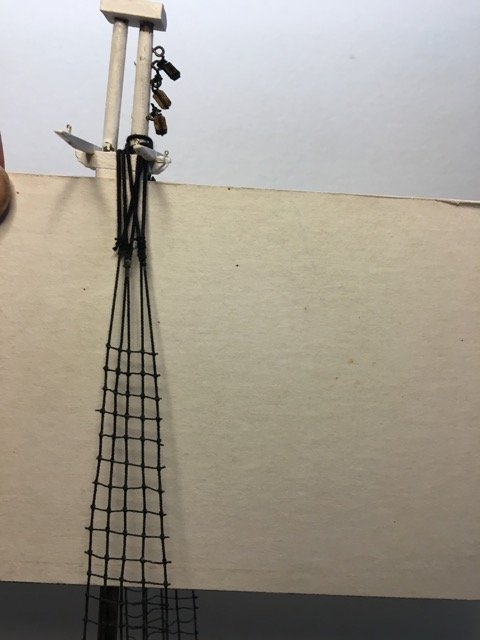
The trial run is over. The shrouds are installed. The foremast shrouds were already on the ship so I did the rattling OnShip. The main mast shrouds were rattled on the Ratliner and then the port snd starboard units were mounted and the deadeyes stropped and then reeved.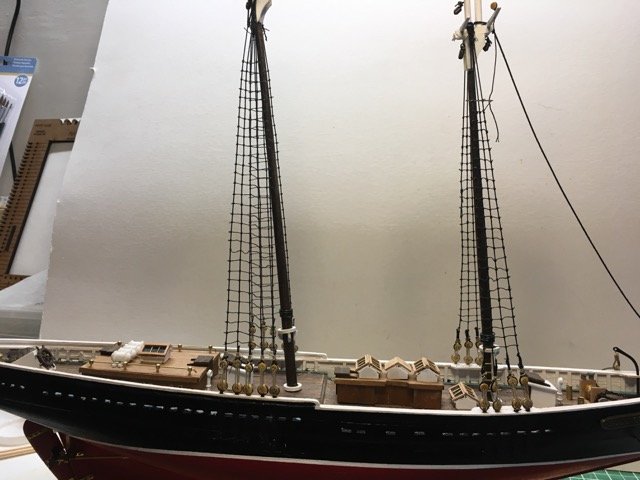
-
I really like the idea of the spacers between the rows of nails on your punch. It looks like it would do a great job on controlling the depth of the rivet head in the copper foil. The copper inn job looks very well done!
- 242 replies
-
- 1
-
-
- syren
- model shipways
- (and 1 more)
-
The finished beech does look very nice! I wonder how it is to work with as planking at 1mm - does it bend easily? You hull looks terrific from stem to stern!
-
Model Shipway Ratline tool
Heronguy replied to fnkershner's topic in Modeling tools and Workshop Equipment
Possibly true but I'm going to finish up and see if I like the results of one approach vs the other. I would imagine anyone who has successfully done the rattling of a model will not find a use for the Ratliner - however those of us who are starting out, those who find the ergonomics of the process OnShip quite tiring, or those who have had trouble rattling their models OnShip for other reasons (maybe a bit clumsy like me?) may find the device a help. I still haven't finished my starboard shrouds so it'll be a while 'til I can mount them and finish my trial. -
Model Shipway Ratline tool
Heronguy replied to fnkershner's topic in Modeling tools and Workshop Equipment
We better be careful or we'll end up designing a model ship - from the ratlines out! -
Model Shipway Ratline tool
Heronguy replied to fnkershner's topic in Modeling tools and Workshop Equipment
Pav, If we’re blue-skying a modified jig then I’d ask for a second side -like the current side - hinged at the top so you could set up for both port and starboard shrouds at the same time. That would allow the Singleton shroud to be mounted in the “approved” manner and also have all the shroud pairs alternating port and starboard. I’d also like some clever jam cleat arrangement for the end of the ratlines so it was quicker to attach them to the frame. If possible I’d prefer the sides of the frames to be angled in at the top so that the lines for the ratlines could be shorter - less wasted rope. I’d like some mechanism to allow the upper deadeyes to be attached to the shrouds while still on the jig. I’d like it to be cherry instead of MDF, and offered at the same price! -
Model Shipway Ratline tool
Heronguy replied to fnkershner's topic in Modeling tools and Workshop Equipment
Advice to purchasers: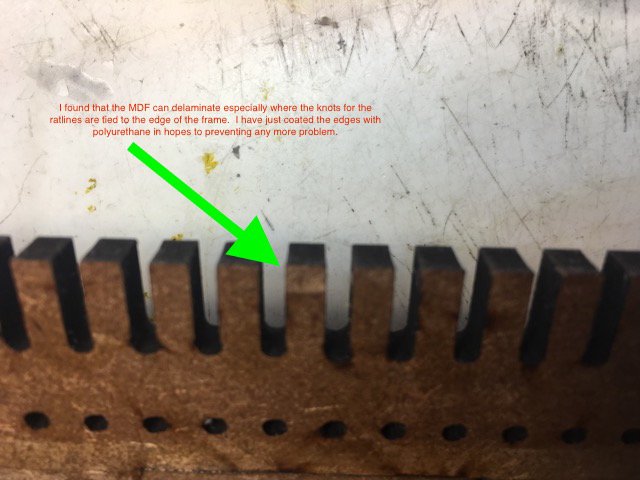
-
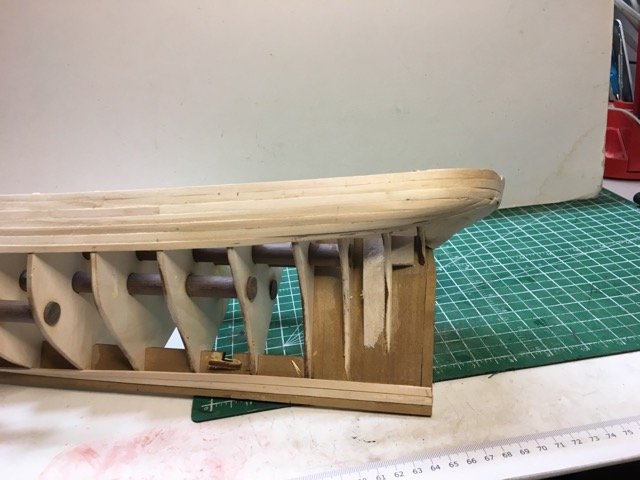
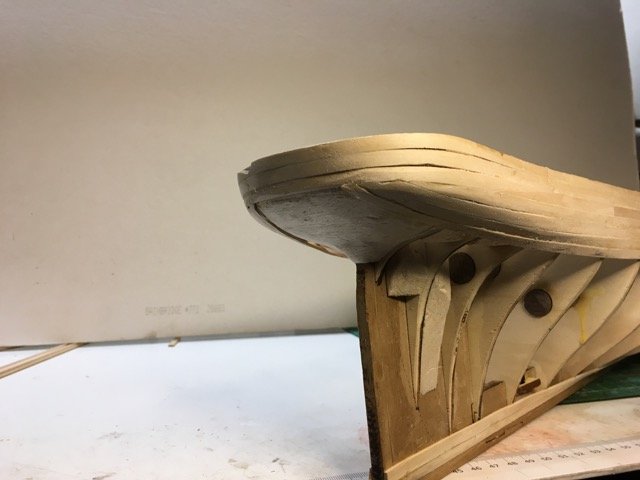
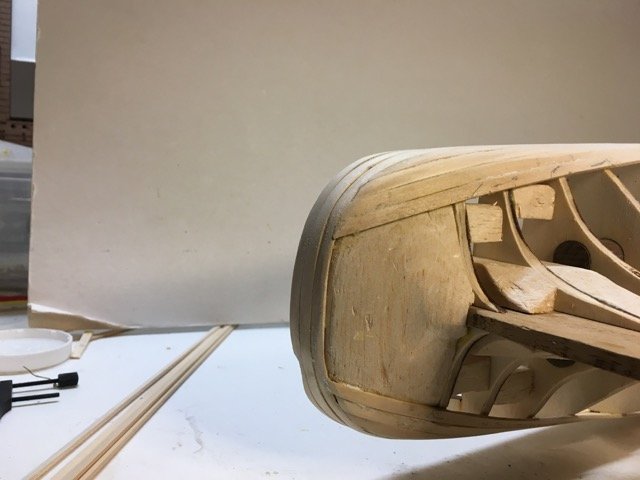
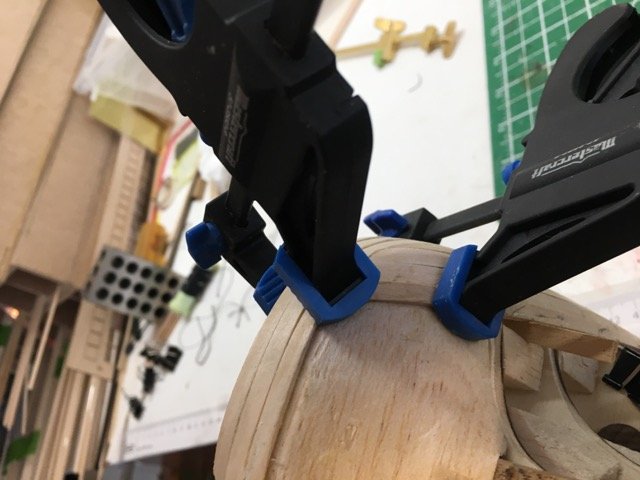
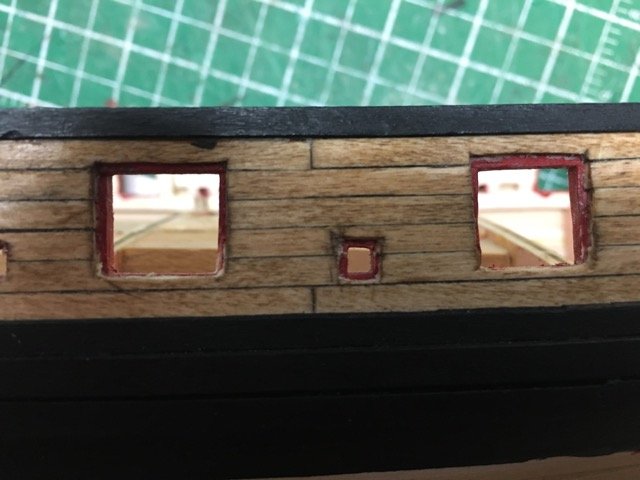
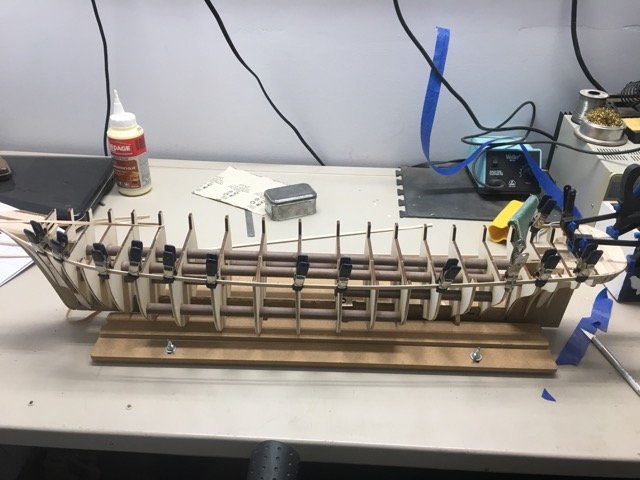
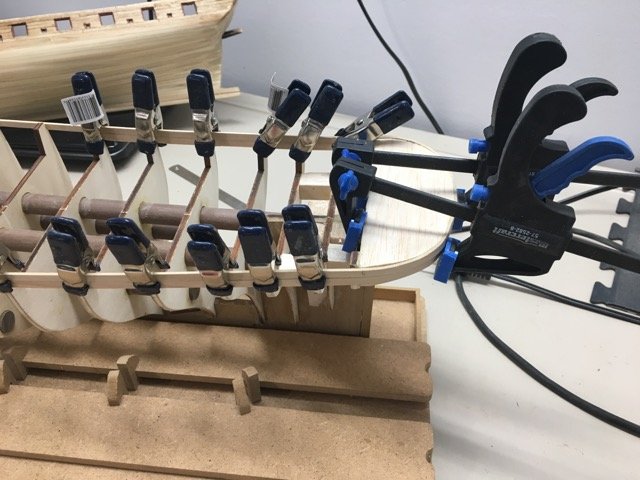
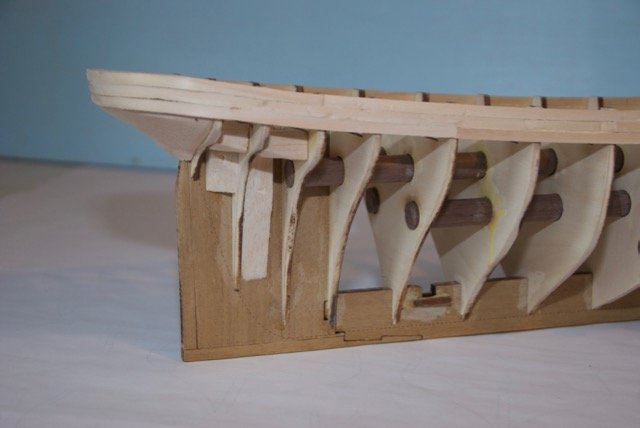
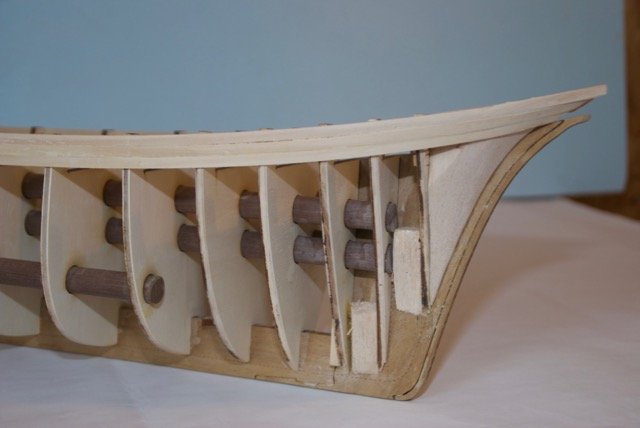
Planking the Stefano requires wrapping a plank around the stern. I soaked and bent a full length strip for 1st strake on the port side going from bow and around the stern. It terminated on the bulkhead 18 (3rd from the stern). For the 2nd strake I used a shorter strip to simply wrap around the stern up to bulkhead 15 on each side and then used another pair of shorter strips to finish the strake to the bow. Since the bulkhead extensions (above dec level) are to be cut off sometime later in the build it was suggested that the planks not be glued to the bulkheads but rather just edge glued to the strake above. Of course that can't work for the 1st strake but I did that for the following strakes until they ere below deck level. The intention is to reduce the amount of "cleaning up" of the inside gunwales when the extensions are removed. I haven't had any problems with the strakes being solid. Same strategy for the 3rd strake as for the 2nd. Wrapped the plank around the stern just to bulkhead 17. Clamping the planks around the stern was a bit of a challenge.
- 79 replies
-
- 5
-
-
- marisstella
- barque
- (and 1 more)
-
Model Shipway Ratline tool
Heronguy replied to fnkershner's topic in Modeling tools and Workshop Equipment
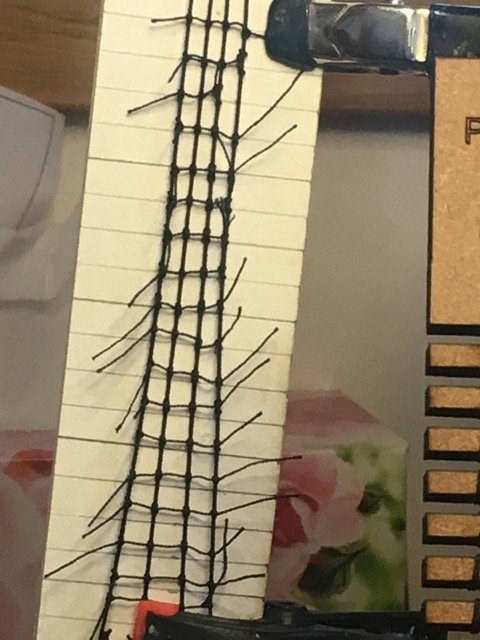
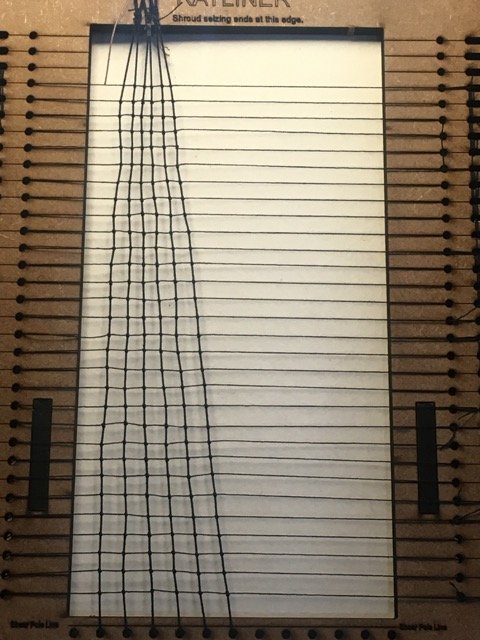
Ratliner Review Spacing of lines Ratliner: 1:64 Ratliner spacing is 1/4” corresponding to 16” on real shrouds OnShip: any spacing desired. Usually a template is placed behind shrouds with spacing lines drawn on it. Rattling process both methods are very similar in terms of knotting process. Skill in one is transferrable to the other. Speed I found Ratliner took about twice as long because the tie up to the frame takes some time that isn’t required when rattling onShip. I had more re-do’s OnShip than on Ratliner. I can’t compare overall time but expect OnShip is faster. Material usage Ratliner lines are all the same length as they are attached on each edge of the frame. OnShip lines are just long enough for easy handling . I found that I was using about 3x more line on the Ratliner (15” as opposed to 5”). Since I was using commercial sewing thread for the ratlines this cost difference is insignificant. However if one was purchasing rigging line therefor the ship I’m rigging the ratline cost would be approximately $US16. (just counting the lower shrouds for the main and the foremast assuming 10” waste, 30 lines on each main shrouds and 20 on each foremast shroud. 1000” total waste at $4 for 20’ or 240” from Syren Ship Company). Process and Results Ratliner: I found that because it held the lines under a bit of tension that the knots ended up be tight and did not open up at all. Leveling the ratline was very easy due to the ruled lines and the holes that hold the lines to the frame. It was easy to tie the clove hitches as my tweezers could be inserted between the shroud to pick up the ratline thread for each clovehitch. Working on the frame had pretty good ergonomics - not holding my arms up at mast height on the model. OnShip: I found that the clvvehitch knots at each end of the ratline tended to loosen as they were not under any tension. Also the loose ends could occasionally get in the way. Some of the knots ended up being a bit loose on the middle shrouds as well. Perhaps that was a function of the polyester thread I was using - is cotton better in that regard? Working with the shrouds on the model also seems a bit dodgier just because of the proximity of the desk lamp/magnifier near the masts although I didn’t actually have any incidents. Preliminary Recommendations I liked using the Ratliner - I had a sense of confidence doing the work on the frame. I was disappointed that the time per ratline was 2x that of the OnShip ratlines. I found the skills developed on the Ratliner transferred very well to the OnShip method. Next Steps I have to build the starboard side shrouds and do the rattling of the starboard foremast shrouds before I can mount the shroud units on the mainmast and rigging then to the deadeyes. -
Carl, I’m afraid the link is to a different Syren than Jesse is building!
- 1,306 replies
-
- 5
-
-
- syren
- model shipways
- (and 1 more)
-
Model Shipway Ratline tool
Heronguy replied to fnkershner's topic in Modeling tools and Workshop Equipment
I haven’t bothered to do the trig on this but I suspect the adjustments would be small enough that the flexibility of the shroud structure would accommodate the adjustment and not be noticeable to the eye. The angle between the shrouds are not rigid and the ratlines aren’t supposed to be straight lines anyways. I gather the challenge in any rattling exercise is to actually get them to droop a bit. -
Amongst your many modelling achievements I admire that you get your builds into the FINISHED status. I gotta learn how to do that!
- 79 replies
-
- 1
-
-
- marisstella
- barque
- (and 1 more)
-
Welcome aboard popeye. I guess we should warn all the MSW membership that the bug is contagious! I like the slip so far but I will confess that I usually handle my hulls off the slip - too big for the desktop I work at most often. I should probably catch up on my other projects too!!!!
- 79 replies
-
- 1
-
-
- marisstella
- barque
- (and 1 more)
-
Model Shipway Ratline tool
Heronguy replied to fnkershner's topic in Modeling tools and Workshop Equipment
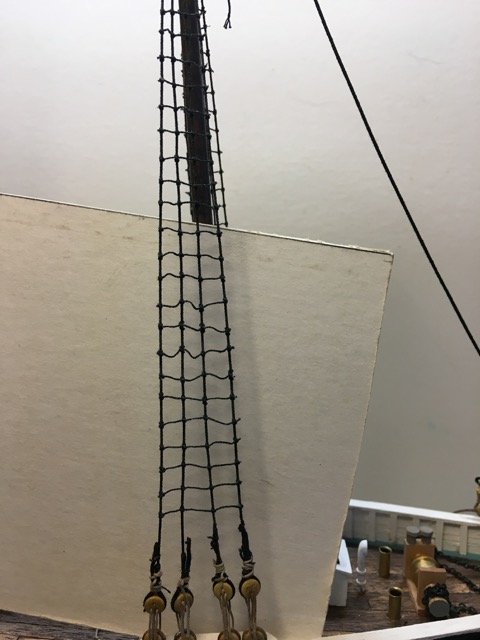
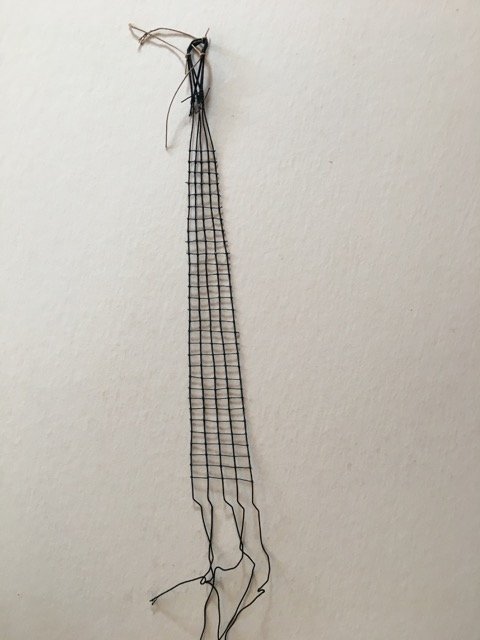
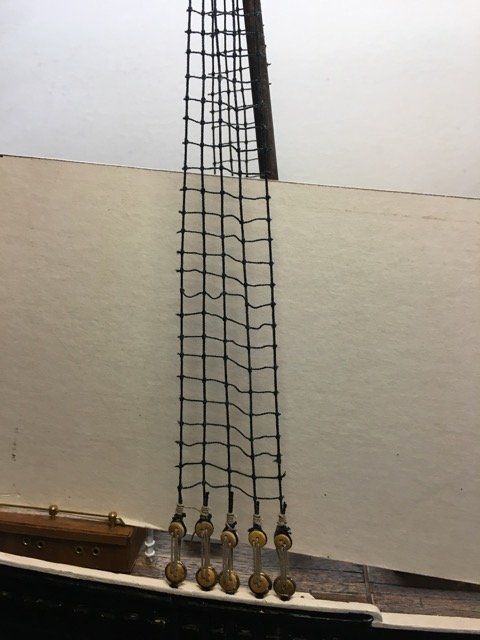
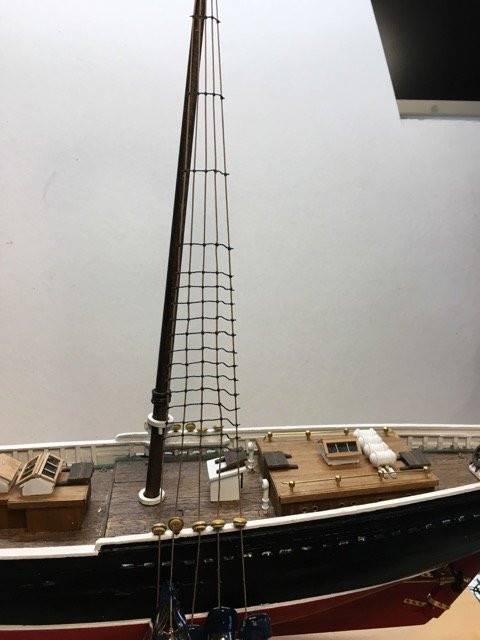
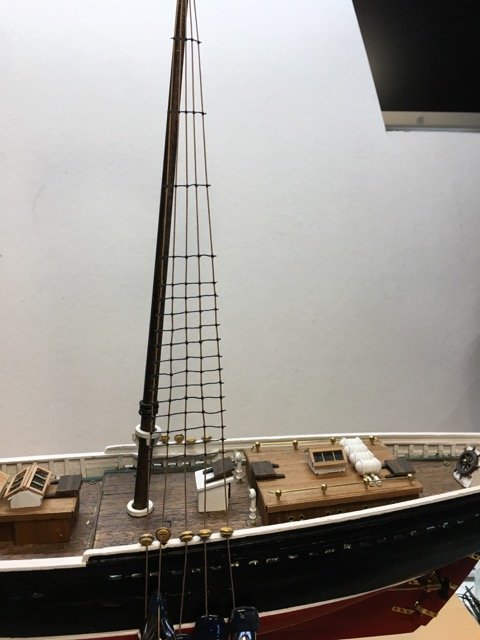
As another little test to get a sense of the end product of this approach I took the trial shrouds from above and reeved the shrouds through the bottom deadeyes. Then I weighted each of the shrouds with a clamp. I thought the result was quite OK - recall that this was my 1st trial and that I didn't fuss over the ratlines too much and didn't do ratlines all the way to the top. In addition although I had rigged the starboard shroud on the Ratliner I inadvertently show it here on the port side of the ship. Furthermore I can assure you I have not been at all gentle with the unit as I wanted to see how stable and robust it is. Second test here was to yank quite hard on individual shrouds (without actually breaking my mast!). Here is the 5th shroud yanked down - you can see the distortion in the ratlines. Once released the ratline resumed its original position quite well. I'm satisfied that I can do pretty well using the Ratliner approach so now I'll do a pair of shrouds using it, install them, and then tie ratlines on the fore shrouds already on the model and comment here on the experience and show the results. Back in a couple of days.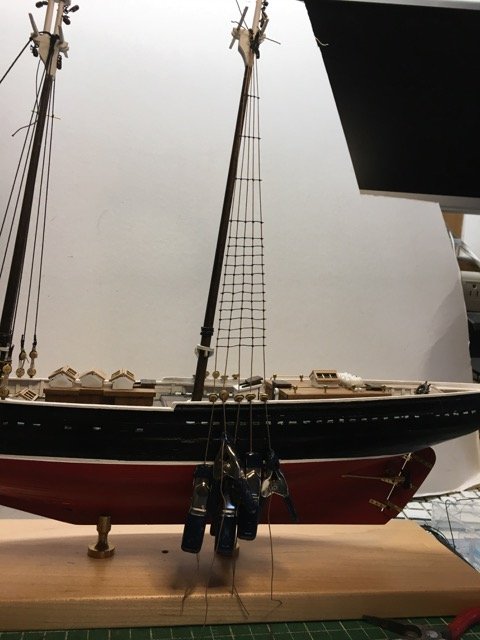
-
I find that seeing the hull "skinned" creates a real satisfying feeling! Almost there Mike! My planking is usually at that rate even if I can clamp at the stem and stern.
- 204 replies
-
- 2
-
-
- trajta
- marisstella
- (and 1 more)
-
Thank you Scott. Most likely many, many happy hours and over a long calendar interval as well!
- 79 replies
-
- 1
-
-
- marisstella
- barque
- (and 1 more)
-
Thanks Bob. Don's work has certainly motivated my interest. I know from your other builds that your Stefano will be marvellous - I hope to see you do it!
- 79 replies
-
- 2
-
-
- marisstella
- barque
- (and 1 more)
-
Mike I guess we can consider some of these cross-sections as eye-candy. Nothing wrong with that!
- 99 replies
-
- 1
-
-
- essex
- cross-section
- (and 1 more)
-
Model Shipway Ratline tool
Heronguy replied to fnkershner's topic in Modeling tools and Workshop Equipment
Thanks for that - I've been frustrated with my attempts to make rope coils for a build using carpenters glue - I just thought it was wrong dilution or lack of technique (both of which may still be true). Off to try out white glue! -
Thanks Derek. I’m fortunate I’ve got some time to put into the hobby. I don’t imagine I’ll ever do a scratch build - on the other hand a bit of kit bashing seems reasonable. When I looked at the Bluenose II today (vis-a-vis the Ratliner trial) I see so many mistakes and things to do better that I figure I’ve still got a lot more skills to develop before I even get a good kit build. This kit has such good quality parts and plans that I’m a bit daunted what I’ll do to the poor thing. Gotta try though!
- 79 replies
-
- 3
-
-
- marisstella
- barque
- (and 1 more)
-
Repetitive work adding all those timbers! I like the appearance they create. Don’t you find the detail such things add really important to the model? I like your Bluenose Derek!