rwiederrich
-
Posts
5,520 -
Joined
-
Last visited
Content Type
Profiles
Forums
Gallery
Events
Everything posted by rwiederrich
-
I tend to agree, however, my point was the array caused by yards swinging about under a tack. I used this image to demonstrate what happens when every yard on a mast must shift in order to catch the wind. This image is what I had to demonstrate the principle. Thanks for pointing out the specifics of the movement. Your observation demonstrates how orchestrated the movement of the yards/sails was and how every purpose could be recognized. The question brought up originally about yard placement in relations to what I was trying to accomplish, I feel, was answered satisfactorily...solely based on historical evidence that Clipper ship masters would indeed extend the proper use of sails to achieve their ultimate goal of speed and to set a good sailing record. Clipper captains were known for PUSHING/DRIVING their ships and crews to the very brink of catastrophe. I think 12 to 20 degrees is ample pitch for my sails to exhibit their prowess and still expose enough rigging detail. The only folks who will ever see it will be family and friends, and myself. Scrutiny is low. Cept for now, while under my MSW friends all seeing eyes. Rob(Thanks for the fine comments and many likes everyone)
- 1,208 replies
-
- 4
-

-
- great republic
- clipper
- (and 1 more)
-
IT would be the house....... When I am focused on adding as much detail as I can....it becomes almost second nature to *go for it* and add as much as possible. One thing one needs to keep in mind when identifying sail requirements for any particular wind speed. You are correct in the stun sails were made of much lighter material then storm sails and were generally employed in light breezes...to gain as much momentum as could be gained. But the little known fact is that many clipper captains were notorious for DRIVING their ships in all manner of weather and if they felt they could gain another knot by keeping the stun sails aloft while running before the wind...they would...and not even blink an eye doing so. Some captains would leave they sky sails set the entire voyage...even while rounding the horn(Dangerous stuff). Thanks for the fine compliment and comment. Rob
- 1,208 replies
-
- 3
-
-
- great republic
- clipper
- (and 1 more)
-
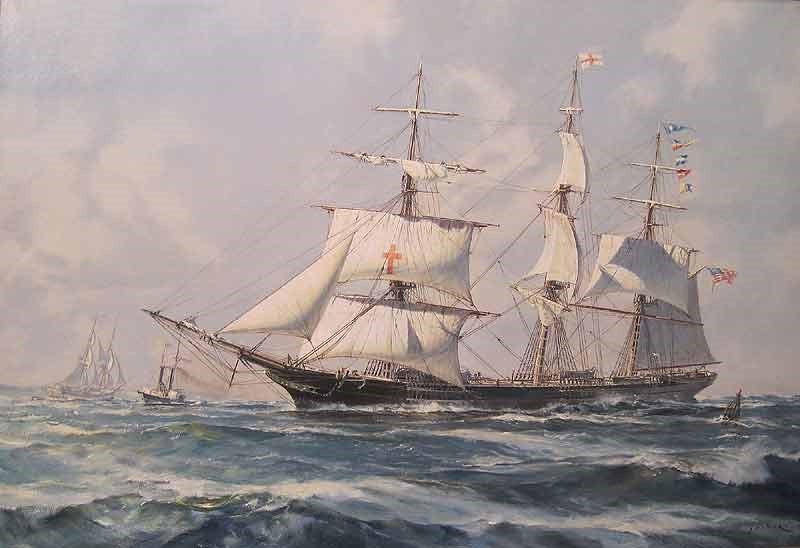
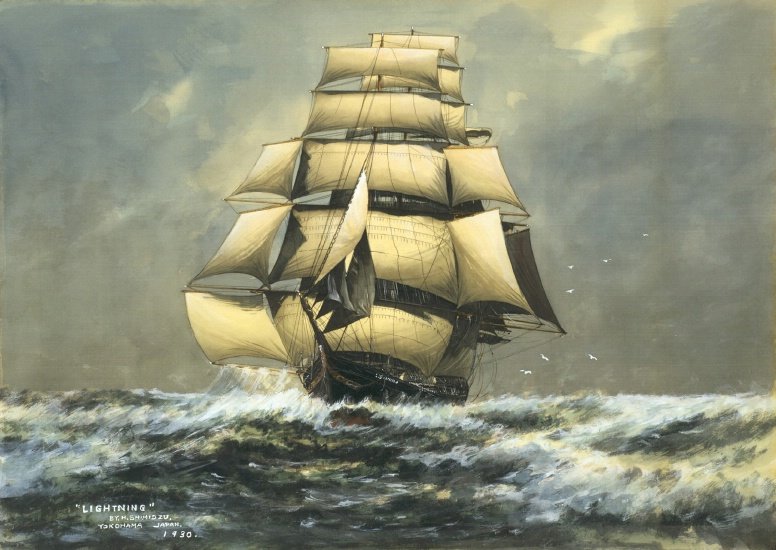
Yes...I would assume to fully use the stun'sles ...and to prevent them from plunging into the waves as the vessel heals to one side...you would require to be running before the wind. I've not yet seen a model rigged where she was tacking her yards...where they are aiming in all directions shifting from one tack to the next. I'm sure it looked messy and would not be an example one would want to display. Note the painting.
- 1,208 replies
-
- 4
-
-
- great republic
- clipper
- (and 1 more)
-
Over the years of building clippers(before I decided to form my new technique of single mast building), I openly dreaded the task of rigging 66 to 72 deadeye shroud combos....couples with the one million ratlines that were required(sarcasm injected). Add the many other very repetitious tasks...and 5 years later(If you're fortunate), you are half way done. Repetition can be a project killer for some.....I just hope I retain most of my dark hair when this is all said and done. Rob
- 1,208 replies
-
- 3
-
-
- great republic
- clipper
- (and 1 more)
-
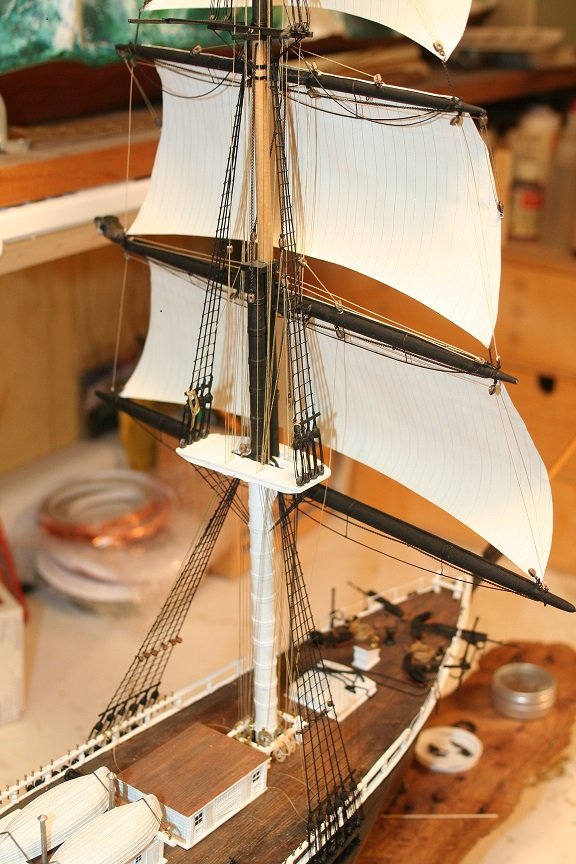
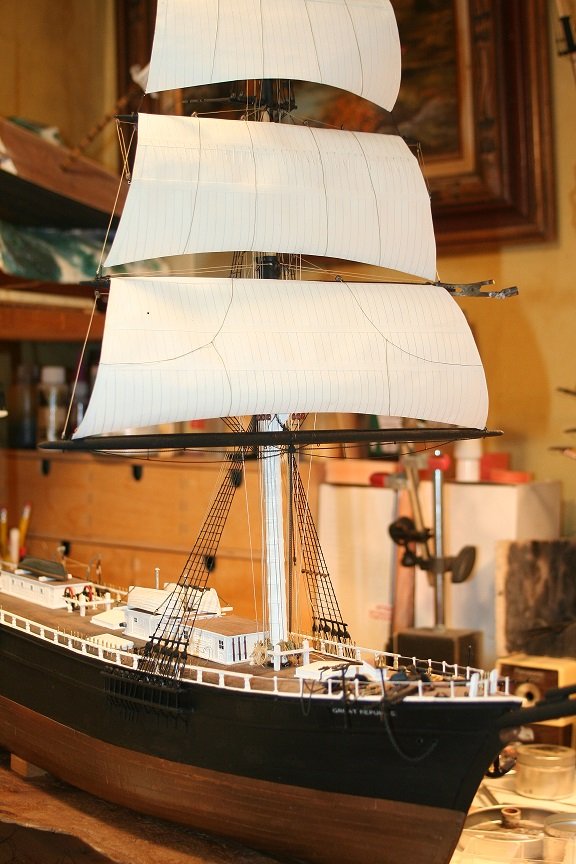
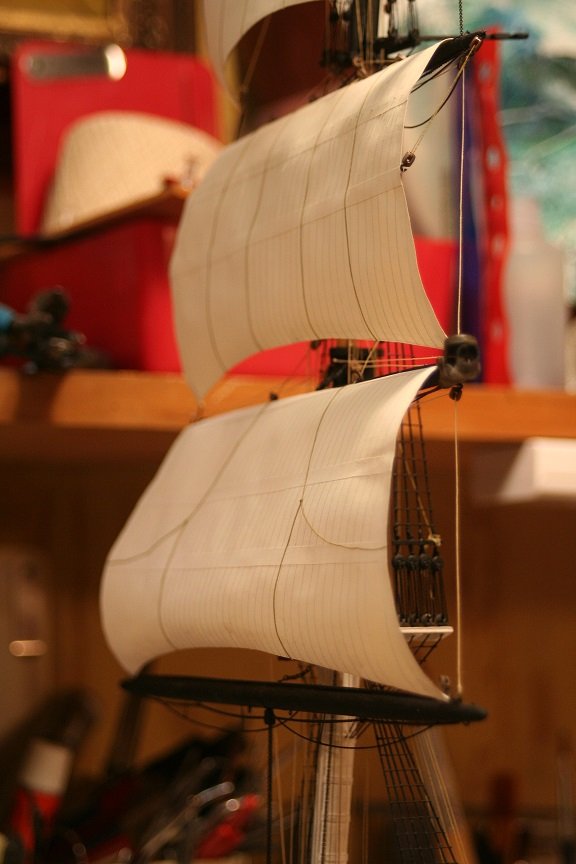
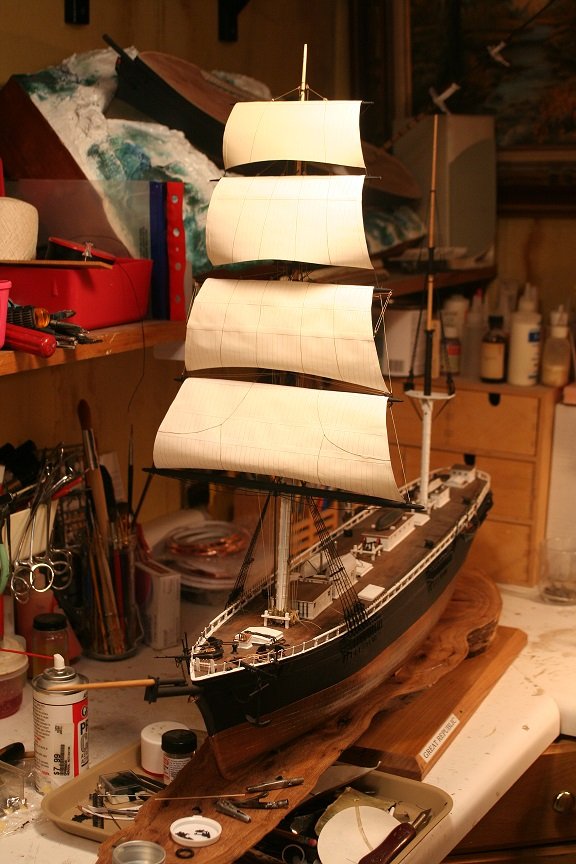
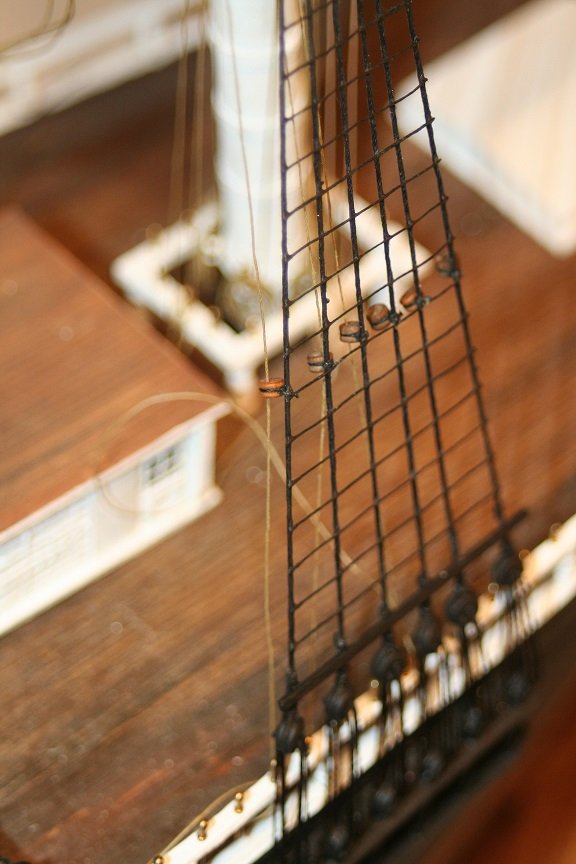
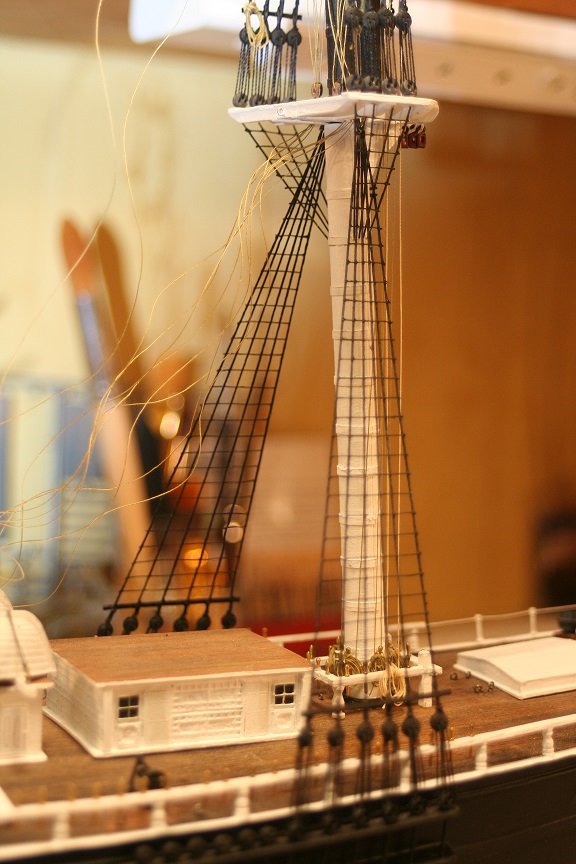
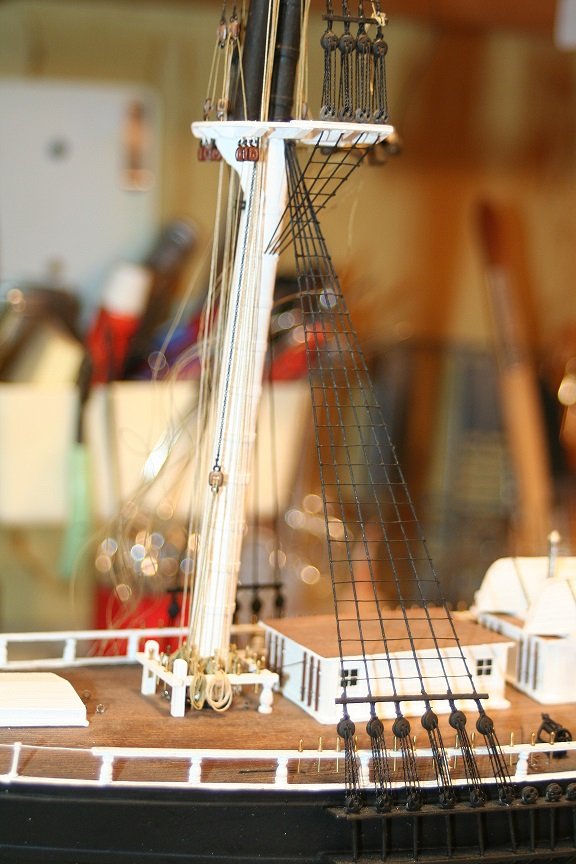
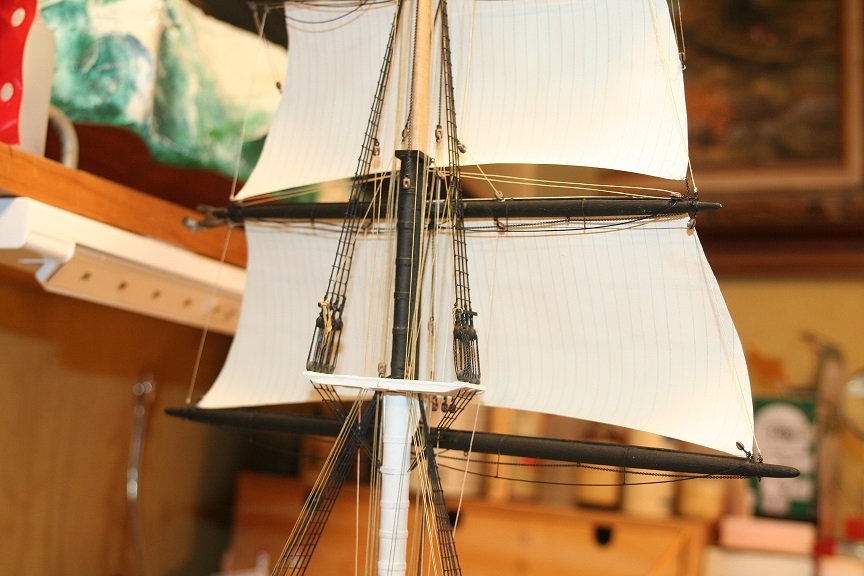
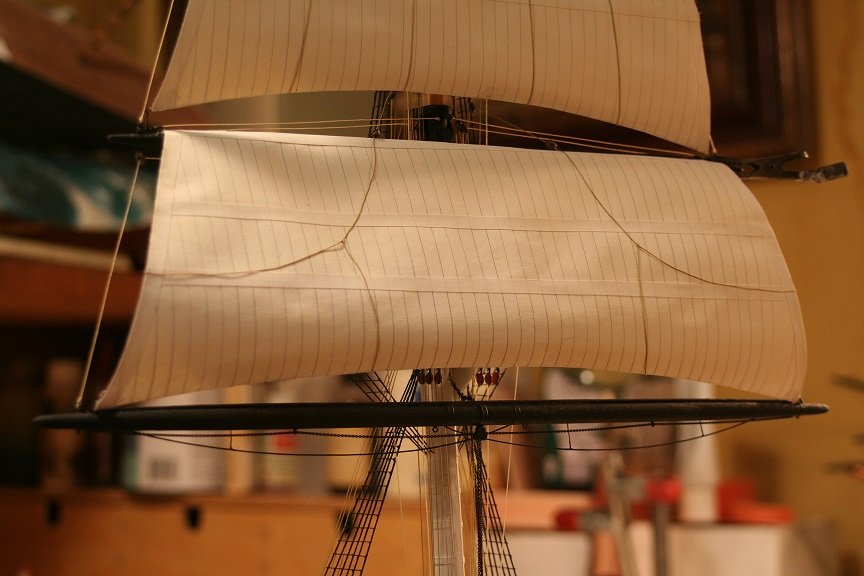
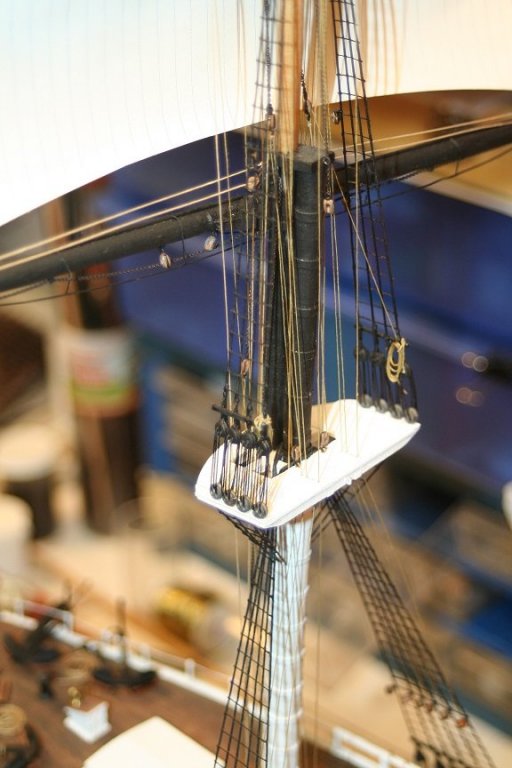
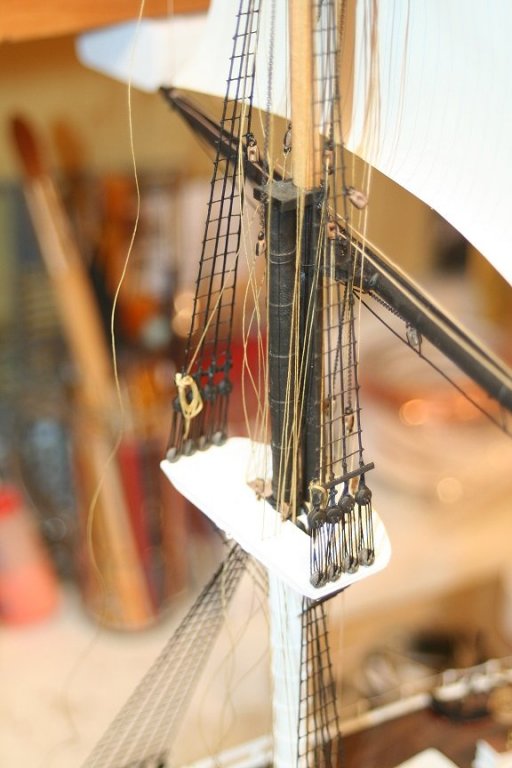
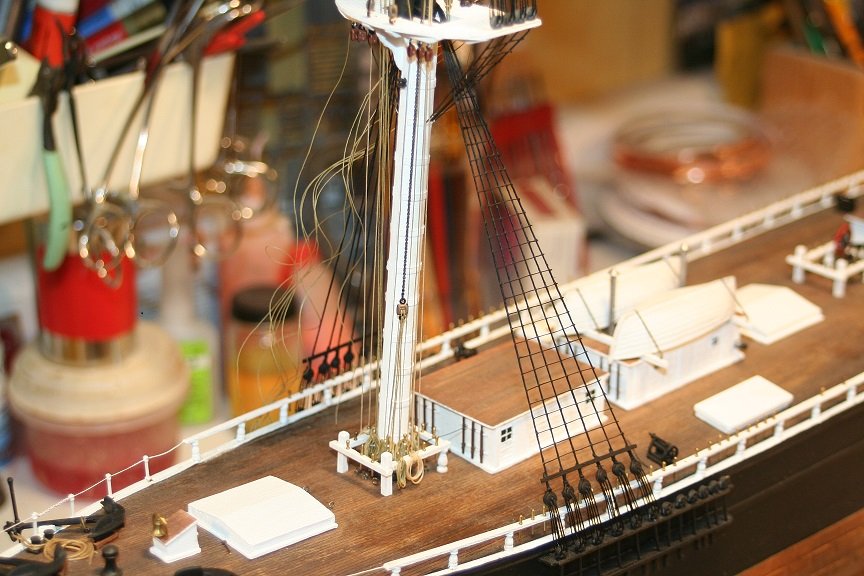
Thanks for noticing. The yards are braced at 12deg...The reason was if I had braced them further I would in essence block the view of either the front or aft of the sail...hiding lots of rigging work. The main mast yards will be braced at slightly greater degree and the mizzen even further. I did wrestle with how much angle I would brace the yards....like a typical painting with full face exposure of the sails...either port or starboard. Either way, portions of the rigging detail would not be in view. I opted for a middle approach. Running before the wind was not unheard of while setting your tack. Capturing the curl of leading footer edge of the sails was the hardest thing to tackle...It looks authentic as much as I can possibly make it. Here is a contemporary example and a painting.

- 1,208 replies
-
- 5
-
-
- great republic
- clipper
- (and 1 more)
-
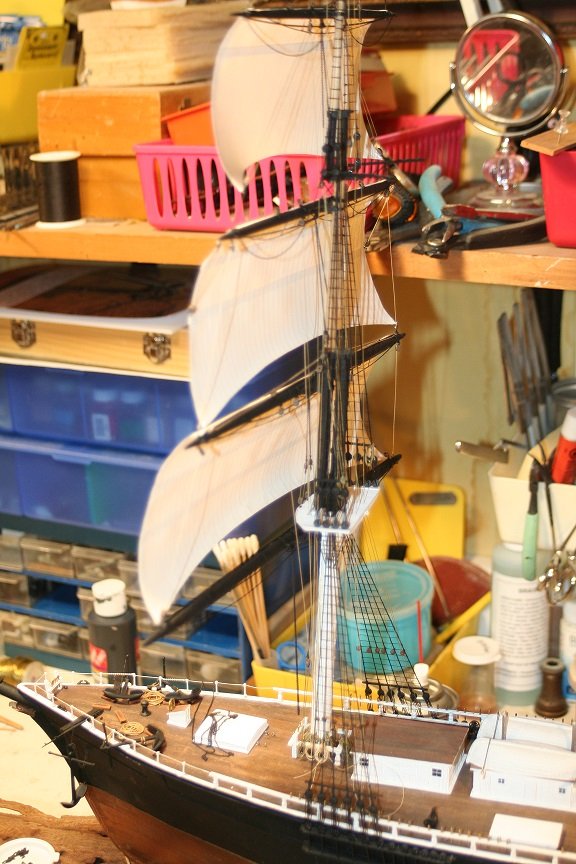
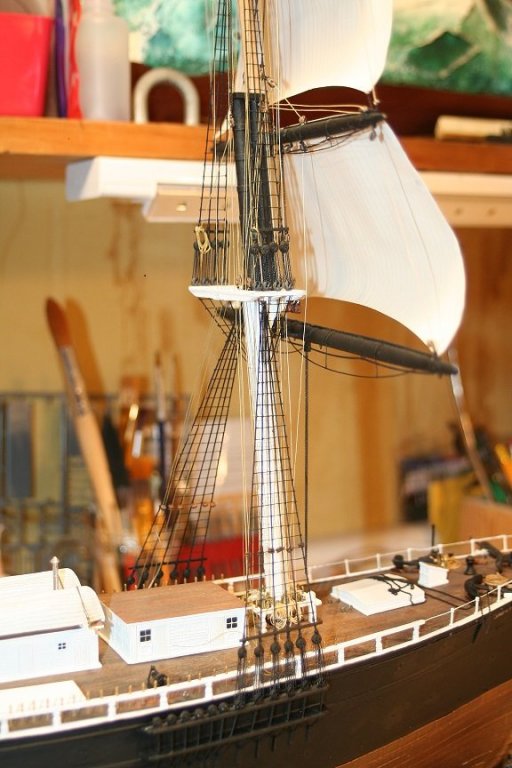
Riight! I'm not finished installing the clew lines for the lower topsail and the lifts for the main yard....not to mention the main sail and all its control rigging. Once done this will nearly finish off the fore mast mini project. I might add the forestay...but my focus is proceeding to the main mast....off model. Generally I add all the details for each step...for example...once a line is belayed at the rail...I'll add the coiled rope to it as well..to finish off that mini project. I left off last night beginning to add the rope coils to the control lines coming through the fairleads to the rail. Still have 6 to go. I used to put off adding rope coils to the end...but that got monotonous. So like many monotonous tasks...I prefer to break them up by following a step through to its completion....and if that means stopping a process to go to another....that is what I do. Makes for less tedium for me anyway. Can anyone say...RATLINES... And this new technique I'm fiddling with provides the relief of that tedium and produces satisfying results in a step by step format. When breaking the entirety of the build down into smaller and smaller mini projects....it makes the entire project feel as if it is moving along.....no...Clipping, along much faster....and seeing each project get done is very rewarding, indeed. Thanks for your fine comments and everyone's likes.... Rob
- 1,208 replies
-
- 4
-
-
- great republic
- clipper
- (and 1 more)
-
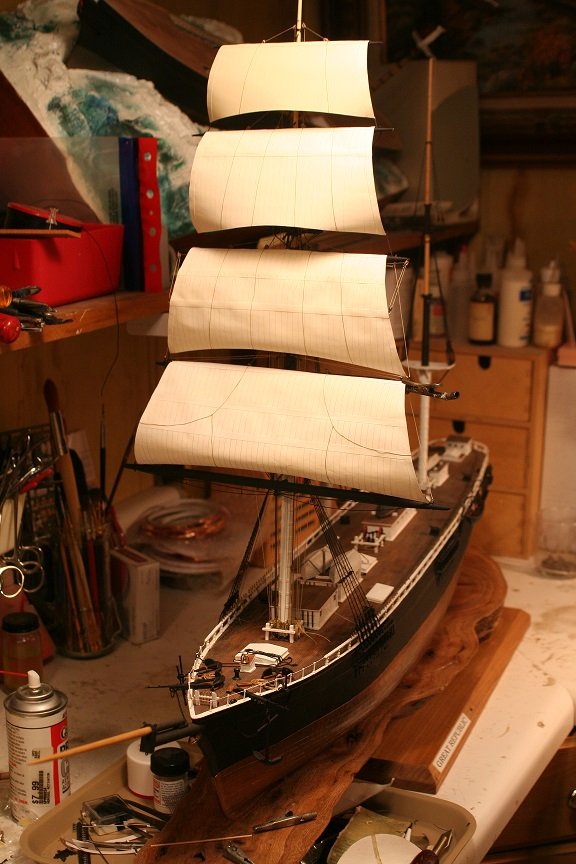
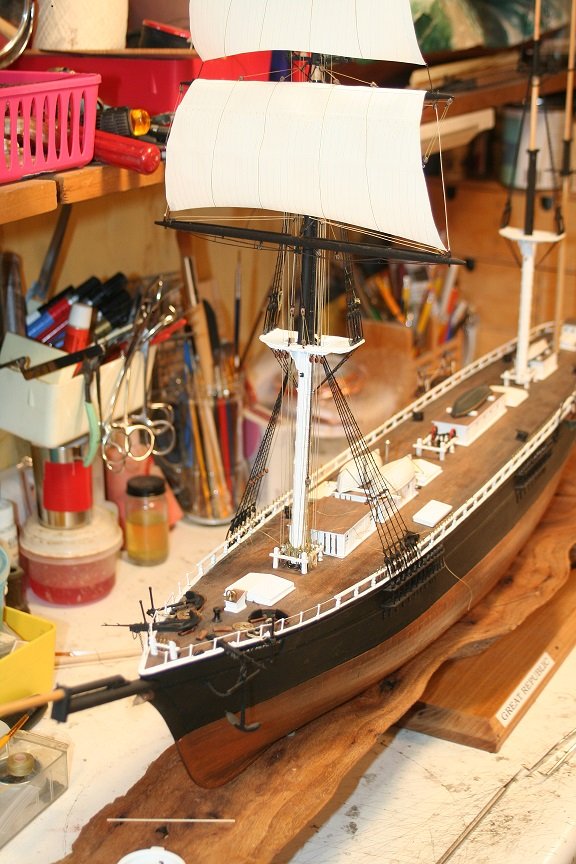
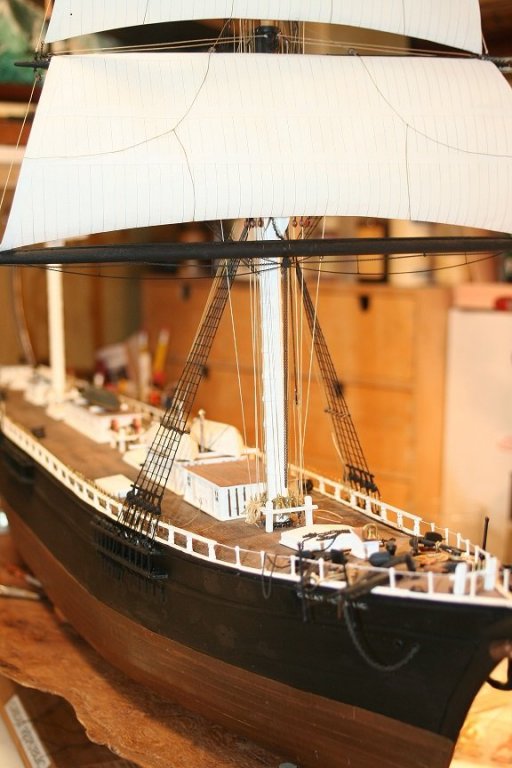
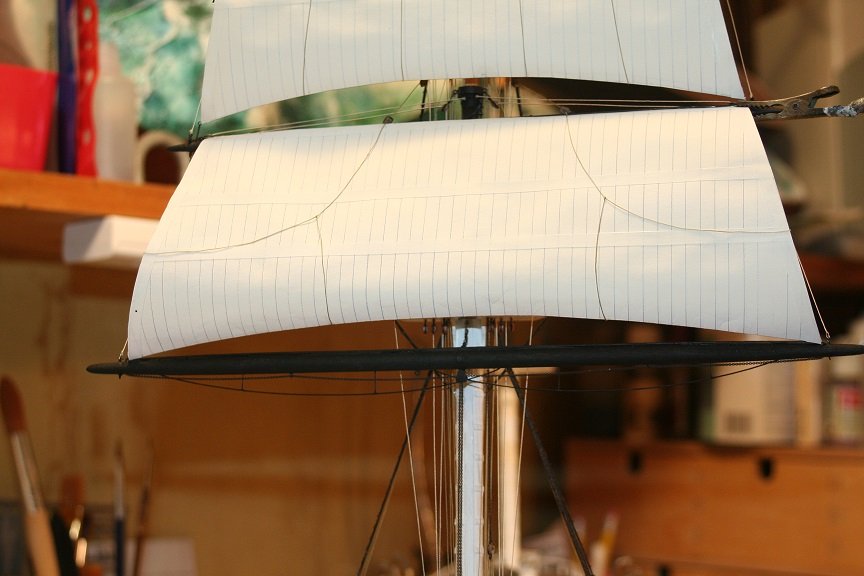
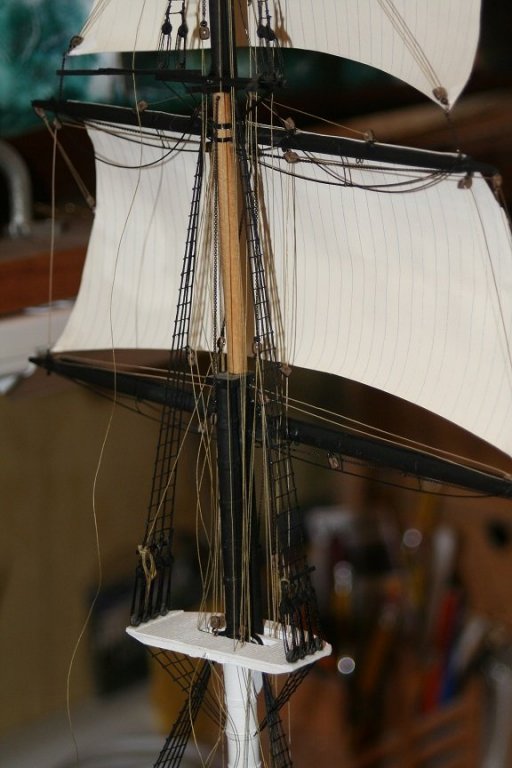
Worked for a bit today finishing up adding the lower topsail.


- 1,208 replies
-
- 13
-
-
- great republic
- clipper
- (and 1 more)
-
I also added the clews to the lower topsail..getting it ready to set . I'll probably rig the downhauls before I rig the sail...less out of the way, plus I can more easily square the yard for the sail. I did all the new work in about 2 hours tonight. Gotta run to get some parts for the mantle I made my wife. Thanks for visiting. Rob
- 1,208 replies
-
- 3
-
-
- great republic
- clipper
- (and 1 more)
-
Next as I progressed it was clear the main fore yard needed to be rigged...so on went the foot ropes and I added the sheets.
- 1,208 replies
-
- 10
-
-
- great republic
- clipper
- (and 1 more)
-
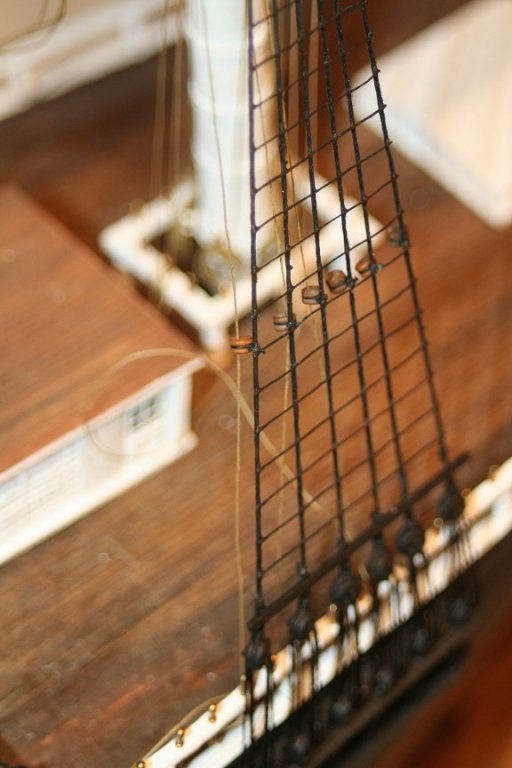
Next, I had to finish up running the sail control lines down through the top fairleads and down to their pins.
- 1,208 replies
-
- 6
-
-
- great republic
- clipper
- (and 1 more)
-
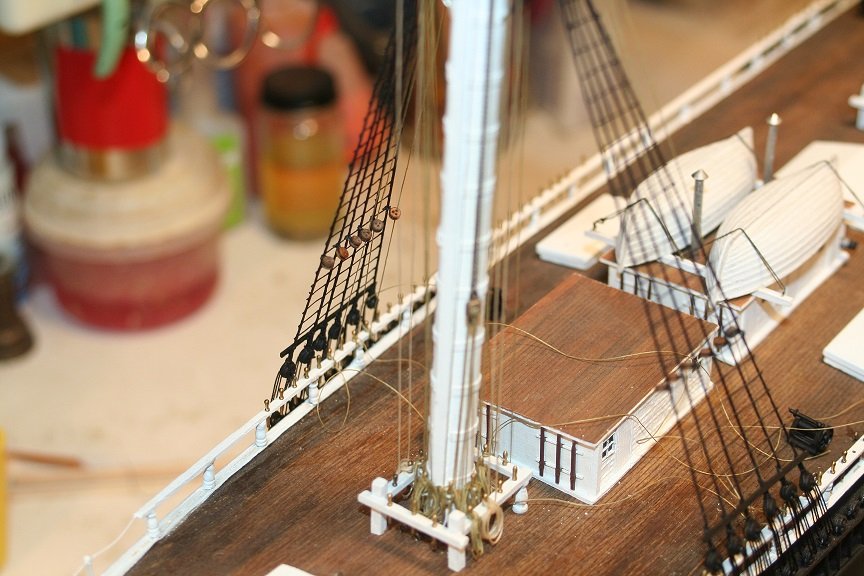
Thanks everyone. I spent some time finishing up the fairleads...
- 1,208 replies
-
- 7
-
-
- great republic
- clipper
- (and 1 more)
-
I've quickly realized that finishing one mast at a time is the method I will employ(On other builds) from here on out..... Once all the running rigging is nicely belayed on their appropriate pins.....this STEP in the build will be behind me. Breaking the build down into far more manageable sections, or (Mini builds) actually makes the build move along faster... IMV. Since each mast has already had their top/topgallant shrouds complete...to spend 3 or 4 of hours finishing the main shrouds/ratlines seams like nothing. I'll easily, off model, add the footropes to the main yard and then rig the final 2 sails. I wish I simply had more time. Rob
- 1,208 replies
-
- 3
-
-
- great republic
- clipper
- (and 1 more)
-
How in the world do you make those reliefs? Rob
- 1,035 replies
-
- 7
-
-
- royal katherine
- ship of the line
- (and 1 more)
-
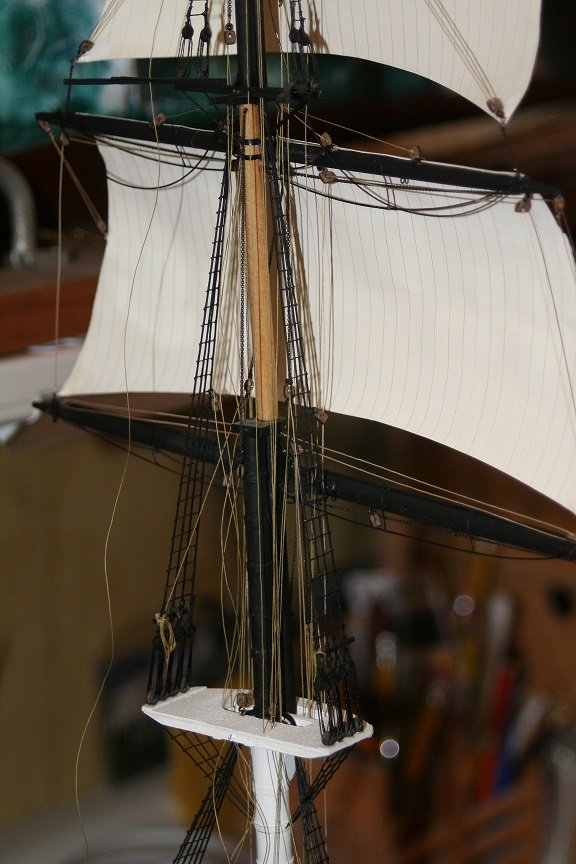
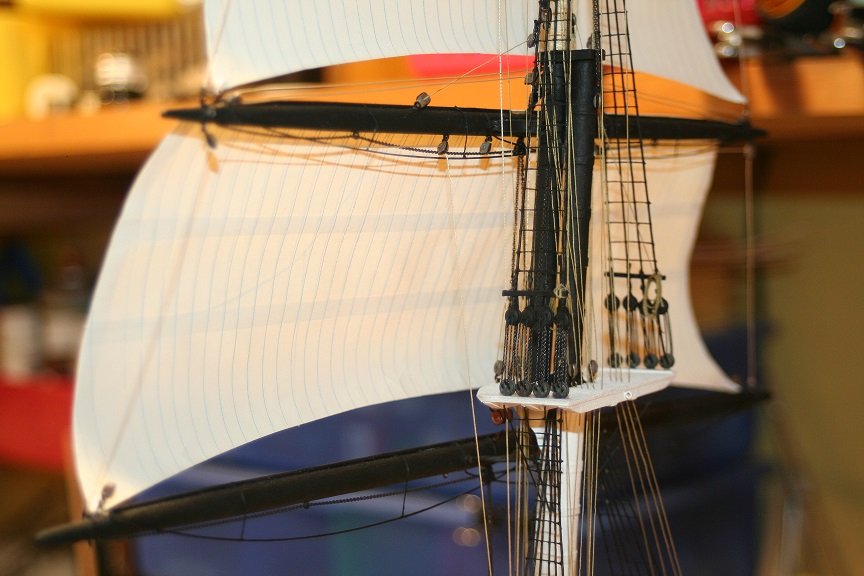
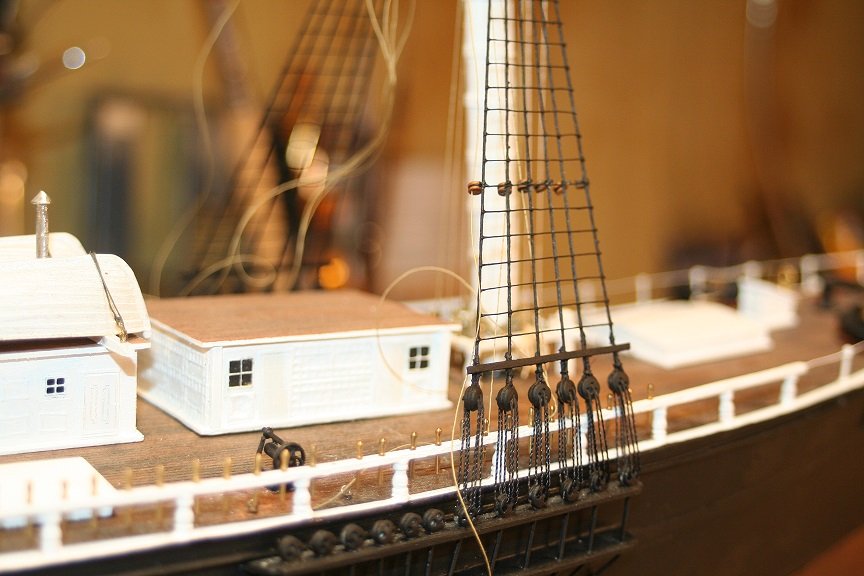
I toned down the light a bit so you can see the top fairleads better. Things are progressing..

- 1,208 replies
-
- 10
-
-
- great republic
- clipper
- (and 1 more)
-
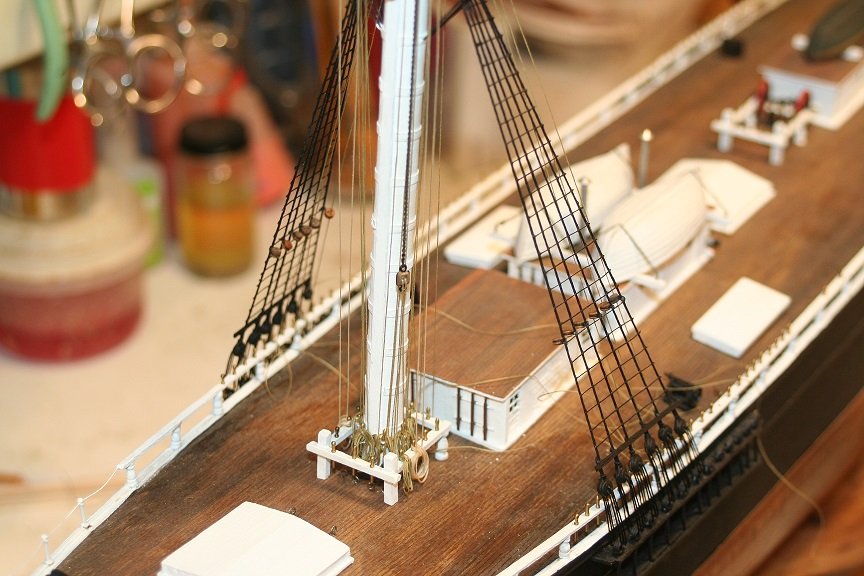
Now on to running some of the sail control lines down through the top fairleads and to the shroud fairleads.
- 1,208 replies
-
- 8
-
-
- great republic
- clipper
- (and 1 more)
-
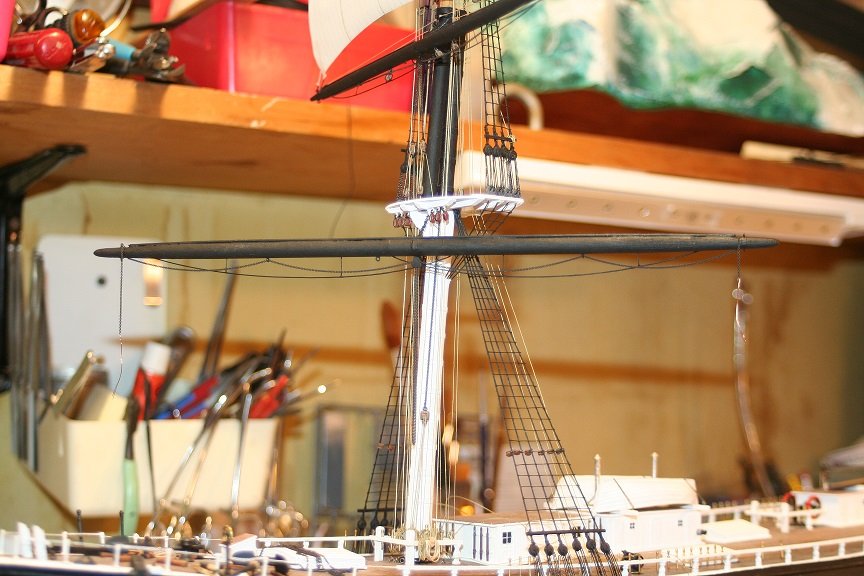
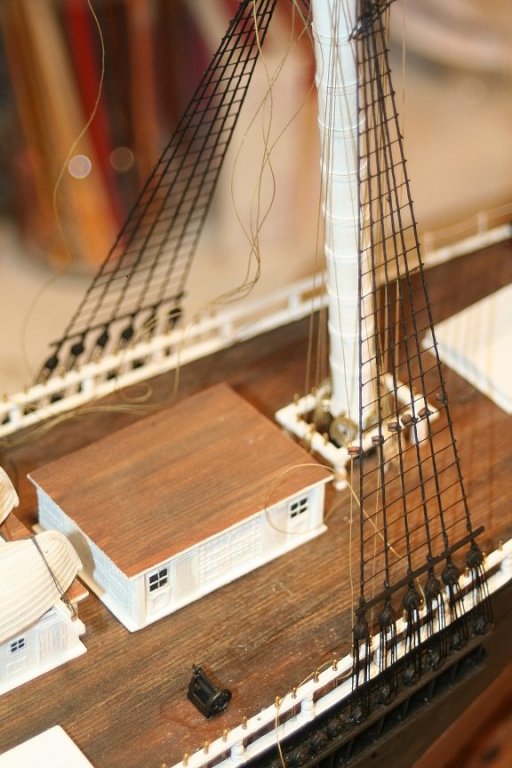
Finished up both sides and the futtock ratlines..

- 1,208 replies
-
- 8
-
-
- great republic
- clipper
- (and 1 more)
-
Spent a bit of time on the ratlines..here is one side finished.

- 1,208 replies
-
- 9
-
-
- great republic
- clipper
- (and 1 more)
-
Clewing up canvas, at times was done to harmonize the balance of the vessel. To answer your question, it would not be unusual to see topsails clewed up or partially furled. As pointed out, the fore and main course is probably clewed up to slow the vessel down for maneuvering in battle or in preparation for anchoring/towing or in response to weather change. In the case of the latter, the royals would be furled first to eliminate undue stresses on the royal mast. Remember...if you are going to clew up the top sail or royal...lowering the yards themselves would need to be considered as well. An entirely different matter. Rob
-
Fantastic job......for this being your first POB...you have apparently mastered some forming techniques. This will be another fine fishing vessel for your collection. Wonderful work. Enjoying your build. Rob
-
Denise...great job on a difficult set of staircases. Symmetry in reverse can be a real challenge. Very nice job...the entire build is moving along nicely.....Now I'm seeing how eclectic you are in your build likes. You have a wide variety of ship likes....and you do an amazing job with every type and design. I applaud you. Rob
-
No...I used a compass/caliper. Occasionally I will not get everyone spot on...but that isn't a real issue for me....the ratlines are straight. The alligator clips have had their teeth bent inward and flattened so they only clamp. I clamp the deadeye with one and the shrouds with another to hold the line close...then seize off the line in between them. Makes the chore much easier. I'll add the ratlines then finish the rigging for the lower topsail and main course. I'll have around only 12~16 lines going through fairleads at that time. So many additions I will be adding in the fab of the main mast....things I had to add after the thought to the foremast. I'm glad I made my mistakes only on one mast...repairs and additions were not that bad...but if I had to do that on all 3 mounted masts...there would have been trouble in river city. Rob(Thanks everyone for the fine likes and comments)
- 1,208 replies
-
- 3
-
-
- great republic
- clipper
- (and 1 more)
-
I'm impressed with the entirety of the image...not just your masterful work on the ship..... Rob(I applaud you)
-
MONTAÑES by Amalio
rwiederrich replied to Amalio's topic in - Build logs for subjects built 1751 - 1800
I'm not sure what level of reality I'm living in, but your work is the highest quality, and I'm humbled. Just magnificent wood work and joinery. Rob -
Wonderfully executed Tom...she is an amazing creation...congrats! Rob
- 1,354 replies
-
- 1
-
-
- constitution
- model shipways
- (and 1 more)