HOLIDAY DONATION DRIVE - SUPPORT MSW - DO YOUR PART TO KEEP THIS GREAT FORUM GOING! (Only 27 donations so far out of 49,000 members - C'mon guys!)
×


rwiederrich
-
Posts
5,518 -
Joined
-
Last visited
Content Type
Profiles
Forums
Gallery
Events
Everything posted by rwiederrich
-
HMCSS Victoria 1855 by BANYAN - 1:72
rwiederrich replied to BANYAN's topic in - Build logs for subjects built 1851 - 1900
What a fun adventure. I would suspect that the error lies in the drawing because photographs and logic dictate the boom Has to be clear of the boat and davit work. The boat must lower from the davit without impediment from the boom. Period! Glean from what is already known how stun sail booms were mounted to clipper ships. This surely isn’t rocket science it must be simpler than we are implying. For all intensive purposes I would just stick with the short boom crane to clear the boat way. Done deal. But that’s just me because I’m just a simple man, a lazy modeler at heart. whatever you do Pat, will be perfect. Personally, I’m an open carry Artistic license kinda guy, so make the call. I’m on your side. Rob- 1,006 replies
-
- 5
-

-
- gun dispatch vessel
- victoria
- (and 2 more)
-
Maybe Snug harbor would like to get in contact with you........? Rob
-
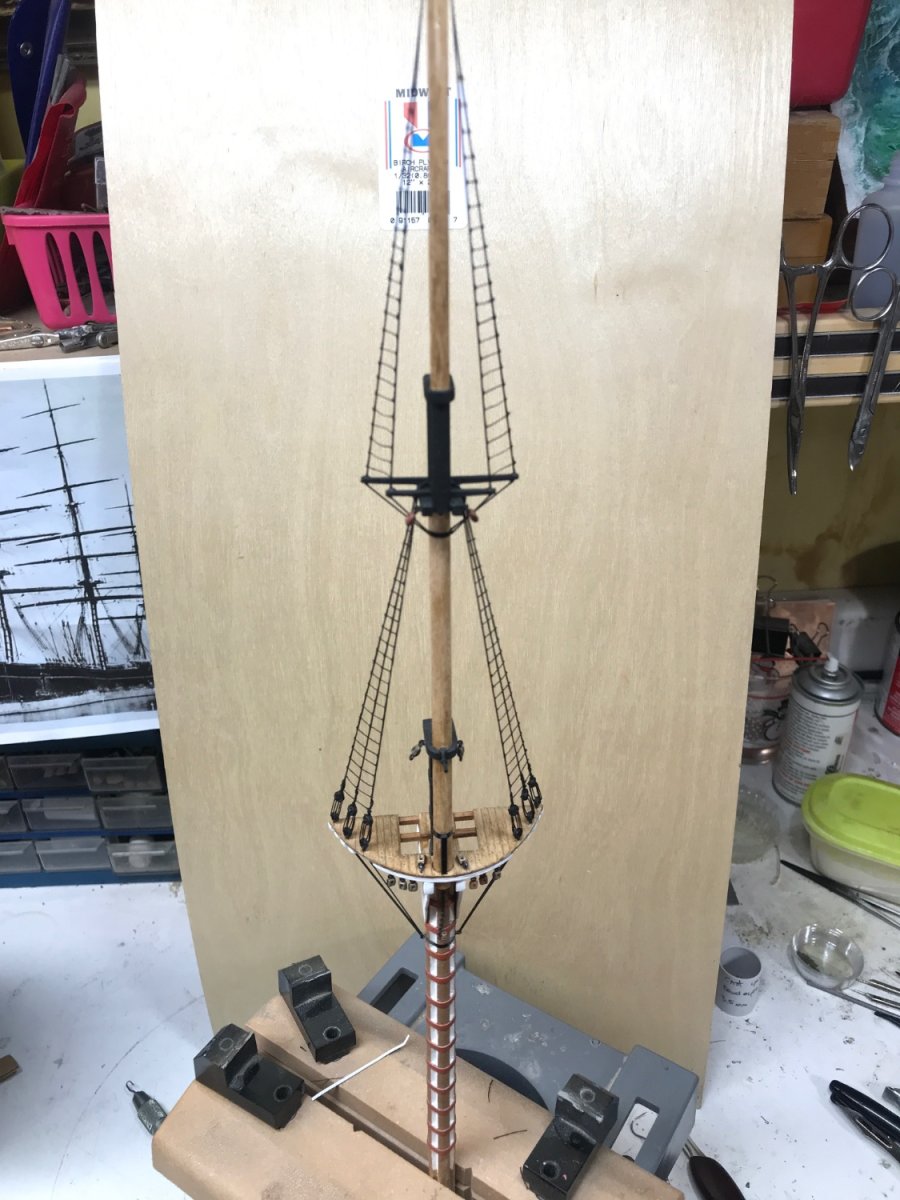
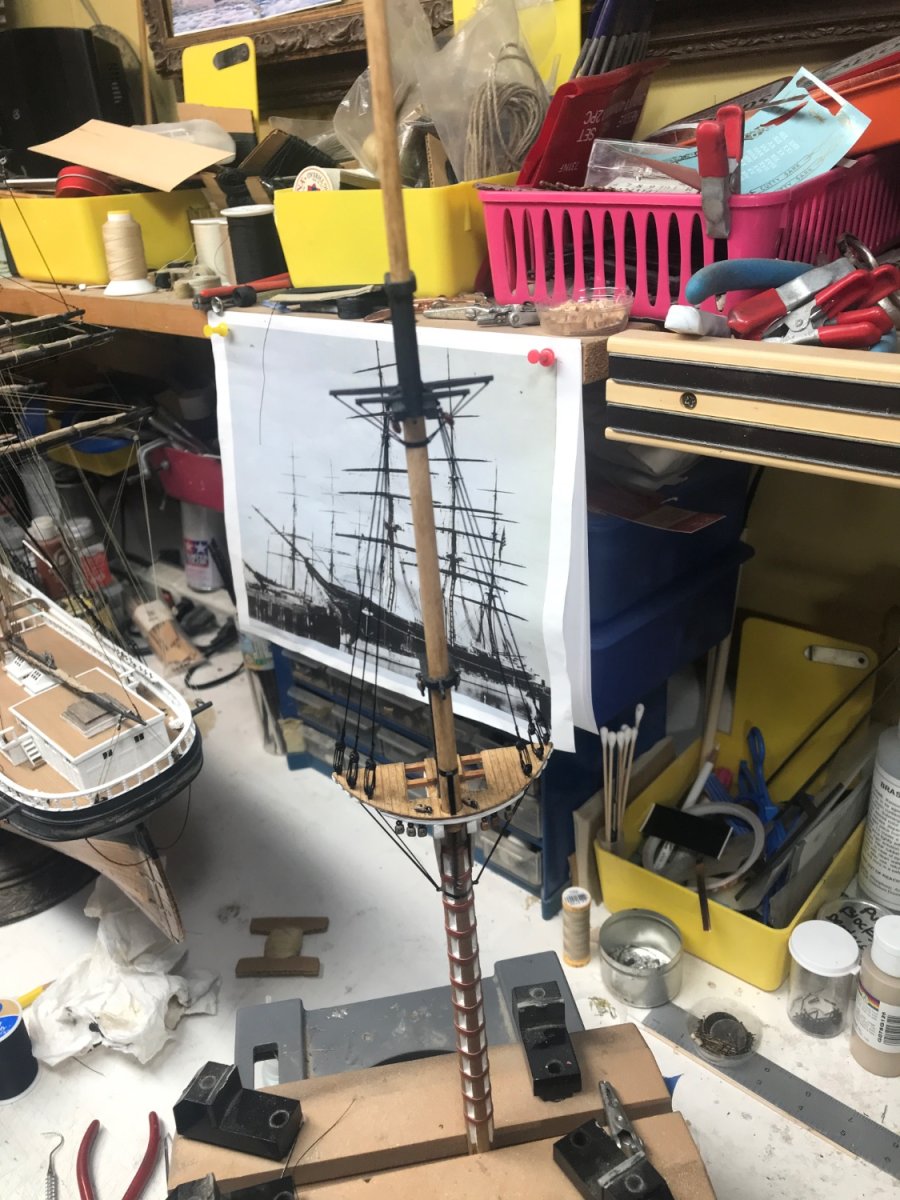
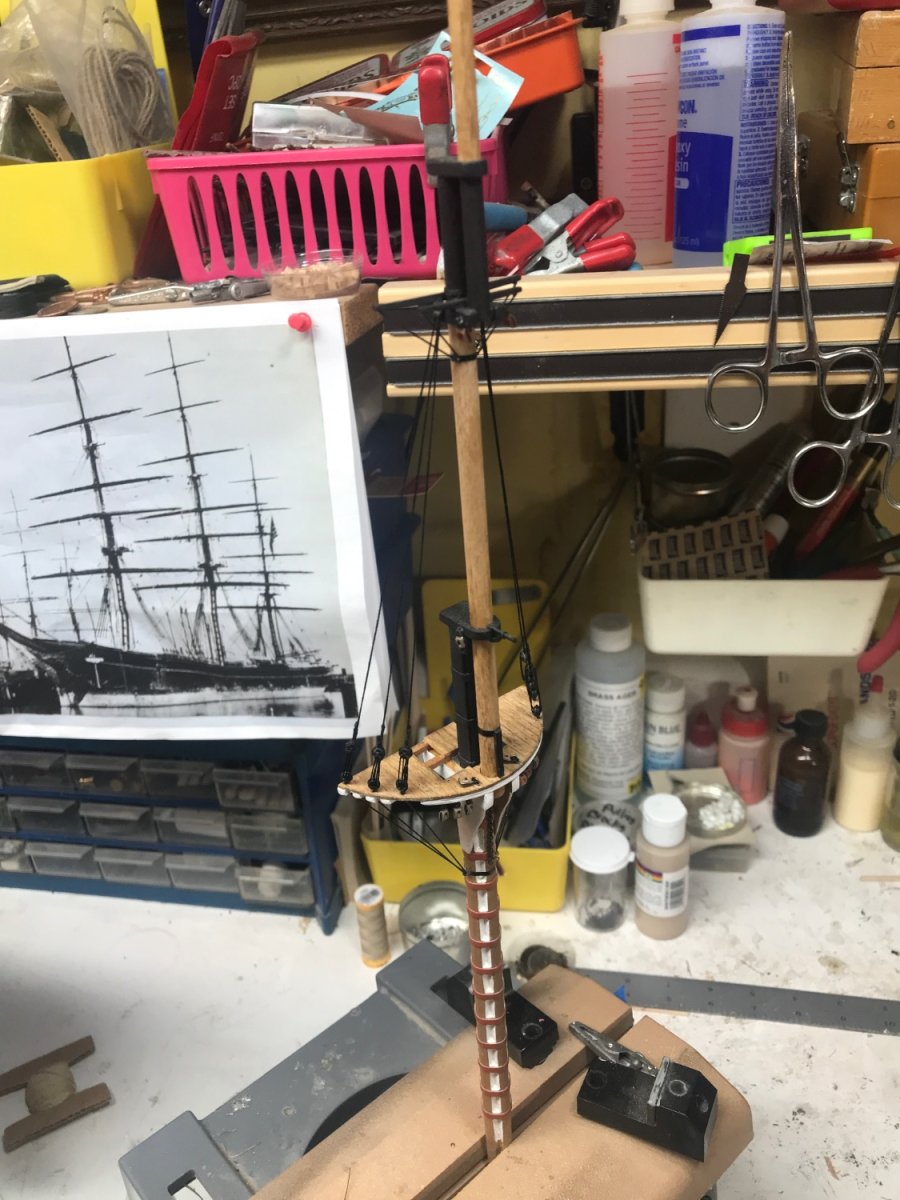
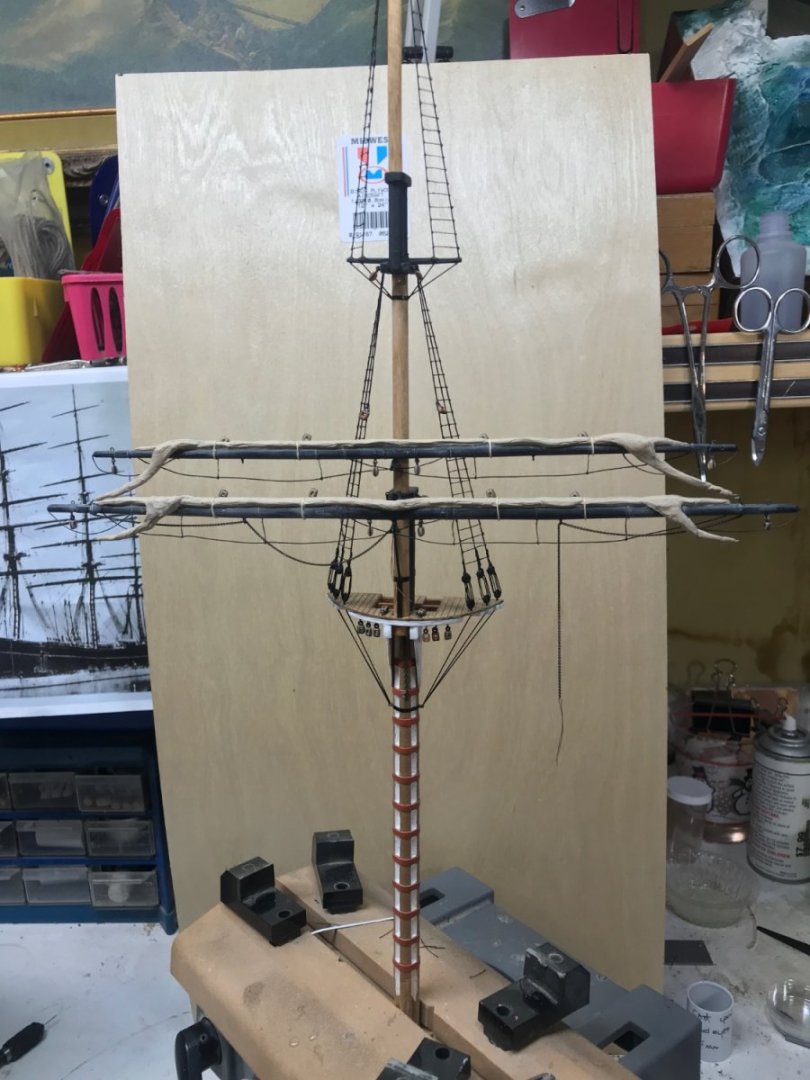
Mark...visit my log on Glory of the Seas(scratch build section, 1851-1900, and you will see my method...I always rig the mast/yards off hull...then mount the mast and finish things up on the lower mast. Plus you can work at eye level and without any encumbrances. Its the best method I've ever used. Rob
-
Wow....$125. I found mine at a second hand store for $20. Keep looking....and visit Ebay...sometimes they have them there. All I know, is that the method I devised is the simplest and fasted way to make thousands of copper plates.....in no time...for the cheapest cost...too. Rob
-
Wildflecken wasn't right on the border...our AO was, and it extended down the Fulda Gap toward Fulda. We stared at East Germans all the time during our duties. We were the front line defense against any EG or Soviet aggression in that sector. Geographically...it was their only way to advance West.. Thanks....it was an *Adventure*..... Rob
-
Right. The wire I use has to pass through a single link of 42lpi chain. It’s pretty thin stuff. Smaller then thread for sure. Winding off a small motor. Pat……your Victoria is amazing and a testament to you own expertise and skill. Your great mind’s doing just fine. Rob
-
That is exactly what I described to Nic. Rob
-
I run thin wire through the first link and then thread it through the block an such. Just sometimes the chain will bind inside the block or sheave and I have to work gently to not break anything. Note the wore at the end of the chain dangling. Rob
-
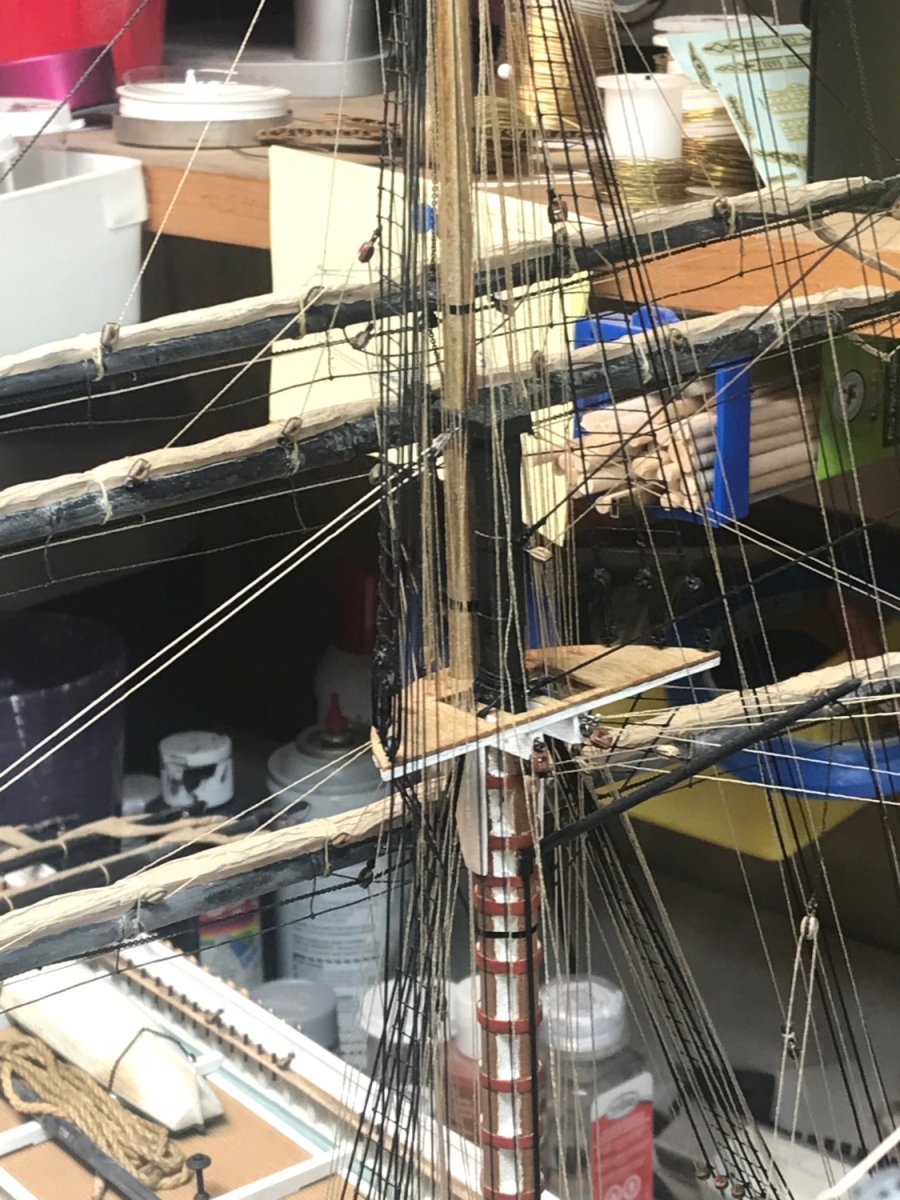
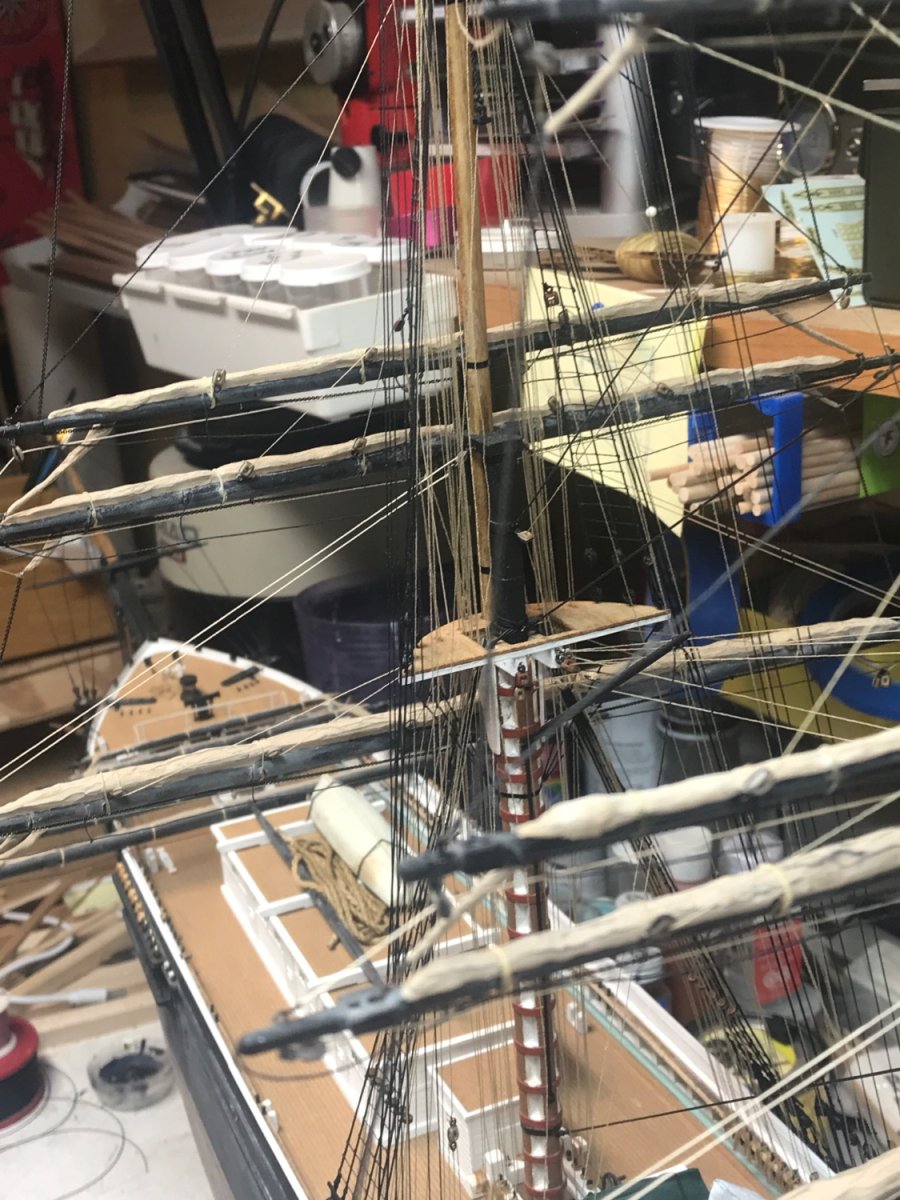
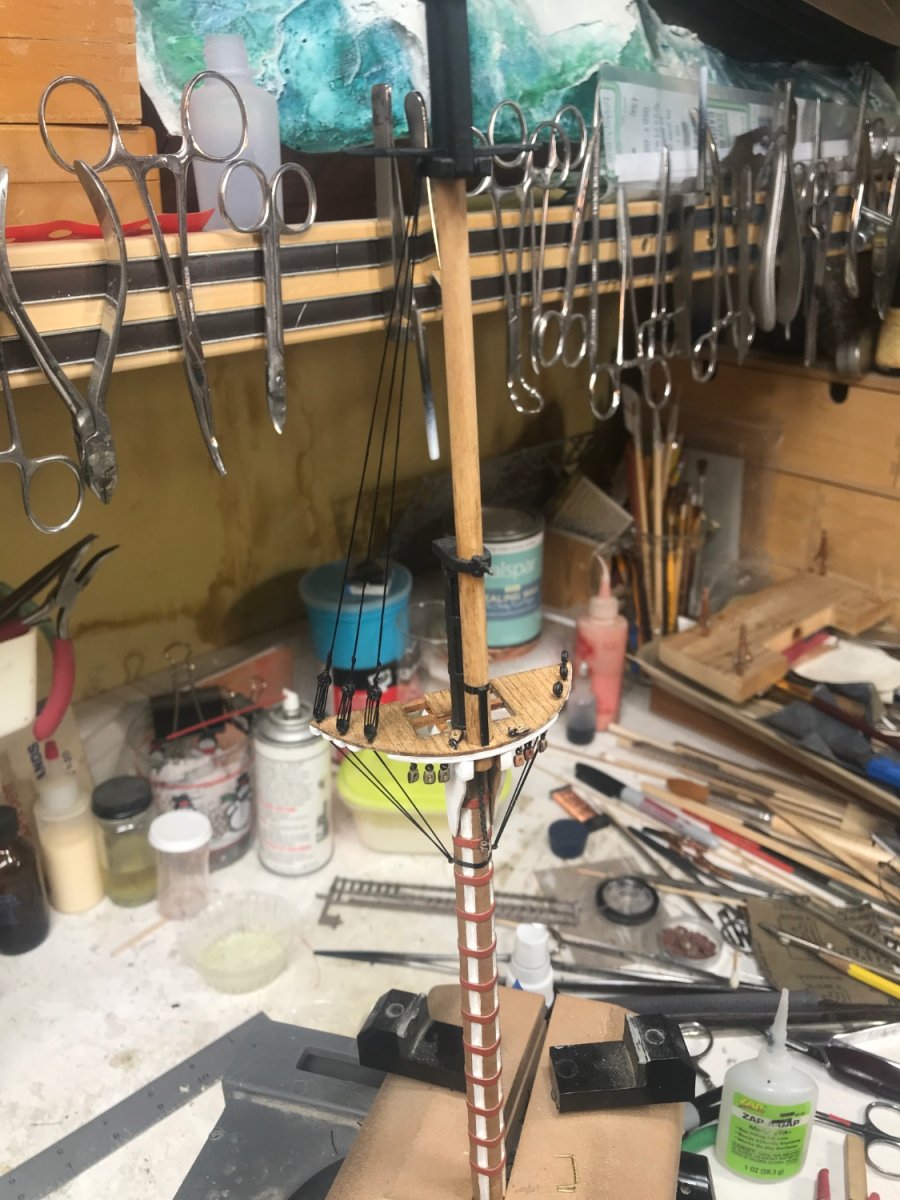
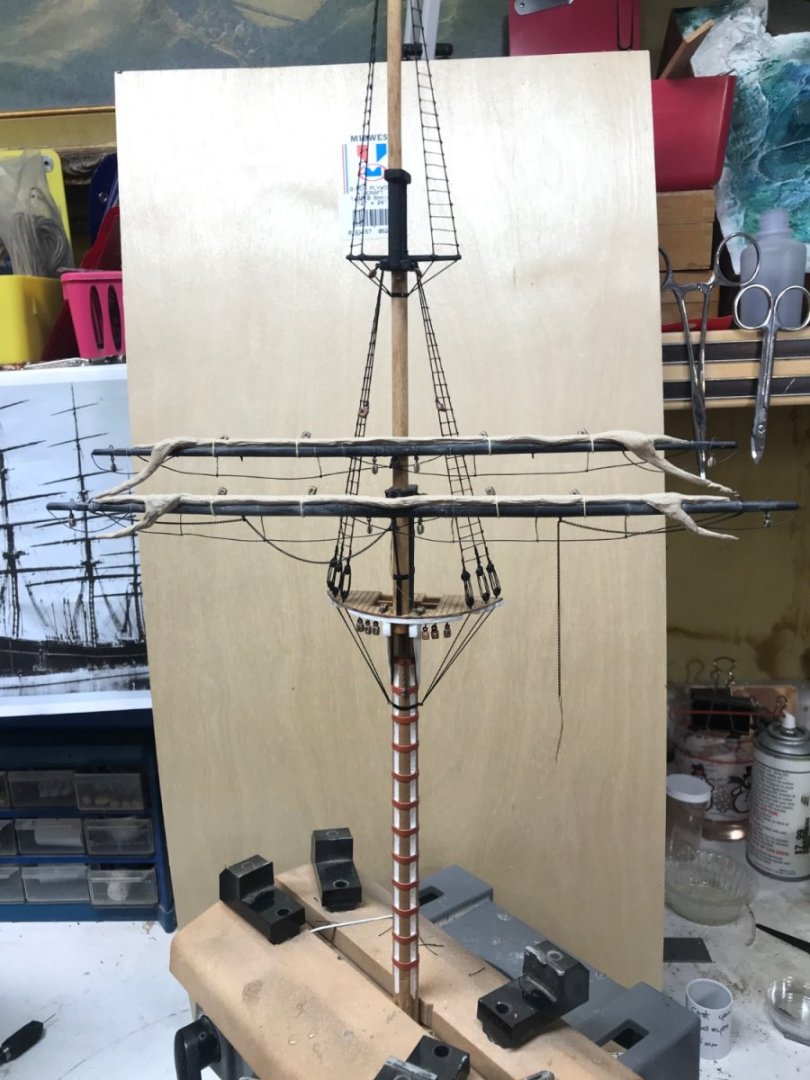
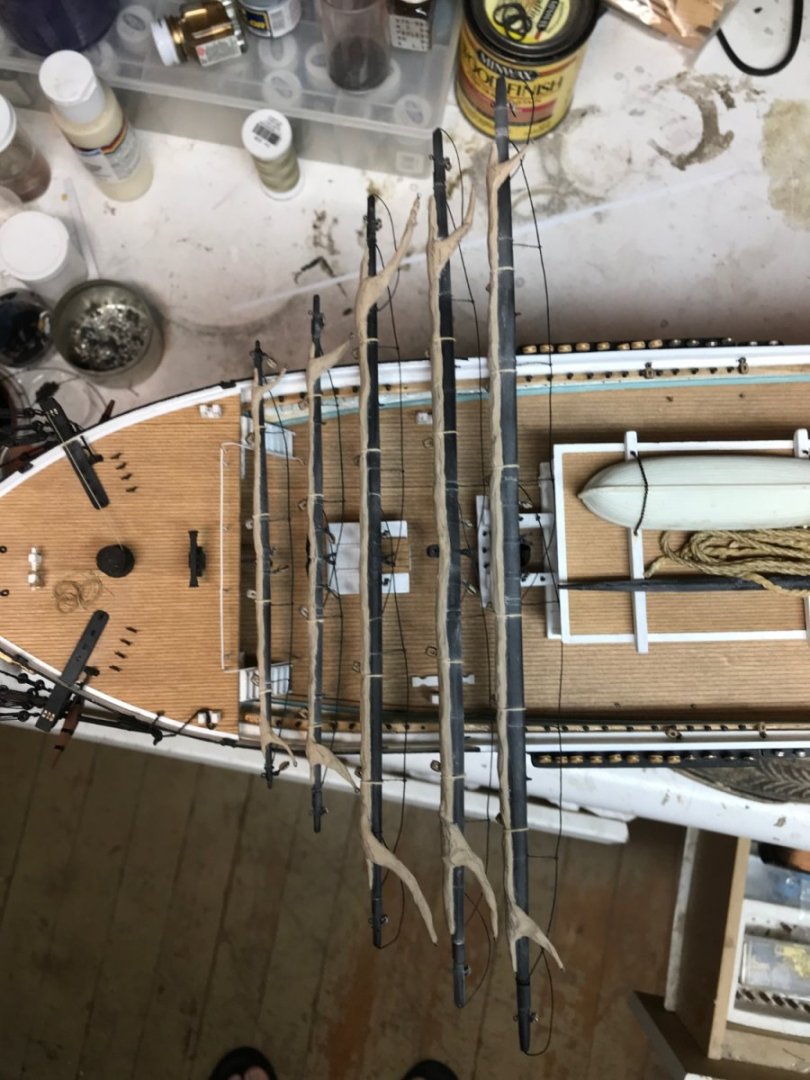
Now the long task of adding blocks and rigging the yards and their furled sails. It begins with the chain clews for the upper topsail yard. Threading chain is like threading a wet noodle through a straw. Rob
- 3,560 replies
-
- 5
-
-
- clipper
- hull model
- (and 2 more)
-
I was stationed in Wildflecken Germany (168 Armor Battalion) ....minutes from the EGB. We were there when the wall came down(I have my piece).....we were there for the *Unification day*...what an adventure. We lived among the history. Now it's nothing but a memory. Rob
- 602 replies
-
- 1
-
-
- Flying Fish
- Model Shipways
- (and 2 more)
-
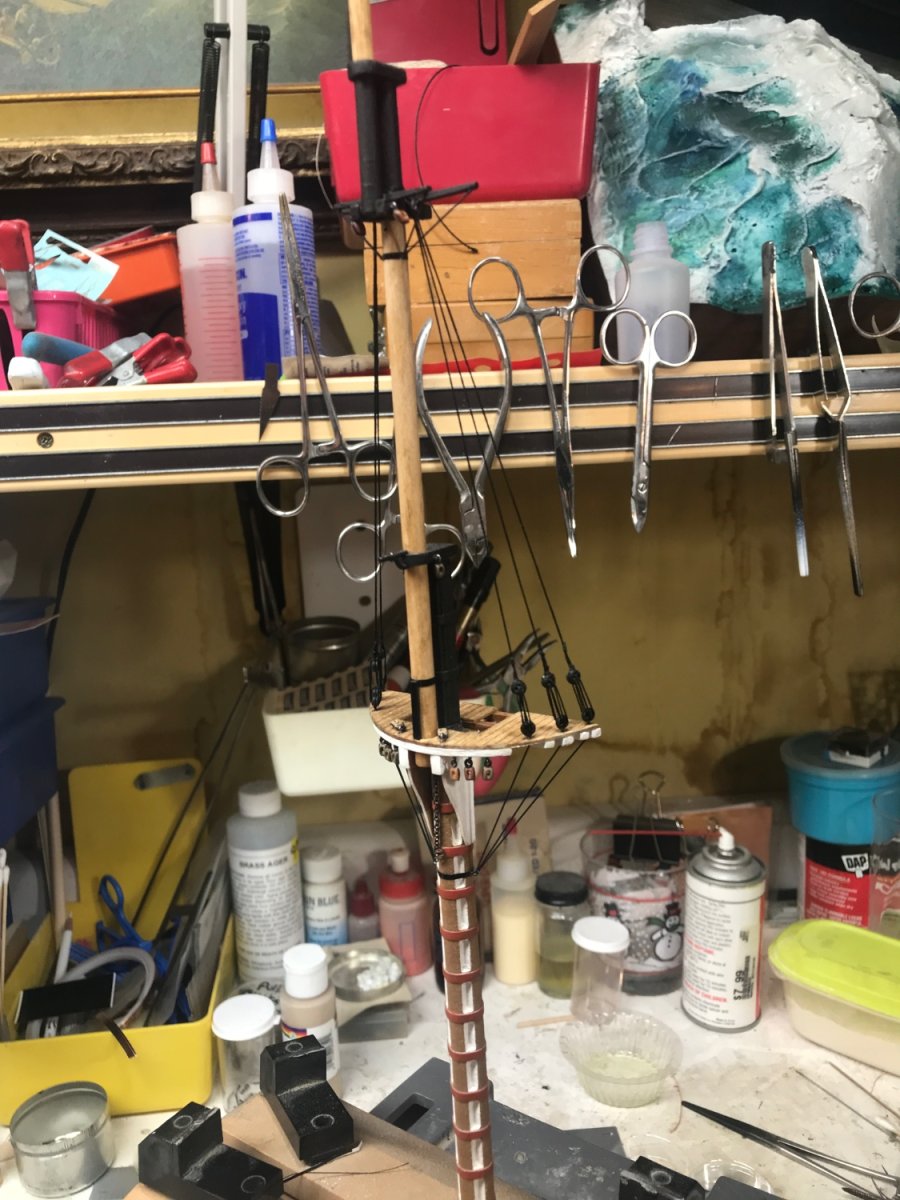
THAT is one skill, I have yet to master. Actually, I focus on time management. Each day, I get about an hour and a half to work like a madman. So I have really spent time perfecting any repetitious processes....like painting and sheaving blocks....making eyebolts.....securing eyebolts to blocks, most importantly....establishing a good sequence to do all this. Preparation and planning for the work cannot be overlooked. Work inward out. Prep and drill all the top fairleads, the tie sheaves in the masts and block/stay eyebolt holes. Not to mention banding for stays and futtock shrouds. Its a symphony. My evening goal is to finish off the topgallant shrouds and begin the addition of the ratlines. Again, thanks for the fine compliments and daily visits Rob
- 3,560 replies
-
- 3
-
-
- clipper
- hull model
- (and 2 more)
-
Real knots verses what is practical for scale ships
rwiederrich replied to Srenner's topic in Masting, rigging and sails
A self proclaimed example. What scale are you performing this magic in? And I don't want to hear 1/128.😁 Rob -
Real knots verses what is practical for scale ships
rwiederrich replied to Srenner's topic in Masting, rigging and sails
Kind of a loaded question. If you are a purist and tend to make models for purist to view.....and your scale is large enough to warrant it, you try your best to replicate actual knots. However, modelers are *Modeling*..so they are not burdened with this issue. A good secure knot will do with scales under 1/72. I typically paint all my knots to replicate preservation any way...so it never is an issue. Lastly....I don't want to take what will most likely take years to complete and add any more years to it....just to make a point. The most discriminating viewer should have learned patience and overlook your choice and the rest,....Well,......they, didn't even know it was a subject. Rob -
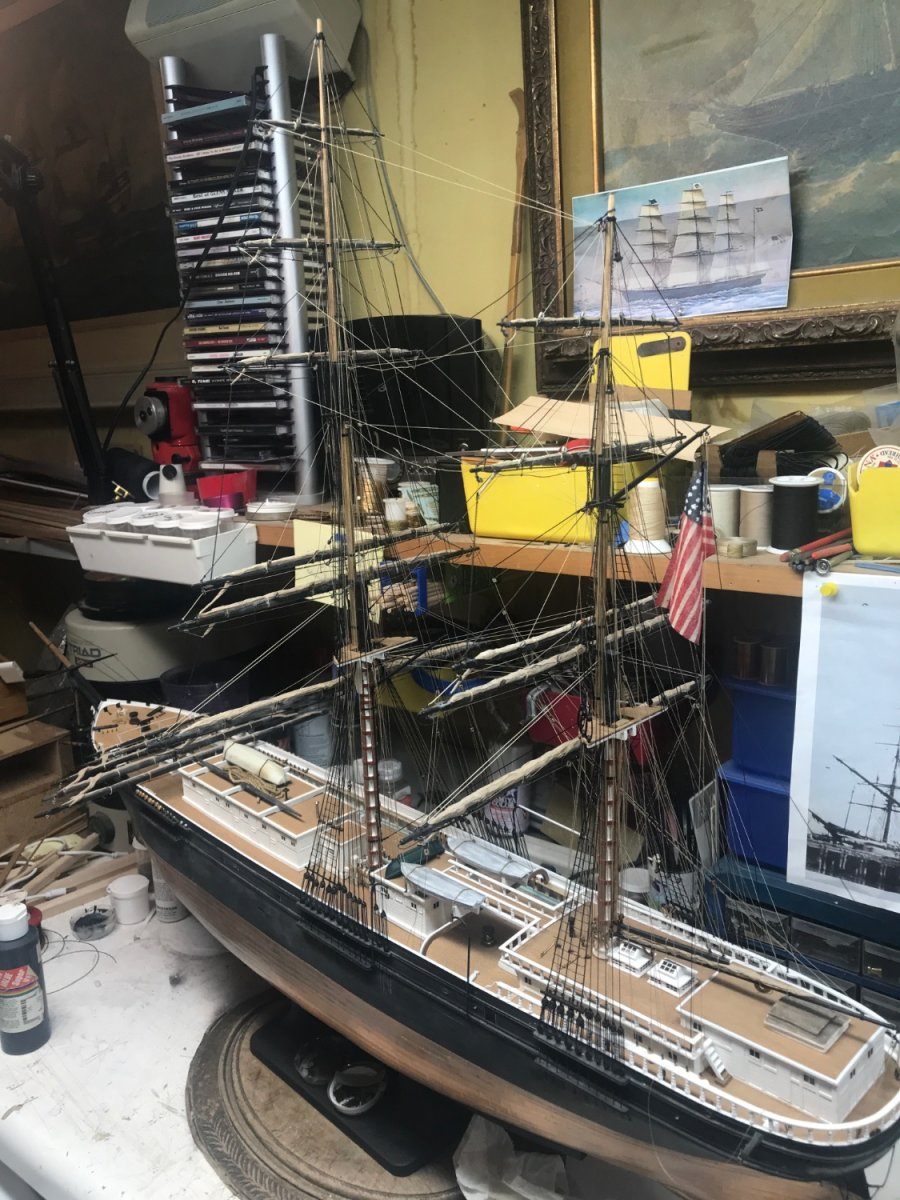
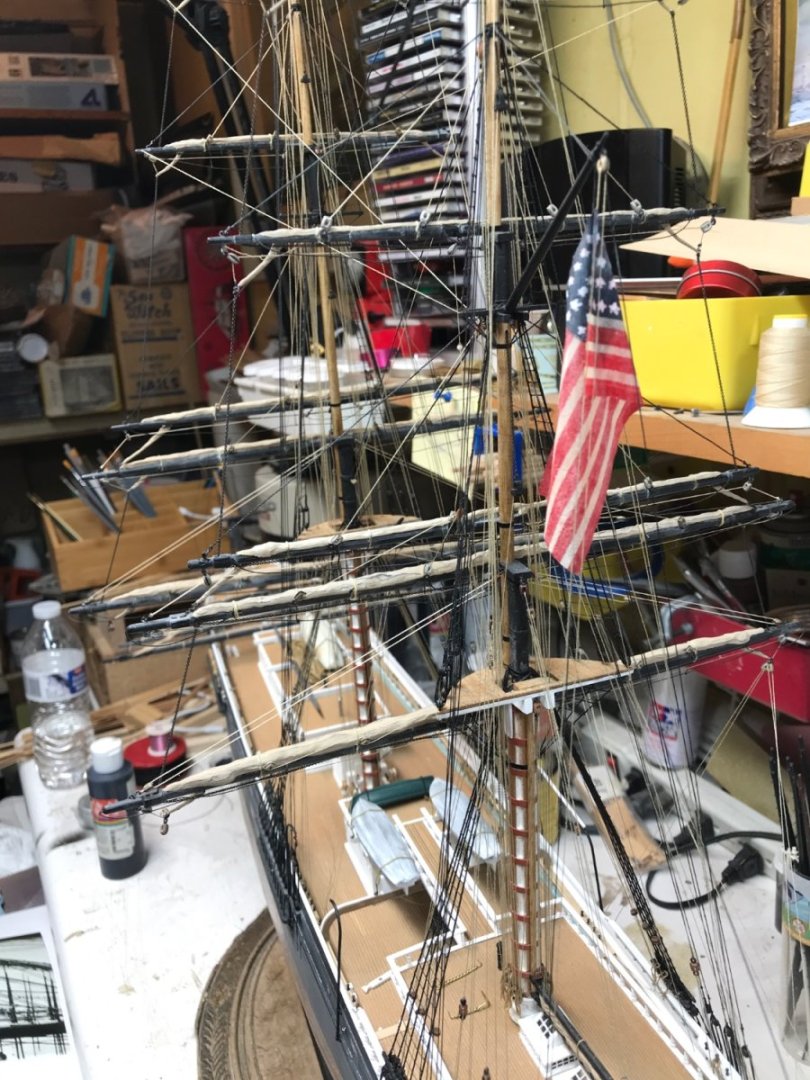
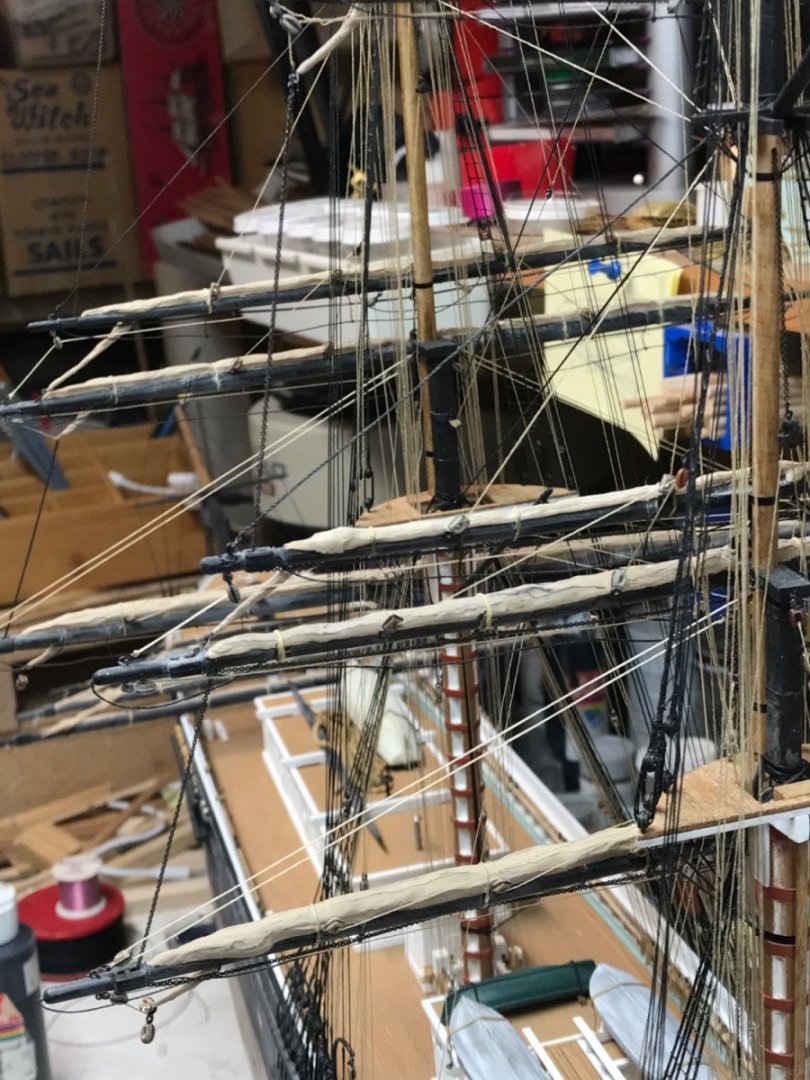
Thanks a bunch Pat. Progress comes in waves. Rigging each yard to the mast has it's own tedium, with its bunt lines, clews, lifts, downhauls and such. Kinda like their own unique micro projects. I'll be making only 3 gin blocks for this mast, and those will be a separate project in of themselves. It's a wonder to think, I'm over 2/3's of the way done with rigging and projecting out...I might be finished with Glory before summers end...or at least by the end of Fall. What a journey. I went directly from finishing the Great Republic to Glory. 5 years to finish the GR and now over 2 years into Glory. Somebody has time on their hands. Rob
- 3,560 replies
-
- 1
-
-
- clipper
- hull model
- (and 2 more)
-
Funny....... I thought all along you knew what I was up to. Rob
-
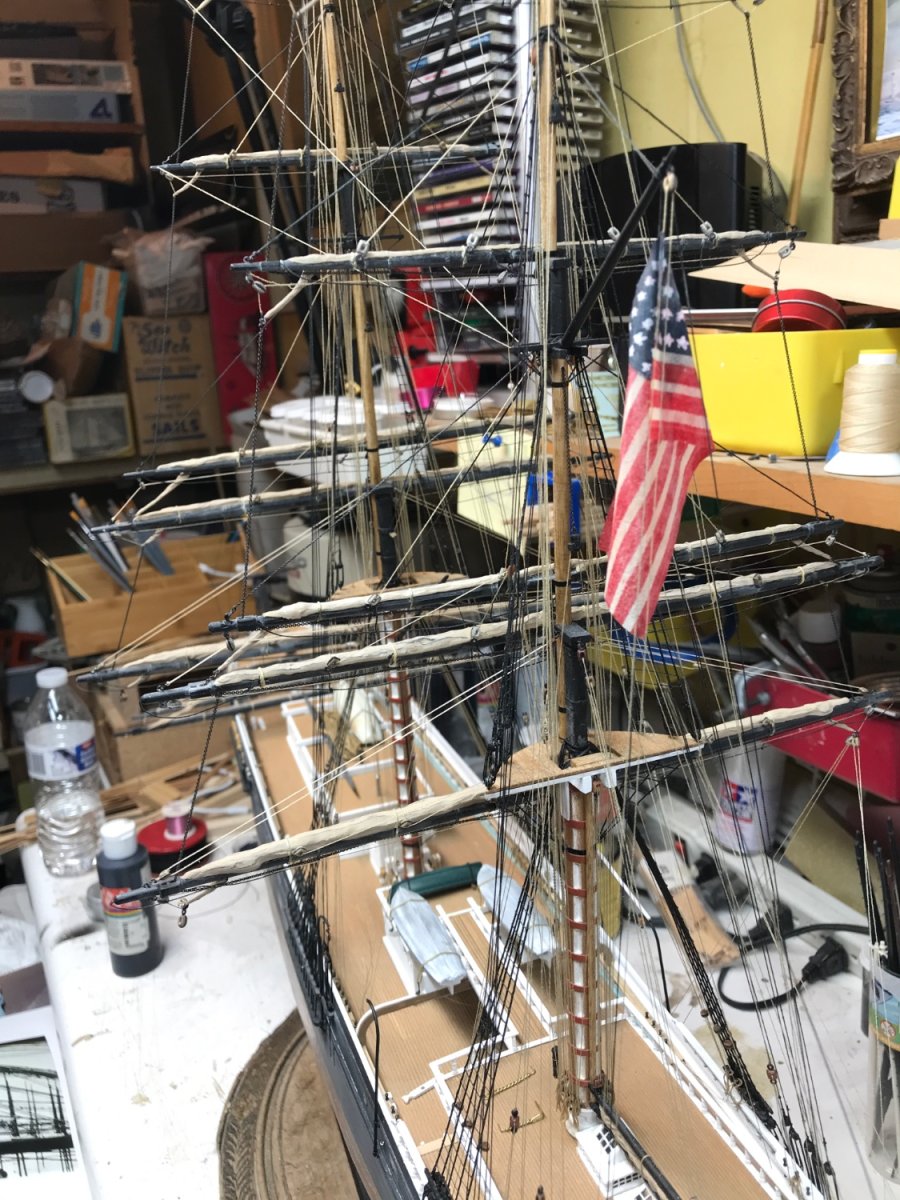
I agree, personally I have never seen a model with such furled sails……..one reason why I went that way. Plus the Frisco pic of her depicts her thusly. Thanks for the super compliments. It is my way to depict and display ships differently and uniquely. Rob
- 3,560 replies
-
- 1
-
-
- clipper
- hull model
- (and 2 more)
-
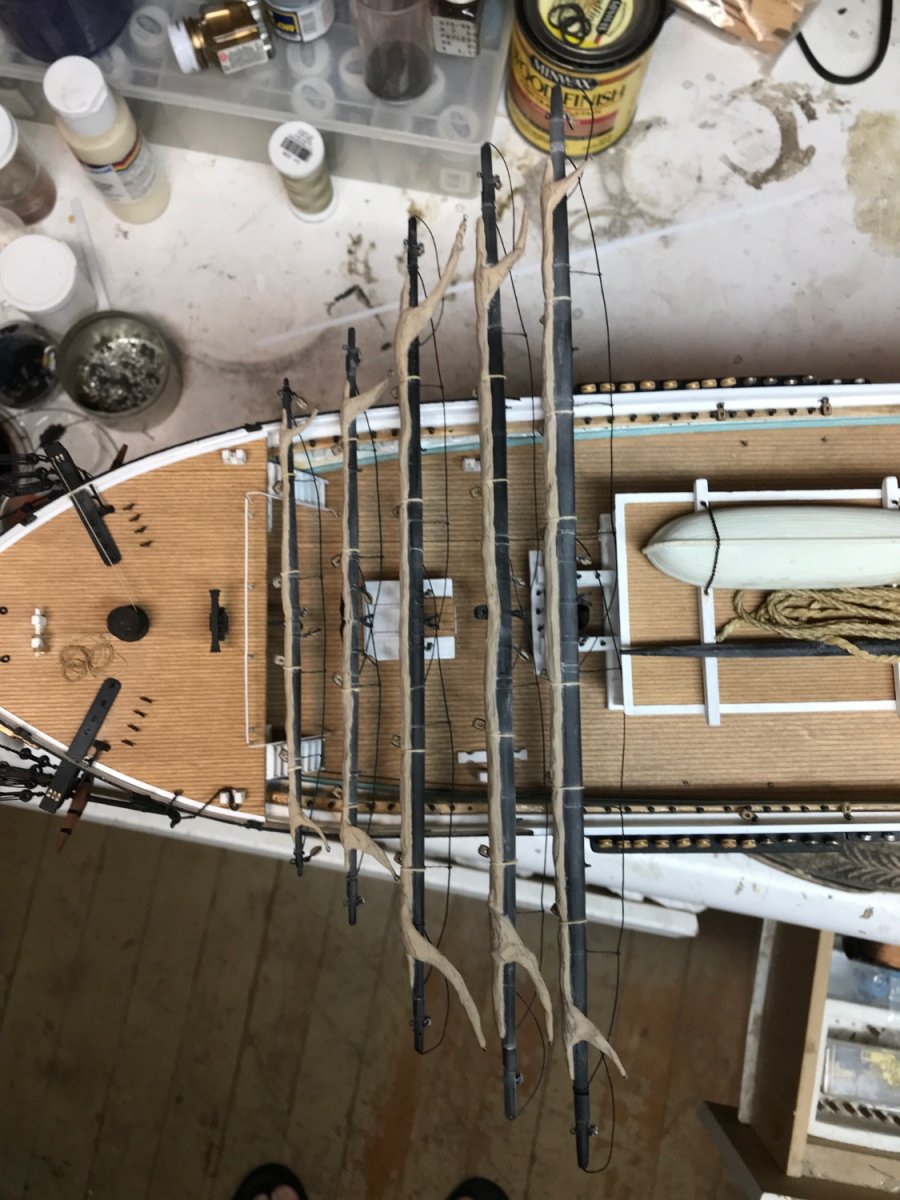
An absolute plethora of rigging. Just a couple extra shots of the rigging on Glory thus far.


- 3,560 replies
-
- 6
-
-
- clipper
- hull model
- (and 2 more)
-
Finished all the fore yards. Sweeeewww. NOW onto the fore mast shrouds. Rob
- 3,560 replies
-
- 7
-
-
- clipper
- hull model
- (and 2 more)
-
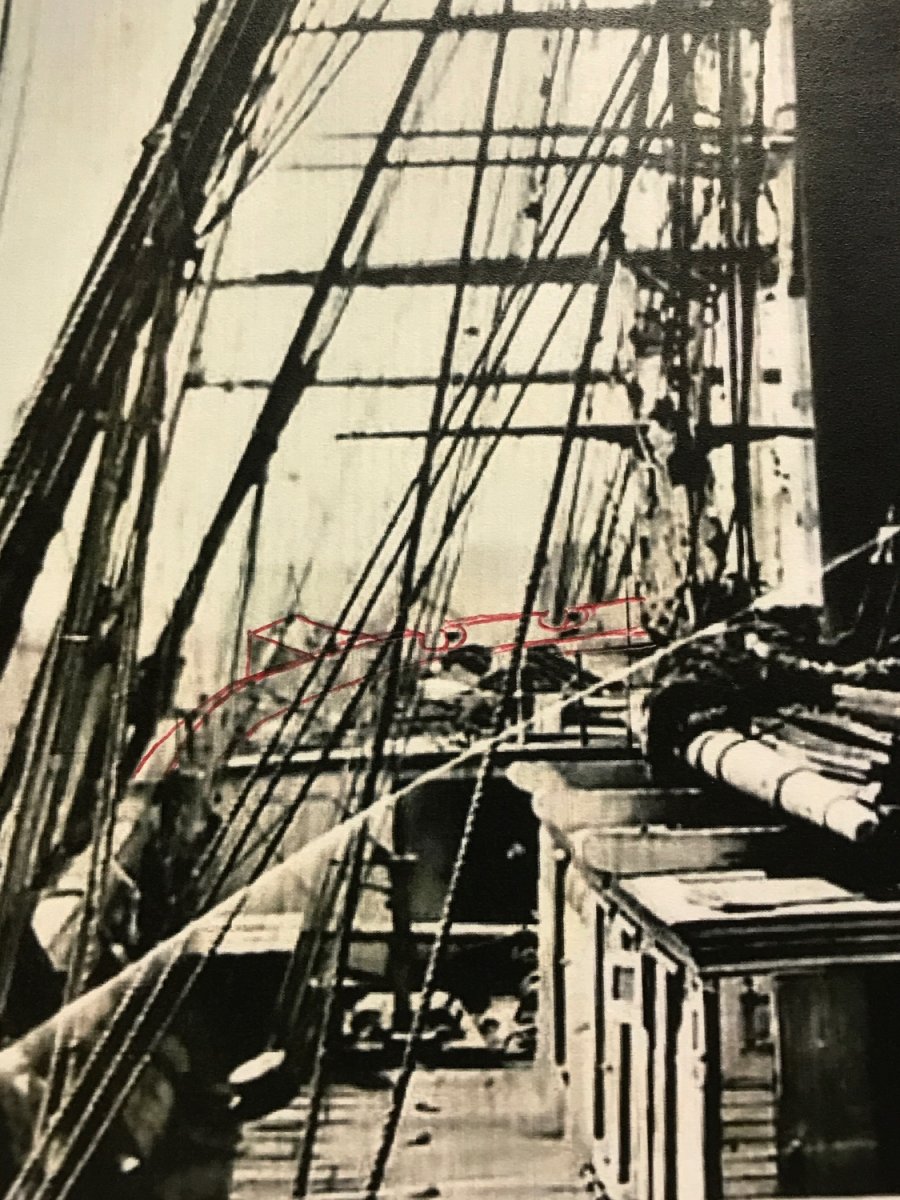
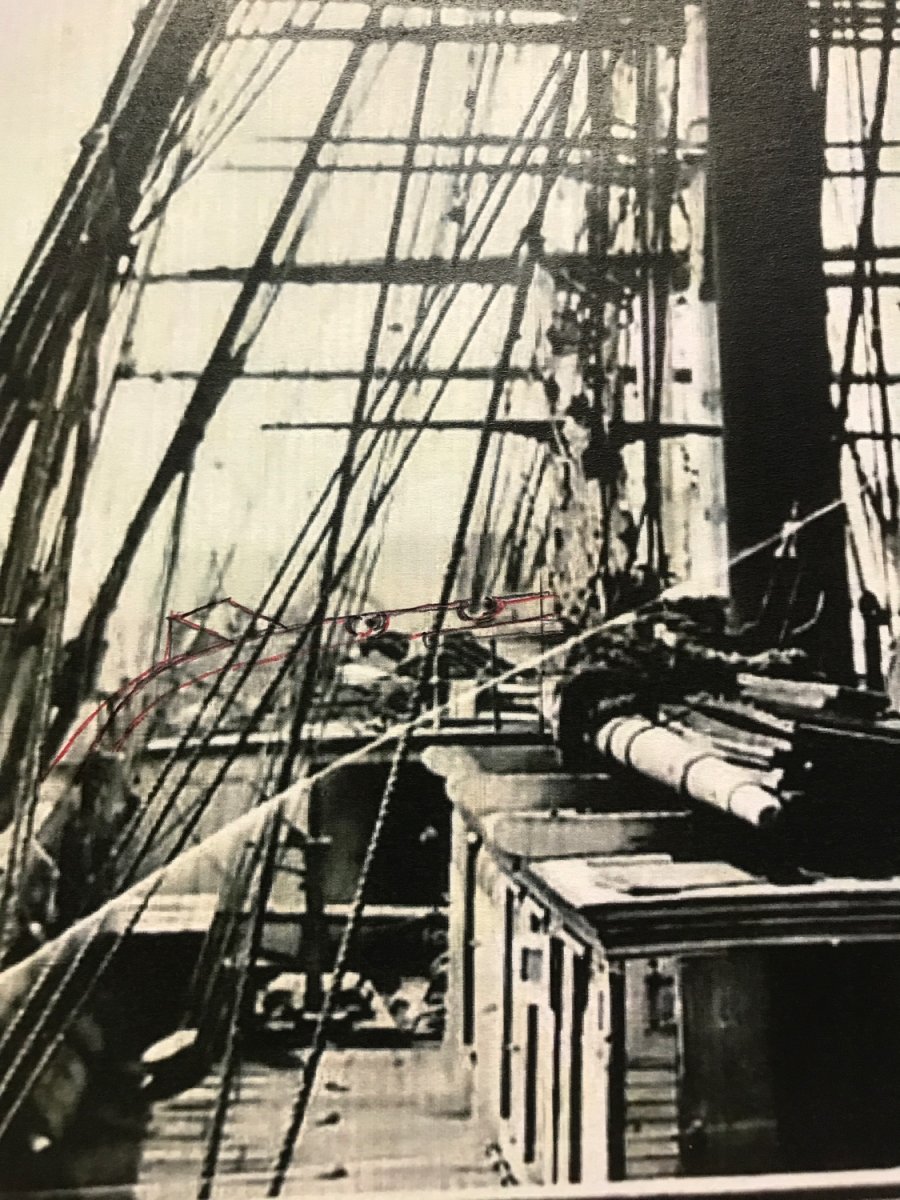
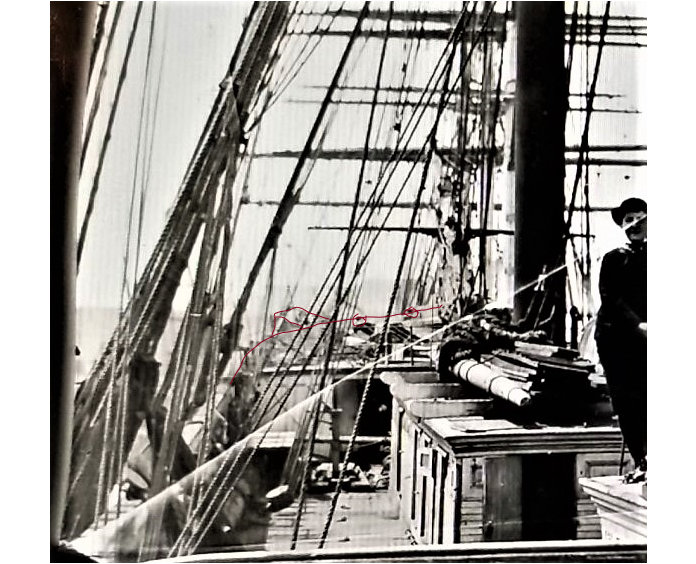
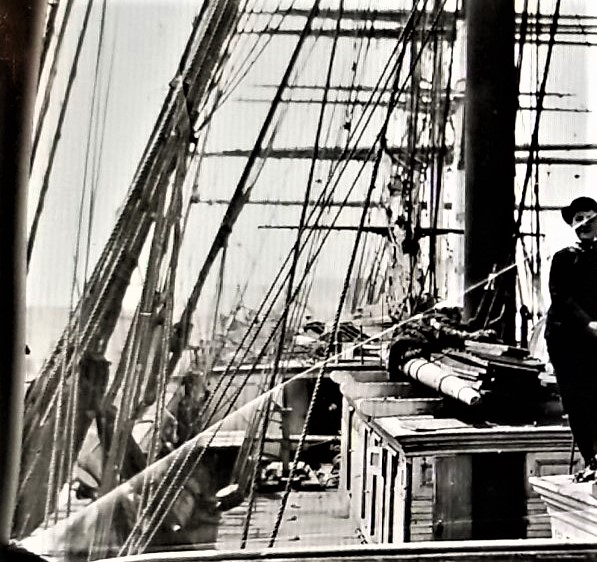
I got caught up in family business last night....so I failed to do the homework on the forecastle. But I did do a rudimentary drawing showing the curve of the bow. If you look and compare to another image, you will see the port cathead identified....following up the curve of the prow, you can identify the two bow mooring fairleads. I identified them with sloppy red circles. The black dots are the inner forward edge of each fairlead. If you look closely just forward of the inner fairlead you can see the curved leading edge of the trim work, that was identified on the new image of Glory that Mike provided. You have to bounce from one image with known structures to identify them in another image that isn't so clear. It is clear by all the work being done around the man kneeling, and by the forging or fabrication tooling, that the mechanic is repairing the port ladder...evidenced by it or part of it laying horizontal just behind him. It is easy to ascertain from what we do know to what we suspect is going on. The state of the debris found strewn around the deck along the cabin and atop....indicates a state of active repair and a period of active maintenance. This is also evidenced by noting that the *Fish* tackle is present just port and parallel of the main deck house front, indicating it was employed to do some heavy lifting. Possibly to remove the ladder. Look into the picture and see what you know should be there...despite the clutter. Rob
- 3,560 replies
-
- 1
-
-
- clipper
- hull model
- (and 2 more)
-
Hey Rich...if you look closely at that boy picture of Glory....you can see the curve of the bow leading to both the forward mooring fairleads and the port Cathead. I drew them out on a copy of the picture and I was able to identify lots of structures that other pics identify. I'll have to wait to get home to post what I found... Also it is apparent the man working is probably the ships carpenter....I see forge material and I believe the port forecastle ladder is on its side...probably what he is working on....... Rob
- 3,560 replies
-
- 1
-
-
- clipper
- hull model
- (and 2 more)