HOLIDAY DONATION DRIVE - SUPPORT MSW - DO YOUR PART TO KEEP THIS GREAT FORUM GOING! (Only 72 donations so far out of 49,000 members - Can we at least get 100? C'mon guys!)
×


rwiederrich
-
Posts
5,518 -
Joined
-
Last visited
Content Type
Profiles
Forums
Gallery
Events
Everything posted by rwiederrich
-
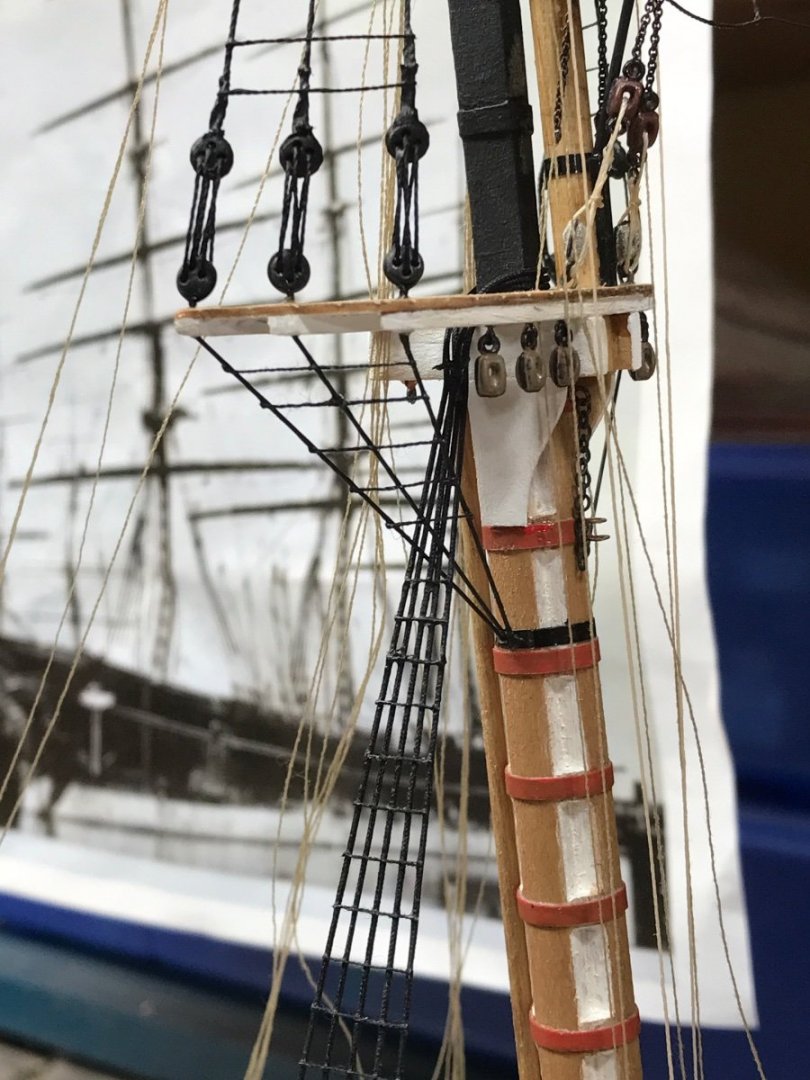
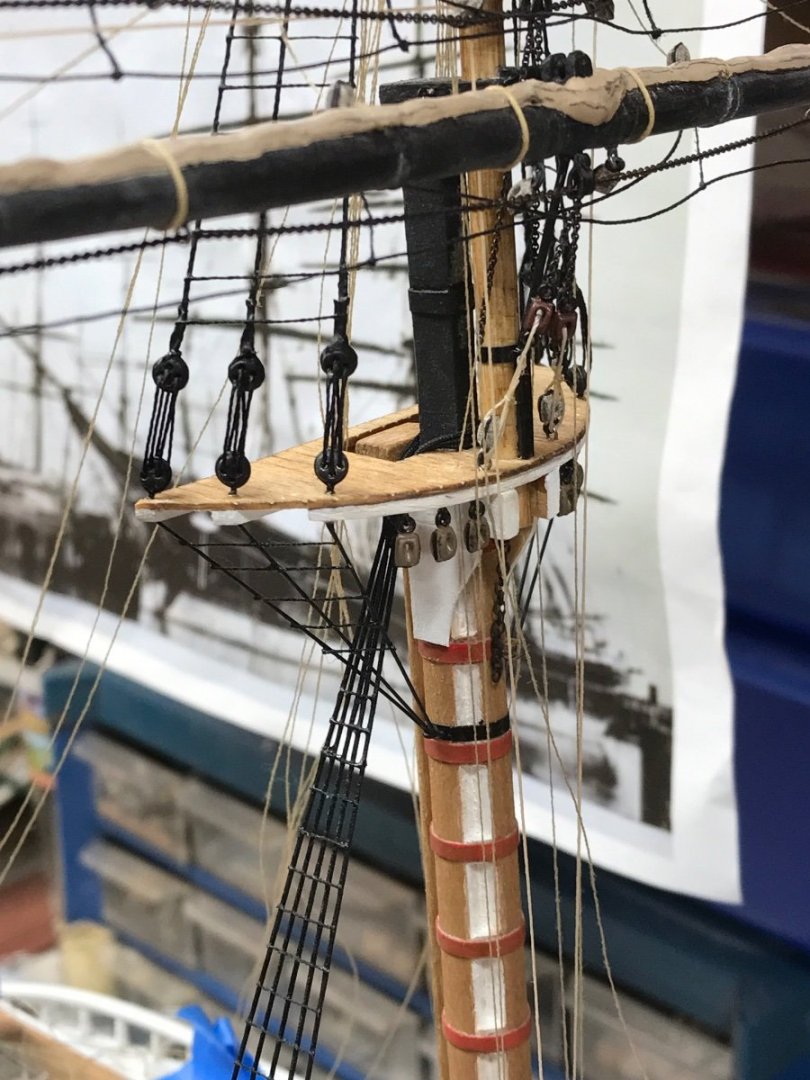
That is a unique way the pin rail for the mizzenmast is mounted on the inside of the aft rail. Is that in the plan? Rob
- 348 replies
-
- 1
-

-
- Flying Fish
- Model Shipways
- (and 1 more)
-
Metal bashing
rwiederrich replied to michael mott's topic in Metal Work, Soldering and Metal Fittings
Oh, I didn’t realize that detail was part of your structural replication . Good job then. Rob -
Metal bashing
rwiederrich replied to michael mott's topic in Metal Work, Soldering and Metal Fittings
Some very interesting linkage...you have there. 3 levered contacts working simultaneously in controlled ratio. The large control action turnbuckle fixed to the truck and the frame...apparently is used for truck alignment....NOT in concert with the linkage. Impressive, for sure. OH...model railroading also provides rivet heads that are stick backed on a sheet...made in many scales. Just peal them off and place them on your project. Rob -
Thanks Michael and Pat……..that means a lot Rob
-
Thanks Rich. She is coming round. When I get those jib stays installed she will look magnificent. Rob
- 3,560 replies
-
- 2
-
-
- clipper
- hull model
- (and 2 more)
-
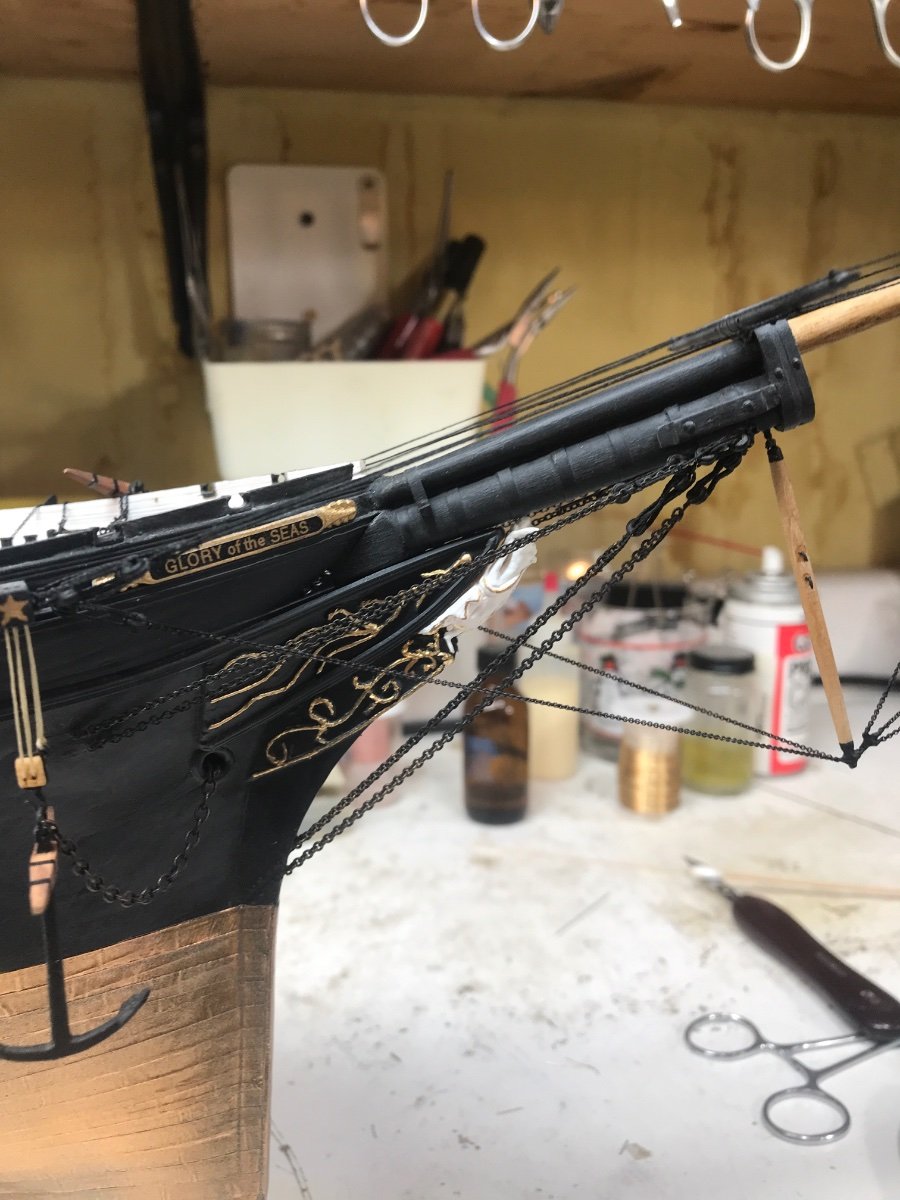
Rick….if you look at this image you will see the three Bolt points for the stays…..mounted just under the Tip of the name board. The for stay passes through the bees the back to this point. The inner jib passes through the jib boom back to the martingale and again back to this point. Same for the jib and flying jib. Thanks for askin. Rob

- 3,560 replies
-
- 5
-
-
- clipper
- hull model
- (and 2 more)
-
Bringing my vision to life and convincing others it is trustworthy can always be problematic……Even much more if I didn’t/couldn’t pull it off. Thanks for you confidence and encouragement. Rob
- 3,560 replies
-
- 1
-
-
- clipper
- hull model
- (and 2 more)
-
Wonderful work thus far....... Rob
-
Thanks Nic. The Display should be as thought out as the model itself....IMV Rob
-
Rich....Mike has been asking me if we are going to do a write up of the models for NRG? I told him that you were going to do something like that. He'd like to help if you need any assistance. He said your email or his isn't working so he can't seam to get in touch with you. Rob
-
Thanks everyone. I feel it still provides the *Pedestal* look, while reminding us that cleats were actually a functioning part of the clippers working structures.....Glory carried many. Then to follow up with a unique antique ornate nautical base that is repurposed(My mantra) as a base.....just ties so many individually distinctive elements together.....making a most striking display.....IMV. Side note: The base has in itself nautical origins and a most tragic end, reminiscent of Glory's own sad demise. I find it only fitting the two are joined to finish their lives reminding us of our rich nautical heritage. The natural patina of the base adds to the authenticity of the idea being conveyed. Rob
- 3,560 replies
-
- 1
-
-
- clipper
- hull model
- (and 2 more)
-
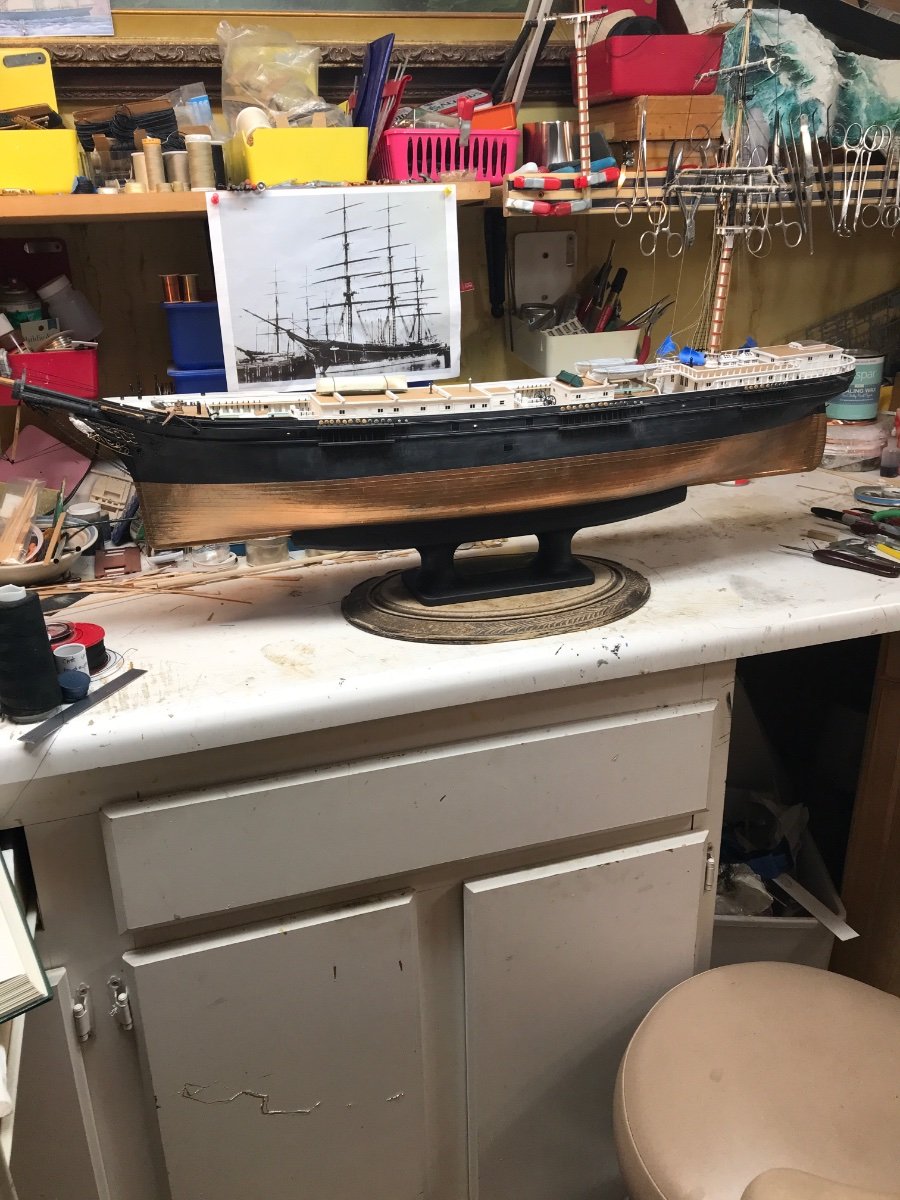
Teaser reveal! I worked all afternoon, milling, grinding, matching hull curves. A bit of paint and finally, mounted on an antique wood ornate plaque salvaged from a nautical collector in Puget Sound. Probably from a local coastal schooner. I think it is quite convincing in its display characteristics. I have a few more small items to finish, like felt bottom. What do you think? Rob


- 3,560 replies
-
- 5
-
-
- clipper
- hull model
- (and 2 more)
-
I received the 18" cleat yesterday for the mounting for Glory. I muddled over this and I'm going to do something I typically do not do. I'm NOT going to show you the cleat...or any aspect of the bases construction. I want you to see it for the first time...complete....and with Glory sitting on it. I want to hear your responses...without any prior suggestions, without any hints or indications from me. Now, everyone knows what I am attempting to make with this new base, and many or most, already have a preconceived idea of what it will look like(Good or bad). I would like everyone to see it for the first time together.....then let the chips fall where they may..... Rob
-
Very appreciated Bob. If one looks back at that portion of the build...they can see I expedited the process by creating plate and nail embossed strips....using copper tape. Painting the entire bottom (Over the shiny copper), with a good metallic paint...aided in securing the plates(to themselves and the hull) and transforming the *copper* color to the more realistic color of weathered *Muntz* metal. Which is what the Glory was covered/plated in. Again, I wish to thank you for your continued support and encouragement. Coming from one with such an experienced background as yourself, is truly motivational. Rob
- 3,560 replies
-
- 1
-
-
- clipper
- hull model
- (and 2 more)
-
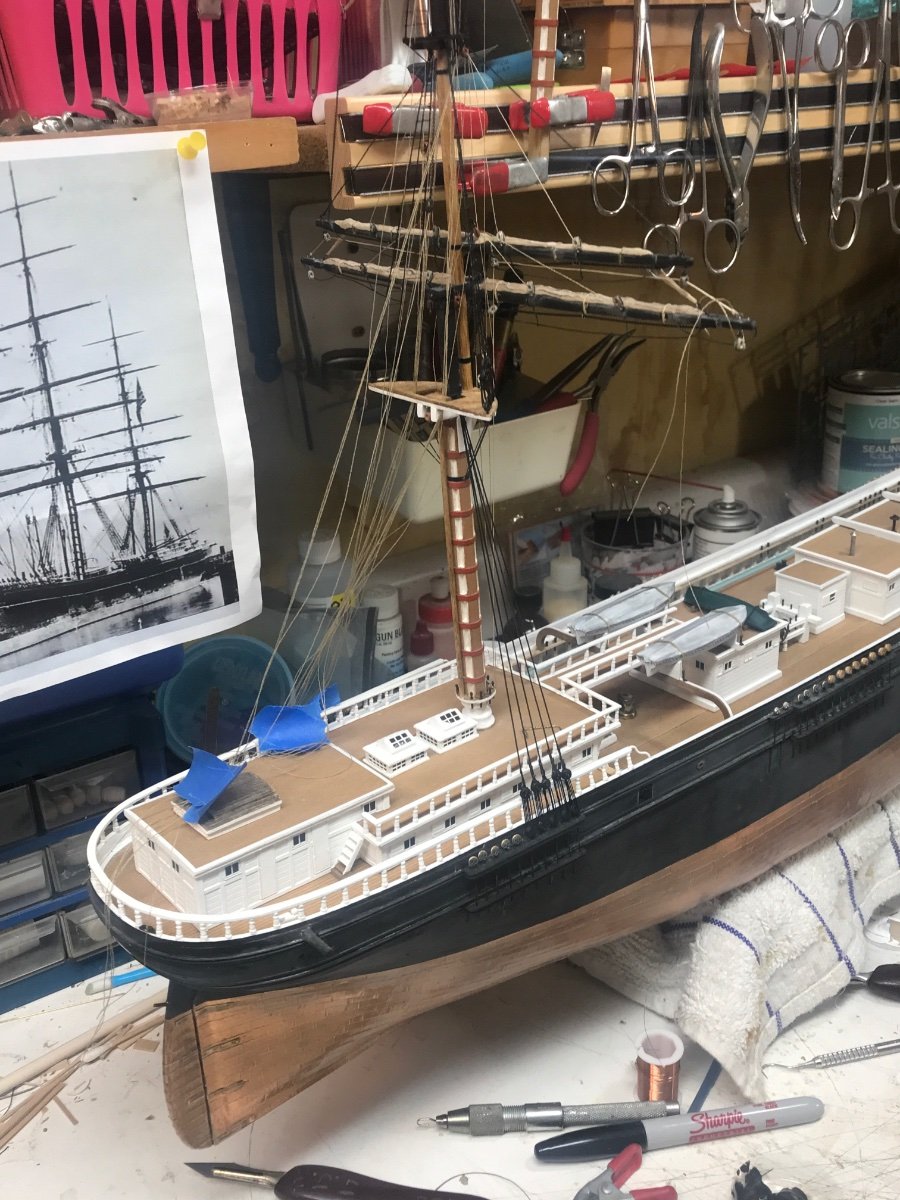
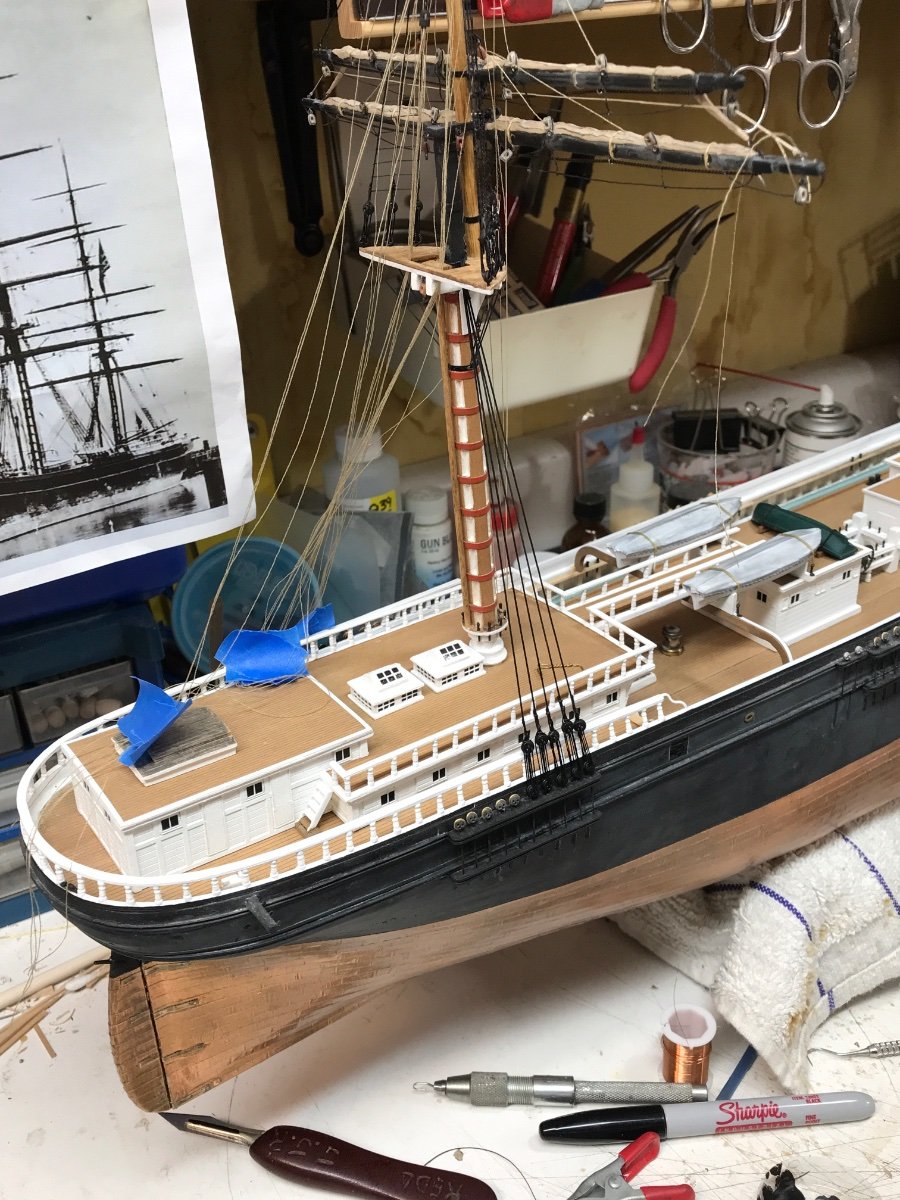
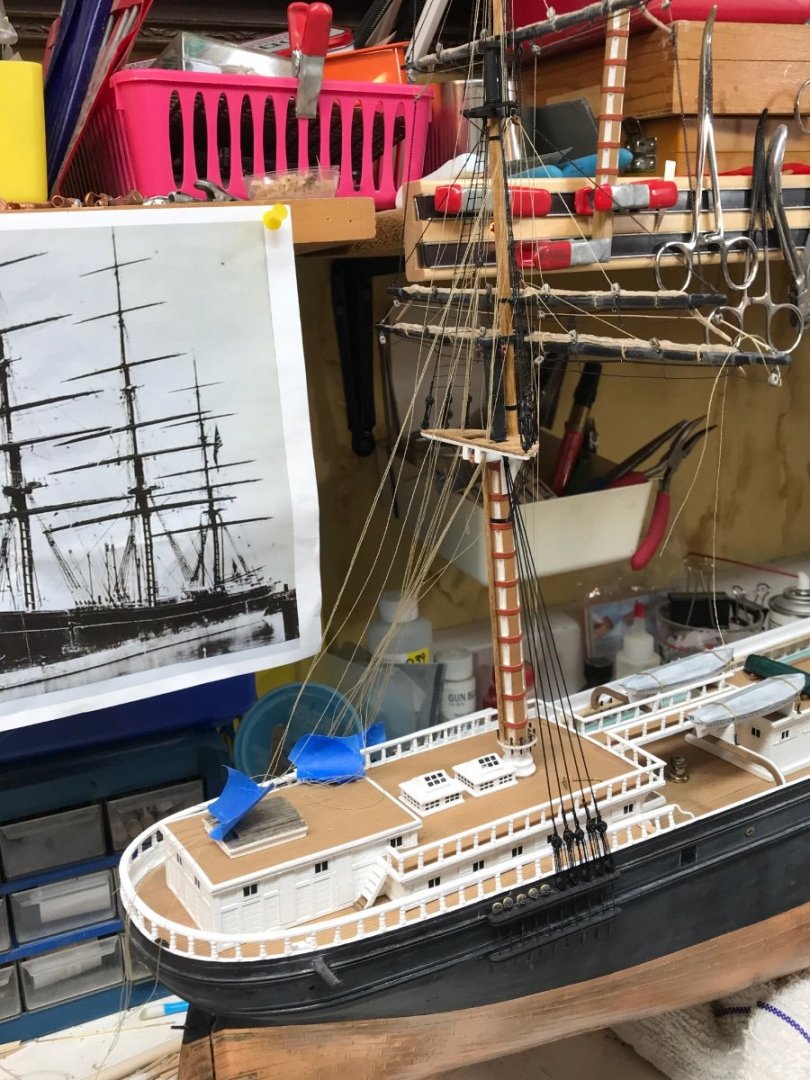
Thanks Rich. those flutes could have turned out to be many things...but I wanted to match the galvanized one on the main cabin. I have developed and am blessed to have an extremely (Level) eye. I set the first ratline and then.....bluuuuuup....I set the next and next..all the way to the top till I'm done. In the past, I would rig several masts at a time and the time spent between them gave enough time for the glue to set, so I could go back to the first and keep repeating the process...never having to wait . Unfortunately, here...I need to wait for the glue to set for each one so I do not interrupt the previous one. I alternate between the futtock shrouds. when I finish them....well....I find other things to do. Rob
-
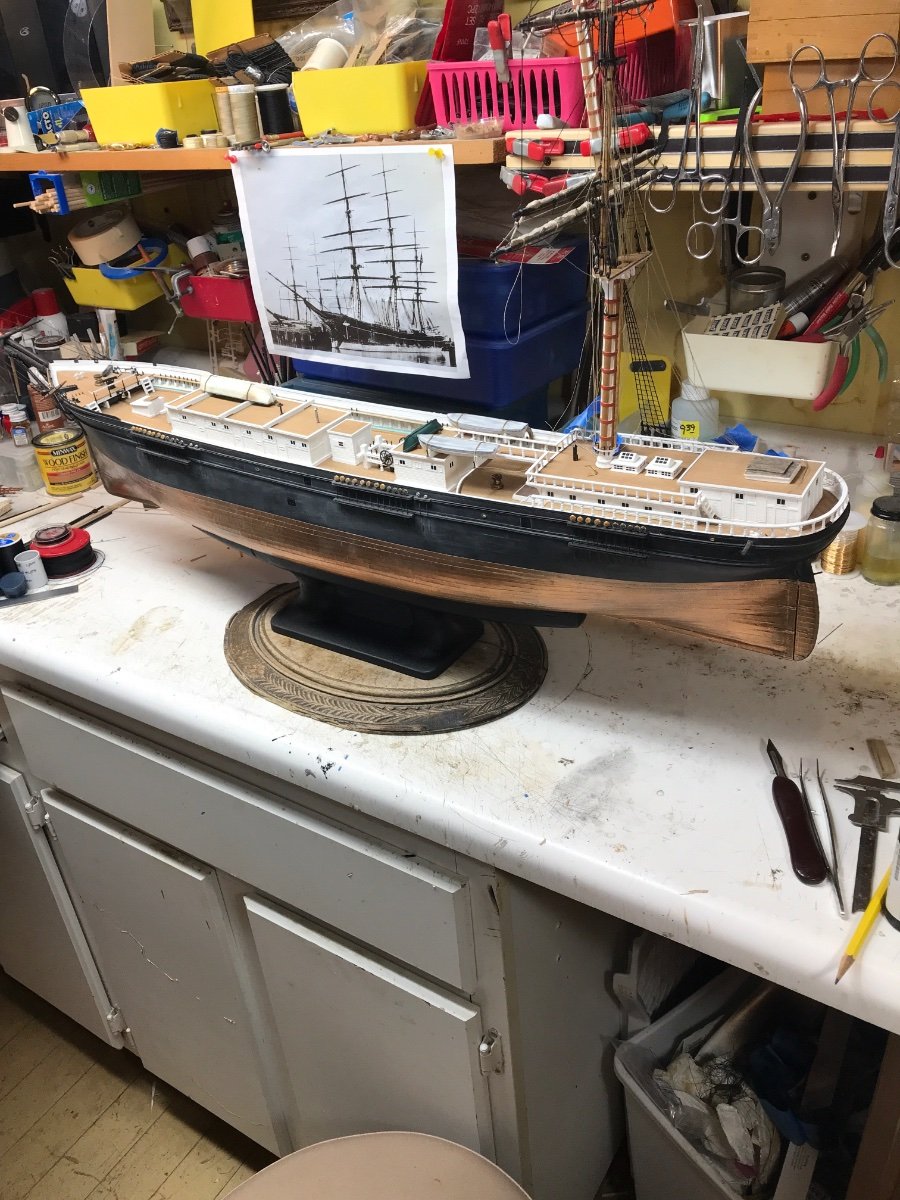
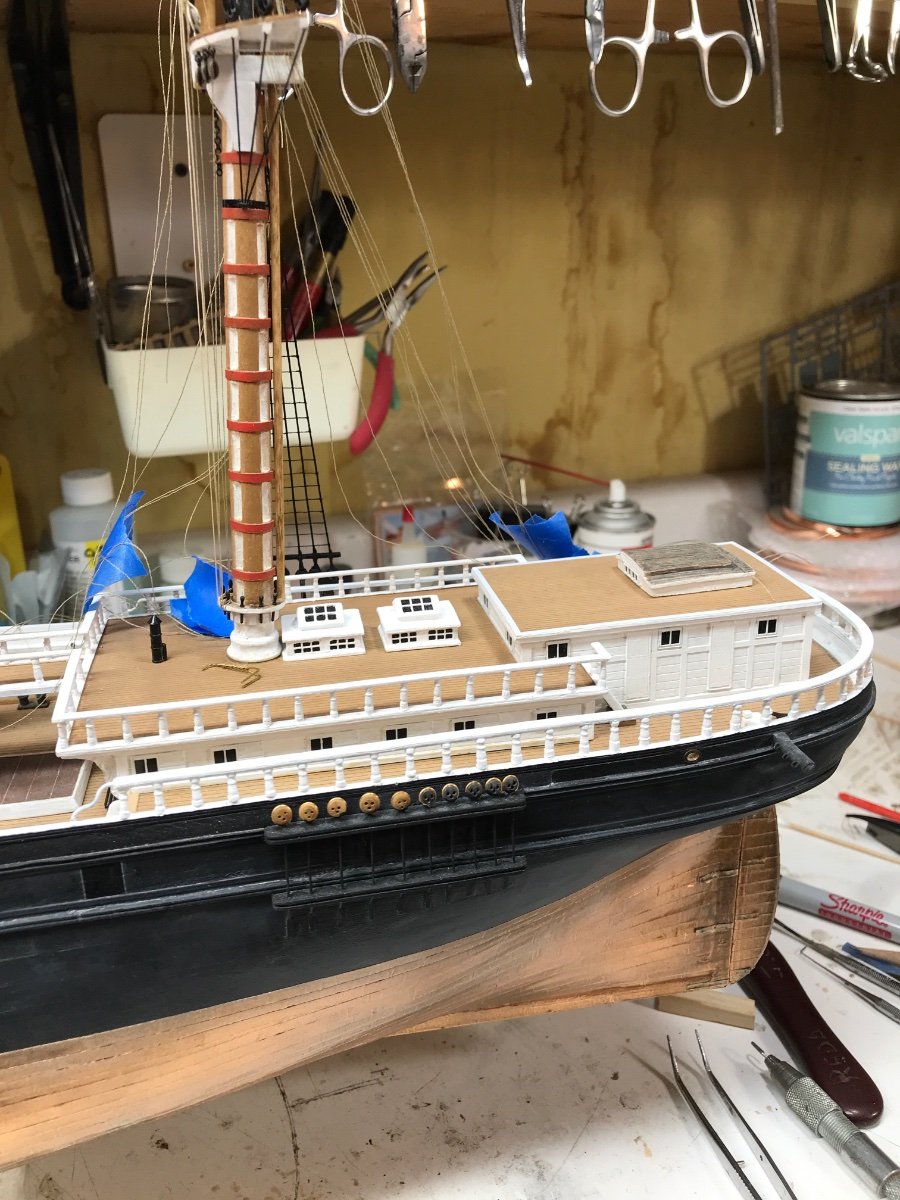
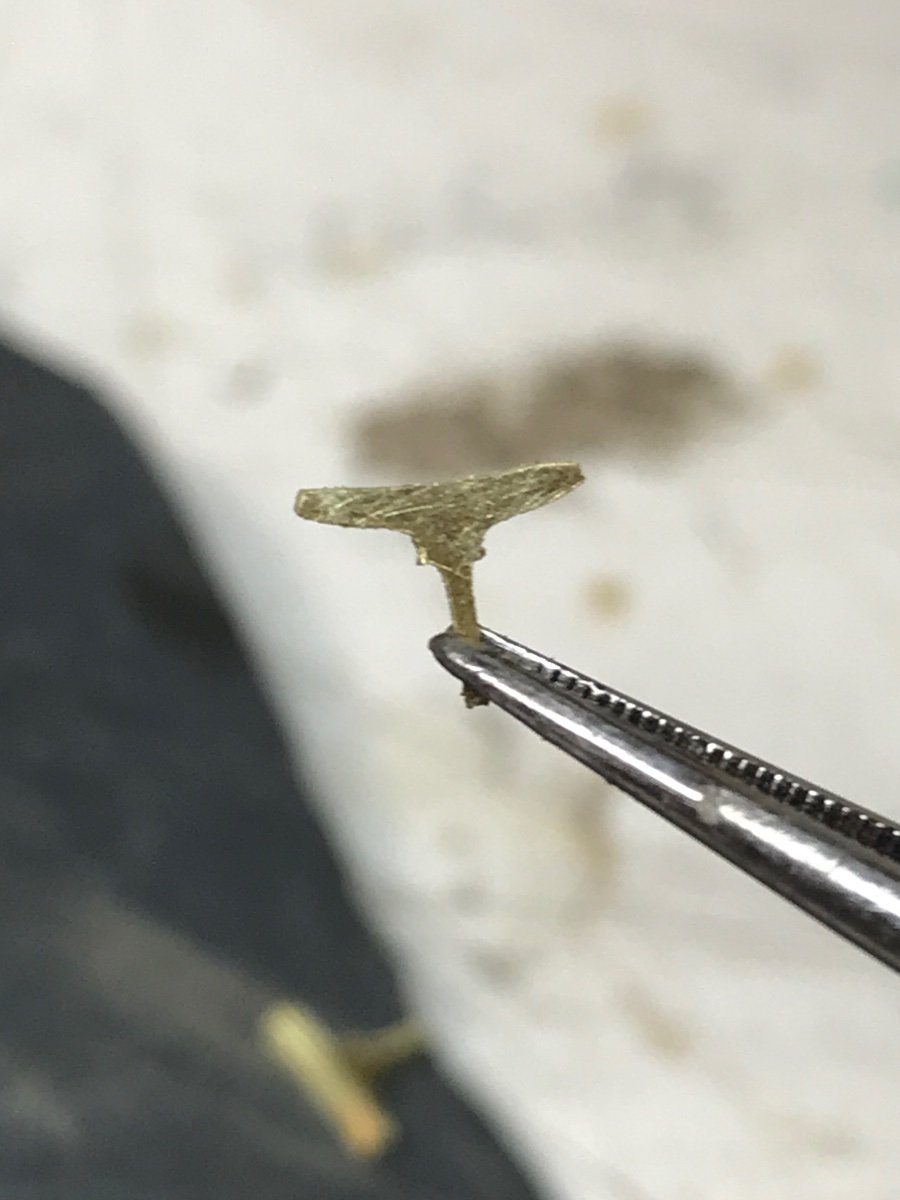
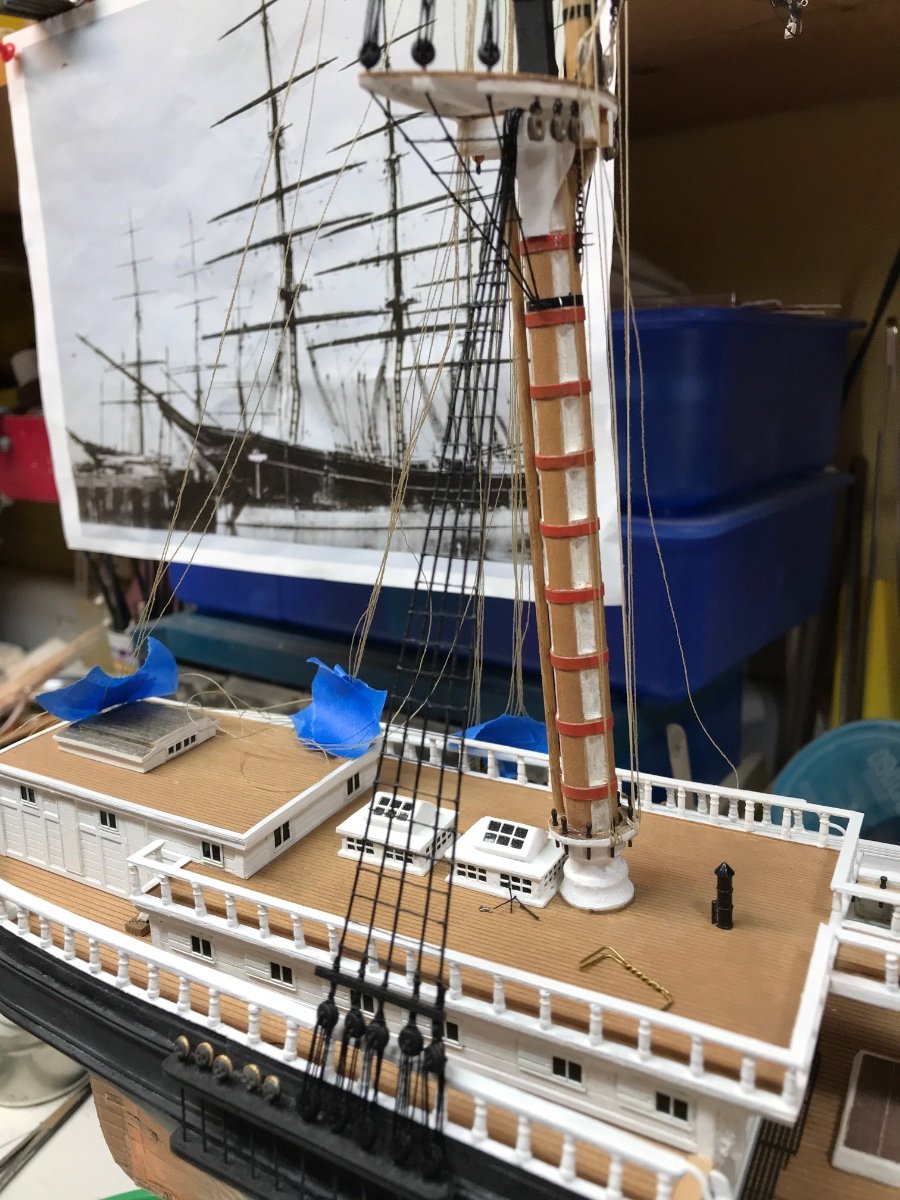
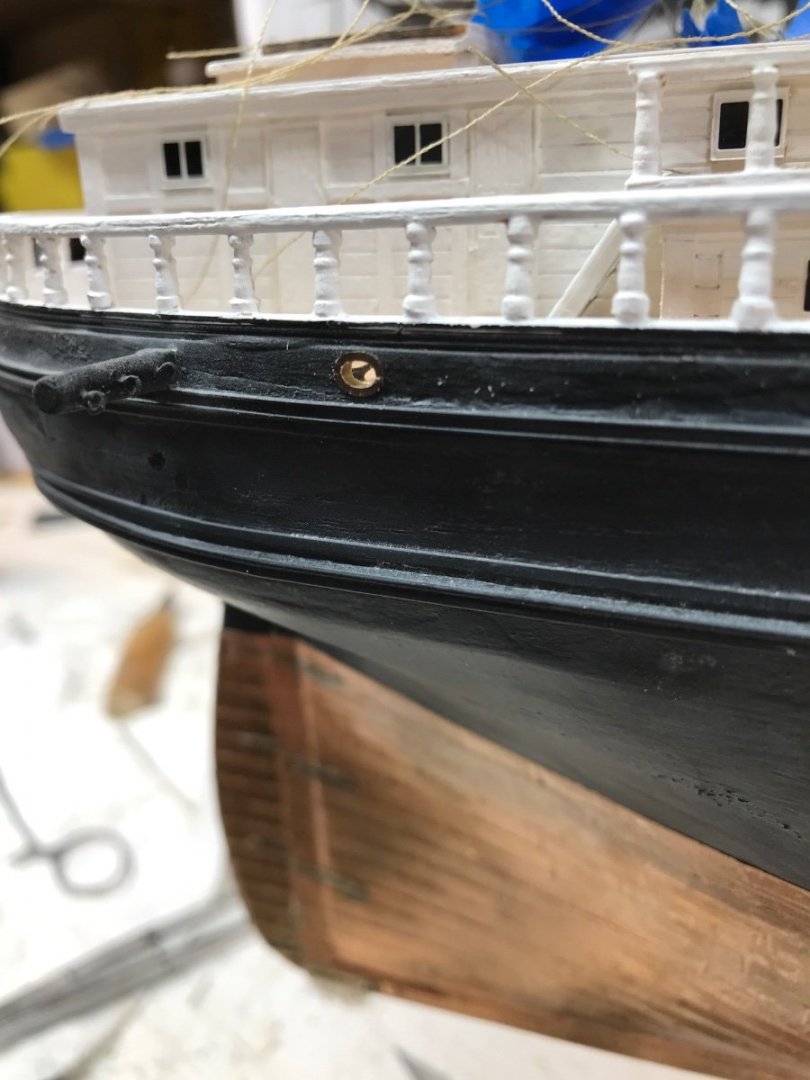
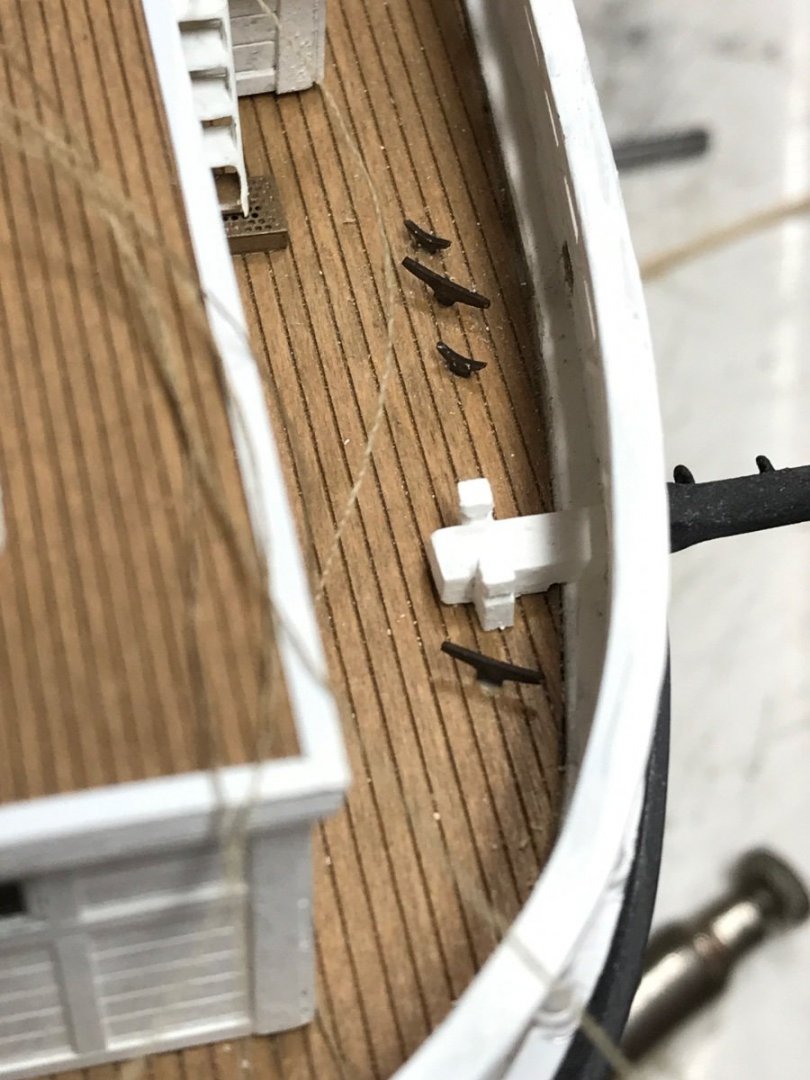
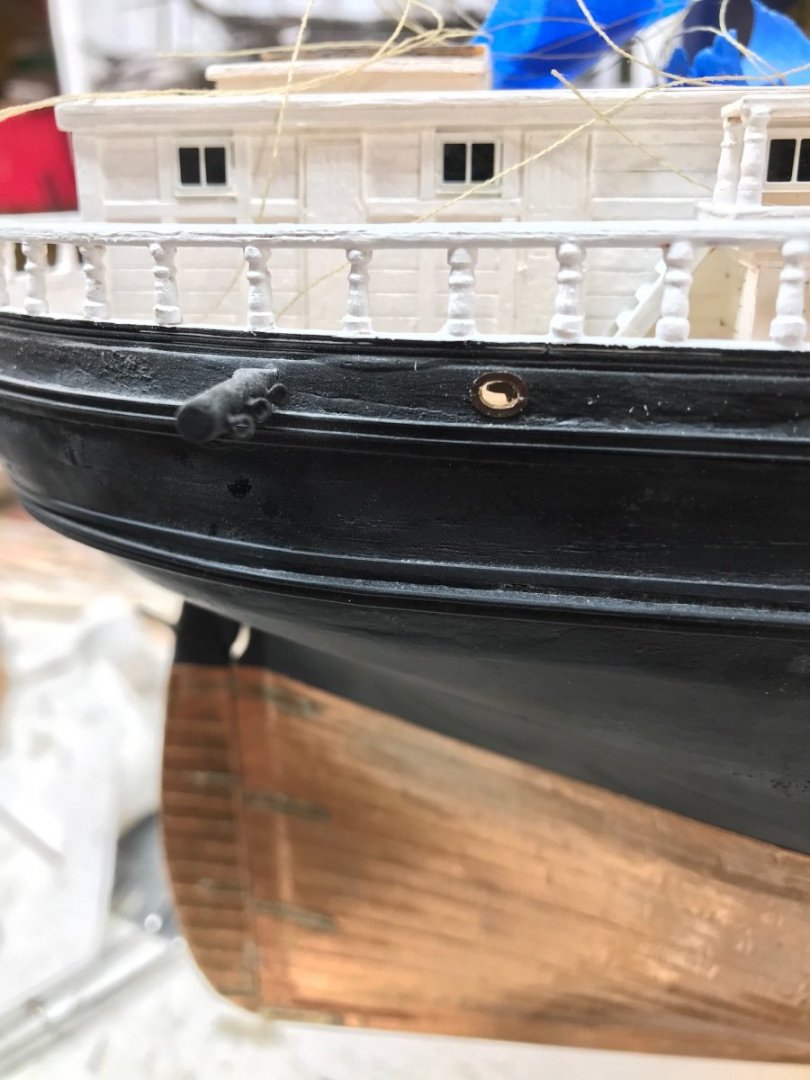
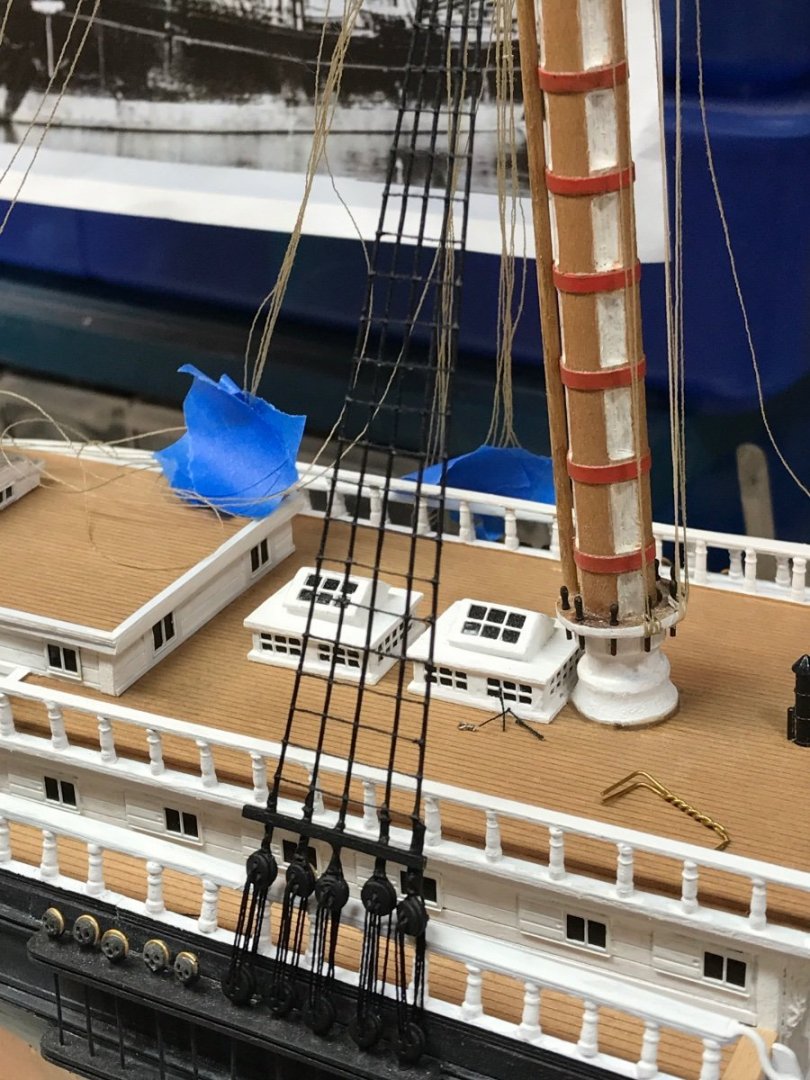
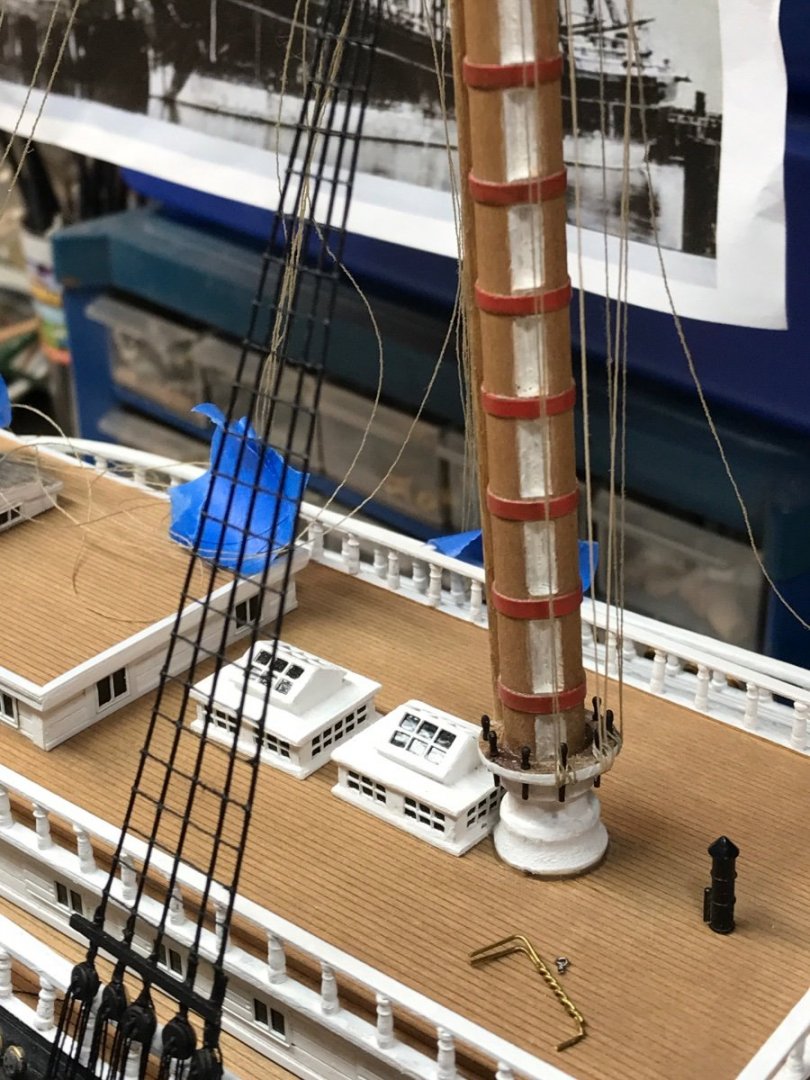
Before I move to port, I decided to add some deck and hull details that would otherwise be tough to work. I added the aft scupper hole to run the main mast yard brace purchases through. I then had to make two sizes of cleats for them and the spanker braces aft of the wheelhouse. Rob

- 3,560 replies
-
- 4
-
-
- clipper
- hull model
- (and 2 more)
-
I spent some time finishing up the starboard rat lines on the shrouds. Now to rotate the ship and begin on the port side. Rob

- 3,560 replies
-
- 6
-
-
- clipper
- hull model
- (and 2 more)
-
I have not forgotten Rich. Rob
-
Thank your wife for me...would you? That is fascinating news about her great great granddad. Its possible she might be able to scrounge up some info or images..... if at all possible. (I'm sure you already looked into that). Rob
-
Good job...but you might want to turn the wheel round about....it's facing the wrong direction. Wheel forward...mechanism house aft. Rob
- 82 replies
-
- 1
-
-
- artesania latina
- cutty sark
- (and 1 more)
-
I haven't forgotten the stove pipe Rich. It's just that it is sucha simple element I want to tackle the shrouds and ratlines first...since I use that deck space to lay tooling on, while I rig. It's been a few slow days in the shipyard. Rob
-
I'll add the ratlines next and then move to the port side and add the shrouds and ratlines there. I'll add the spanker boom and gaff (along with the spanker sail mounted between them). I want to add them before I add the backstays. Trying to be systematic....... Rob
- 3,560 replies
-
- 1
-
-
- clipper
- hull model
- (and 2 more)
-
One thing that goes unnoticed is that the center beam must have a bow in to allow the rain to run off and not puddle on the seam. Rob