HOLIDAY DONATION DRIVE - SUPPORT MSW - DO YOUR PART TO KEEP THIS GREAT FORUM GOING! (Only 24 donations so far out of 49,000 members - C'mon guys!)
×


rwiederrich
-
Posts
5,518 -
Joined
-
Last visited
Content Type
Profiles
Forums
Gallery
Events
Everything posted by rwiederrich
-
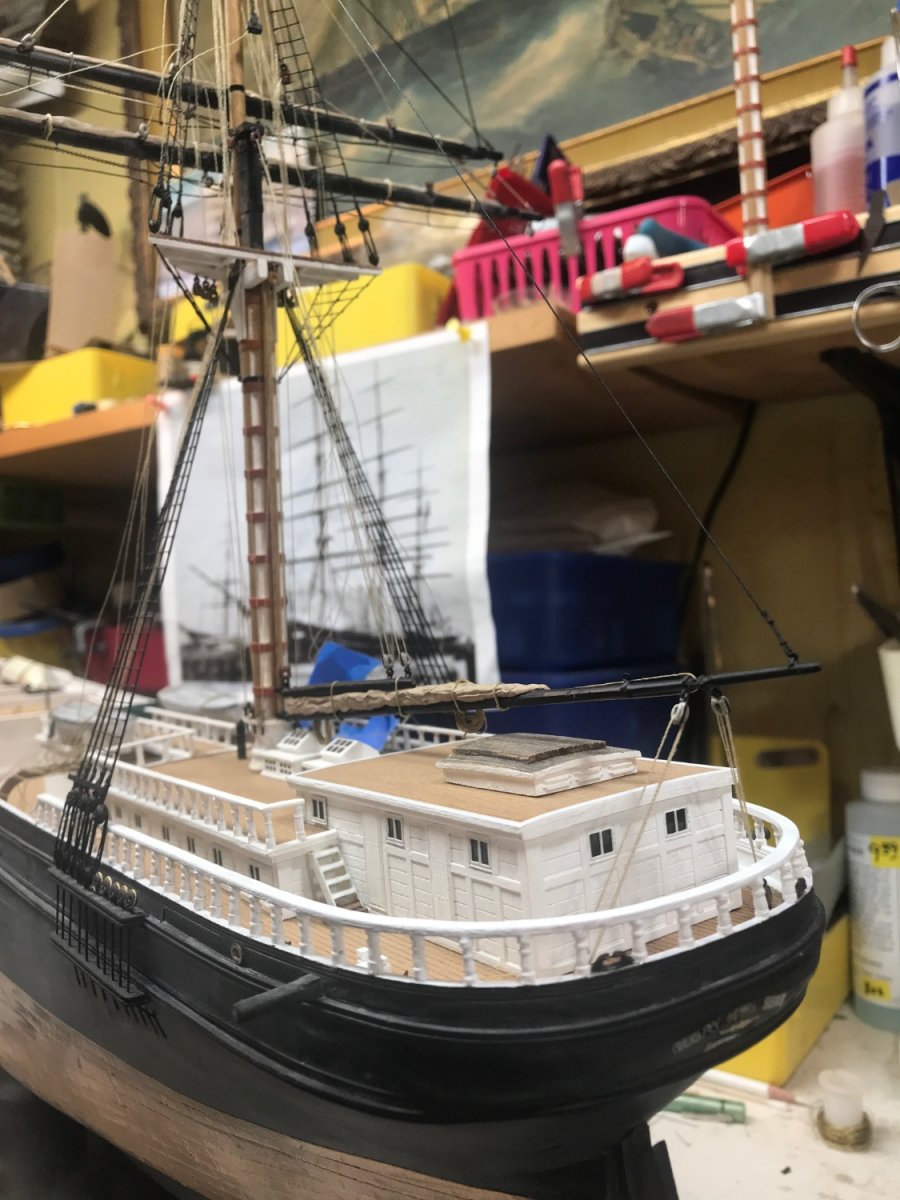
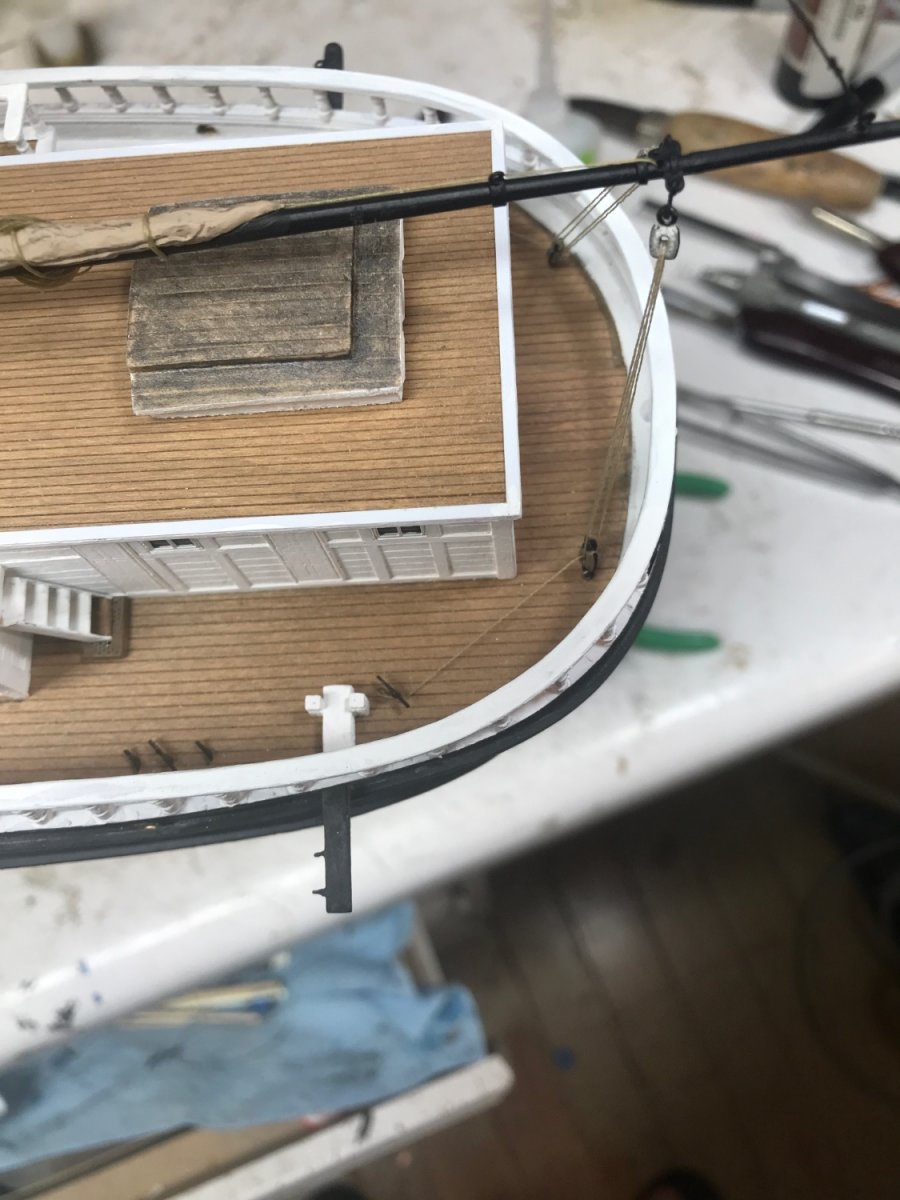
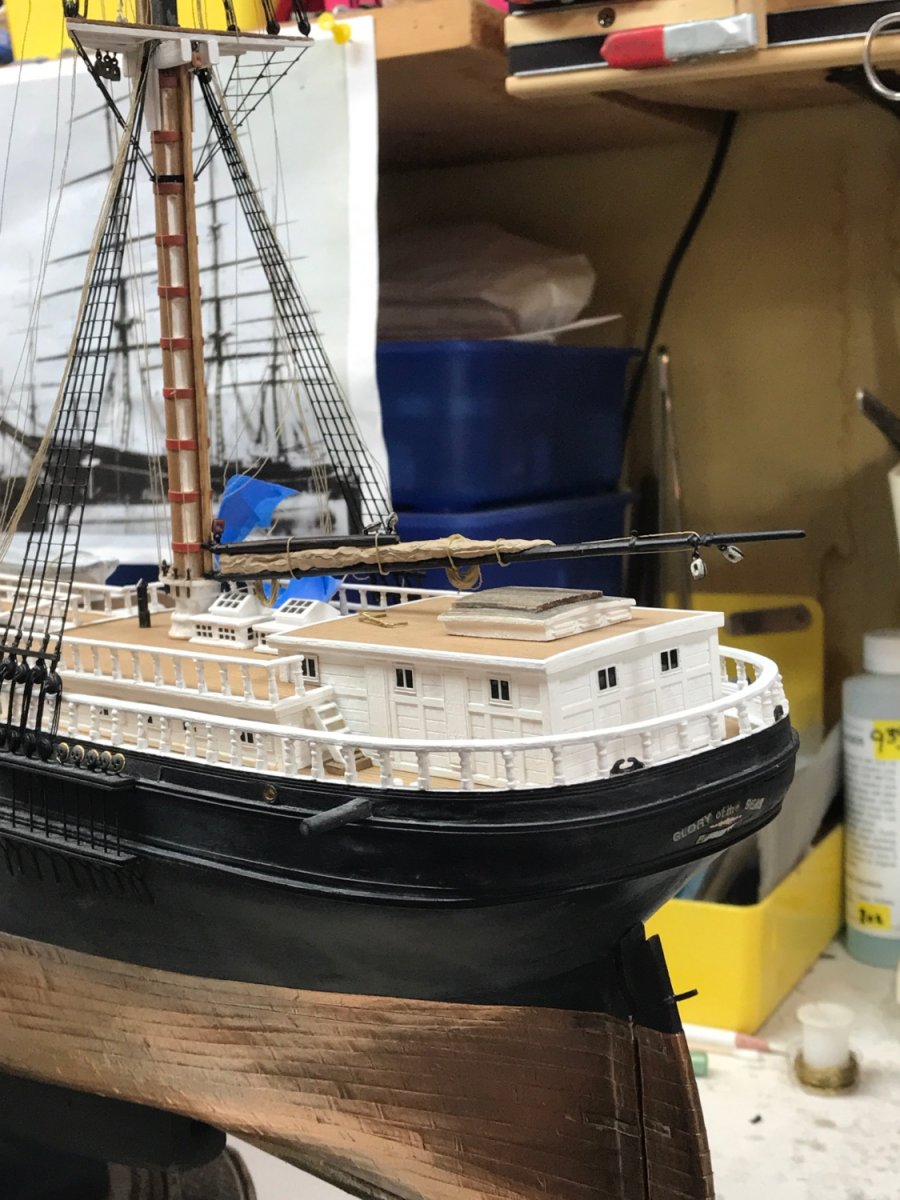
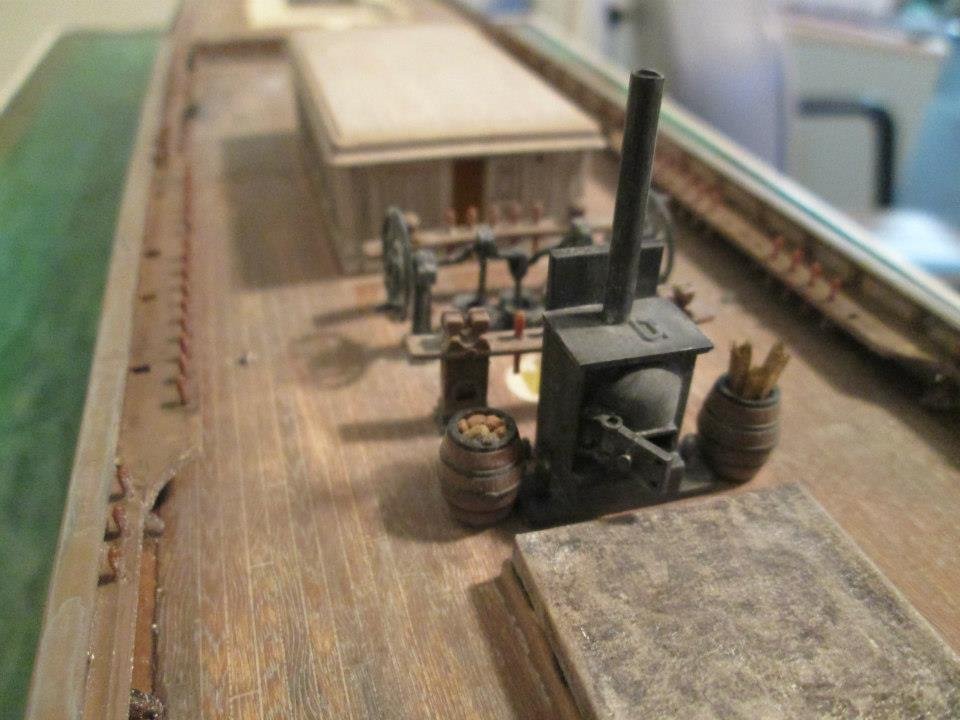
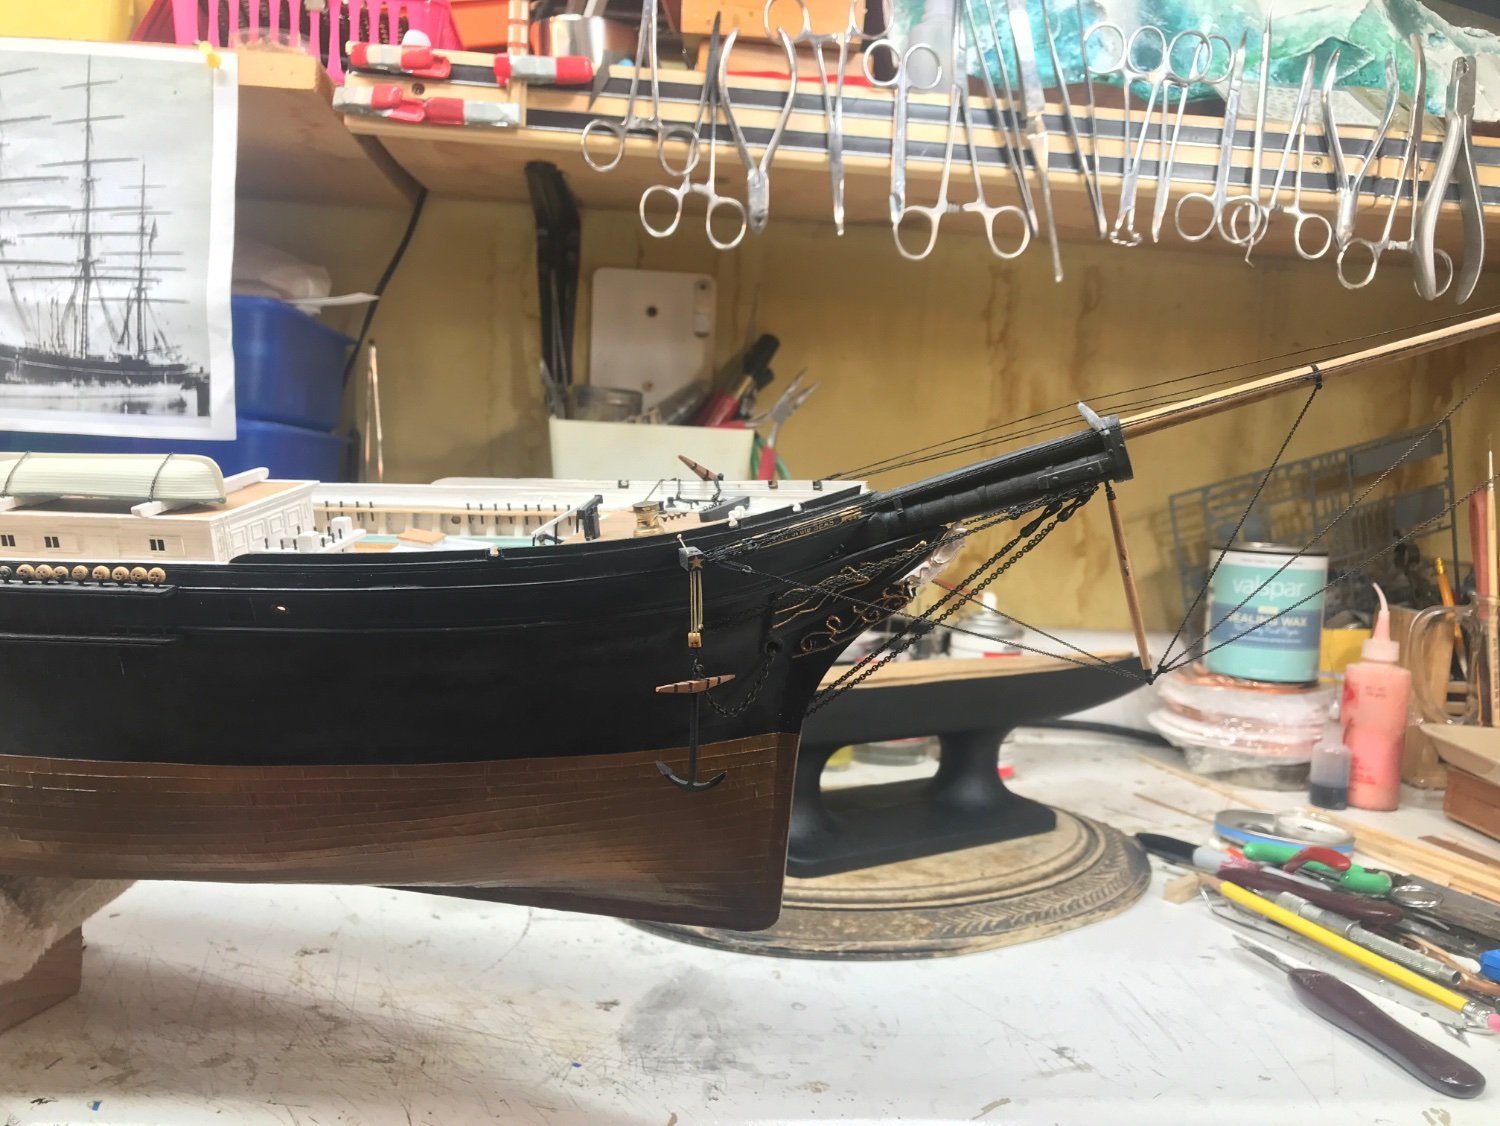
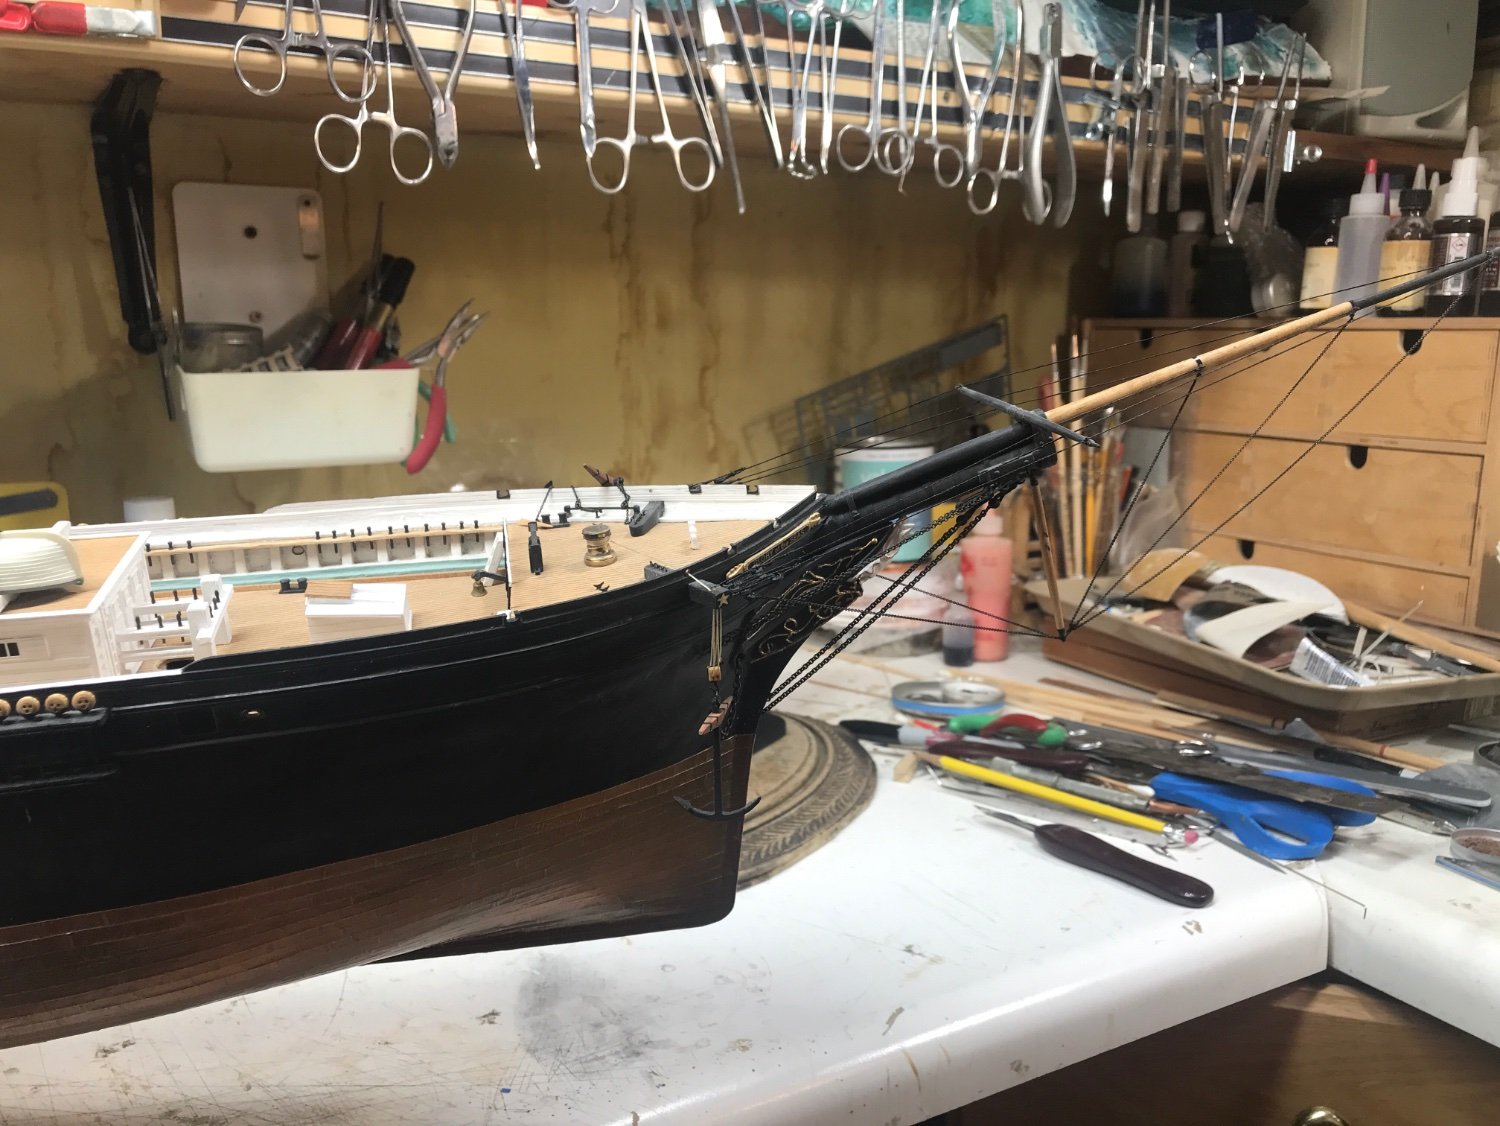
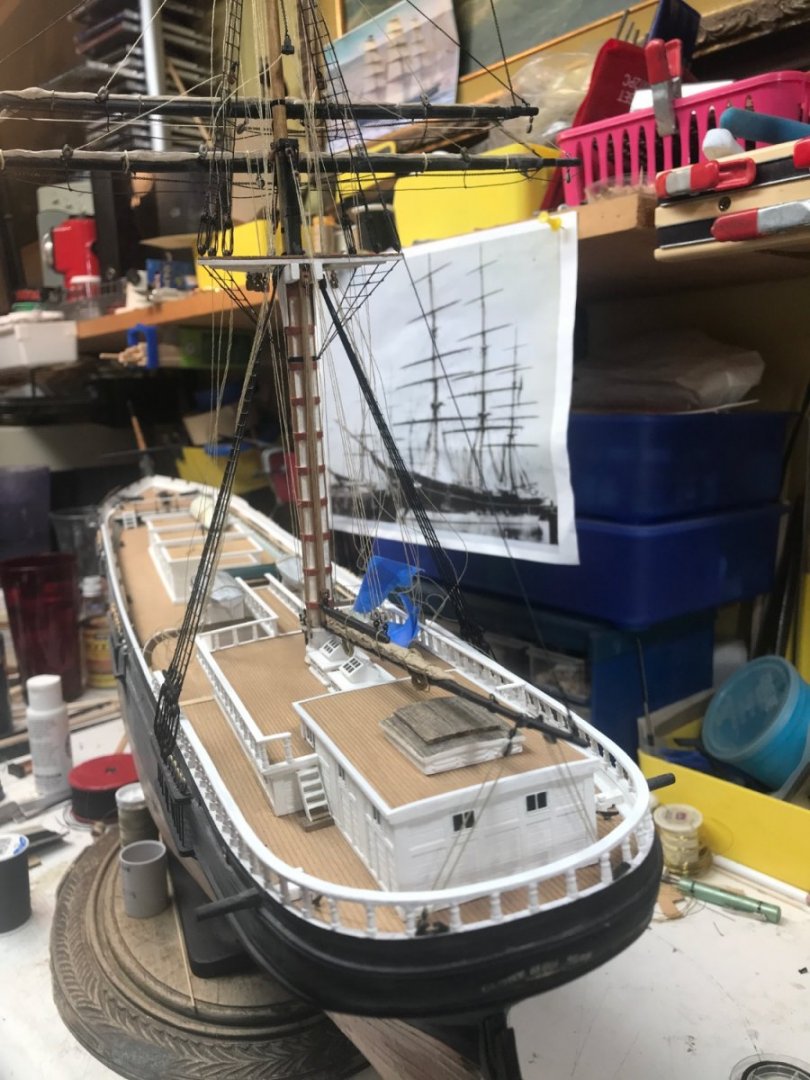
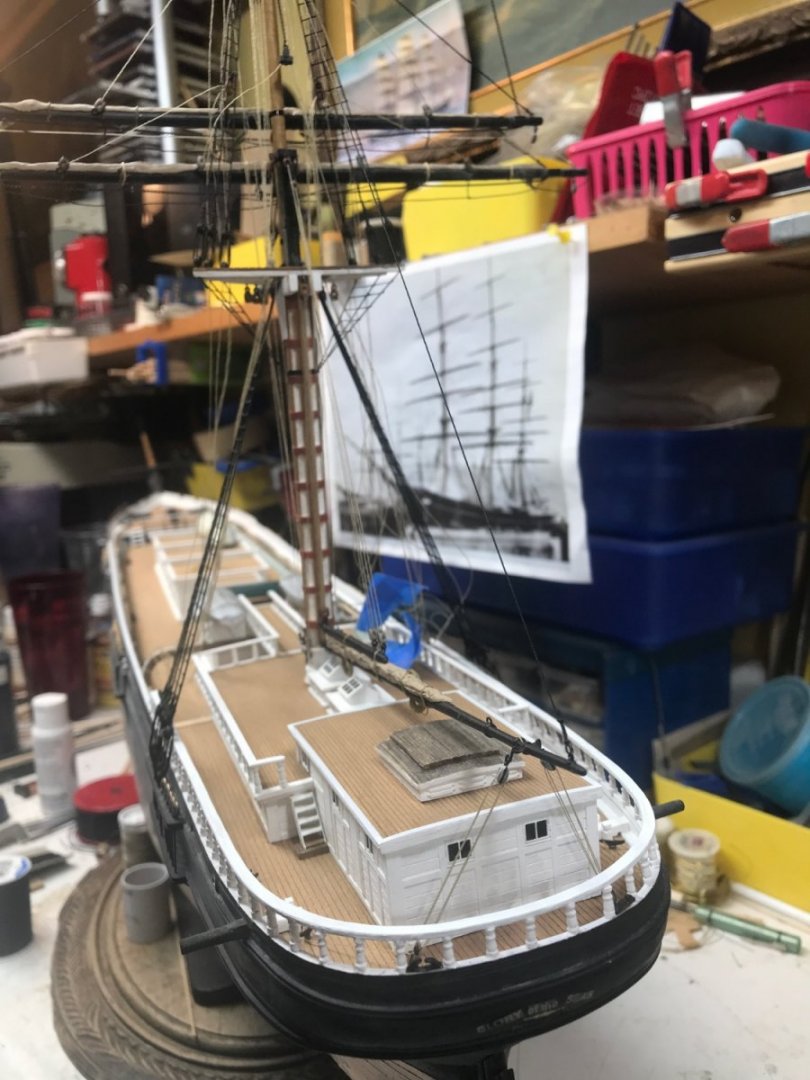
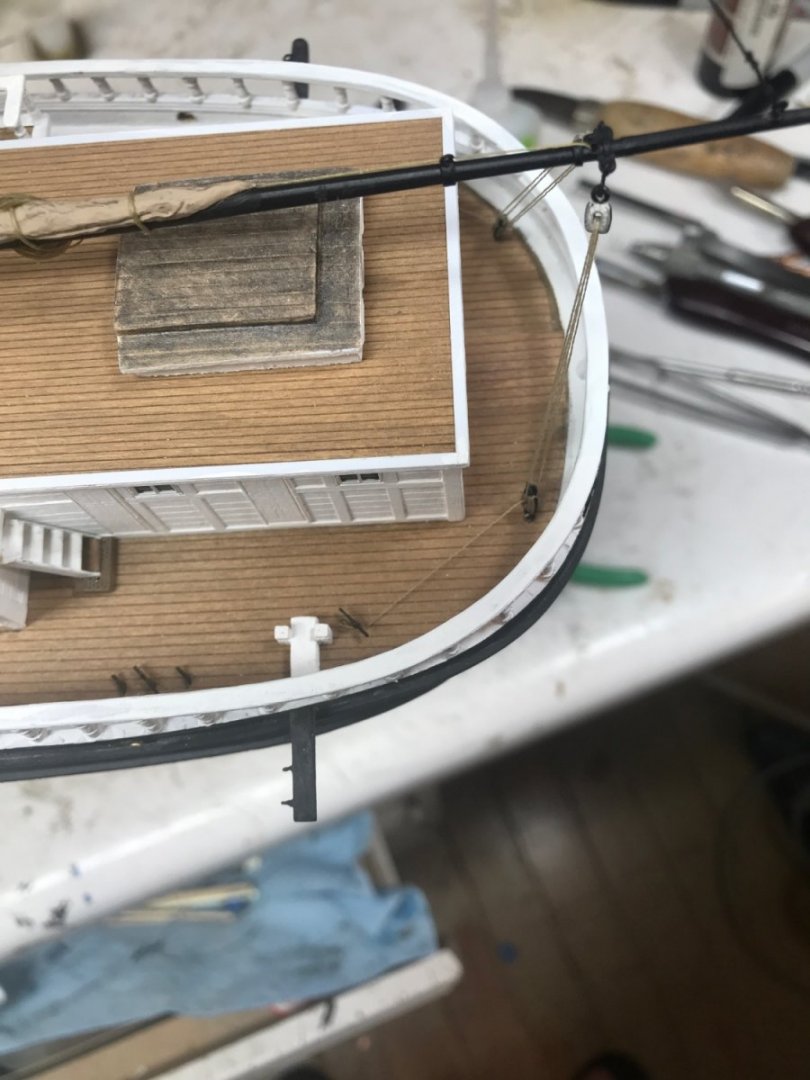
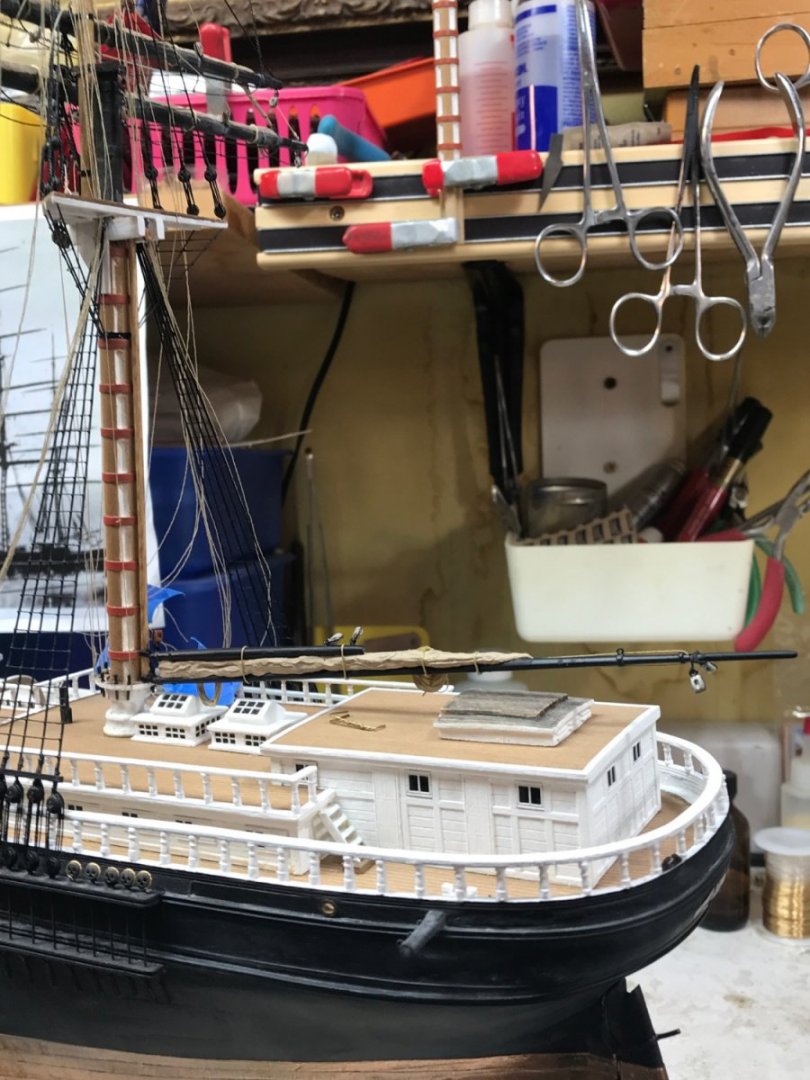
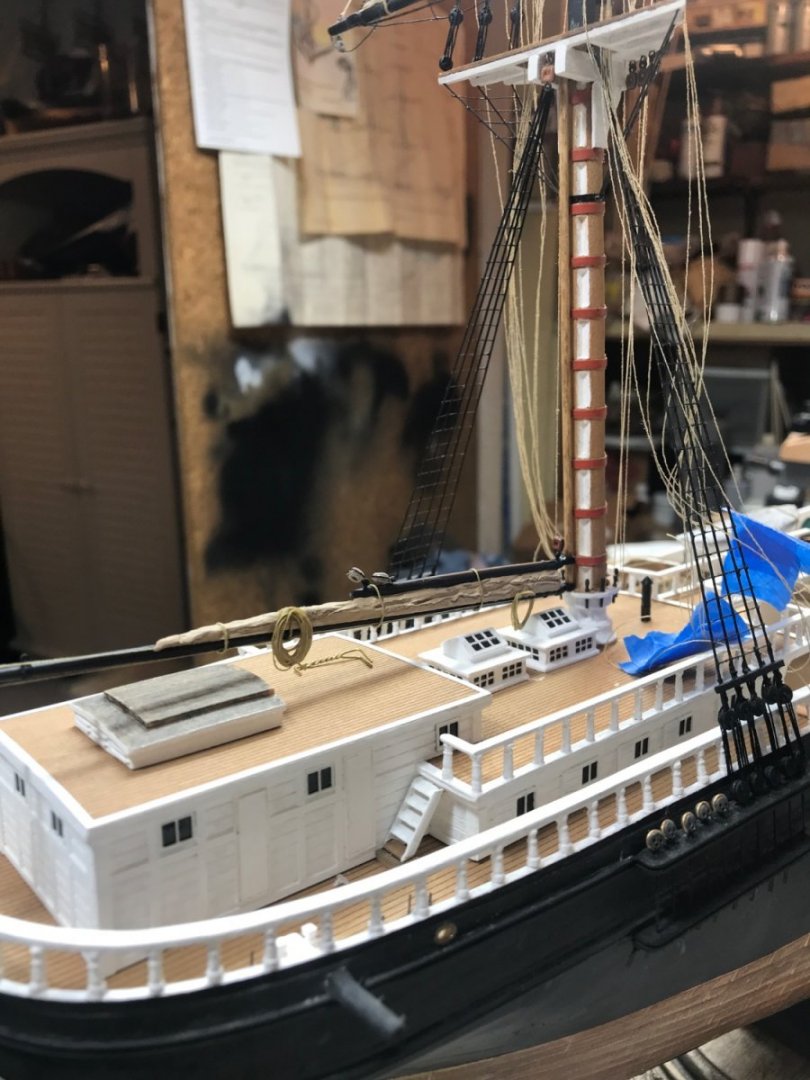
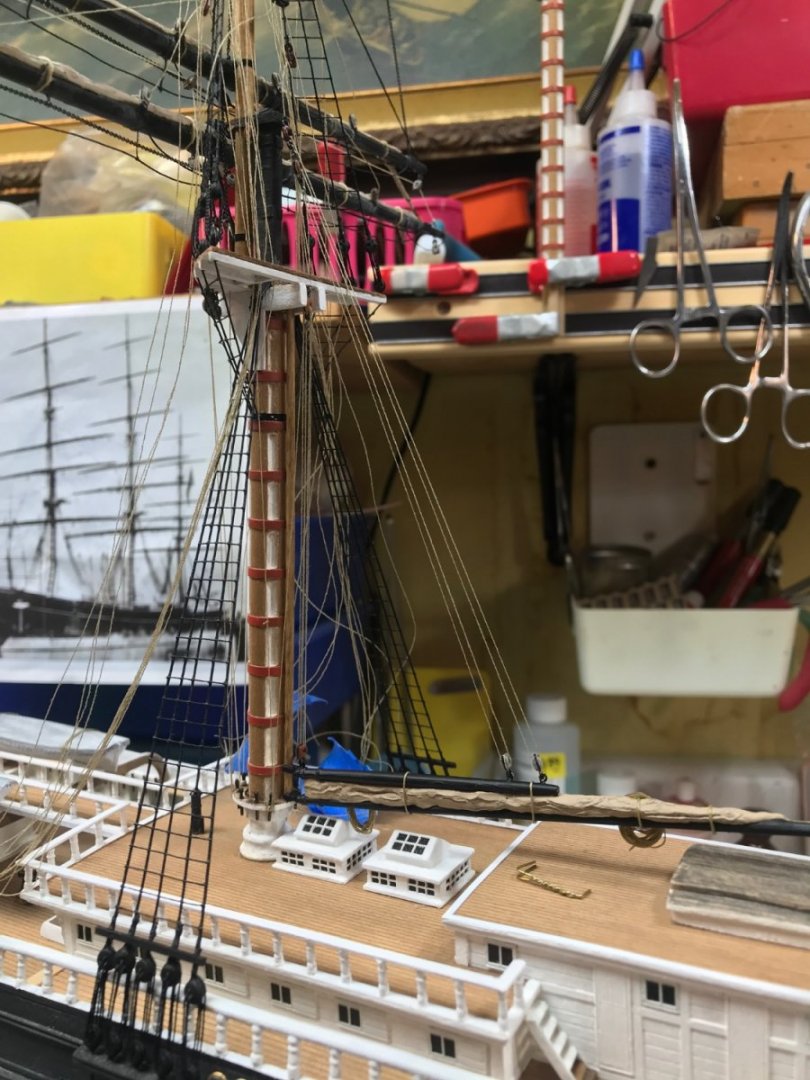
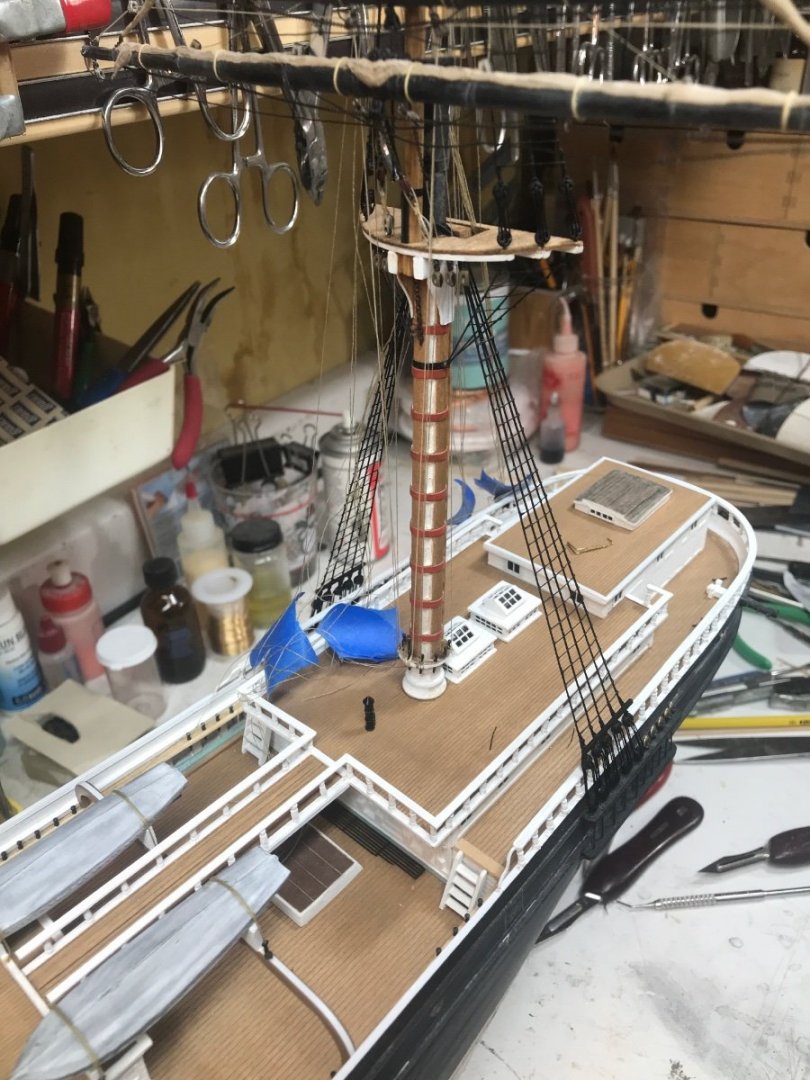
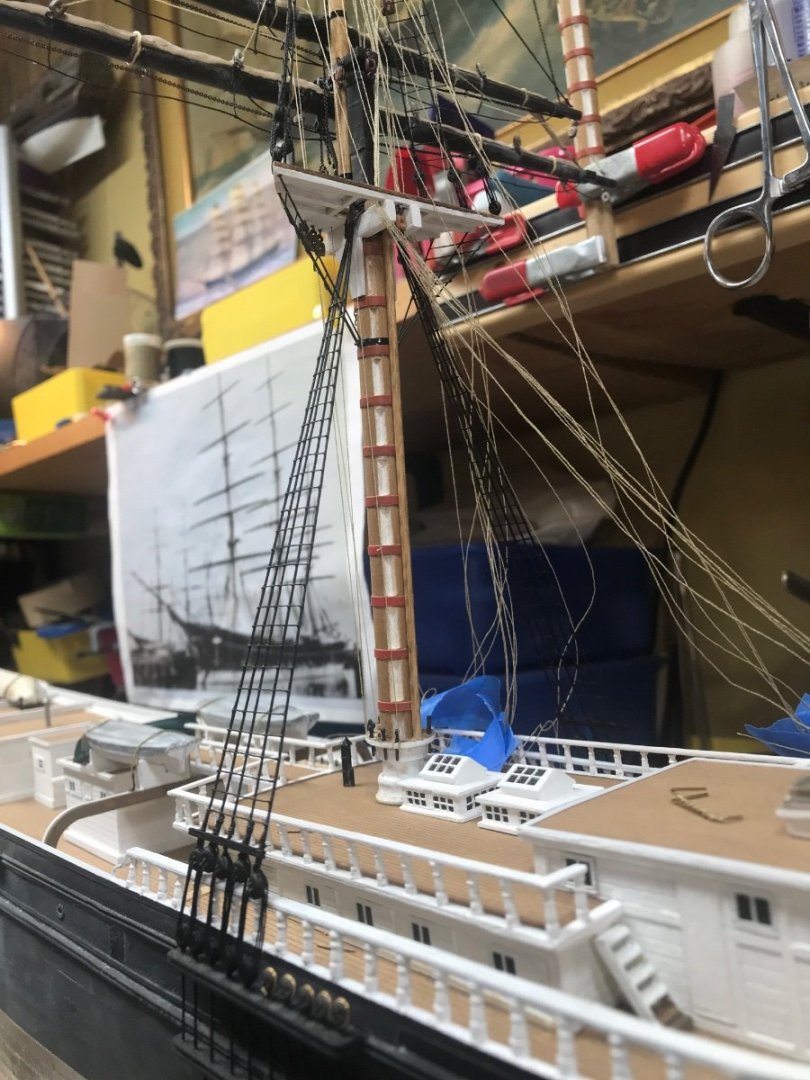
Finished up the topping lift and boom guys. Now I’m going to untangle all the bunt and halliard’s lines and belay them to their control points. Rob

- 3,560 replies
-
- 7
-

-
- clipper
- hull model
- (and 2 more)
-
Spent a little time working the Spangler boom and sail. Now I’ll running the gear and rigging. Rob


- 3,560 replies
-
- 7
-
-
- clipper
- hull model
- (and 2 more)
-
Decks can be tricky for sure. Especially since they *grey* with age. Dependent on the vessel, you were dealing with yellow fir, pine, and even teak on some vessels. My own Cutty's I greyed the deck on my award winning 1/96 Cutty....and on my award winning Ferreira...aka Cutty Sark. Rob


- 481 replies
-
- 3
-
-
- Cutty Sark
- Revell
- (and 2 more)
-
That is why the detail is so good Rob
-
Beautiful model...what scale was it in? Also he chose a unique method to display the fairleads as one large fairlead, instead of individual fairleads mounted on each shroud. From this example is is clear the rail could have been the belay point for the pins. I'm probably sticking to the shroud rails myself. Rob
-
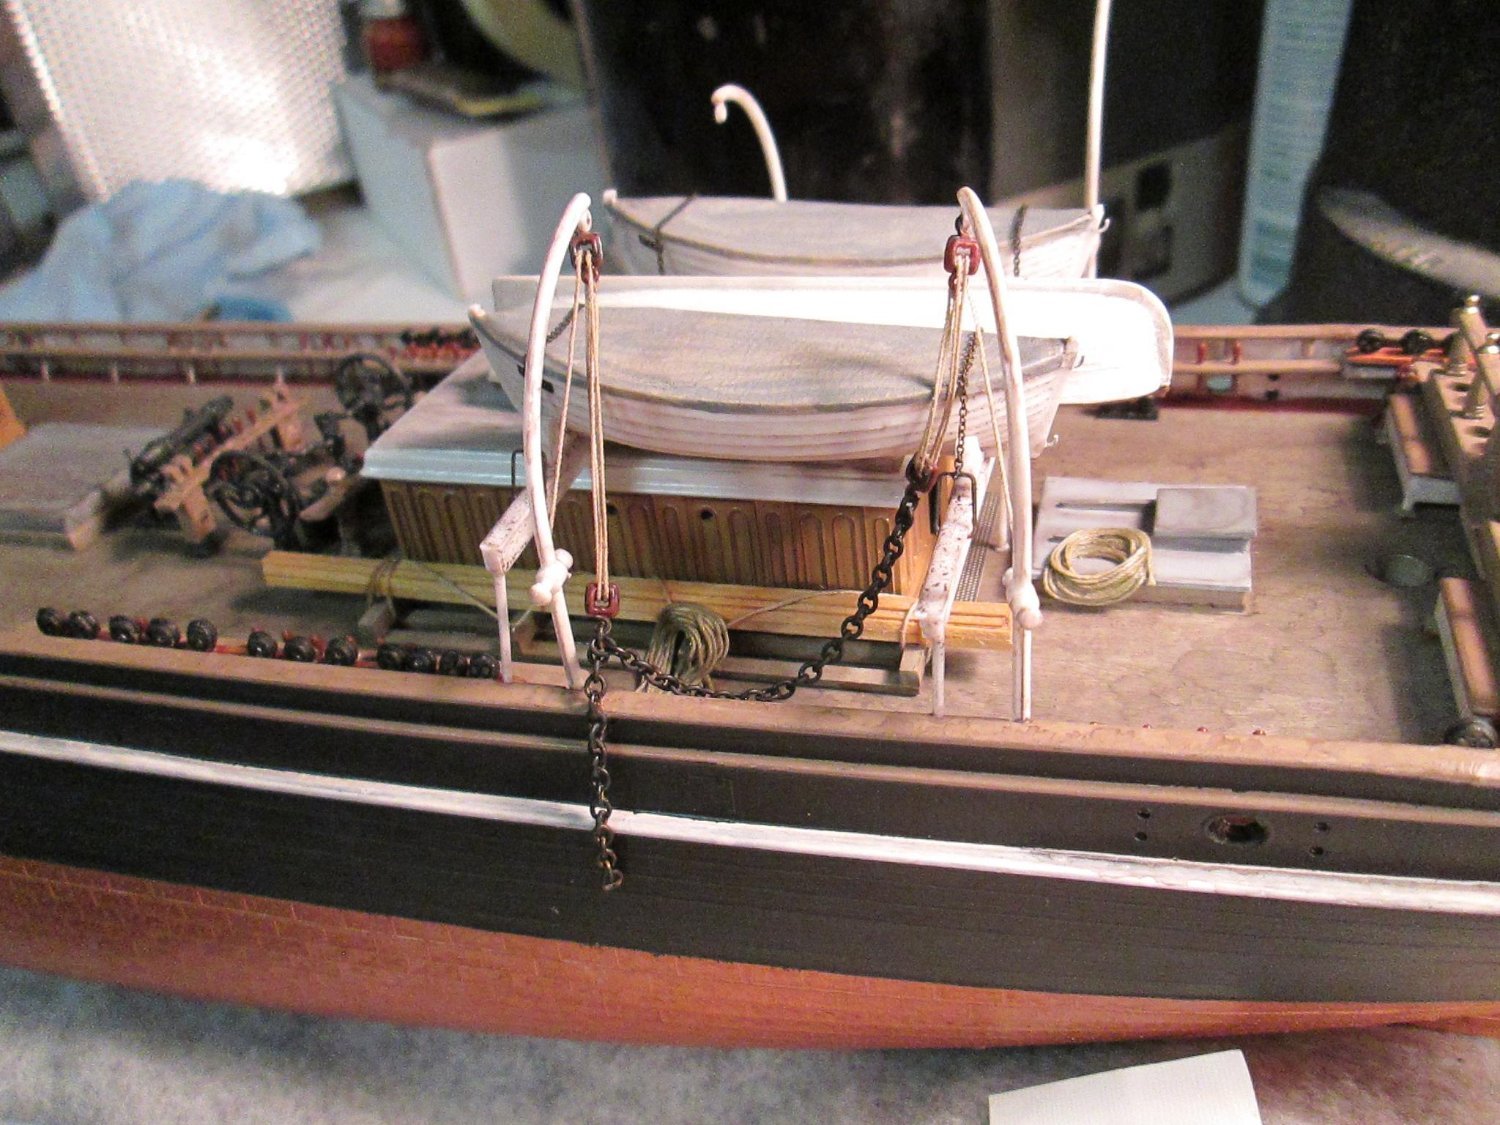
Sorry folks....not much happened over the weekend...I had bad pipes to tend too. I hope to work on the monkey gaff(Pennant gaff) and the spanker gaff and boom next. Rob
-
Yep...you just respond and add more content....ie...pics, graphs....comments.....etc. Rob
- 481 replies
-
- 2
-
-
- Cutty Sark
- Revell
- (and 2 more)
-
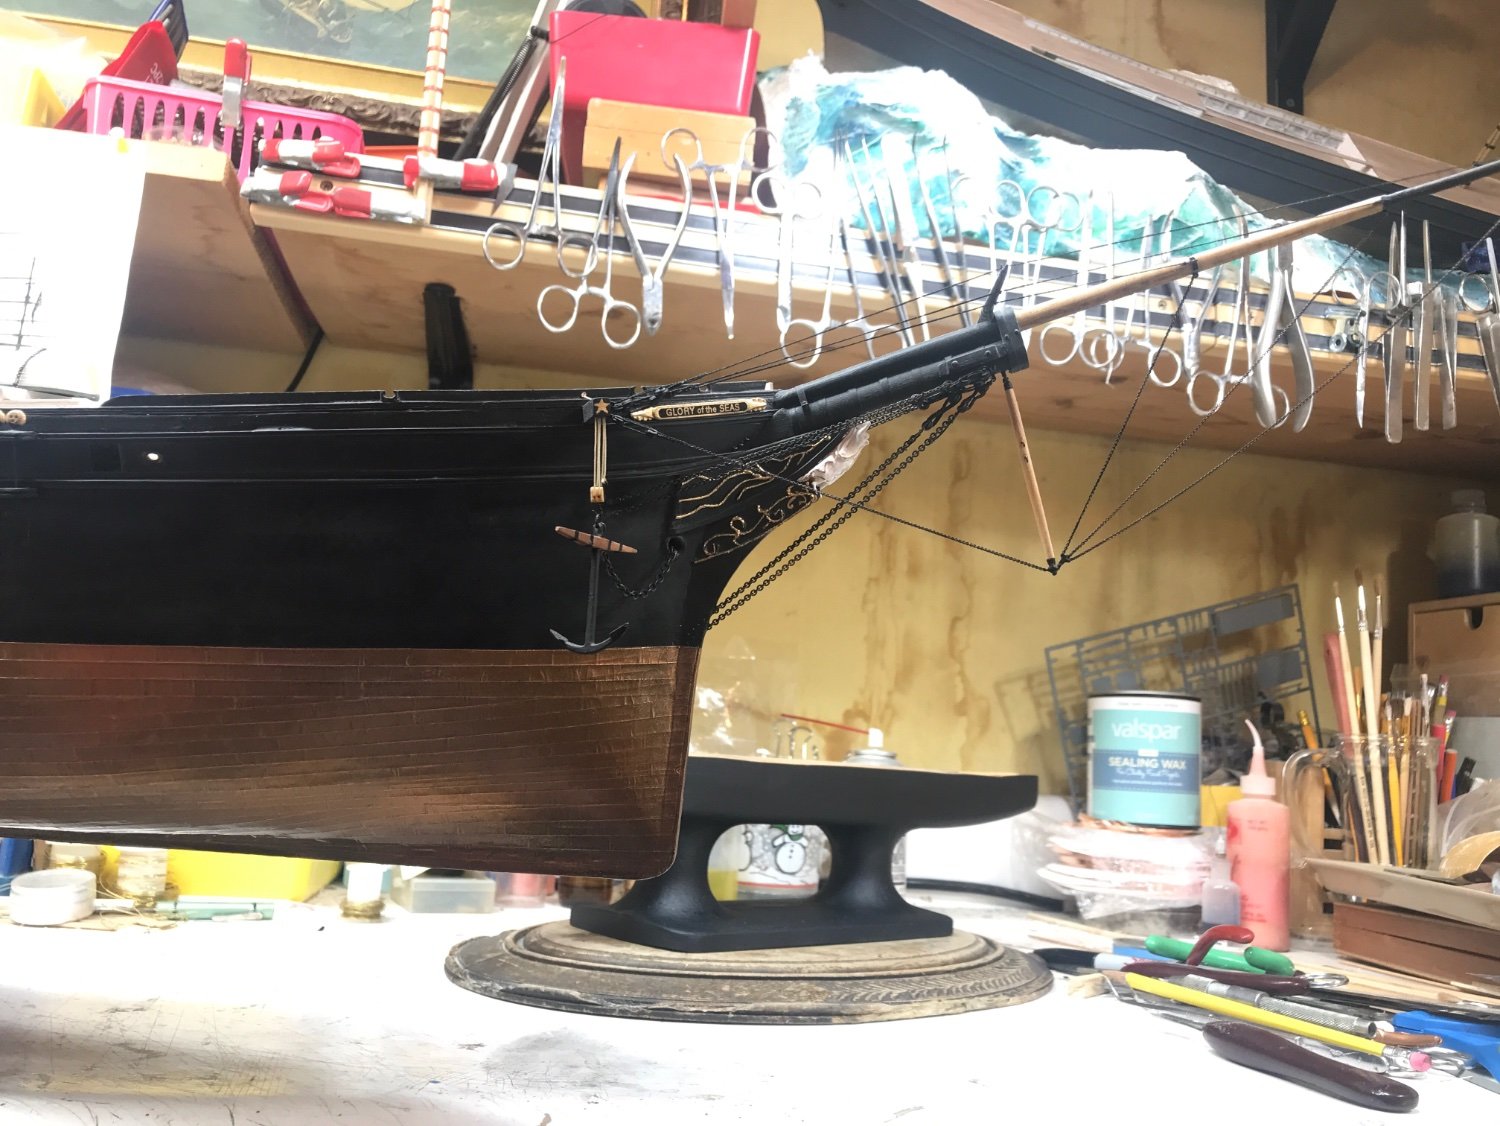
You are correct Rich....not in one image do I see evidence of rail pins. Is it possible and most likely probable.....possibly. but since Glory's running rigging in all her contemporary images is devoid and only the remnant of her buntline fairleads are left.....I'm going with the shroud pinrails myself. The painting you provided only shows the bunt lines coming down to the fairleads....but not to where they belay. Personally I'm not sure putting that much stress on a stanchioned rail makes good sense. On smaller coastal rigs that might have been the case, where the rail was closed....much like a bulkhead. Those blocks you mention could be for stay sails...because the main, topsail and topgallant yards all find their braces and their purchases rigged back at the bumpkin A similar triad of large blocks can be seen in this image of Glory...and these most likely were her foremast main, topsail, topgallant yard brace points. Rob

- 345 replies
-
- 1
-
-
- Flying Fish
- Model Shipways
- (and 1 more)
-
Welcome and great clean job thus far.....she's starting out fantastic. Rob
- 481 replies
-
- 3
-
-
- Cutty Sark
- Revell
- (and 2 more)
-
The rail extension that you pictured is of a closed rail....and you and I are tackling an open rail. The open rail only permits belay pins to be within the space between stanchions...causing a particularly odd pattern. In my unique situation...I have no data that Glory actually used the rail as the pin rail...though I have seen this practice on other ship models.....(The Lightning comes to mind), and particularly on my last build...Great Republic...where all I had was a complete weather deck rail to affix all belaying pins too. There was no other option there, and I'm sure that had to have been the practice on the GR. Here I see no clear depiction.....and the rail is quite short as well....hitting the average man at the mid thigh. By placing the auxiliary belaying pin rails to the shrouds...the pins are just about at mid chest level......mimicing the height of the main bulwark pin rail down on the main deck. One thing is clear, from images, especially Glory's fitting out image. Just below each shroud fairlead the bunt control line is belayed and neatly coiled at the shroud.....probably awaiting direction for the final belay point...or final touch up finishes to the main rail. Its only speculation. The fairleads are relatively high within the shrouds...so the bunt line belay points could have even terminated on the house rail. Decisions, decisions...... Best part is...there is no true expert who can lend any true criticism of any decision I make. I have the same data they have....and the most notable expert on Glory of the Seas is Michael Mjelde and I'm fully confident he would concur with my decision. Again...thank you for your fine compliments...there are many fine examples of exquisite clipper models, I would never include myself on the list of standards to attain. I'm generally a hack builder too apt to compromise on fit-n-finish. Again...thank you. Your own build of FF is noteworthy of much acclaim itself. Rob
-
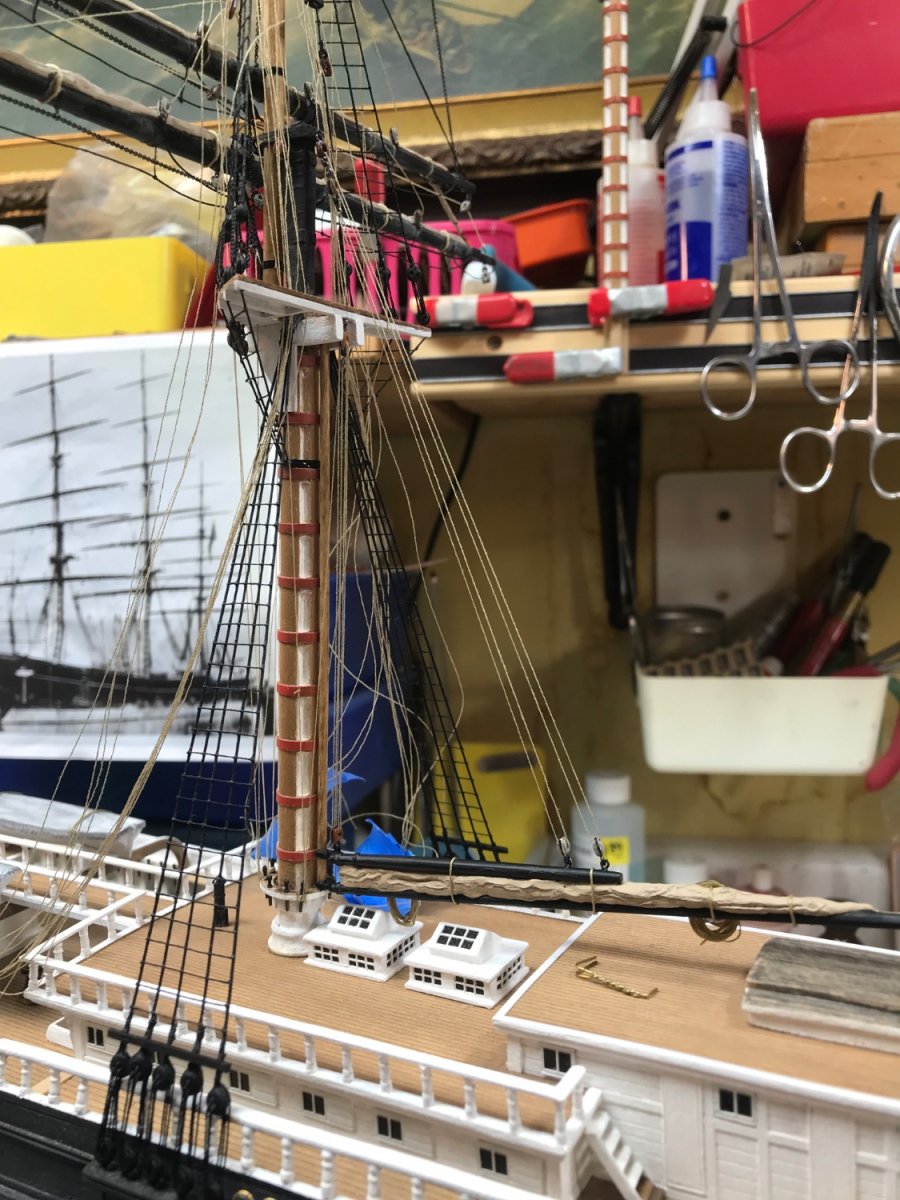
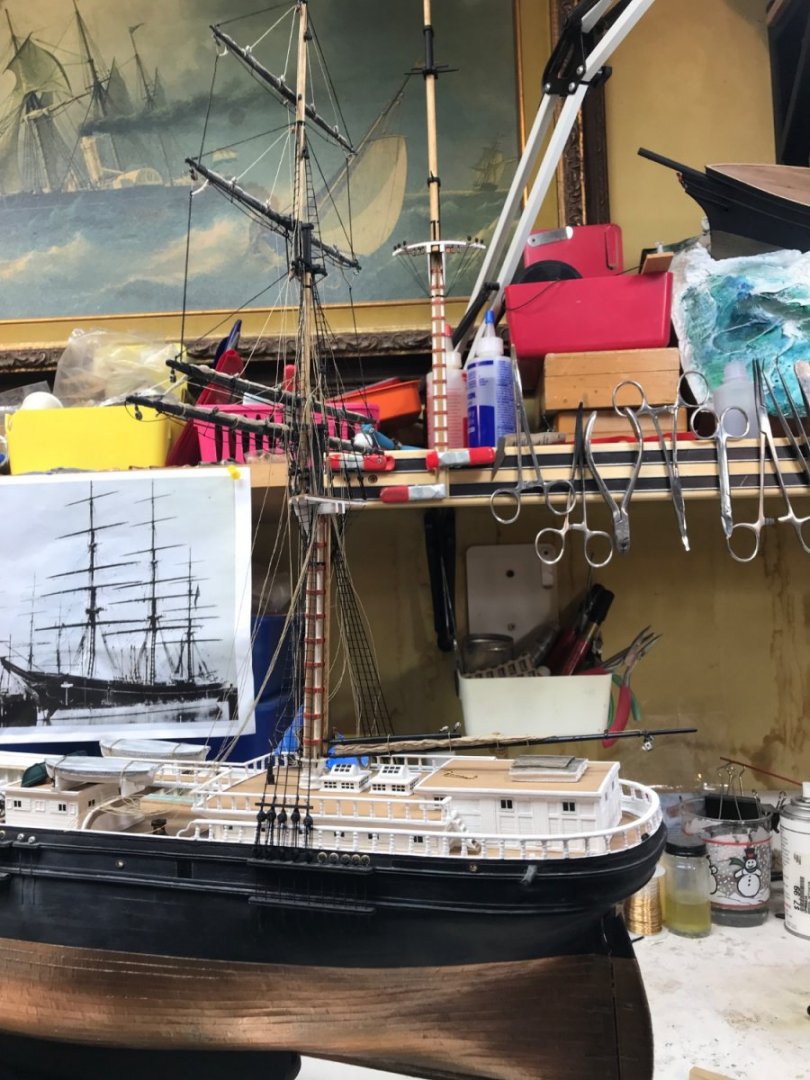
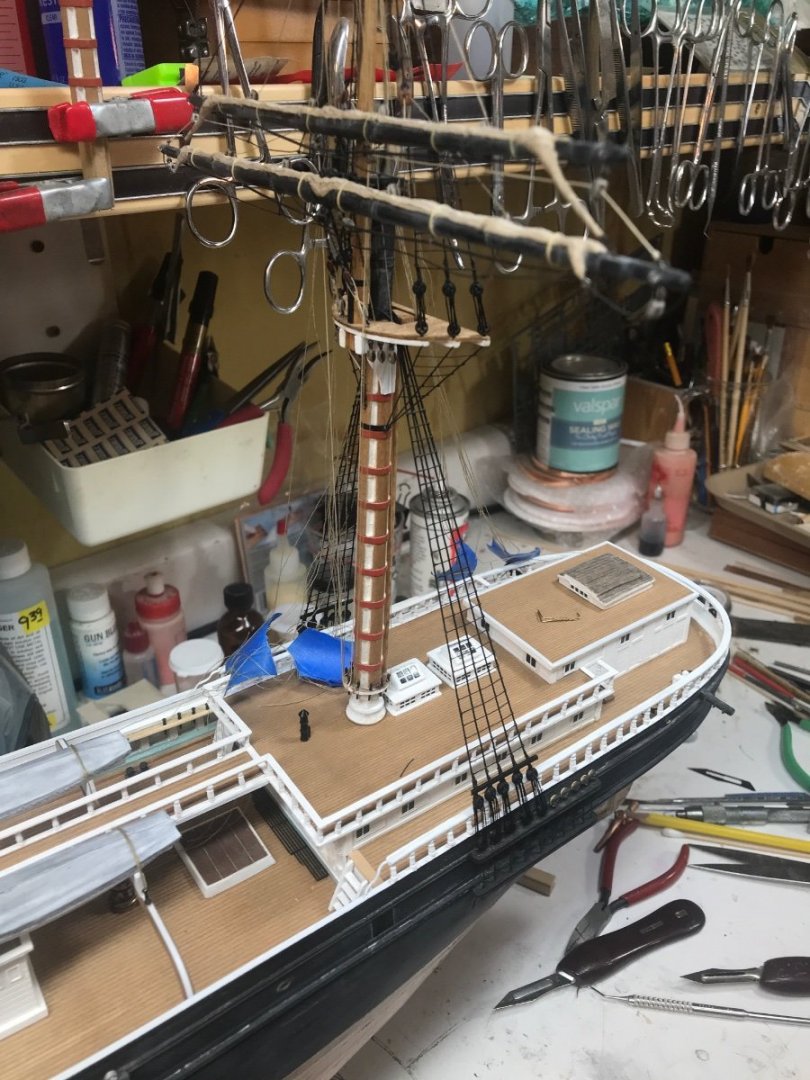
Spent some time finishing up the mizzenmast futtock and main shrouds and rat lines. Rob

- 3,560 replies
-
- 7
-
-
- clipper
- hull model
- (and 2 more)
-
Cutty Sark by NenadM
rwiederrich replied to NenadM's topic in - Build logs for subjects built 1851 - 1900
Looks like he is just test fitting it and evaluating its symmetry. Great job Nenad. Rob- 4,152 replies
-
- 4
-
-
- cutty sark
- tehnodidakta
- (and 1 more)
-
Yeah...I had to be able to remove the ship from the stand....just in case....... Rob
- 3,560 replies
-
- 1
-
-
- clipper
- hull model
- (and 2 more)
-
There are plenty of similarities between the Fish and Glory. The only true issue I will be struggling with is the availability of belaying points for all the sail control lines on the mizzen. Lifts and their purchases are not the issue...the bunt and sheets for five yards will be the issue. Rick has taken a clean approach by adding extended rail portions to the quarter rail to accommodate this similar issue. I just wish I had a close up image of the actual means by which Glory belayed her sail control lines for the mizzen. To keep the rail clear.....I am opting to fashion floating pin rails that will attach to the inboard portion of the shrouds. This practice was prolific at this time and times... before Glory. So it is not unheard of and has as much validity as Rick310's approach. Close up views of Glory's aft, straight on image, of her in Alaska....just isn't clear enough and can be imagined that some lines are draped over the rail....but nothing definitively congruent. Time to rely on my license. I still have time to make any lasting decisions. Rob
-
Thanks Pat…….so true. I think I achieved my goal. Rob
- 3,560 replies
-
- 1
-
-
- clipper
- hull model
- (and 2 more)
-
I see what you’re saying. The taper removes the chapeling . Rob
-
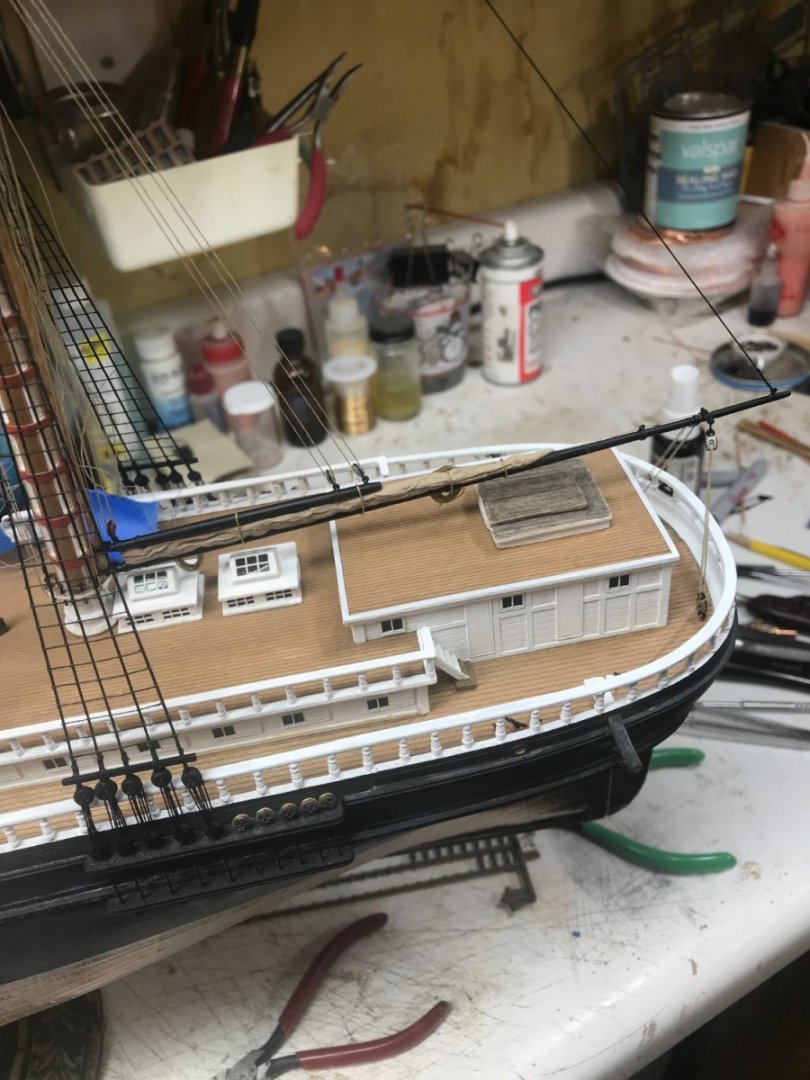
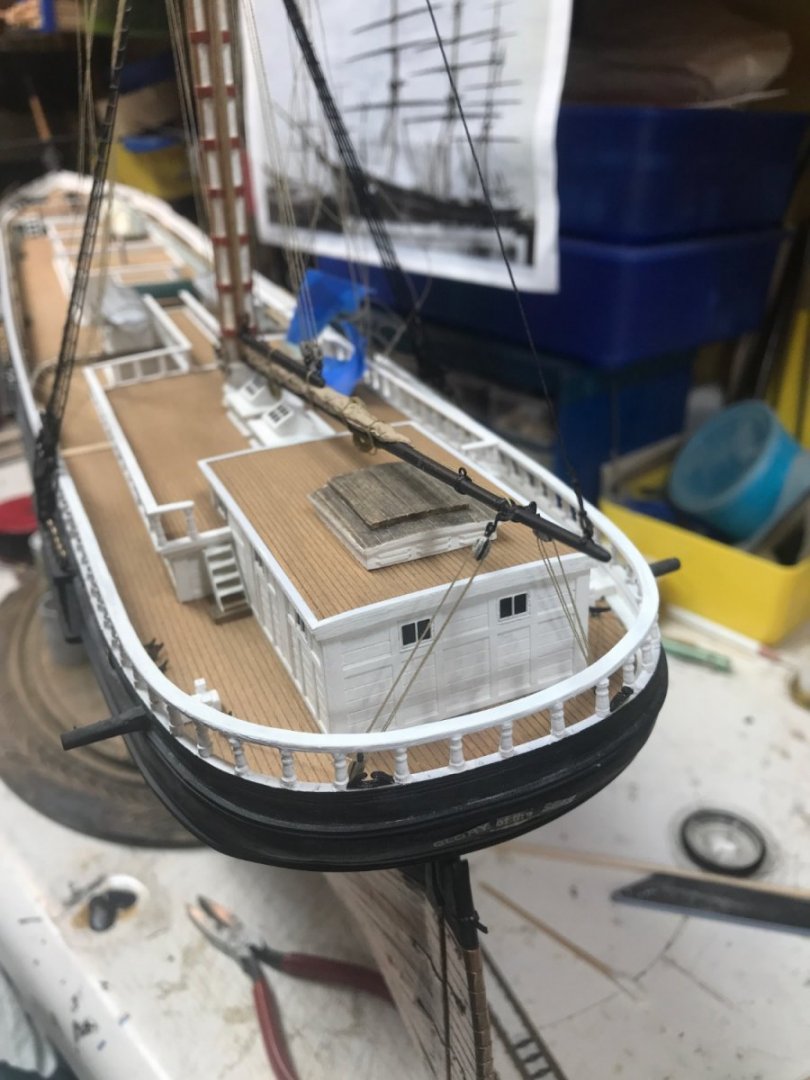
Rob...she's looking sweet. Nice job on the ladders. I purposely left the chicken coop free on my Glory build because I needed the room to belay lines to the pin rail at the foot of the mast.....If I had glued the coop down....rigging any lines there would have been a real booger. I'm also fixing mobile pin rails to the mizzen shrouds for all the bunt and sheet lines. Probably not atypical...but more practical. Did I mention that I have a license......too? Rob
-
Thanks Druxey.....I appreciate that very much. A mix of antique nautical with practical...... incorporating authentic realism. A unique attempt to extend honor to a vessel dearly beloved and respected. Rob
- 3,560 replies
-
- 1
-
-
- clipper
- hull model
- (and 2 more)
-
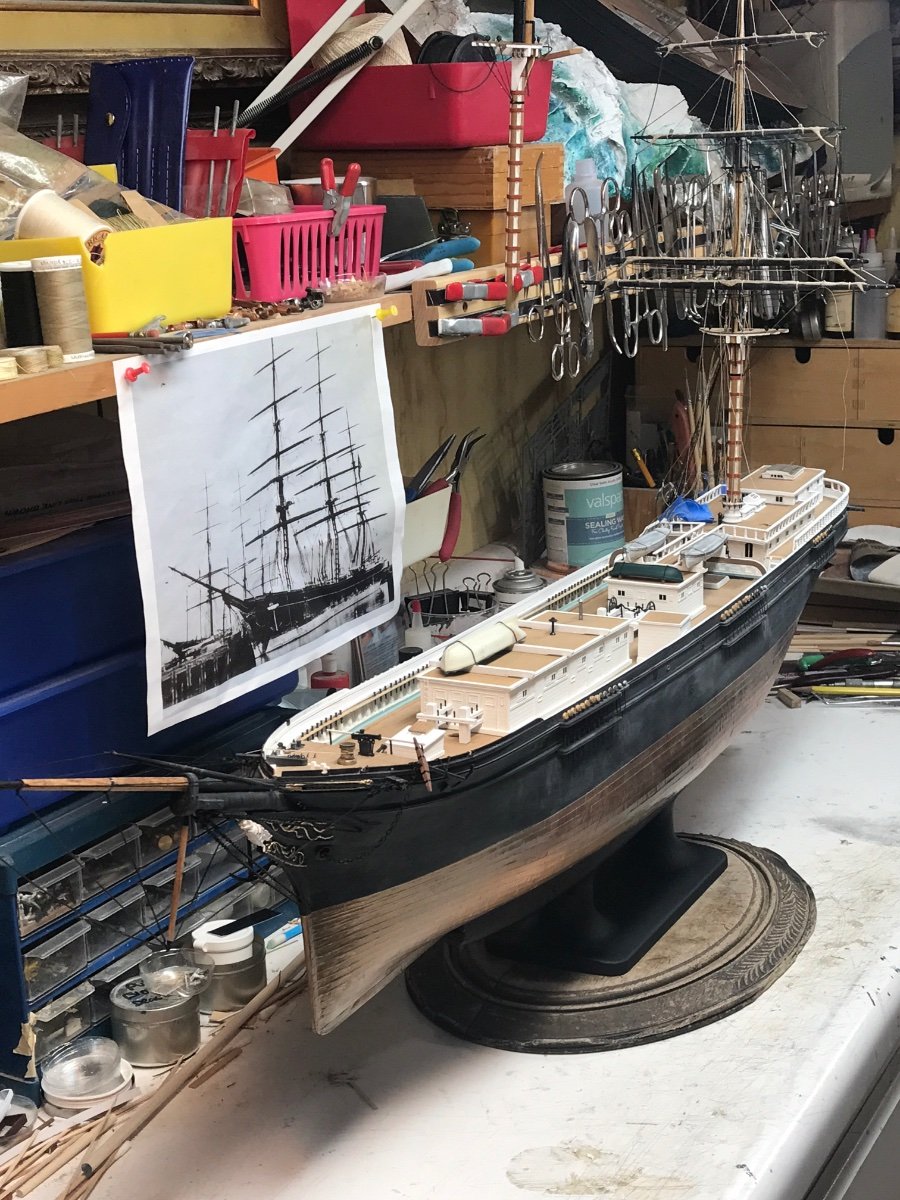
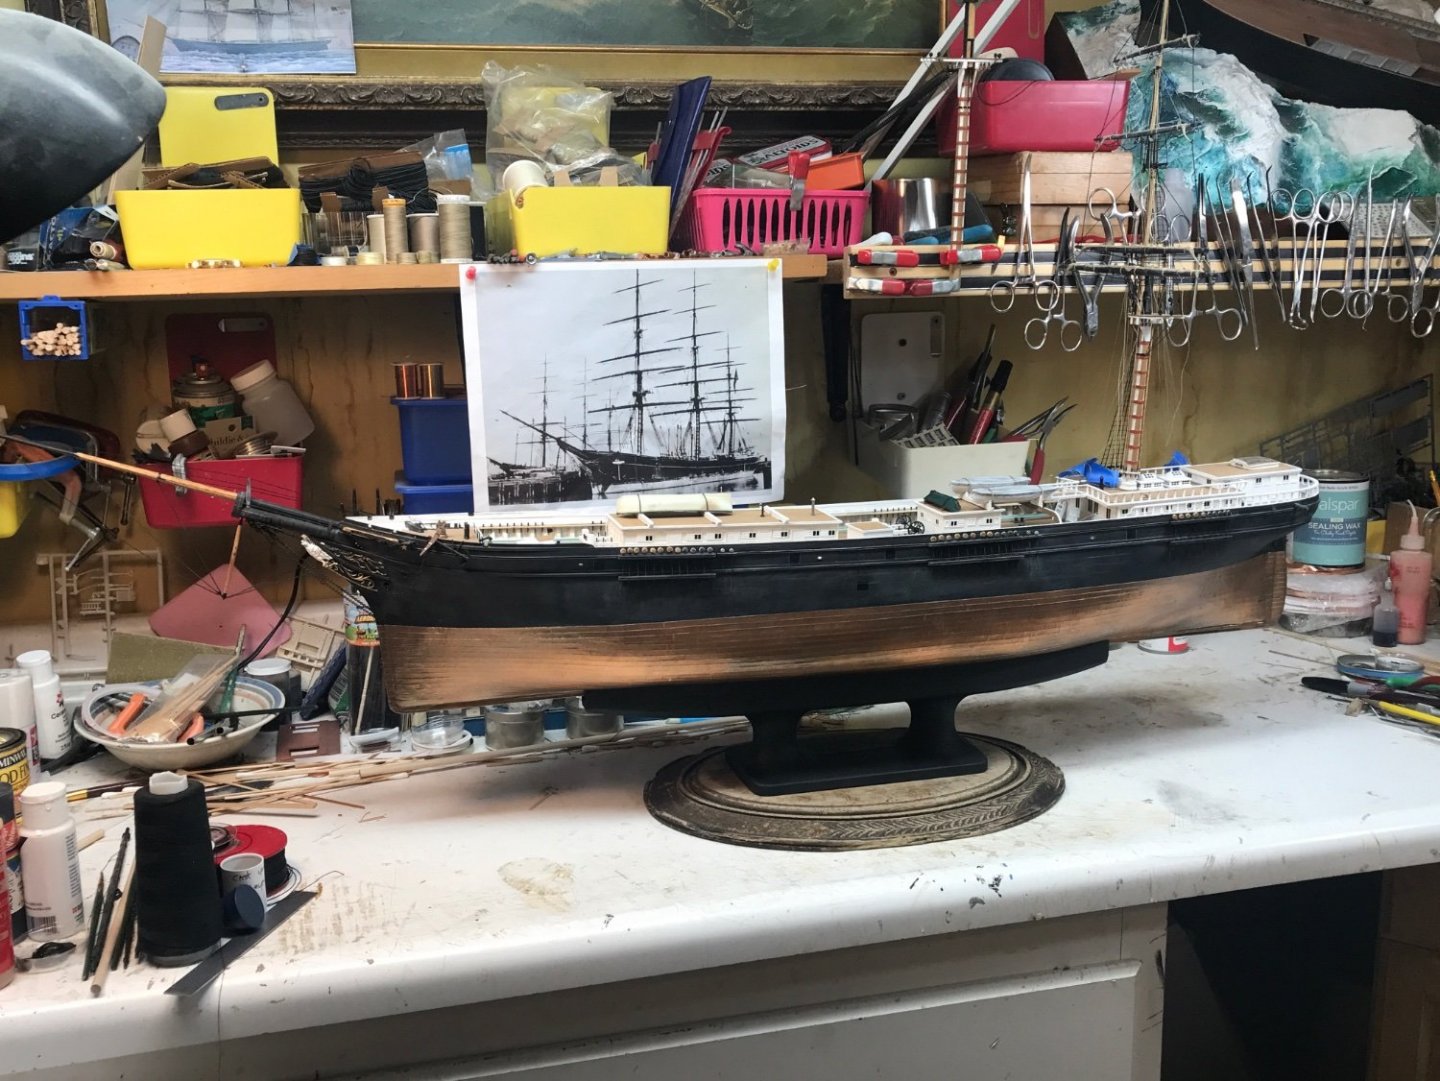
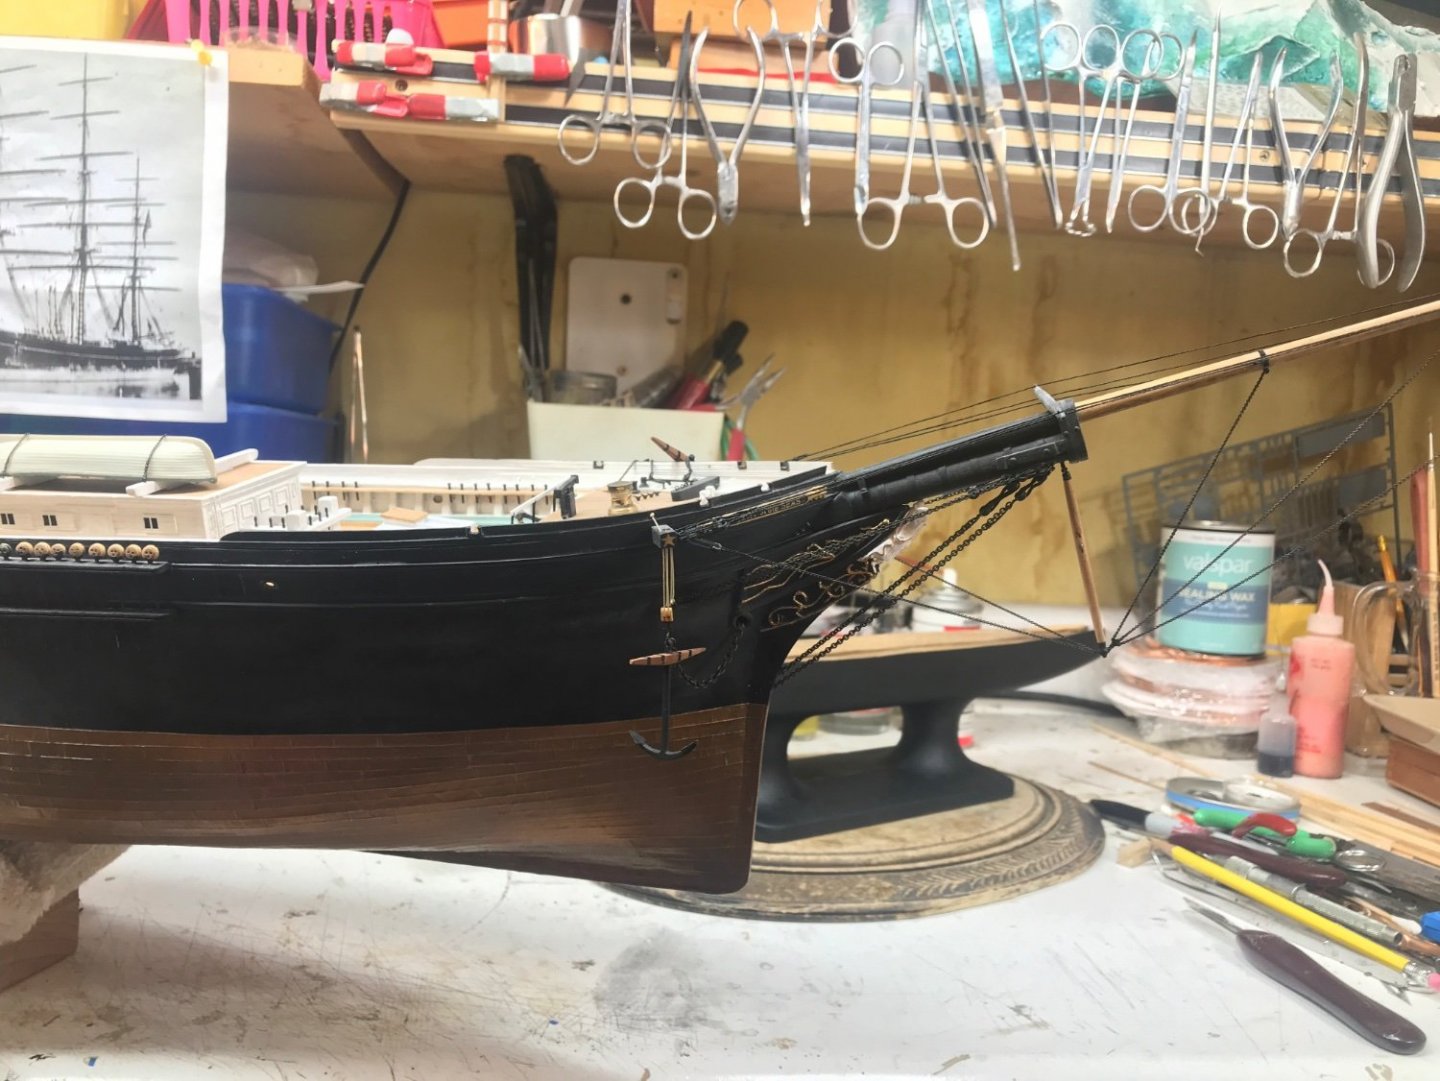
Thanks Vlad...she is quite stable and the weight of the cleat provides ample prevention from toppling. The interlocking interface of the keel and base makes for a good secure mount as well as, I can still remove the model from the stand if need be. Rob
-
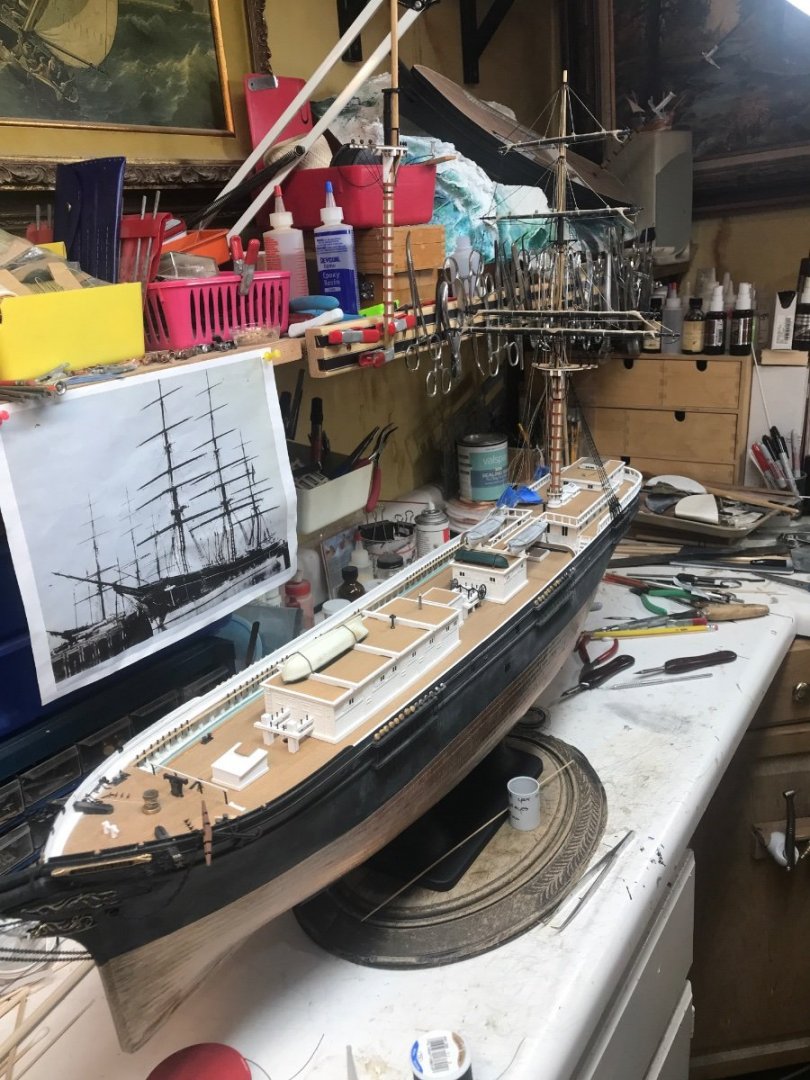
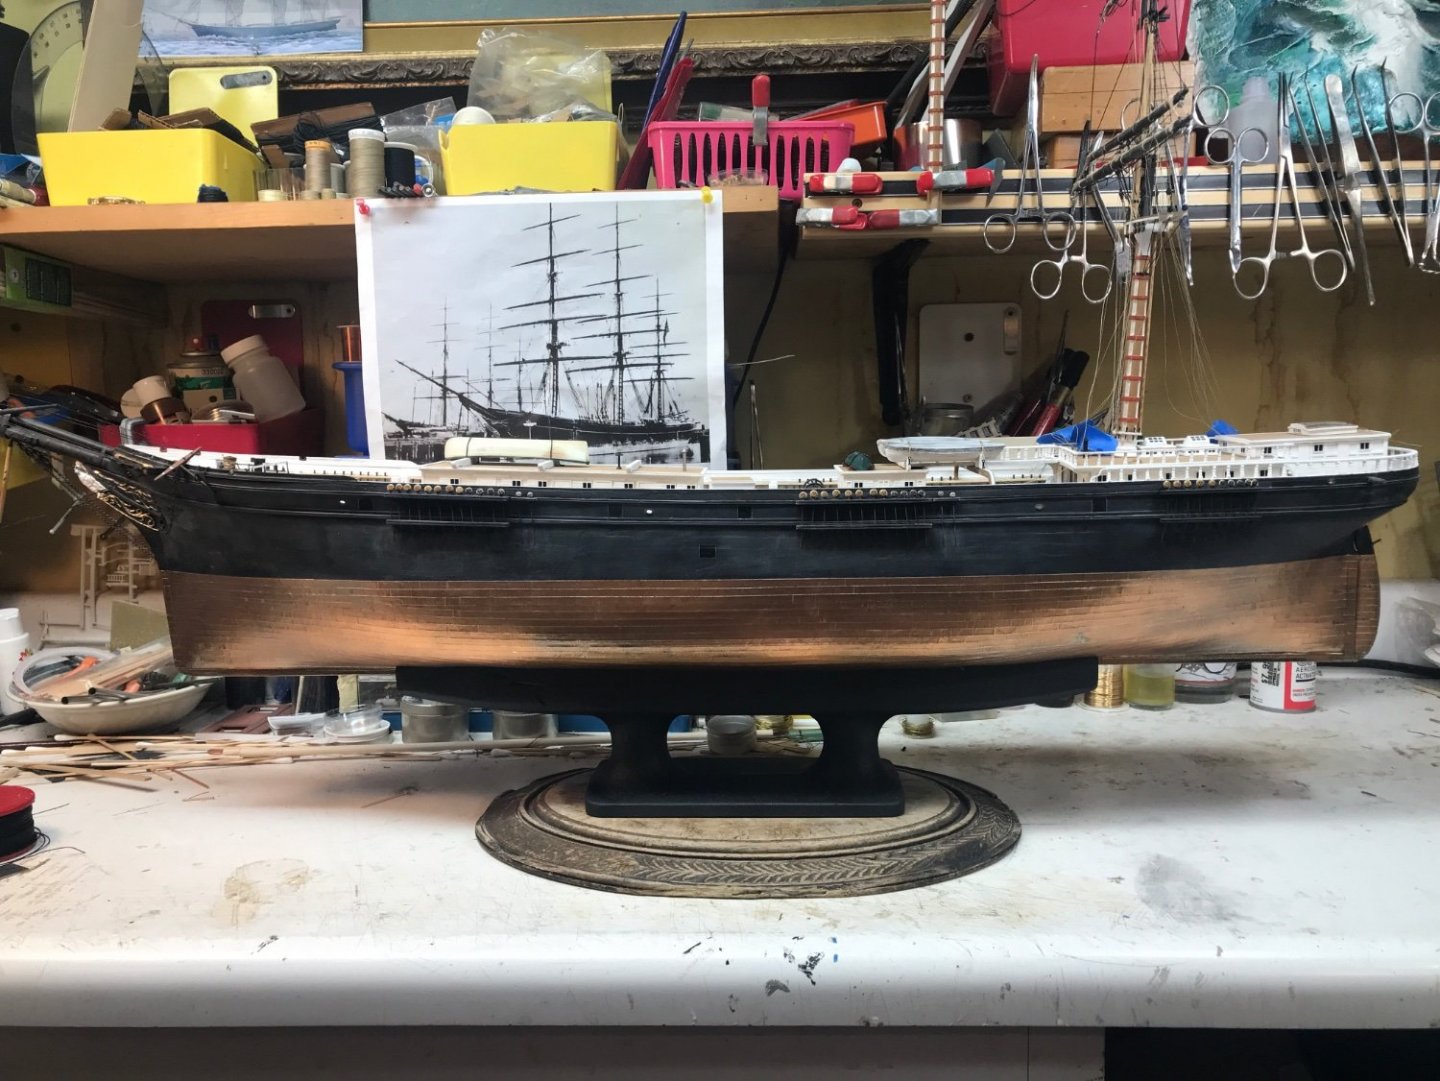
Thanks everyone. Here she is now all mounted on her new cleat pedestal. Now I can get back to the business of rigging the mizzenmast shrouds. Rob

- 3,560 replies
-
- 6
-
-
- clipper
- hull model
- (and 2 more)
-
After final fitting the hull to the cleat……I had to do a bit of hull touch-up while the cleat dries to the antique base. Rob


- 3,560 replies
-
- 6
-
-
- clipper
- hull model
- (and 2 more)
-
Coming along nicely...... But a few minor issues....If I may.... The scroll work on the fantail is actually between the planksheer and the rail..NOT below where you have placed it. It goes between those trim pieces..the light one and the darker one...right along the back edge of the transom. I see you corrected the wheel that I pointed out earlier. One other slight oversight....you can support the stay sails so they are not hanging free, but adding the *Hanks*. small ringlets that allow the sail to slide up and down the stay that it is bent to. You do not have them...so the sail is stretched tightly to keep it from sagging. Over time sag will increase due to gravity and age. Hanks will prevent this. Other then these minor details you are making a nice model for your enjoyment and collection. Rob