rwiederrich
-
Posts
5,520 -
Joined
-
Last visited
Content Type
Profiles
Forums
Gallery
Events
Everything posted by rwiederrich
-
One thing that goes unnoticed is that the center beam must have a bow in to allow the rain to run off and not puddle on the seam. Rob
-
Looks like you are making good progress. Good move to add the strip of wood to provide the right extension and curve to the canvas. Super Rob
-
Yes indeedy…… I used the knot as the cantilever point , resulting in the very effect you pointed out The model is resting fully on its keel, but the Knaurly wood grained base is “ floating” over its own base board. Delivering a satisfying effect. The heavy dense knot counterweights the overextension of the overhung base under the bow of the ship. She is well balanced. What will I think of next? Rob(A ship mounted on a large cleat)
- 3,560 replies
-
- 1
-

-
- clipper
- hull model
- (and 2 more)
-
Thanks Rich...actually the wood the GR is resting on is not drift wood, but a particular piece of a knot I cut and milled from a 120 year old maple tree from my yard. The finished routered base is also from that same tree. I appreciate your views on the subject....we'll have to see what it all looks like to fully make the right call. Here is GR mounted on her milled knot base. Rob
- 3,560 replies
-
- 1
-
-
- clipper
- hull model
- (and 2 more)
-
HMCSS Victoria 1855 by BANYAN - 1:72
rwiederrich replied to BANYAN's topic in - Build logs for subjects built 1851 - 1900
I suggest you you return to happiness and let your build bring you joy. There is so little these days that brings happiness. Do you have a build log, so we can enjoy what you have accomplished? Rob- 1,013 replies
-
- 2
-
-
- gun dispatch vessel
- victoria
- (and 2 more)
-
Your emotional paragraph says it all my friend...thank you. I have been using hack processes, unorthodox materials and re-engineering others work for my own particular uses for so long that I suppose I have forgotten the impact of the end result. Its all become second nature to me, I guess. When you've put your socks on for so many years without anyone noticing (Through The internet), you sometimes forget how impressive putting on your socks can be. Rob
- 3,560 replies
-
- 1
-

-
- clipper
- hull model
- (and 2 more)
-
Less then 2/3 of her keel will be resting within the recess of the cleat. In this way she will be very secure and still presented fully and respectfully. This contact will occur at the most extreme point of her deadrise and will be less of a distraction then the overall effect the mounting design will convey. We will only be able to really make a definitive evaluation once the cleat base is made and Glory is resting safely within it. This issue reminds me of the same situation modelers for centuries have struggled with when deciding to add or retract sails from their models. *They will cover up and hide lots of detail I have put into the model*, is always the fear. While the opposite is equally true, that, * A sailing ship without sails is like a plane without wings*. The trade off is perceptions. She has to be mounted.....thus......Do I display her averagely and receive an average wage....or do I display her in the most unique way and profit from both model and mounting? These are the things that haunt me at night under covers. You have seen all the ways I mount my models...have you not? Rob
-
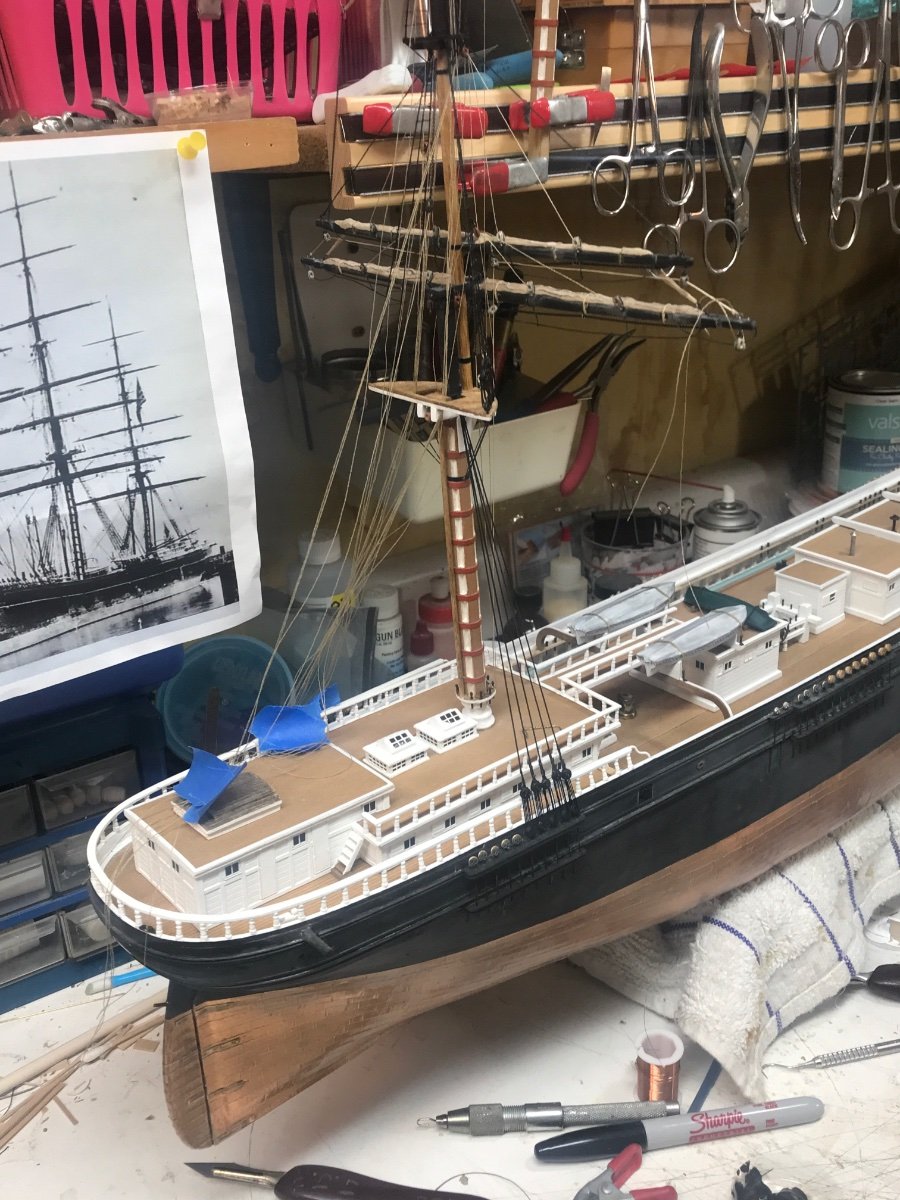
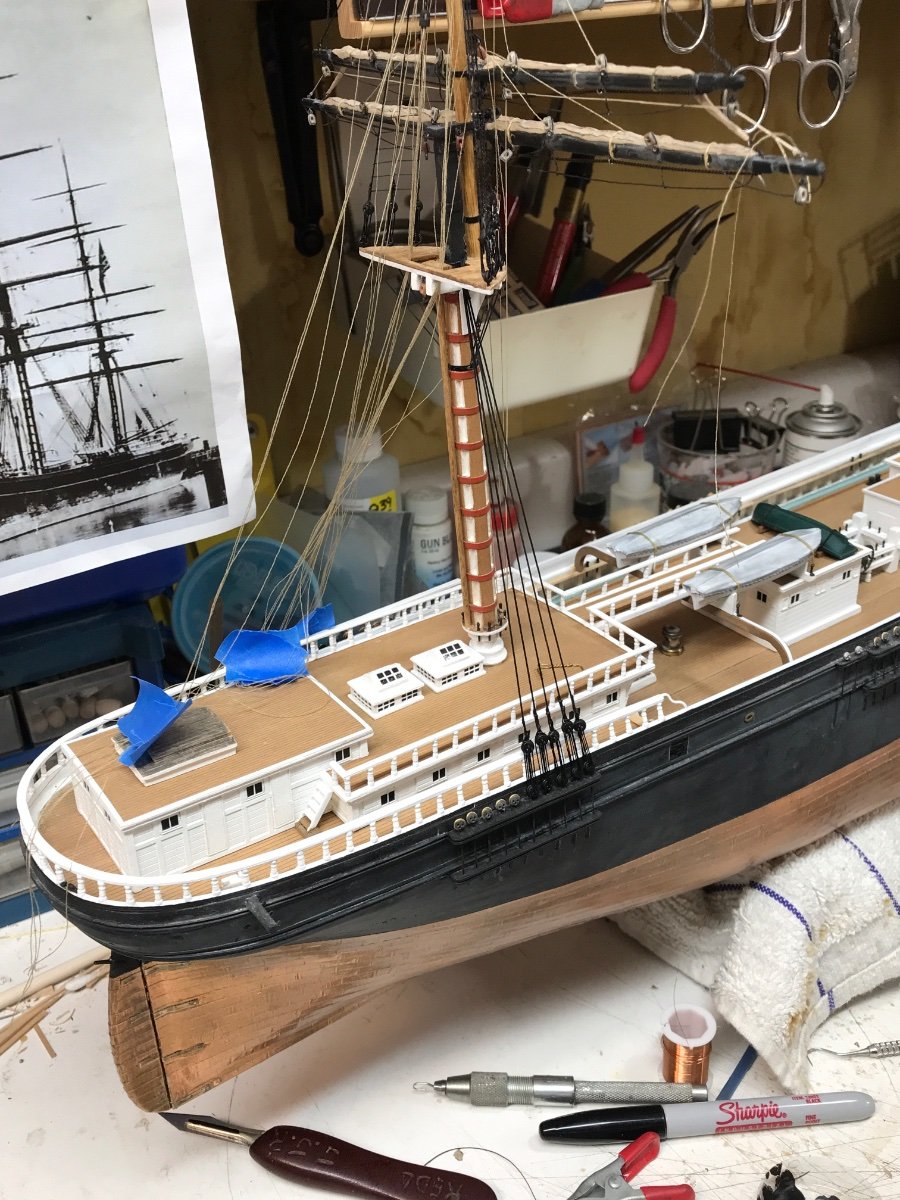
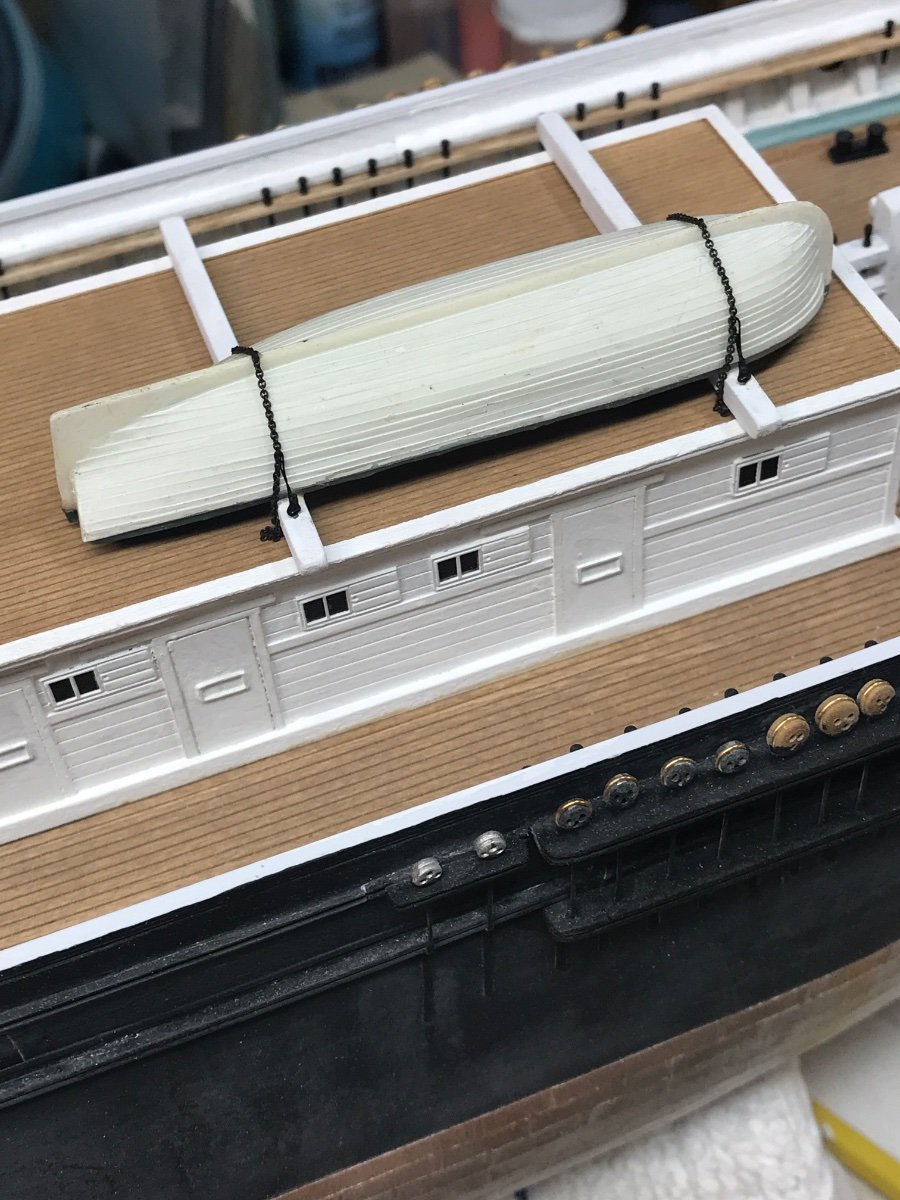
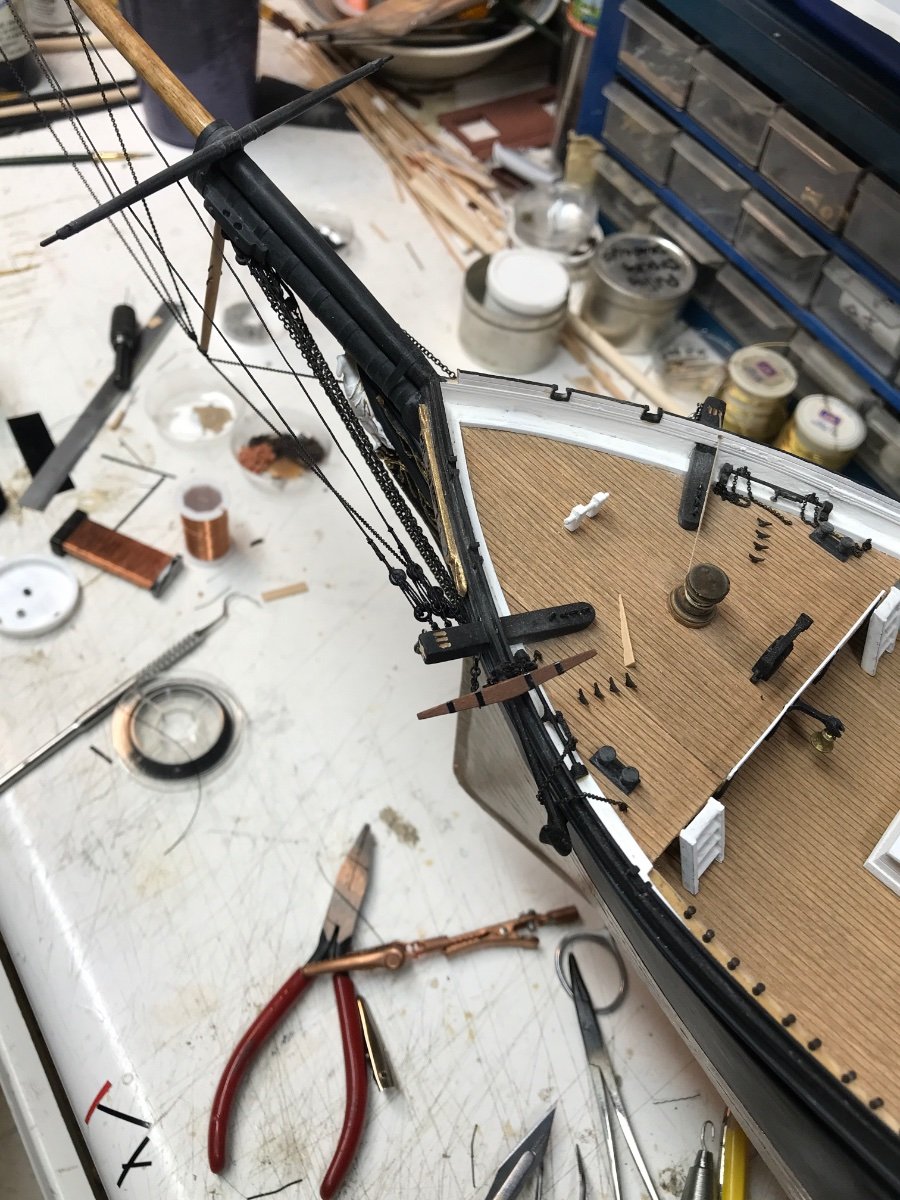
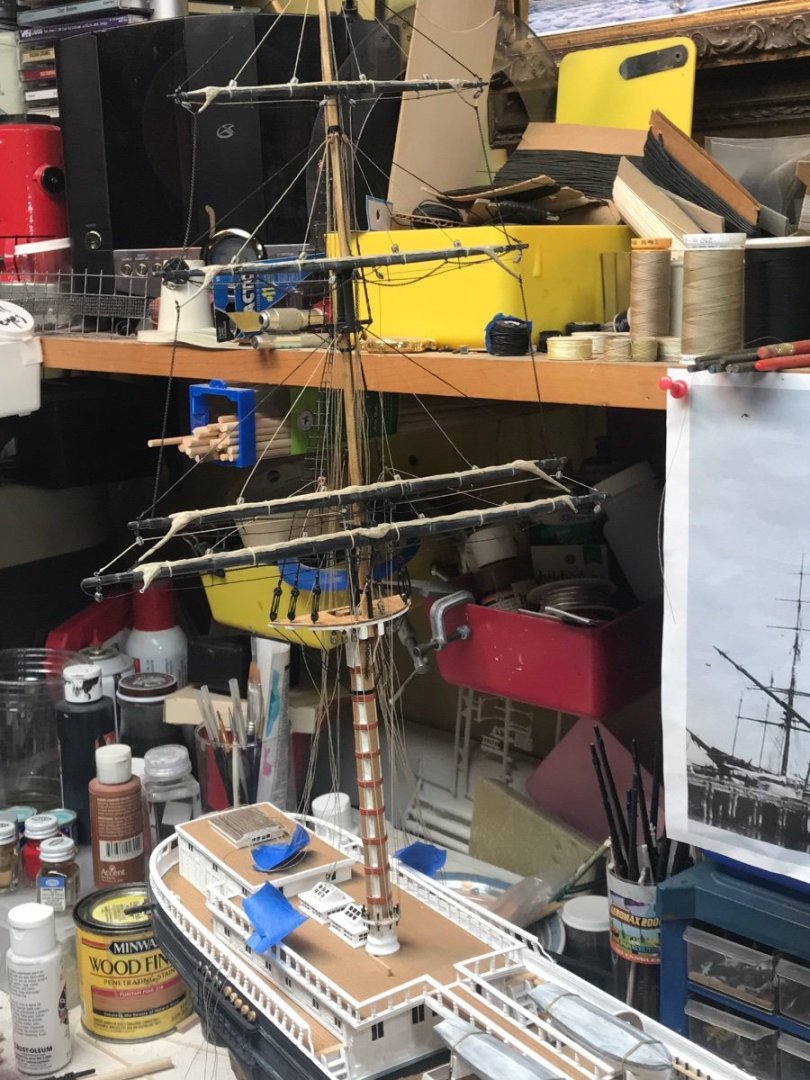
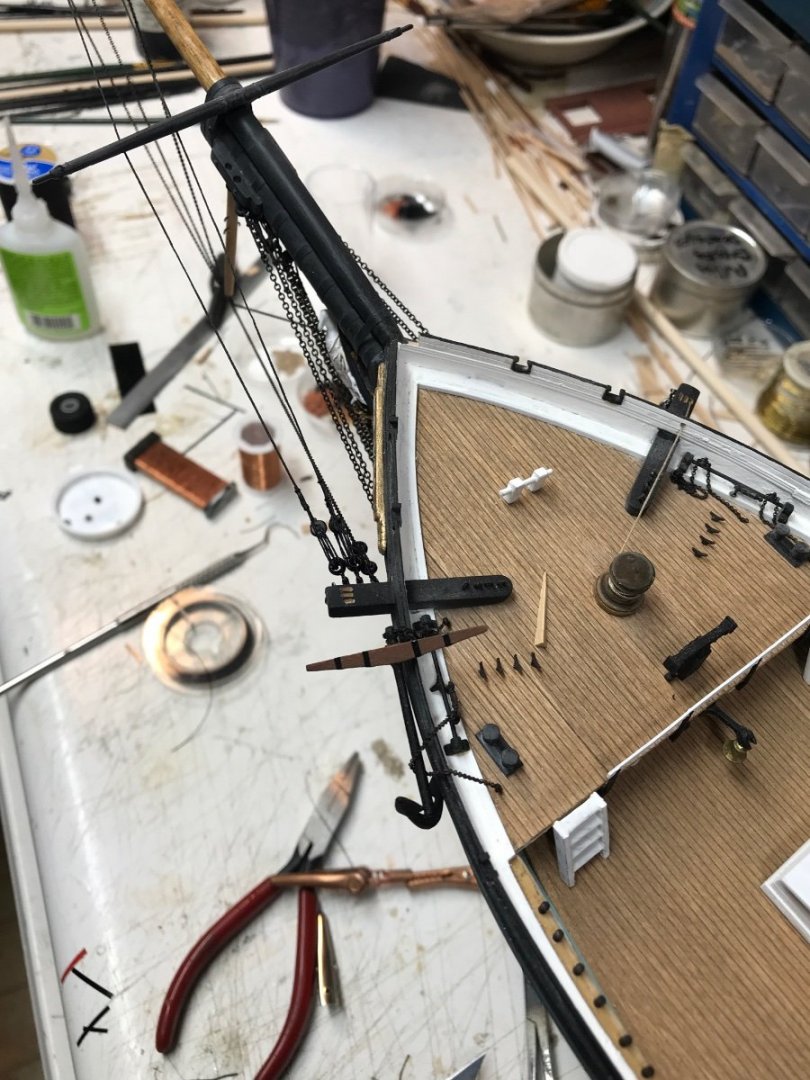
Stepped the mizzenmast. Once dry I will clean things up and roughly belay lines out of the way. Then I’ll probably begin the mainmast rigging off model. Rob
- 3,560 replies
-
- 6
-
-

-
- clipper
- hull model
- (and 2 more)
-
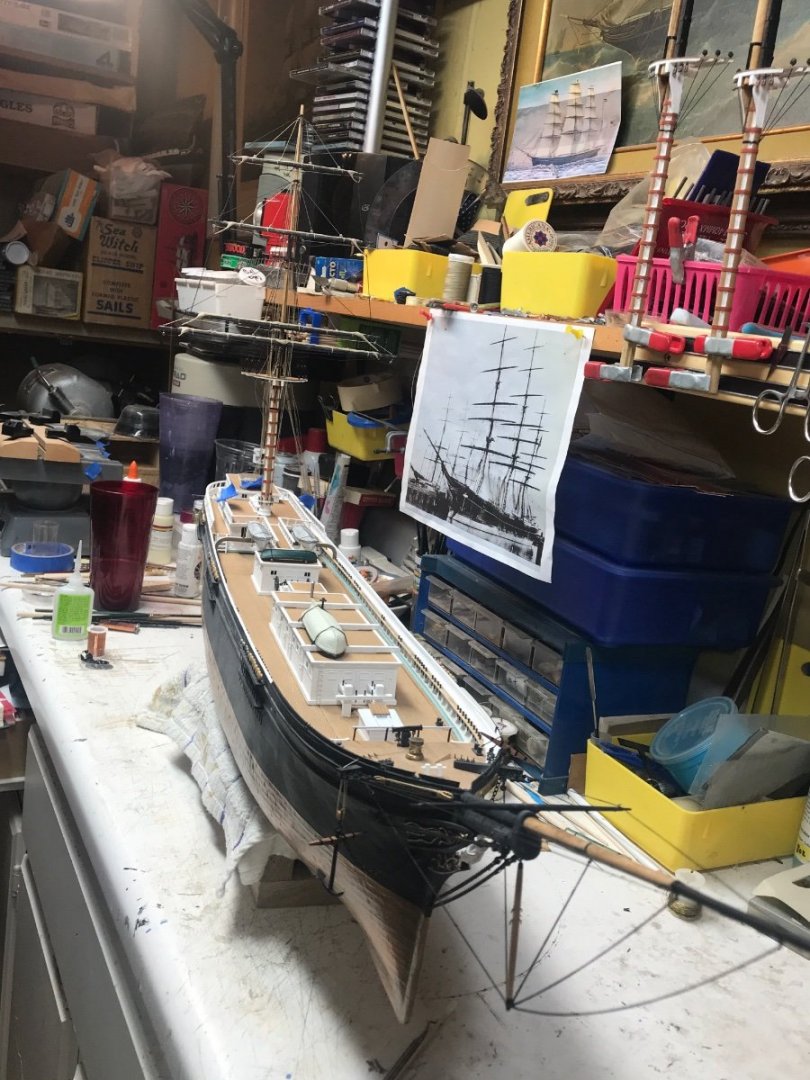
I found and ordered the large 18" cleat I have been looking for....that I will be mounting Glory to. I will machine a groove along the top leading edge of the cleat to house the keel of Glory. Then the cleat will be painted and detailed and mounted on a fine piece of 100 year old maple. This will be my *Unique* mounting I have devised for displaying Glory in all her glory....(No pun intended) Of course I will take pics of the project as I build it......when the cleat arrives. I'm stoked to have found what I have been searching for, for as long as I have been building her. Rob
- 3,560 replies
-
- 1
-
-
- clipper
- hull model
- (and 2 more)
-
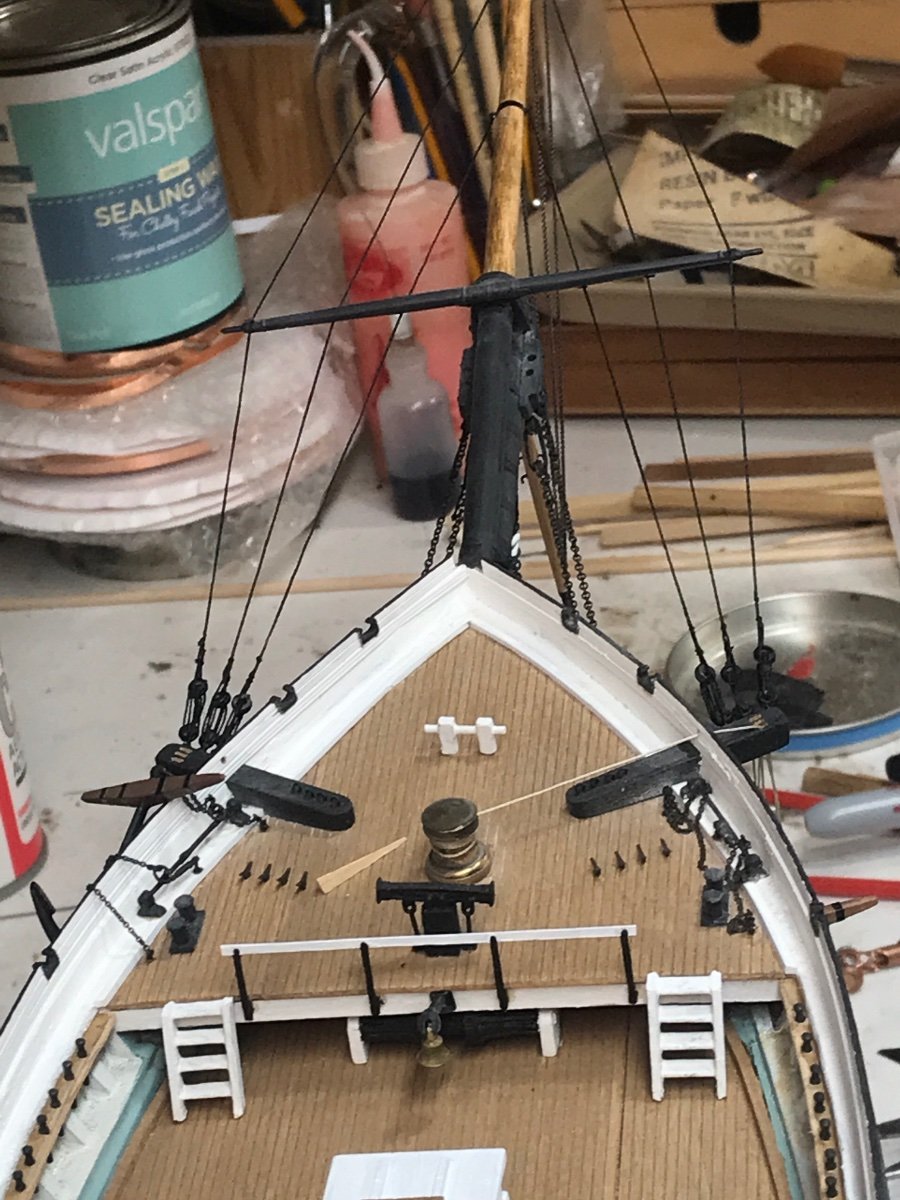
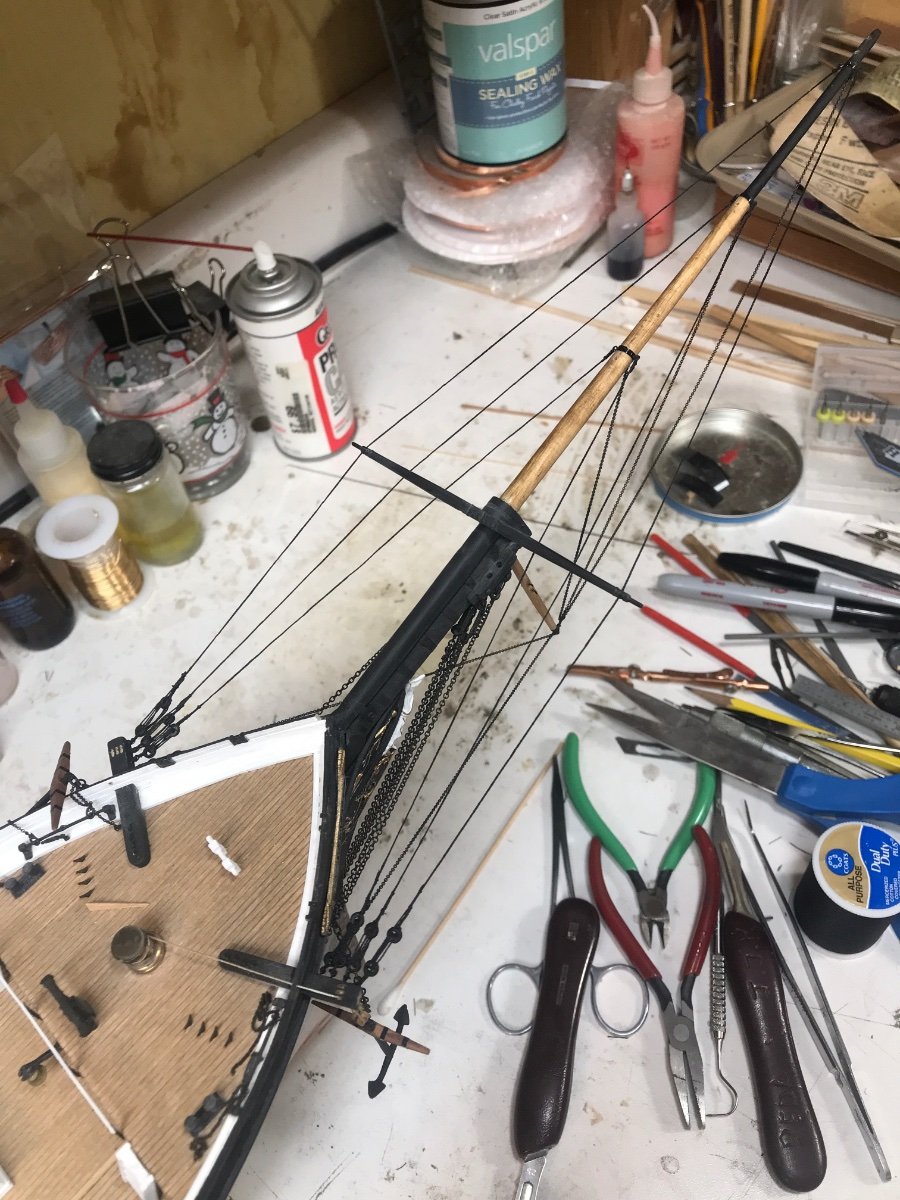
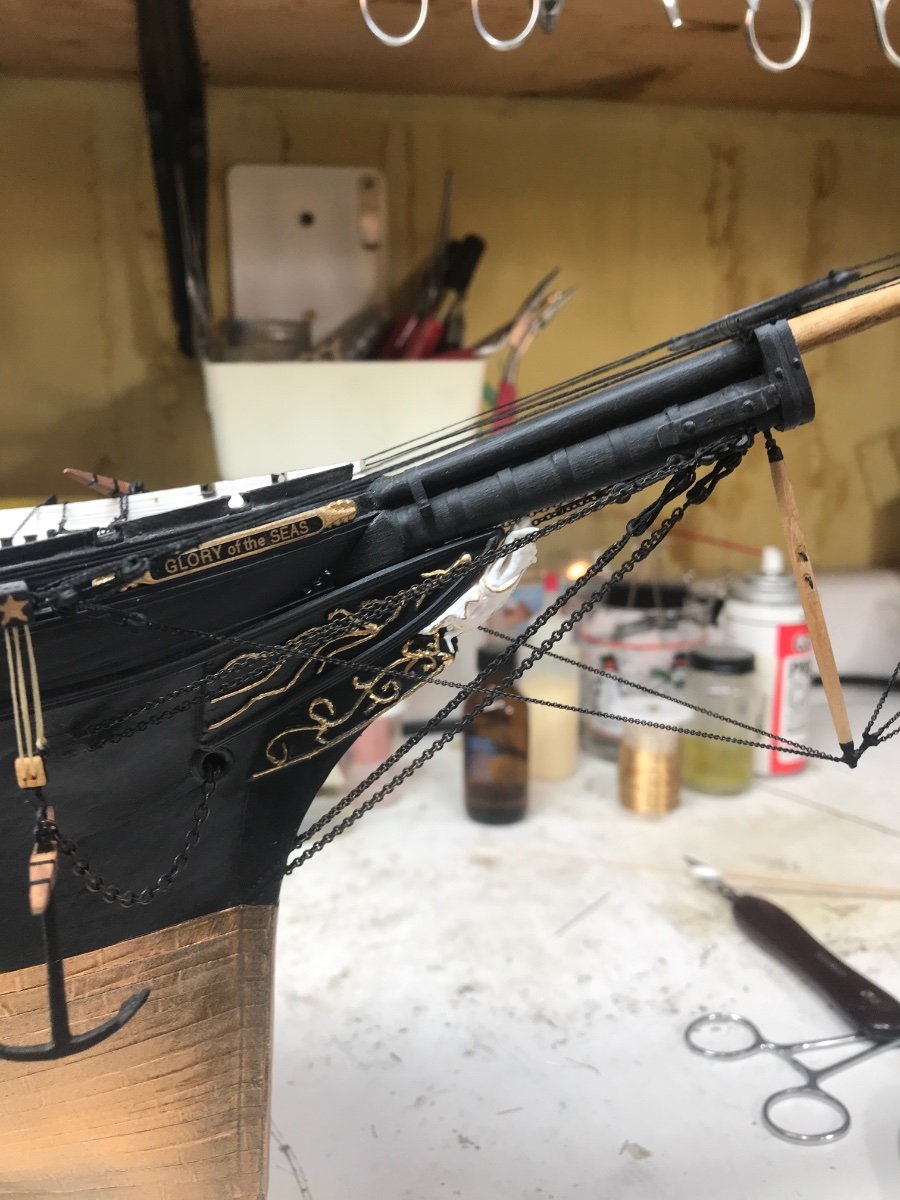
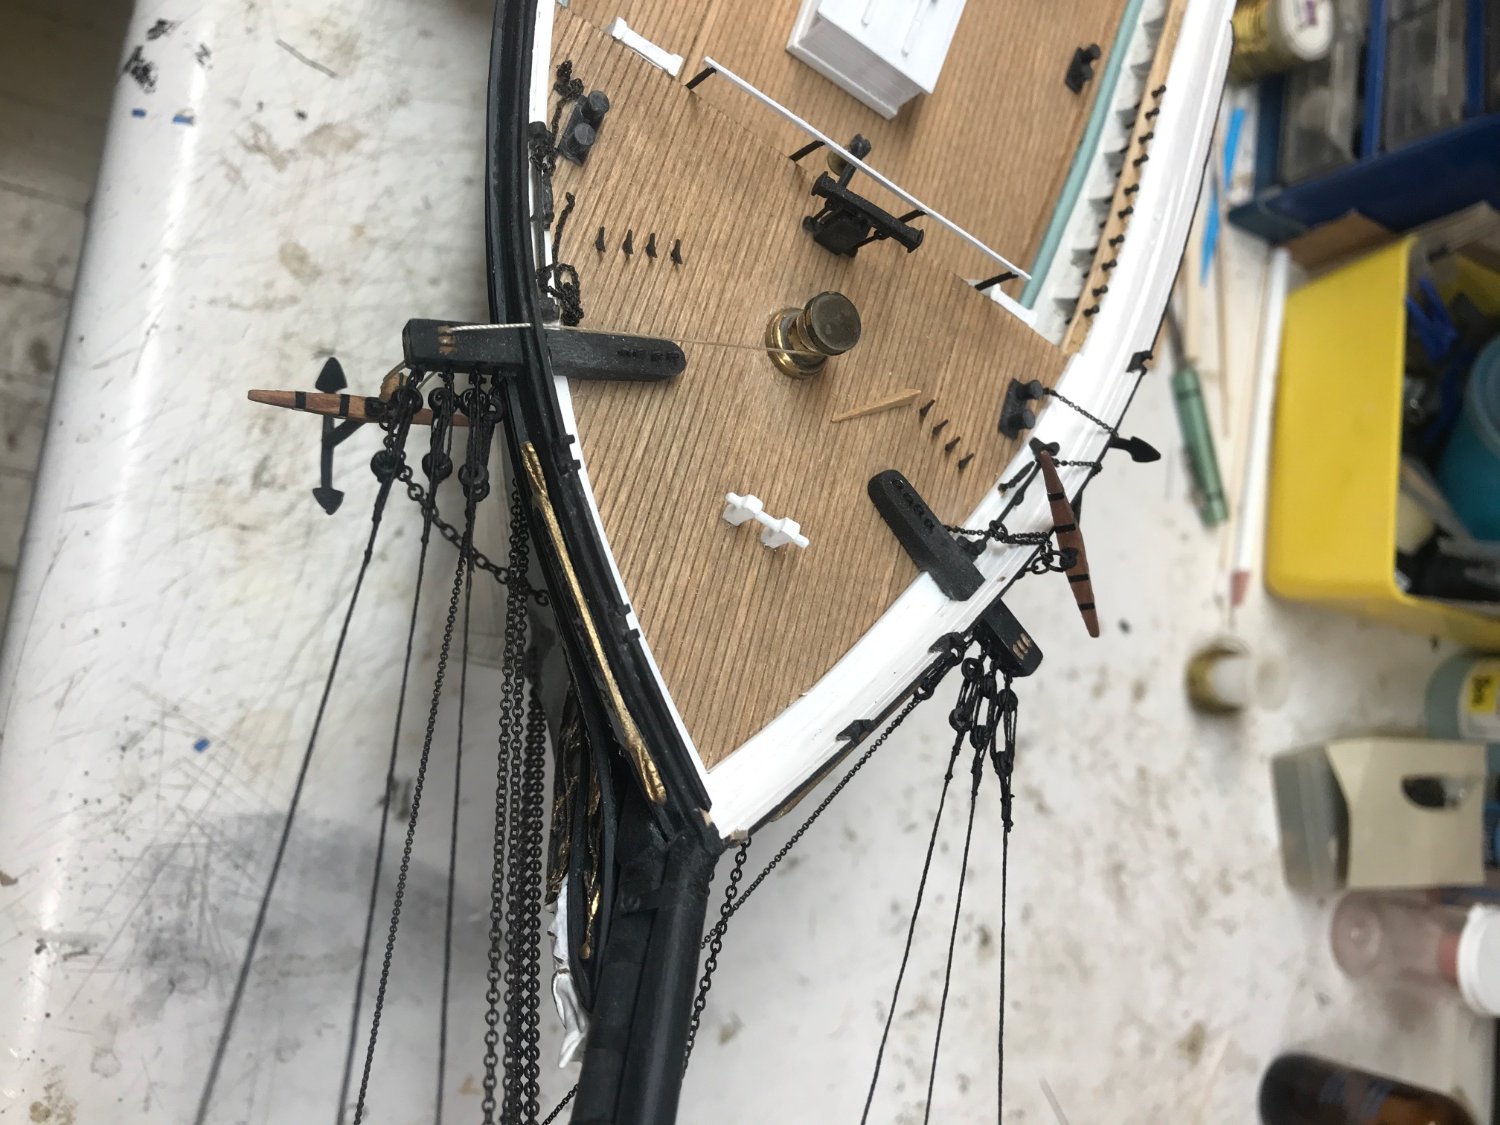
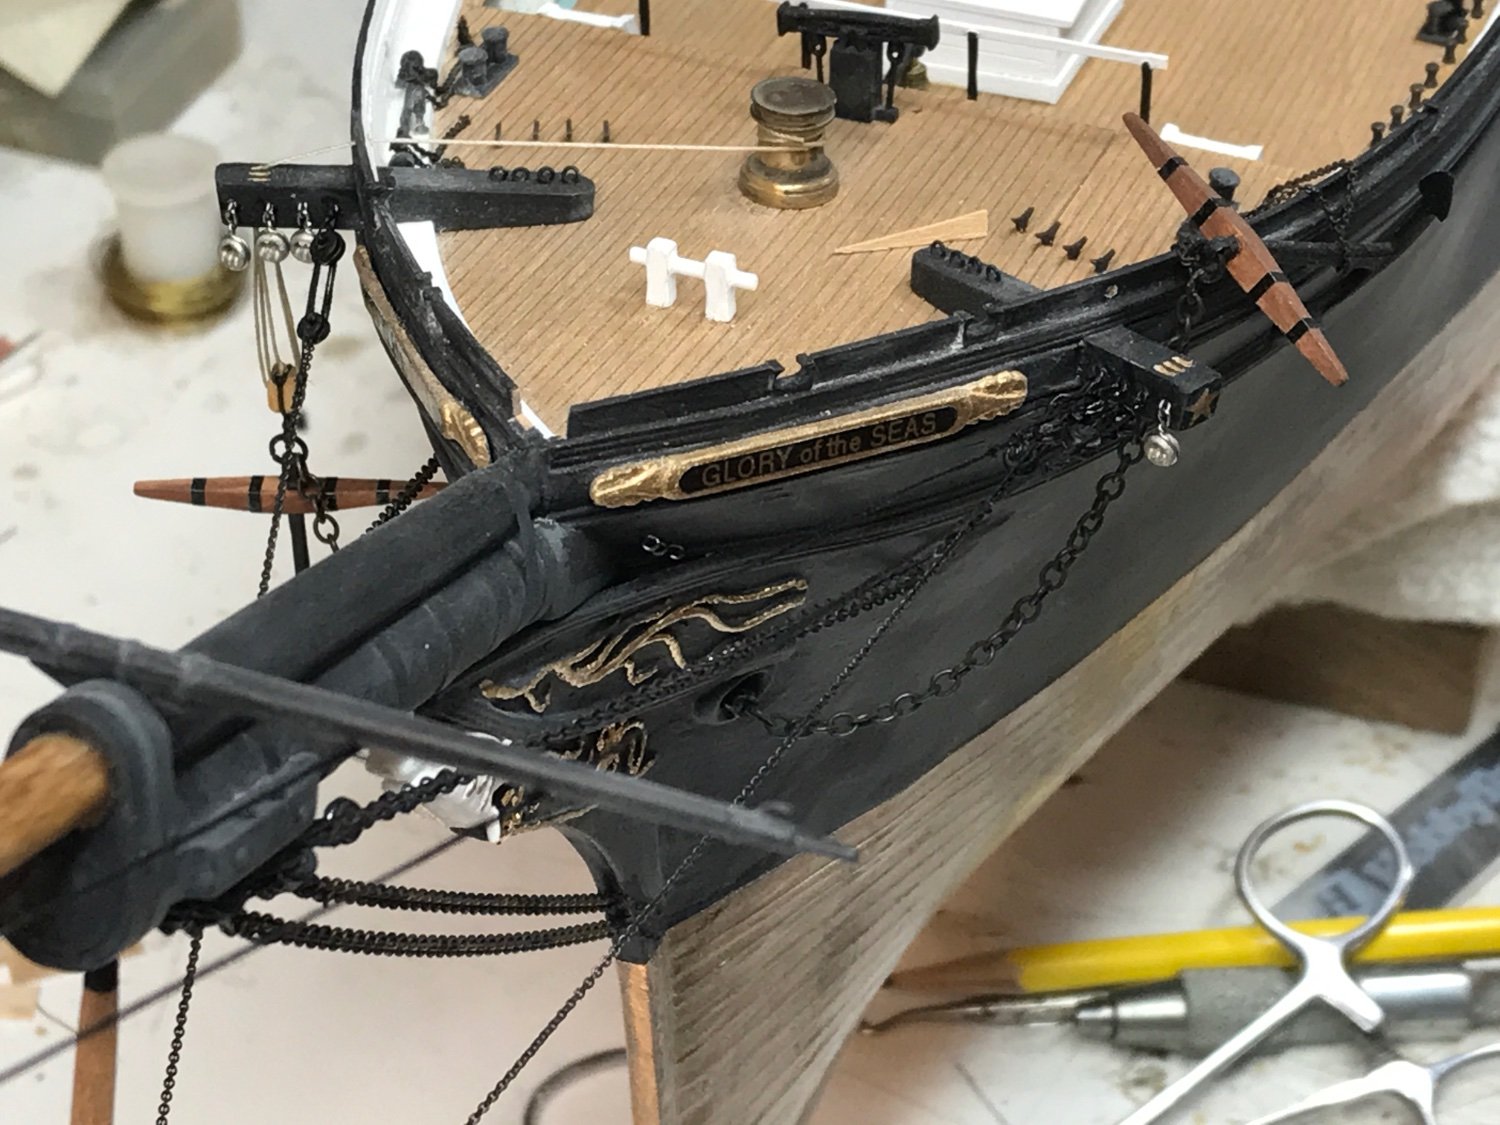
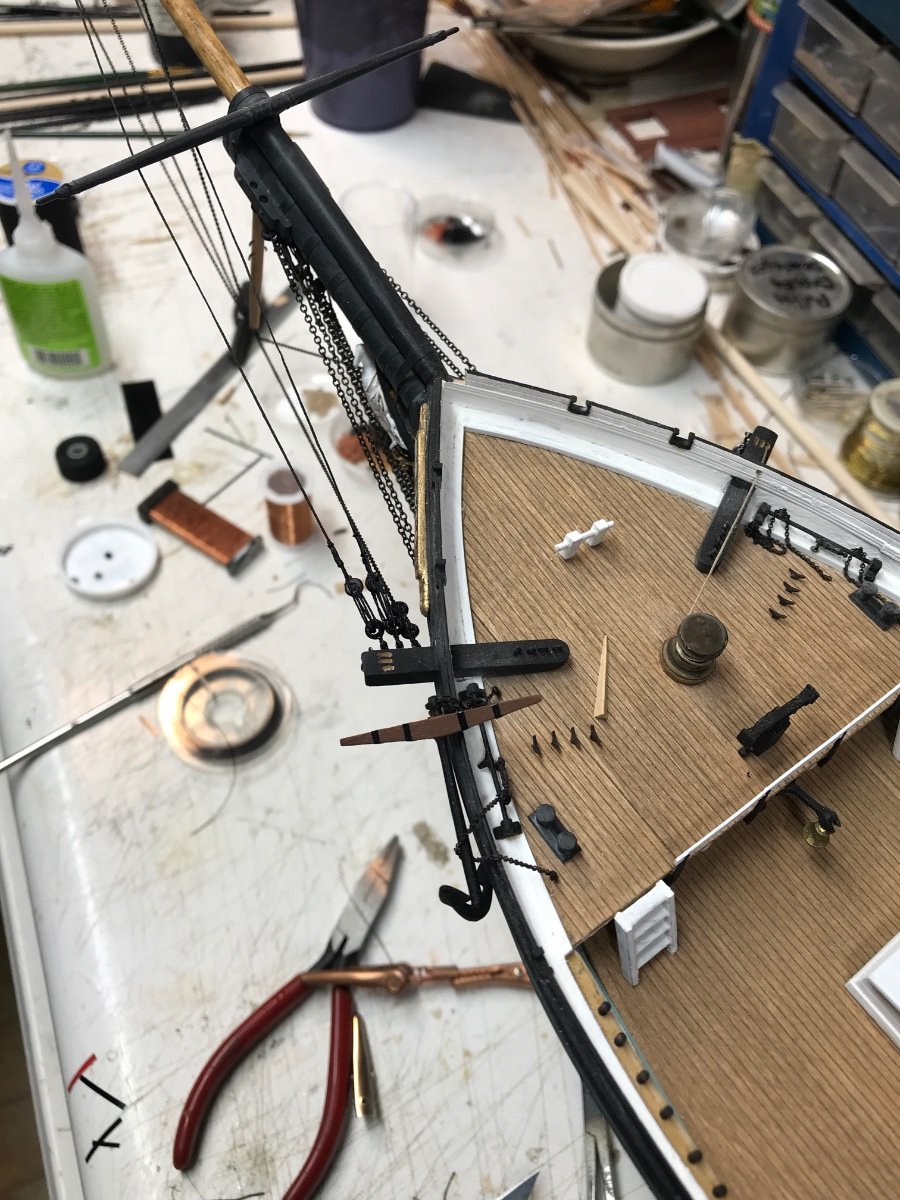
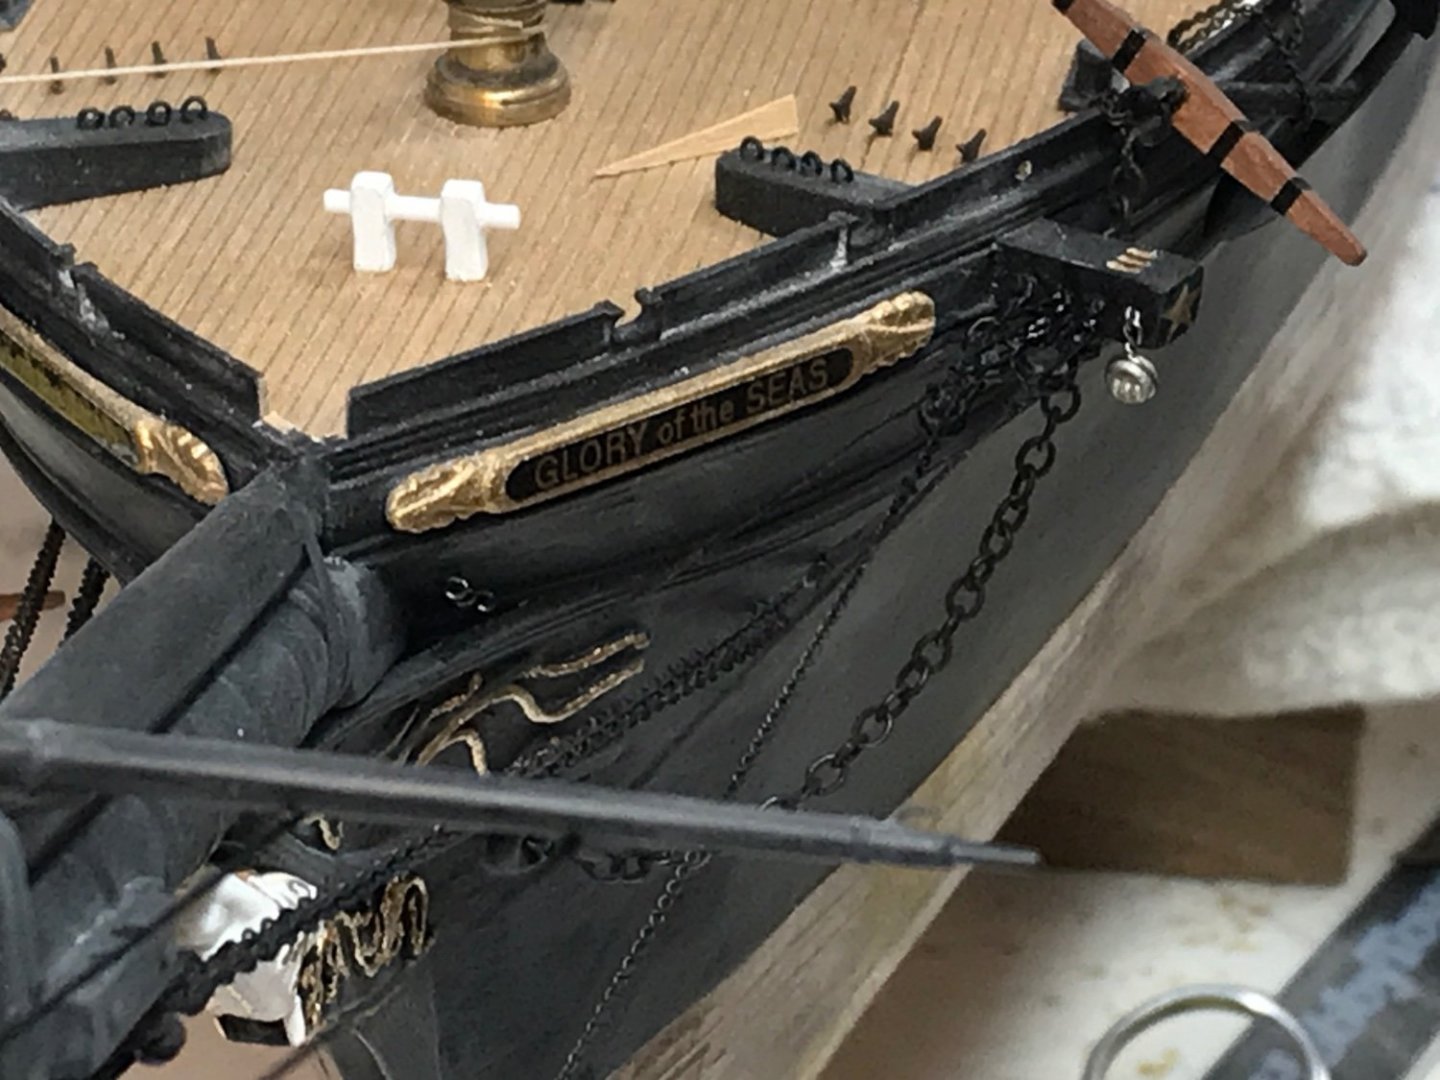
Well I finished up the bowsprit guys. Here are some pics. I deleted these funky images and will post correct ones later. Sorry.

- 3,560 replies
-
- 2
-
-
-
- clipper
- hull model
- (and 2 more)
-
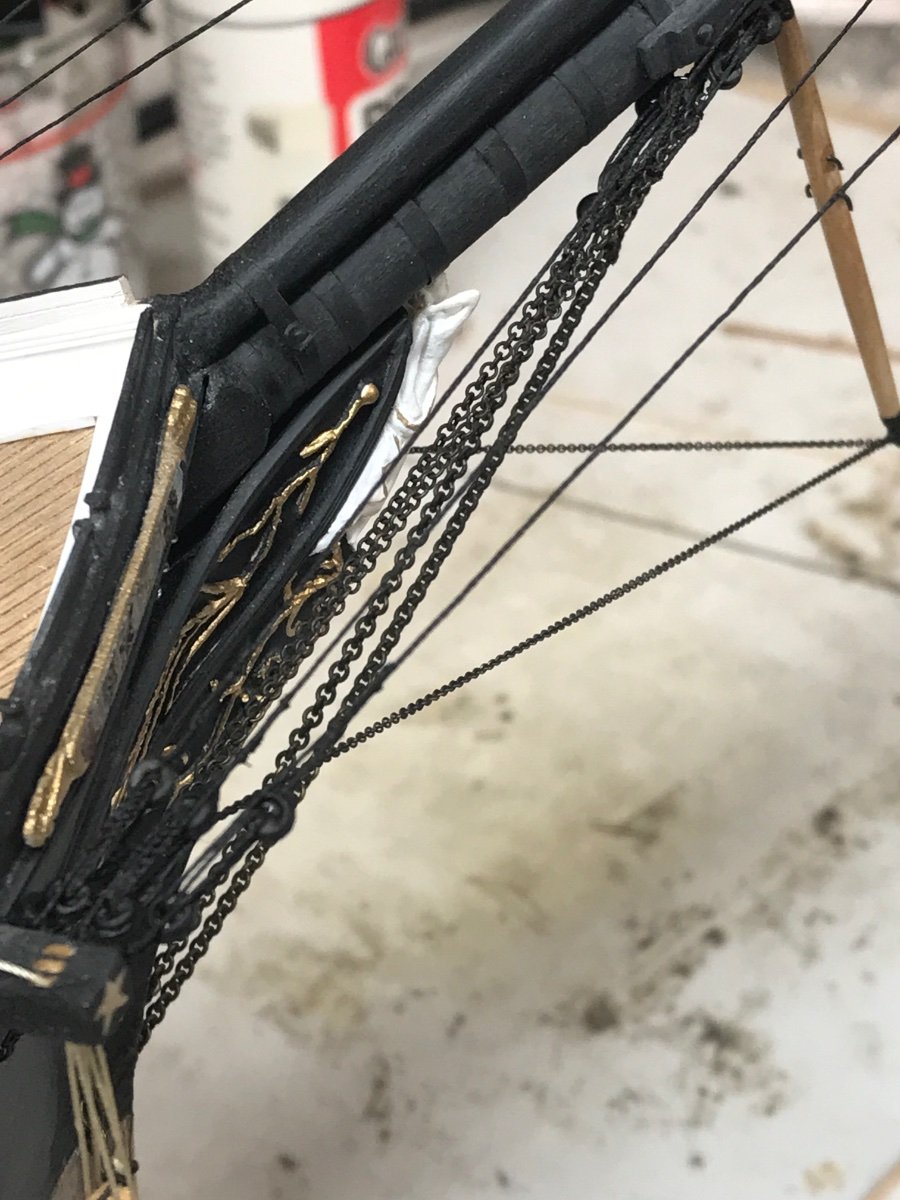
Spent some time working on the port bowsprit guys. Rob


- 3,560 replies
-
- 3
-
-
- clipper
- hull model
- (and 2 more)
-
George, being the general modeling hack that I am, over the 40 years of my collecting kits , I have accumulated thousand of blocks from various models such as Cutty Sark, Connie, Alabama, Corsage,……you name it I modify their blocks for my own purposes. Each one may get restropped, painted , bracketed and hooked or looped to make them suitable. As is my habit, I will reuse any part or combinations of parts of previously engineered items for my purposes. It is the end result that matters, NOT, how I got there. Thanks for asking. Rob
-
Thanks Rick. Actually I’m retired ……but I was a DDN. A Denturist. Kinda like a prosthodontist, but my specialty was removable and maxiofacial prosthetics. Now I’m just a humble procurer of clipper ship relics. Rob
- 3,560 replies
-
- 1
-
-
- clipper
- hull model
- (and 2 more)
-
Sweet job for sure Rick310. Beautiful finish....clean and precise. Rob
- 602 replies
-
- 1
-
-
- Flying Fish
- Model Shipways
- (and 2 more)
-
Interesting Rich......I never noticed this before, or if I did, I dismissed it....but I see some type of bracket beneath the lower channel, between the first and second, fourth and fifth and the tenth and eleventh chain plates? Interesting......Seams to be on all three masts plates....... Can you confirm this on any other images of her? Rob
- 602 replies
-
- 1
-
-
- Flying Fish
- Model Shipways
- (and 2 more)
-
Cutty Sark by NenadM
rwiederrich replied to NenadM's topic in - Build logs for subjects built 1851 - 1900
And here we go Nenad.....tops are being made.......good job. Oh...I can't believe you're going on, or are on 9 years for this log....what an adventure. Keep going strong... Rob- 4,152 replies
-
- 1
-
-
- cutty sark
- tehnodidakta
- (and 1 more)
-
I always install my foot ropes first...then install the stirrups. Never have a problem with string curling. since I hydrate the string forming it straight. Bammmnnnn! Rob