HOLIDAY DONATION DRIVE - SUPPORT MSW - DO YOUR PART TO KEEP THIS GREAT FORUM GOING! (Only 13 donations so far - C'mon guys!)
×


jfhealey
-
Posts
361 -
Joined
-
Last visited
Content Type
Profiles
Forums
Gallery
Events
Everything posted by jfhealey
-
Thank you Thukydides. Yes, it is a big expanse of blue. The dustsheet of the Swan Class books, which I followed closely-ish, shows two tassels - I guess to avoid the issue you identify. I originally intended to include two but thought they might be much harder to paint than turned out to be the case. I may think on it further though, that said, when the model is in its cradle that lower transom area is not conspicuous because of the overhang. The Syren friezes break up the blue with a sort of subtle smokey - both black and white smoke - effect which I like but I don't see how that can be effectively painted except with an airbrush. Thanks for your thoughts. Fred
-
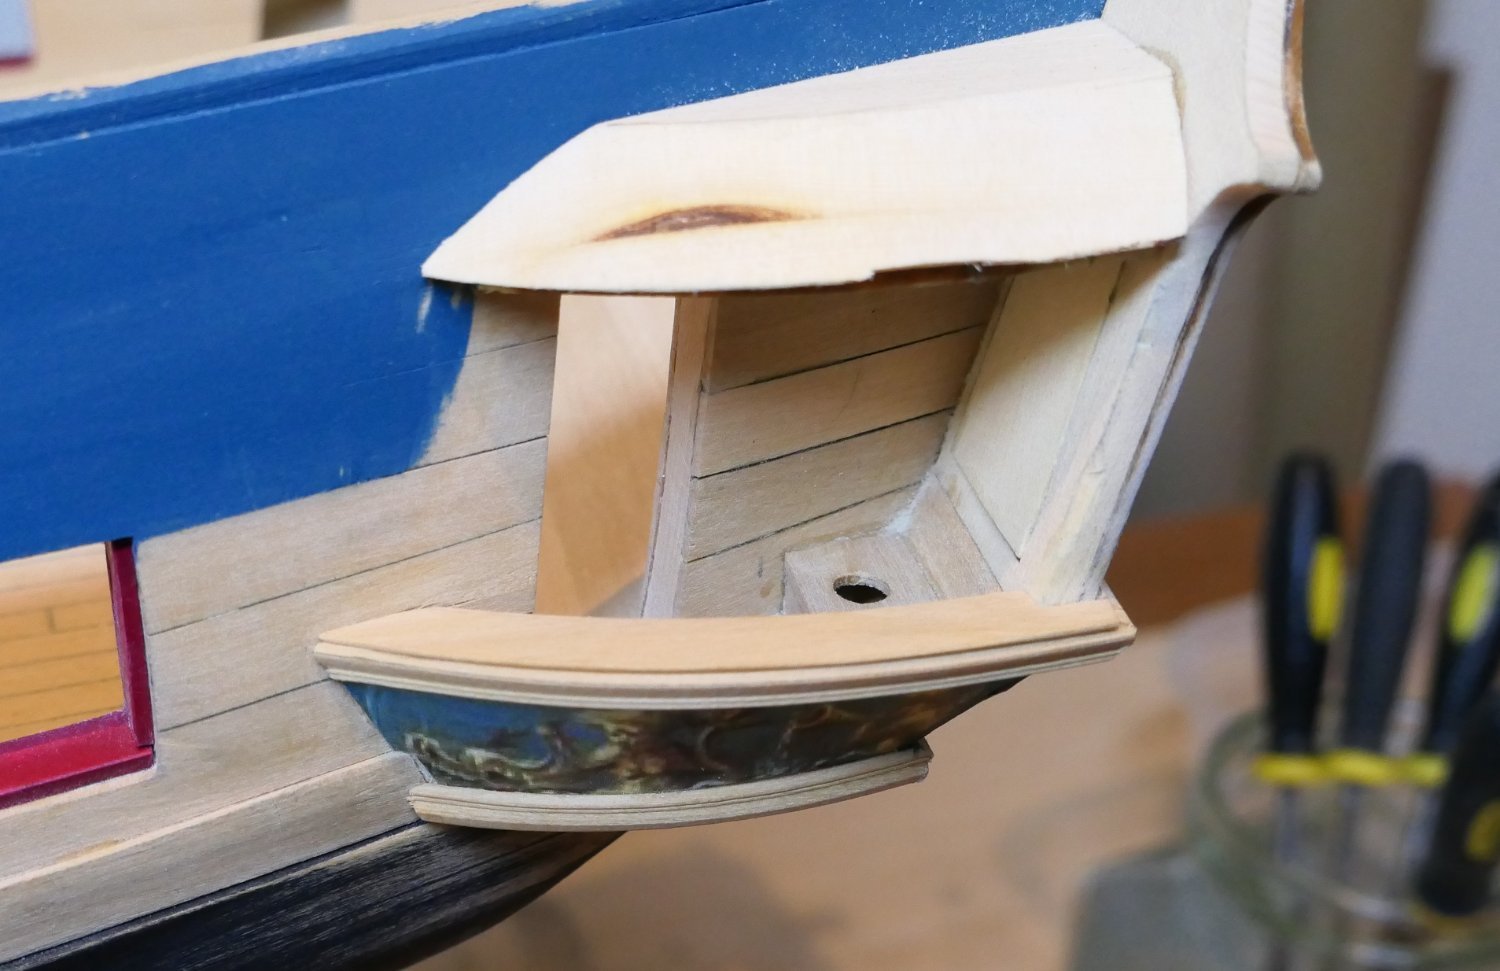
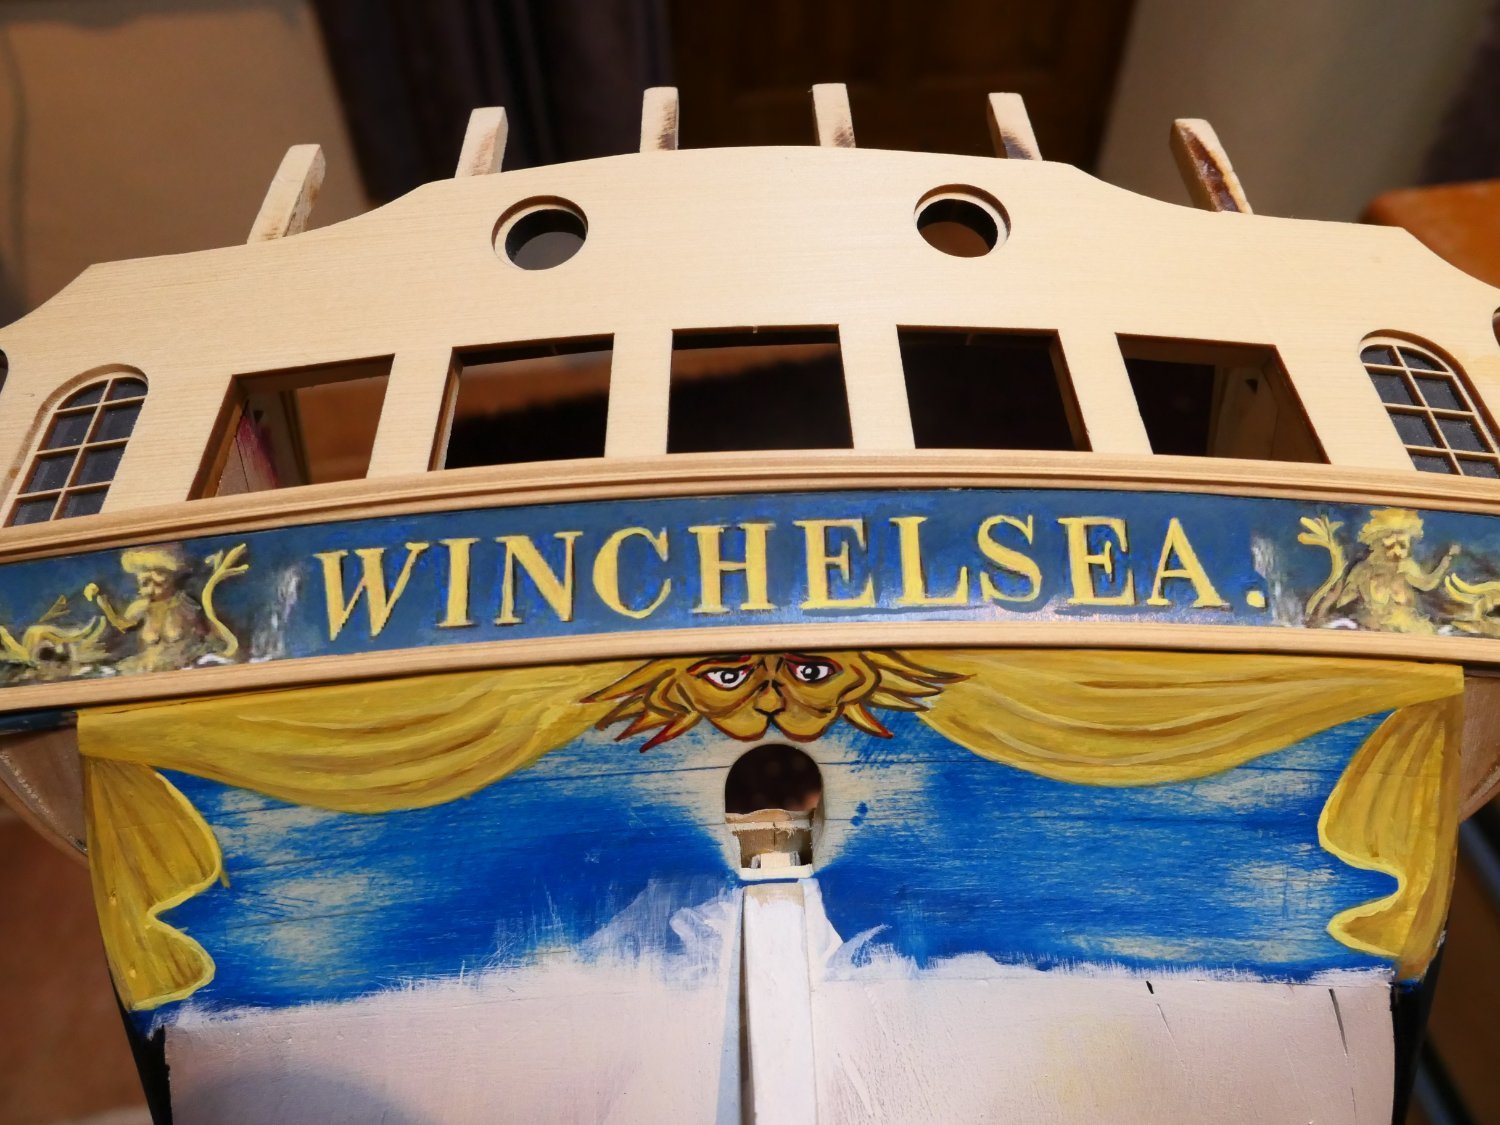
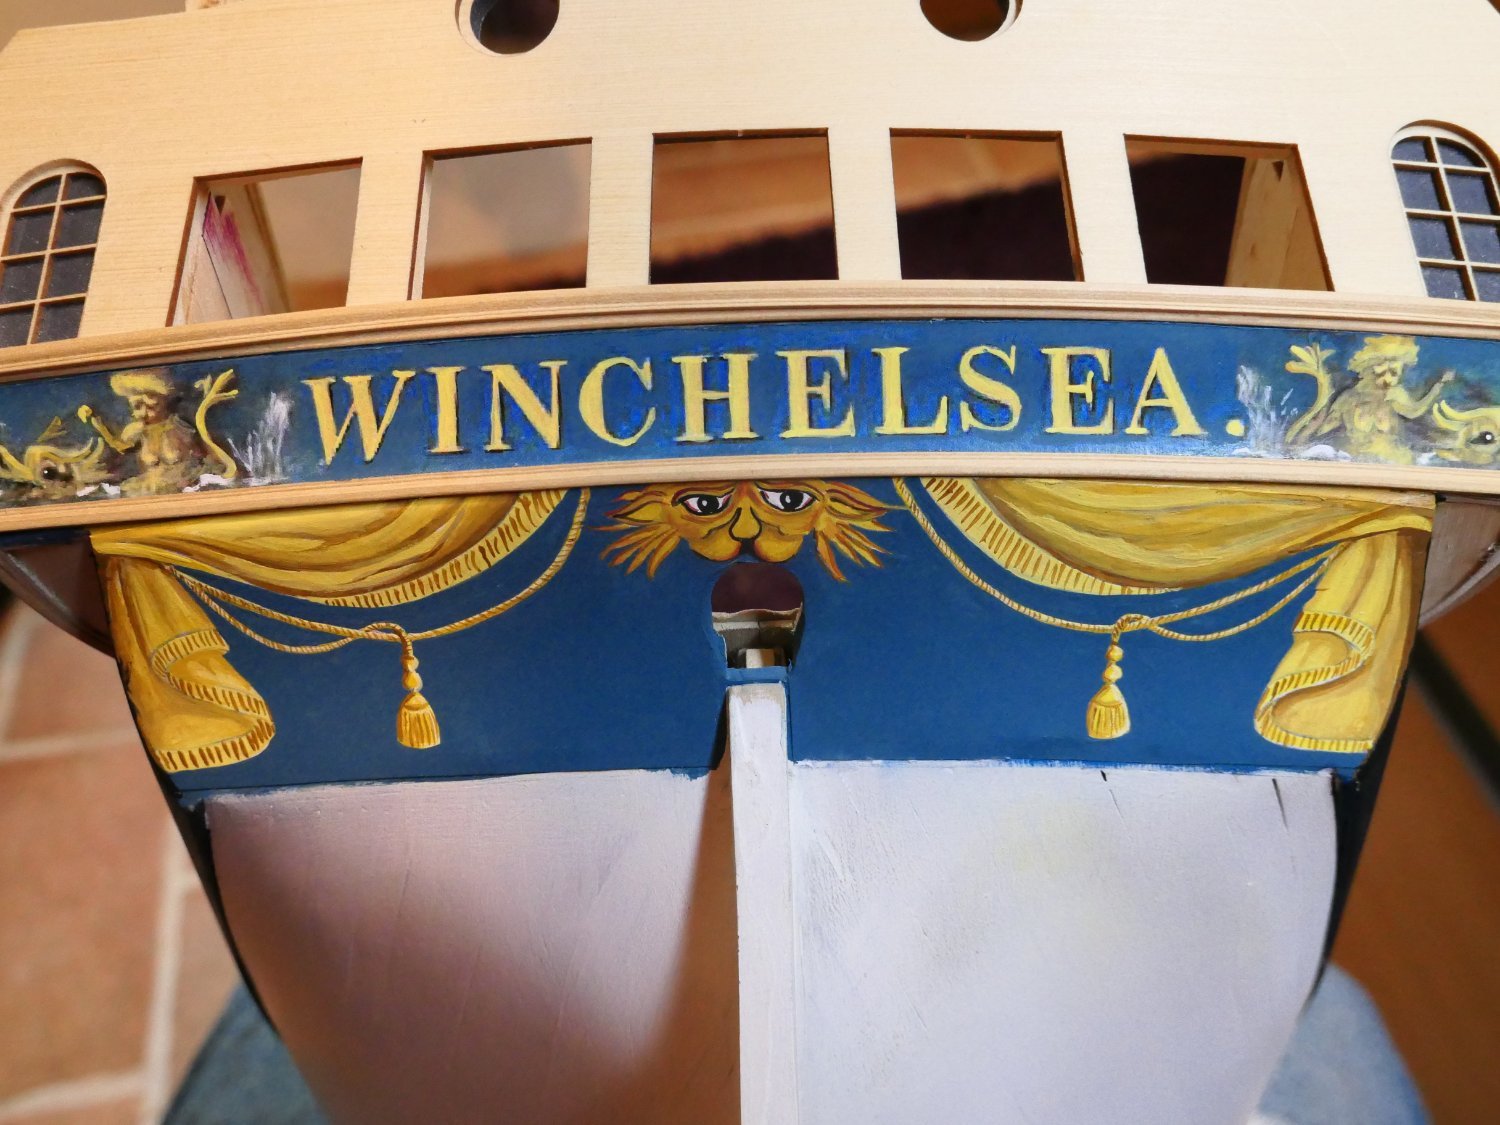
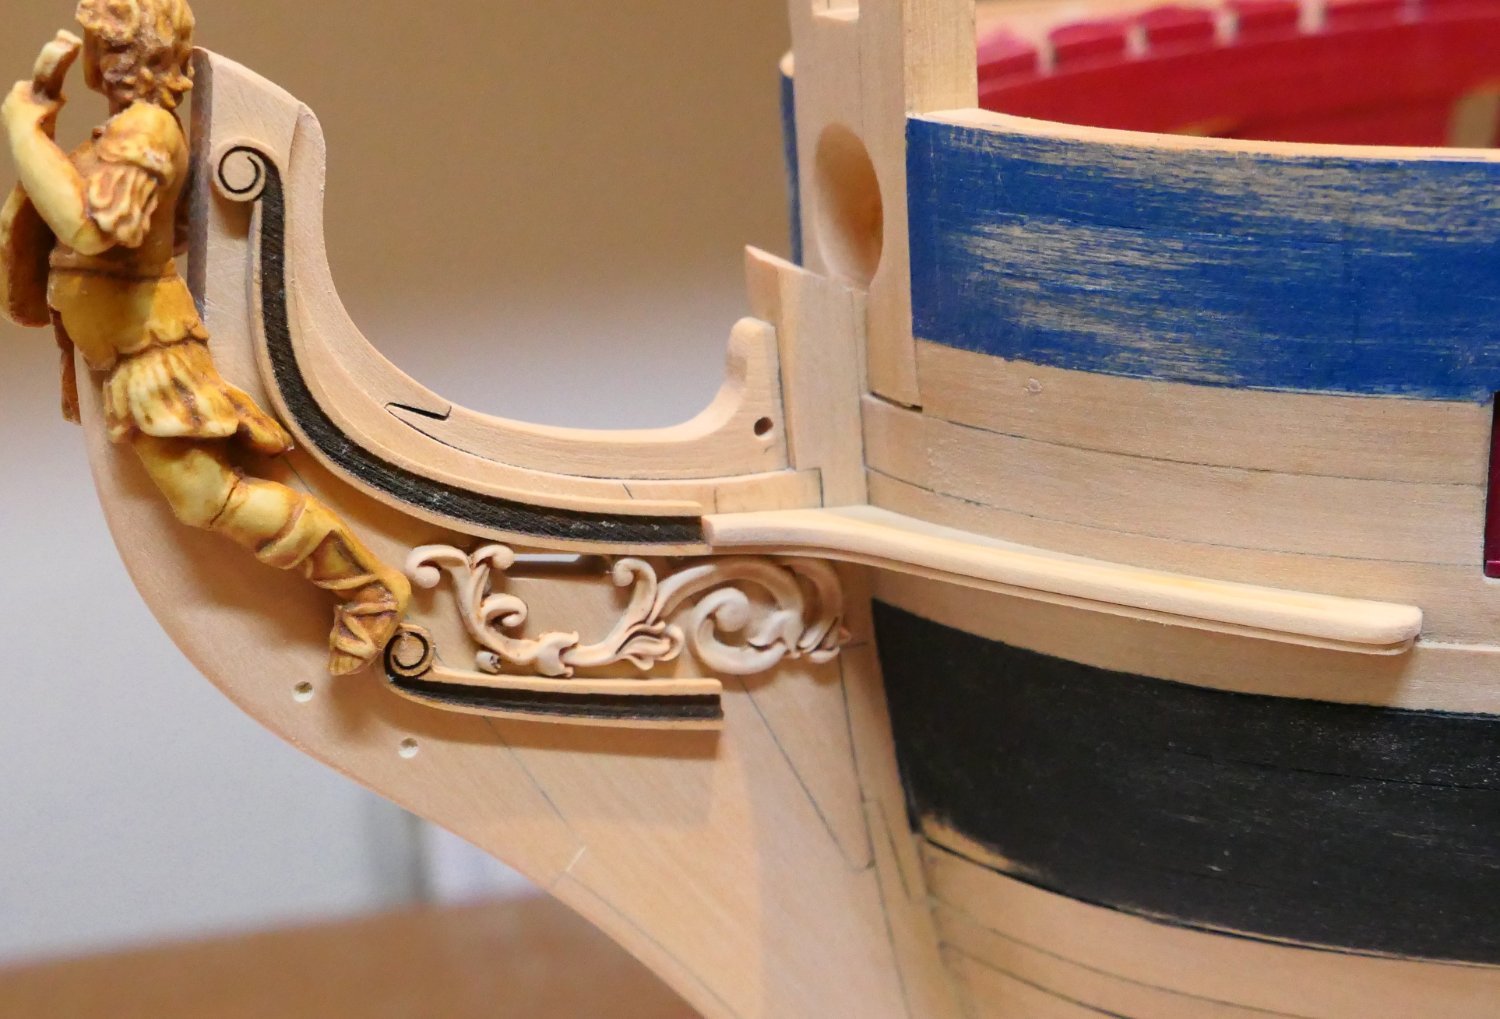
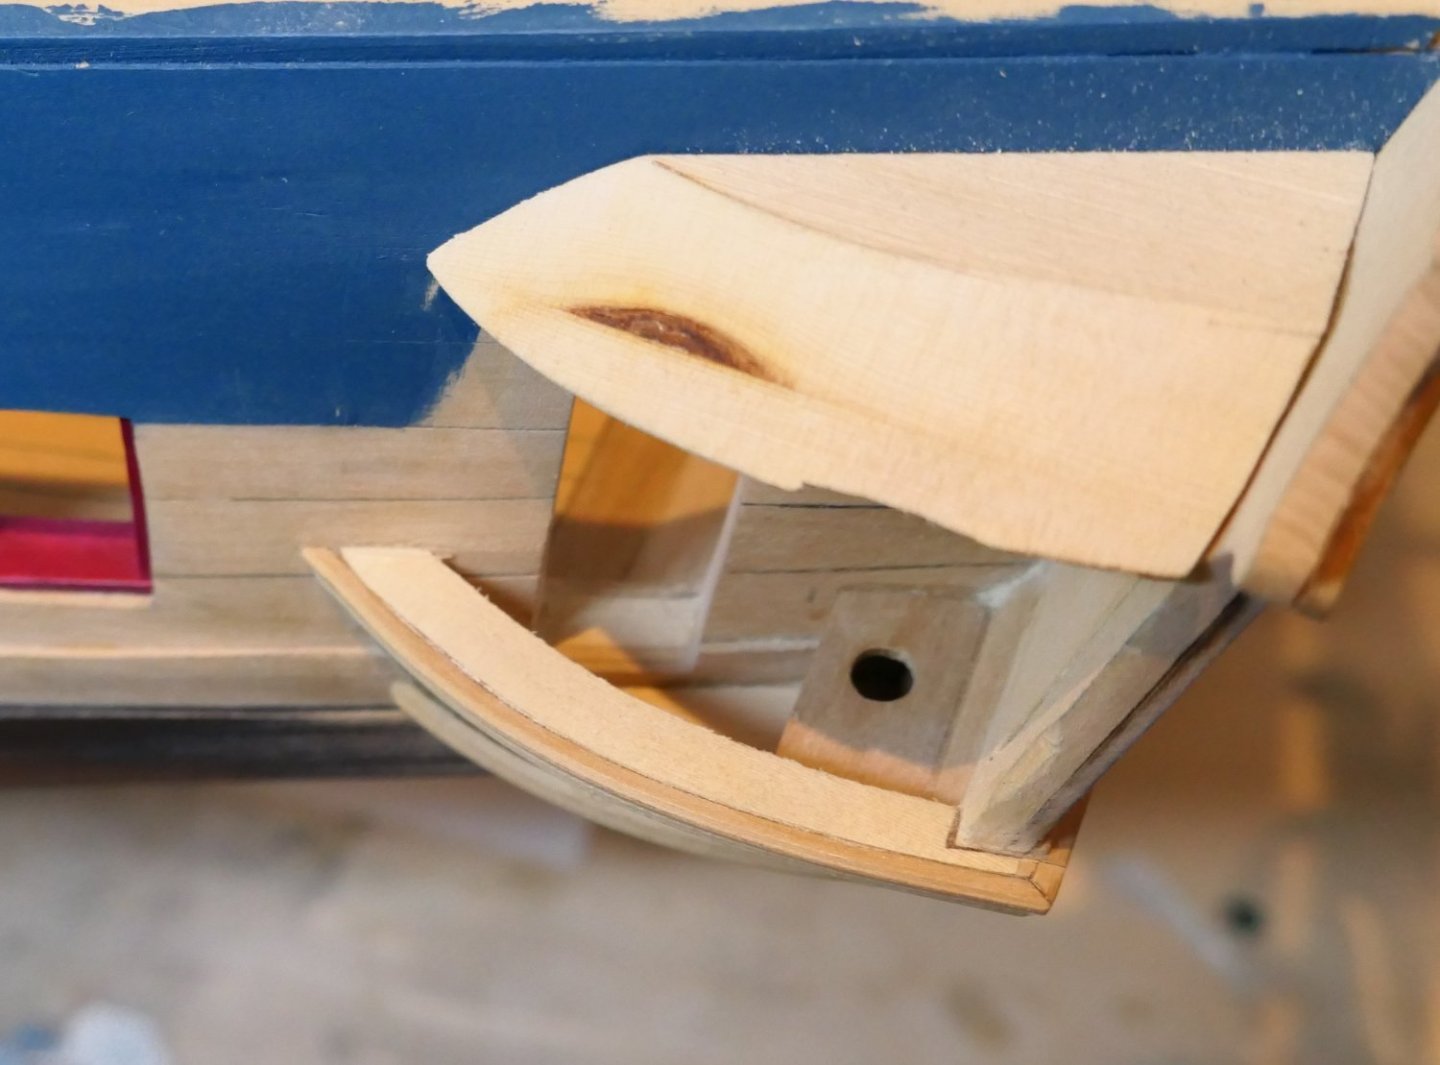
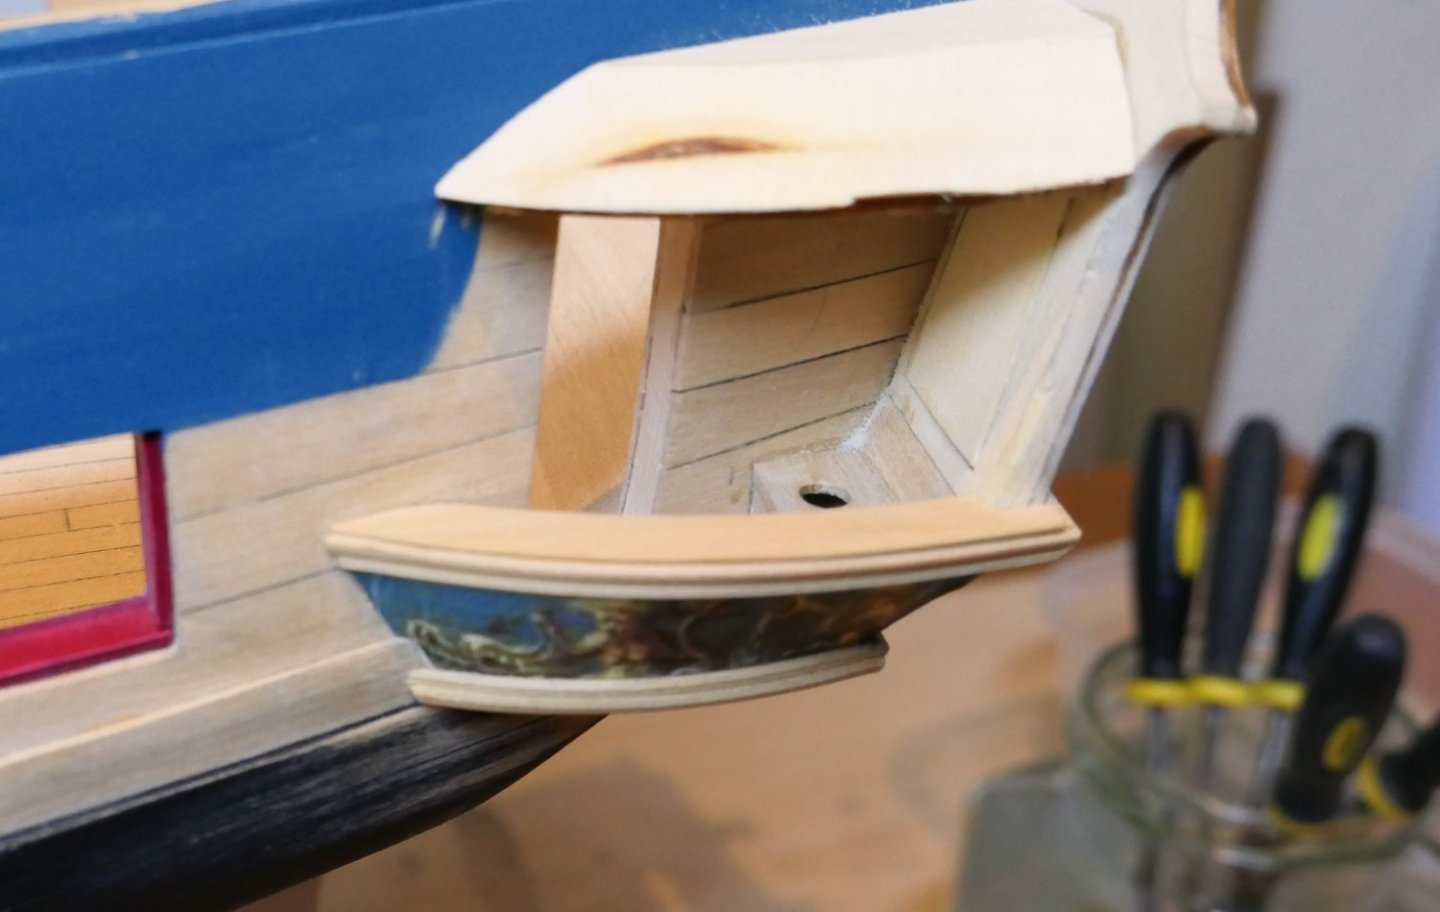
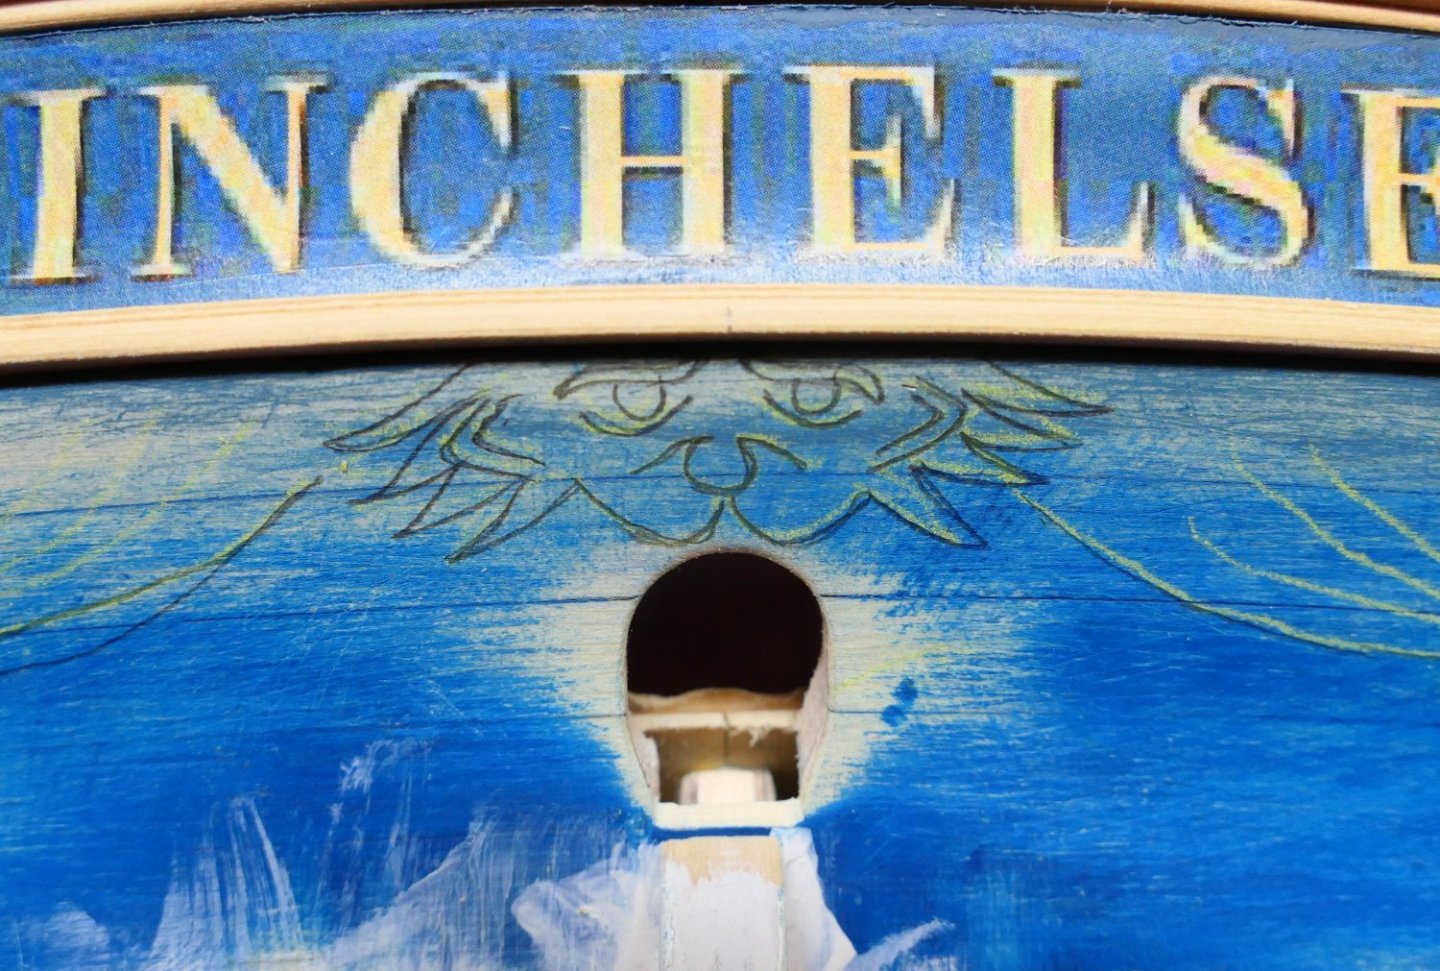
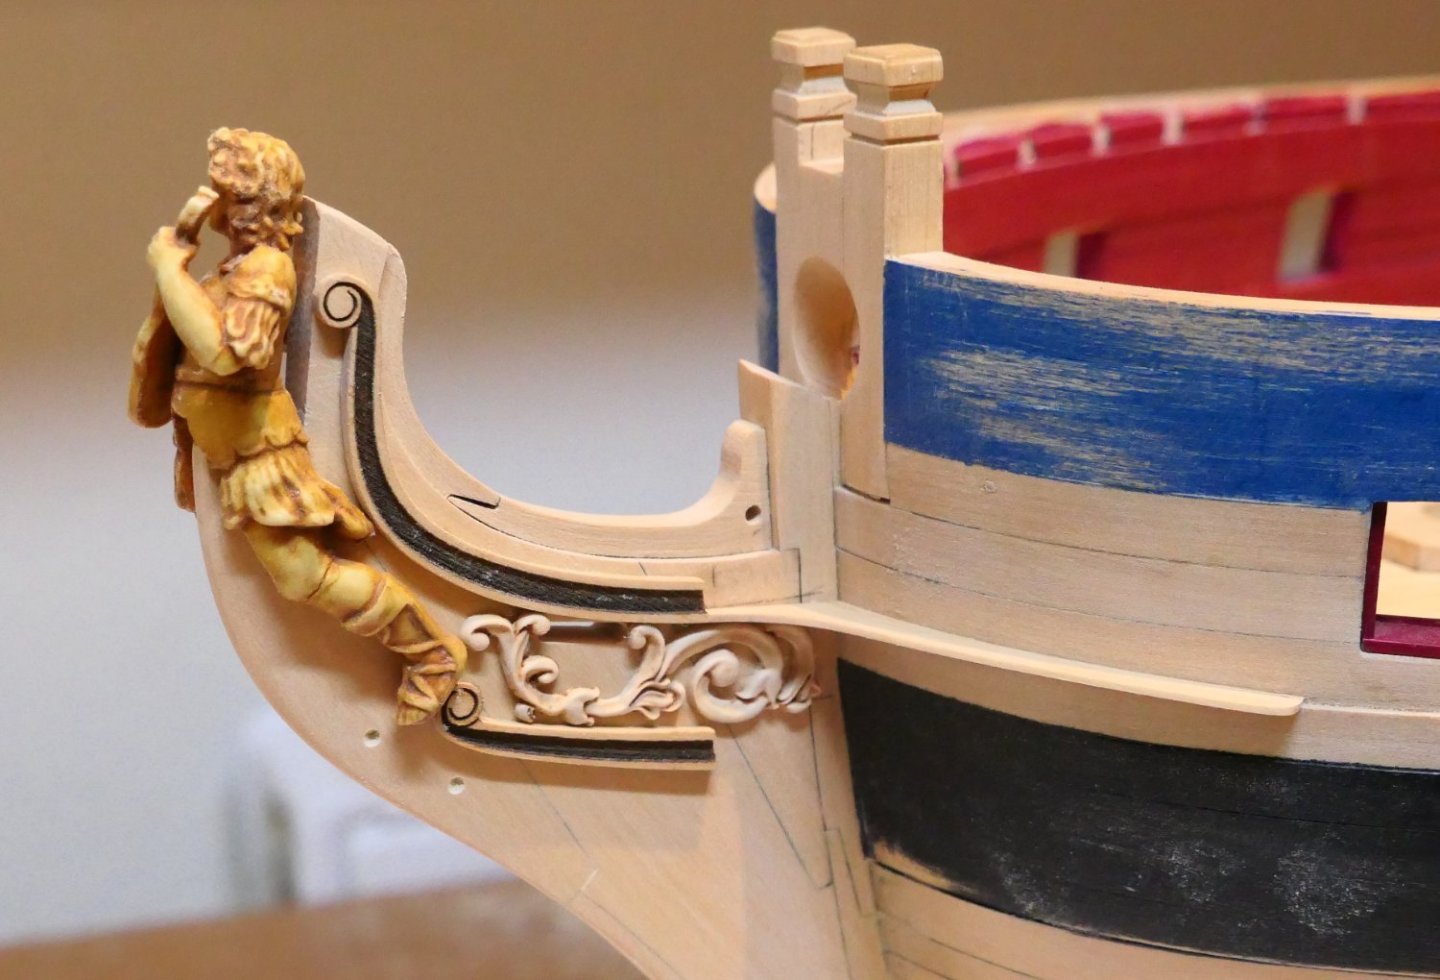
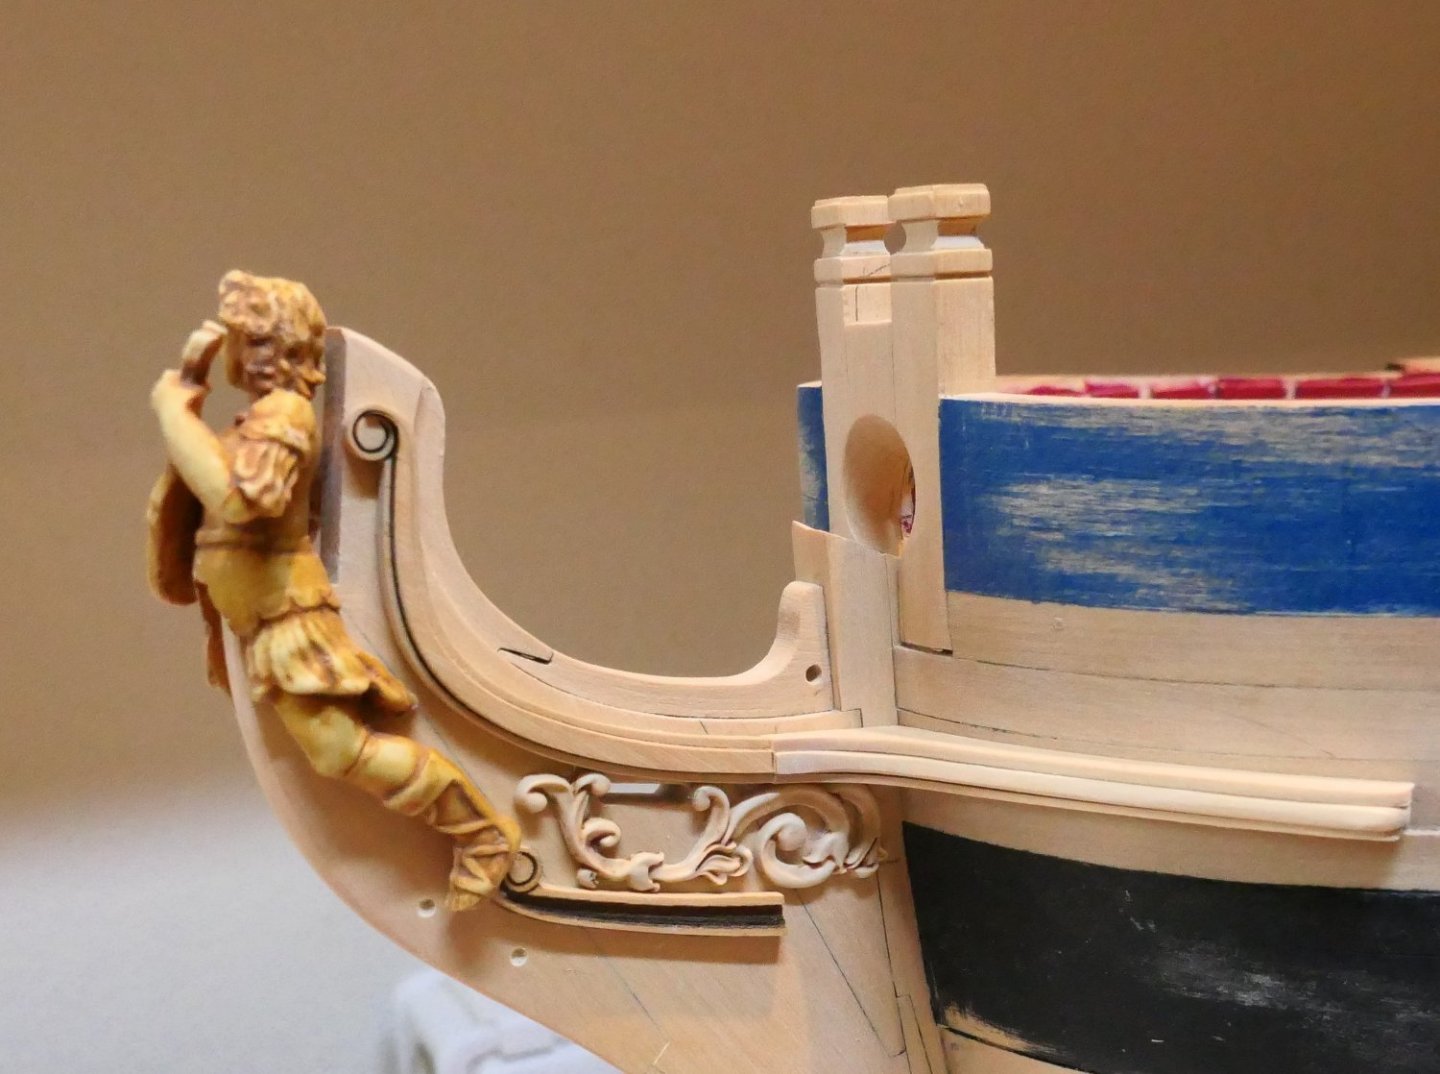
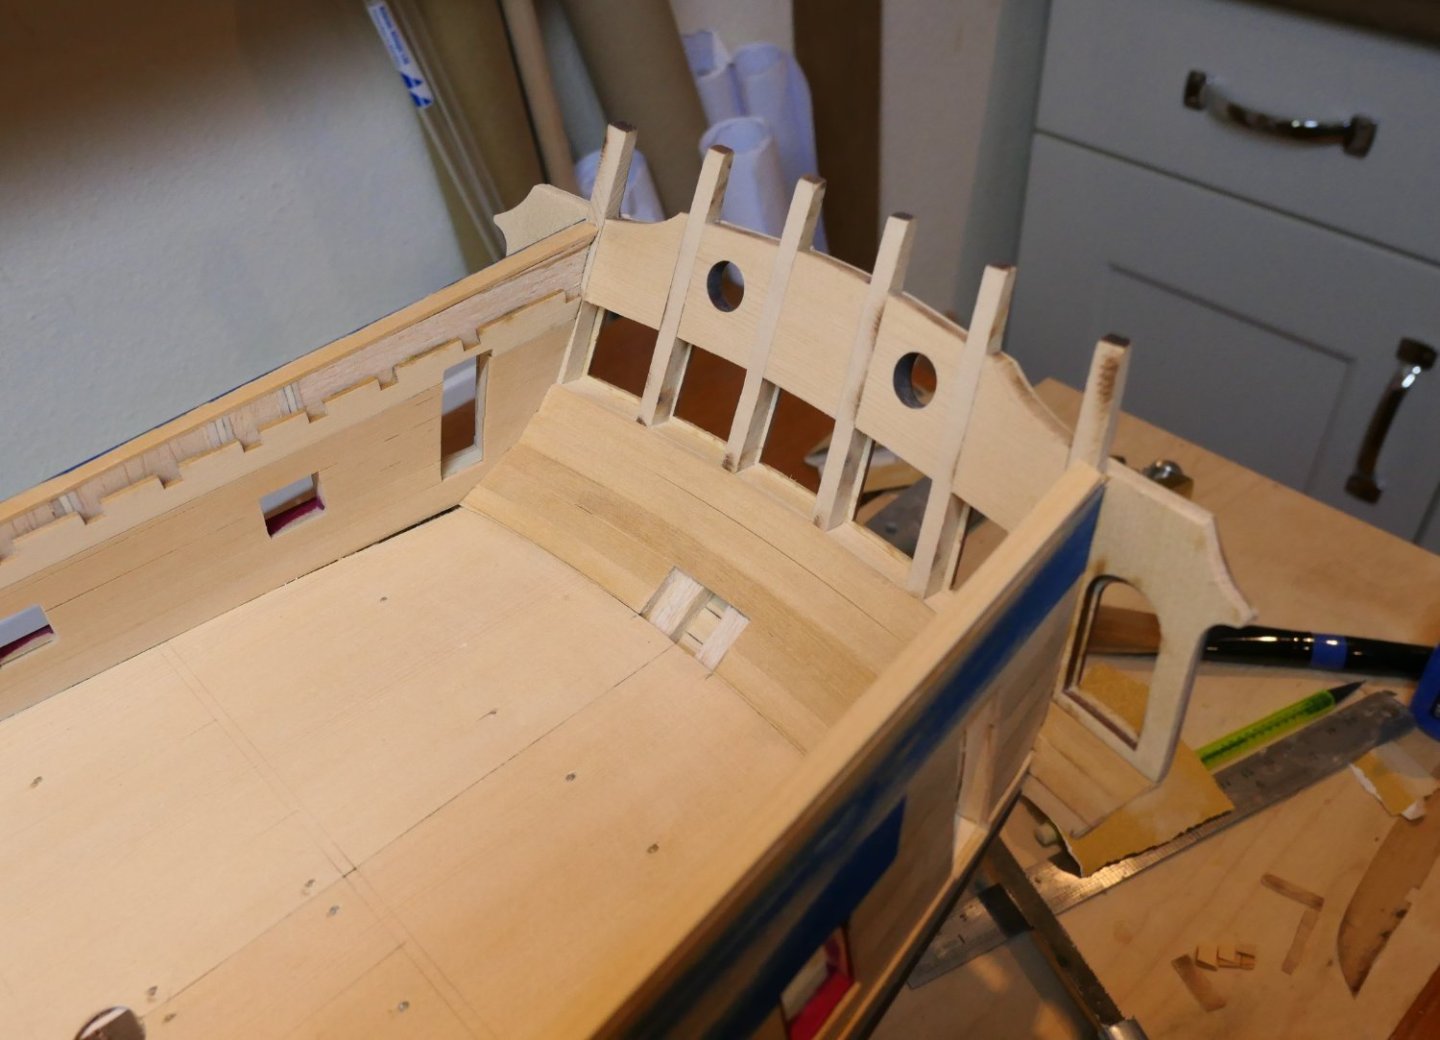
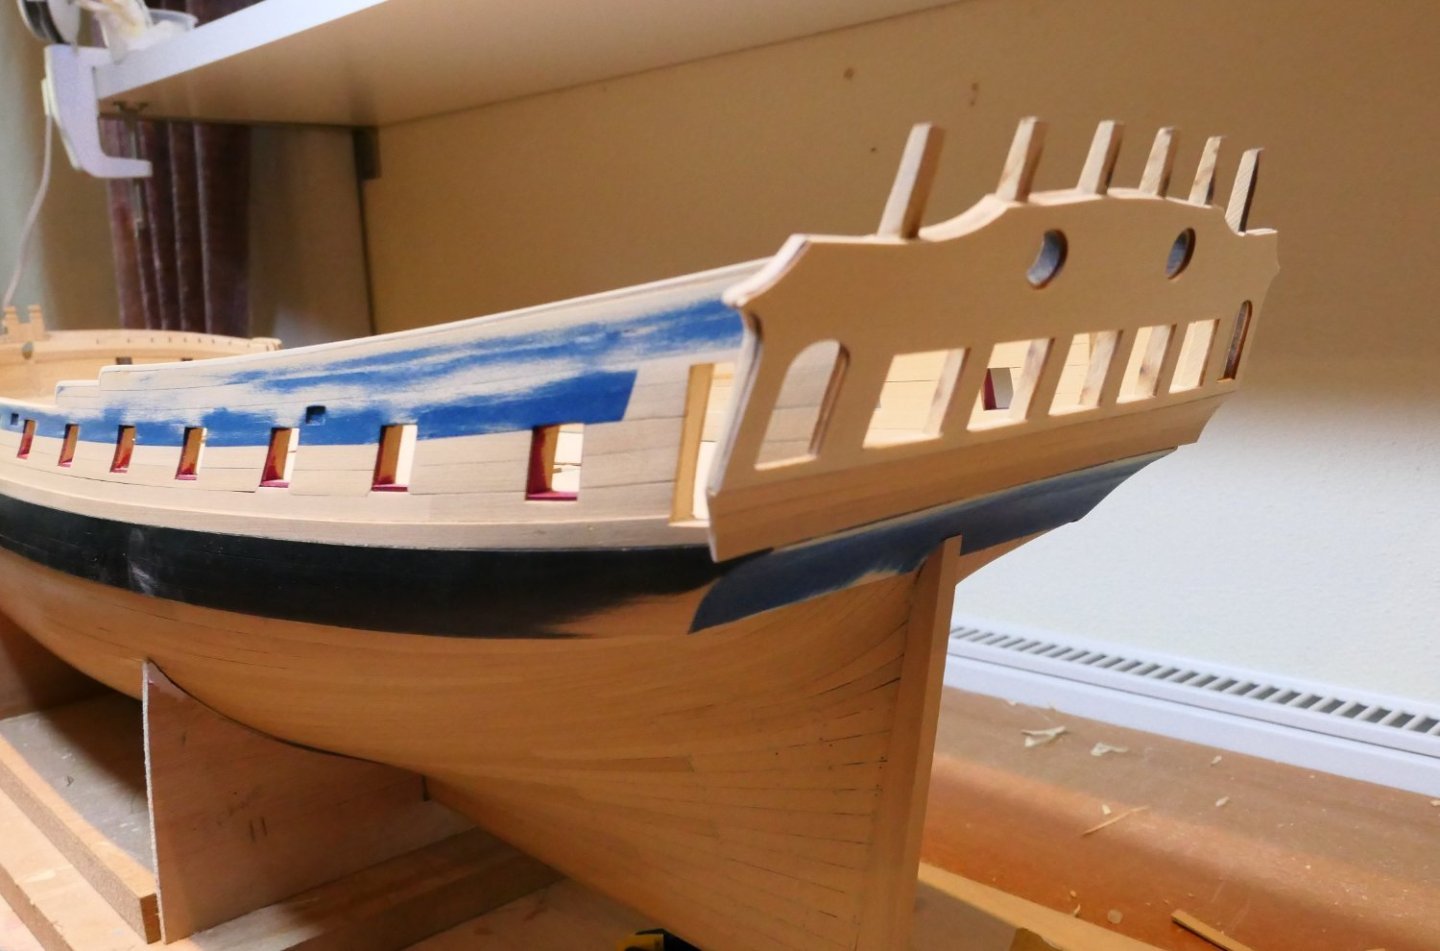
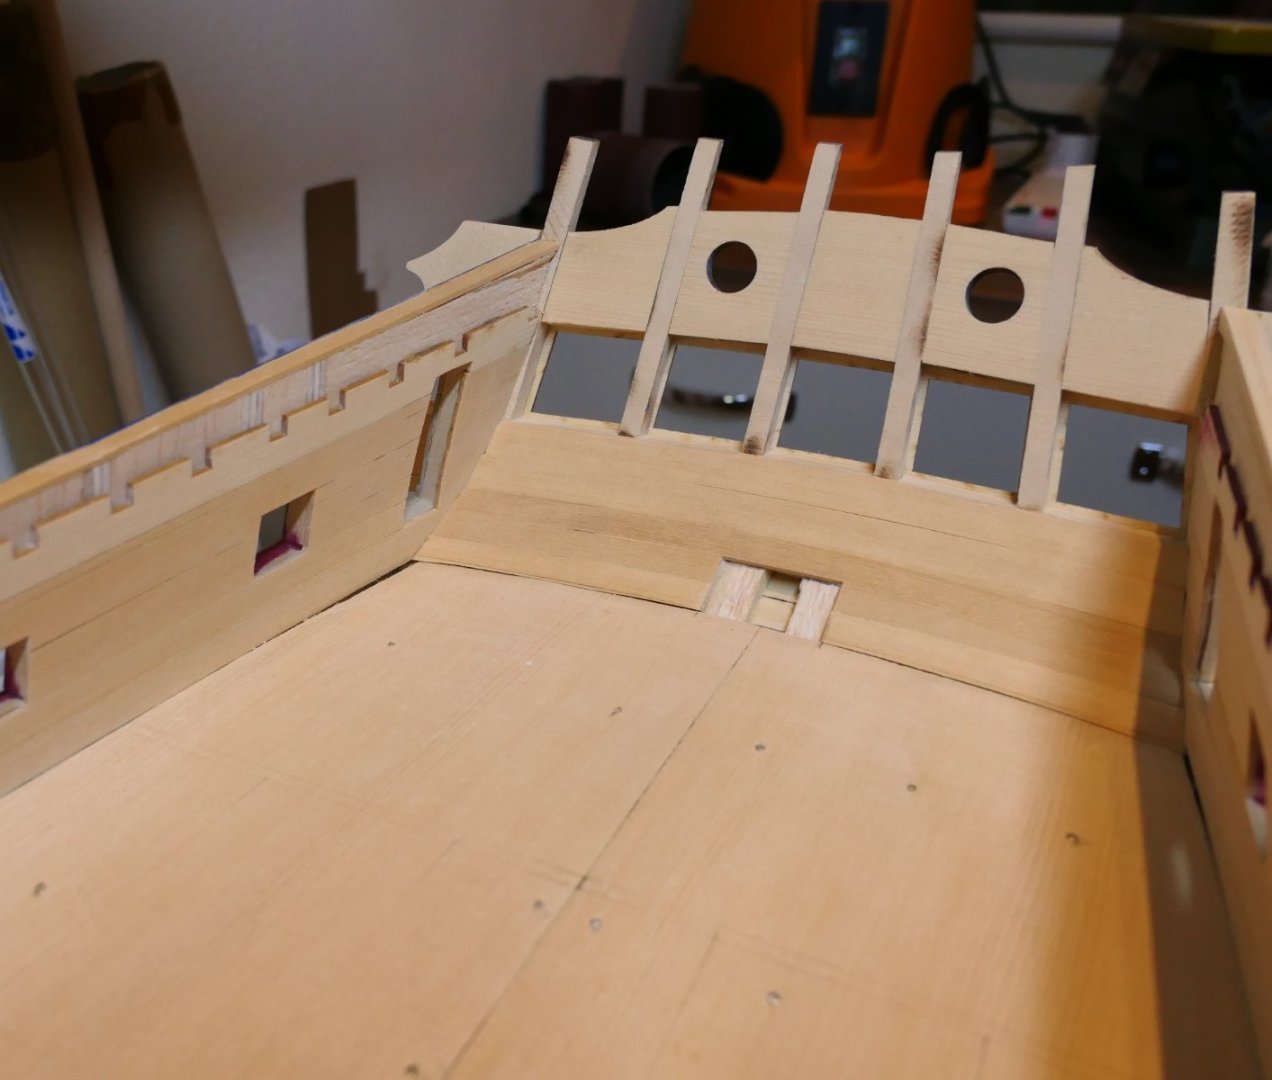
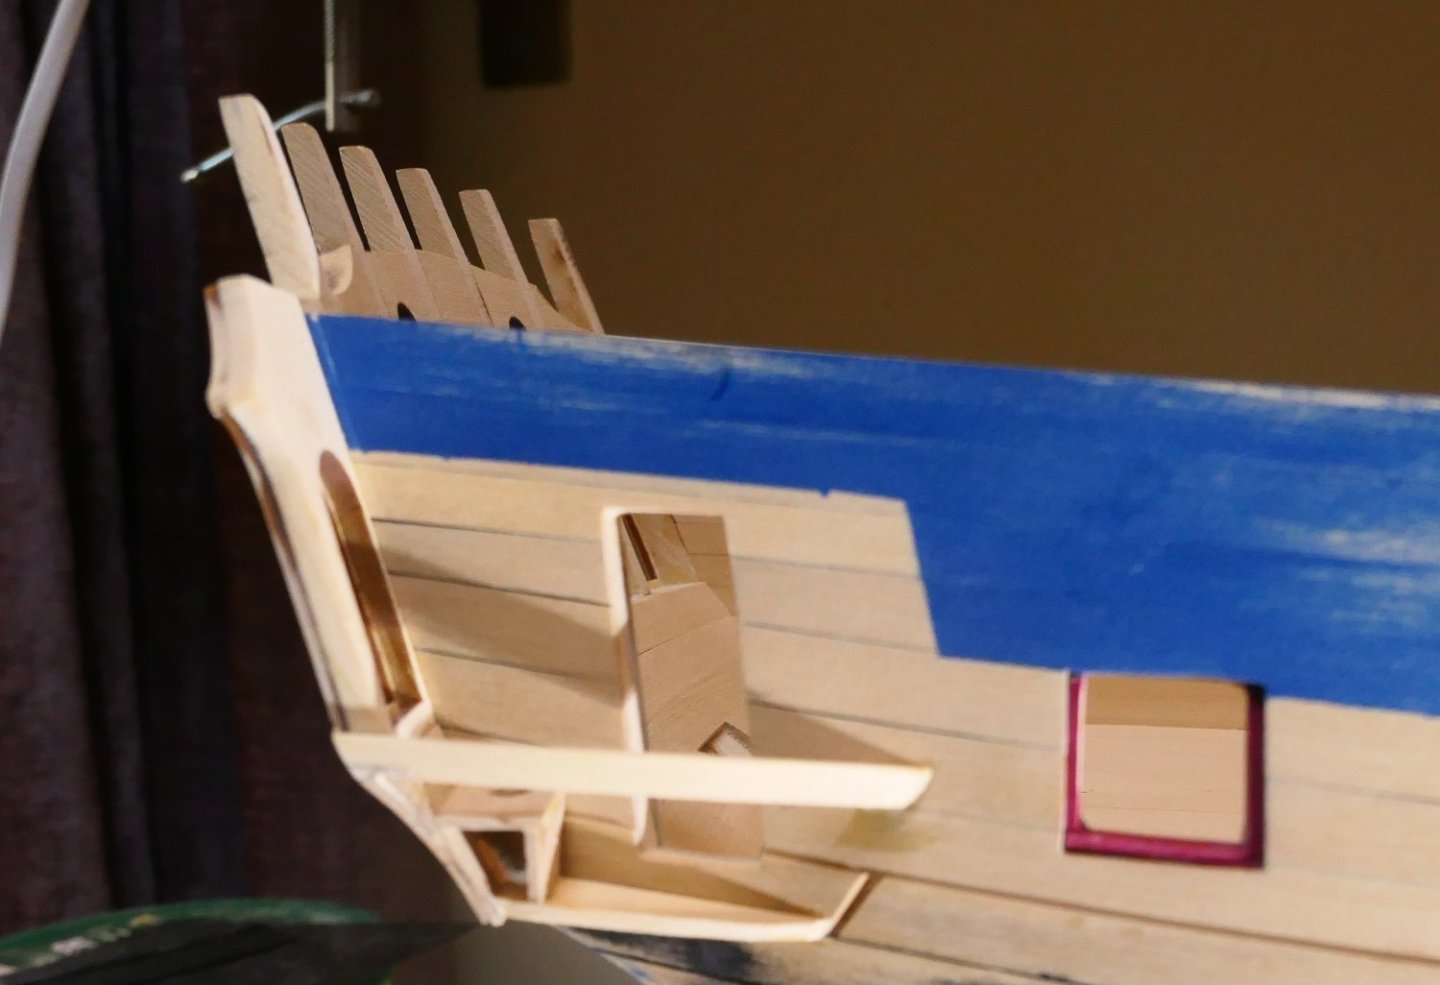
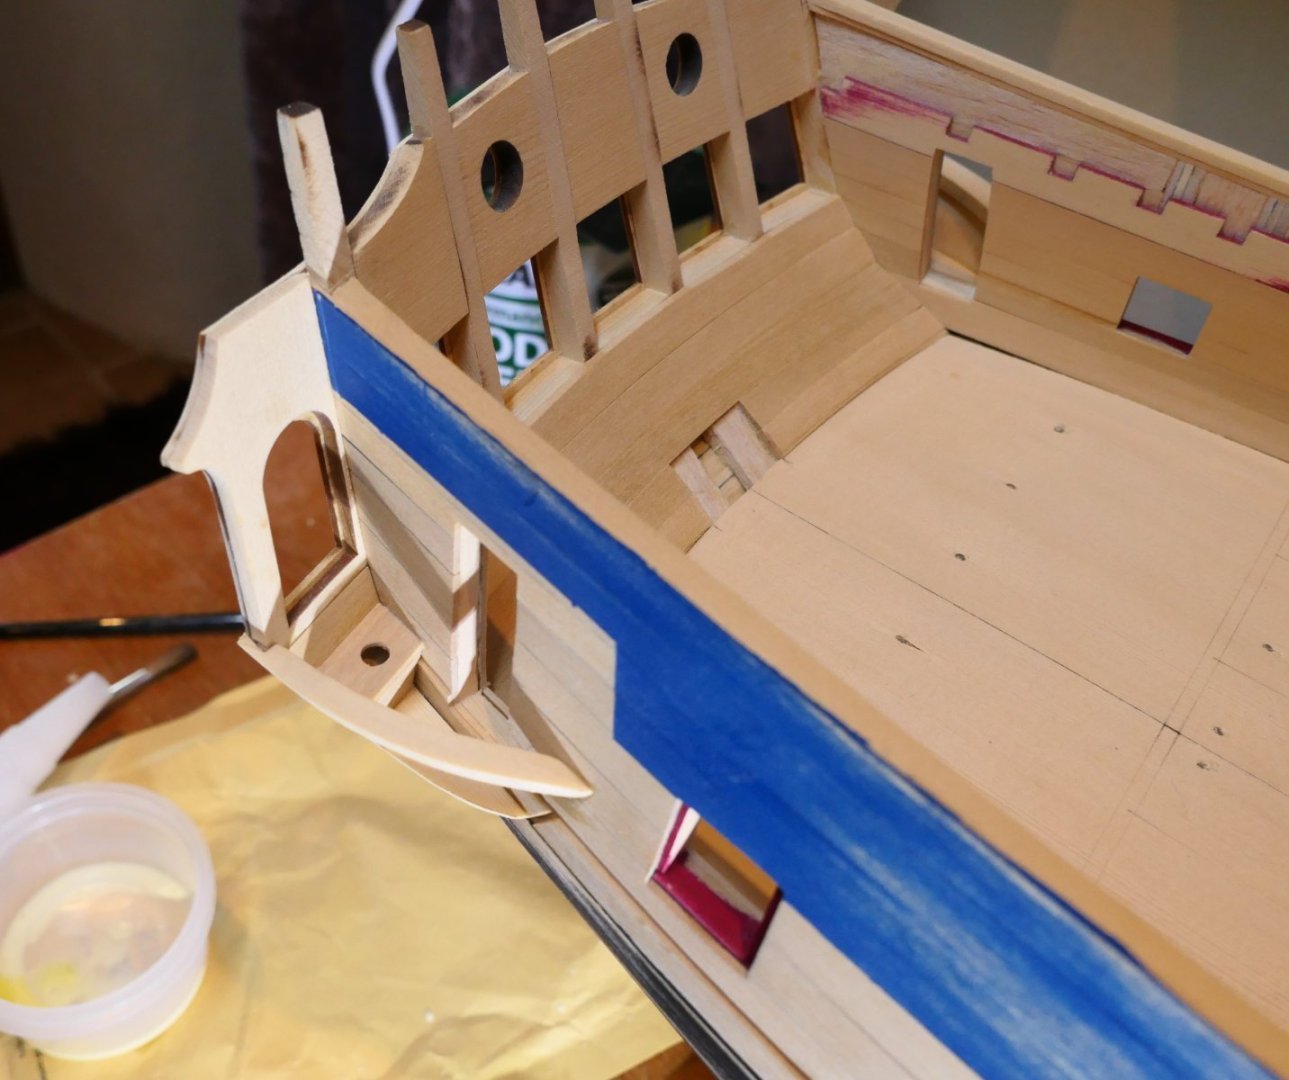
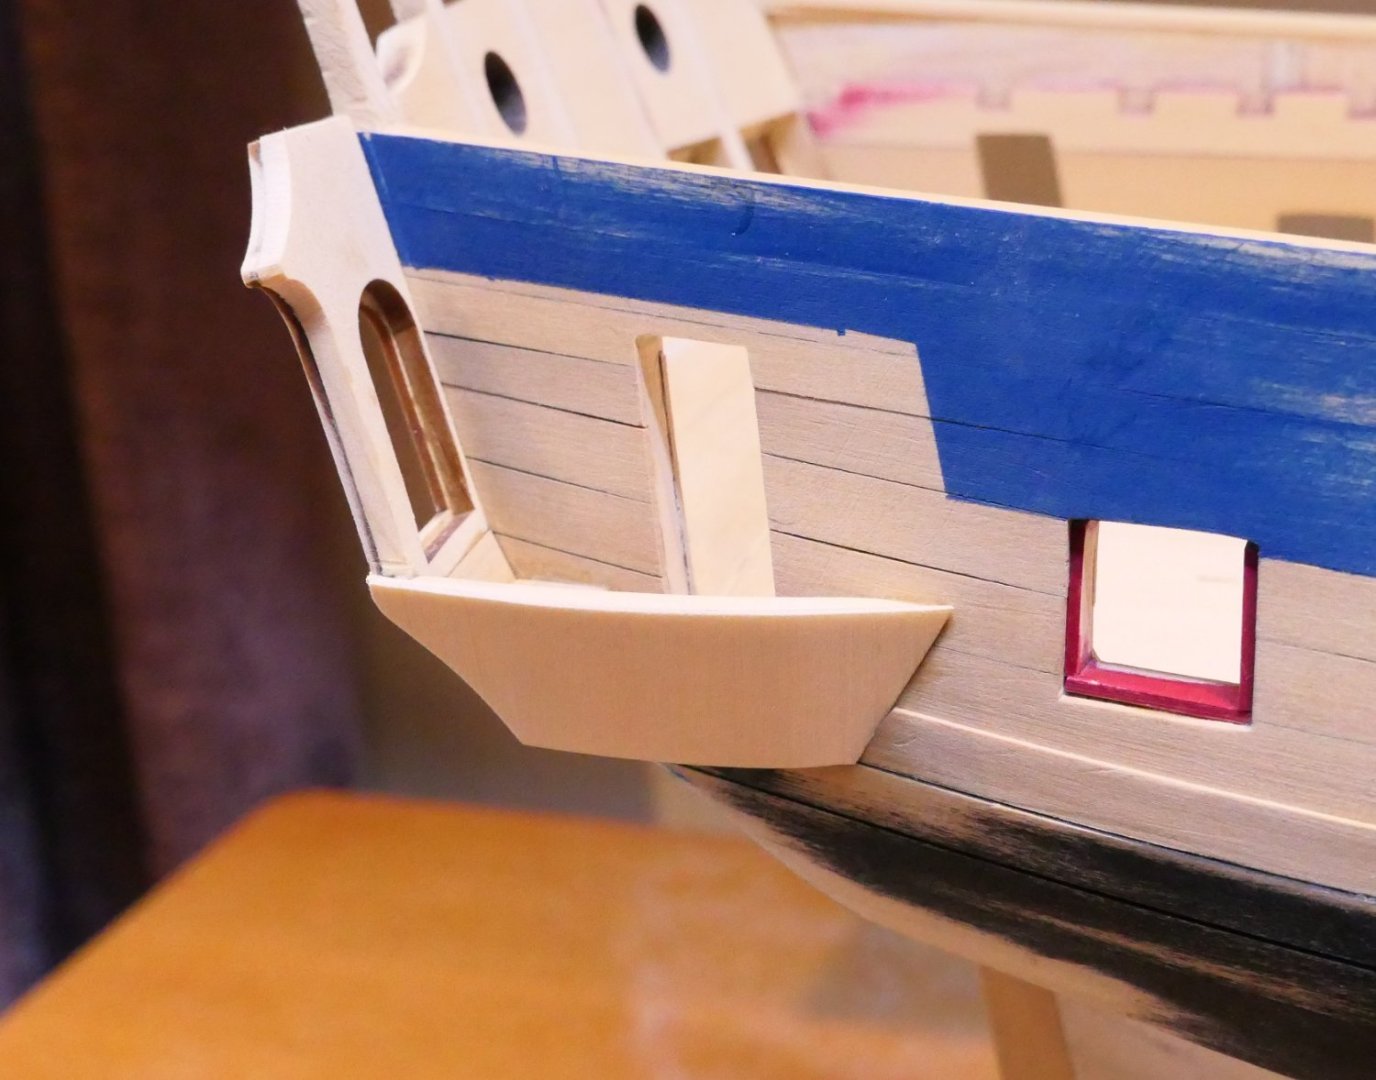
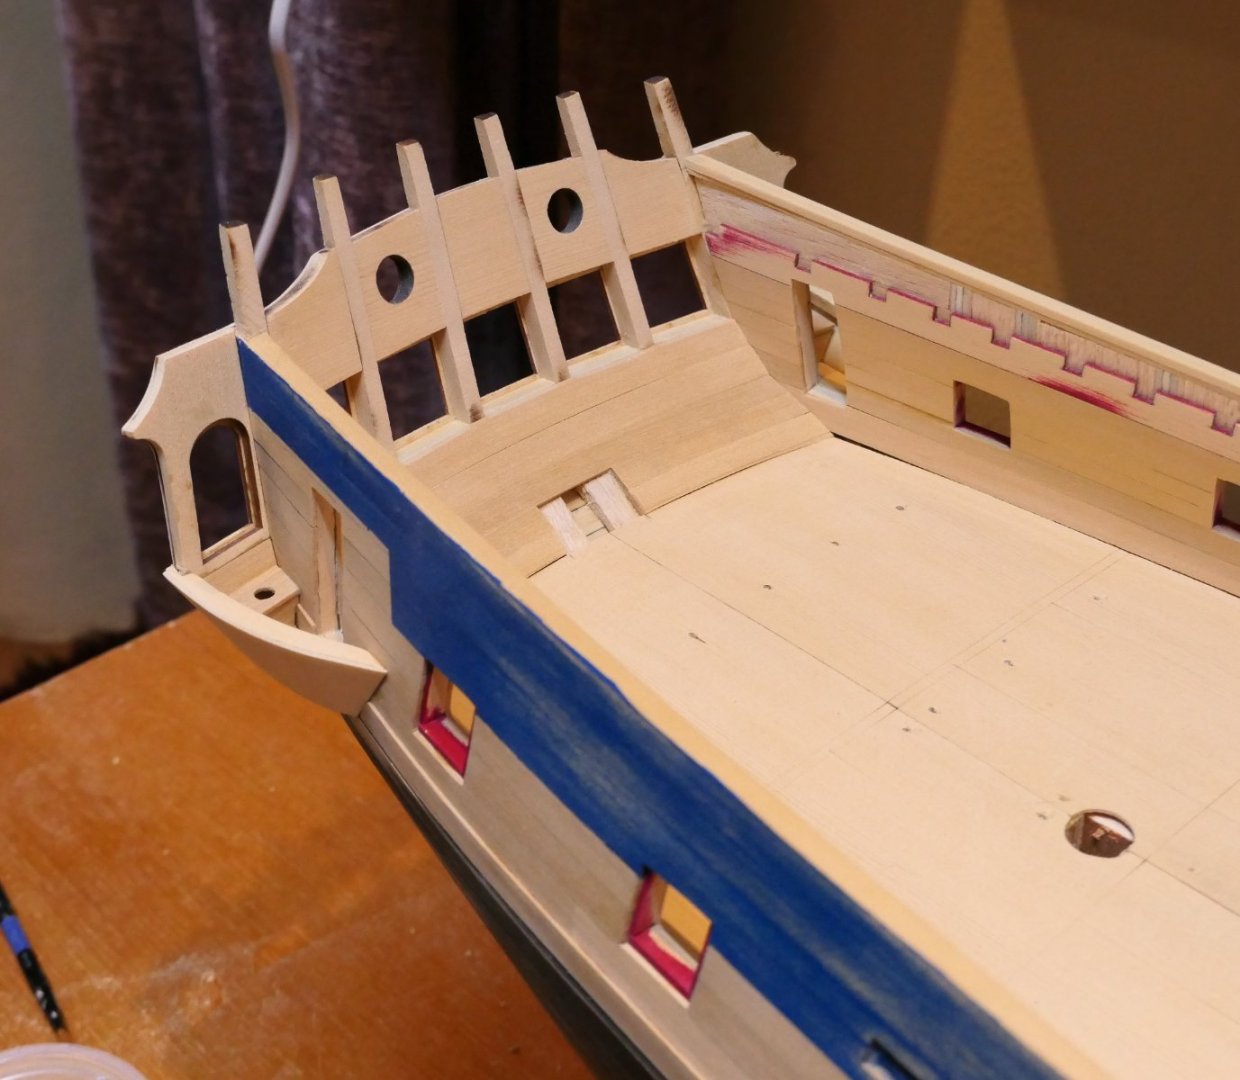
The QGs and in particular the scraped fancy rails proved a right old trial for me. I could not get the rails either to sit correctly on the compound curves of the lower portion of the QG or to follow a nice line. I ripped off the QGs twice and eventually settled upon filing the upper edge of the lower portion more or less vertical. That was the only way I could get the rail to sit nicely. Then I didn't like the join between the rail and the adjacent former. So I cut a piece of very thin boxwood to cover it. I think it finishes off the rail nicely. I wanted to paint the lower transom. I followed the design shown on the dustjacket of Antscherl/Herbert's Swann Class Sloop: I just liked the look of a lion's head even if that forsakes historical accuracy. I also followed the painting directions found within that work - though without success. Painting direct on to the ship is very diificult. Here I am transferring the design using transfer paper. And here is the lion's head ready for paint. And here I have painted the transom. But I dont like it. So I painted the design on paper and stuck that on. It's much easier. I used the Syren friezes. I had intended to paint the figures but it proved far too difficult. Instead I painted on a few highlights and lowlights intending that that should give a bit of a hand painted feel. A cheat I know..... I also painted went over the letters in yellow and the blue background to match the lower transom. Its all actually quite uniform though the pictures suggest otherwise. Far from perfect - I think my lion looks anxious/sad rather than terrifying and the right hand drape is a bit of a mess - but I will stick with it. Thanks for looking in. Fred


-
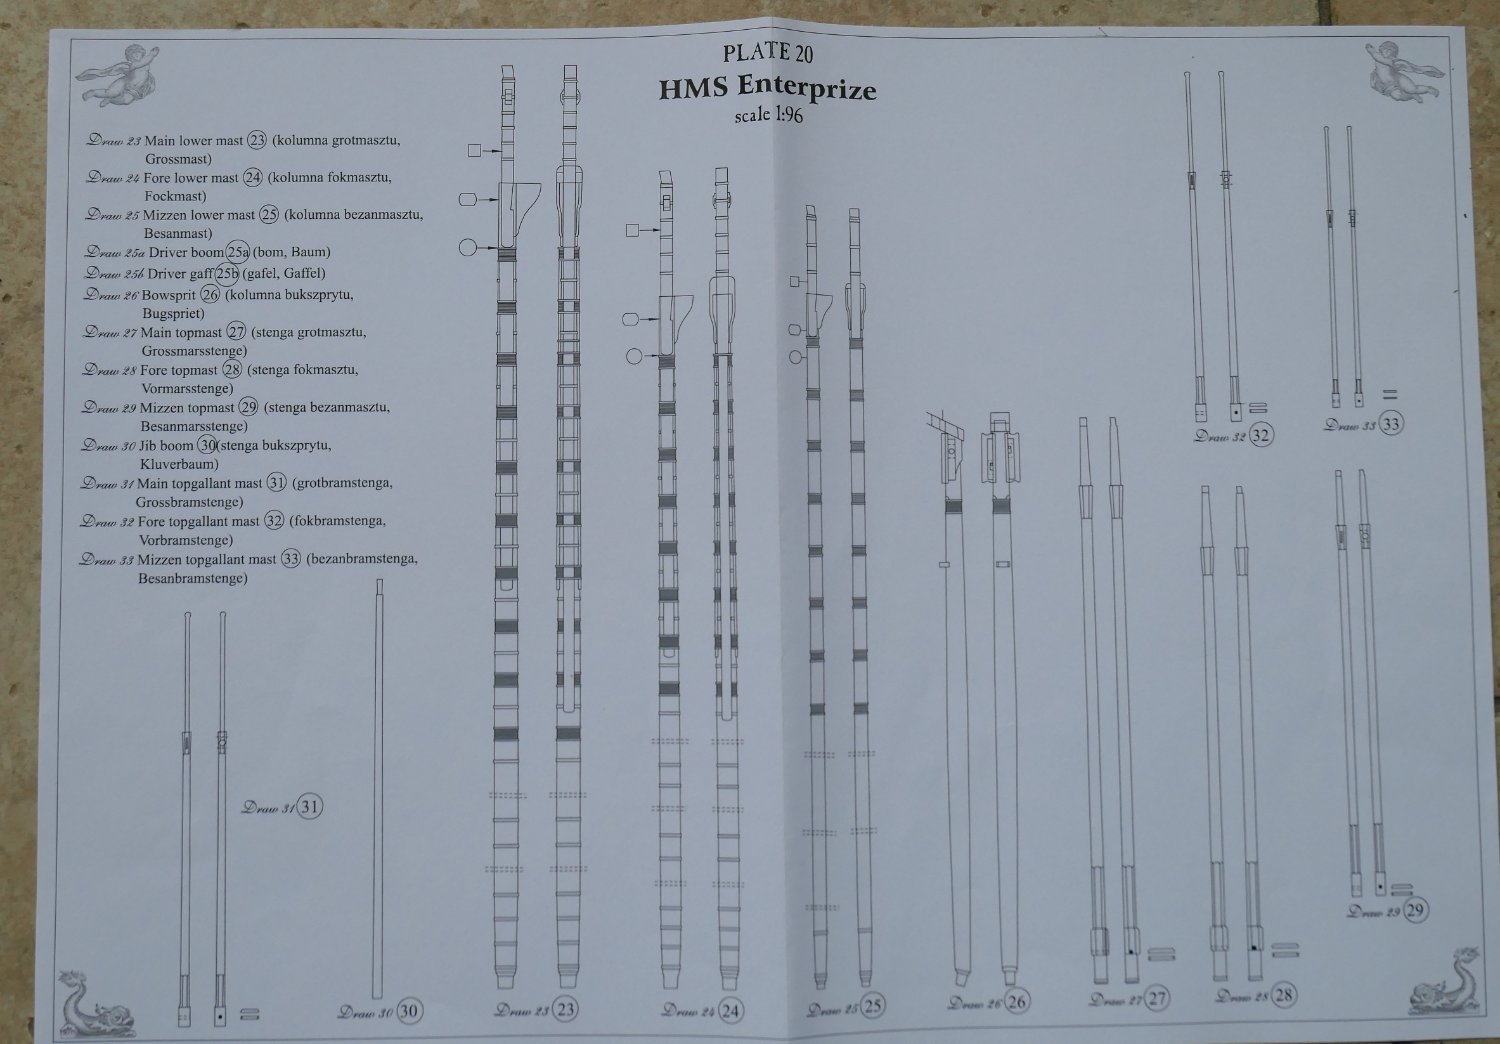
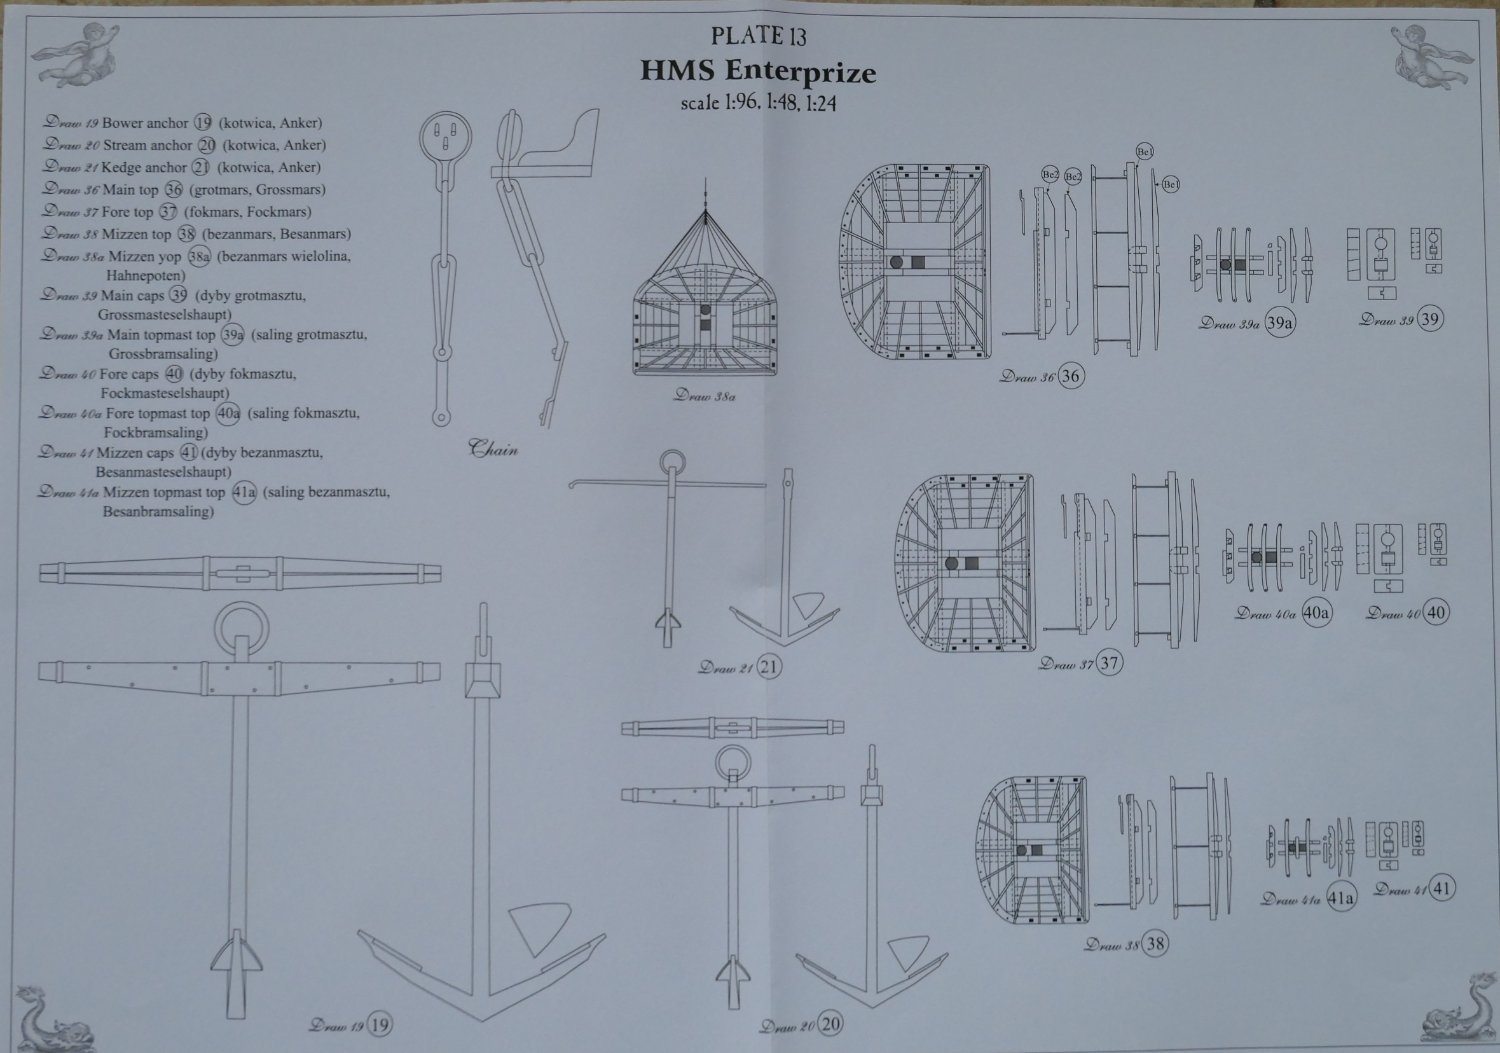
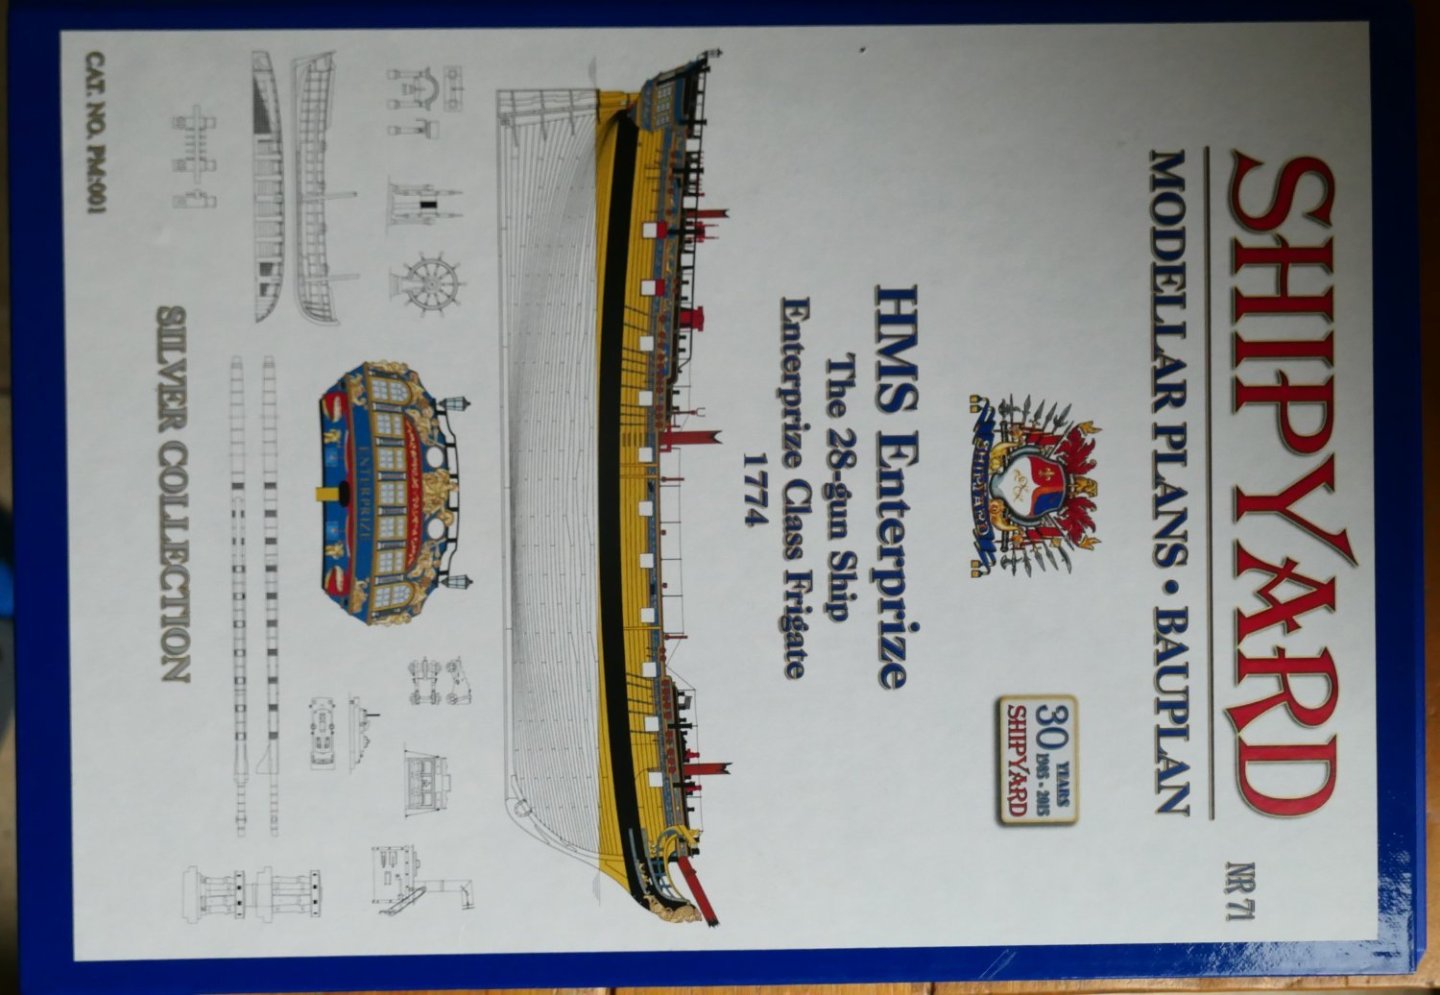
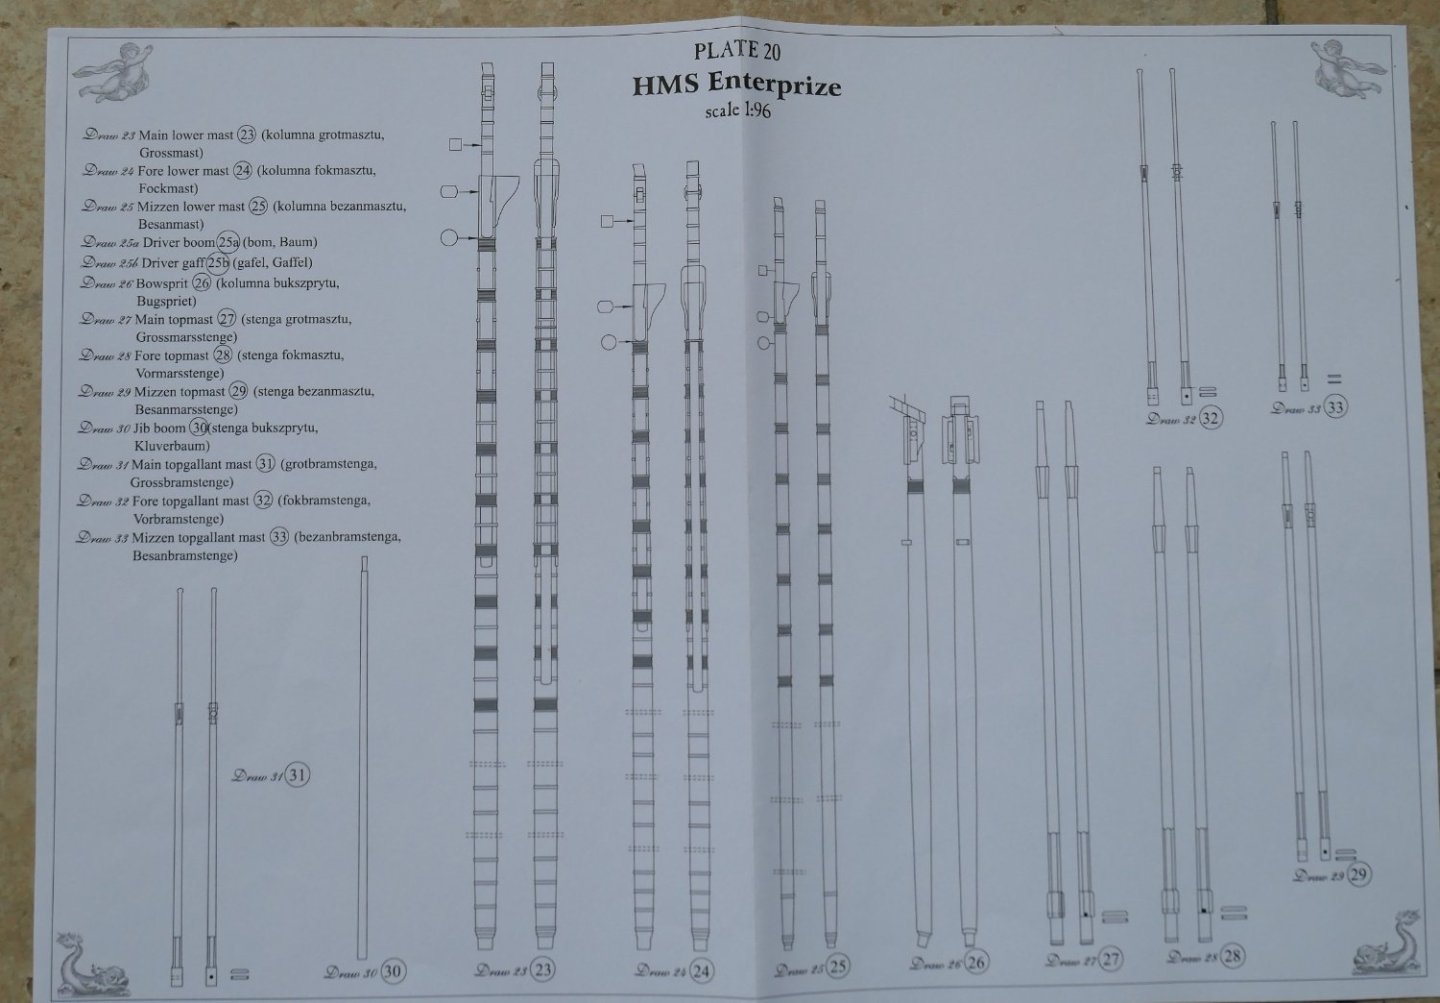
Hi Frank Thanks for your message. I located the masts by reference to both the markings on the false deck and the plans which show the mast and bowstrip stubs. As far as i can tell (and this is what I worked to) the main mast is vertical - 90 degrees to the waterline) while the mizzen and fore mast are raked. I took the angles from Chuck's plans. The plans for the Enterprize are available from Cornwall Model Boats. Here is the box and the plates for the masts. I took the plans down to the local copyshop to scale them up to 1/48. I do not know how accurate the Enterprize plans are for Winchelsea. The 2 frigates are 10 years apart so more or less contemporary. I also have HMS Diana from the Anatomy of the Ship series. To my un-schooled eye the Diana masts look pretty much the same as those shown by the Enterprize plans. At all events these are the best I have and good enough for me! Looking over some of the build logs I am lost in admiration not only at the skill levels others achieve but also by the depth of scholarship others possess. Best wishes Fred
-
I love, in particular, the last photograph with the light coming through the starboard gun ports. Wonderfully atmospheric! Do you have any pictures of each stage of making the port hinges? I would love to understand how you achieve that level of consistency. Best wishes Fred
-
That really is looking very fine indeed. Fred
- 840 replies
-
- 1
-

-
- winchelsea
- Syren Ship Model Company
- (and 1 more)
-
Thanks Chuck. I appreciate you taking the time to offer sage advice. Fred
-
Glenn - Yours is one of my "go-to" logs because (a) it appears to me you are a bit of a perfectionist (b) you are clearly a wonderful photographer and (c) you are always willing to take the time to help - so thank you. I think I probably need to line up the upper hair bracket with the top of the stem (as you have done) and fiddle the fit of the bottom layer of the upper cheek. If I do otherwise I fear I may run into problems with the rails. If I splosh a bit of paint around I suspect all will be well. Thanks Fred
-
Thanks JJ and for the likes. I've started on the cheeks and hair brackets and run into a problem. If I sit the bottom segment of the upper cheek on the top of the black strake - where it should be - the hair bracket sits a little too low against the stem. If I move the cheek up a coupls of millimetres I'll get a better fit with the hair bracket but have an awkward gap with the ends hawse hole pieces when they go in (if you see what I mean). I am inclined to go for the latter and put a little filler sliver above the black strake to fill the void. Any sugestions would be very welcome. Here is a picture of the bottom segmentsitting on top of the black strake but see how low the hair bracket is. Here is the middle segment filed and sanded to fit. And here with the top segment. The Syren one was a little tioo thin to fit so I used it as a pattern and cut a new one from slightly thicker boxwood. The whole is held together by prit-stick glue so its no problem to move. Subject to finalising the position and a little more delicate sanding I think I'm ready for a bit of CA and to splash a bit of paint around. Fred

-
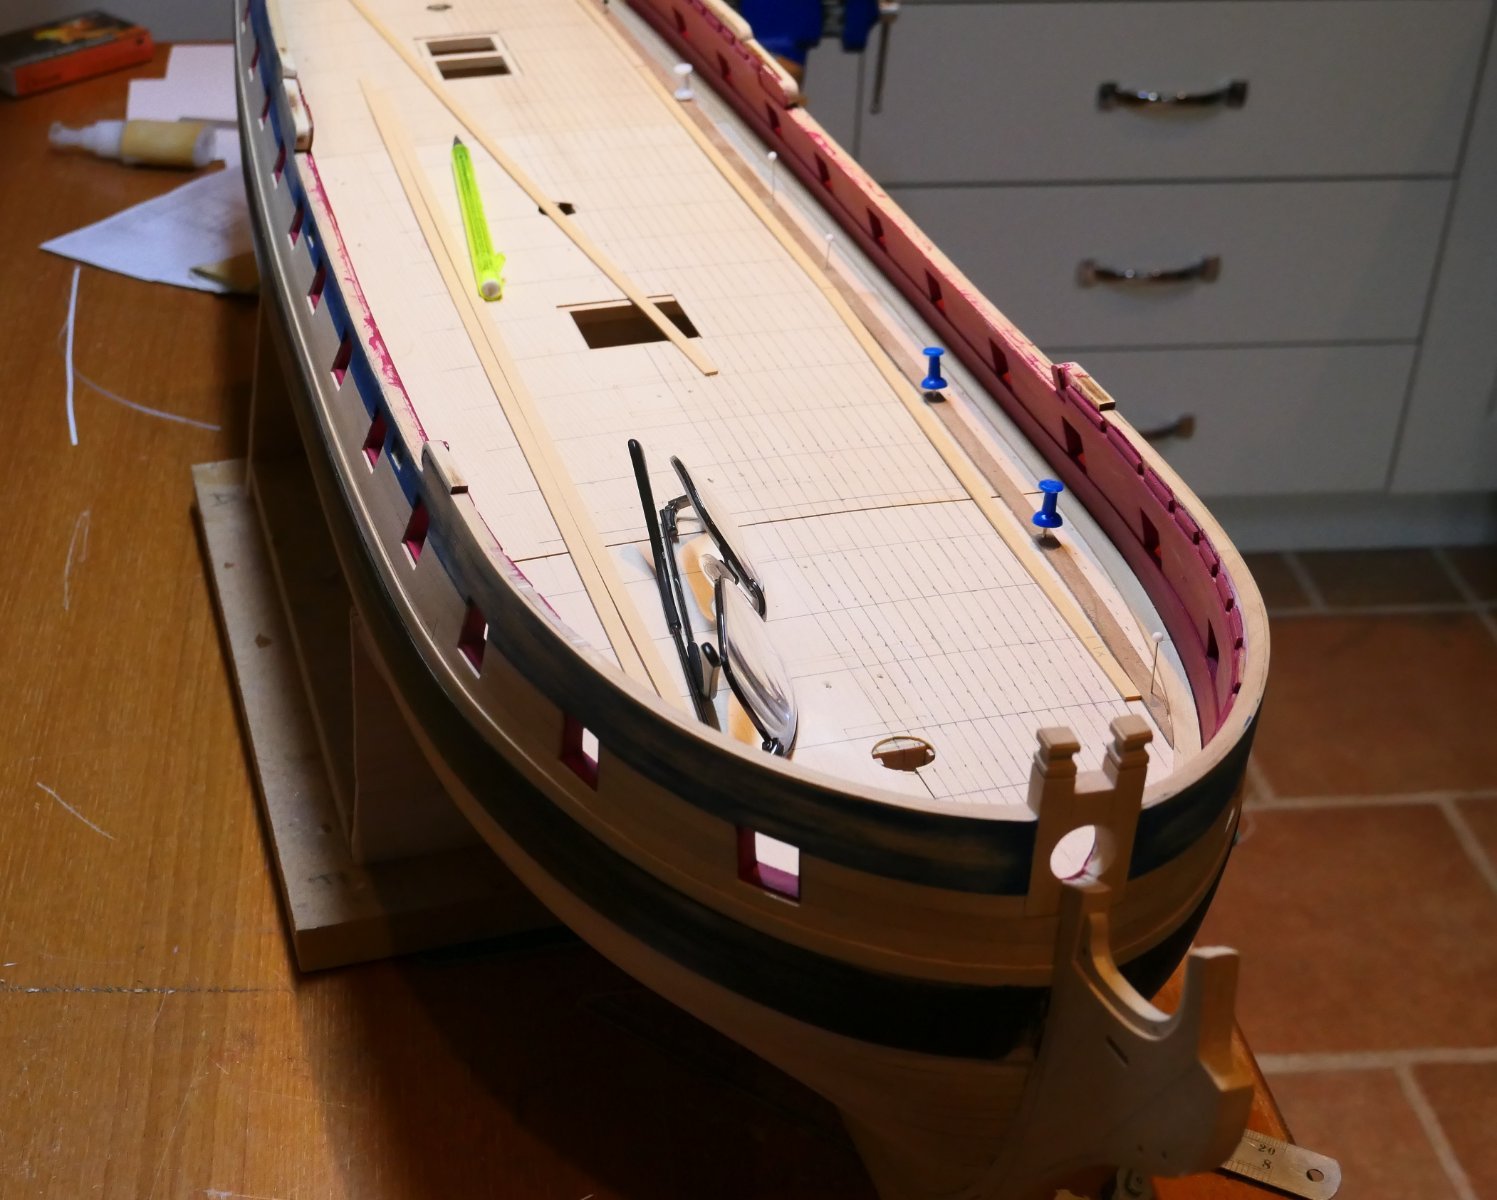
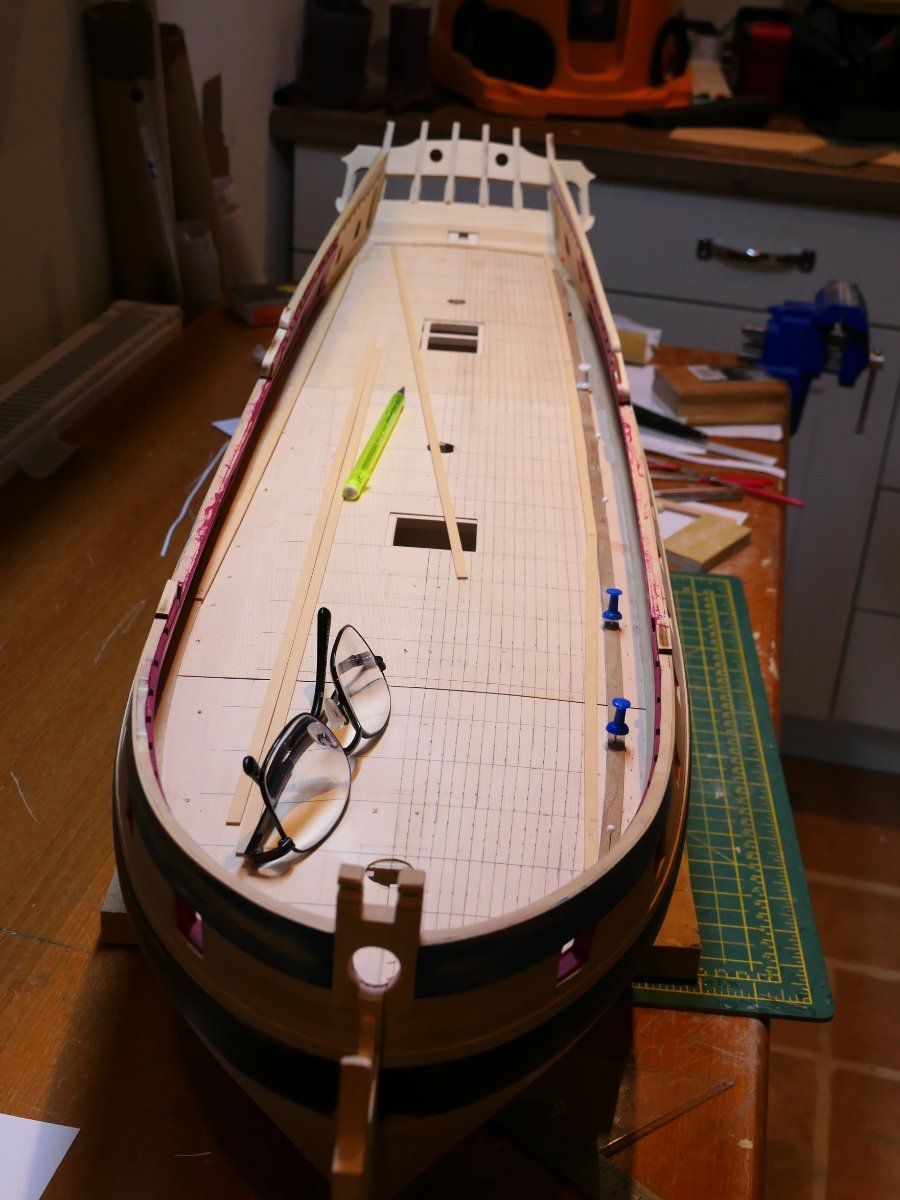
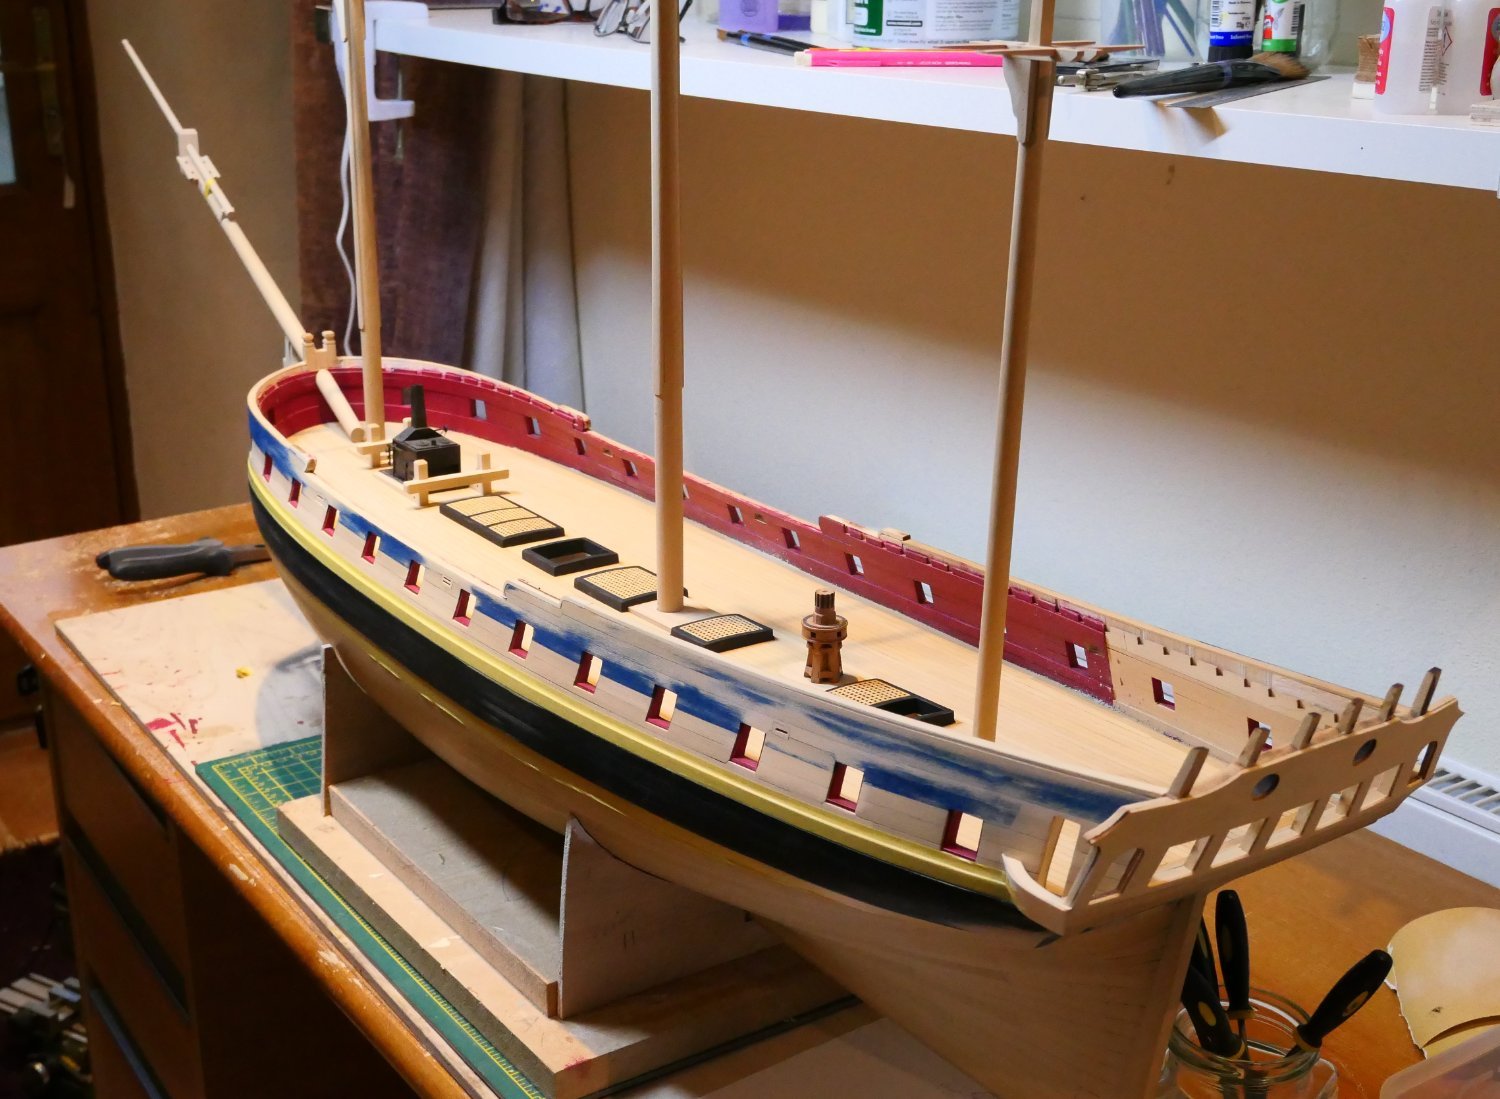
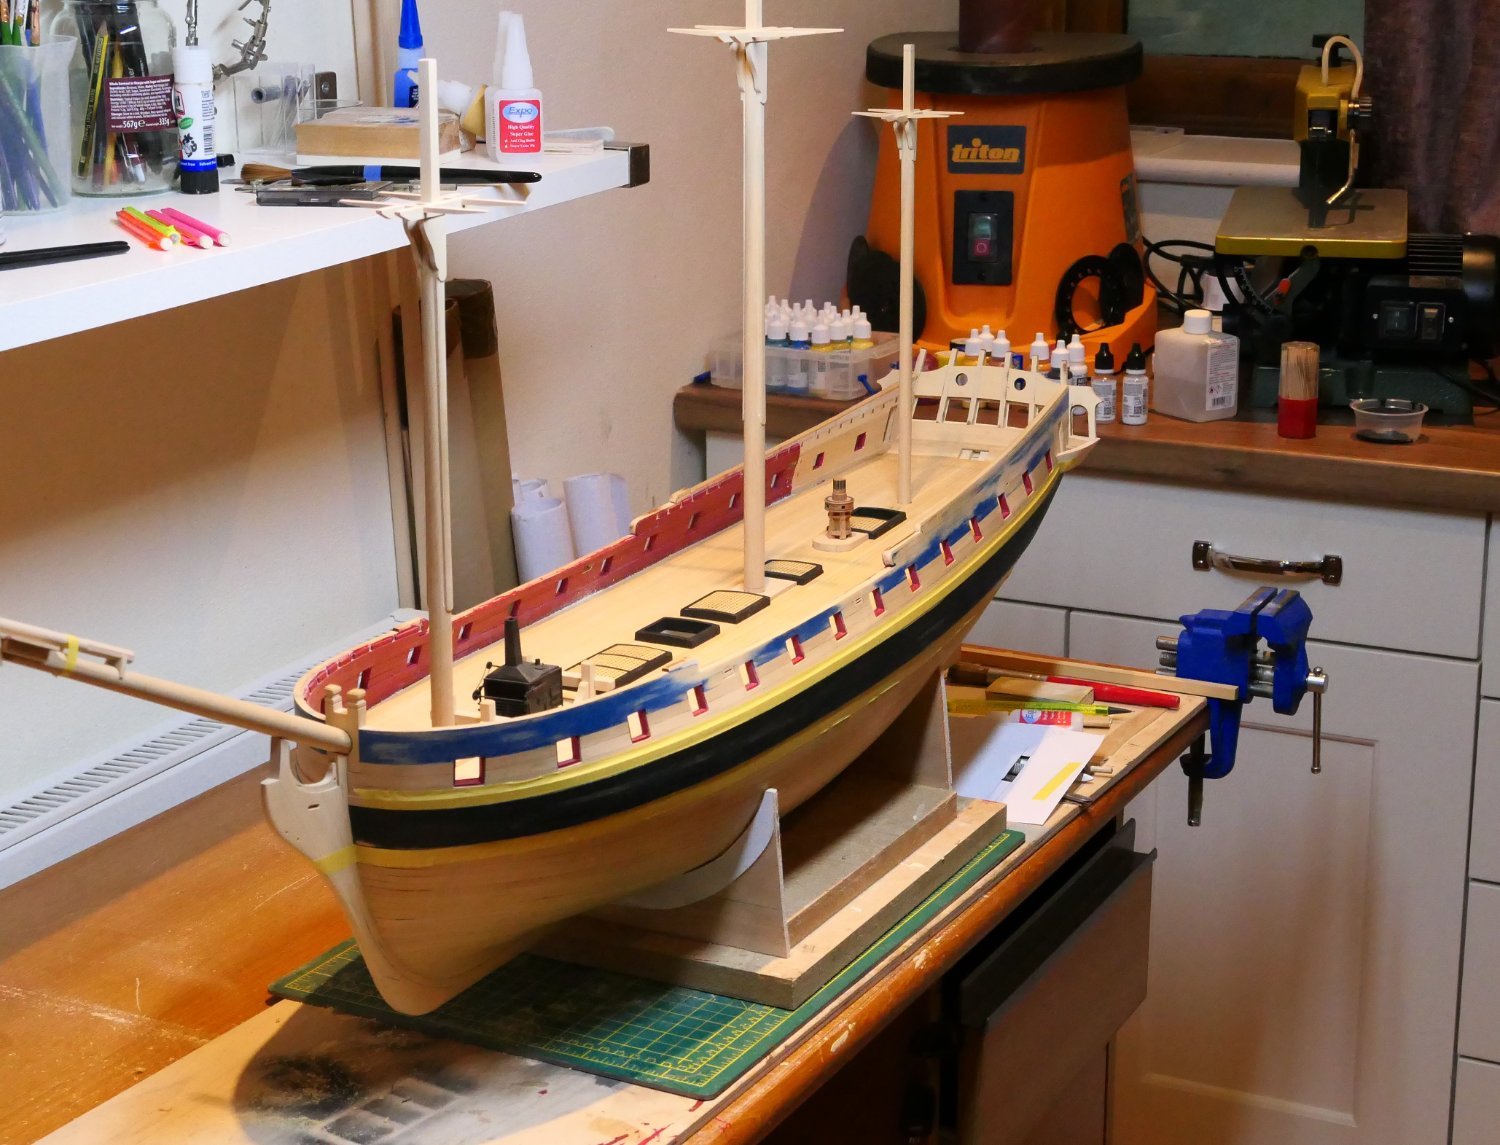
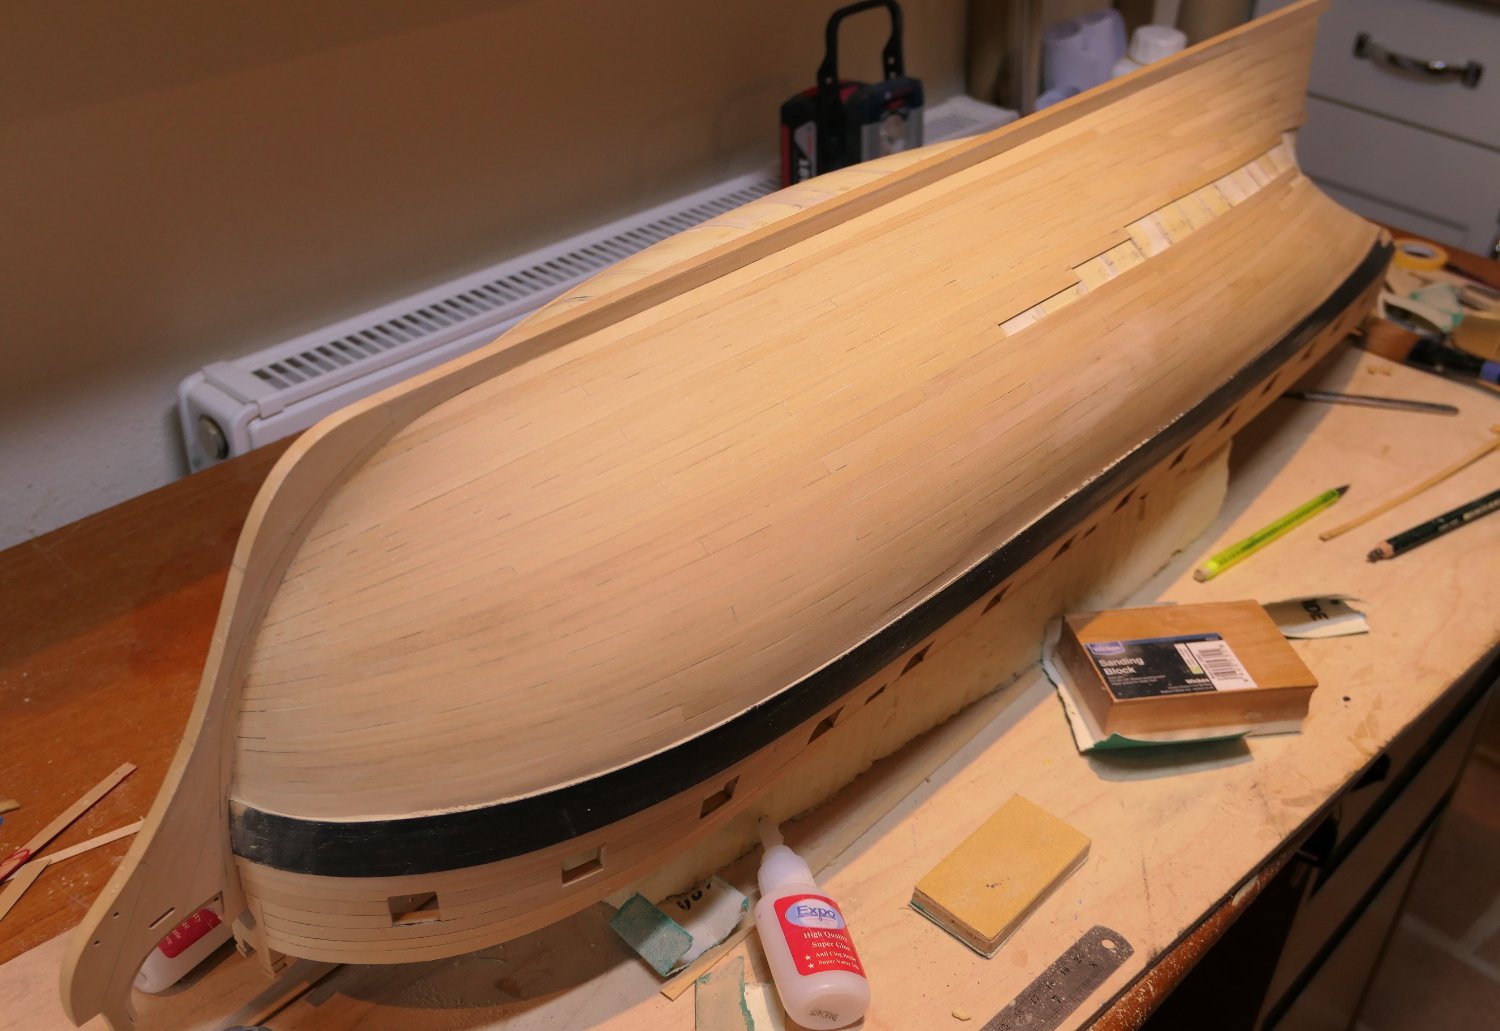
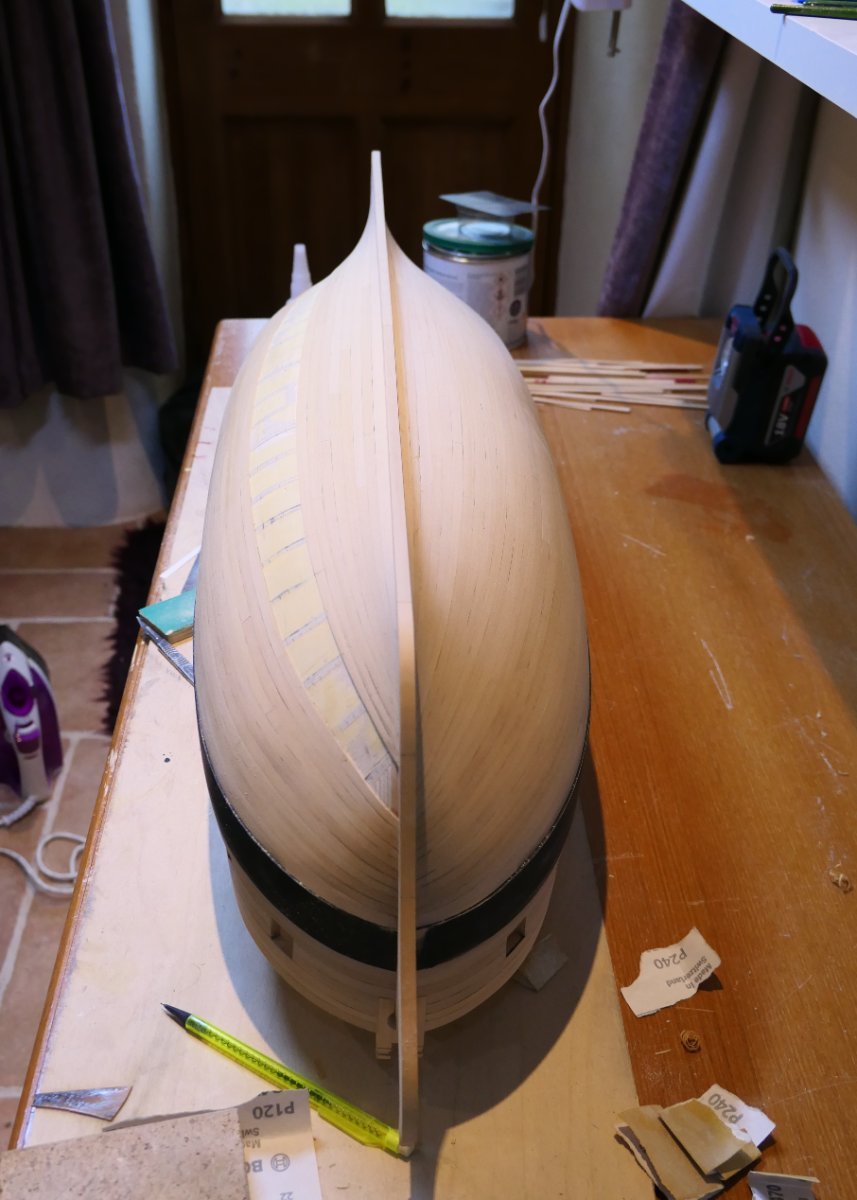
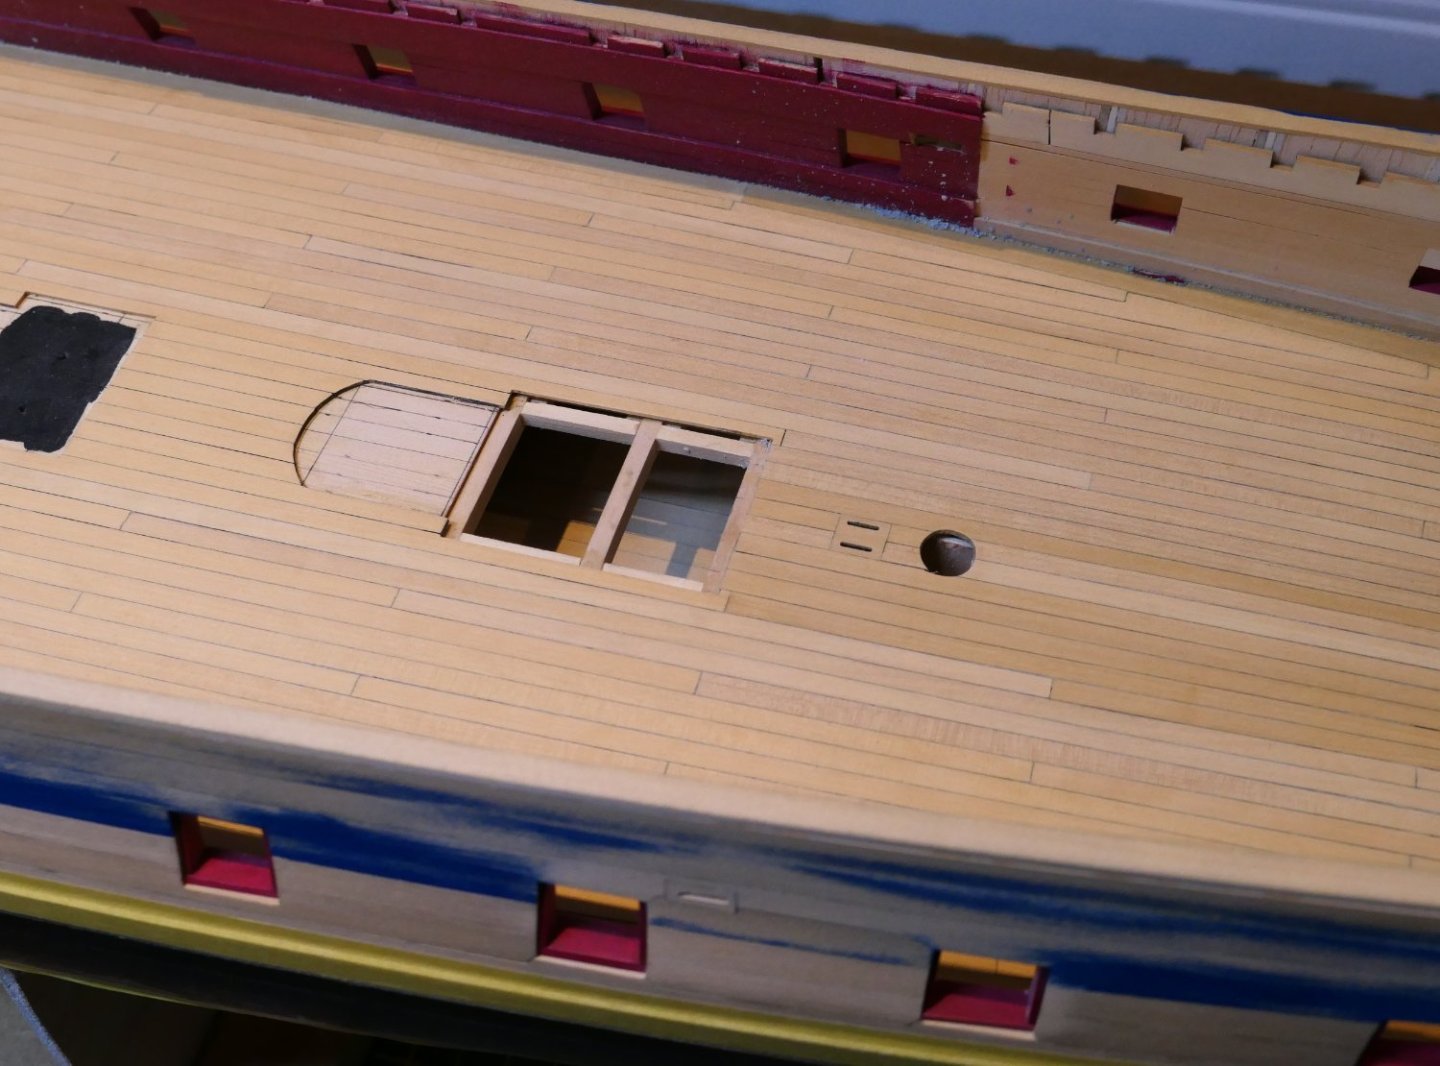
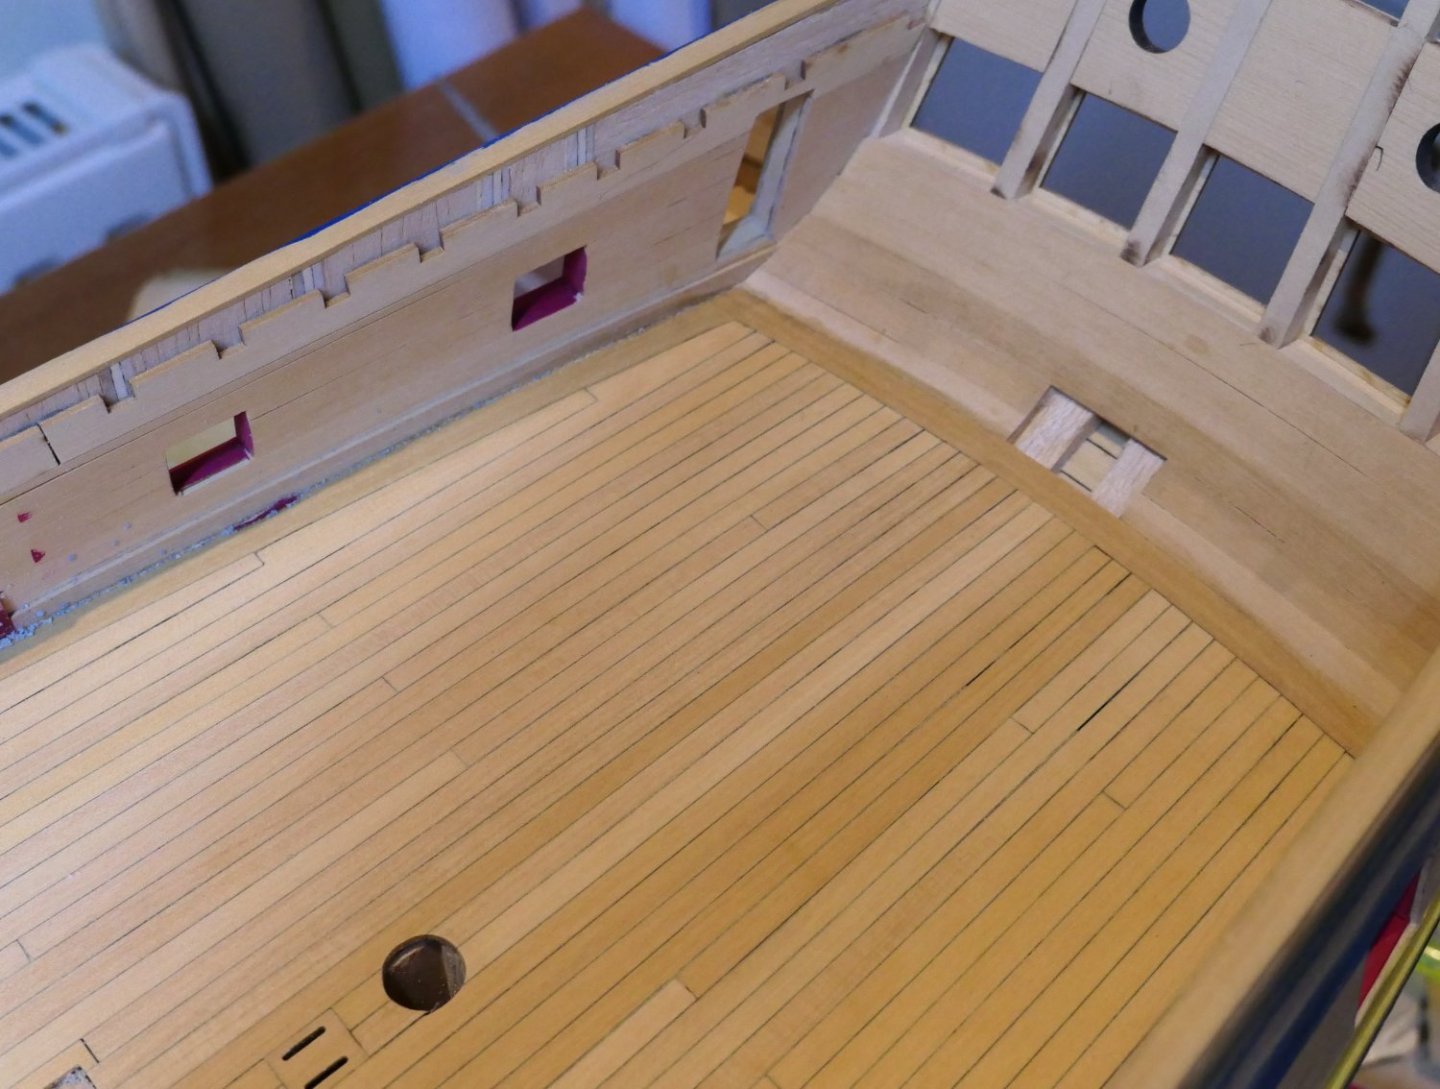
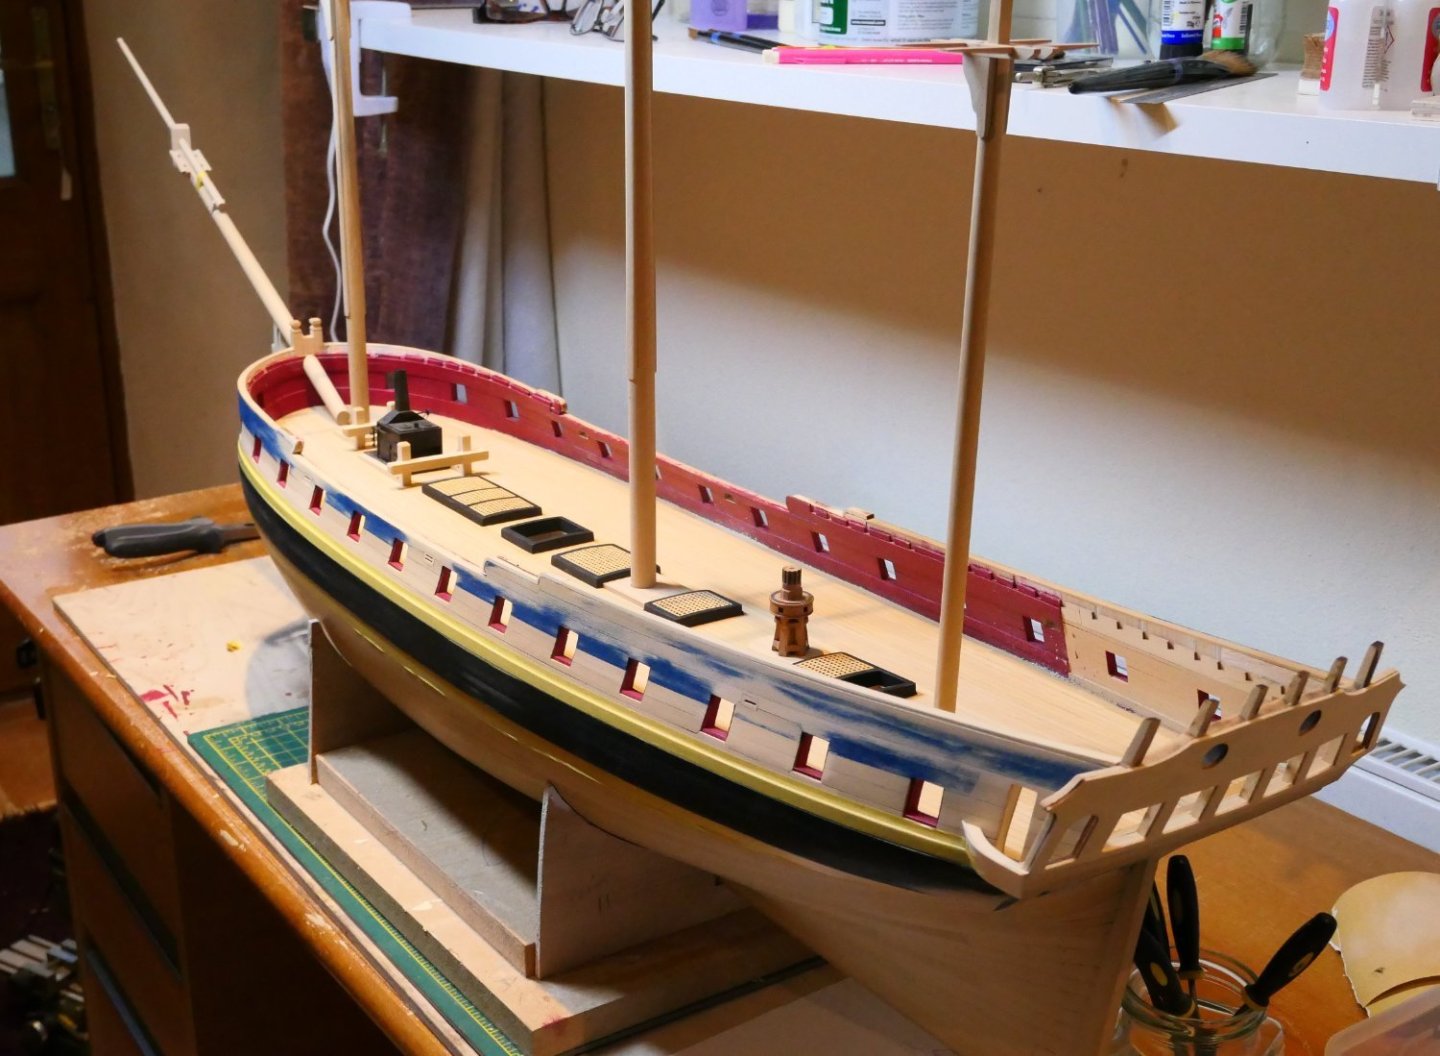
Thanks for the comments chaps. Here is an update. I have completed the deck. That seems a big milestone - with the hull and deck planked all the repetetive donkey work is behind and now its the fun fiddly bits. To plank the hull I fixed a battern with a curve that looked something like it and then tick stripped and planked from the outside inboard. I know its not the approved way but it works for me. I glued the deck fittings down with a prit-stick - is that what you Americans call rubbber glue? - so I could pull then up to sand the deck easily. I left out the captain's chequerboard floor. I'm not quite sure why. I suppose I slightly prefer plain old planks. What, I wonder would the chequerboard be made of? Patrick O'Brian has Captain Aubrey rolling his up when calling action stations I seem to recall so I guess its a waxed sailcloth ? I mad the fixed blocks up on my Proxxon mill. And here is the present state of play: All the best everyone Fred


-
I guess a rough sea could compromise your aim so a larger target area would be wise if little accidents are to be avoided.
-
Or to make a nice cup of tea and a bacon sandwich.
-
absolutely gorgeous work. Fred
-
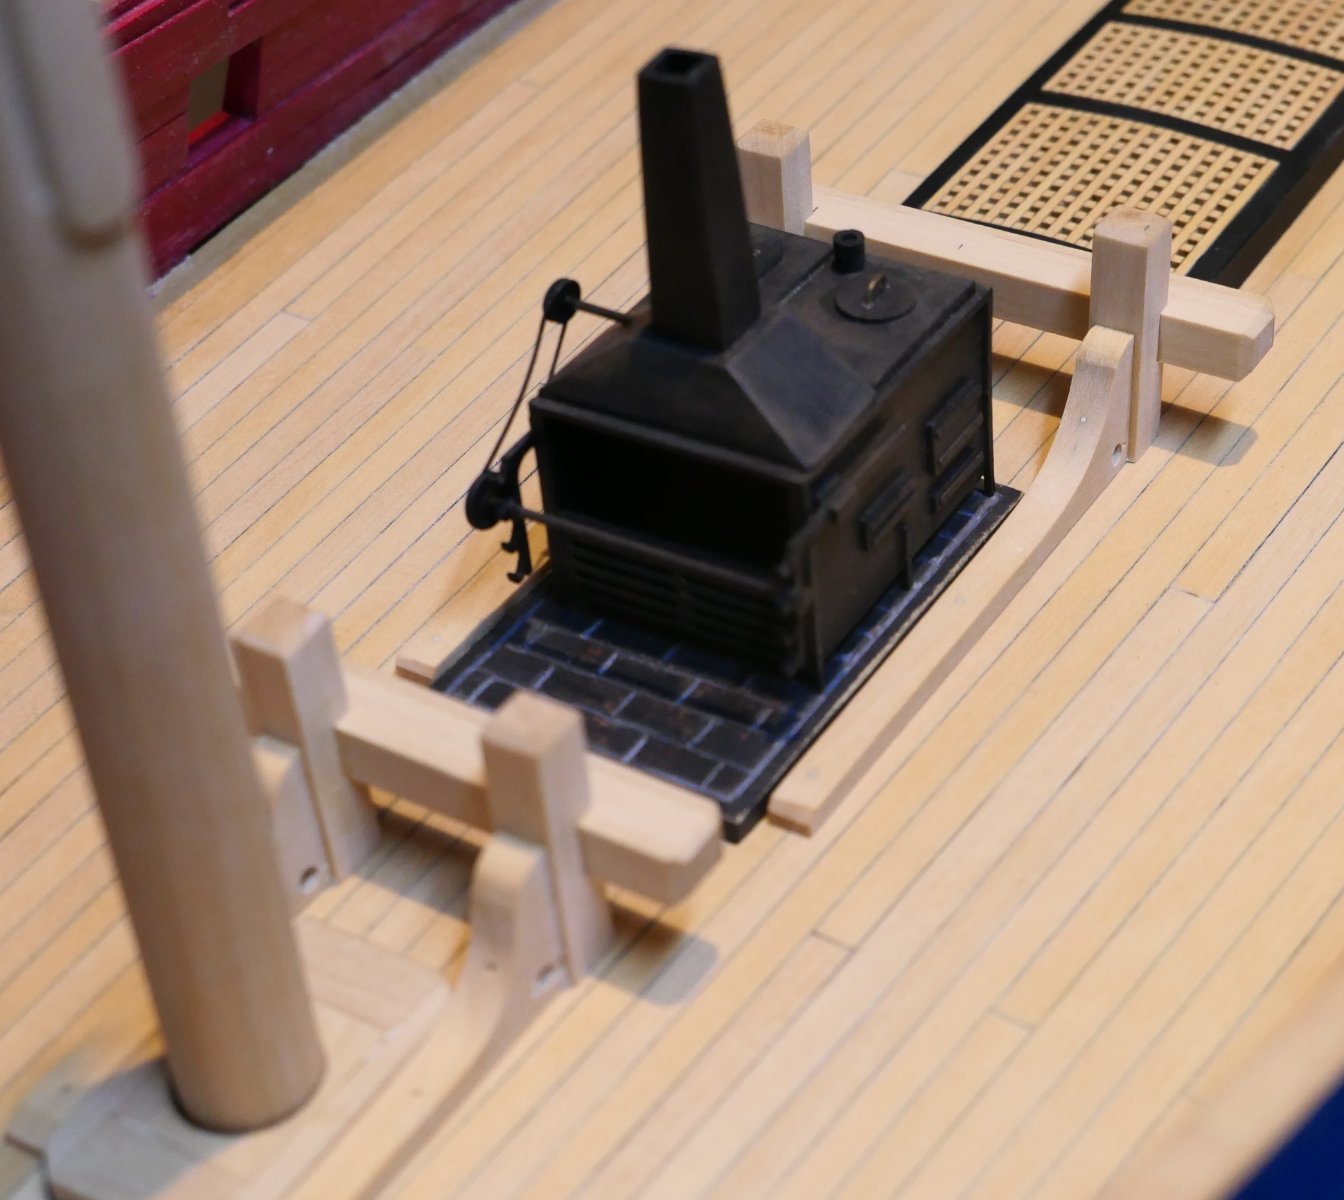
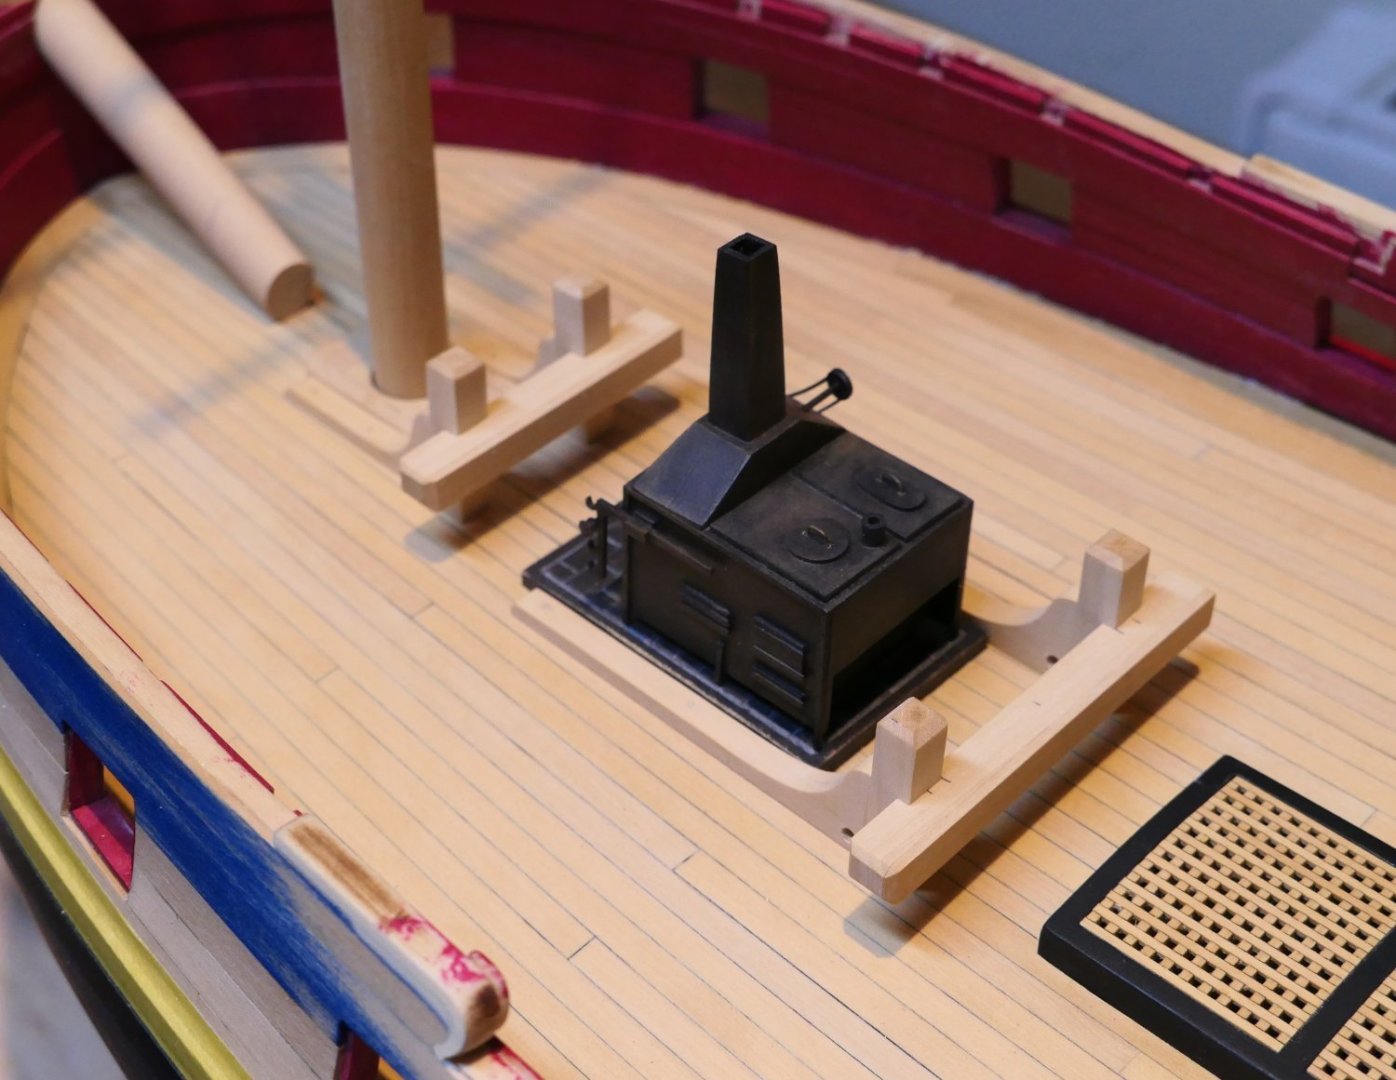
Good point Siggi. There is an English expression - I expect there is a direct German equivalent - "Don't spoil the ship for a halfpence (pronounced "hay-p'nse") worth of tar". A halfpence is (or was before decimilisation) a very small unit of currency. So here is a good example - build a beautiful ship and then stick in a second hand stove bought off a dodgy trader. All that said, what a beautiful example of the craftsman's art this is - both the ship and the second hand stove which I love. You don't think it will leak a bit do you Chuck? Fred
-
HMS Euryalus 1803 by rlb - 1:48 scale
jfhealey replied to rlb's topic in - Build logs for subjects built 1801 - 1850
I like that sentiment very much. Very much indeed. Fred- 122 replies
-
- 3
-
-
- Euryalus
- Plank-on-frame
- (and 4 more)
-
I guess we all think: "One day, when I'm as good as I'm ever going to be at making a model ship, I will build my masterpiece." Your Pegasus is exactly what I have in mind when I think those thoughts. The trouble is, I know I shall never have the skills to build the model I have in my mind's eye. You must have: and that must give you enormous pride and satisfaction. Its a masterpiece. All the best Fred
-
Thank you, Dusan, for sharing how you made the canon carriage wheels. I might have a go but I suspect the tool making is way beyond my skill level! I shall certainly have a go at painting the friezes. I shall be very pleased if they turn out half as well as yours. Would you share what colours you used? Kind rgards Fred
-
I'm not surprised you are happy. It looks faultless to me.
-
I Know you are part way through planking your Cheerful Erik - and a superb job you are making of it. I will start planking the deck of my Winchelsea soon and I fully intend to follow your meticulously careful lining out. I can see you are well on the way to a fantastic result. Best wishes Fred
- 113 replies
-
- 3
-
-
- Cheerful
- Syren Ship Model Company
- (and 1 more)
-
Thank you Johann. Coming from a master craftsman your kind words mean a great deal to me. Best wishes Fred
- 113 replies
-
- 3
-
-
- Cheerful
- Syren Ship Model Company
- (and 1 more)
-
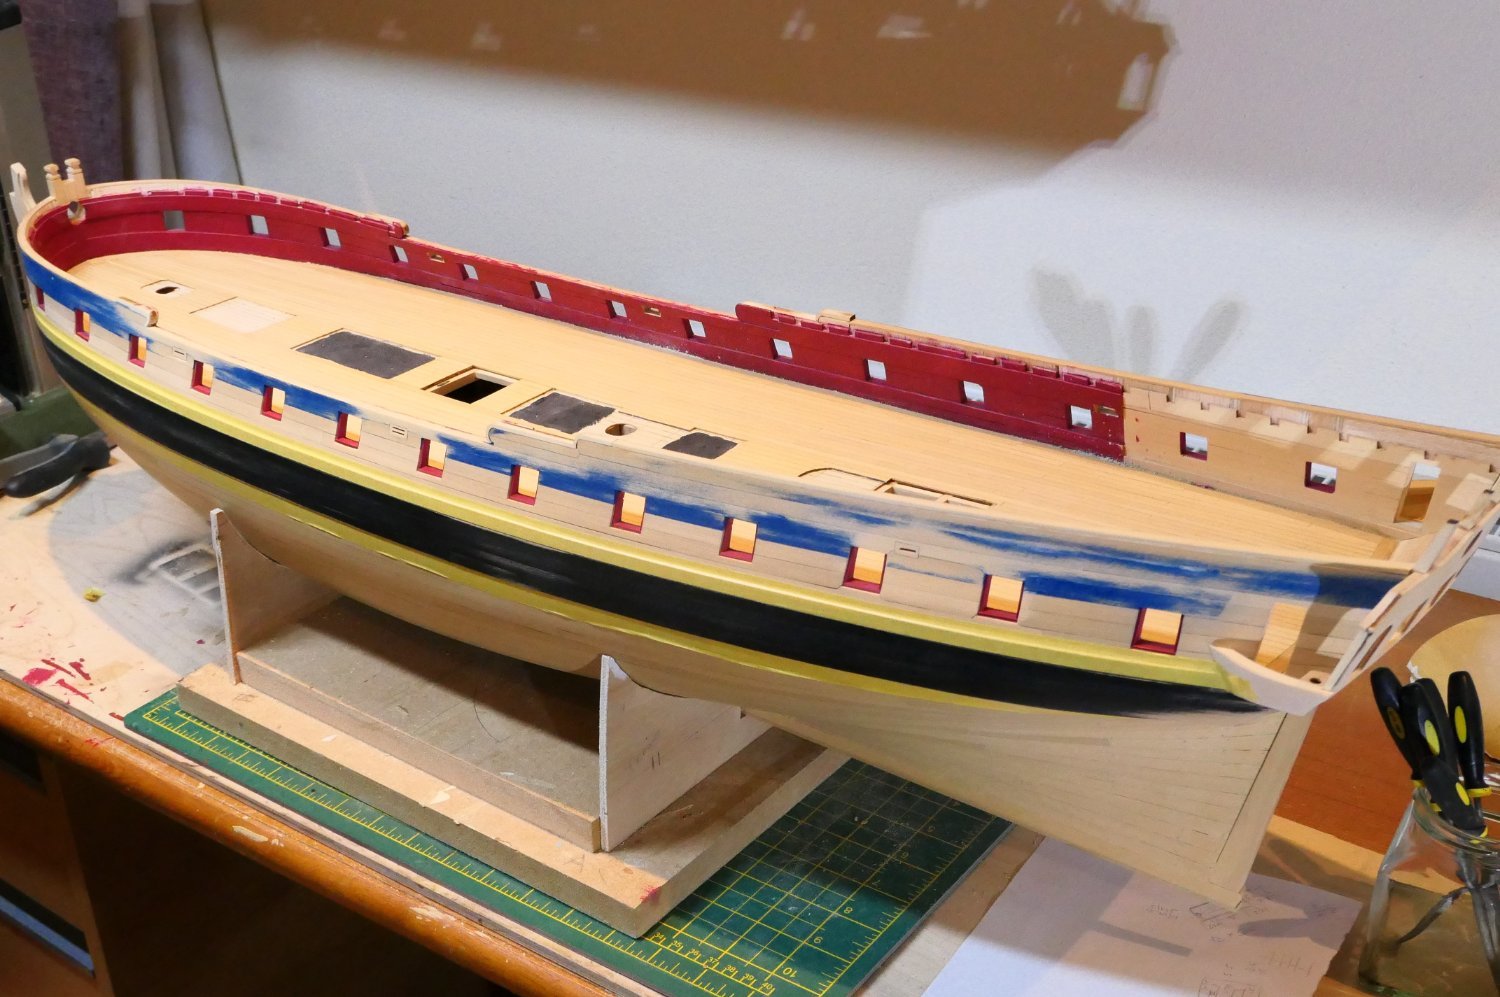
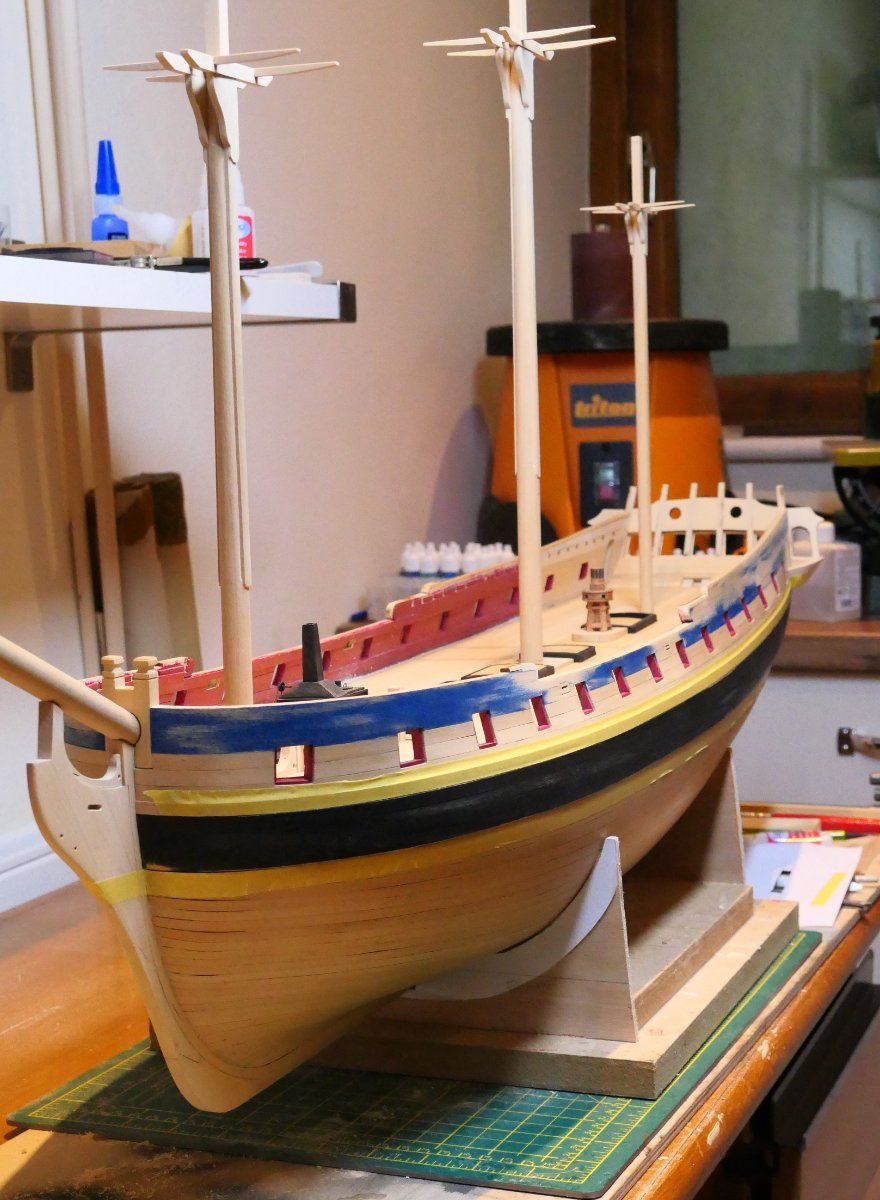
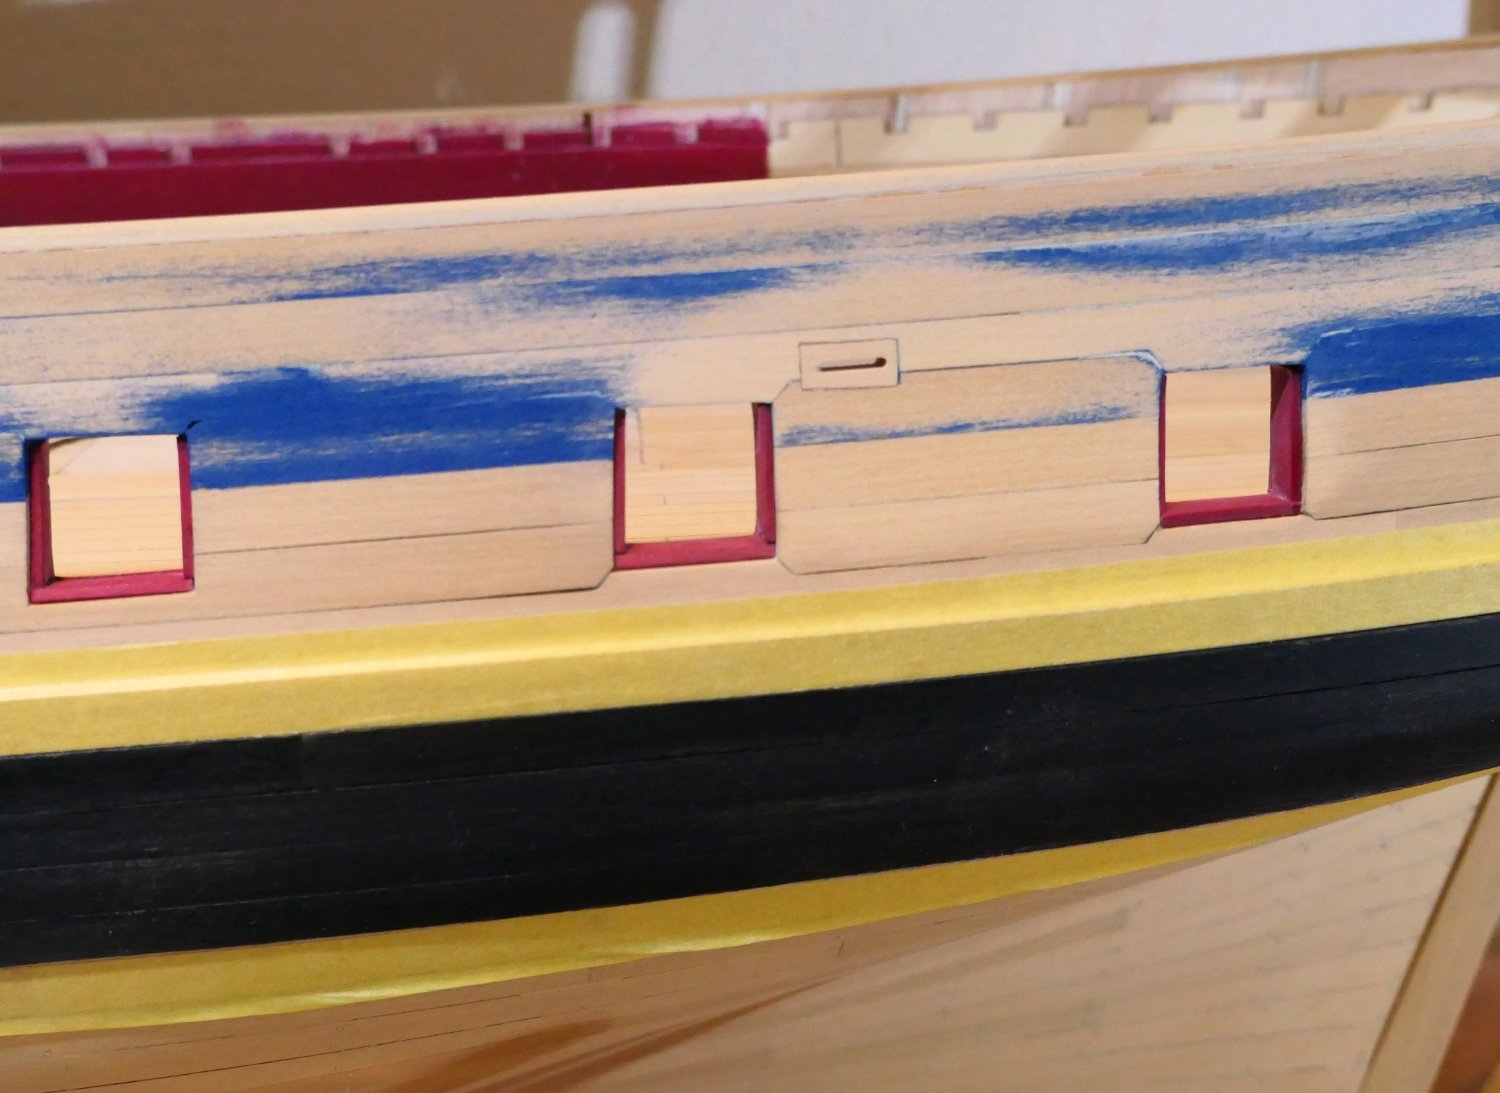
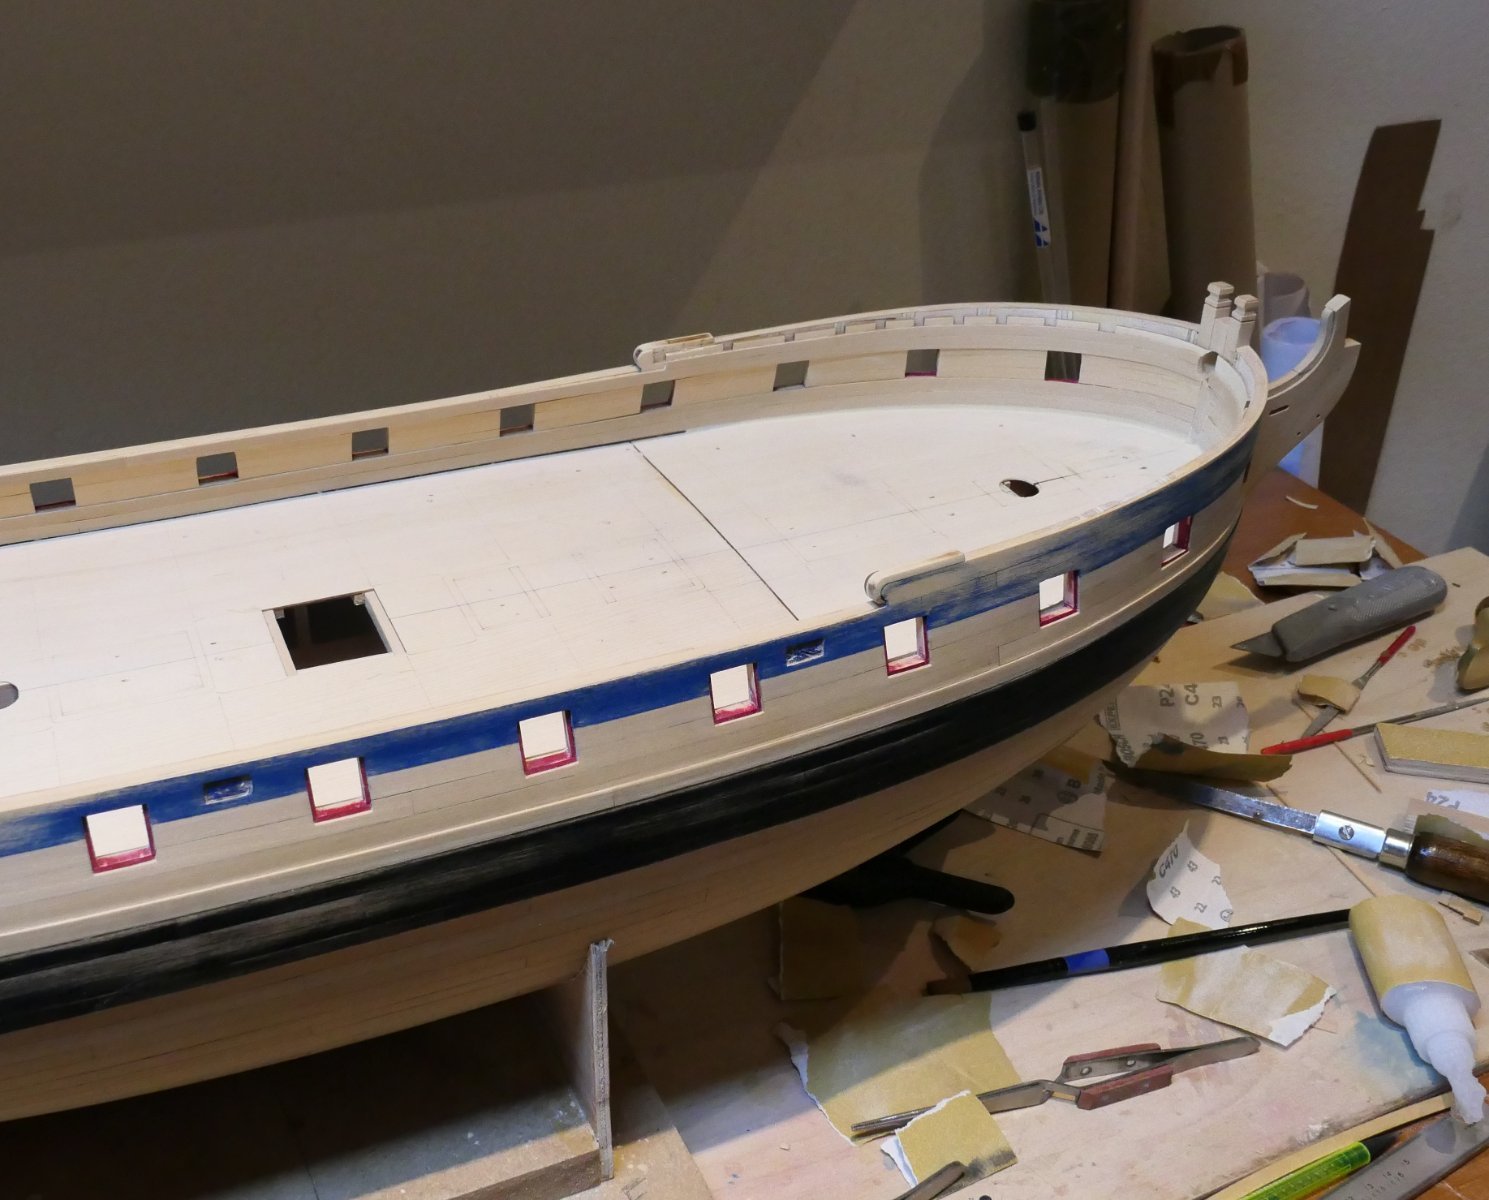
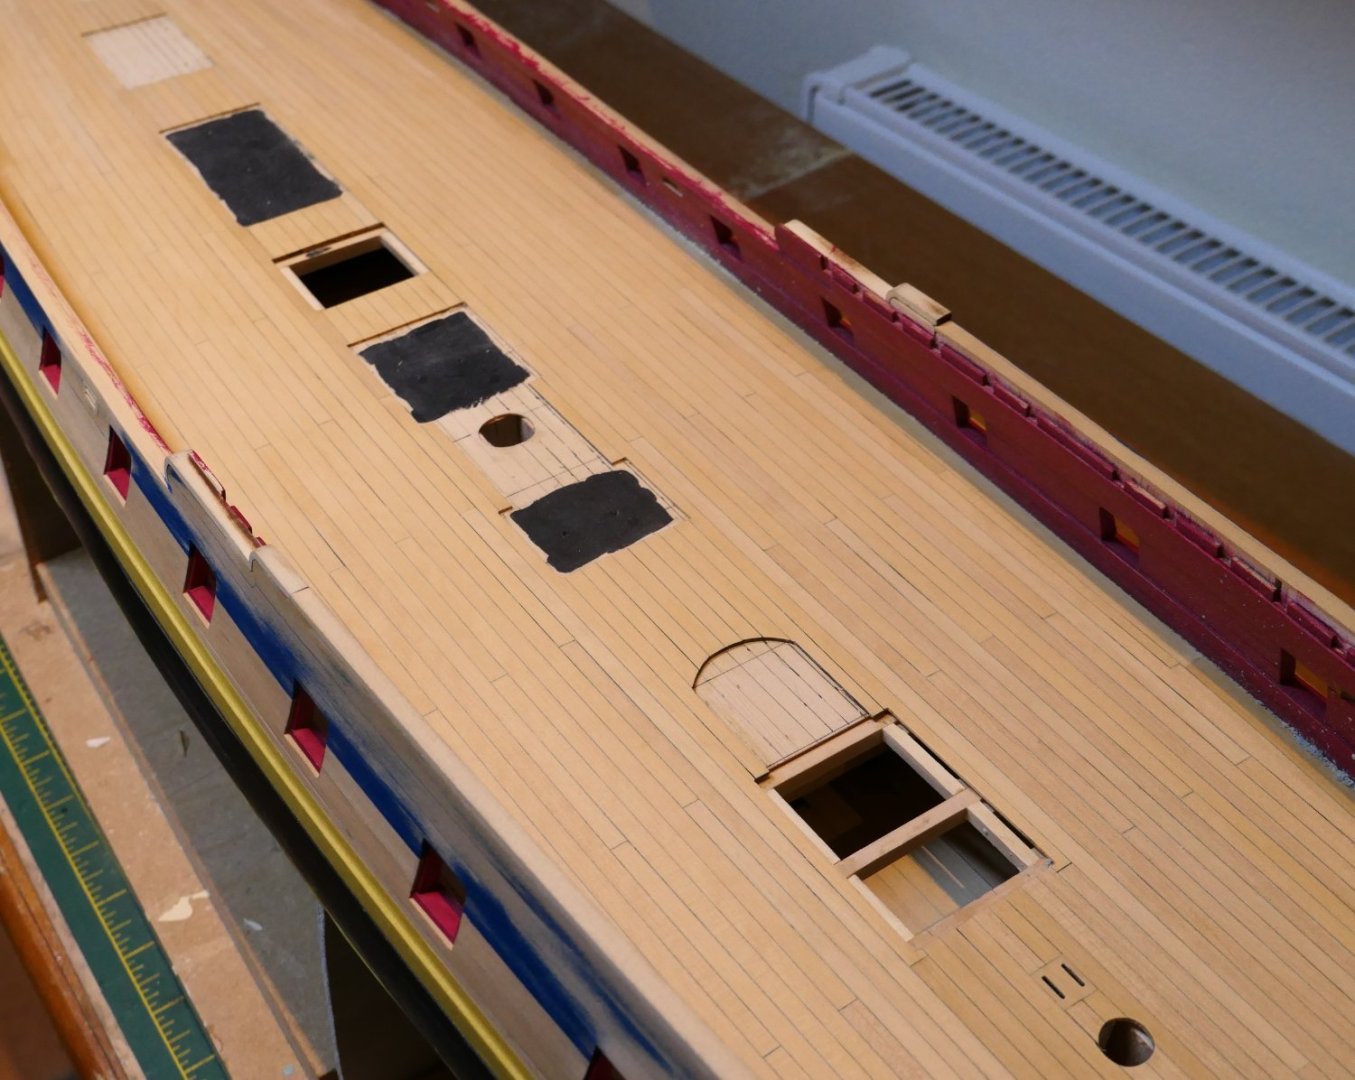
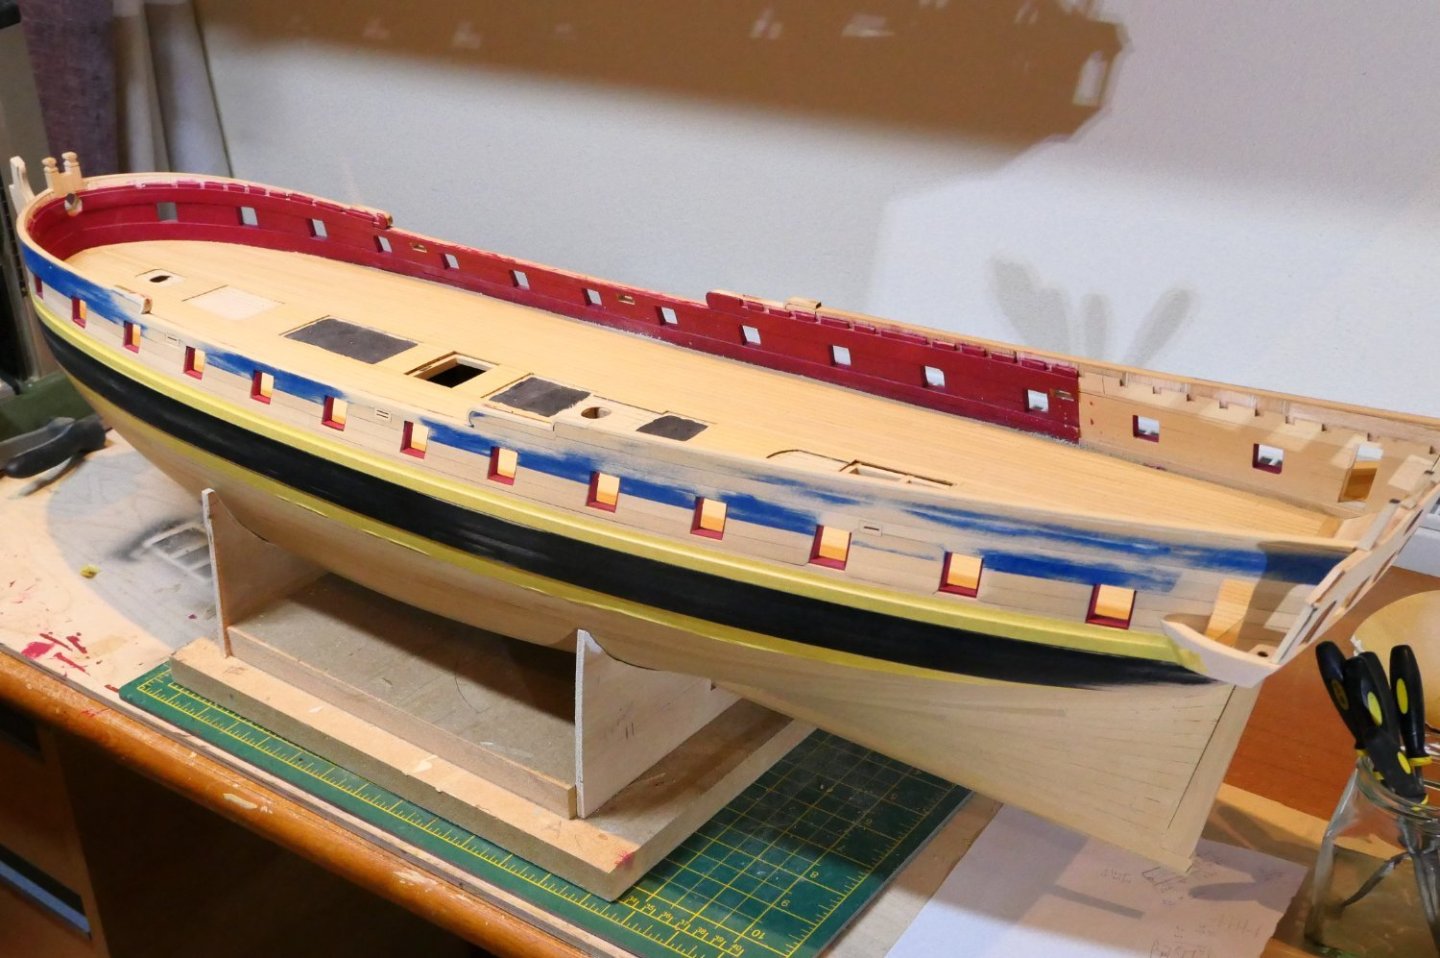
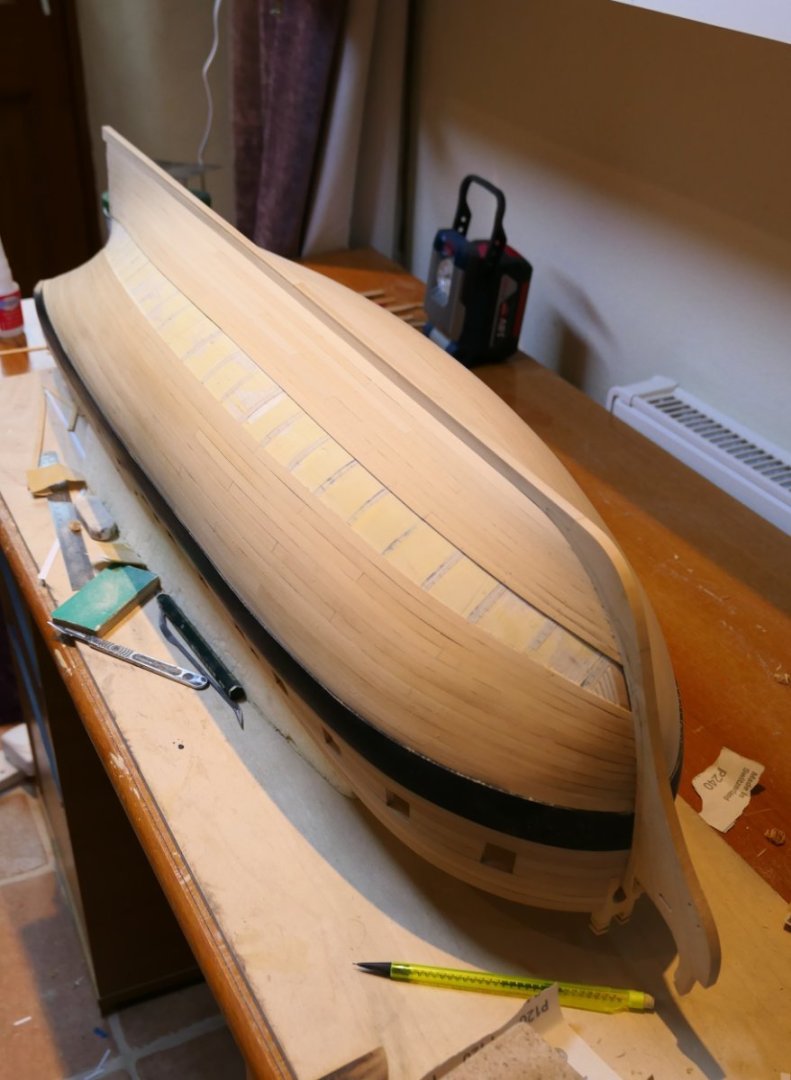
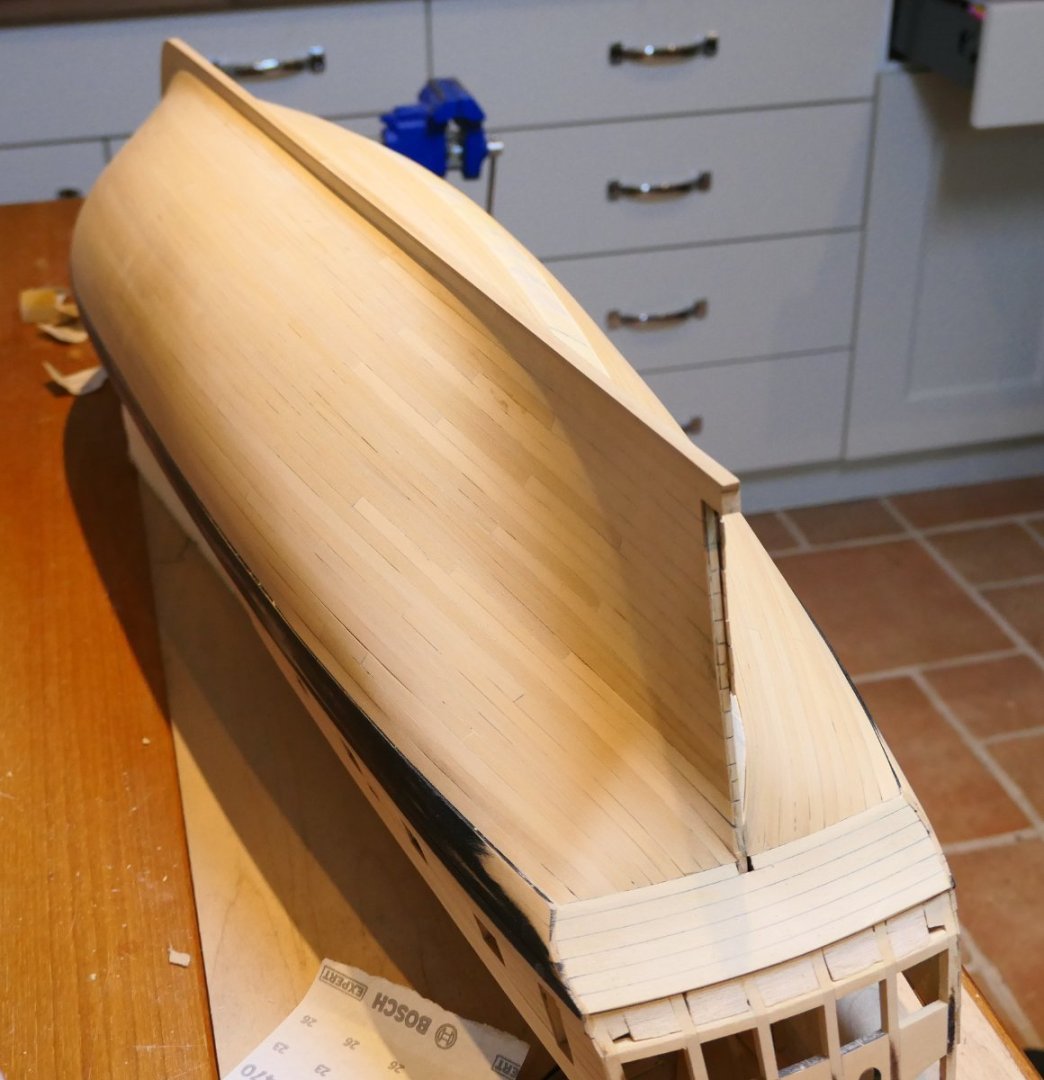
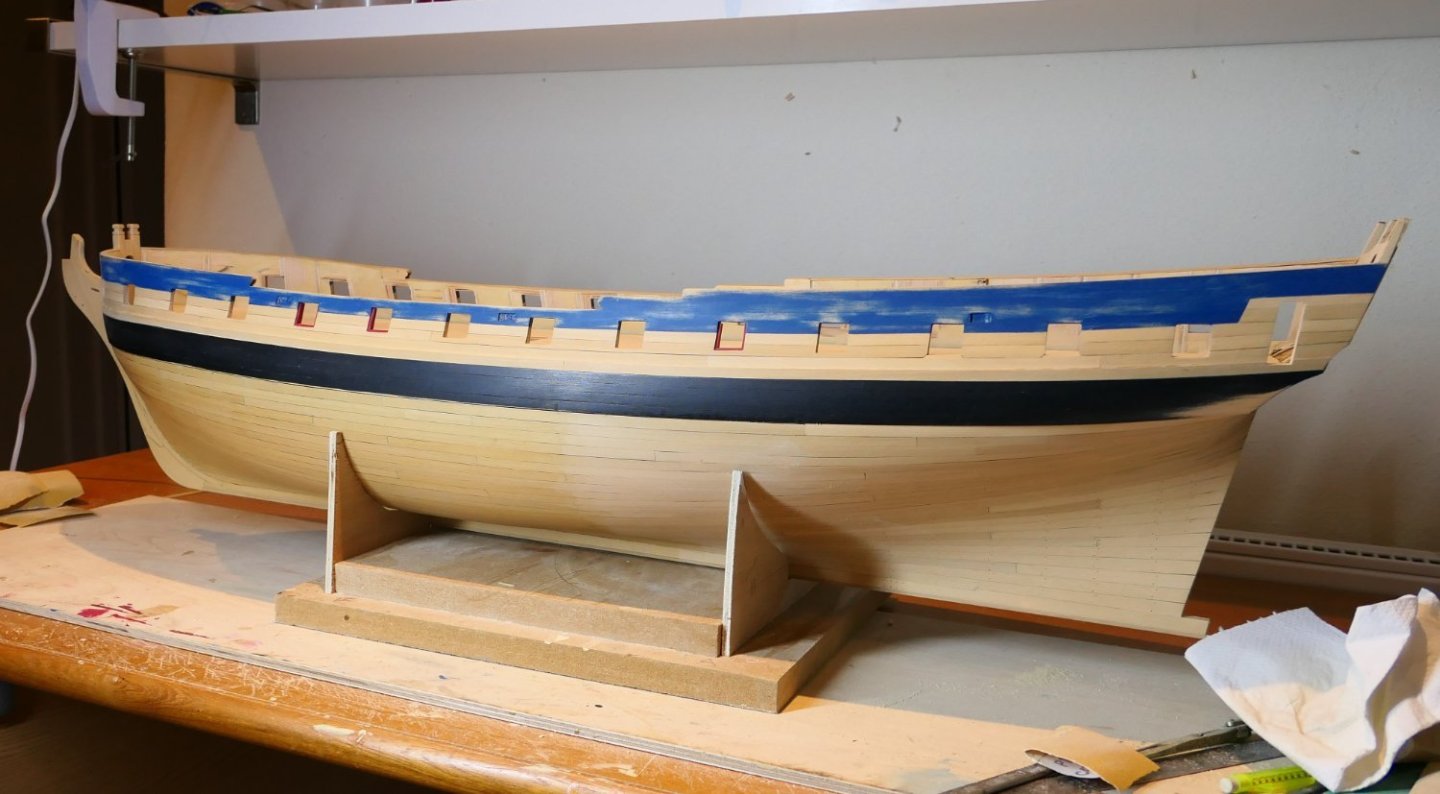
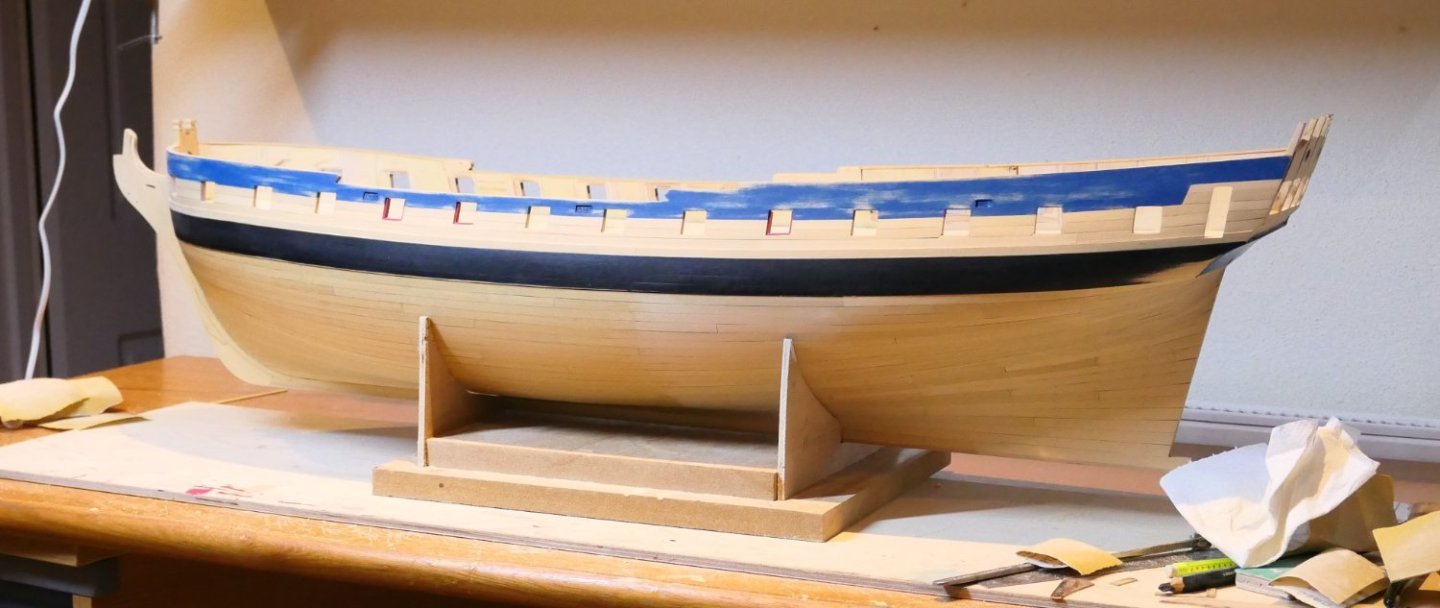
Thank you gentlemen for your replies and likes. Trussben - thank you for your post. I had forgotten the plans illustrate the treenailing. My "workshop" isn't big enough to keep the plans unrolled so these things can get overlooked. I used a dark pencil and woodfiller for the treenailing so far - all below the wales. Im not sure about it (and I may yet paint the hull). I'm going to order a drawplate and see how I get on doing a proper job on some scrap before I decide how to go forward. In the meantime I have finished planking the hull. It's OK. Some of the seams could have been tighter but otherwise I'm pretty happy with it. I intend to have a go at painting the figures and fancy scrolls rather than using the printed friezes. If I fall short of what I hope to achieve I can always stick the friezes on - but at least I will have had a go. In readiness I have given the topsides a first coat of Prussian Blue. The transom went on with no alarms or difficulties. The windows fit perfectly with no adjustment - so thats all a relief. I have finished the shells for the QGs. I cut the black strake/wale (just in front of the pie shaped piece) rather than try to rebate the outer shell of the QG - which is a bit of a tricky bit without the additional difficulty of trying to rebate it. Here is the result. All went very smoothly on both sids happily. The internal planking is all but done. I'll finish that today and then its red paint time and starting the deck planking. Deck planking let down my last attempt at Winnie so I shall take special care and hopefully, bringing to bear the learning and experience of my last go, I shall make a better job of it. Al the best Fred


-
I'm glad I did Glenn. As ever there is a lot to take in and learn. I will study your latest post carefully as I have done throughout your build. Best wishes Fred.
- 840 replies
-
- 3
-
-
- winchelsea
- Syren Ship Model Company
- (and 1 more)
-
I'm spechless - so I will say nothing......except bewilderingly brilliant. Fred