king derelict
-
Posts
3,286 -
Joined
-
Last visited
Content Type
Profiles
Forums
Gallery
Events
Everything posted by king derelict
-
Nice, neat PE work. alan
-
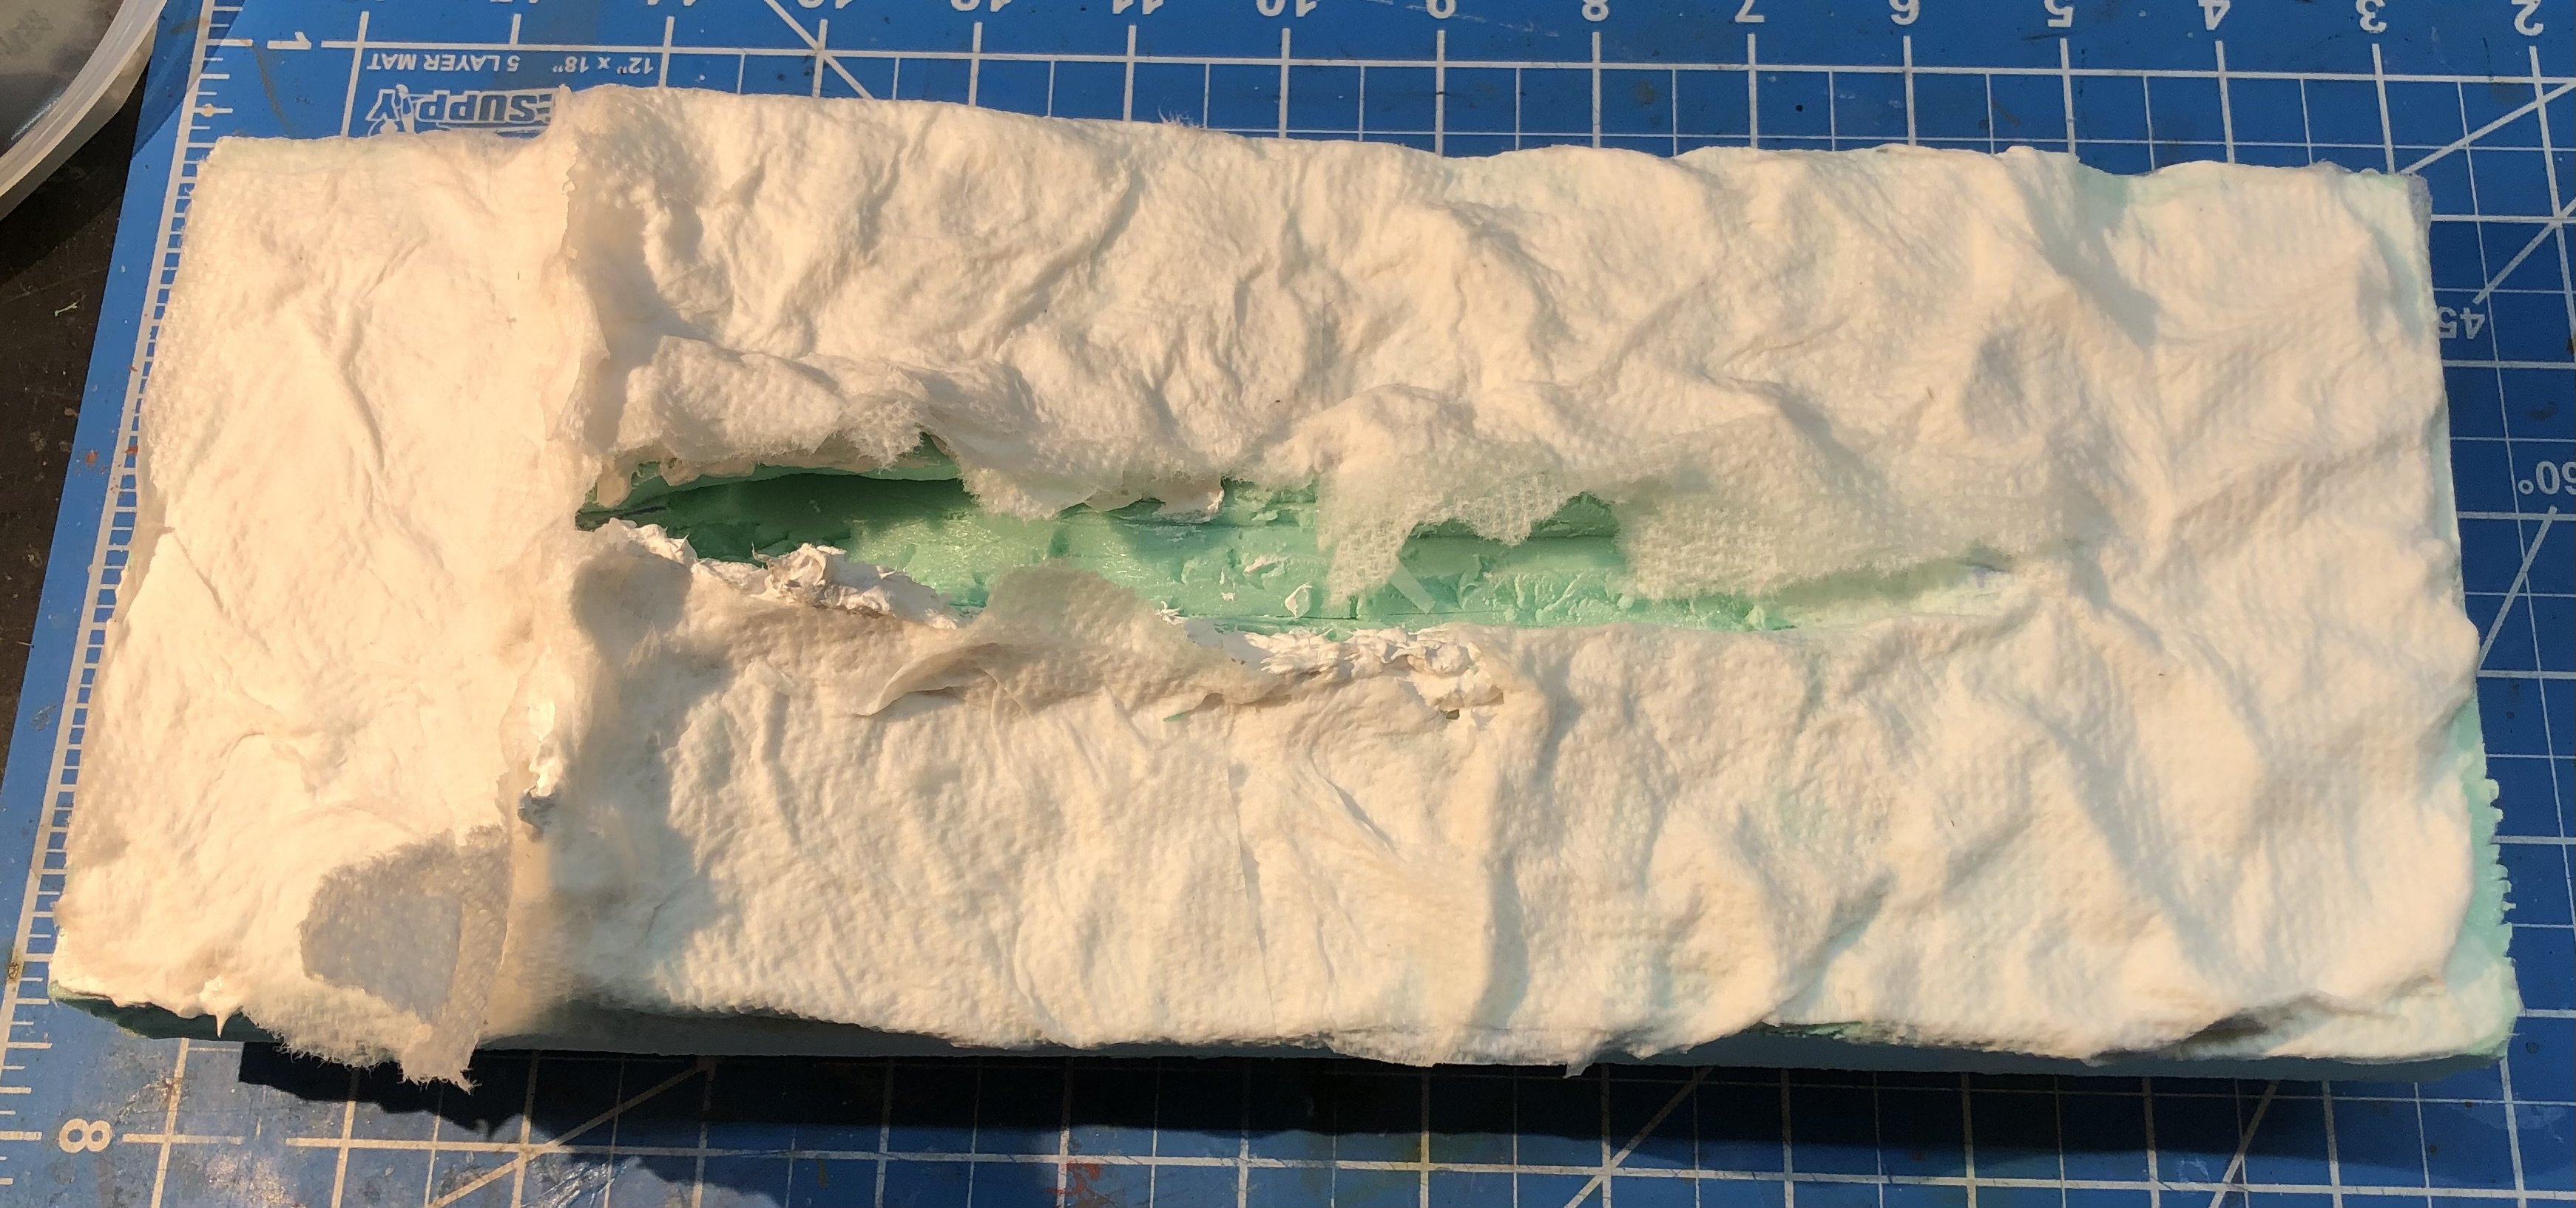
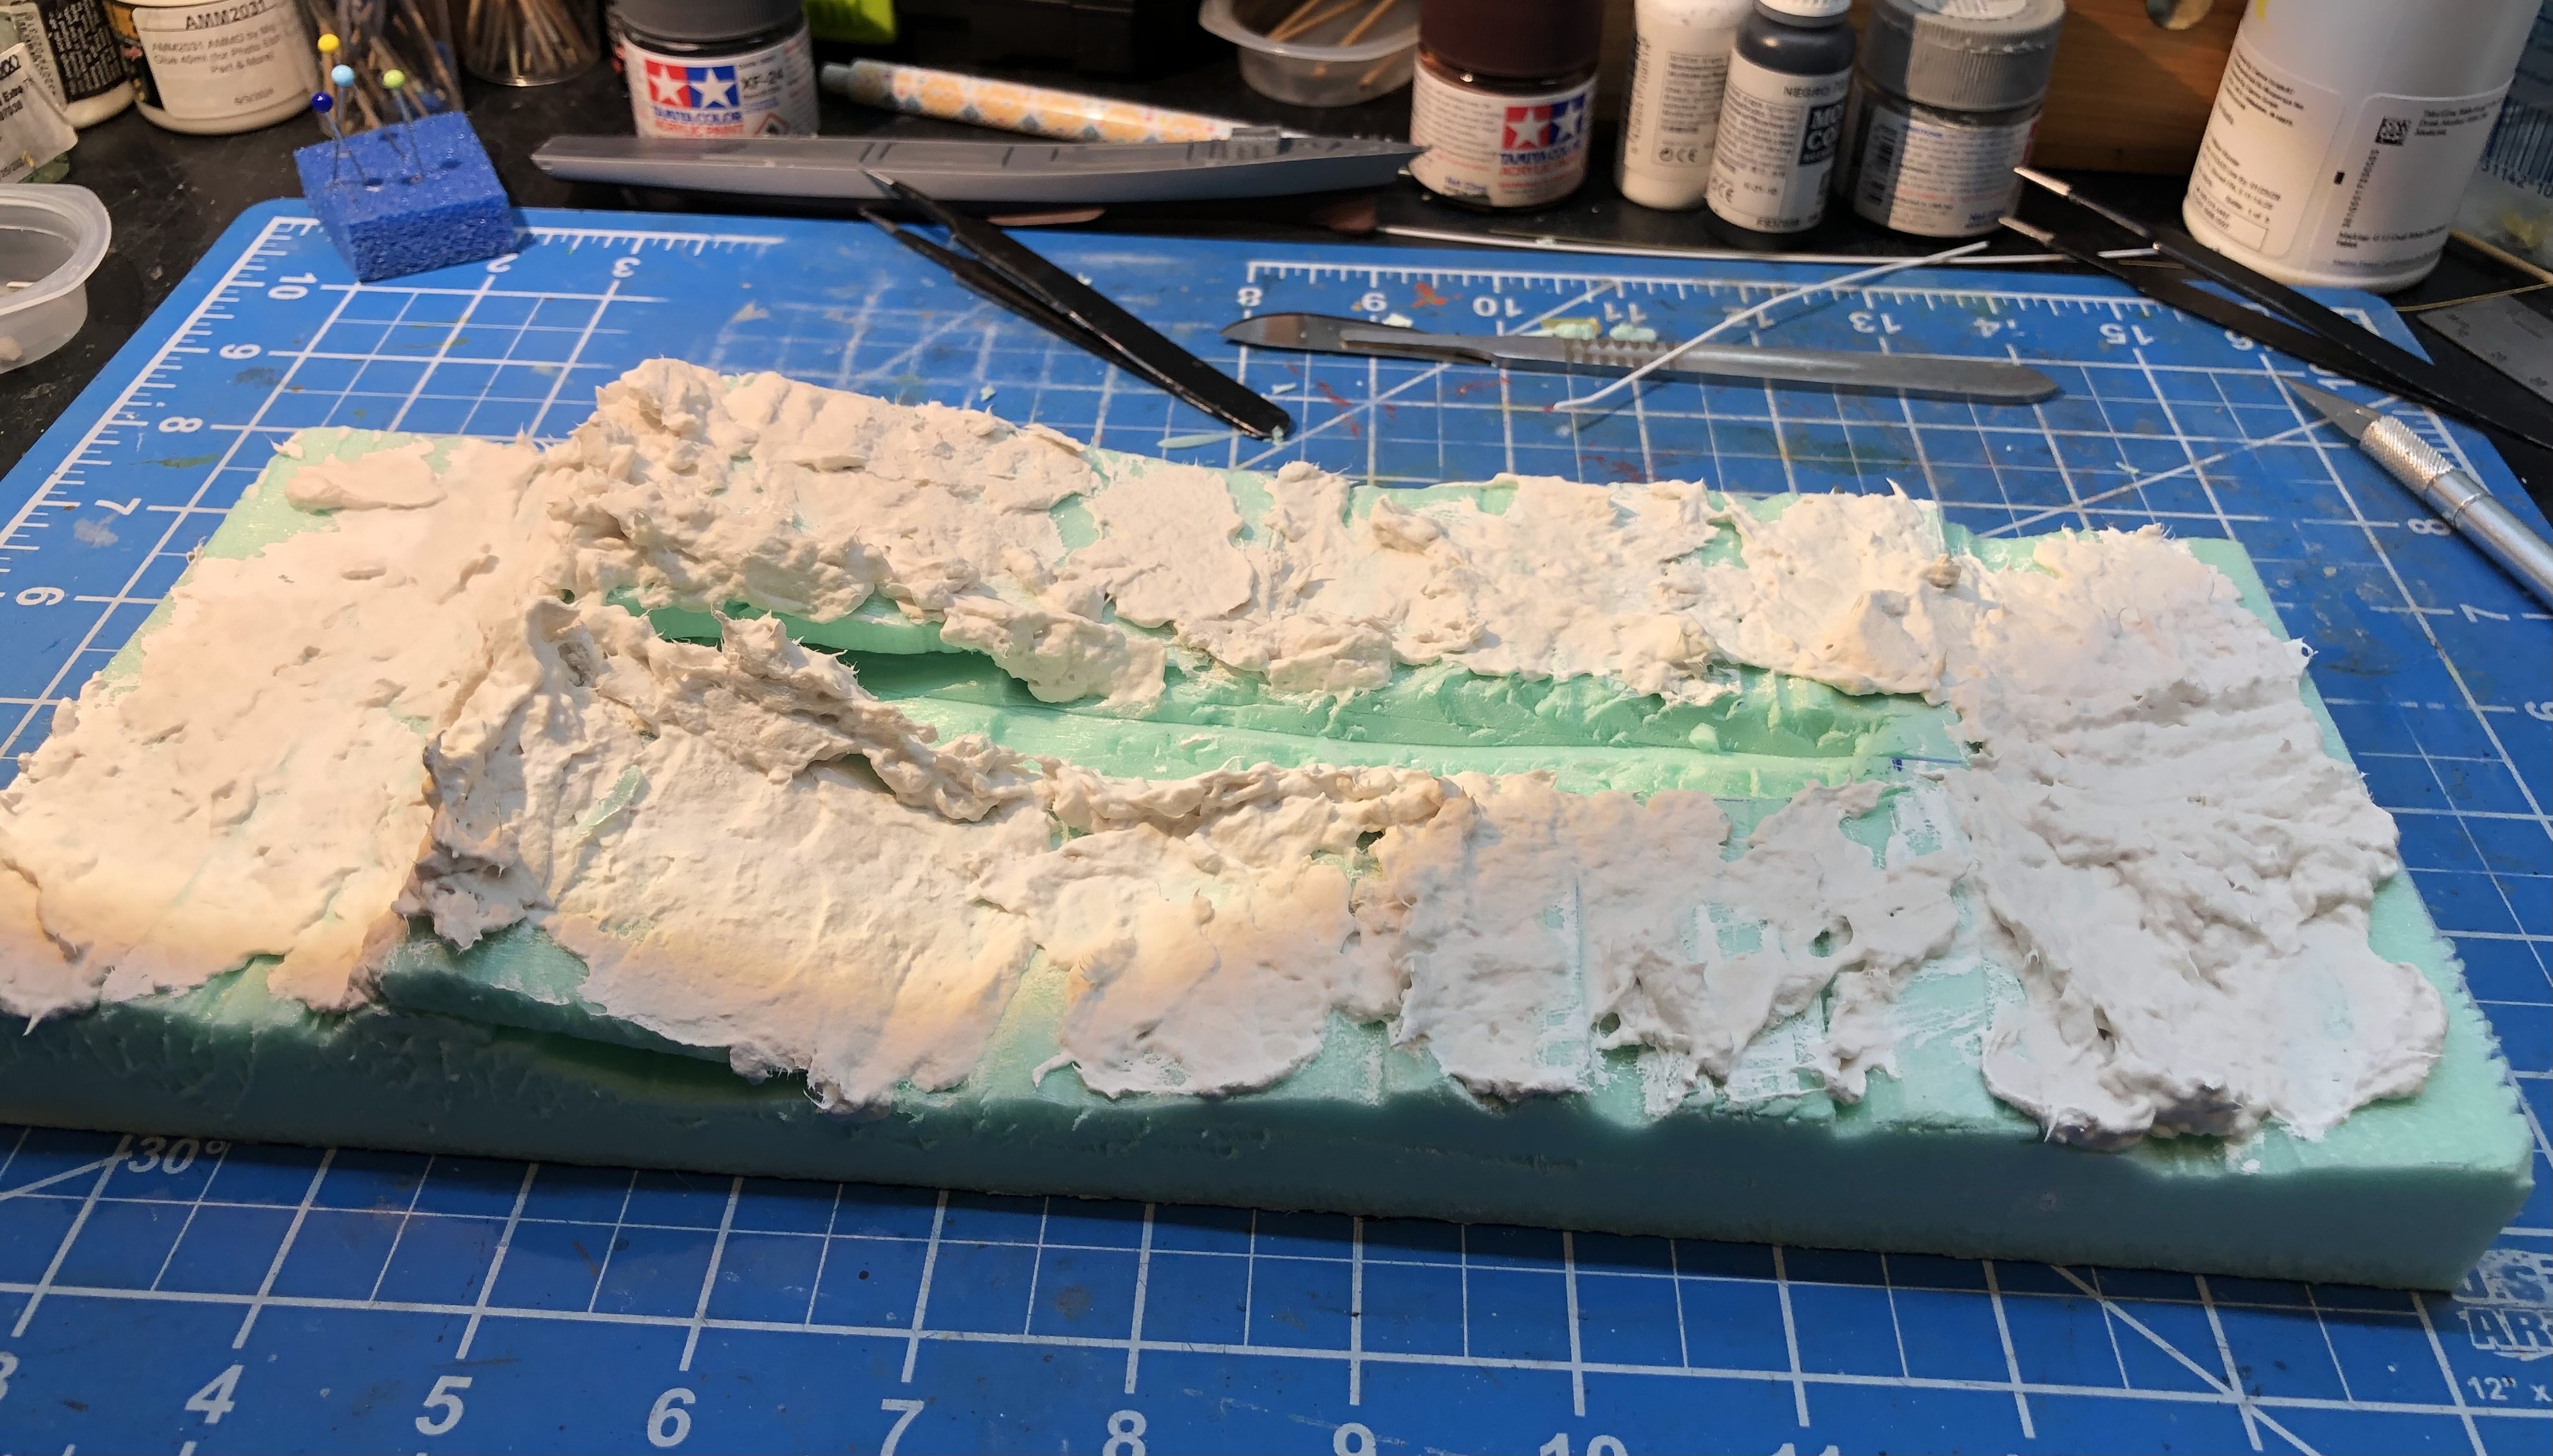
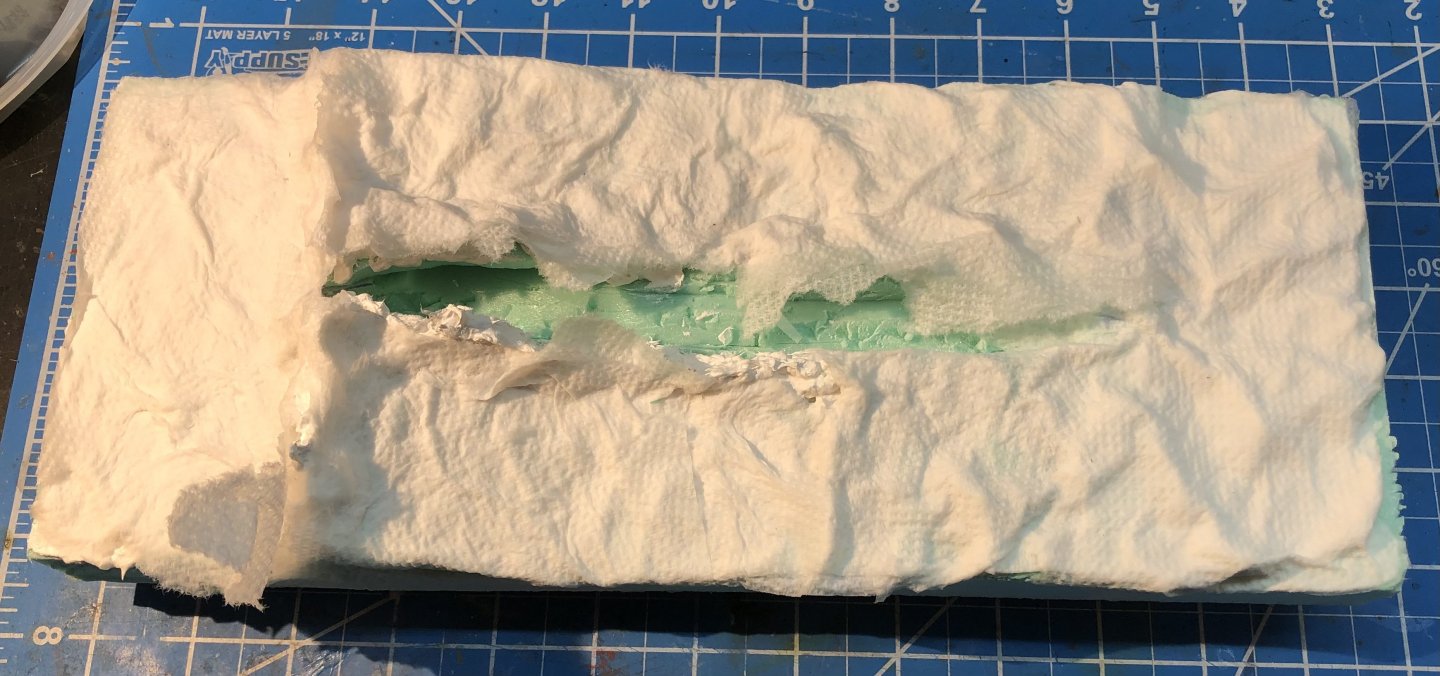
Today I used torn paper towels soaked with diluted white glue to soften the scuptamold surface and then pushed around the wet paper to form smaller surface details. Some edges have been left to help the modeling of the wakes around the hull. This is now drying. I may add another layer tomorrow. Thanks for looking in, the likes and the comments Alan

-
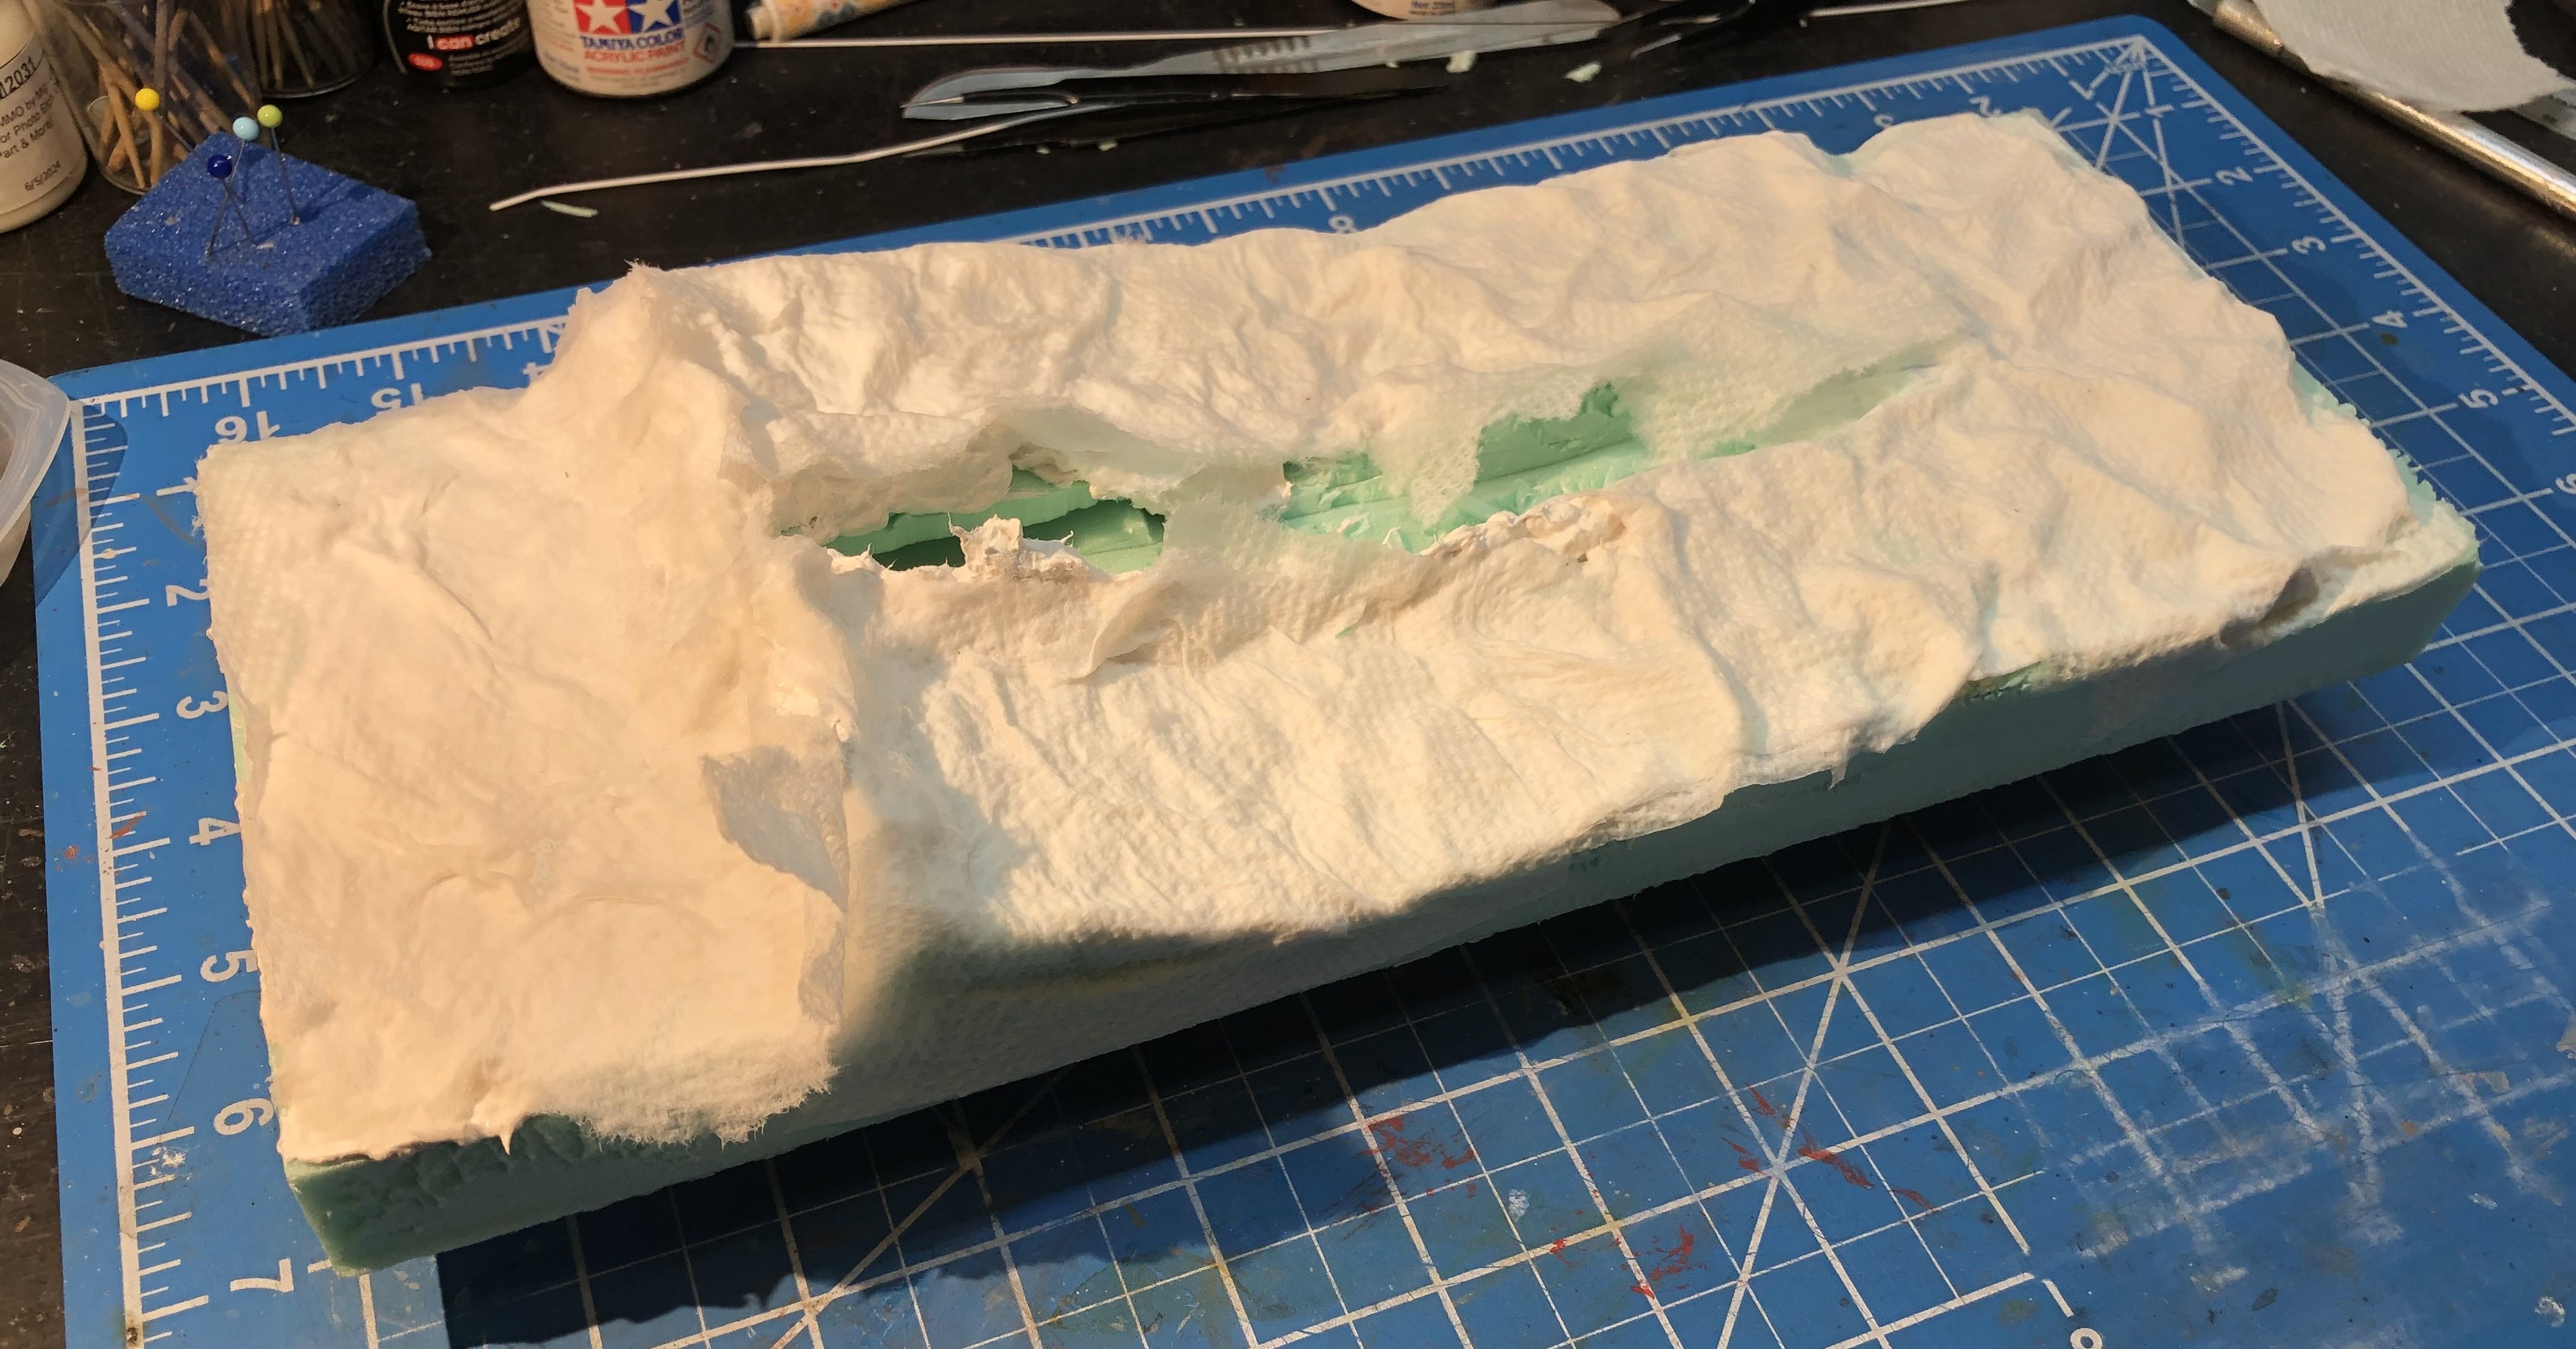
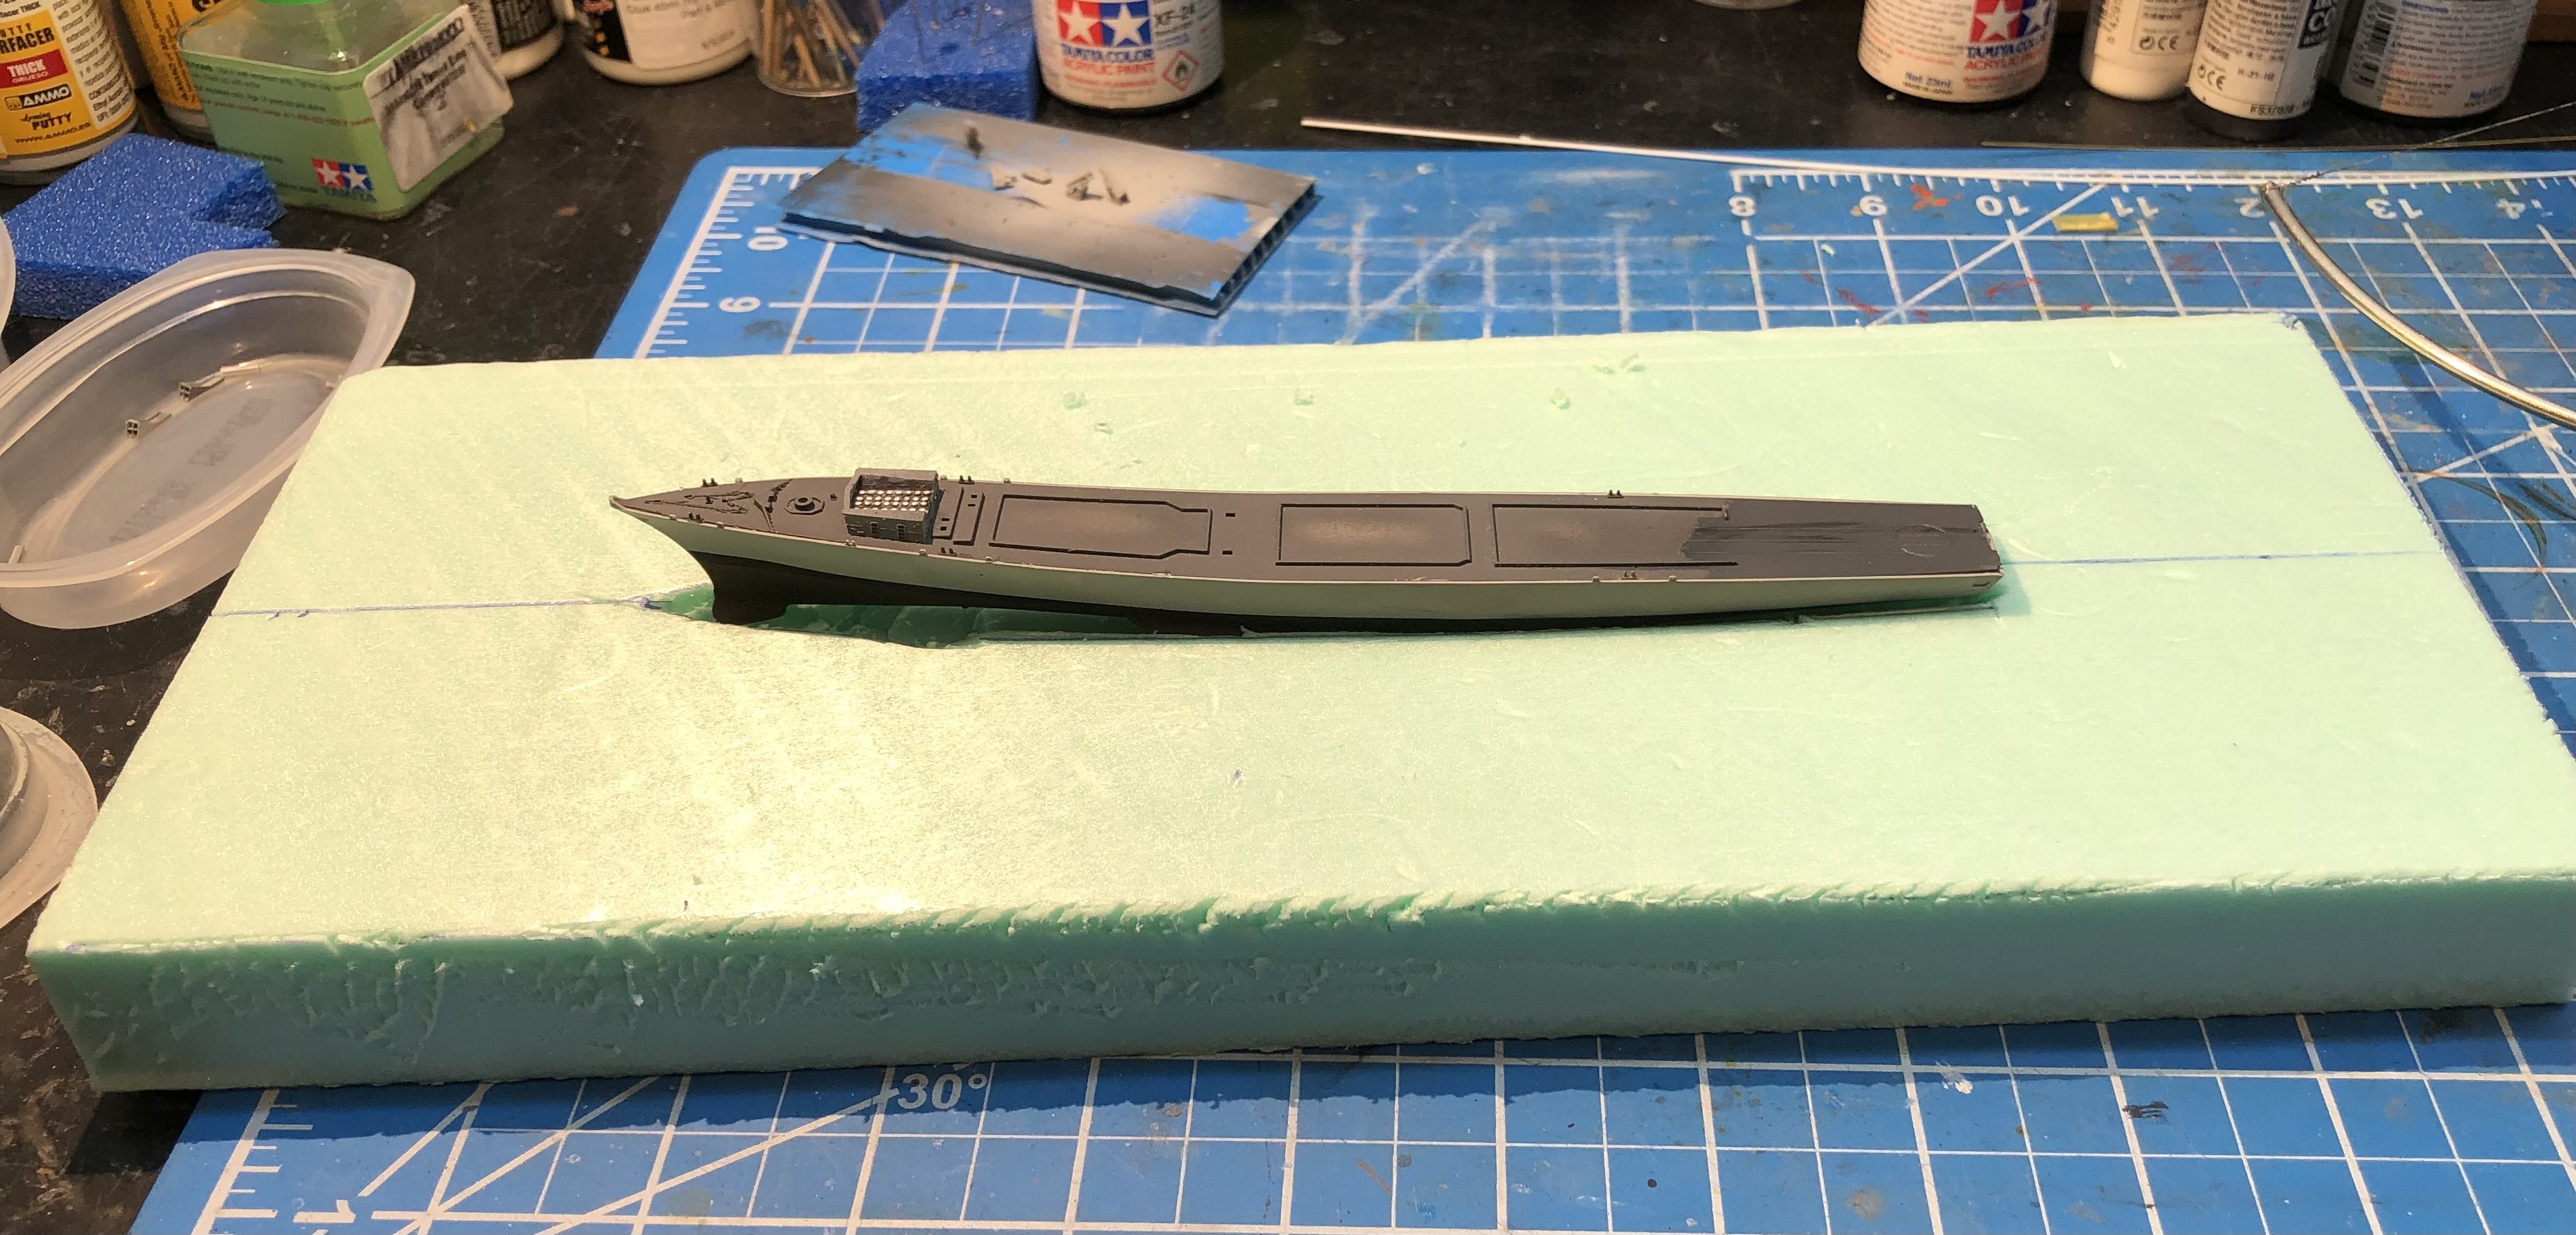
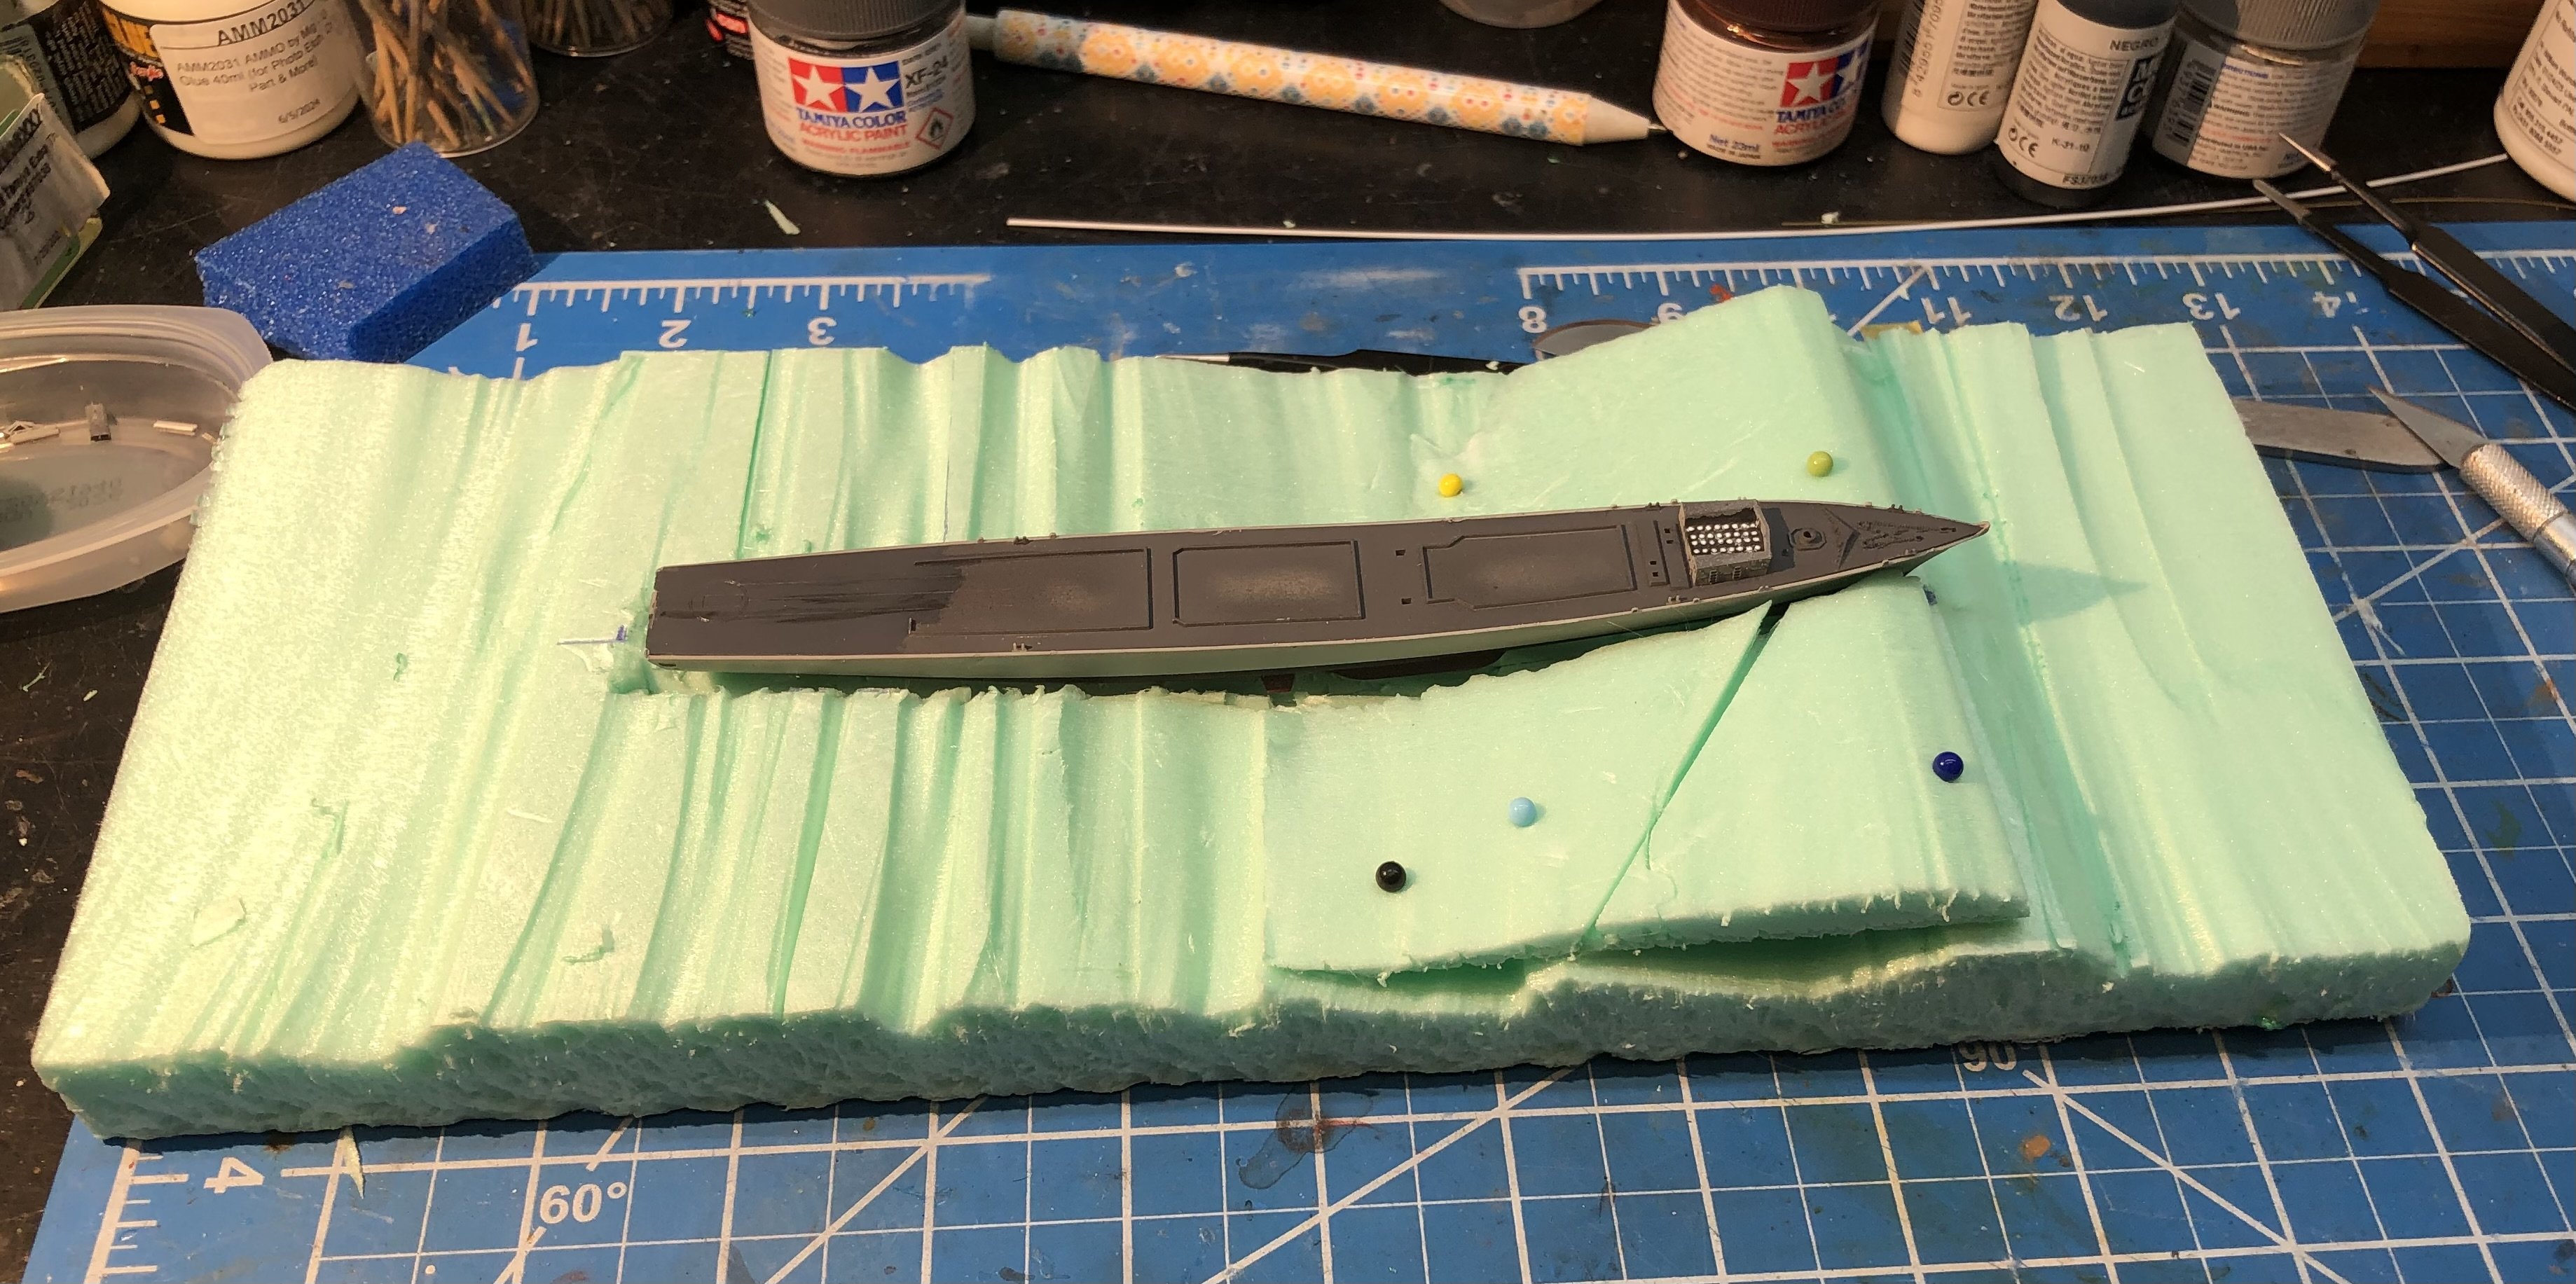
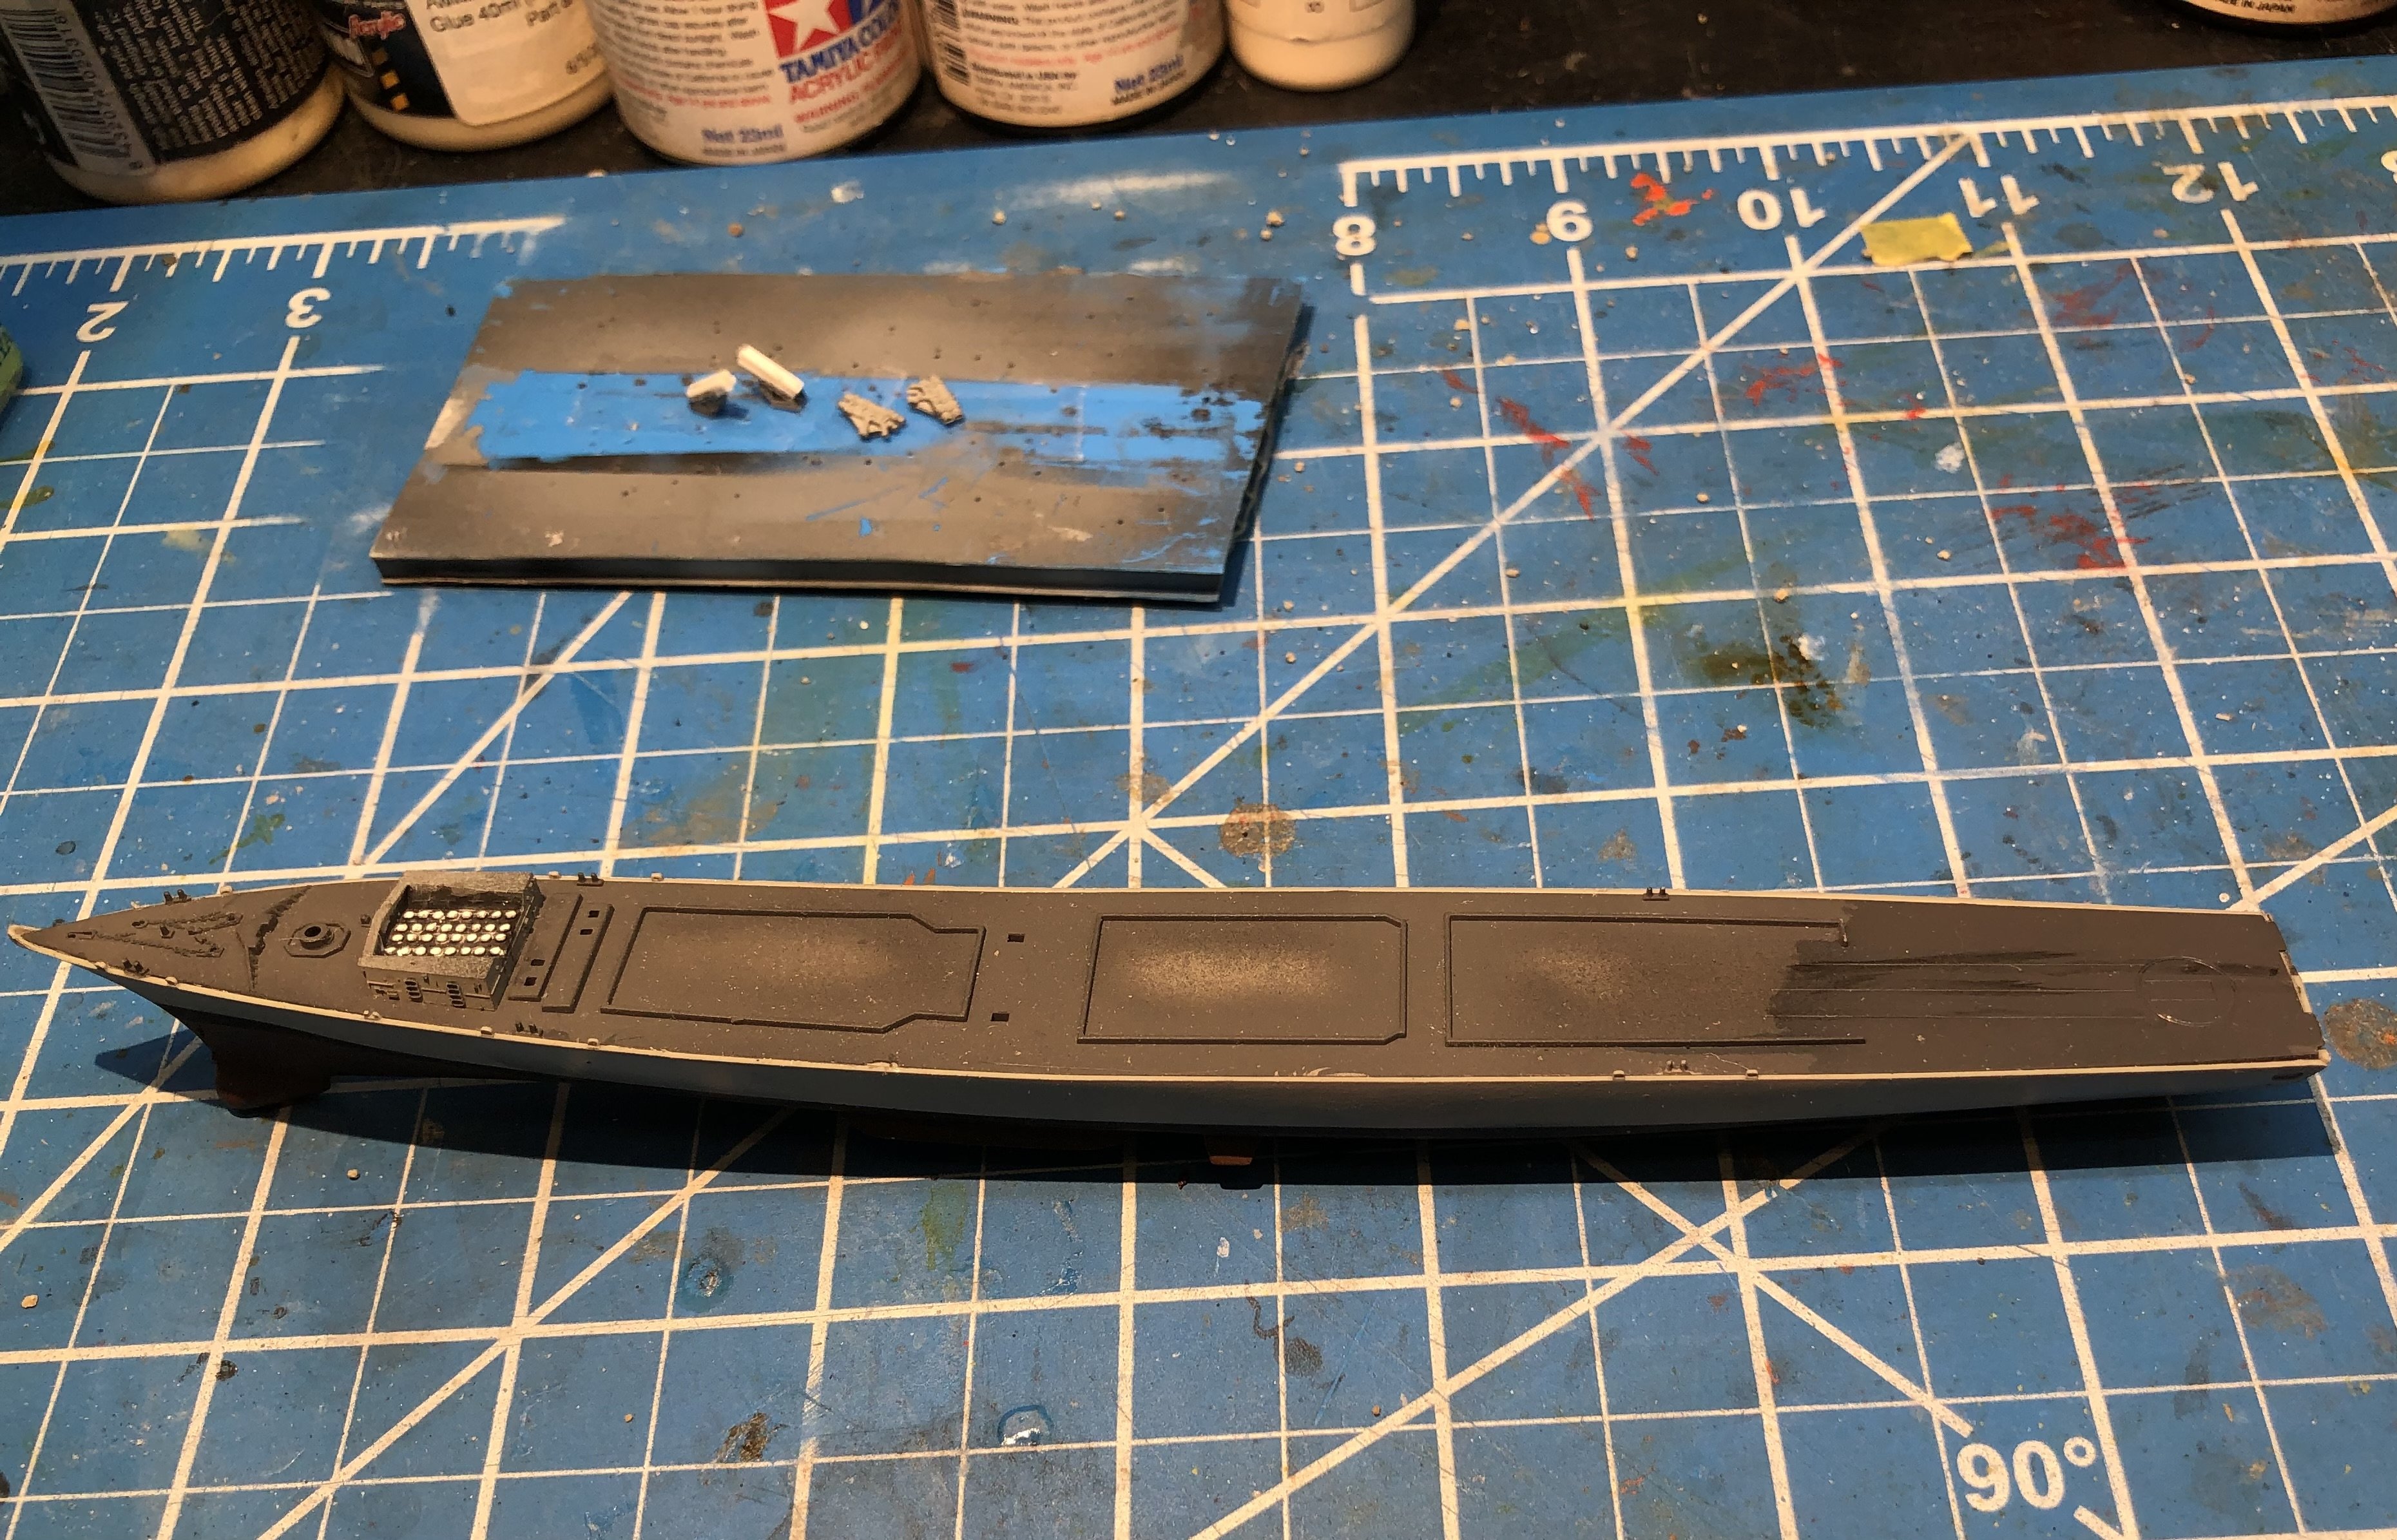
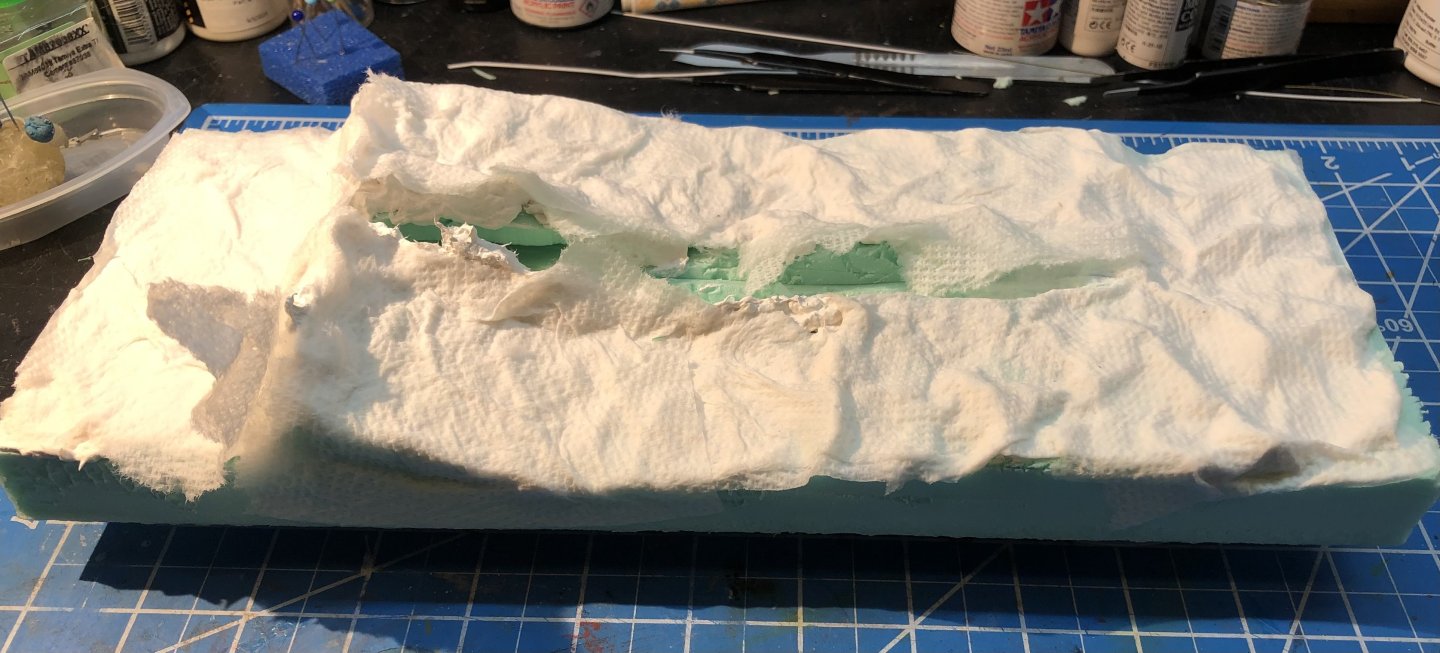
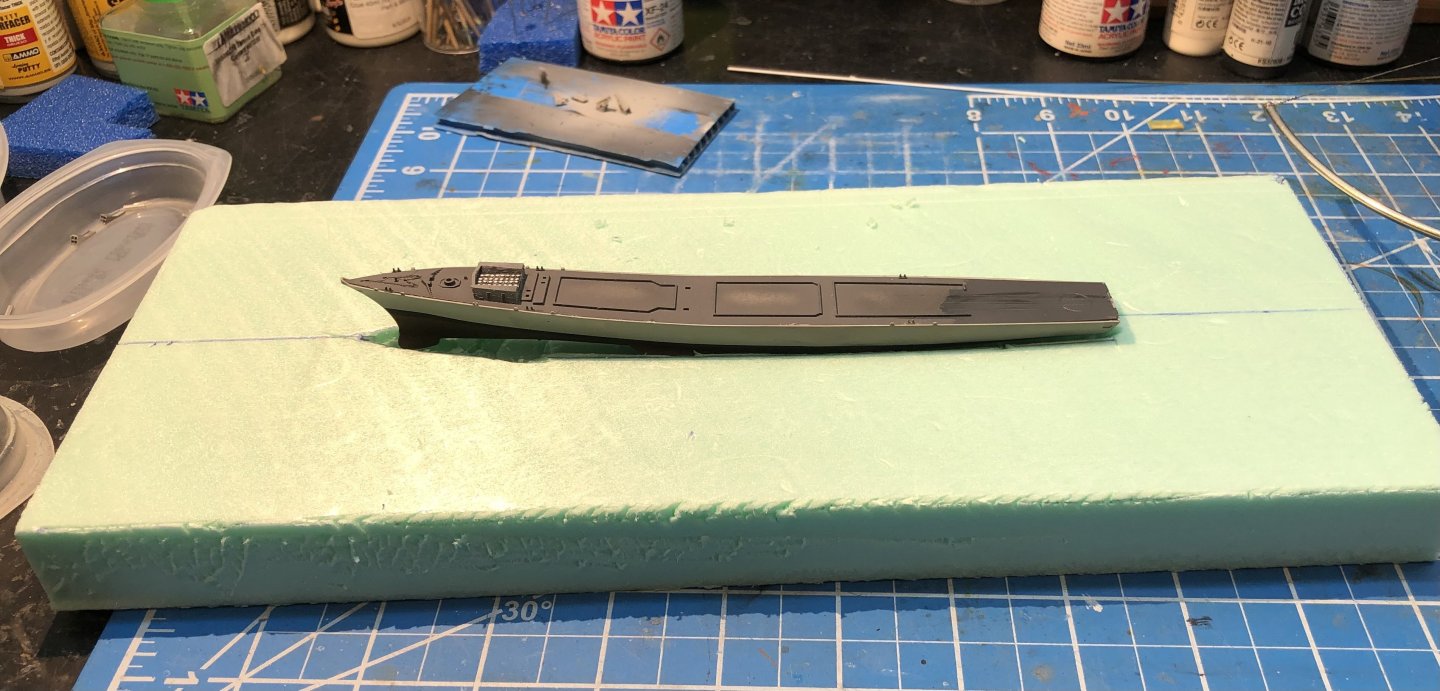
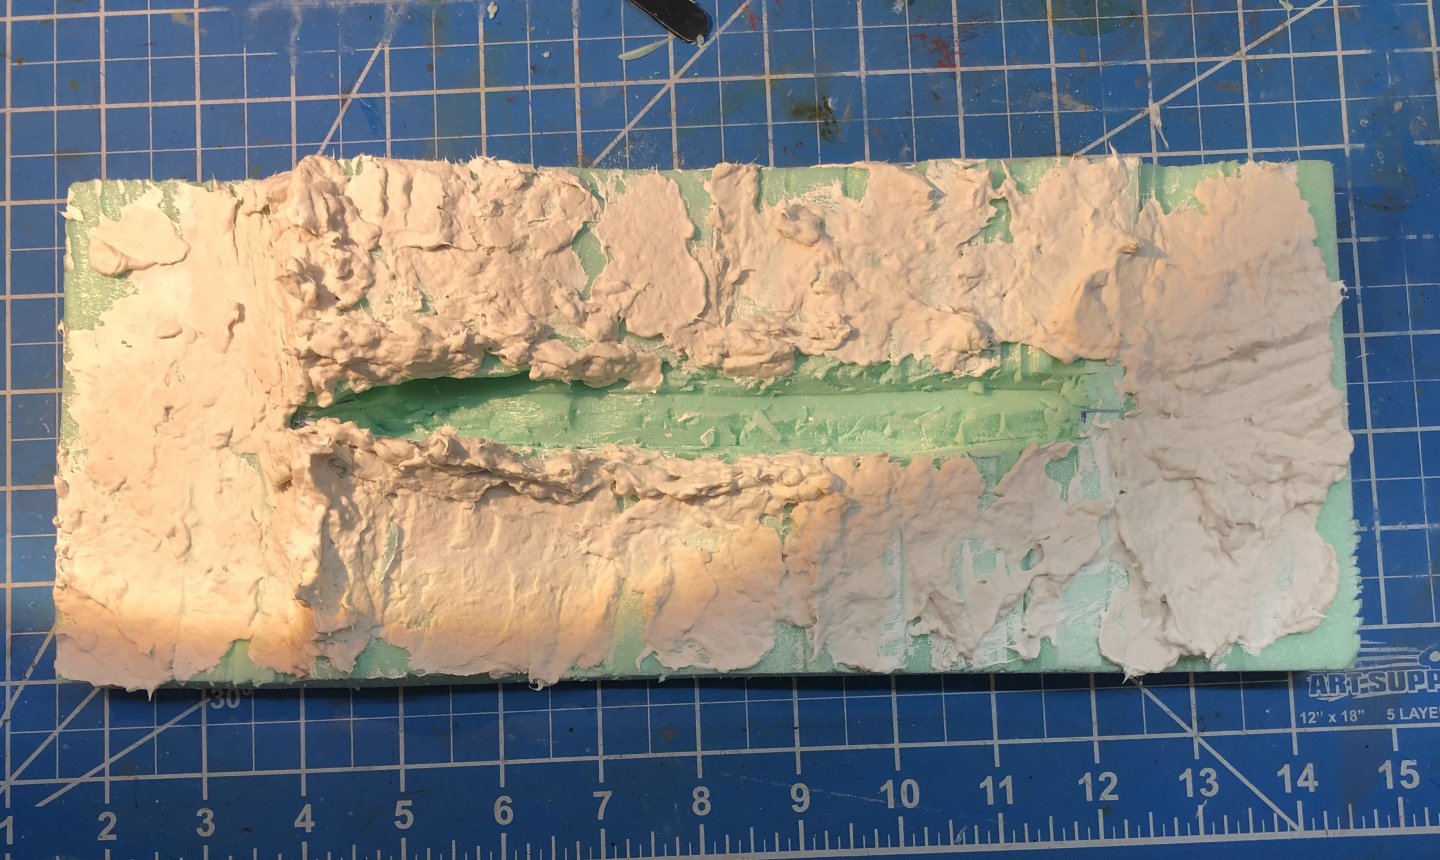
I don’t think I can progress Monmouth any further until I have the seascape ready to take the ship. So, onto the seascape! I’m using my usual one inch thick extruded polystyrene sheet, bought in a twenty four inch square and now cut to five by twelve inches. I find this material much easier to cut and shape compared with expanded polystyrene. I used a scalpel to cut out the outline of the hull. Then I used a hot wire cutter to carve the rough wave shapes I want. According to my ancient copy of Allard Coles “ Heavy Weather Sailing” a seventy mph wind on open seas can be expected to generate waves of around 65 feet. So at 1/700 anything around an inch would be acceptable. The dressmakers pins are holding pieces together while the glue dries. Then Sculptamold was added to break up the flat and smooth surfaces and to further define the waves. Once this has dried I will add torn up paper towels soaked in diluted white glue to refine the surface and build small waves. As always this is very experimental and may evolve in unplanned ways. Thanks for looking in, the likes and comments. alan


-
Thank you very much OC, the PE is giving me fits this time but most of the tiny stuff is done. Lots of railings and lifeboats still to do though. l’ll take a bit of a break with the seascape for a bit. alan
-
Wow, the aircraft look amazing, congratulations on what must have been seriously fiddly work. alan
- 39 replies
-
- 2
-

-

-
- Five Star
- Akitsu Maru
- (and 1 more)
-
Hi Mike, thanks for the information, very helpful. As you can see I’ve been using old pill containers for holding hulls and assemblies. The child proof top means you can rotate the model without any risk of unscrewing the lid which I find useful when painting the miniatures. I usually fill them about three quarters full of water which helps with stability. I’ll look at the Dspiae vices, that may be a better solution. The idea of tracing the hull outline to use as a template for the seascape is a good idea, I’ll give it a go. I need to start some serious planning for the seascape. Thanks again alan
-
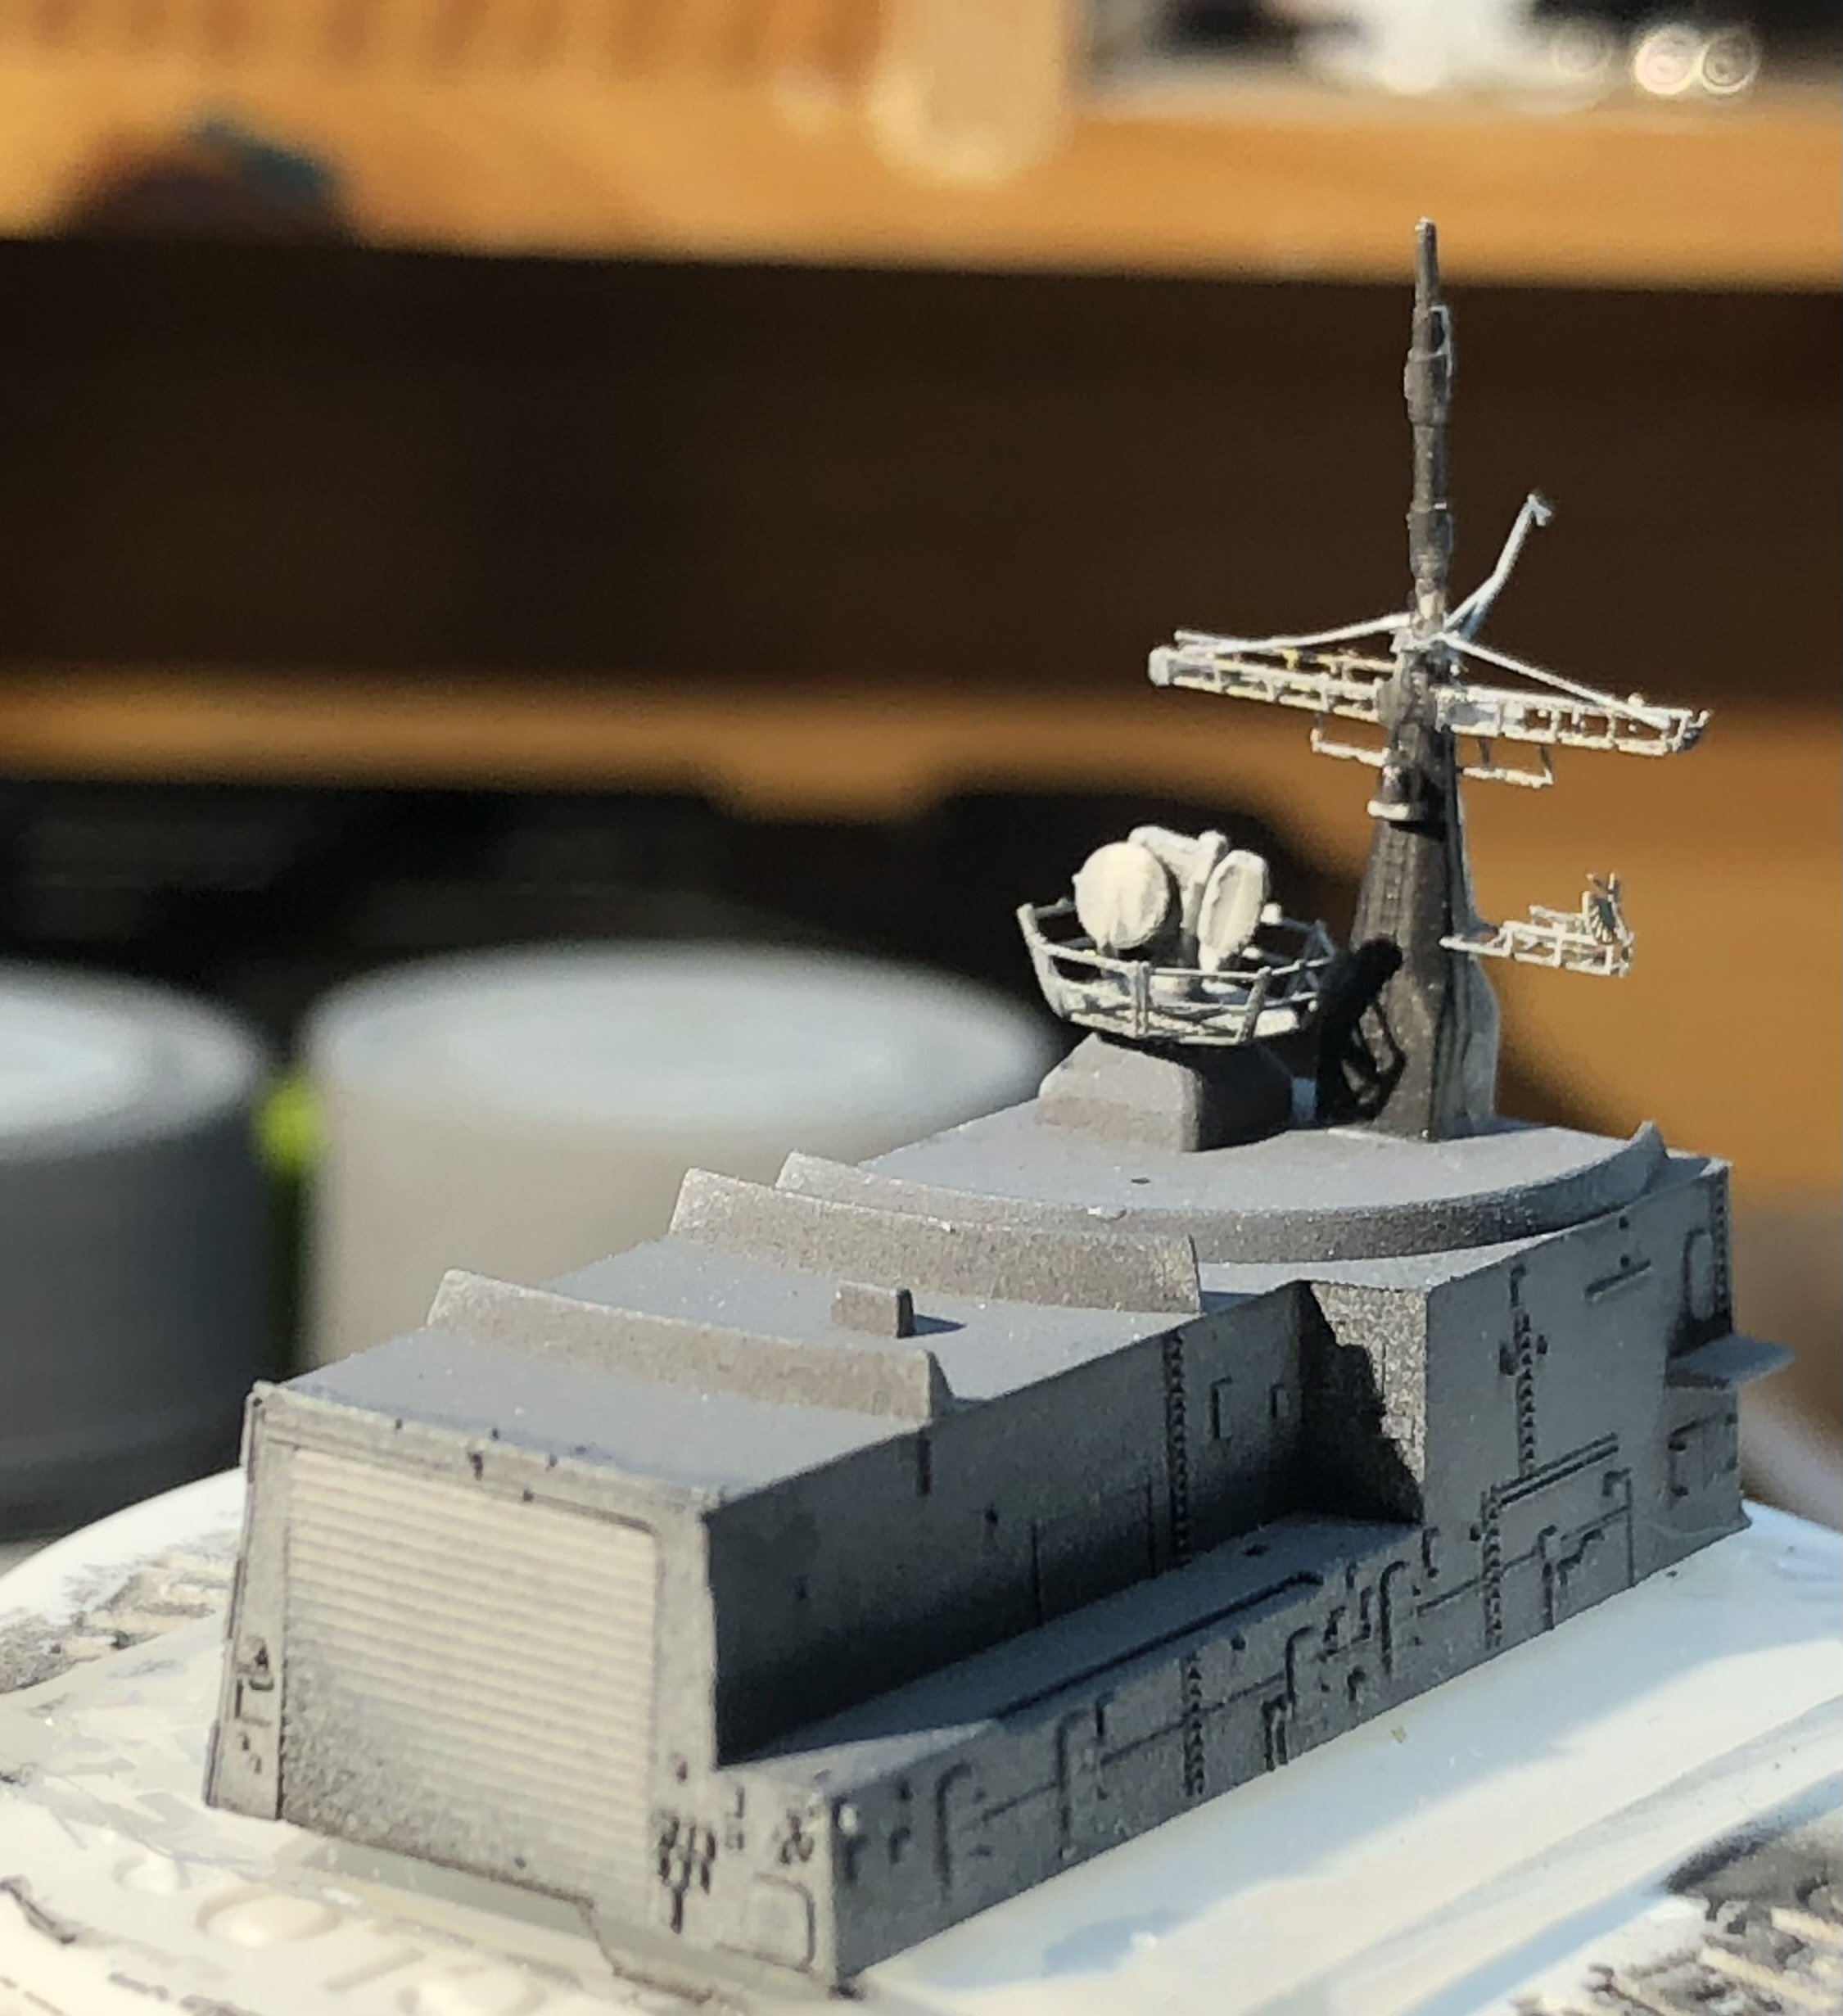
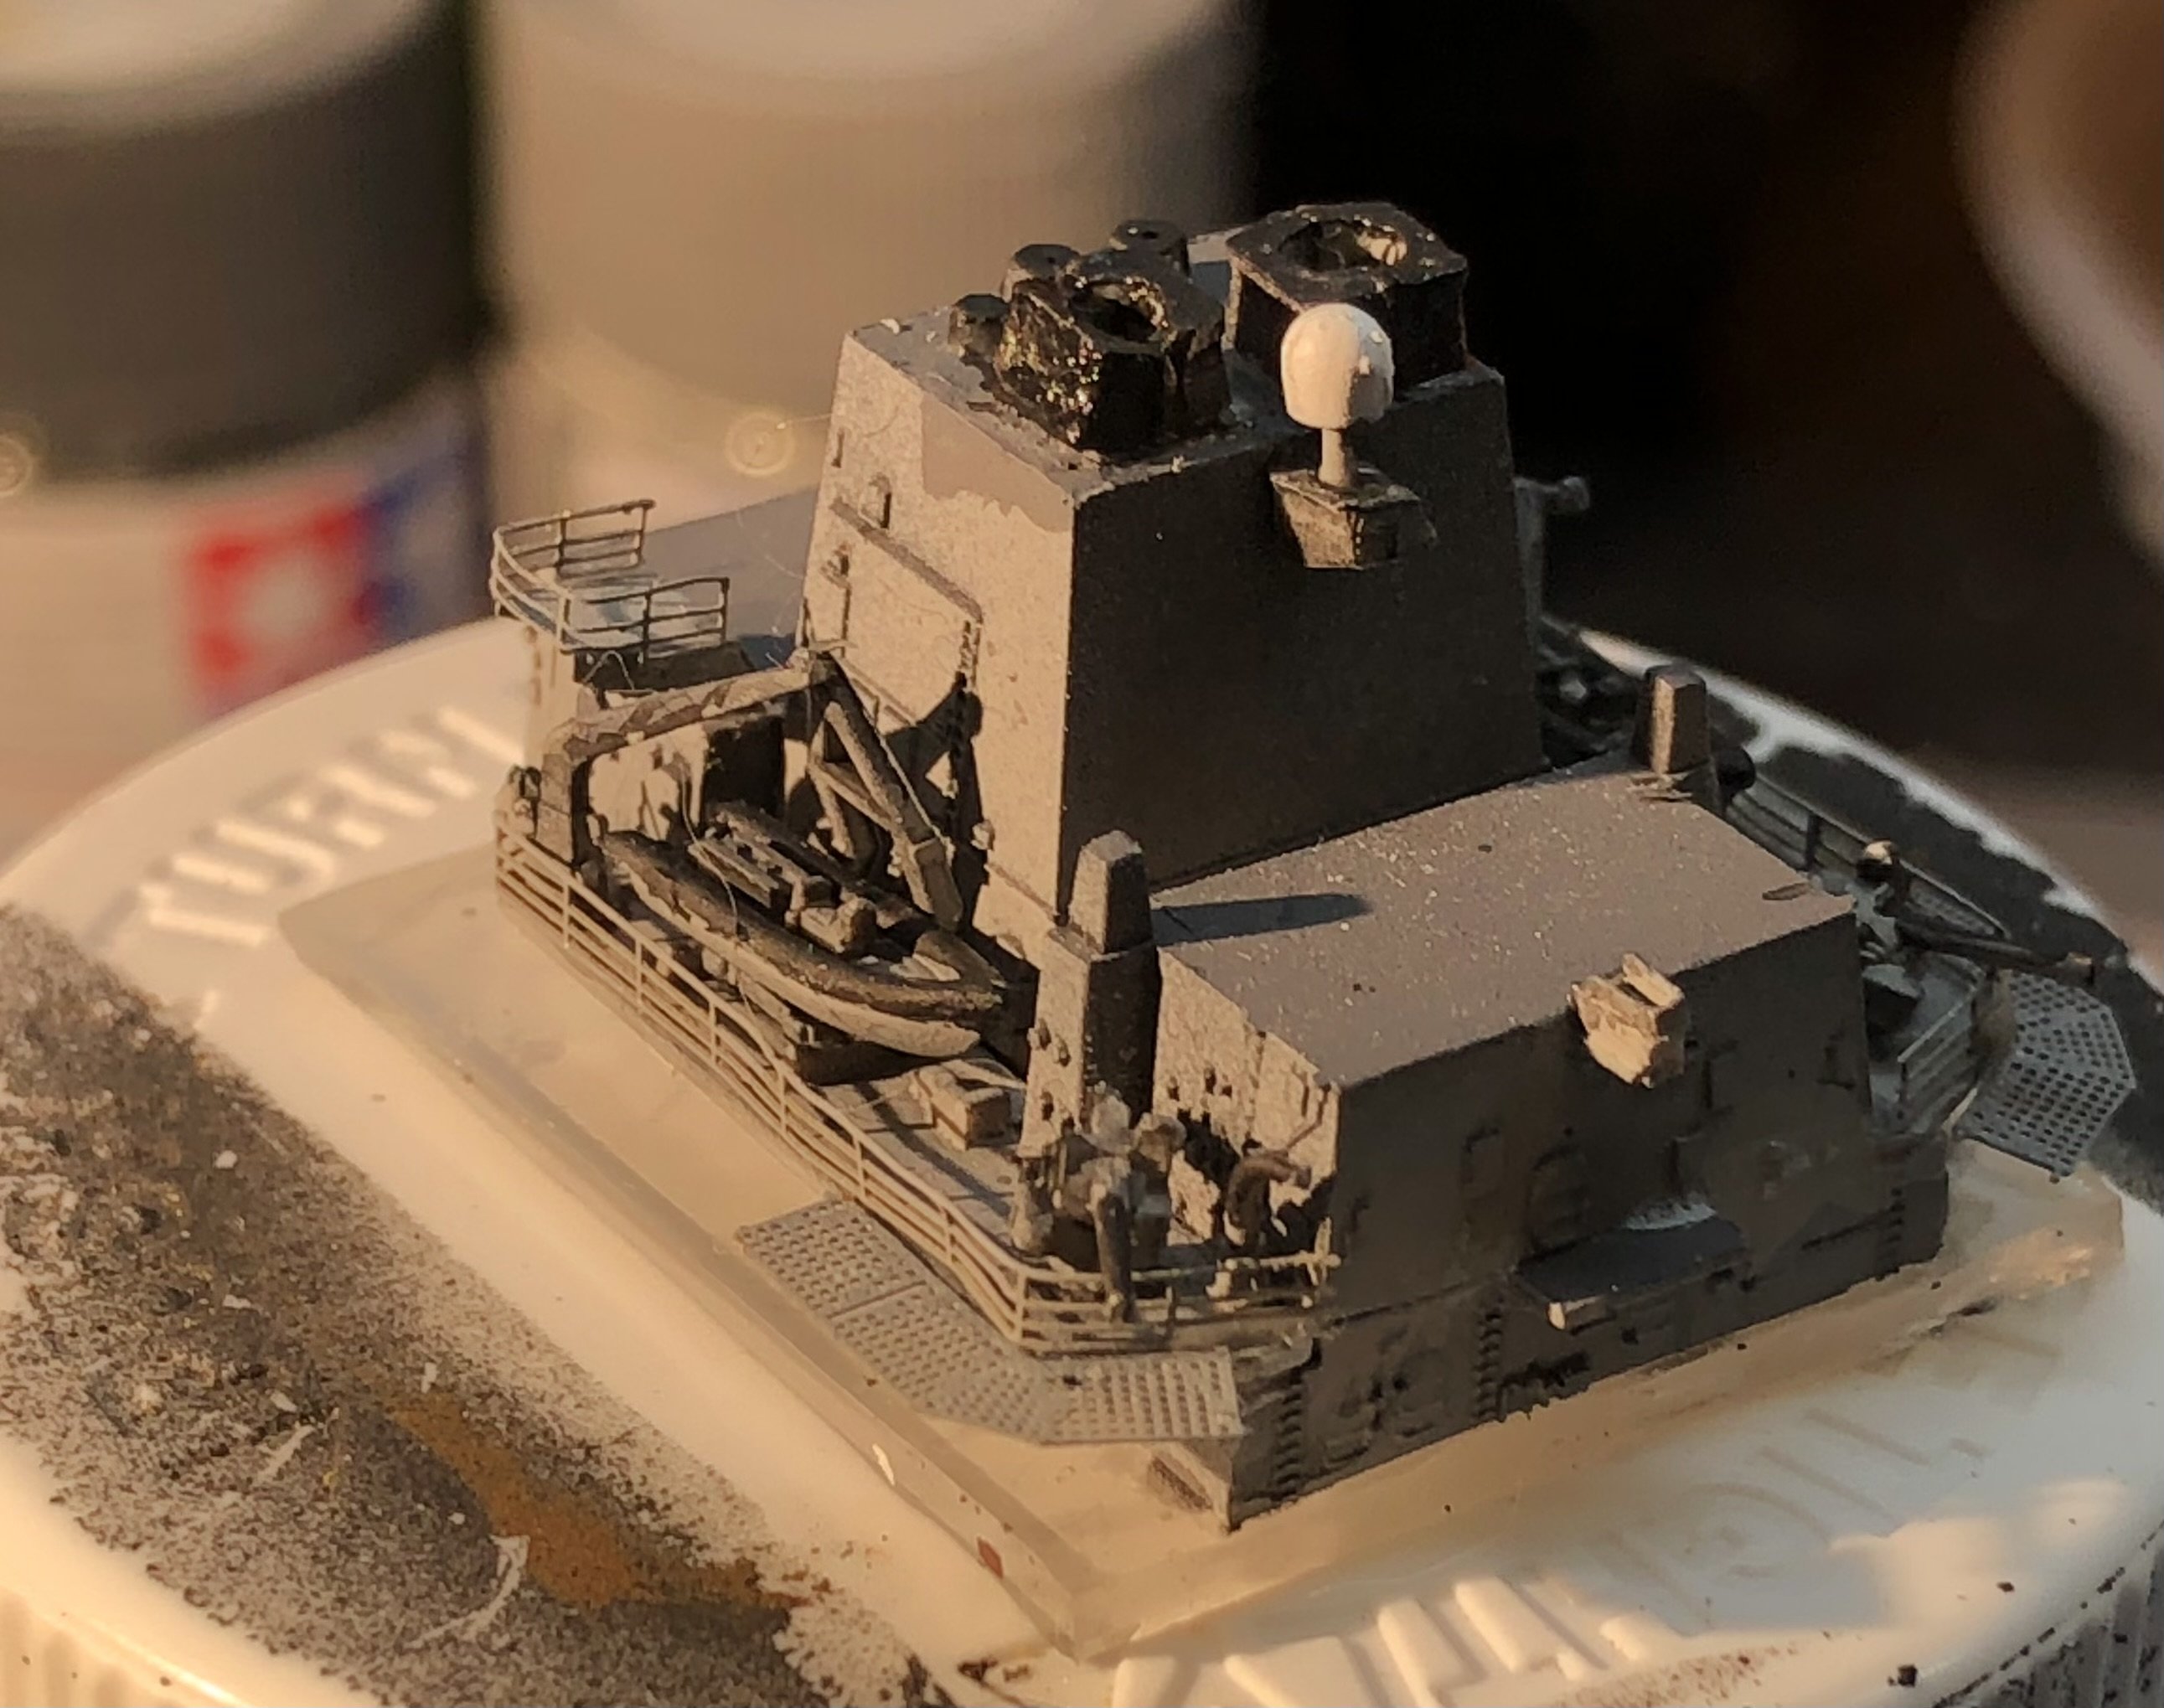
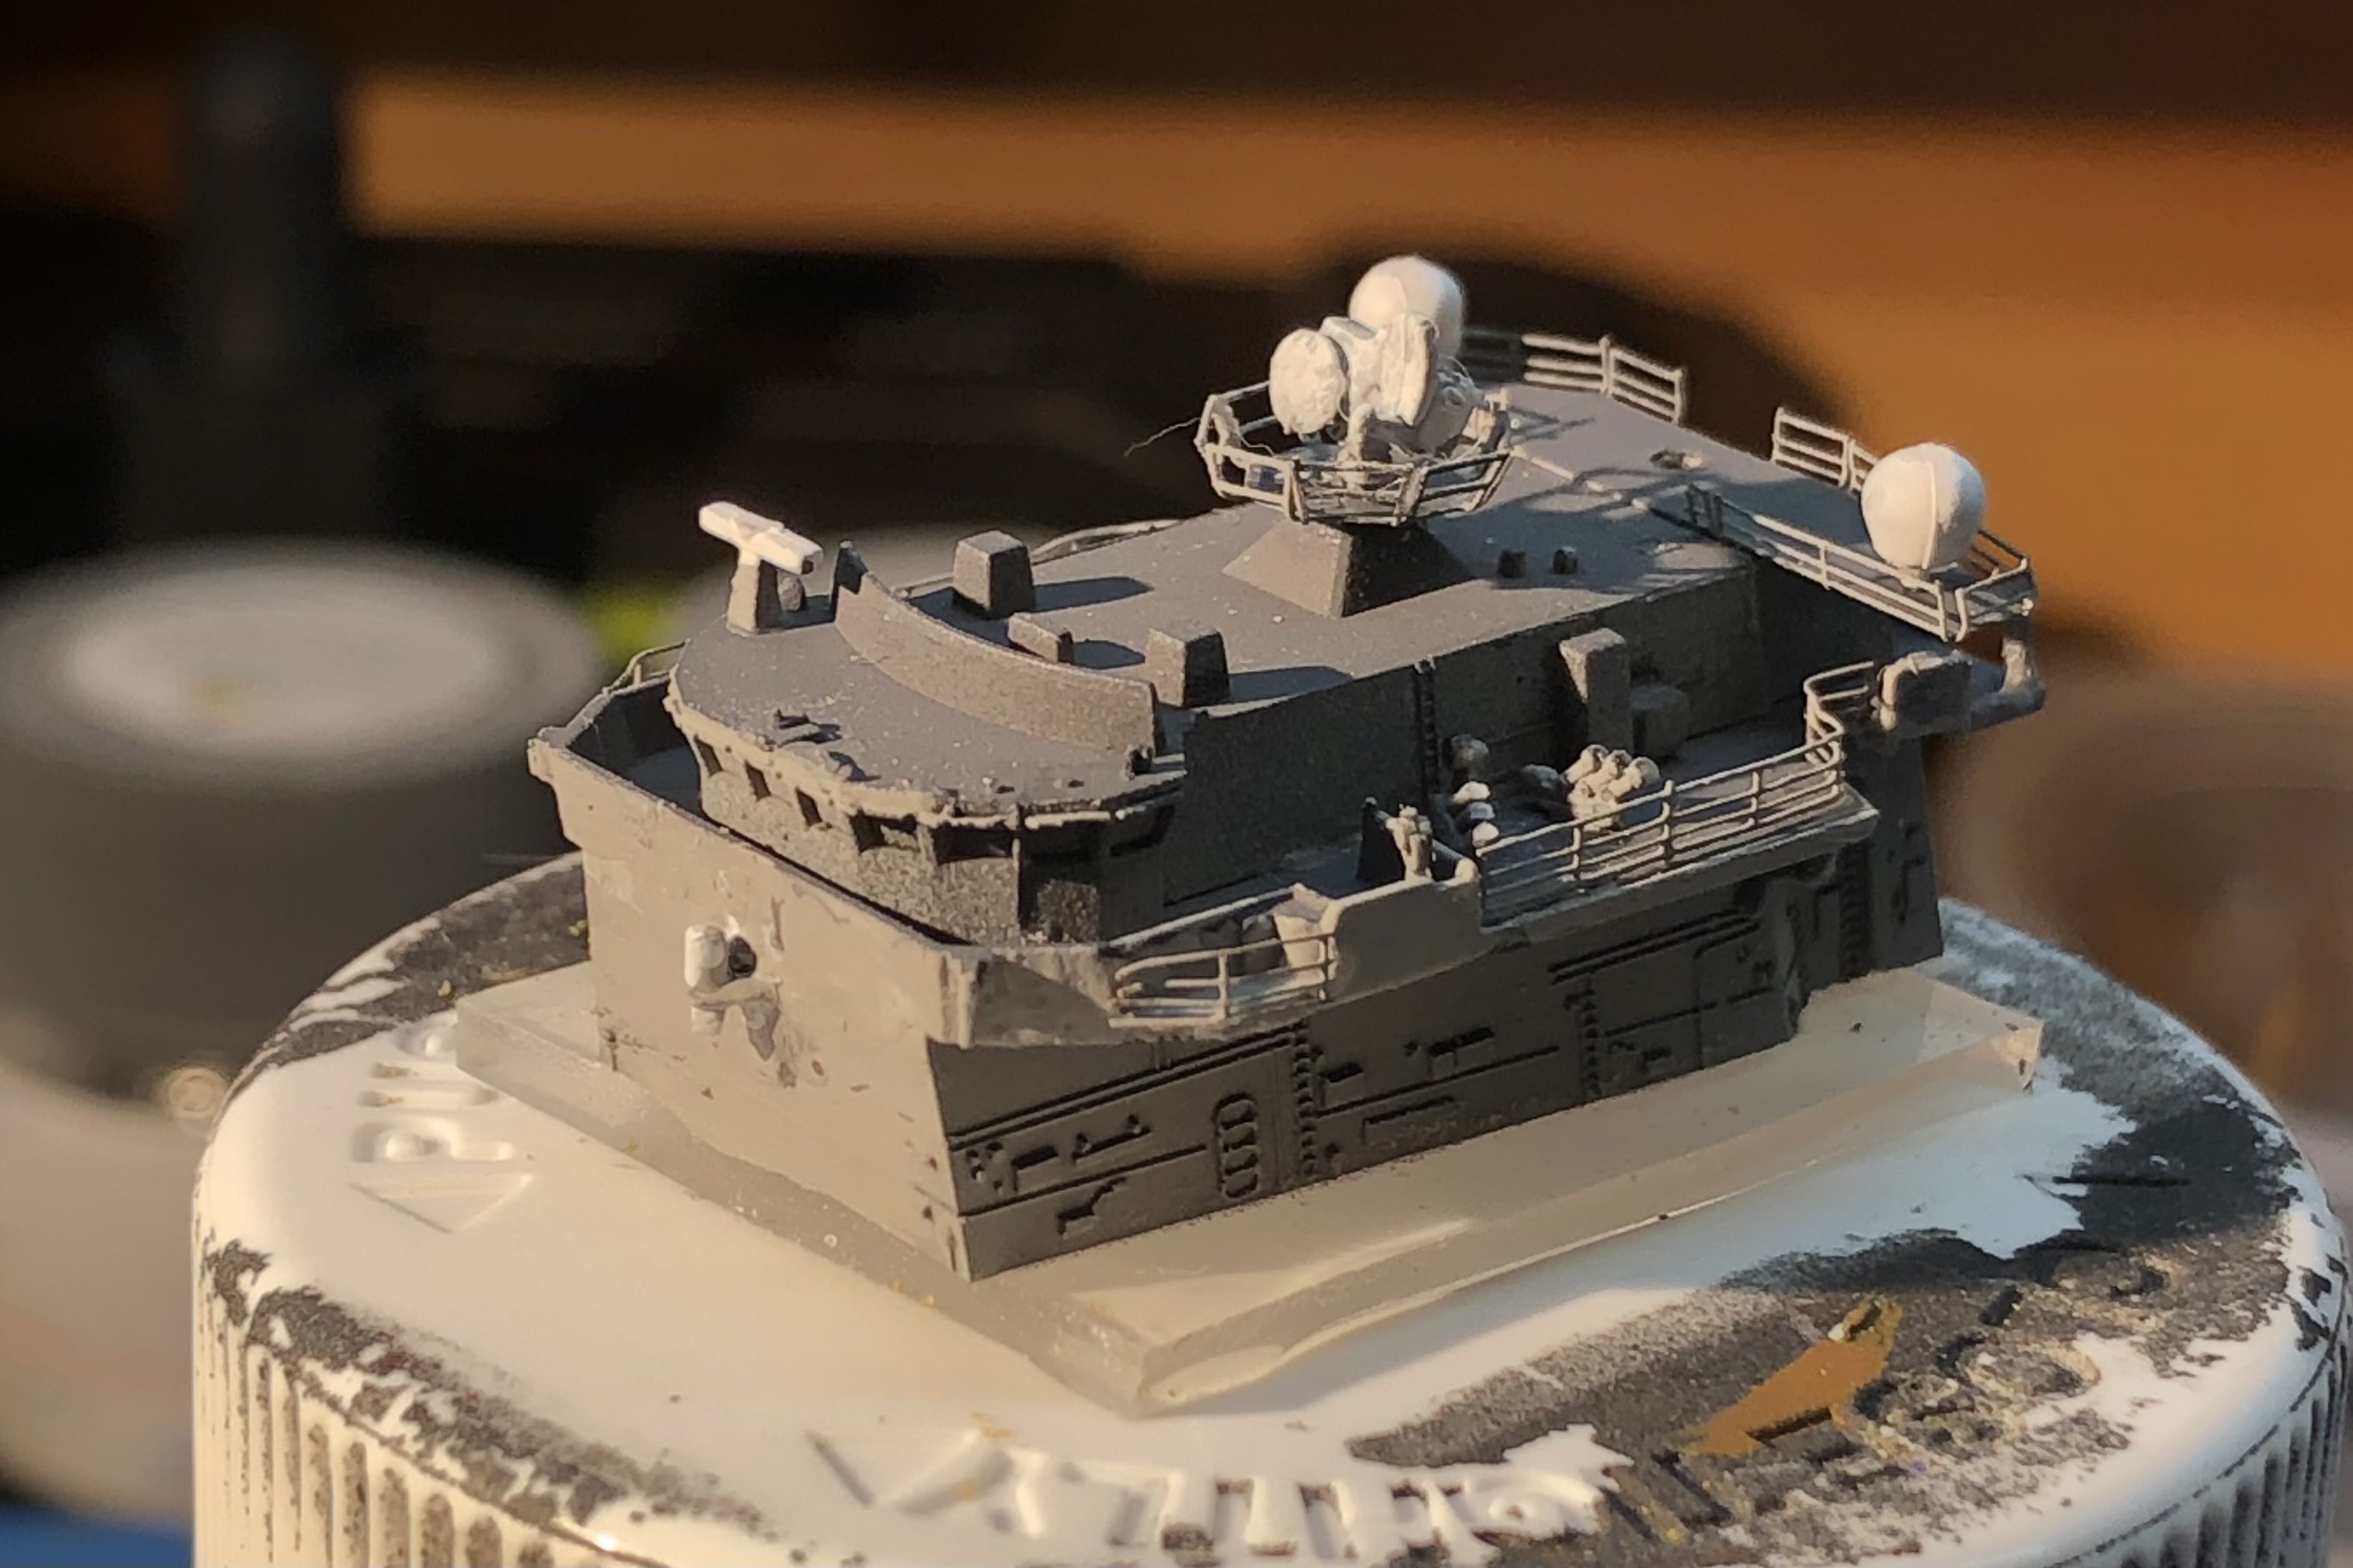
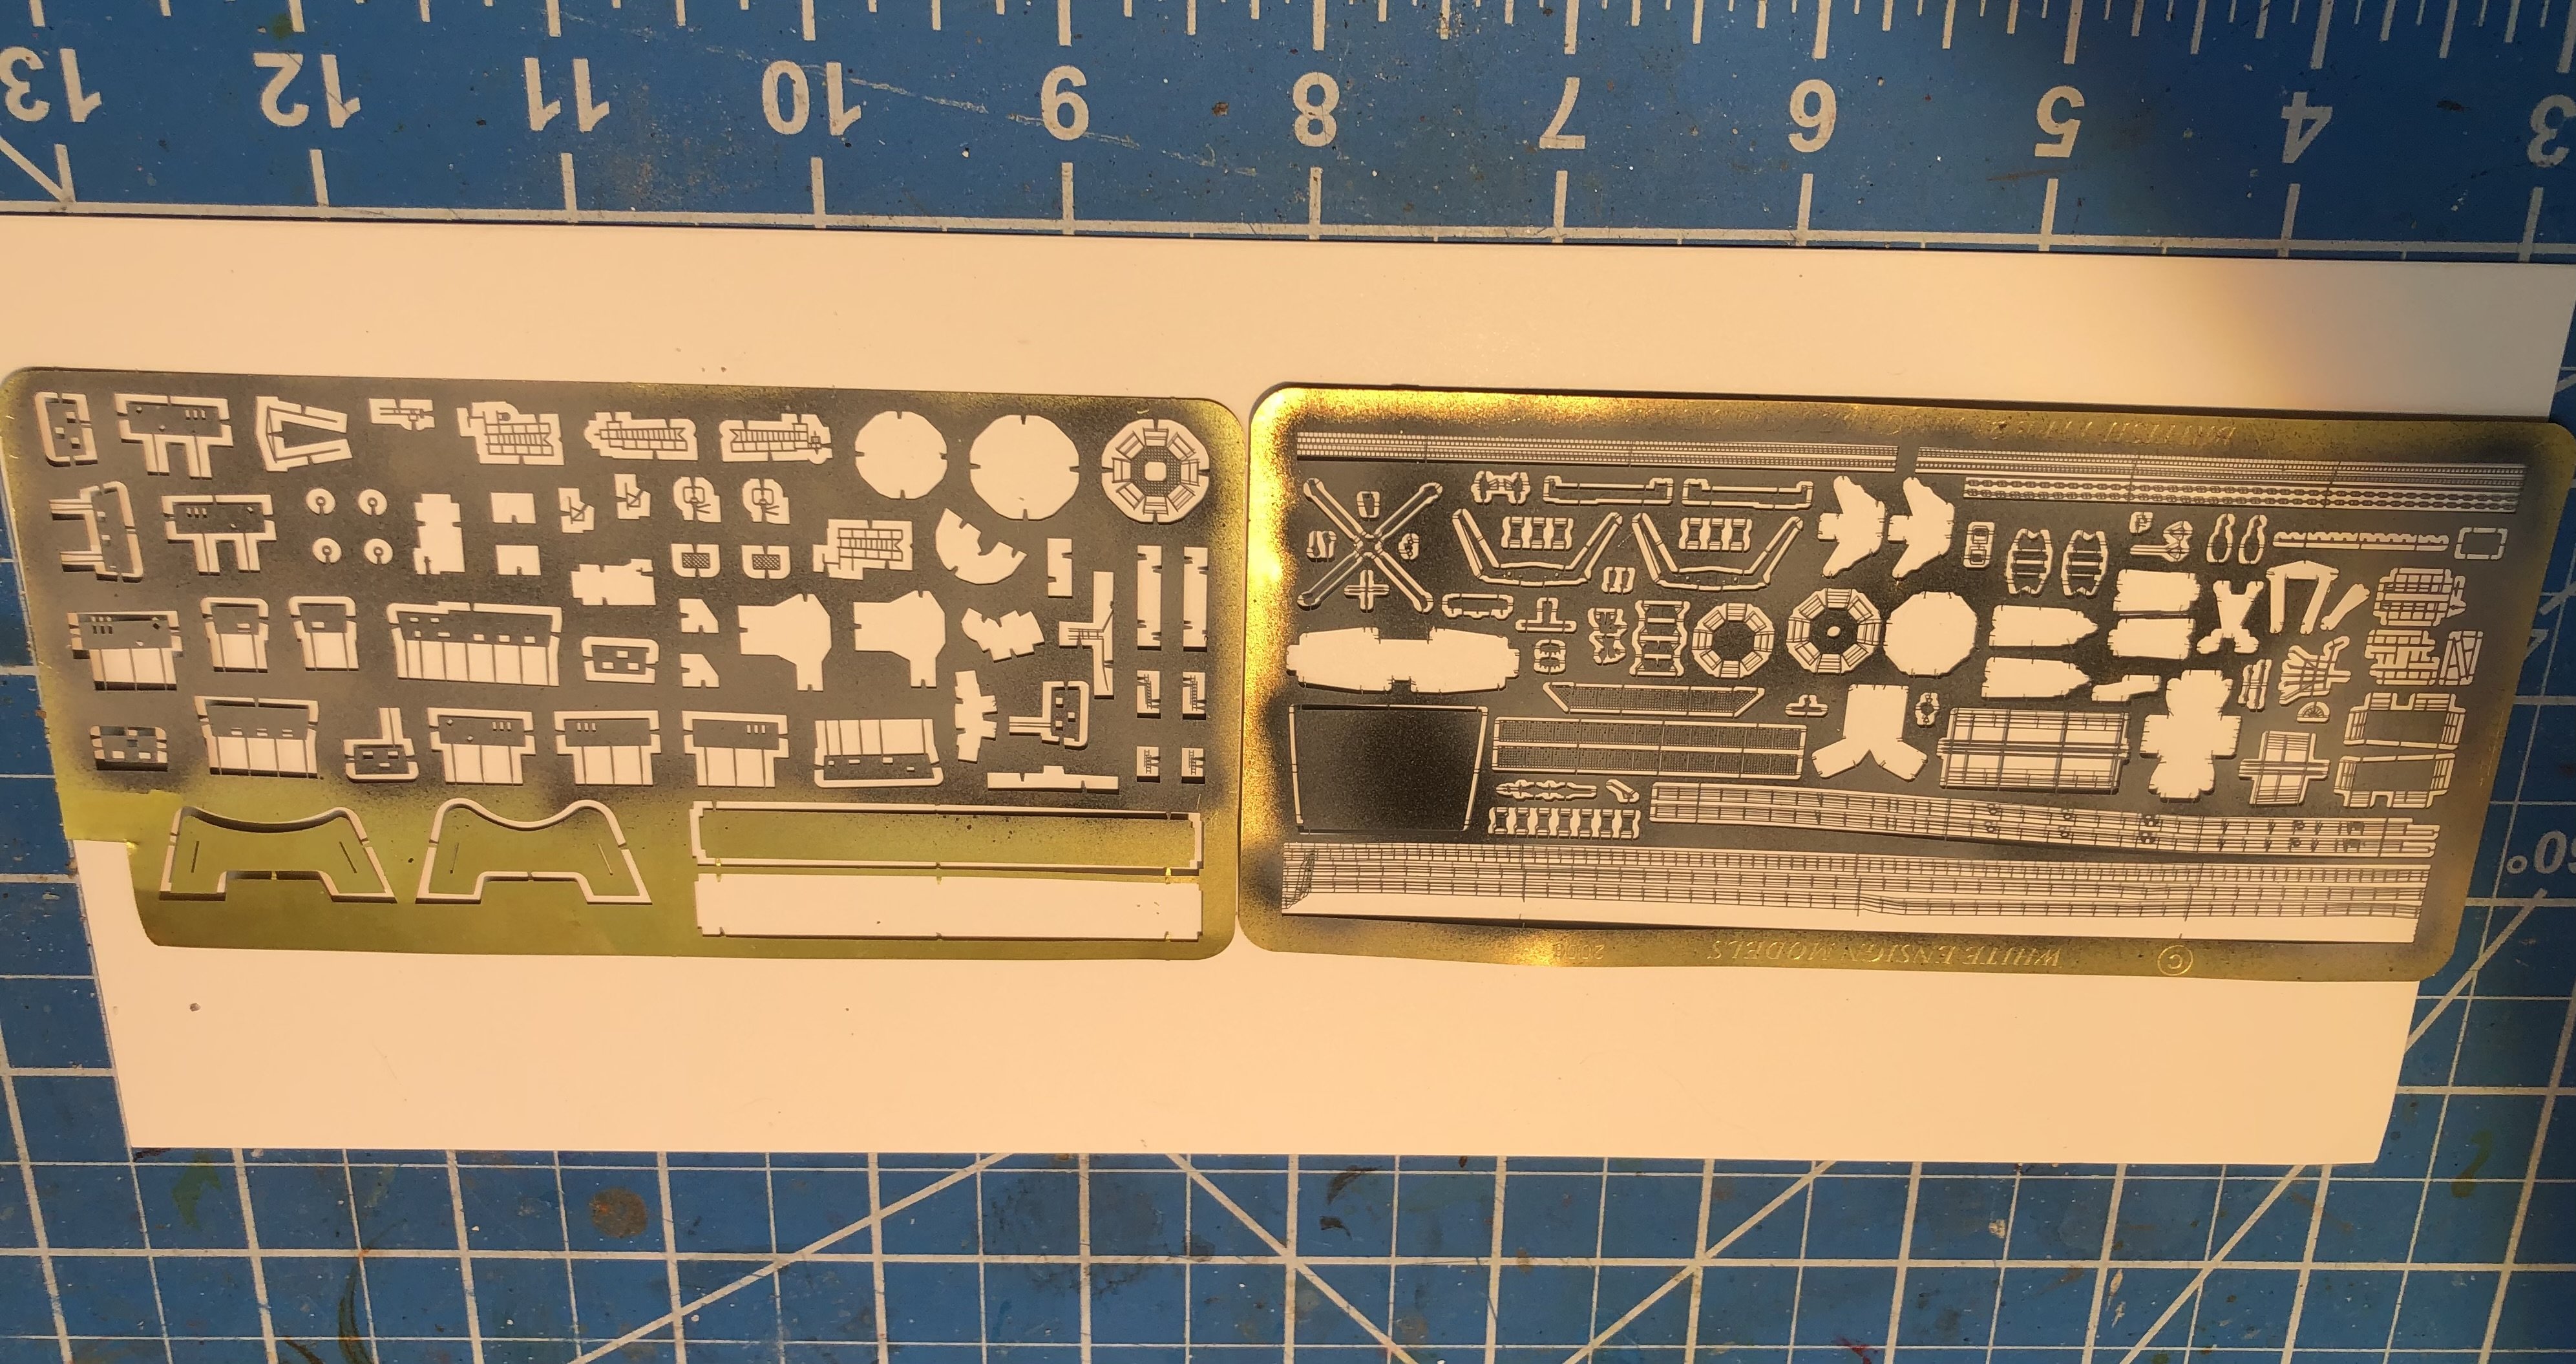
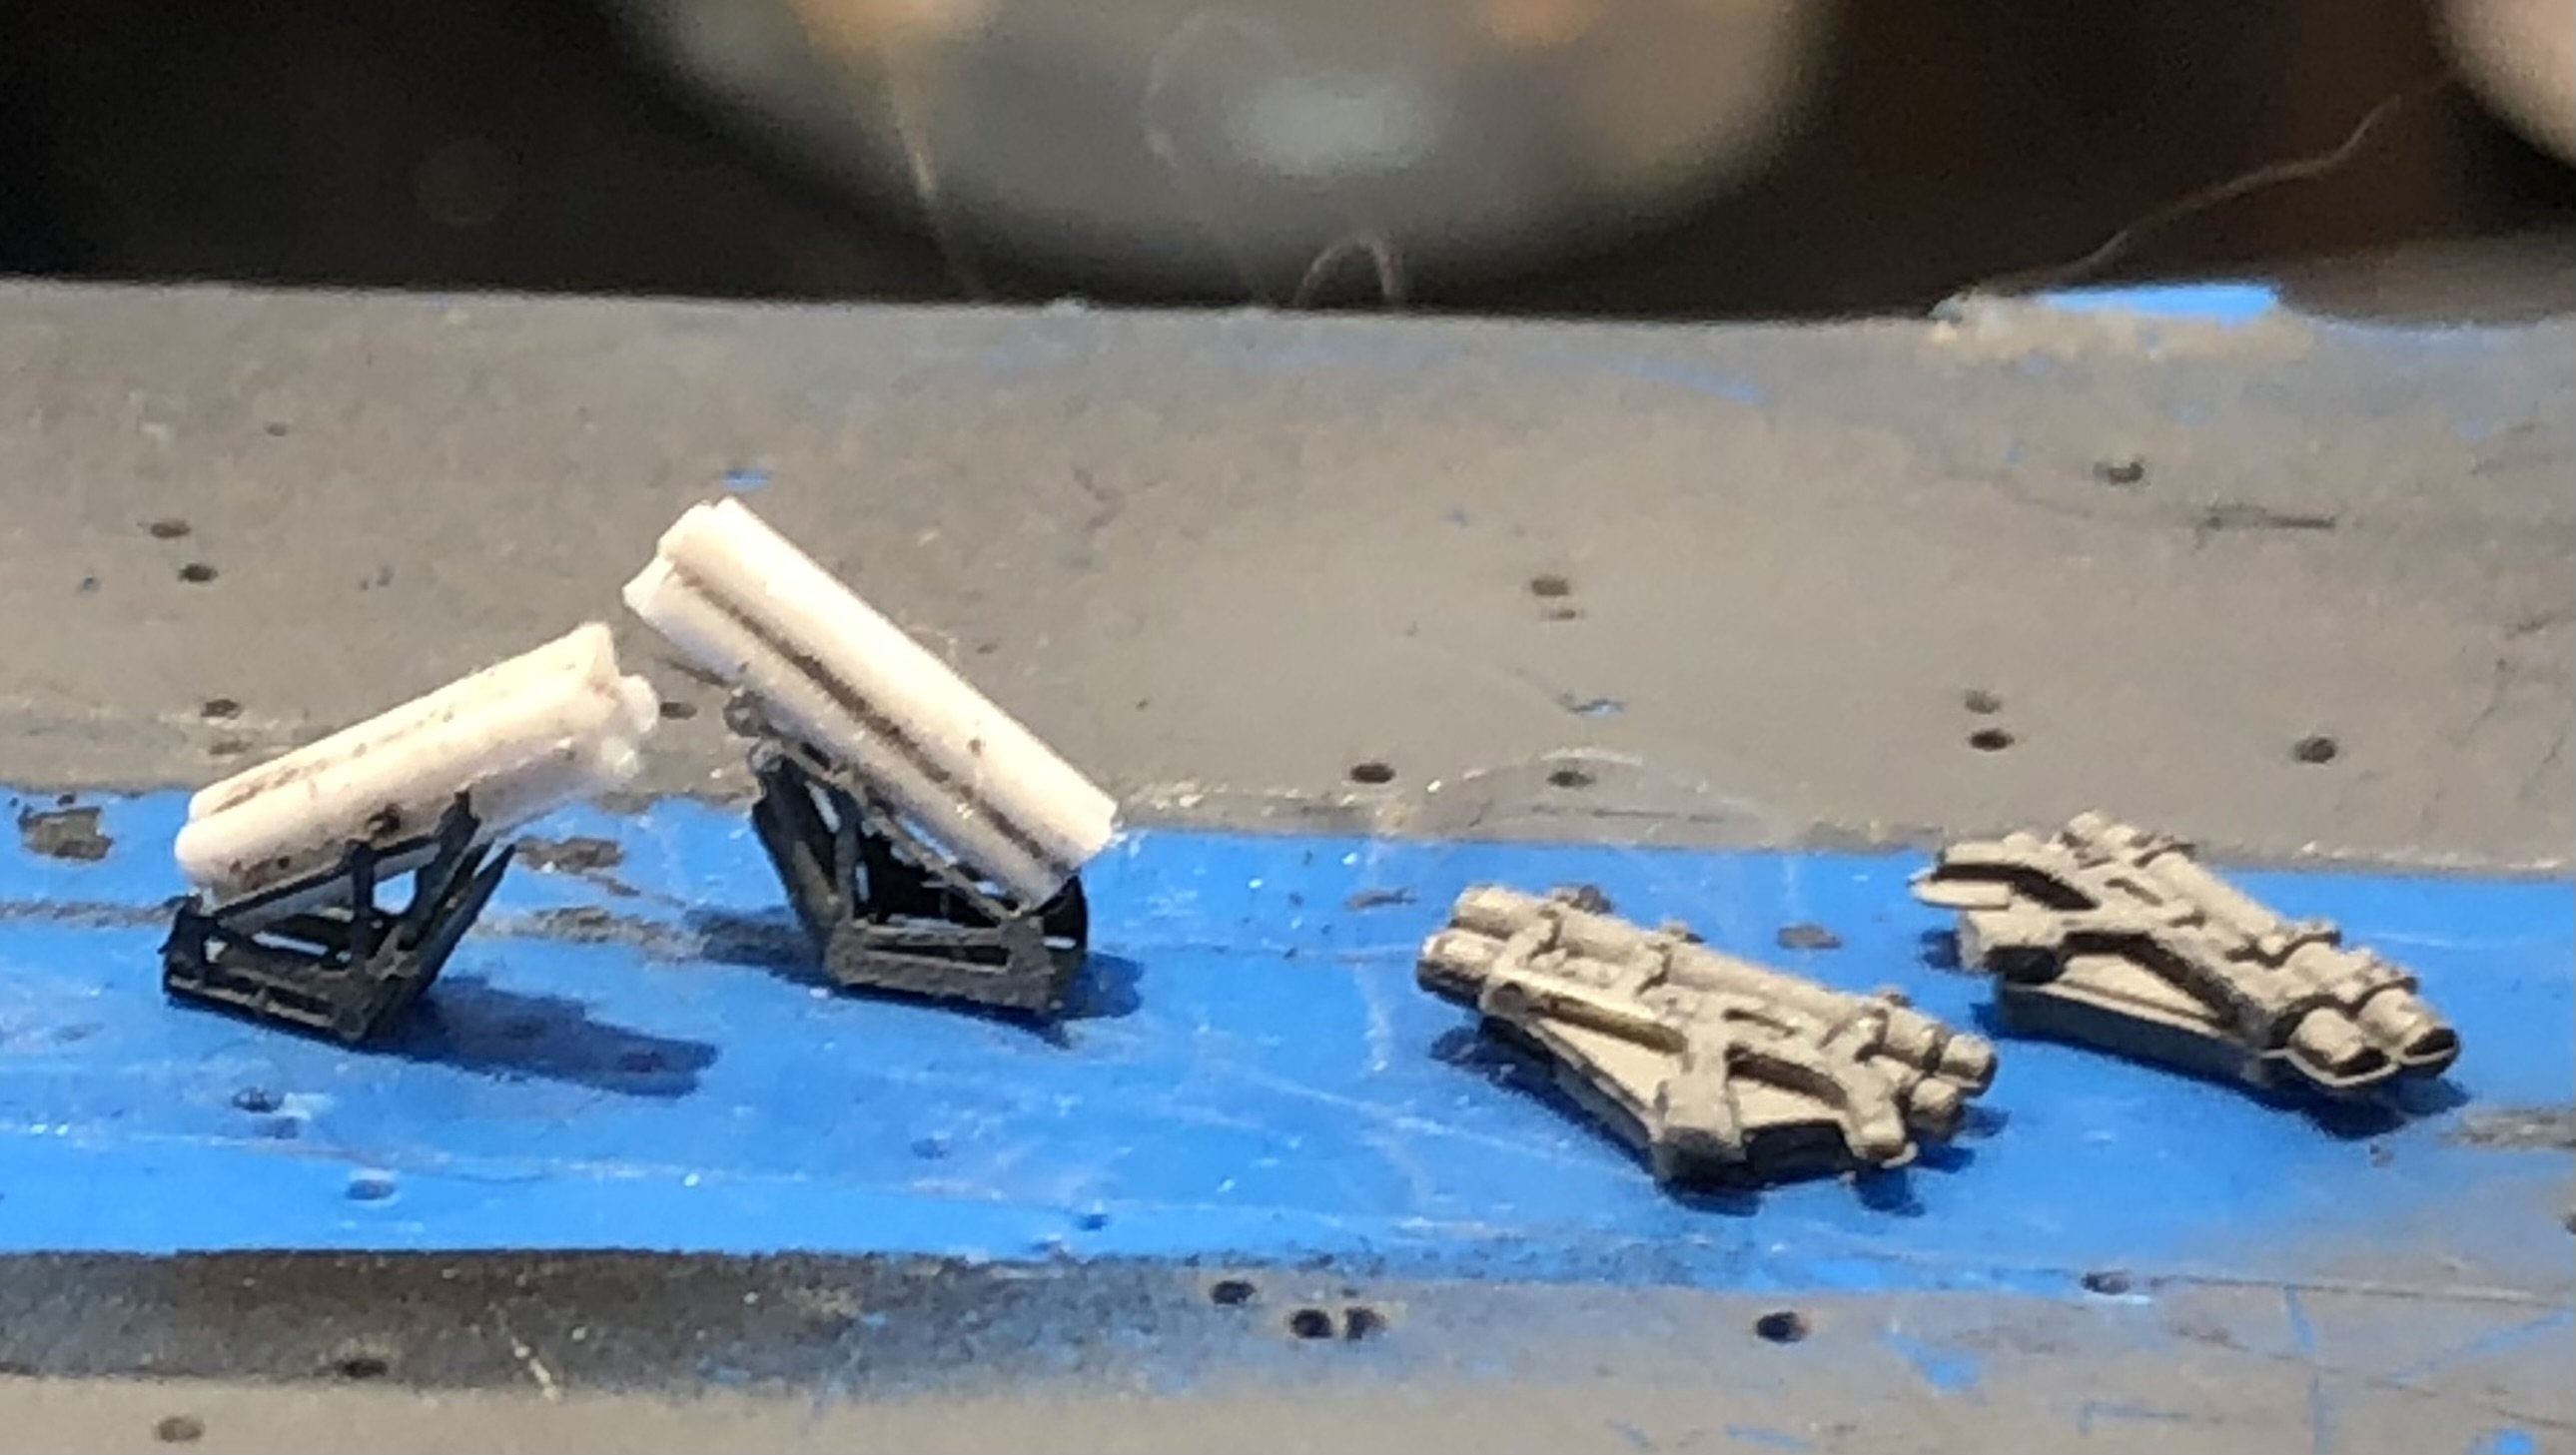
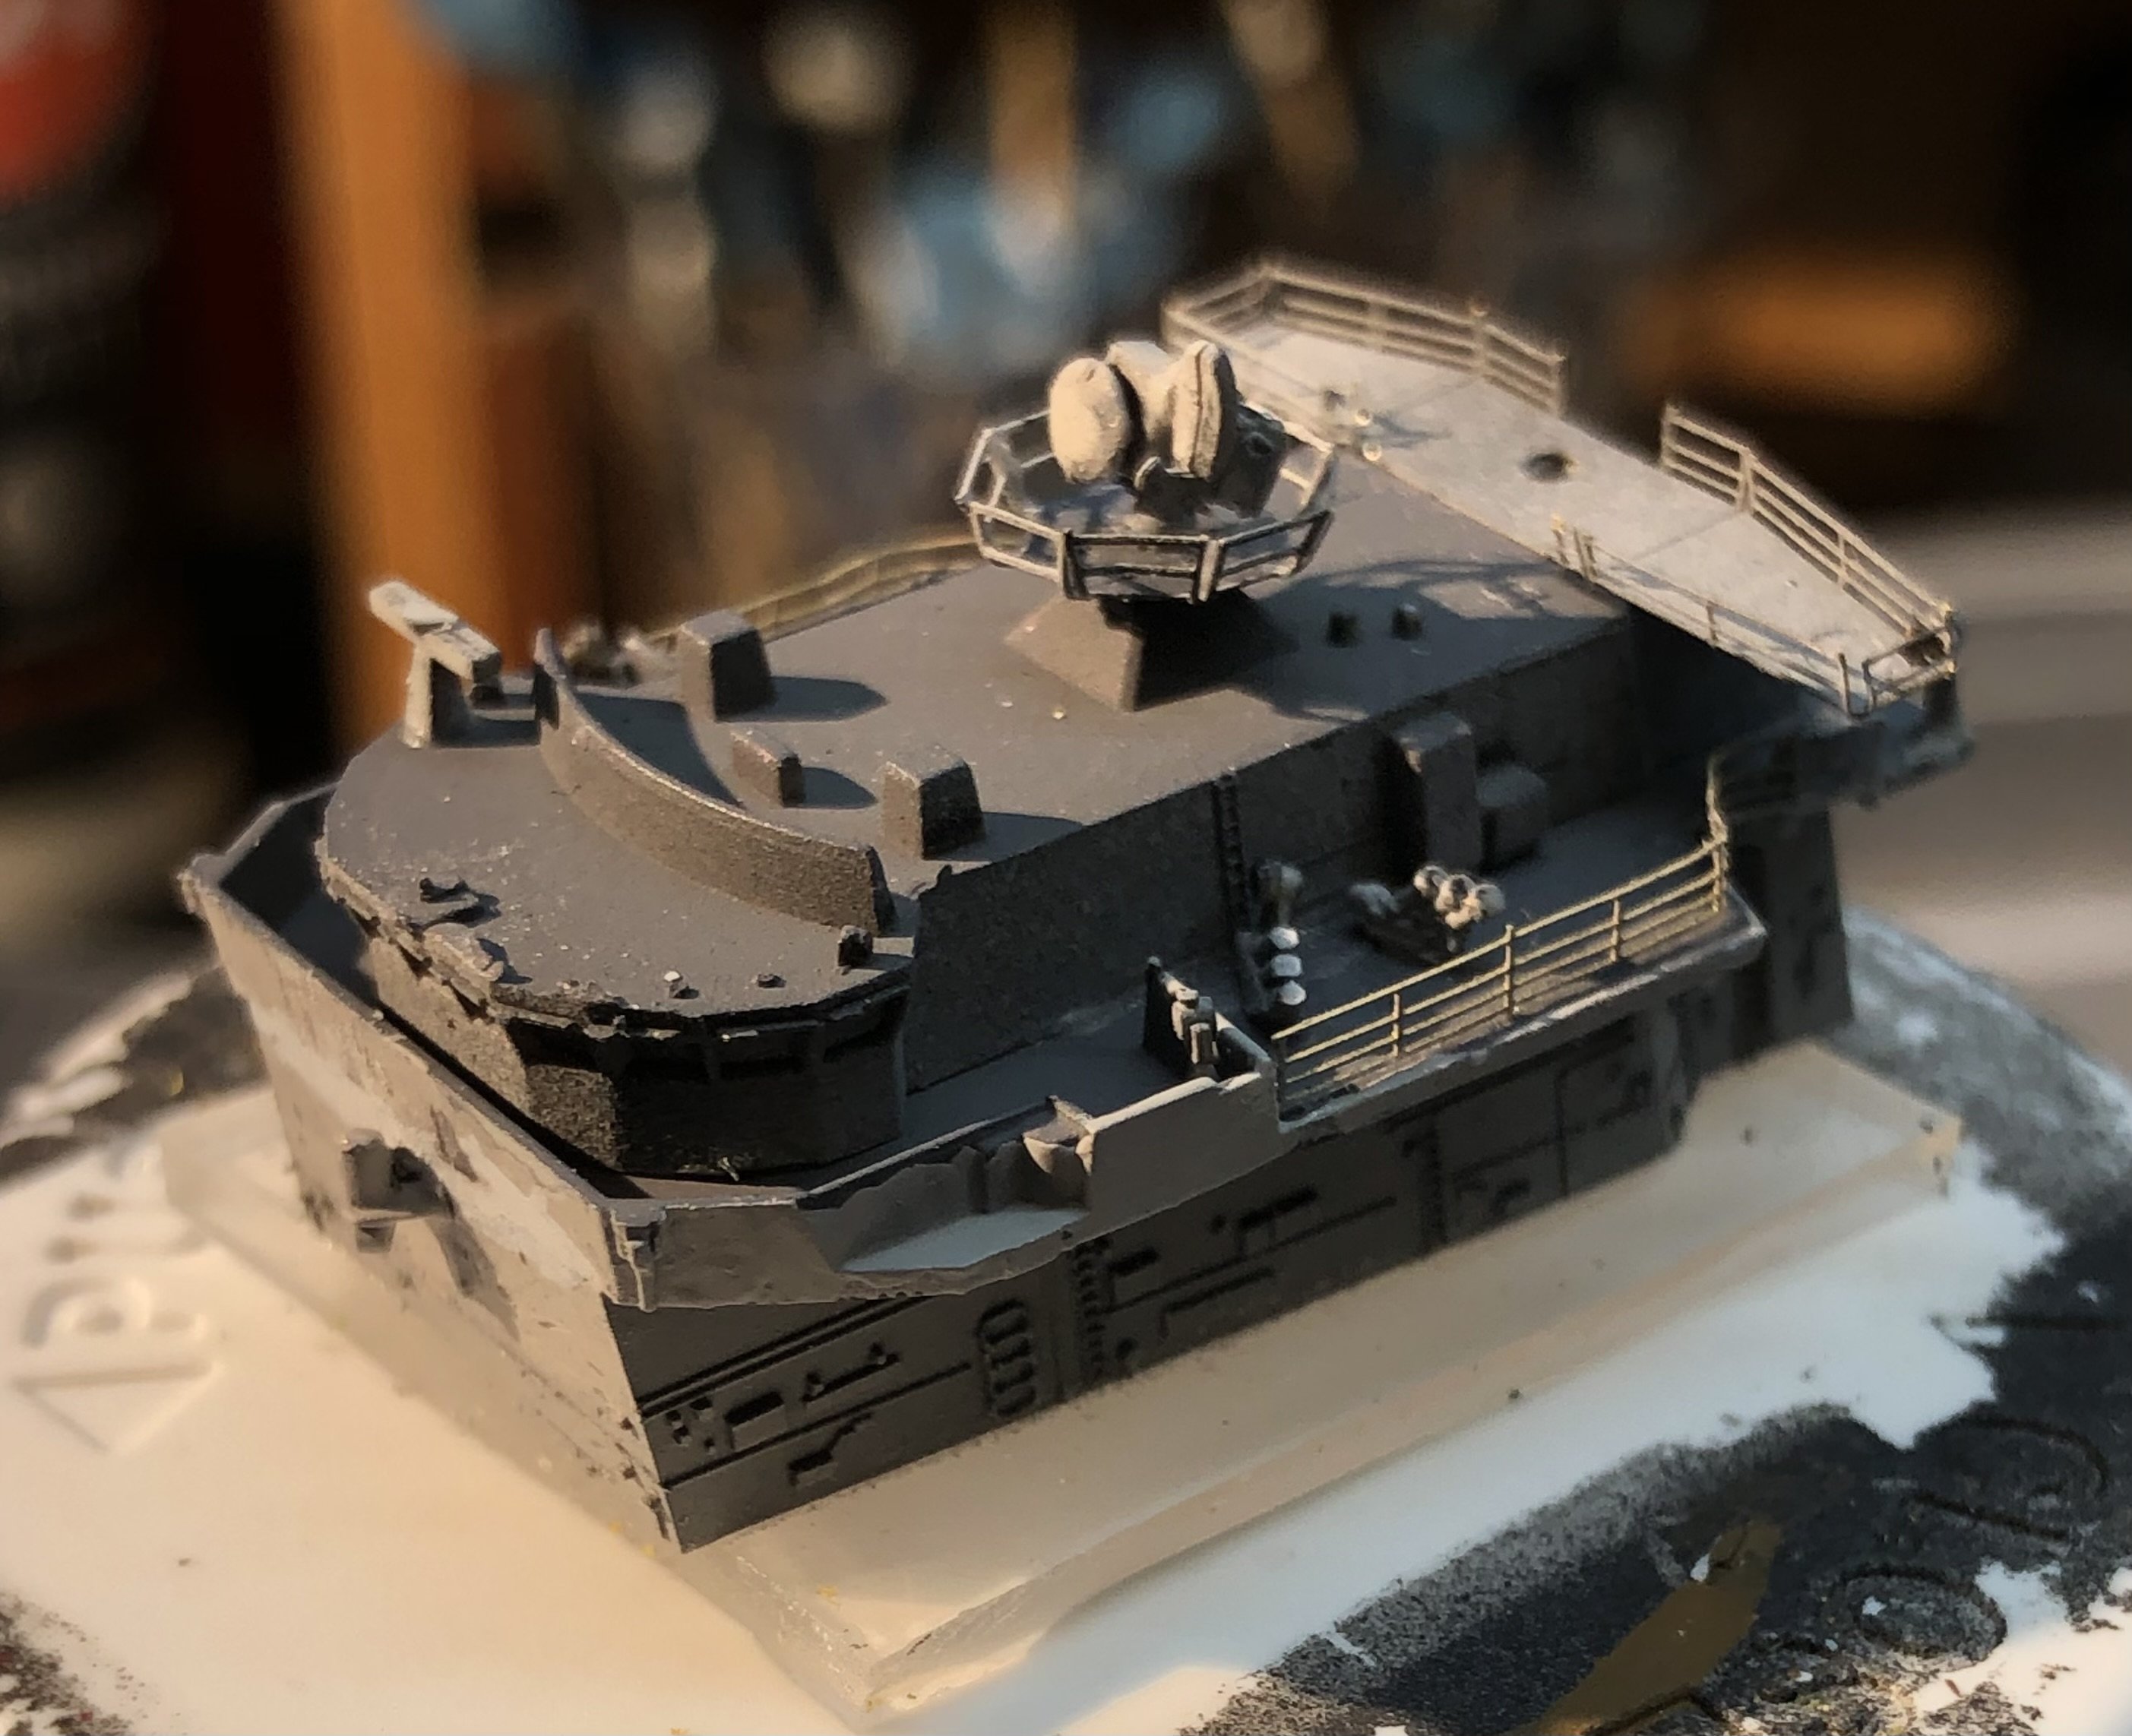
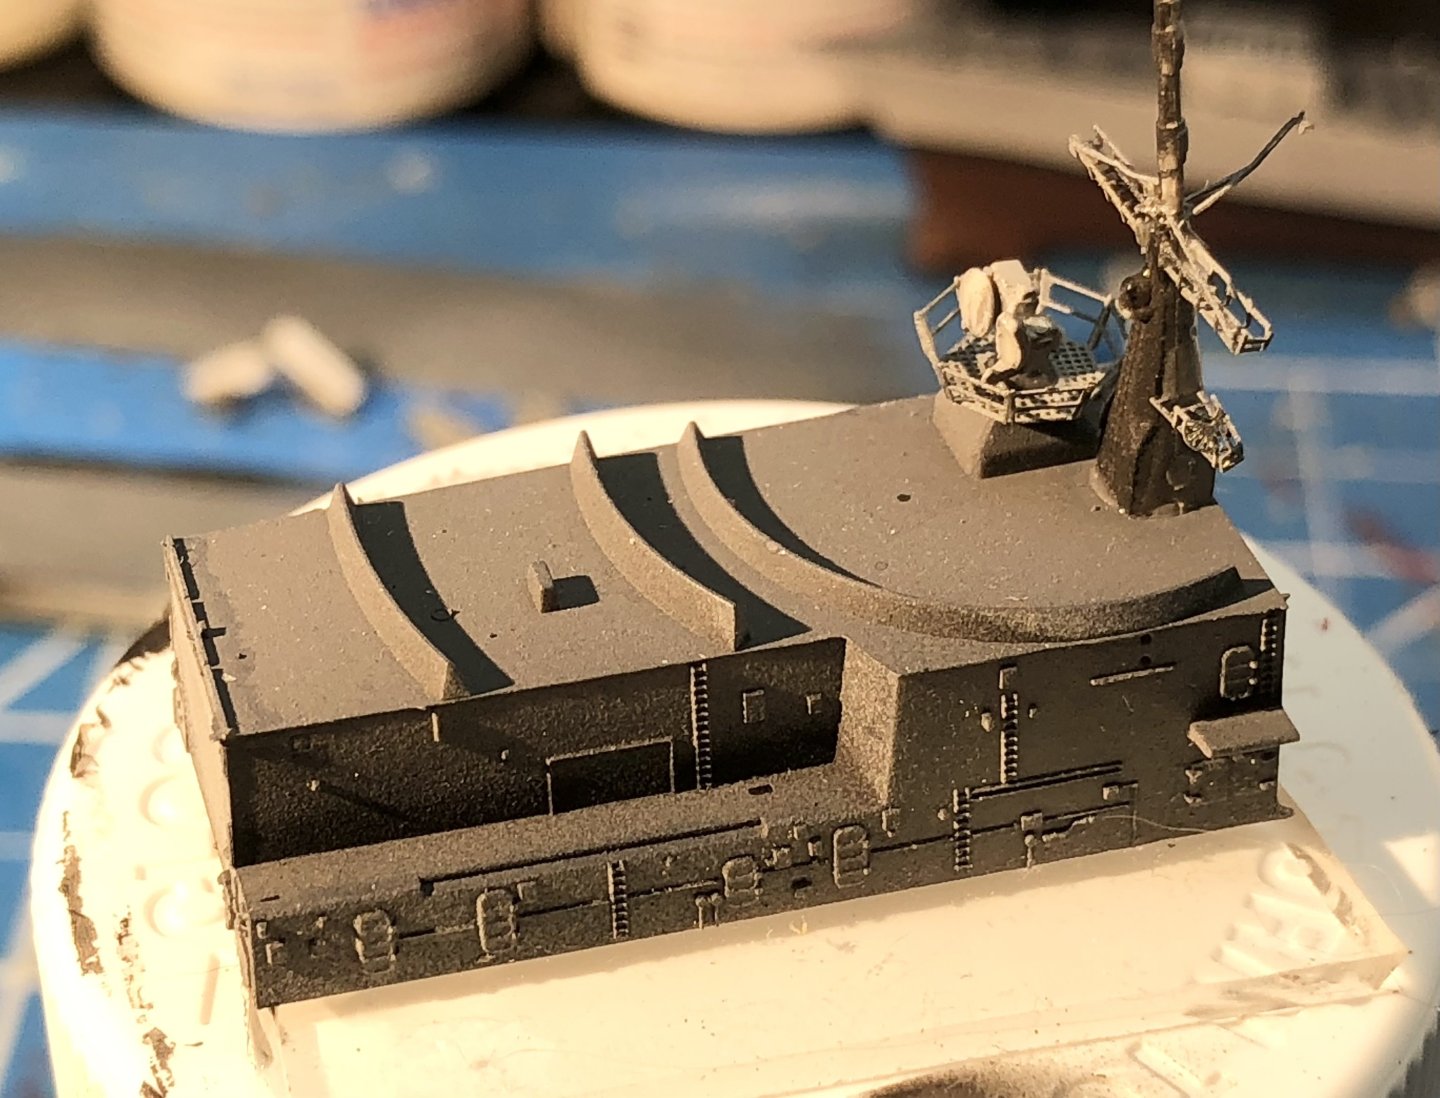
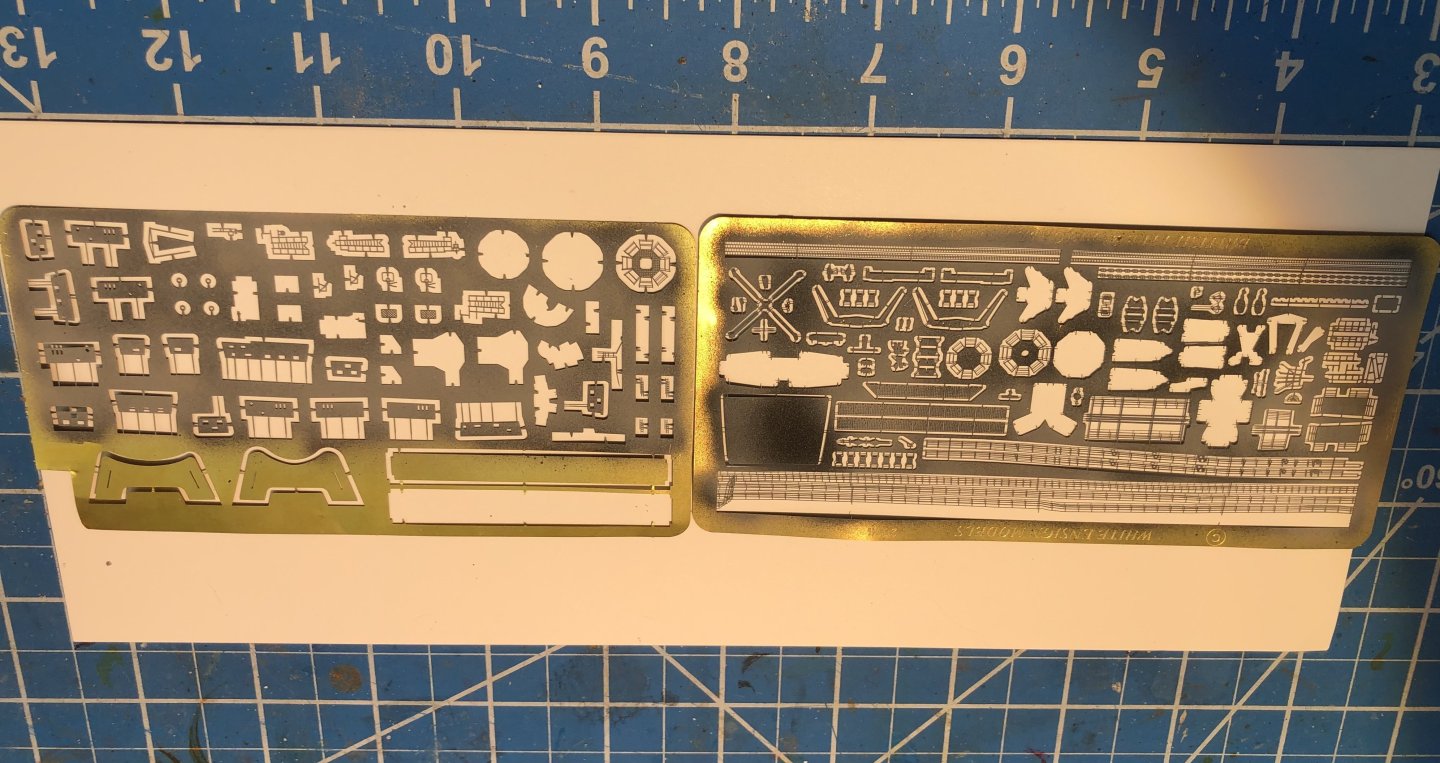
In spite of the lack of updates some work has been done along with some backwards steps. I’ve mostly in tiny PE world but thankfully I think it’s mostly done now. Heres the two frets showing the gaps. Trumpeter on the left. I still need to add the side decks but they will need to wait until the structures are added to the deck. And it suddenly occurred to me that I’m making a diorama around this model and that’s going to involve a lot of trial fitting of the ship into the seascape so I probably shouldn’t wait until Ive got a very fragile model to do that. So I think it’s time to address the seascape which will be light relief from tiny bits. i just finished making up the Harpoon launchers. The plastic kit parts are horrible so I used the WE PE frames and pieces of .020 diameter plastic rod. This was going quite well until I lost one of the PE frames. It’s taken me two days (really) to find it. It had jumped into the spares box somehow but meanwhile the workbench area is now the cleanest part of the house! plastic kit parts are shown to the right of the WE launchers. bridge structure is complete apart from adding the foremast which will wait until the bridge is secured to the deck. midship structure is also complete The hanger needs a few very small PE bits adding but the mainmast is thankfully complete. yardarms on both masts are a disaster waiting to happen. Every move I make seems to end up with me knocking one of them off. Luckily they are still the proper shape. it’s felt like I was making no progress but I think it’s going to move a bit faster now. Thanks for looking in, for the likes and for all the supportive comments. Alan


-
Great printing again Mike. I think I need to see if I can attempt a scratch Sea Send system, I think I can see it just forward of the foremast in my WESTLANT18 photos. I’m starting to think I need to look down the resin printer rabbit hole. alan
-
I can see the likeness. That was a great series. I still have the books somewhere on the shelves alan
-
The details on the decks are really nice, it’s all looking very good. Well done. alan
- 74 replies
-
- 2
-
-
-
- Nordkap
- Billing Boats
- (and 2 more)
-
This will be a magnificent project Yves. I look forward very much to seeing it develop. The combination of filament and resin printing should make for great detail and integrity. alan
-
Thanks Mike, the yardarms are an exercise in patience and breath control but it does all look nice when it’s finished. alan
-
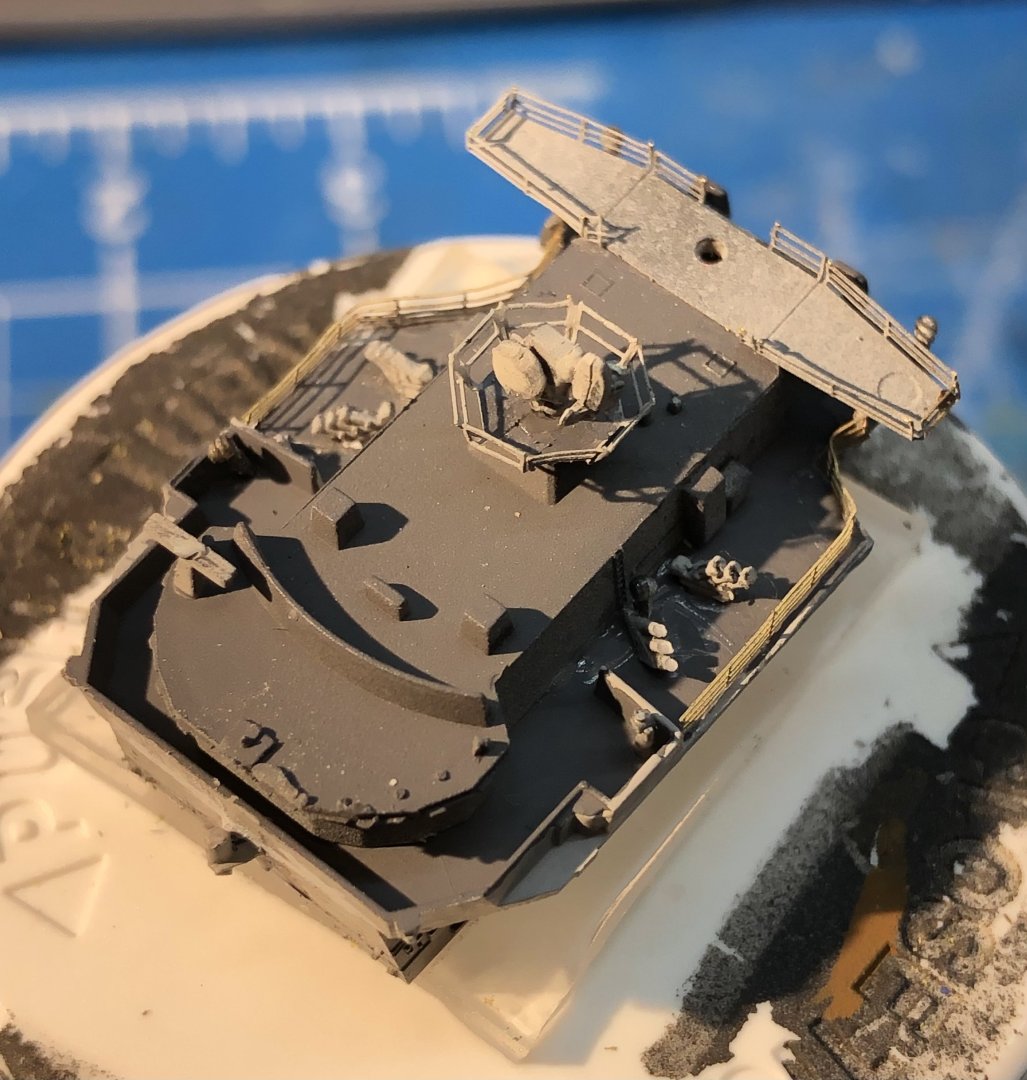
I was looking ahead a bit this afternoon while I was waiting for some paint to dry. Curiously the Monmouth kit has both turret types. The rounded one is on sprue “C” and is provided in the Montrose kit In the Monmouth kit there is also a sprue “J” which has the earlier angled turret So, one problem less to deal with. Alan

-
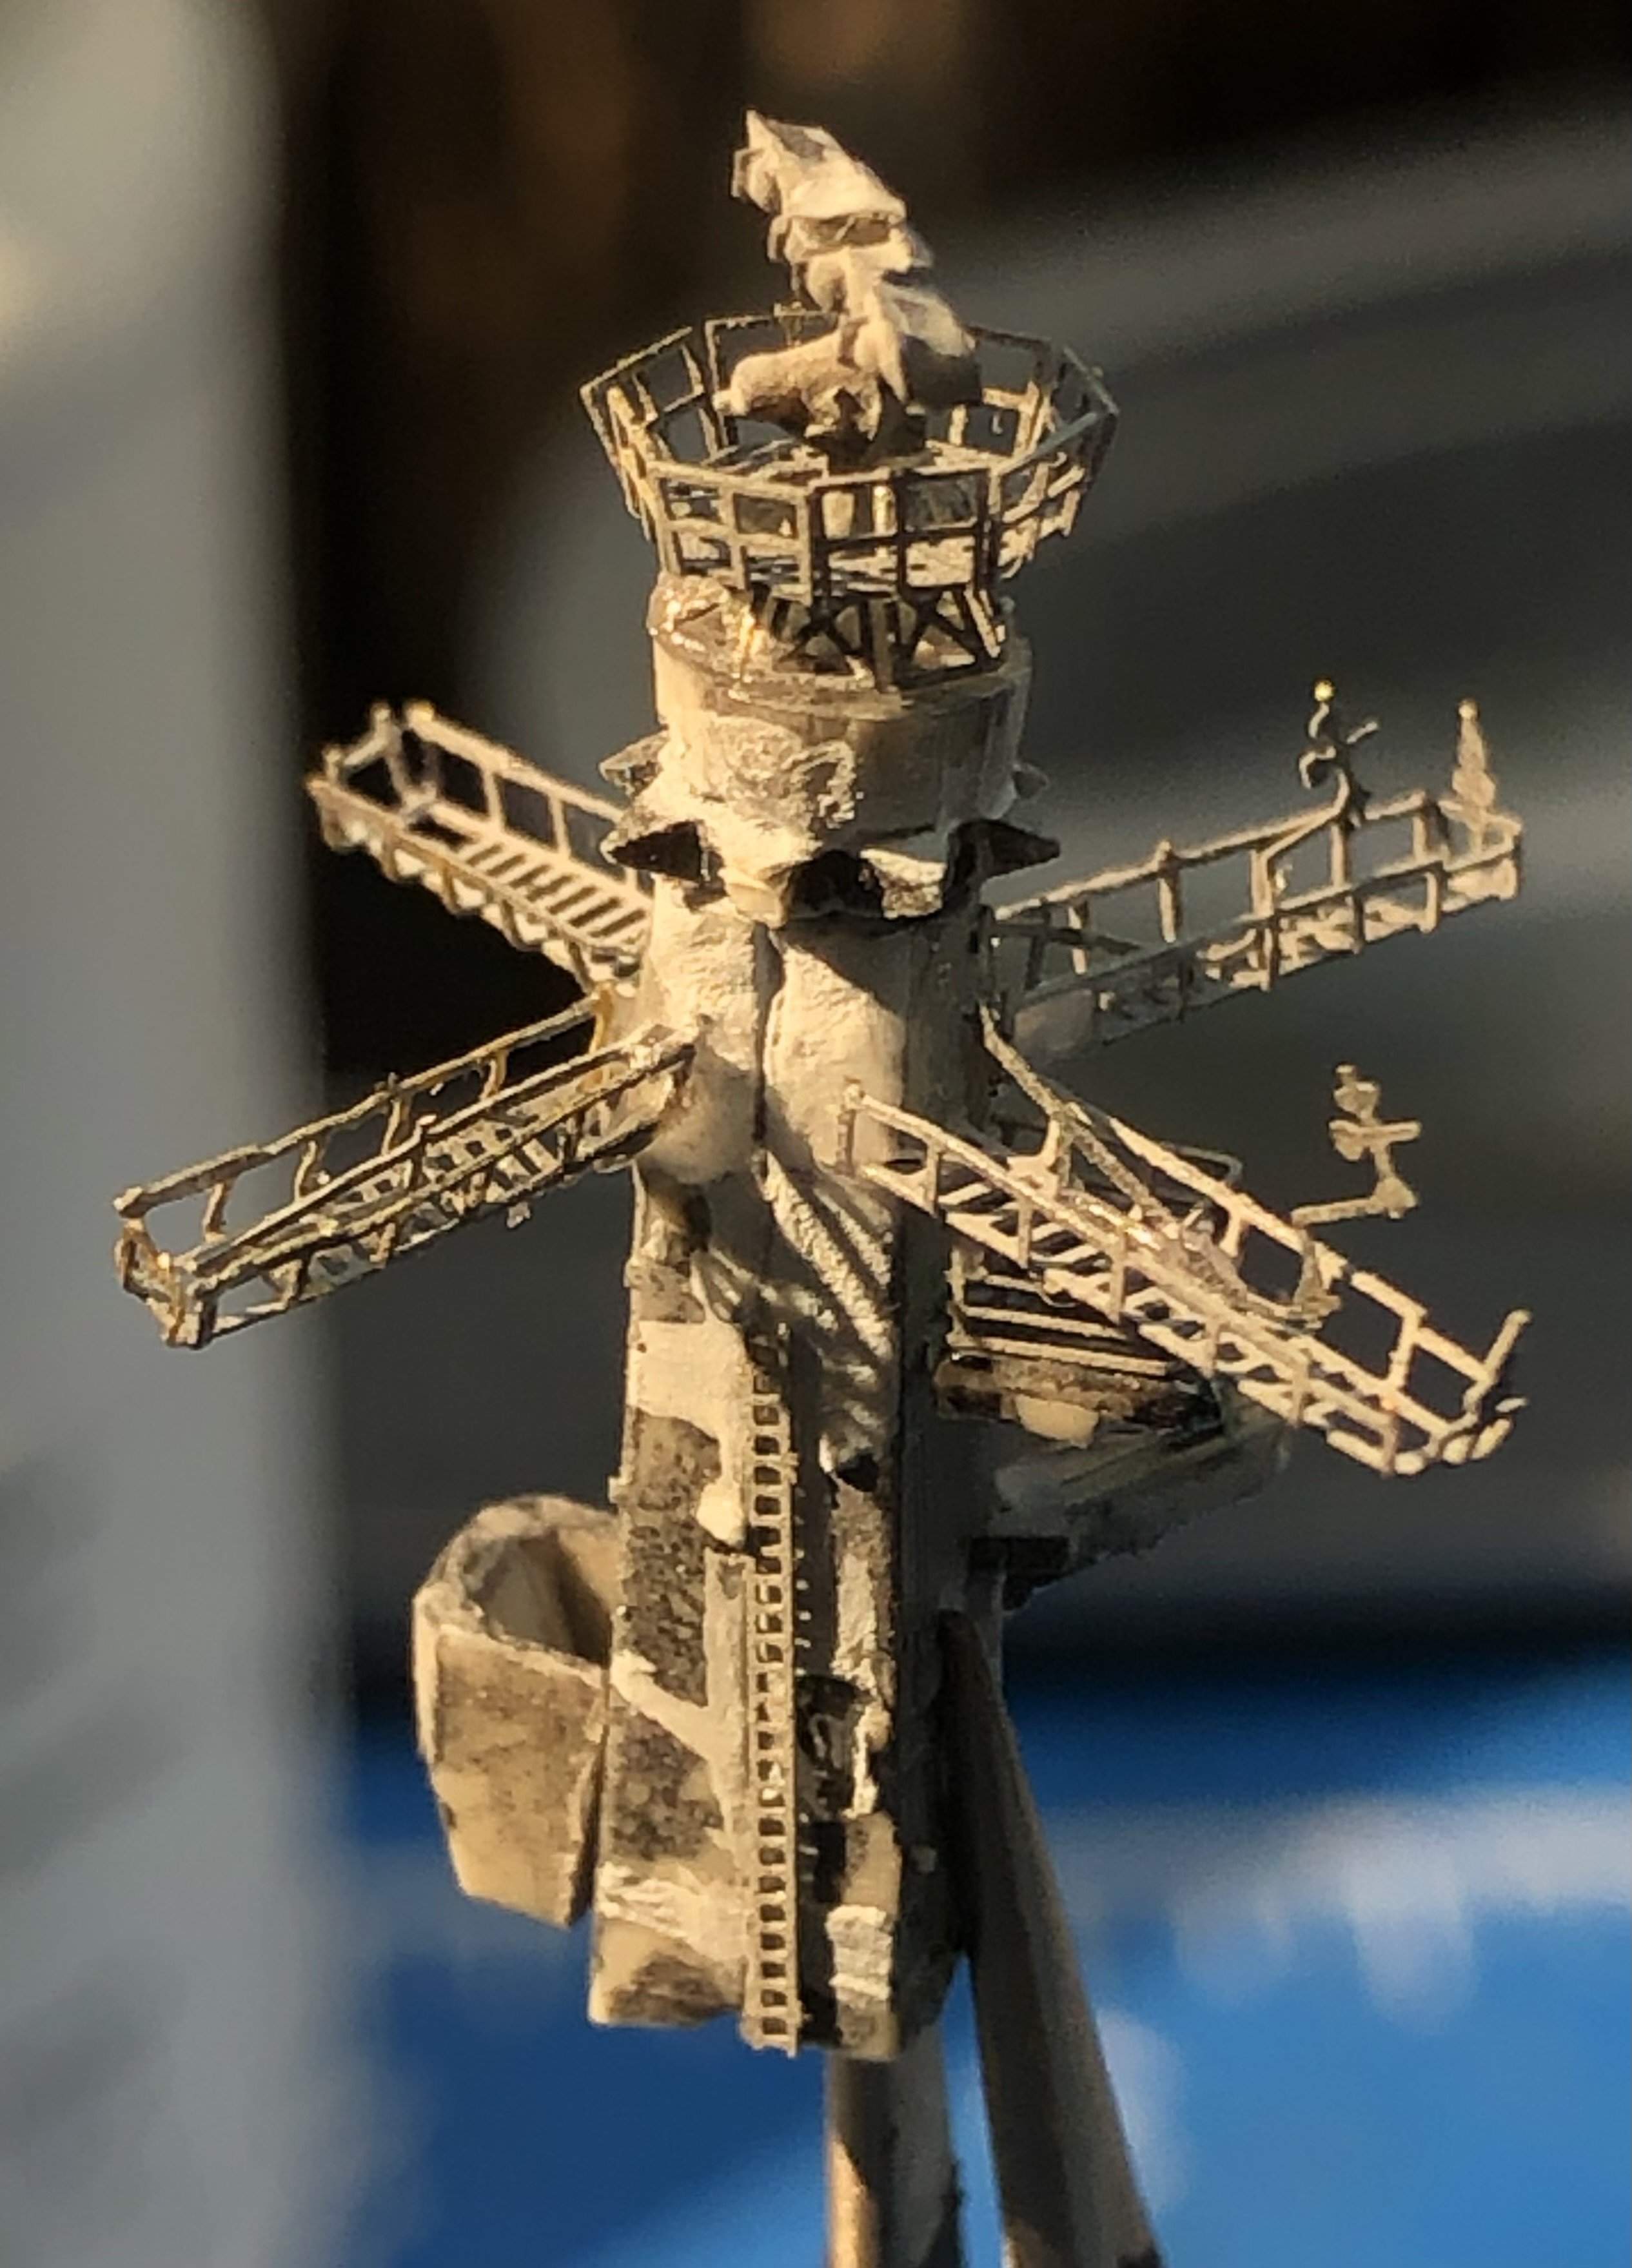
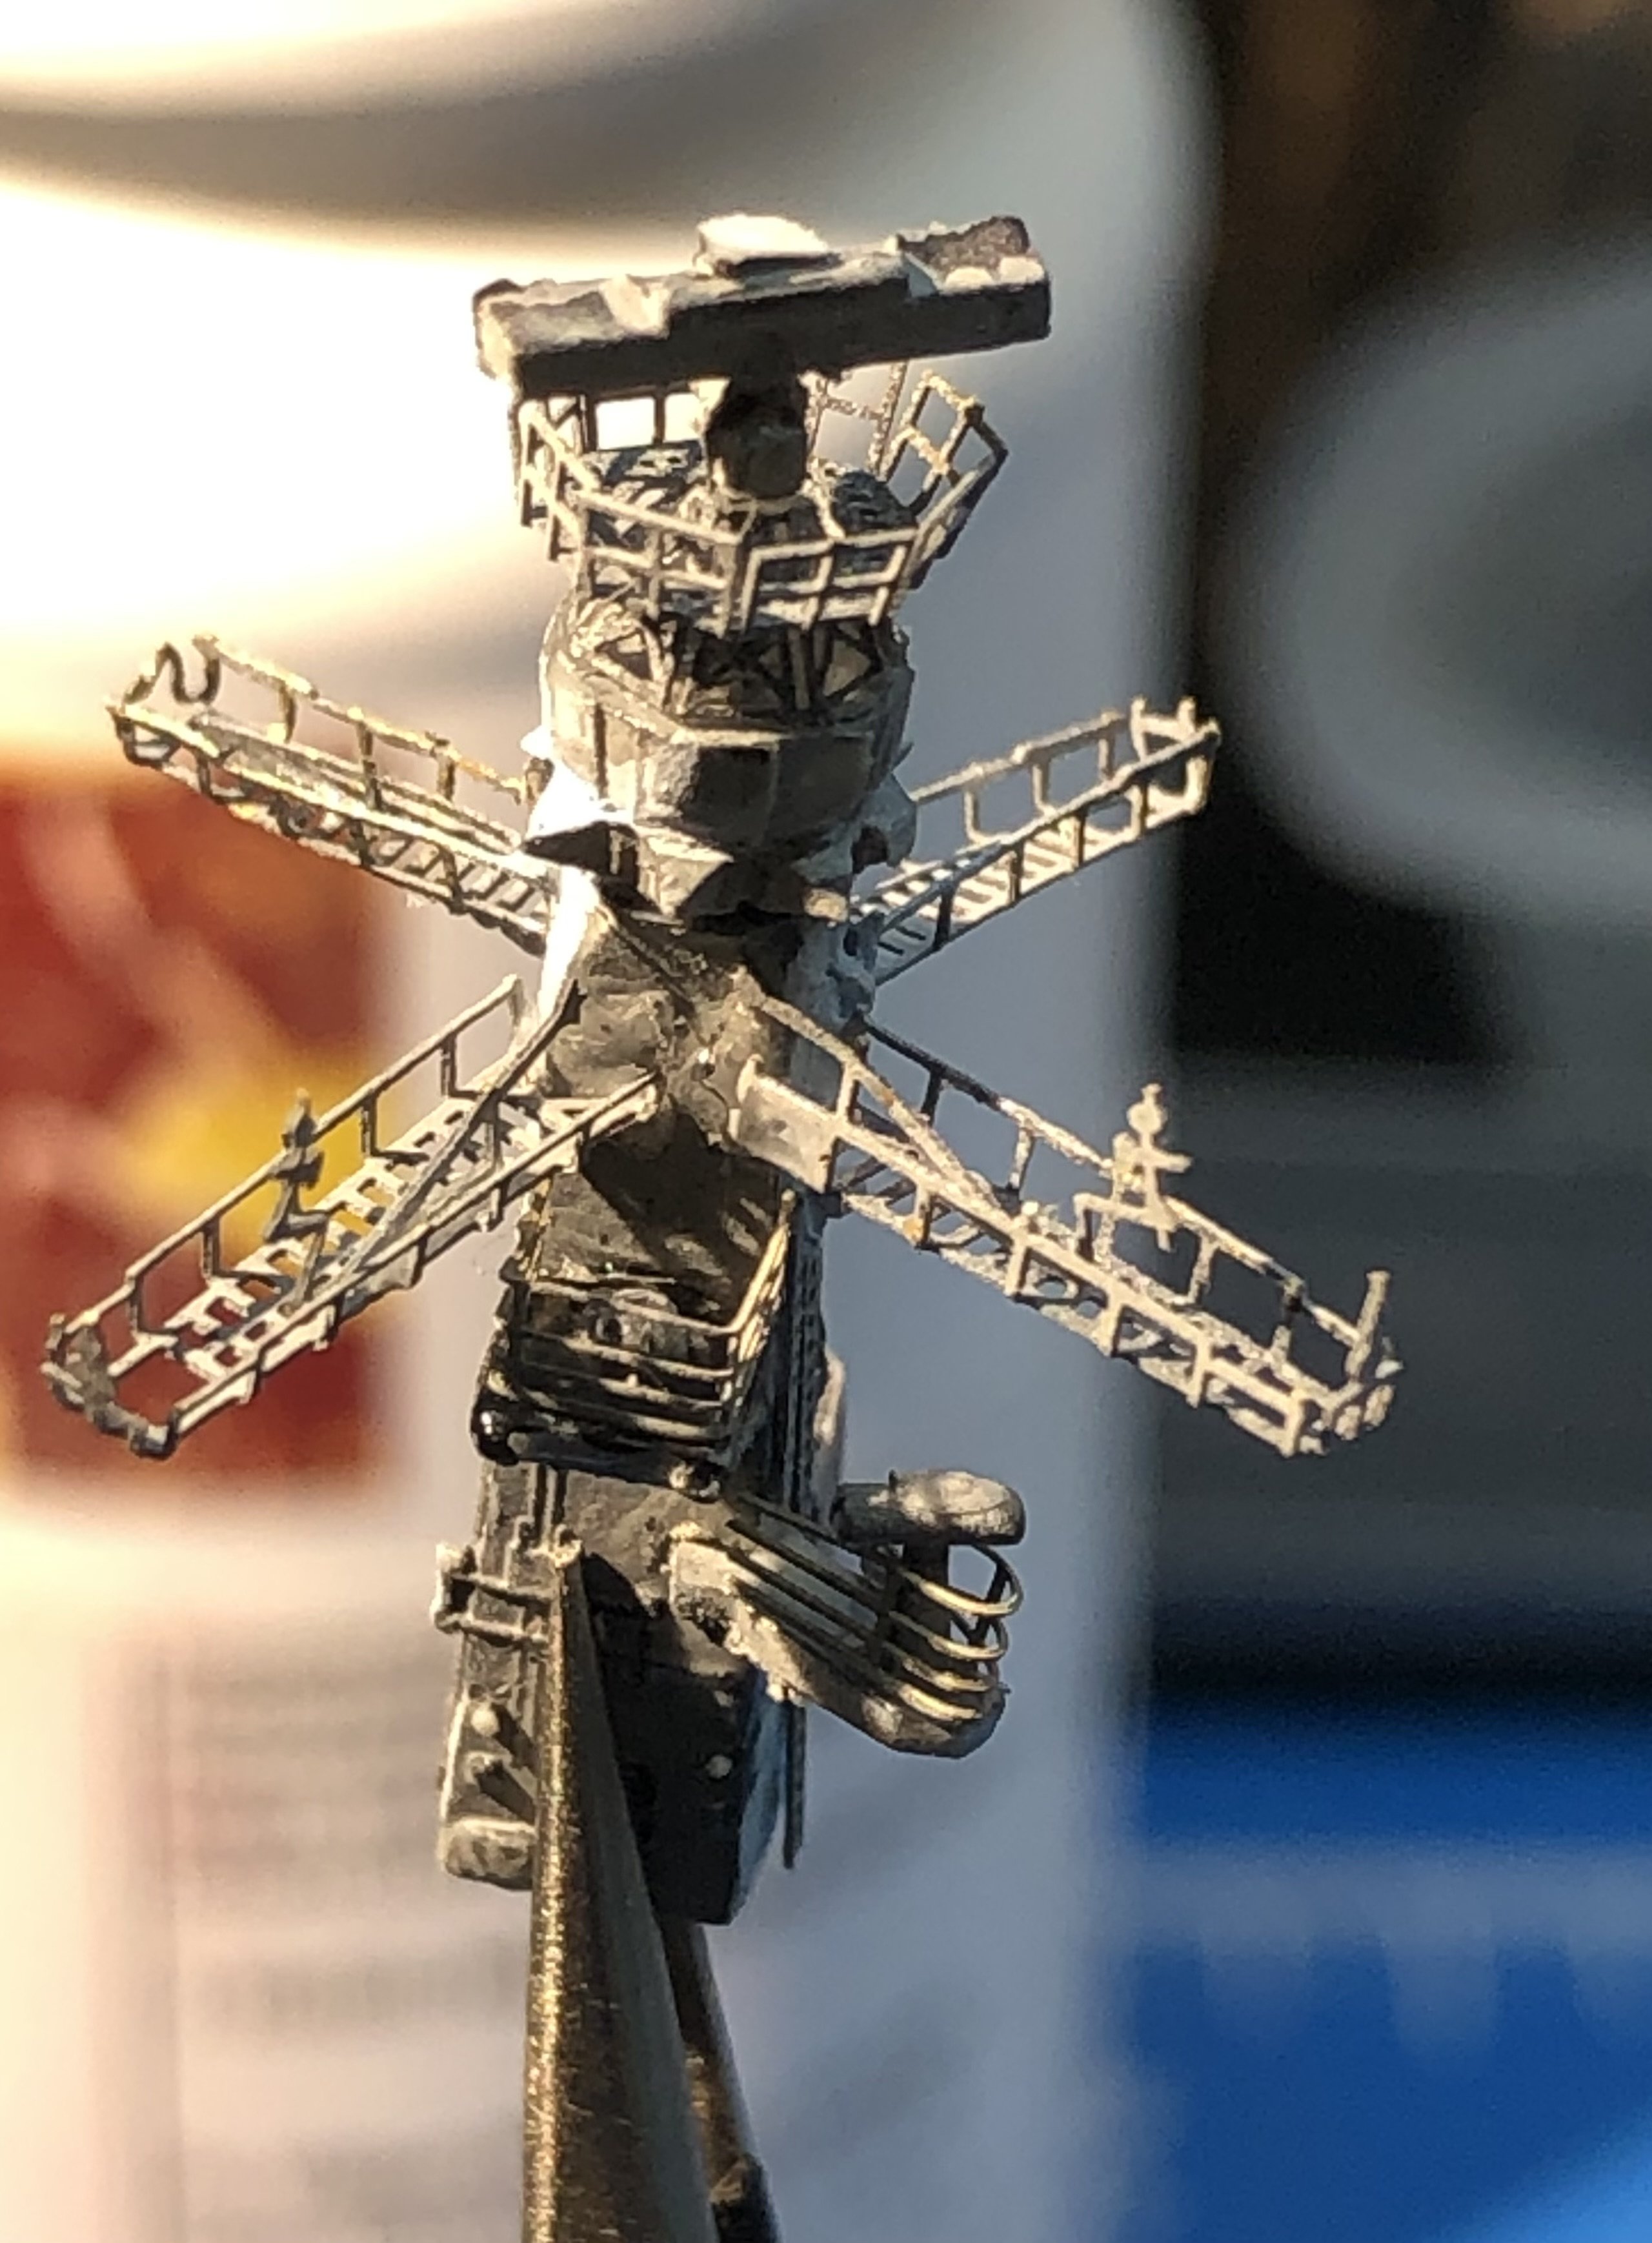
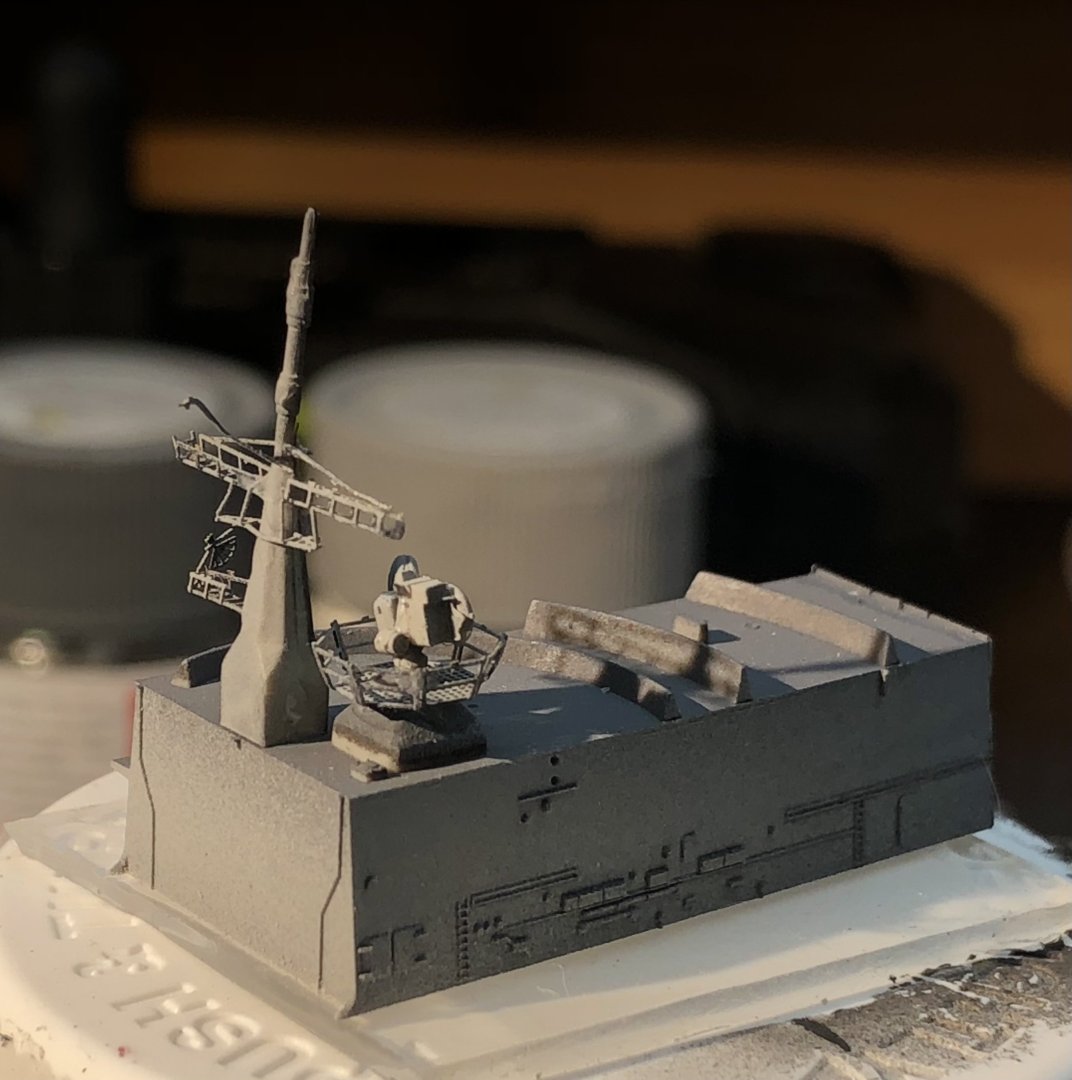
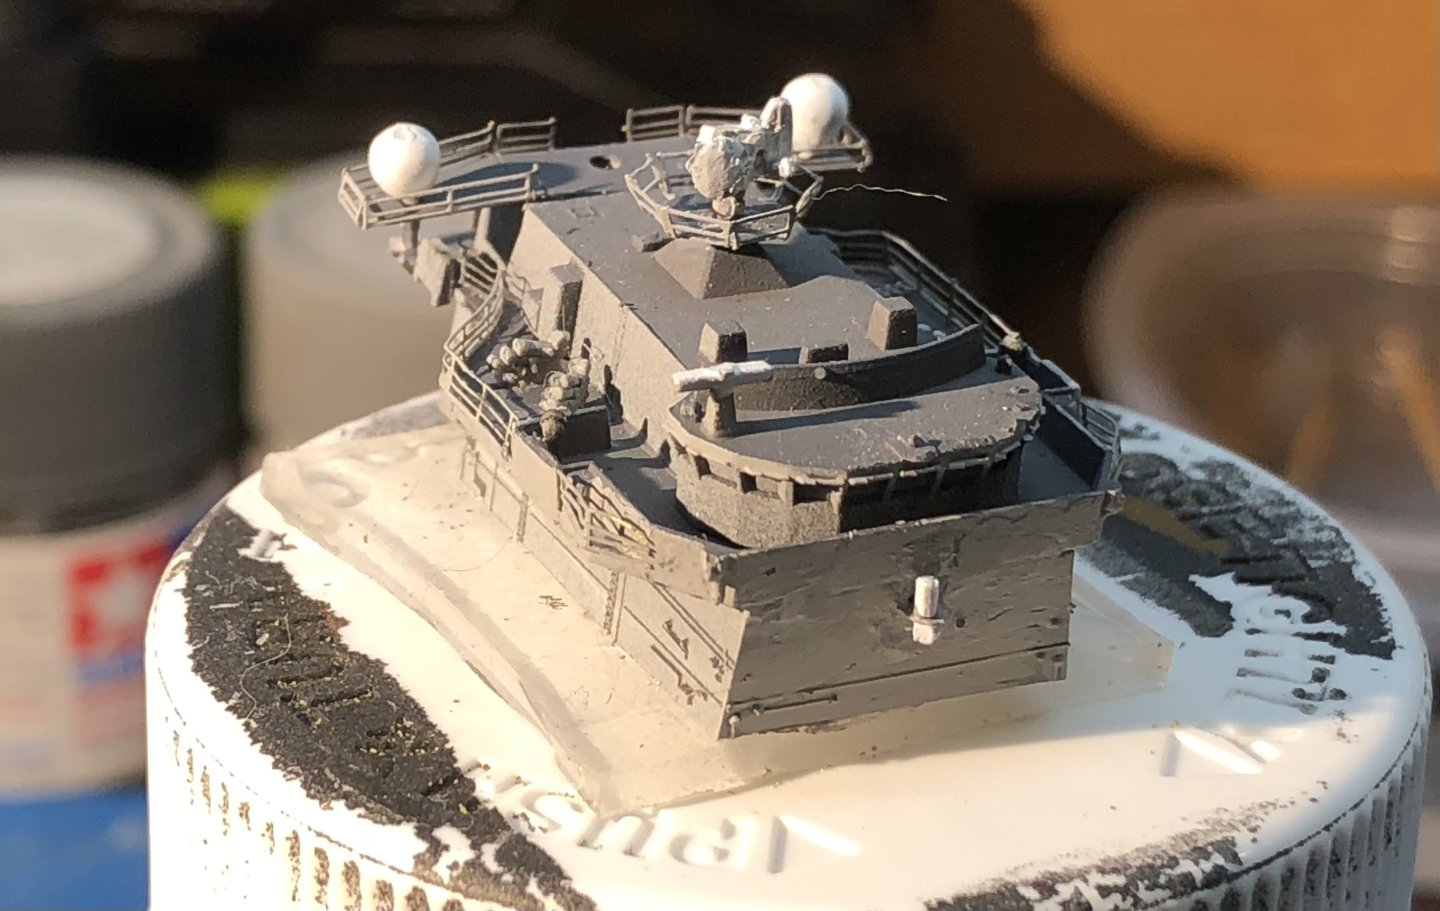
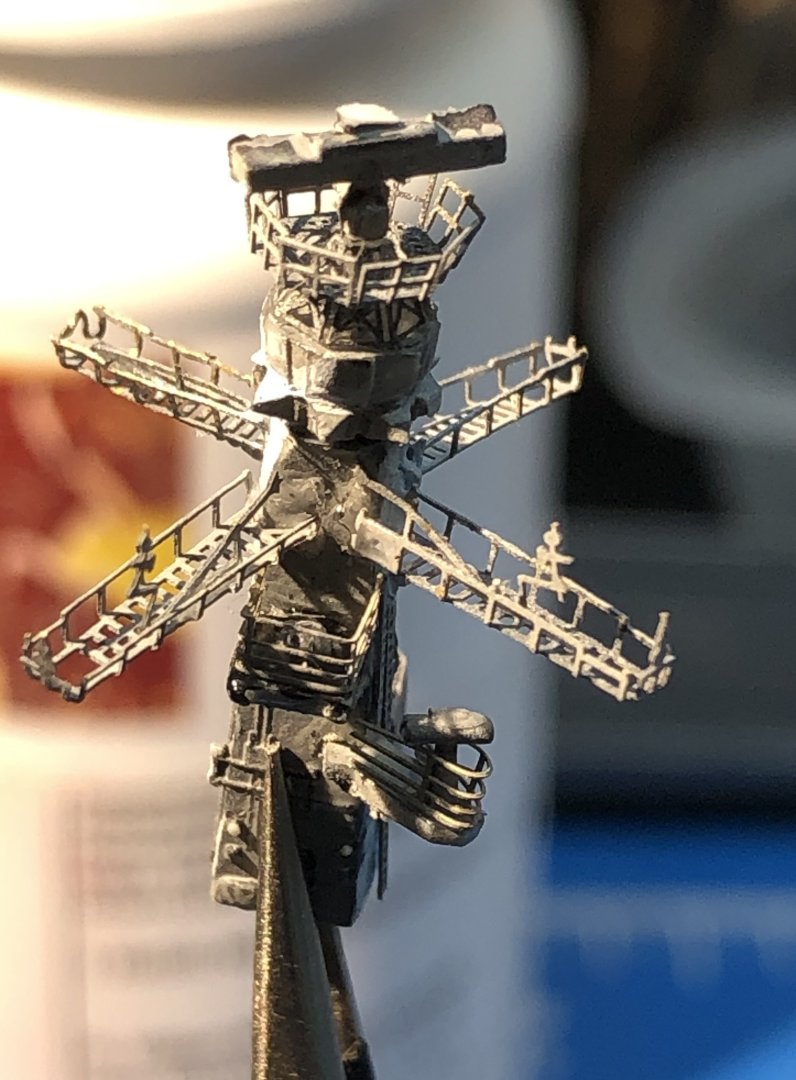
I spent the morning working on the PE and small details building up the foremast. It’s quite a challenge for me with delicate PE structures making up the radar platform and the yardarms which have separate stays. These were delicate items to add but they are done and with the ladders added I think the foremast is ready for a coat of light grey and detailing. I added the railings to the side decks of the bridge superstructure and modified the plastic to allow the PE wing decks to be used from the WE set. There are some gaps appearing in the PE frets but there is a lot of fiddly work ahead. Thanks for looking in, the likes and the helpful comments. alan


-
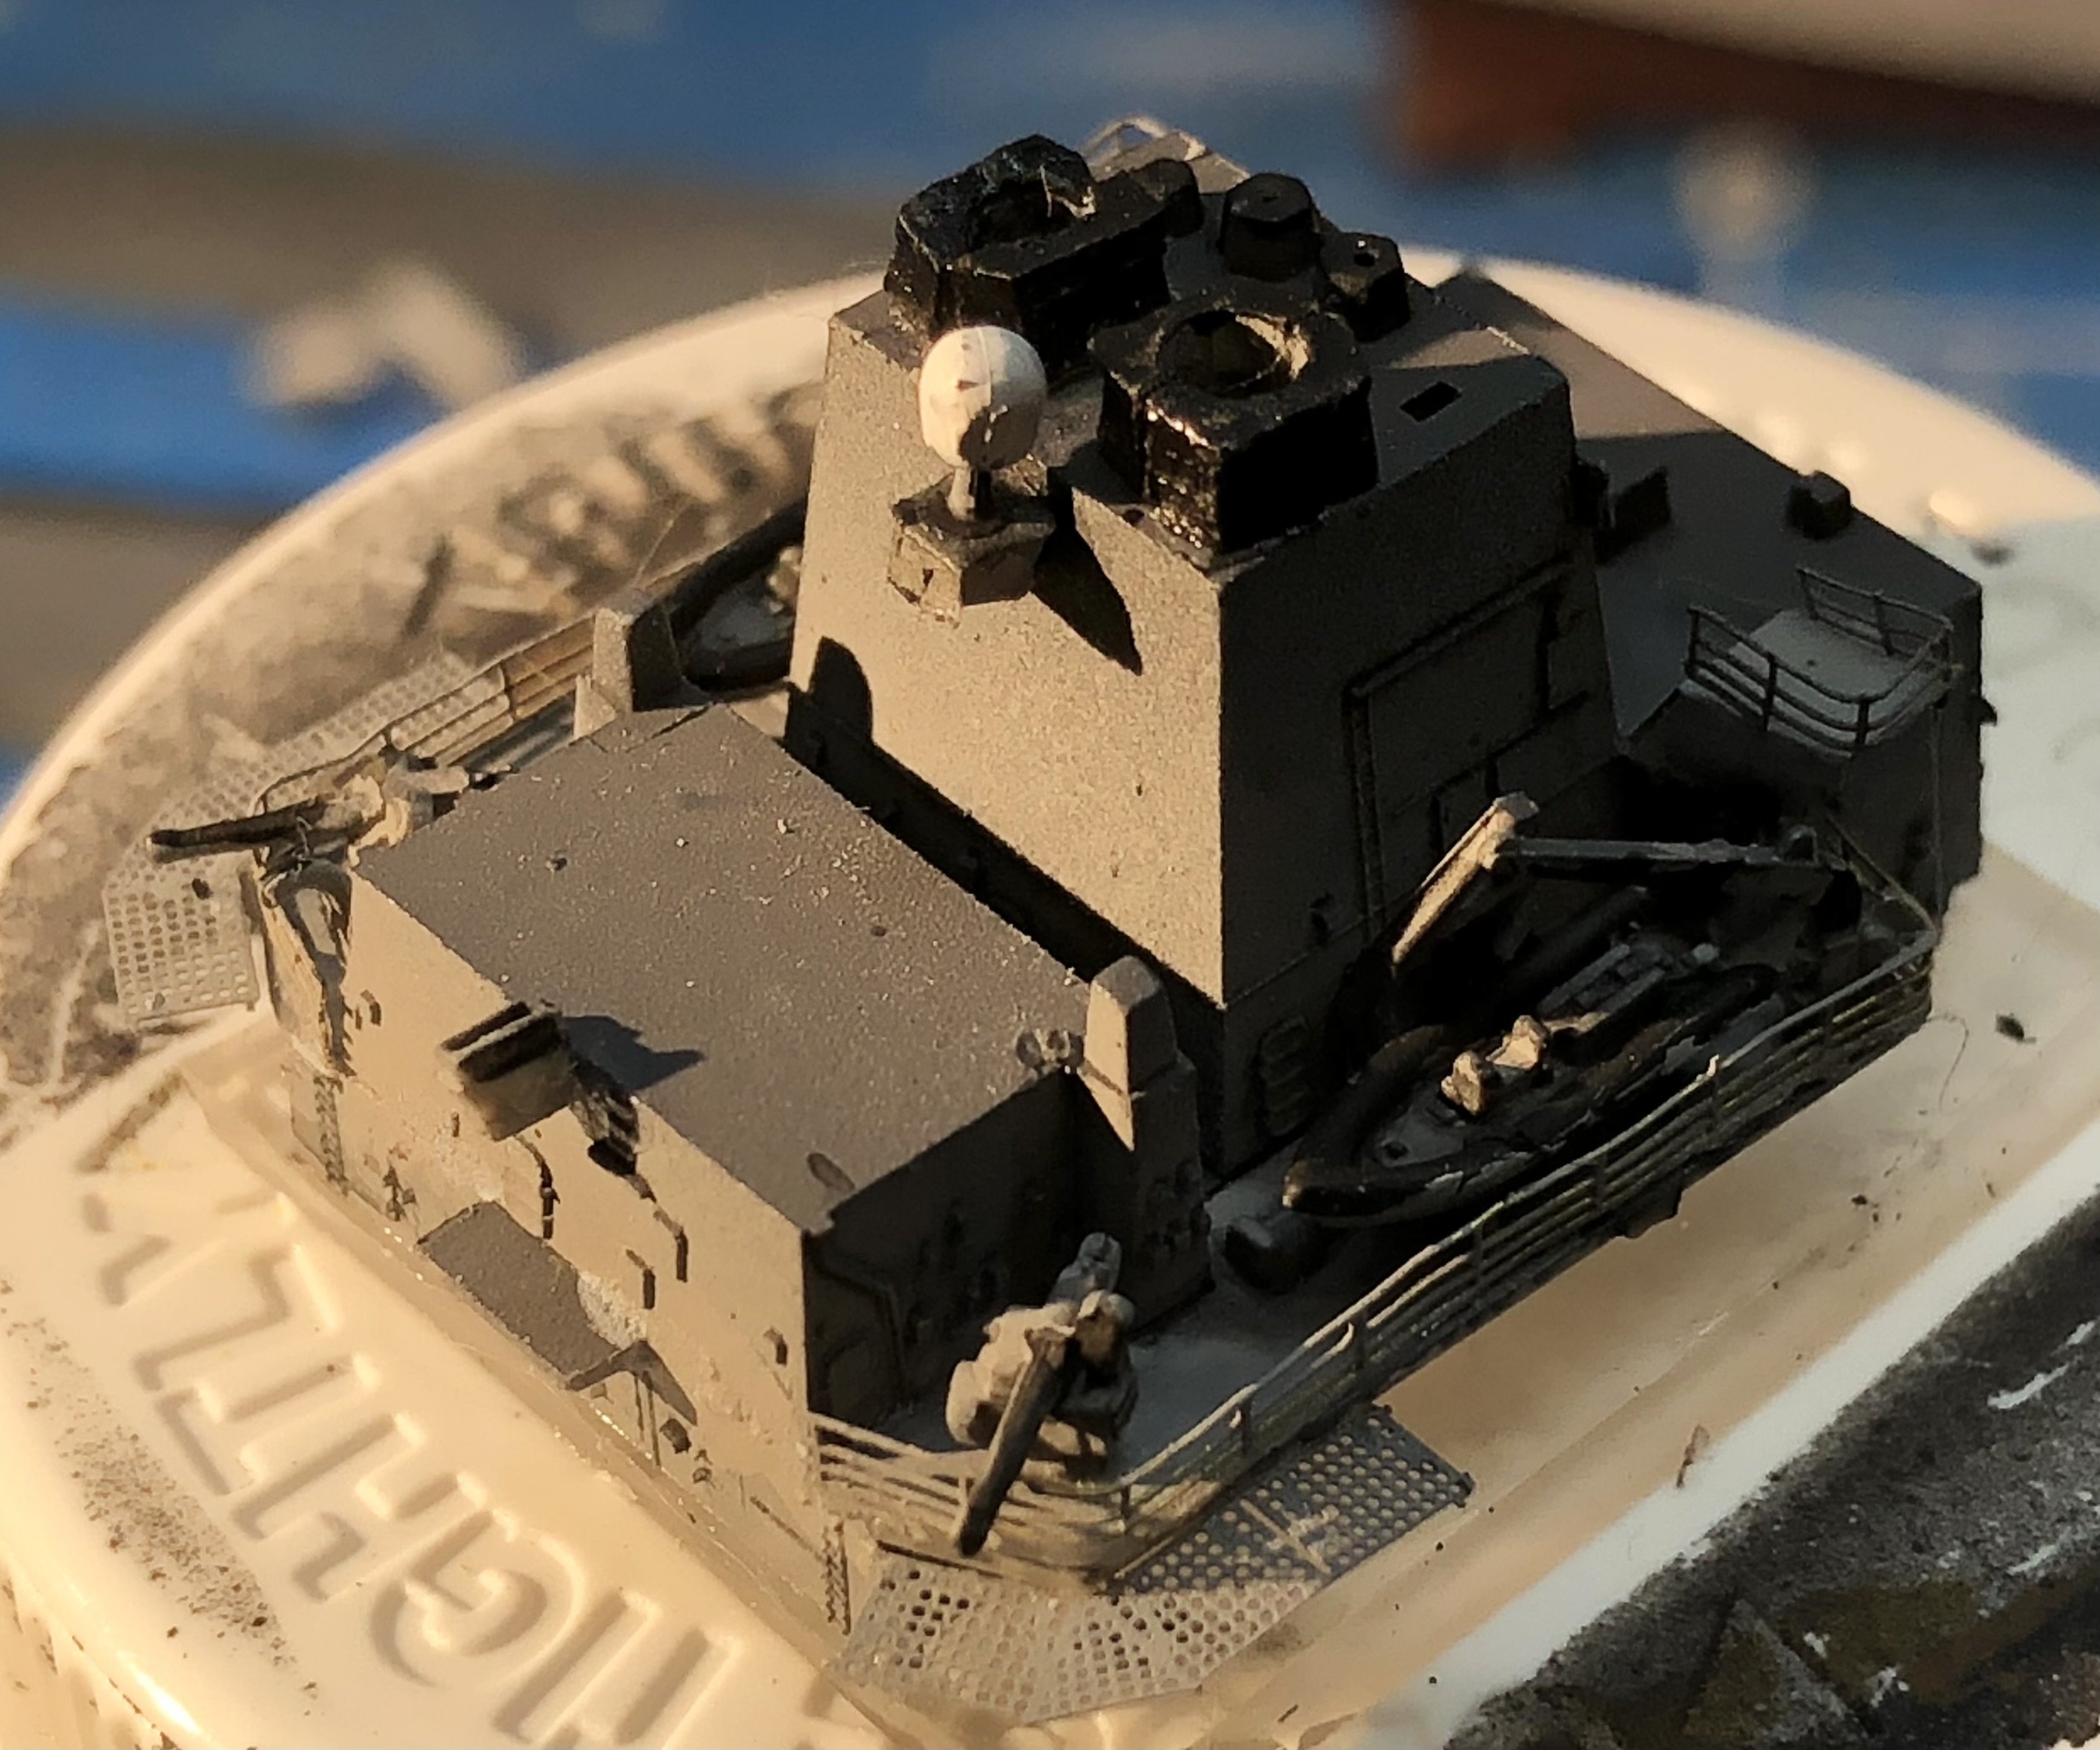
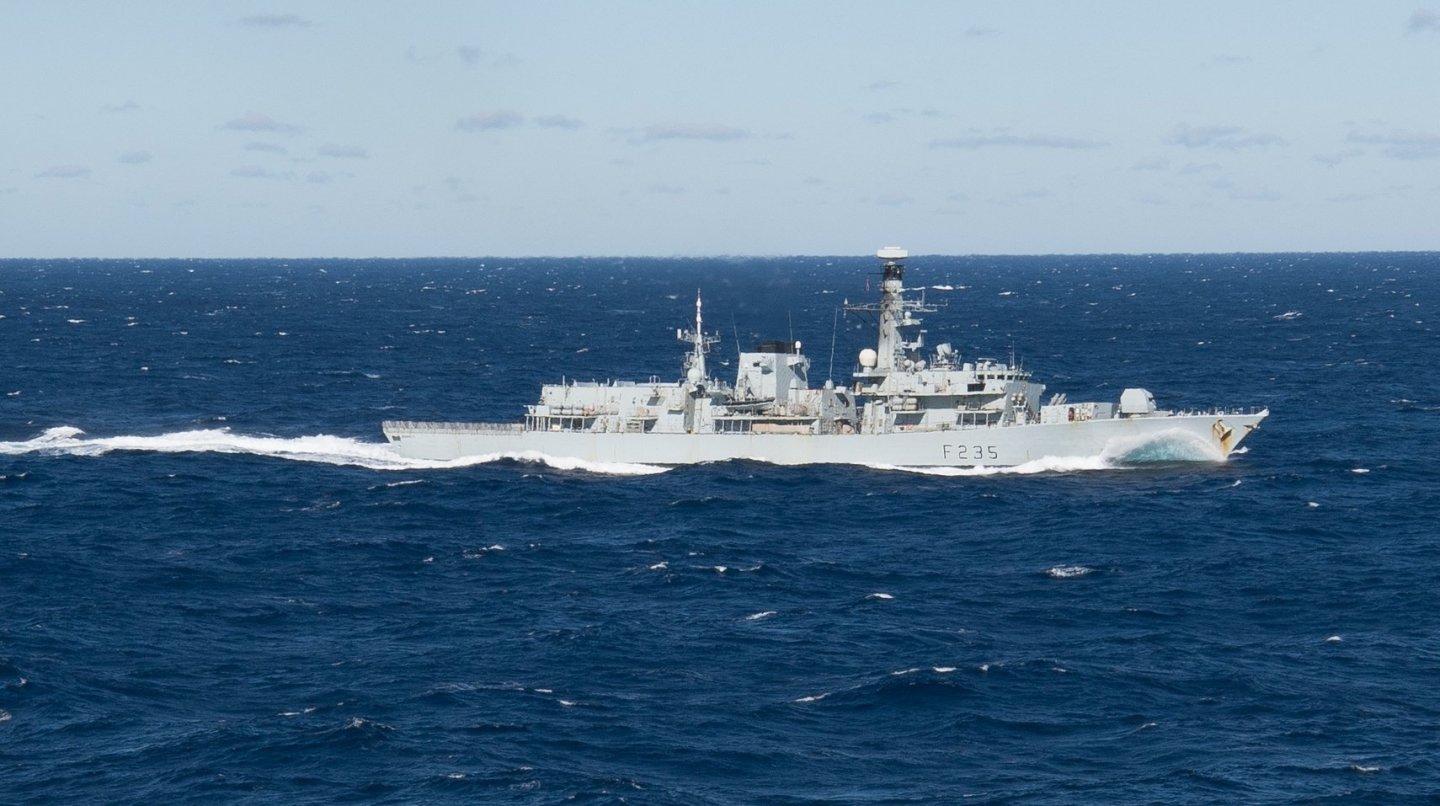
I found my photos from WESTLANT18 which I think shows the Sea Sendor system mounted on Monmouth. I assume there is a cover over the multiple barrels. Just forward of the foremast. alan
-
Thank you Mike for a lot of really useful information. The Sea Sendor system is completely new to me and I missed the shape of the gun turret. I need to add the ladders too. Your files look very nice, your usual high quality work. Thanks again Mike alan
-
Thank you very much for the solid advice Mike. With being so bothered about what’s been going on with my father I think I’ve been allowing myself to get overly worked up about minor issues like the missing parts. I’m back at work on Monmouth again and I’ll put that all behind me and move onto the rest of the kit. again alan
-
Thanks Andy. I think you are correct, they are simplified Seagnat launchers. From your photo it could be possible to improve on the kit parts, but they are so small that the improvement might not even register. alan
-
Thank you very much for your kind offer Mike. The offending items are C35 and D4 in the instructions. I have no idea what D4 is. They look like some sort of triple barrel weapon but nothing like that is listed in the ships inventory. Possibly they are chaff launchers For reference the sprue is 3/32 inch or 2.5 mm thick so the bits are tiny. I got fairly close to the chaff dispenser ( if that’s what they are) by cutting down a spare quad fifty cal gun. The C35 radar at the front of the bridge was replaced by a bit of PE and spare styrene rod and I think it might be better than the original kit part. Thanks again for the offer. alan


-
He’s immensely stubborn. He is finding hard to stand for very long but flatly refuses to have a walking frame. He feels it’s a show of weakness.
-
VTOL(s) by yvesvidal - FINISHED - 1/48th - PLASTIC
king derelict replied to yvesvidal's topic in Non-ship/categorised builds
Beautiful models Yves. The route to VTOL / STOVL flight passes through some fascinating prototypes and exhaustive efforts by the engineers. Even as recent as the 90s there are some interesting examples by Northrop and Macdonnell Douglas that didn’t make the final selection for JSF (X-32 and X-35 being selected for prototype builds) using gas driven fans and lift engines. alan