king derelict
-
Posts
3,286 -
Joined
-
Last visited
Content Type
Profiles
Forums
Gallery
Events
Everything posted by king derelict
-
Very nice metal finishes Dan alan
-
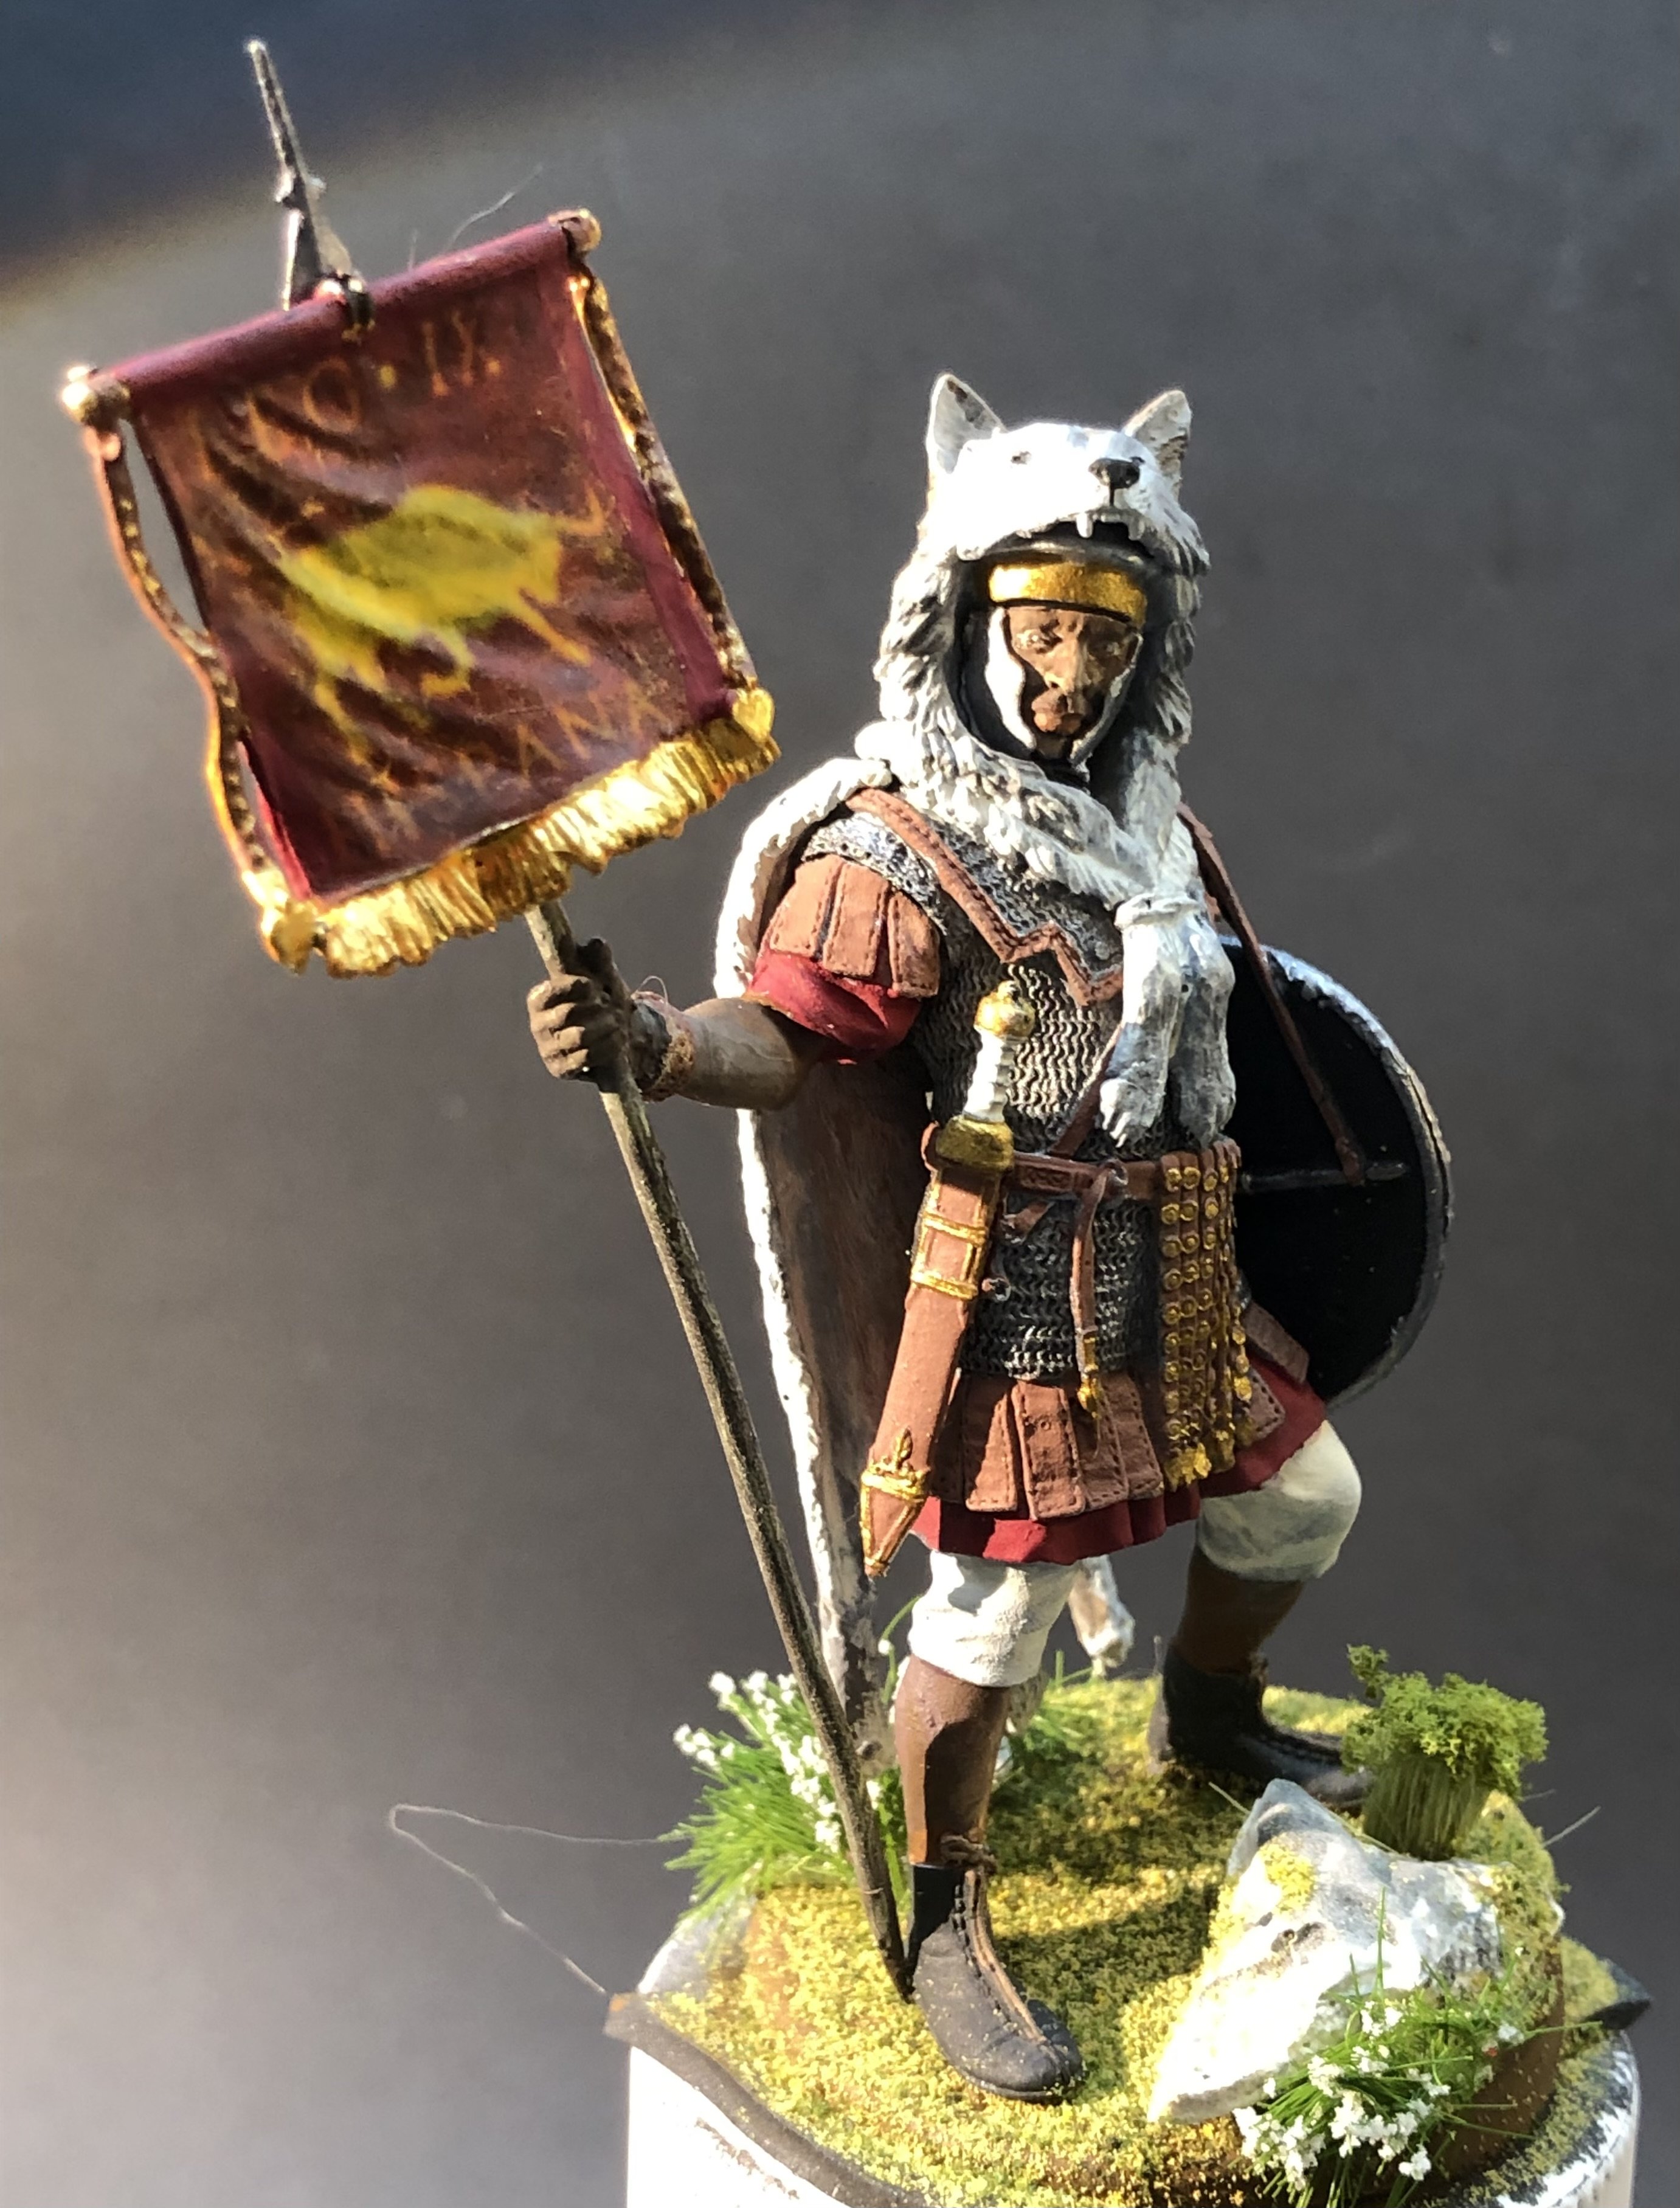
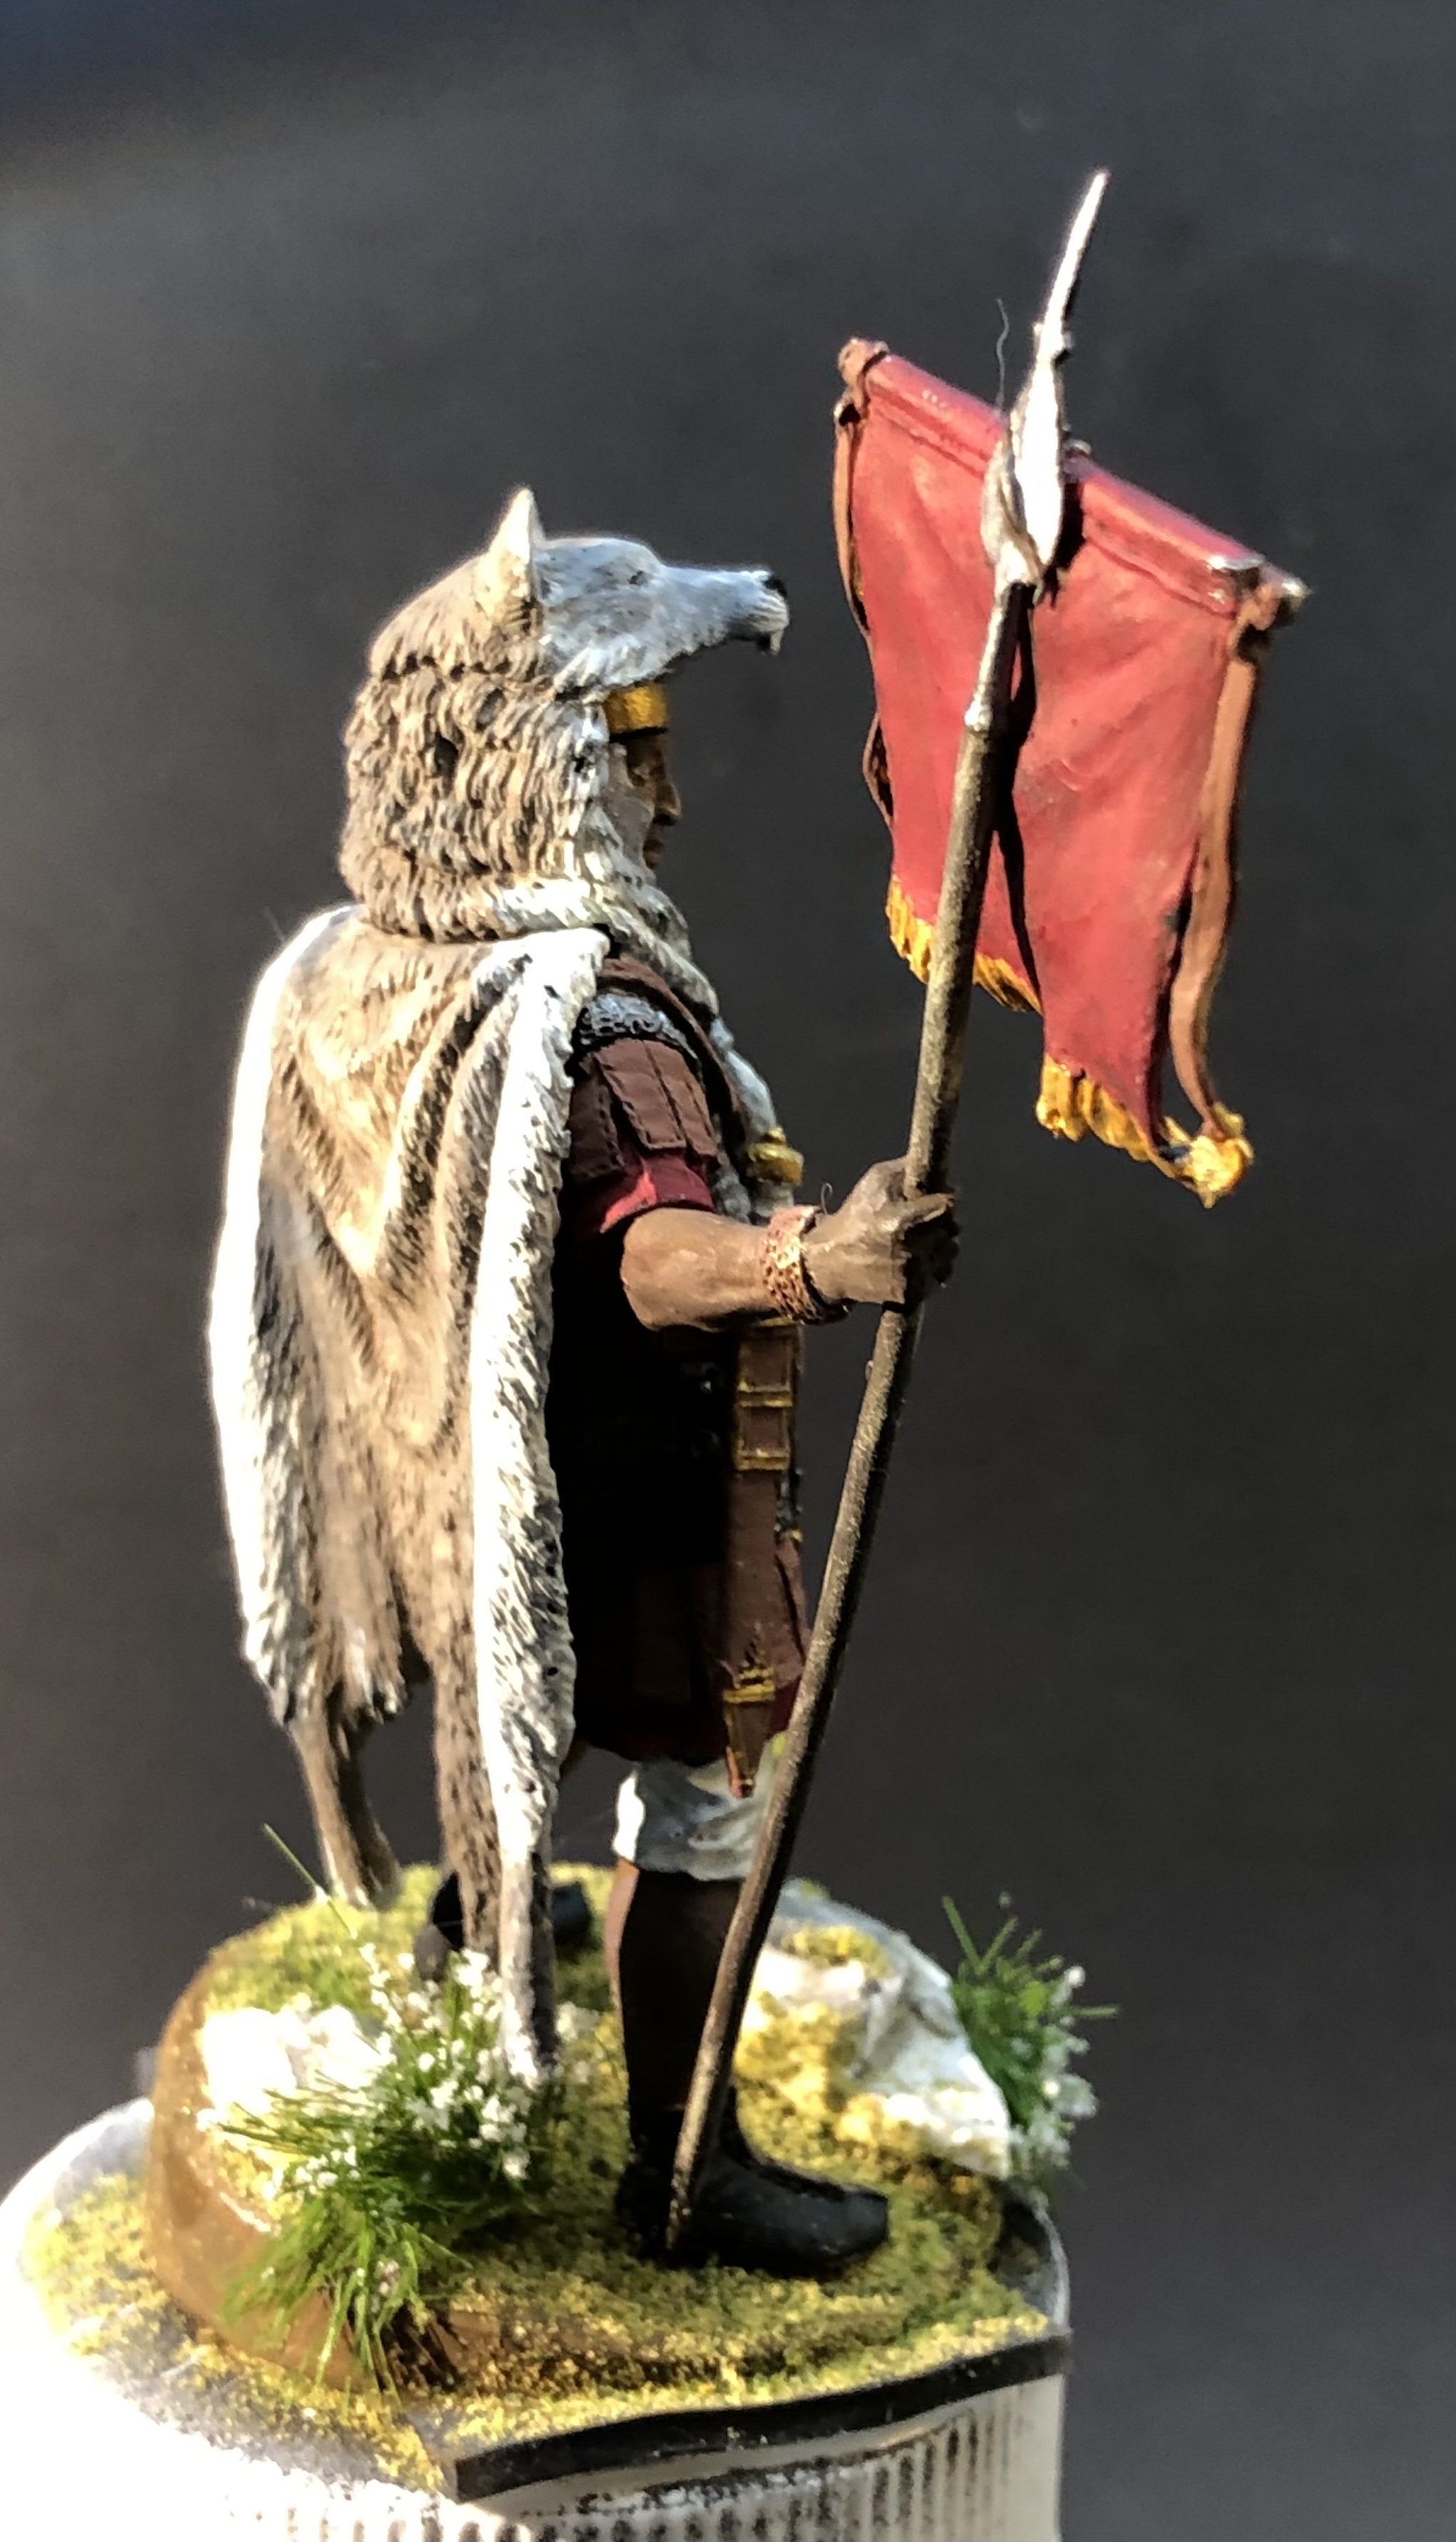
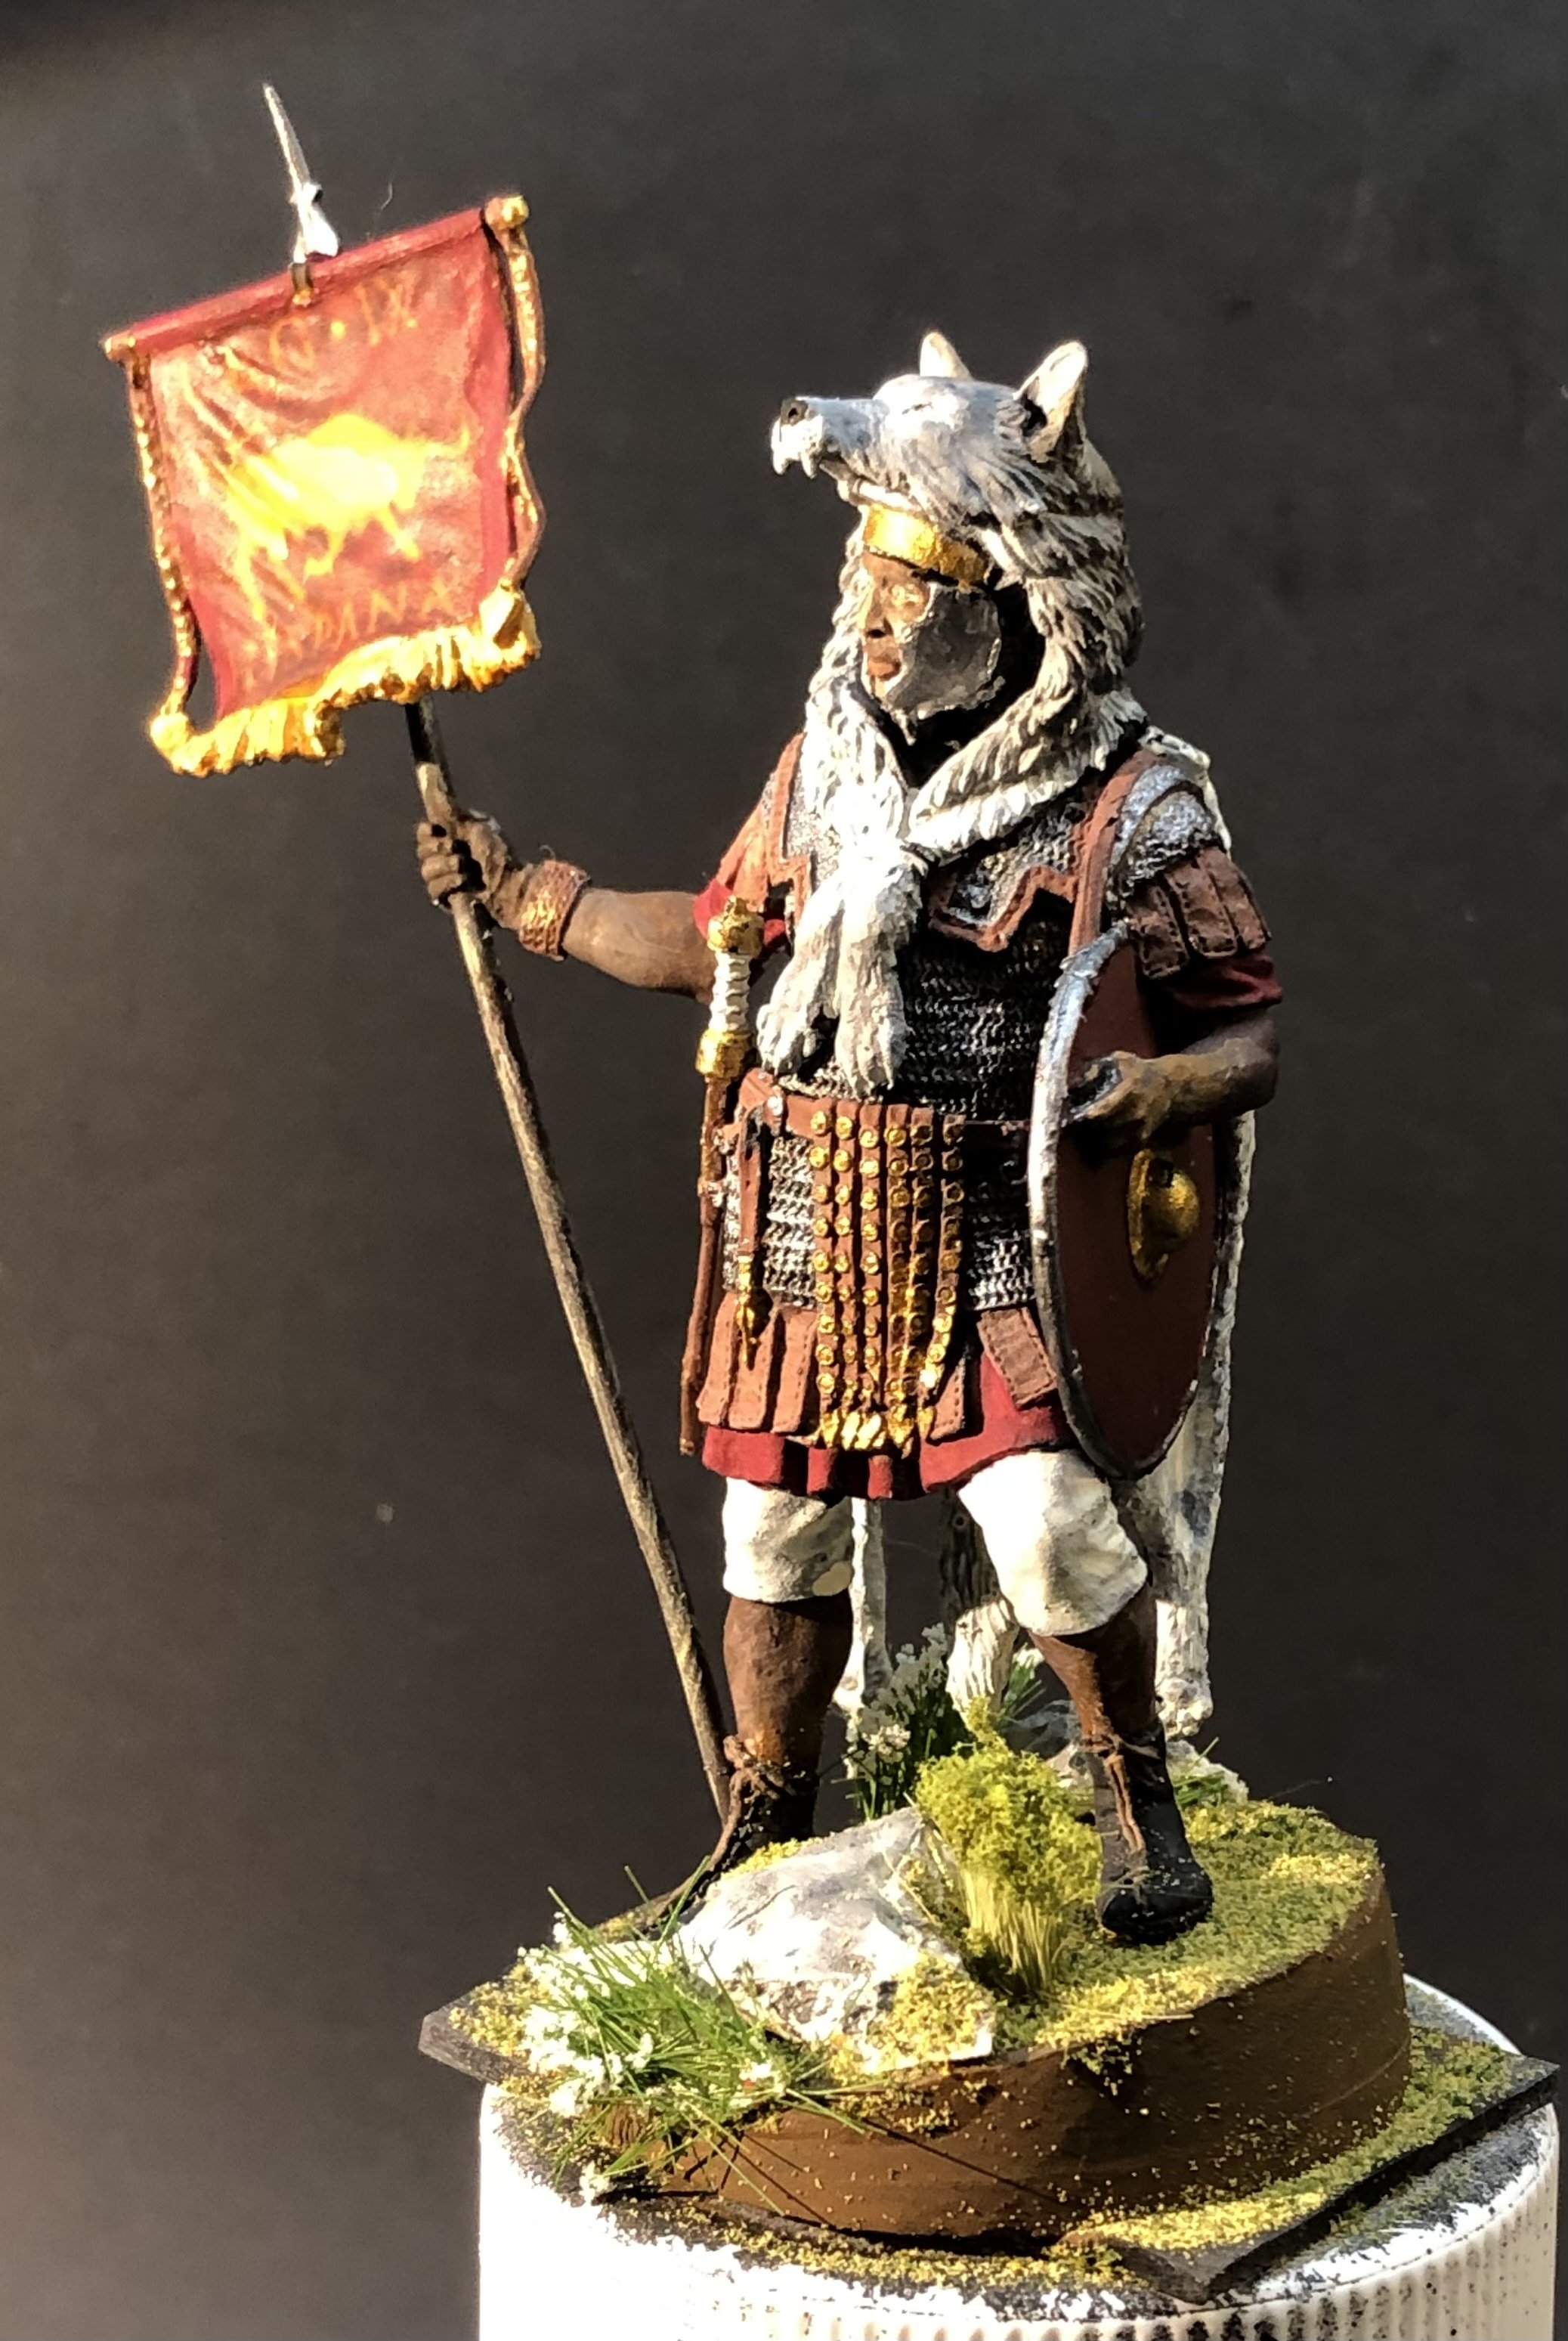
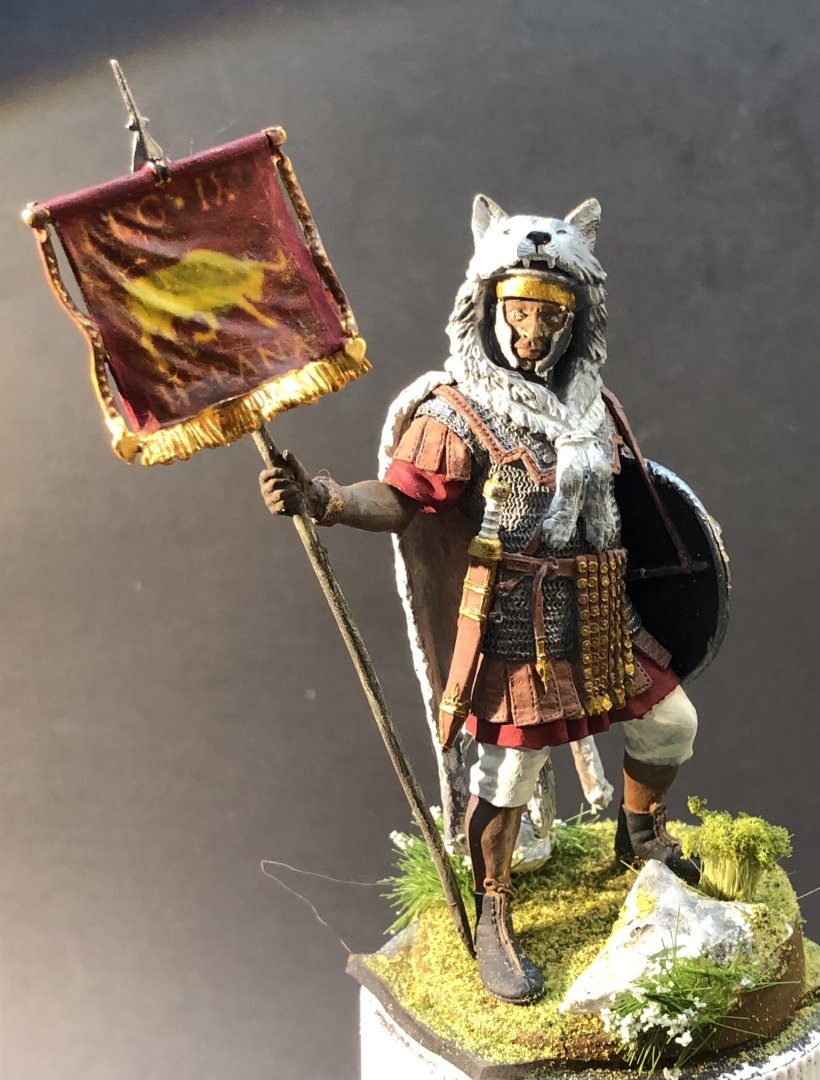
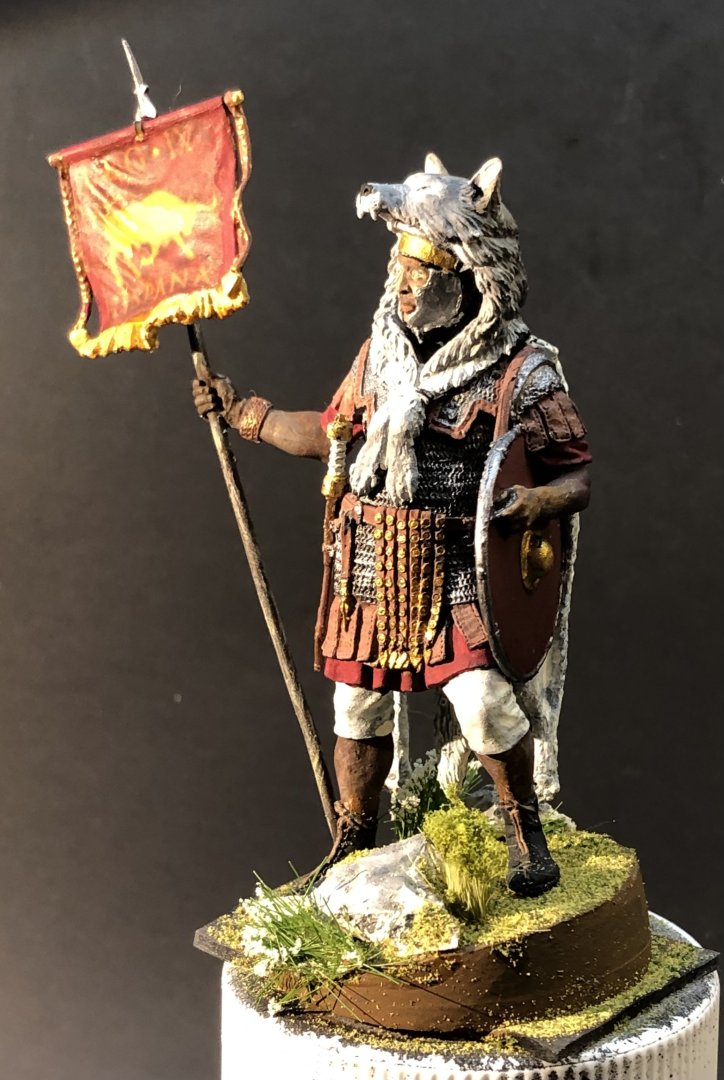
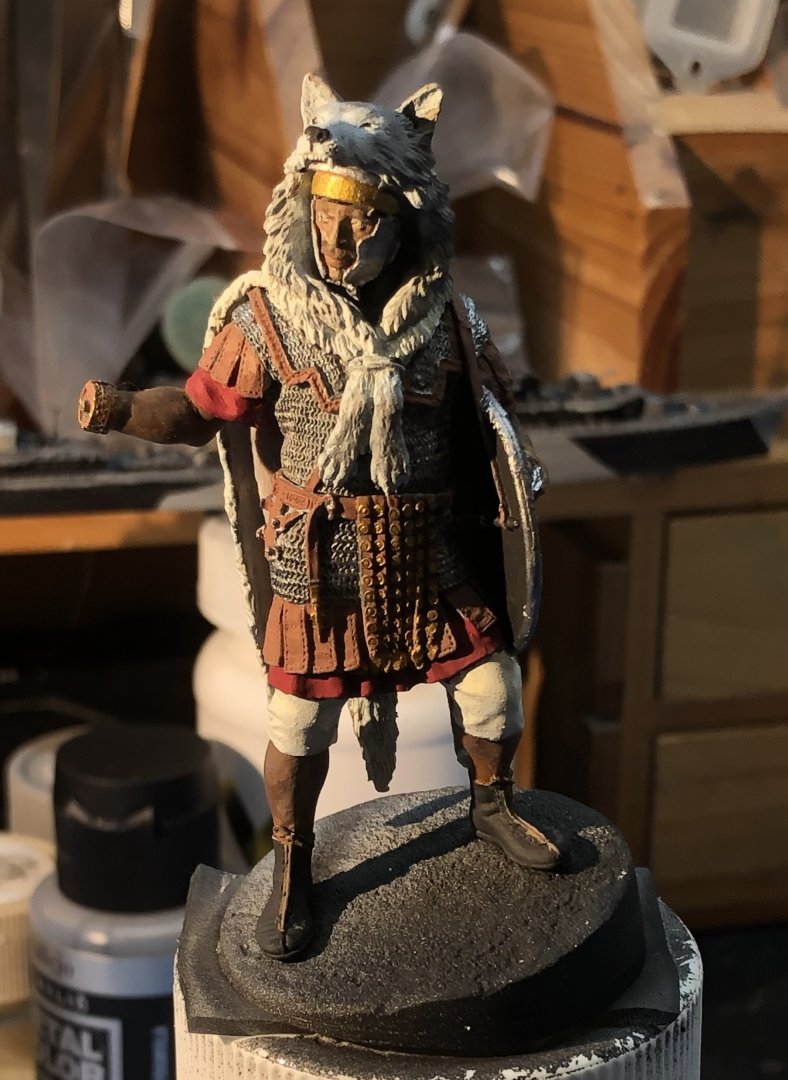
And finished I think. The standard glued onto the spear without a problem and the hand fitted to the arm with only a few bad words. I may have gone overboard with the base but I didn’t like the sloping top and wanted to break it up a bit. All the bits are Woodlands Scenics apart from the rocks which are bits of plaster of Paris. This was a very nice figure to work with and I think I would choose some more Alexandros figures. I would like to try a few more Roman figures if I can find some less belligerent ones. I had been a bit concerned with the Nubian skin tones but I think it came out pretty well. I just noticed that I had forgotten to paint the strap holding the front legs of the pelt together. That’s now been rectified with a touch of leather brown. Thanks for looking in, the likes and kind comments. alan


-
Thank you very much Ken. There are some fascinating remains of the Romans in Britain and elsewhere. The legions seem to have been constantly busy but I suppose that’s what having an empire is all about. alan
-
Thank you so much OC. Using the decal paper was harder than I expected but it was worth the learning curve. It’s a possible solution for fancy shields on future figures. alan
-
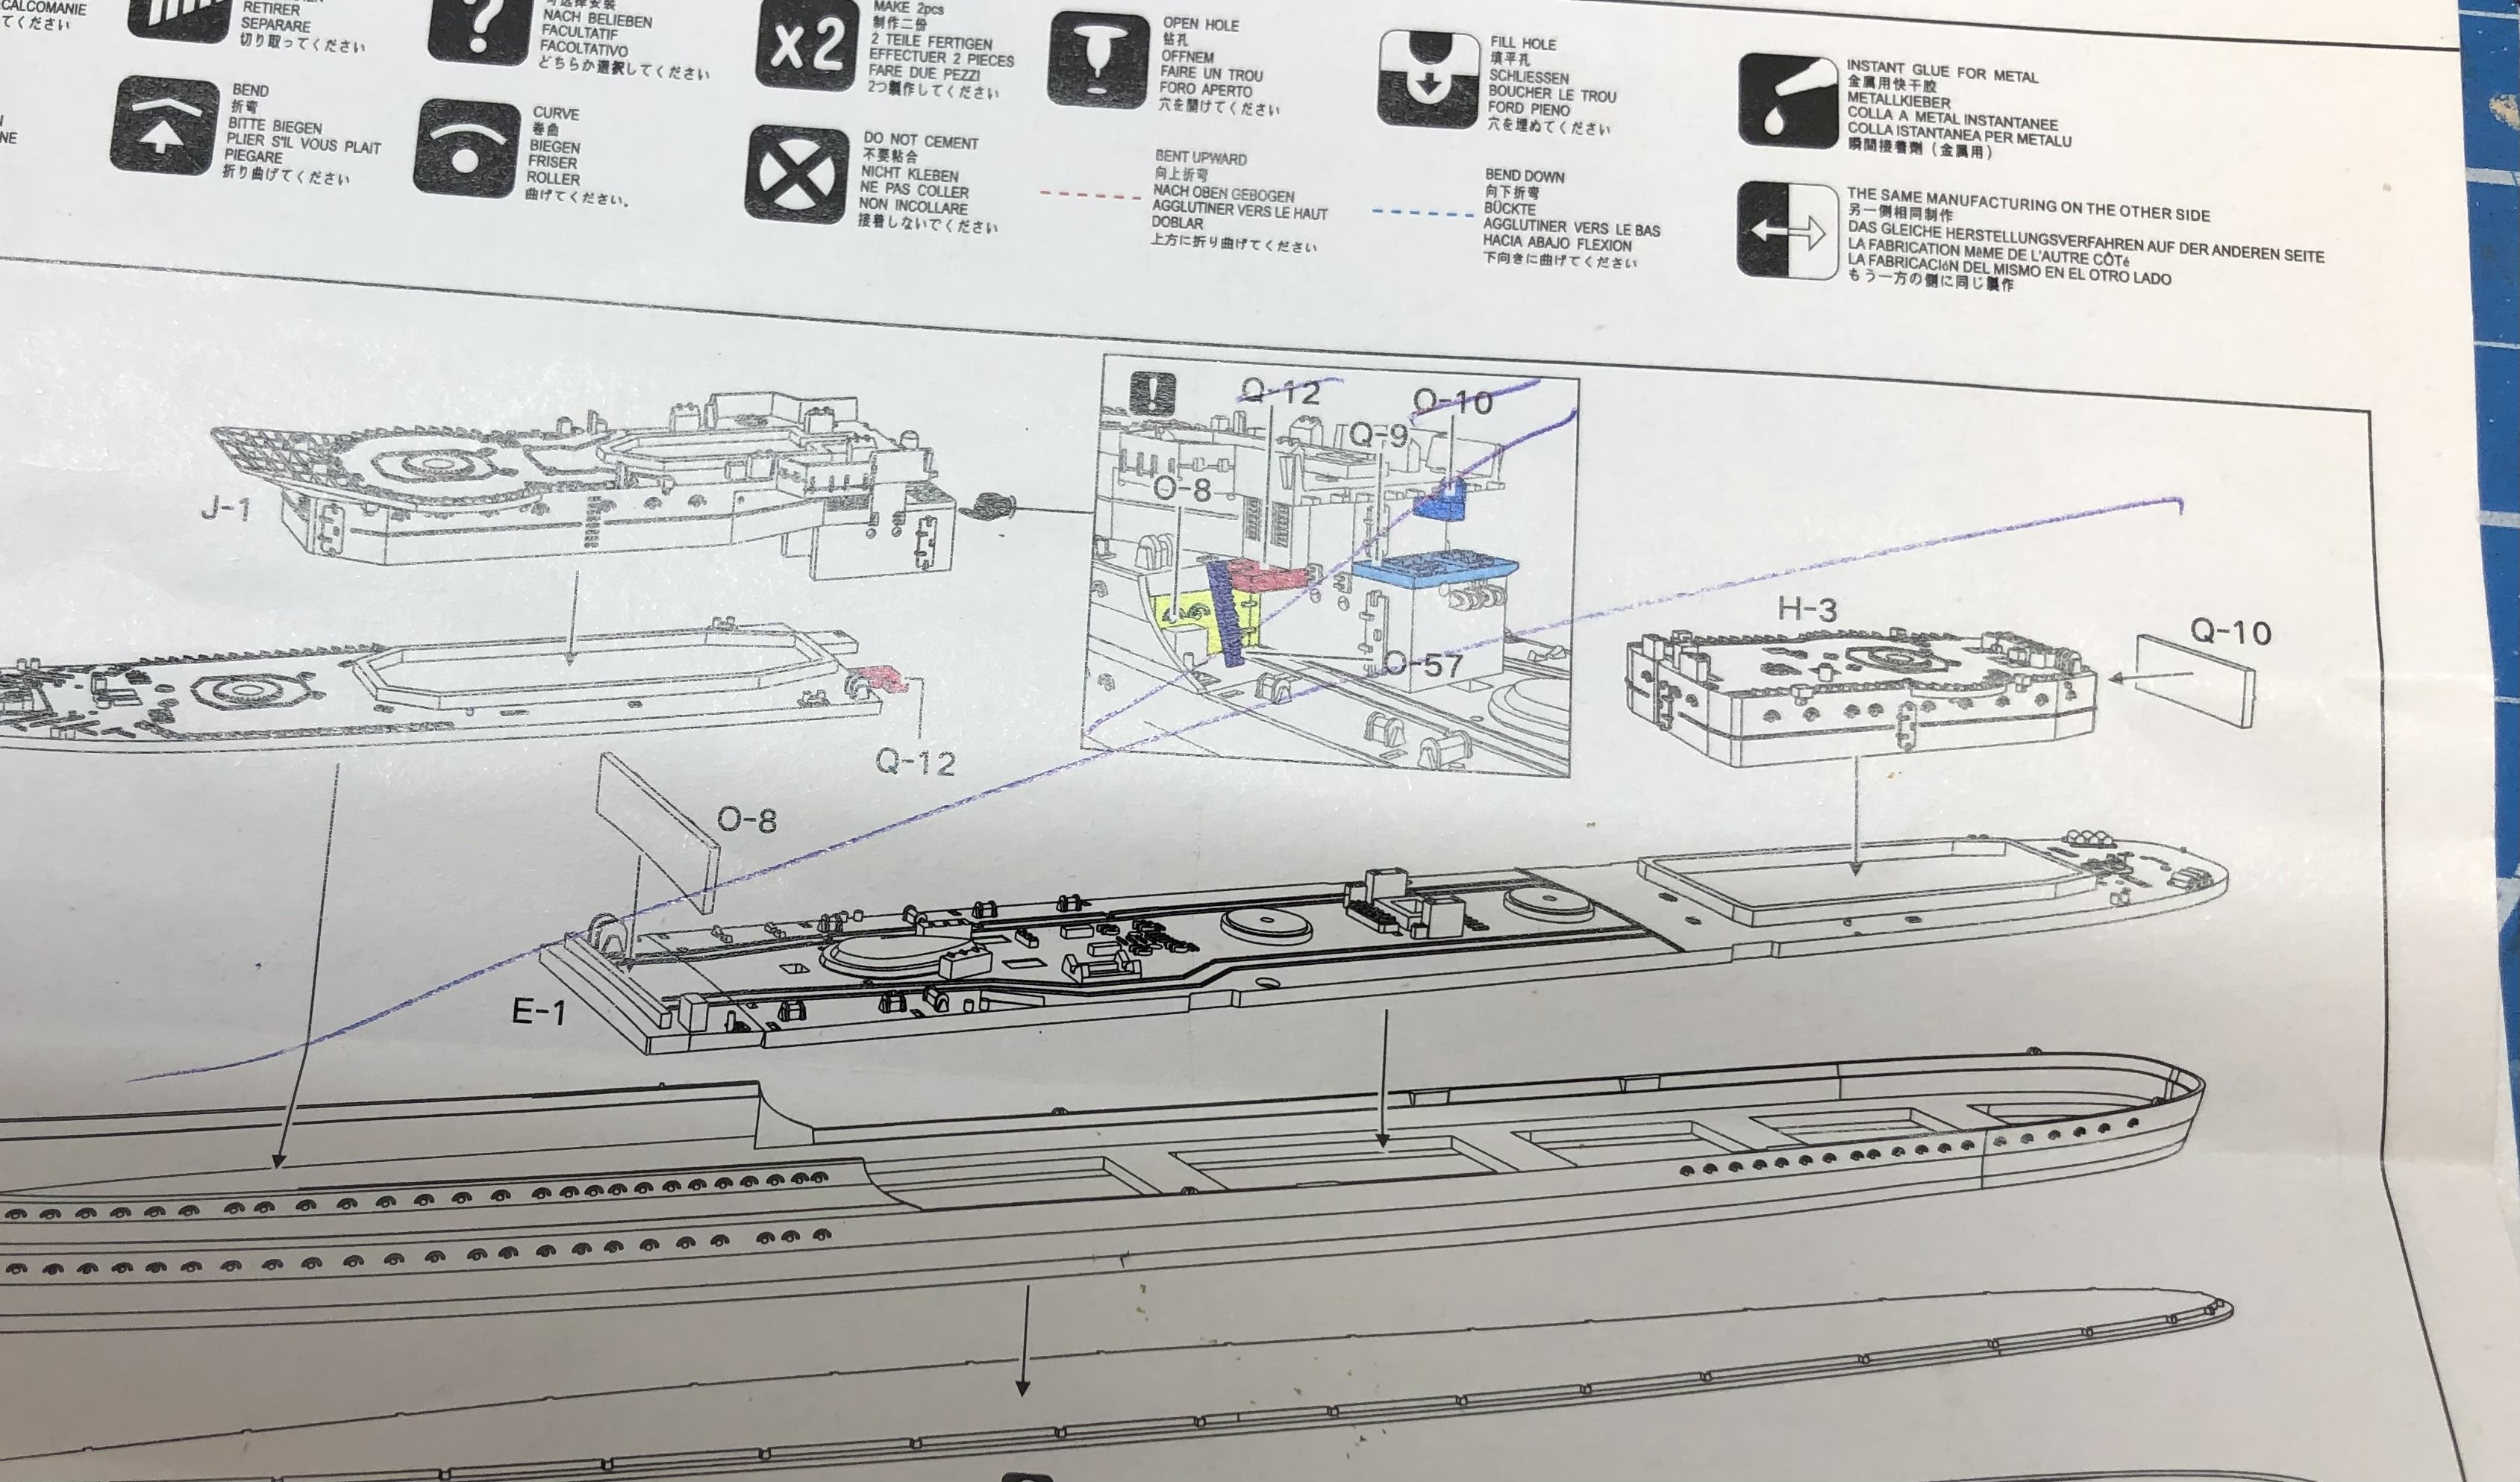
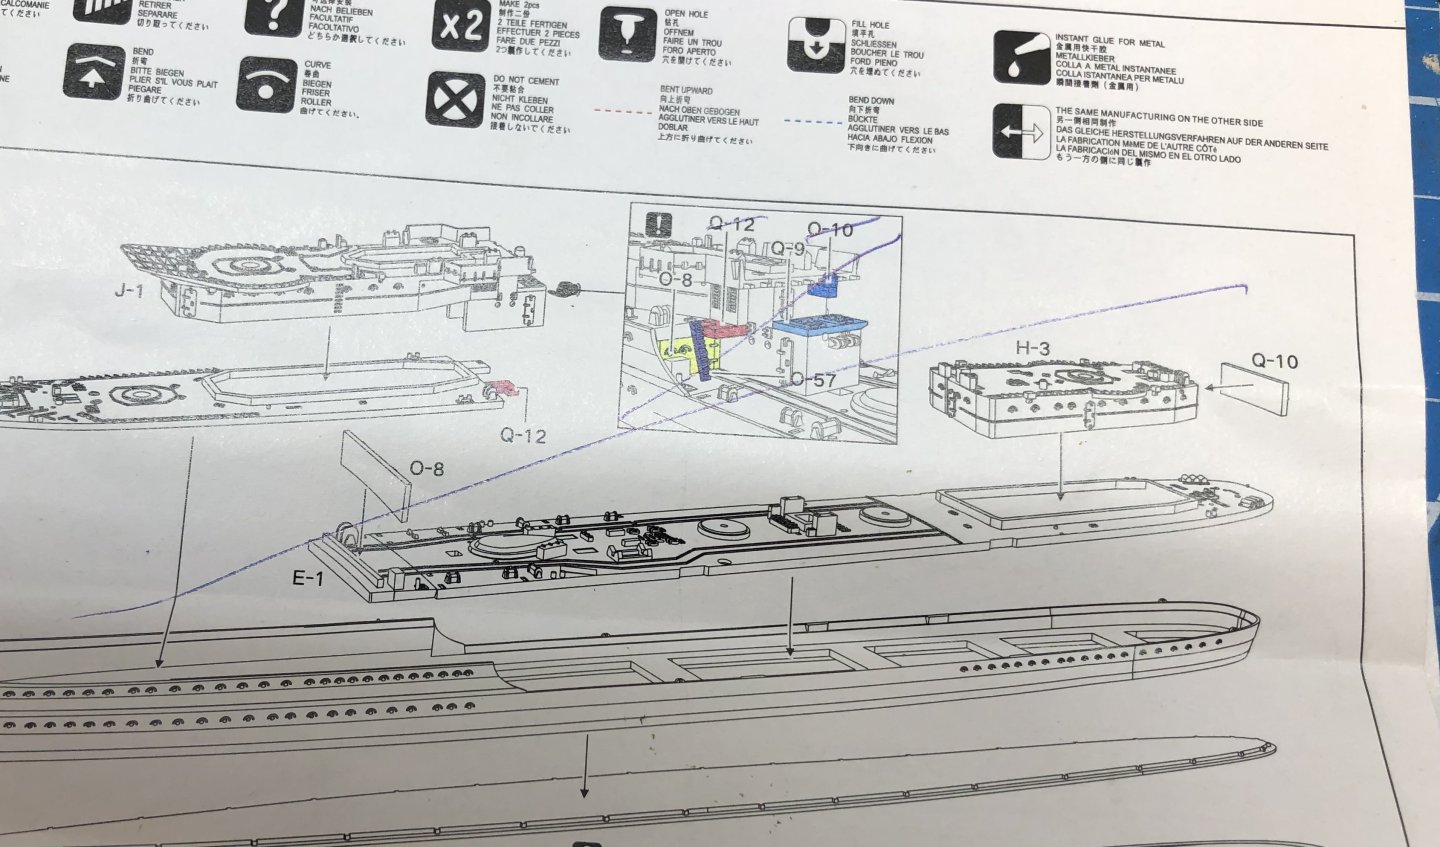
The Flyhawk instructions are a bit wired at times although I think they are trying to be helpful but it doesn’t seem to match the way my brain works. As an example from HMS Kelly, the above inset shows certain parts to be added in color and again partly on a second inset. It took me quite a while to make sense of it. Alan
-
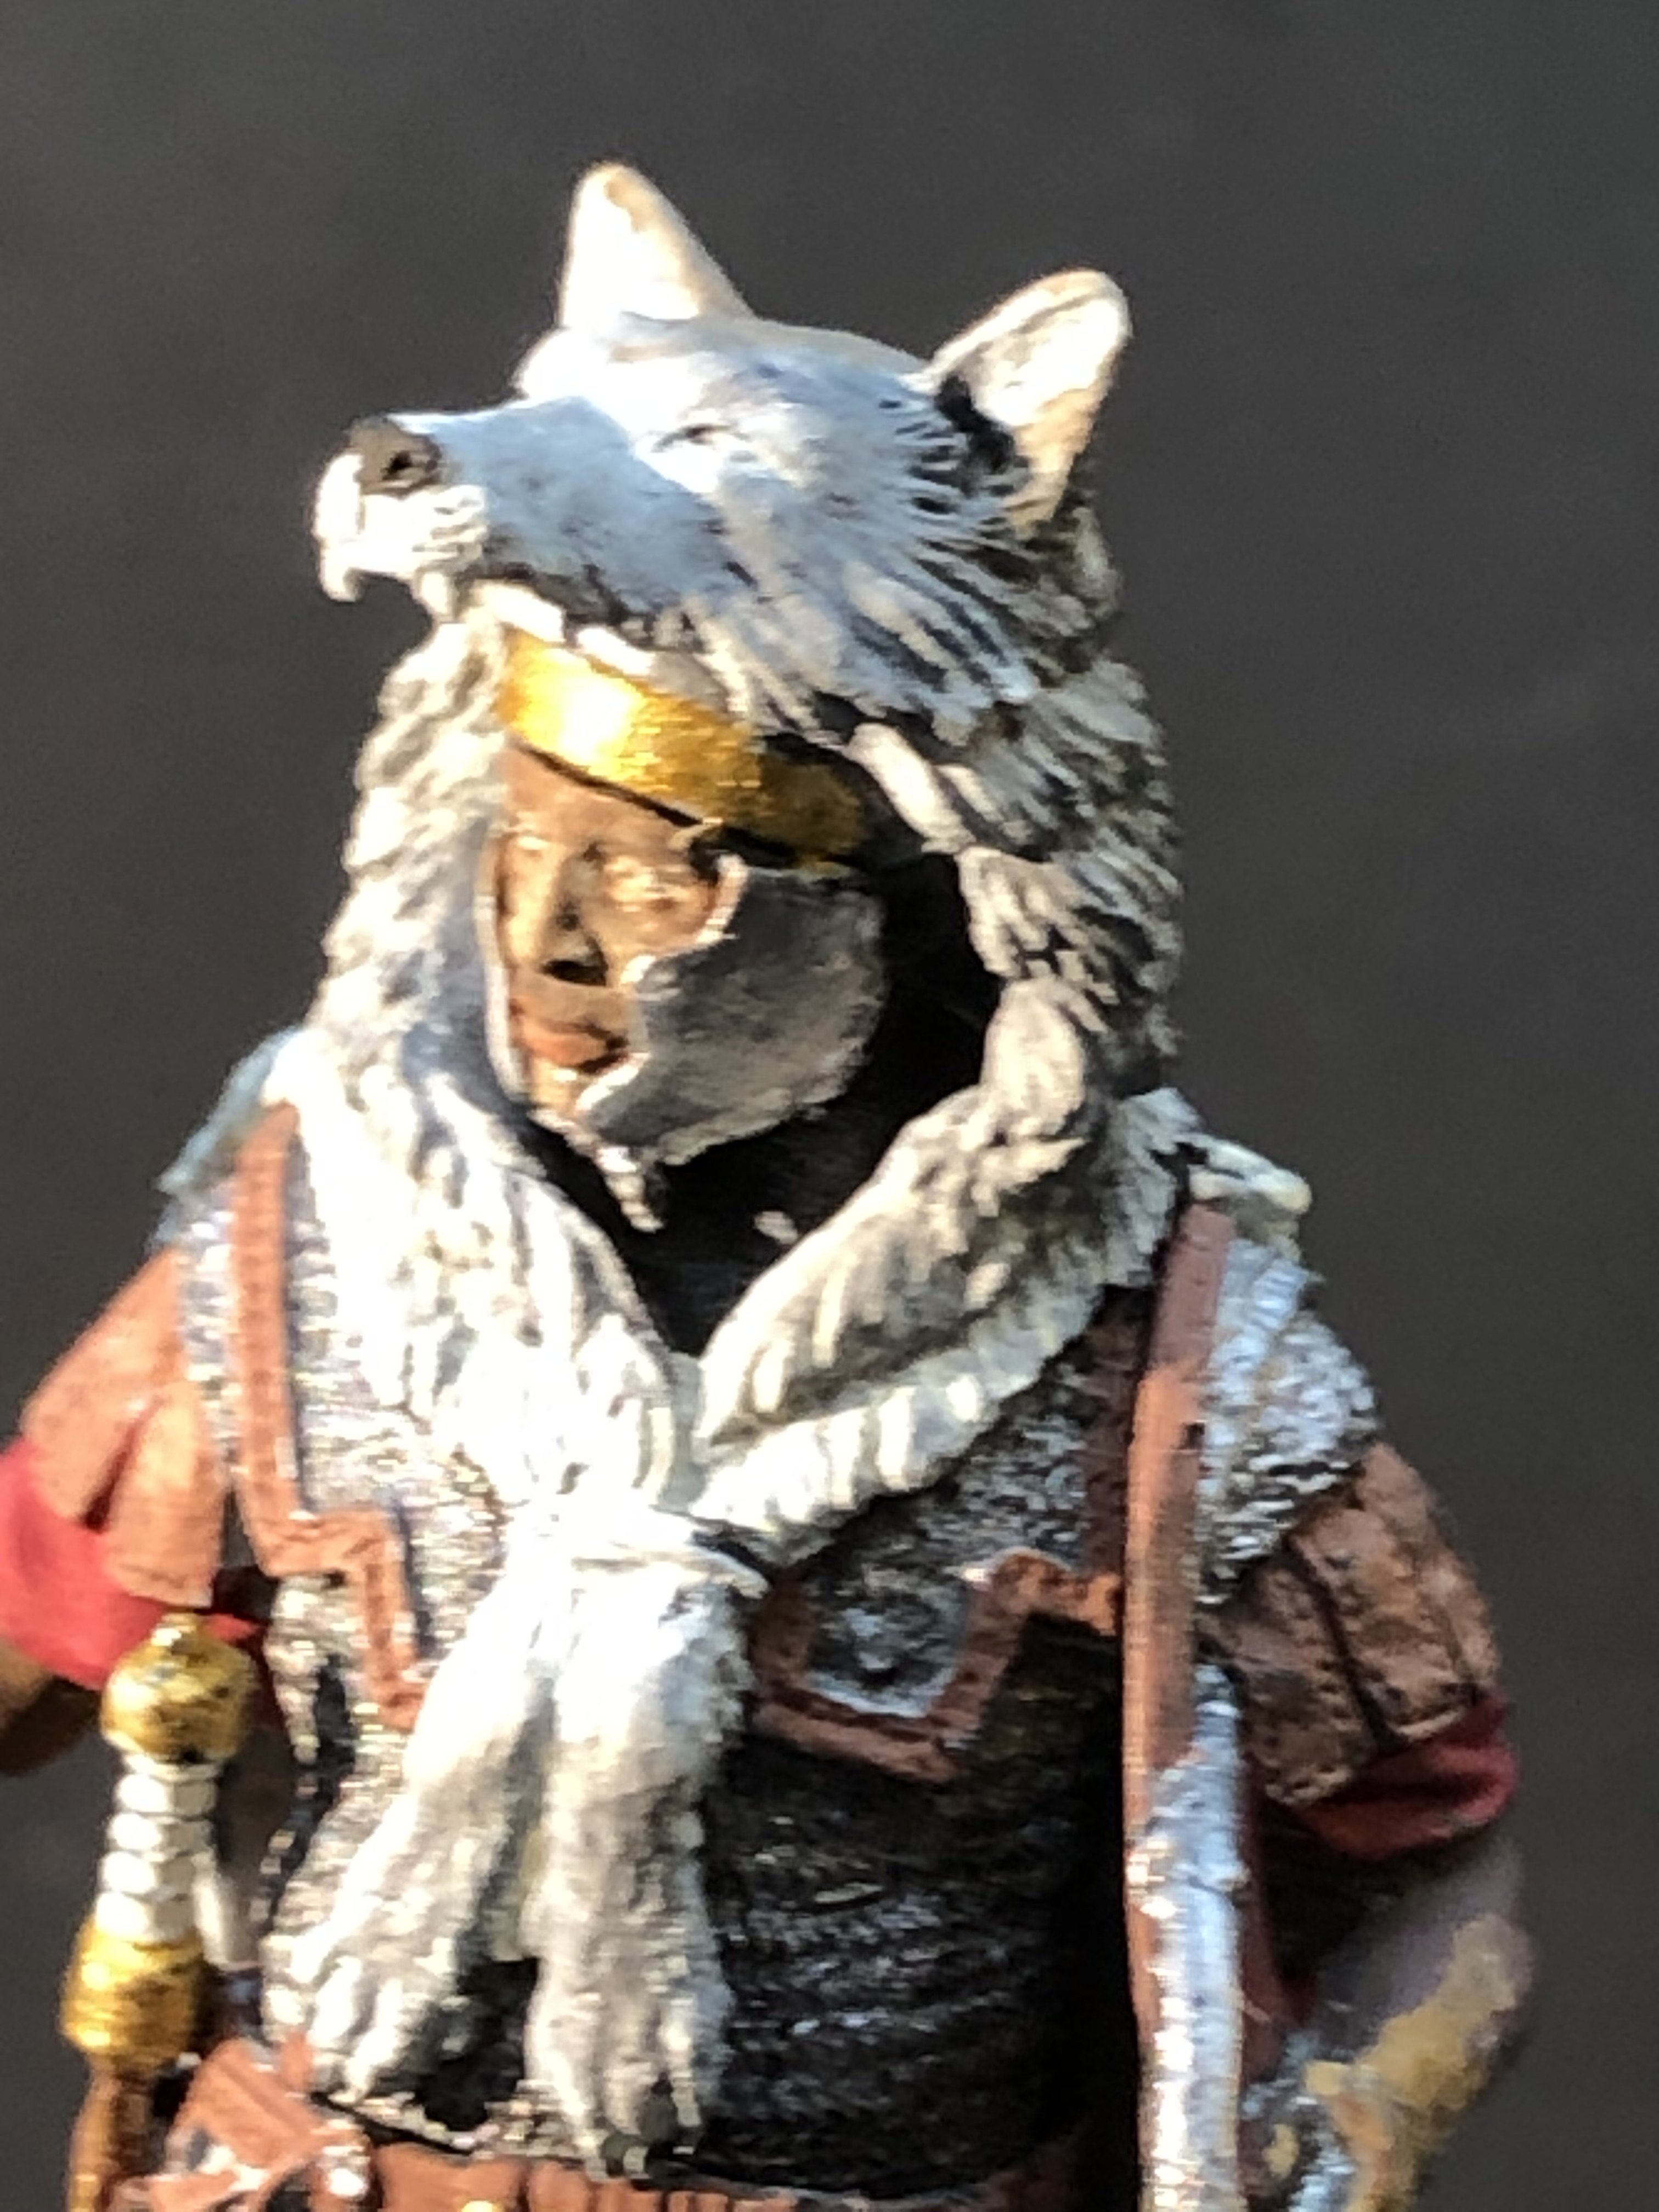
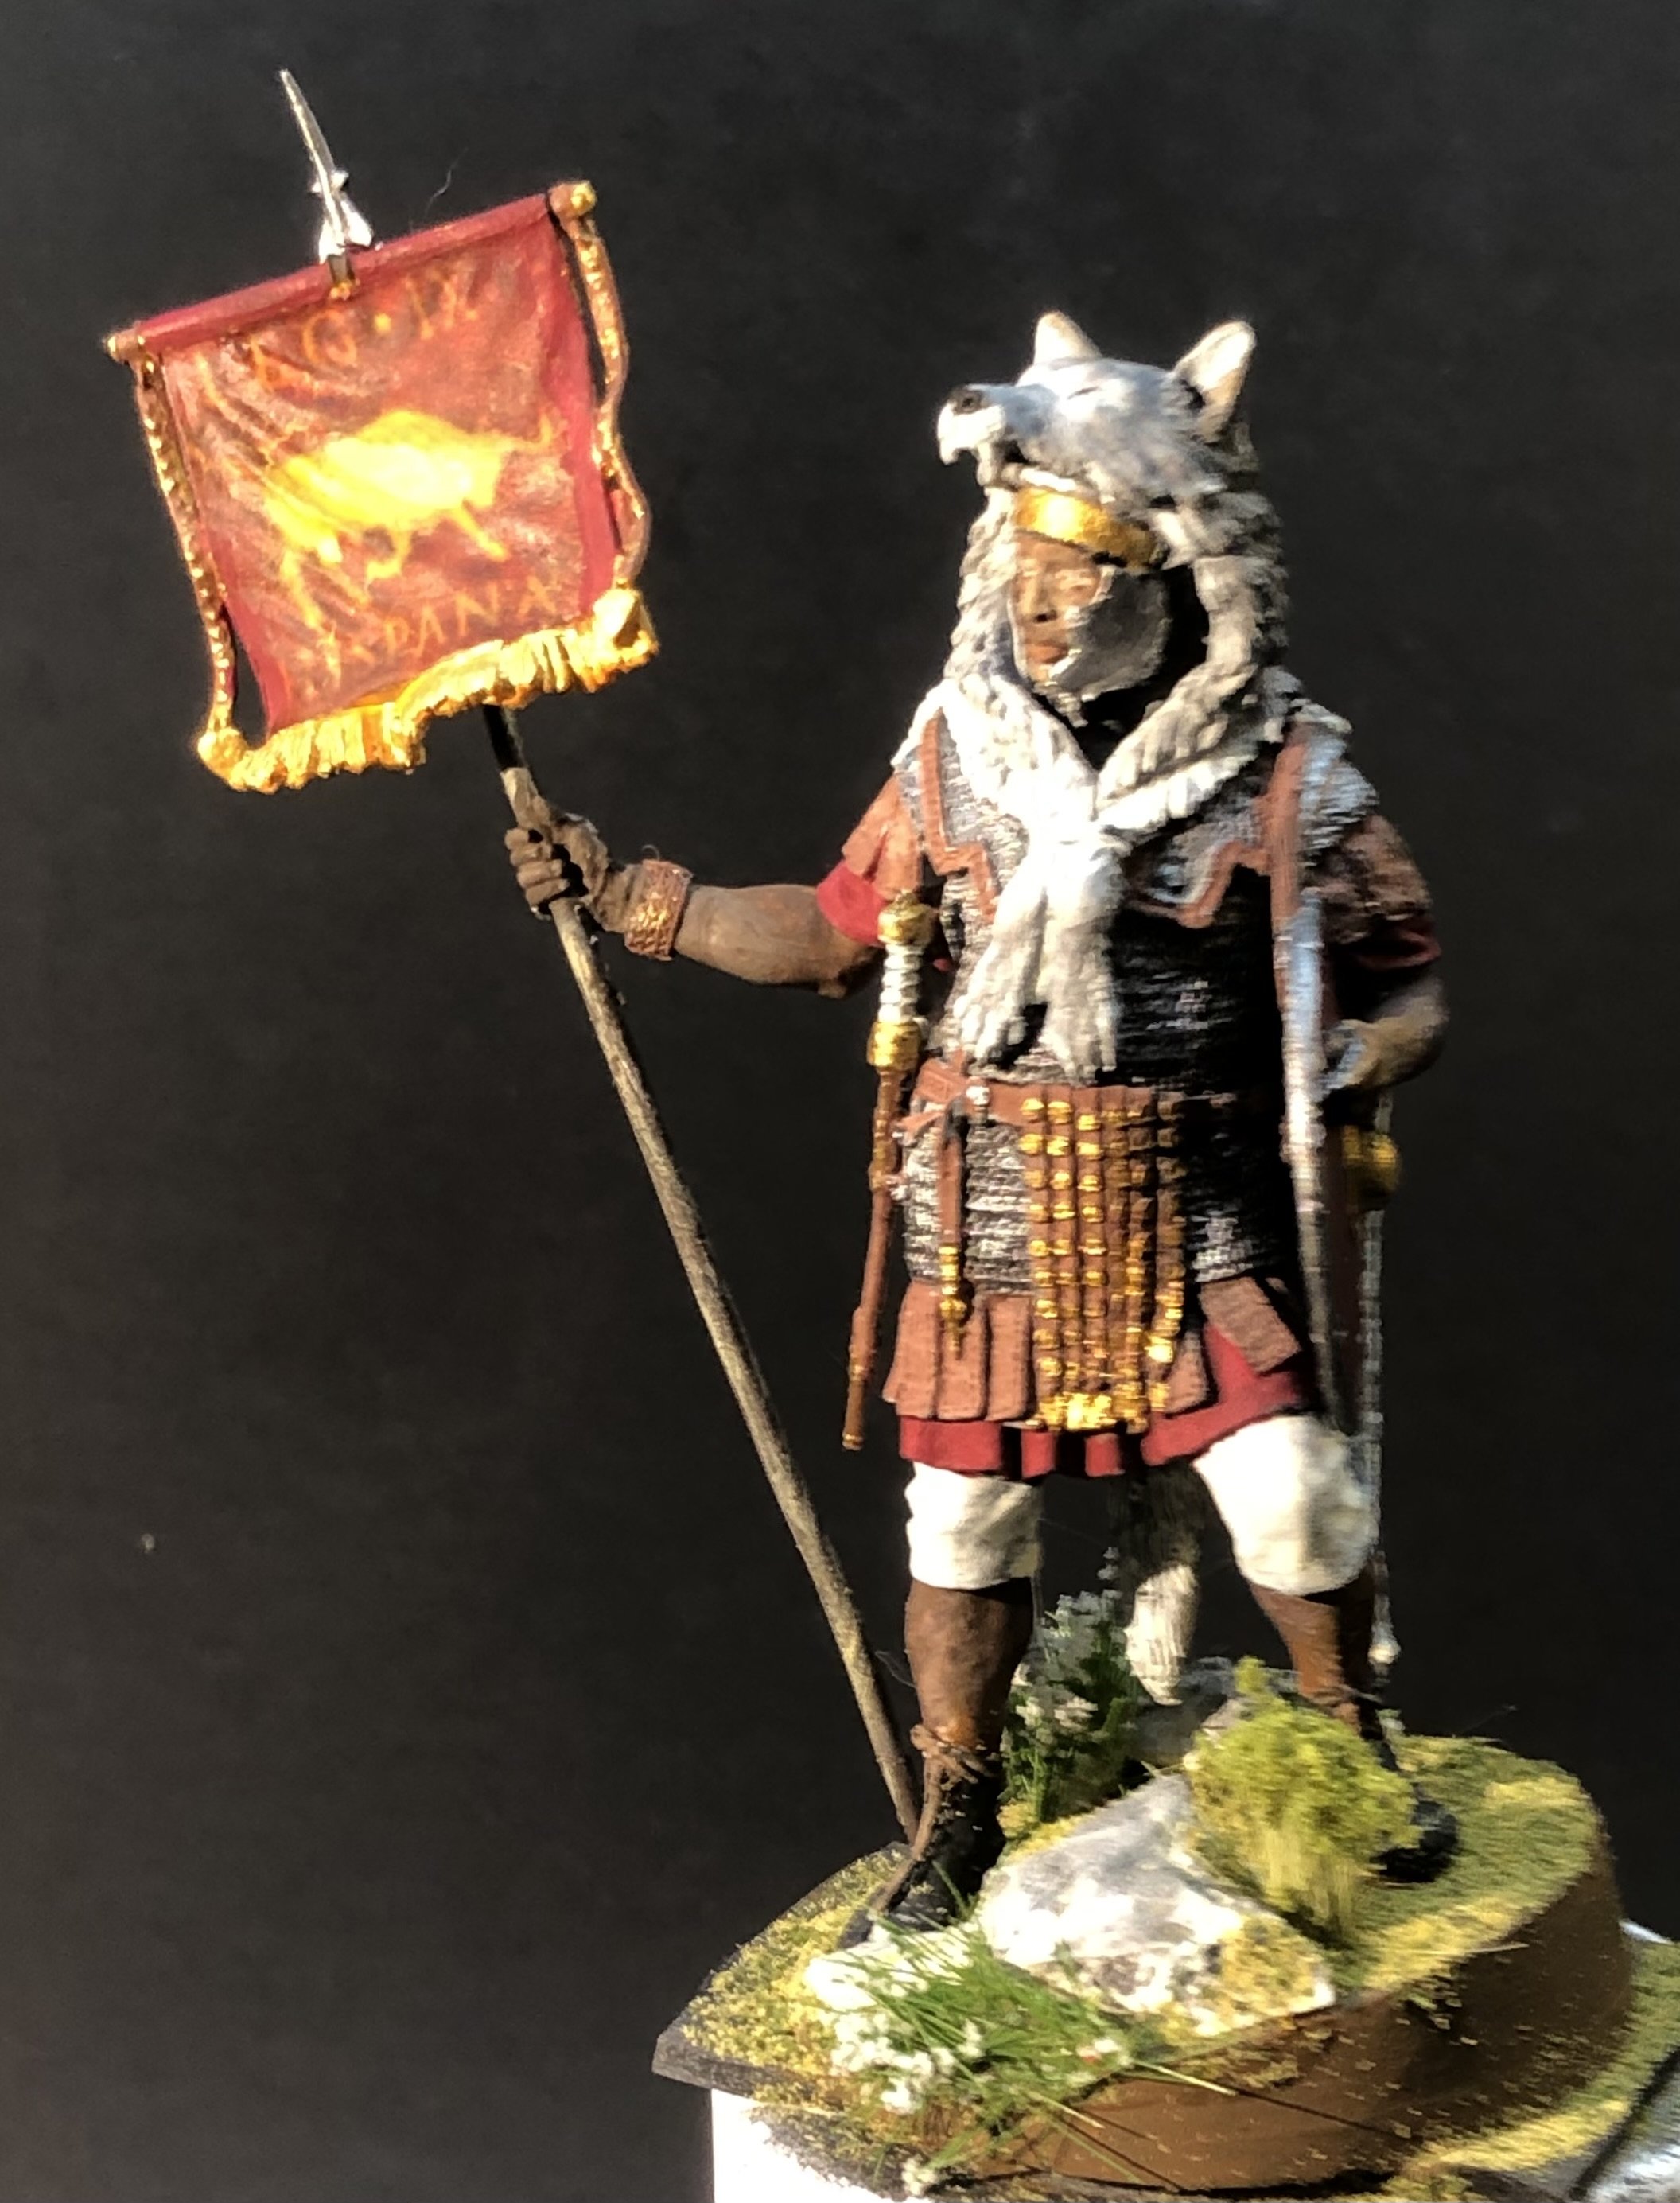
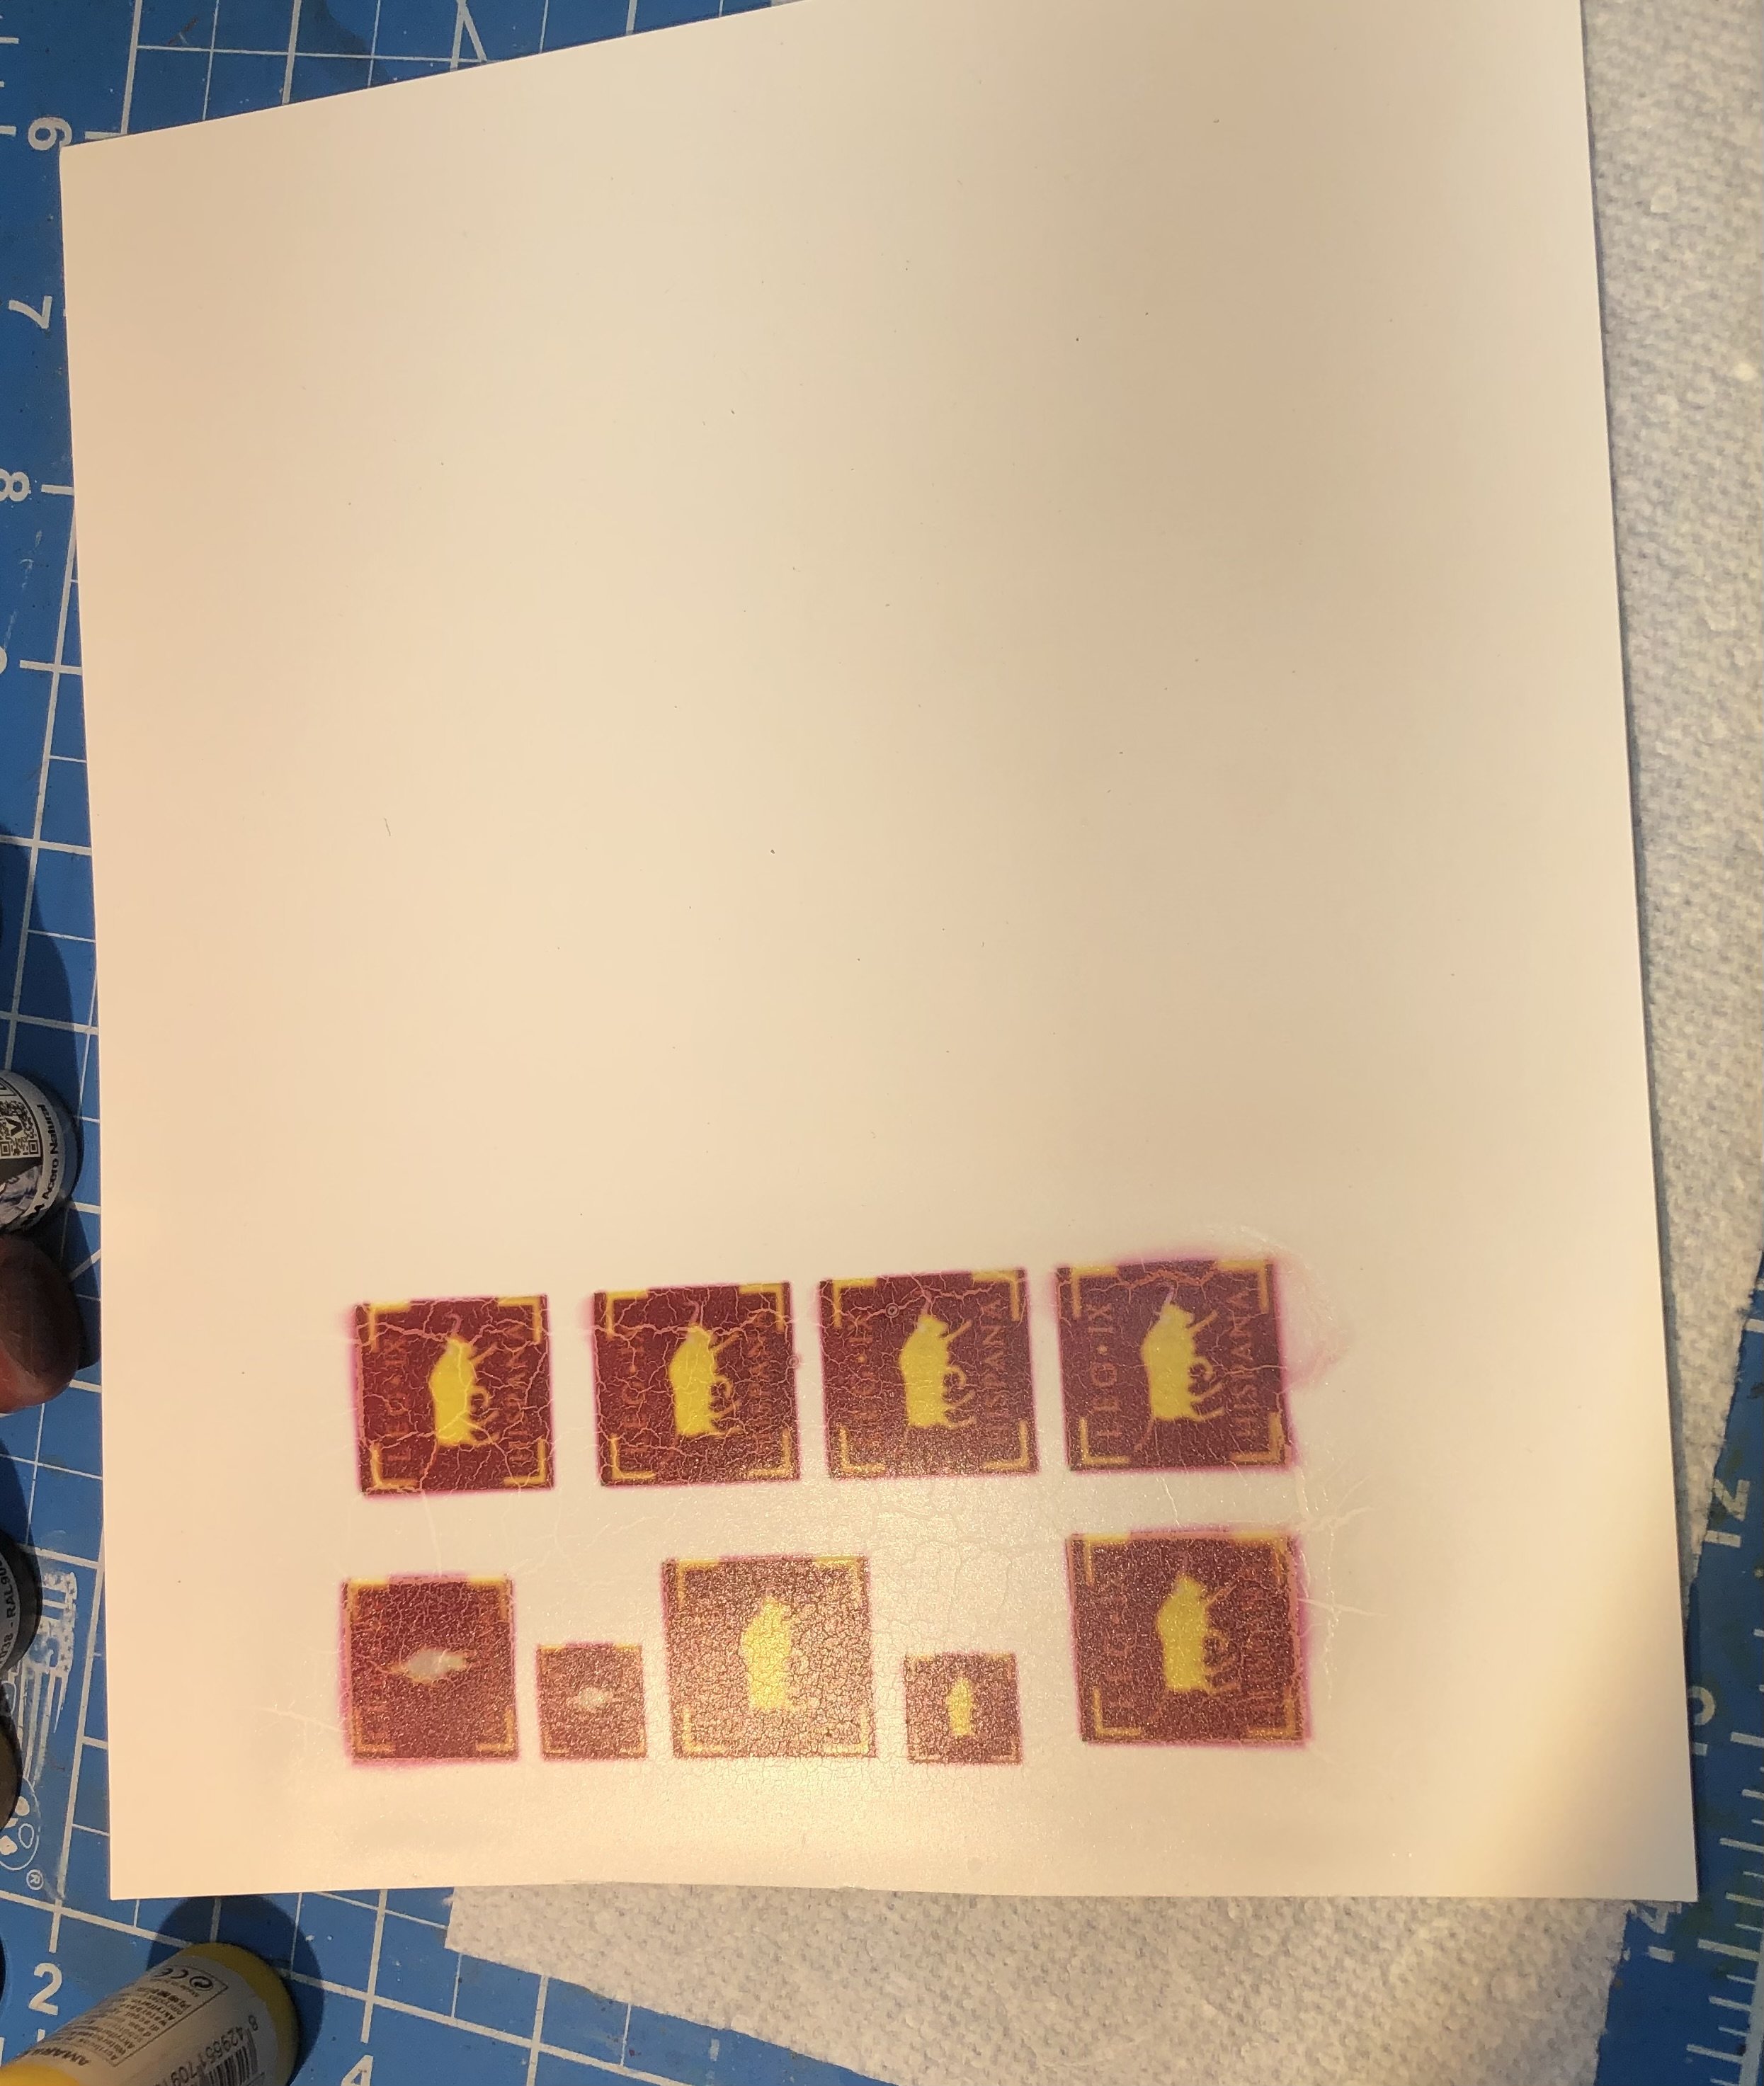
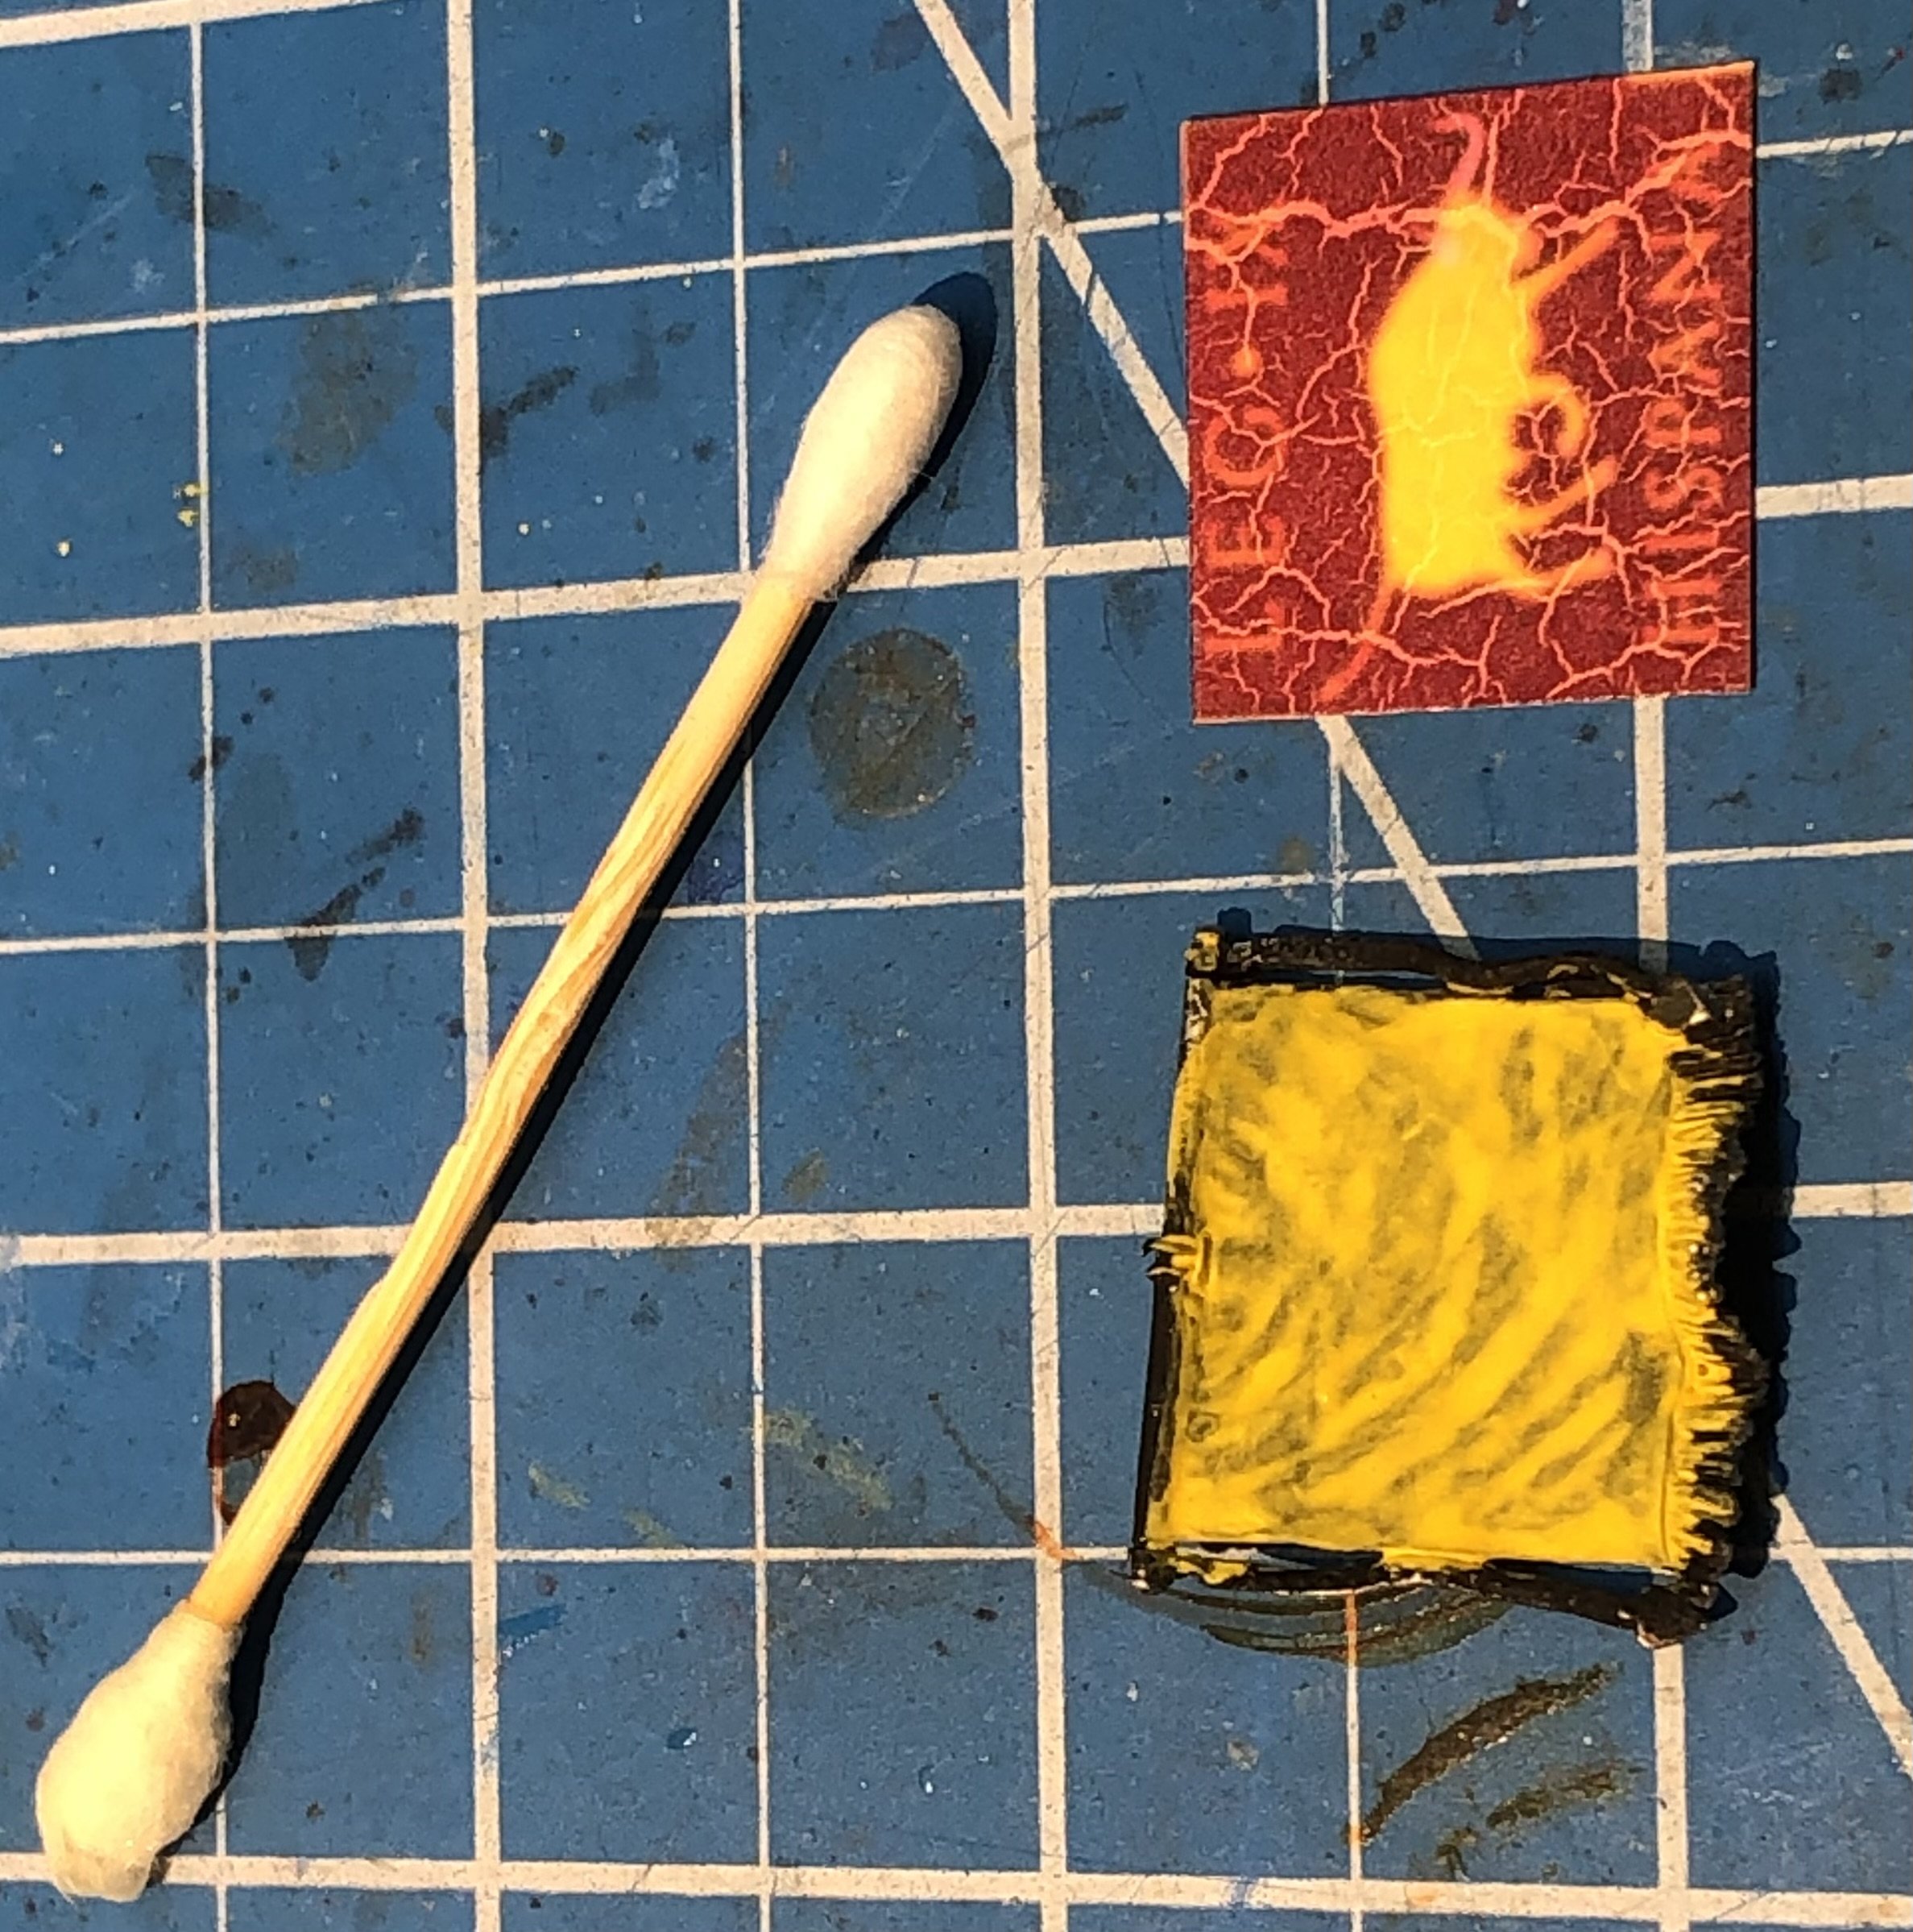
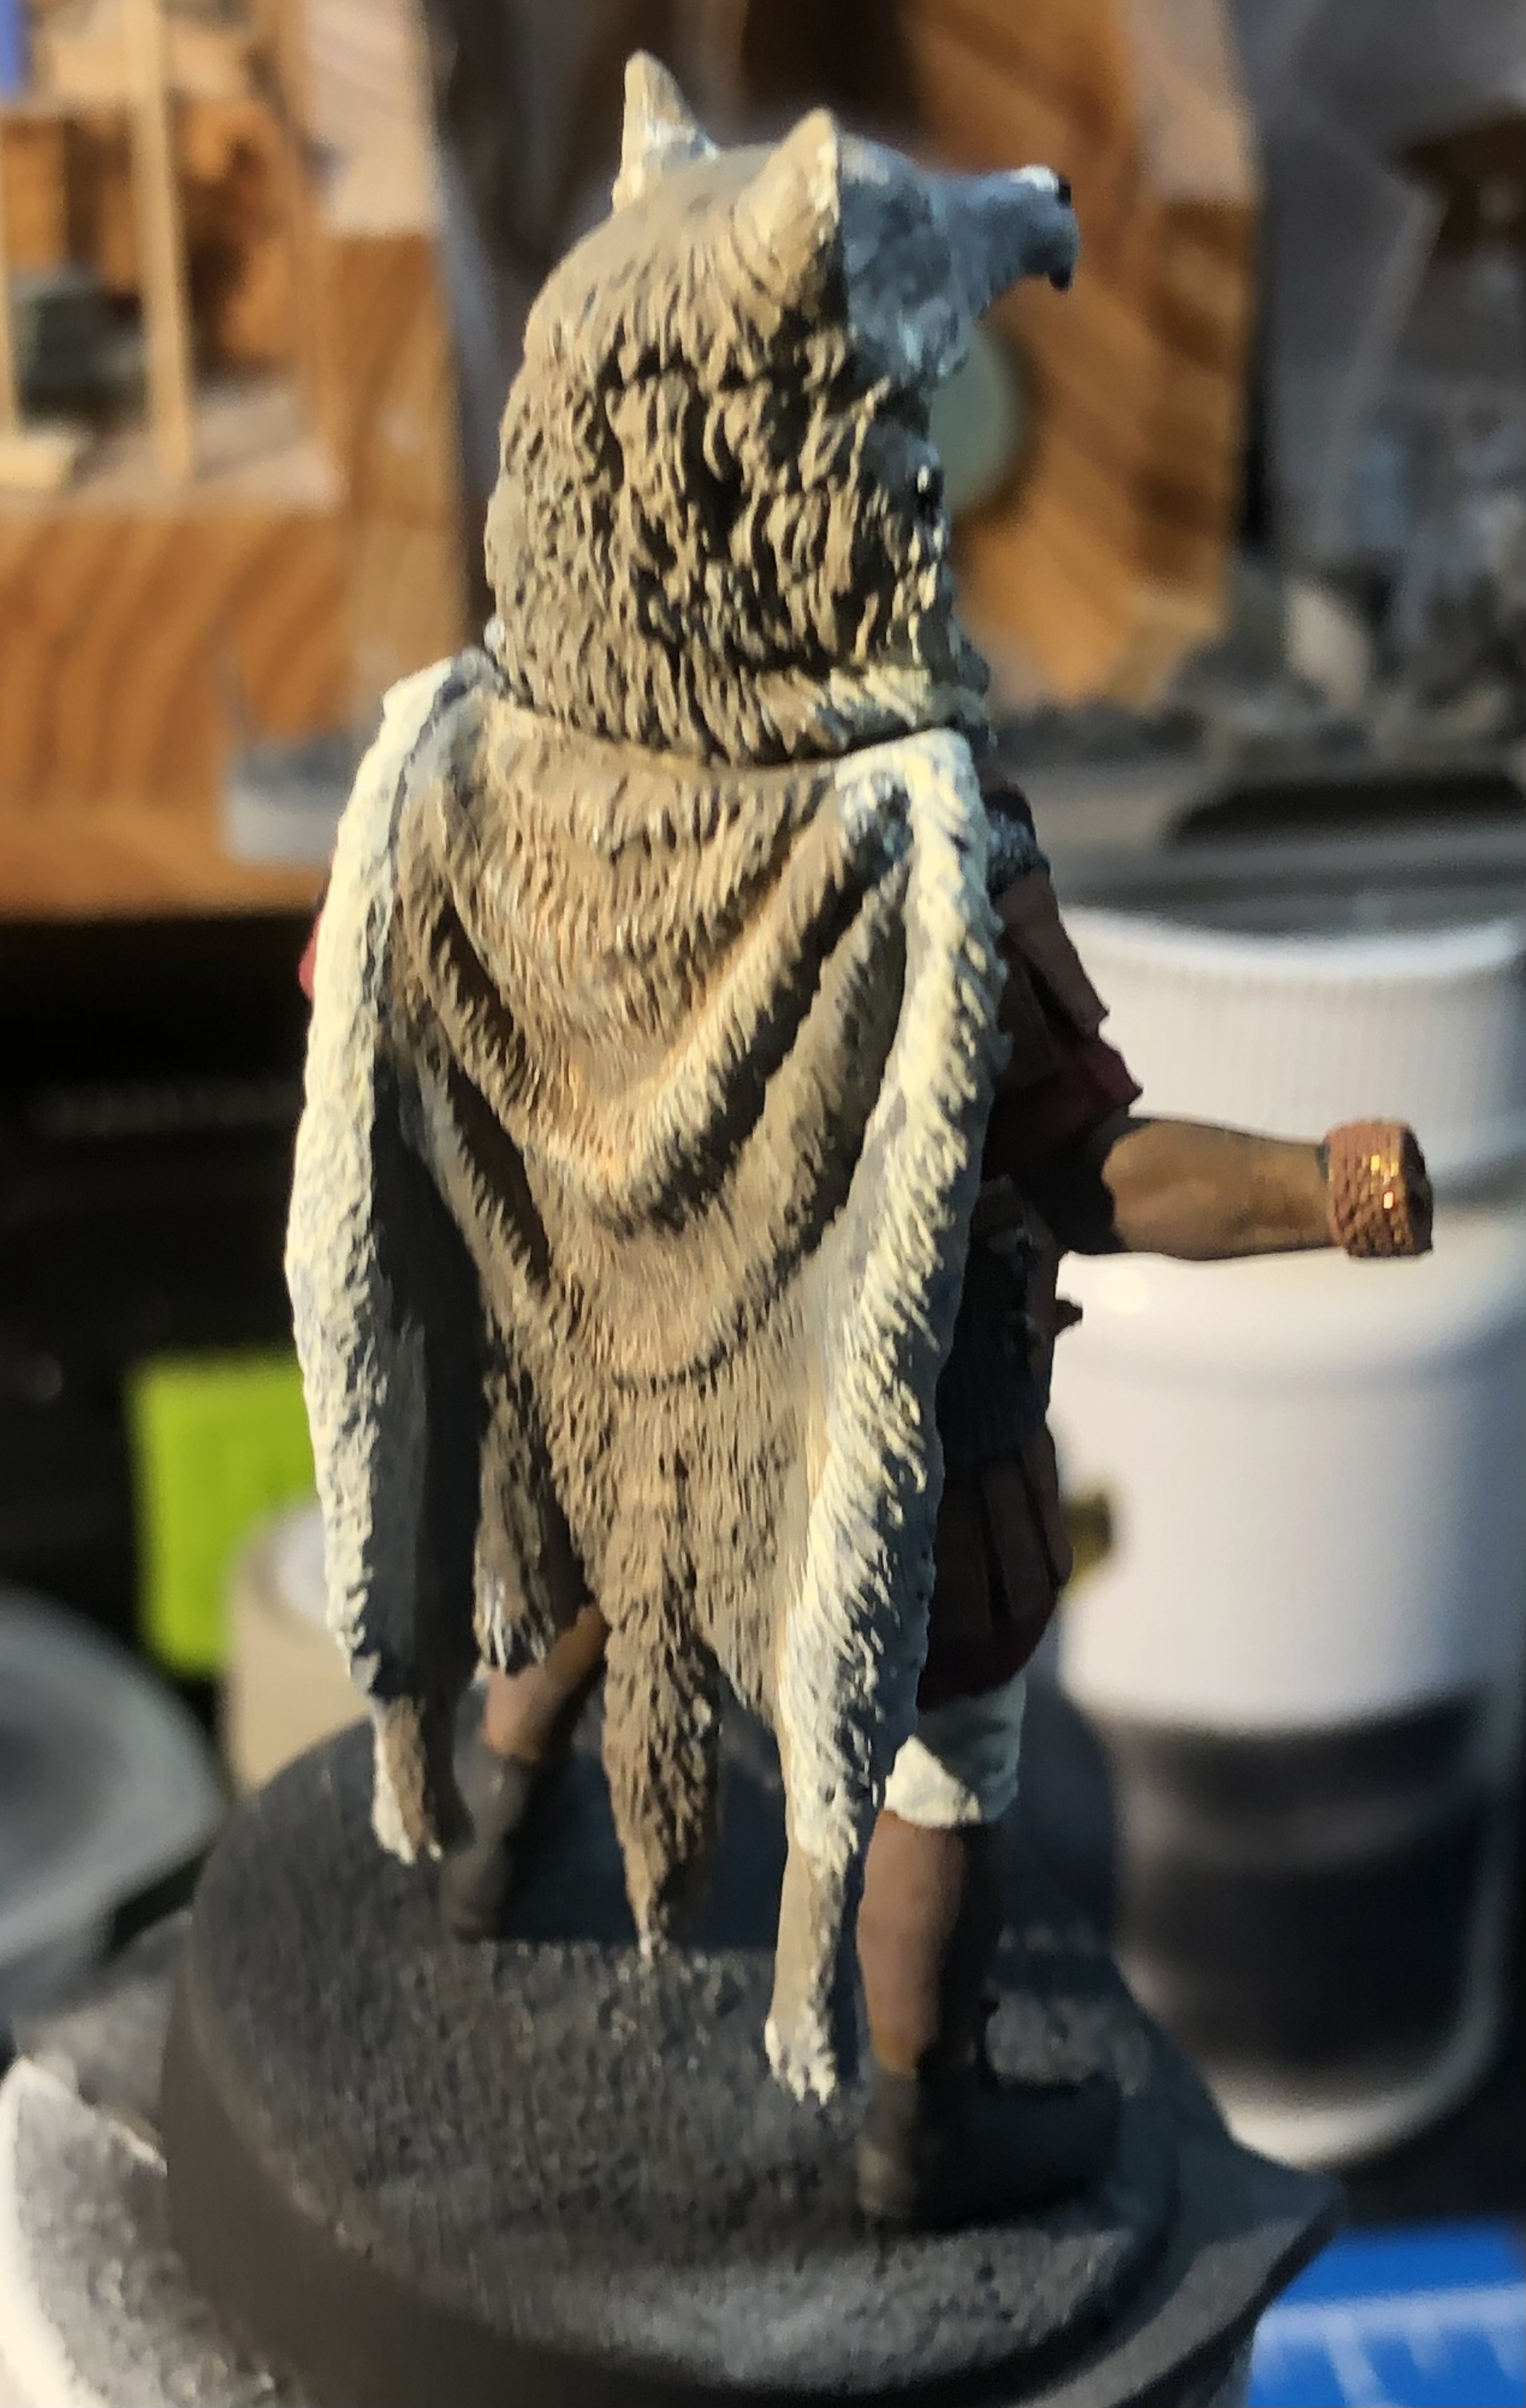
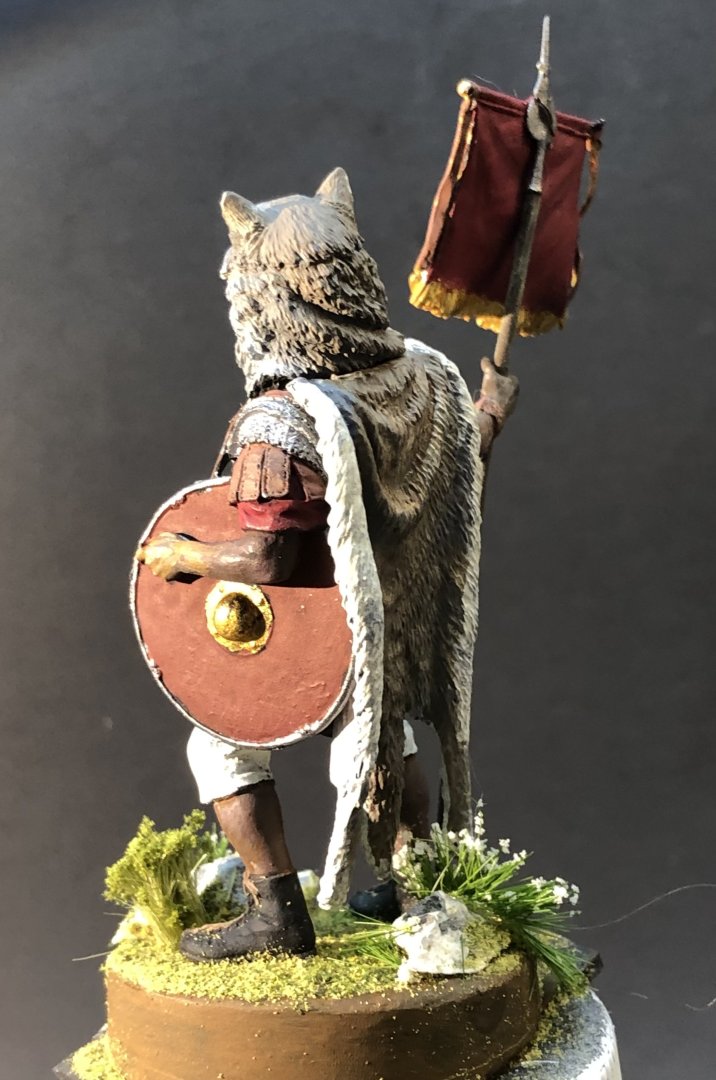
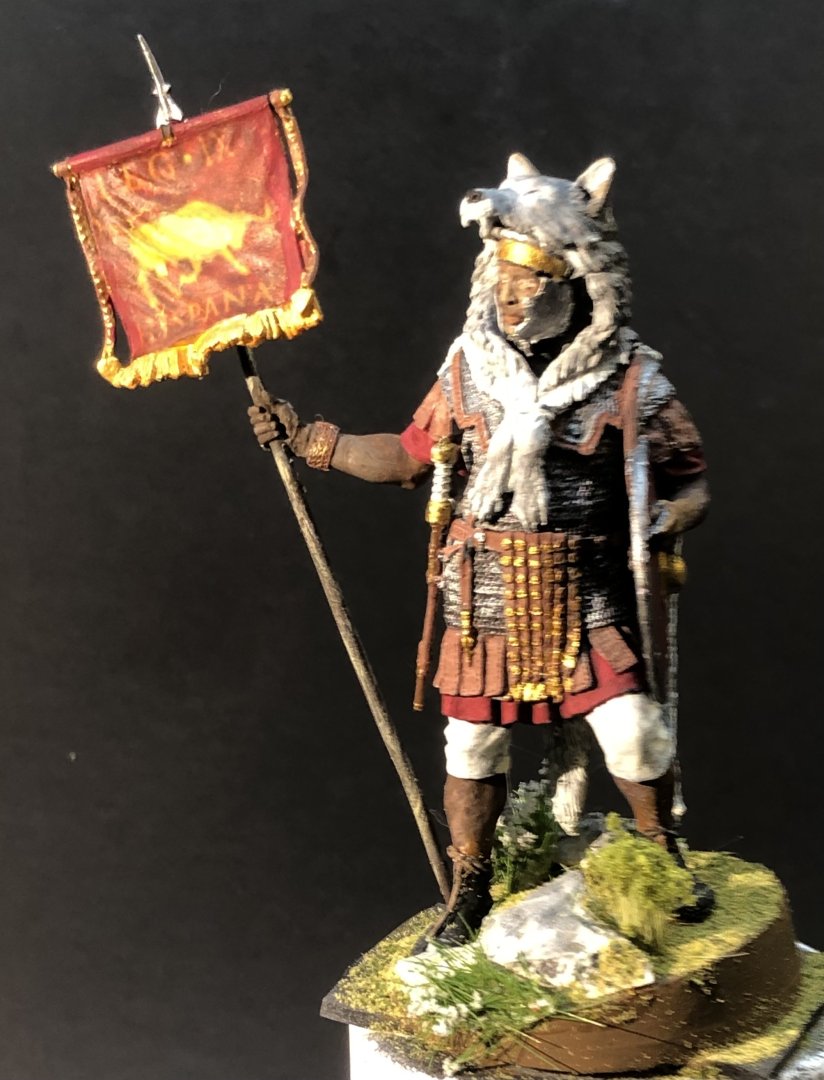
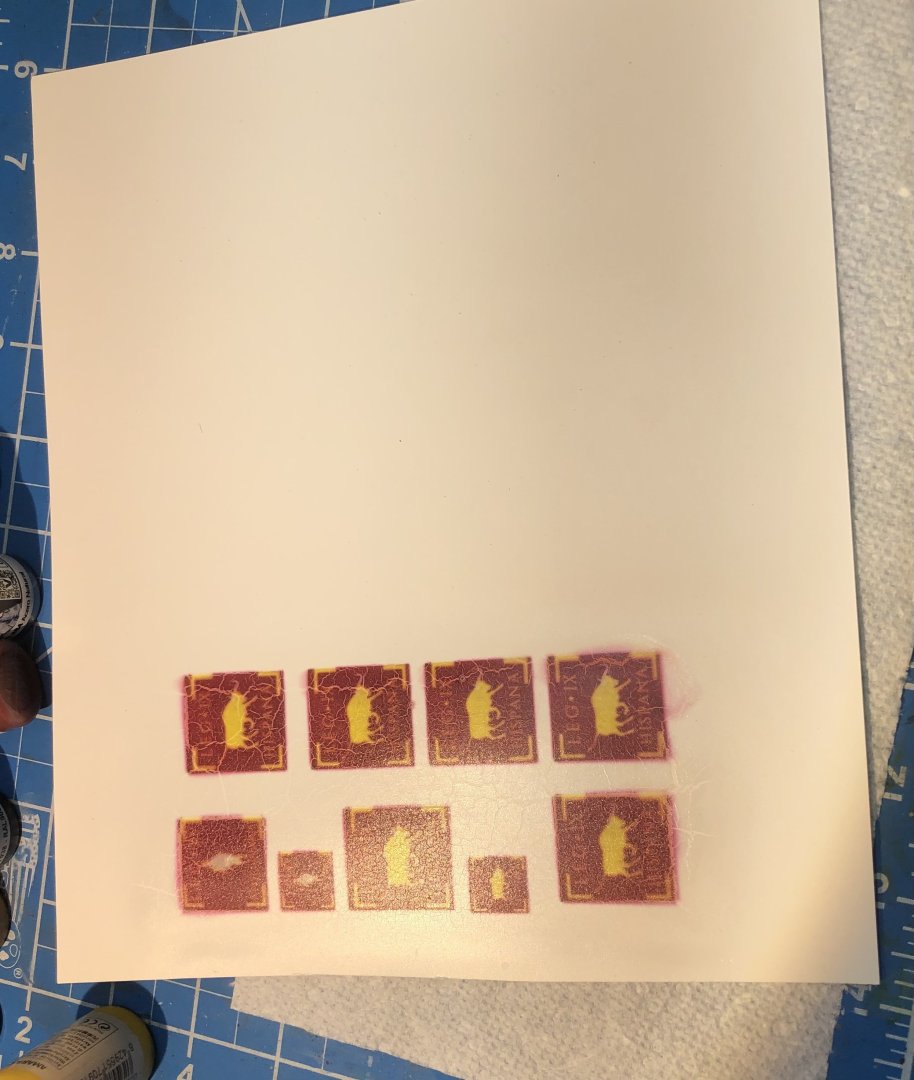
Please excuse my absence. I’ve been learning the art of using inkjet decal paper which wasn’t as easy as I expected along with a sizable detour into printer troubleshooting. I had found a suitable Roman legion standard and embedded several copies of the image in a PowerPoint file and the test print on regular paper looked good so I loaded the decal paper which turned out to be A4 size. No problem, I changed the paper size setting and printed. The print came out black, not even grayscale. I worked through all the primer control settings and couldn’t get color printing back. I spent most of Saturday and Sunday working on printer drivers, alternative software and reading inappropriate solutions. I was about to hit checkout on Amazon for a new printer but thought I would try one more time to delete and restore the printer - and it worked. So now I have the required images sized and printed on decal paper but the inkjet ink is water soluble so needs protection. I have a few clear coats but they are too thick to airbrush. I ended up using AK matte acrylic varnish diluted with water which worked although the ink took on a crackle finish after drying. I need to find something better next time. I painted a base coat of yellow onto the blank standard because the decal paper is clear and the yellow part of the image was lost against the primer on the standard. So here we have the standard of Legio IX Hispana. A little sun faded but somehow the crackle finish has disappeared. I think a legion that was stationed in Hispania might have had Nubian legionaries. Legion IX is the “Lost Legion” disappearing from the Roman records in AD 120, possibly being annihilated in combat in northern Britain. I think I will repaint the side pieces of the standard as leather and add the brass studs rather then show them as gold ropes. As an antidote to the decal / printer craziness I worked on the wolf skin. I added neutral grey to the pelt and while it was still wet I blended light brown down the back and up to the ears. I picked out the nose and eye holes in black. I just need to whiten the teeth. Thanks for looking in, the likes and comments. Alan


-
Thank you OC, this is turning out to be a bit of a favorite. I hadn’t been terribly drawn to Roman figures but this one is definitely fun. alan
-
Thank you. HMS Ajax should build into a beautiful ship. As a deluxe kit I assume it has metal barrels as well as plenty of PE. The Flyhawk instructions are definitely idiosyncratic. The long strip of several illustrations is a bit unwieldy and the small size is a challenge. As far as I can tell there is really no logic to the colour coding although on the bigger ships where there are a significant number of small details in a given area they show each part number in a series of boxed illustrations, ventilators, hoists, depth charges, lockers for example and then assign each a color. The main illustration then shows each part in the corresponding color. Otherwise they sometimes use a color just to make it easier to see the placement. One thing to watch out for with the deluxe kits is the separate instructions for the PE. The main instructions don’t reference any of the PE parts so it worth studying both sets of instructions and working out how the PE integrates into the build. If is complex I often mark up the main instructions with highlighter. I hope this helps a bit. Good luck alan
-
The paint looks really nice and the extra details like the chart are great. alan
- 74 replies
-
- 2
-

-

-
- Nordkap
- Billing Boats
- (and 2 more)
-
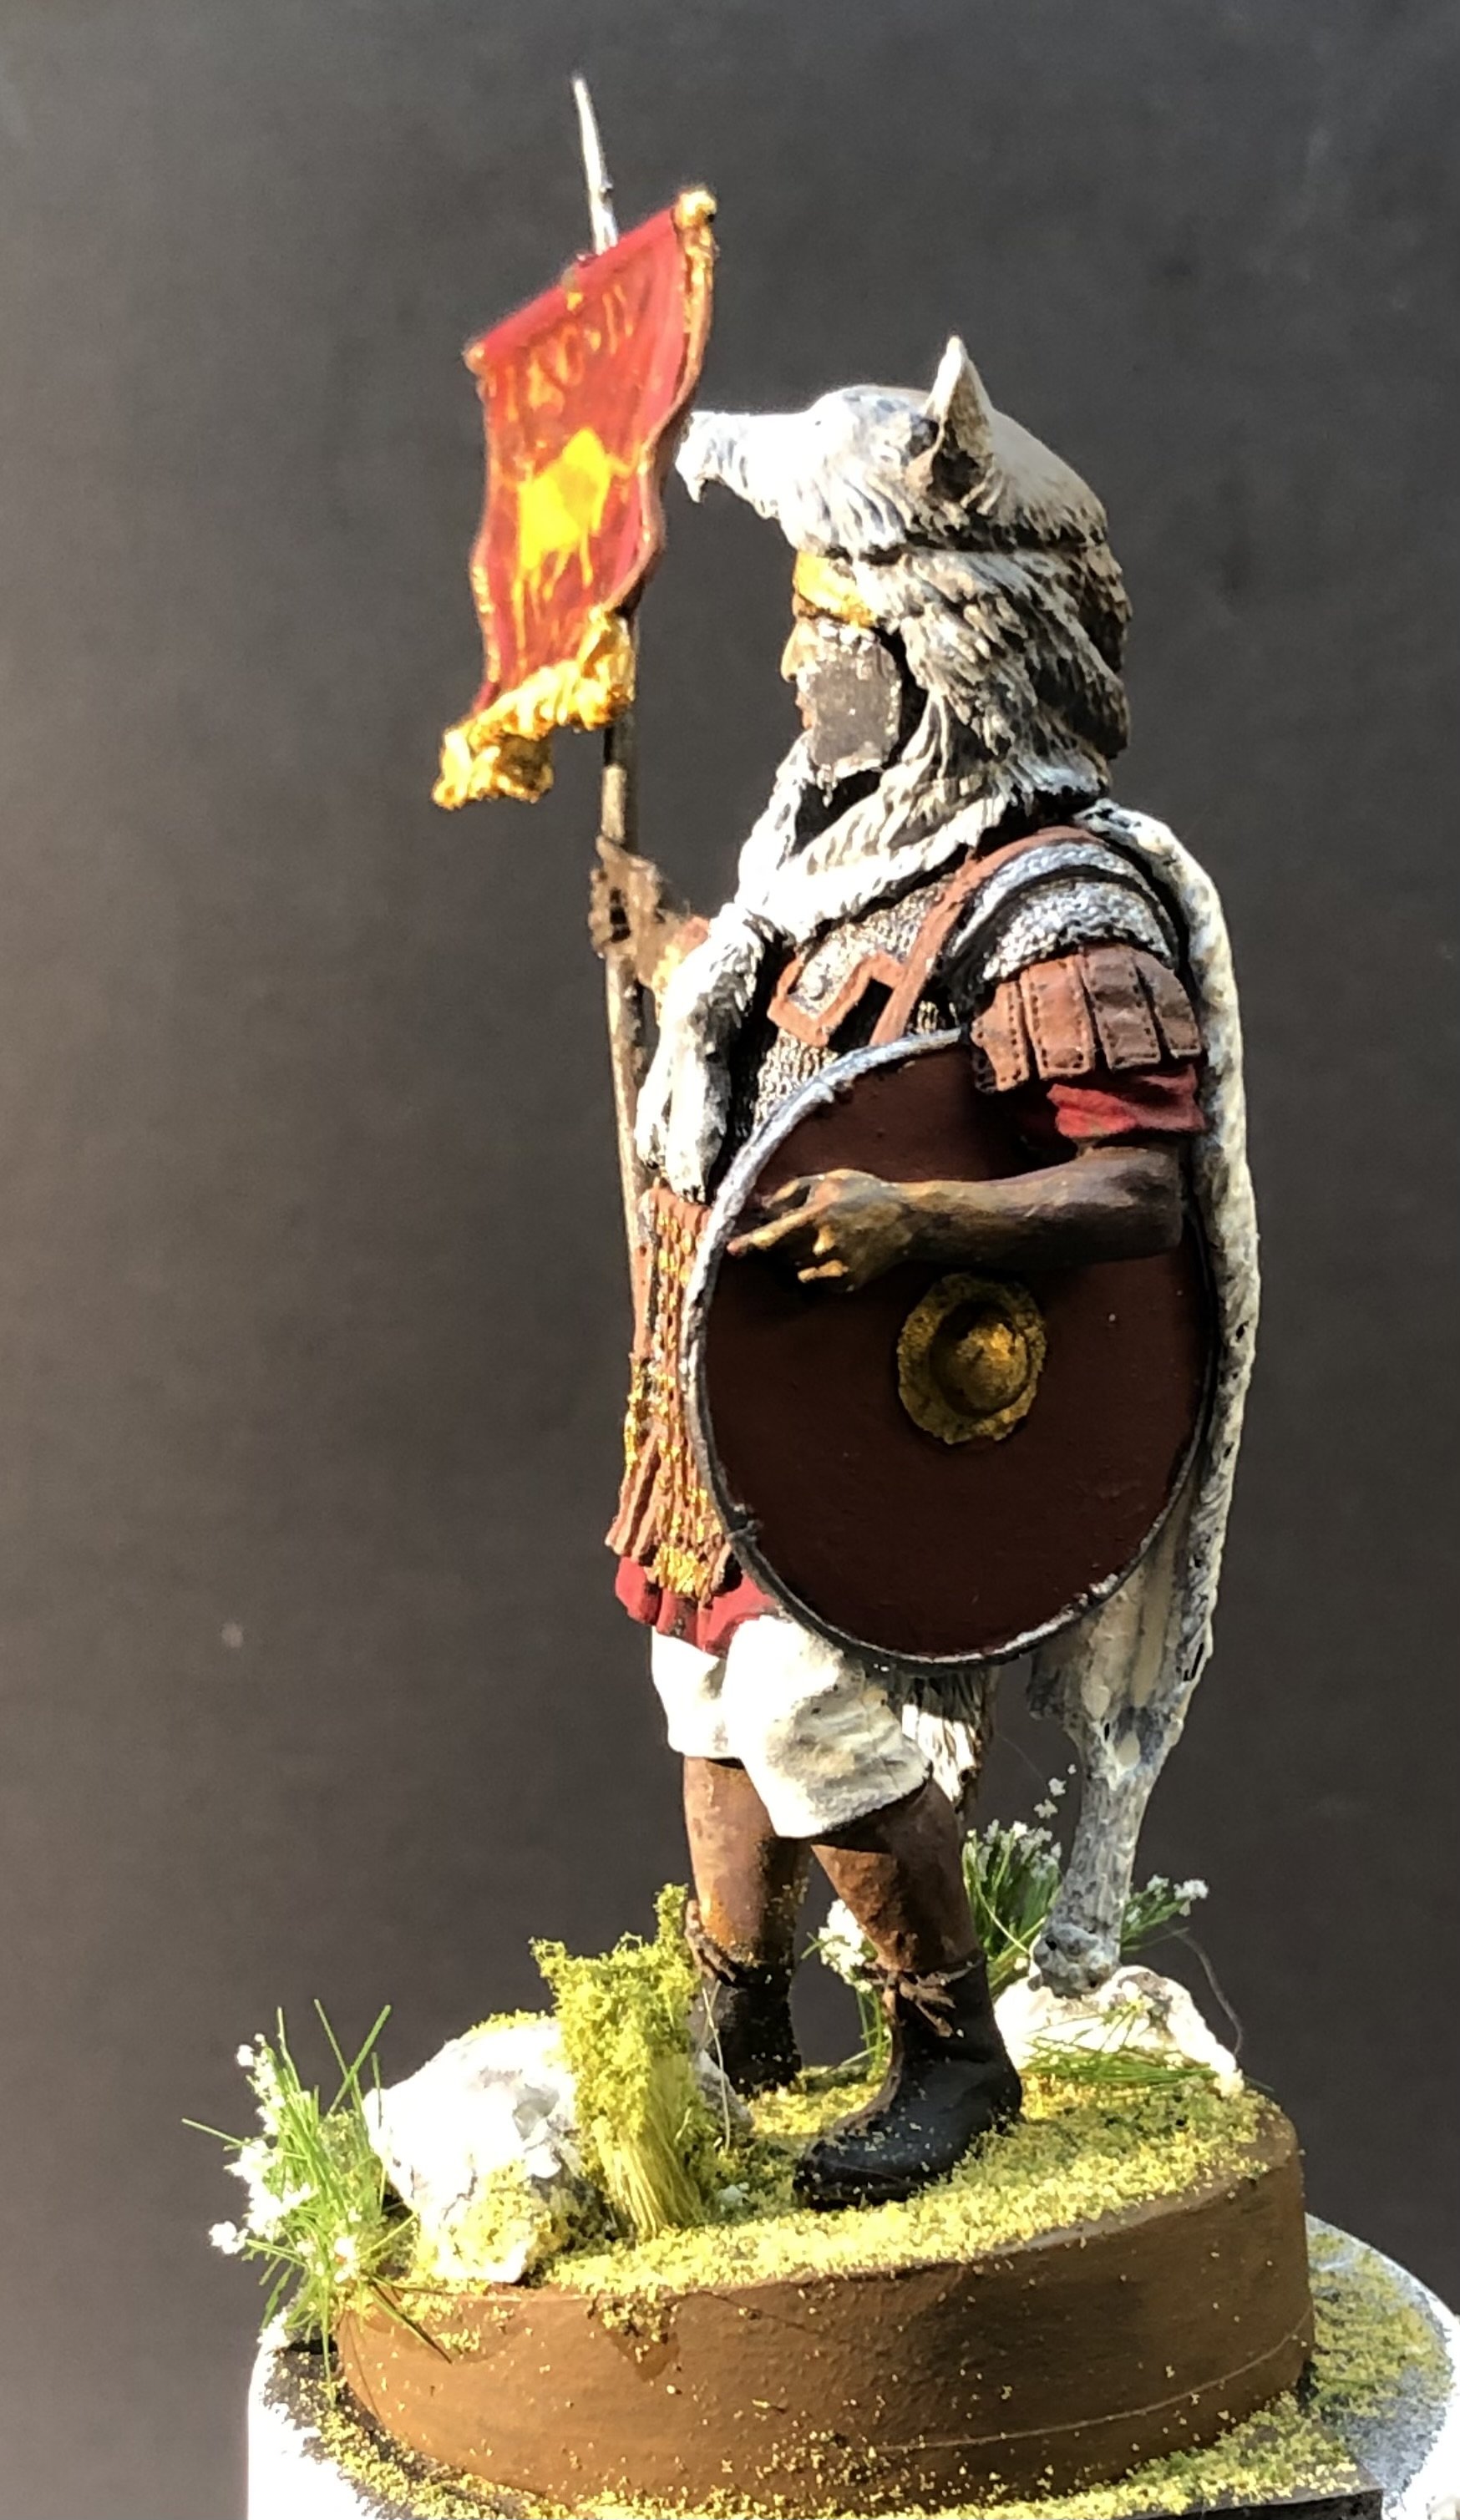
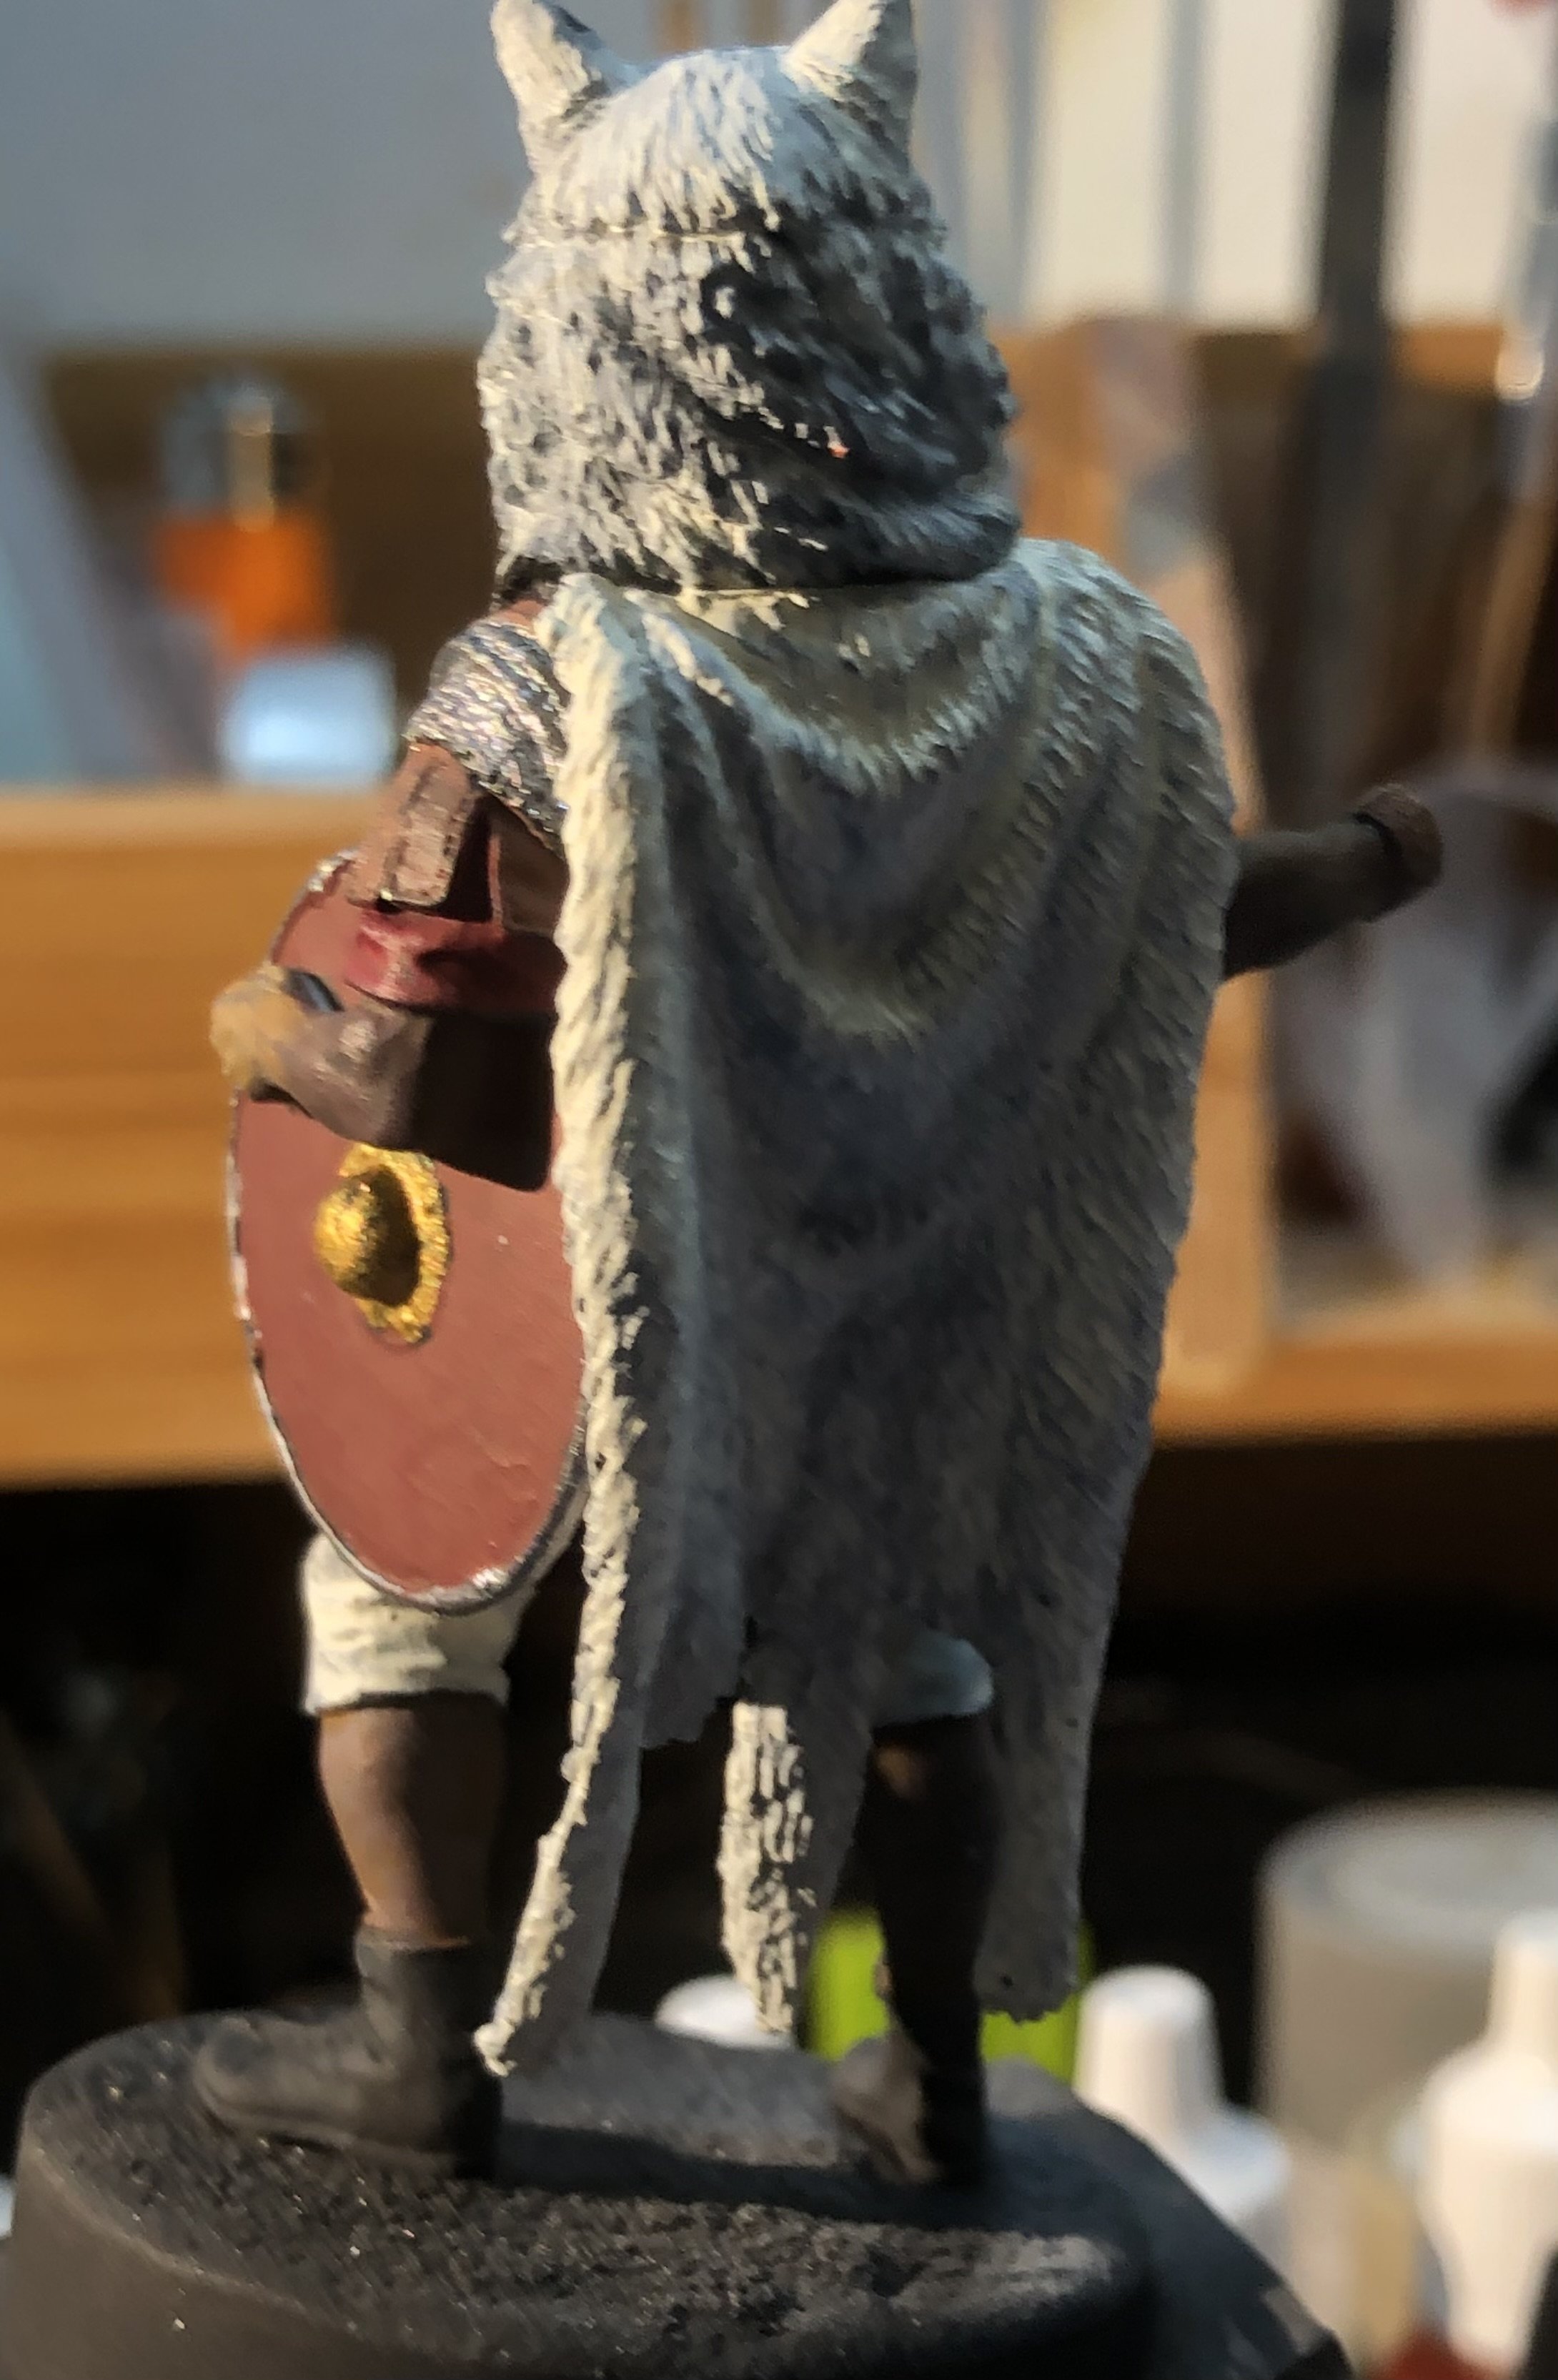
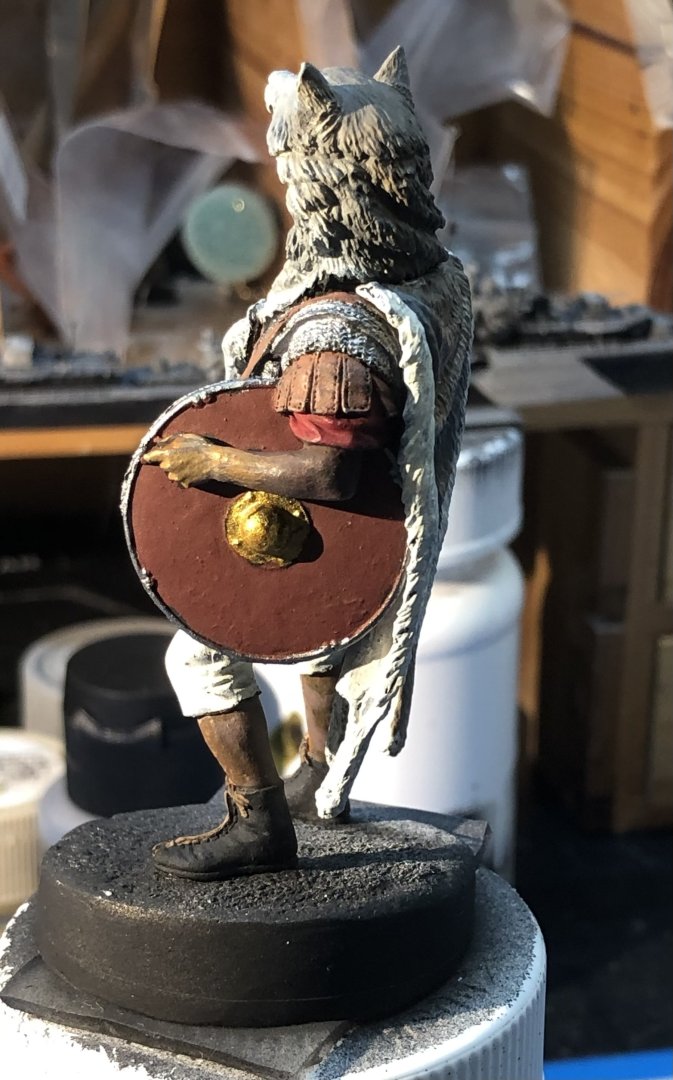
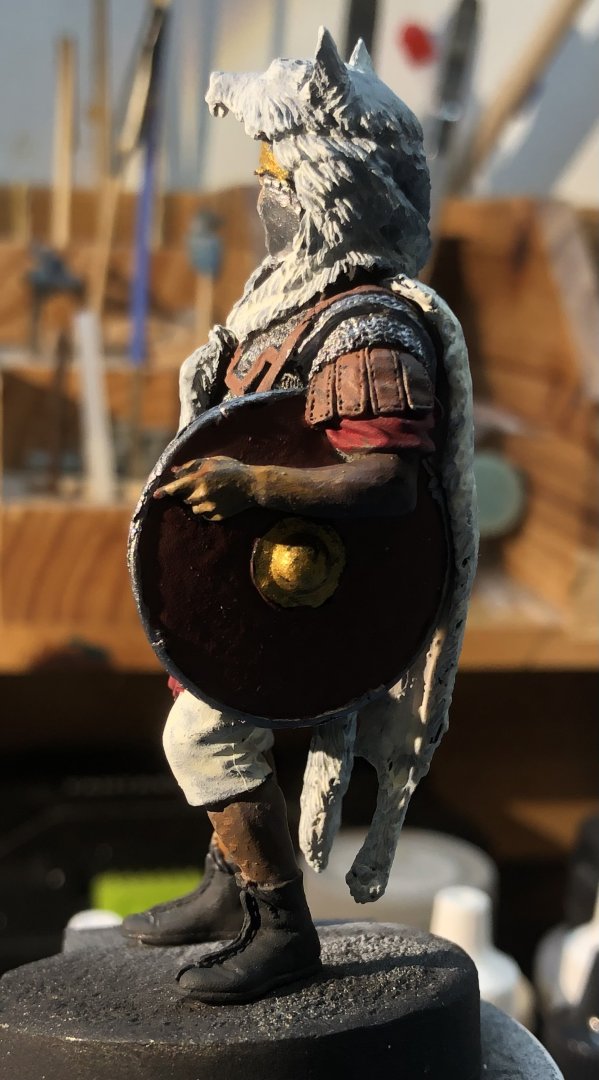
For some reason I didn’t feel the enthusiasm to weather HMS Kelly even though that’s usually my favorite part of the build. So, I thought I would add a bit to the Roman. I added the wolfs paws and painted the shield and left arm. The wolf skin got a series of glazes in ivory and the inside had a wash of brown to suggest the skin. The current state of the skin colours are not bad but I think I need to deepen the gray down the back and maybe add a touch of brown. I need to look for some wolf photos. Any wolf related advice is very welcome. The shield has been left plain. My references seem to suggest that is more probable than the designs shown and freehand painting them is well beyond my abilities. The left arm is attached so is the wolf skin too. Both went into place with ease and stayed put. I may add a little filler at the neck though. Then I need to fiddle with the standard and the decal paper. This is a great figure to paint. I would like to try some more of the Alexandros figures but the shipping from Europe is an issue. I still have a few Art Girona figures to keep me busy. Thanks for looking in, the likes and comments alan


-
Thank you very much OC. I think I will try another Roman figure. I tend to like the more relaxed poses rather than the action style. alan
-
Merkava III by mikegr - Revell - 1/72 - PLASTIC
king derelict replied to mikegr's topic in Non-ship/categorised builds
The wheels look very tidy. I have to agree with you about using Tamiya paint with the airbrush. Always seems consistent and easy. alan -
Thank you very much Andrew. I do have a couple of 1/350 Flower class corvettes for the big boy moment alan
-
Thank you very much Mike. I did mask the funnel and bridge and use the airbrush. I did have to go back with the brush and tidy up after I added the detail. This one doesn’t have a lot of PE details in those areas and what there were got added later. Very basic compared to your Akitsushima. alan
-
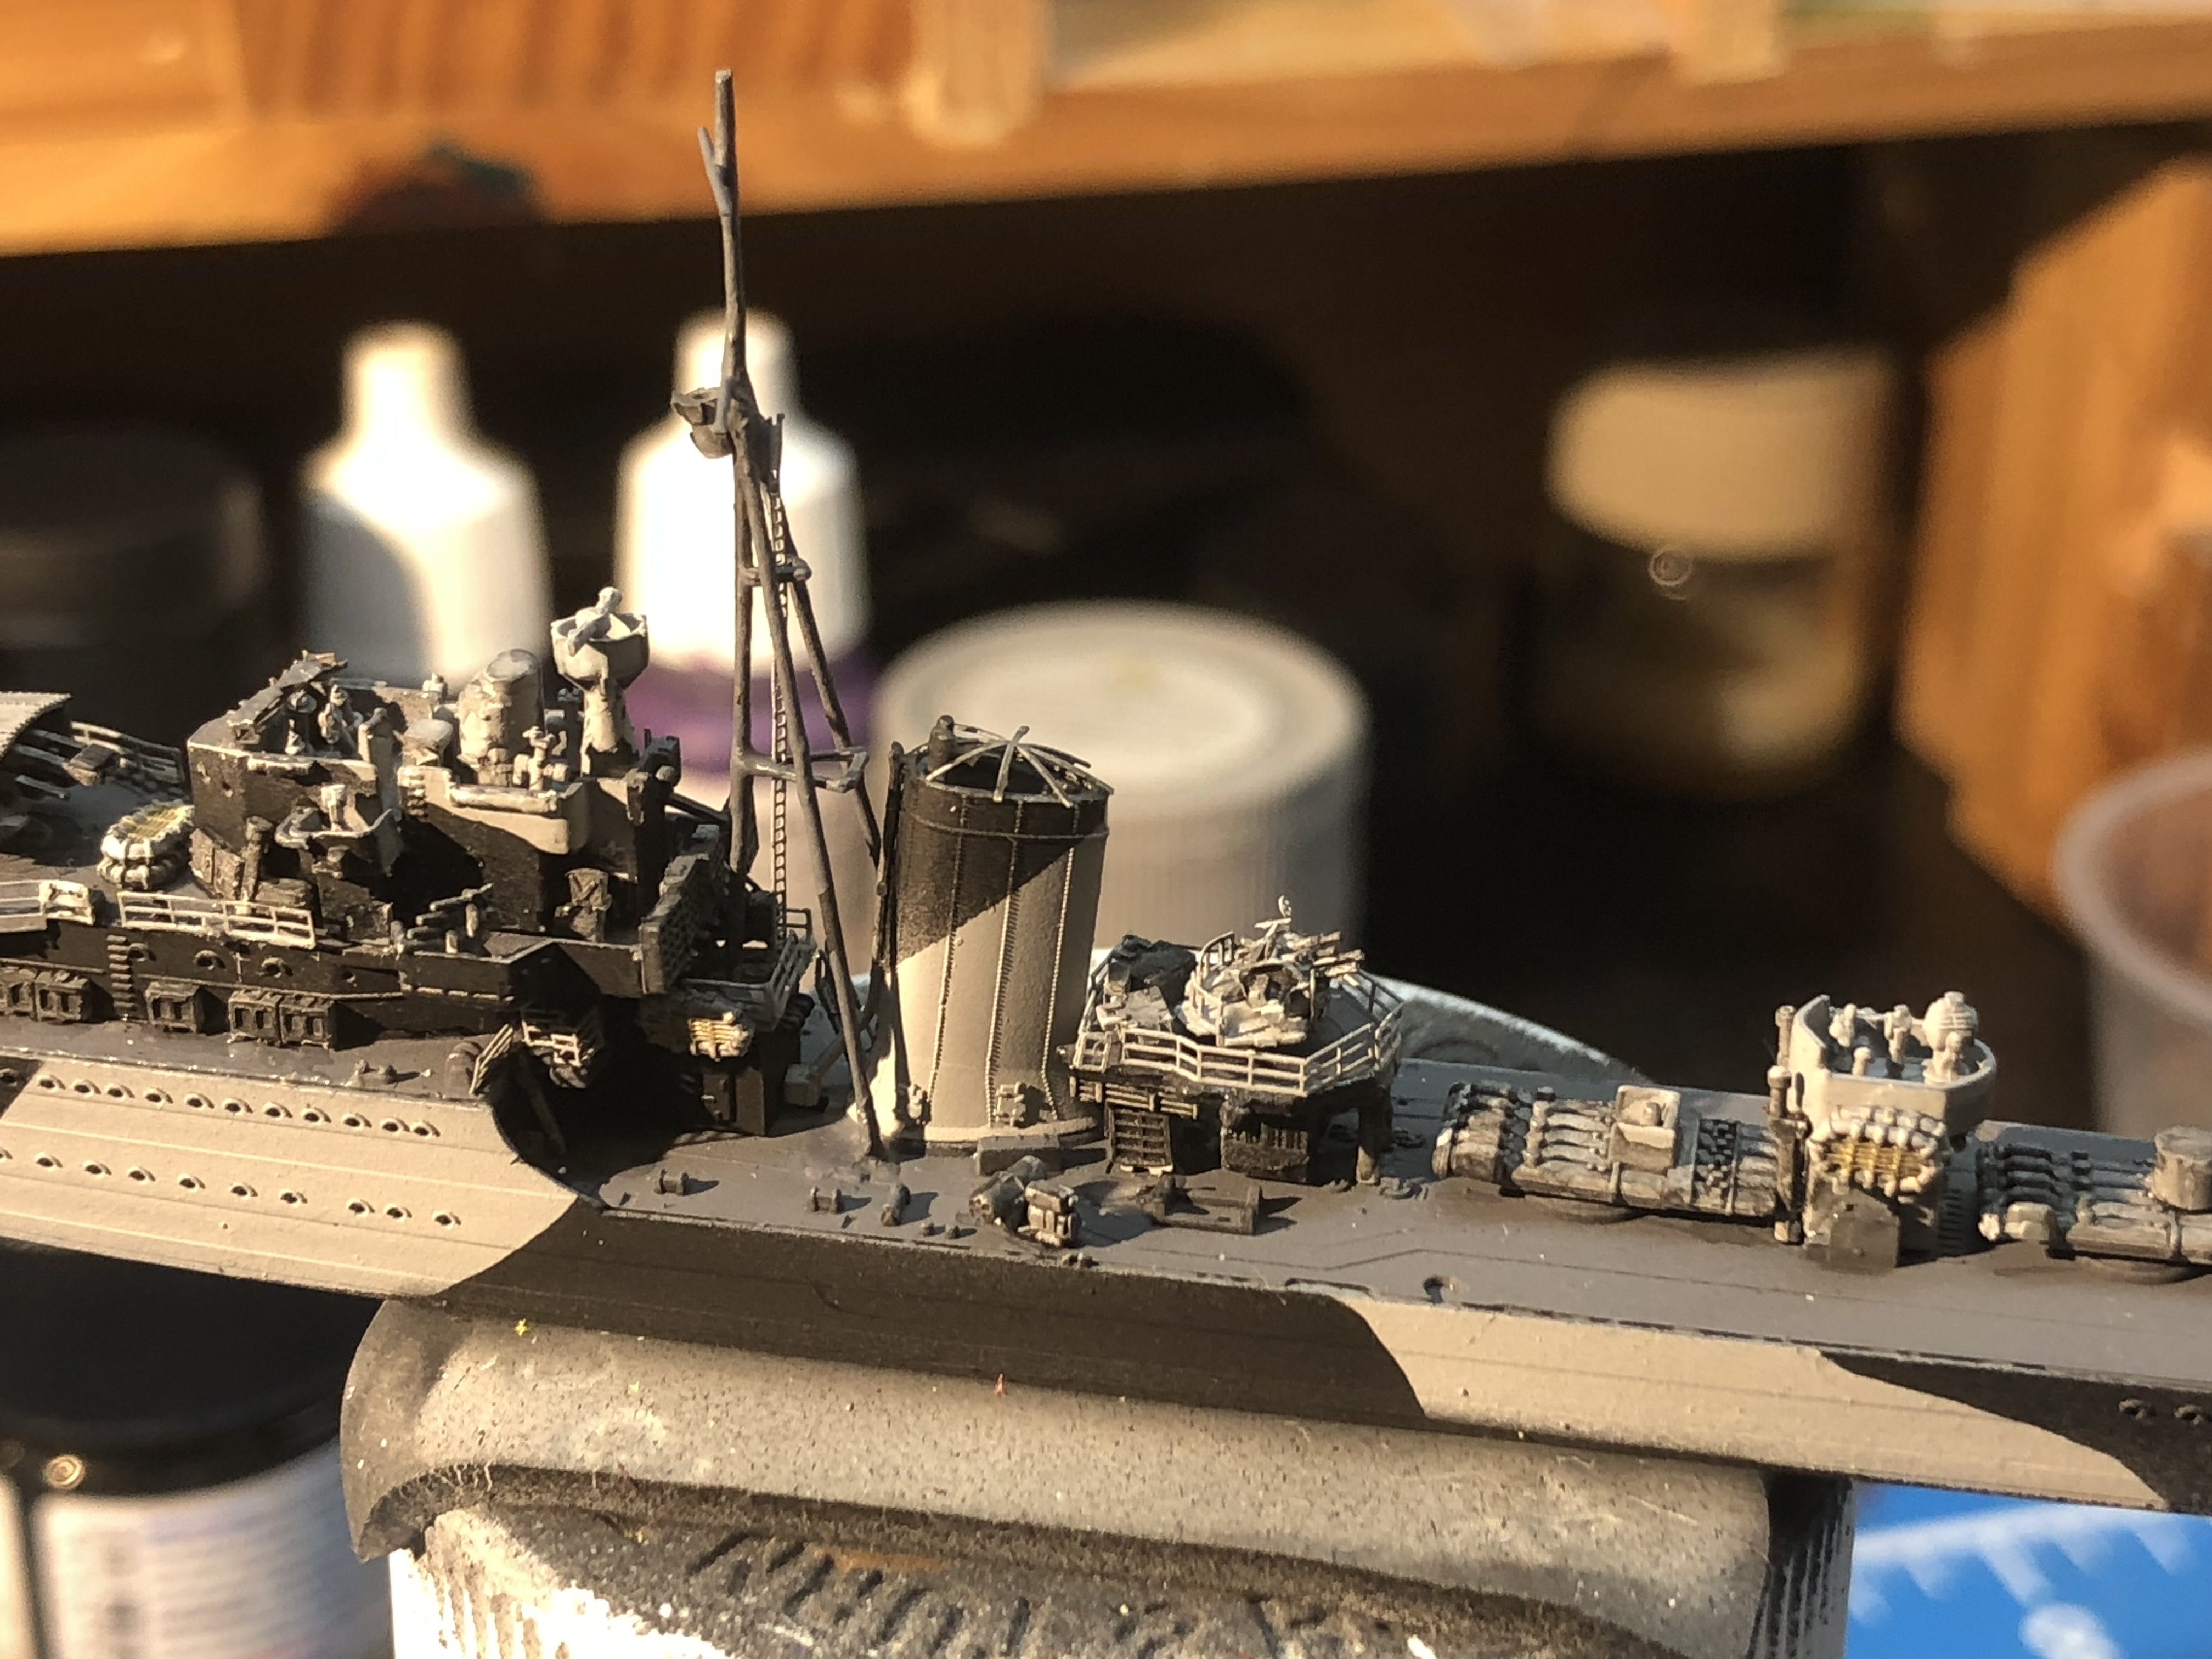
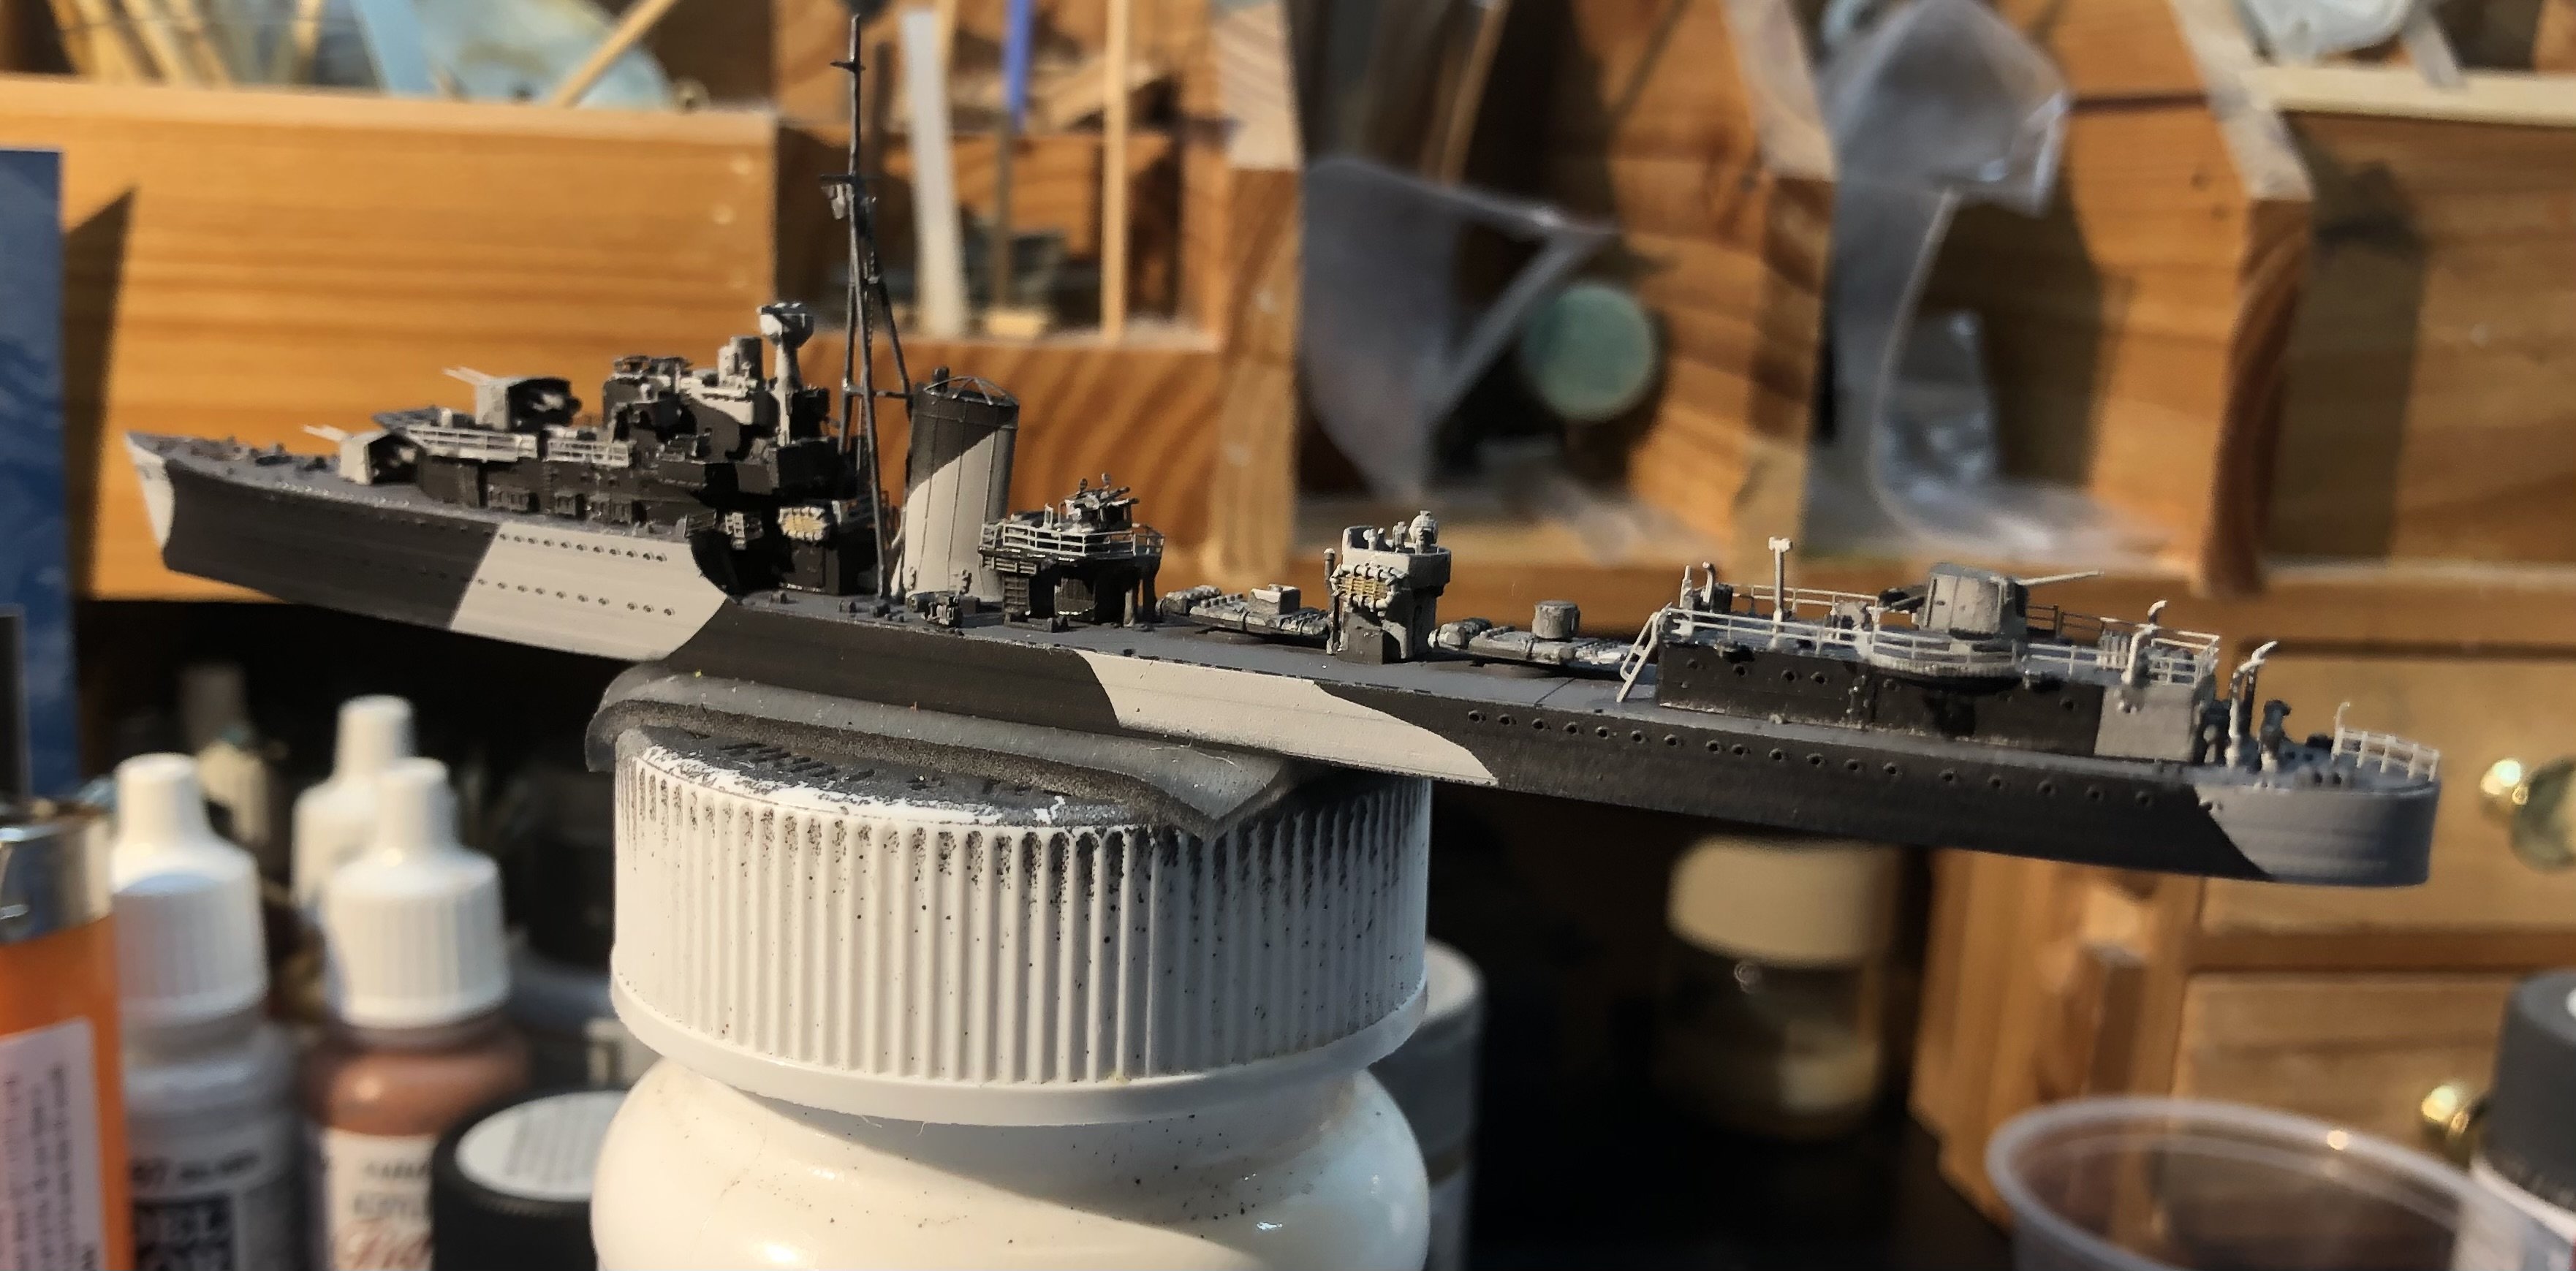
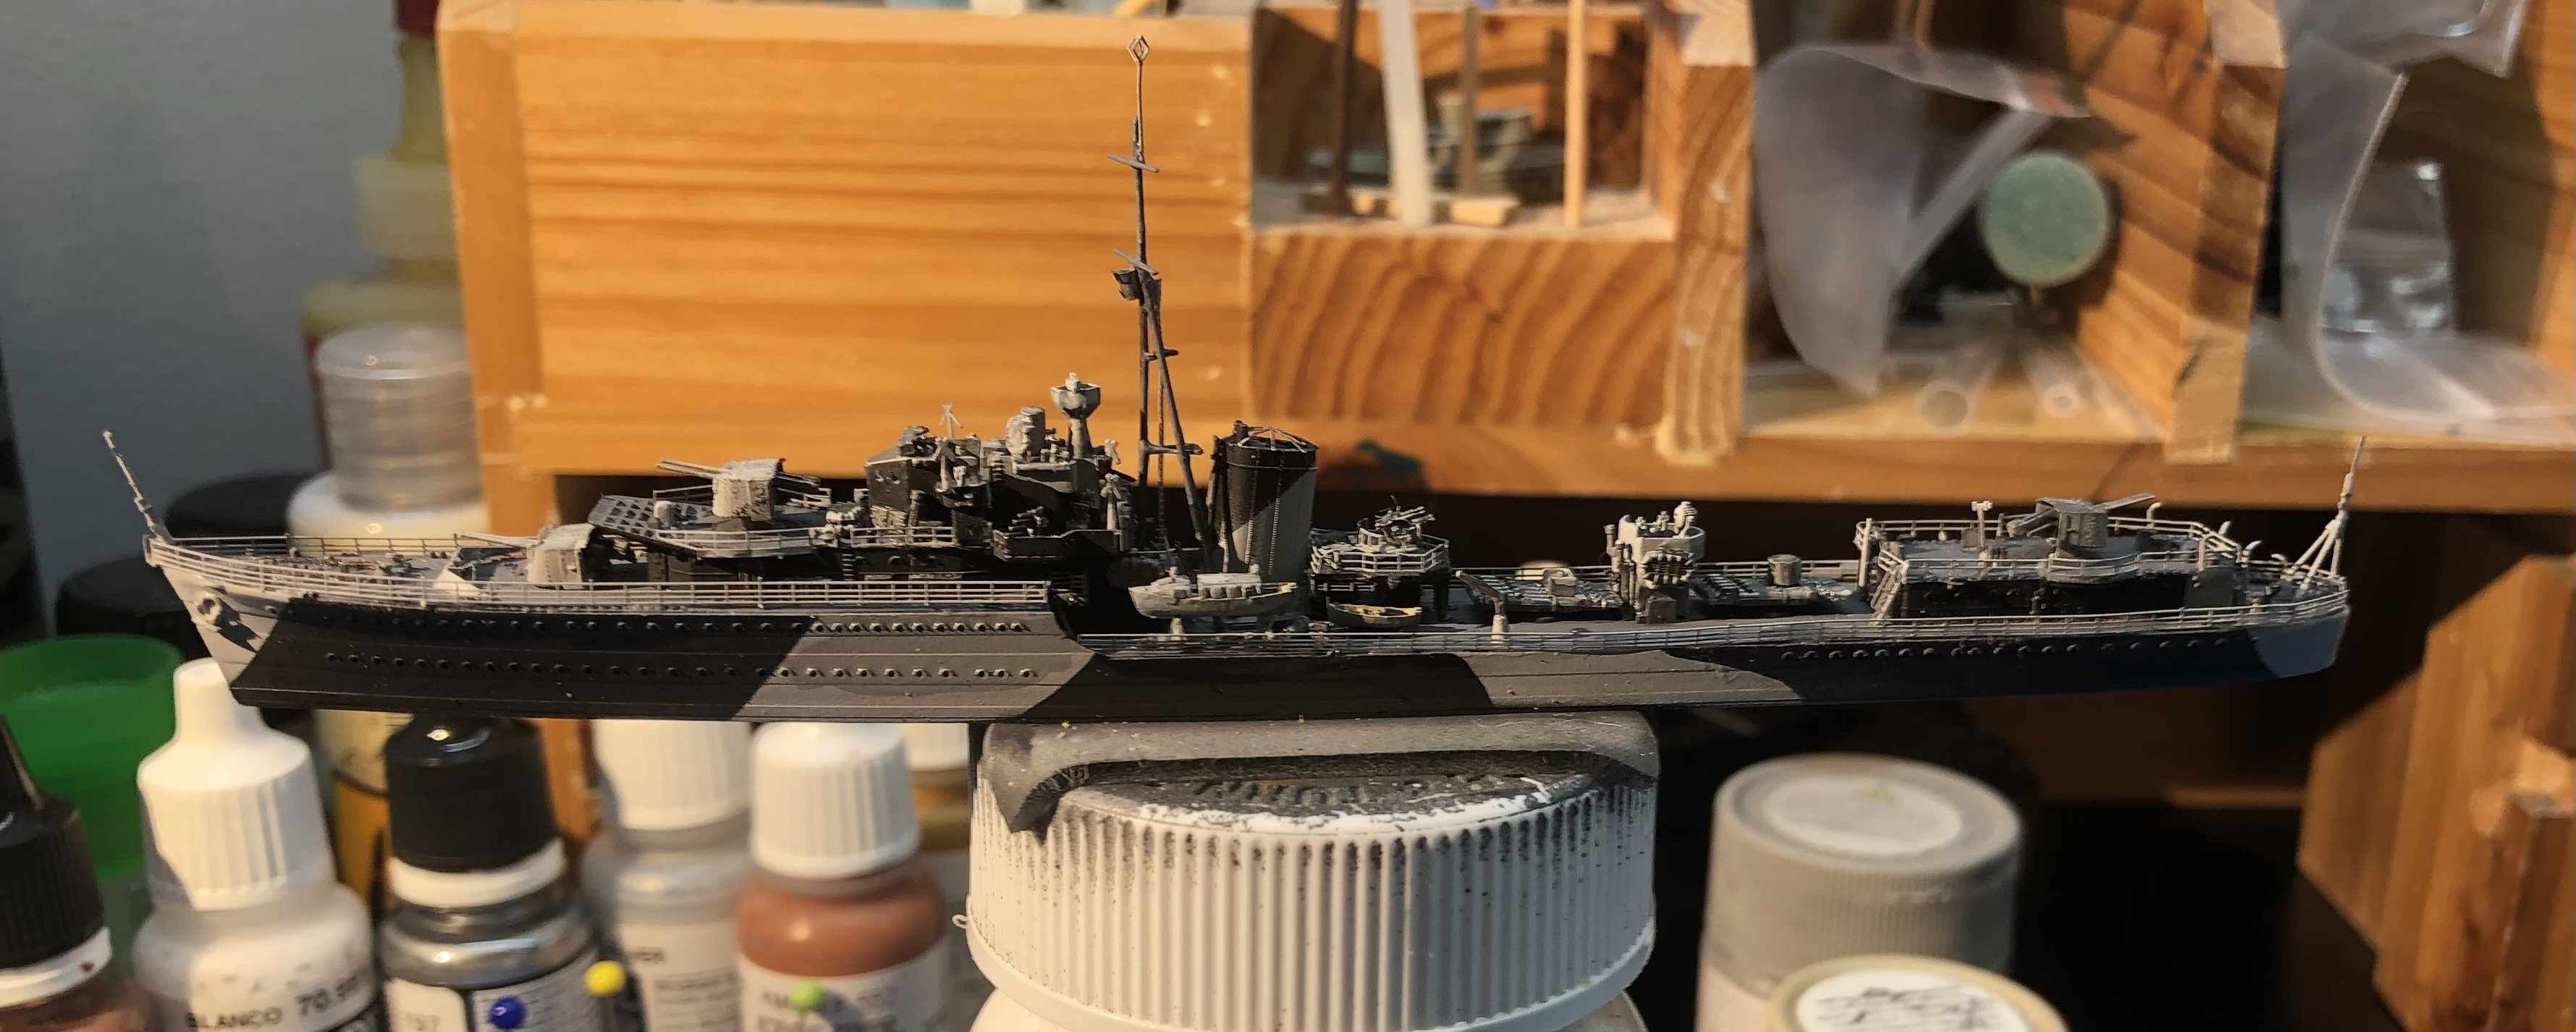
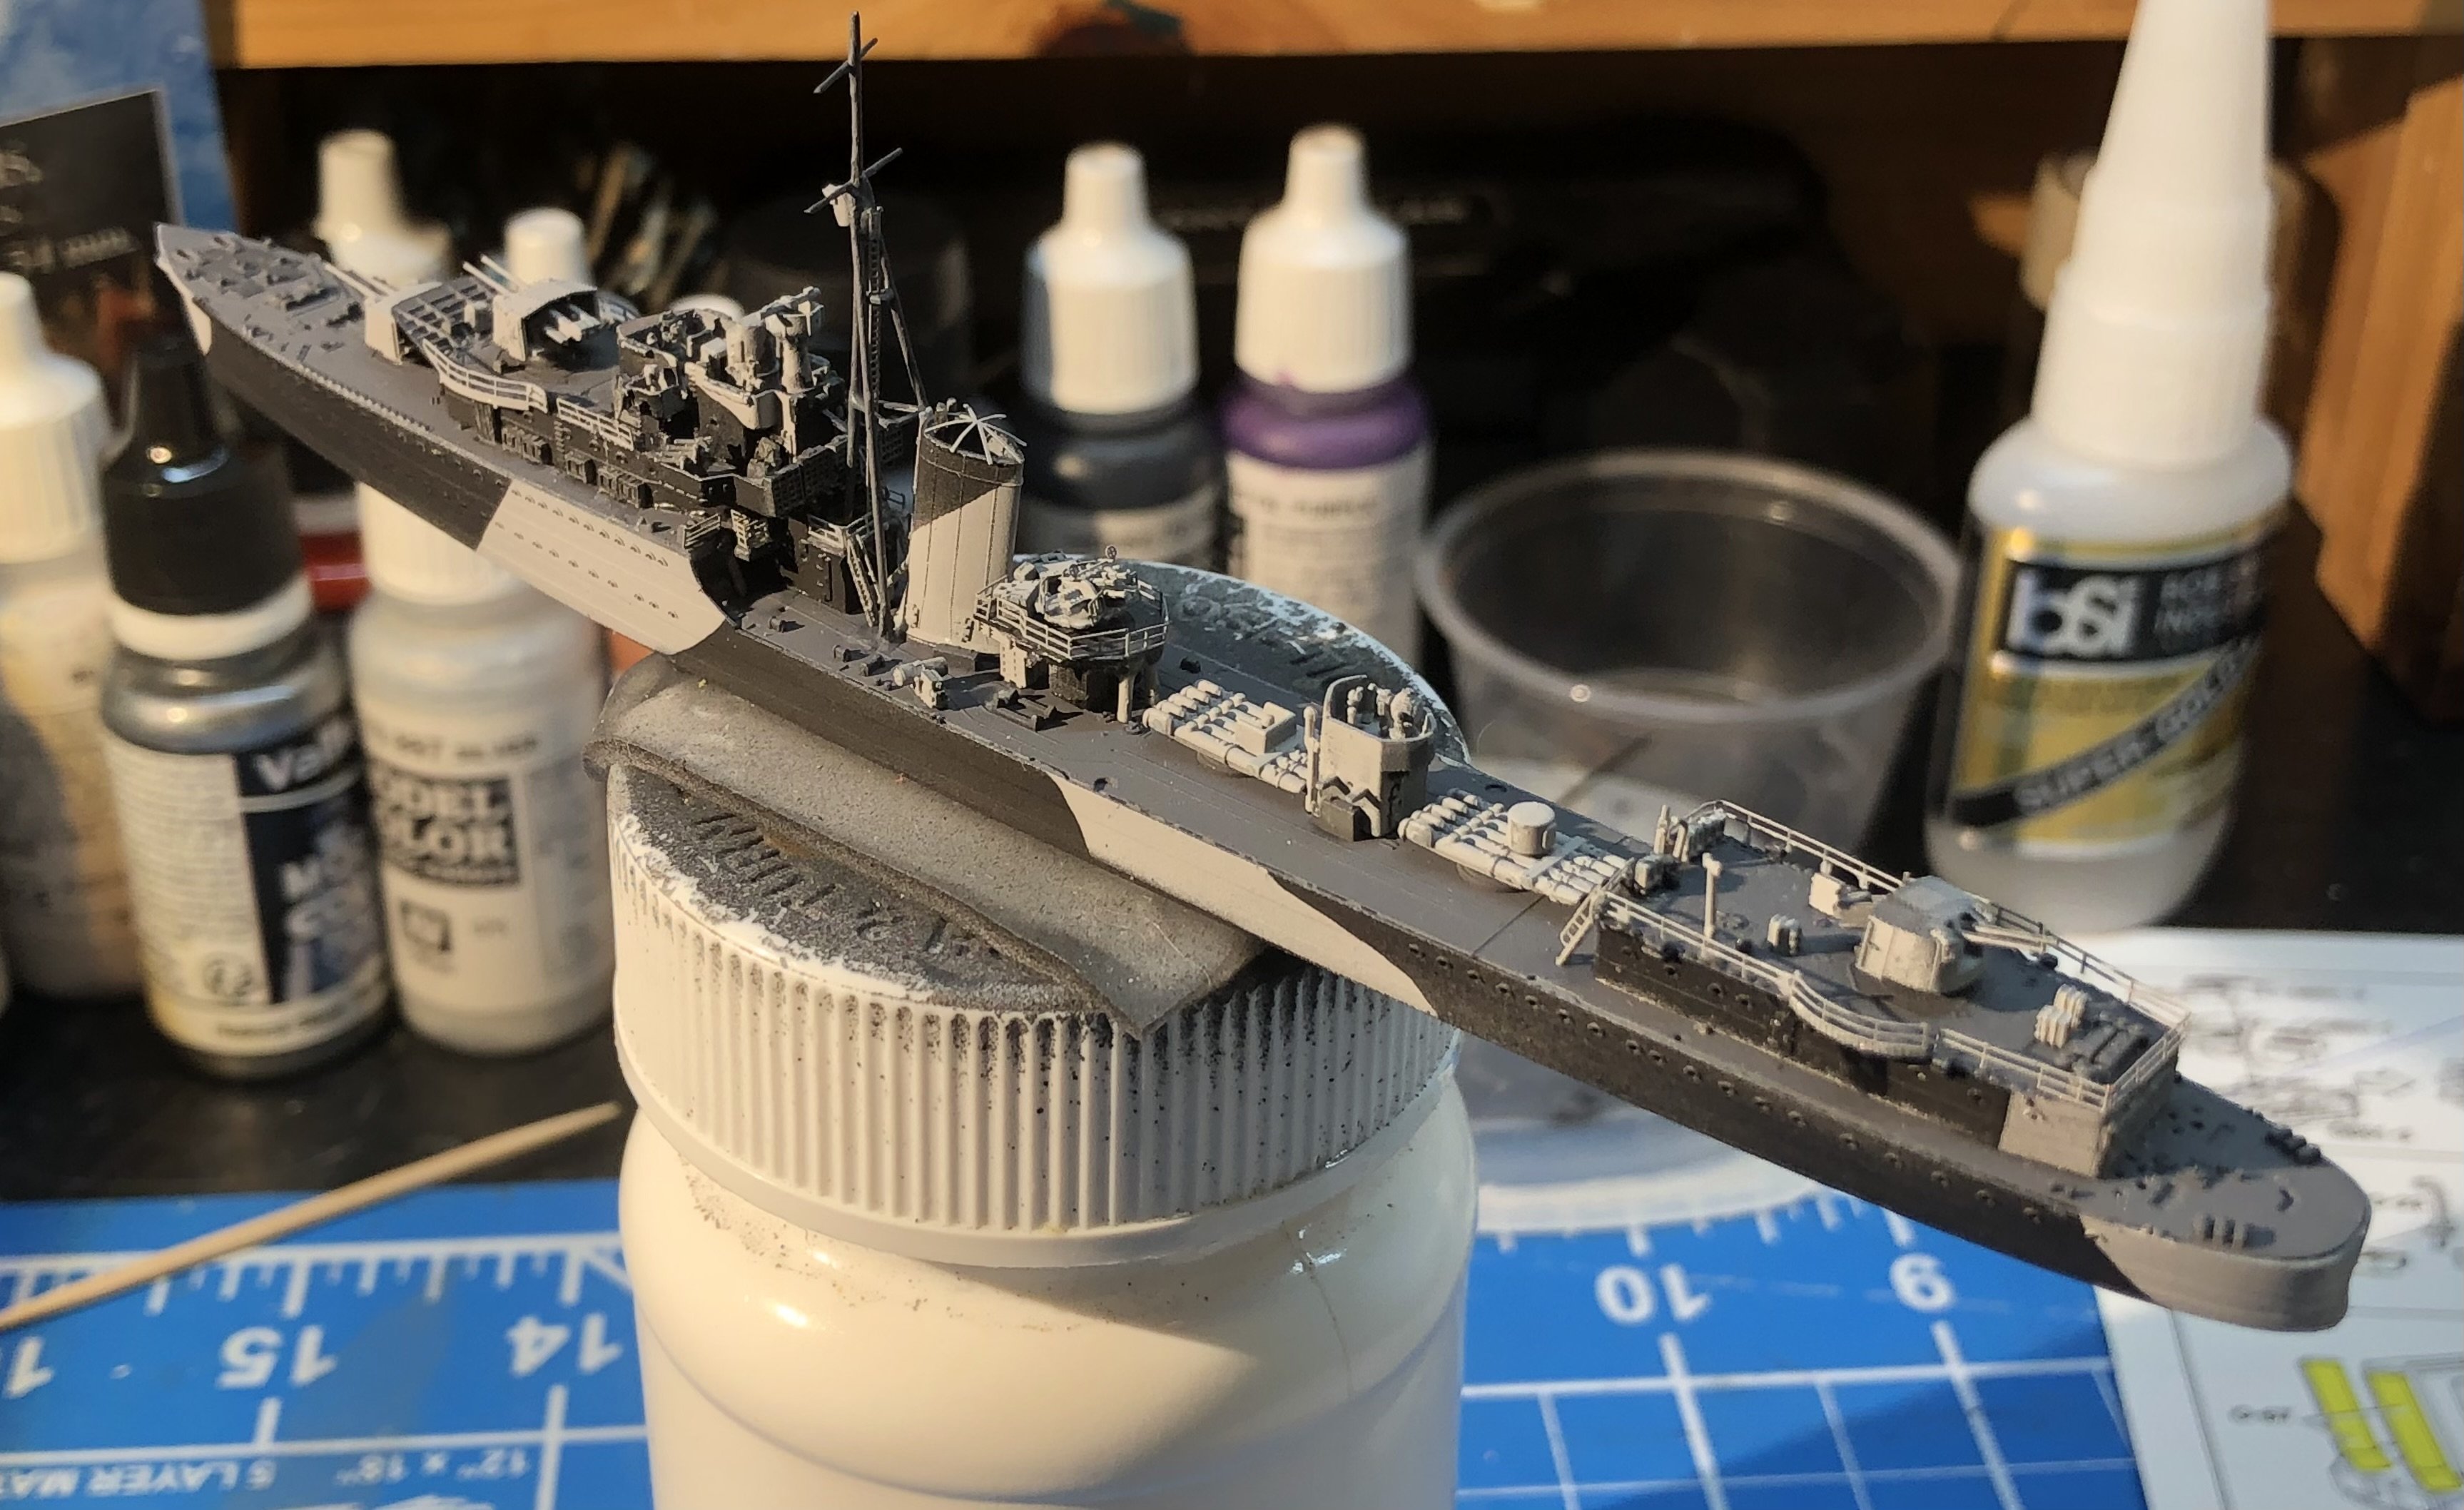
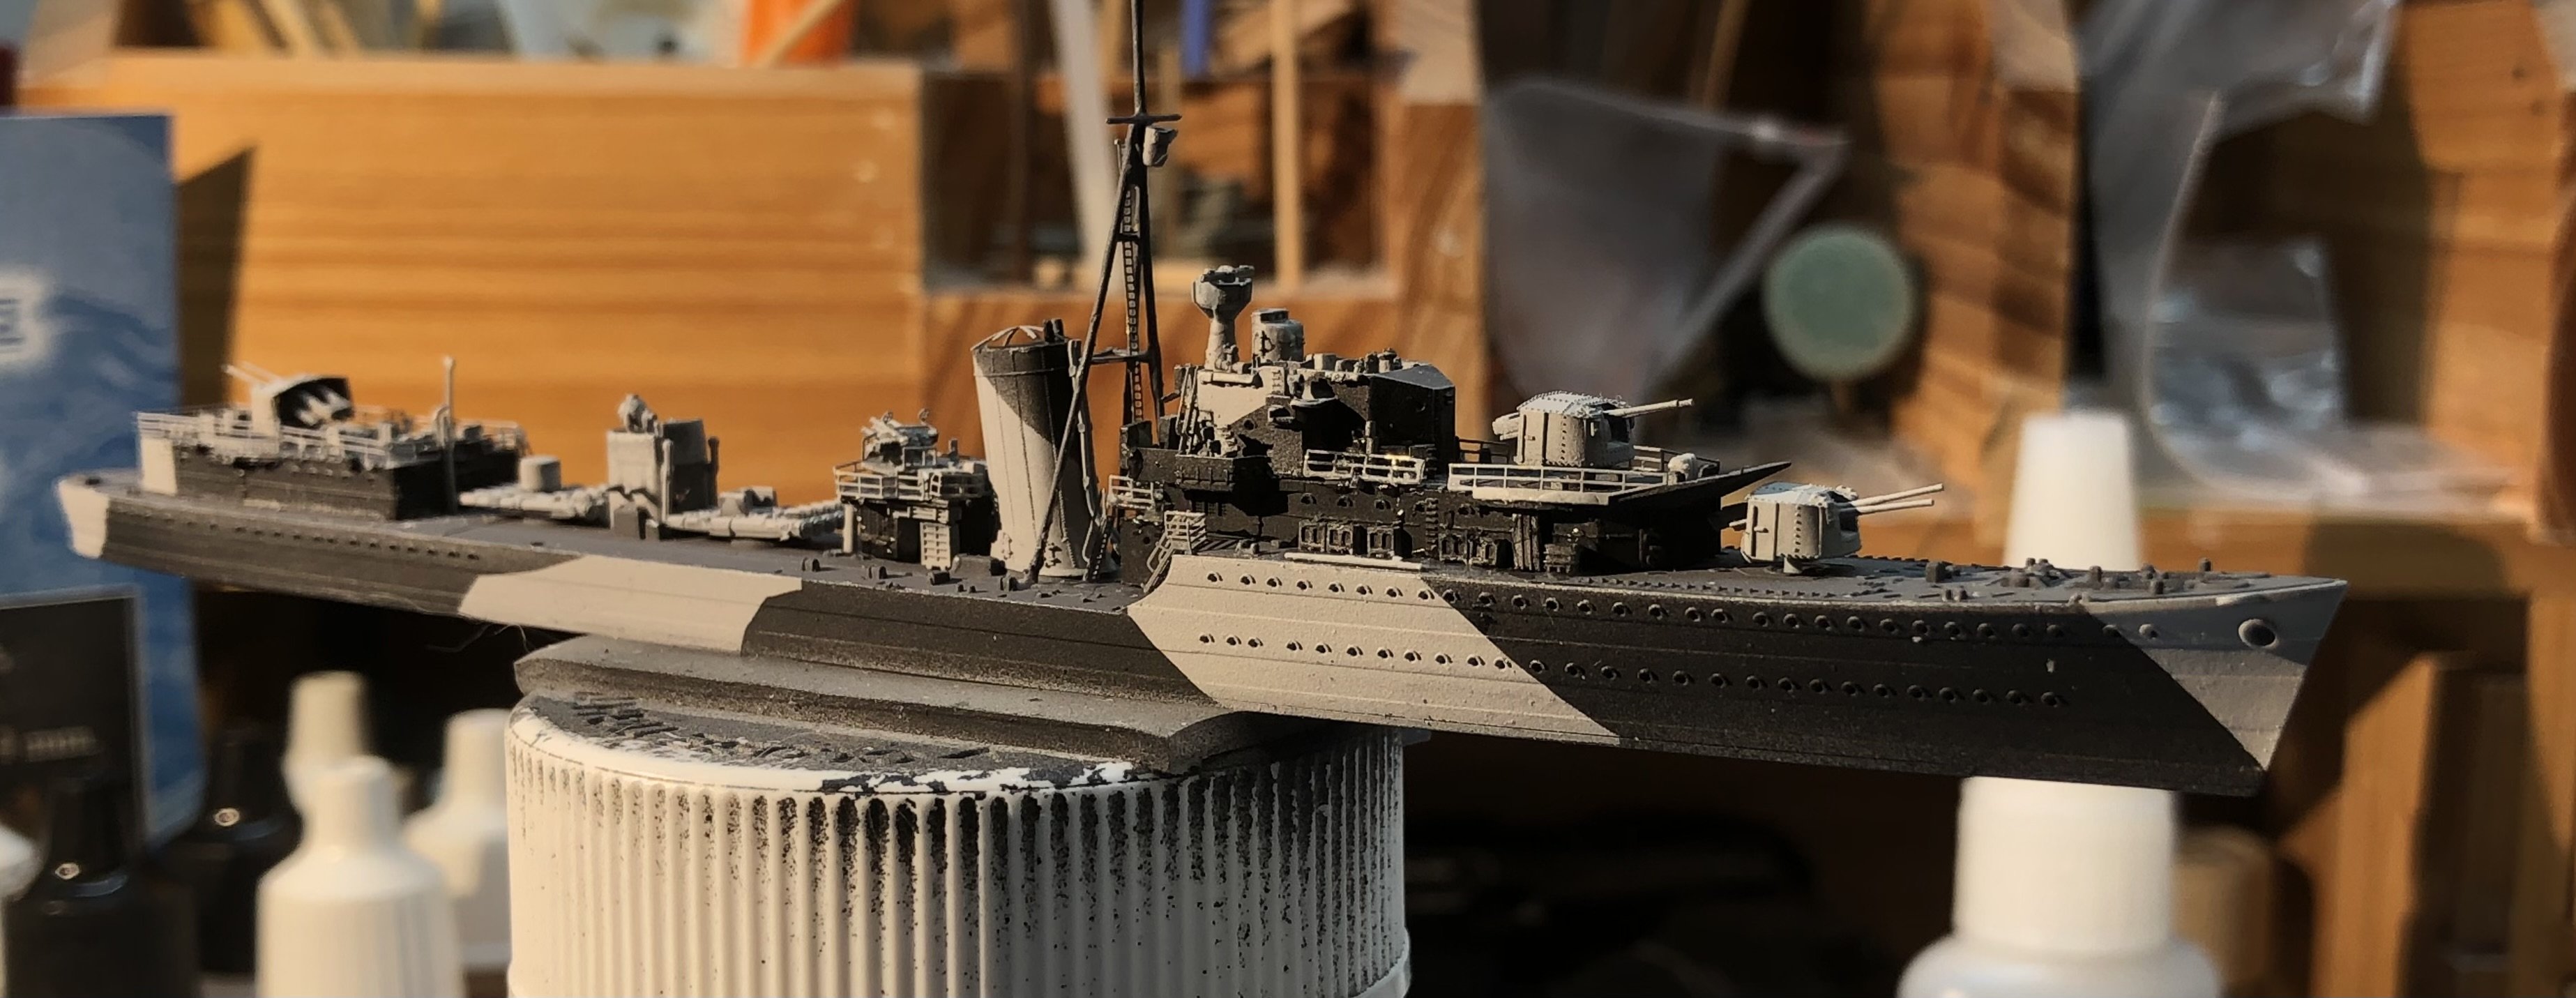
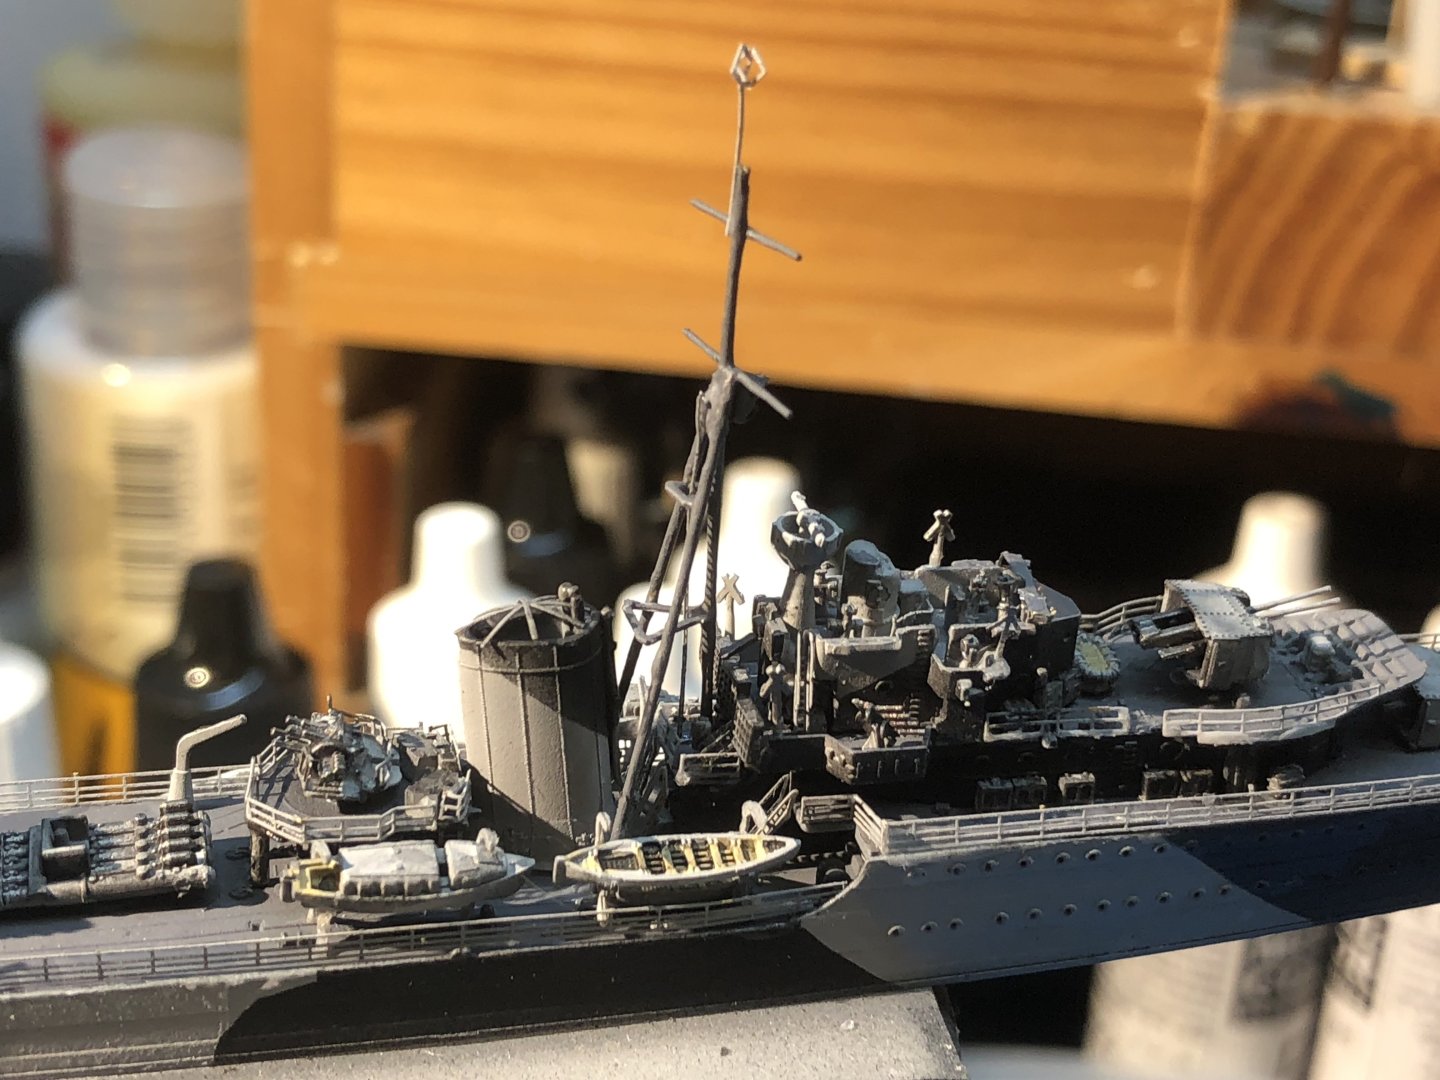
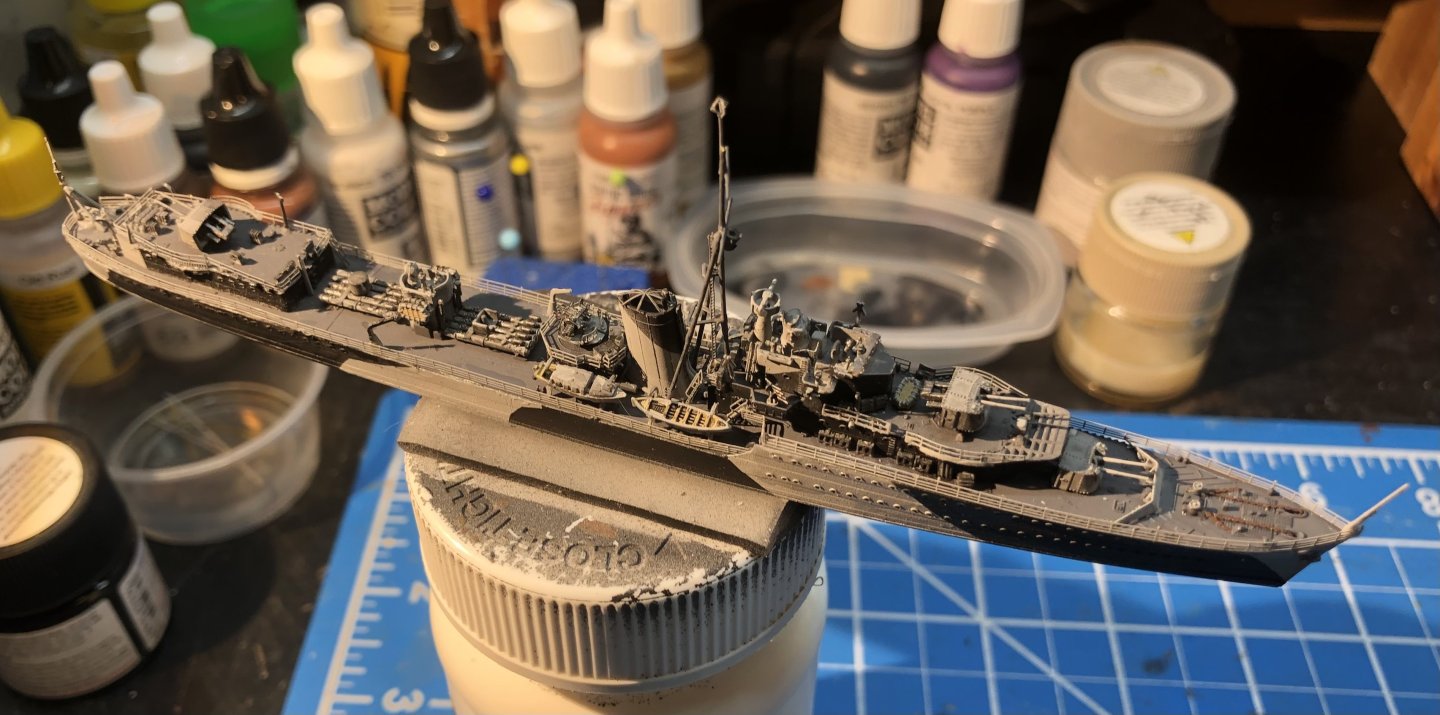
The details are now in place. It was a bit of a frustrating day at times. Place a boat, knock off a set of stairs, lose tiny pieces of PE etc. The boats and davits are in place. The PE fret has boarding ladders for the boats but they are almost invisible when added and it’s quite crowded around the boats so they have been omitted. The foredeck railings went on quite nicely but for some reason the main deck ones were a fight and one side is a little distorted. black wash has been added and a bit of dry brushed steel to bring up a few details like the tiny, tiny sights on the Bofors. I was planning to add the pennant number decals but the sheet only provides G61 and G85 which are HMS Javelin and HMS Jupiter. HMS Kelly is F01. It’s a bit of an odd kit in that respect. The main sprue has quite a lot of bits left so I think it covers other J/K destroyers. The PE instructions are pretty basic and the paint guide is poor. Neither it nor the box art show any pennant numbers. Tomorrow I will start the weathering of the hull. Thanks for looking in, the likes and comments. Alan


-
Thank you very much OC. No I think this one will be added to the crowd of destroyers in the display case. I am keen to work on it diorama though. alan
-
Looks like a nice kit Dan. Welcome back and I look forward to the progressing log. alan
-
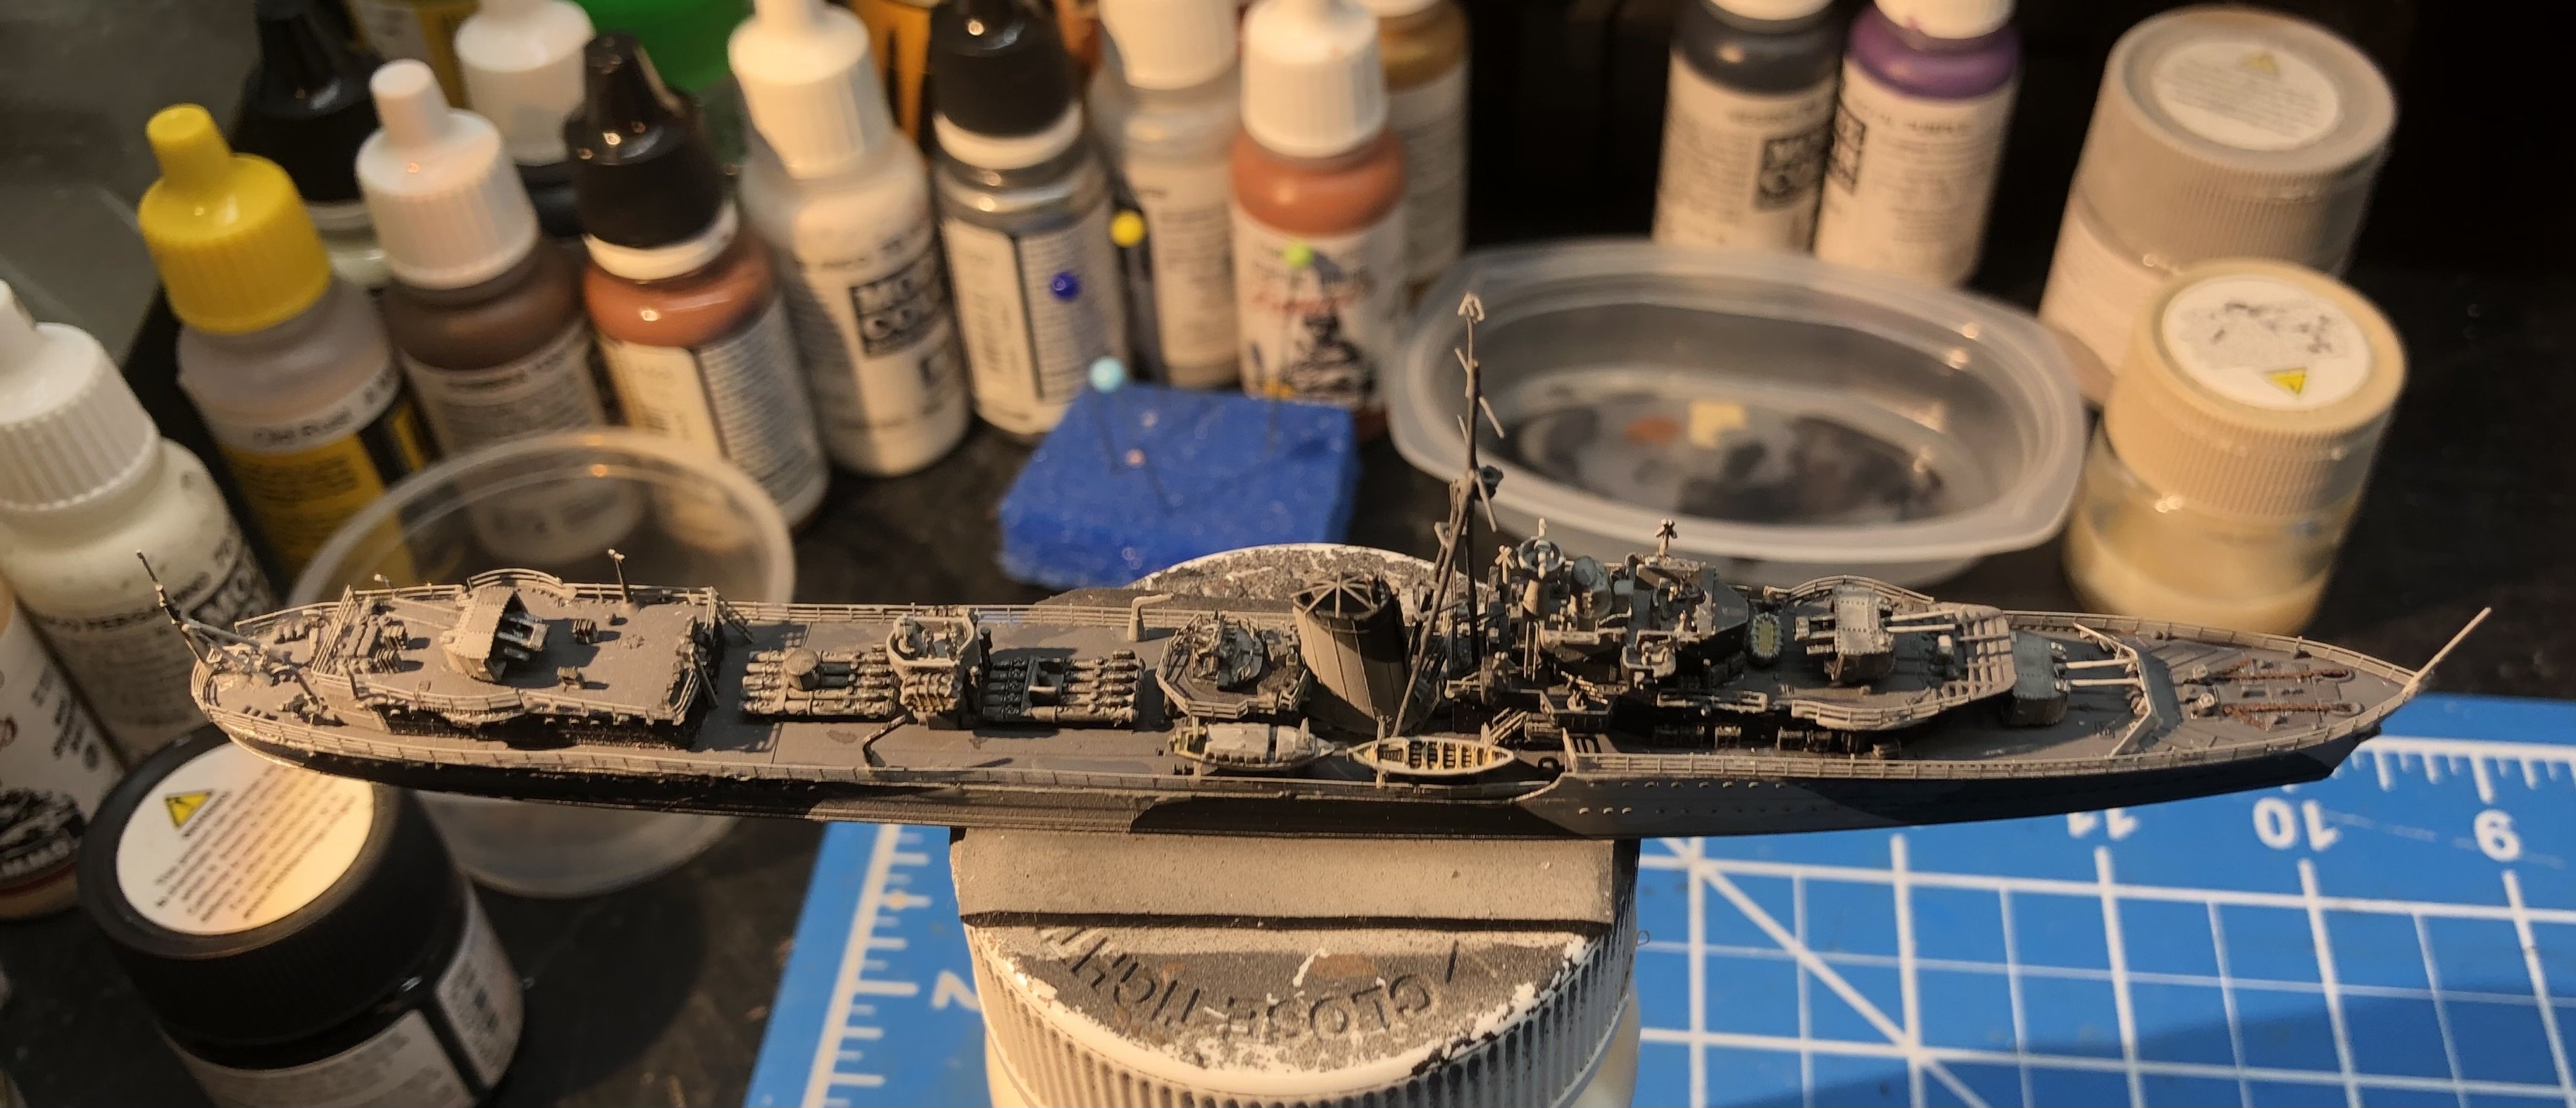
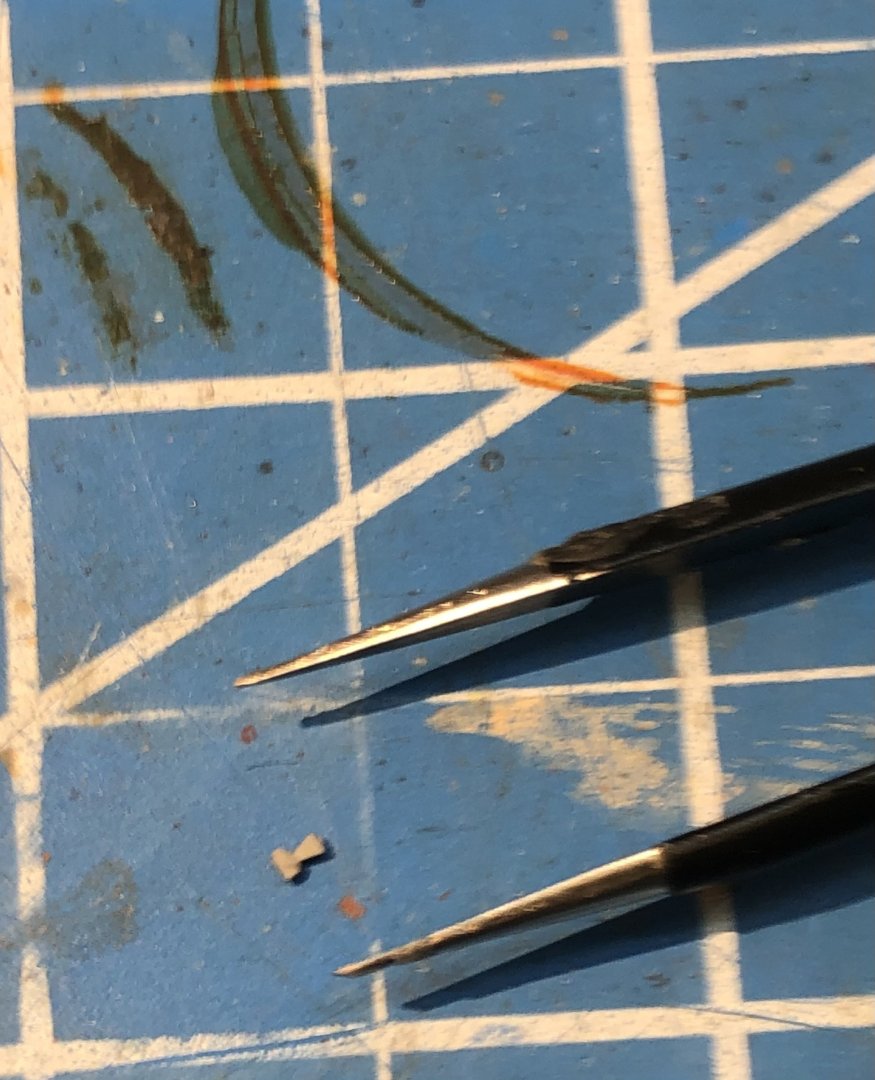
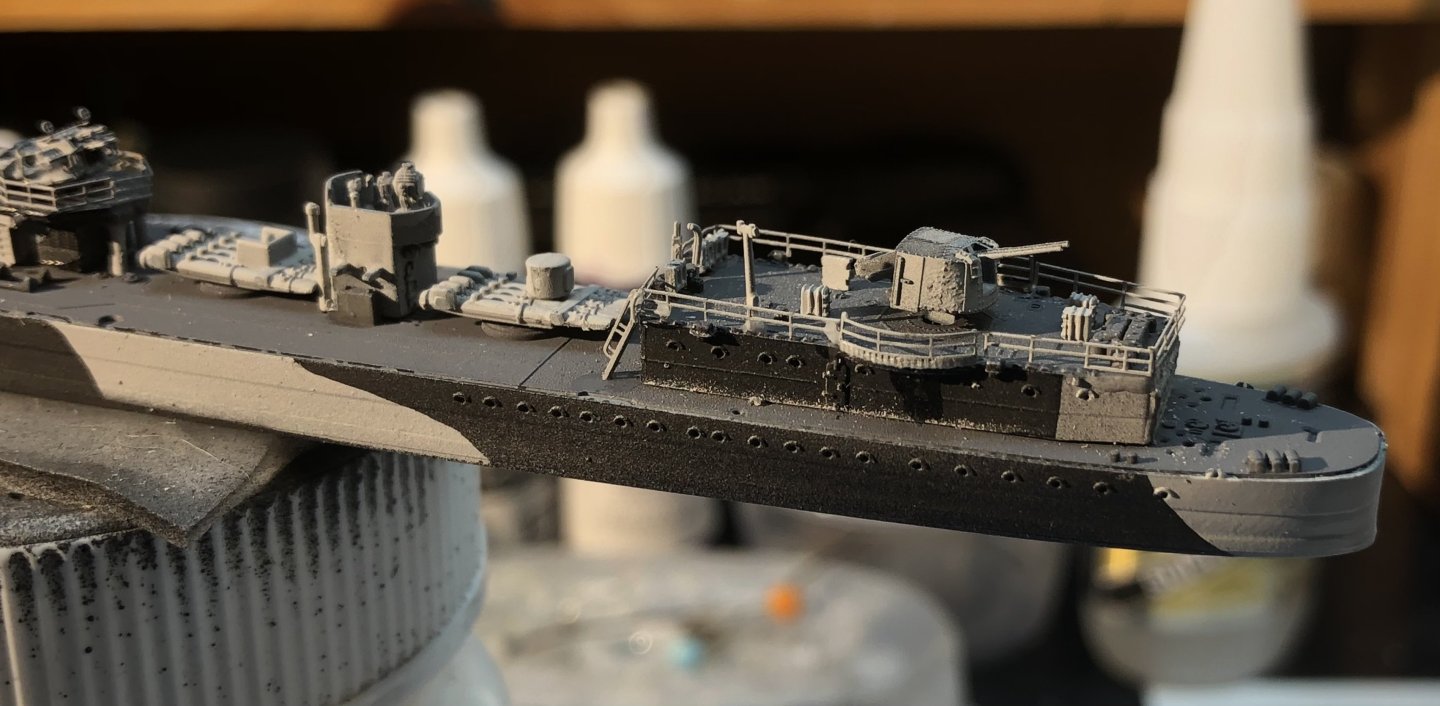
The tinyness continues. I started populating the aft deck with depth charges, throwers and hoists. depth charges are tiny. Thankfully none escaped from the tweezers, no spares provided. And this is the aft deck loaded up Six depth charges, two throwers and two hoists. The depth charge rail was quite relaxing by comparison. Ive painted the Carley rafts and added them along with various hoists and the bridge screen. Ive decided to use the PE davits for the ships boats. Assembling the boats on the davits and adding them to the deck will be the next task, and then the deck railings. Beginning to reach the end now. Thanks for looking in, the likes and comments. alan


-
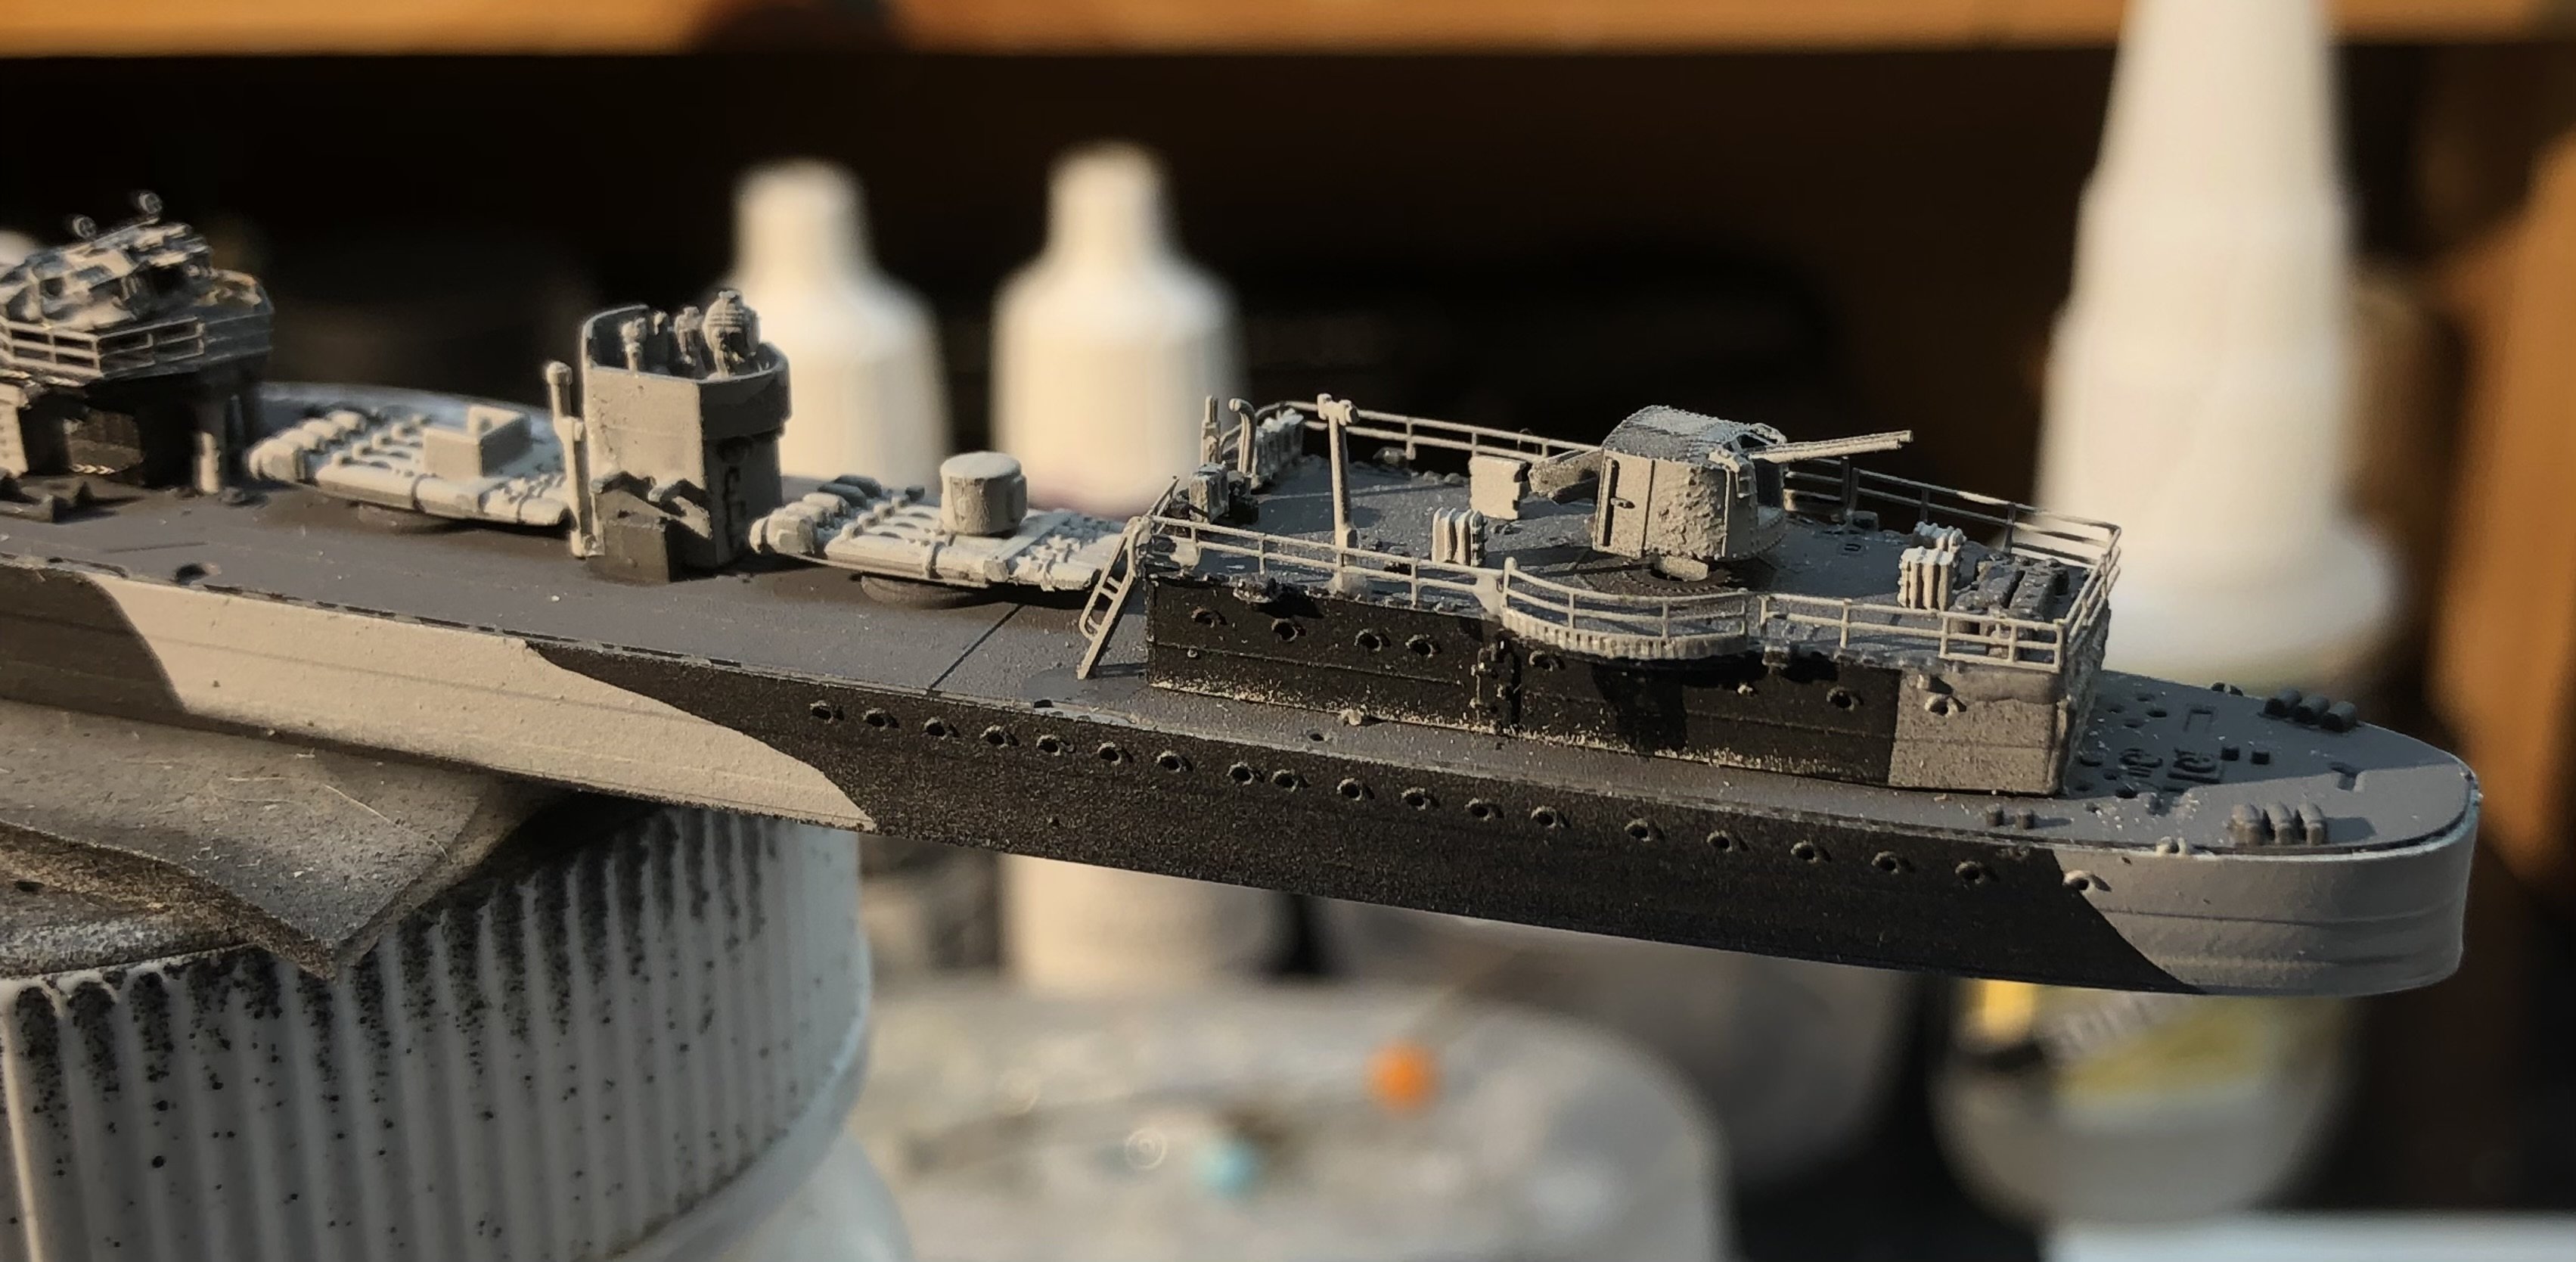
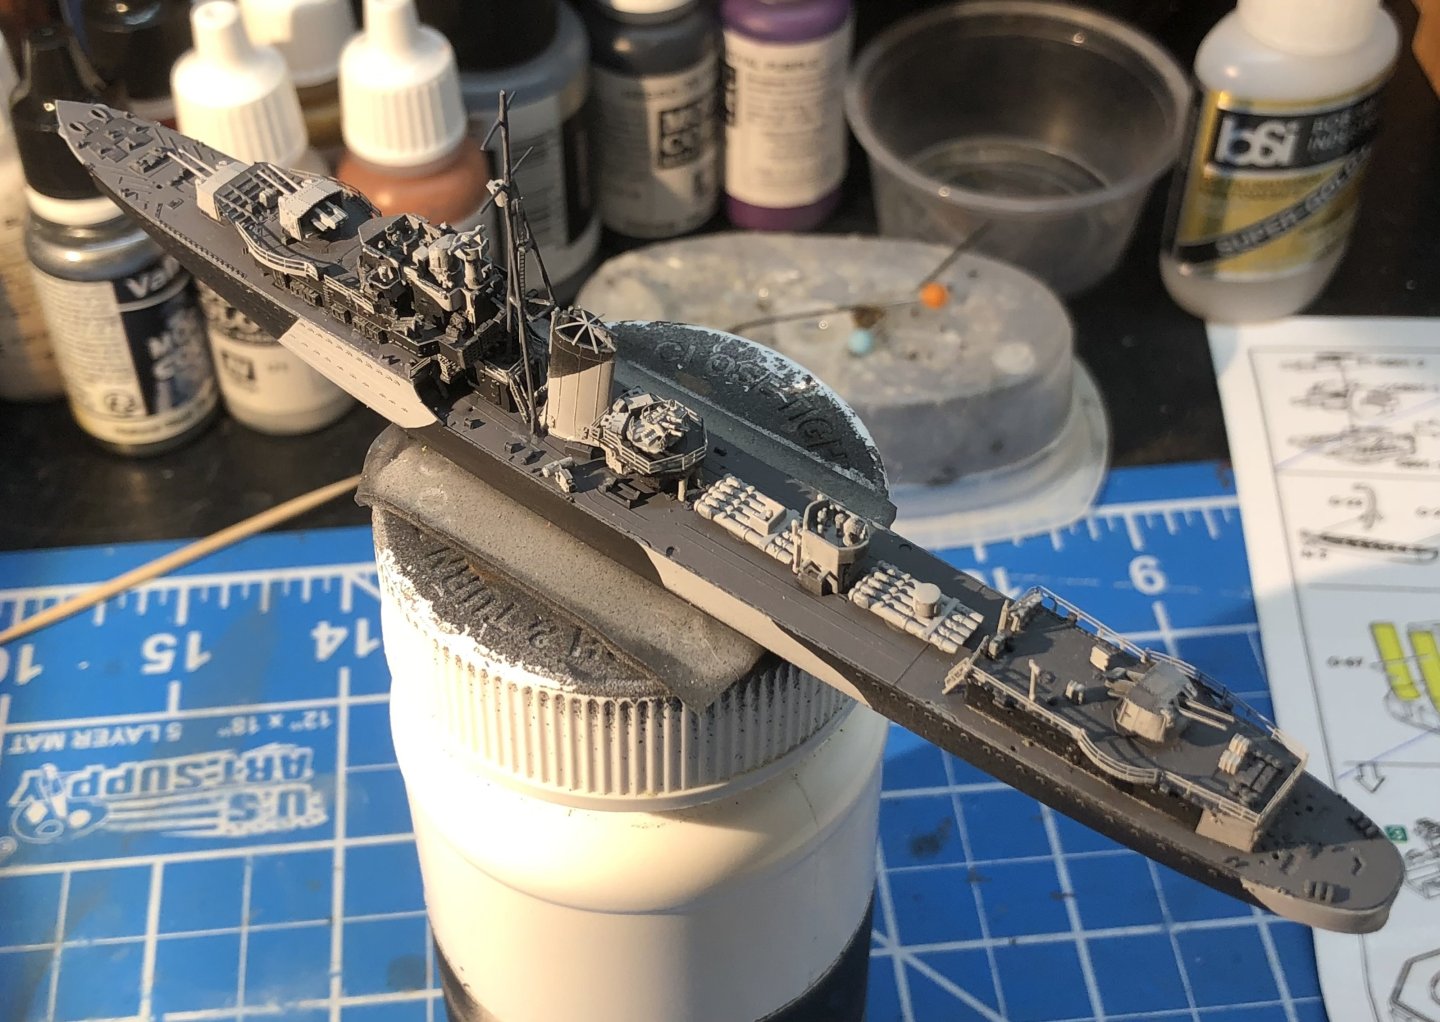
I made steady progress today. I detailed the searchlight and Bofors platforms. Another tiny binnacle, and more lockers and PE railings. I just finished the aft superstructure and the last lockers I think. The railings were broken down into sensible pieces so bending was quite straightforward. CA glue throughout. I now have the aft deck, depth charge throwers and rails and hoists. The rafts and boats are being painted. I haven’t decided whether to use the plastic davits or the PE ones. The plastic ones are quite delicate and three dimensional. Thanks for looking in, the likes and kind comments. alan


-
I think that’s one of the great side benefits of reading. Exploring the locations of some great books especially pre digital age fiction. You know the authors couldn’t google a setting, they had to go there in most cases and it’s fun to compare the reality. alan