king derelict
-
Posts
3,286 -
Joined
-
Last visited
Content Type
Profiles
Forums
Gallery
Events
Everything posted by king derelict
-
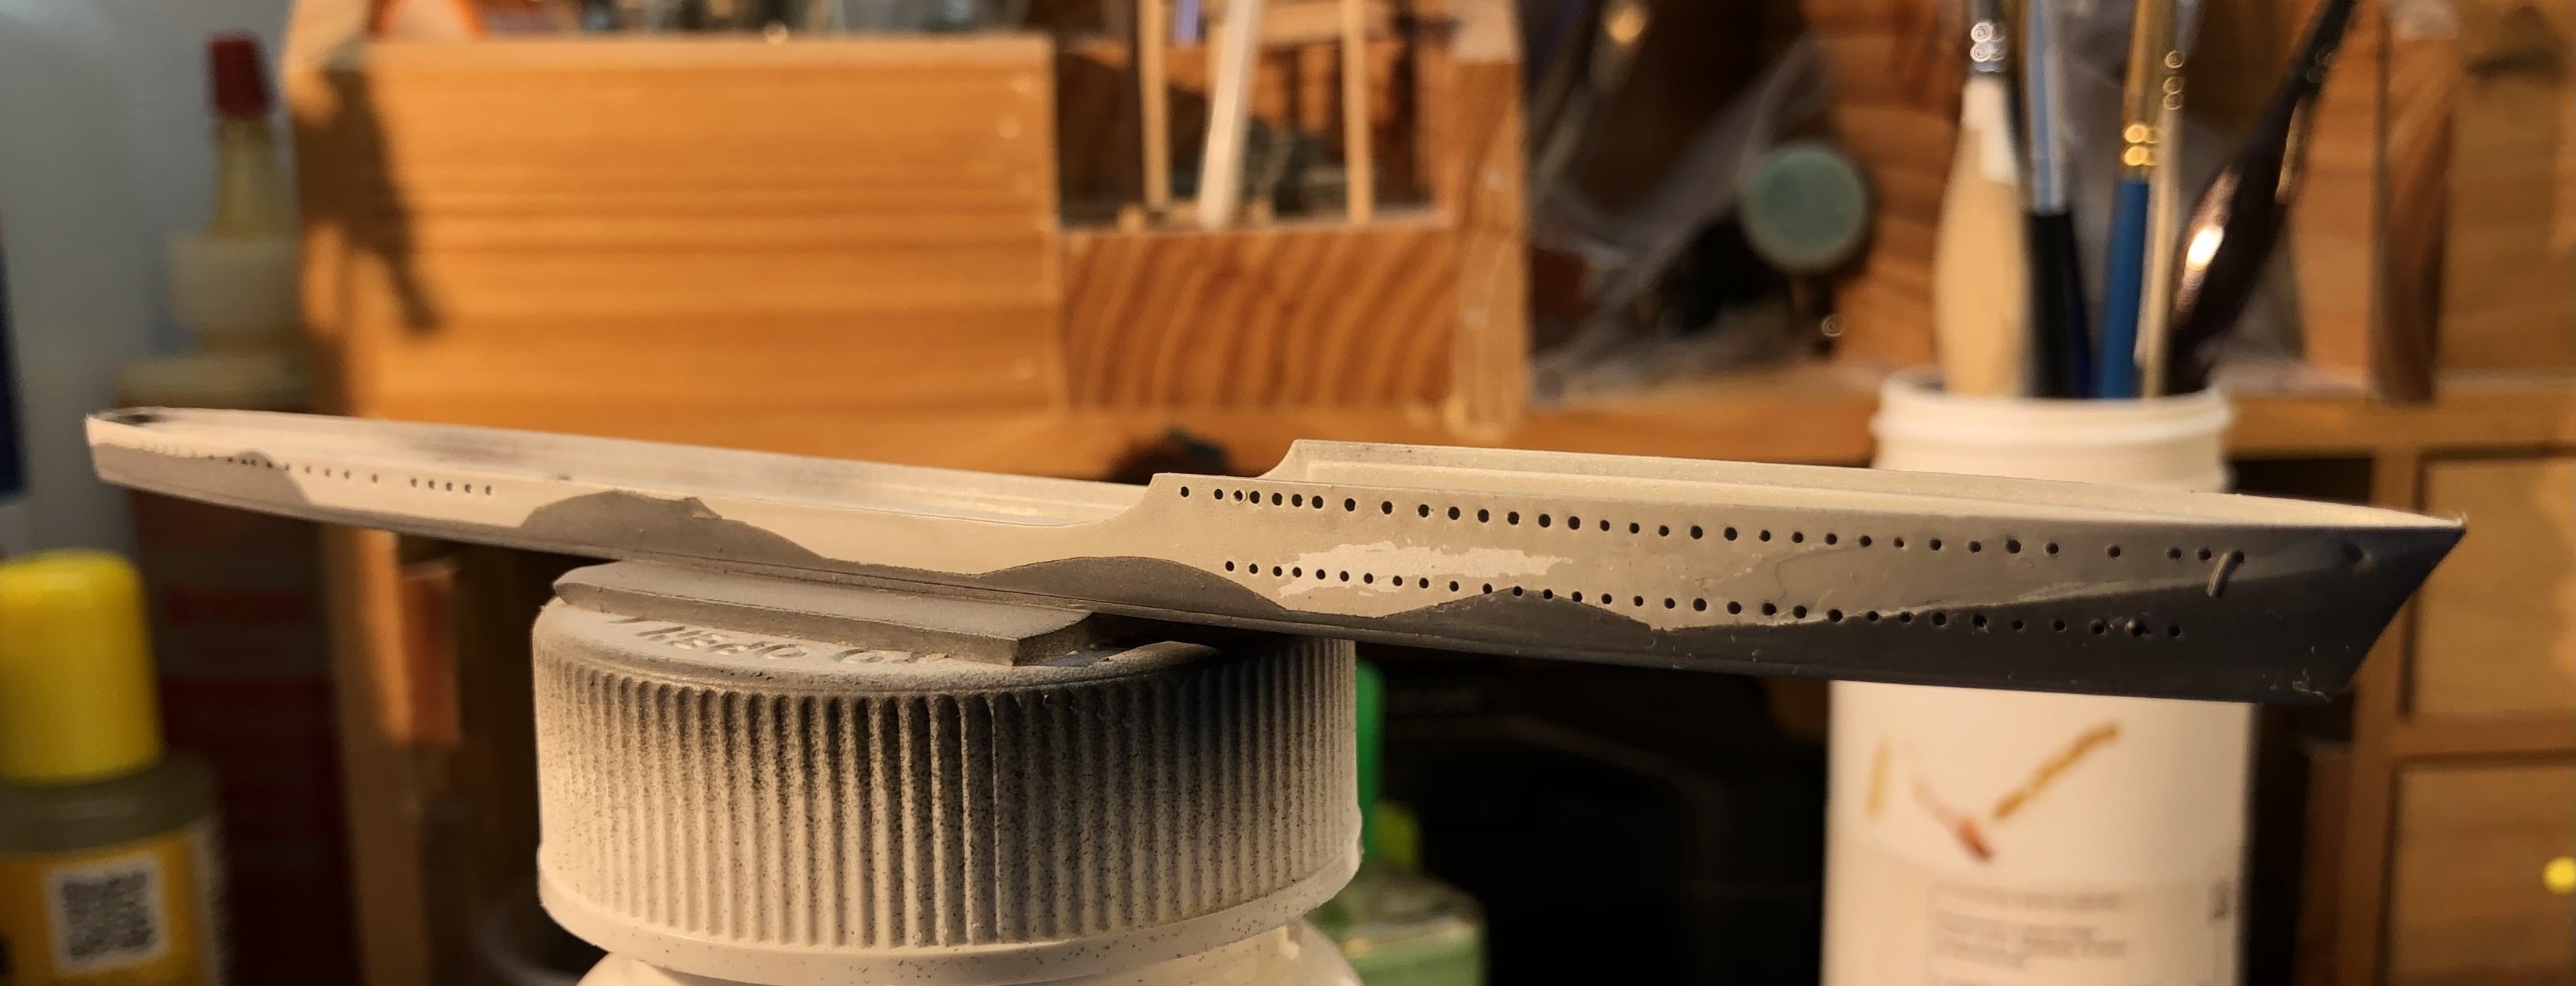
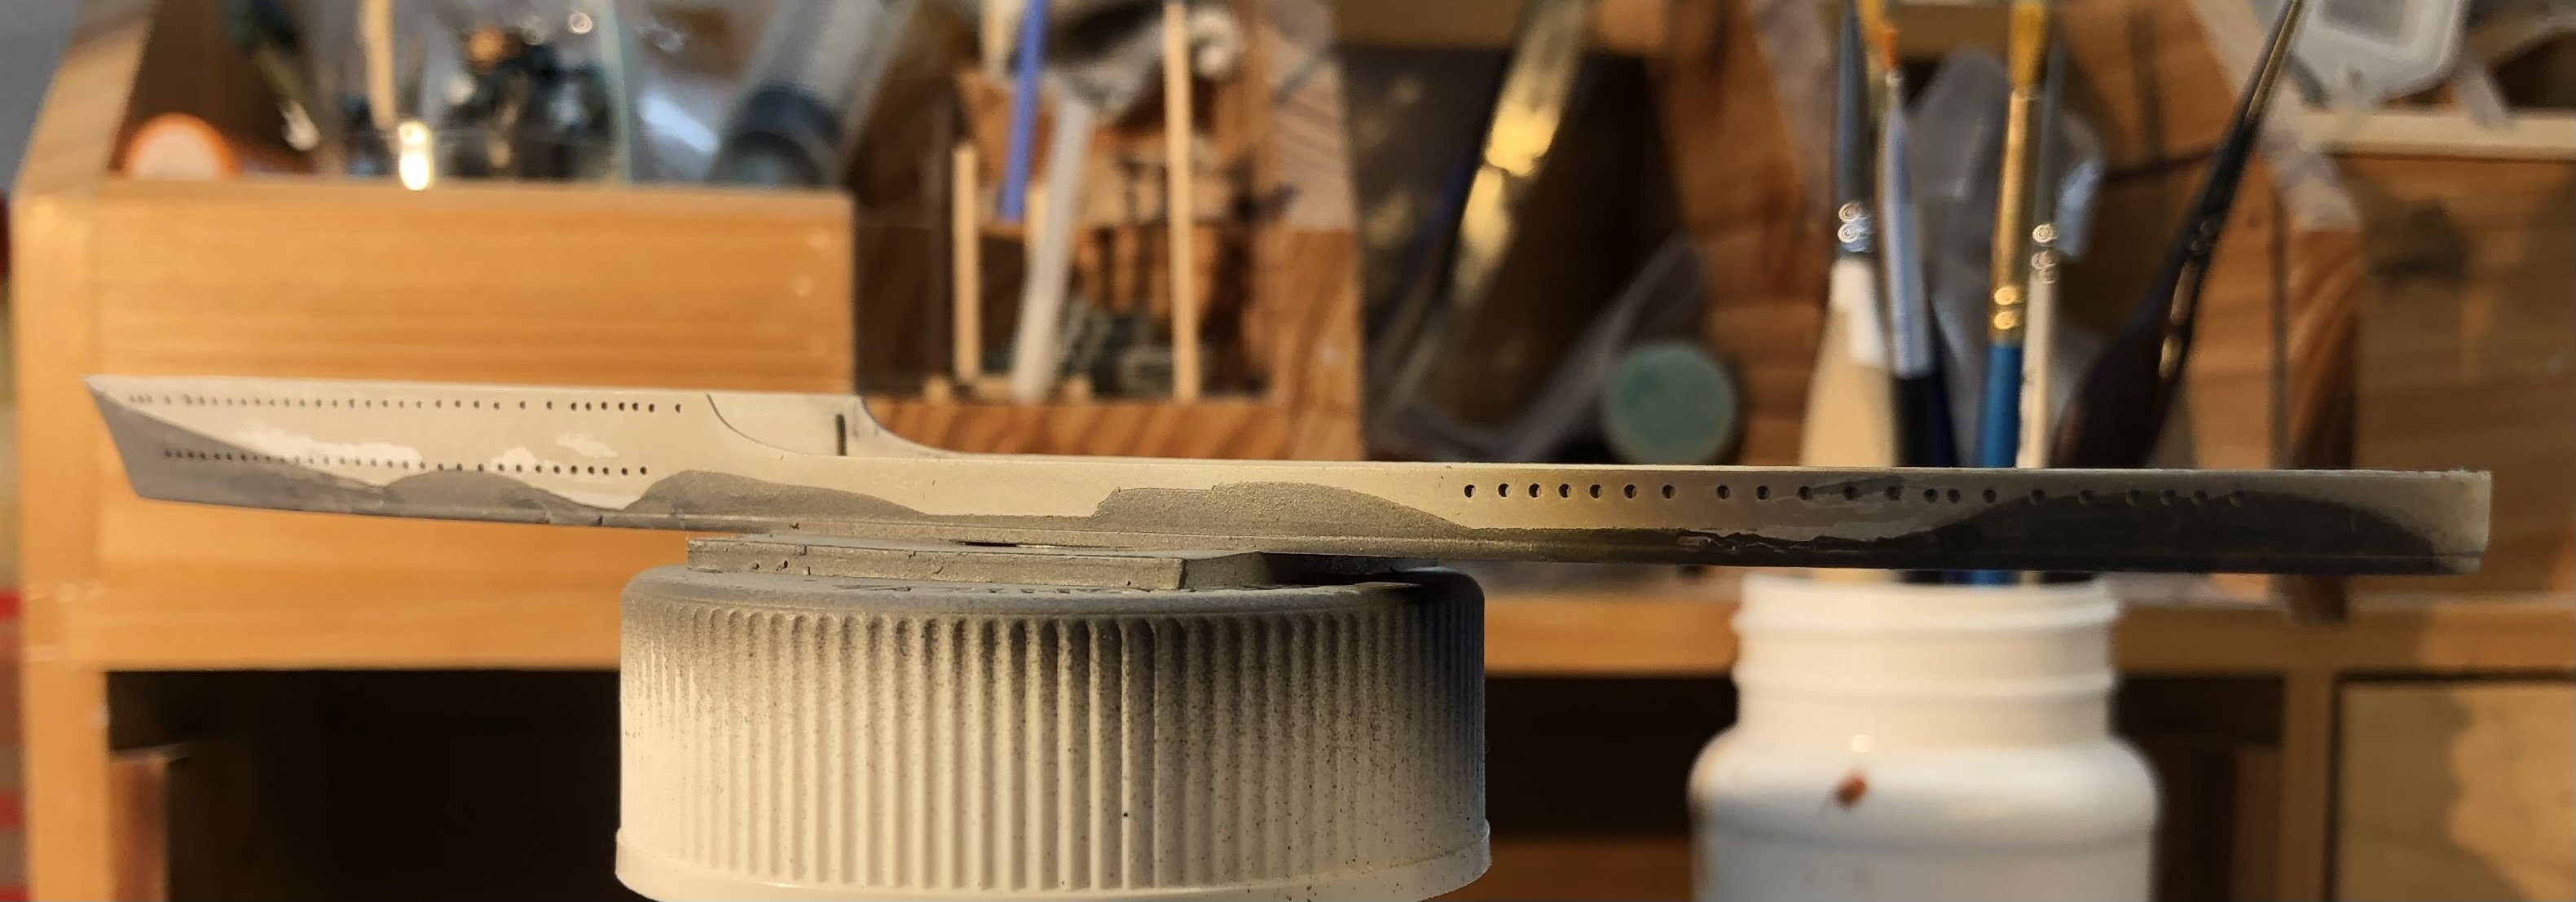
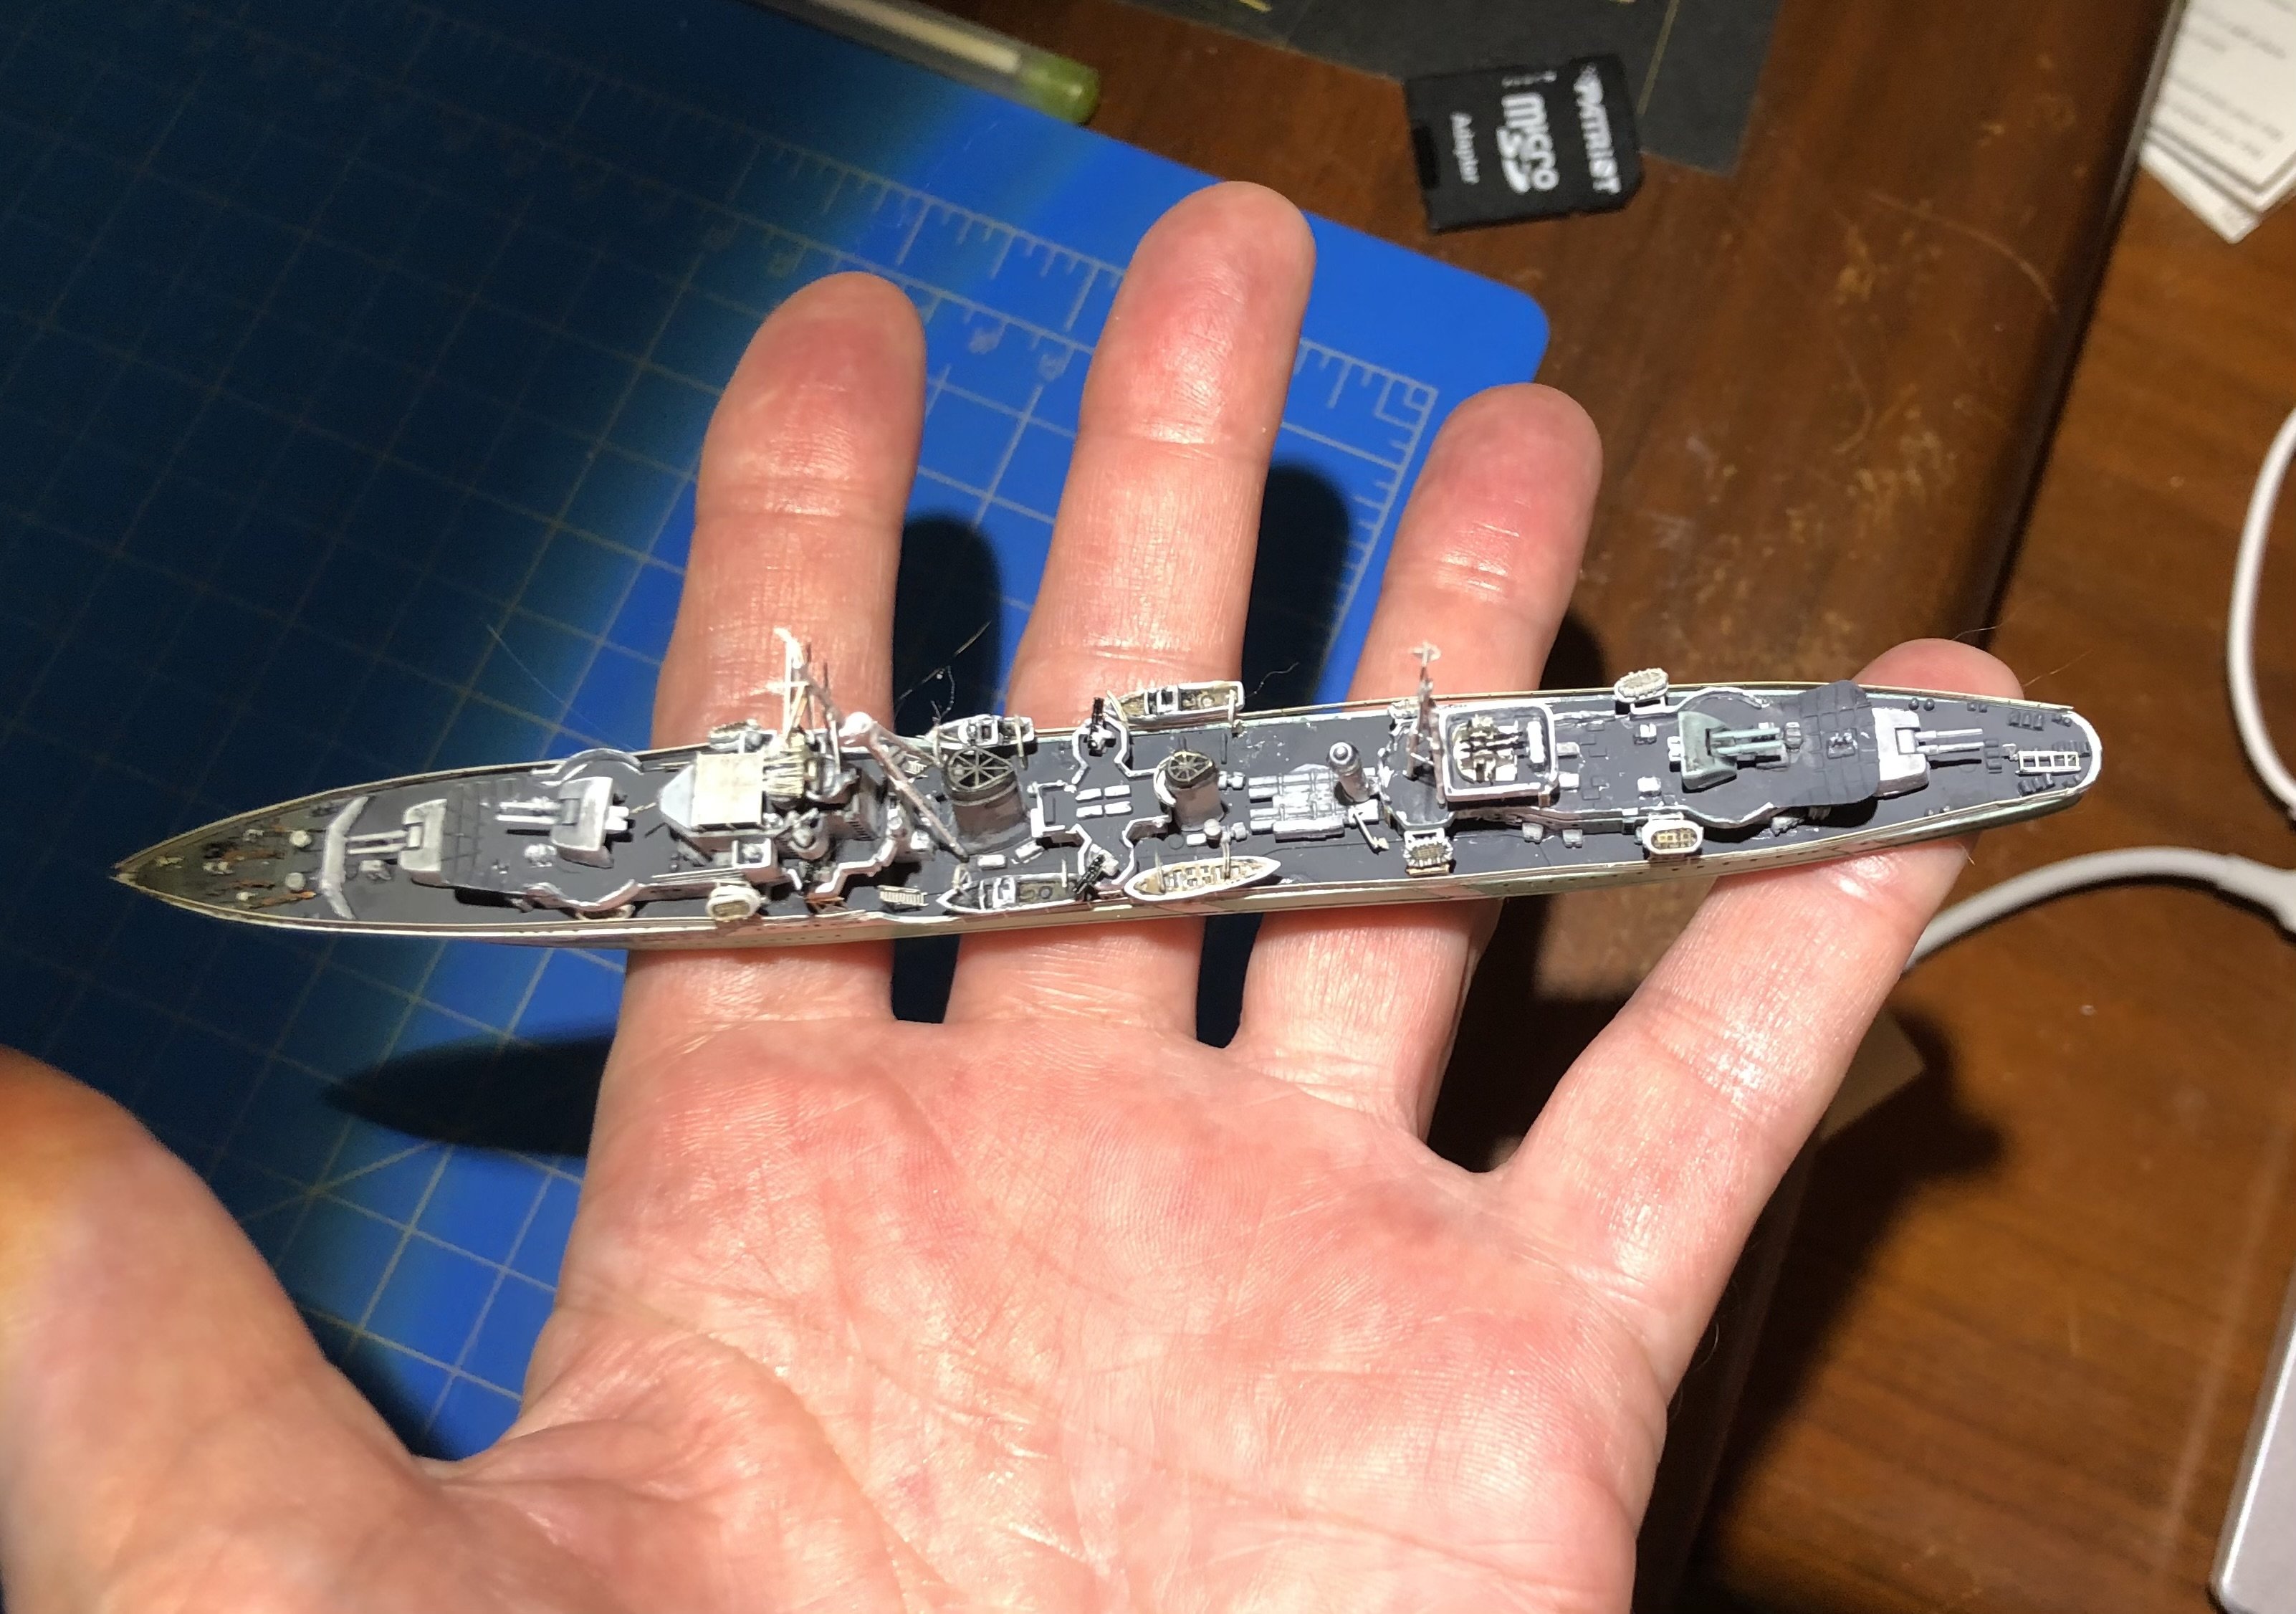
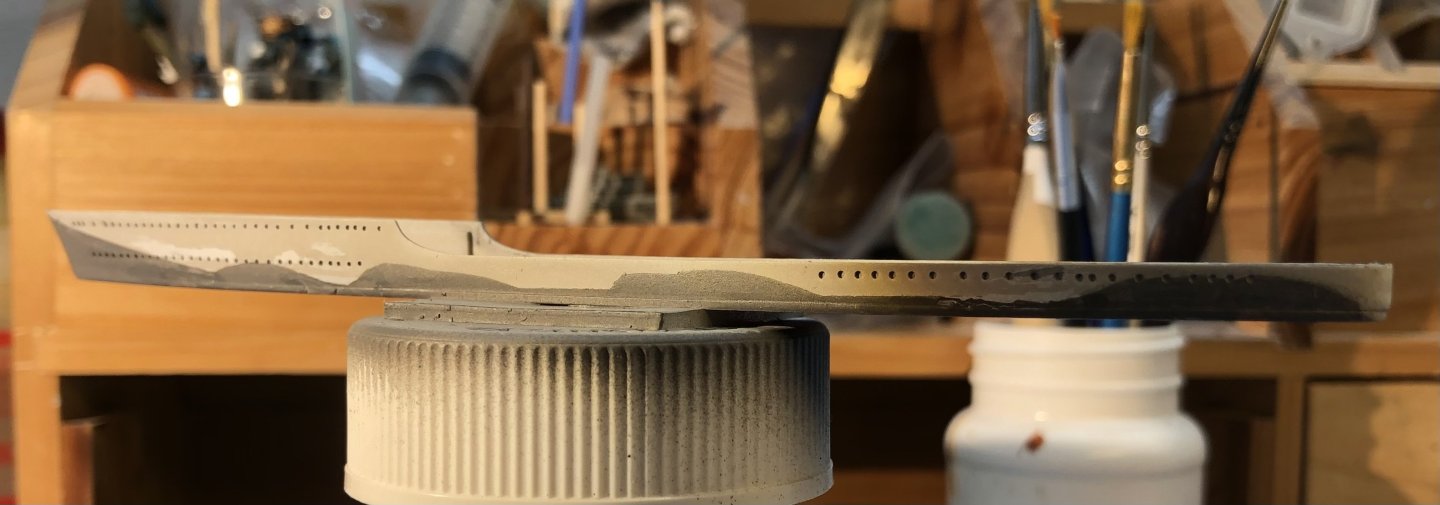
I found time during the weekend to spray a coat of Tamiya light grey followed by the chipping fluid and then the AK 507C. Today I masked for the 507A dark grey and sprayed it on. The AK paints gave me trouble last time with horrendous bleeds under the masks. This time it all went well. I really burnished the masks down and I kept the paint coats light. I also used the AK thinner instead of water. Maybe that helped the paint dry faster, along with the 90F in the garage this afternoon. Working with the chipping solution was a bit of a mixed bag, some areas went nicely, revealing the light grey as I wanted. In other places not so good, I seemed to get through to the primer without seeing the light grey. Part of the problem is the small size of the hull and wanting the chipping in specific areas. I’ll try a bit more tomorrow working on the aft section but I think it captures the look of the hull in the photo of the real ship. Thanks for looking in, the likes and comments. alan


- 42 replies
-
- 7
-

-
- Zulu
- Tribal class
- (and 2 more)
-
The details are terrific but. It all looks great alan
-
Very neat work. Congratulations on a nice model. alan
- 68 replies
-
- 3
-
-
- Sanson
- Artesania Latina
- (and 2 more)
-
It’s looking really good as the details get added. Great job alan
- 49 replies
-
- 1
-

-
- Brannaren
- Caldercraft
- (and 1 more)
-
Great idea for making the brass masts. I’m a messy solderer so I will be trying your method soon. alan
-
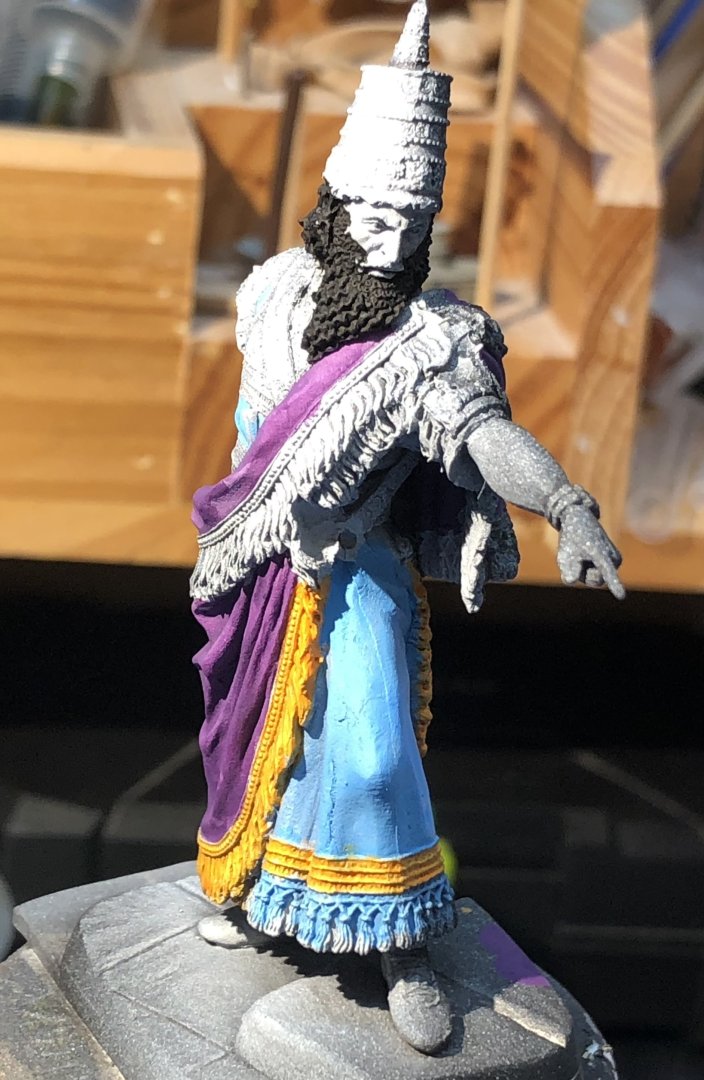
😁. Thanks very much Phil. I hope I can make his face suitably imperious. alan
-
Some happy hours ahead of you there Dave. alan
-
Thank you very much Ken, yes I need to do something about that featureless black blob. alan
-
Thank you very much Jack. This is very nice figure to paint. alan
-
Looks very good so far. The PE looks quite daunting but you are doing a great job with it. alan
-
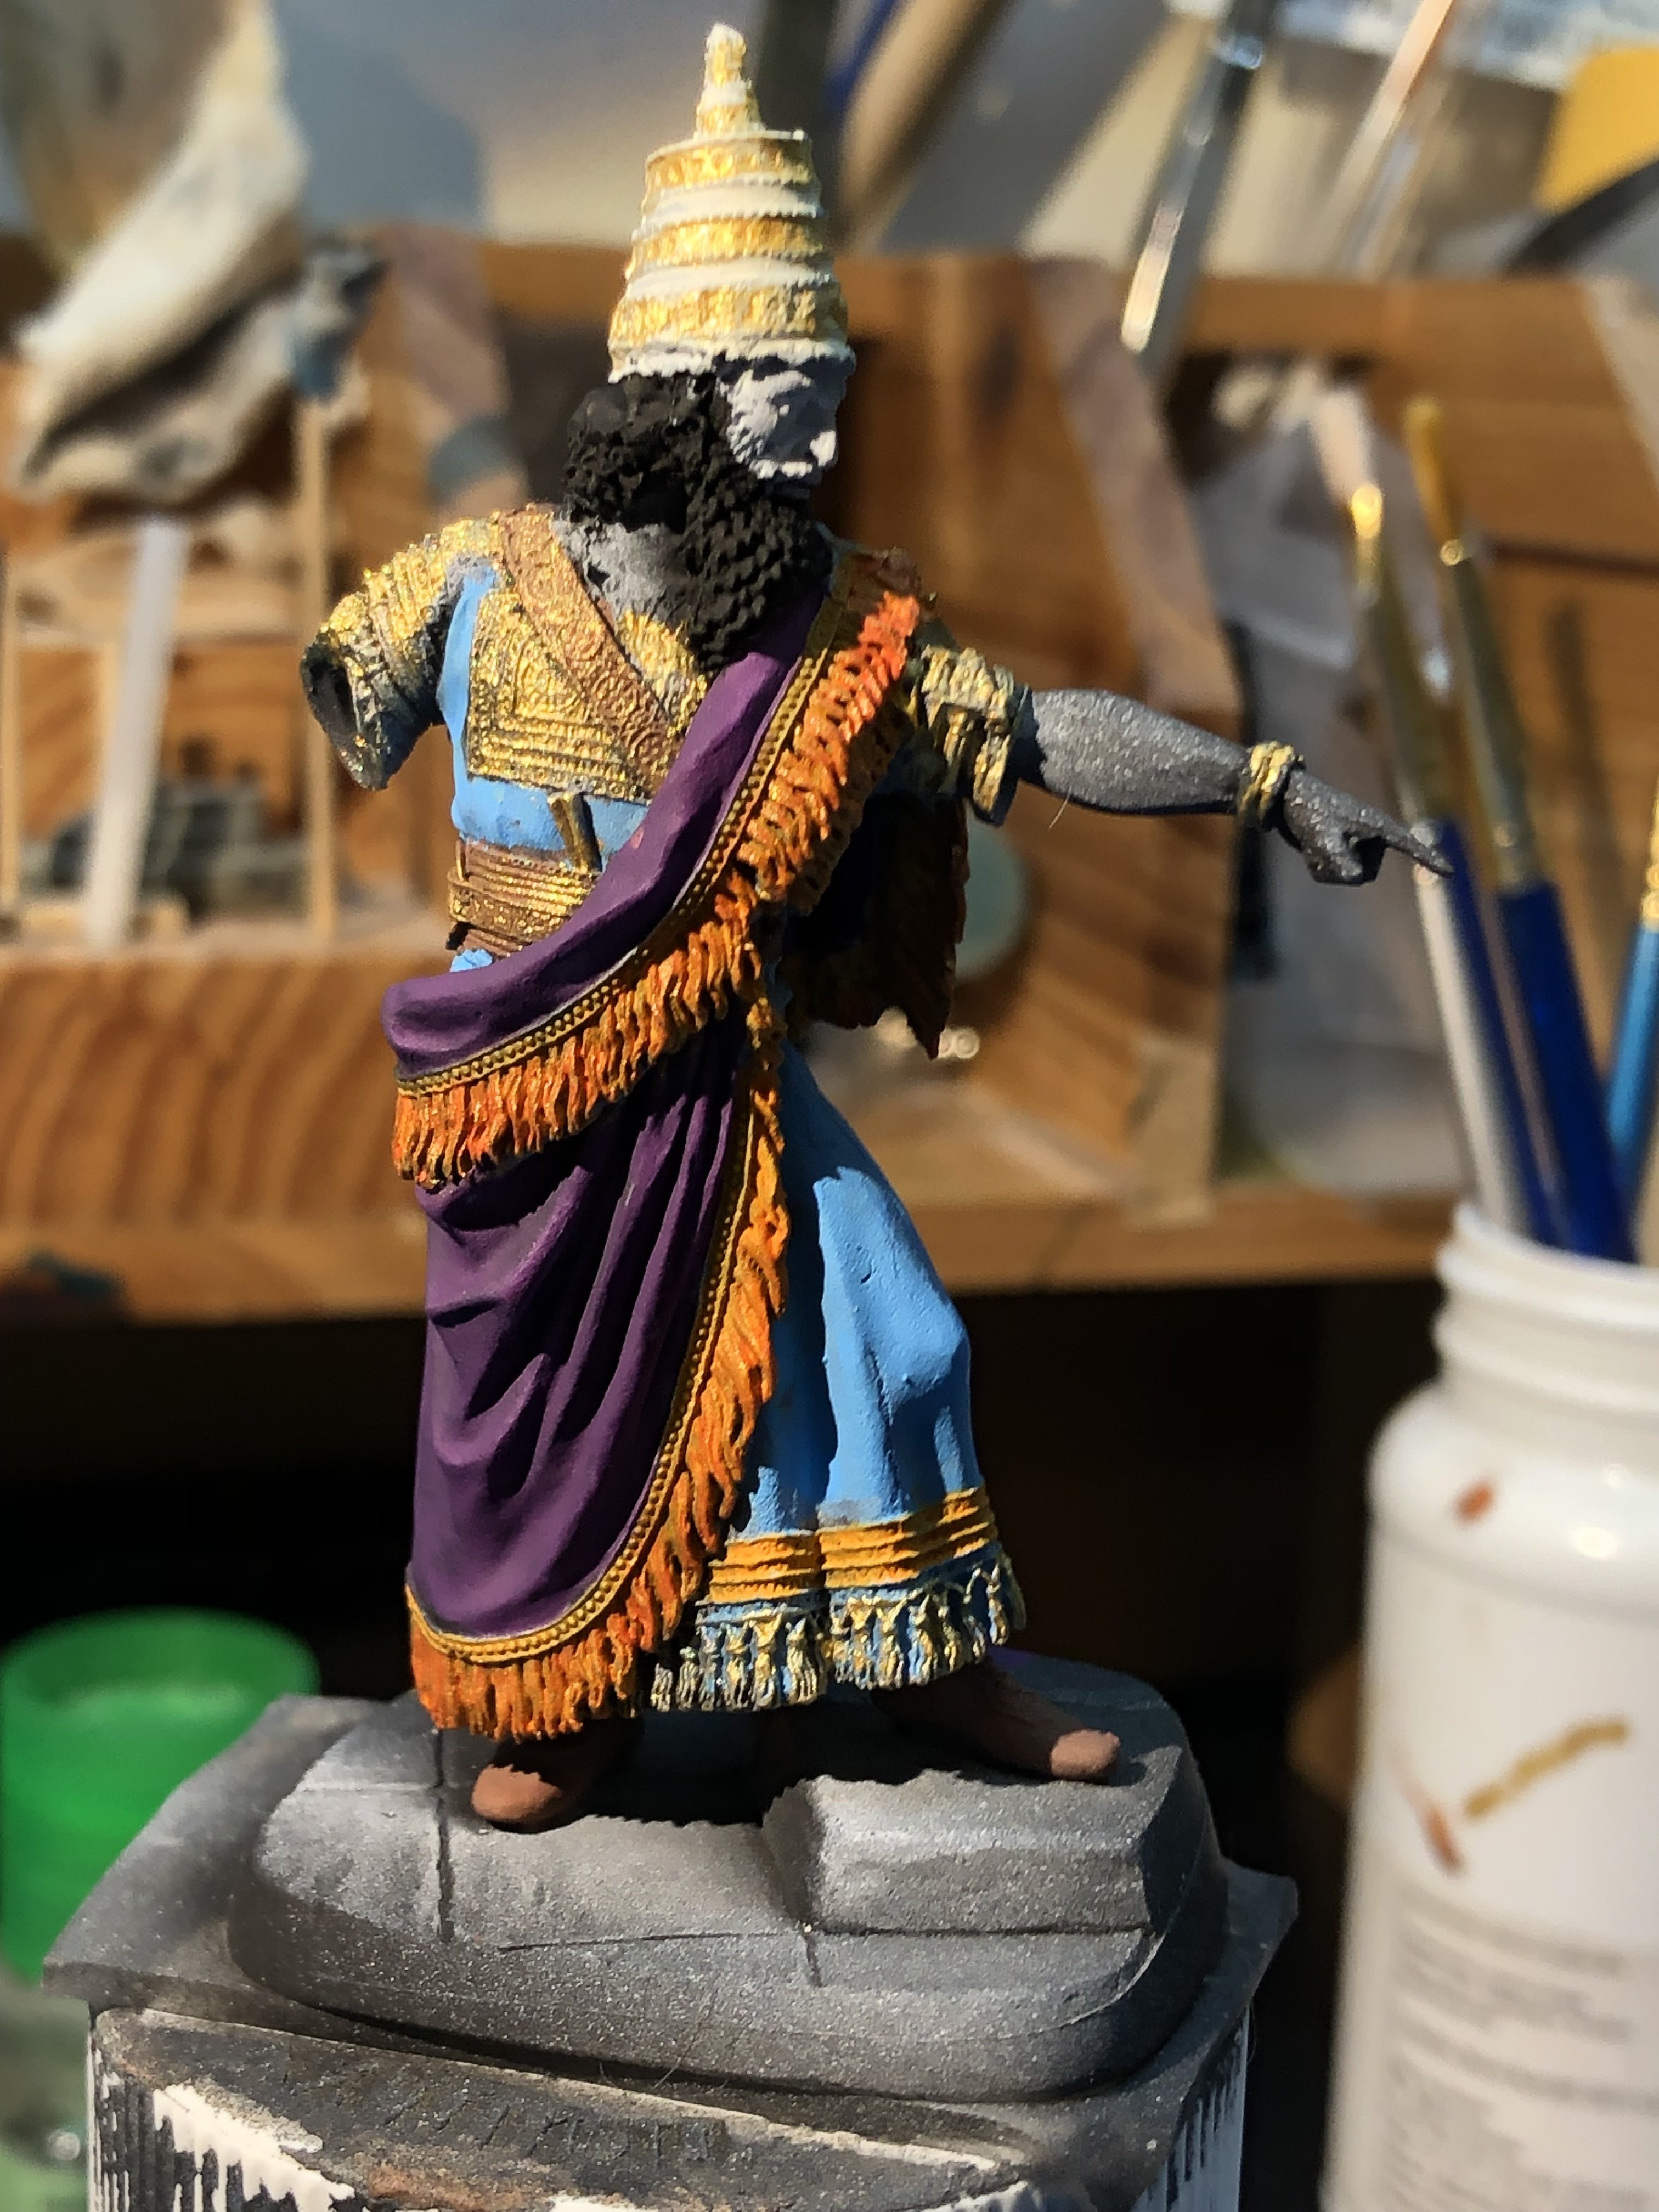
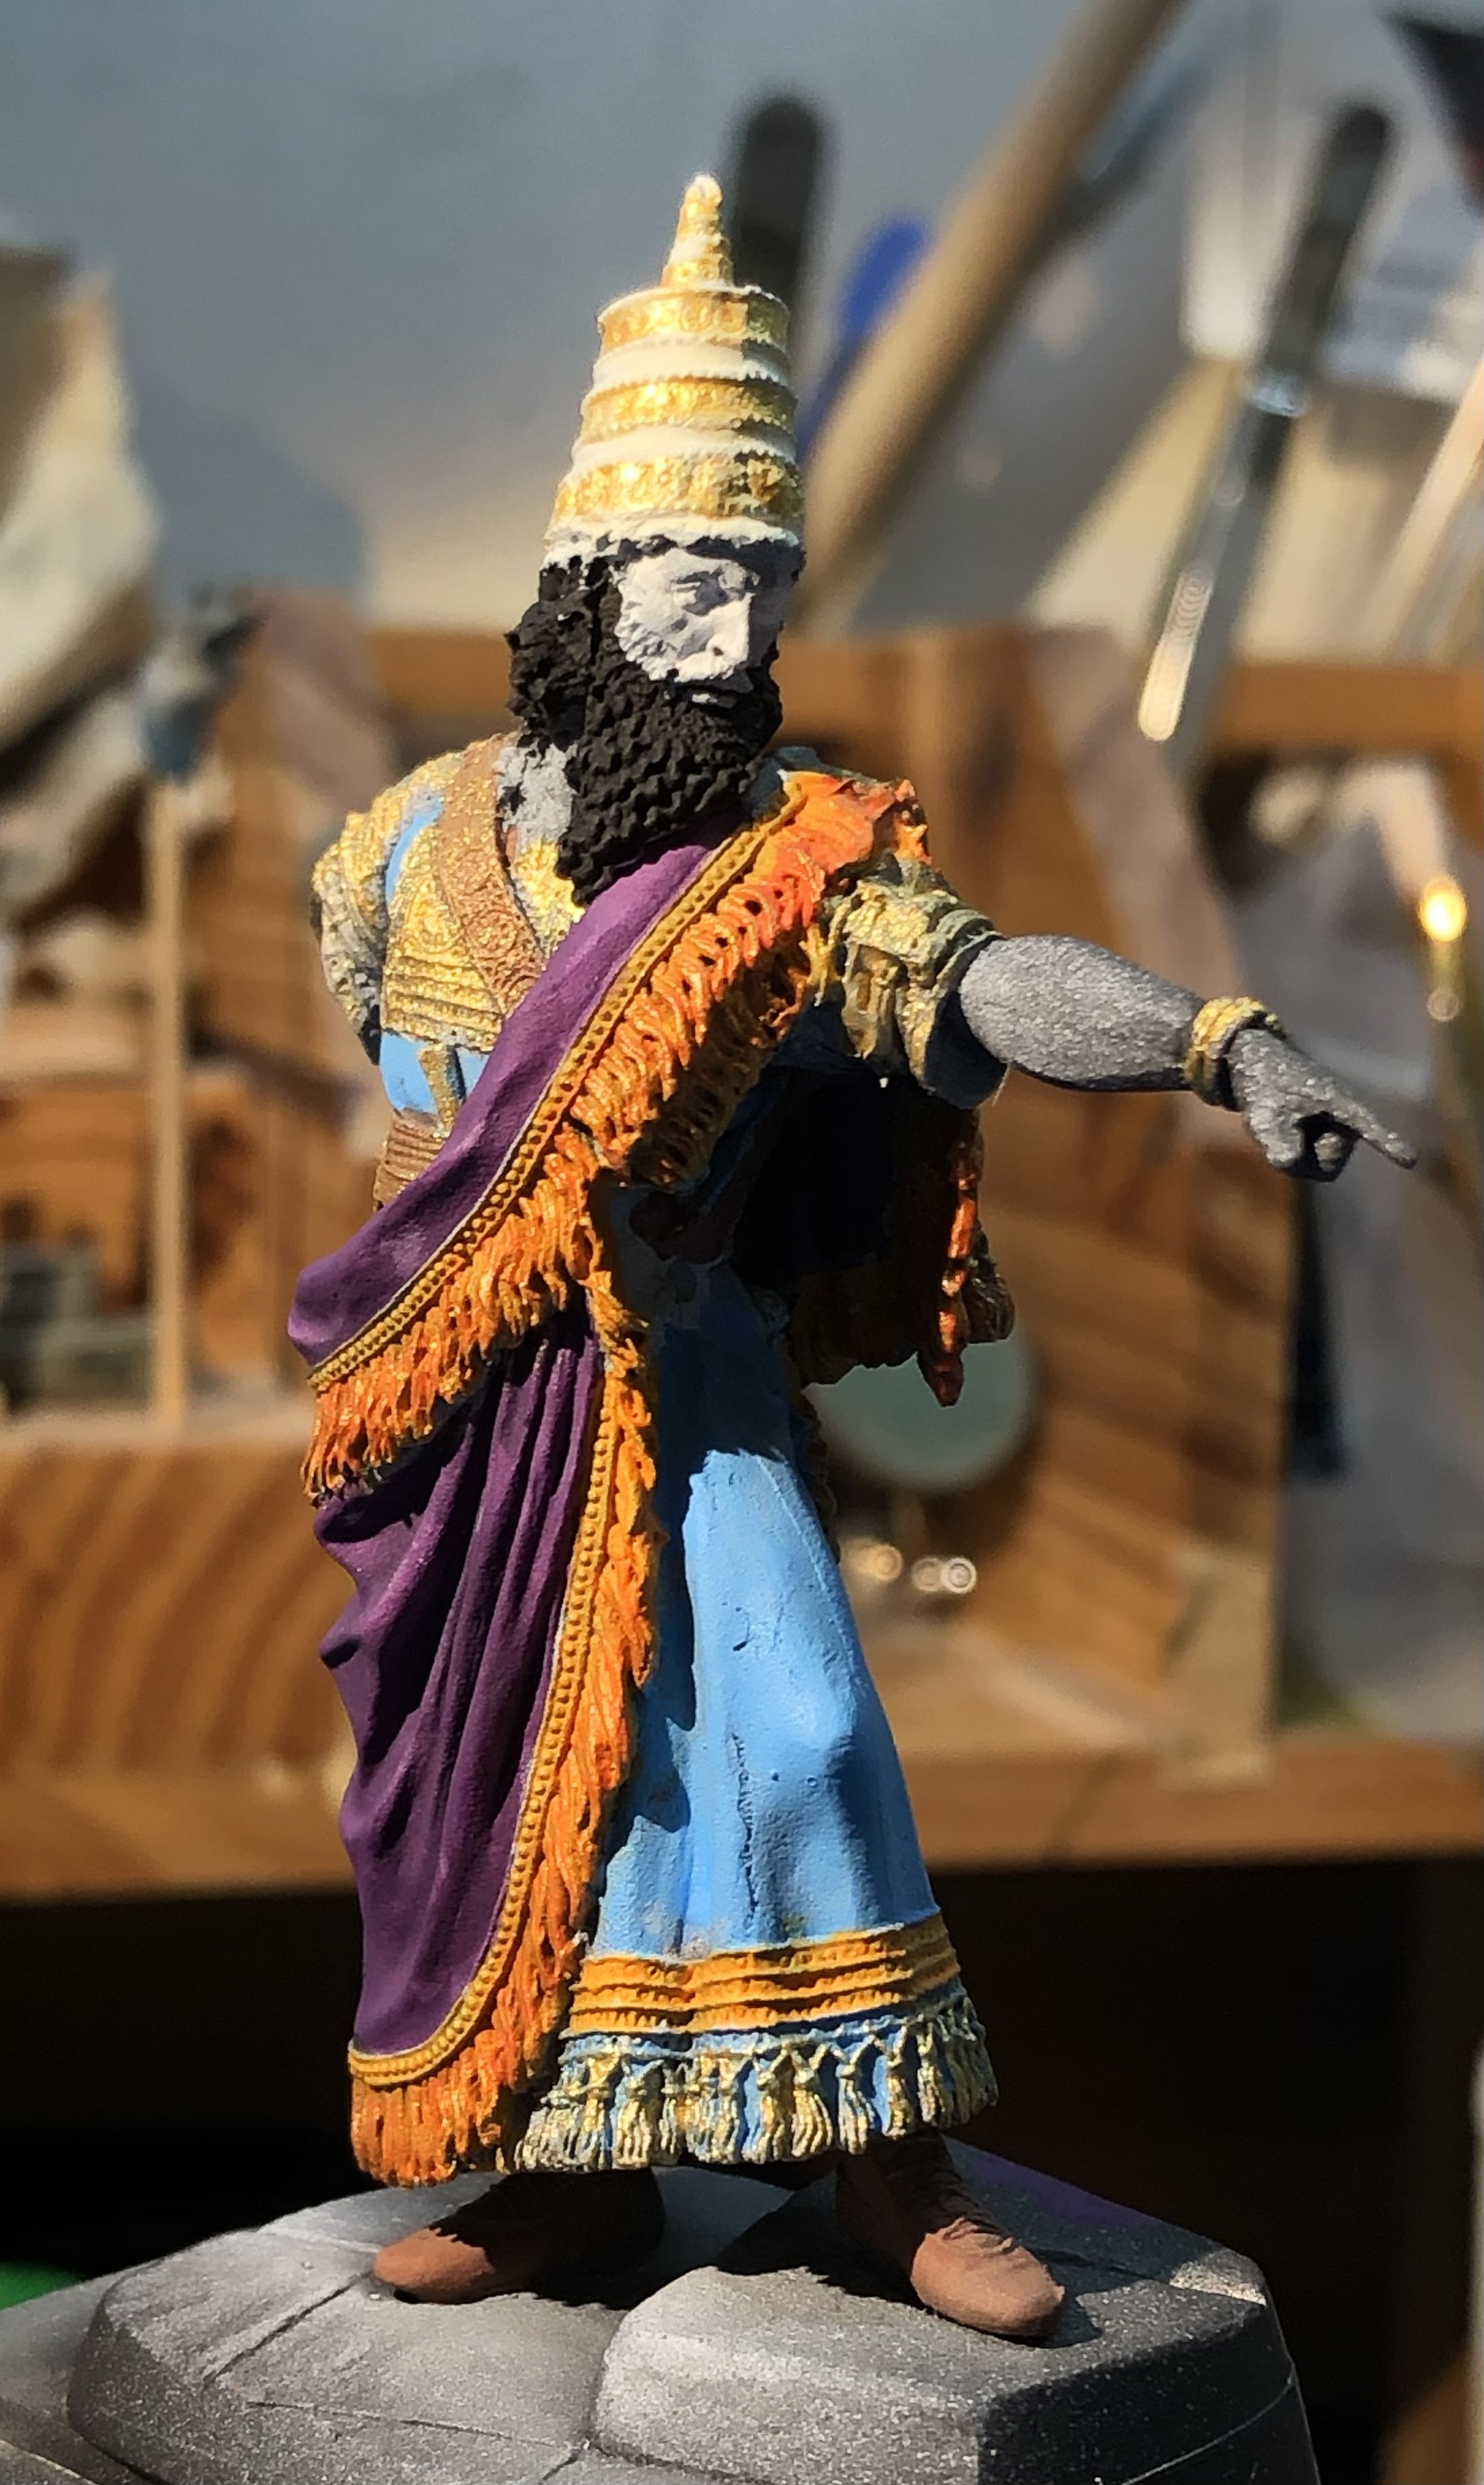
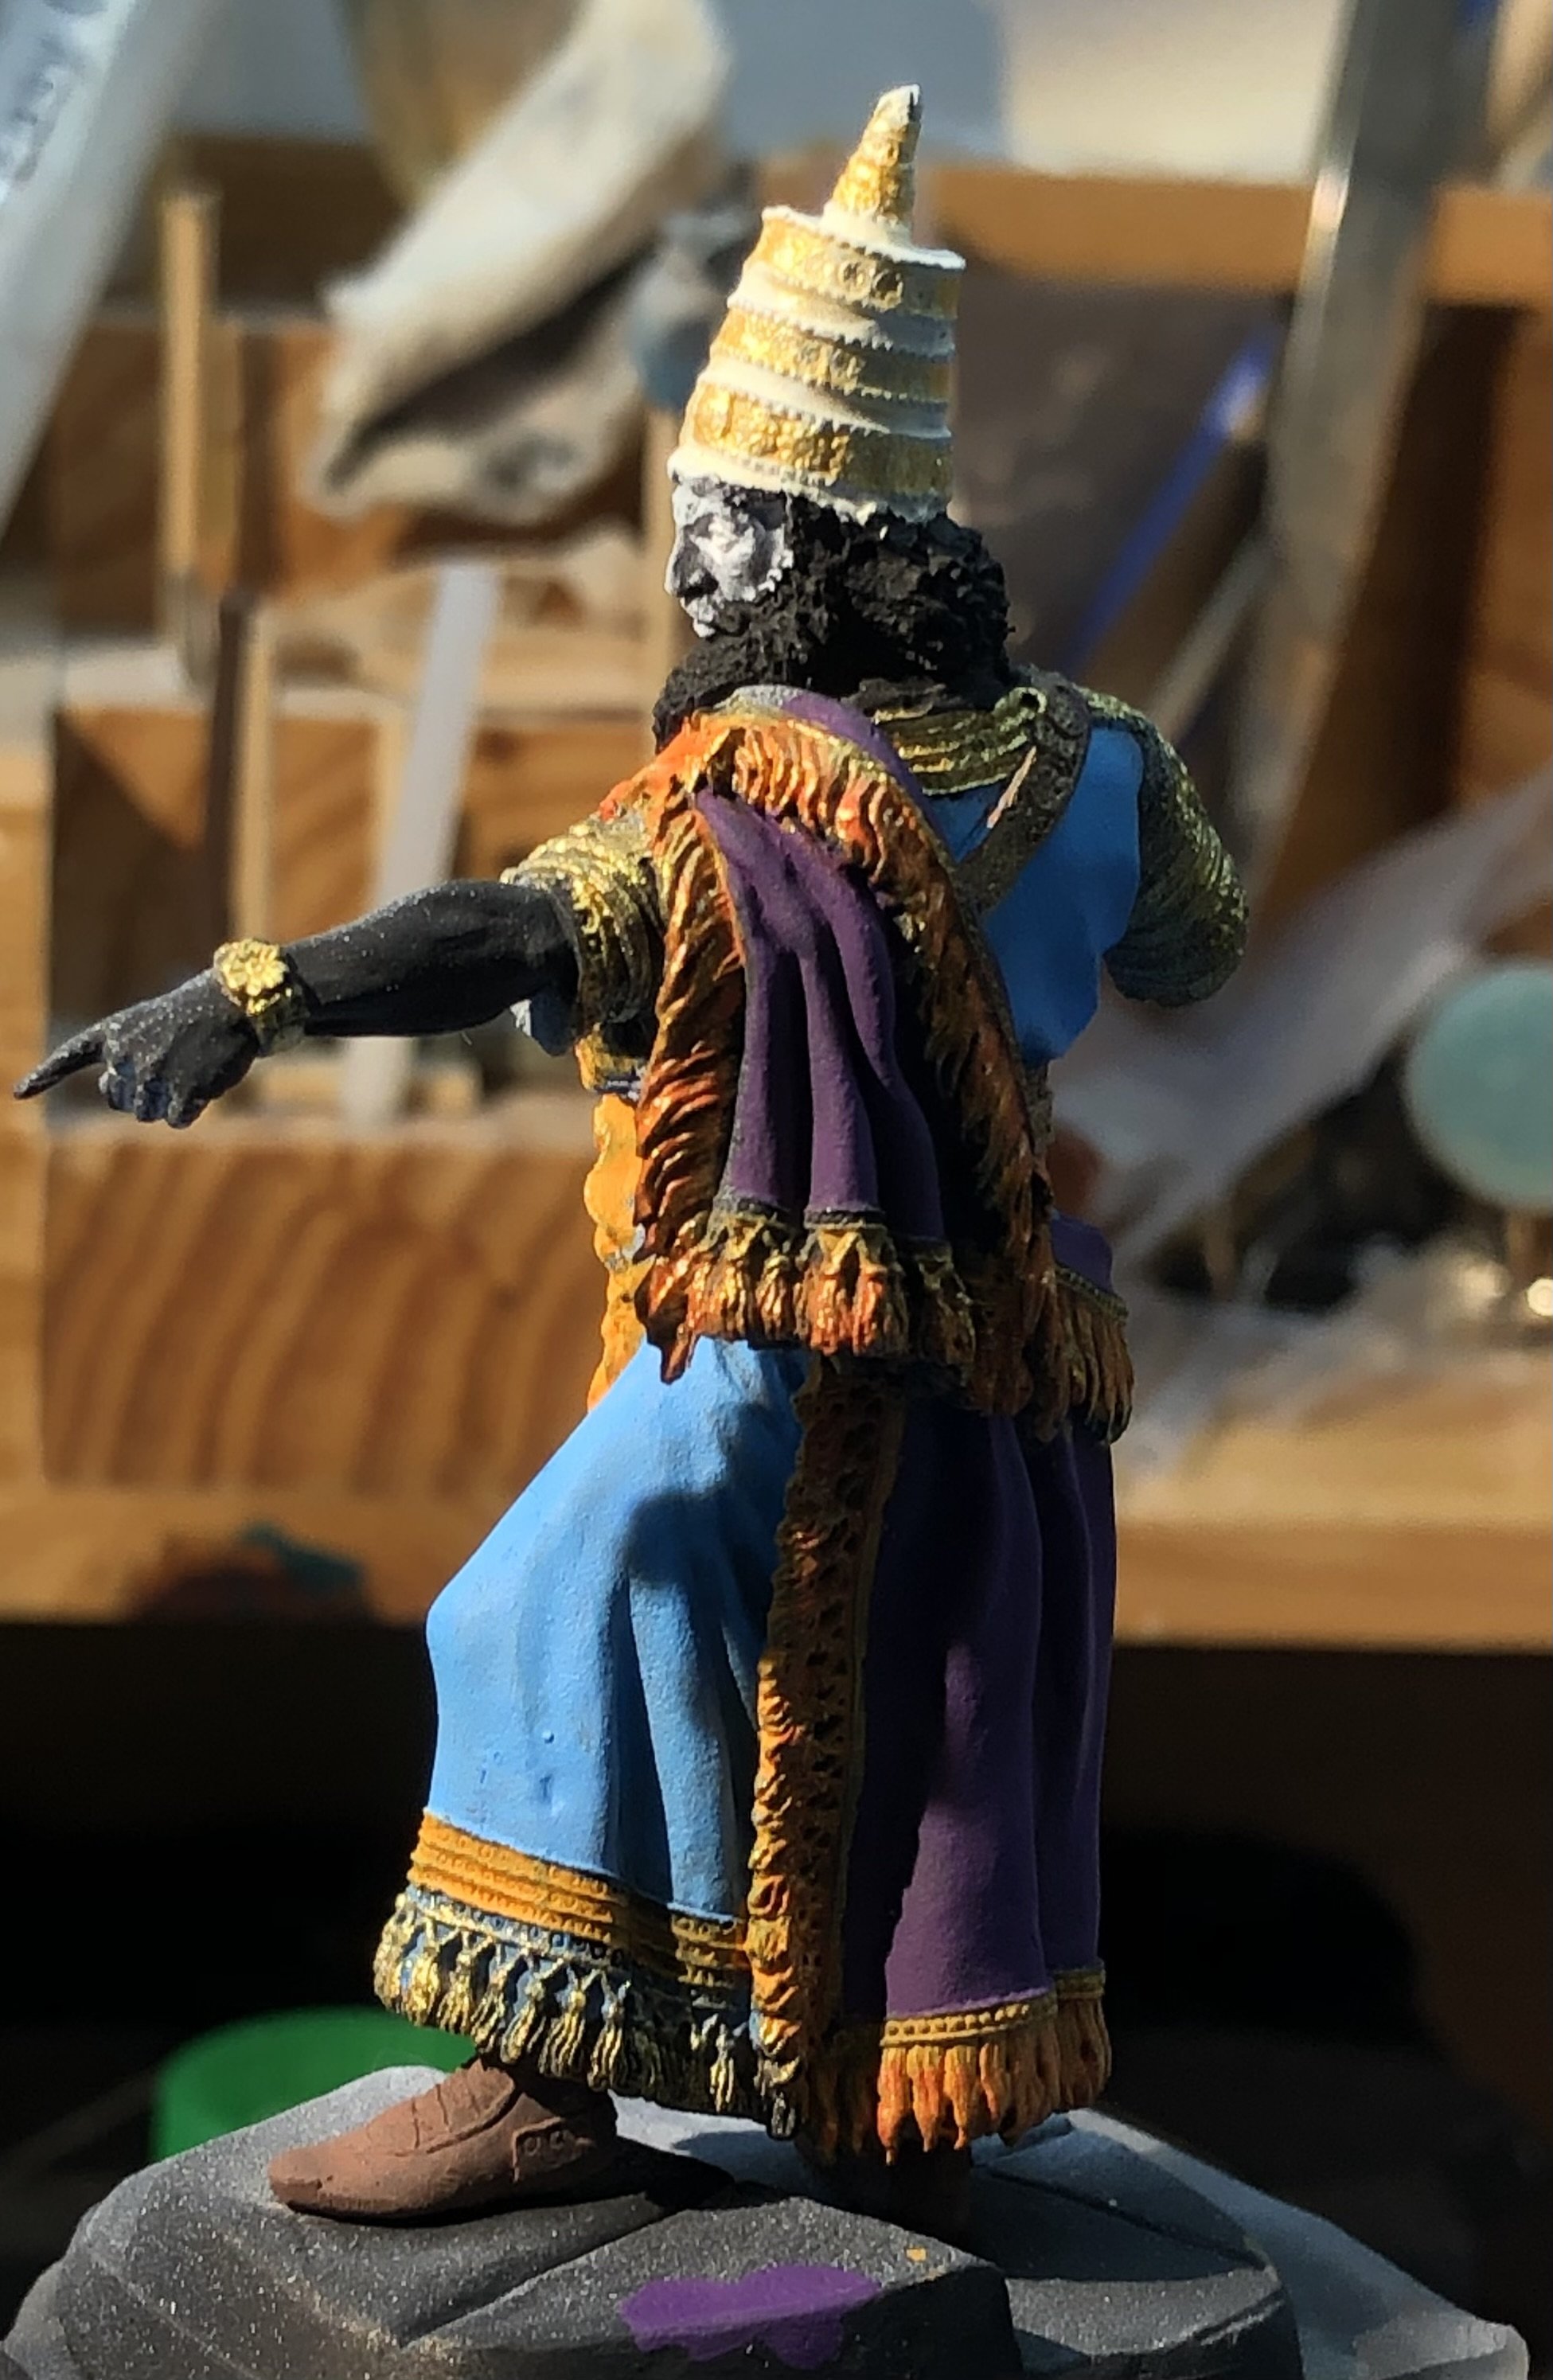
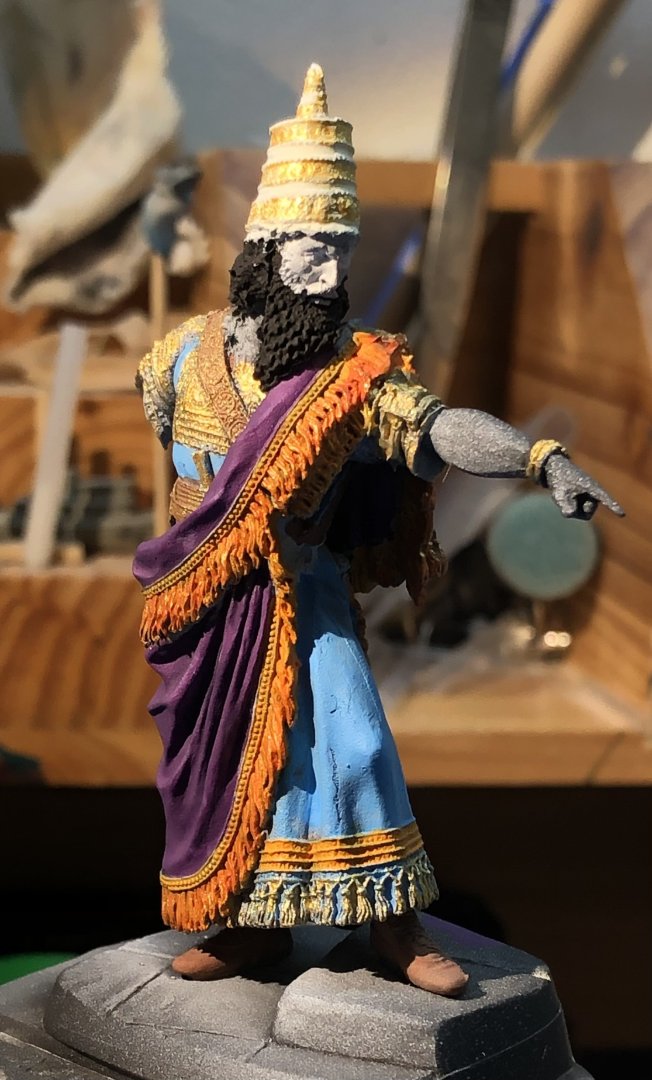
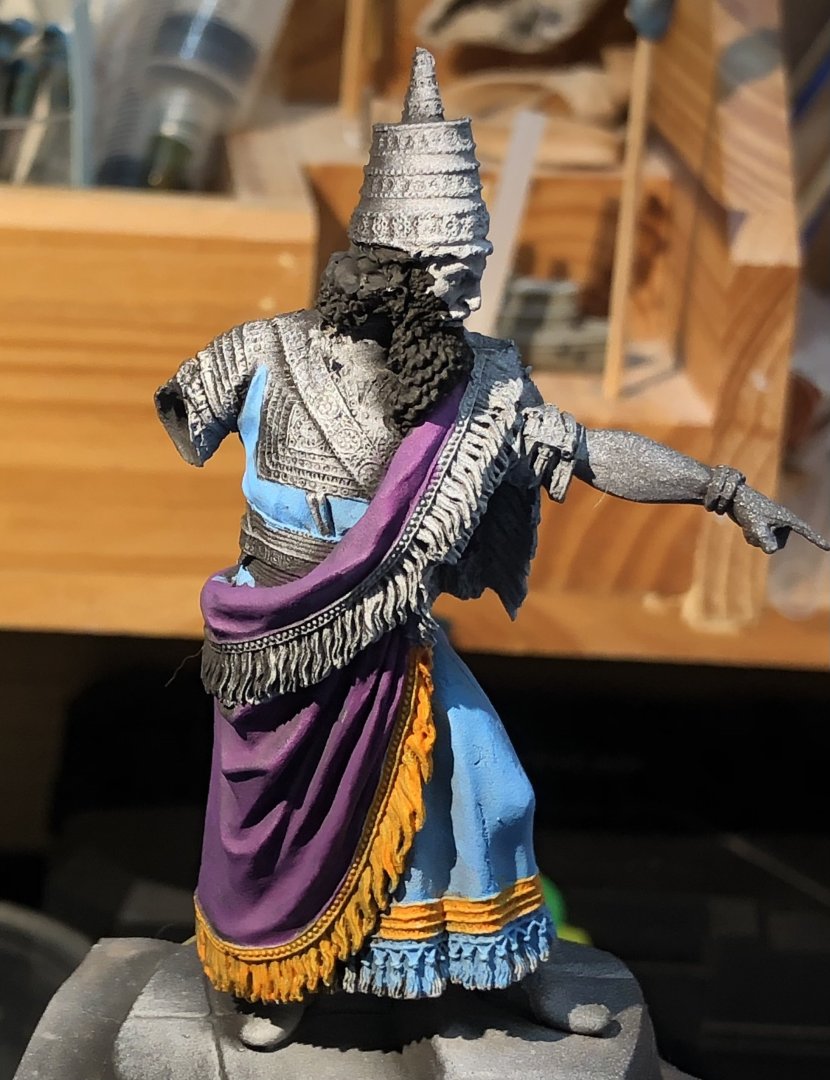
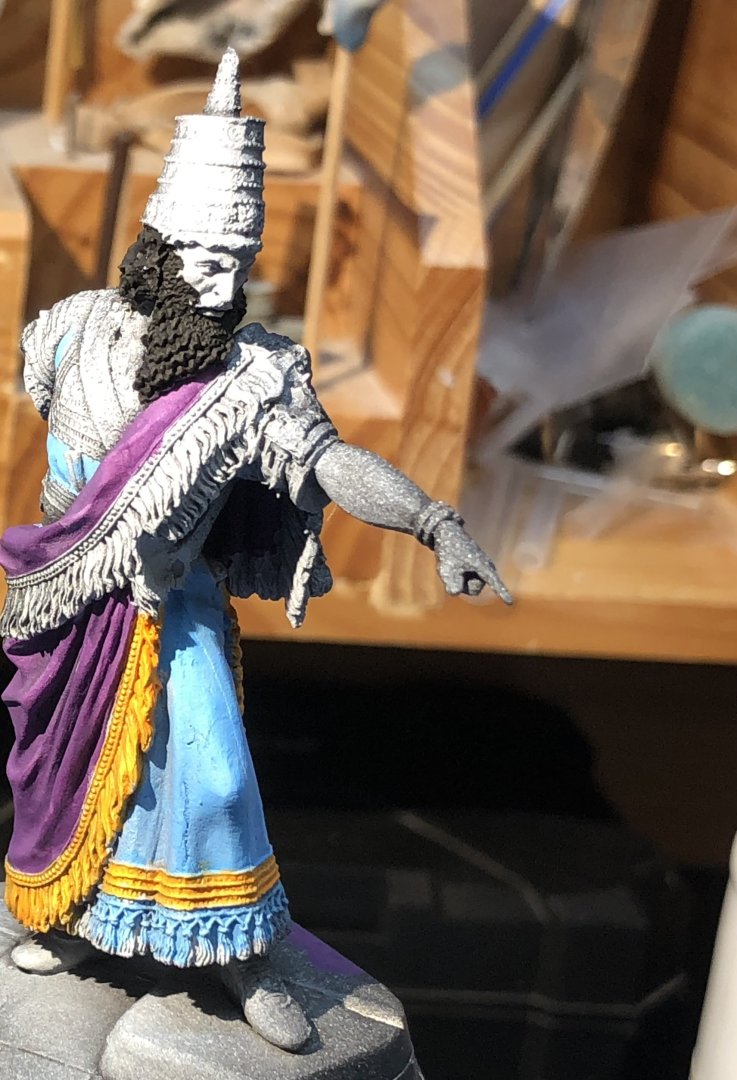
I worked some Amaranth Red into the fringes to complete the base for the gold. I then dry brushed gold lightly over the base. I think it distinguishes the fringes from the gold plates he wears over his tunic. His leather belts were painted saddle brown and then dry brushed gold. The patterns at the bottom of the tunic were also dry brushed gold. I’m not too happy with the hair and beard but I’ll see how the face looks. I’ll probably add some dry brushed dark blue to the hair and then a satin finish. Its amazing what an afternoon can accomplish with these guys. Thanks for looking in, the likes and comments. alan


-
Thank you very much OC, this one is nice to work on. alan
-
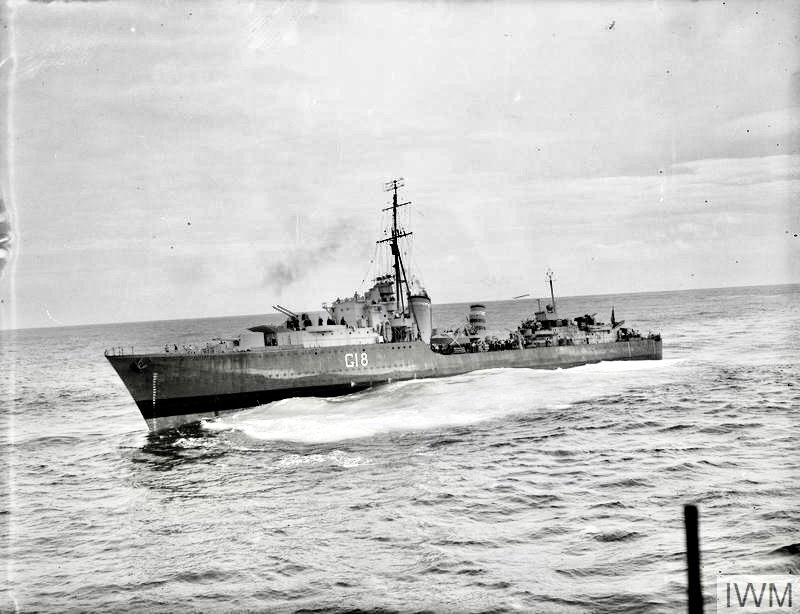
I worked on scaling the camouflage scheme from the photo, using the mast as a comparison for scale. That suggests the black stripe or boot top is below the waterline of the model which simplifies things. I stared too long at the light patches on the hull and decided that they may be where the camouflage had worn off to show the earlier colours which could be white or more likely light grey. I want to try to emulate this so I decided that the best way was to use chipping fluid. I sprayed a coat of Clear to protect the 507C grey (I don’t want to risk going down to the black primer) and will then apply the chipping fluid and the Tamiya light grey, reapply the 507C, mask and then spray the dark 507A. And then try the chipping. At least that’s the plan. I might have some photo worthy progress by then. Thanks for looking in, the likes and comments. Alan
- 42 replies
-
- 6
-
-
- Zulu
- Tribal class
- (and 2 more)
-
Looks great Dave alan
-
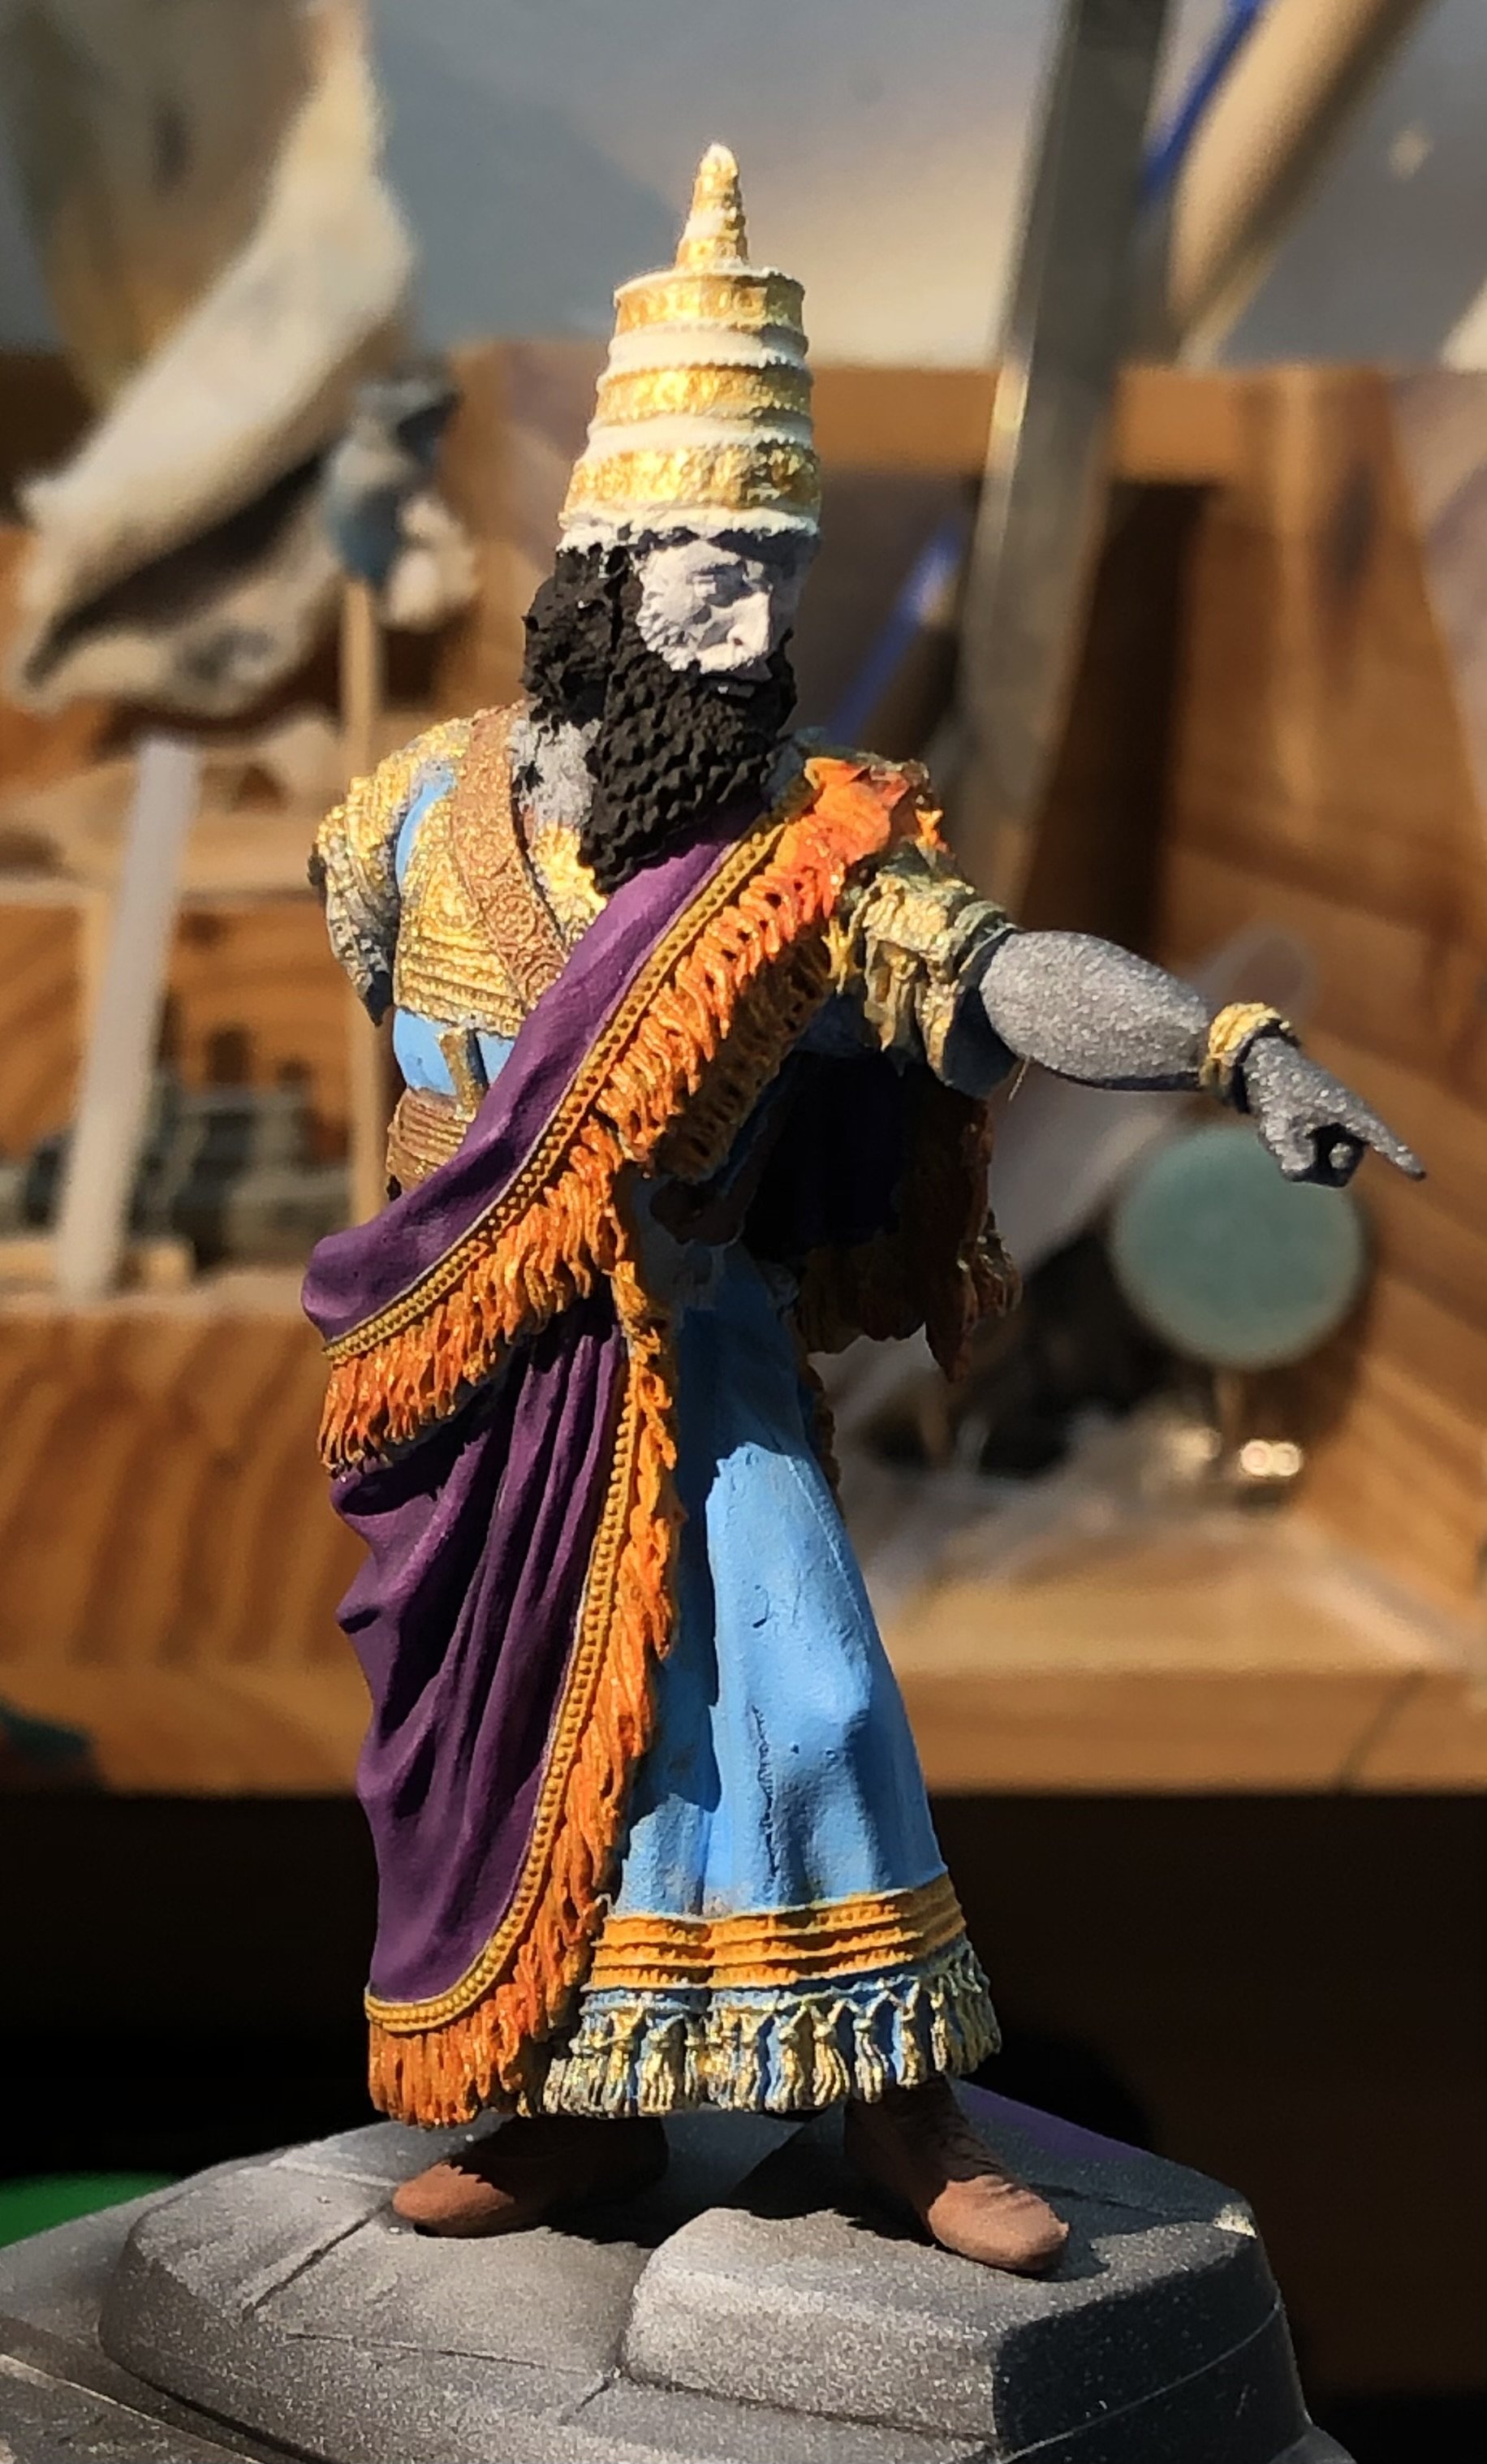
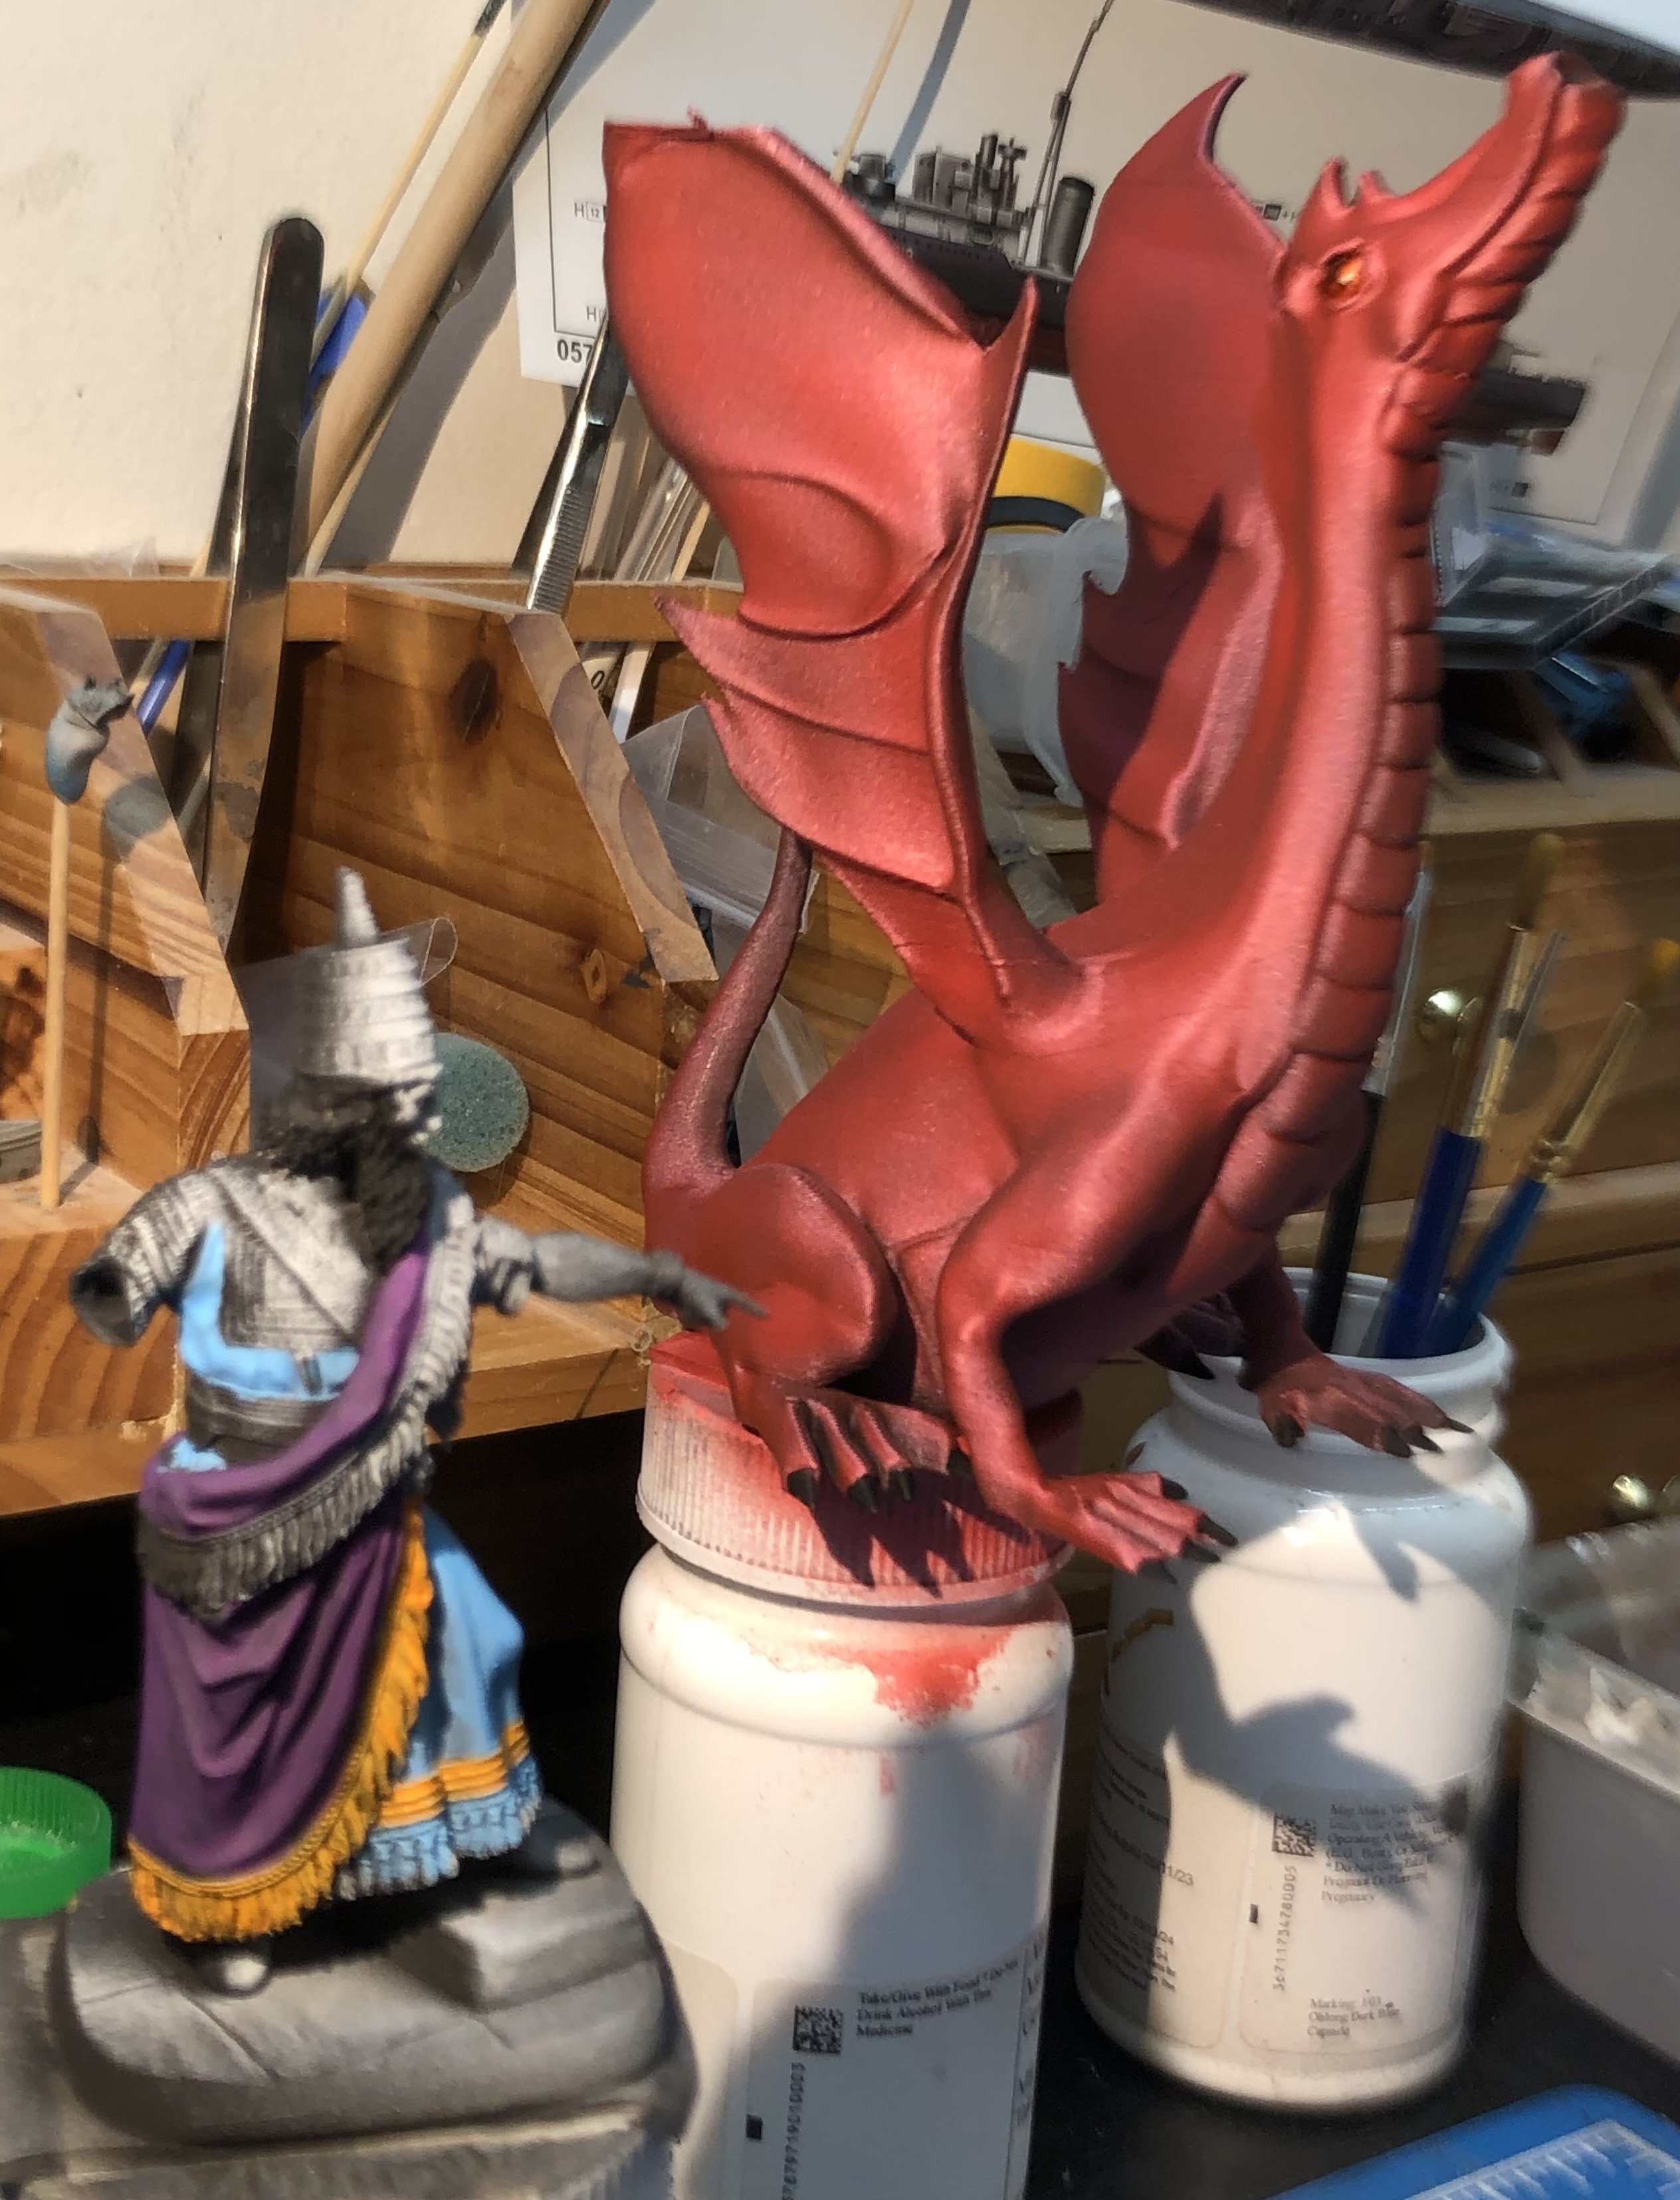
Time to make a little progress with Sargon. I started adding glazes to his cloak and tunic. The cloak is probably about right now, probably a few more coats on the tunic. The orange fringes are the base for the gold thread. Somehow it look more like material than metal if I use and orange base. It might have worked with his cat but I’m not sure pointing like that does for dragons. Thanks for looking in, the likes and comments. alan

-
I spent too much of the day in various rabbit holes trying to get a bit more definitive about Zulus camouflage. Generally I failed. The reference IWM photo was taken in the North Atlantic and so she would likely be wearing Western Approaches or Home Fleet colours. I wandered off comparing WA blues and greens with the admiralty greys in terms of reflectivity and couldn’t really resolve it to my satisfaction. The darker shades on the hull seem to count against WA colours so I have evolved the following plan based on the IWM photo. The hull will be 507C light grey and 507A dark grey in the best approximation of the pattern shown. A black horizontal band will around / above the waterline. The superstructure will be white except for the aft structure and Y gun which will be 507C. I think it’s plausible but if anyone feels that this is foolish please let me know. With the plan in hand I put the 507C coat on the hull and aft structure. Thanks for looking in, the likes and helpful comments. alan
- 42 replies
-
- 6
-
-
- Zulu
- Tribal class
- (and 2 more)
-
Thank you very much OC, I don’t have that photo so it’s very useful. alan
- 42 replies
-
- 3
-
-
- Zulu
- Tribal class
- (and 2 more)
-
Nice recovery Mike. It’s looking very nice. alan
-
I thought there was quite a lot of good information there. I played about with contrast and exposure on the IWM photo and I can see the pattern better now but of course no nearer the colours is the white really a separate colour or deterioration of the paint? I read that Atlantic storms could strip the paint away. However the WA schemes all use light colours. It’s all rather confusing. alan
- 42 replies
-
- 2
-
-
- Zulu
- Tribal class
- (and 2 more)
-
Thanks Scott Your build photos are great and I think your version is a bit more accurate than mine. alan
-
Thank you very much Rob, These little ships pack a lot of enjoyment into a small space and take a bit of pressure off the display area. I found the railings went better with the ca glue because of being able to use less and a quicker grip. I was finding regular ca after a while gave me streaming eyes and nose, sneezing like a bad allergy. So far the BSI Gold (odorless) doesn’t so I will accept the extra cost and continue. alan
-
Thank you very much Andrew. I need to find some of those old kitchen matches to exaggerate things. alan

- 55 replies
-
- 10
-

-