


killickthere
-
Posts
43 -
Joined
-
Last visited
Content Type
Profiles
Forums
Gallery
Events
Posts posted by killickthere
-
-
Looking good. Bringing back fun memories. Keep up the good work.
-
-
Good luck with your build. It's a fun ship to build and large enough to have nice detail. I also build the ship. Although my log is not any where near as good as the two you mentioned, (I used then also), there may be some methods or ideas for you.
Following...
- Peanut6 and Jason Builder
-
 2
2
-
WOW, just found out about the Indy from Facebook. I love the Hornblower tv series. I certainly would love to attempt her, (need to finish rigging the Alert), but I'm not so sure my skills are worthy. But you don't know until you try!
- Dave_E, thibaultron and mtaylor
-
3
-
Thank you David. Sorry I just saw this post. I just received my kit today, yippie! I will probably rig the guns. Thank you for the info.
-
I ordered my Alert kit Tuesday. I'm finishing up my Bounty launch, (the small amount of rigging). Looking forward to starting the Alert.
Good luck on the build.
- Obormotov, Thukydides and jpalmer1970
-
3
-
Hello David, I'm very interested in building this model after I finish my Bounty launch. Your build is beautiful. One question... I noticed the cannons are not rigged. Any particular reason? Does the kit not come with the blocks and cordage to rig them?
Thanks!
-
Subscribed.
Wow thank you Glen for the fantastic tutorial on the Alert. I am working currently on the Bounty launch and have been looking for my next build. With your log I may just attempt the Alert! Thank again!
-
A beautiful build Tom. I've had your build saved for a few years now and the kit for as long. I needed to finish my viking ship first and got that done last year. I am going to start the kit within the next week or so. Interesting seeing new posts, (sorry for the circumstances!).
Thank you for the build. I know I'll be referring to it daily!
Mark
-
6 hours ago, Balclutha75 said:
killickthere, you may have convinced me that I shouldn't go there! Just kidding ... kind of.
Oh no! It was just a method that worked for me. The work is just very monotonous. But as you see the hull coming together it's worth the work certainly!
5 hours ago, md1400cs said:NIce updates.
My brother is super involved in the painting of historical figures hobby (mostly Pegaso). Sent him the link to that one that was painted for you. He also thought that it was an excellent example. He wondered about the size 75mm?
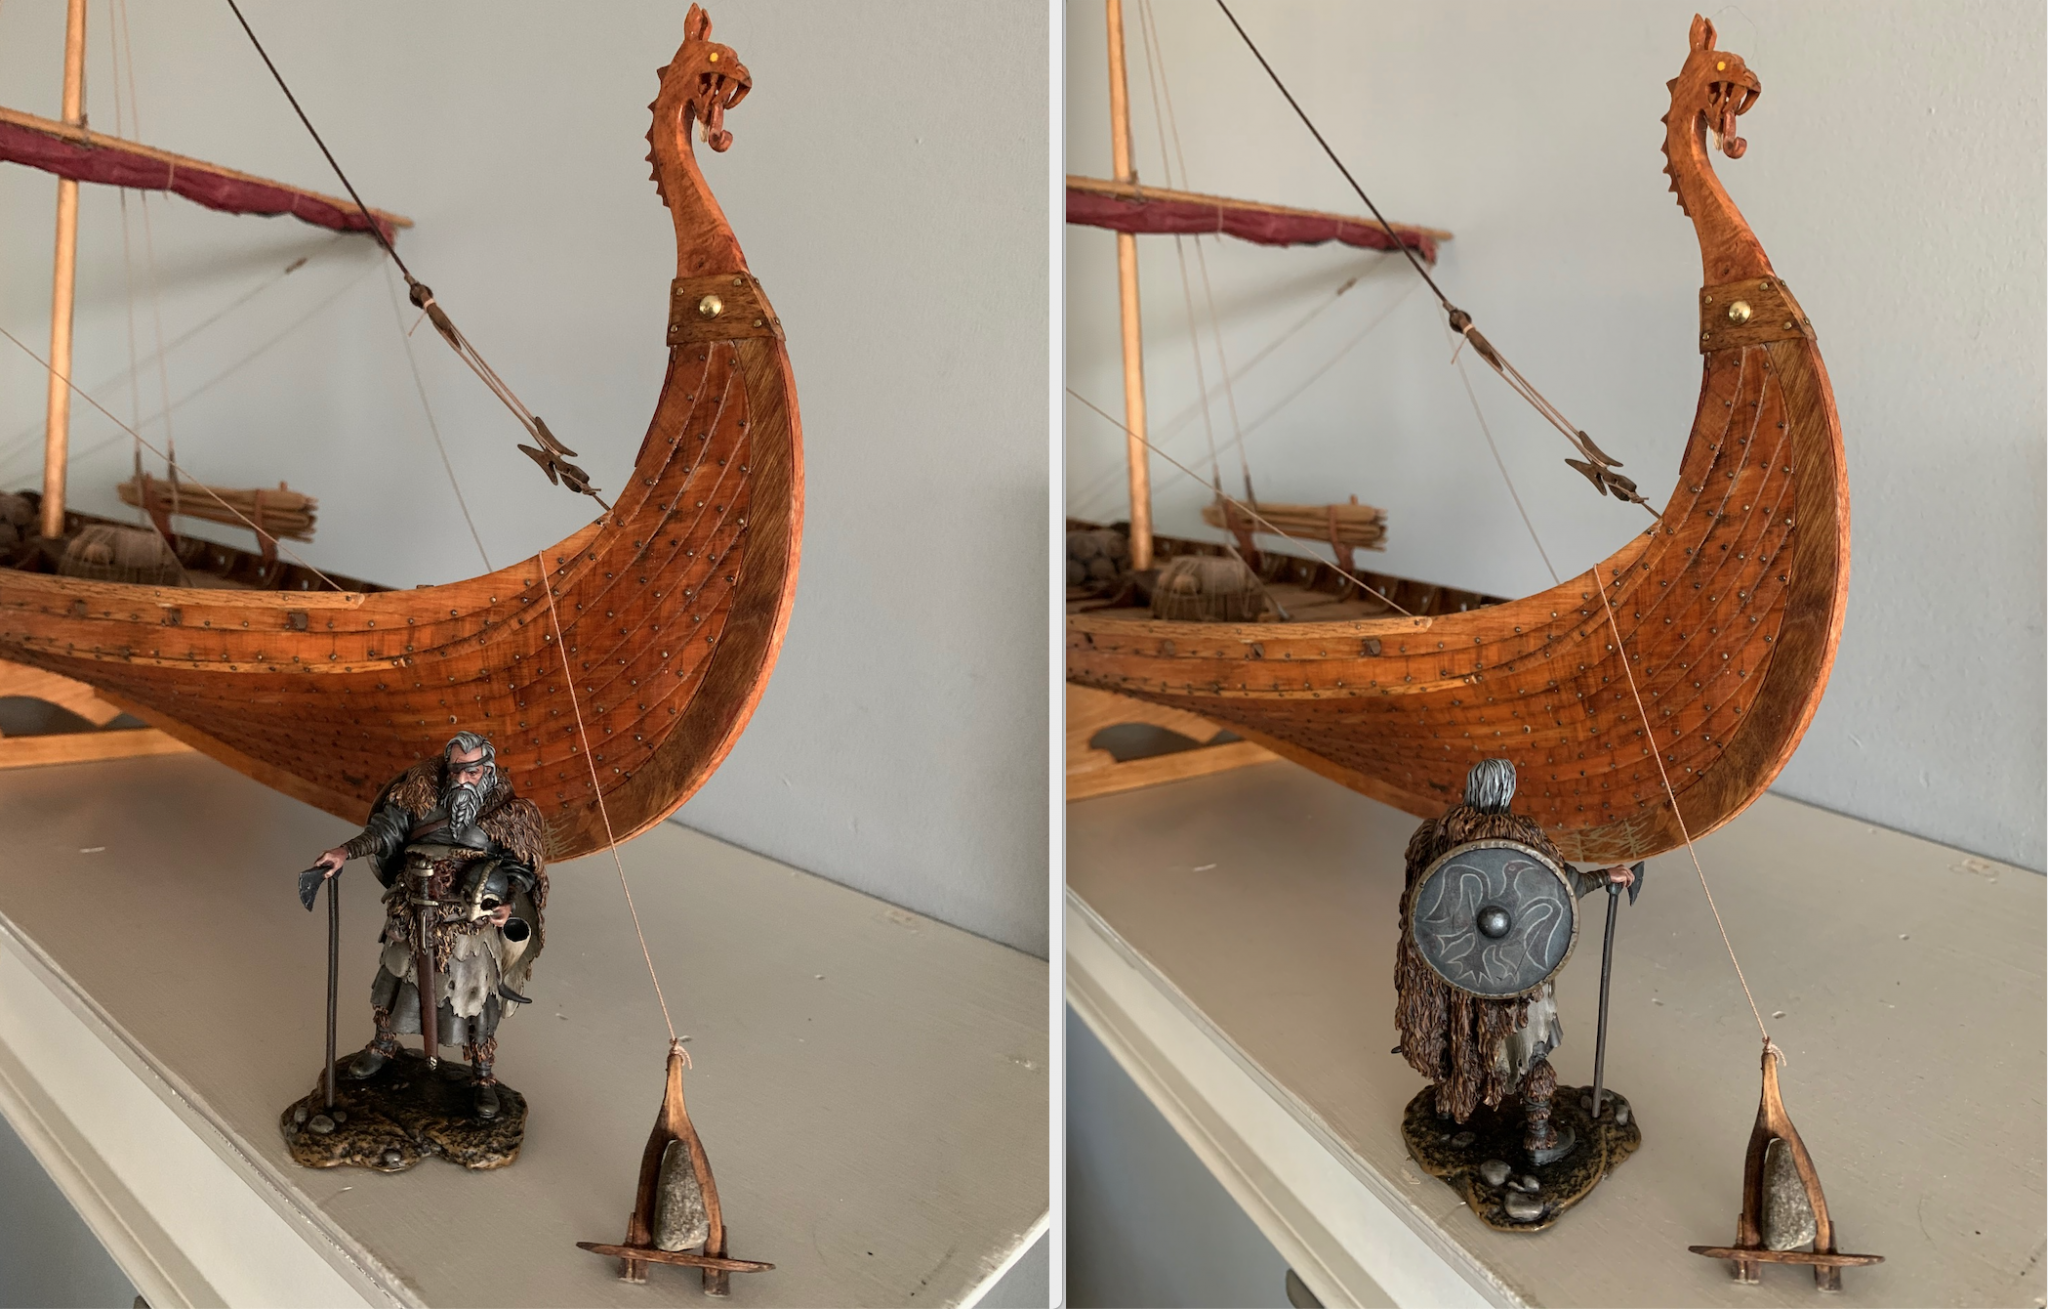
That's very cool. Yes the figure is 75mm which would put him at 7'4", too big for the ship. That's why he is not on the ship. But he looks good beside it. I found 54mm figures but they would have been too short. I'd rather have a larger figure than smaller as they are Vikings after all!
My goodness your ship building is impressive. Unfortunately I don't have the patients to build something like the Sovereign of the Seas. I'm building the Bounty Launch soon. I would like to try the Constitution maybe one day.
-
6 hours ago, Balclutha75 said:
Sure, thanks. This is a new hobby for me so I'm still the kid in a candy store. I did a quick Ebay search and found some pins "Bridal & Lace Pins", two different sizes but the difference is just length.
You really did nice work with those!
Well then... Welcome to the hobby! You'll find a wealth of information on the forum. I wish I was half as good as most of these guys but as I said I pick and choose the battles I think I can do really well.
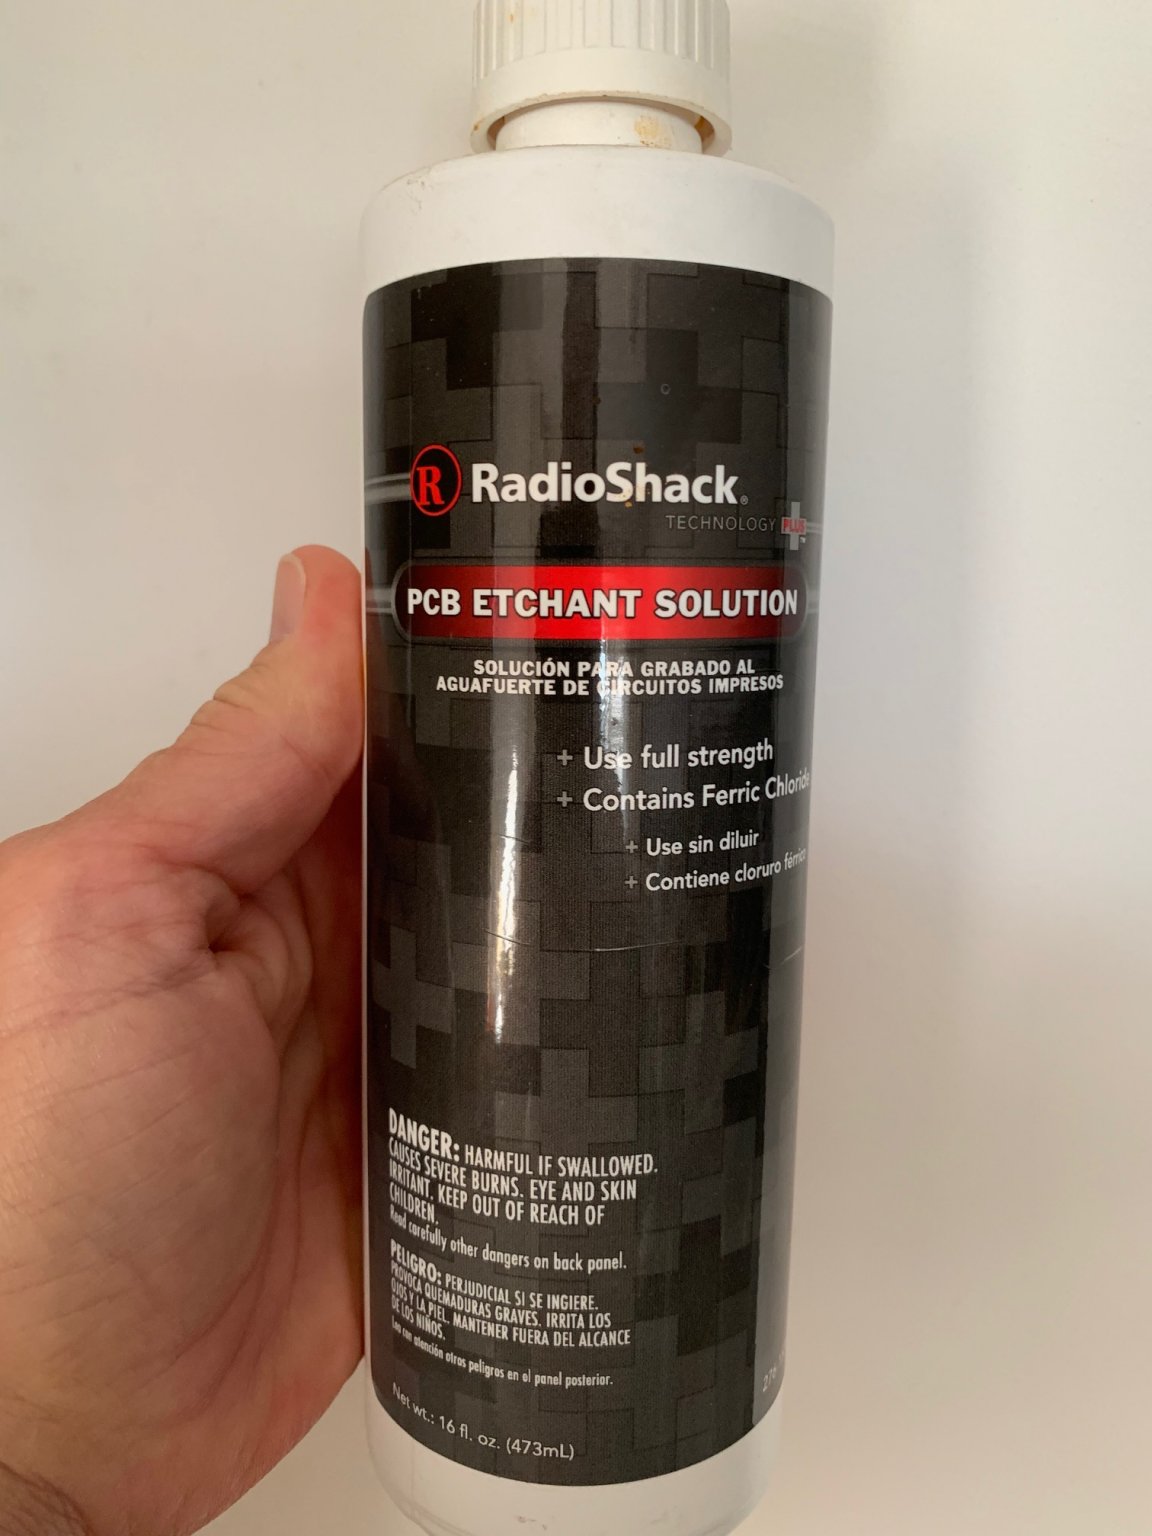
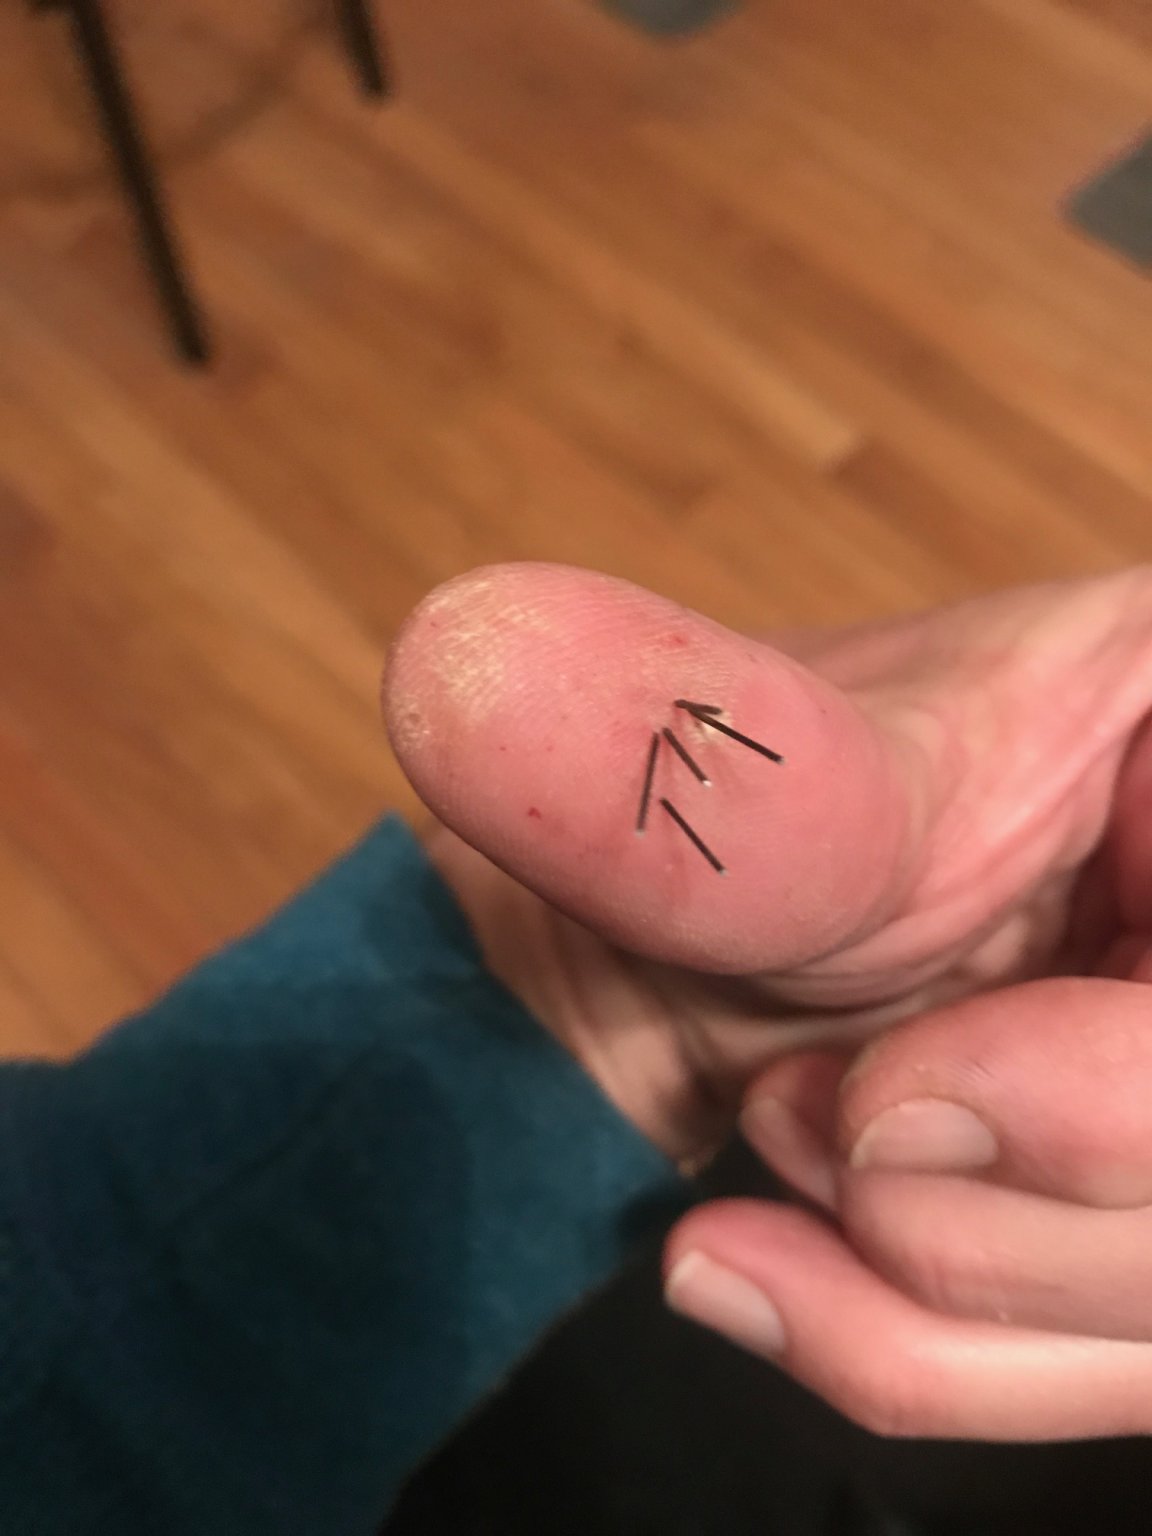
Thank you again. Adding nails is a painstaking process but adds so much to the model. Ask the eBay seller to give you the head diameter. Seems to me to get the smallest head I had to purchase longer pins but the excess just snaps off. Be careful snapping them as they go flying. I would stick my thumb in front of the pin as I snapped. The snapped off section would shoot ride into my thumb sticking in it. They are so small didn't hurt so I'd just pull them out lol.
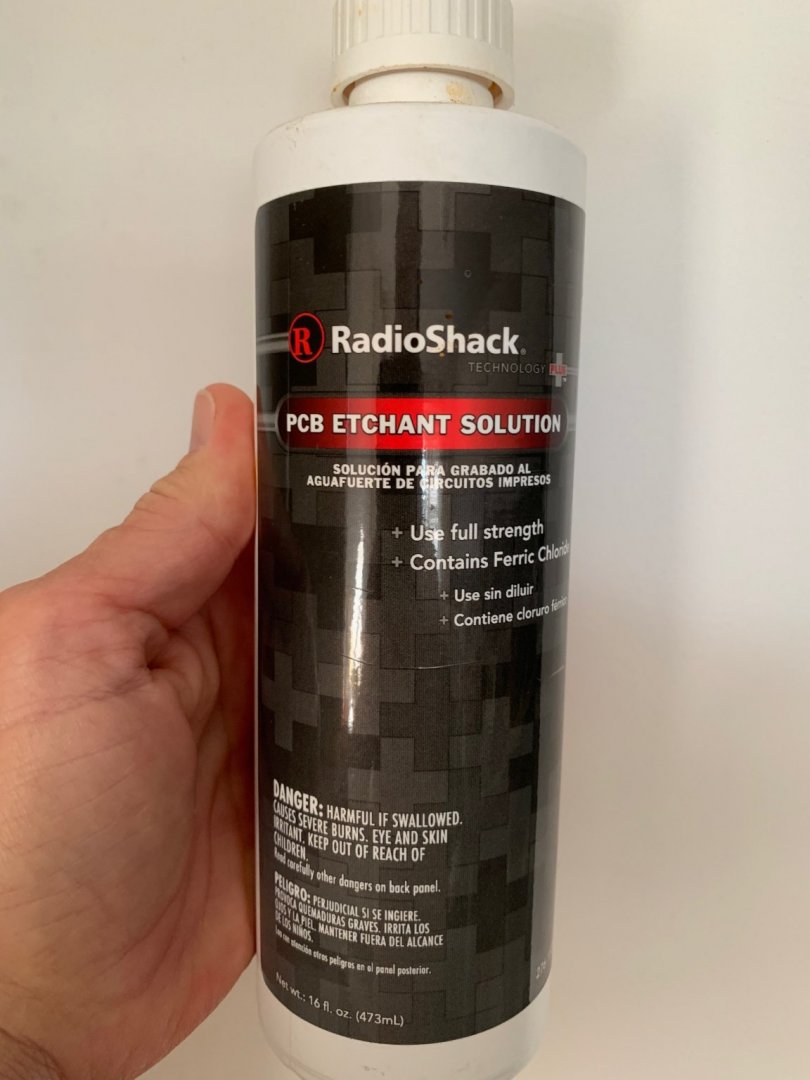
Here's a pic of the solution I used. Experiment with time.

-
22 hours ago, Cathead said:
Just read through this build, great work. Love some of the extra details like the anchor, I may use that for my current build.
10 hours ago, Balclutha75 said:Ditto that! I've wondered about the iron anchor that came with my Amati kit. Didn't feel right, yours looks great.
Are these the kind of lace pins you used?
https://www.amazon.com/dp/B000PSFC46/
Thanks.
9 hours ago, Louie da fly said:Looking good, but the sword needs a pommel (the counterweight at the end of the handle). They came in all kinds of interesting shapes, some quite beautiful.
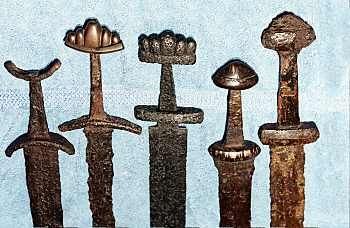

For more varieties, do a google image search on Viking sword pommels. I think you'll be agreeably surprised.
Thank you all for the kind words. The anchor was a really fun little aside from building the ship. Going out and finding a suitable rock then messing around with the fit, (for the better part of the day!). Squaring the holes for the wedges etc.
Louie thank you for the pictures yes they do need pommels.
Bulclutha75, they are something like that except I purchased mine on eBay. I tried to go back to my purchasing history for them but that only goes back to 2018. I don't remember if they were nickel plated or not. I do remember though that I soaked them in an electronic etching solution for various times. The longer they soaked the more rusty they became. If you want the name I still have the solution.
-
One more pic. I ordered the warrior from a Ukrainian fella on Etsy. He's pewter , (really heavy), and had an artist friend of his paint it. I gave her artistic license and think she did an awesome job.

- GrandpaPhil, Binho and md1400cs
-
3
-
-
Again thank you Michael. Yes that is one of the pictures I found to model my mast fish after! Haha.
- md1400cs and BLACK VIKING
-
2
-
33 minutes ago, md1400cs said:
Nice - let's see how the outer hull nails came out. I also plan to add nails, but to complicate things I'm hoping to leave some deck panels open
to show interior details - big issue I know - covering the deck, as you did makes things so much easier
Yours looks very good - nice build indeed. Anchor perfect - interesting that Viking kits only include much later style anchors.
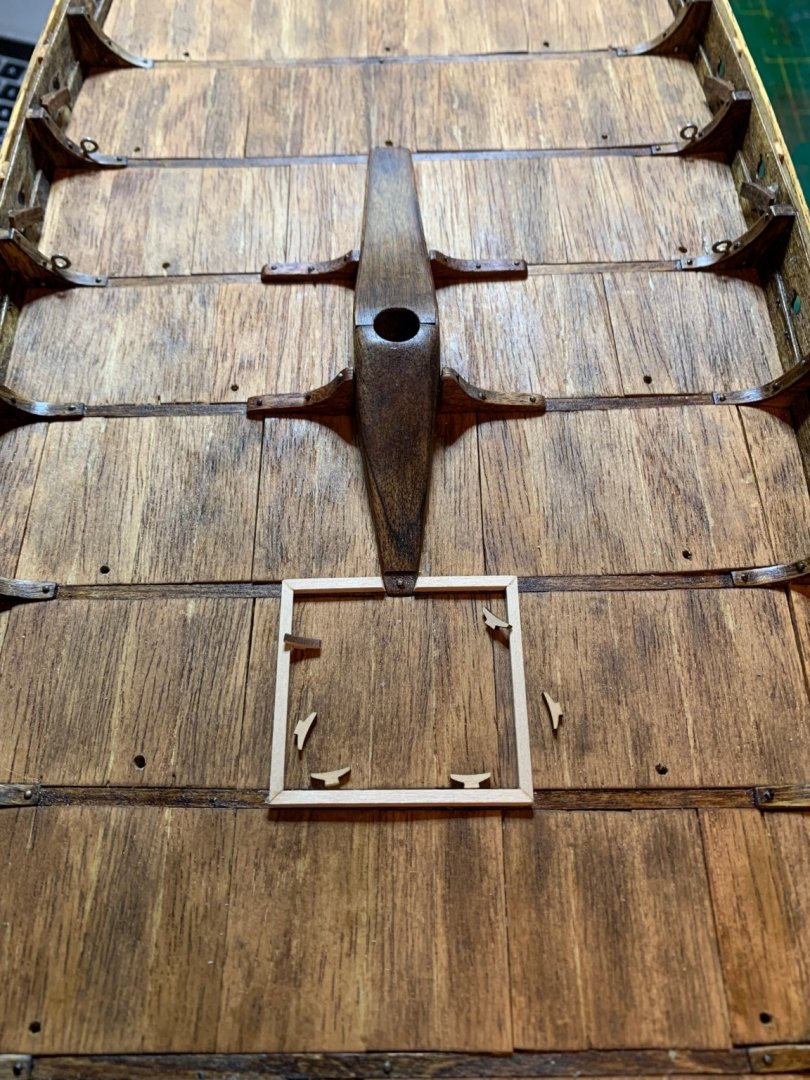
Also Michael, I was going to leave a couple of the deck sections off also, maybe show some storage. Well everything would be soaking wet I doubt they used it for much storage. If you noticed I drilled holes in a couple of boards in each section. I saw this on the Draken. They had to lift the deck boards somehow to bail the water out and that is how ! There really isn't much detail to show inside other than a bunch of nails sticking through! Good luck with your build.
-
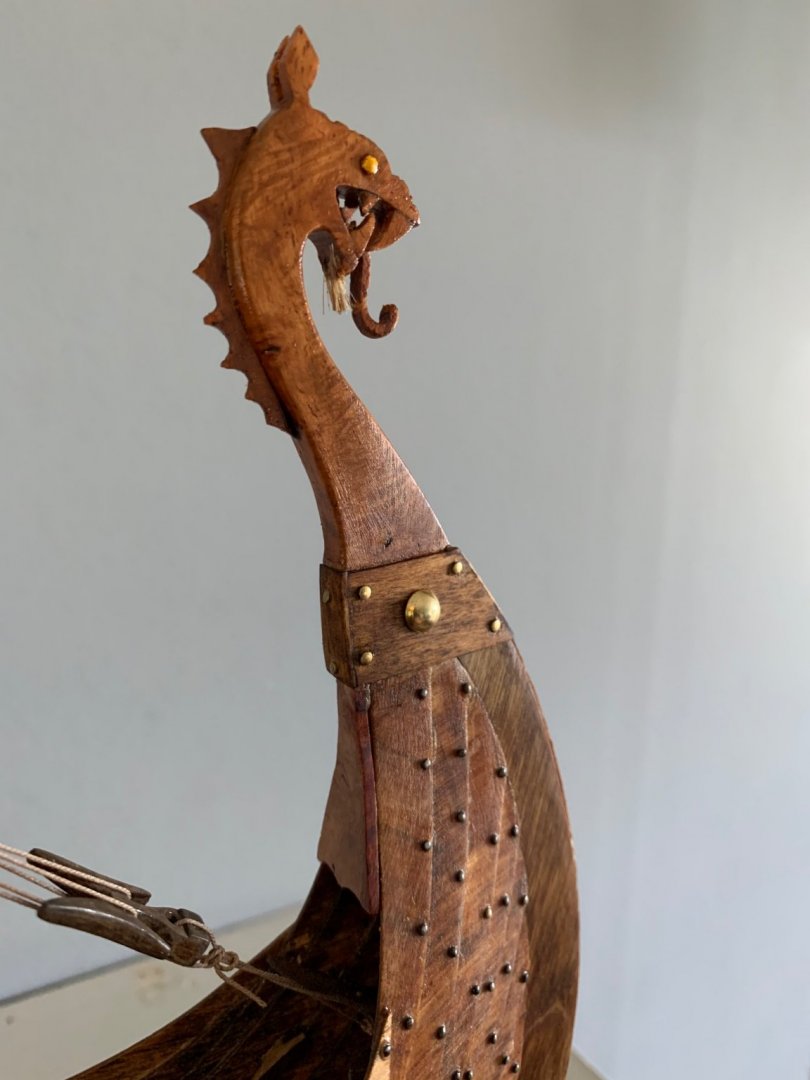
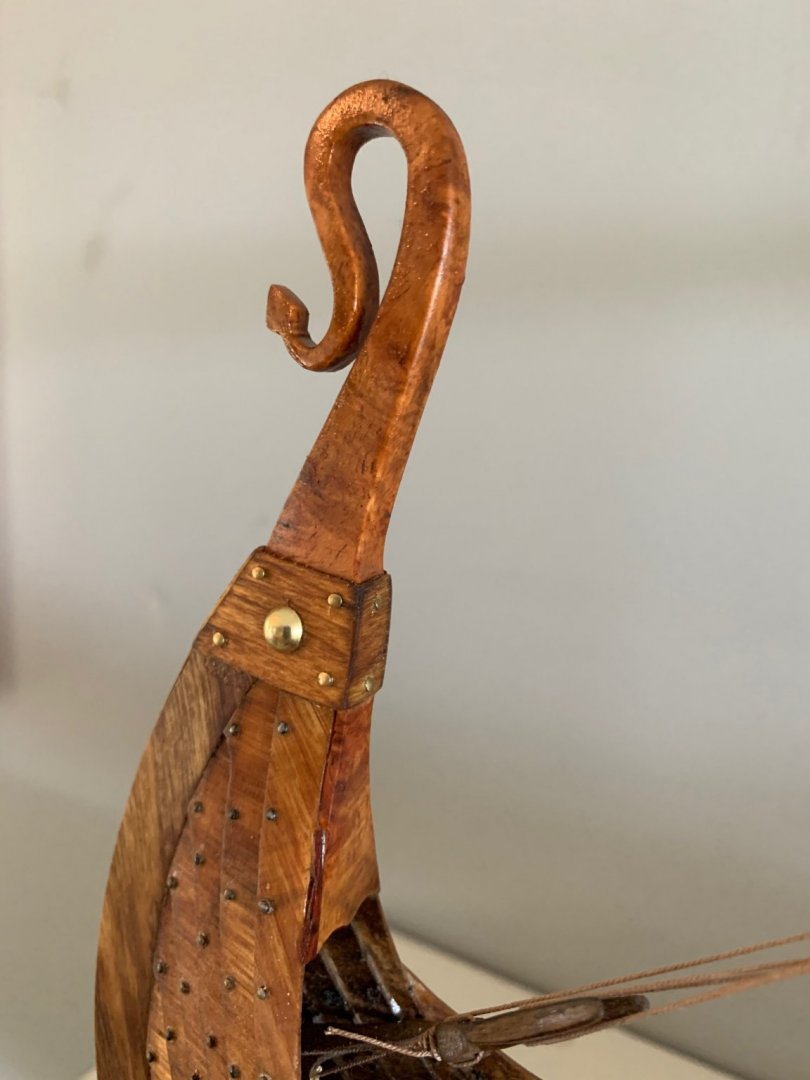
Back to the head and tail. I knew I was going to have to cover the area where the figurehead stempost, and planking came together. I tried cordage, couldn't get it to lay right, leather, too thick, and metal, I'm not a good fabricator. Well the whole darn thing is wood. Why not wood?? I really like the way the head and tail came out. And it needed some bling right?!
- GrandpaPhil, Sea Hoss, md1400cs and 5 others
-
8
-
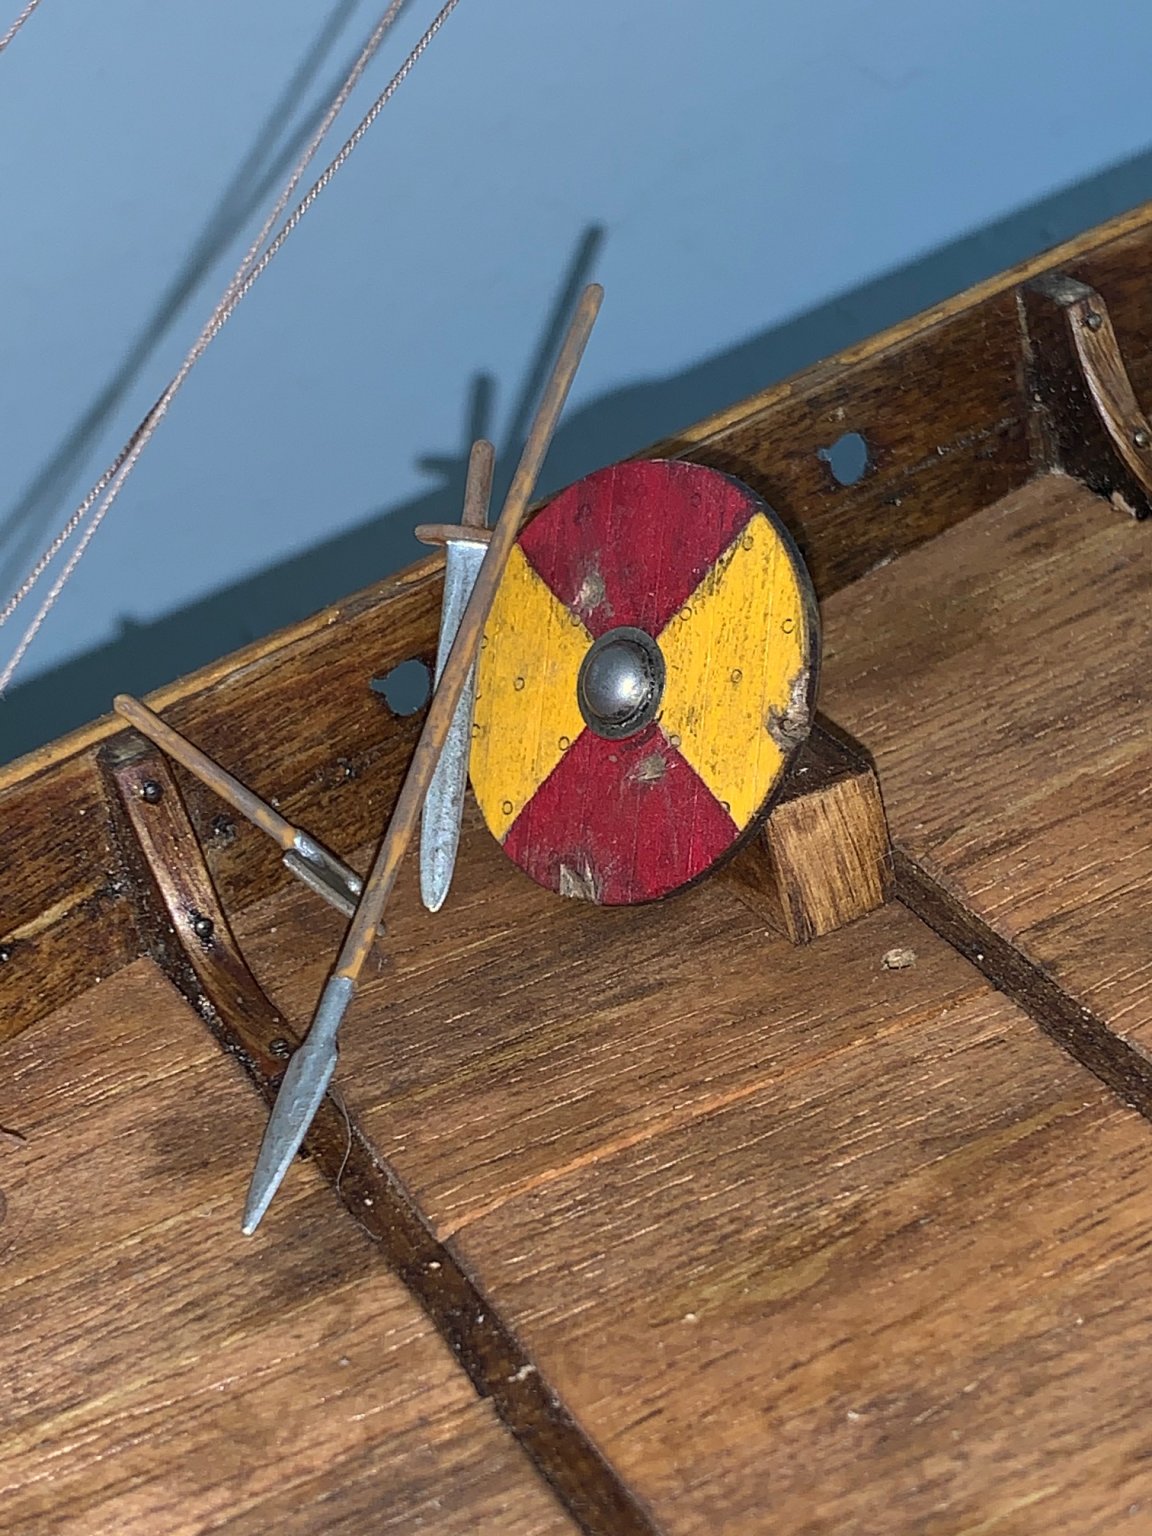
I only made one shield as they're out on a raid. The shield and weapons are from the only, to this point, fallen comrade.

- BLACK VIKING, md1400cs and GrandpaPhil
-
3
-
15 minutes ago, md1400cs said:
Nice - let's see how the outer hull nails came out. I also plan to add nails, but to complicate things I'm hoping to leave some deck panels open
to show interior details - big issue I know - covering the deck, as you did makes things so much easier
Yours looks very good - nice build indeed. Anchor perfect - interesting that Viking kits only include much later style anchors.
Thank you very much for the kind words. There are a hundred and one mistakes but it is what it is. Here is a picture of some of the 2500 nails. Of course you have to pre-drill 2500 holes first!
One word of caution and maybe it was just me. It's tricky getting enough glue to have them stay yet not make a mess. I'll bet I had to replace a couple hundred maybe?

- md1400cs, KrisWood and GrandpaPhil
-
3
-
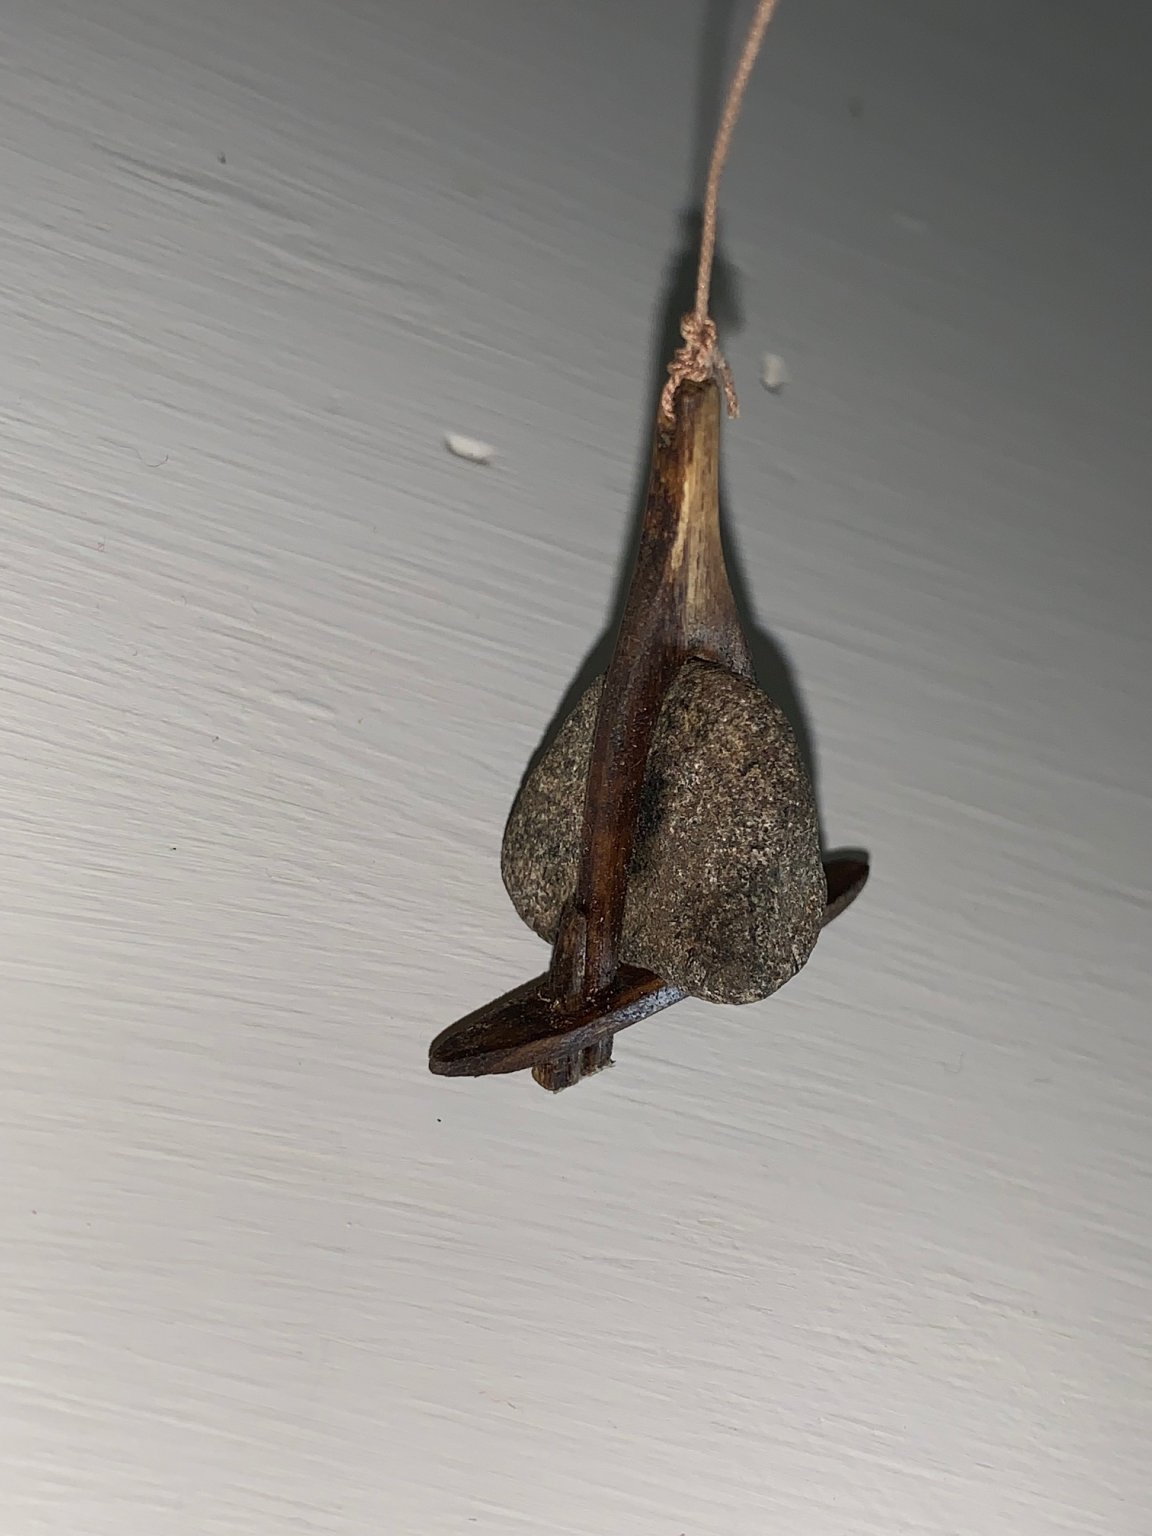
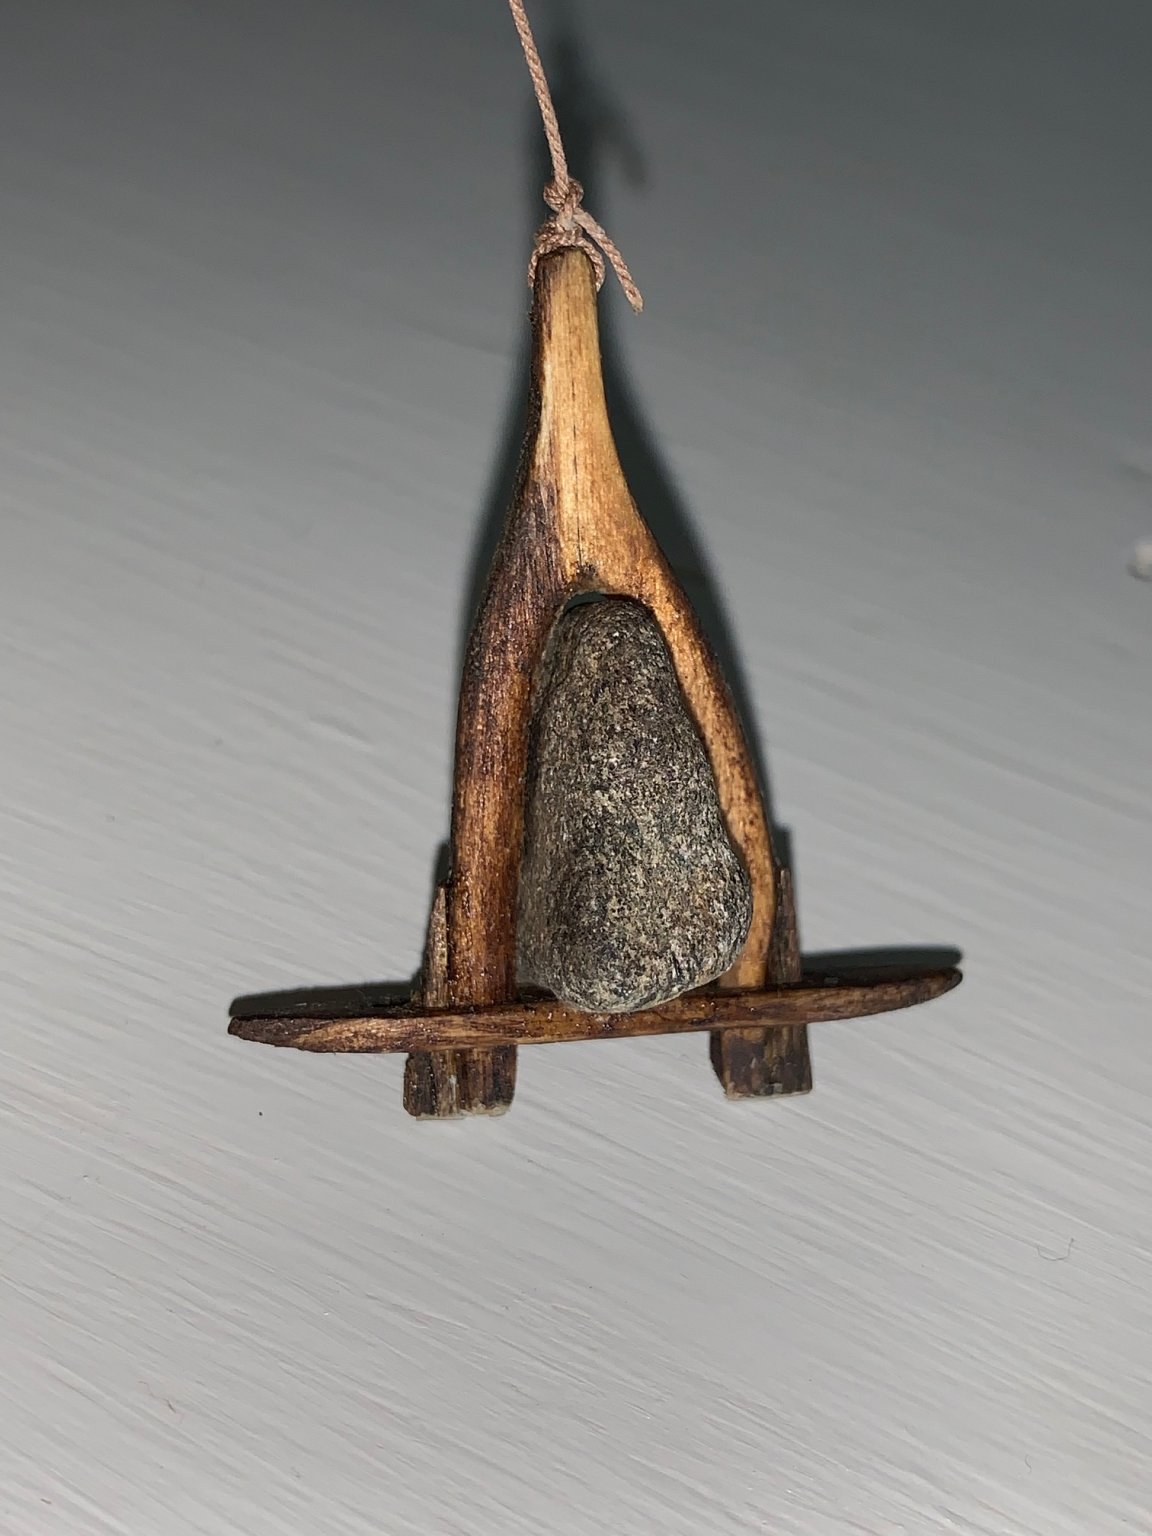
What was next? Oh, and anchor. I understand the Vikings valued iron too much to use it on an anchor. At least at some early point. I found a picture of an anchor made from stone and wood. Here is my inturpretation...
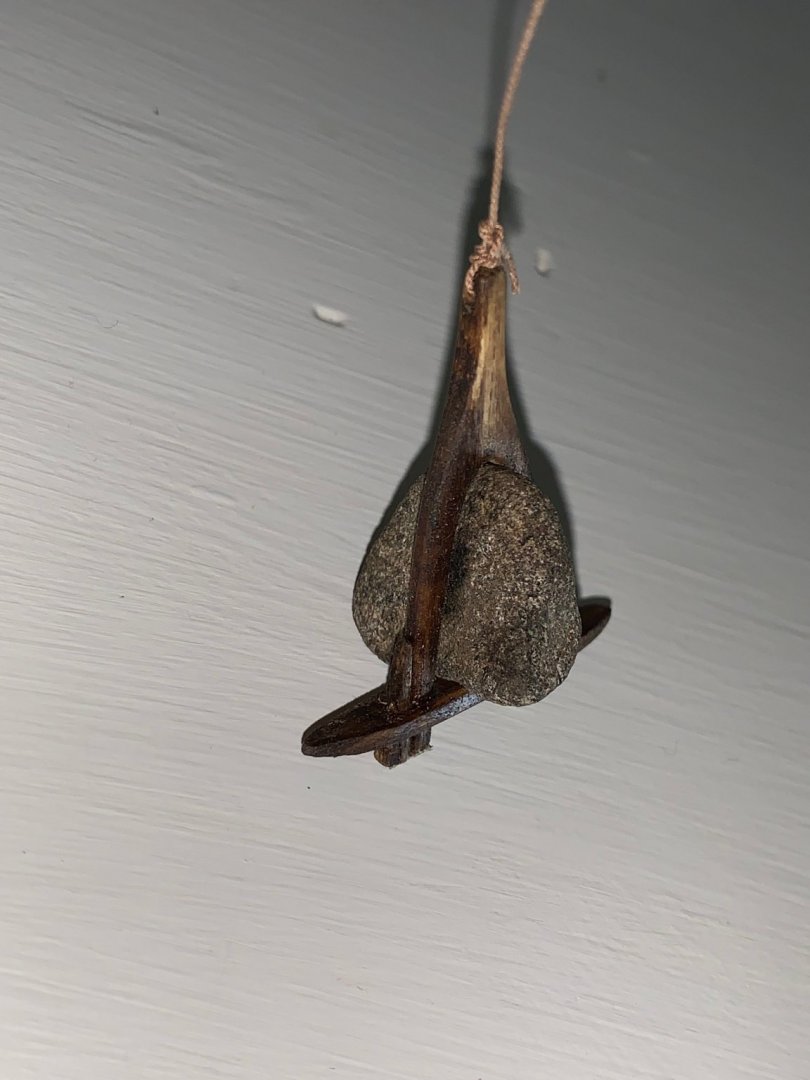

Pretty cool the wedges hold the stone in. No glue used in the anchor.
- md1400cs, GrandpaPhil and Binho
-
3
-
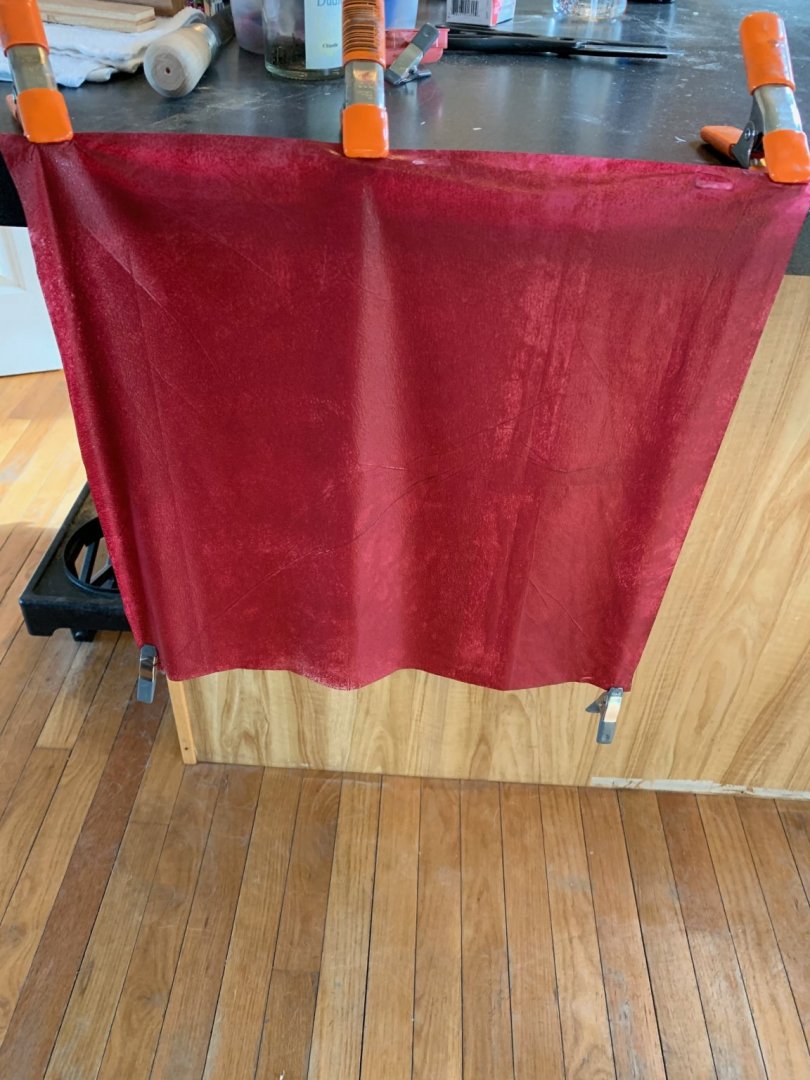
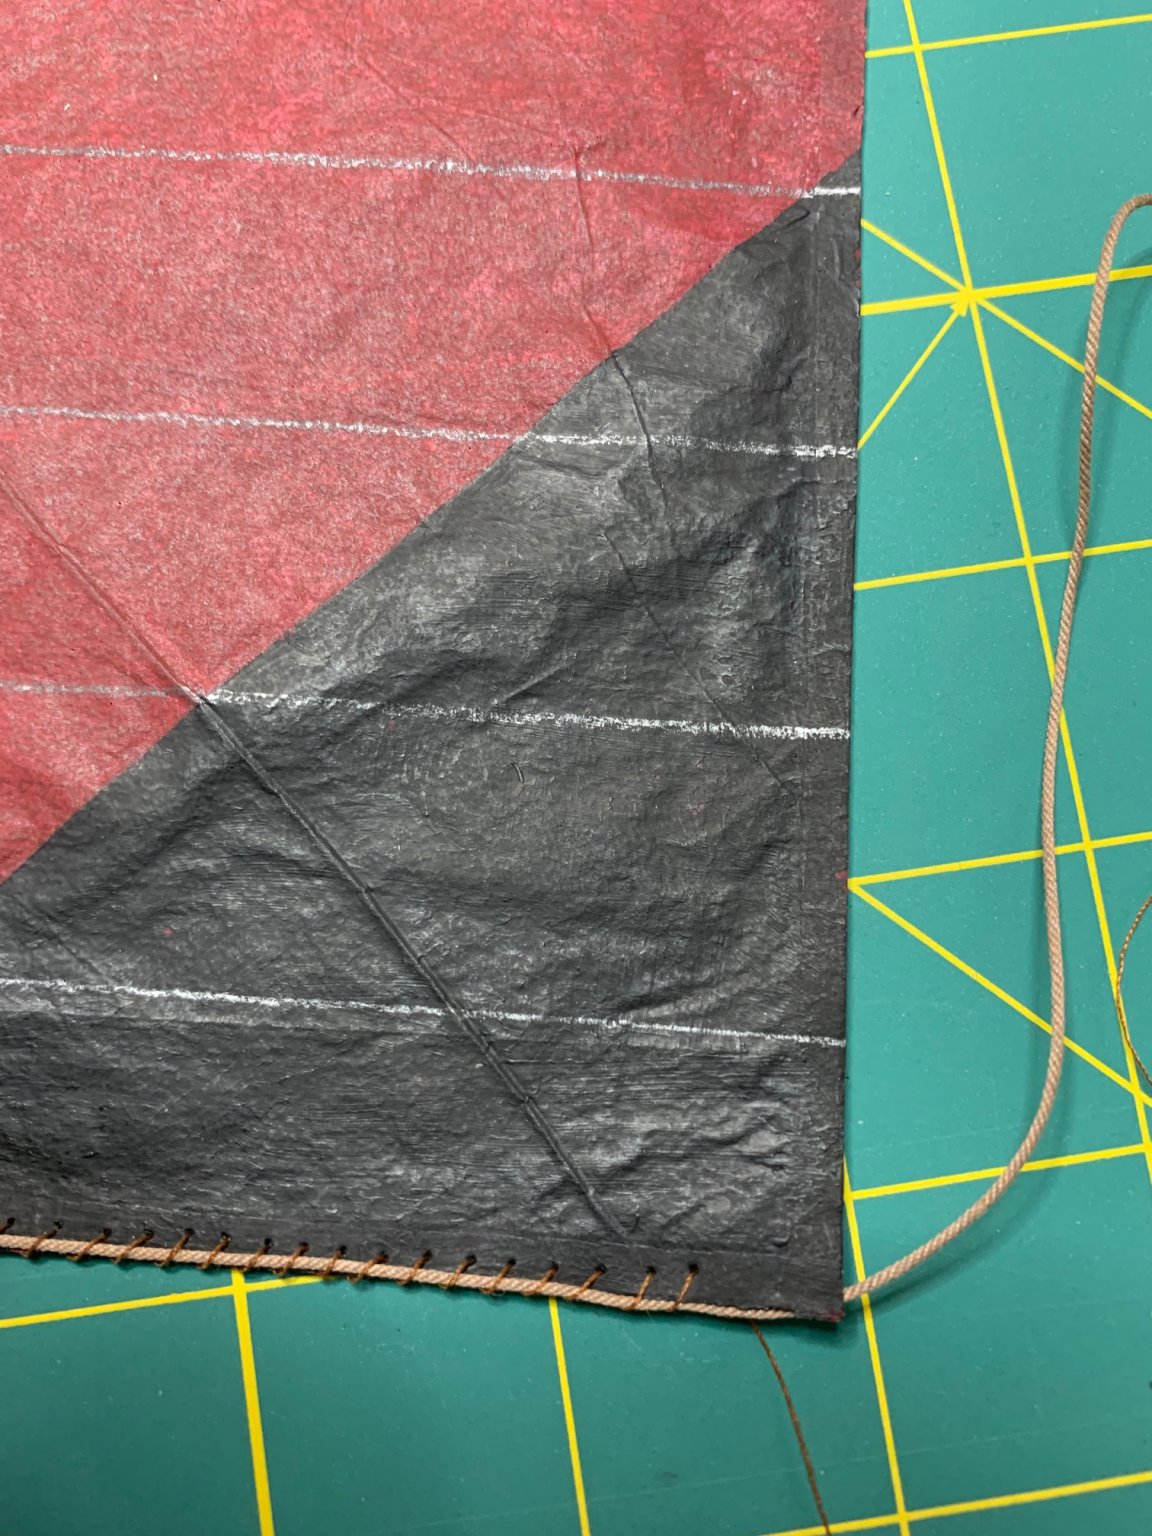
Basically the rest is pretty cut and dry. I wasn't going to make a sail as the cloth provided was a bit, (ok a lot), out of scale. To me anyway. I YouTubed making a model sail and found an awesome tutorial by Tom Lauria using silkspan. I figured I'd try...
Sized, painted, and drying.
I figured it needed a little individualism...
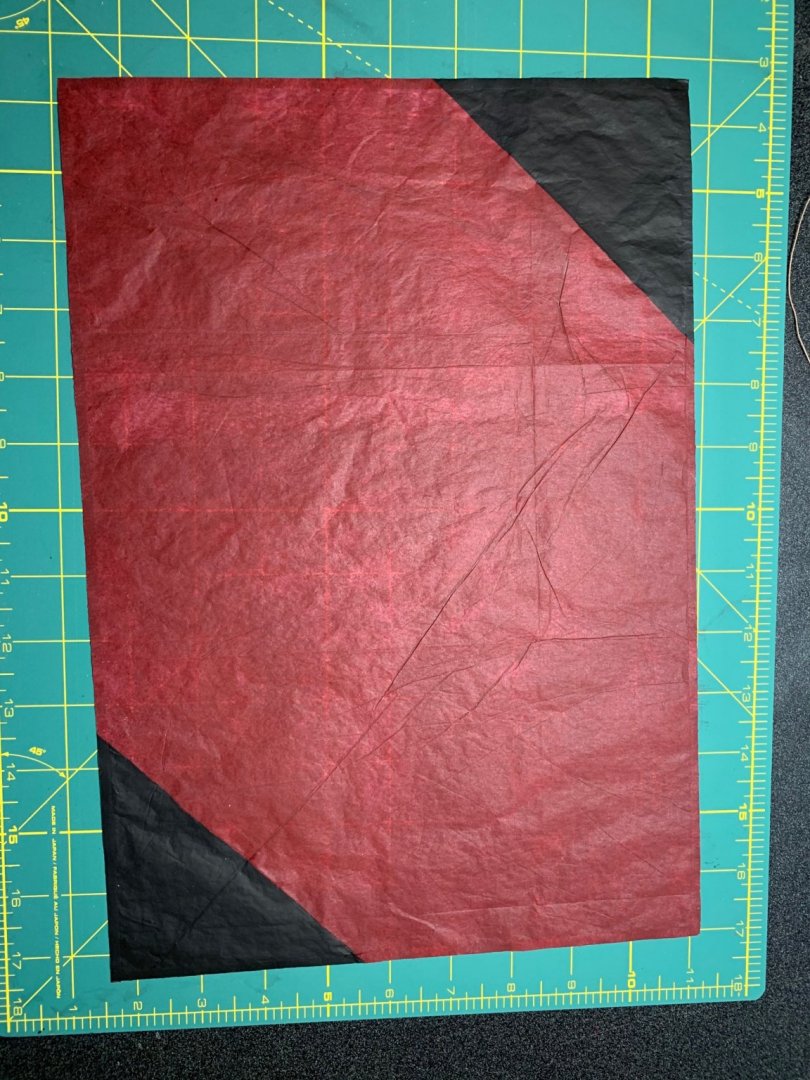
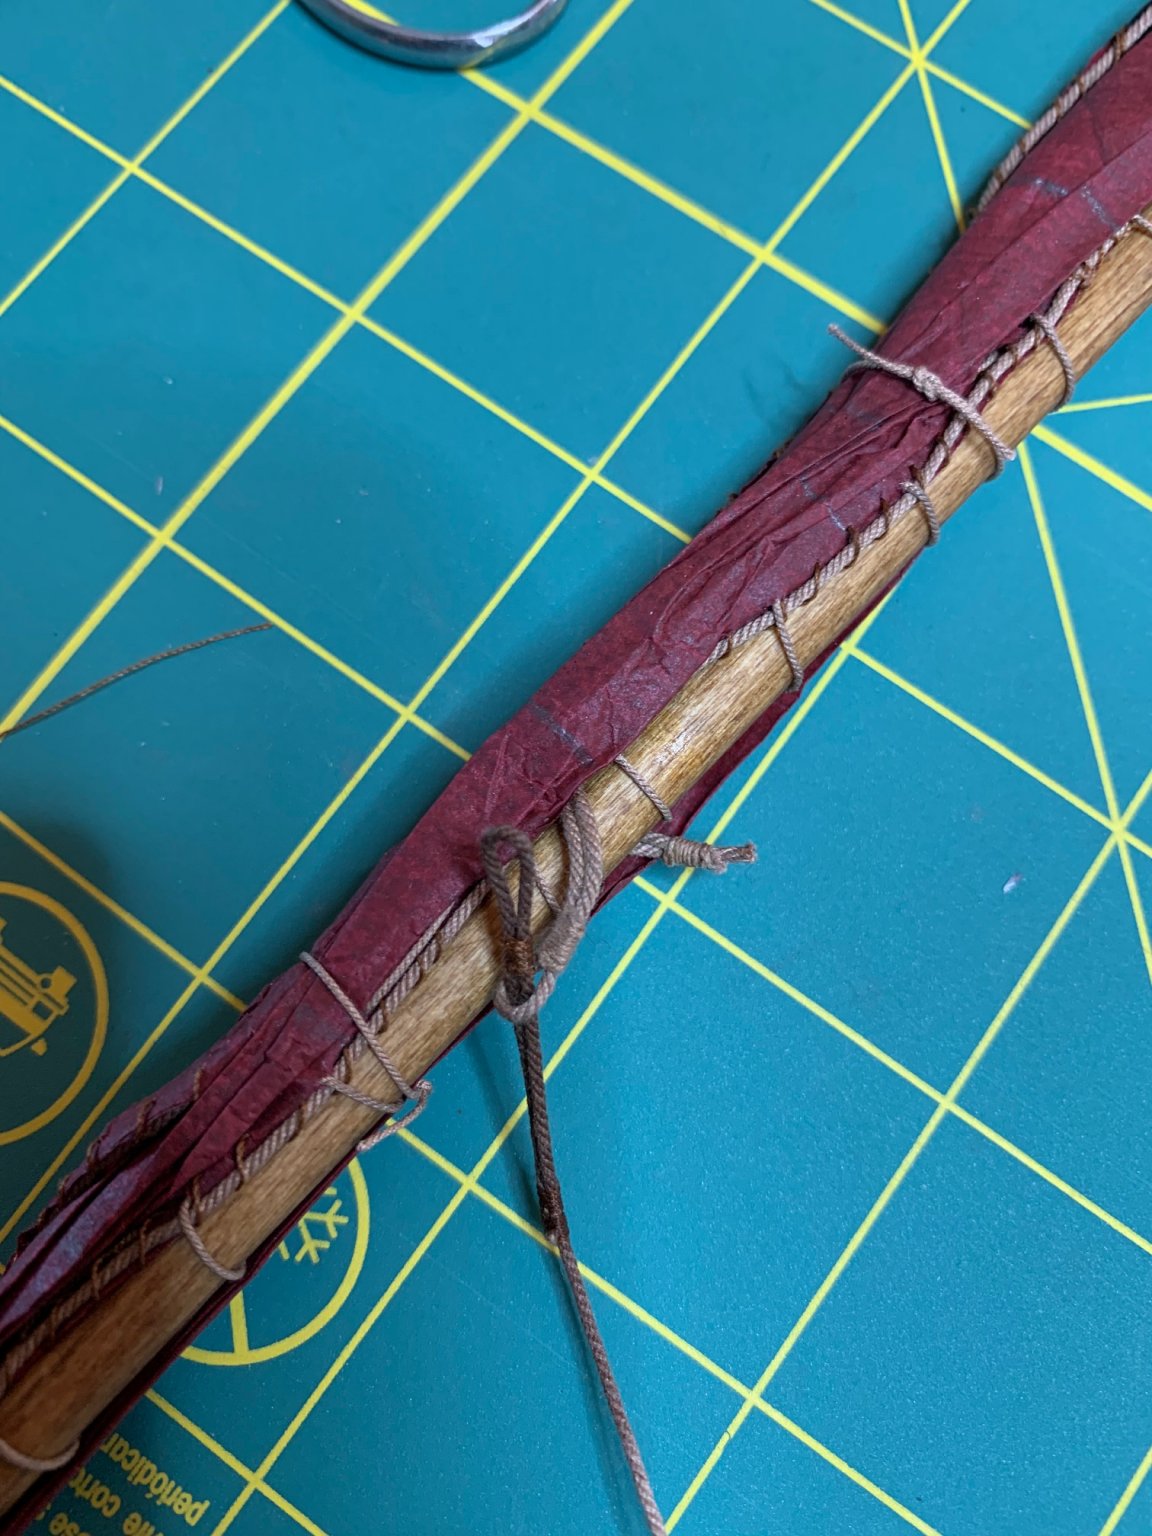
I did glue an 1/8" strip in both sides all the way around the parameter for strength. Since I'm into this sail I might as well try adding a bolt rope. I had no idea if you can even do this with silkspan but what the heck.

Hey it works!
Let's put it on the spar
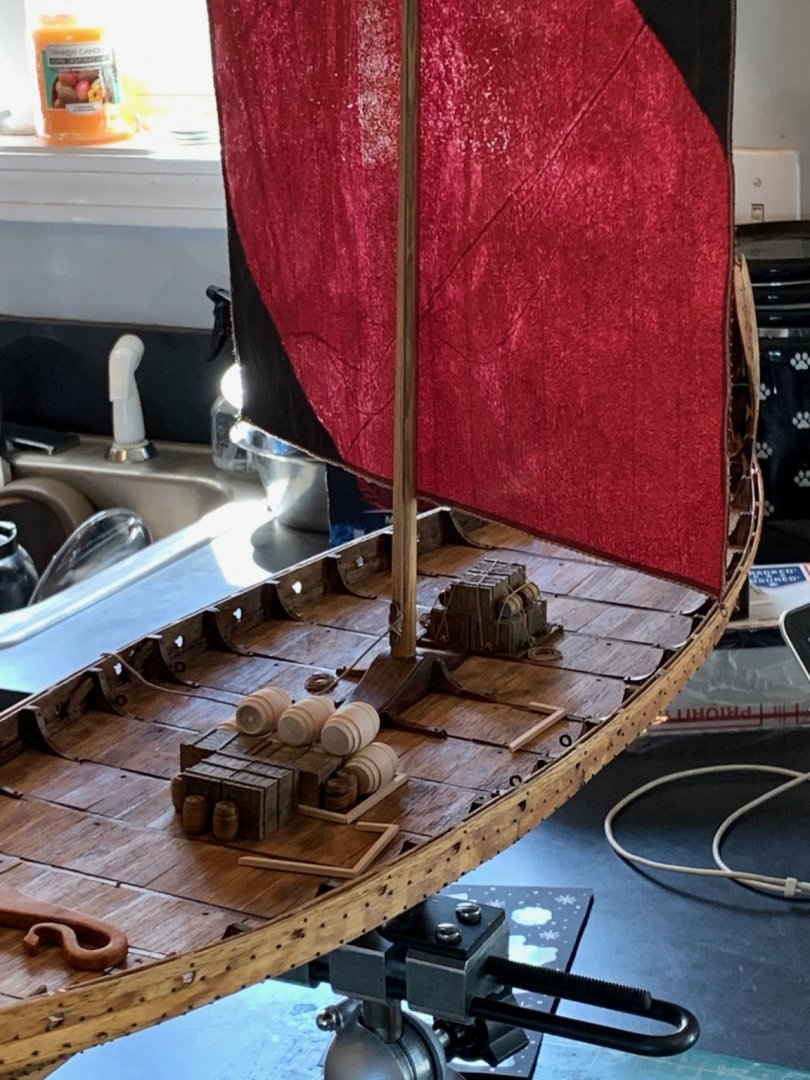
I decided to furl the sail as I wasn't going to mess with trying to get the perfect shape.

That's better.
- GrandpaPhil and md1400cs
-
2
-
After the decking was completed, staining and glueing in place I worked on the deck furniture. I took liberties with certain aspects of the build. I was fortunate enough that the Draken Harold Harfagre docked in Mystic Seaport here in Ct. and I got to take a tour. What a beautiful ship!
Anyway I wanted to but in some water casks, crates etc. Here are a few pictures of those...
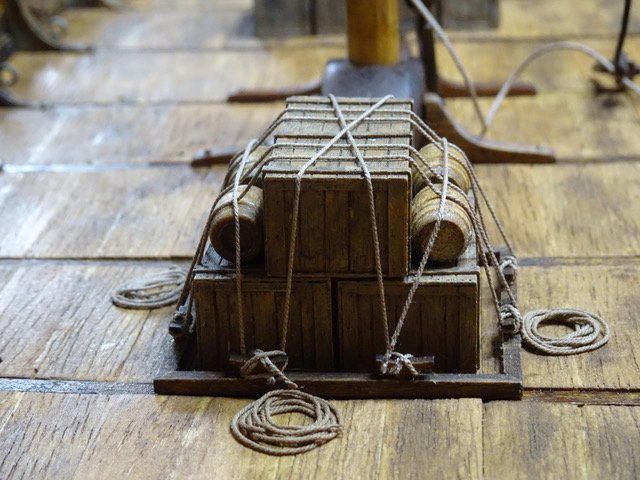
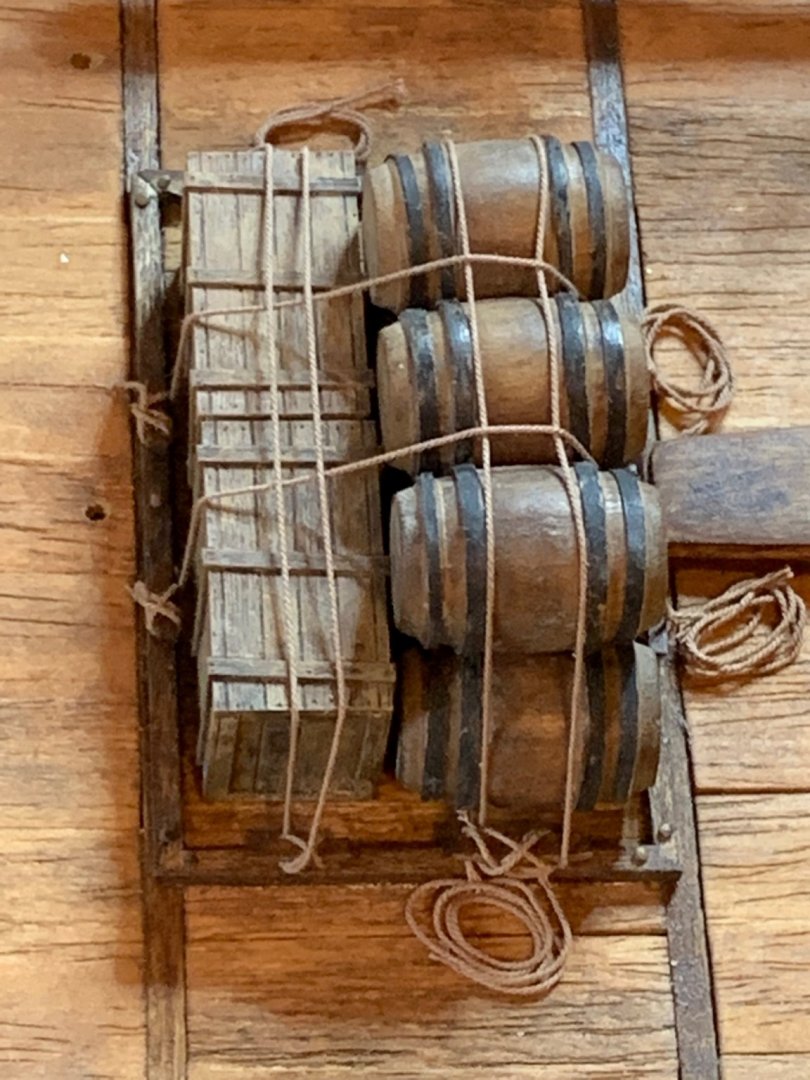
Vikings need water and have to have spoils from their radios right?
- GrandpaPhil, md1400cs and yvesvidal
-
3
-
I'mmmm back. Hey, it took Michelangelo years to finish the Sistine Chapel. One positive of all this virus mess is the free time. So I finished my ship. Named her Puffe. Yes after the song Puff the Magic Dragon. So I finished the nailing of the hull. As others have mentioned around 2500 nails I believe.
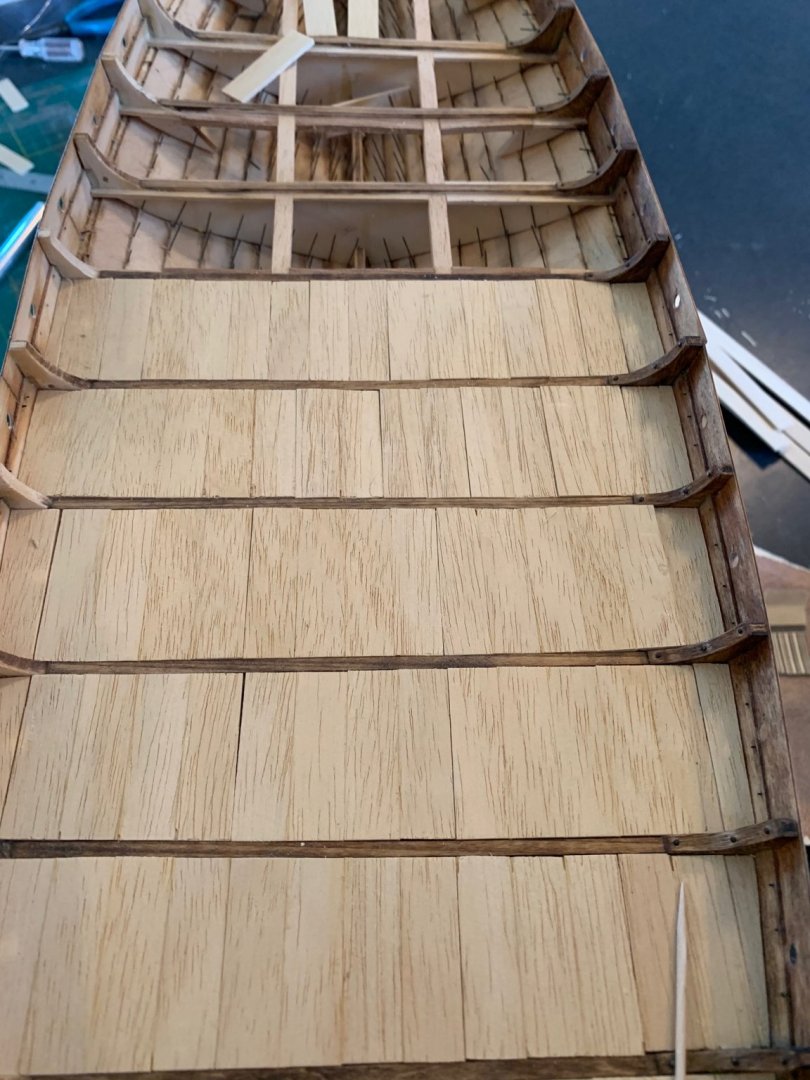
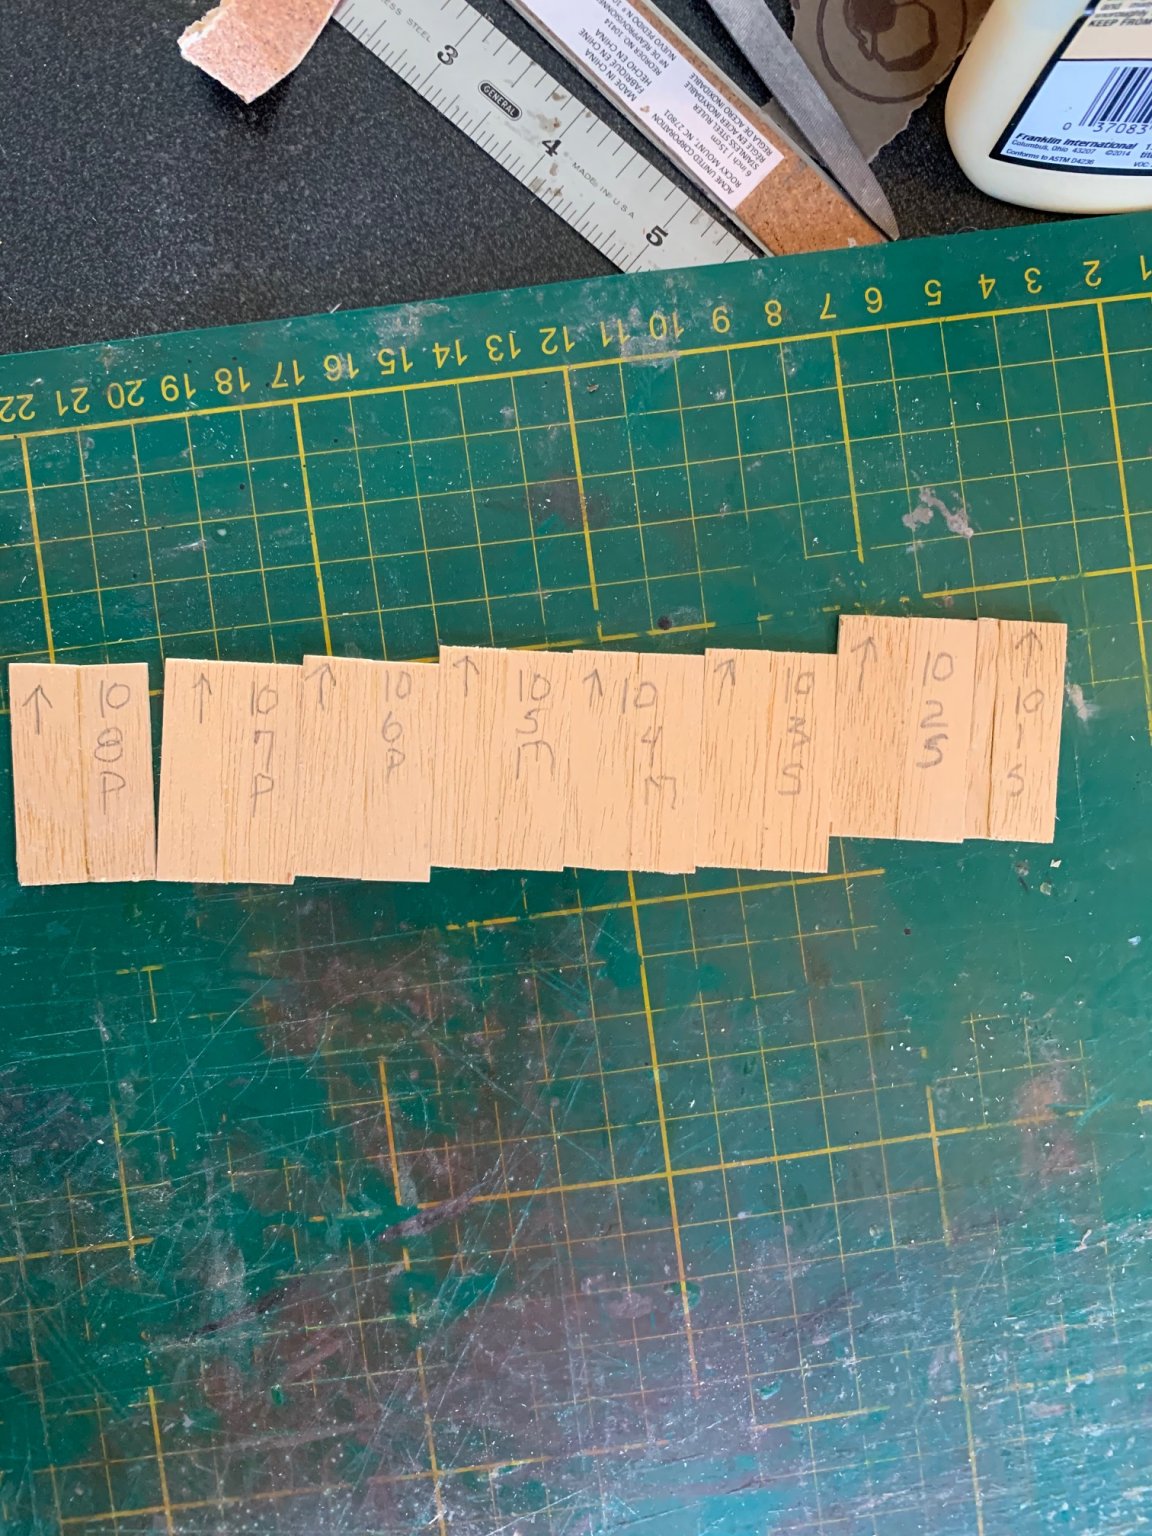
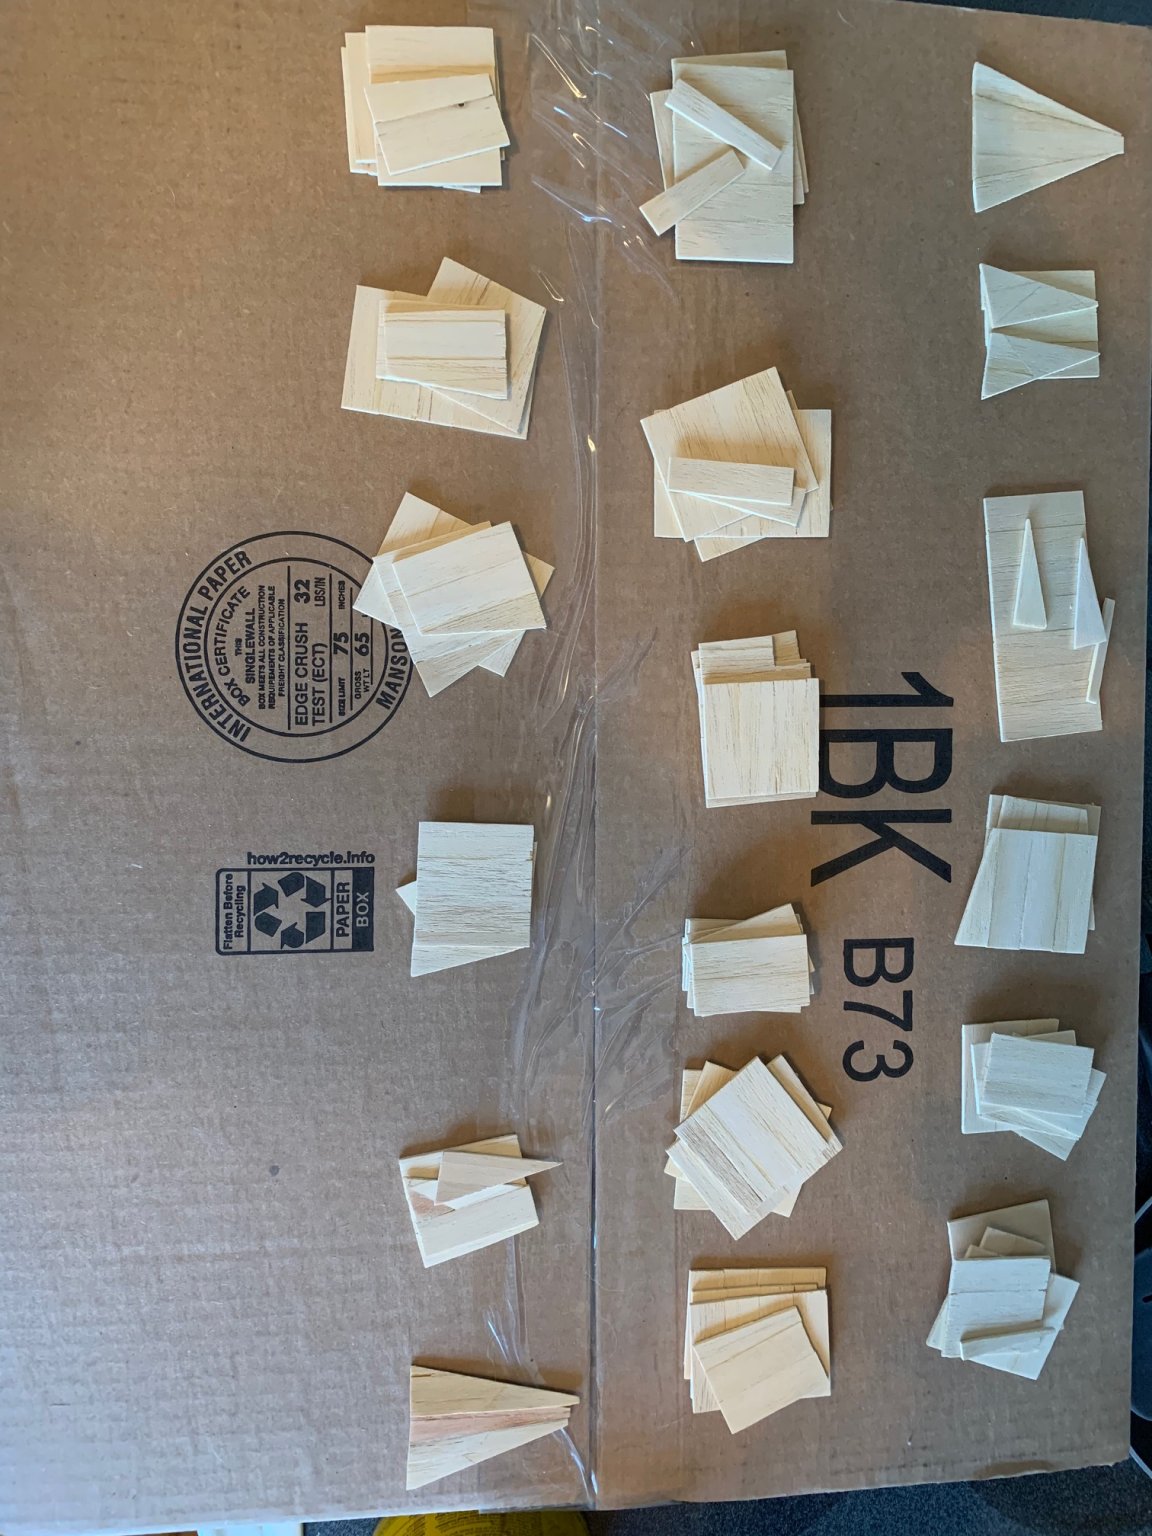
I made some odds and ends then proceeded on the decking. 231 hand fit pieces. Here's what I did. After fitting a section I removed each piece and marked on the back where they went. I wanted to see what a section glued together looked like so being the smarty pants I am I glued like all 4 or 5 pieces together thinking they'll fit right back into the section. Ummm, not! Such subtle placement caused them not to fit. I ended up glueing two or three together to make sections with in the sections. I forget, I had something like 70 sections?
Here are some pictures of the decking process...


-
WOW what a beautiful build Steve. It is truly inspiring. I am in the middle of building the Oseberg ship and have already purchased the Bounty launch to get my feet wet in POF building. And just started the book buy Caroline Alexander on the Bounty. My thoughts are now moving to this kit! Great job Sir.


HMS Sphinx 1775 by Glenn-UK - FINISHED - Vanguard Models - 1:64 - V2 Kit by Glenn Shelton
in - Kit build logs for subjects built from 1751 - 1800
Posted
Unbelievably beautiful. I wish I had the talents and patience, (and lack of ADHDLMNOP), to attempt a model of this caliper.