Osmosis
-
Posts
626 -
Joined
-
Last visited
Content Type
Profiles
Forums
Gallery
Events
Everything posted by Osmosis
-
Welcome aboard Larry.
-
 Thanks for sharing you amazing work with us. It is truly an inspiration for those of us just getting our feet wet and I get the sense from your build log that you had fun building it. Best Regards
- 67 replies
-
- 1
-

-
- philadelphia
- model shipways
- (and 1 more)
-
Only certain metals it seems. The guys in our lab at work use it to clean brass and stainless all the time with no effect on the metal at all. But you should see it strip the marine growth off of fiberglass in seconds. It is pretty amazing stuff. Basically 30% Hydrochloric acid, 10% phosphoric acid and water.
- 82 replies
-
- 4
-
-
- naval smoothbore
- model shipways
- (and 1 more)
-
Thanks Tom. That was a great day well spent.
-
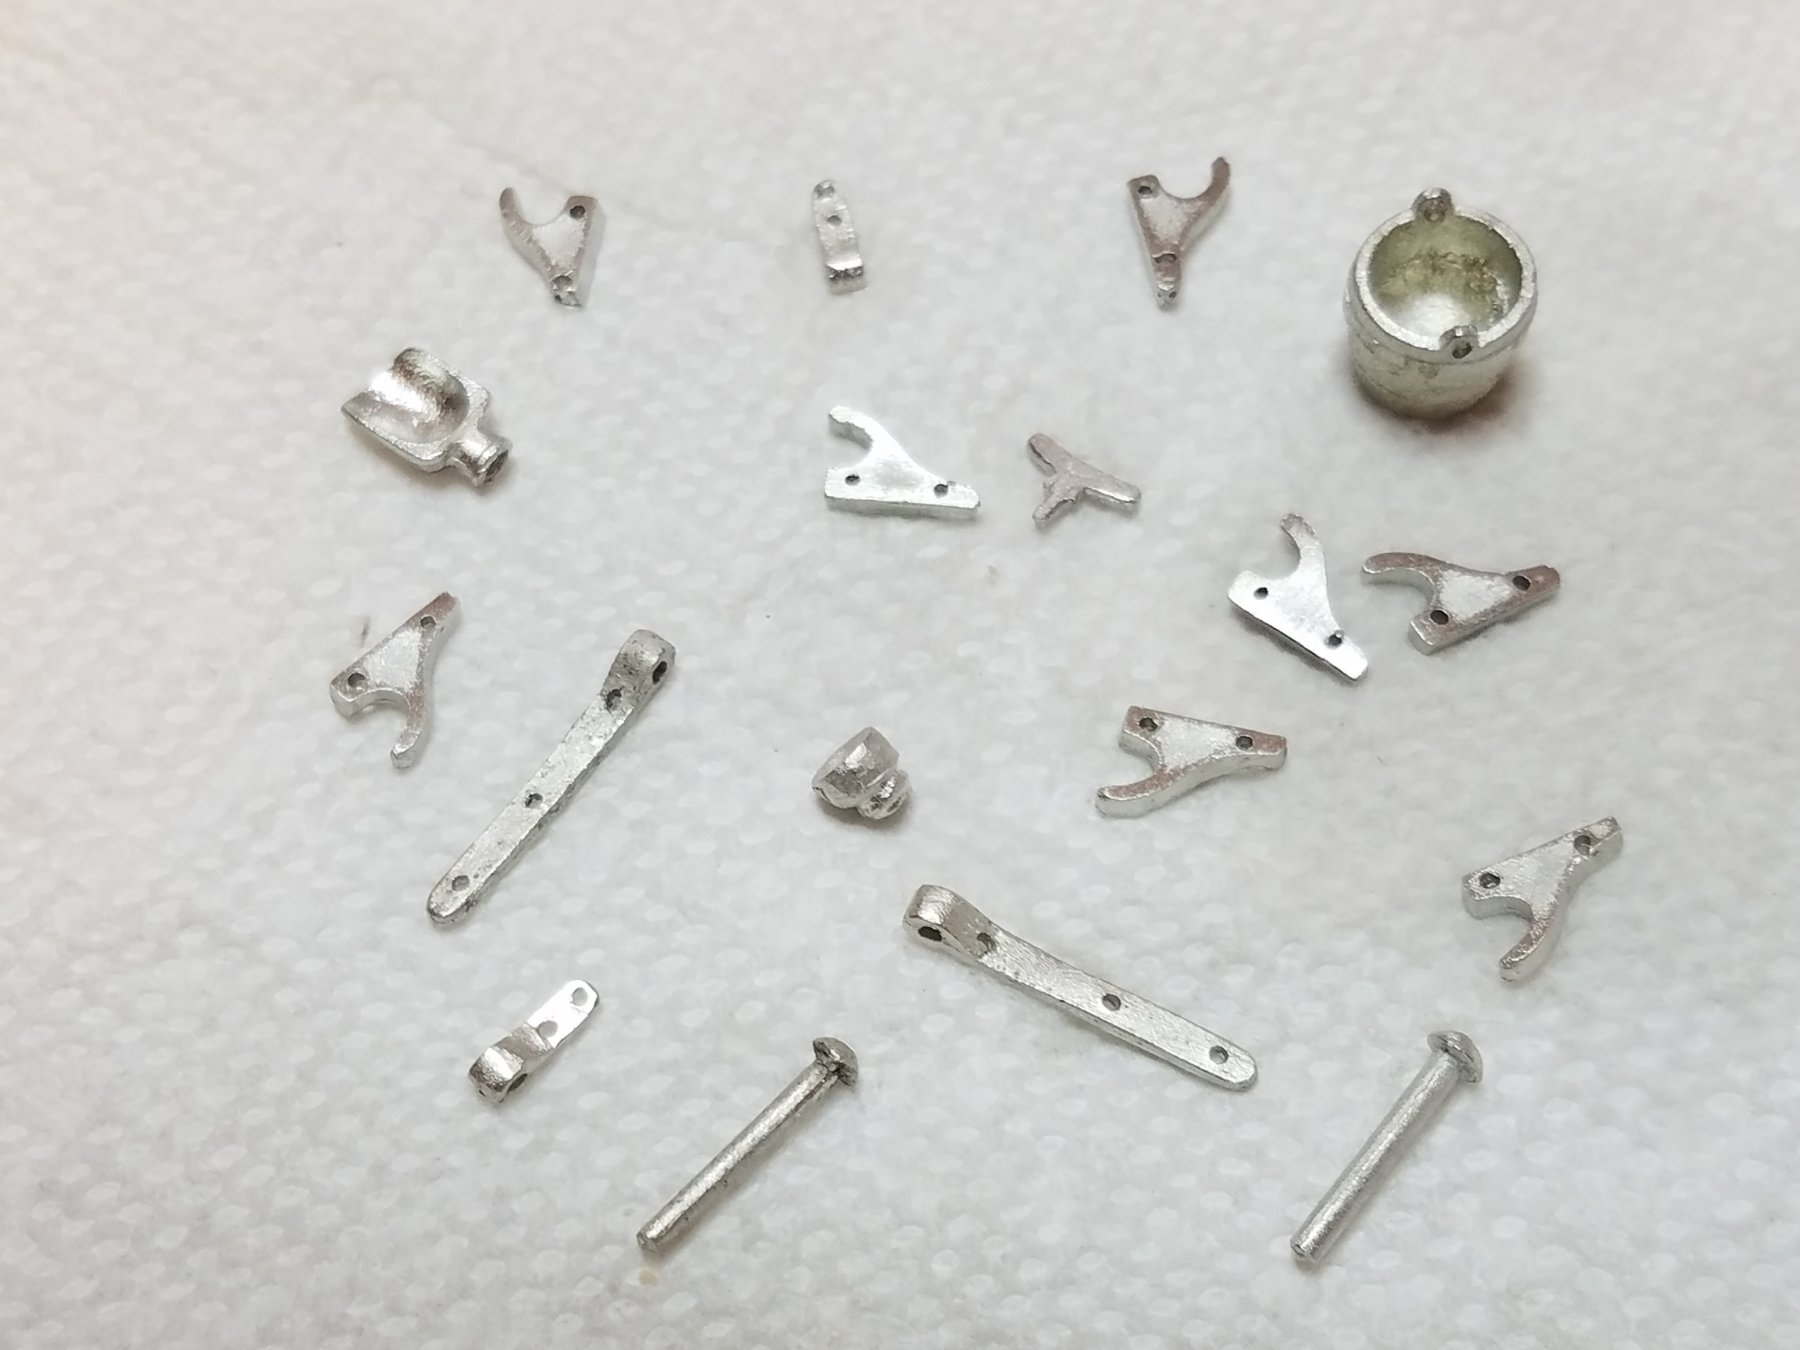
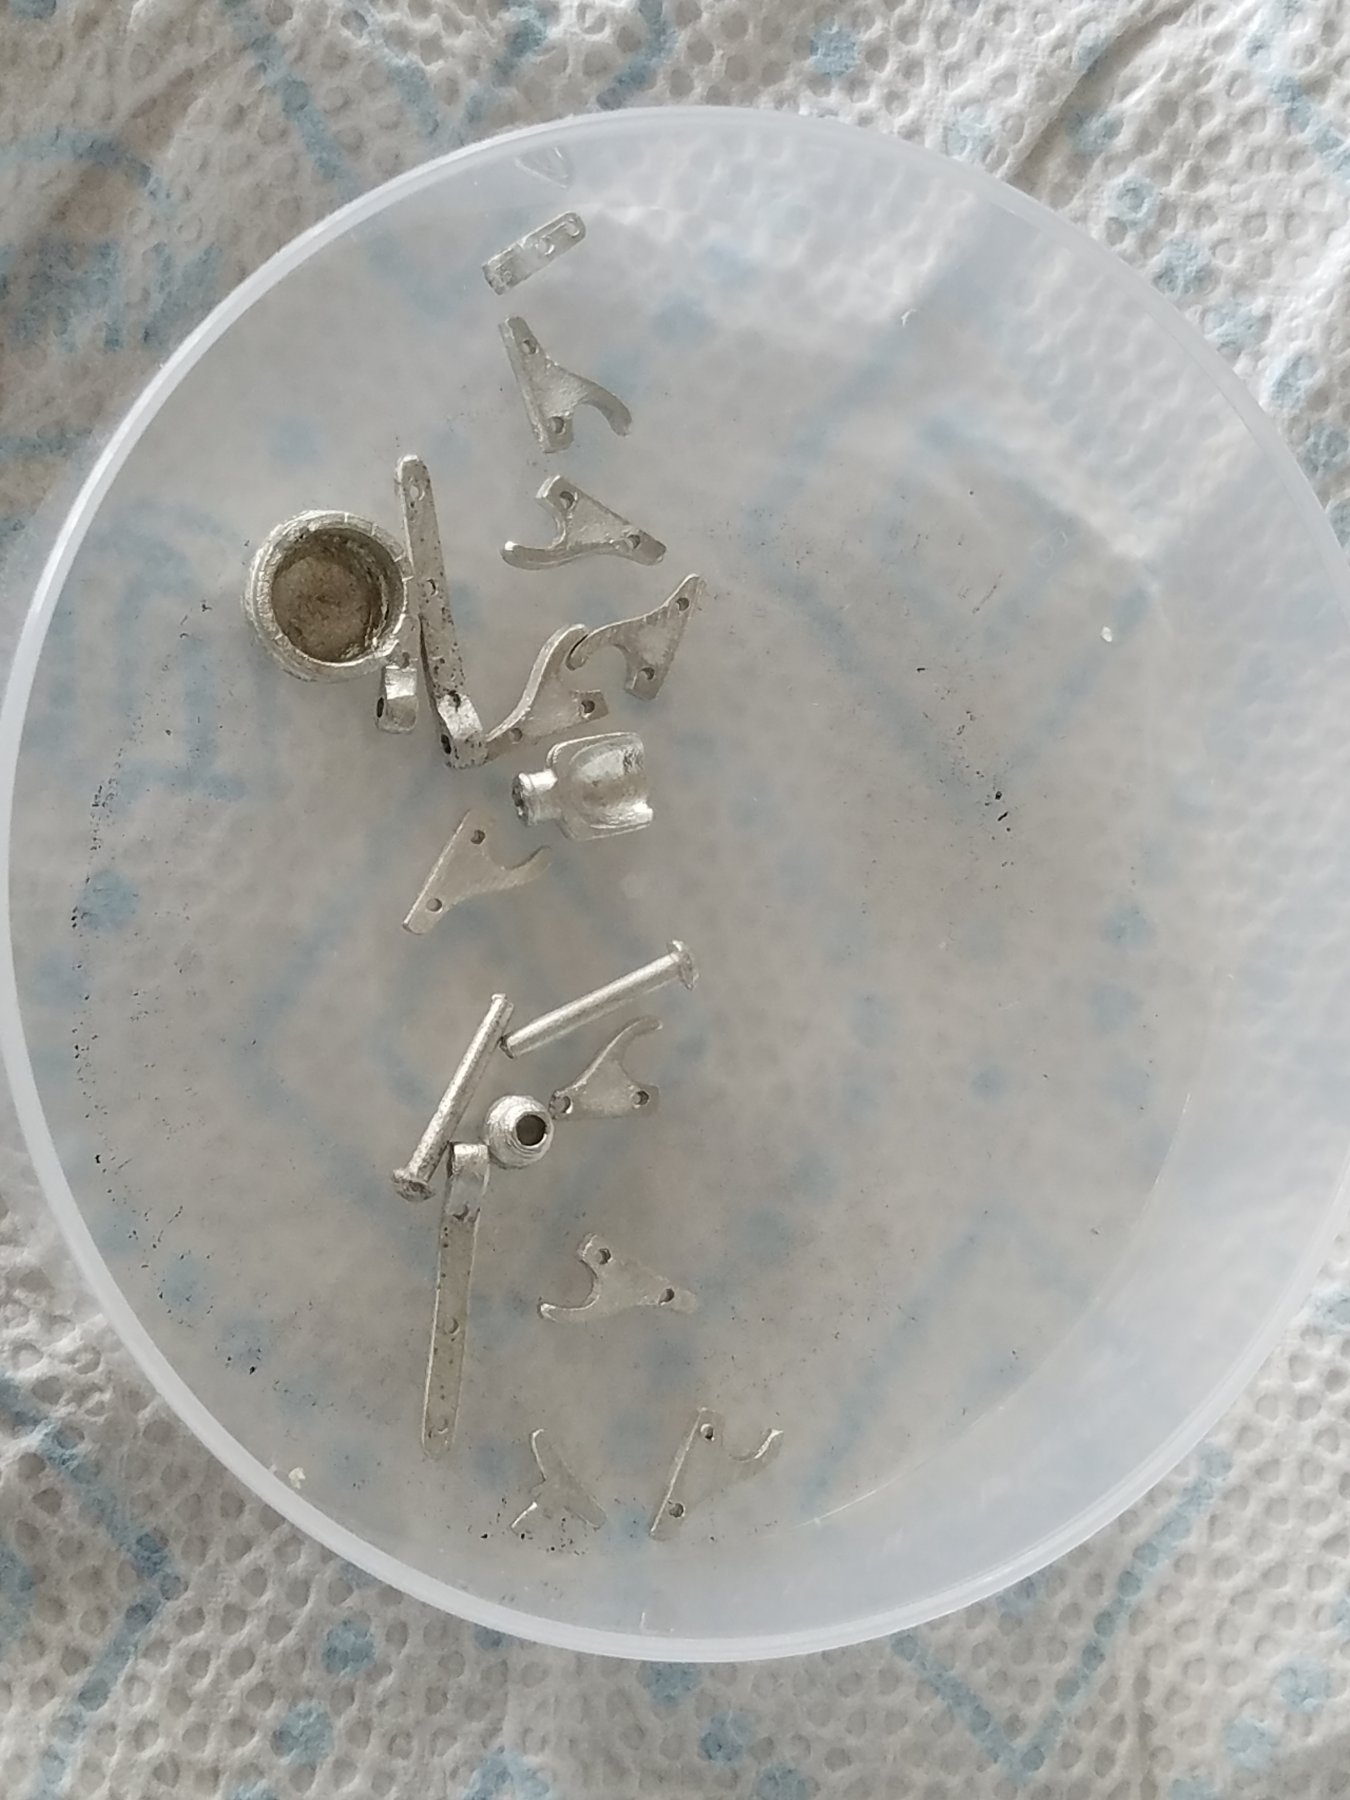
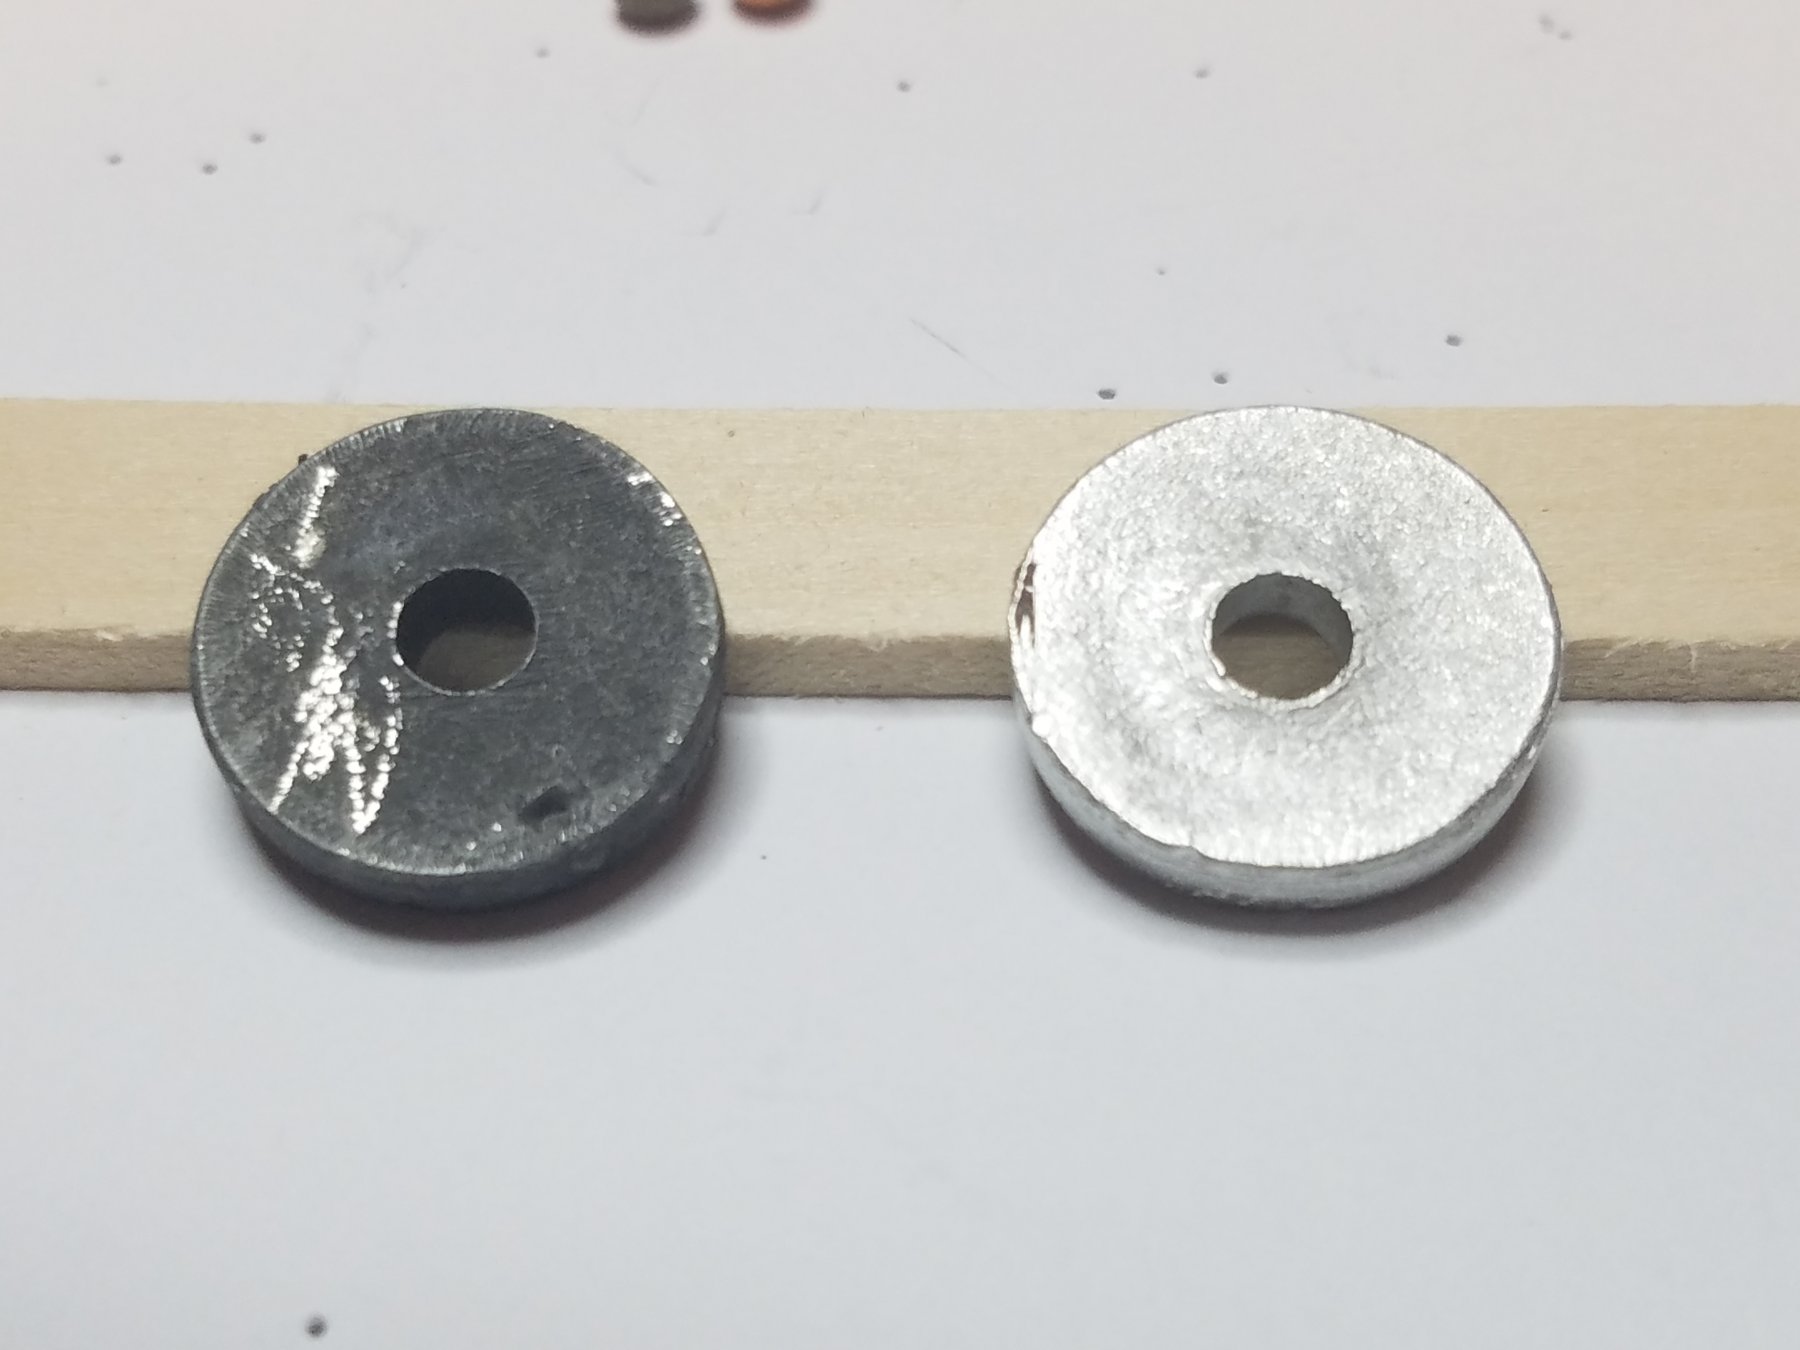
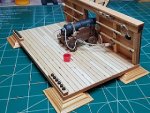
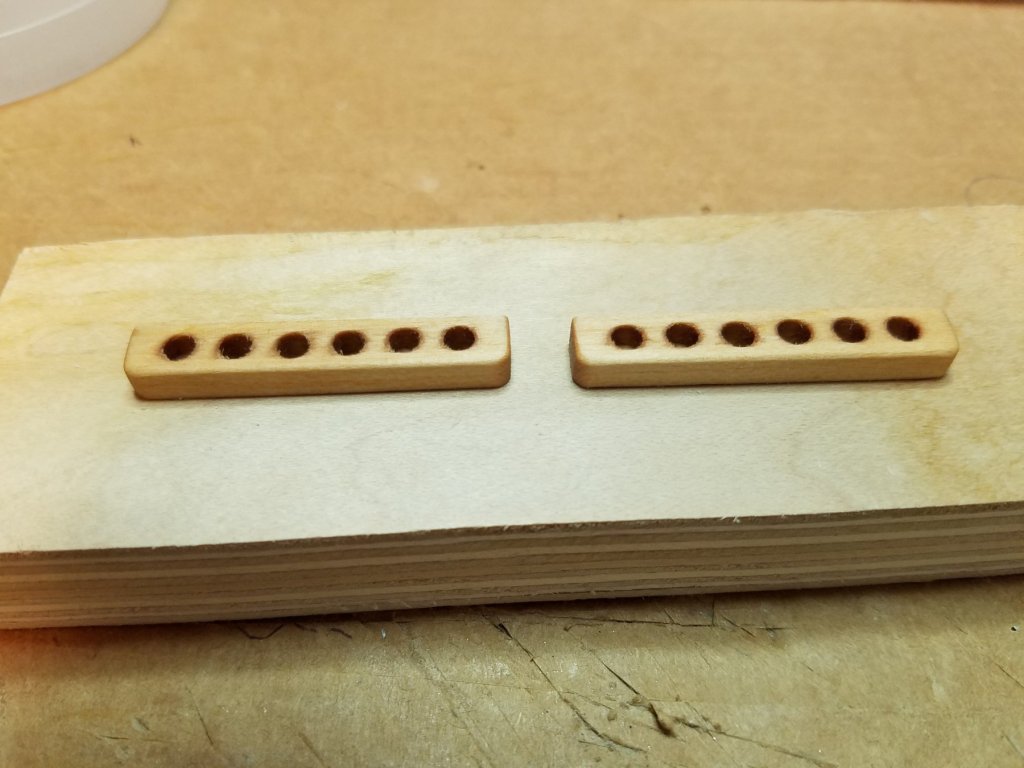
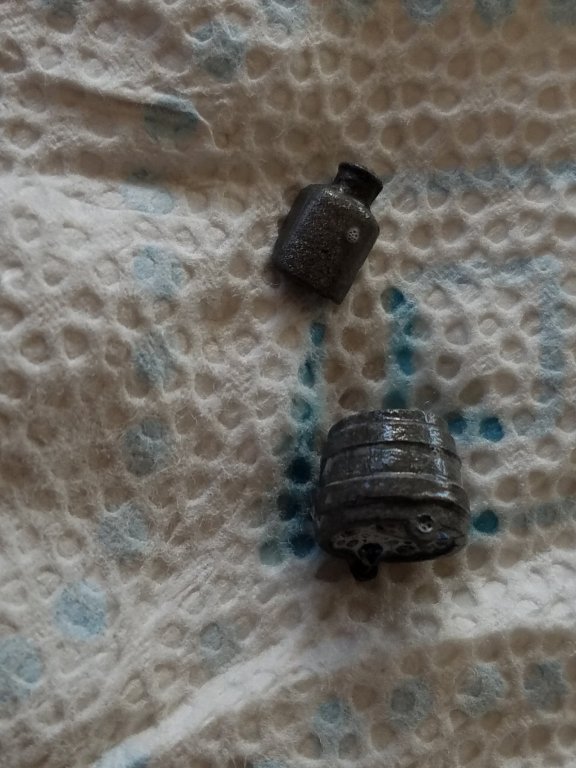
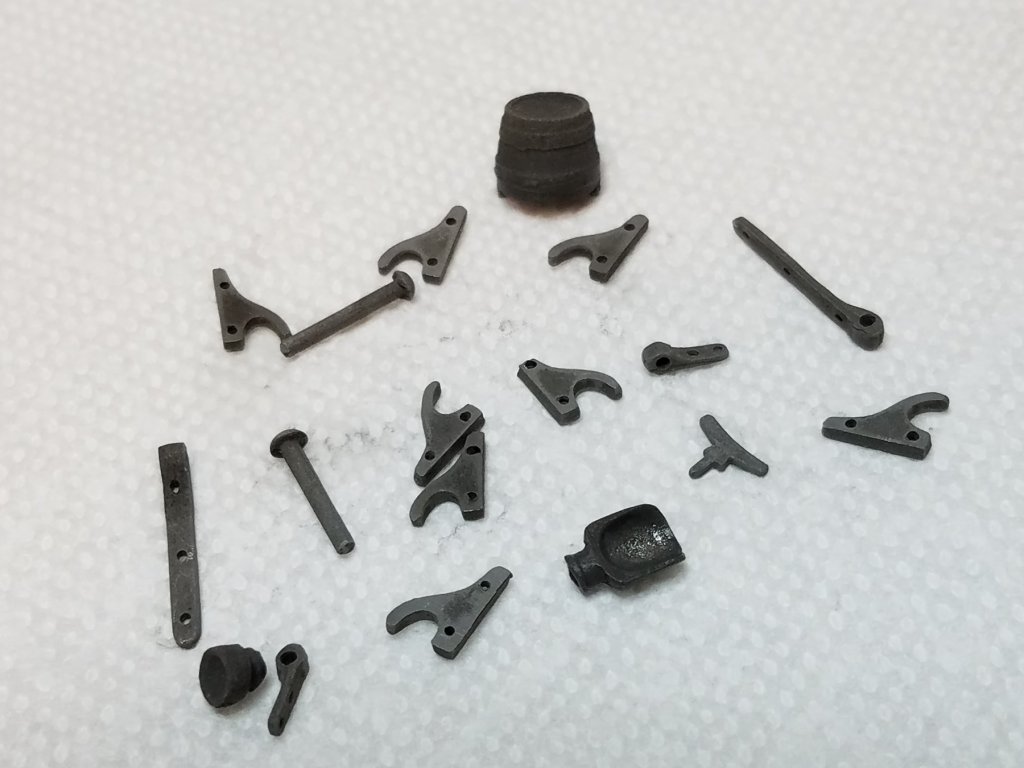
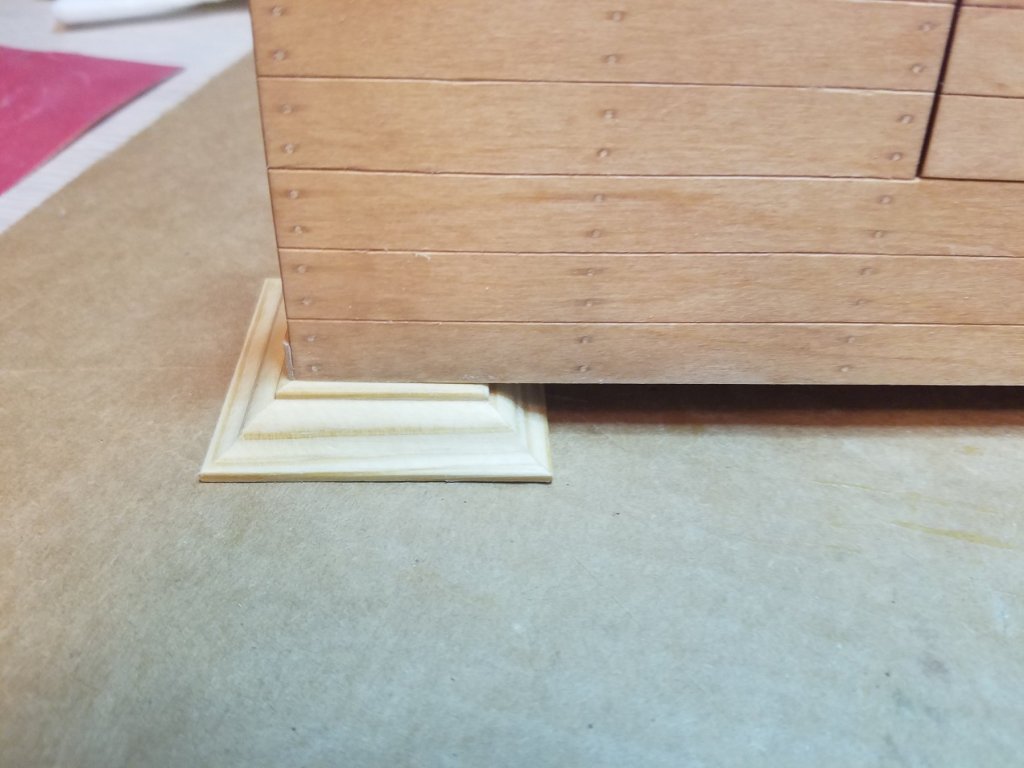
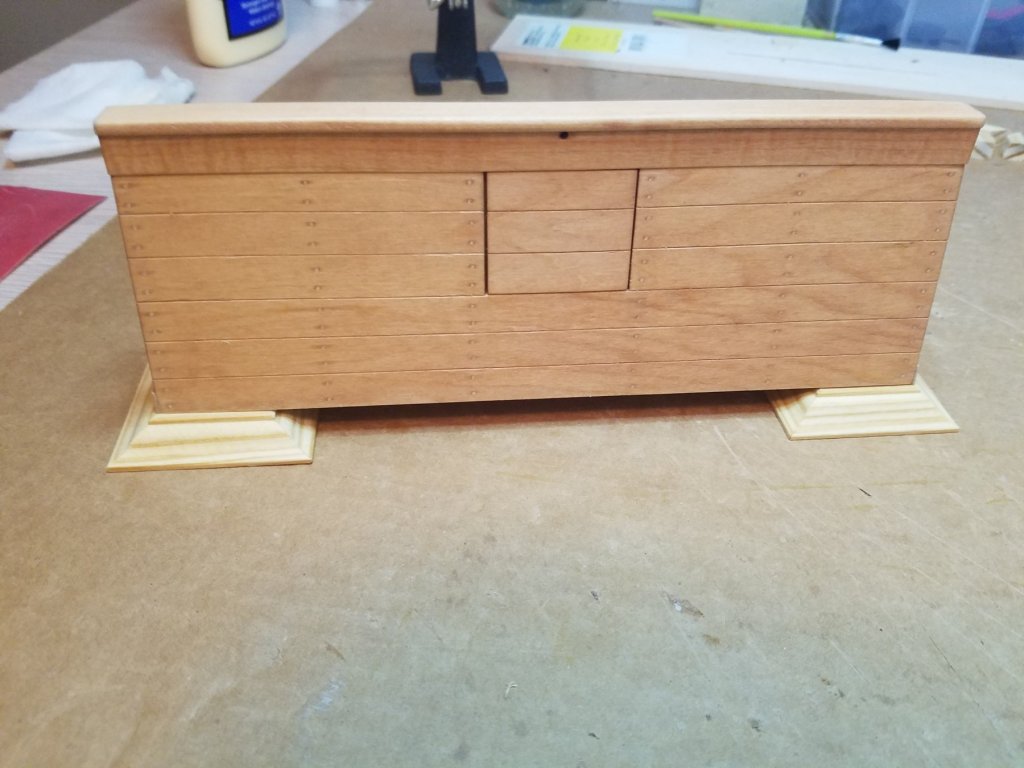
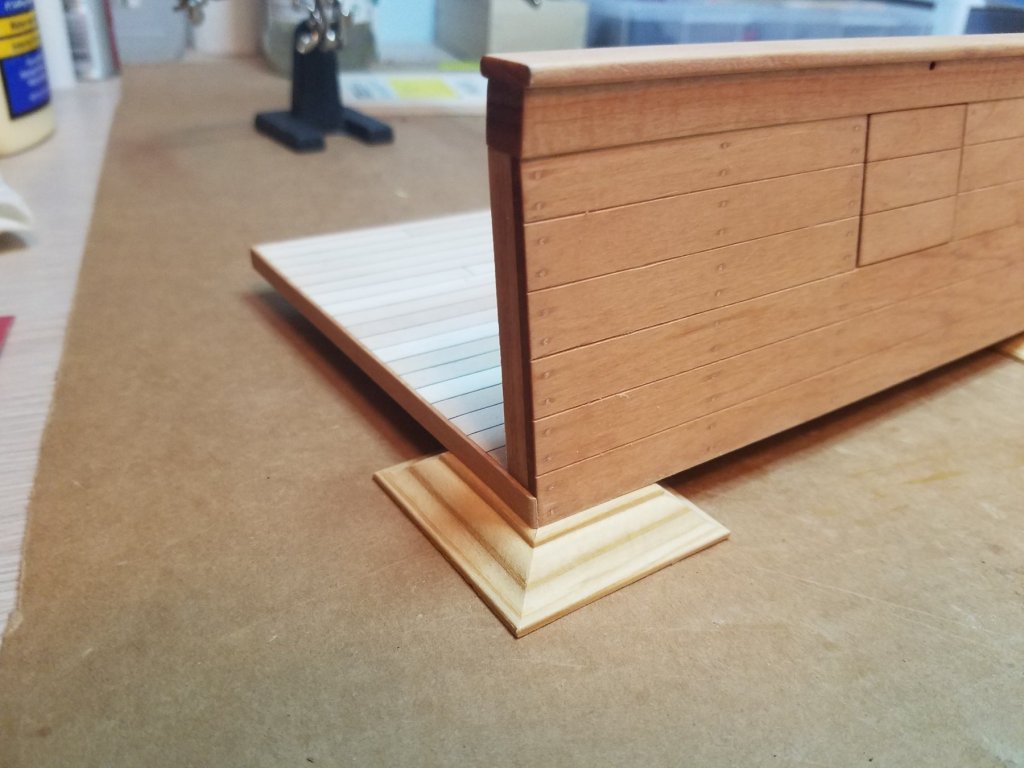
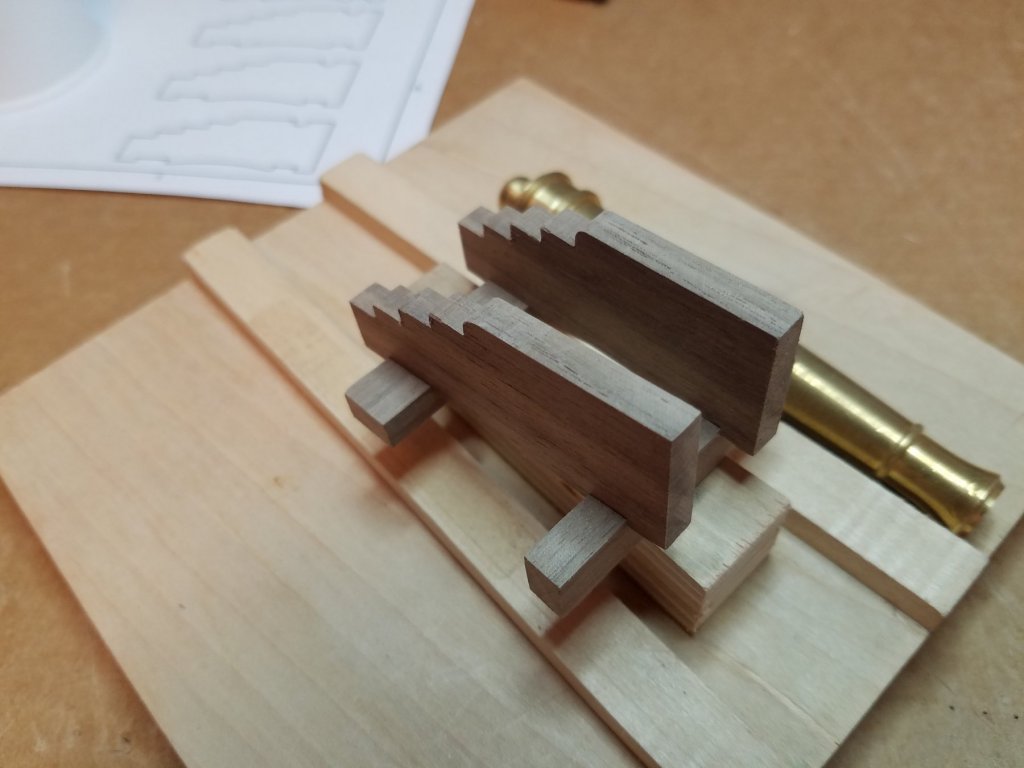
I managed to get a little bit done between trips to our storage unit and putting up X-mas decorations. I stained and attached the display feet that I made earlier. Many thanks to robdurant and his excellent pictures of the HMS Victory. I finally decided on how to display on deck round shot stowage. Pictured below. These are freshly made waiting for the stain to dry before attaching them and that will finish all of the wood work I intend to do on the deck and bulwark section. Then I trimmed the flashing off of all of the cast bits I will be using. After a wash in ammonia they are ready for blackening. Below are a couple of the pieces after about 5 mins in a bath of full strength Marikates Bottom Cleaner. The after 15 mins and a thorough rinsing with fresh water. Still not to sure about using the bucket I might try to make one. That's it for now.


- 82 replies
-
- 7
-
-
- naval smoothbore
- model shipways
- (and 1 more)
-
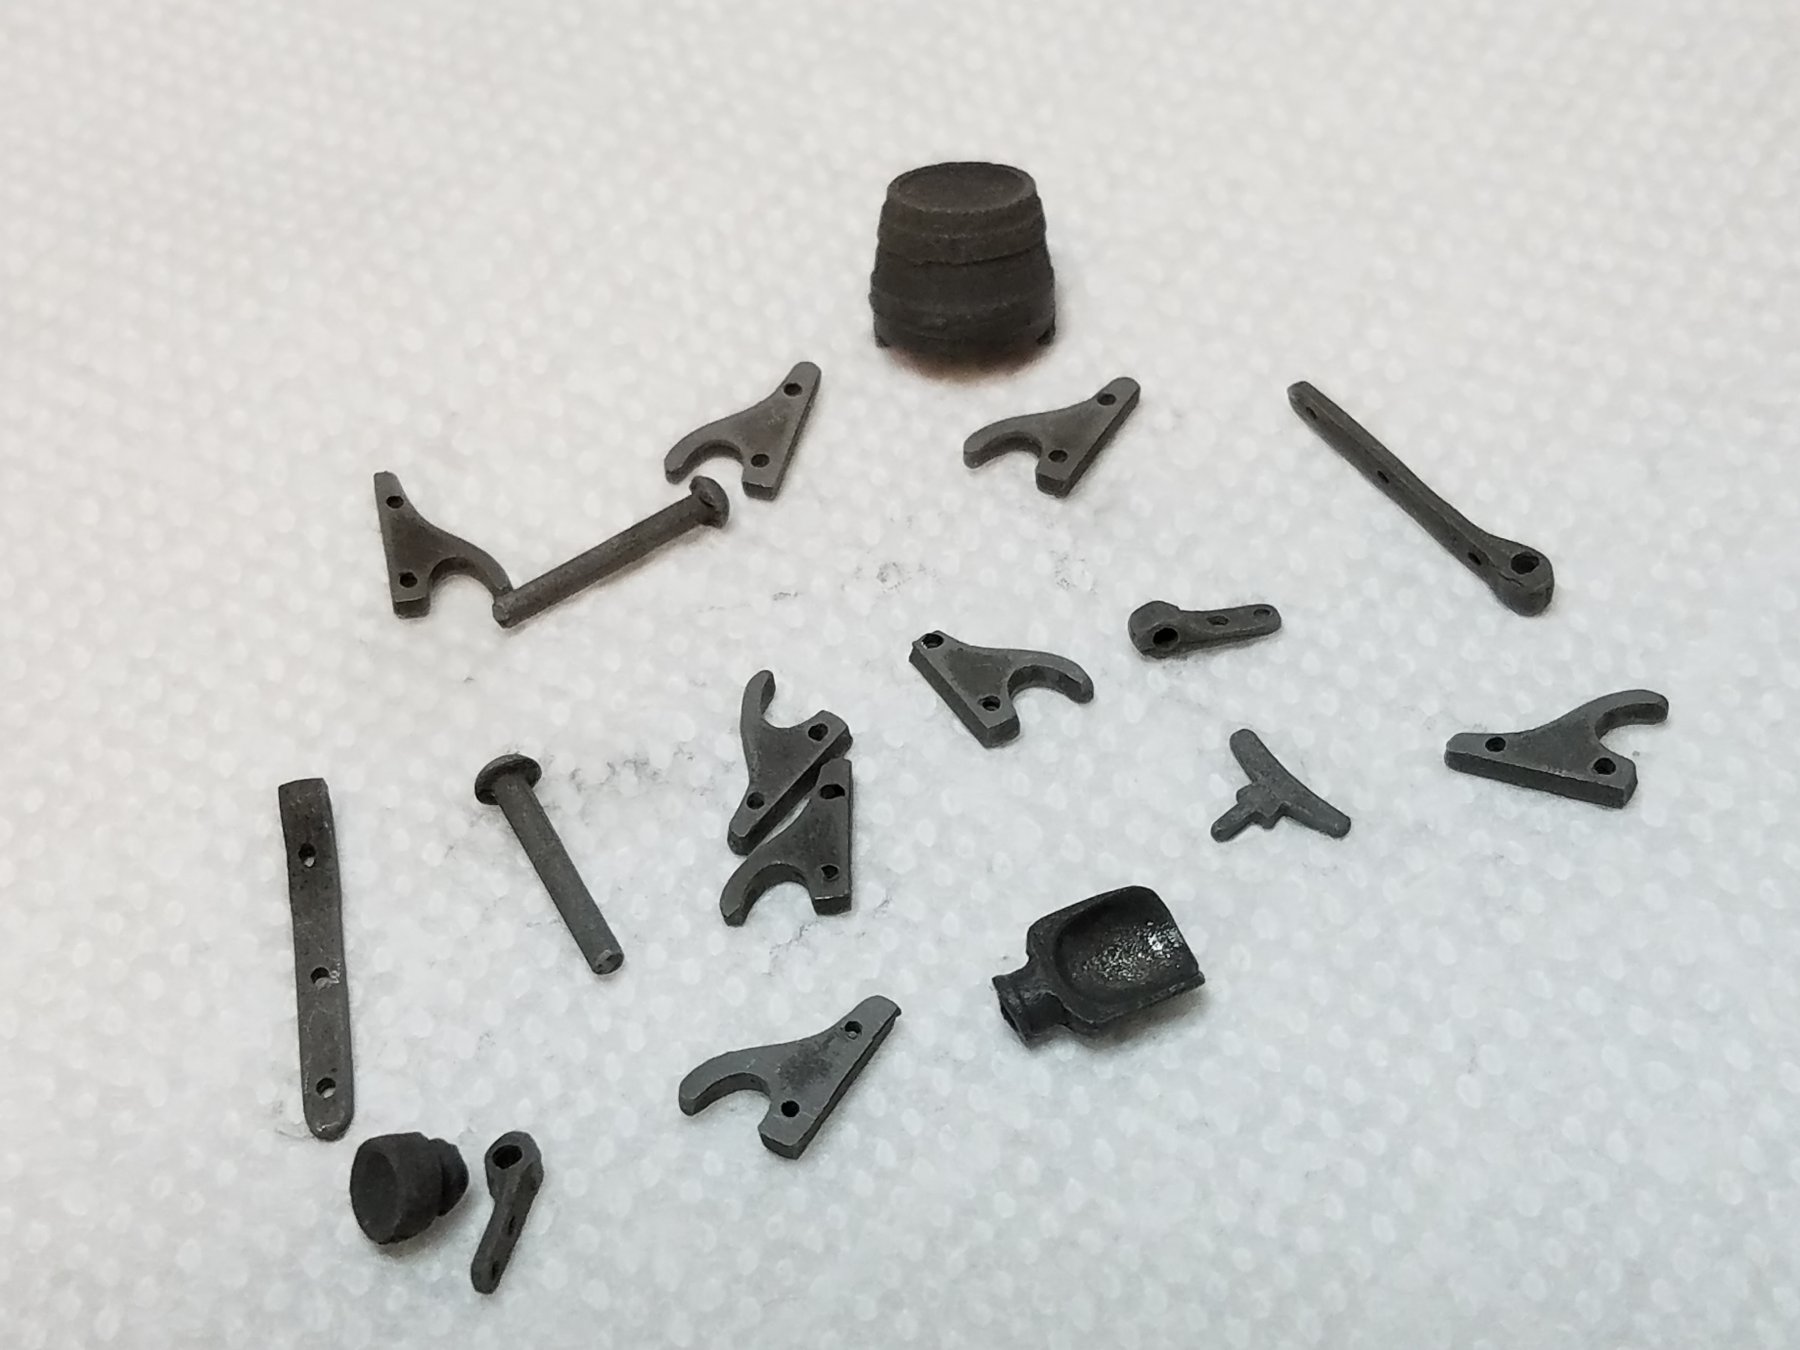
Last night and today I experimented with blackening some of the different metals I will be using in this build with some pretty amazing results. I posted a thread Link here in the metal working section. Take a look it is much easier than you might think and I only used readily available household/shop chemicals.

- 82 replies
-
- 5
-
-
- naval smoothbore
- model shipways
- (and 1 more)
-
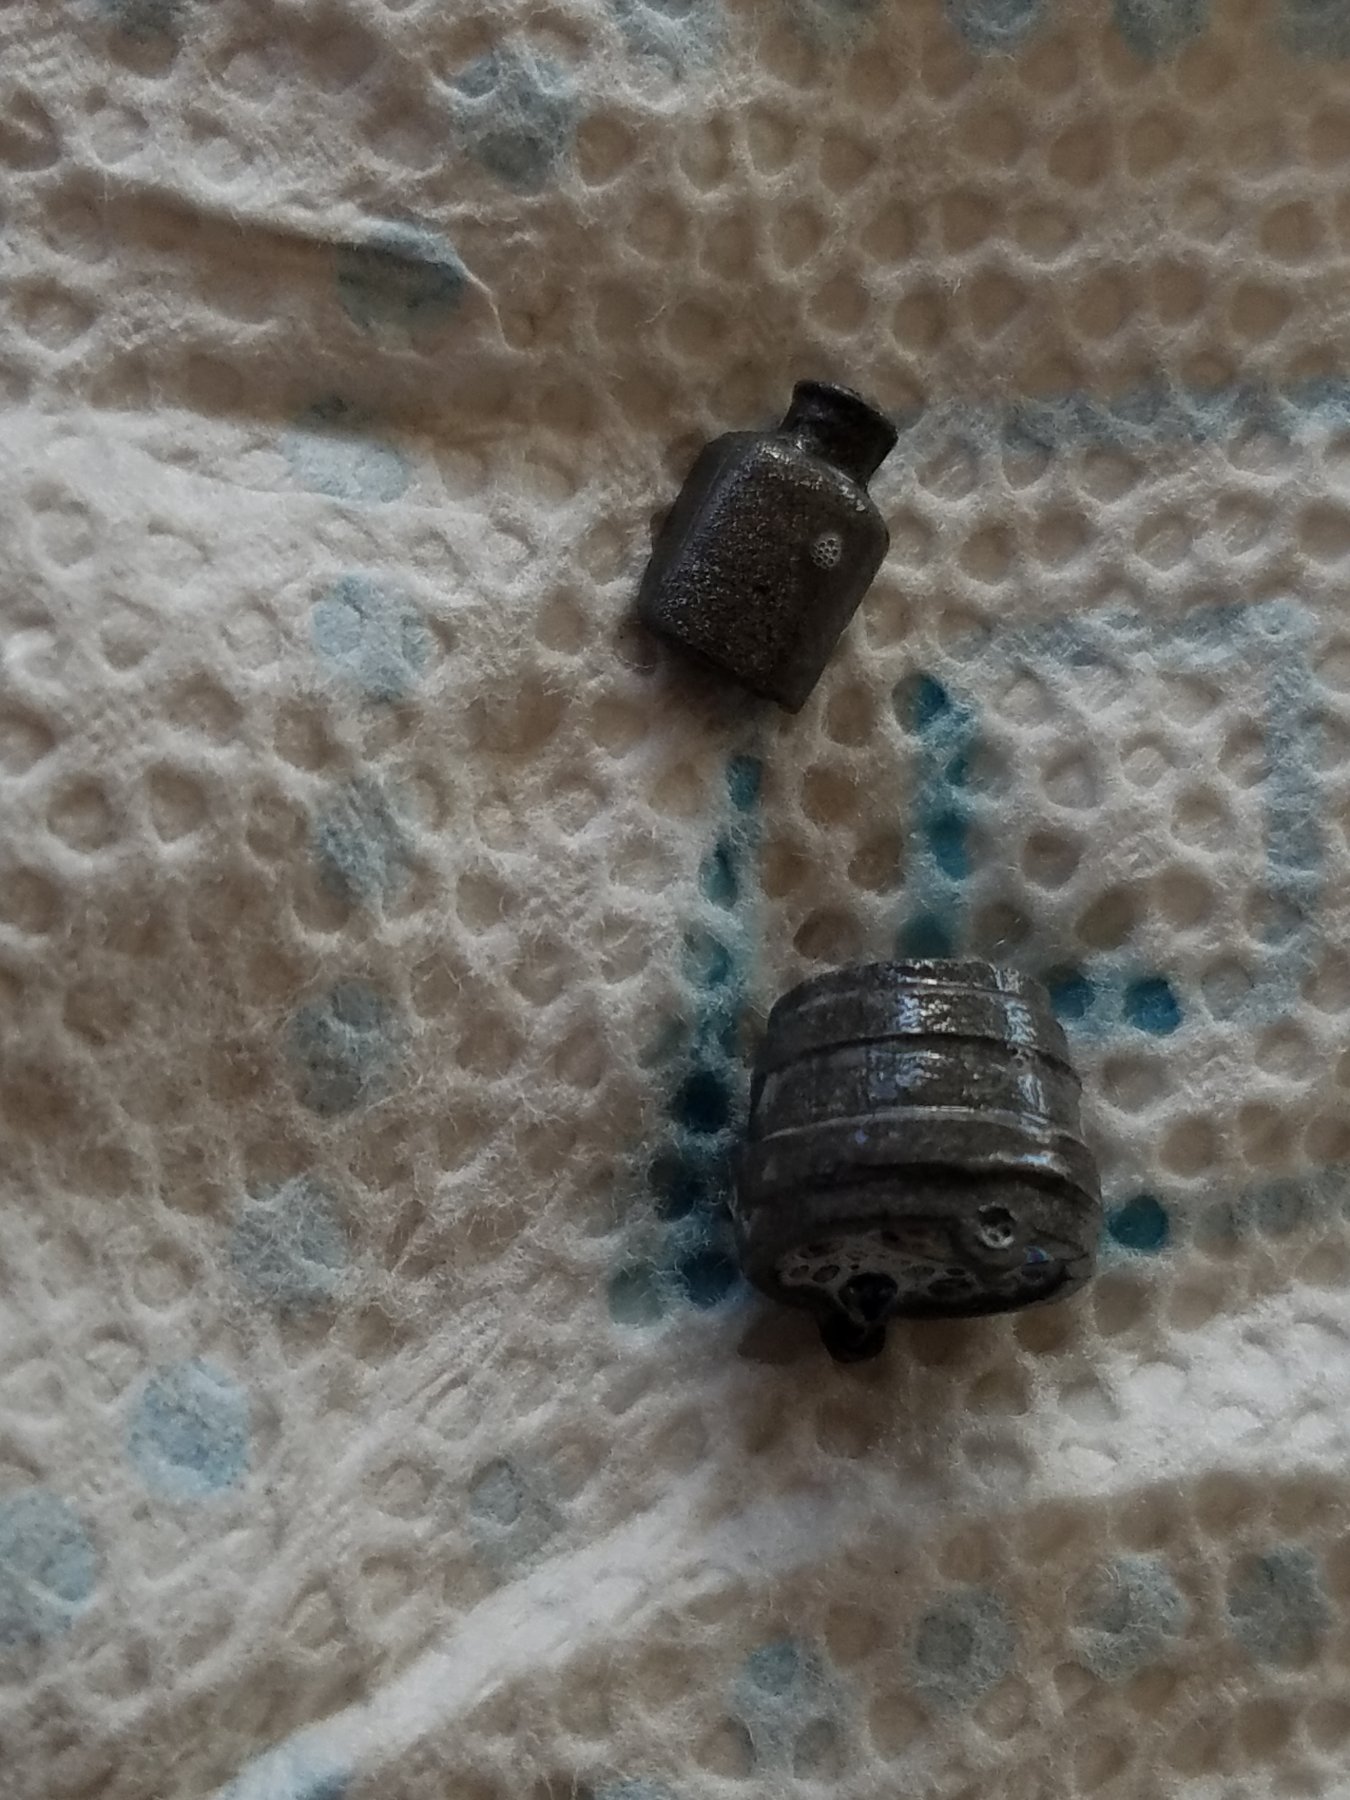
I am currently building the Naval Smooth Bore Gun Kit from Model Expo. There are quite a few cast Britannia/Pewter I will also be using common BBs for round shot all of which will require blackening. After doing a search of this site specifically and the webs in general I decided to experiment on my own using mostly household products. A little background. I have been in the Marine Water and Waste Water business for going on thirty years. My current job is designing Reverse Osmosis Desalination Systems. As such I have a fairly decent lab at my disposal. Not a lab in the strictly chemistry sense but also in the system testing and refurbishing sense. Lots of exotic cleaning chemicals and such. Any way I have a fairly good handle on water chemistry as it relates to the marine/seawater environment. So Last night I started with a very concentrated Ammonia solution and heated it in the microwave for 30 seconds. Caution do not breath the fumes when removing from the microwave and if take it immediately to a well ventilated area preferably out side. I then dropped in a handful of BBs and one of the cast pieces I did not intend to use (see my build thread). After 15 minutes or so I noticed no change in the pewter and a slight discoloration of some of the BBs. I let them sit in the solution over night and everything looked the same when I got up. Notice the uneven coloration then compare it to the picture below. I took the cast piece and one of the discolored BBs and one of the seemingly unaffected BBs to work with me for further testing. In the lab we use a product called Marikate On and Off Bottom Cleaner. It is a 30% Hydrochloric Acid, 10% Phosphoric Acid and water solution available in most all marine/sporting goods stores and most hardware stores. A weaker version called Aluma-Prep is what we use to etch aluminum prior to painting and an even weaker version is under you bathroom sink right now disguised as toilet bowl cleaner. Anyway I put the parts in an undiluted batch of Marikate and immediately saw the blackening process begin and after 5 minutes and a thorough rinse with cold water had the results you can see below. The scratches you see are me testing the hardness of the finish. I had to rub fairly hard with another piece of metal to scratch it. The Marikate evened out the finish on both BBs. I am still stumped on why only some were affected at all. Tomorrow I am going to experiment on some brass using the same methods. Thanks for looking in I hope this helps.


-
Nice job on the hinges Derek. What did you use to trim the brass strip down? I need to make my trunnion clamps and they need to be 1/8" wide but all I could find was 3/16" wide strips of brass.
- 30 replies
-
- 2
-
-
- model shipways
- finished
- (and 1 more)
-
Thanks guys. I know I am spending way too much time with this "simple" kit. But once I get going it is hard to pull in the reigns sometimes.
- 82 replies
-
- 2
-
-
- naval smoothbore
- model shipways
- (and 1 more)
-
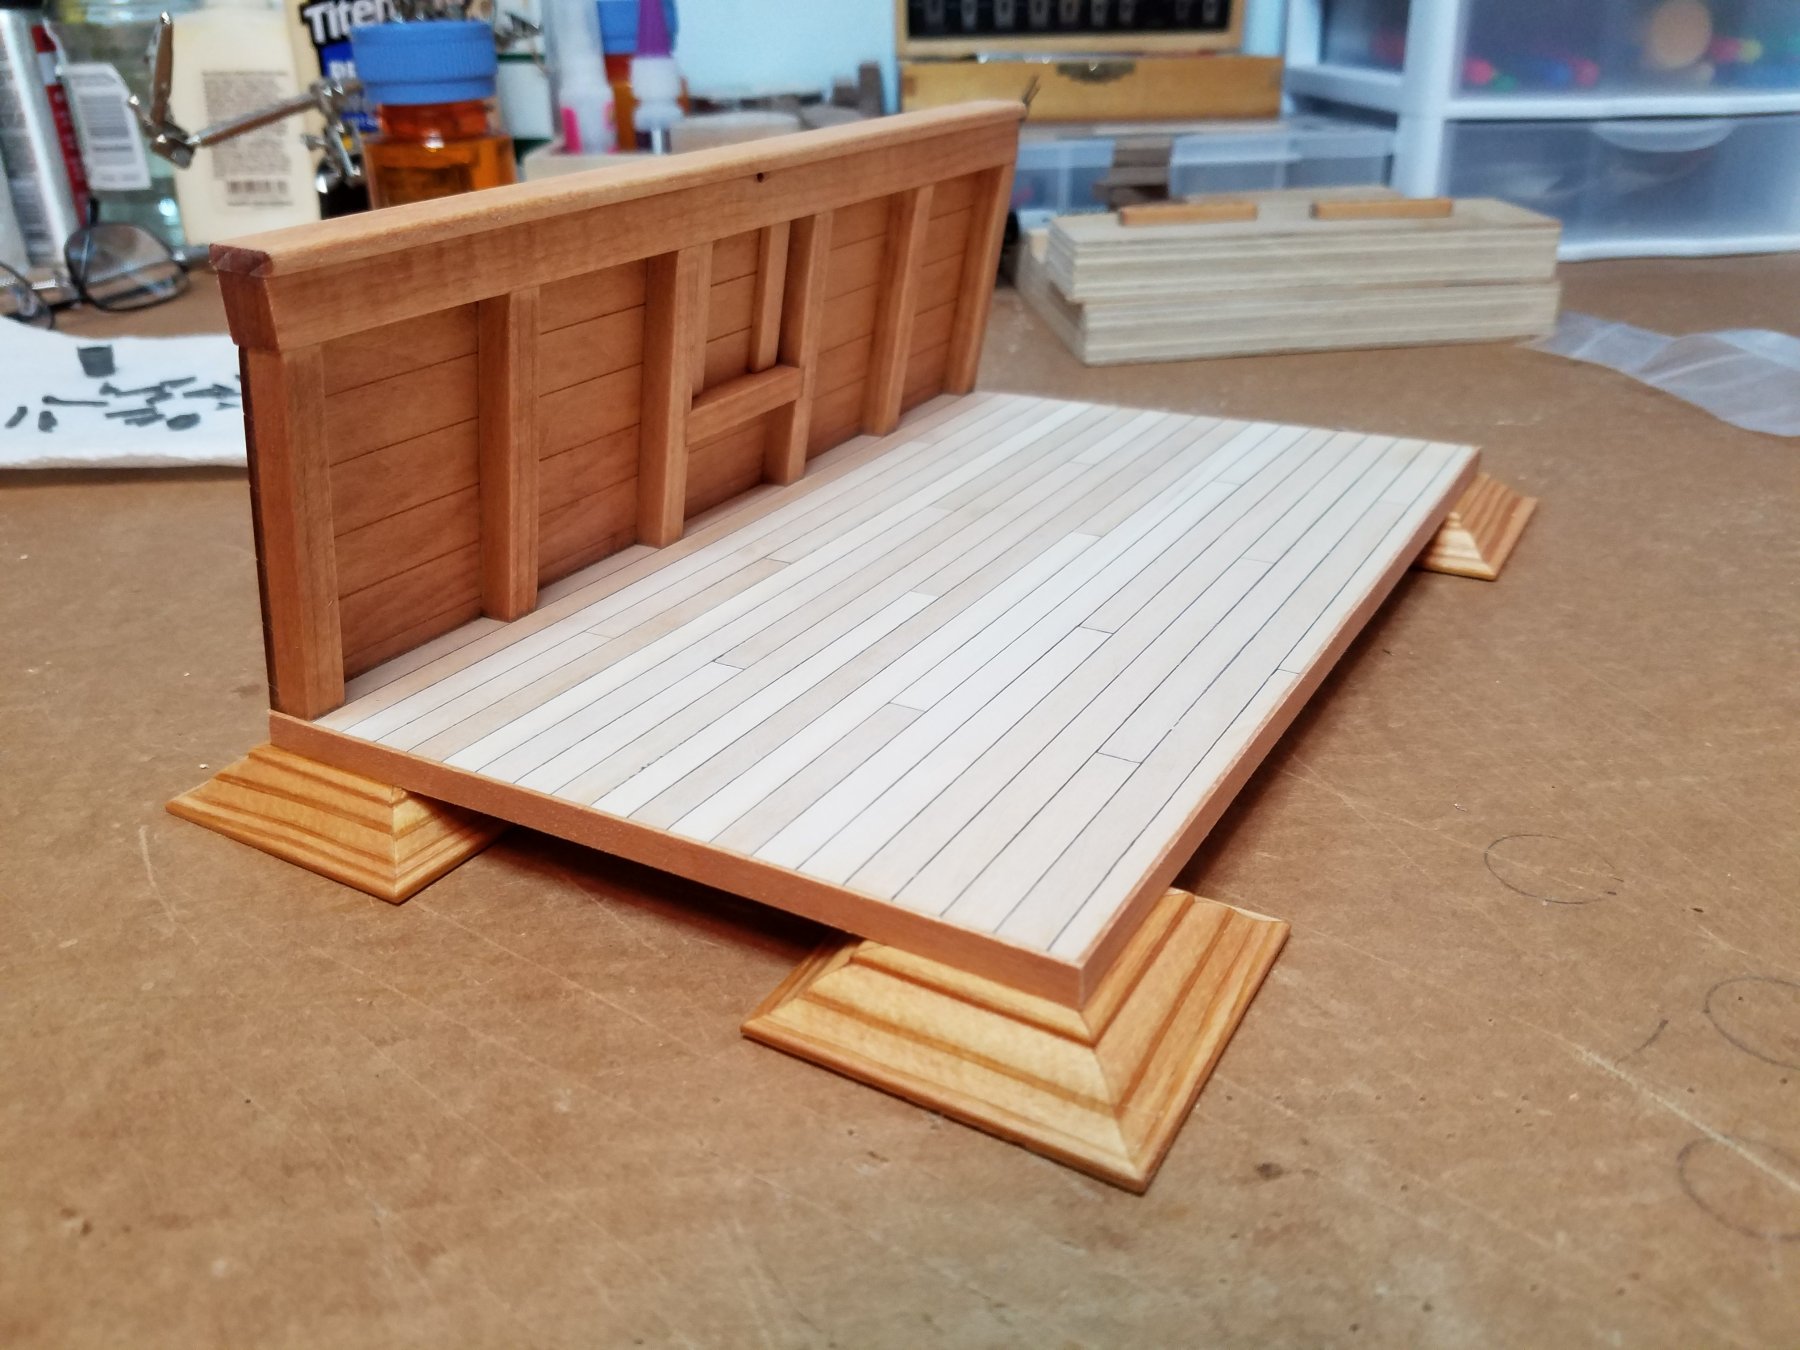
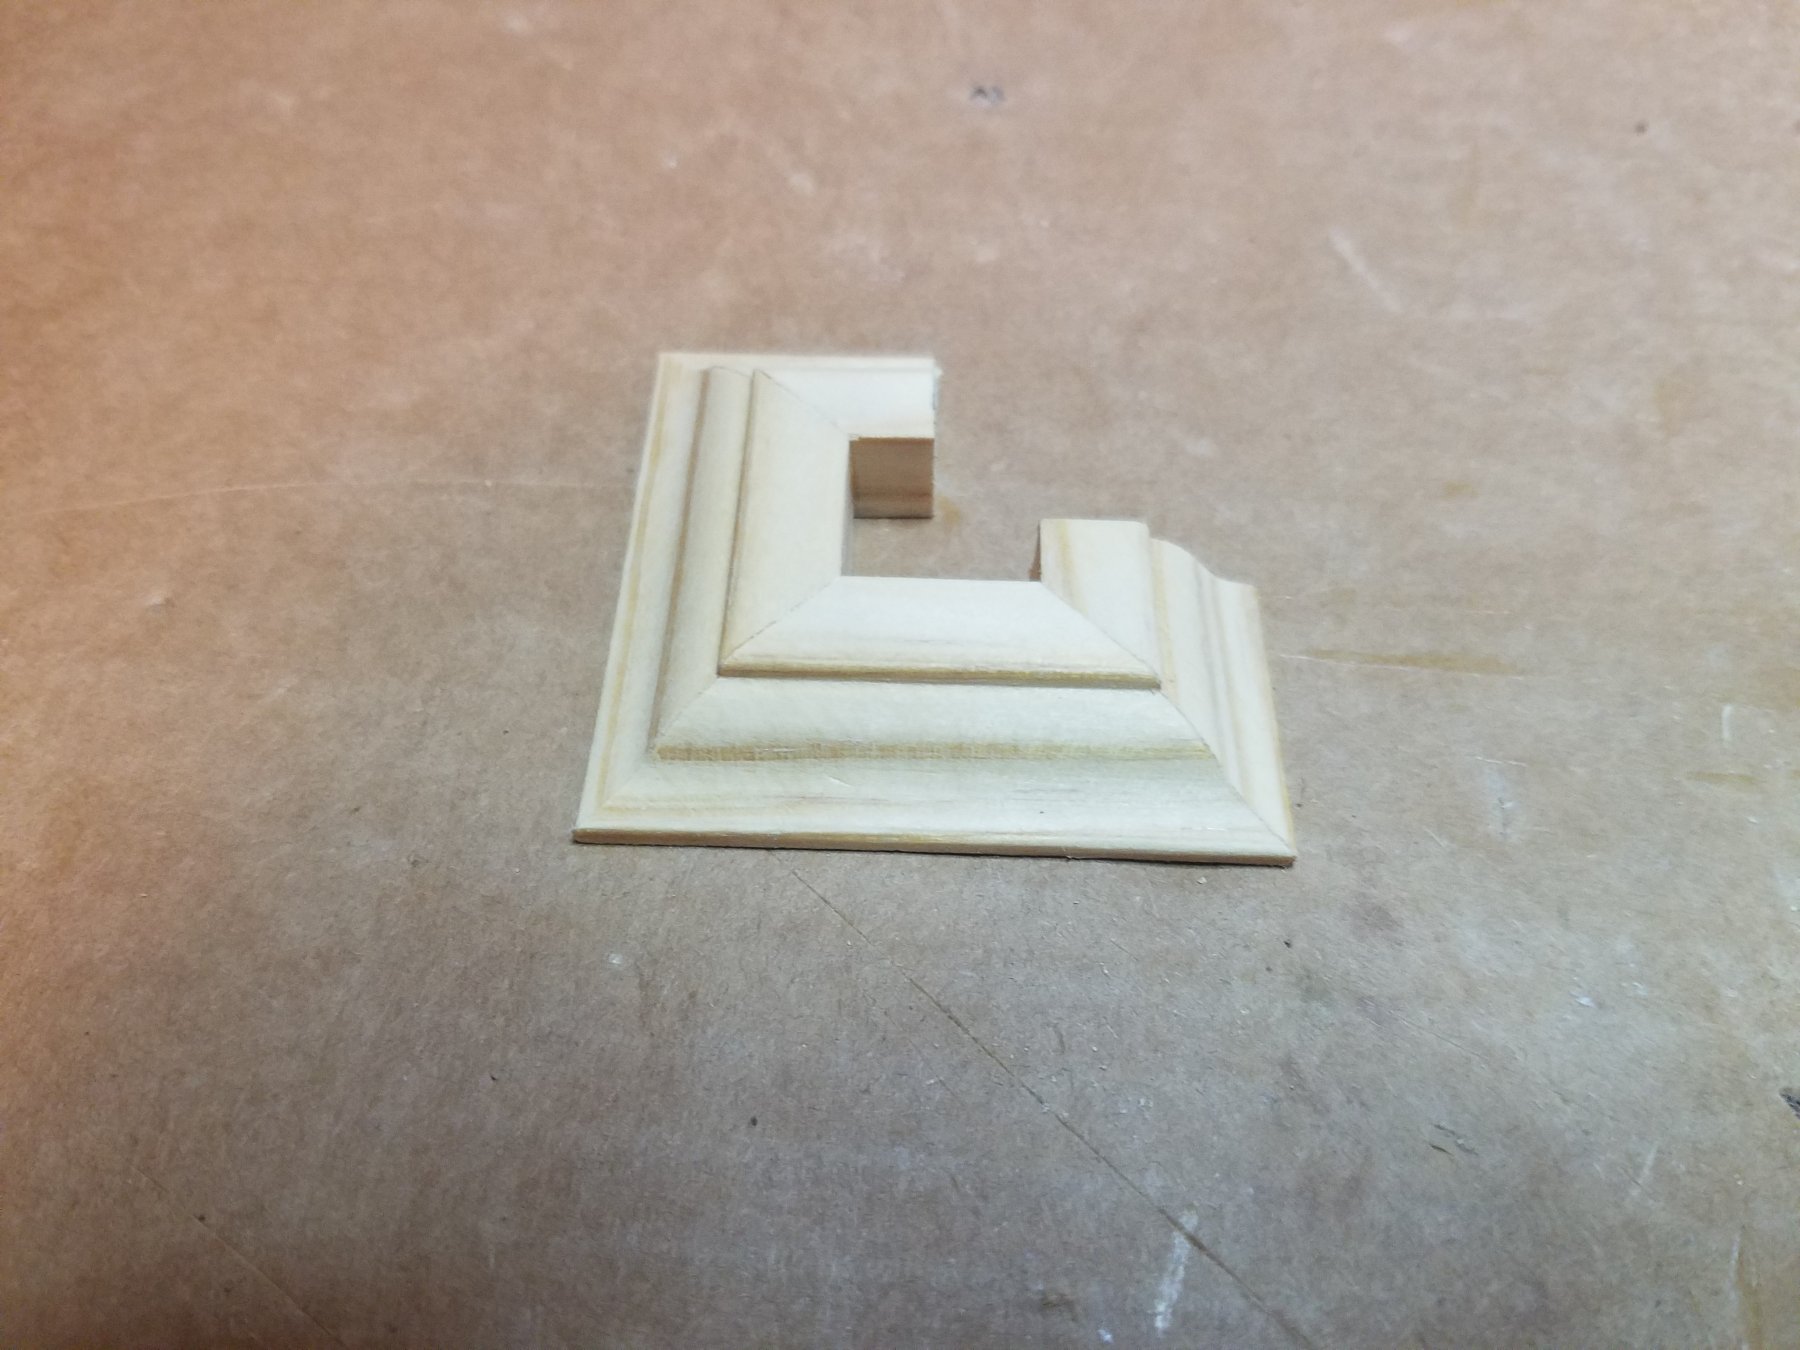
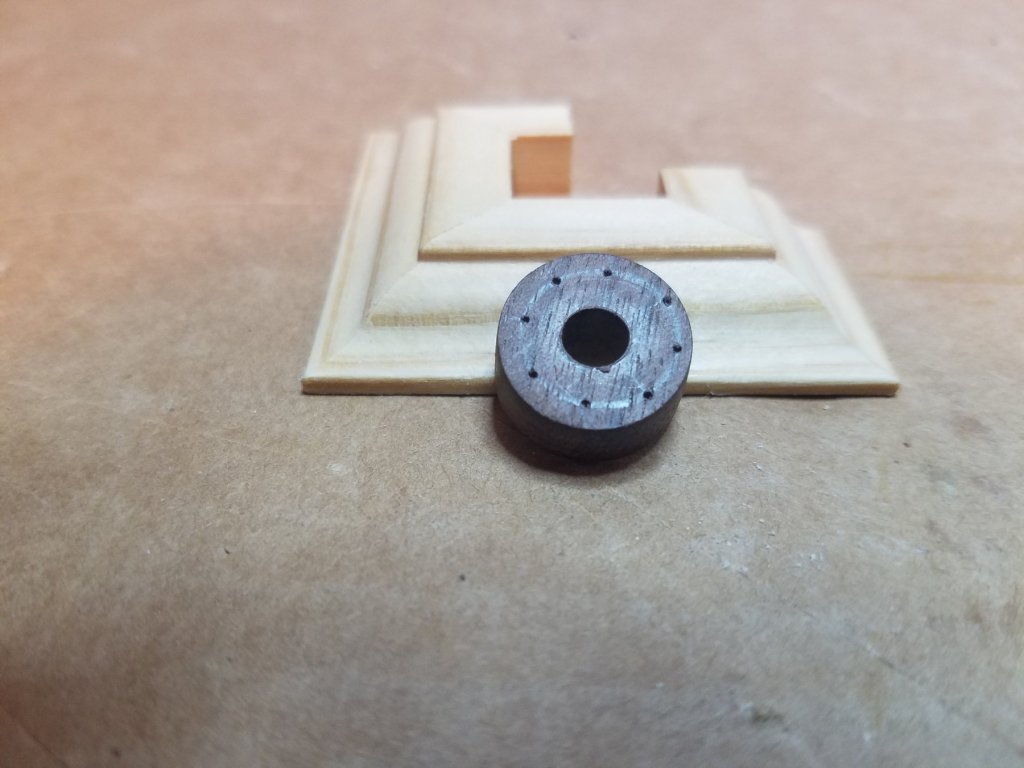
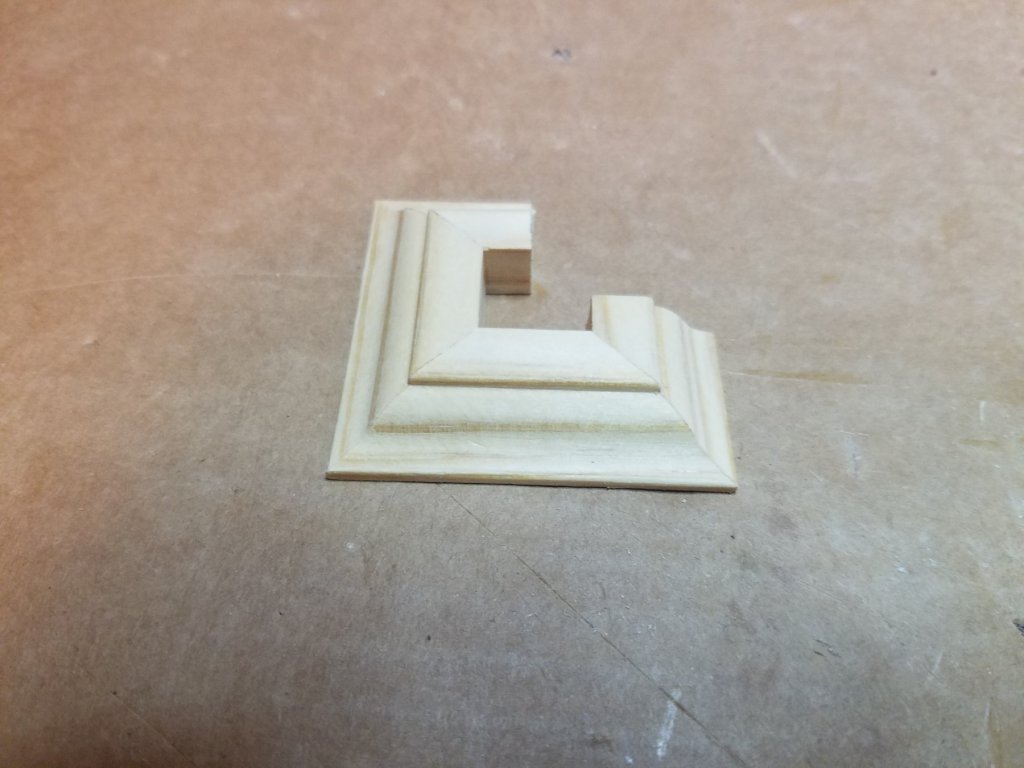
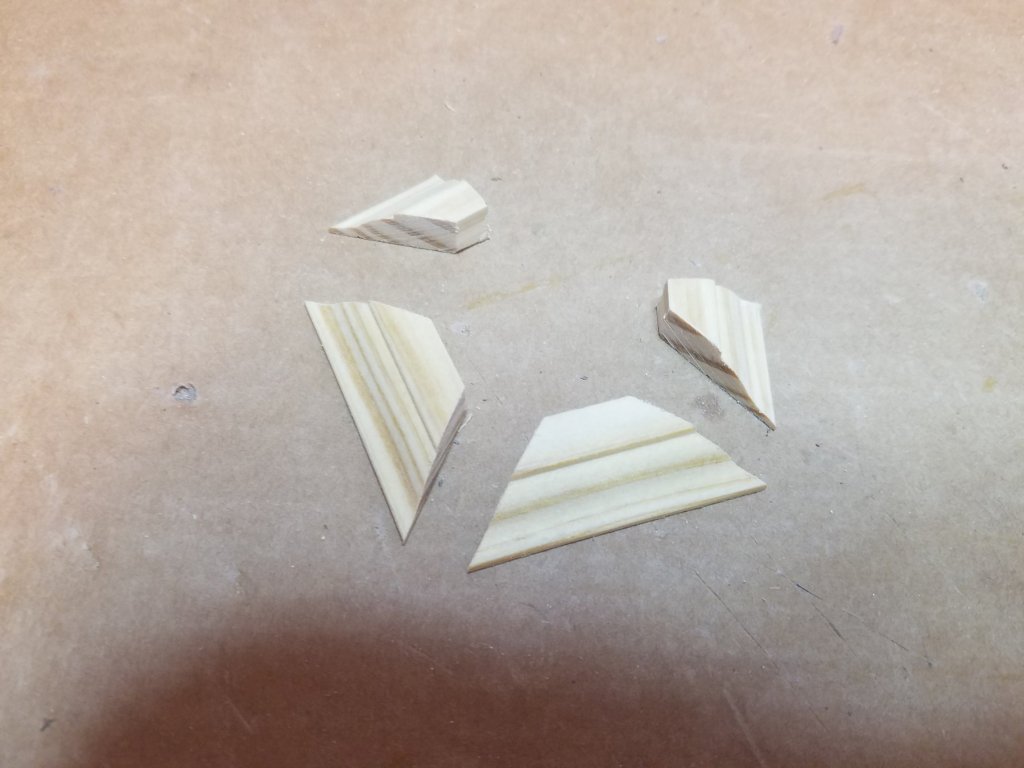
Well a minor fail and a minor success should bring you up to date. I cut and laid out the blanks for my trucks. Since I decided to tree nail the bulwark planking and not use the brass nails provided in the kit I thought I would use them as lamination reinforcements on the trucks. I pre-drilled for them before mounting them on a #10 screw with nuts and washers and chucking them up in my drill press to turn using a rasp and emery boards. I did not document the entire process as it has been shown before in other threads. Even though I took great care in centering everything and not trying to take too much off at a time. As you can see I wound up with two unsatisfactory trucks after my first attempt. they came out slightly egg shaped and my pre-drilled holes are off center. I think the reason was that I did not chuck it far enough into the chuck leaving a long length of screw exposed. The resulting "bounce" made it impossible to achieve a round shape. I only tried one set and have plenty of material to experiment unit I come up with the right method. In the mean time I found some small ogee molding laying around and decided to make some feet for the platform. I saw this on another manufacturers kit and liked it so I figured I would add it here. A couple of minutes on the chop saw then carefully refining the cuts with 400 grit sand paper. Glue them up and that's that. I will stain them prior to attaching them then I can finally put a coat of poly on the entire structure before starting to add the metal parts and rigging.

- 82 replies
-
- 9
-
-
- naval smoothbore
- model shipways
- (and 1 more)
-
That didn't take near as long as I thought. On to the trucks.
- 82 replies
-
- 9
-
-
- naval smoothbore
- model shipways
- (and 1 more)
-
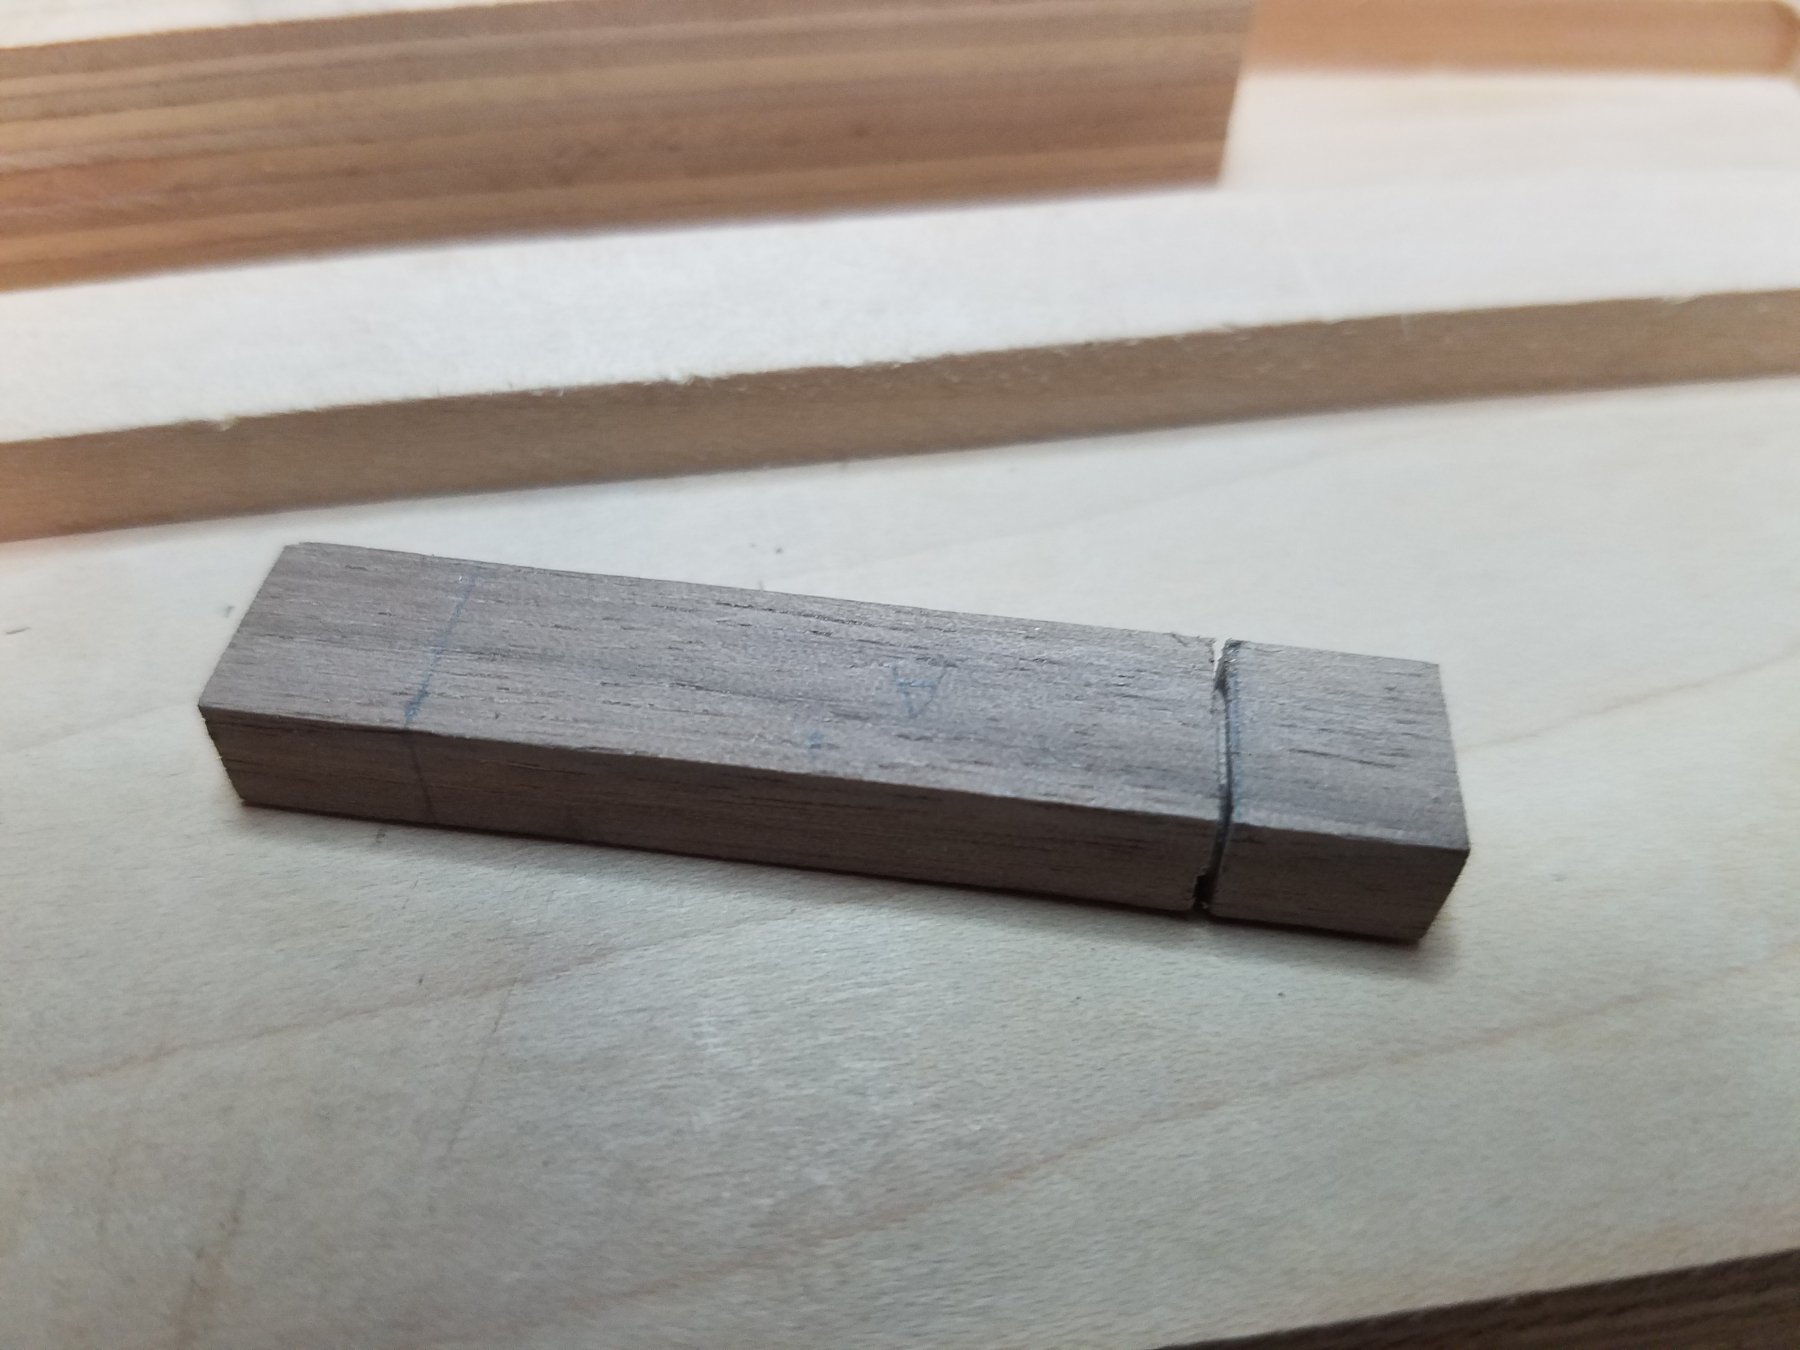
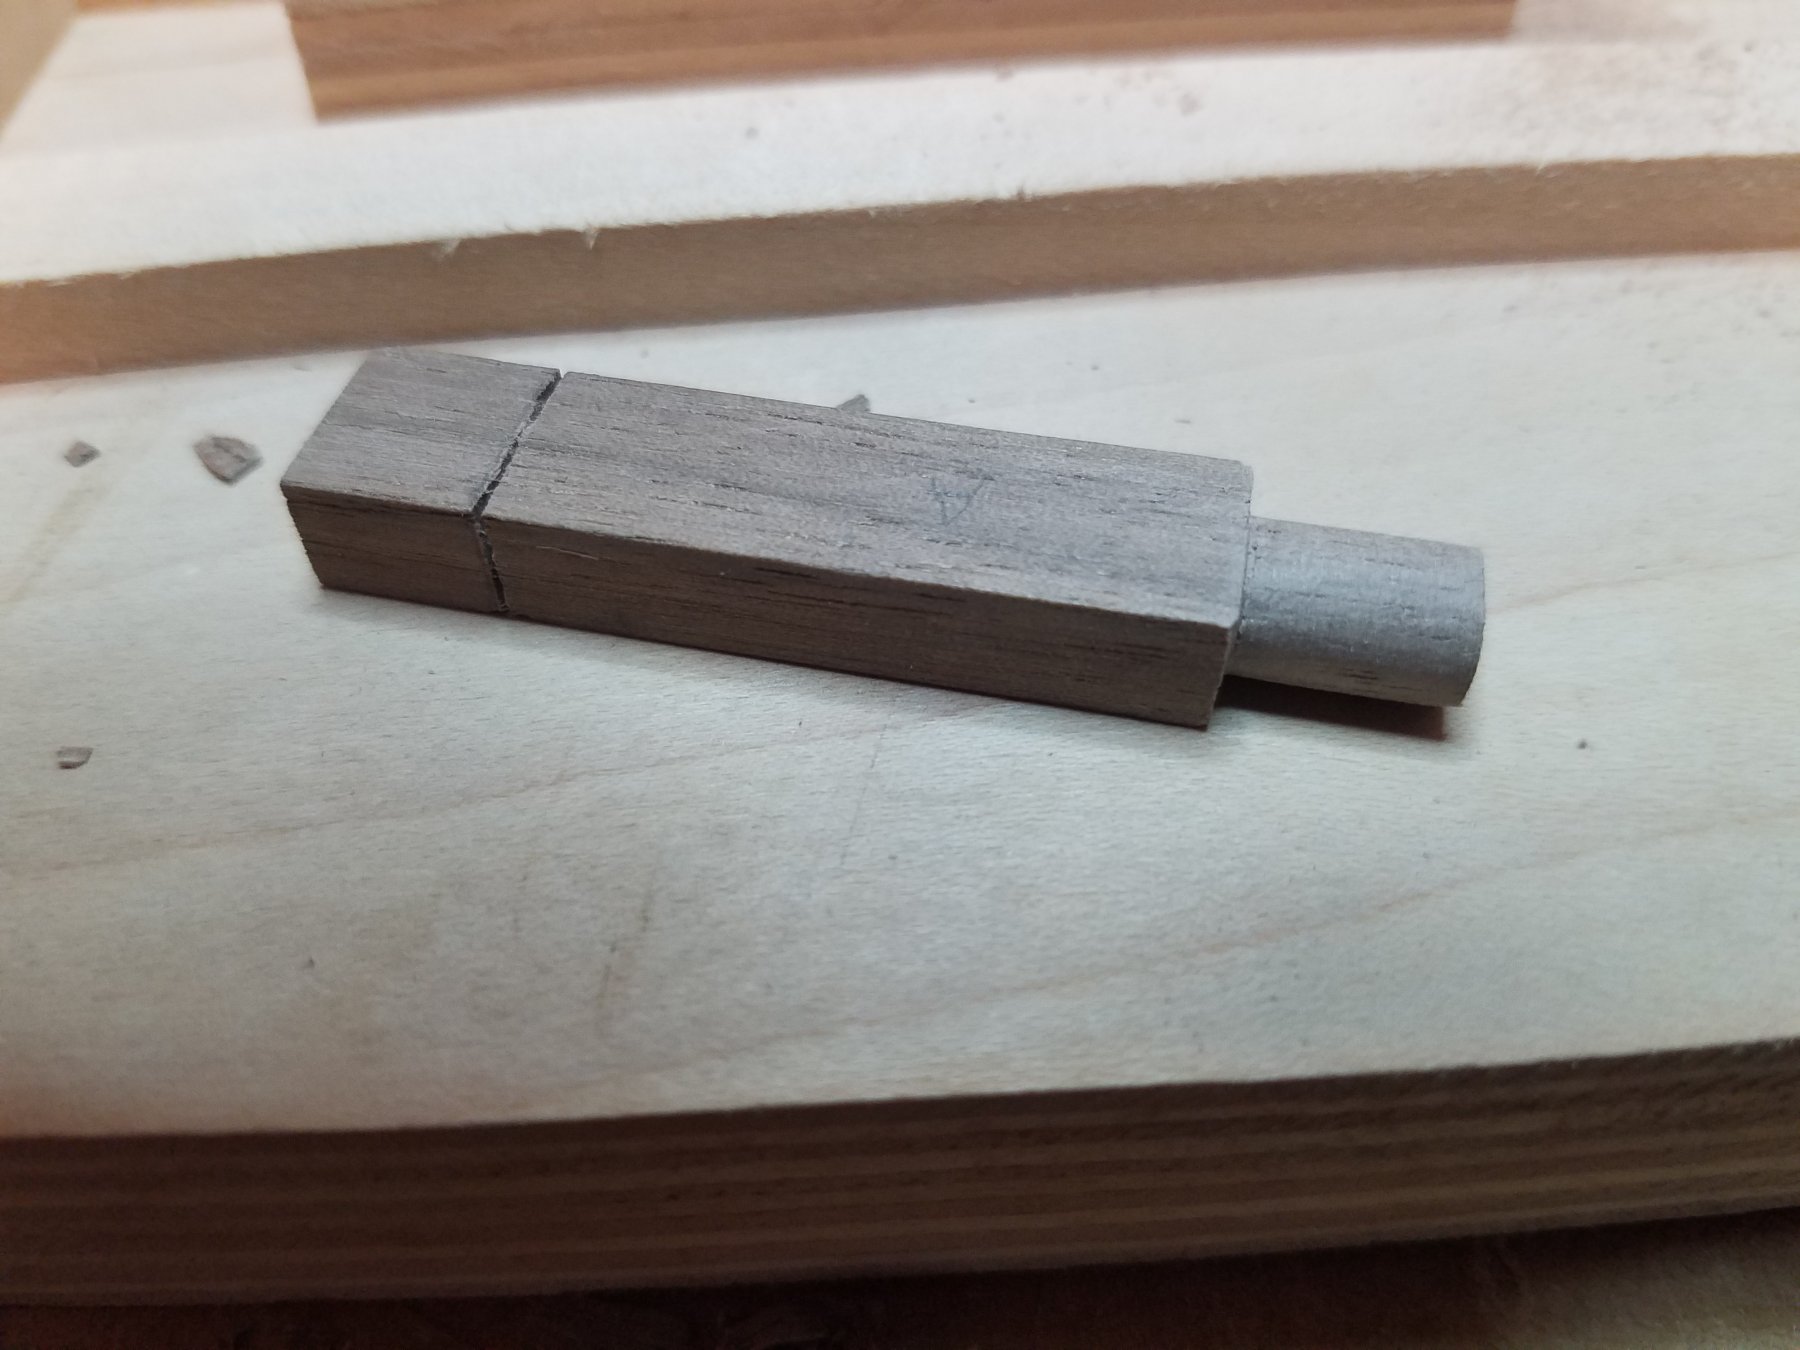
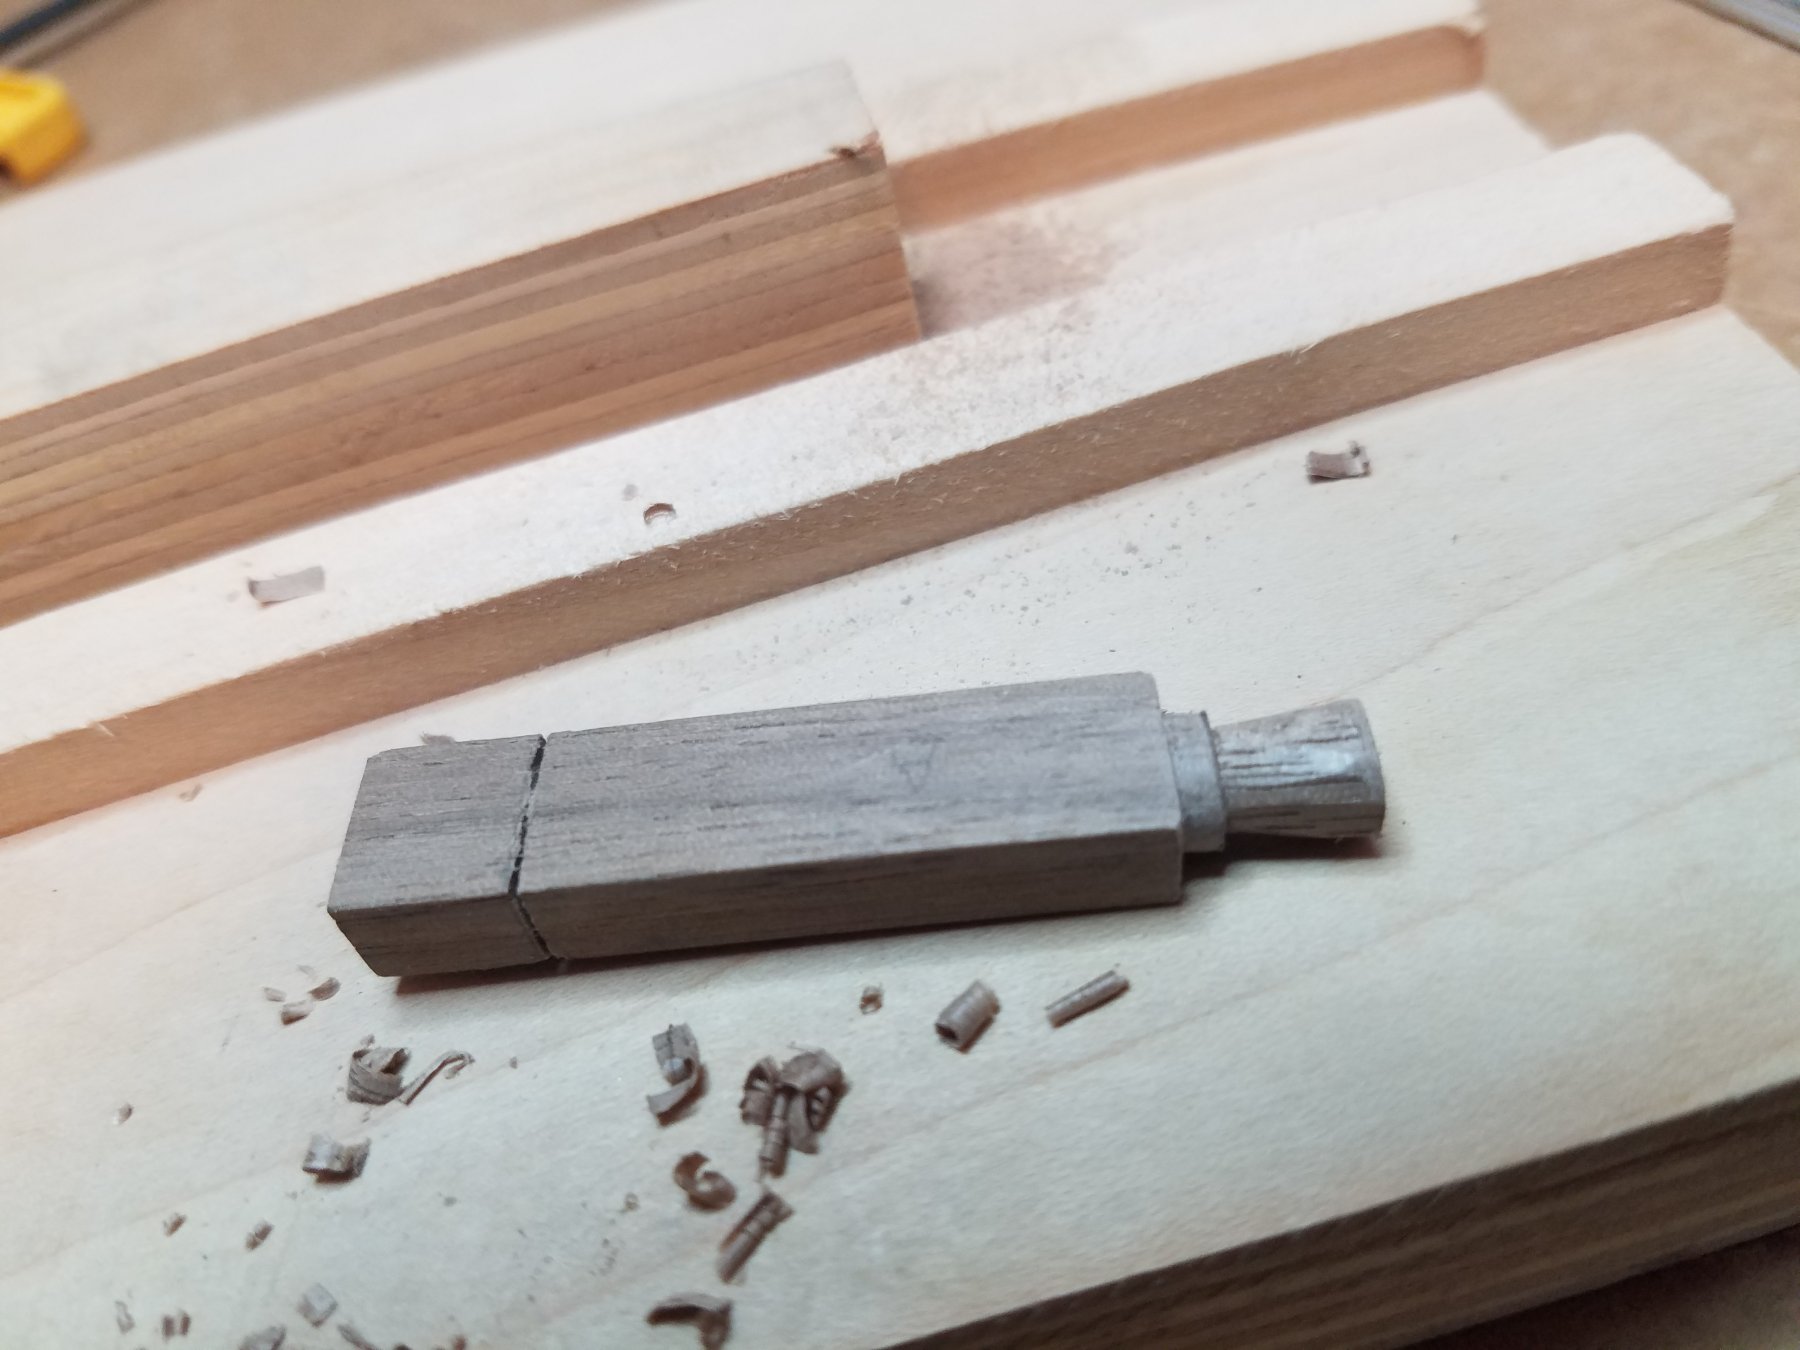
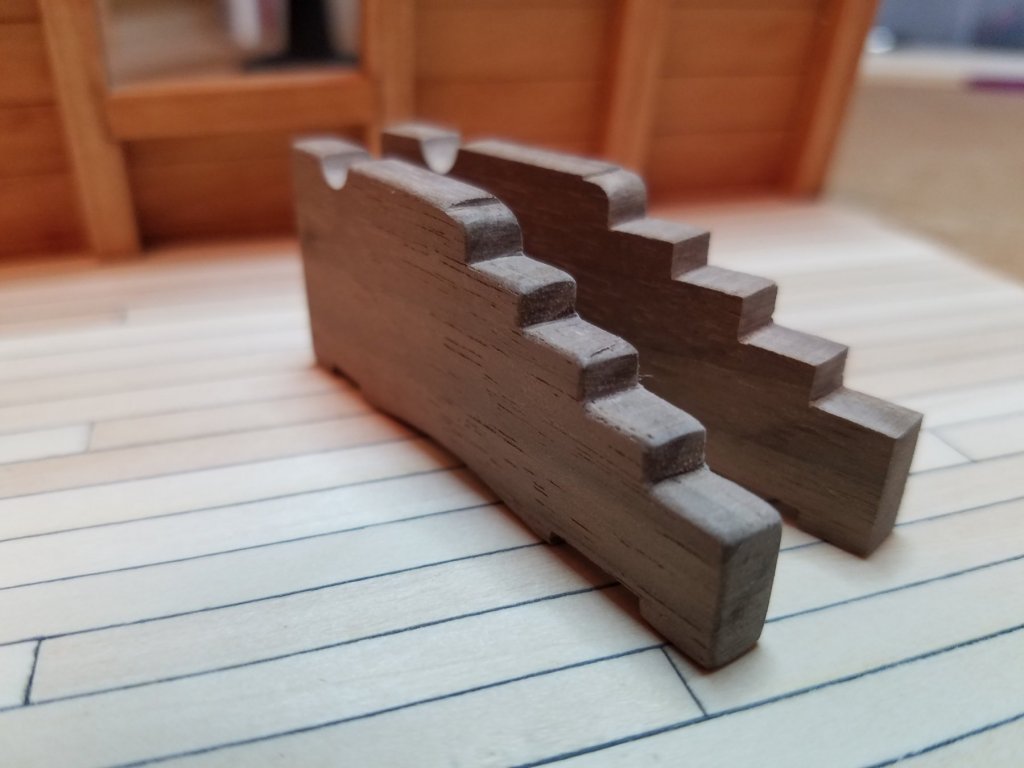
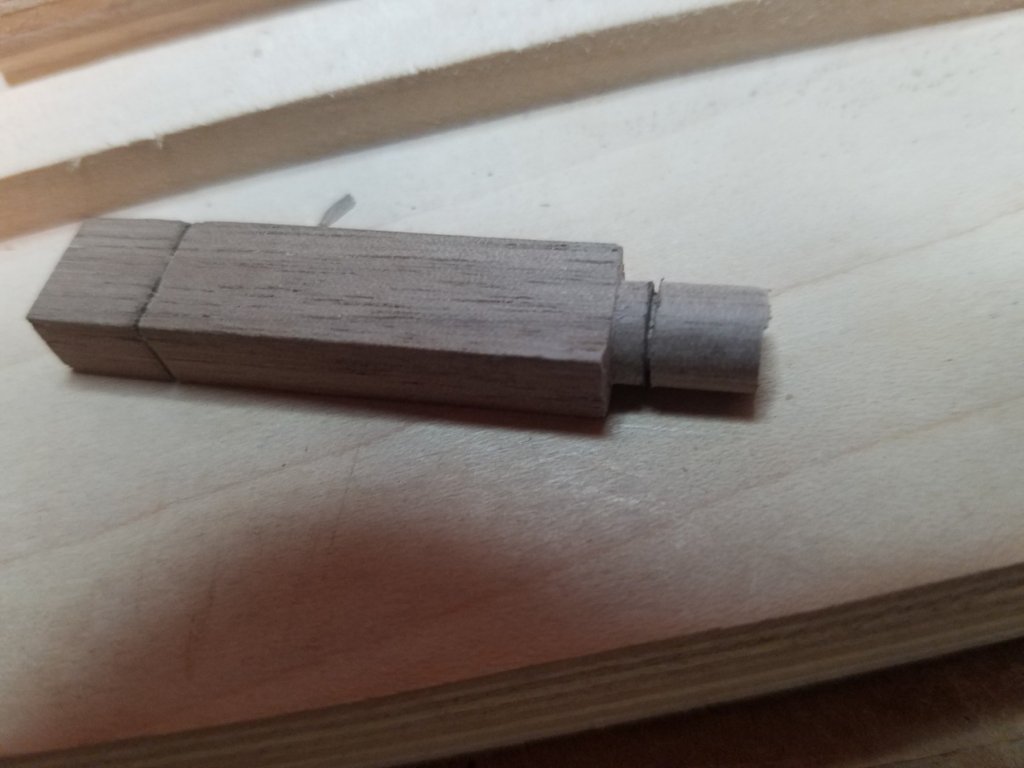
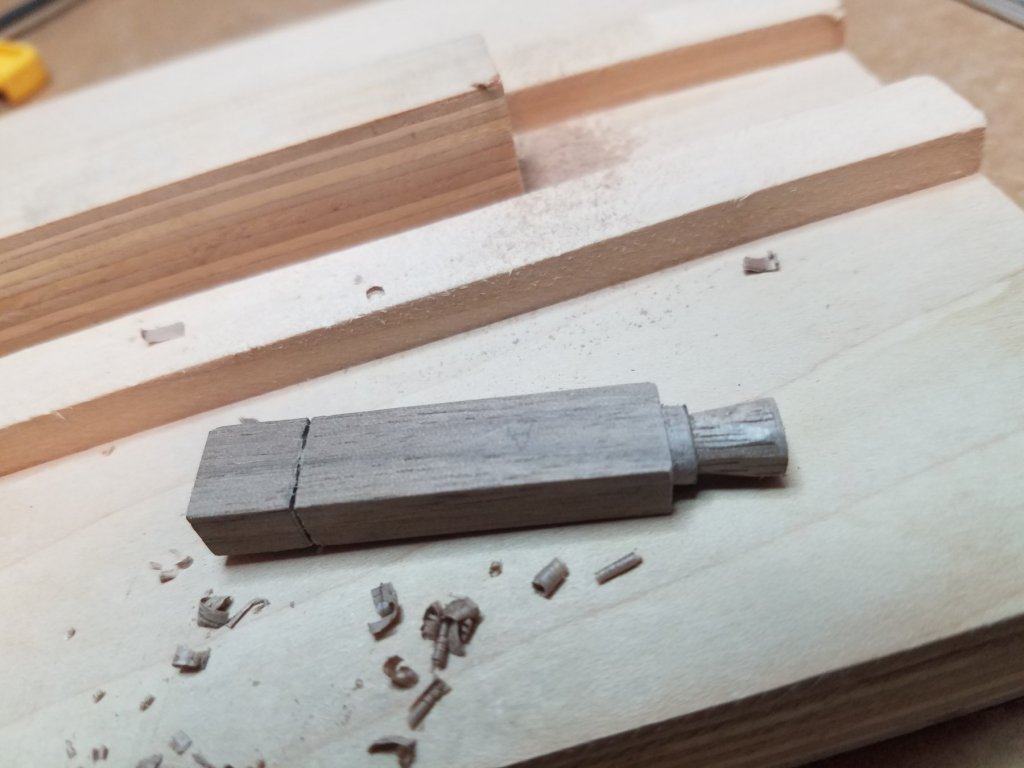
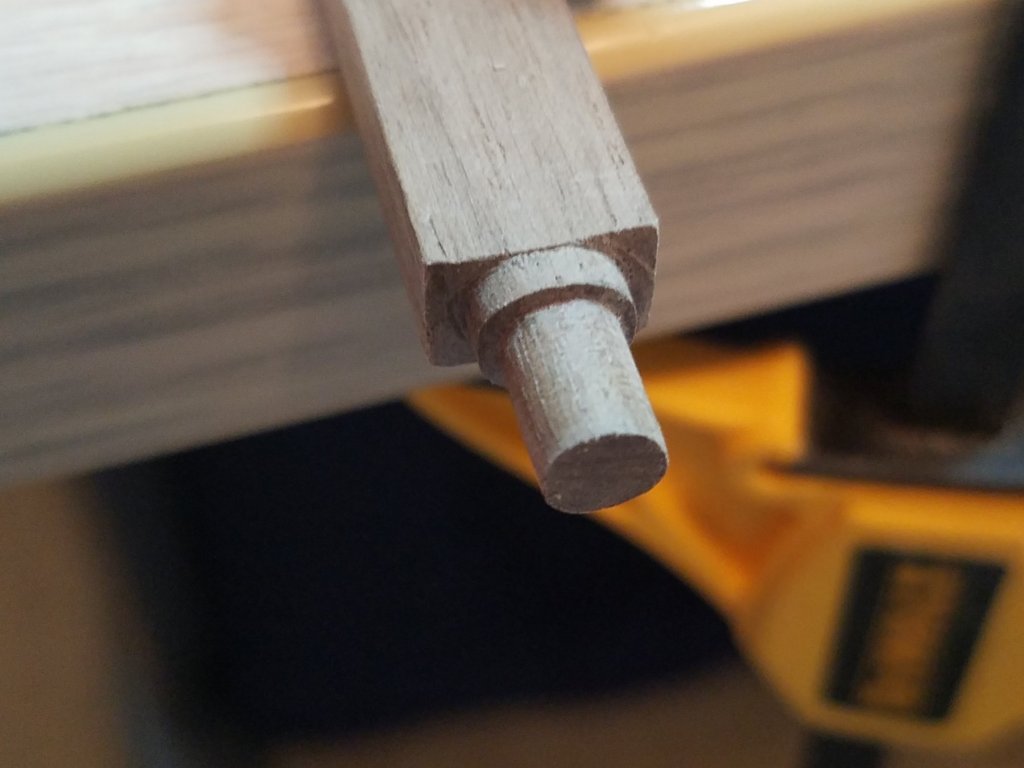
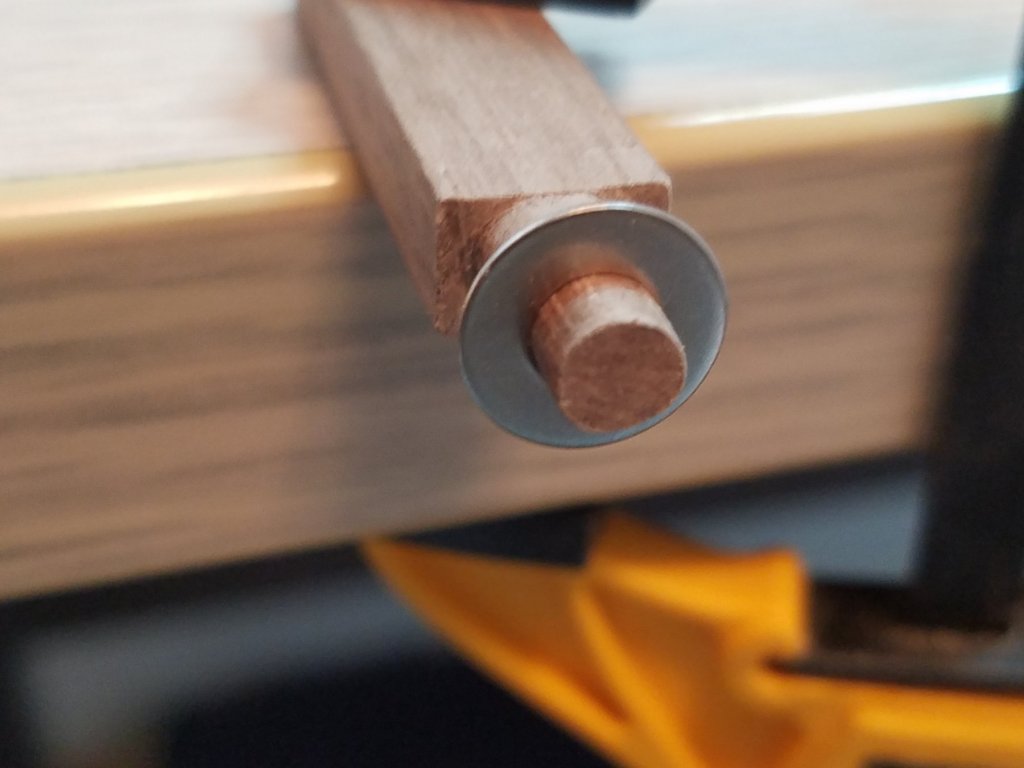
I managed to get a little work done even with the holiday. I finished up the brackets as far as I thought practical just need to drill the holes for the rigging rings and trunnion clamps. Before and after. After and after. I know it looks ruff but every thing will get a final sanding prior to finishing. But at the same time I think in real life after a while the edges would be rounded over with use and normal wear and tear. That is kind of the look I want even though I probably took it a little to the extreme. I would appreciate any feedback on that as this is my first attempt. Got to work on the Axtrees this morning. I started by laying out the first shoulder cuts on the Hind Tree. Then very carefully with an exact-o chisel blade cut down until I had the shoulder exposed to wok against. Using emery boards I shaped the larger diameter for the hub. Then I laid out and kerf cut for the spindle diameter. Lather rinse repeat for the spindle. Not to bad for my fist try. A #8 flat washer has the perfect inside diameter to use as a guide. One end down and three more to go should not take me more that a day or two.


- 82 replies
-
- 7
-
-
- naval smoothbore
- model shipways
- (and 1 more)
-
What finish did you use on the decks? I really like the washed out effect you achieved with them.
- 67 replies
-
- 1
-
-
- philadelphia
- model shipways
- (and 1 more)
-
Welcome Pavel, I also am a newbie that luckily landed in the right place. I have been a member of many forums for other hobbies (of which the admiral says I have too many). But I have never been among a more helpful talented group of people. Good luck and be sure to post your builds so we can all learn together.
-
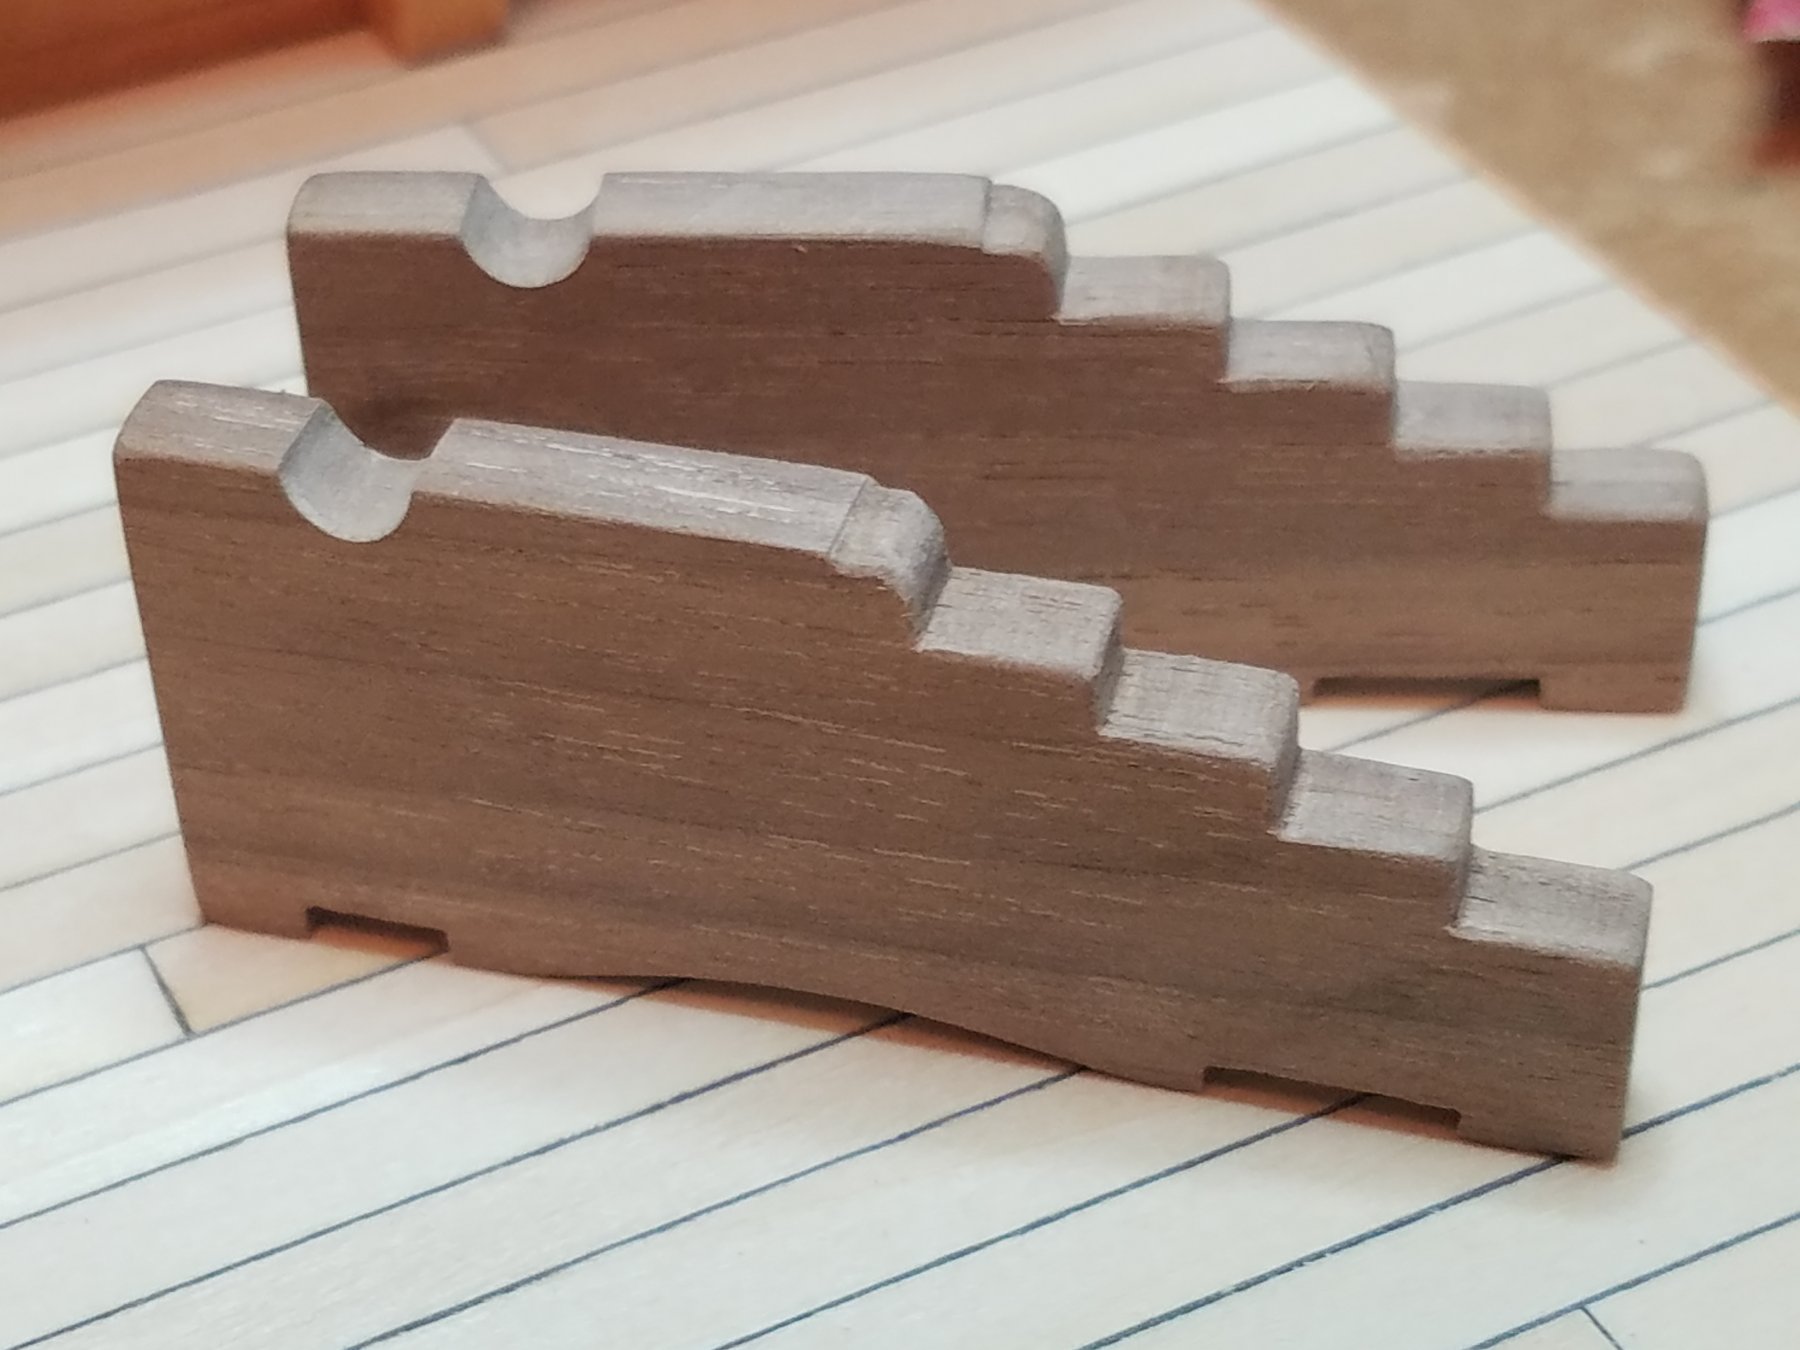
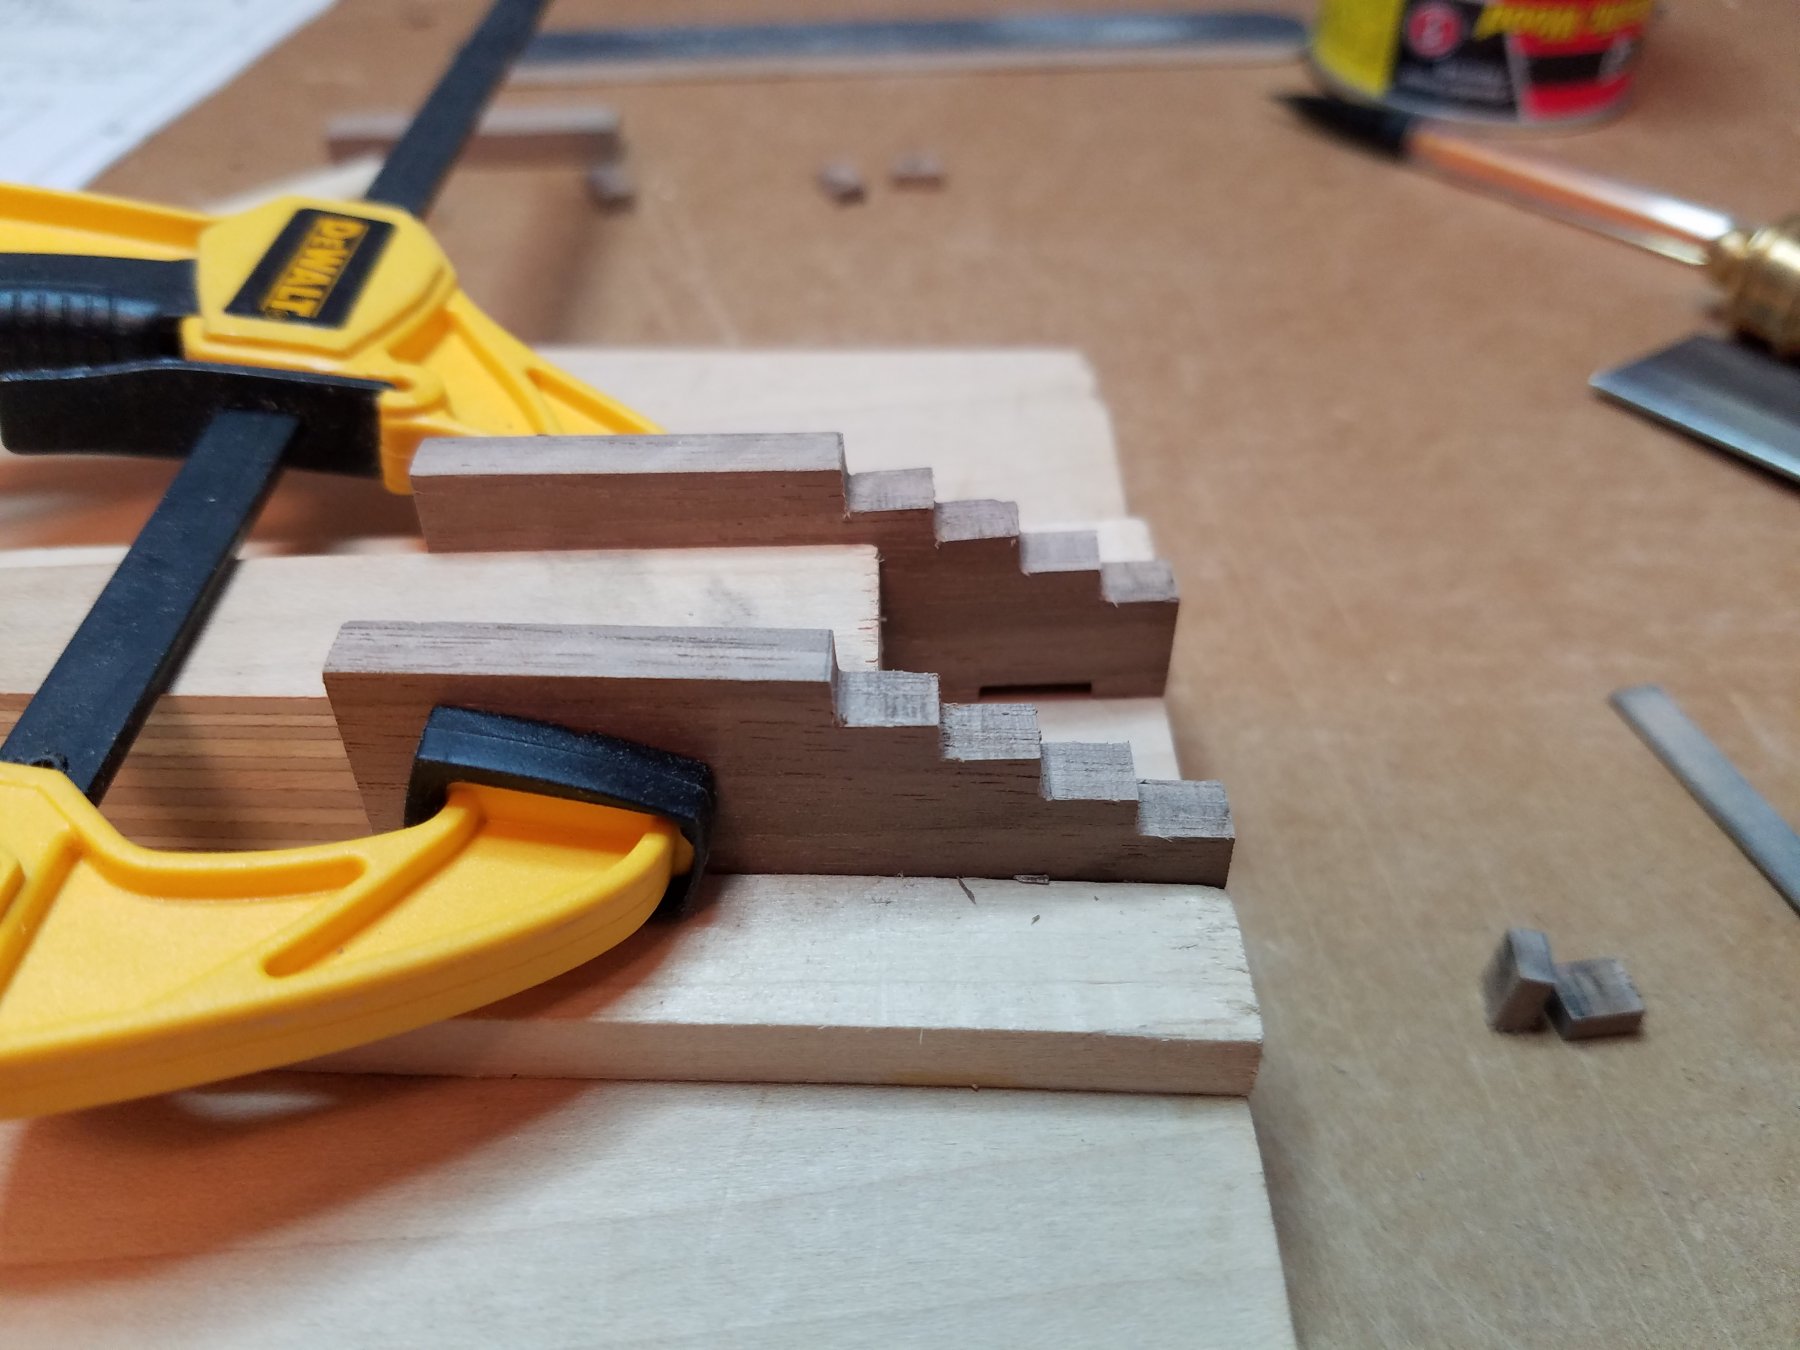
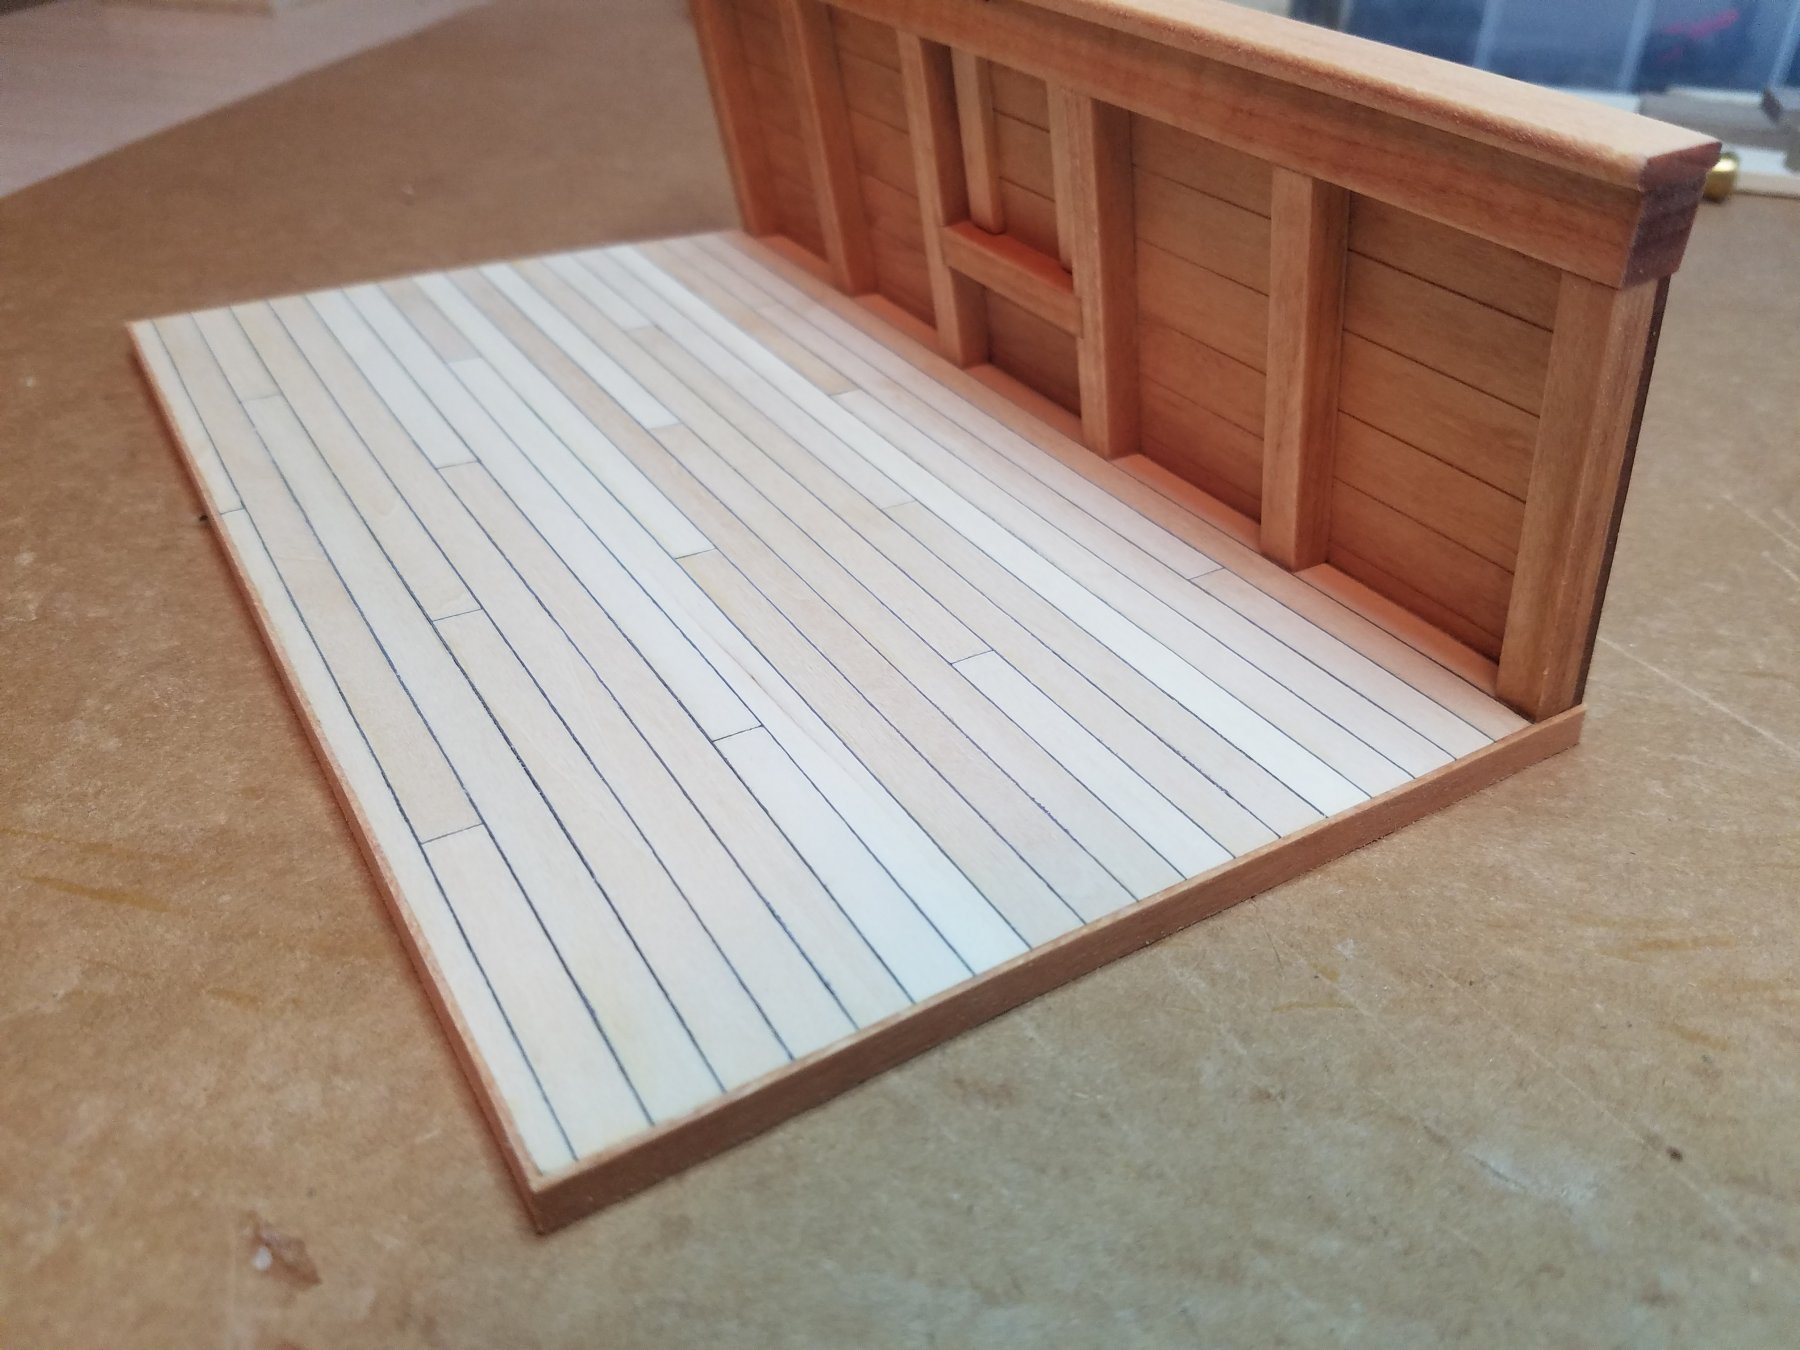
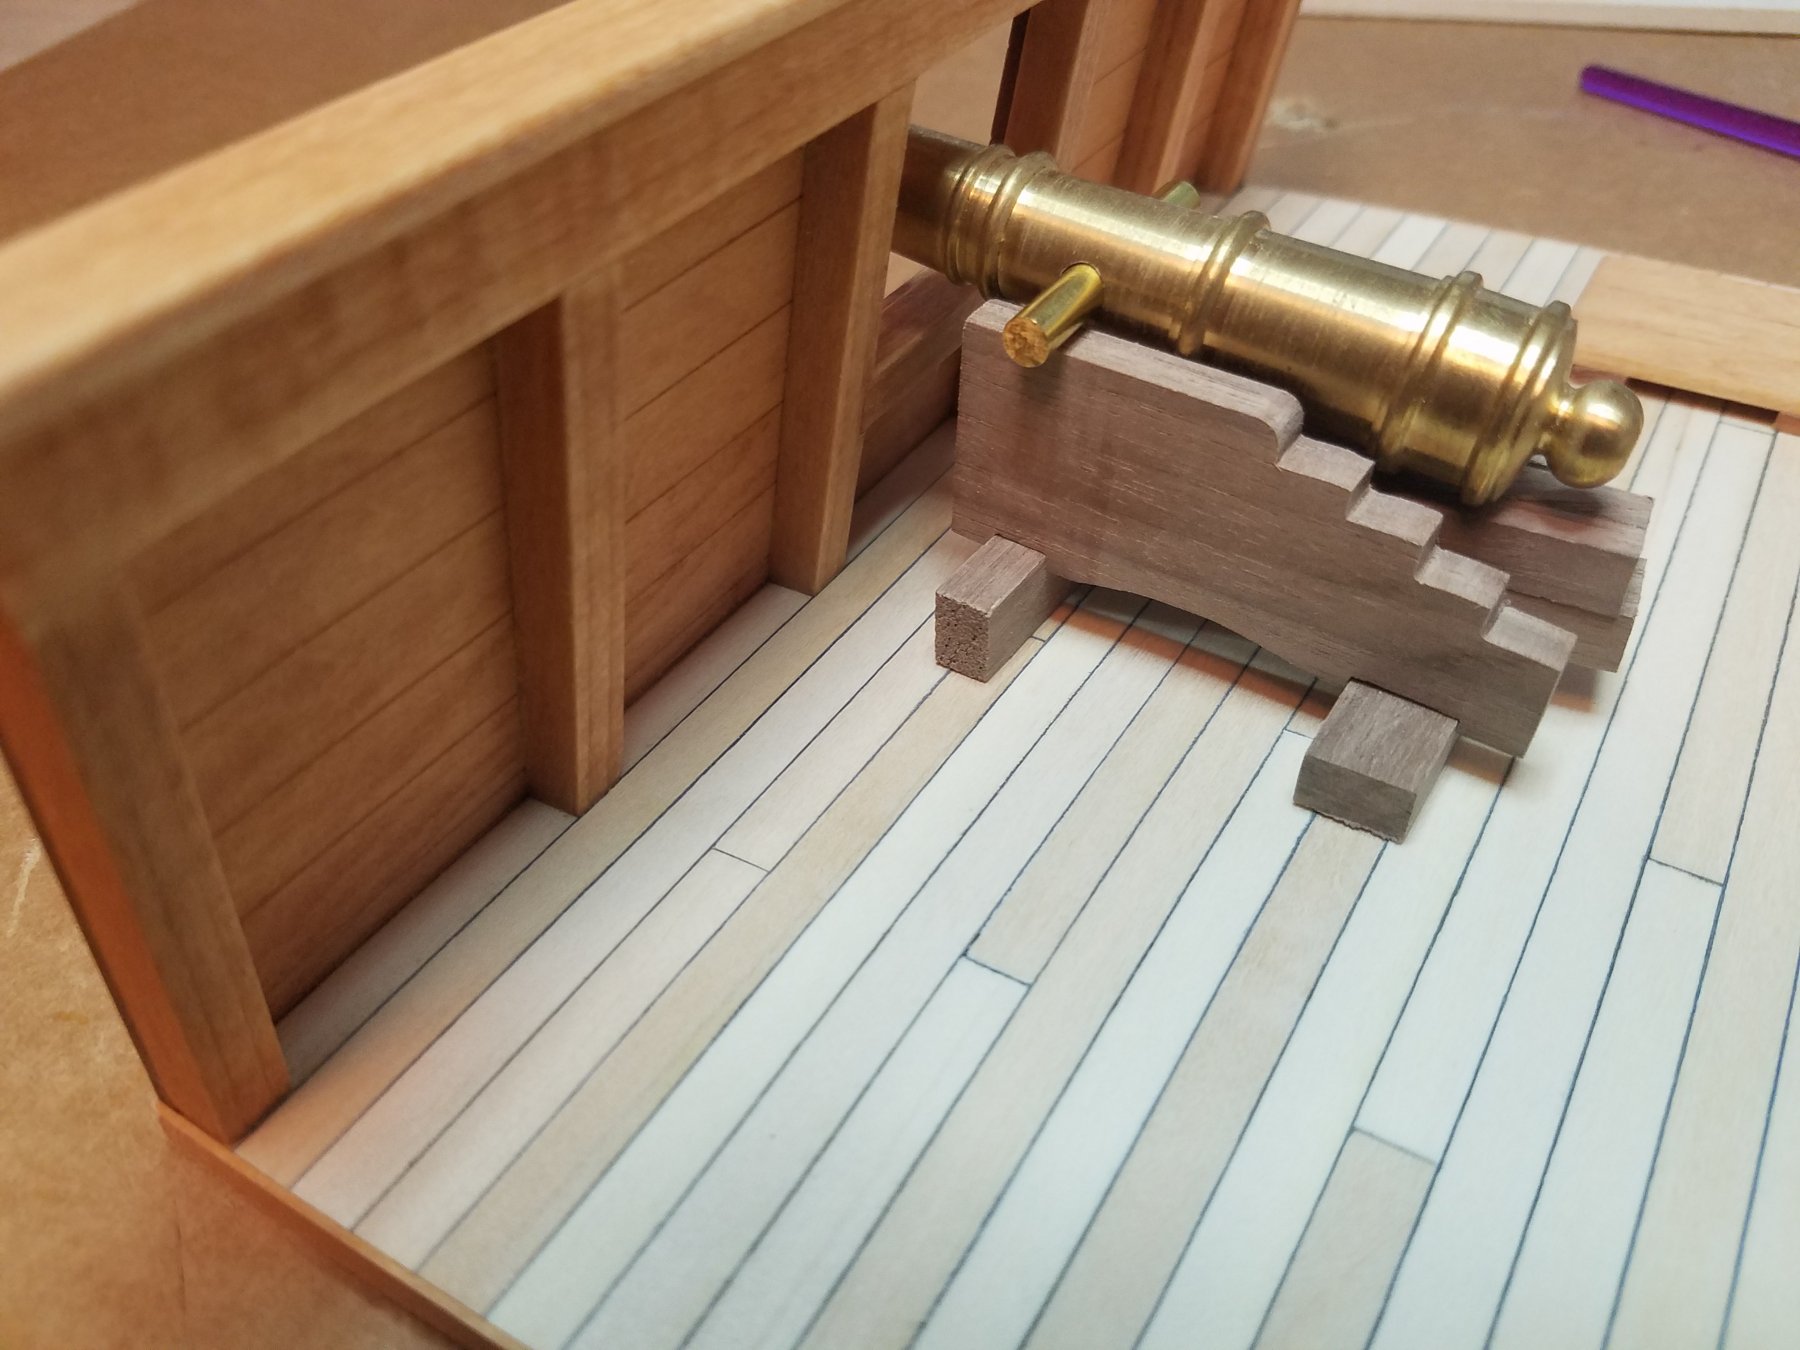
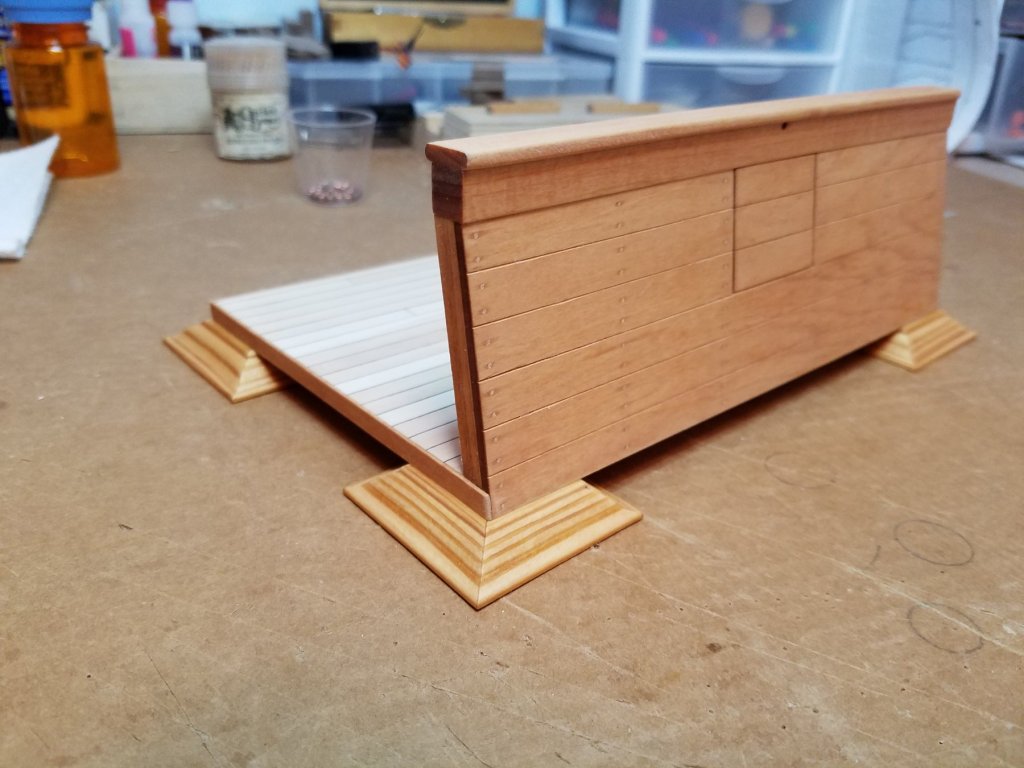
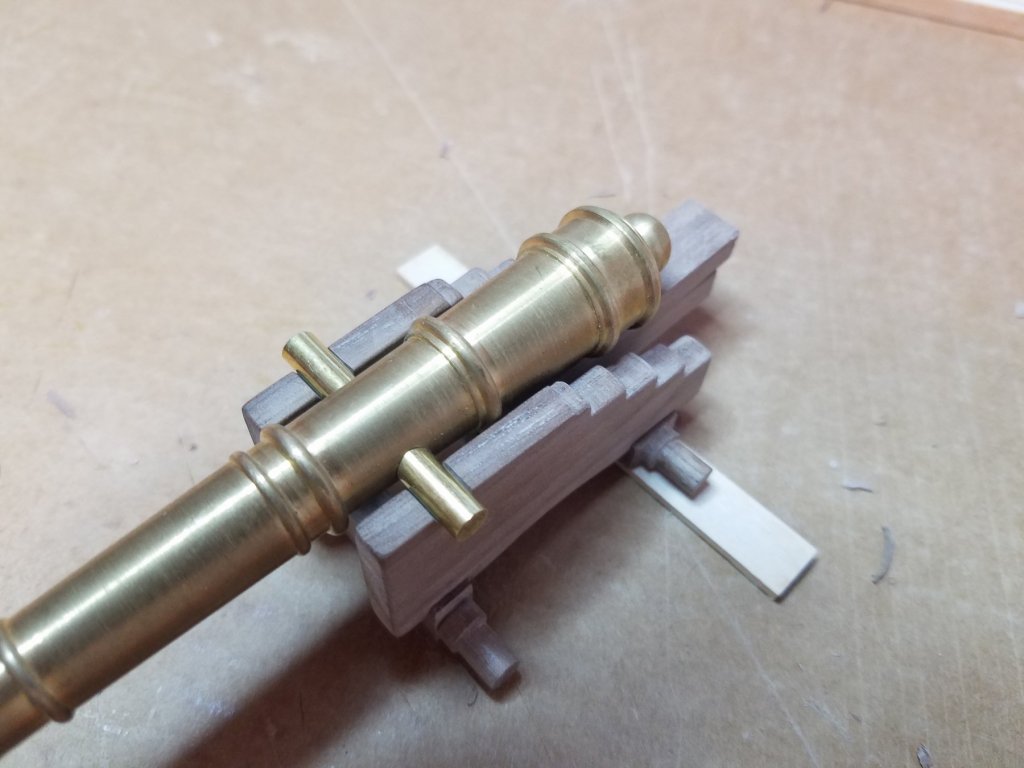
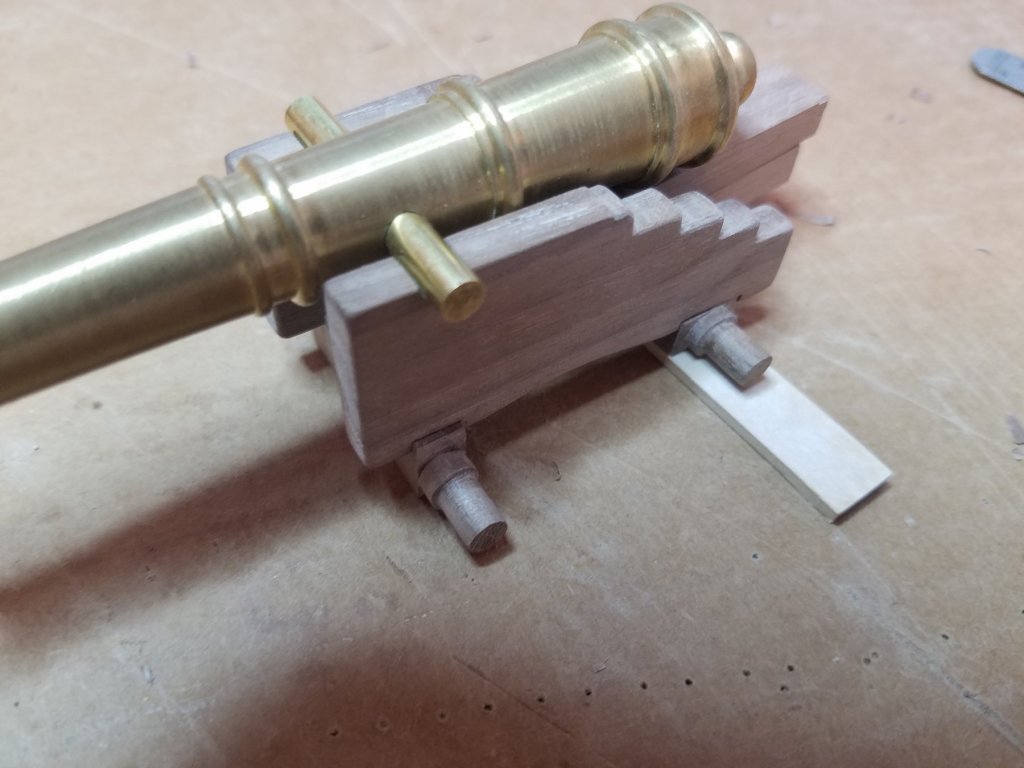
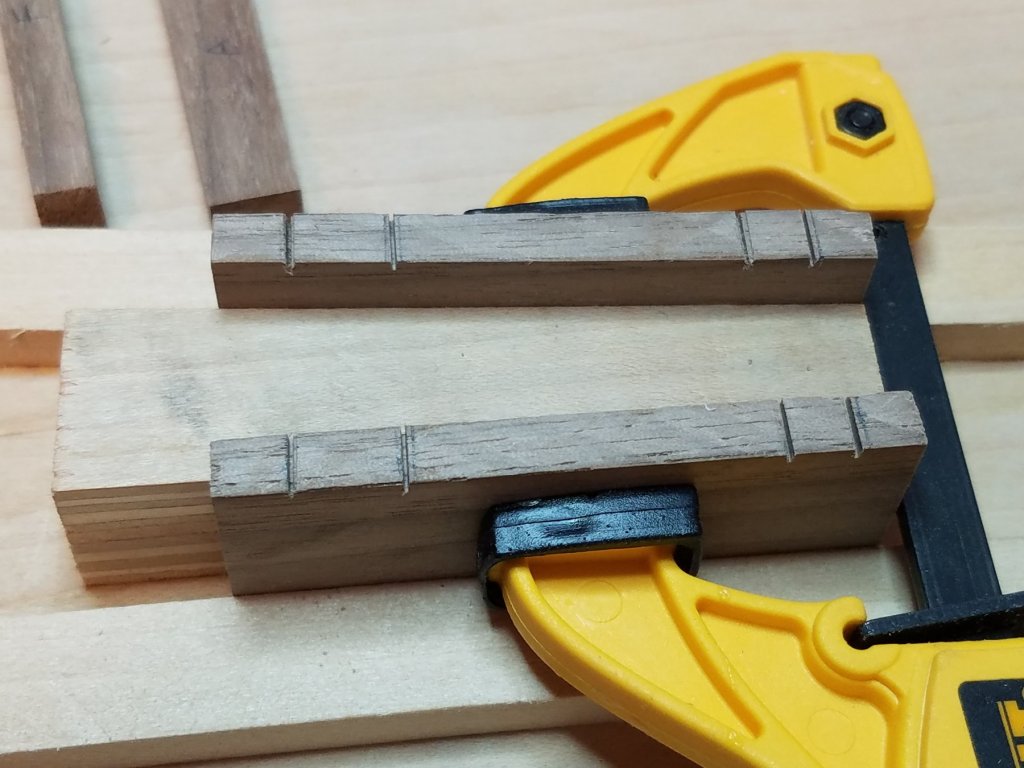
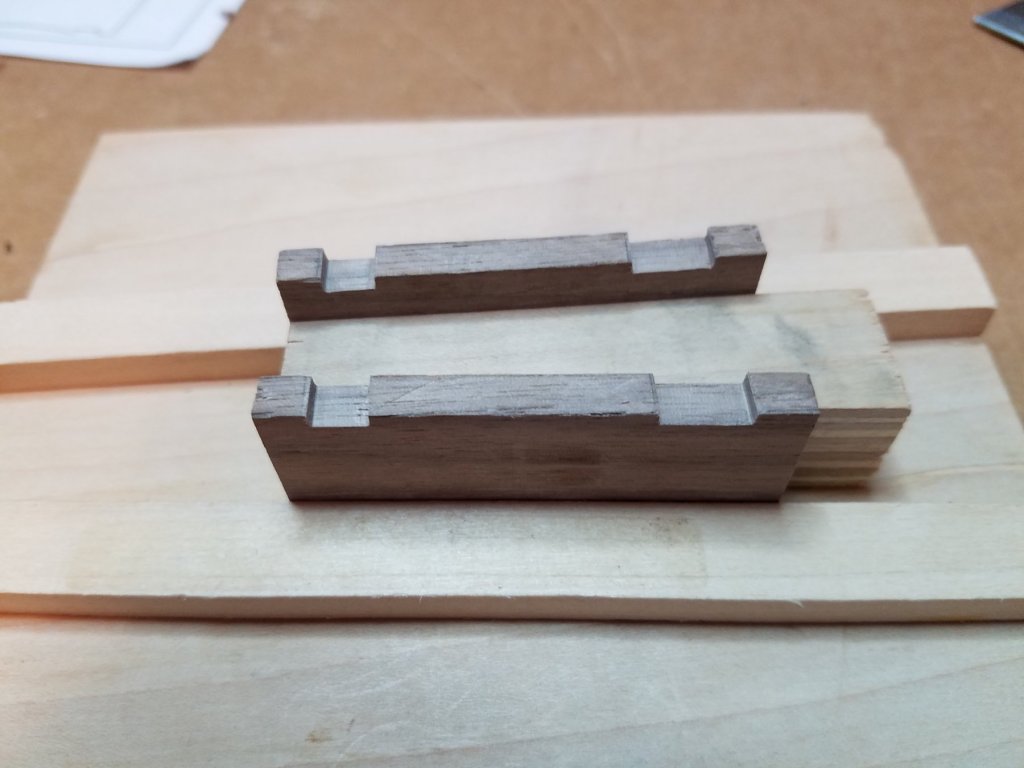
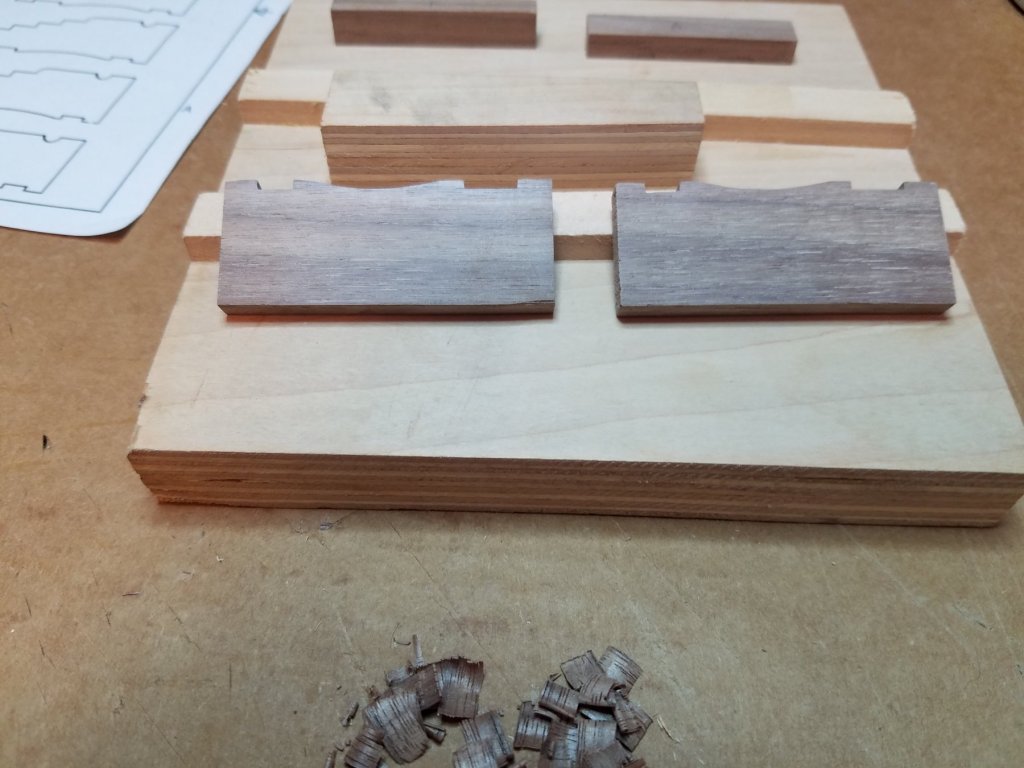
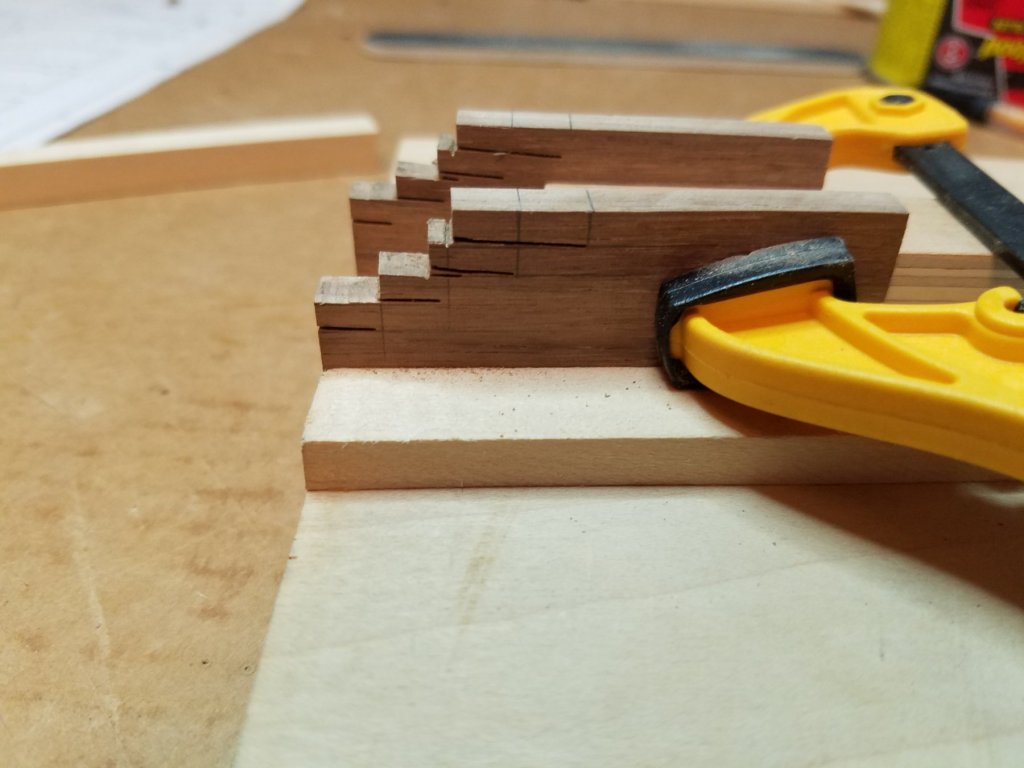
Made a little progress this weekend have not had a chance to update until now. I don't have any power tools geared toward smaller work pieces so good old fashioned hand tools. It is actually quite relaxing. 1st I laid out and cut the mortises for the axtrees. Then cut and shaped the bottom arch detail. The I laid out the stair step pattern on the back side. After cutting and filing. Still have to cut the mortise for the trunnion and some final shaping to do but I am pleased with the way it is coming along. I then finished wrapping the base with some left over deck planking that I stained earlier. A first test fit just to check proportion and barrel height. It sits a little low right now but once I get the trucks on it should be fine. Thats it for tonight, tomorrow it is axtrees and trucks.


- 82 replies
-
- 10
-
-
- naval smoothbore
- model shipways
- (and 1 more)
-
This build get more amazing every time I check in. Beautiful work Bruce.
- 67 replies
-
- 1
-
-
- philadelphia
- model shipways
- (and 1 more)
-
Billings Boats Santa Maria for a Beginner
Osmosis replied to Osmosis's topic in Wood ship model kits
I was wondering why all of the listings I saw said Model Ship Kit plus Fittings Kit -
Looking good Derek. I would have to agree about the "instructions" I found the illustrations to be more of a help than the written narrative.
- 30 replies
-
- 3
-
-
- model shipways
- finished
- (and 1 more)
-
Amazing work Wolfman. Don't forget we still used COD's back then. So I think there would still be an external avgas bladder on the aft stbd quarter wouldn't there.
- 82 replies
-
- 2
-
-
- carl vinson
- trumpeter
- (and 2 more)
-
Wow this is great to see. I am a plank owner of the U.S.S. Carl Vinson and was serving in her for the around the world tour as we called it back then. I was a Machinist Mate first class in M division assigned to Main Machinery Room 1 (the forward engine room). In fact it was my last deployment. When we reached our new home in Alameda I transferred to Sima San Diego and detached from there. One small detail. You left out the two big stainless steel cans on the hangar bay the housed the spare reactor coolant pumps. I will be watching this one with more than a casual interest. Wonderful job so far.
- 82 replies
-
- 4
-
-
- carl vinson
- trumpeter
- (and 2 more)
-
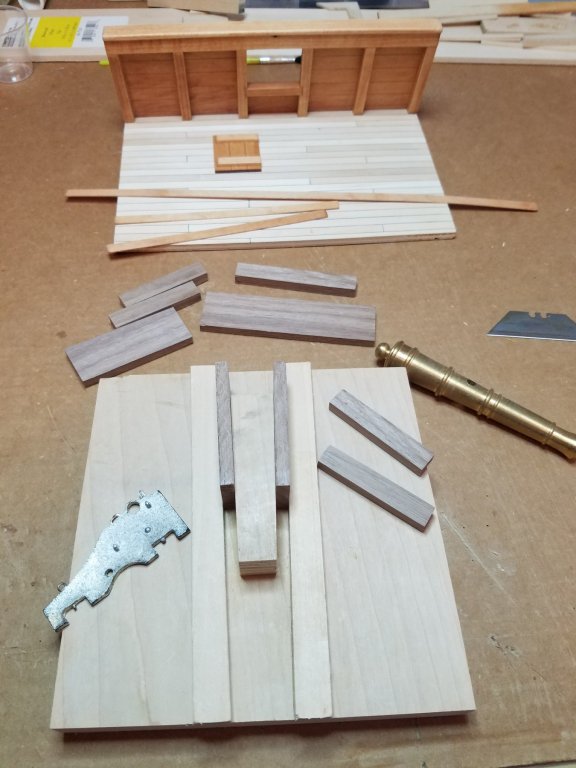
Thanks Steve and Ron. I posted this in another thread but I will repeat it here. The other day I stopped into a cabinet/molding shop around the corner from my work. Just browsing around at all of the exotic lumber. These guys supply cabinets and custom molding to the luxury yacht builders here in South Florida. Teak, Holly, Red Heart, Cherry anything you could ask for they had. When I told the owner that I build model ships he took me out back to the "Scrap Pile' and told me I could help myself to as much as I liked. I found some really nice 1"x3/4" walnut about 6' long that I will resaw and use for my gun carriage and a 1'x18" piece of walnut veneer I am sure I will find a use for eventually. On my way out I stopped at the front counter and asked how much and He said no charge and told me I was welcome to come by and root around as often as I like. Today I cut the blanks for my gun carriage plus a little extra just in case. I also made a fixture to hole the brackets at the proper angle while I work on them. I had a few pieces of deck planking left over so I stained them to wrap the edge of the plywood base.
- 82 replies
-
- 6
-
-
- naval smoothbore
- model shipways
- (and 1 more)
-
I found a Billings Boats Santa Maria kit for sale locally on C-List and was wondering if it was a decent kit to tackle as a beginner. I have heard that it is not the most accurate or detailed version available. But would it be a good learning experience and wind up being a "decent" model in the end. By the way the asking price is $60.00. Thanks
-
Hey Derek, Glad to see you finally got yours. I will be watching this one.
- 30 replies
-
- 4
-
-
- model shipways
- finished
- (and 1 more)
-
Ron, Nice job on the MS Smoothbore. I am building the same kit and came up with the same questions. A quick search revealed your thread and all my questions were answered. Thanks a million. Art
-
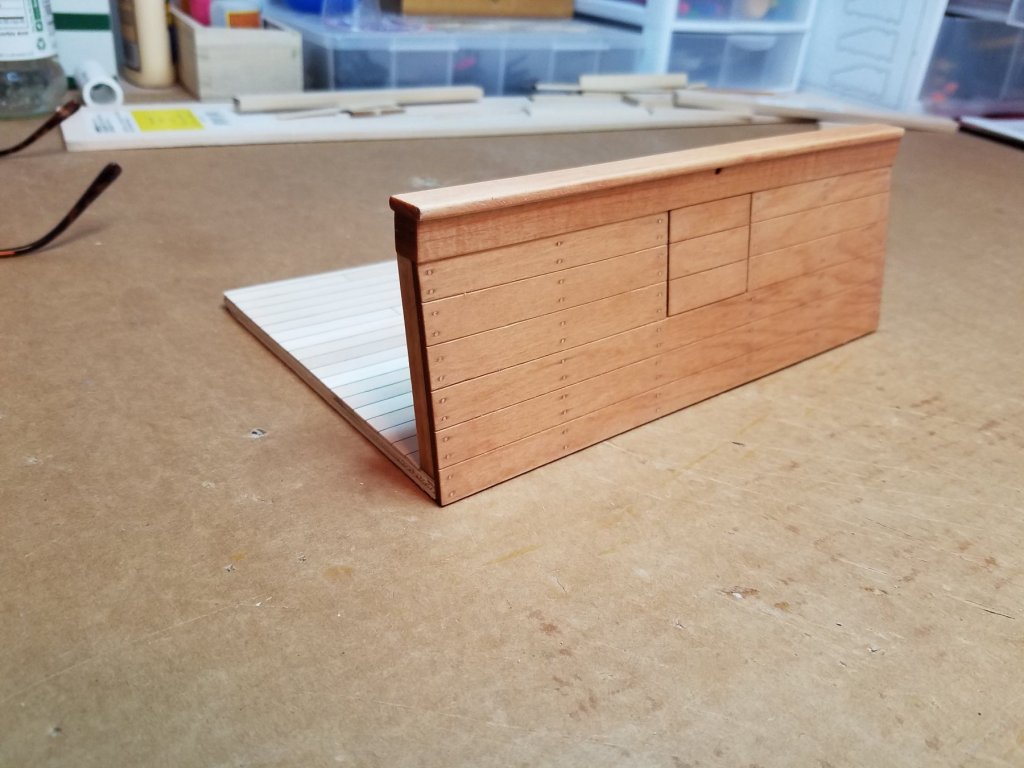
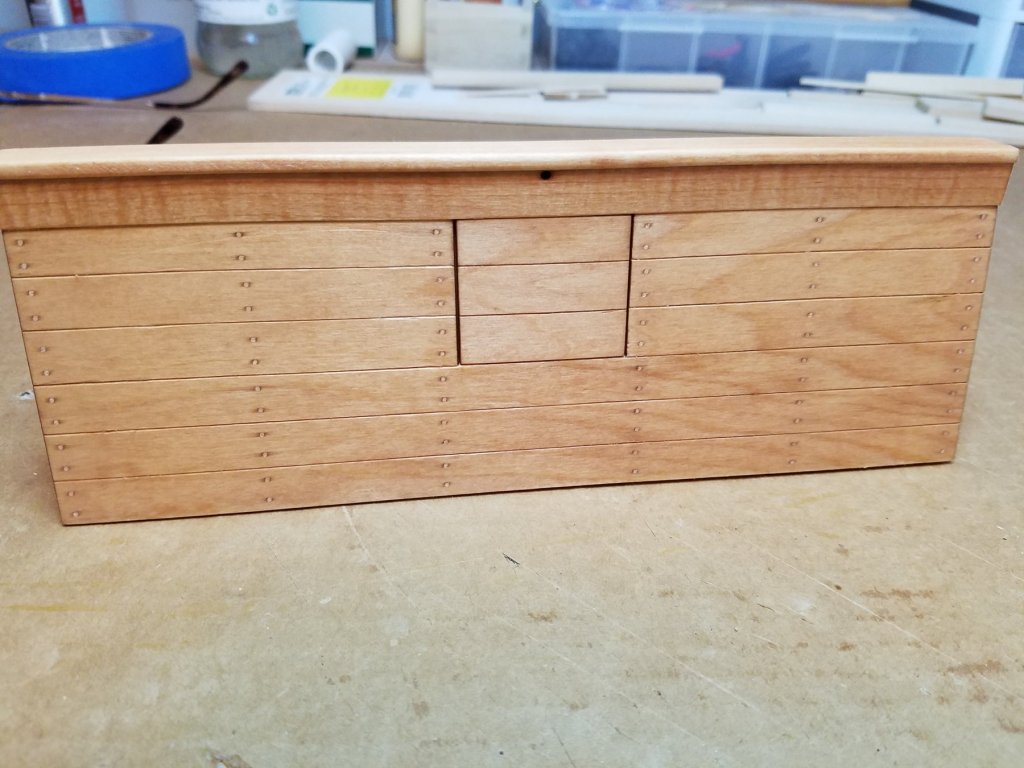
Just got back and it was great. I had time to get a little more done and still take in a movie. As I lay in bed last night I realized that I had forgotten to notch the clamp timber for the gun port chain prior to gluing on the cap rail. So I had to drill it out this morning. Then I laid out and drilled for the treenails. I stained the entire bulwark prior to filling the holes with Dap wood filler. Probably not historically correct color wise but it makes a nice contrast to the basswood just the same. I will let the stain dry for a couple of days before attaching it to the deck.
- 82 replies
-
- 10
-
-
- naval smoothbore
- model shipways
- (and 1 more)