Osmosis
-
Posts
626 -
Joined
-
Last visited
Content Type
Profiles
Forums
Gallery
Events
Everything posted by Osmosis
-
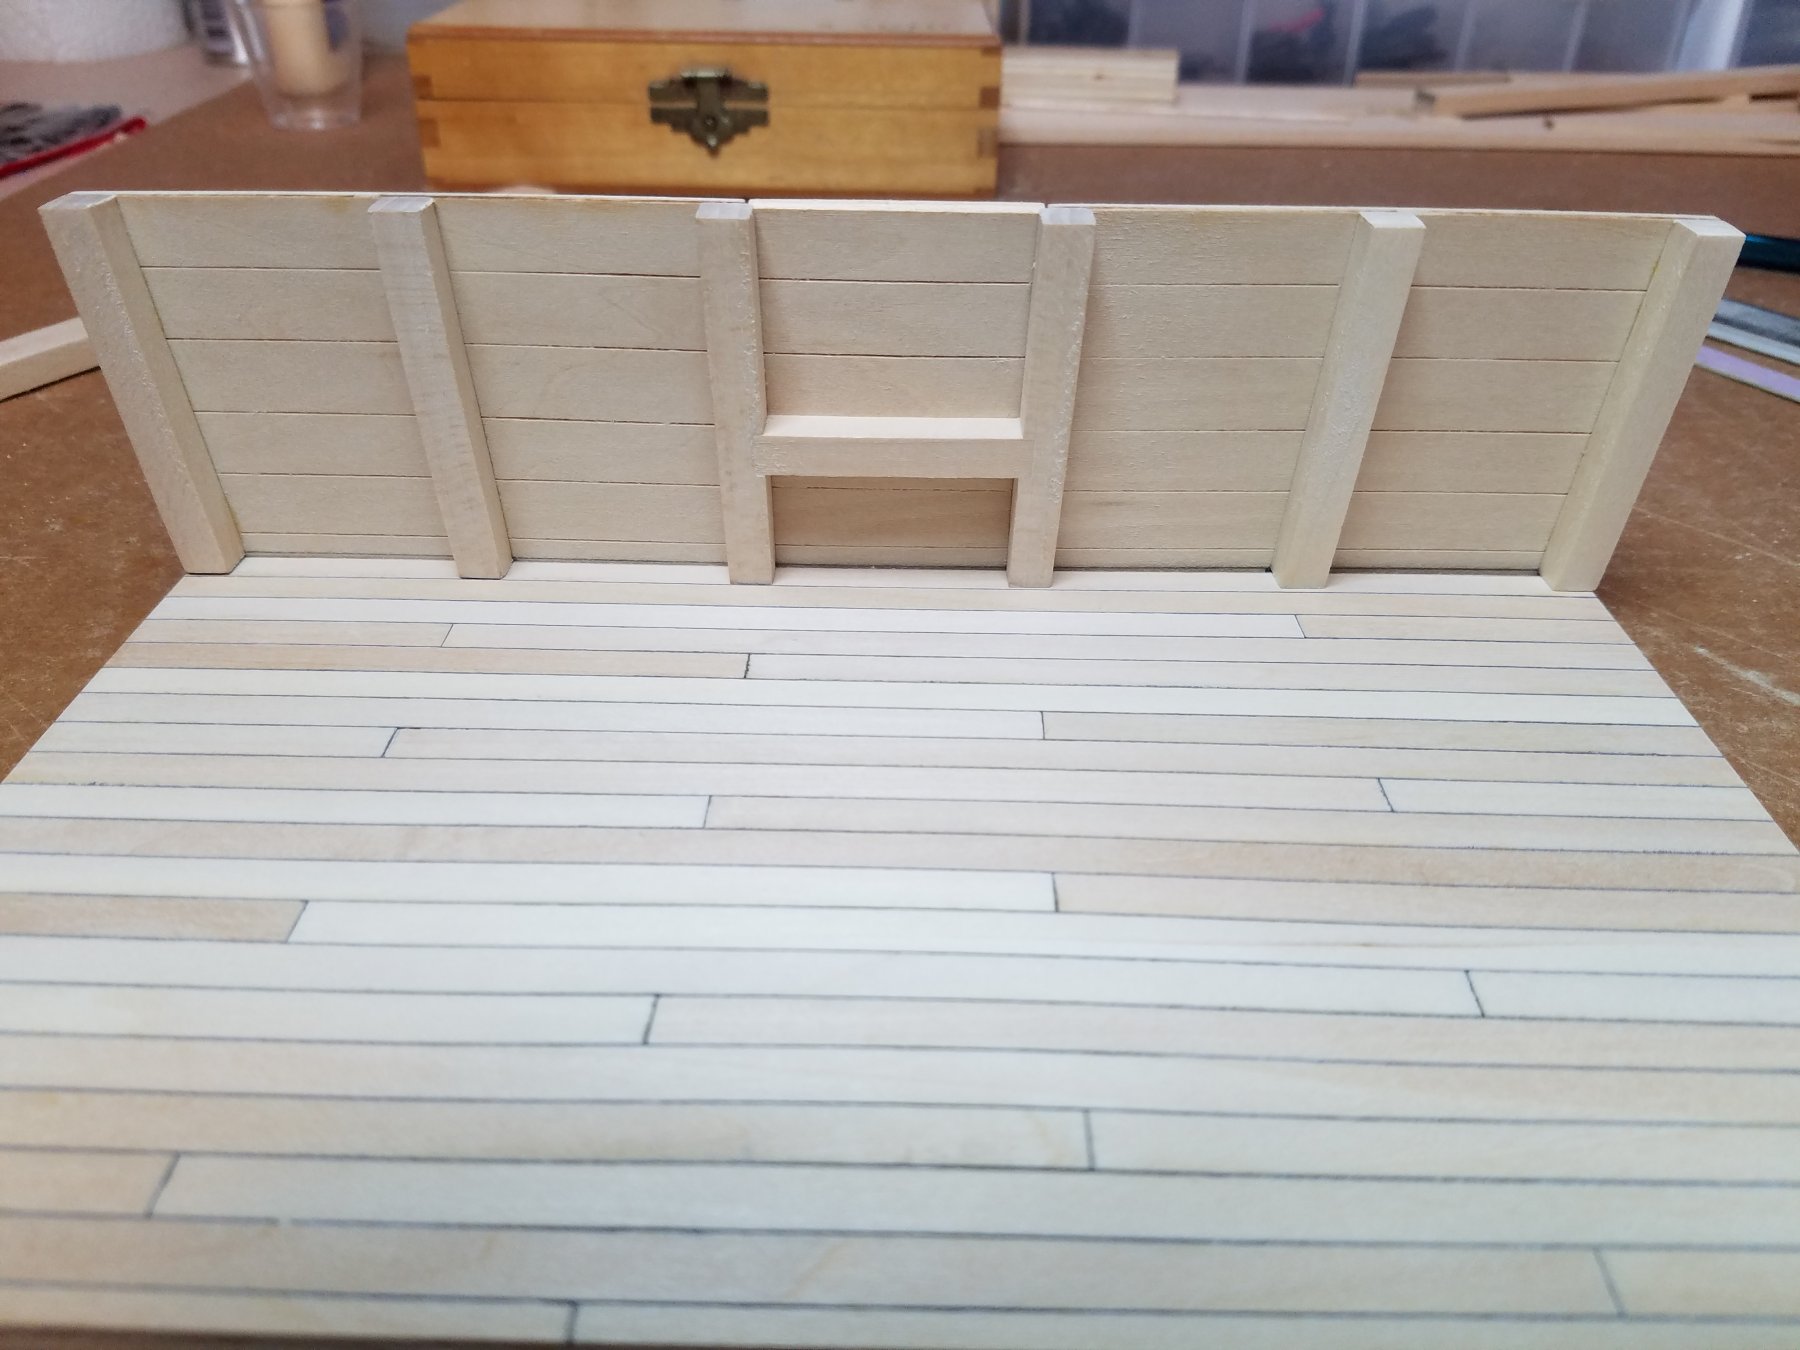
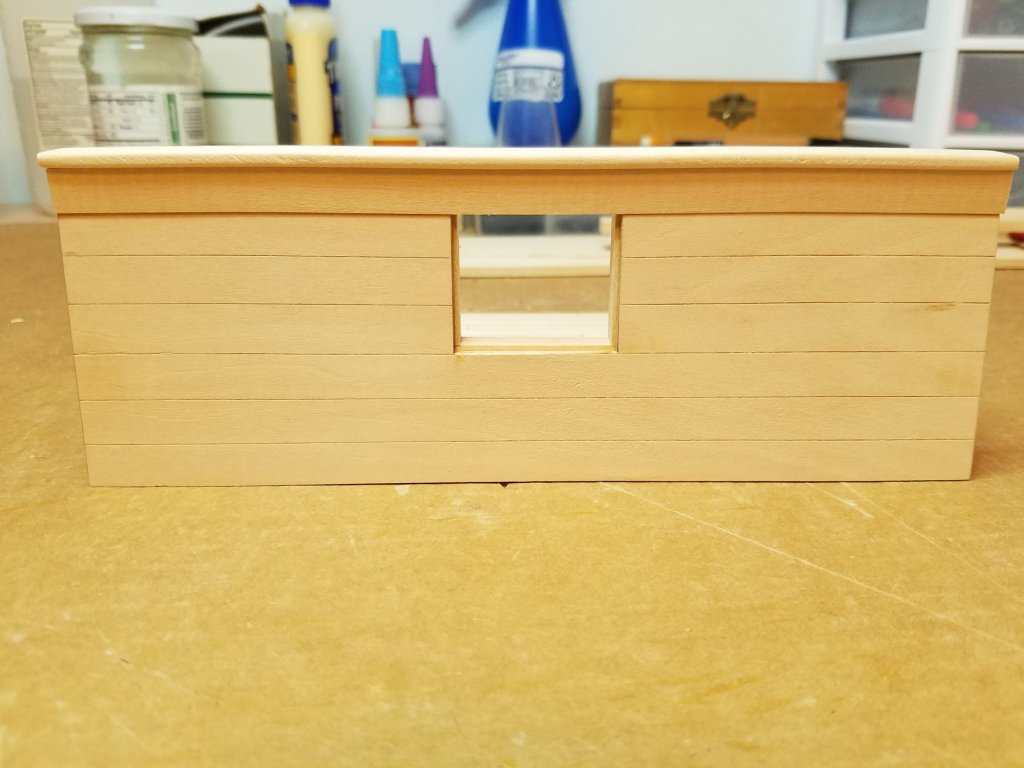
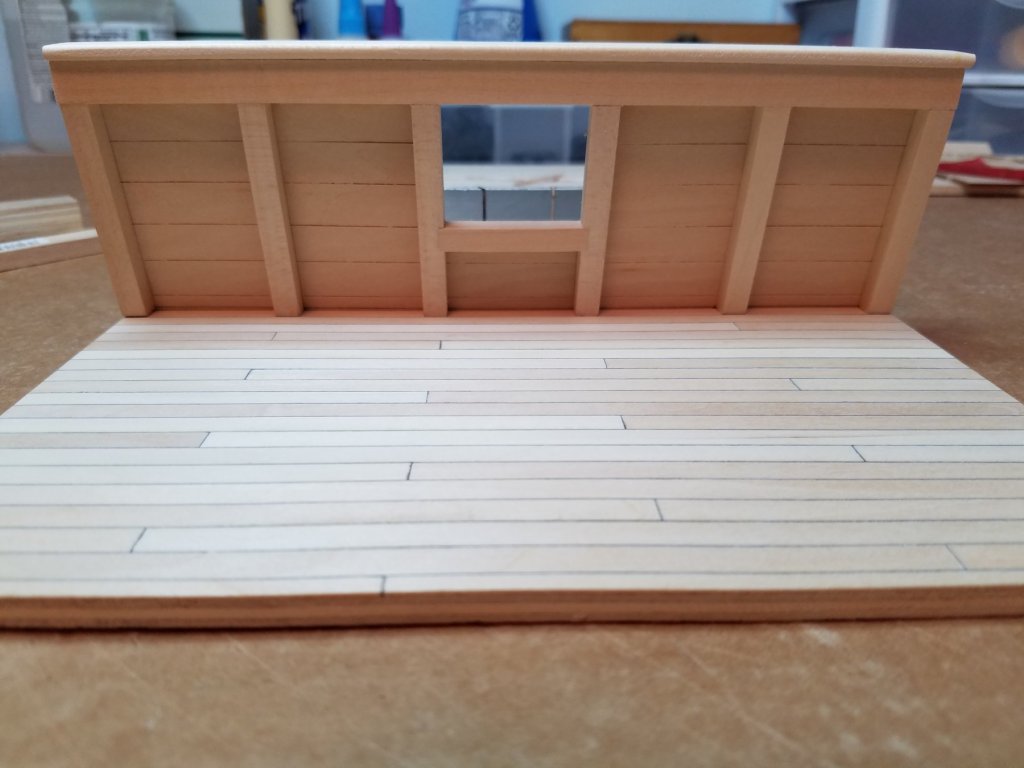
 Thanks for the recommendations I will be sure to check them out. Well after a very busy week or so I finally had some time to relax and get back to hobbying. I made some progress on the bulwarks today. After scoring the back side to match the front "planking joints" and attaching the two outer timbers I noticed that there was no gun port sill provisions in the instructions. I am no expert on ship building but I do know a little about carpentry and I suspect there would have been one there. Luckily I had some 1/4" X 1/2" Basswood stock and after chiseling out a couple of mortises I cut and trimmed the sill. Not glued on yet but I think it is an improvement. The "Clamp" timber was a bit oversized and even after sanding was wider than the bulwark itself. After some debating I decided to leave a shadow line on the outside. I think it adds a bit of depth and I just like the way it looks. I plan on staining the entire bulwark, clamp and cap rail before I attach them to the decking. That's it for today hopefully a little more progress tomorrow. Although I did talk the Admiral into going to see Casablanca in the theater tomorrow.
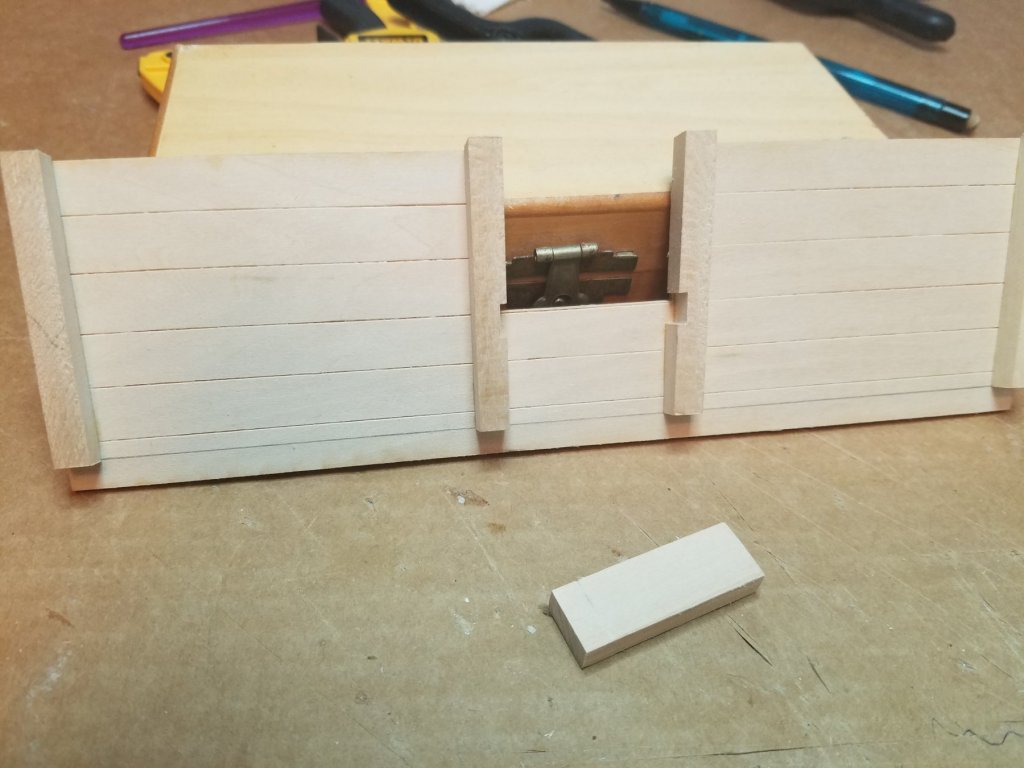

- 82 replies
-
- 11
-

-
- naval smoothbore
- model shipways
- (and 1 more)
-
Thanks for the kind words Derek. I forget where I saw that trick with the construction paper but it certainly was not my idea. It looks really good after the final sanding. However I don't think it would be of practical use on any scale smaller than this. It is time consuming also I was only able to do 4-5 planks in a single evening. Also don't make my mistake be sure to line up your shift joints. By the way nice work on your Bluenose build I am following that one as I have the AL kit lined up right after this.
- 82 replies
-
- 3
-
-
- naval smoothbore
- model shipways
- (and 1 more)
-
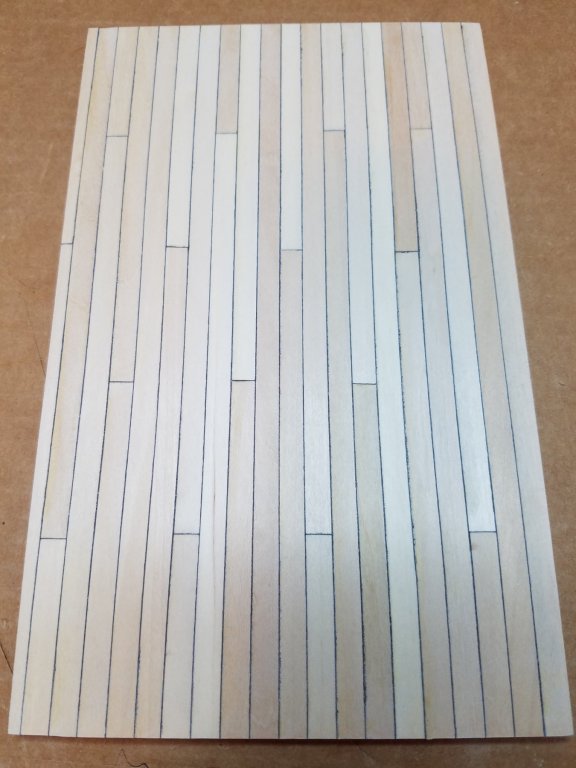
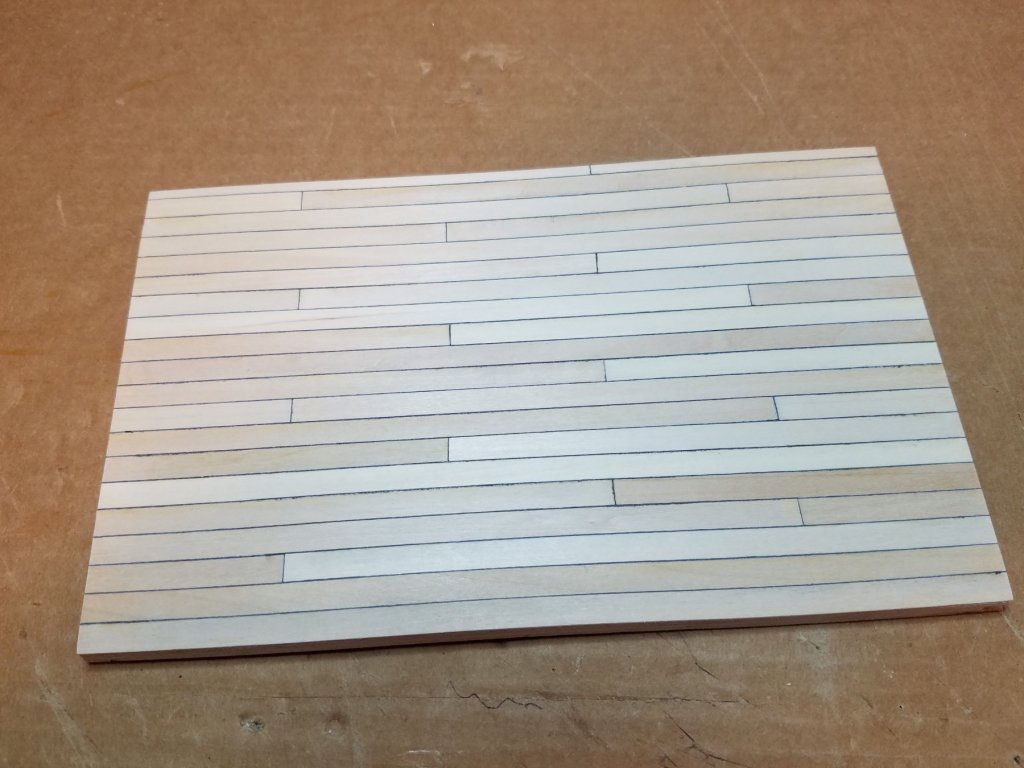
The deck planking is finally complete just a little more fine sanding then it is on to the bulwarks. I don't know why my phone decided to take wavy pictures tonight bu I can assure you that the planks are straight as can be. This was my first attempt a deck planking and while it is not a very large or tricky job I think it was still a good learning experience. For example; "LESSON LEARNED - THINK AND LOOK AHEAD" Being my first attempt and being such a large scale 1:24 I had intended to include nail bungs in the planking. However I was in such a rush to get there that I did not measure each shift. Instead just eyeballing the next butt joint in each row. So while they came out pretty close if you lay a straight edge across the joints some are off by as much as an 1/8 of an inch. I think now if I were to add the bungs it would just amplify the error. That one won't happen again and no lives were lost and no animals were injured in this lesson.
- 82 replies
-
- 8
-
-
- naval smoothbore
- model shipways
- (and 1 more)
-
Thanks Scott and to all those who liked this thread. I have decided on BBs for cannon balls for 2 reasons. I have a ton of them that I use for ballast in my RC yachts and, since I am building a 12 pdr in 1:24 scale they are the perfect size. The only question is can someone recommend a good way to blacken them. I have searched and found lots of ways to blacken steel or brass some easy some not so much. But nothing specifically for BBs. I think they are brass plated steel if I am not mistaken. Is there a simple way to remove the plating and just blacken the steel.? I don't want to paint them unless there is just no other method. Thanks
- 82 replies
-
- 3
-
-
- naval smoothbore
- model shipways
- (and 1 more)
-
Beautiful work Sir. I am only just starting to dig into this wonderful hobby and seeing all these skills you guys call ordinary and run of the mill just amazes me. One day I hope to get to the point where these thing come as second nature but for now I am still in awe.
- 60 replies
-
- 1
-
-
- dragon class
- billing boats
- (and 2 more)
-
I just realized that there are no cannon balls included with the kit. Seems sort of odd don't you think? Why go to the trouble to design a kit displaying a typical naval gun installation and not include even a couple of round shots. After a quick search of the forums I found several good replacement ideas though. Thanks to all
- 82 replies
-
- 6
-
-
- naval smoothbore
- model shipways
- (and 1 more)
-
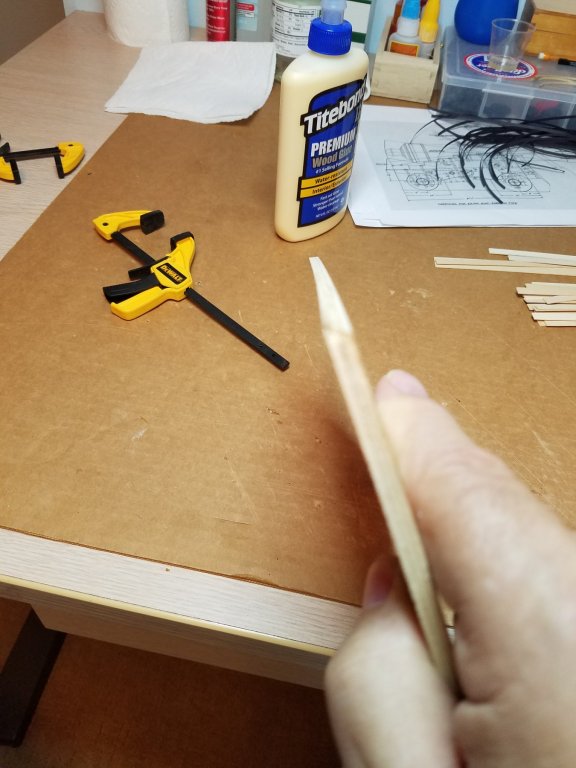
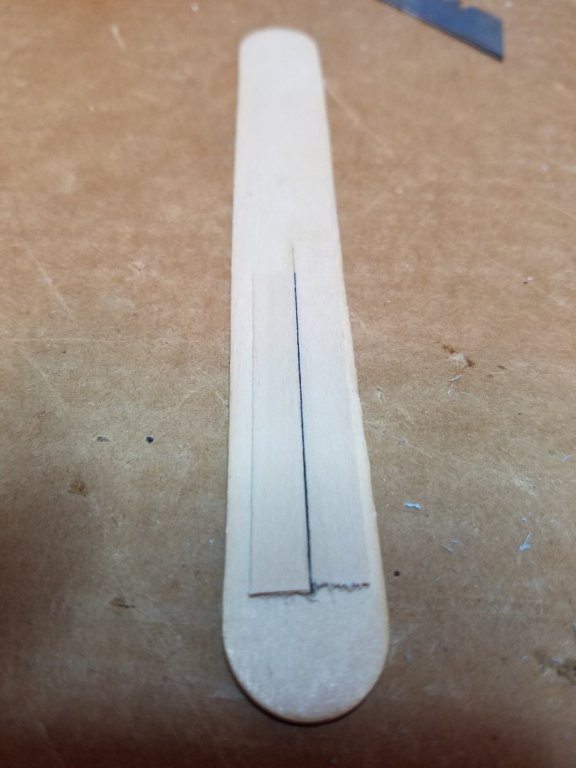
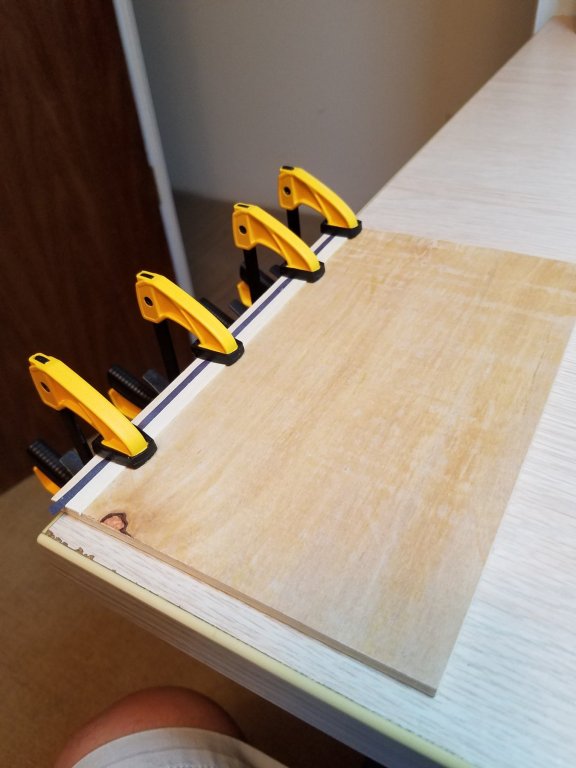
Thanks to everyone for the encouragement and the likes I will try not to disappoint. I set up the table saw to bevel the long edge of the base plywood at 10 degrees as per the instructions. As you can see in the pic below there is a slight warp in the base. I have a couple of ideas on how to correct this as I go along. You can also see my caulking strips in the upper right. Below is a test of the caulking method I plan to use. I am not sure if it was on this forum or another that I first saw it but it involves gluing thin strips of black construction paper between each course of deck planks. Then trimming with a razor and of course sanding. Not to bad. First attempt at taking out some of the warp. Clamping to the edge of the work bench after each course of planking is glued on. Below is a close up of the paper strips between the deck planks. You can see the first seam just trimmed with a sharp razor. once the glue is good and dry this one will get trimmed the same way. It is a bit more time consuming then simply coloring with a pencil but I think the end result is worth it. Hopefully I will get a few more planks done before bed time.
- 82 replies
-
- 10
-
-
- naval smoothbore
- model shipways
- (and 1 more)
-
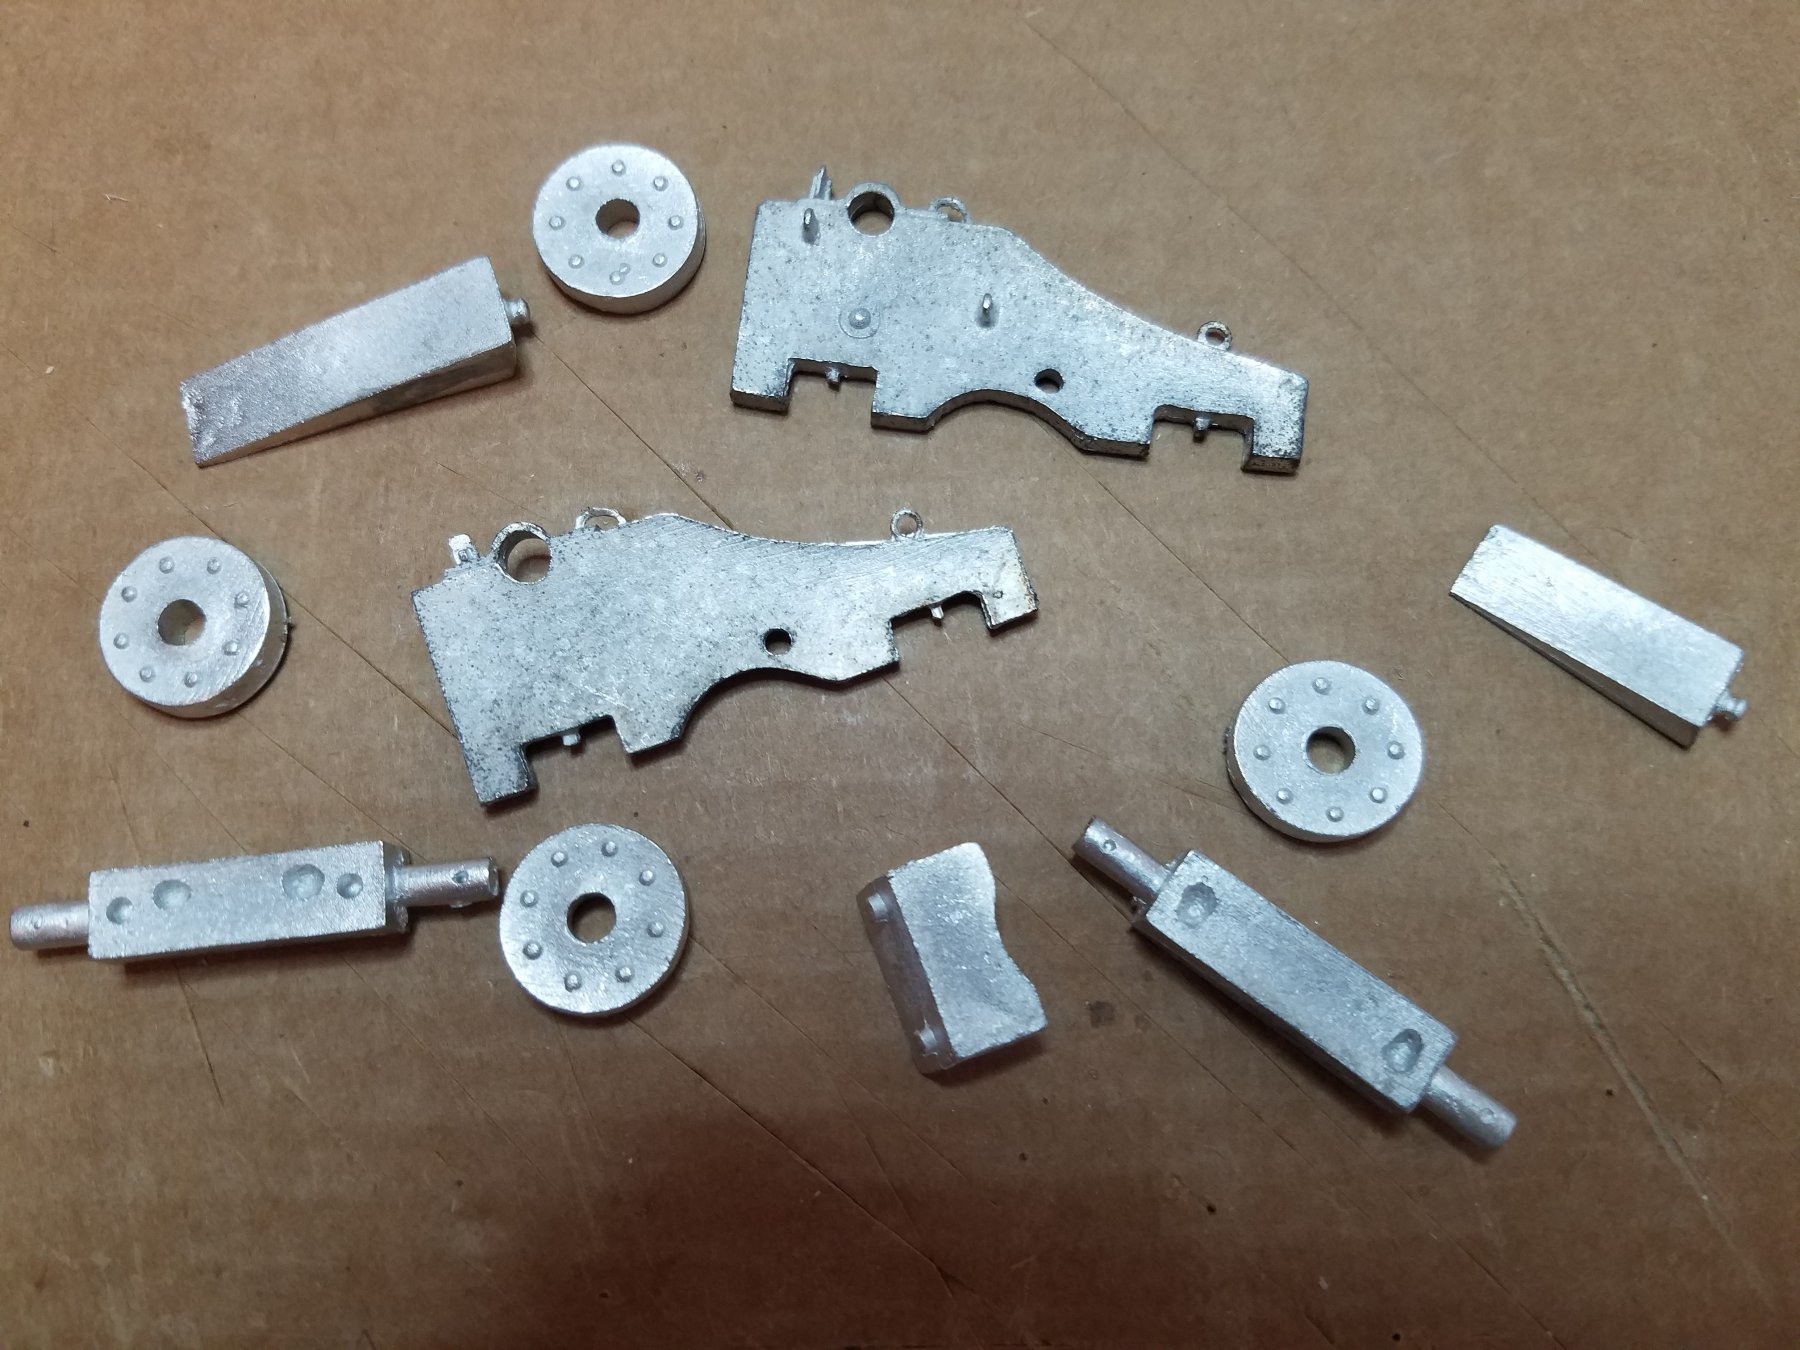
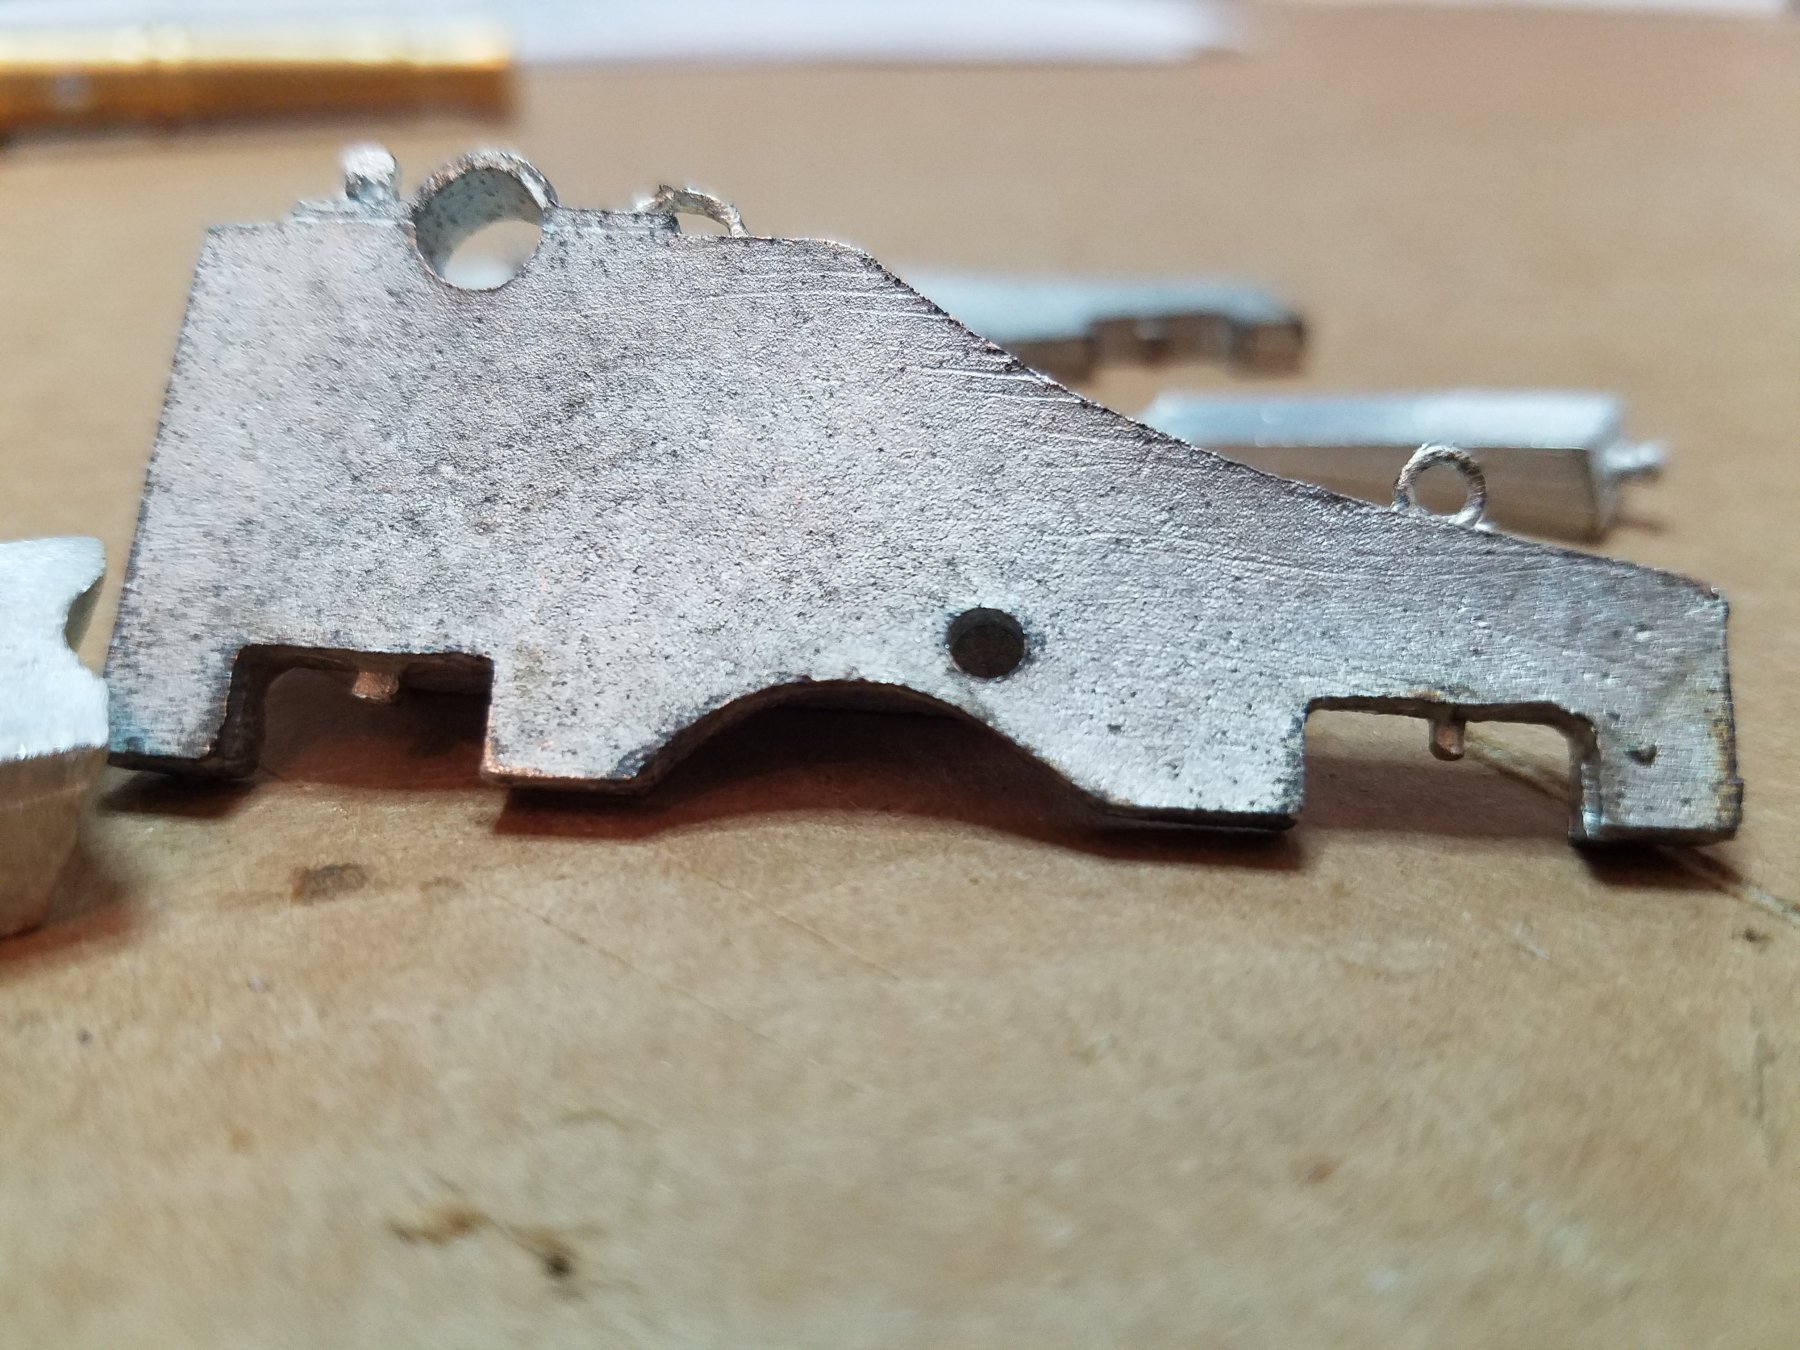
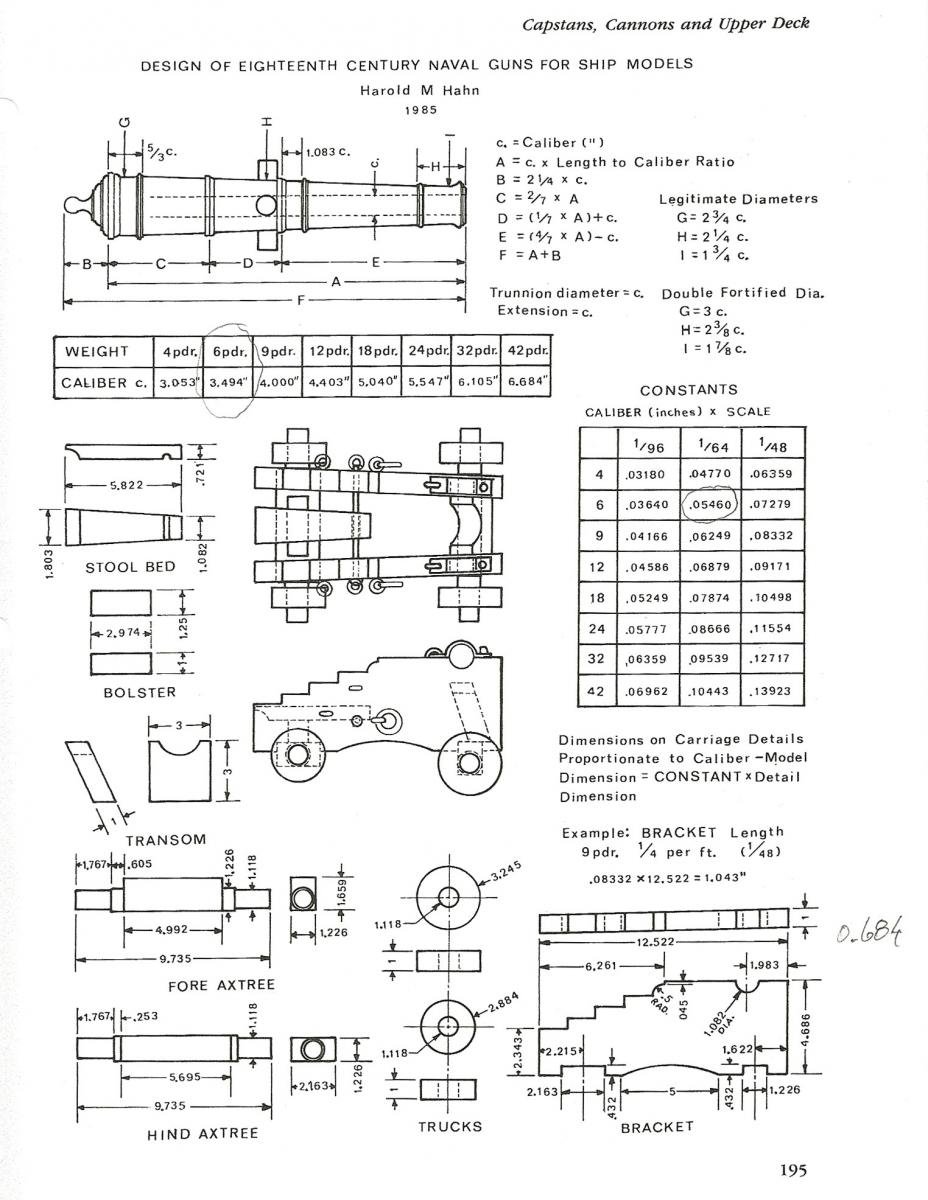
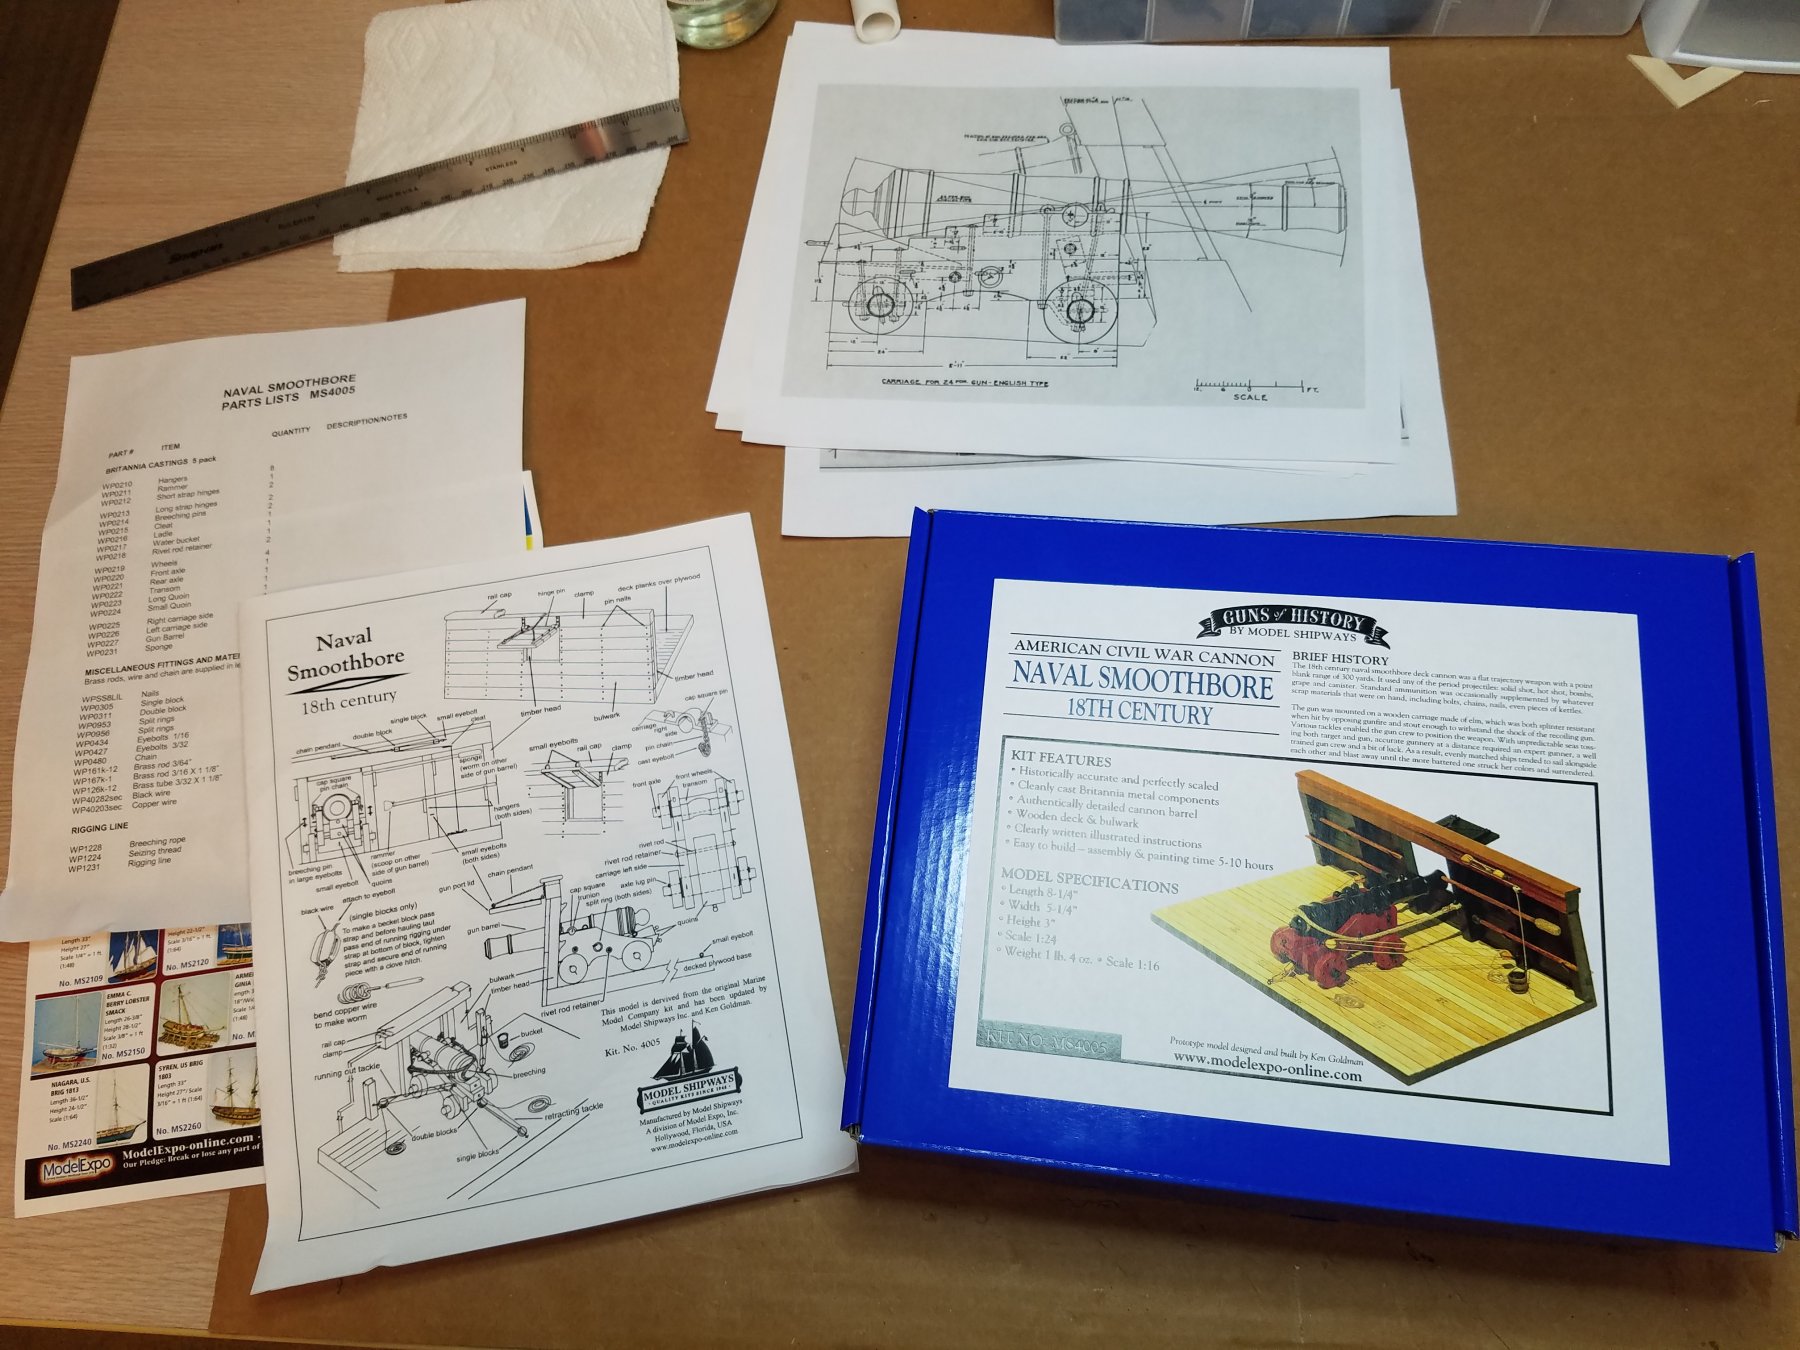
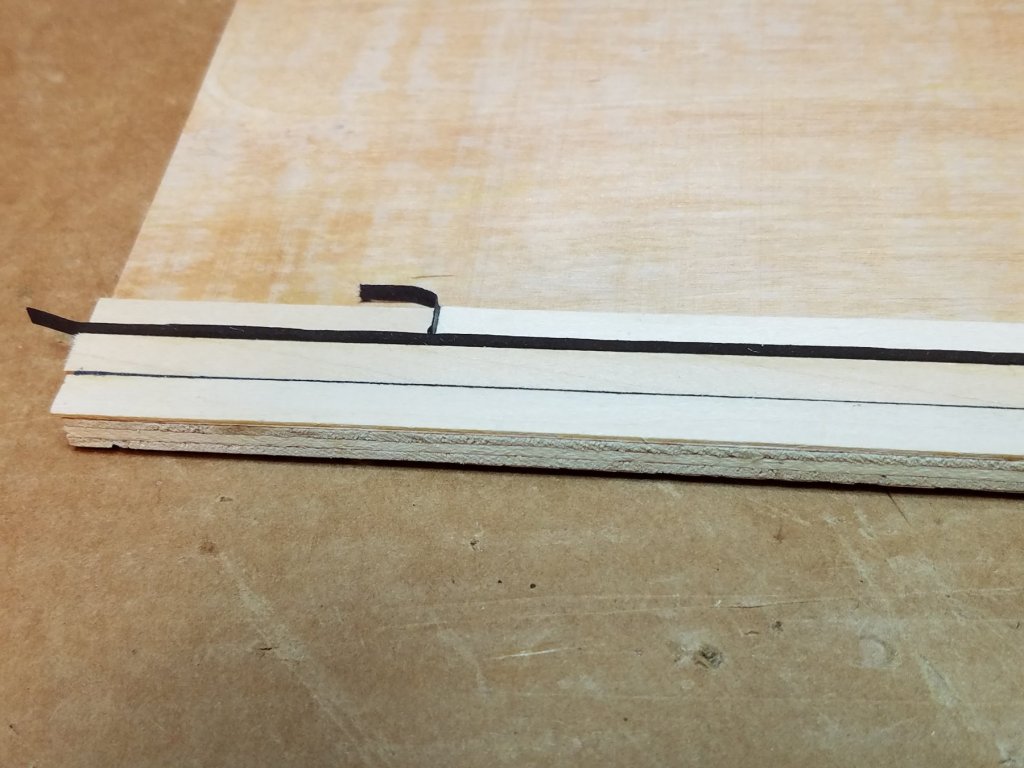
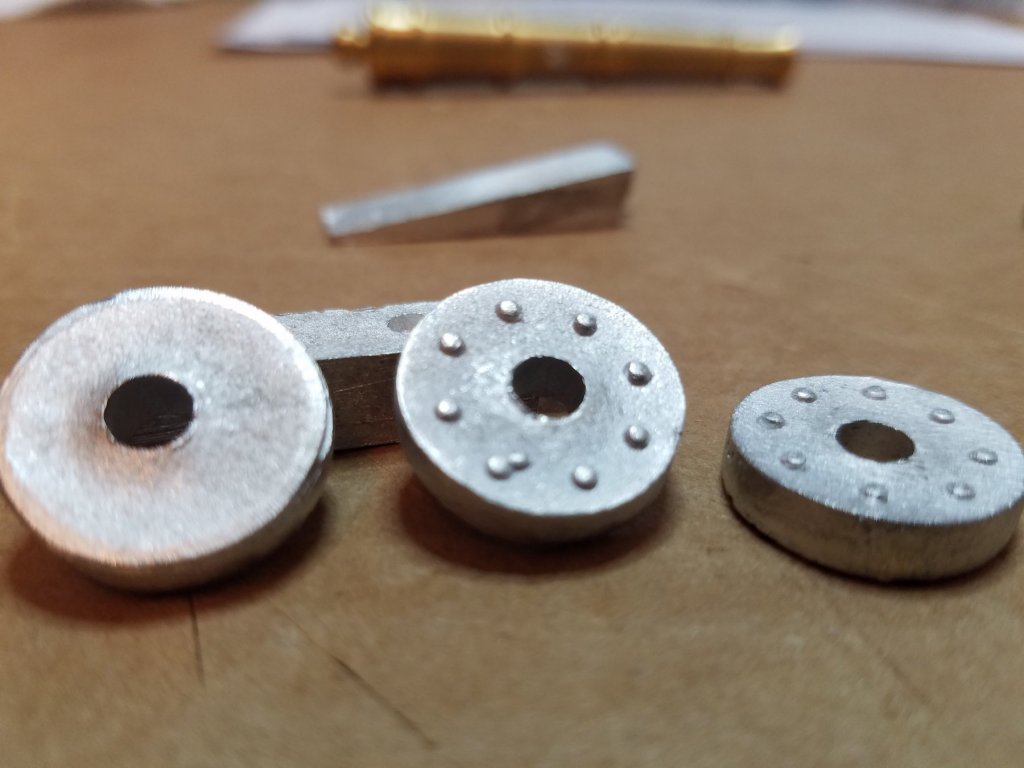
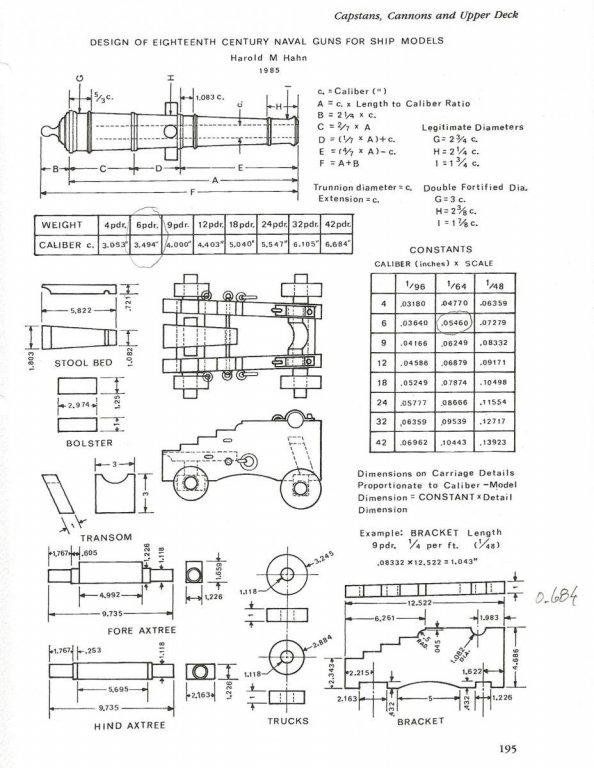
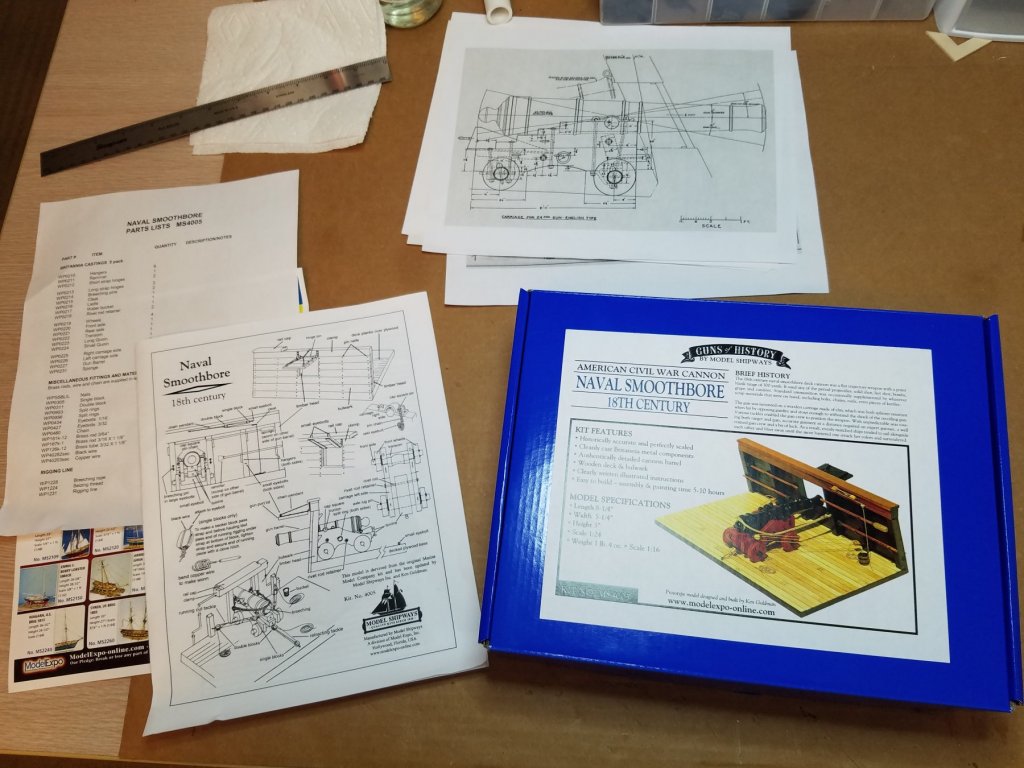
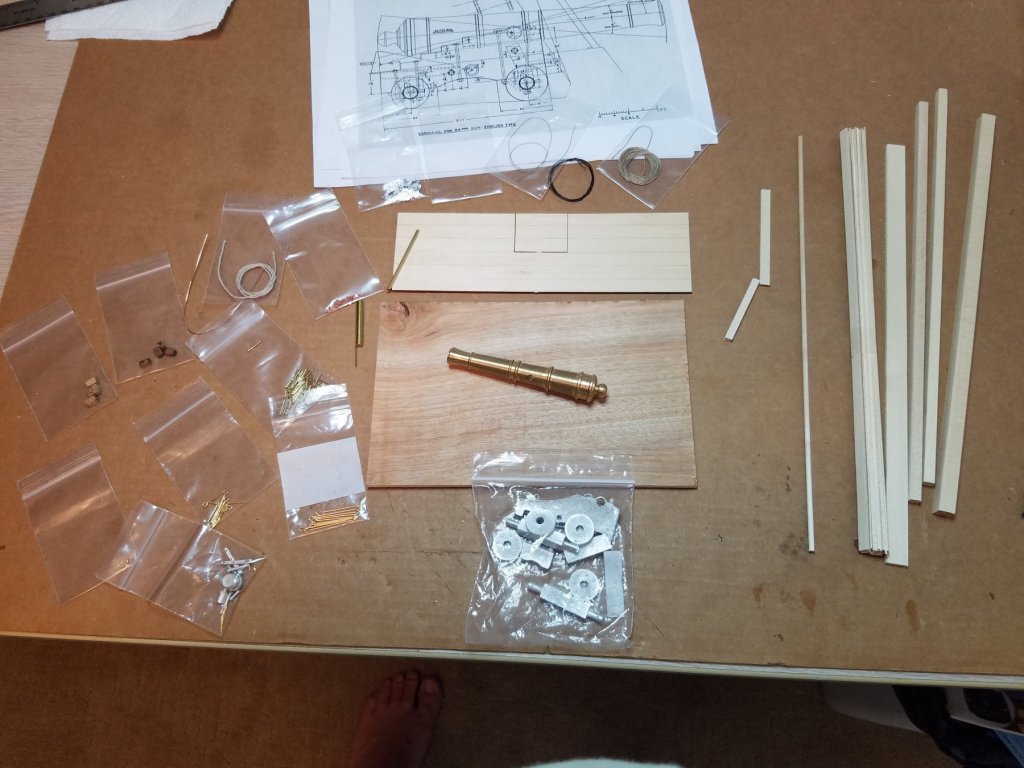
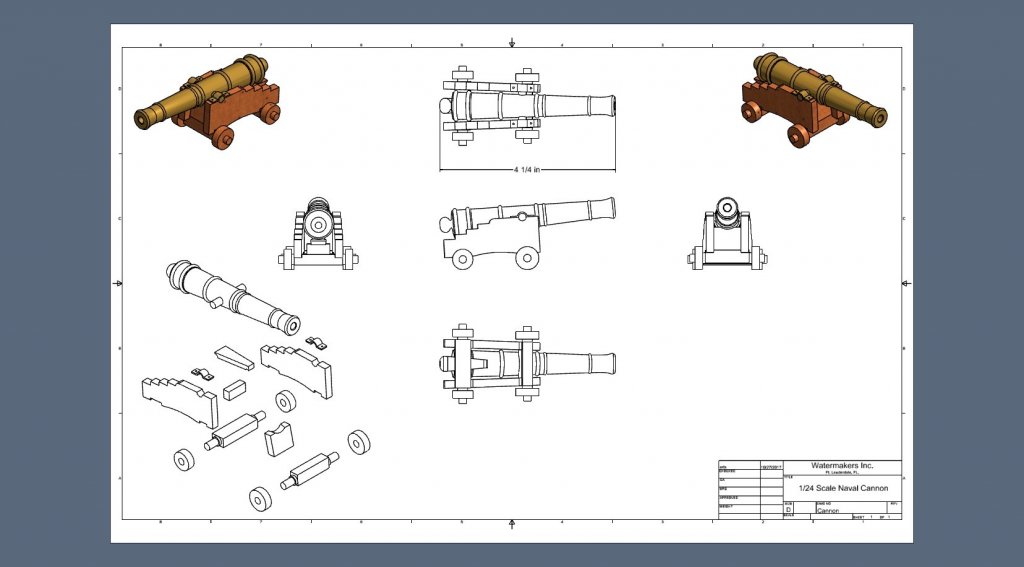
I decided that this would be my second build instead of the bluenose. I thought this would give me a little practical deck planking opportunity as well as some scratch building/kit bashing practice as I will get into later. I purchased this kit while visiting Model Shipways a week or so ago. Where I got to see behind the scenes what goes into these kits before they go into the box so to speak. I would encourage anyone in the South Florida area to make the trip to Miami it was well worth a look. The kit itself is very complete with a nicely turned brass cannon and nice wood and cast metal fixtures, all the line, wire and chain you need is included. The instructions are not very specific written as more of a description than step by step procedure. There are enough illustrations to get the major point across though. I did not realize until opening the box that the carriage is made of cast metal and rather disappointing in my opinion. The thickness and shape of all the carriage parts is inconsistent and sloppy at best. Besides they were really made from wood weren't they. So after doing a bit of research and some quick calculations I was able to come up with what I think will make a nice replacement carriage. Using Harold Hahn's publication as a guide and after determining the real world size of the barrel as 8-1/2' and that the size of the included carriage parts most closely resembled the 12 pounder I decided that is what I would go with. So then it was just a matter of spending a couple of lunch hours reverse engineering the barrel converting the appropriate dimensions according to Mr. Hahn and drawing up a new carriage. Here is what I have so far I will finish the drawings and make a dimension set on Monday. By the way I made the 3d model in Inventor so if anyone has access to a laser cutter and wants to build one of these I would gladly trade the files for a couple of laser cut sheets. Cannon.pdf I am not sure if this will work (PDF) if not I will save it as a jpeg on Monday. in the mean time iI am off to the workbench. I will update you as work proceeds.


- 82 replies
-
- 9
-
-
- naval smoothbore
- model shipways
- (and 1 more)
-
I found and read the build log Hobby Zone Build Slip Build Log and lots of people seem to have bought them but I could not find a review or even a mention of someone actually using it. Hobby zone has them back in stock but I would like to have some input from some of the modelers that have experience with it before I pull the trigger. Thanks
-
I just found this thread and have read it through as I am about to embark on the same build. What a beautiful job. I can only hope that mine will be half as nice when I am done.
- 66 replies
-
- 2
-
-
- bluenose ii
- artesania latina
- (and 1 more)
-
Best Model Company with great Kit Instructions and Plans
Osmosis replied to Sapot's topic in Wood ship model kits
Hello Simon and welcome aboard. A couple of us are meeting for lunch at Lesters in Ft. Lauderdale on Monday 10/16 then taking a road trip to Miami to visit Model Expo. You are more than welcome to join us if you would like. I am planning on picking up my second build kit while down there and from what I have read here on this forum they are one of the top rated customer friendly companies with excellent quality kits and materials. PM me if you are interested and I will give you the details. -
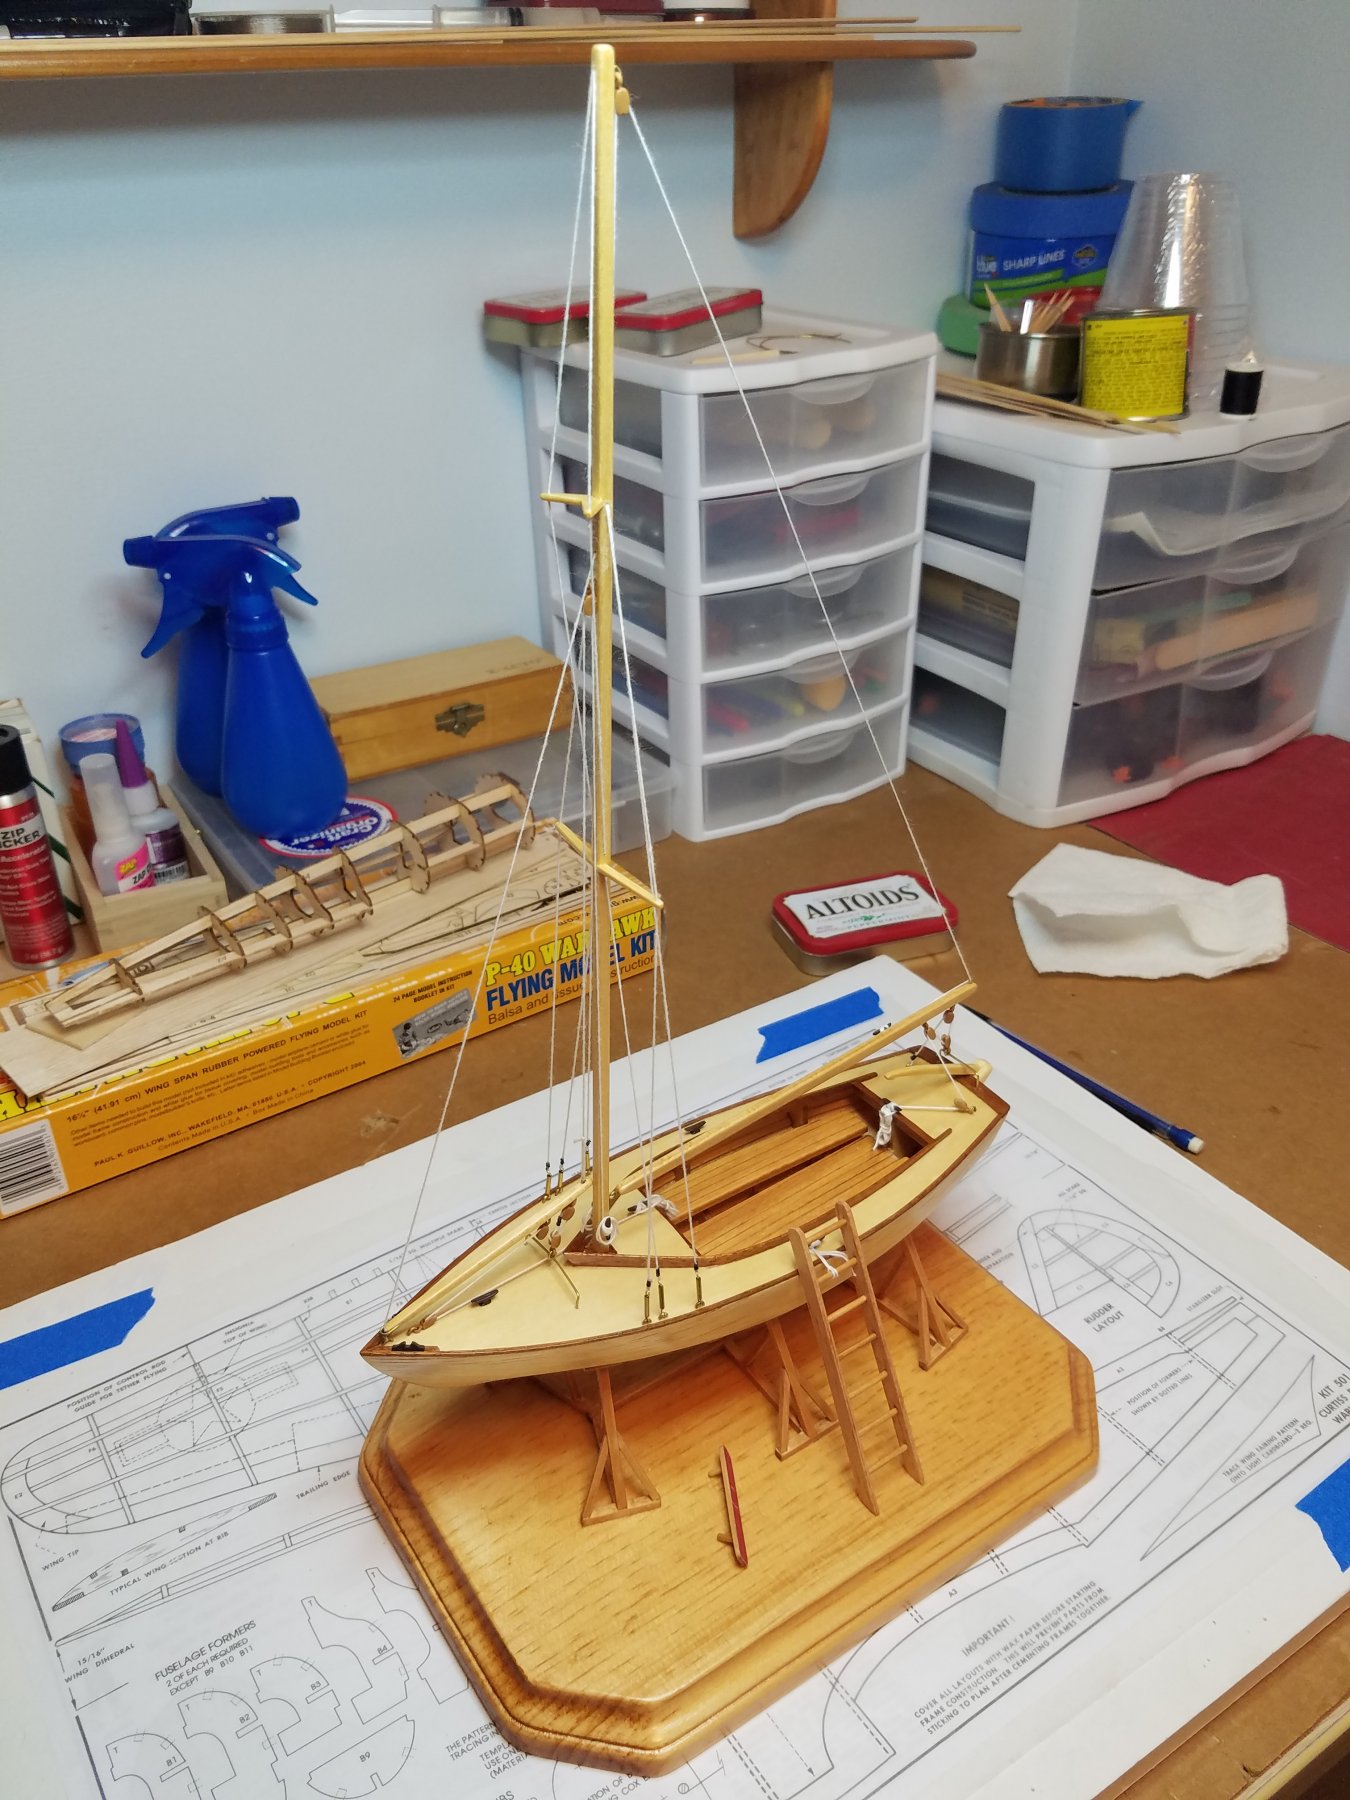
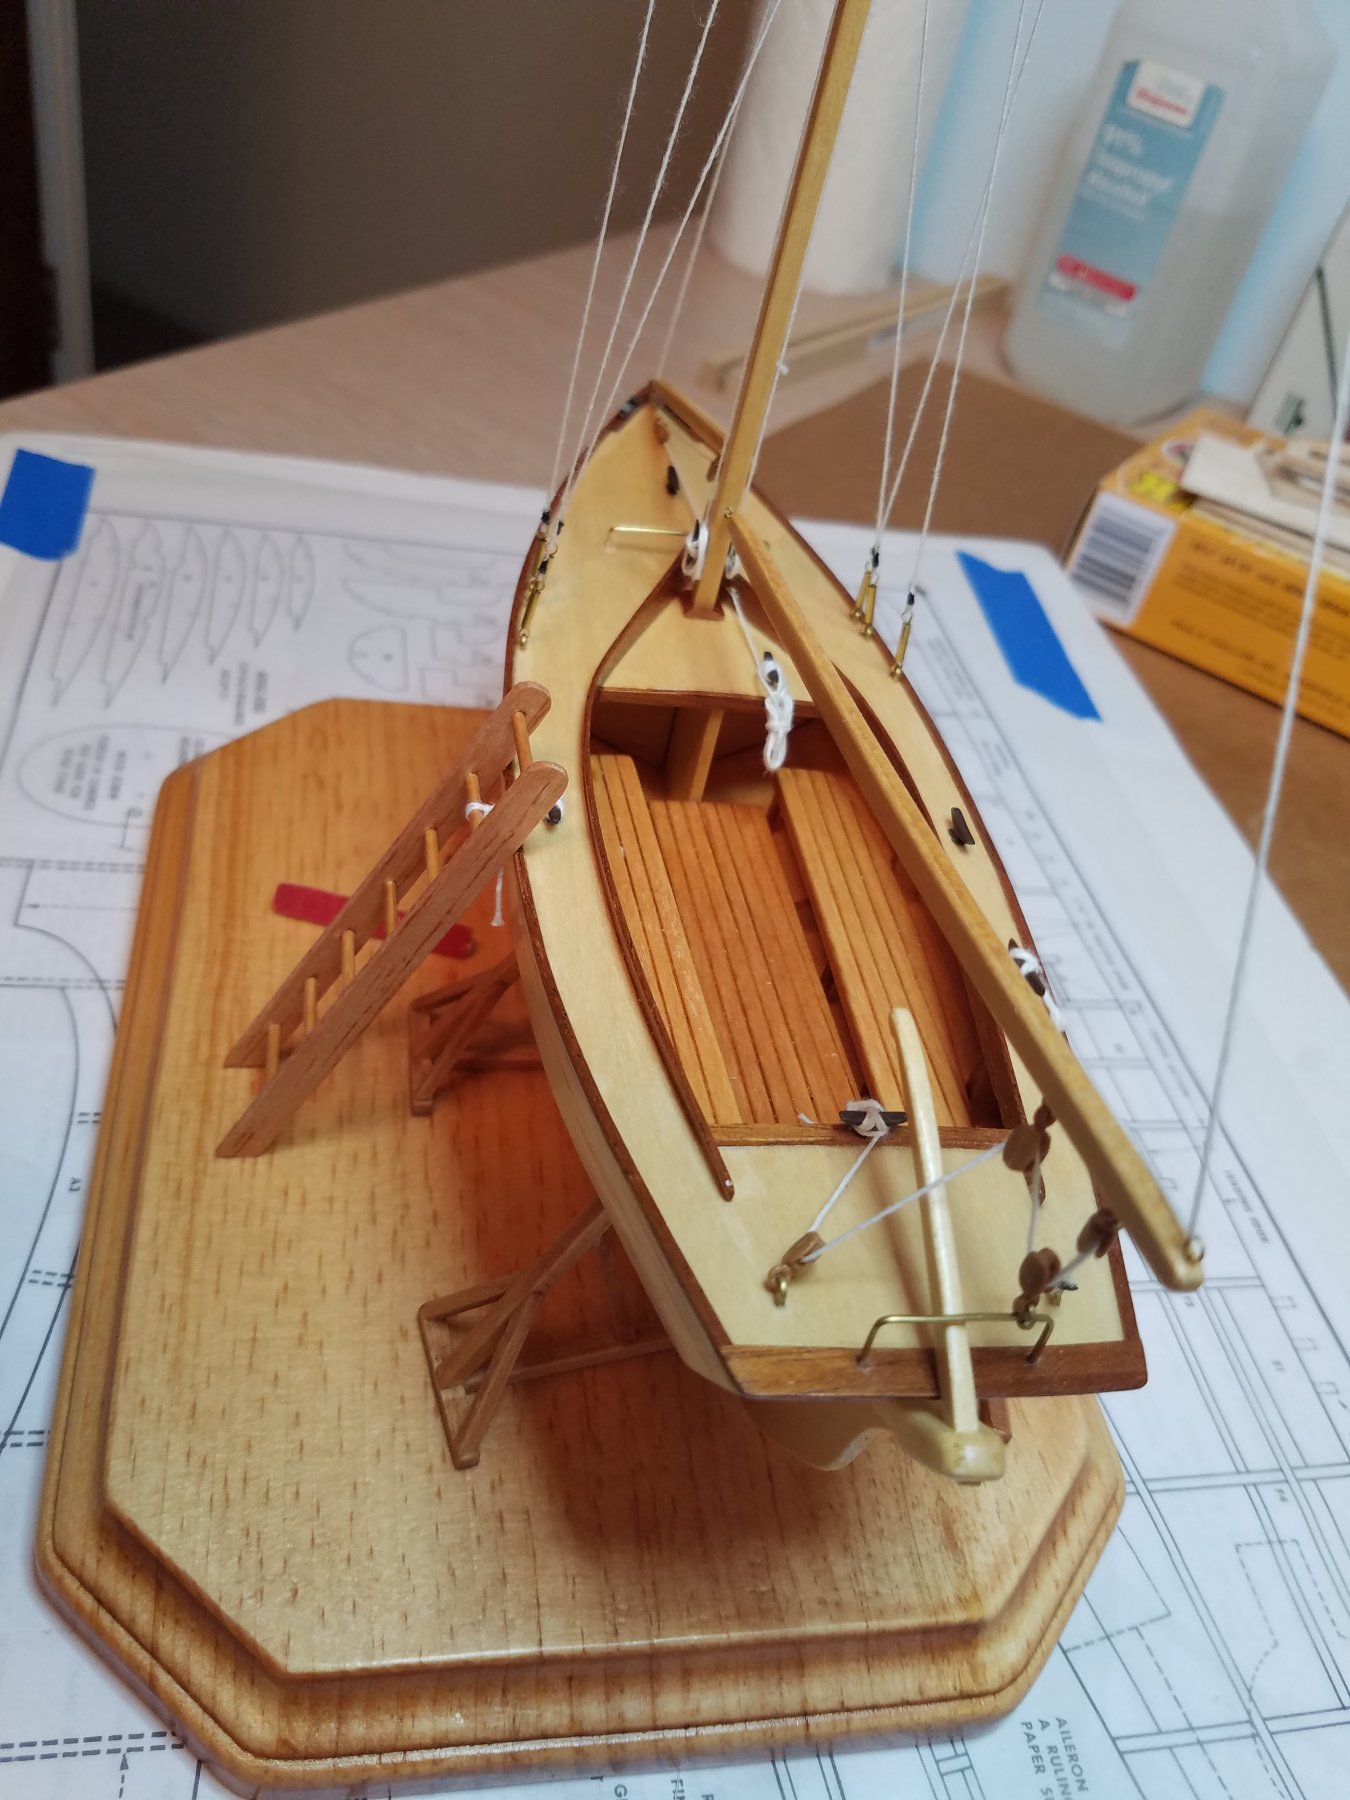
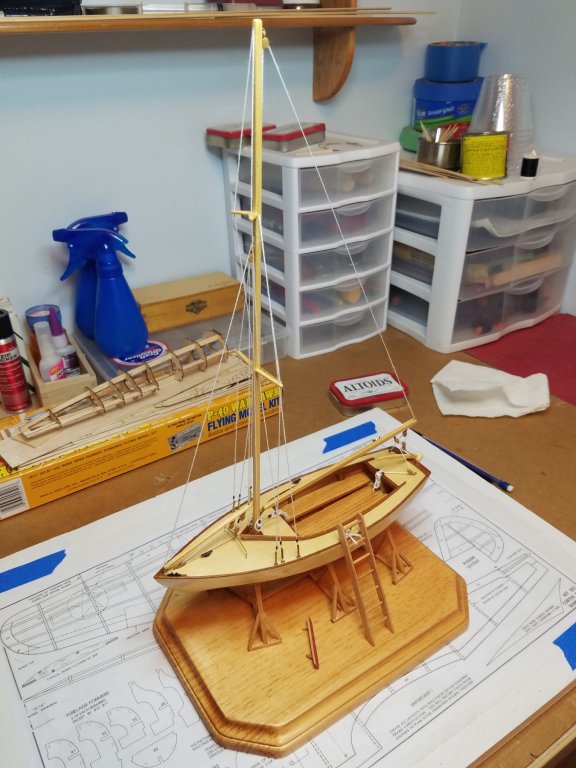
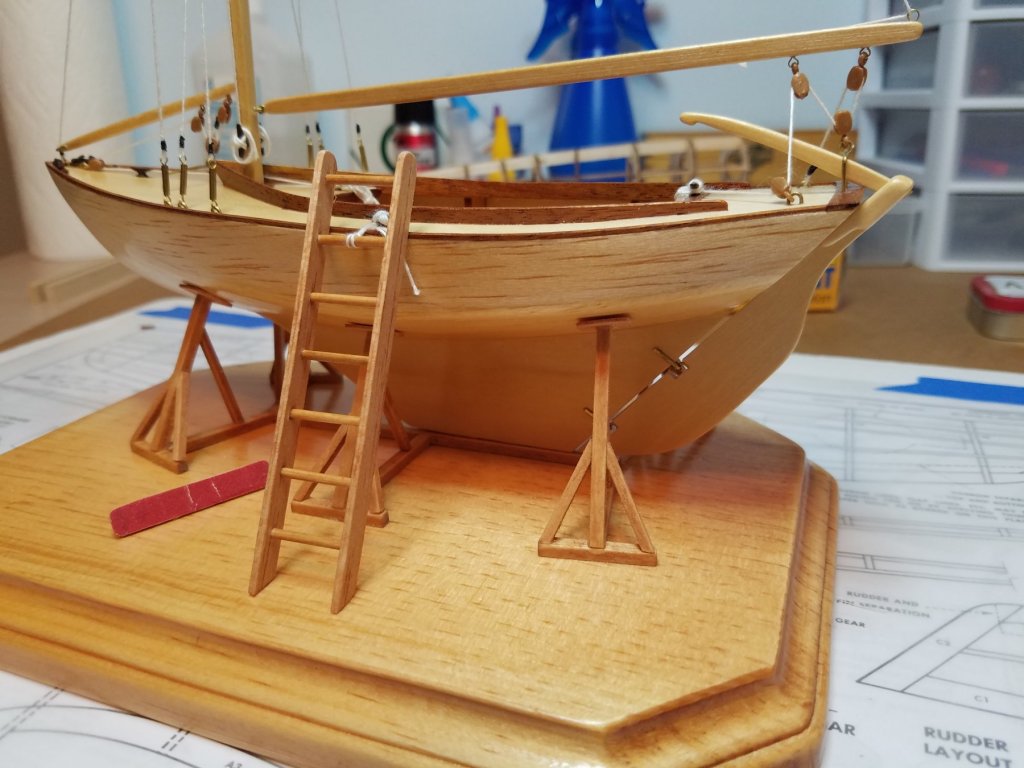
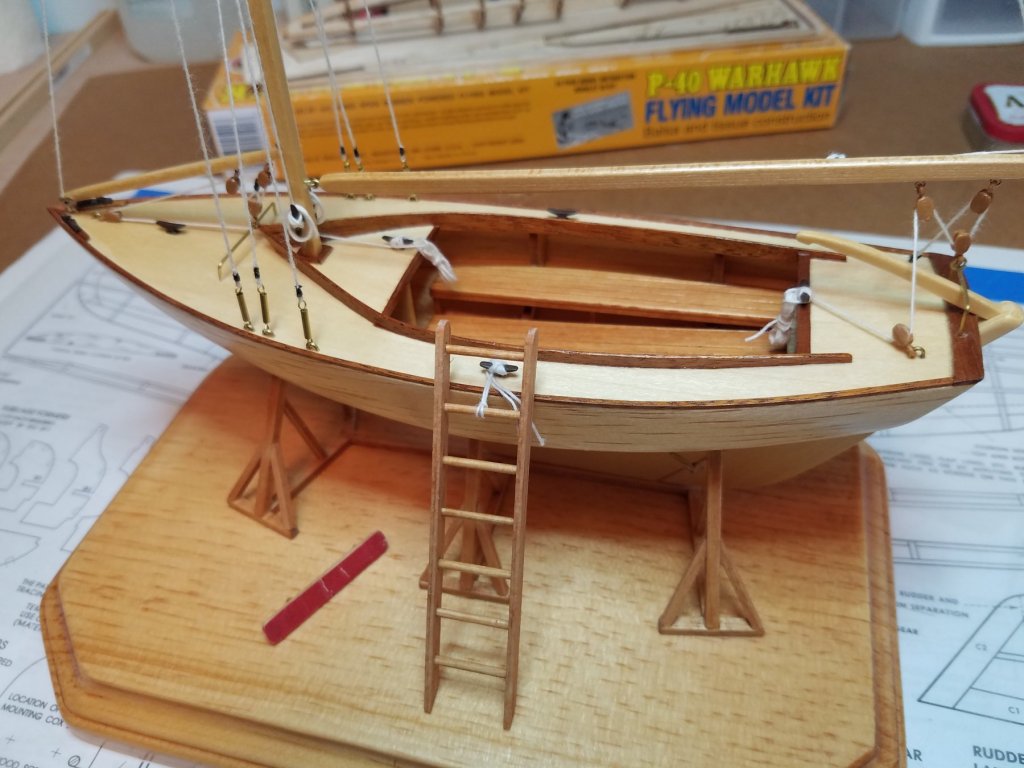
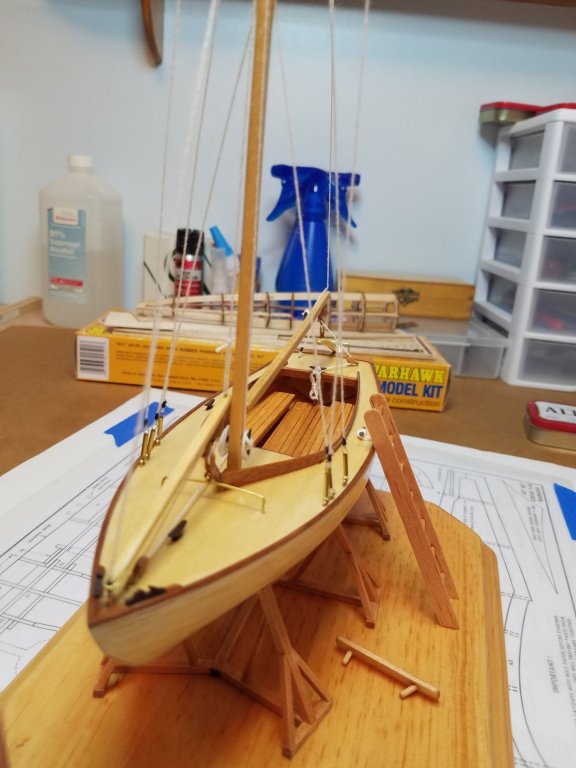
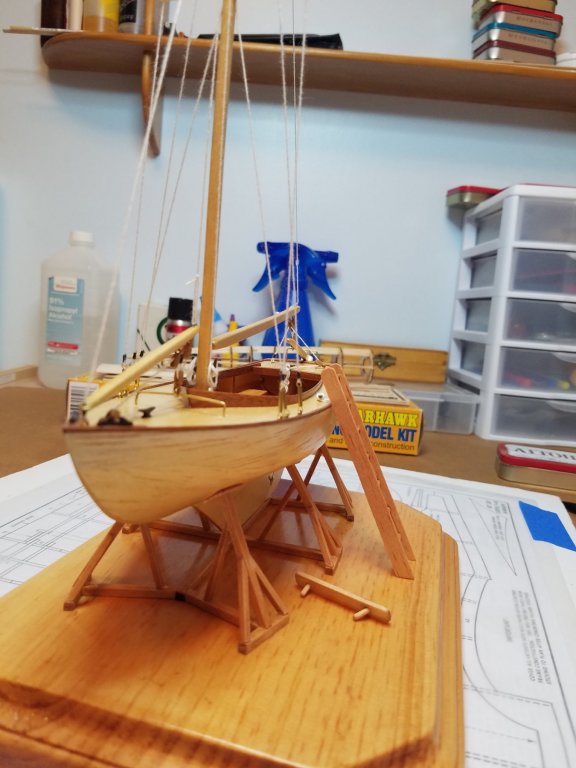
Well after a long layoff I think we can call this one finished. Since I have to do all my painting outside I had to wait for a day when the humidity was below oh about 80% there have not been many of them in the last week or so . Anyone from South Florida will back me on this. But we finally had a decent weekend and I managed to get an acceptable finish on the base. I made a long board to add to the scene while I was waiting. Anyone that has been cruising on the Dania Cutoff Canal or the South Fork of the New River or just about anywhere in the Keys will recognize this scene. All that is missing is an old guy with a floppy straw hat, cargo shorts, flip flops and a Kalik. As you can see in the background I did not have another boat to start so I grabbed a Guillows P-40 off the shelf to hold me over until I can get to Model Expo next week. While it is probably not "Gallery" worthy I think it came out OK. I certainly learned a lot for what should be a simple build. I tried a few things that were not exactly in the instructions and for the most part I am happy with the results. Now what to build next. Another member, Pathagoras and I have scheduled a trip to Model Expo next Monday I will have to see what catches my eye and fits my limited budget. Until then I will mark this one finished.


- 36 replies
-
- 8
-
-
- sakonnet daysailer
- Midwest Products
- (and 2 more)
-
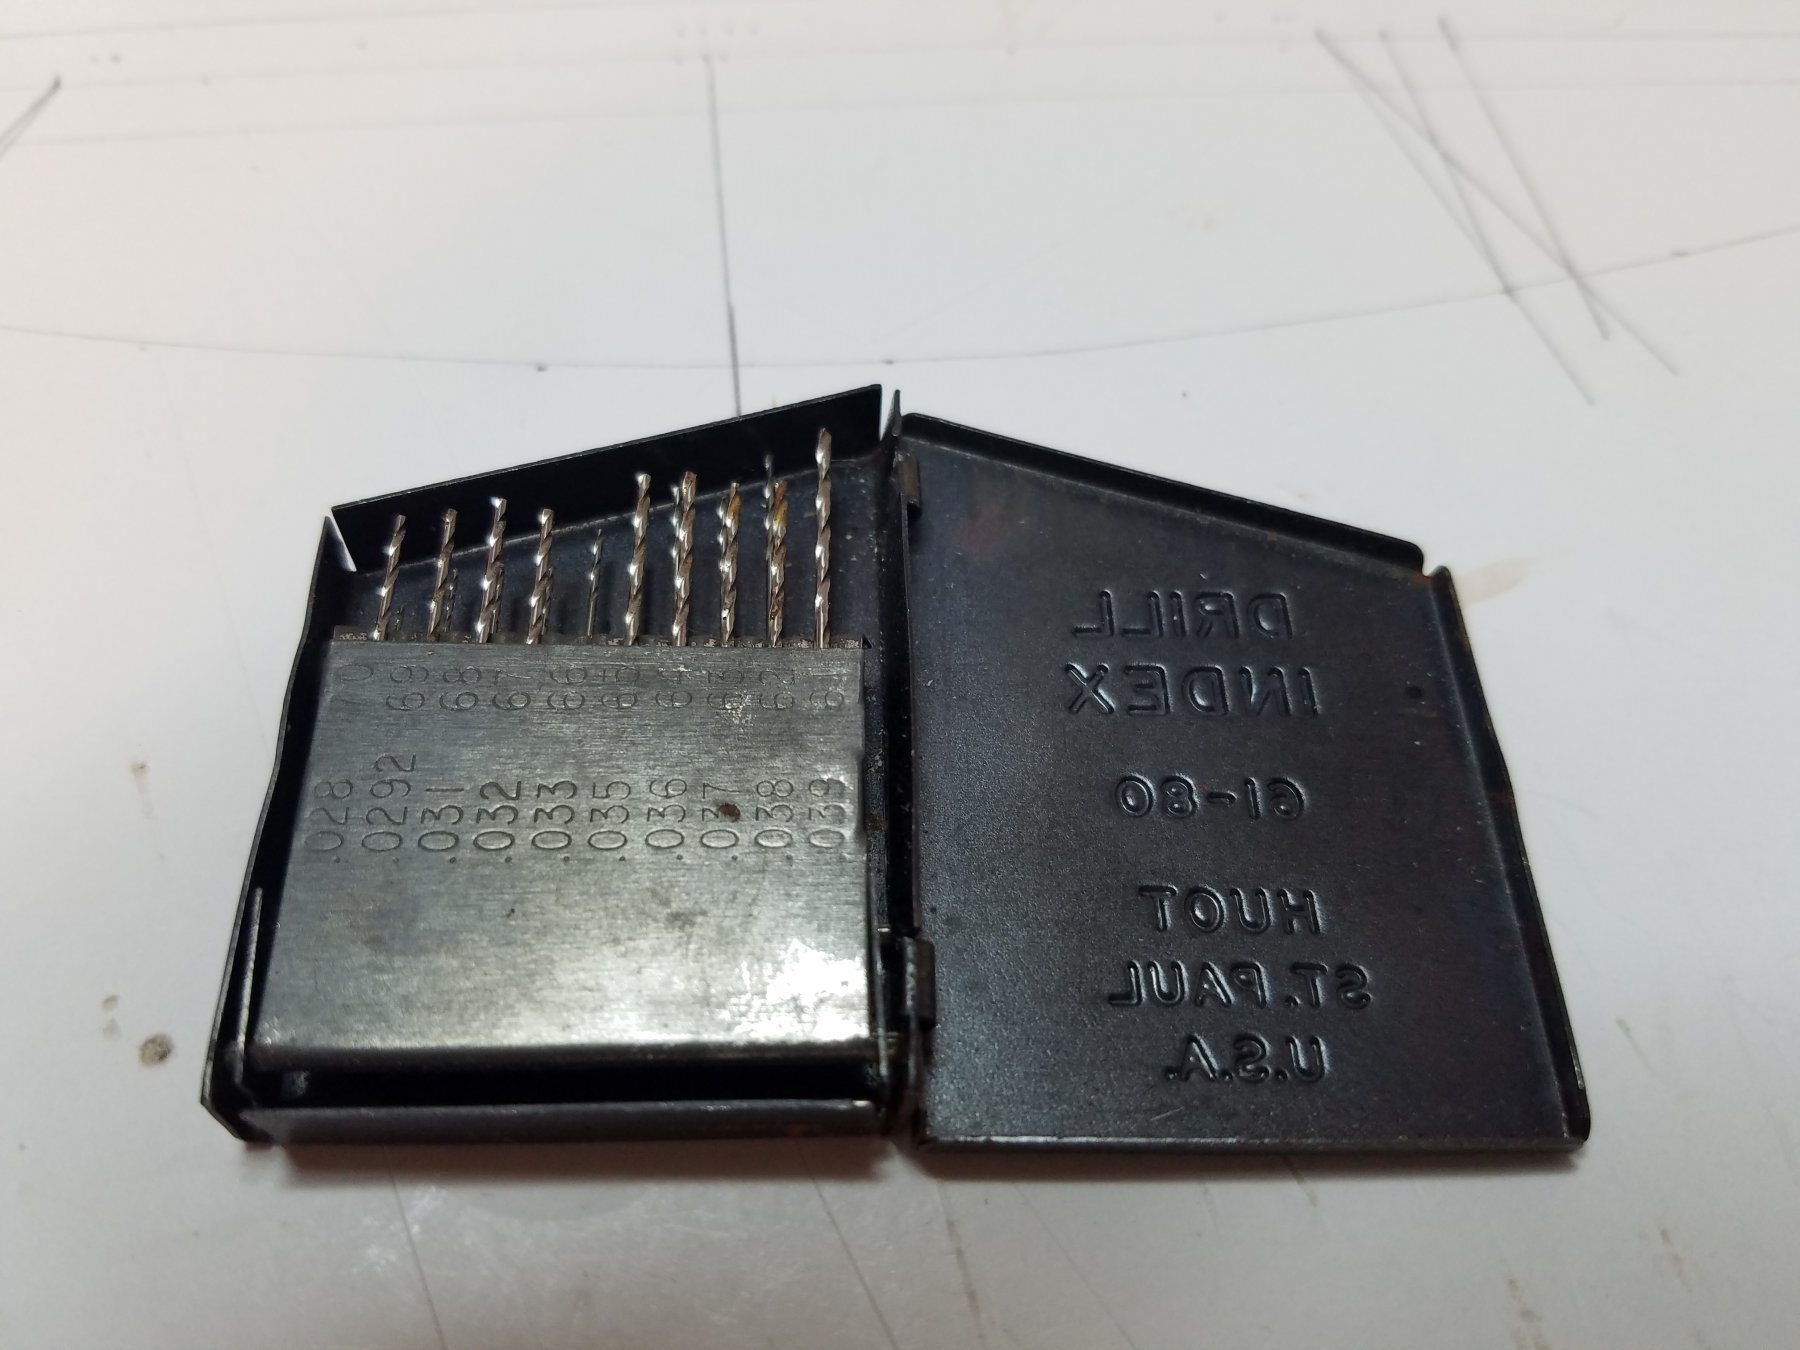
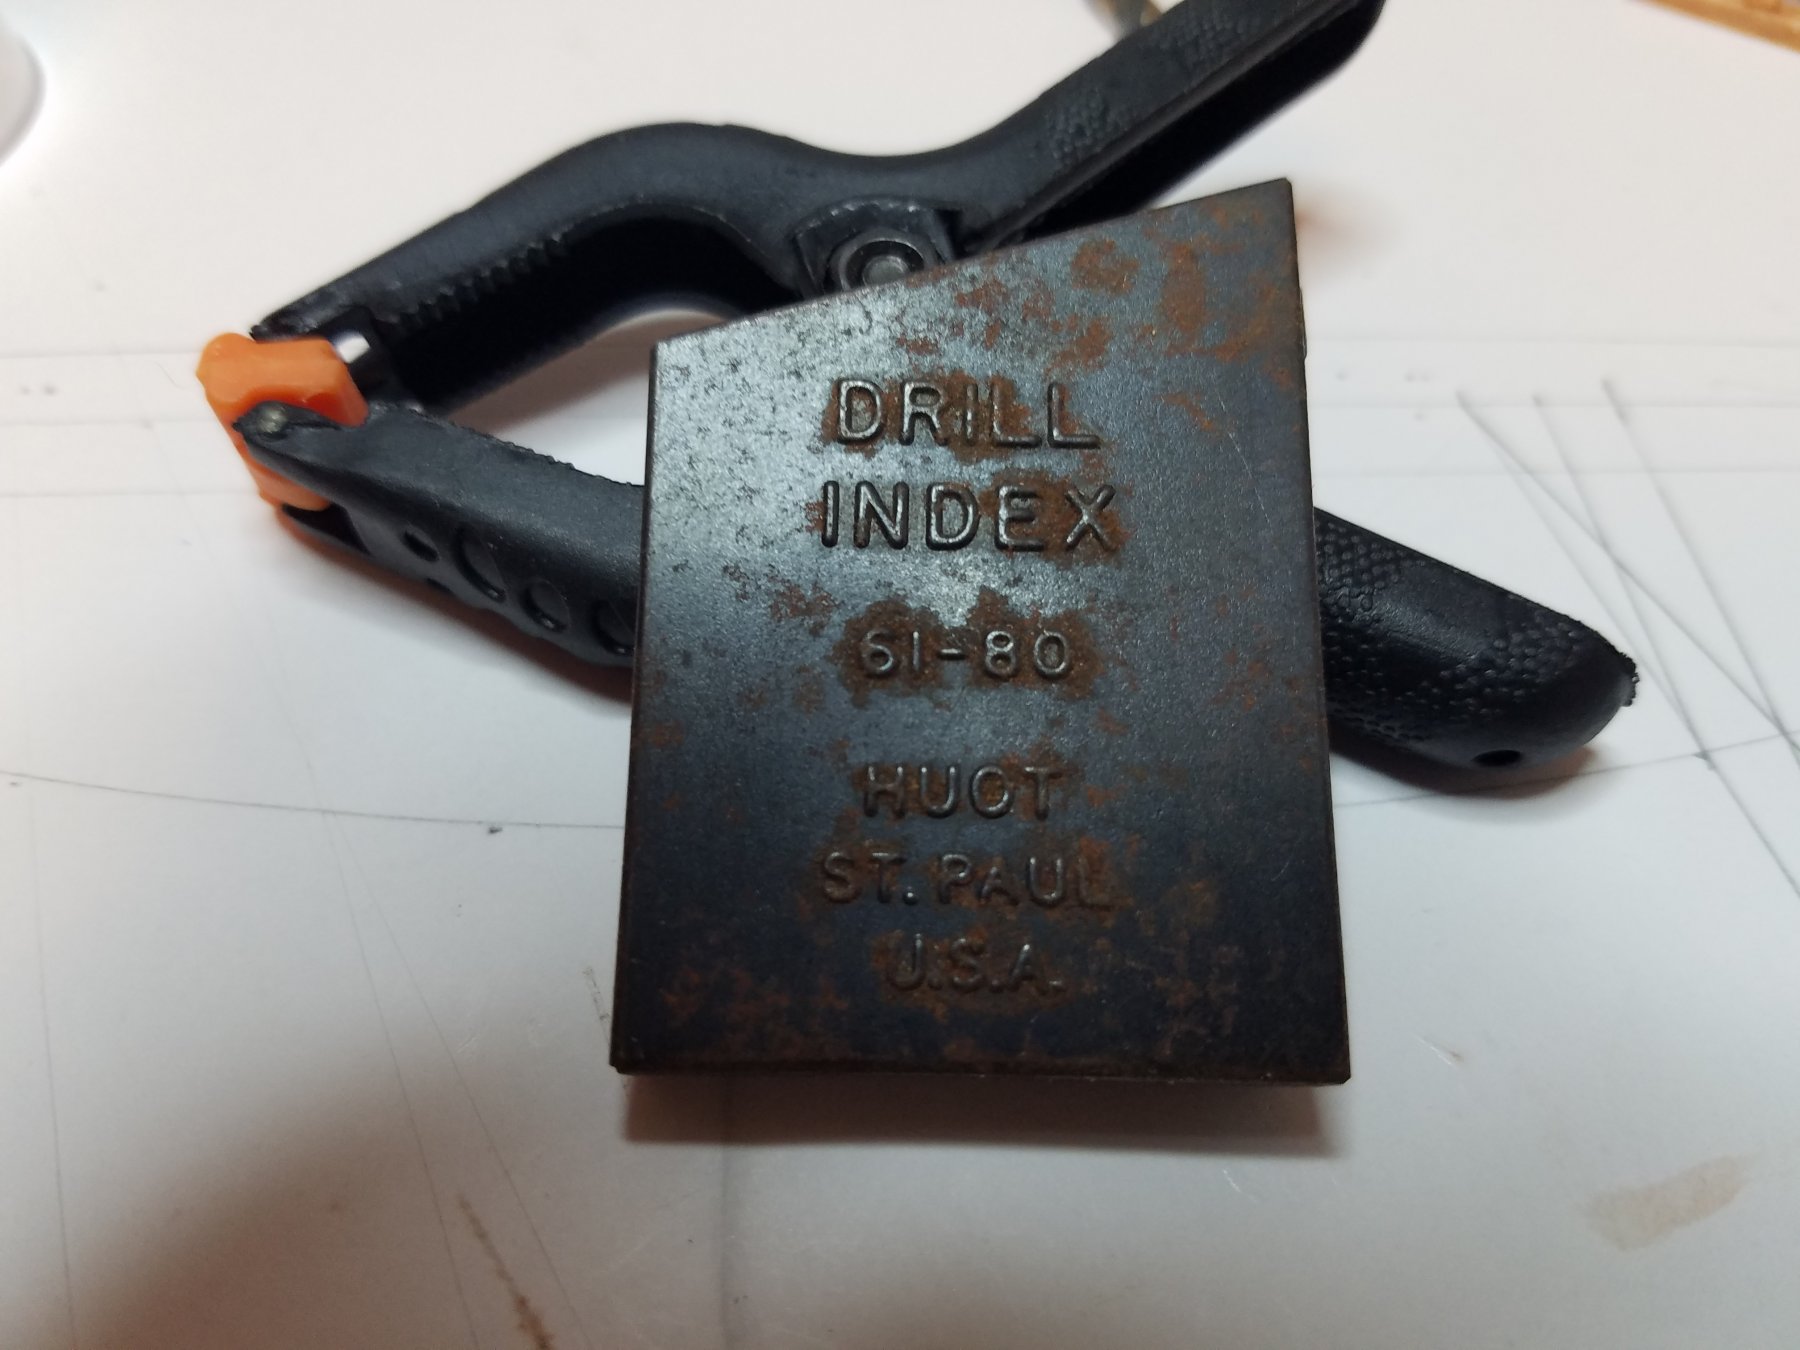
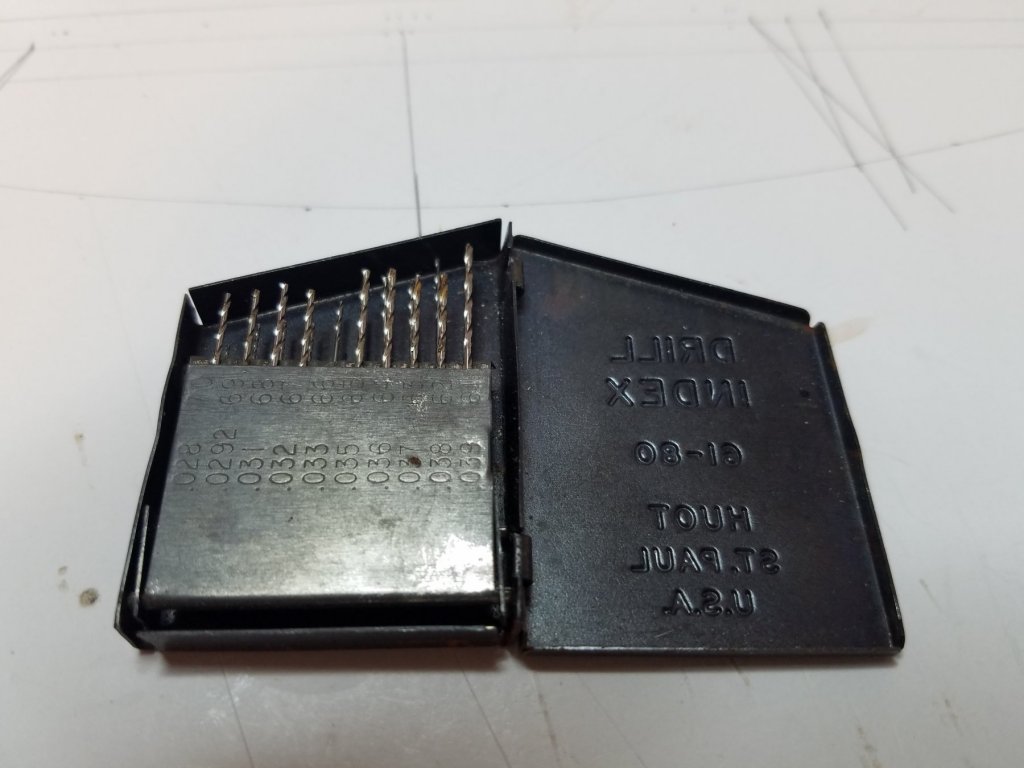
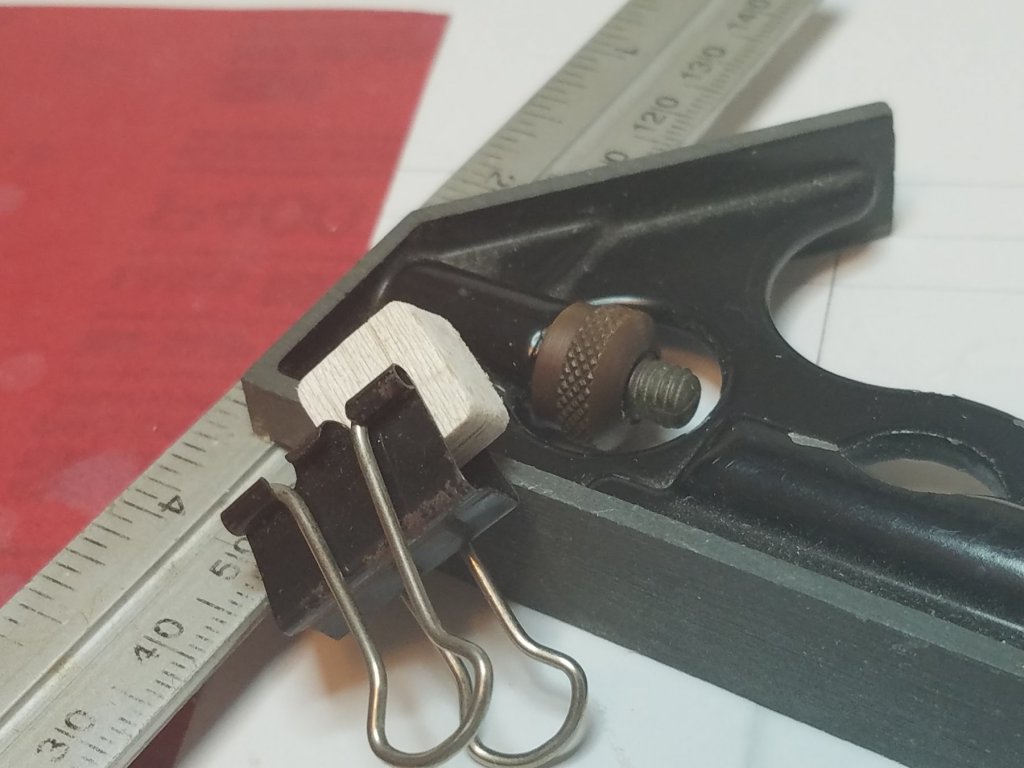
About 20 years ago a tool jobber came into our shop and handed these out as free samples. They have been in my tool box all this time and I am finally getting some use out of them.

-
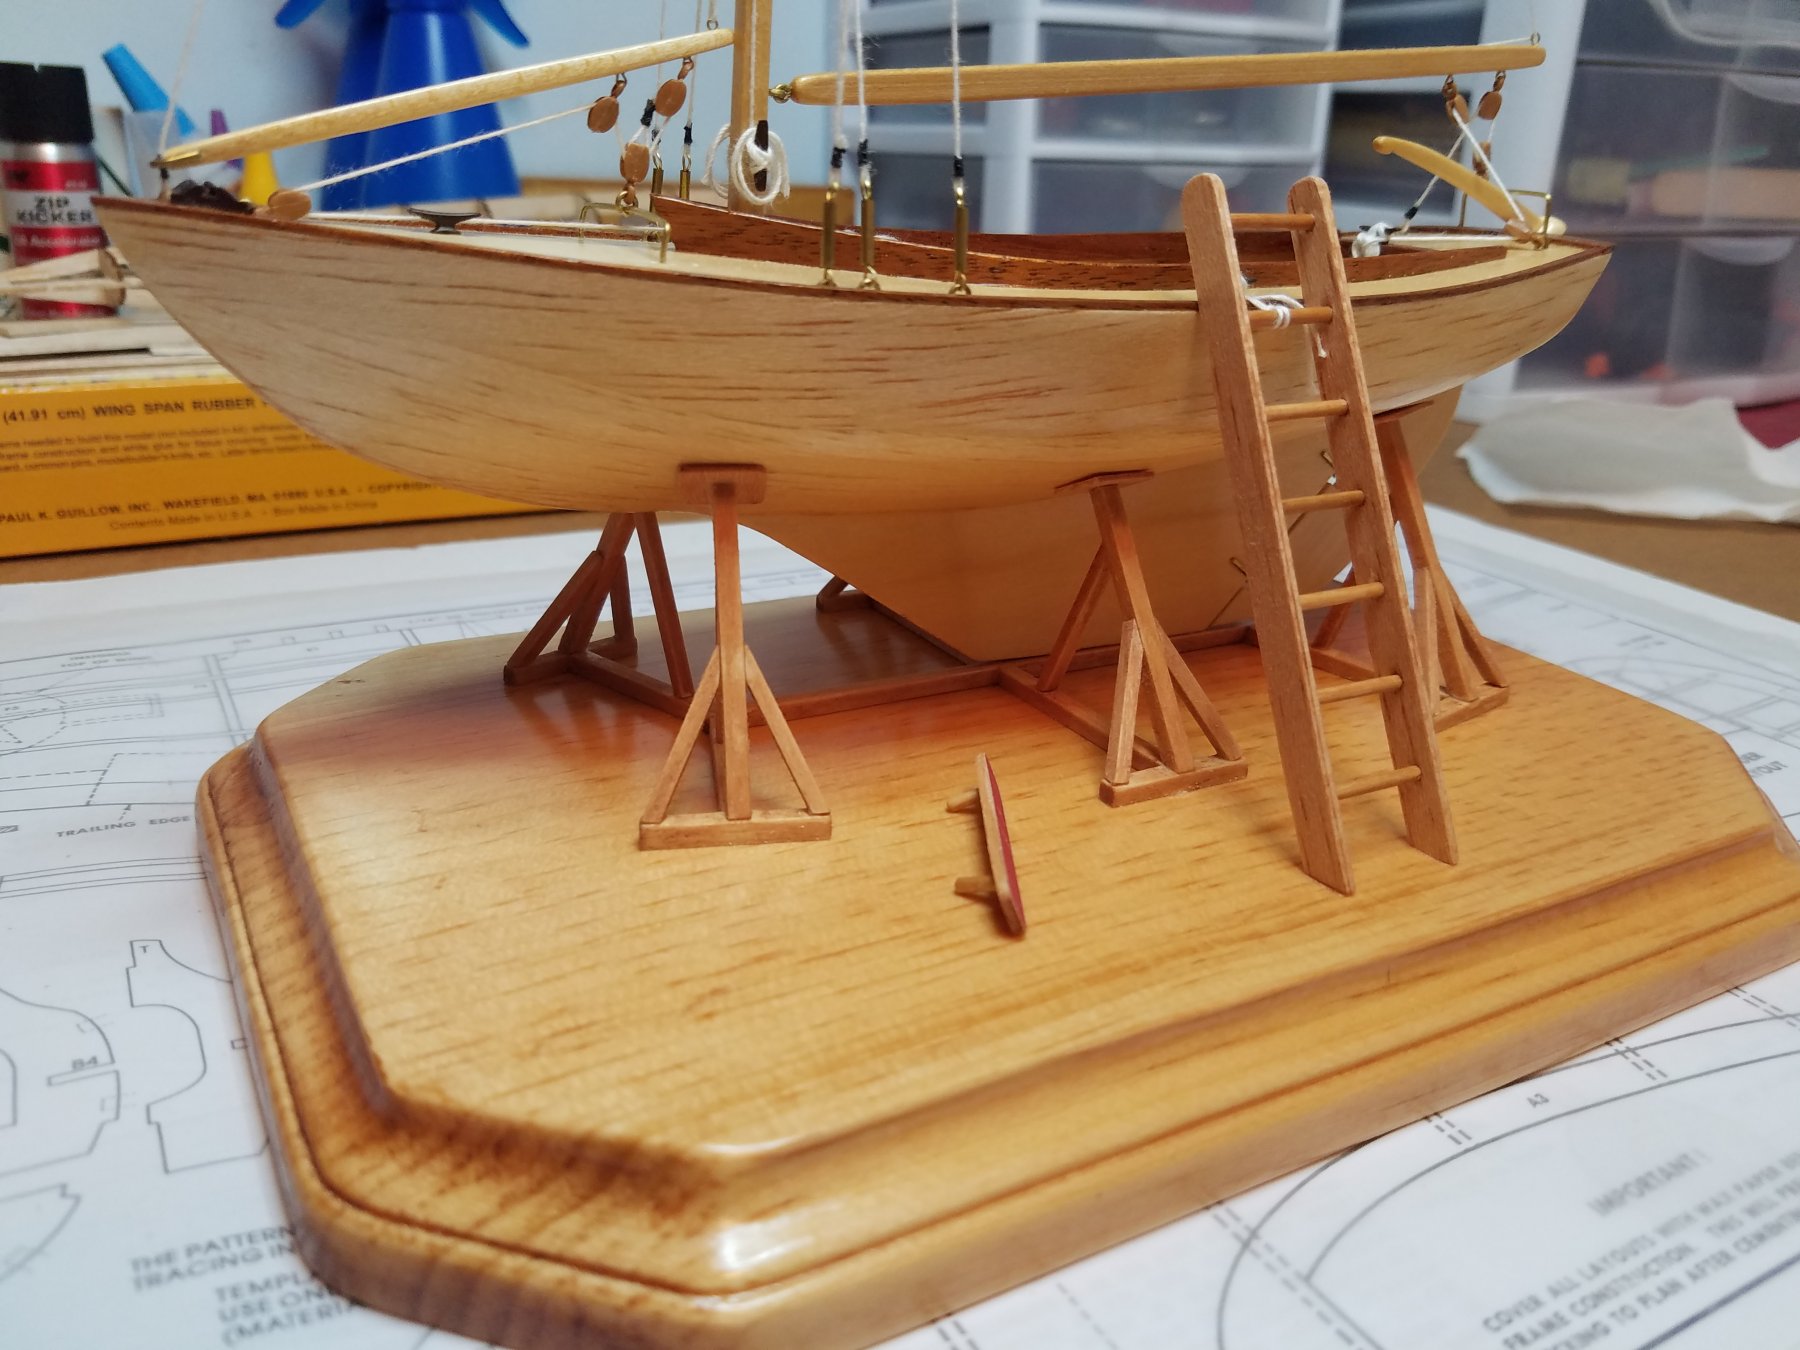
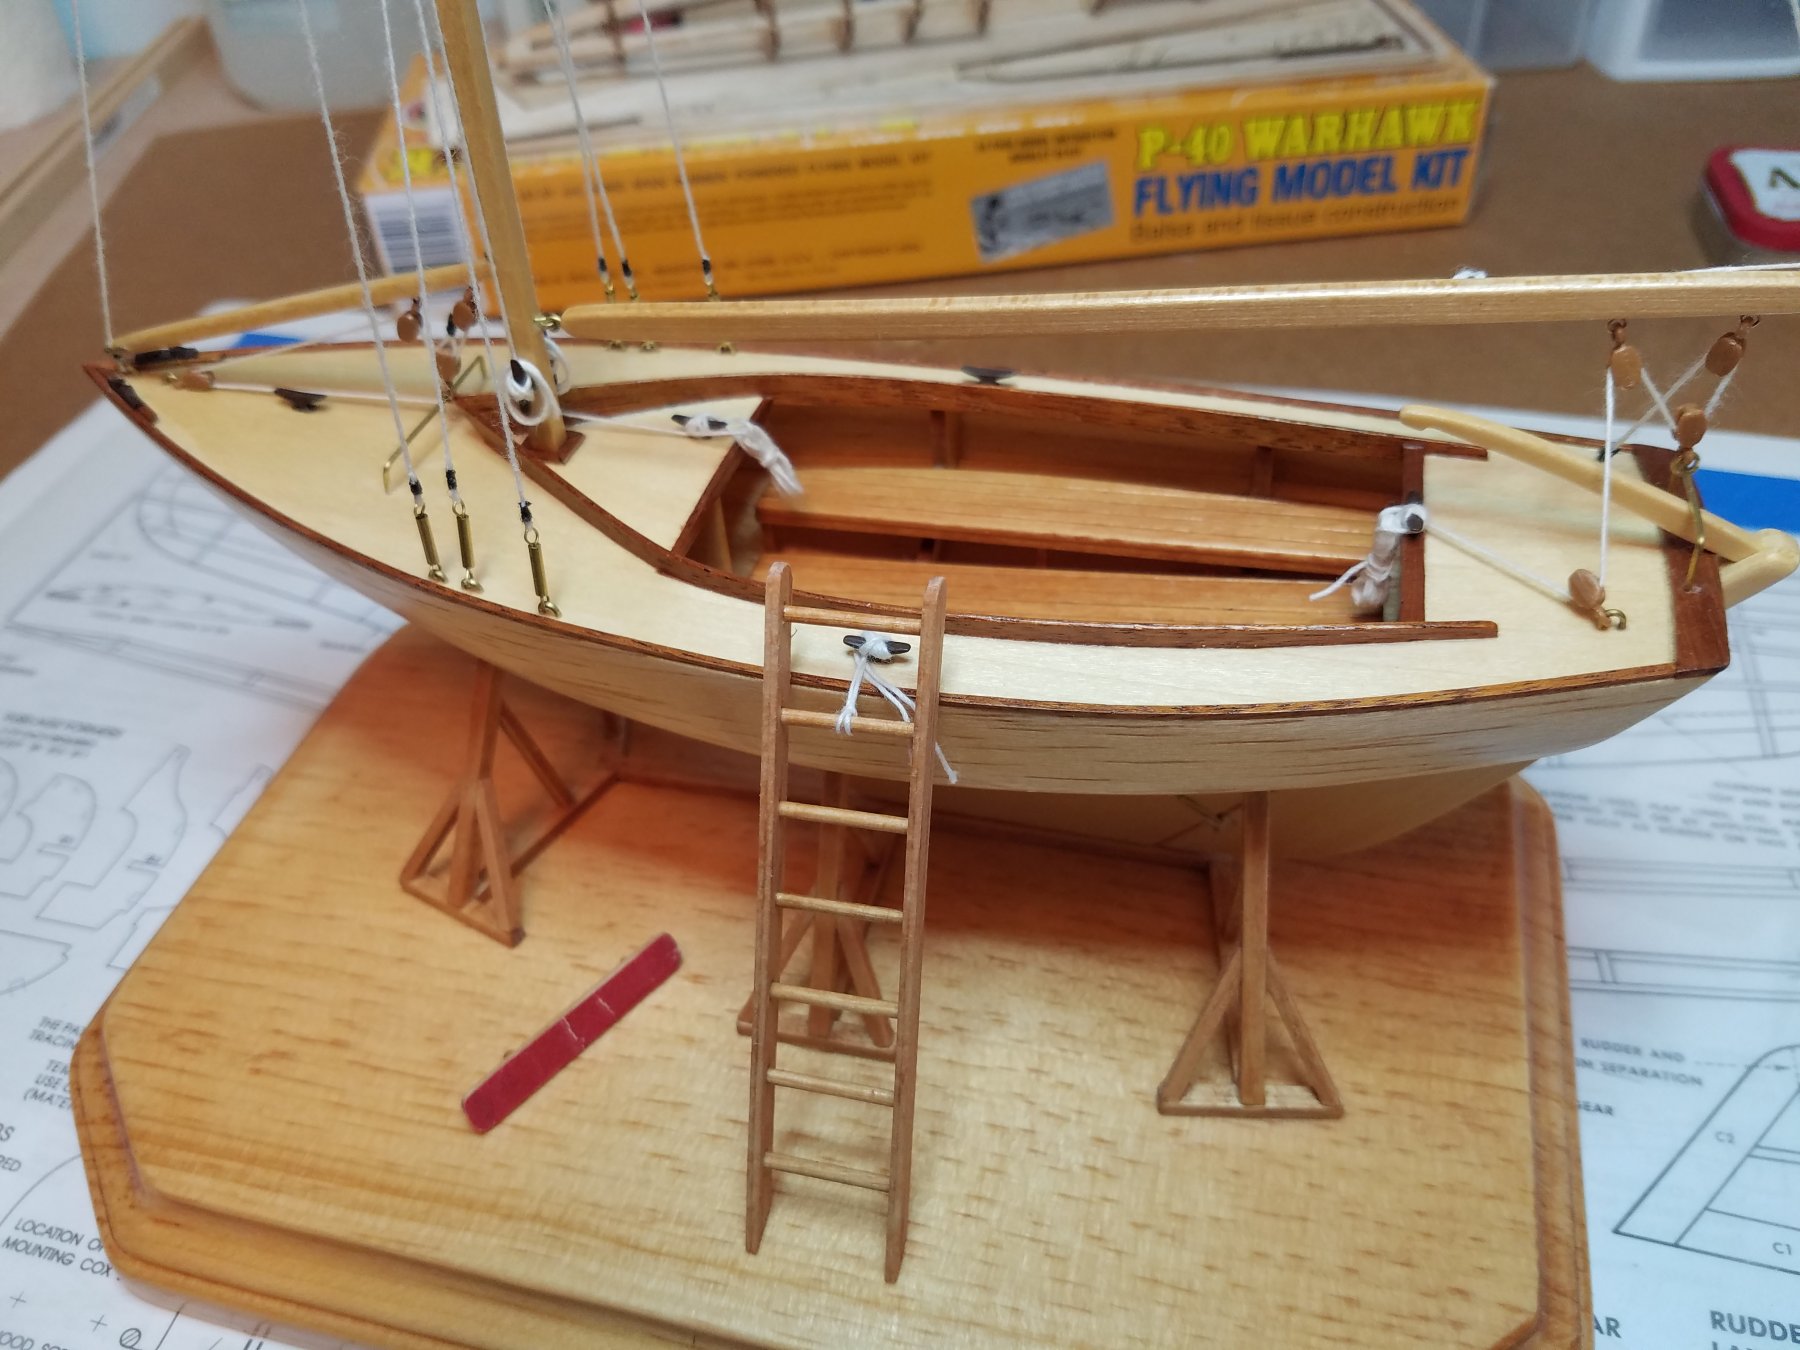
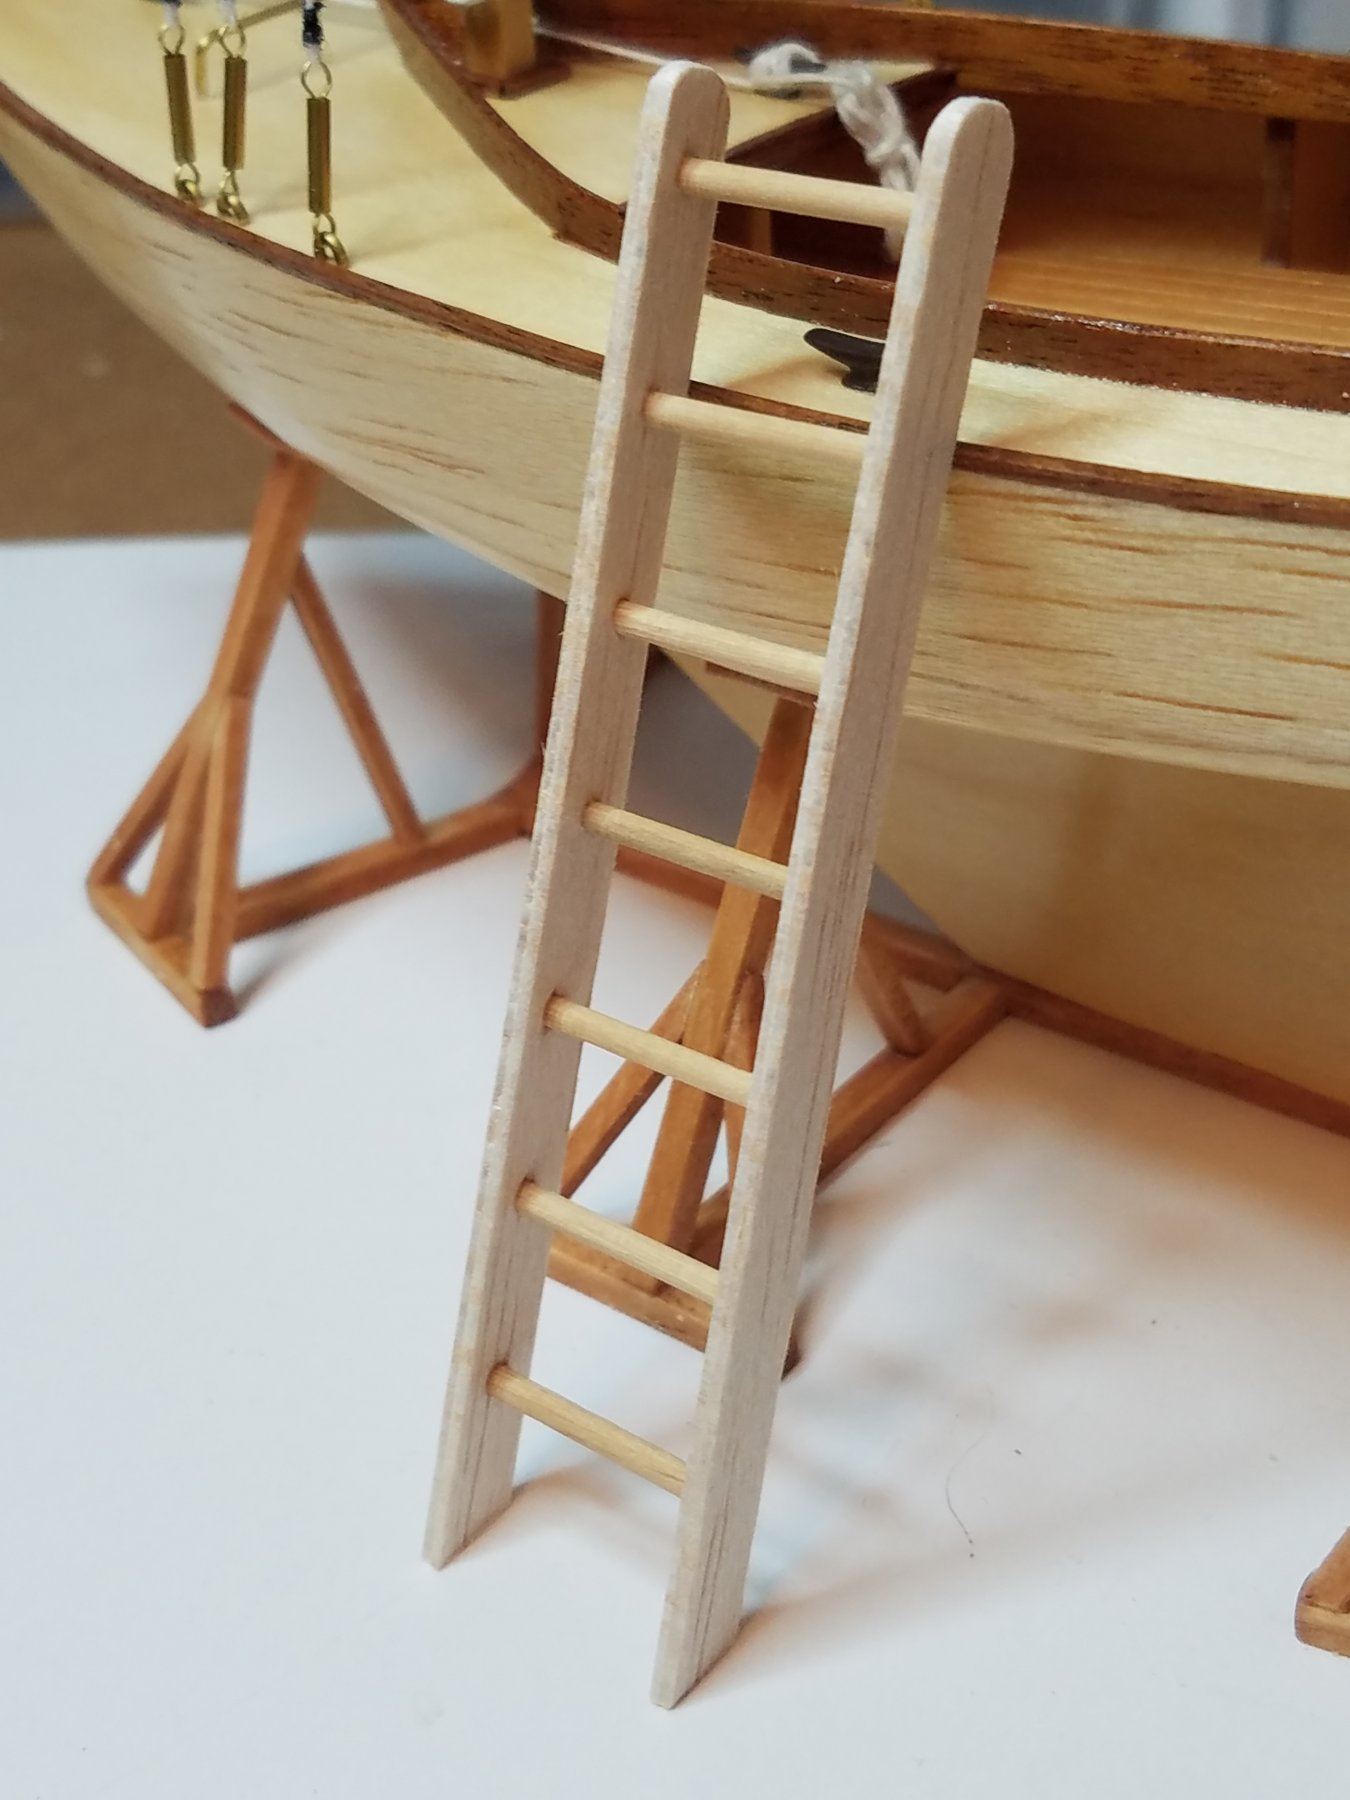
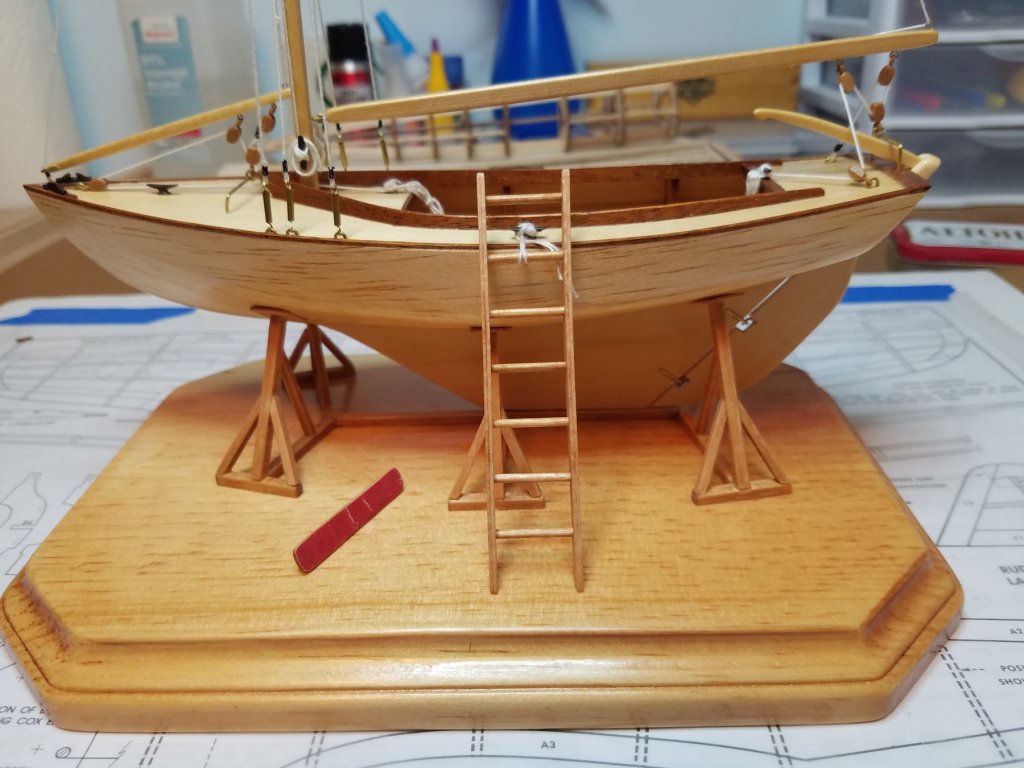
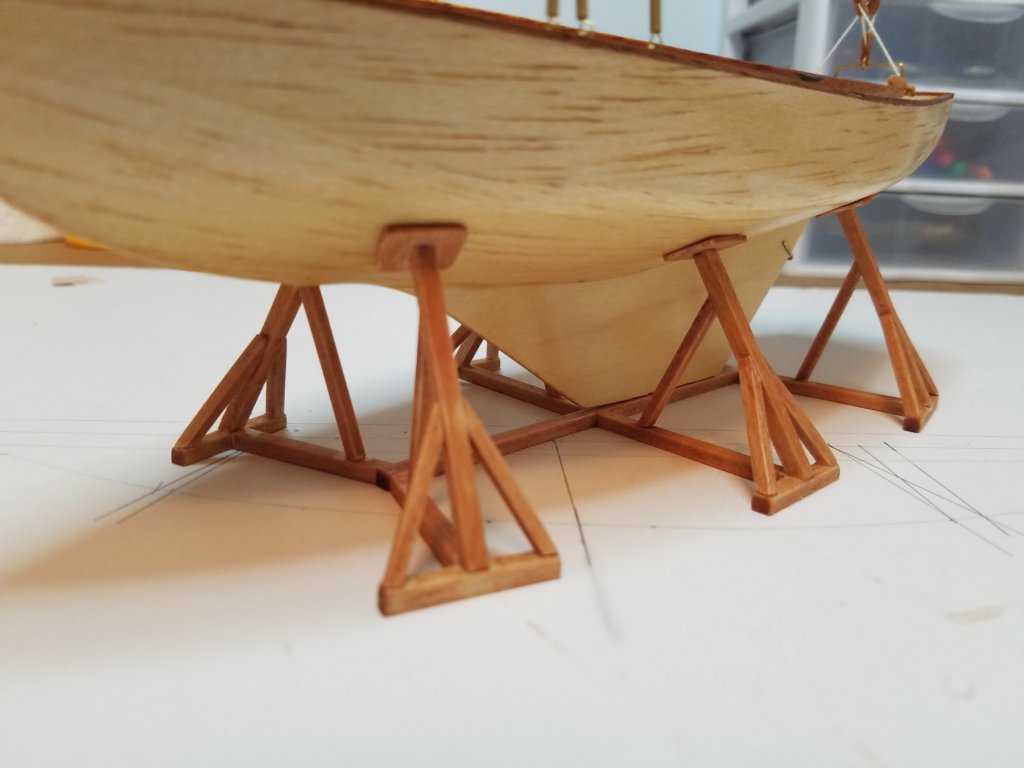
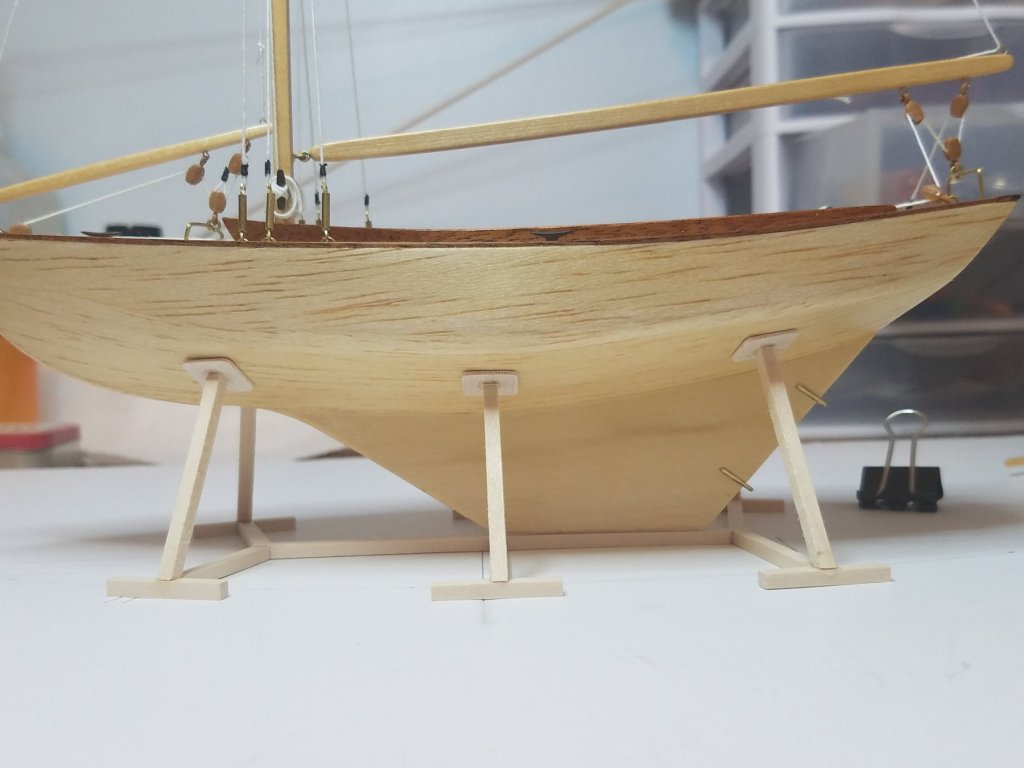
One of those days were you work on something all day yet don't feel like you accomplished much. I completed and stained the jack stands. I left the stain uneven and nasty to try to make it look like it has been around the yard a few times. Then in keeping with my goal of using what I have in my shed I found an old pine craft mounting/plaque board with a routed edge. Probably left over from some project my Daughter and I worked on 25 years ago. I knew it world come in handy that is why I would not let the Admiral toss it out. I sanded and stained it and it came out ok. I will see what a couple of coats of poly look like on it. Then I needed a way to get up on the boat so I made a 1/24 scale ladder. The stain is drying on that now. I will see what it looks like in the morning. I documented it with pictures but thought it would take up too much space here. If anyone wants to see how I did it I will be glad to post them up.


- 36 replies
-
- 8
-
-
- sakonnet daysailer
- Midwest Products
- (and 2 more)
-
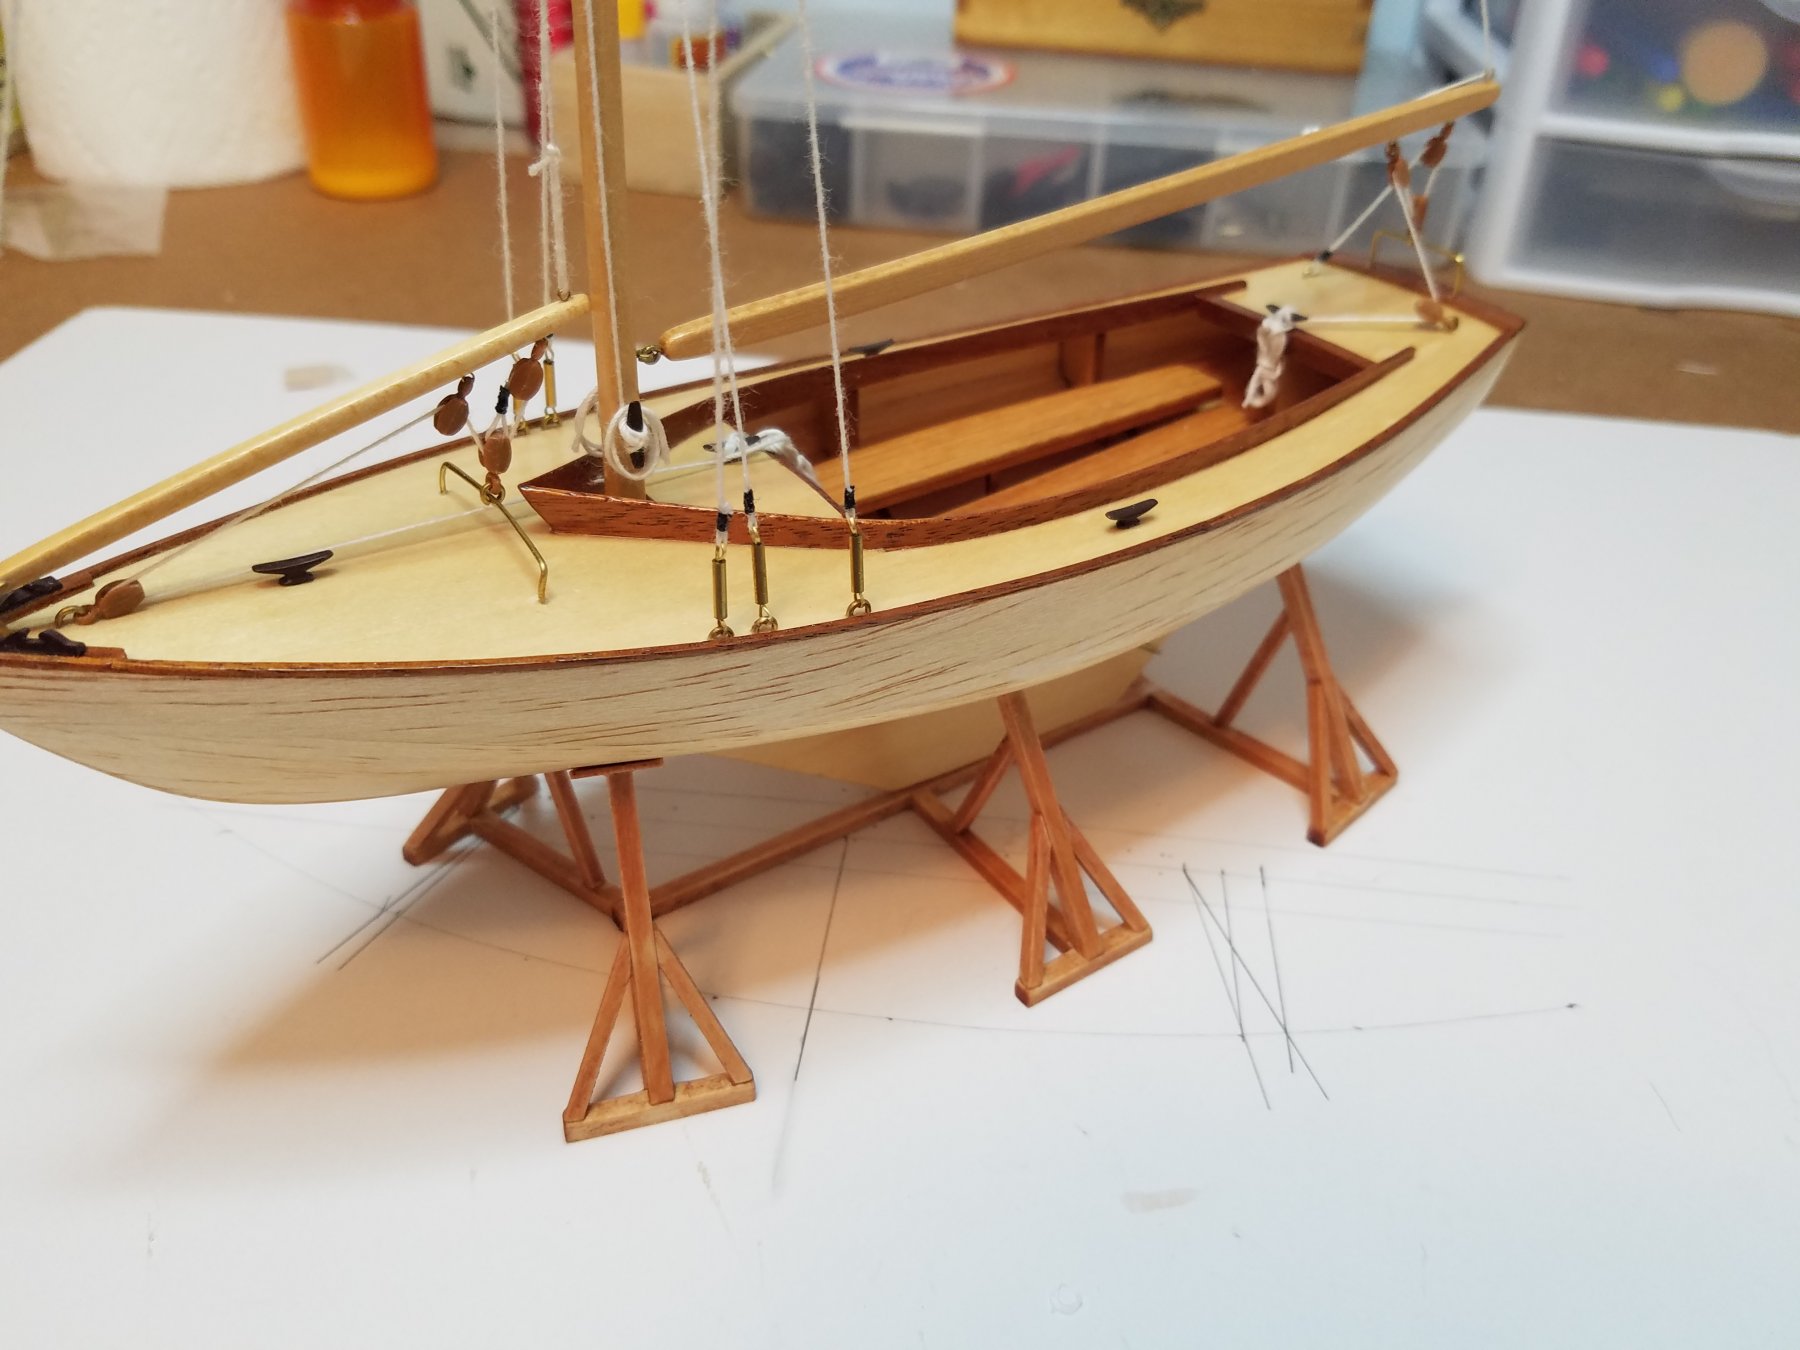
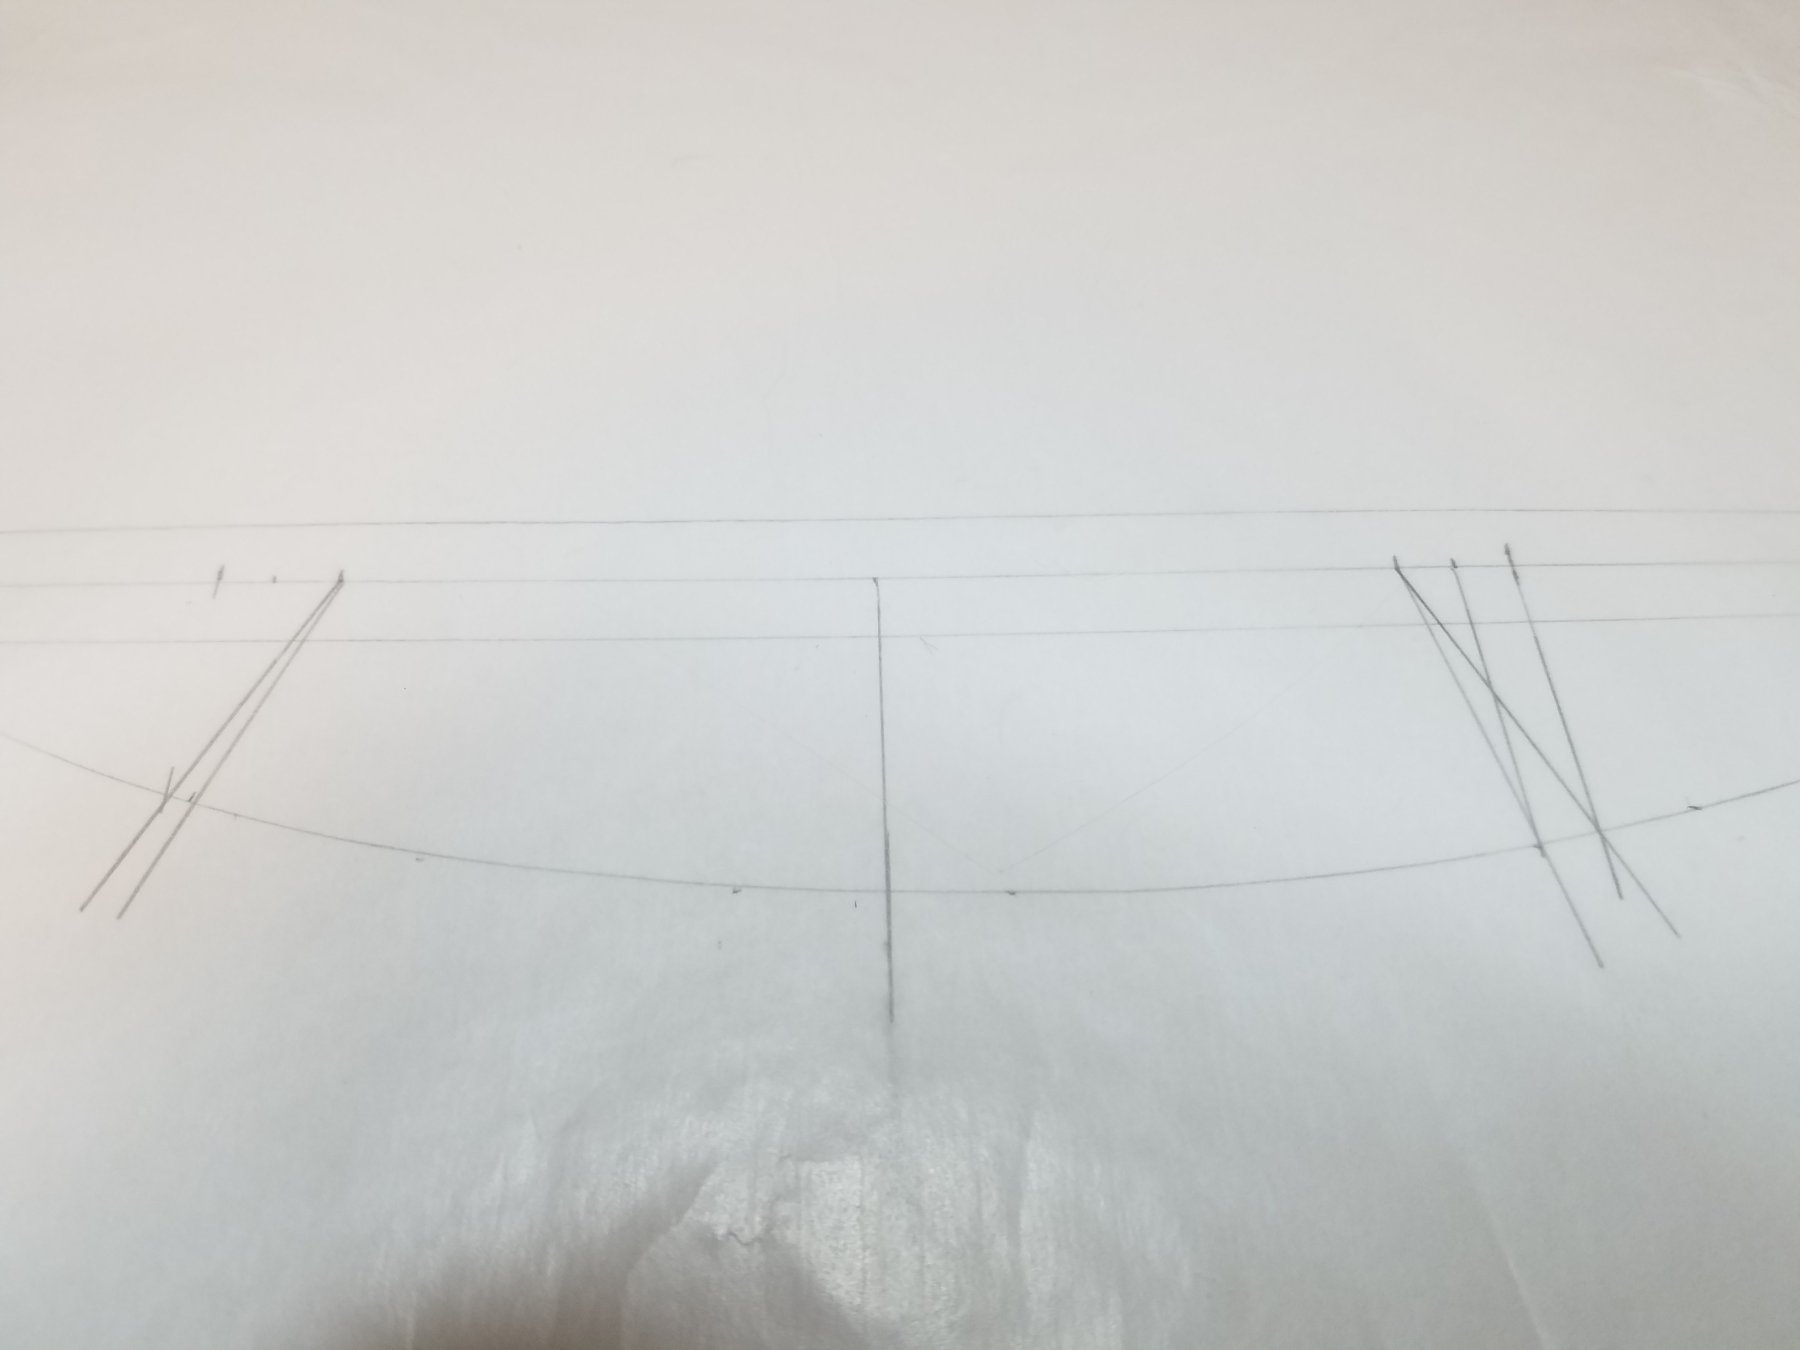
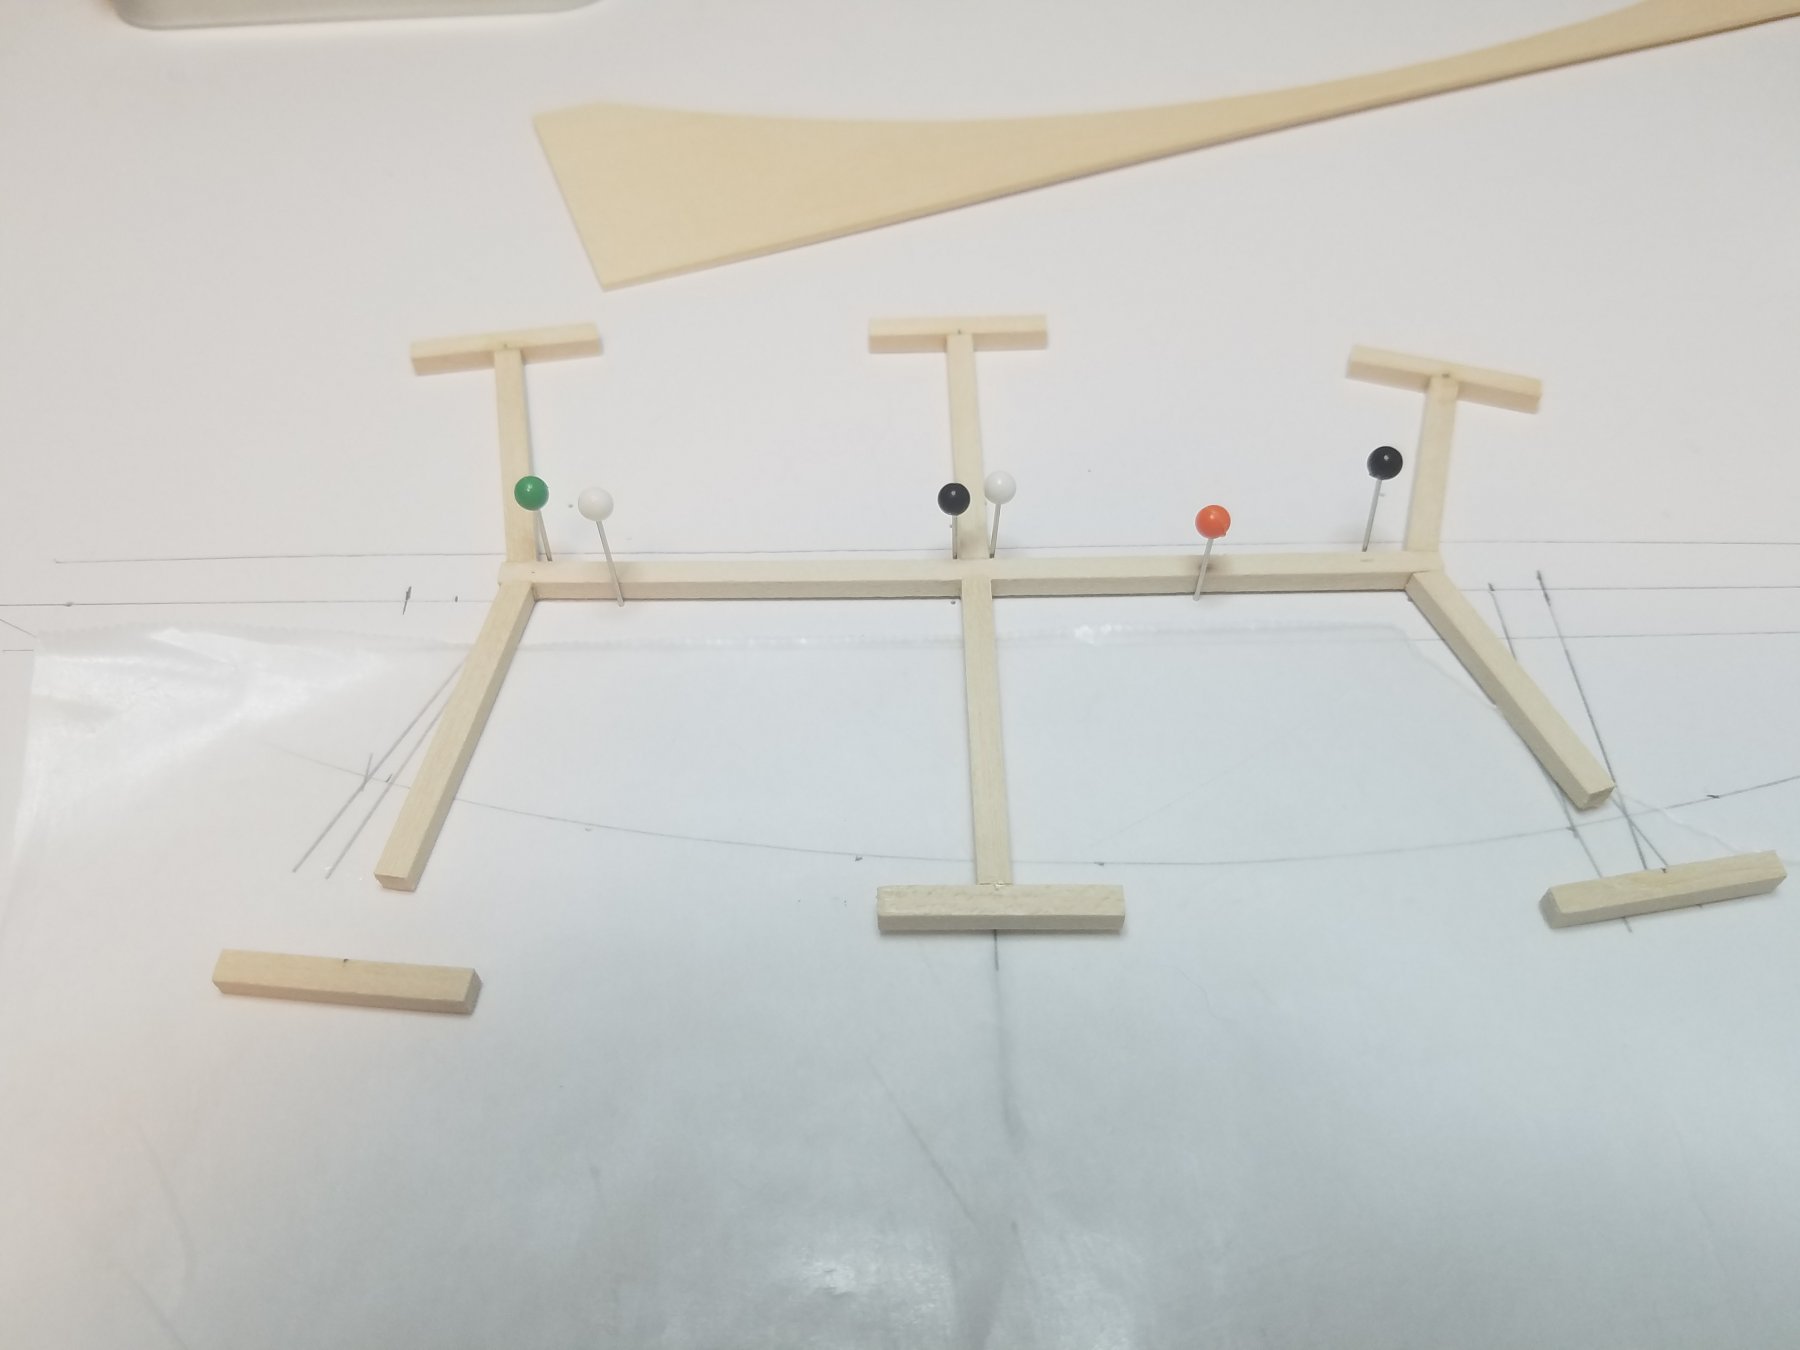
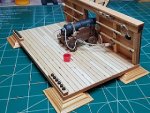
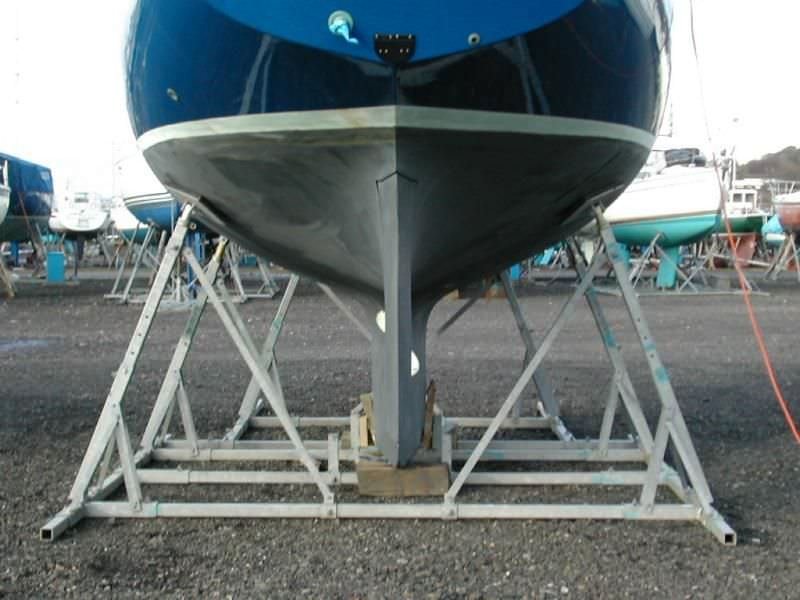
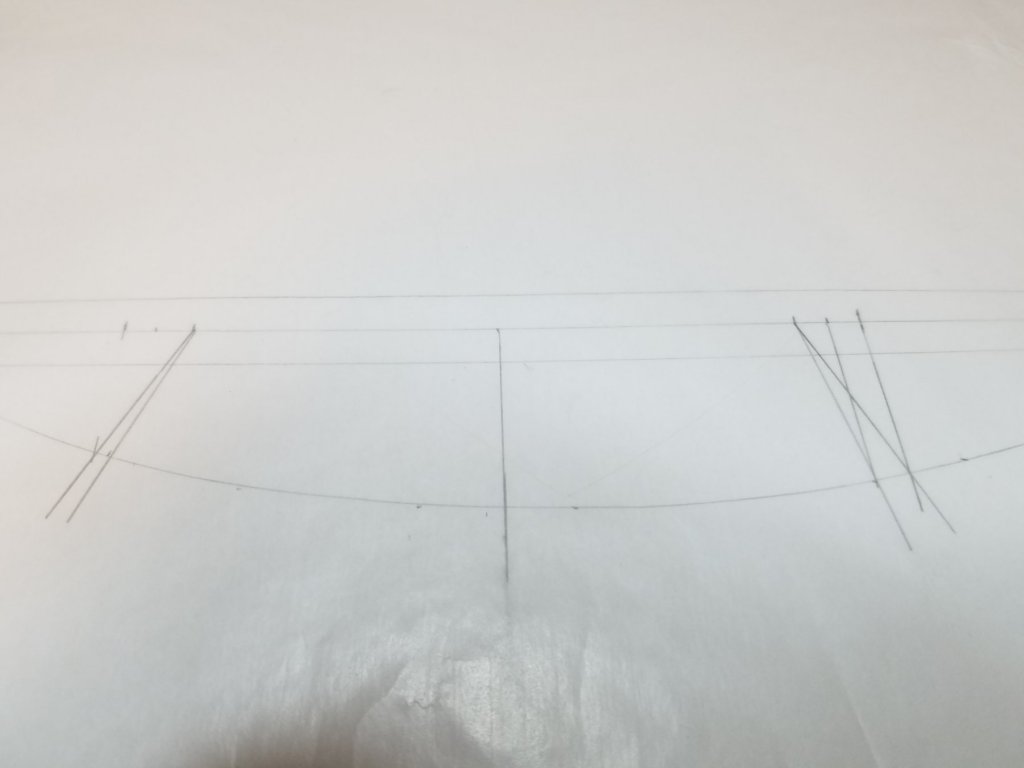
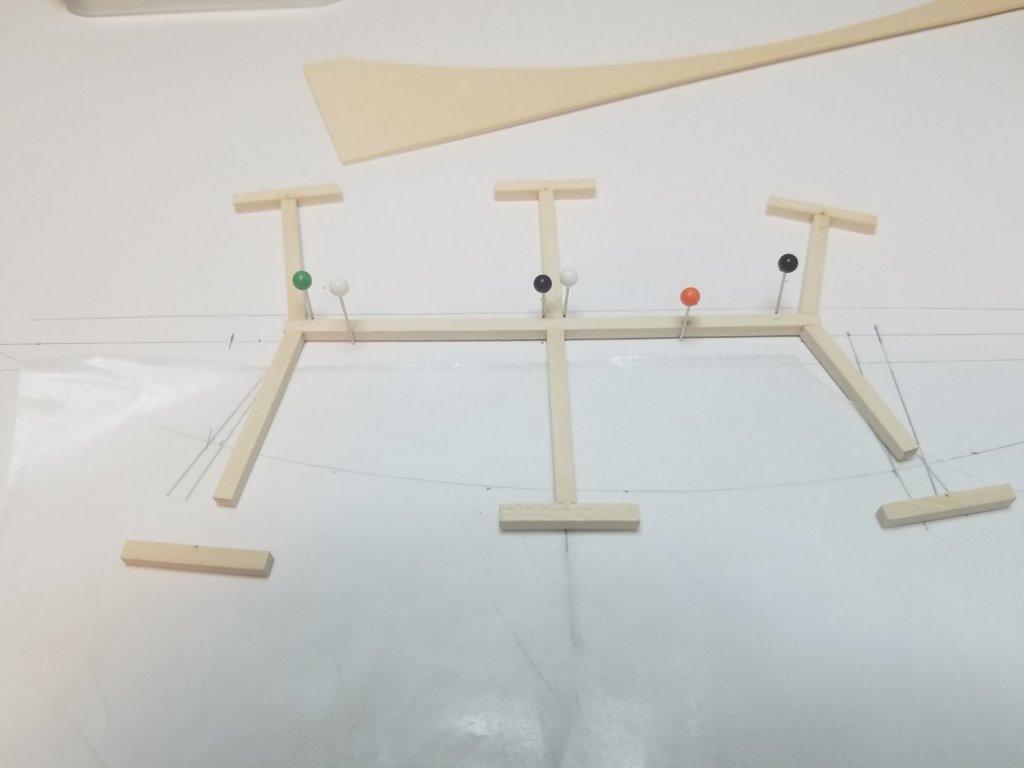
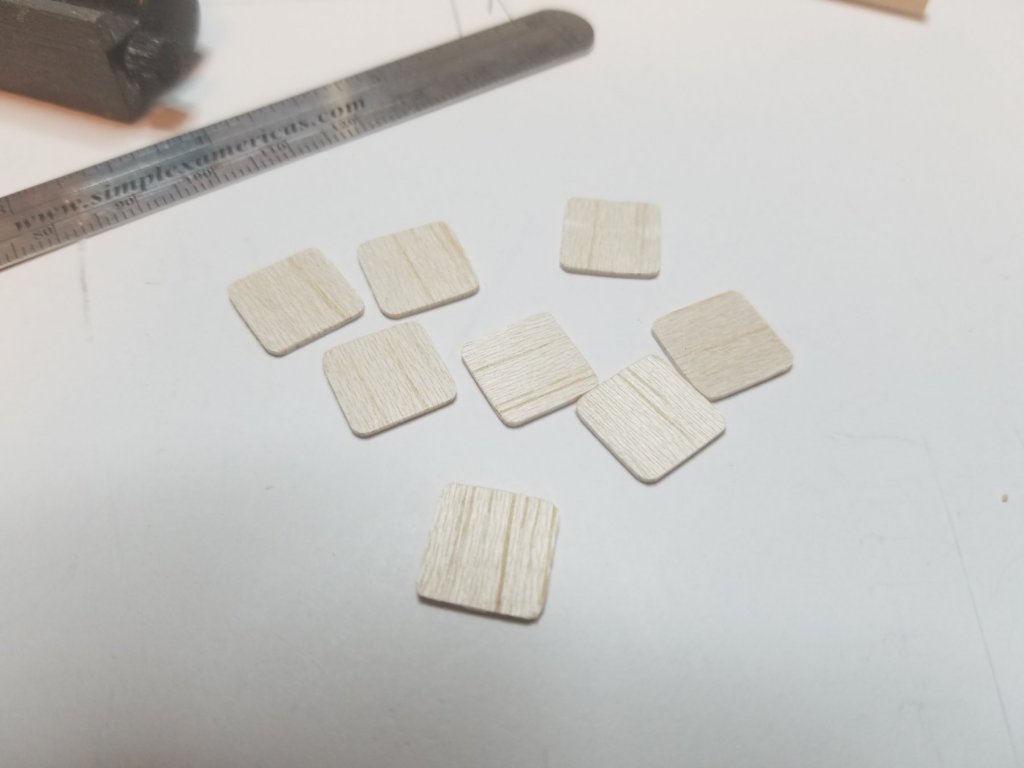
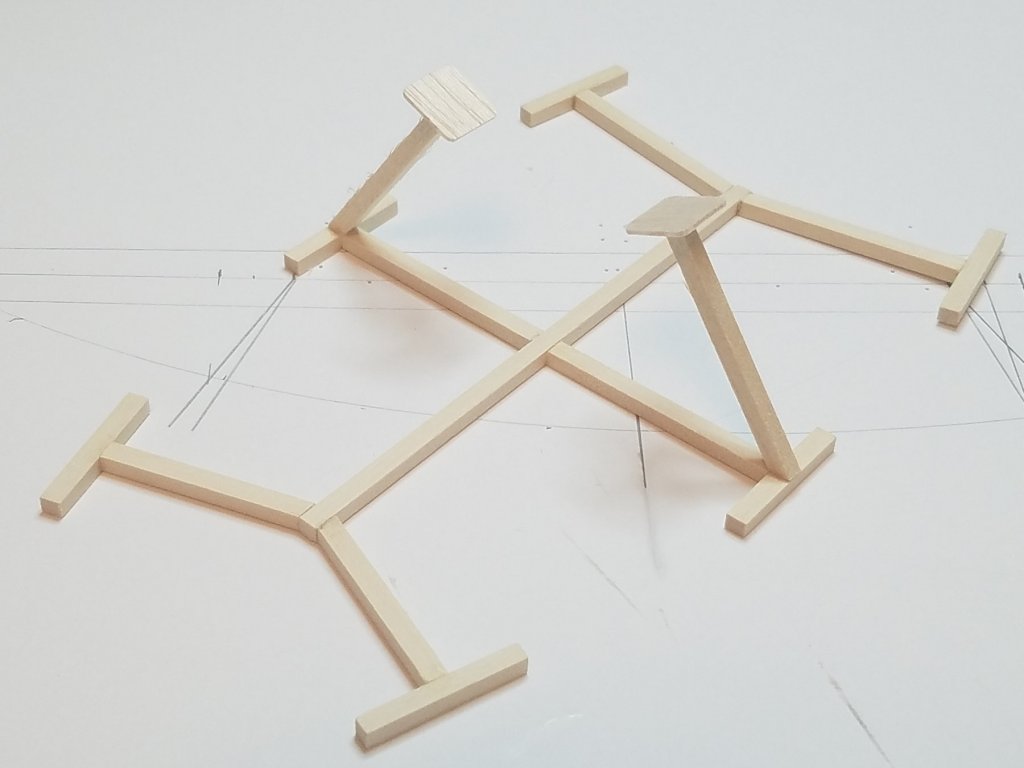
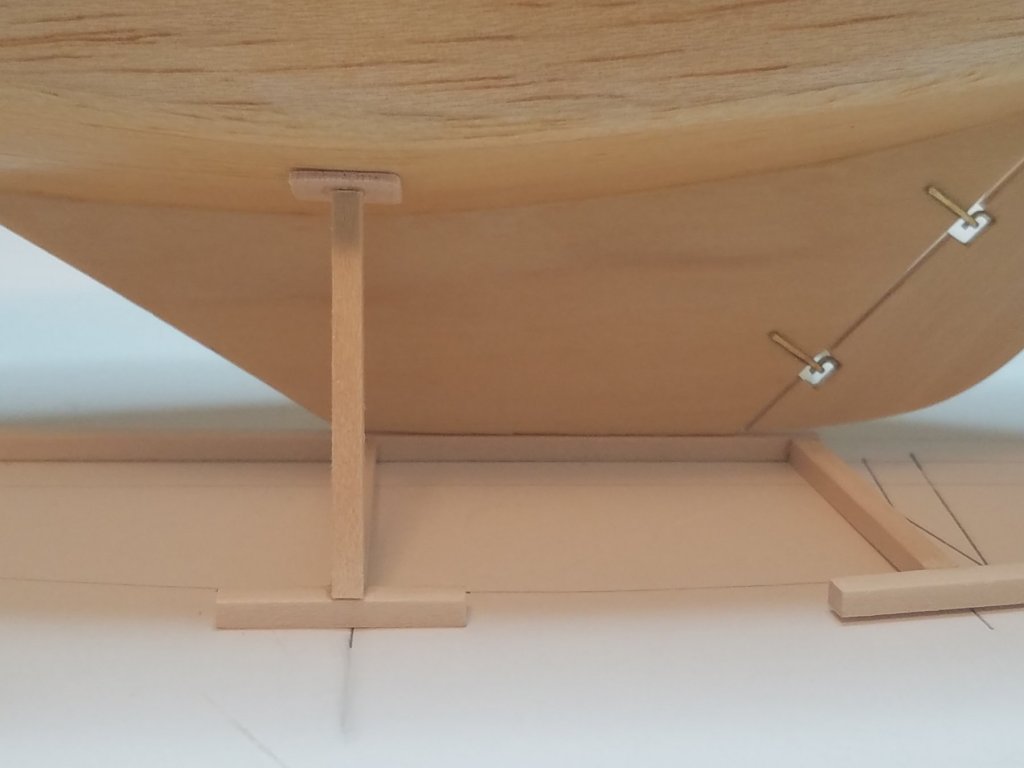
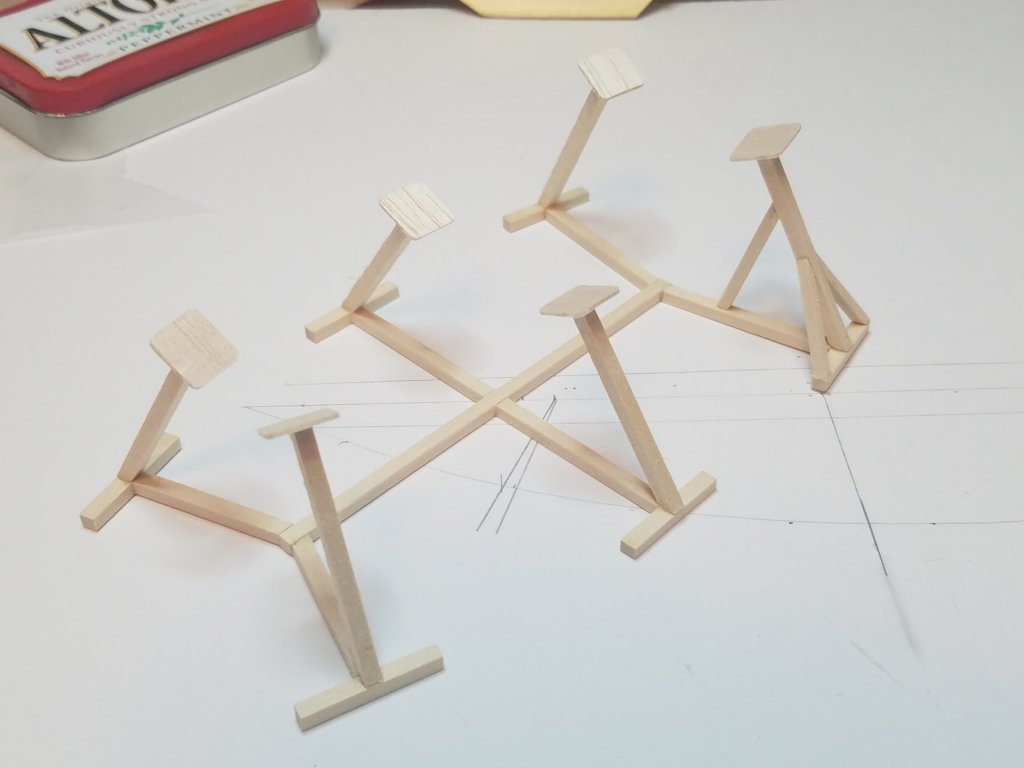
Thanks for the kind word guys and all the likes I have received on this thread. I got started on my display stand today. I am still not sure how it is going to turn out. But I thought I would update you on my progress. I did a google search for boat yard jack stands and came up with a couple of ideas I thought were not only doable but would also create a not your run of the mill display. I started by using the piece of scrap that once held the deck to scribe a line that approximated the outline of the hull. I then marked a center line and three radial lines that looked like they would end up about perpendicular to the deck edge. No calculators or protractors just by eyeball. After a few adjustments I started with the center beam and worked my way out to the tee bars on the ends. Again no real effort to scale any thing although I did try to keep the size of the lumber as close to scale as my wood pile allowed. Just trying to approximate the pictures. Once I had the base done I cut, clamped and sanded the pad plates using 1/32 balsa. I made a couple extra just in case. Then I started making the main uprights in pairs starting with the center two. Once I had them done I moved to the bow and then to the stern. All the time checking to make sure that all the pads maintained contact with the hull. Once again no real measuring just cut the beams over sized and trim them down and angle them till they matched the image in my head. A little light sanding at this stage I want it to look rough and weathered when I am done so not too much. Then start the bracing with slightly smaller lumber. One complete five to go. Since I am still not sure what I am going to build next this might turn into some kind of boatyard diorama.

- 36 replies
-
- 6
-
-
- sakonnet daysailer
- Midwest Products
- (and 2 more)
-
Bruce, Thanks for the info. As I said I will be watching with great interest to see what I can pick up. I might go down to Model Shipways next week ( I was actually planning a trip there today but found out they are closed on Fridays) and pick up my kit and follow a few steps behind you. Go and enjoy your vacation and we will see you when you get back.
- 67 replies
-
- 1
-
-
- philadelphia
- model shipways
- (and 1 more)
-
I am watching this with great interest as I am considering it for a future project. How much detail would you say you have added over and above what is provided for in the kit. I was initially considering this for my second build due to the limited amount of hull planking. But after watching your progress I am not sure I am ready for anything this detailed yet.
- 67 replies
-
- 1
-
-
- philadelphia
- model shipways
- (and 1 more)
-
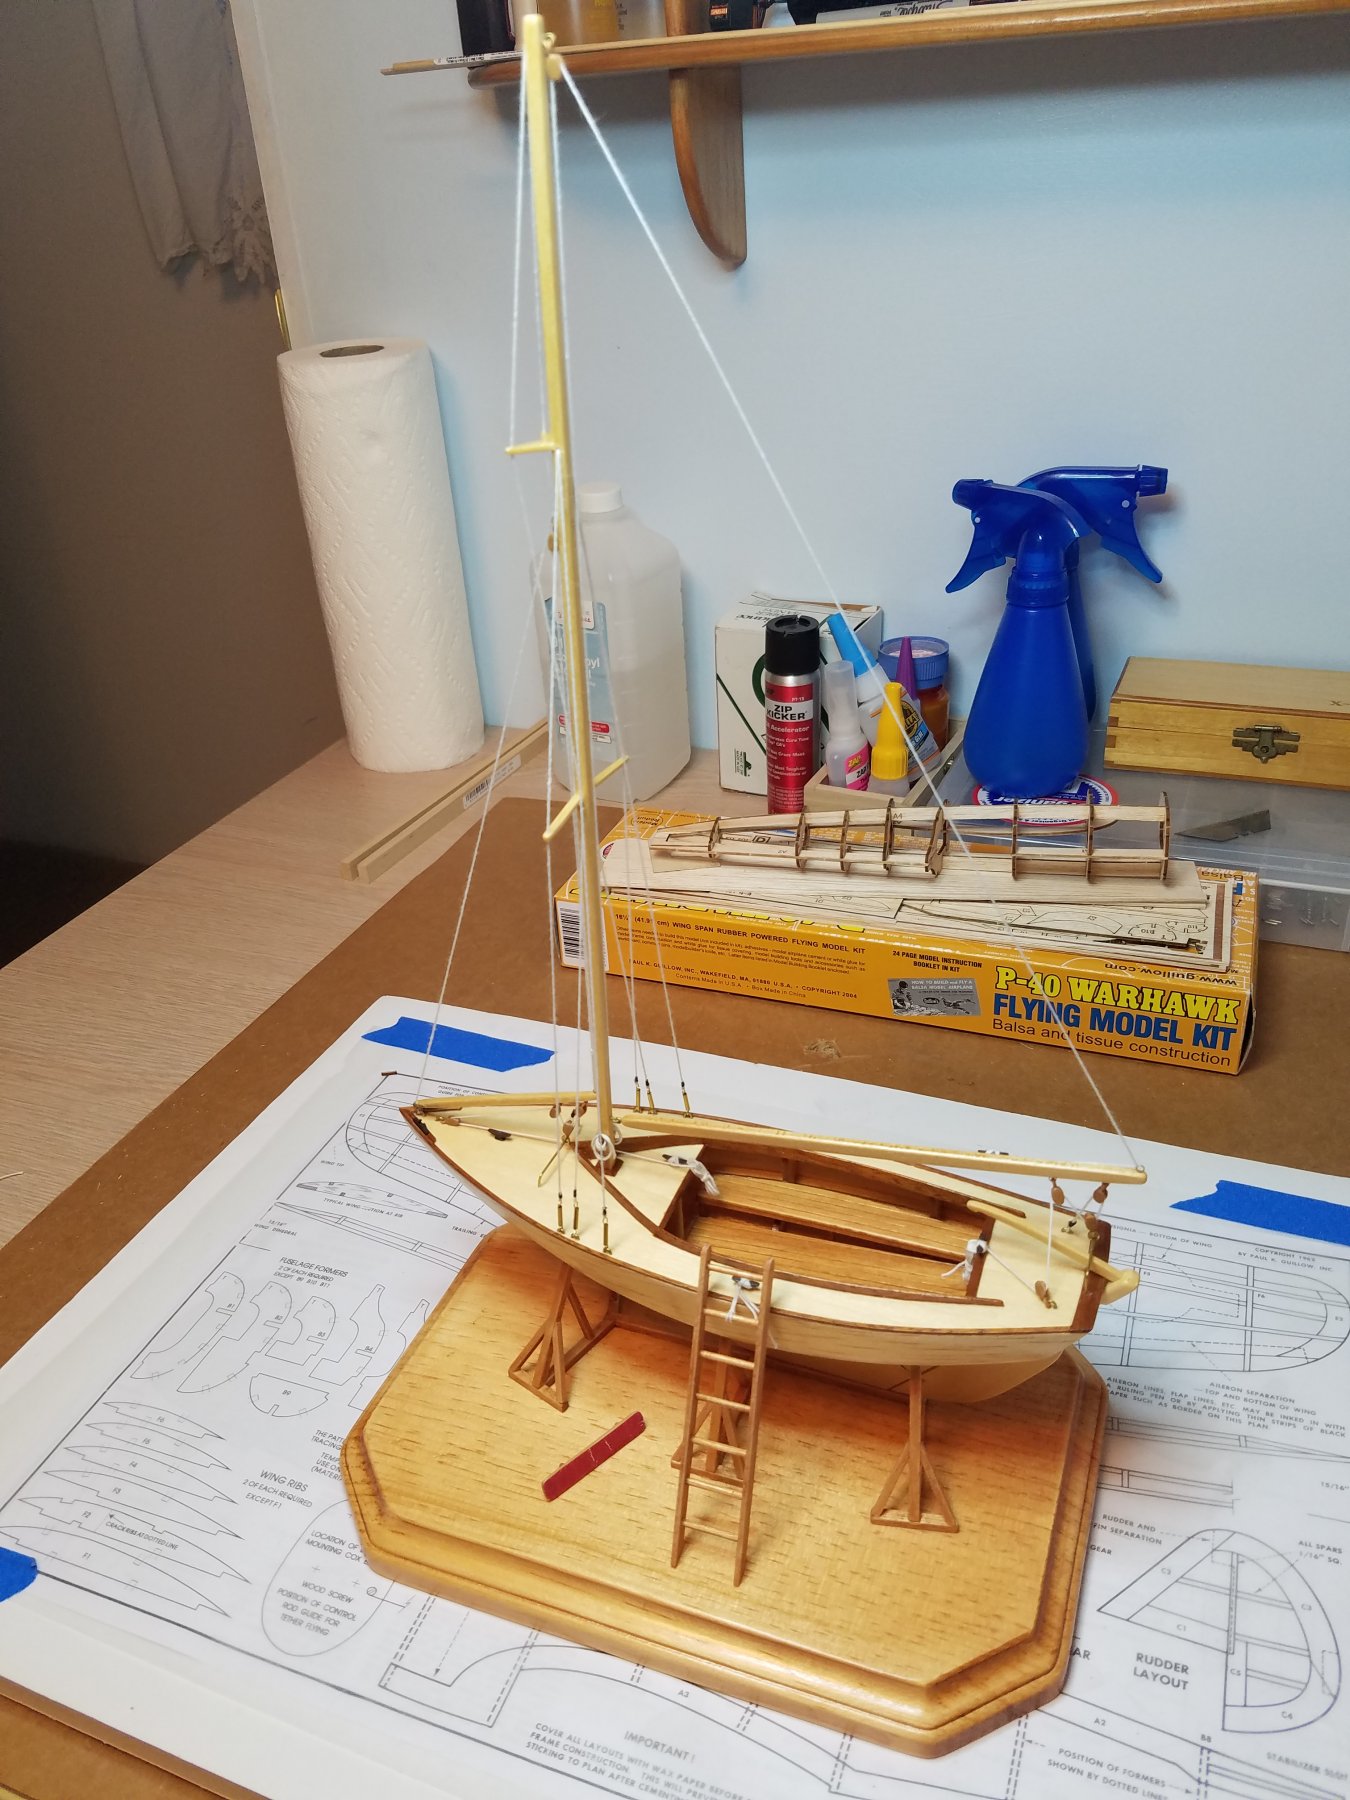
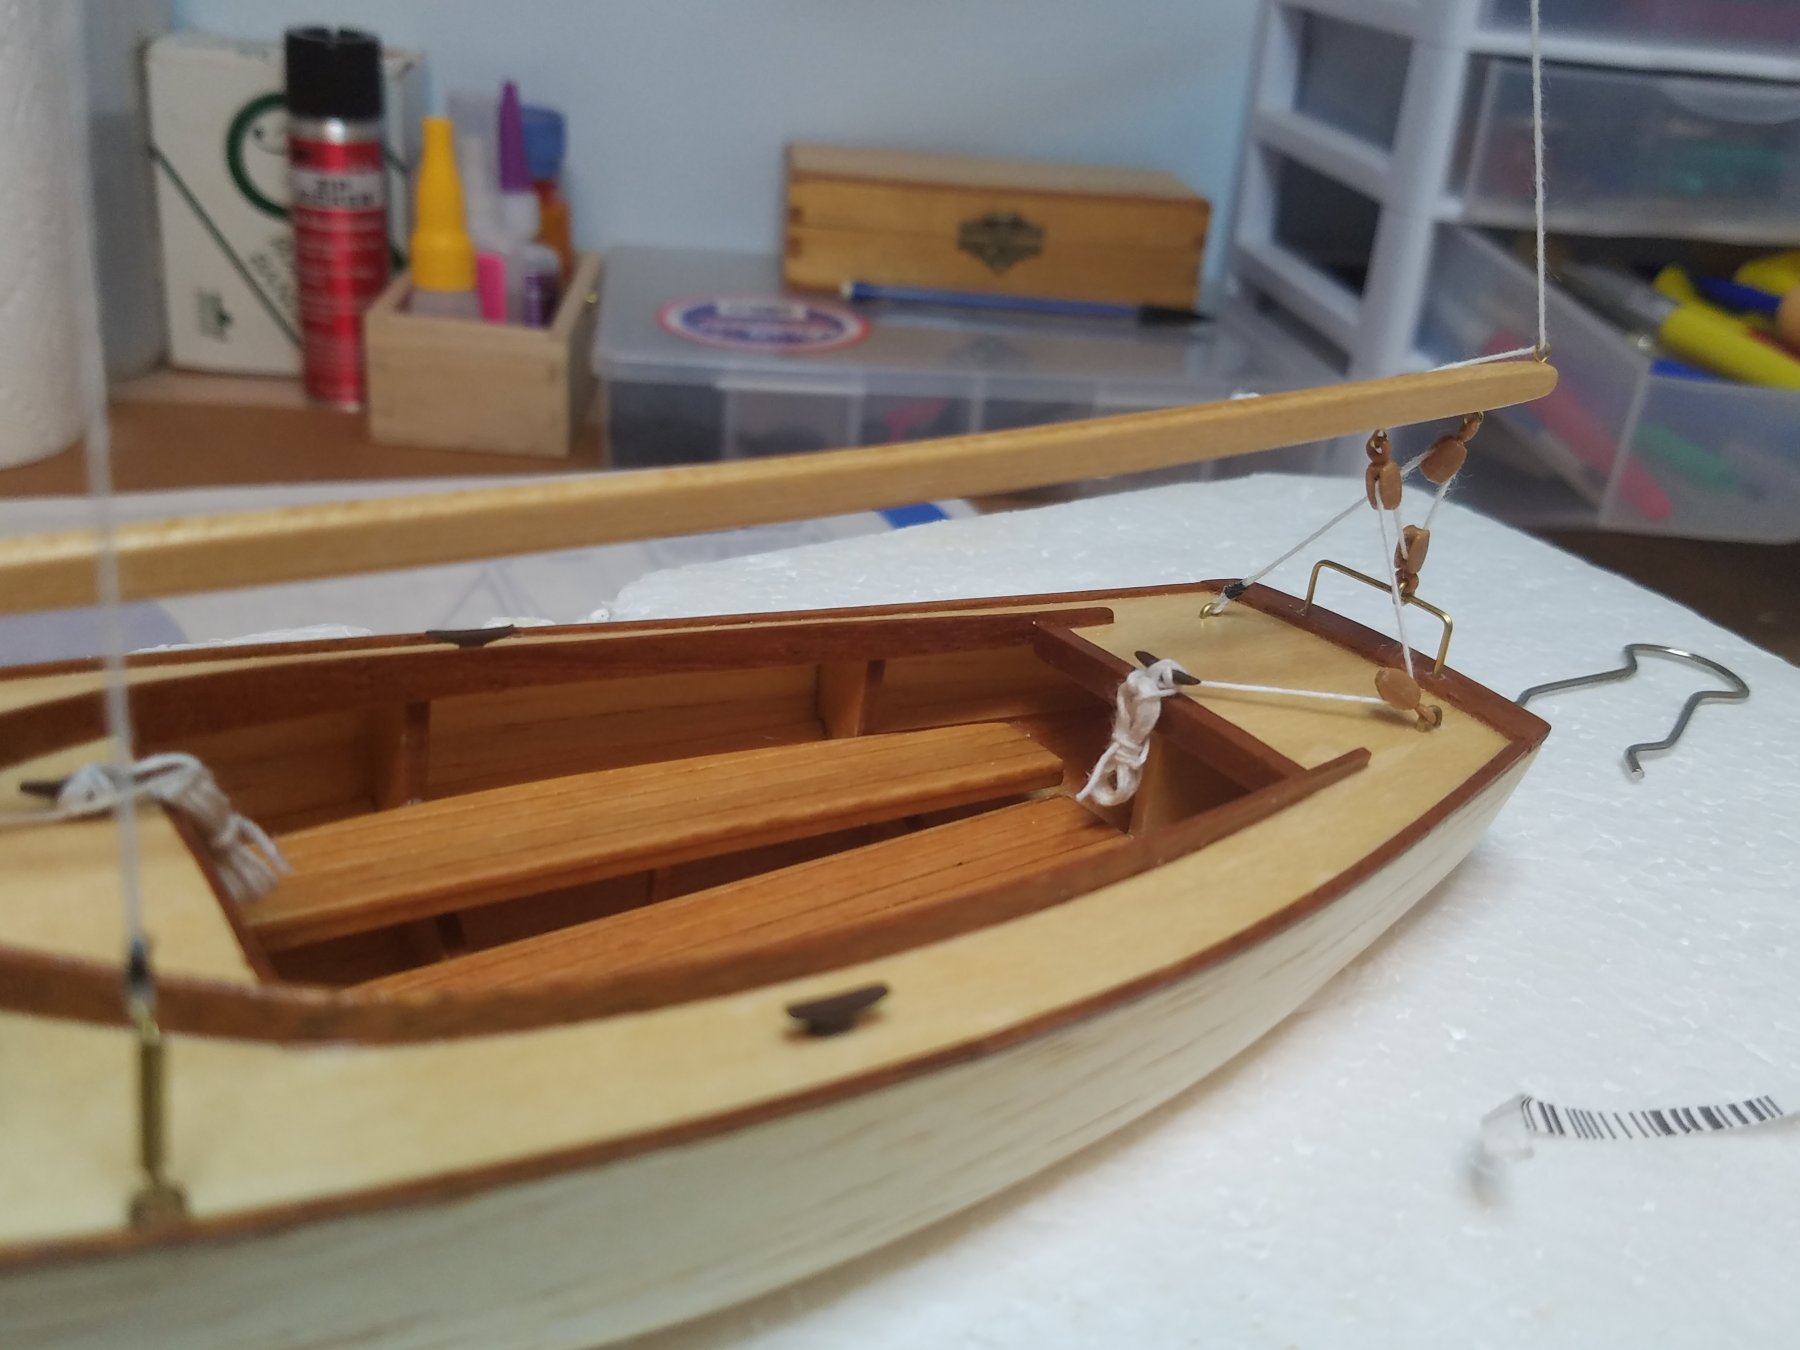
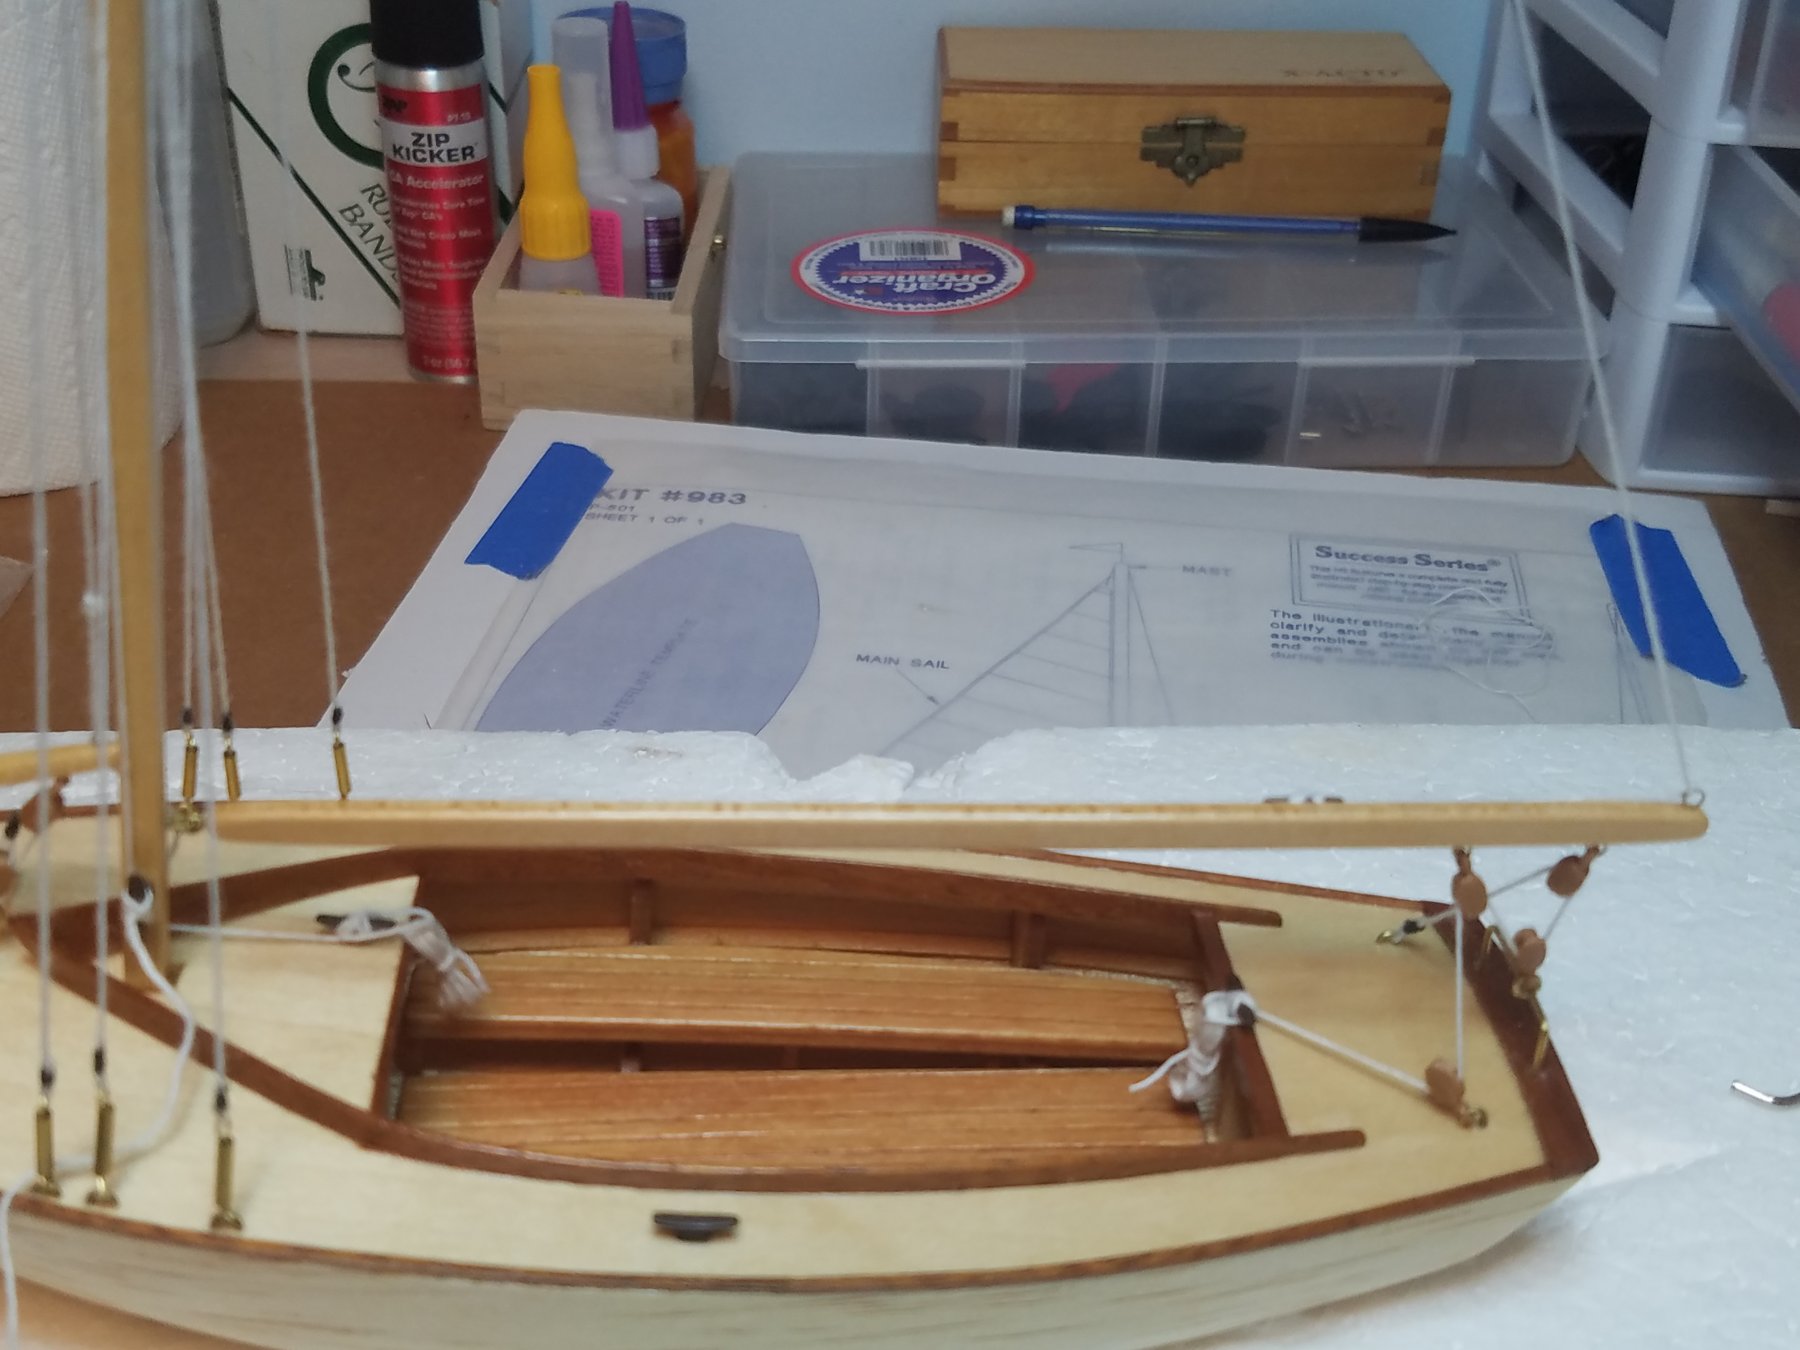
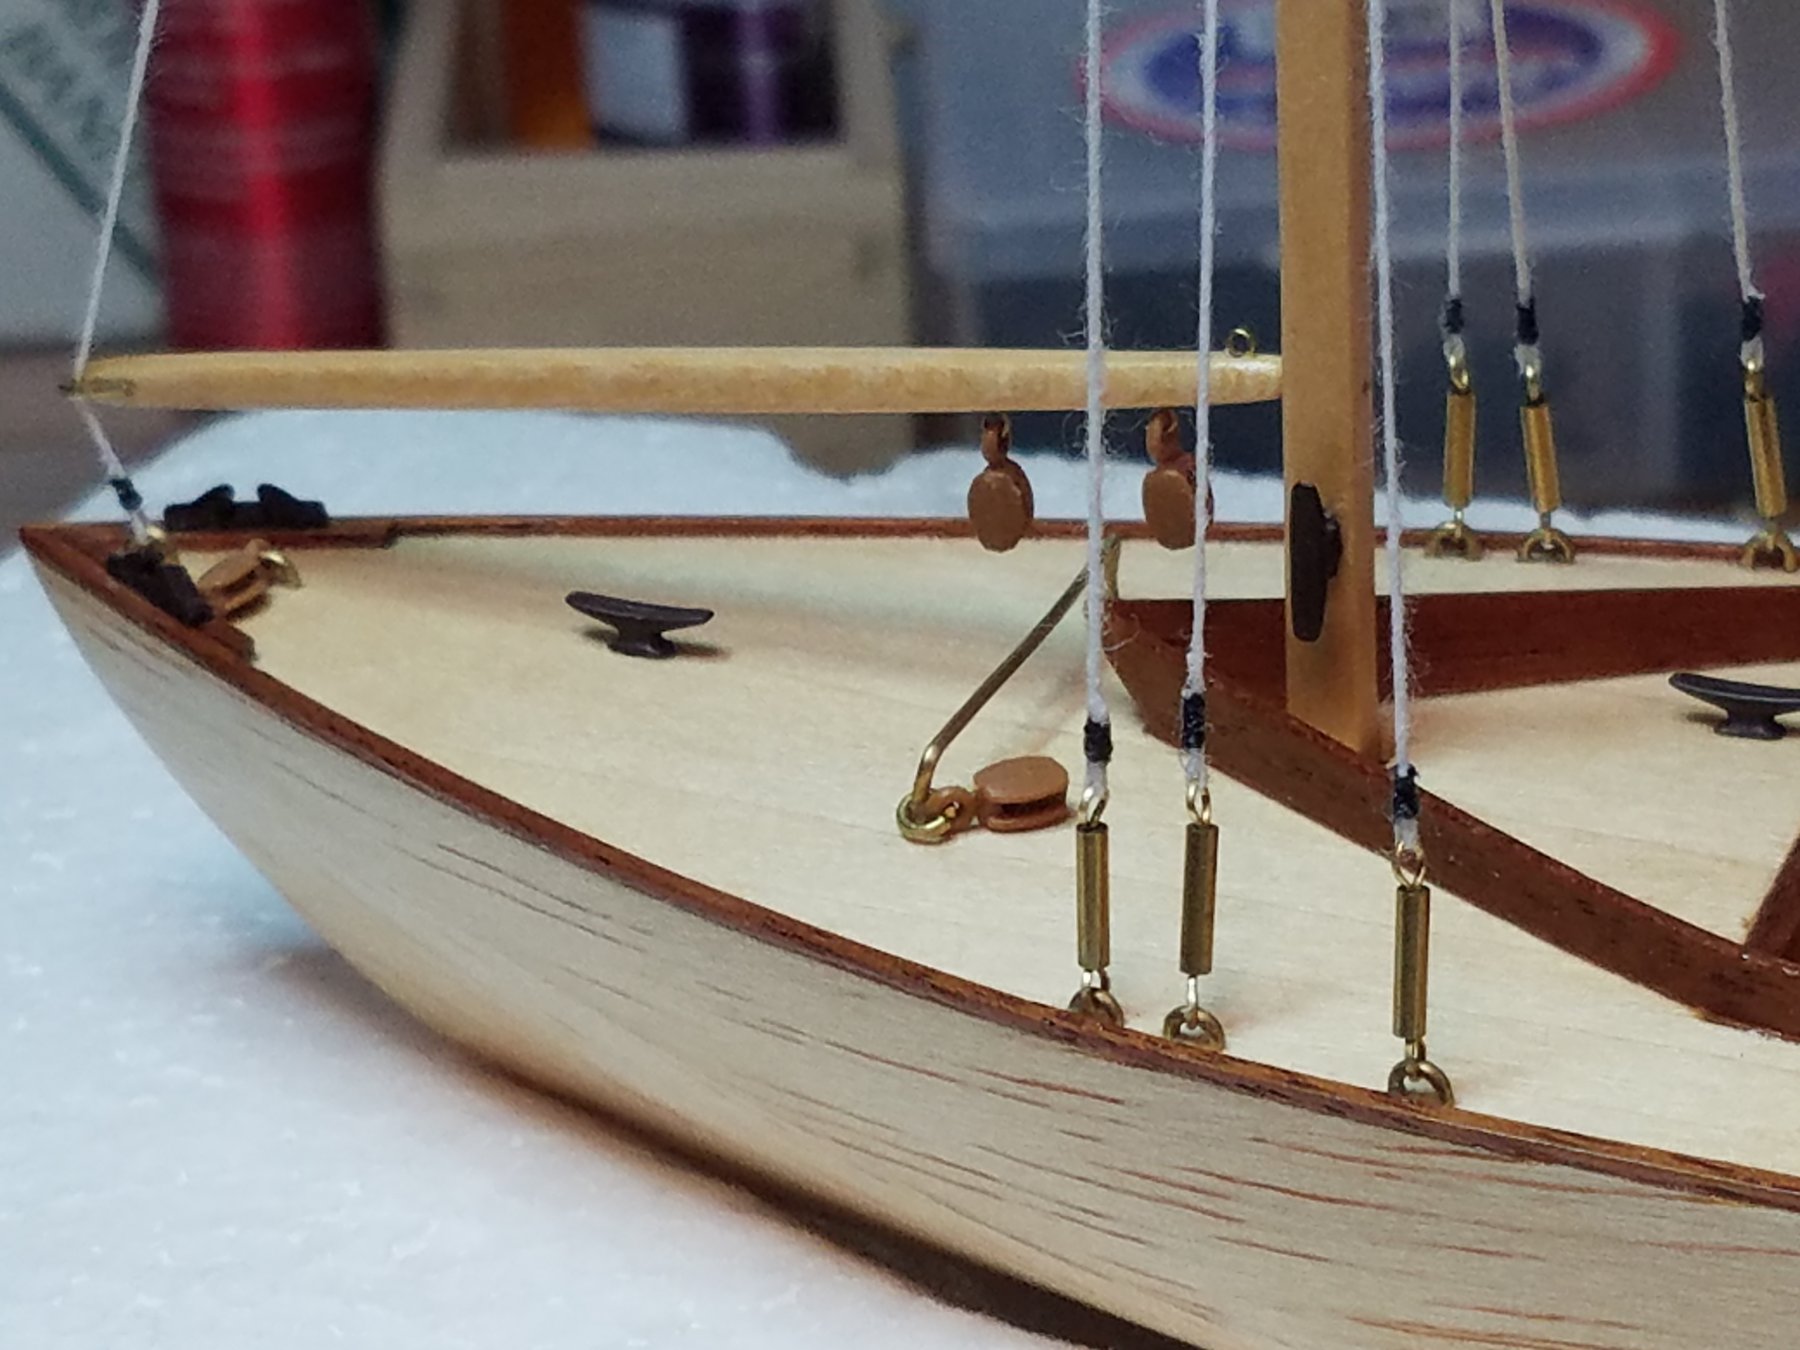
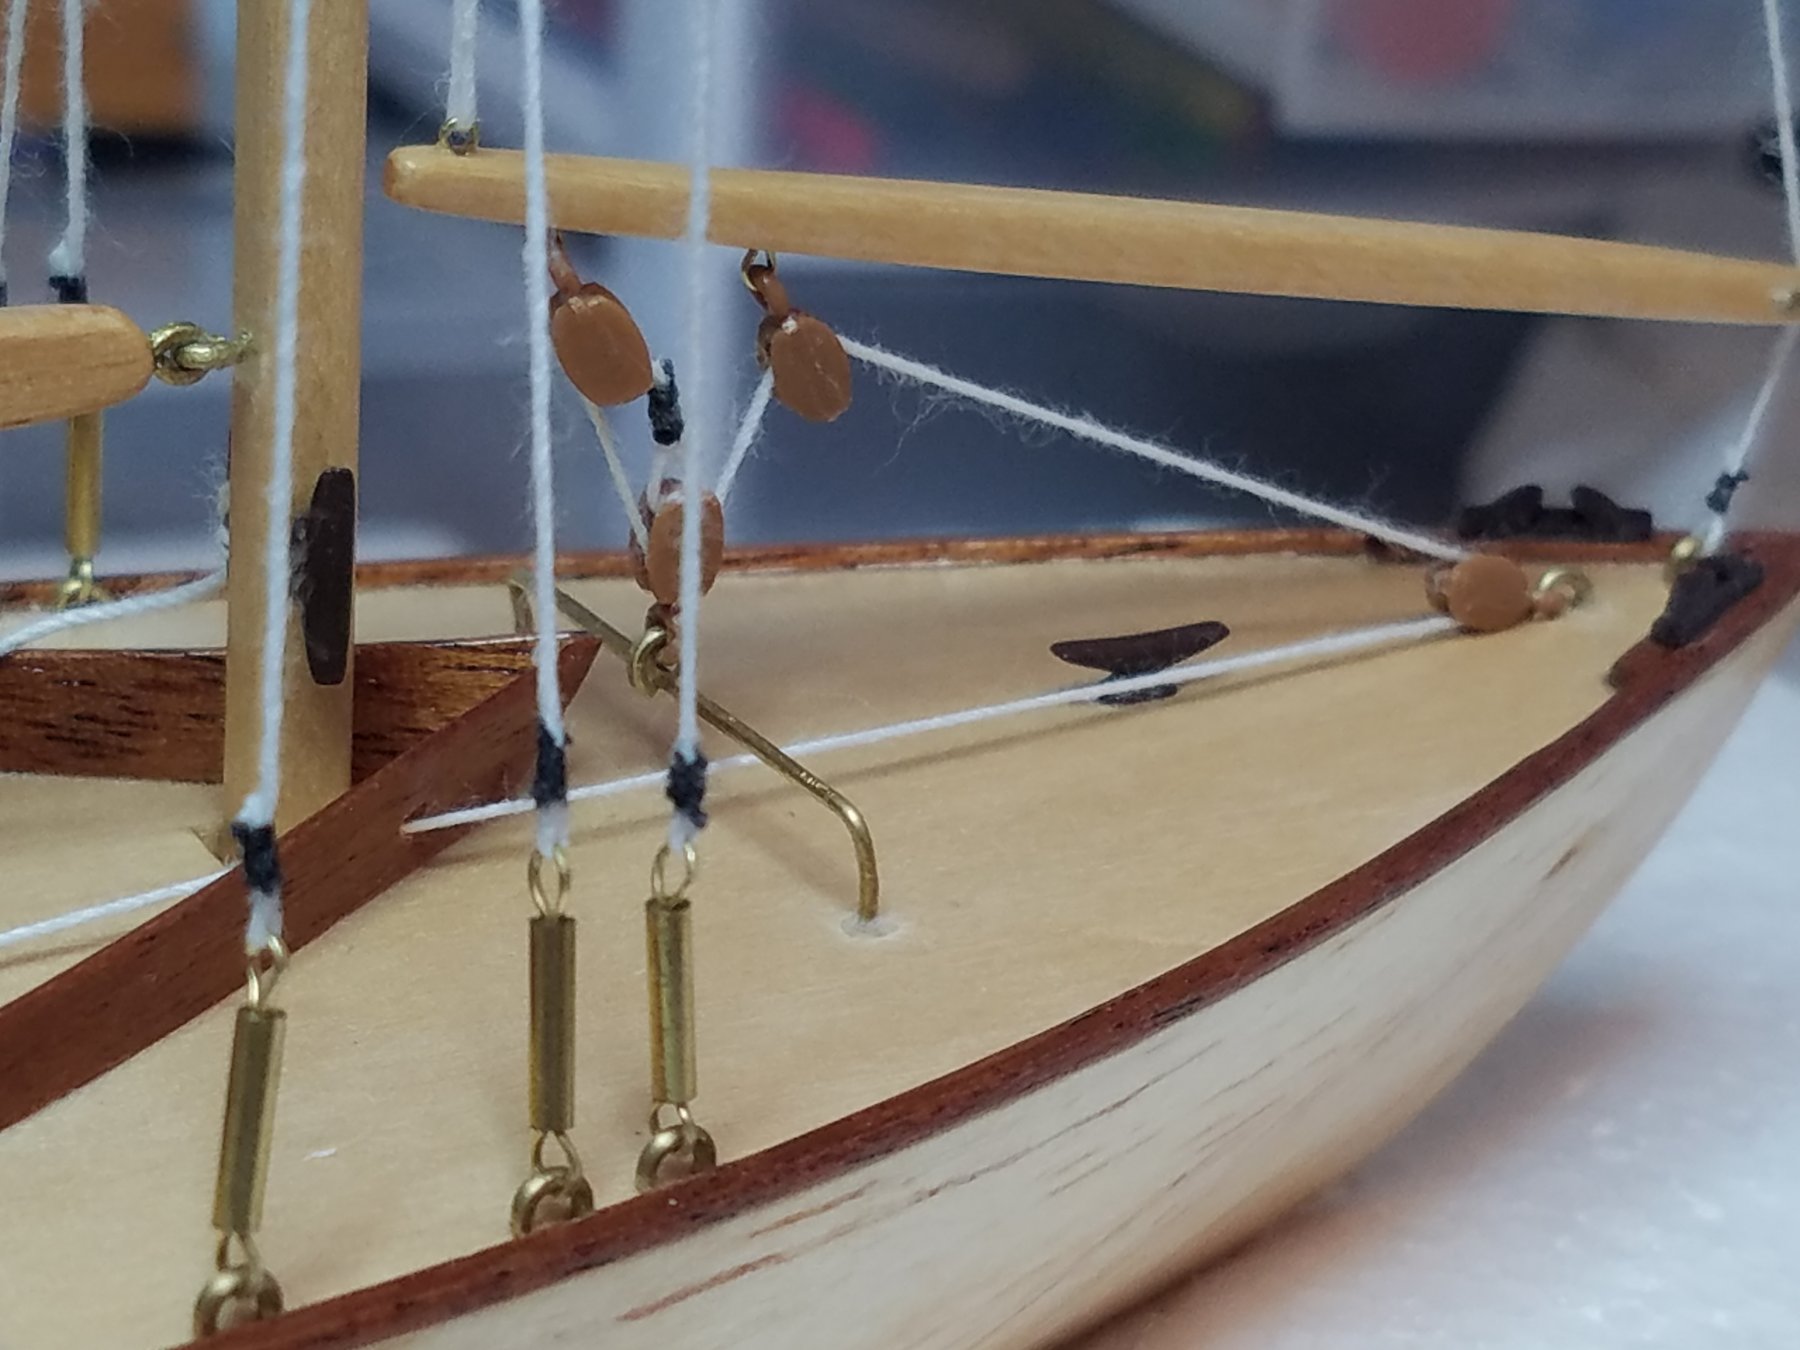
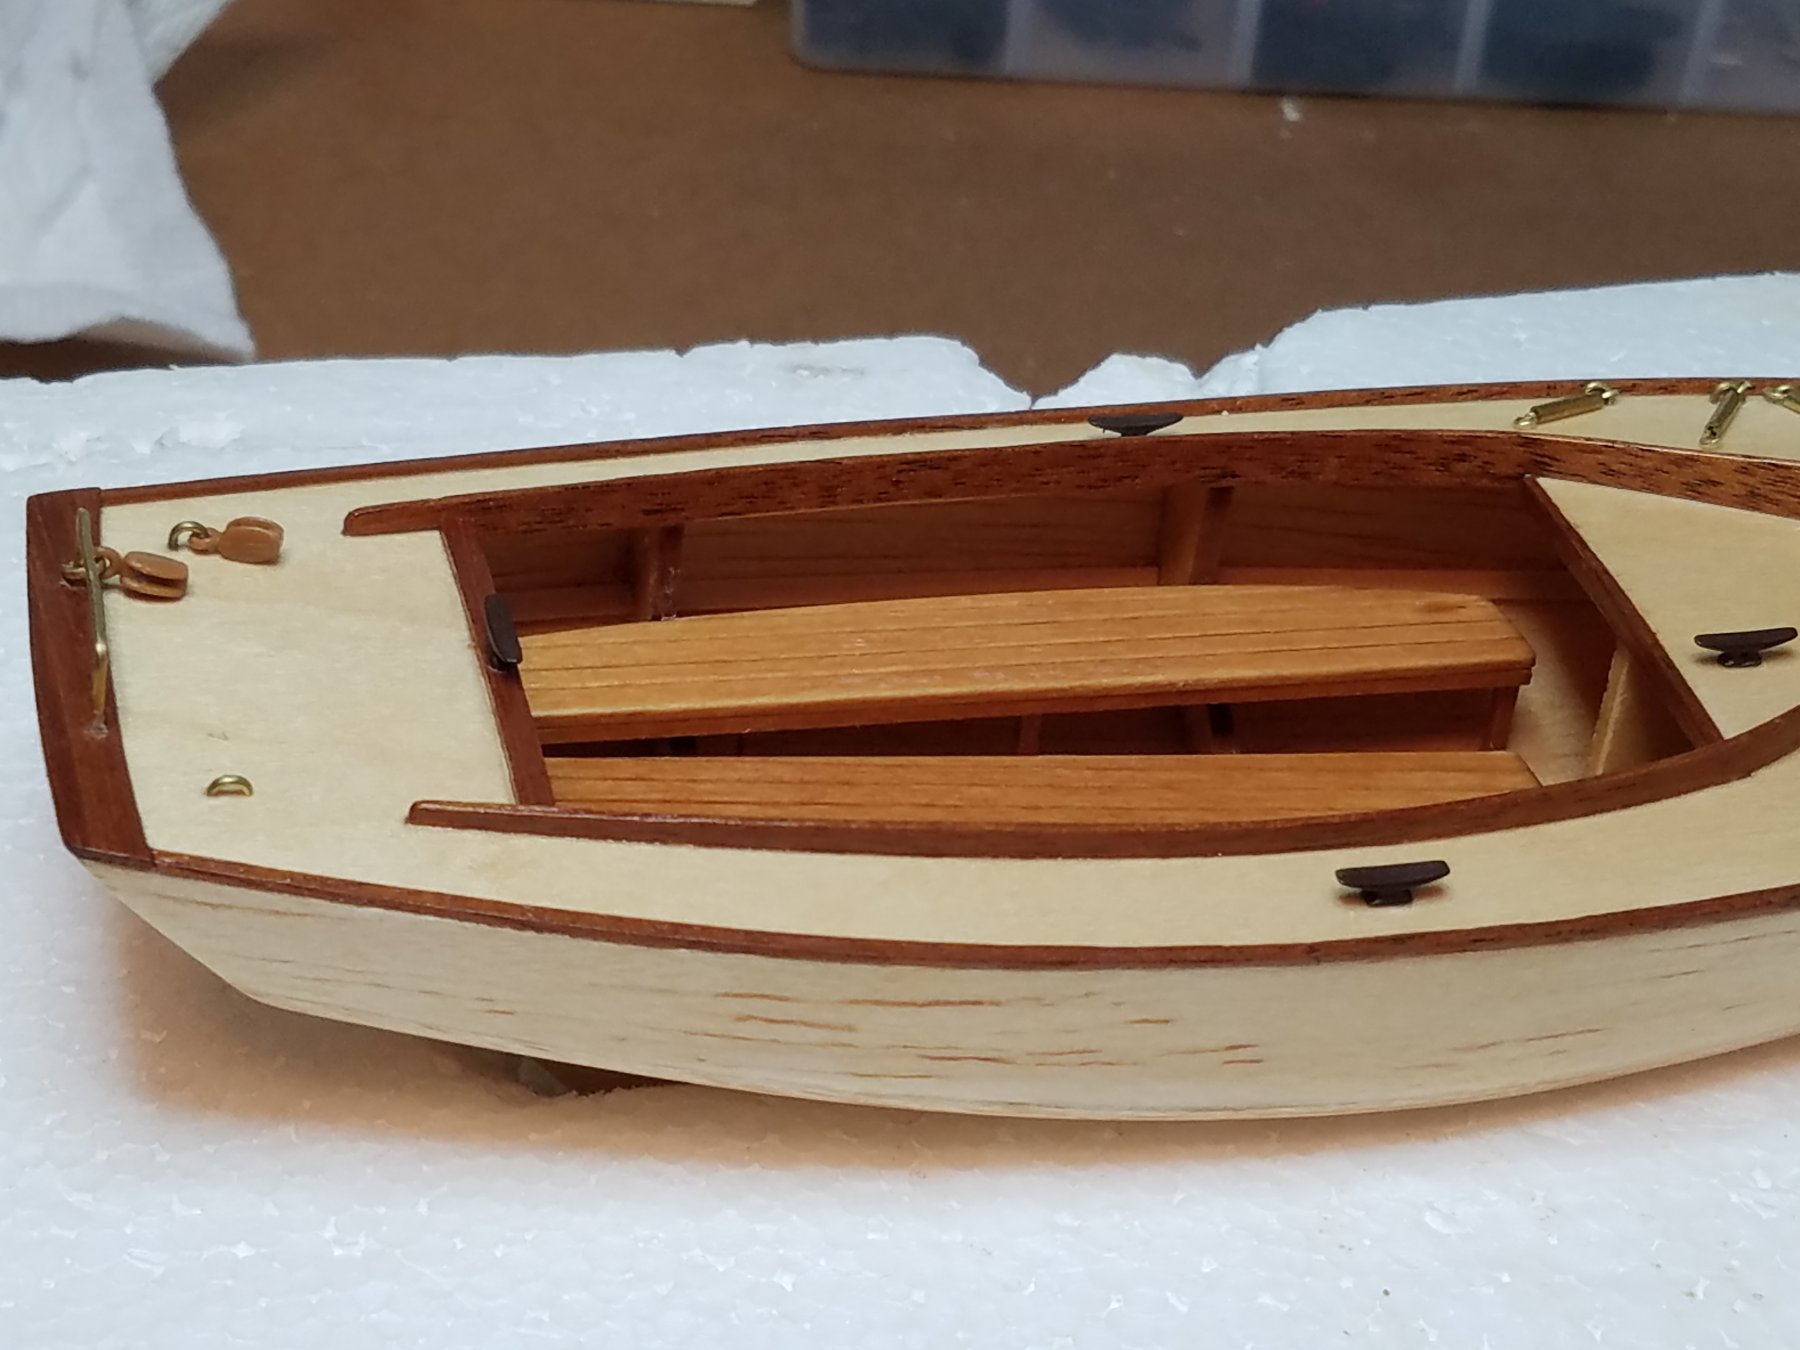
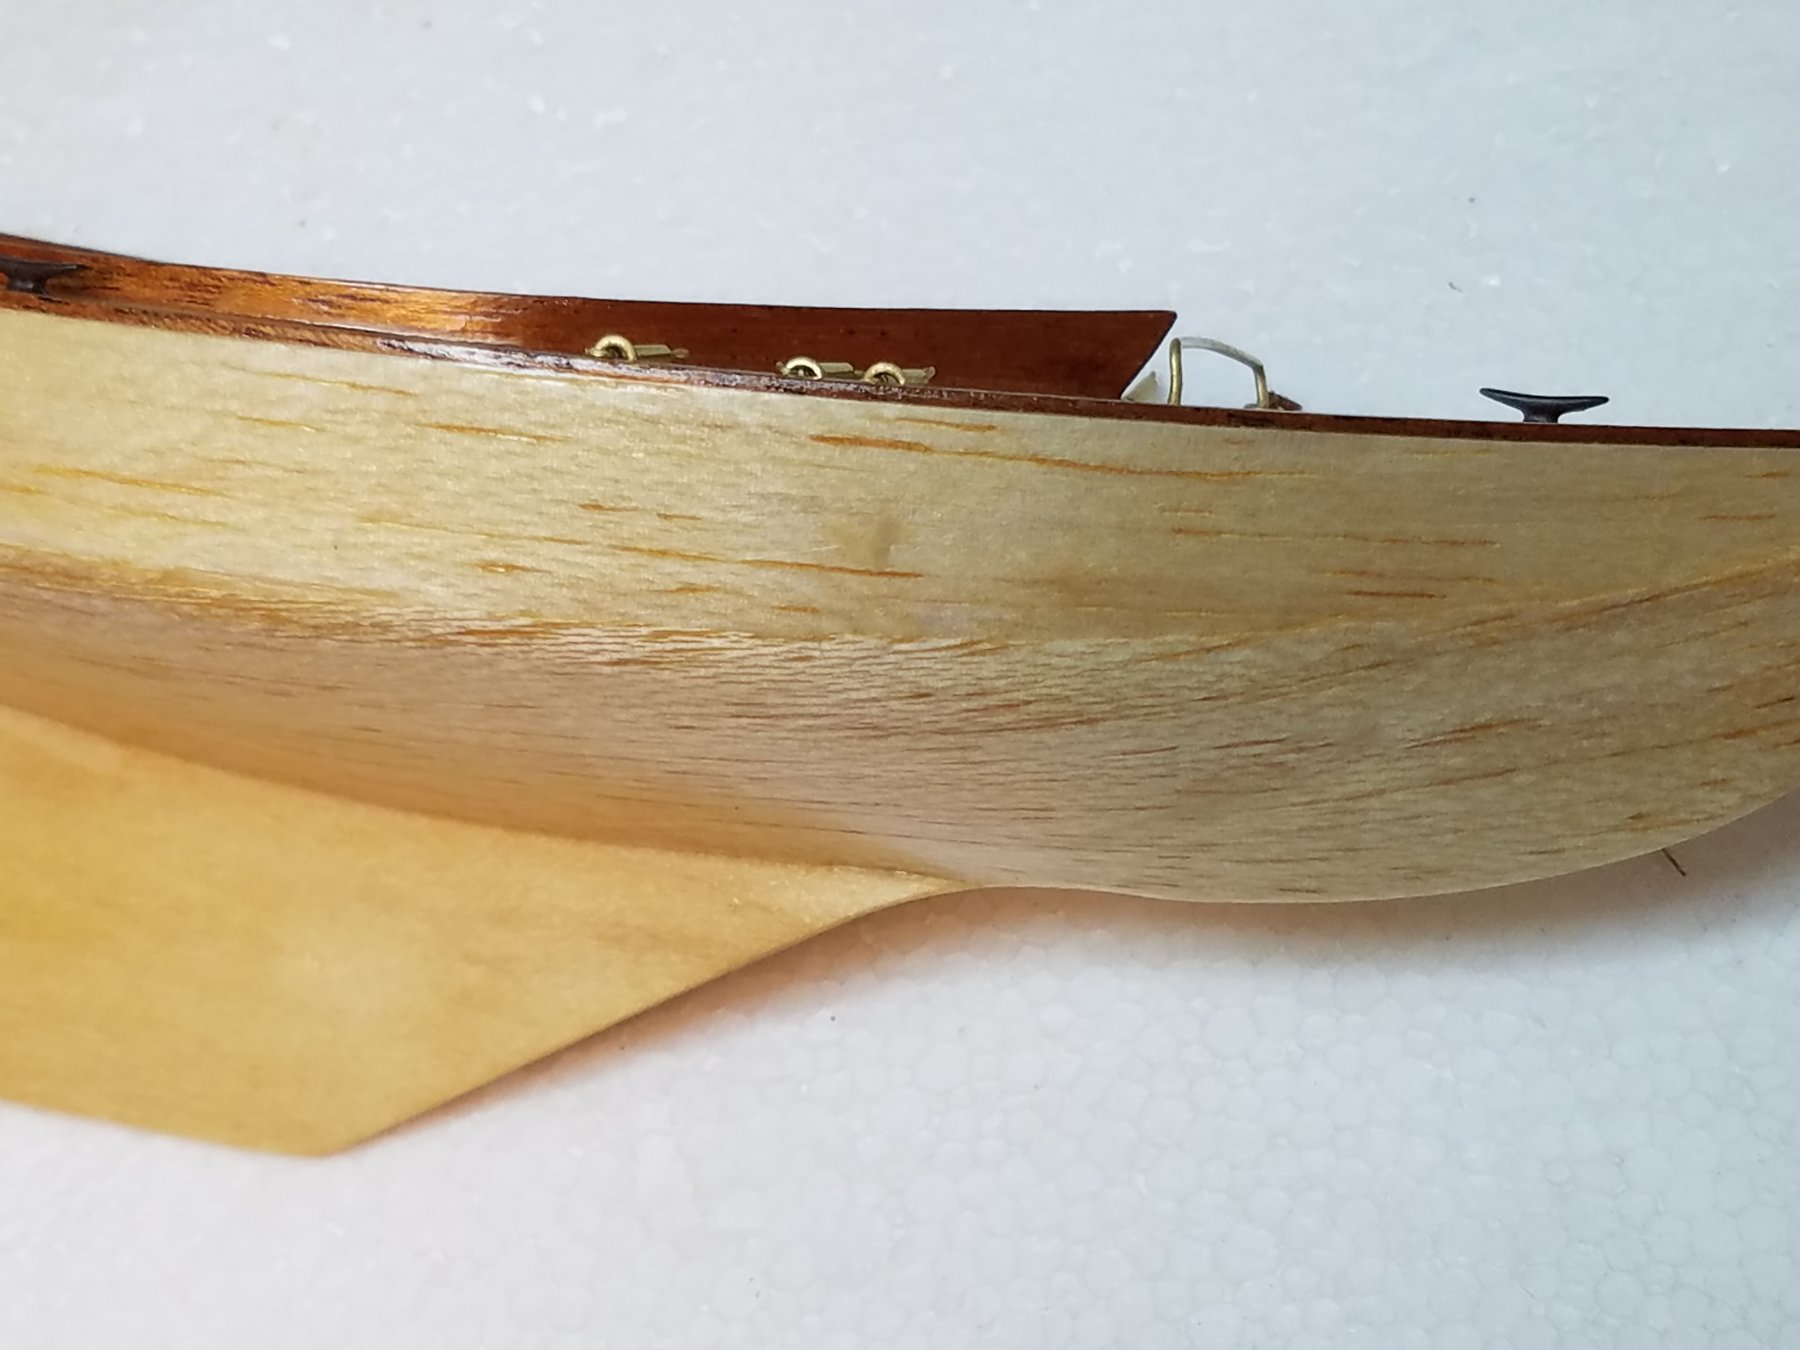
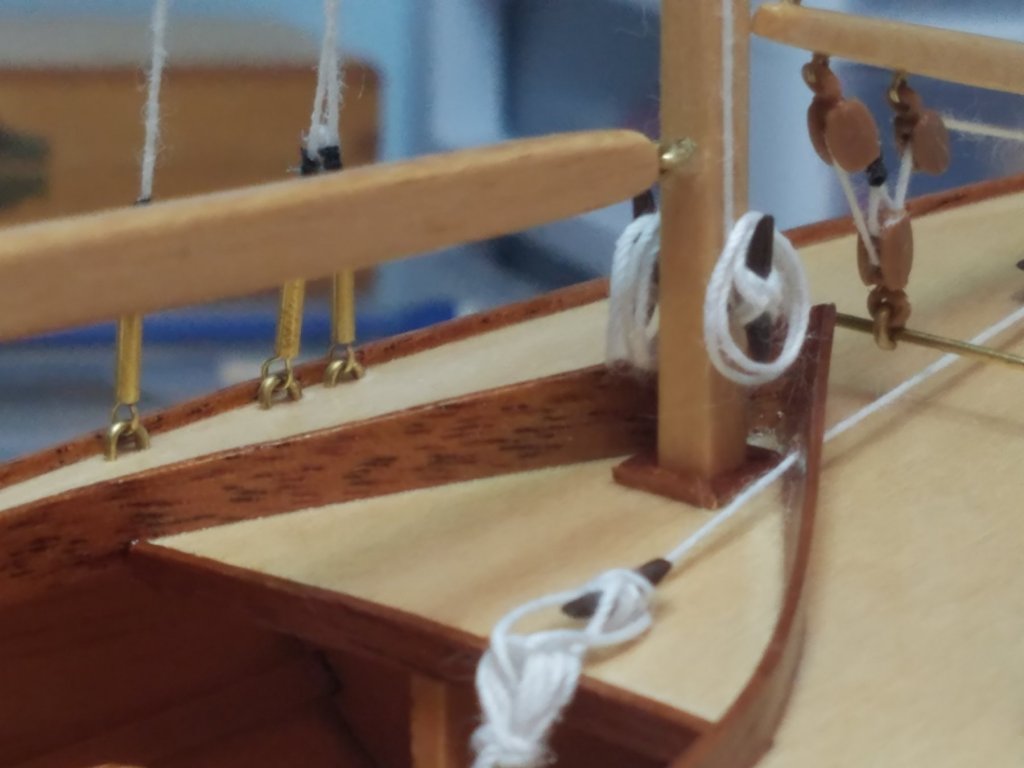
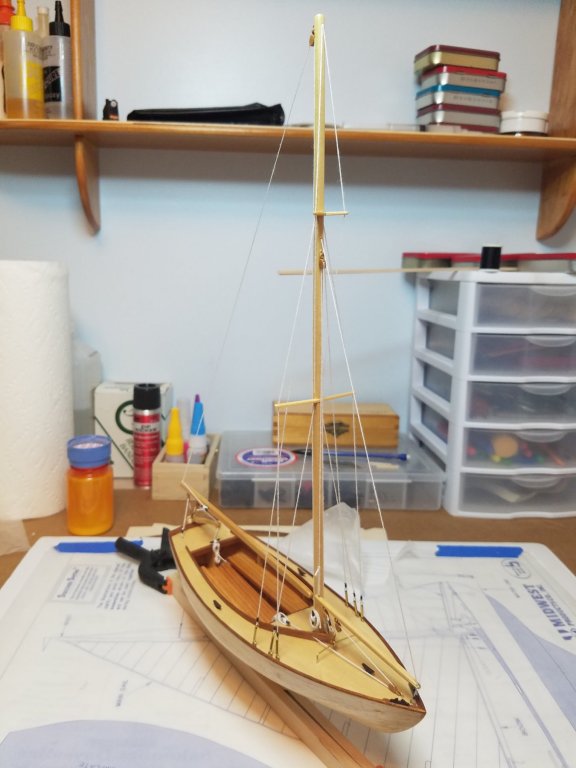
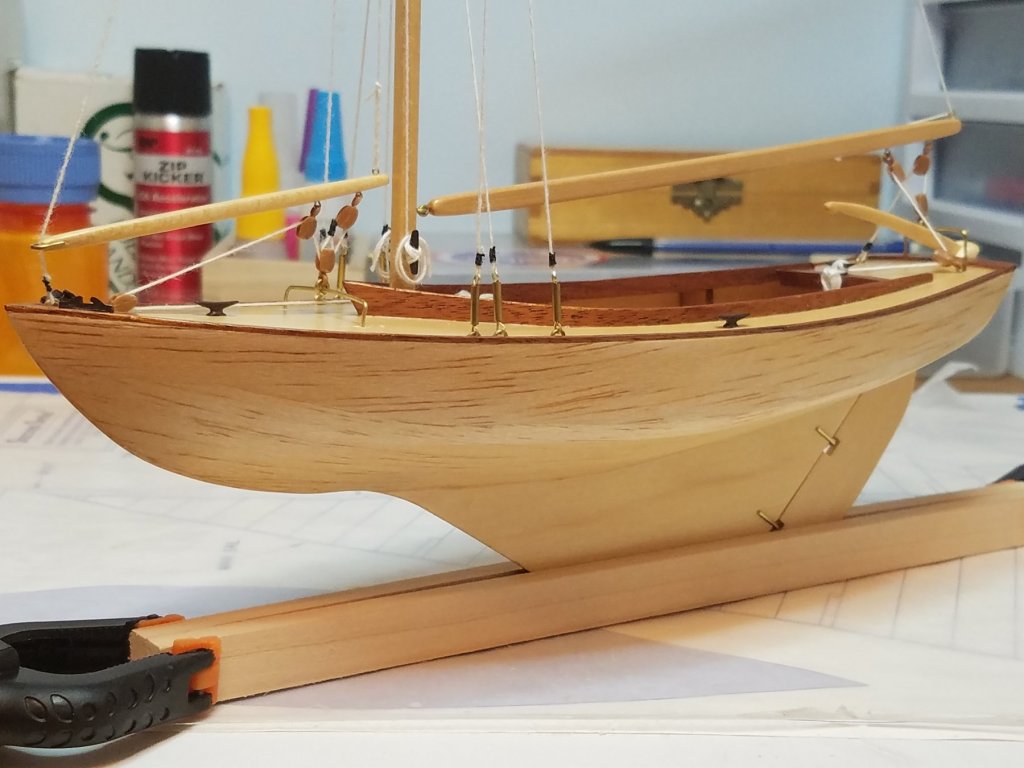
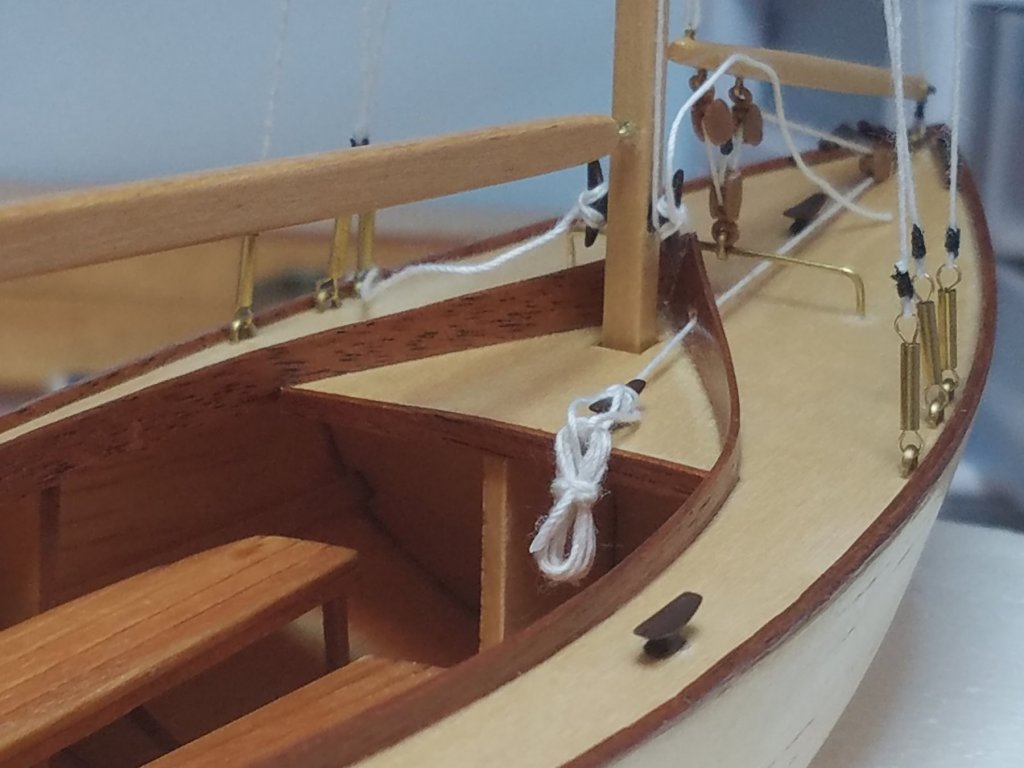
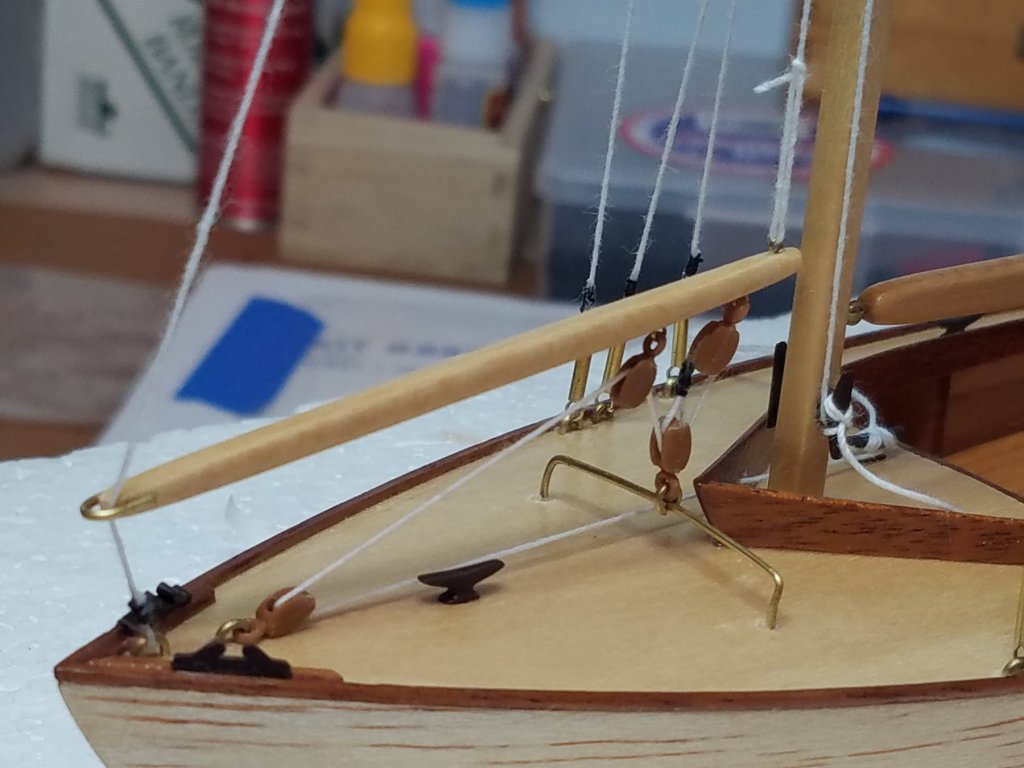
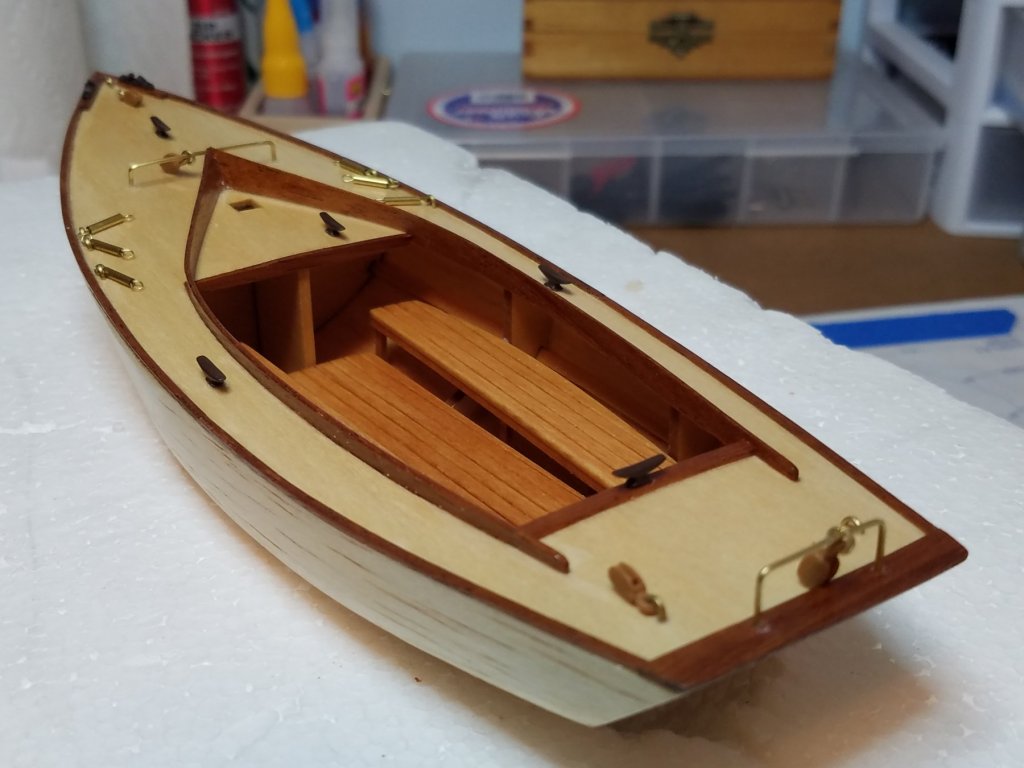
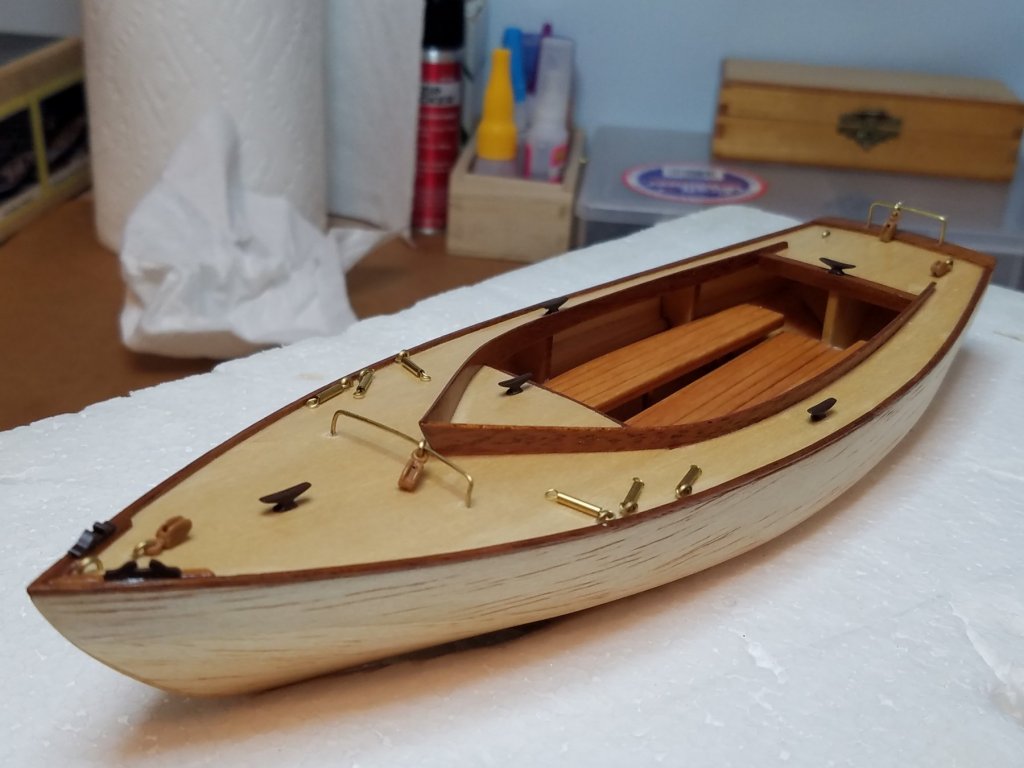
All that was left for tonight was to coil the ends of the main and jib sheets and hang them on their respective cleats. Then using some of the leftover 1/32 x 1/16 mahogany strips I cut for the toe rail, I made an escutcheon plate (I am sure there is a nautical term for it) for the base of the mast. The hole in the deck was quite oversized as you can see in some of the earlier pics. I thought it would give it more of a finished look. I think I am done with the actual boat, now I need to build a stand. I really hate the kit supplied one. I have an idea in mind I will start on that tomorrow night.

- 36 replies
-
- 6
-
-
- sakonnet daysailer
- Midwest Products
- (and 2 more)
-
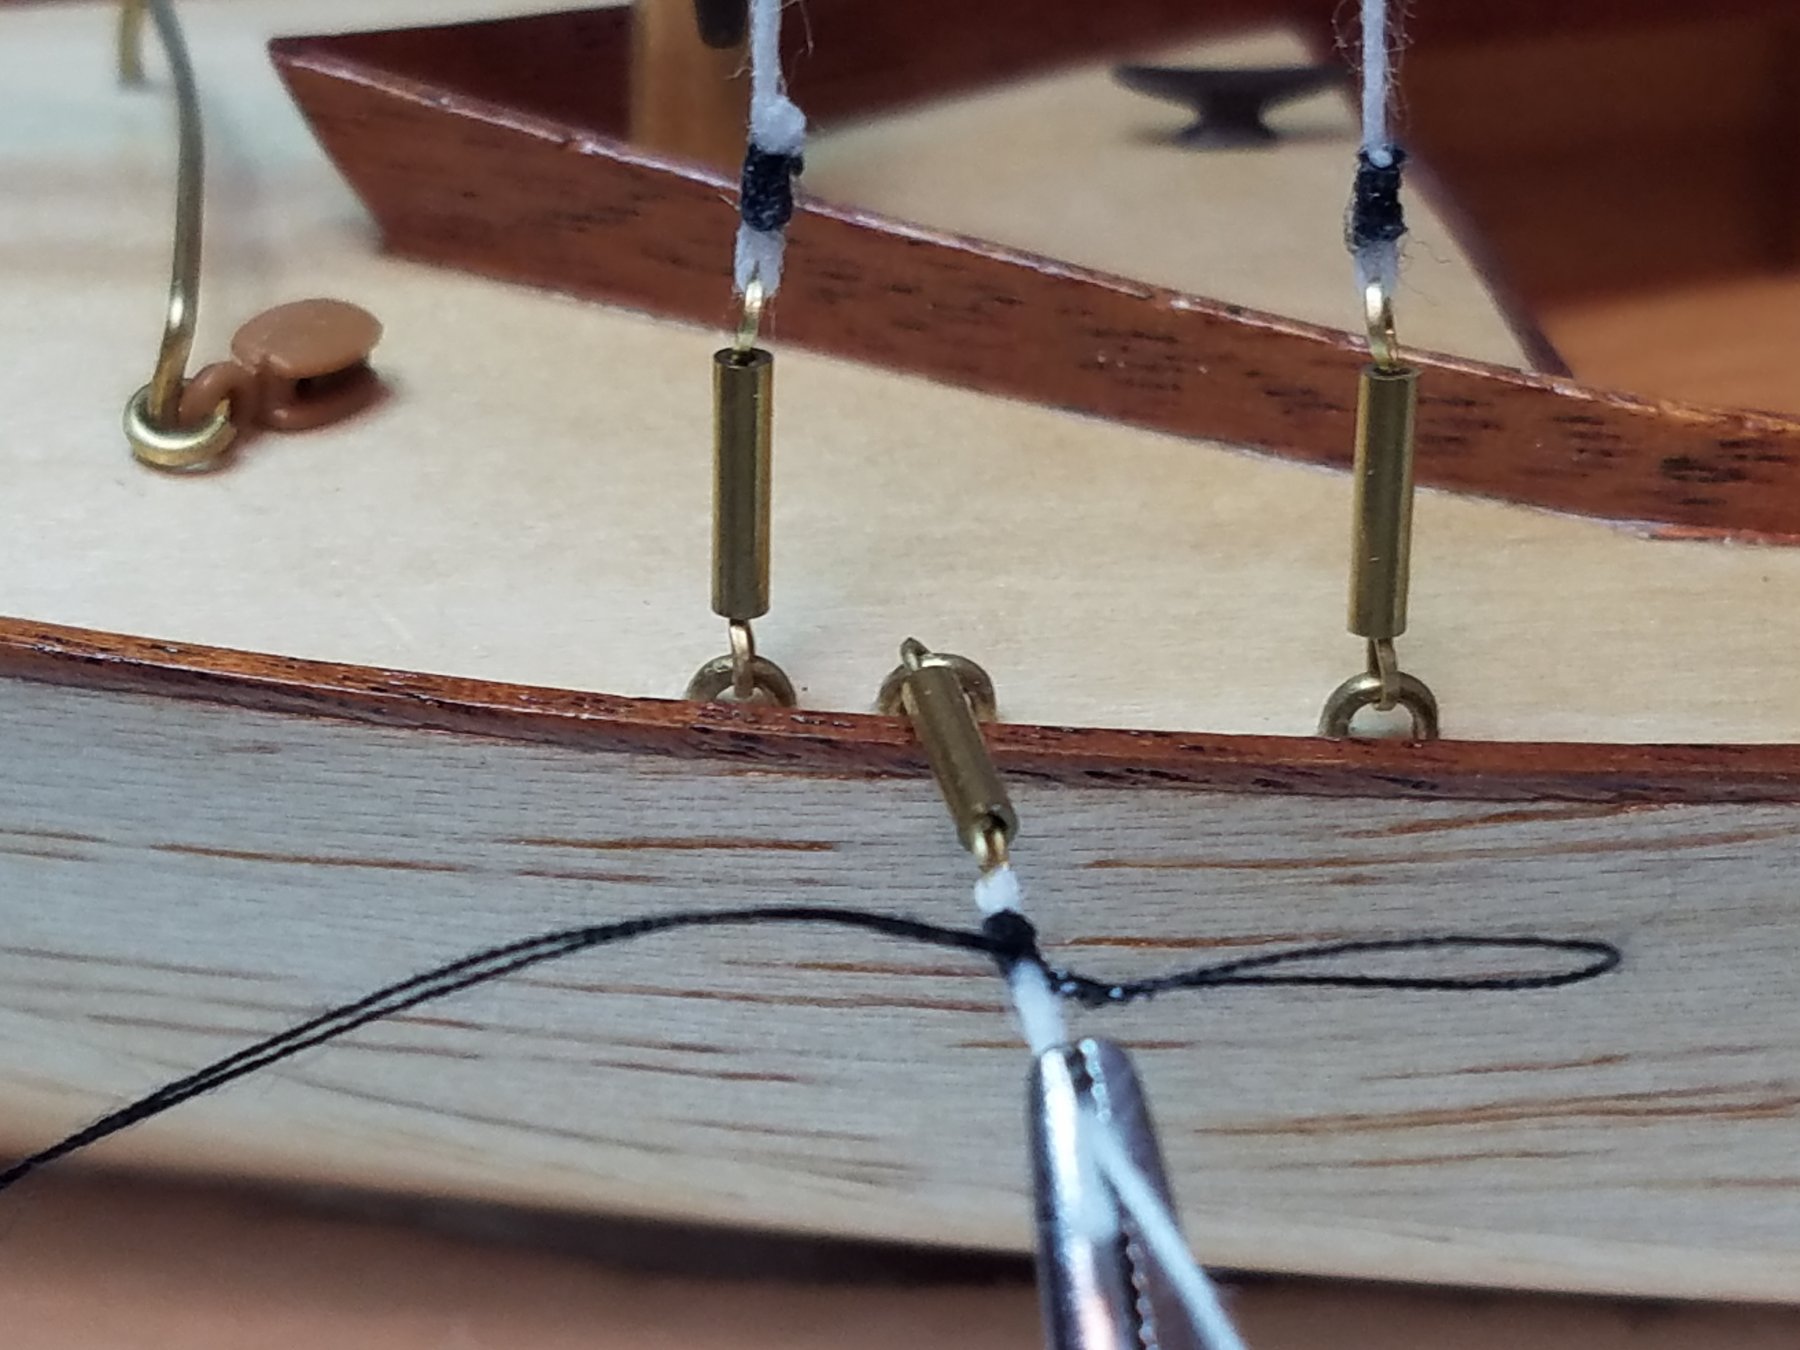
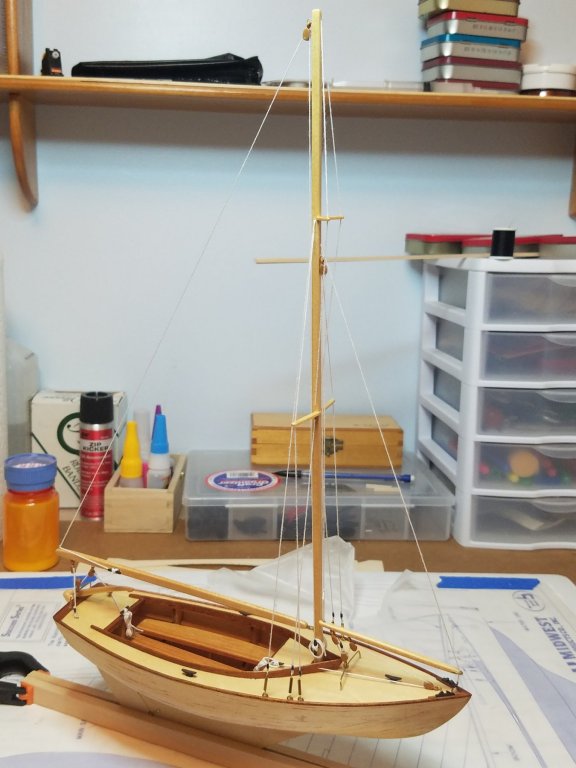
Let me start out by saying that not only am I new to this wonderful hobby but also to forums in general and build logs in particular. As such I am not familiar with forum etiquette when it comes to acknowledging all those who have taken the time to post likes to this thread. I do appreciate all the encouragement and support, thanks to all of you. I would ask only that you forgive my apparent rudeness and please write it off to an old mans ignorance. Now back to work. Not much accomplished tonight but the little that I did wore me out. Finished the last of the rigging. Then tried my hand at making and belaying a couple of coils of rope. Wow that will test your nerves as well as your commitment to finishing a build. But I muddled through and had some minor success anyway. Still not sure how to treat the end of the main and jib sheets. Should they just be coiled on the deck? On a different note. Since this build is winding down I am thinking of making a road trip down to model ship ways on Friday to grab my next build. If there is anyone in the area who wants to join me or if I can relay a message or pick up any small items please let me know.


- 36 replies
-
- 8
-
-
- sakonnet daysailer
- Midwest Products
- (and 2 more)
-
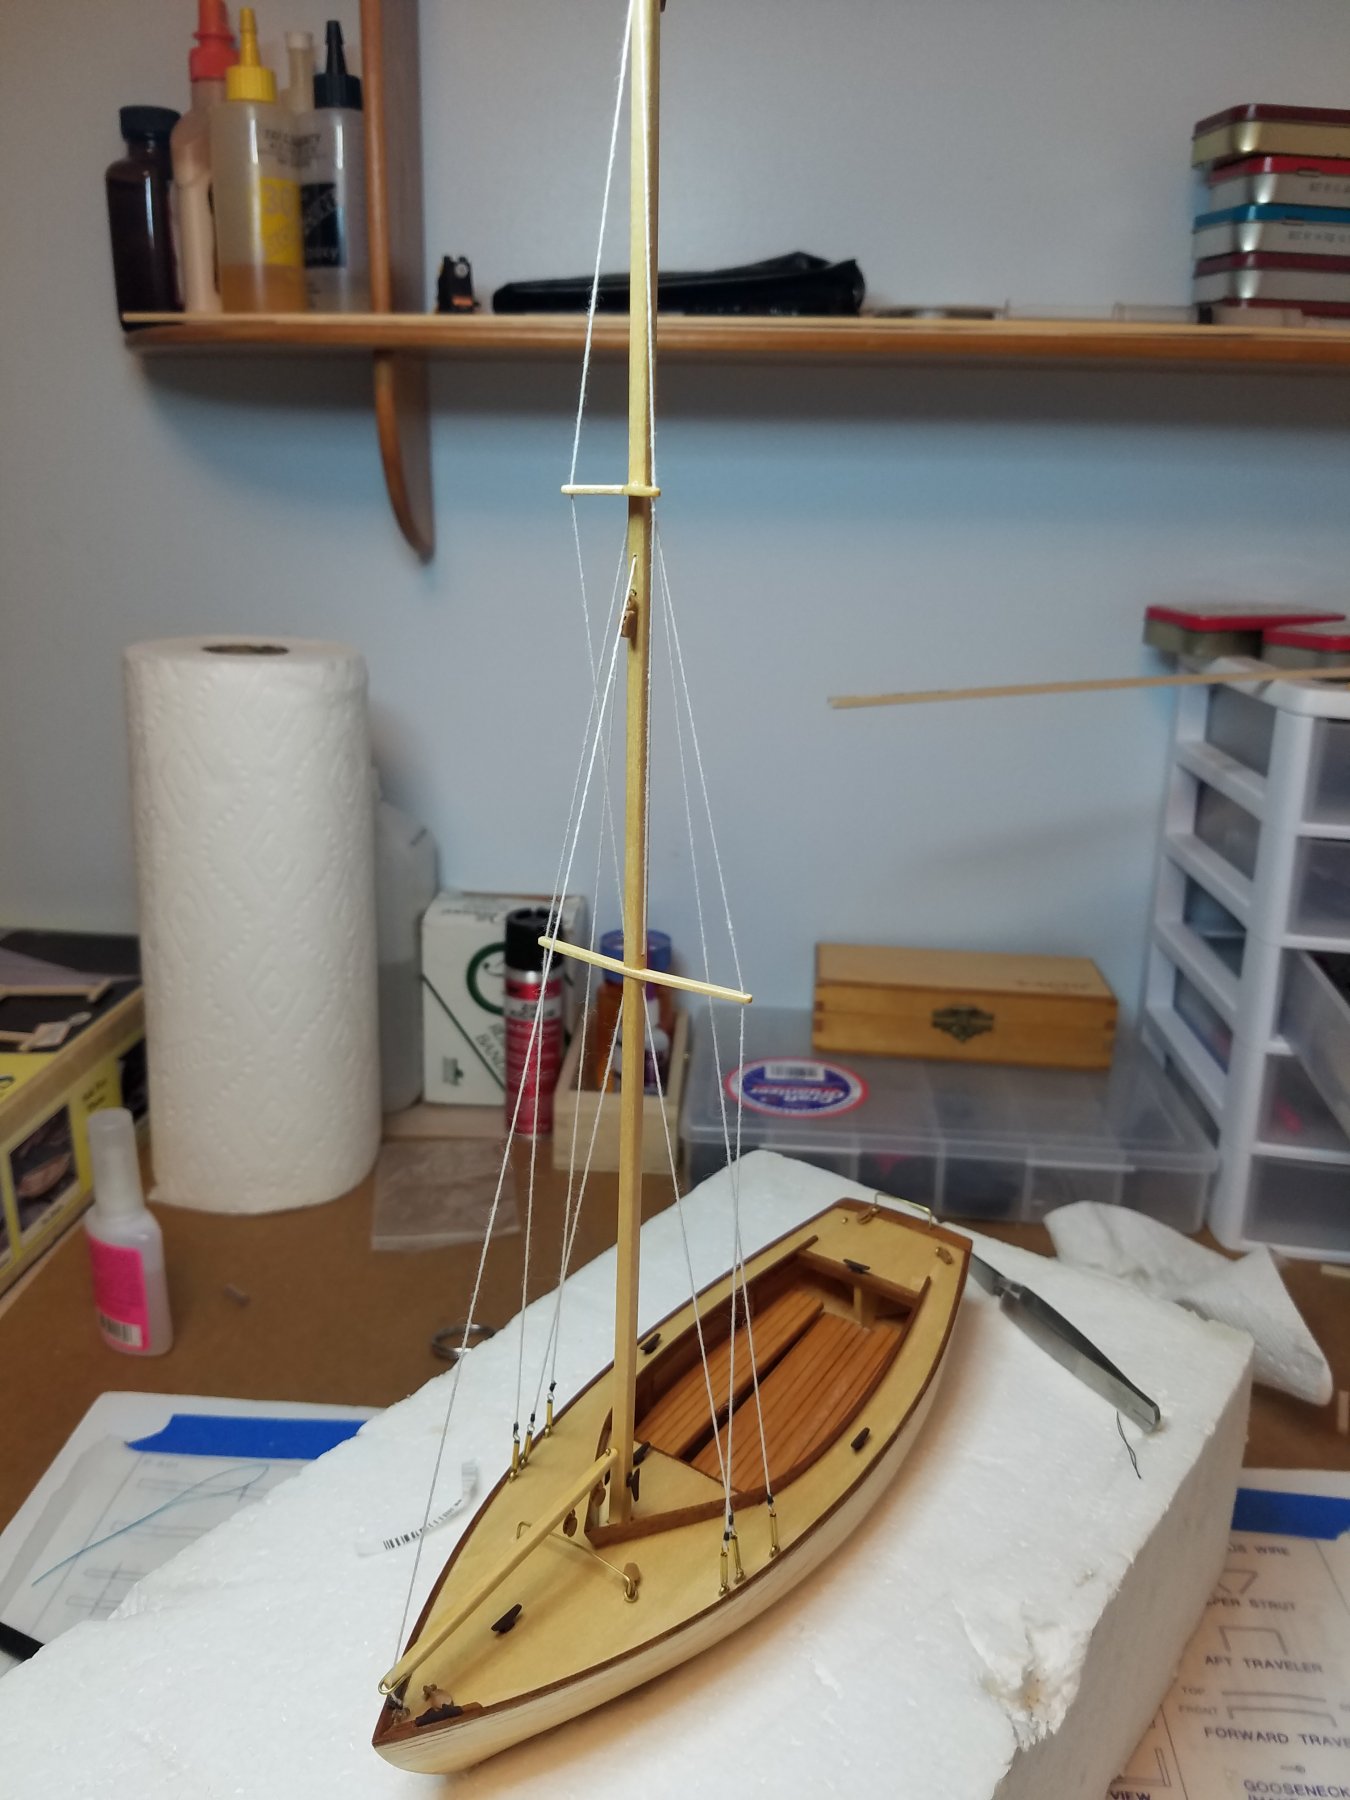
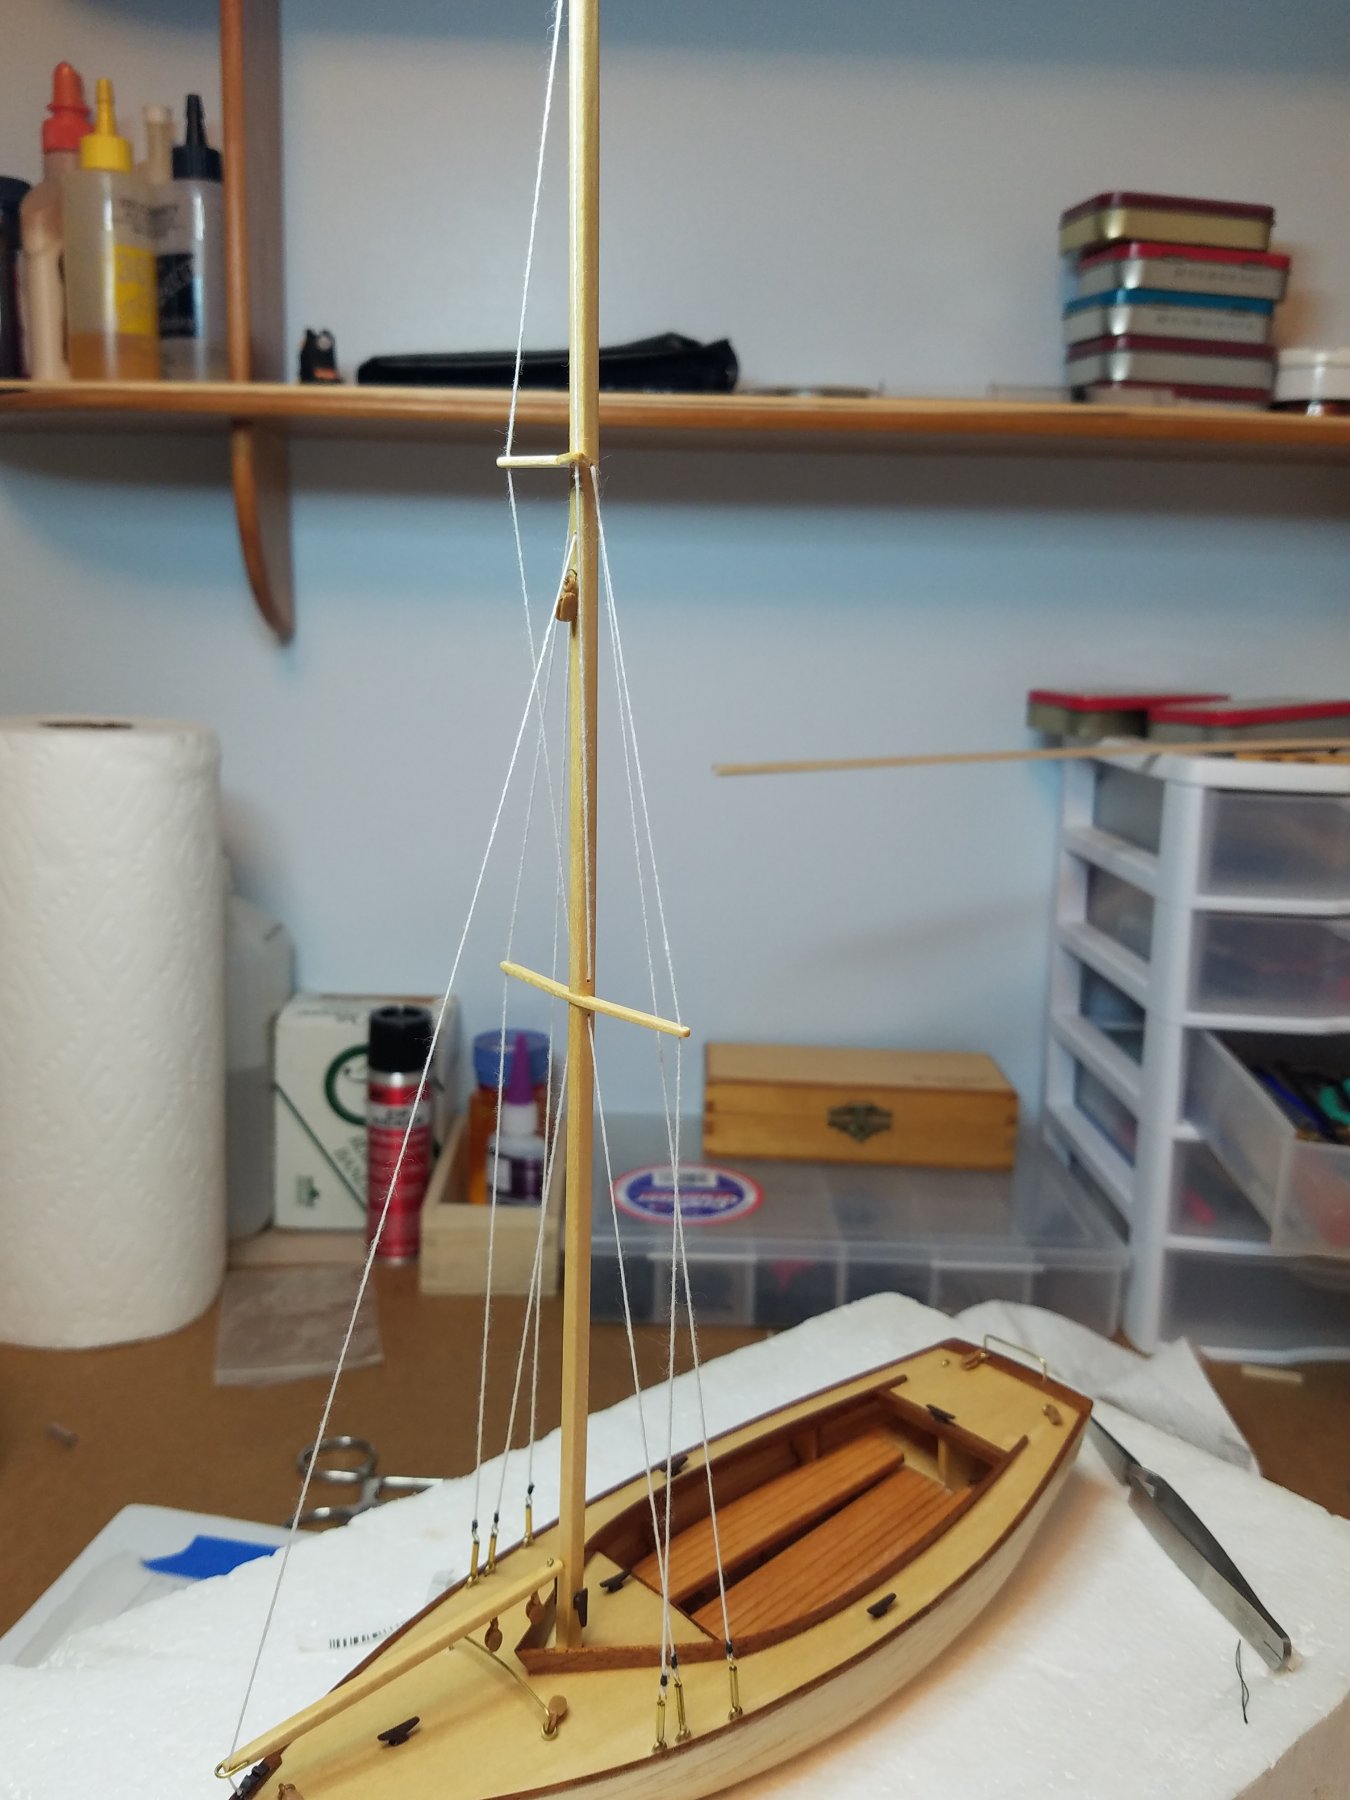
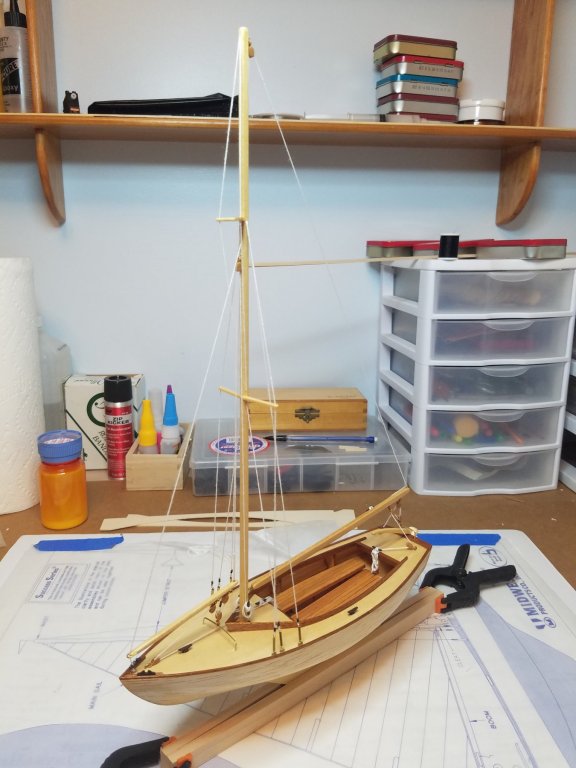
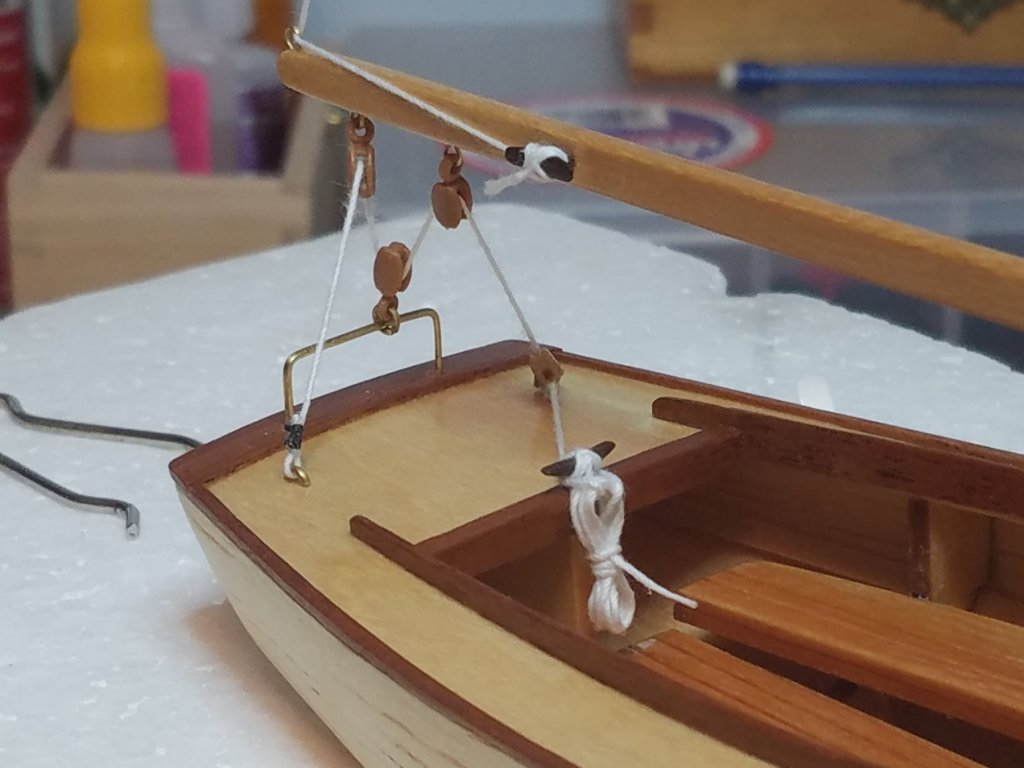
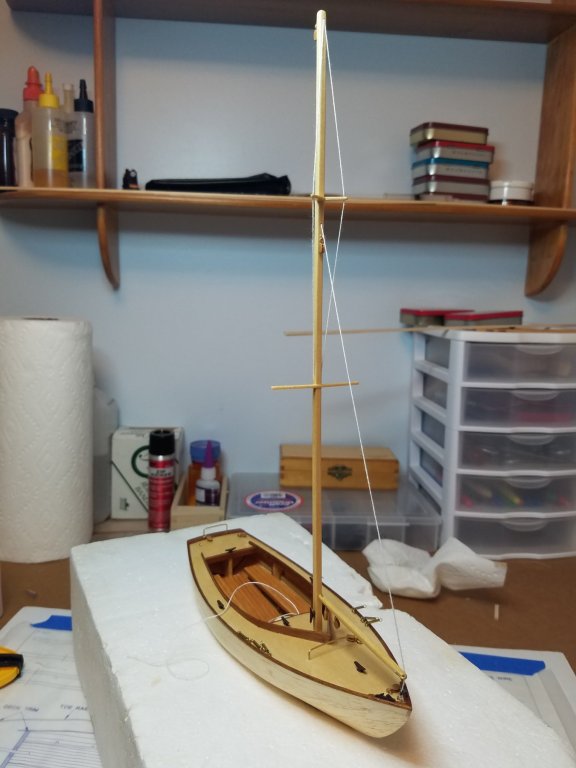
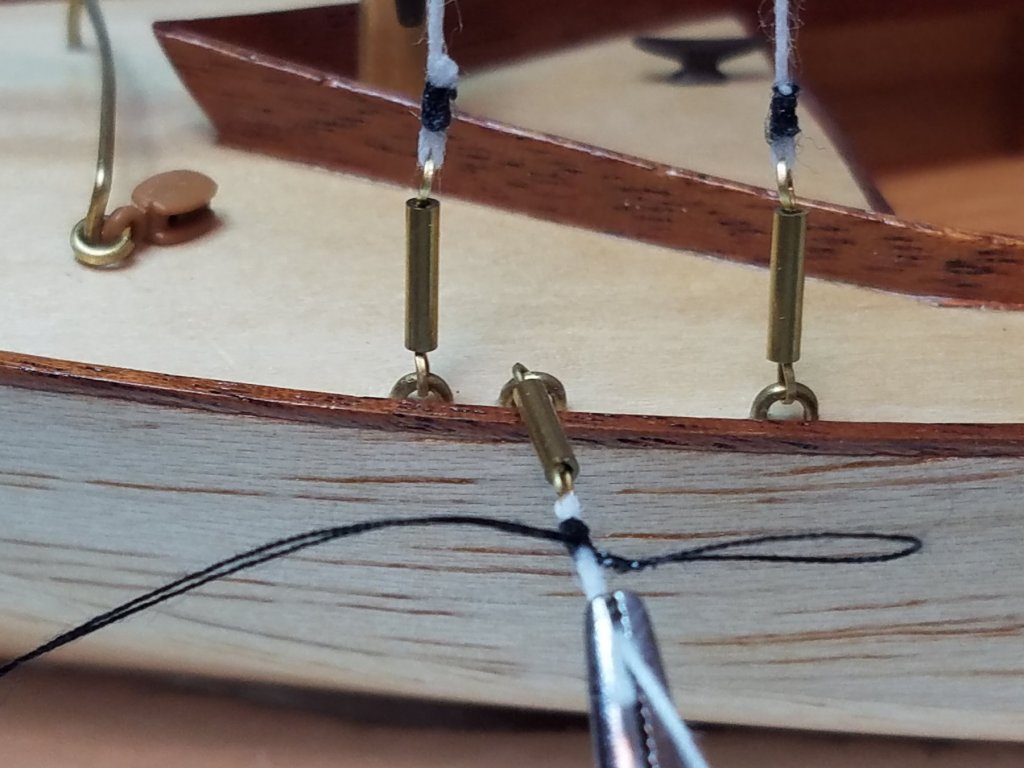
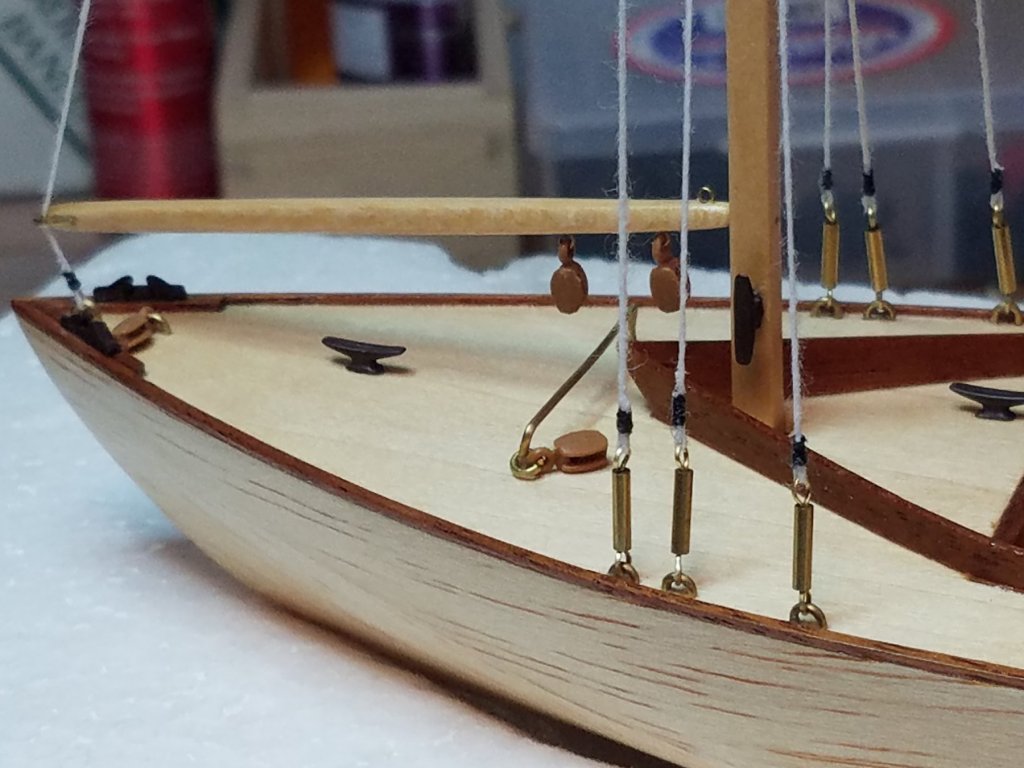
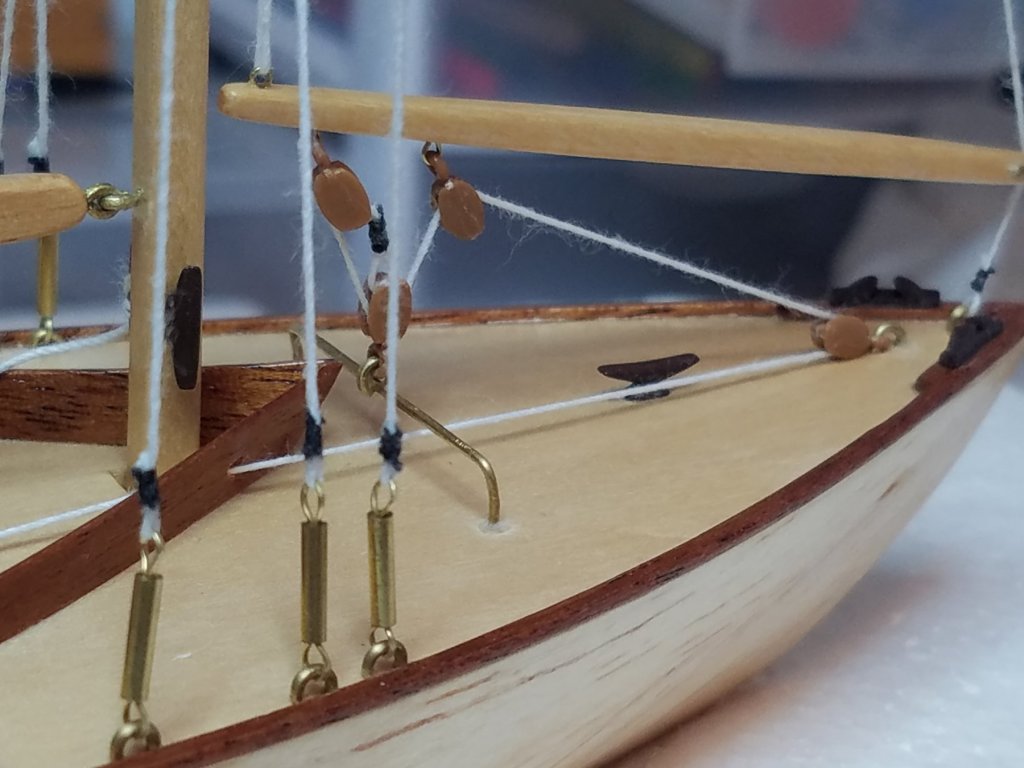
Some real progress to report tonight. Hooray we have a mast. I managed to get the mast in along with all the standing and Jib rigging. I just decided to use the kit supplied line for all the rigging. However after looking at the close up pics and doing a little research I guess that I should have used some bee's wax on the line to get rid of the fuzzies is that right? It does not mention that in the instructions. Do you think it will be possible to apply it after the fact? The mast is finally in. Yes I whipped all the standing rigging. Standing rigging complete. Almost two blocked but not quite. That blob of glue on the traveler is rather annoying in the close up pictures but I can hardly see it when just looking at it.


- 36 replies
-
- 8
-
-
- sakonnet daysailer
- Midwest Products
- (and 2 more)
-
I don't have an answer to your question but also speaking from what little experience I have I can tell you Jan is 100% right. Check my build log on the Midwest Sakonnet Daysailer. It was the very first thing that went wrong and it only has 4 stinking frames.. I leveled and eyeballed until I could not see straight. I was sure they were perfect then I glued the deck on and .... well you can see the result. I did manage to fix it though. Regards Art
-
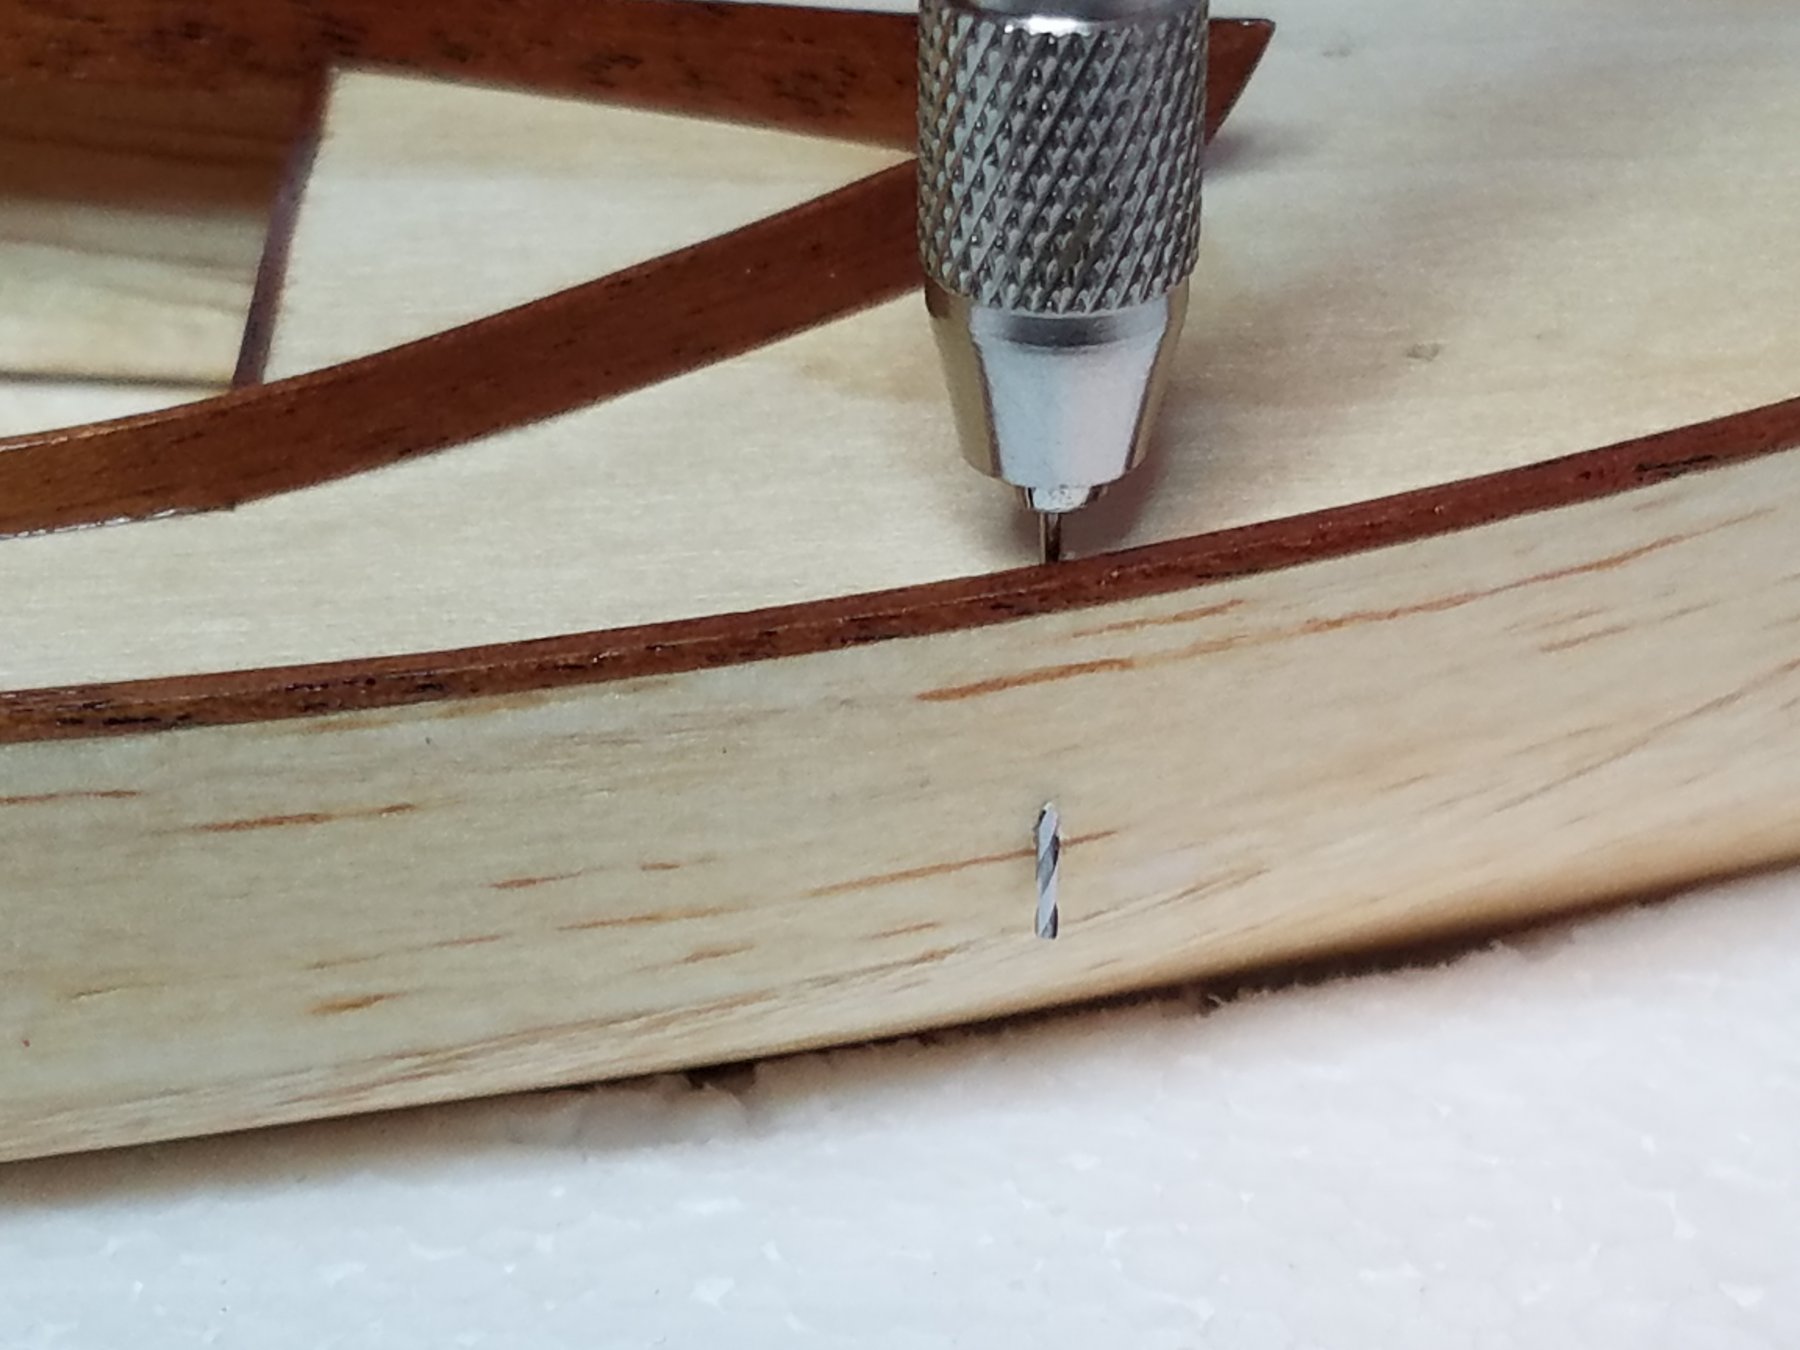
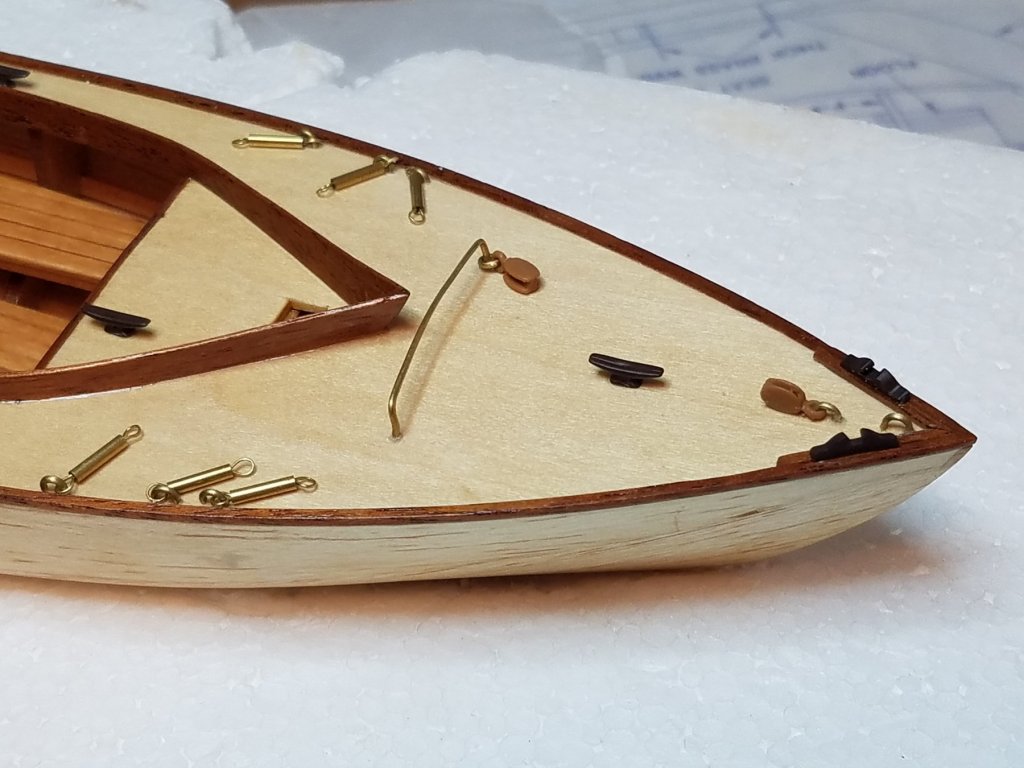
Well, after a slight mishap instead of stepping the mast I am back to waiting for paint to dry. I read in another build log that you should always show the bad along with the good so in that vein I offer the following. In preparation for installing the mast I was clearing the finish out of the holes for mounting the deck hardware. As you can see in the photo below that it did not go so well. apparently one of the holes was not quite as deep as I thought. I did manage to get all of the hardware installed along with the seats and cockpit deck. I also affected the necessary repairs. I tried to feather in a small area of new poly. Hopefully it will look all right tomorrow so I can try to get the mast installed. I will also take greater care when working with sharp objects around my boat from now on.


- 36 replies
-
- 6
-
-
- sakonnet daysailer
- Midwest Products
- (and 2 more)
-
Artesania Latina Bluenose Old vs New Kit?
Osmosis replied to Osmosis's topic in Wood ship model kits
Thanks Doug, I read your complete build log the other night along with all the others I could find and have already printed Mr. Earls practicum and read it through. Thanks for you input. Best Regards Art -
I am coming to a close on my first build and am starting to think about my next kit. I have a chance to pick up the above mentioned kit for $75.00. I figure for the money I cannot go wrong. I understand that it might not be the most accurate representation out there and that there are those that simply don't like this kit. My question it this. I have noticed two different boxes for this kit and I am wondering are the kits themselves different? Is one older than the other, different materials, better or worse? The kit I an looking at comes in this box. The other box looks like this. Thanks for any thoughts you might have.

-
New Member from Sunny Southern California.
Osmosis replied to ruben_dominguez's topic in New member Introductions
Welcome aboard Ruben, I am new to MSW and the hobby as well. There are lots of helpful talented shipbuilders here that's for sure. Good luck with your build!