Osmosis
-
Posts
626 -
Joined
-
Last visited
Content Type
Profiles
Forums
Gallery
Events
Everything posted by Osmosis
-
 Looks like an excellent start. I will be pulling up a chair for this one.
 -
I found this drawing on the web. I think I will print it on my large format printer at work and hang it on the wall at my work station for a little inspiration. I did not see a copyright for this so if there is one please let me know so I can cite it or take it down.
- 139 replies
-
- 1
-

-
- san francisco
- artesania latina
- (and 1 more)
-
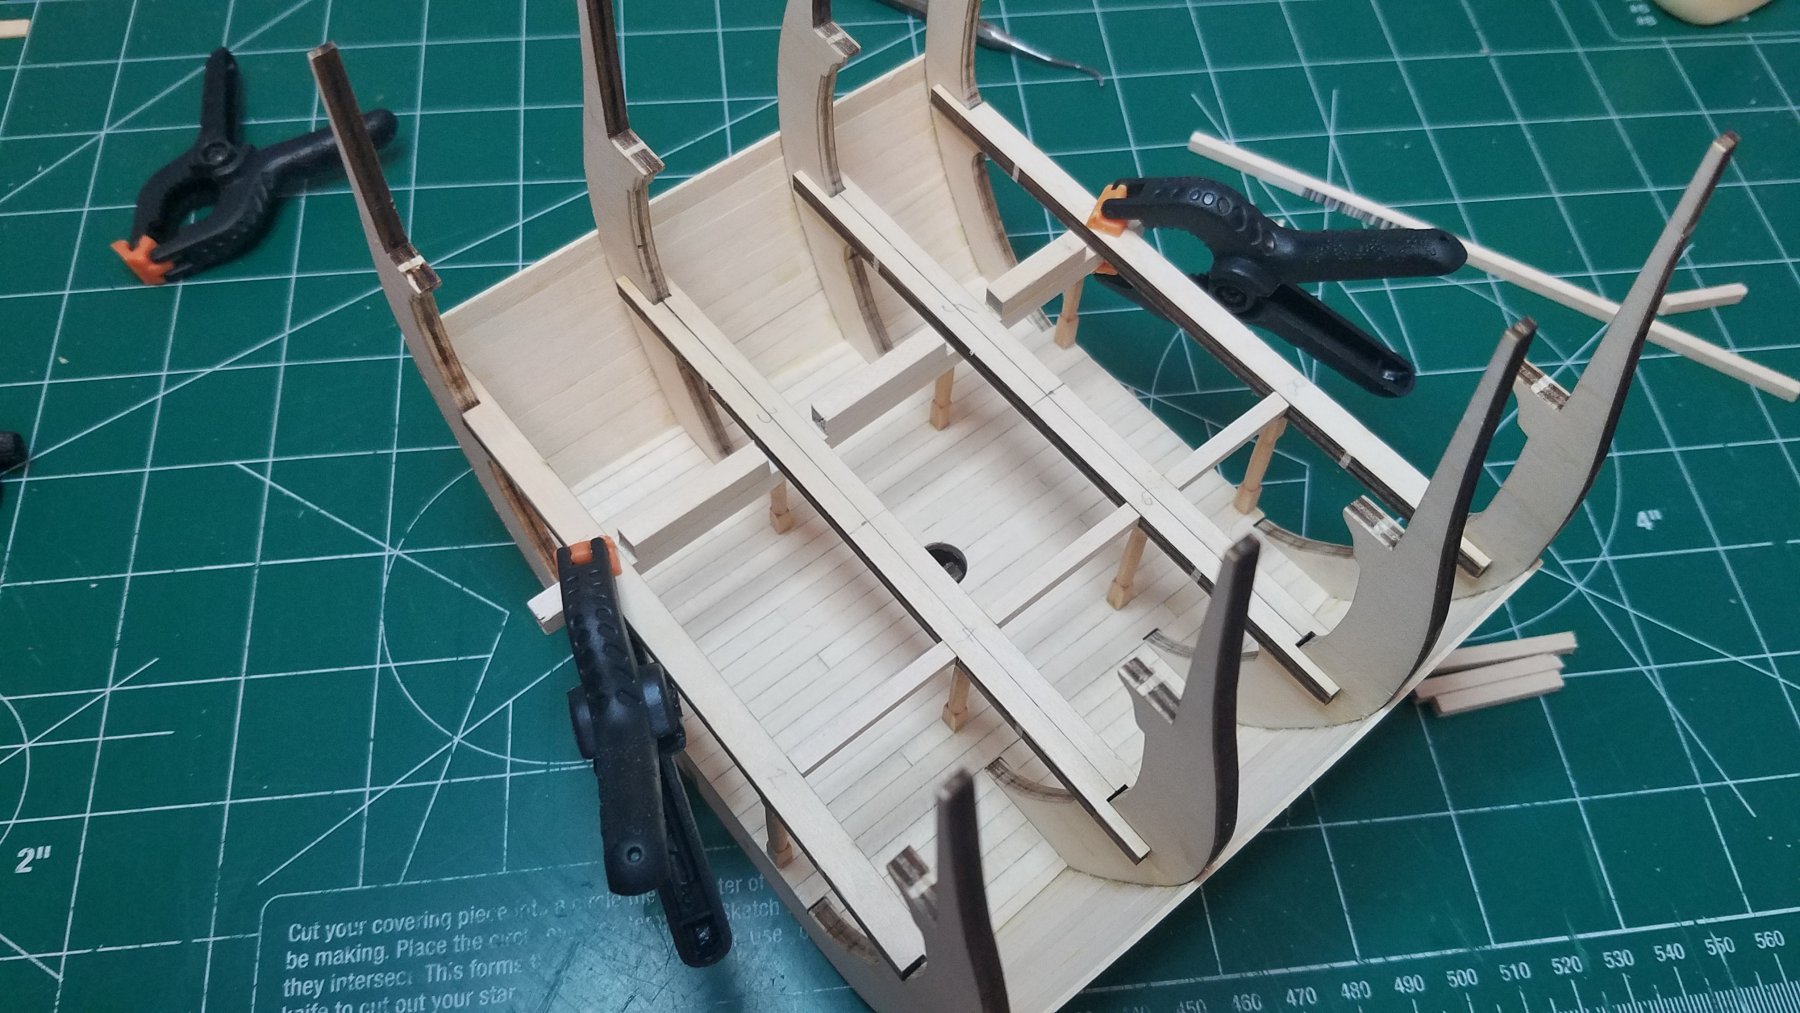
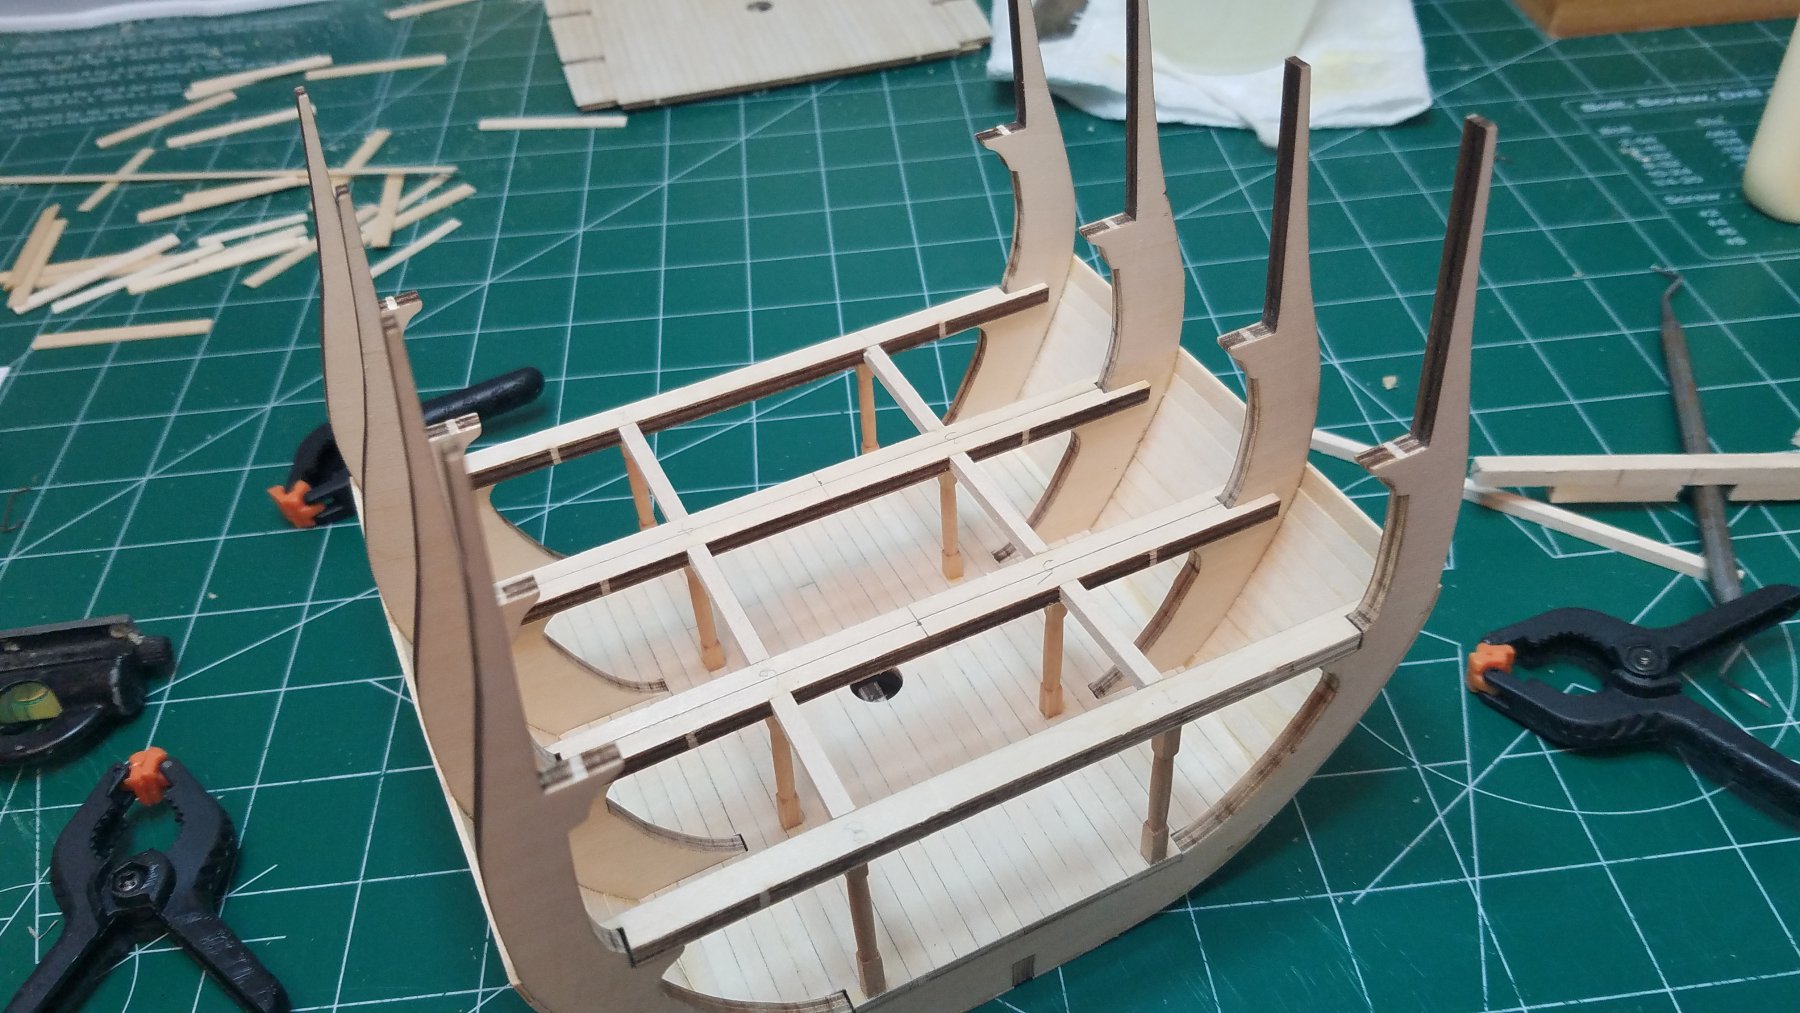
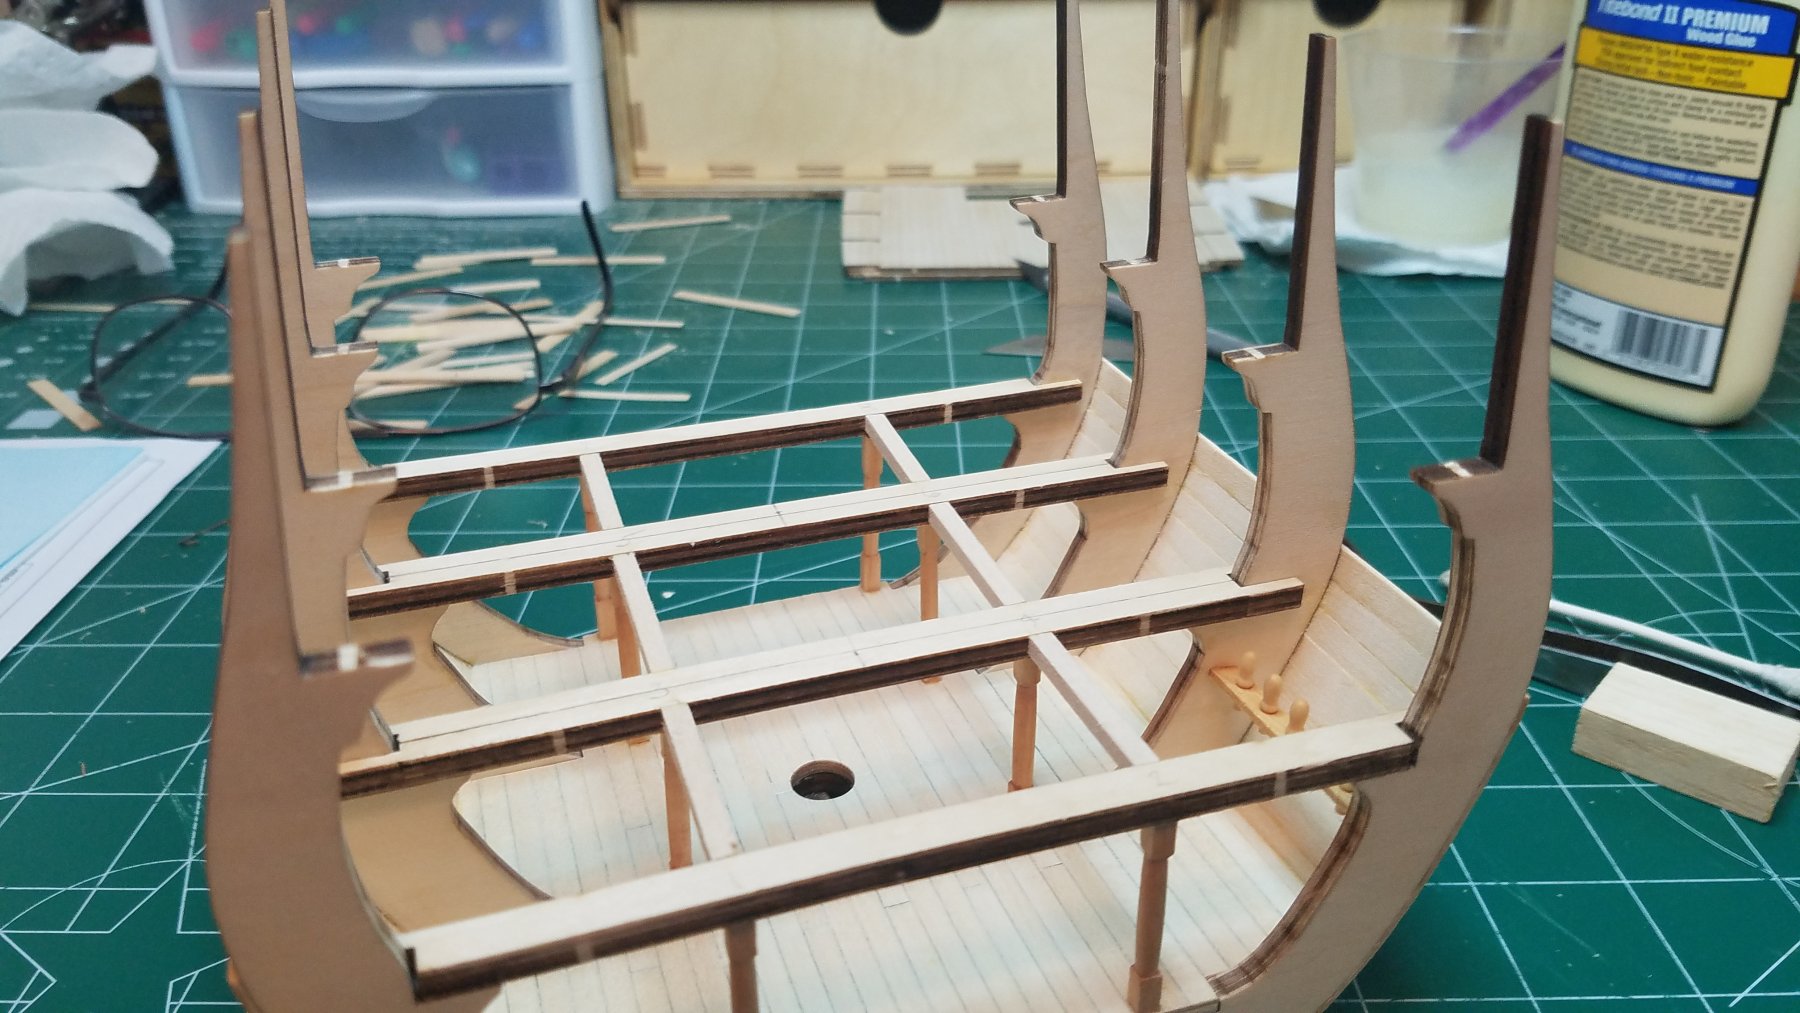
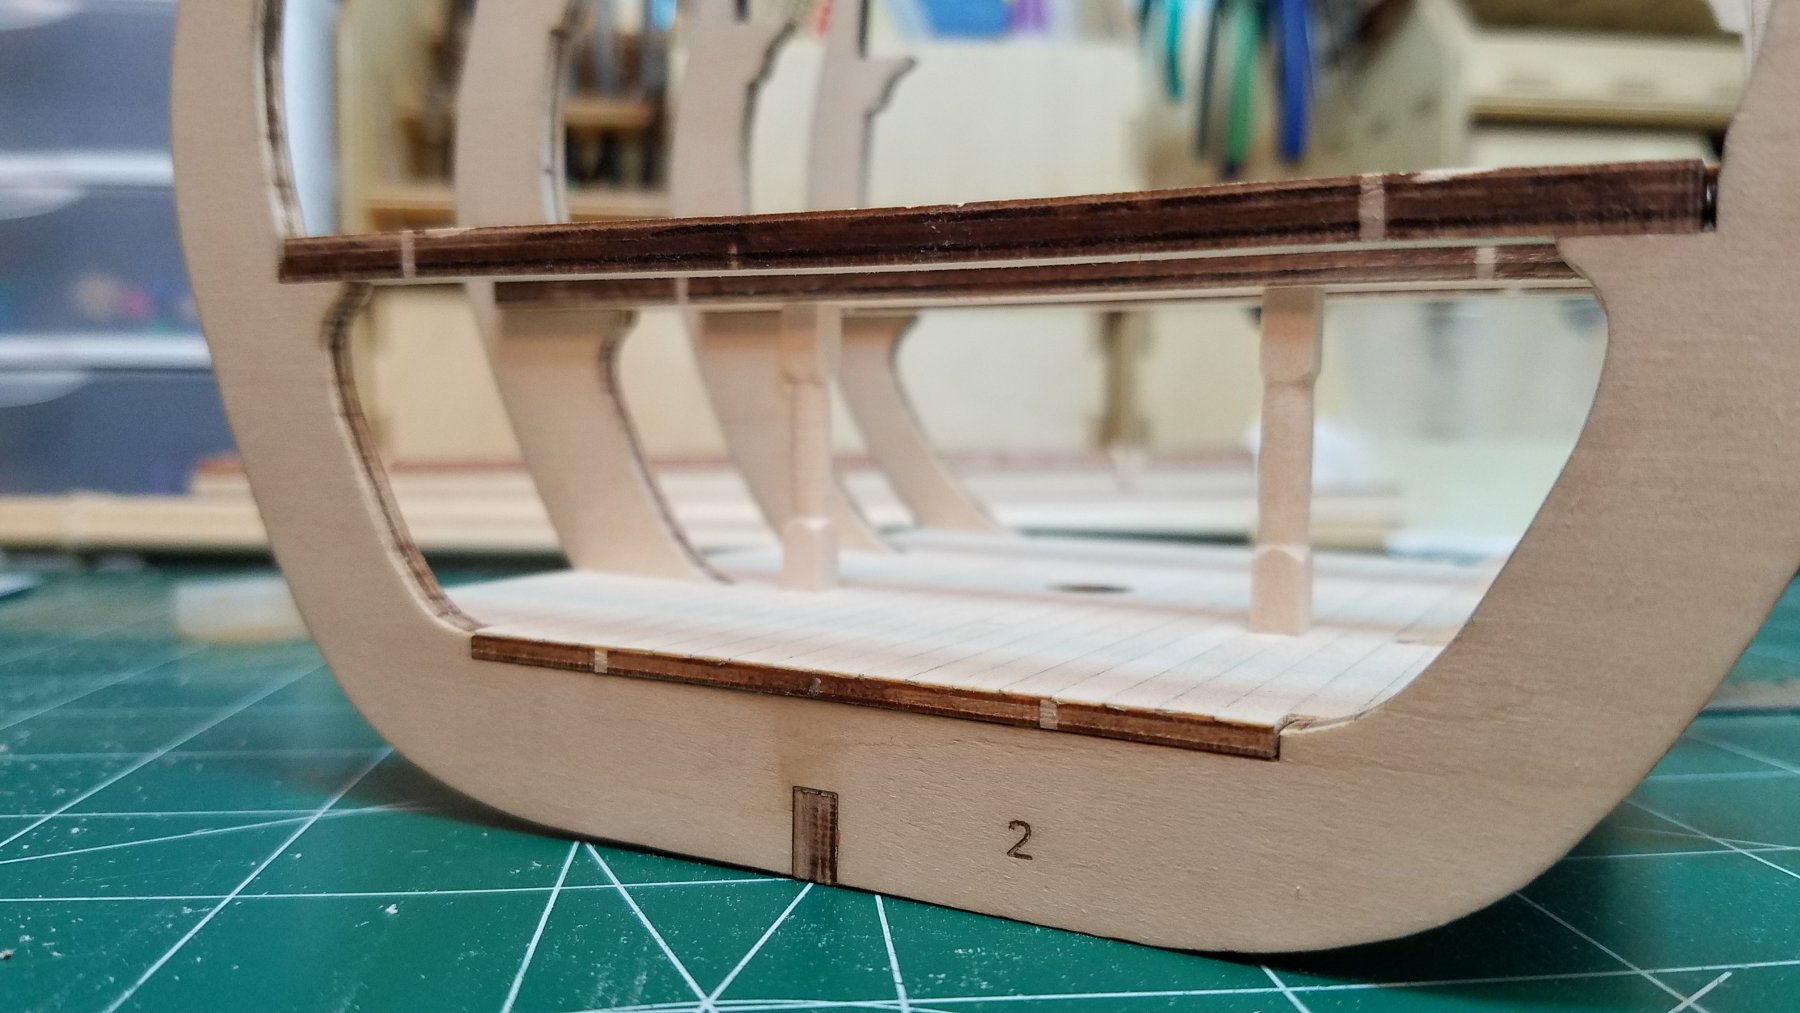
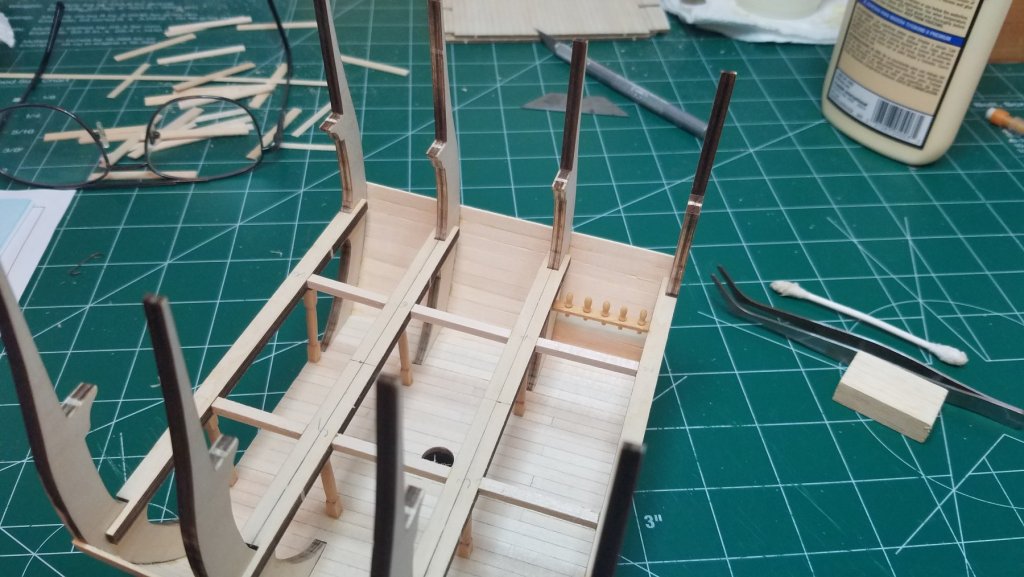
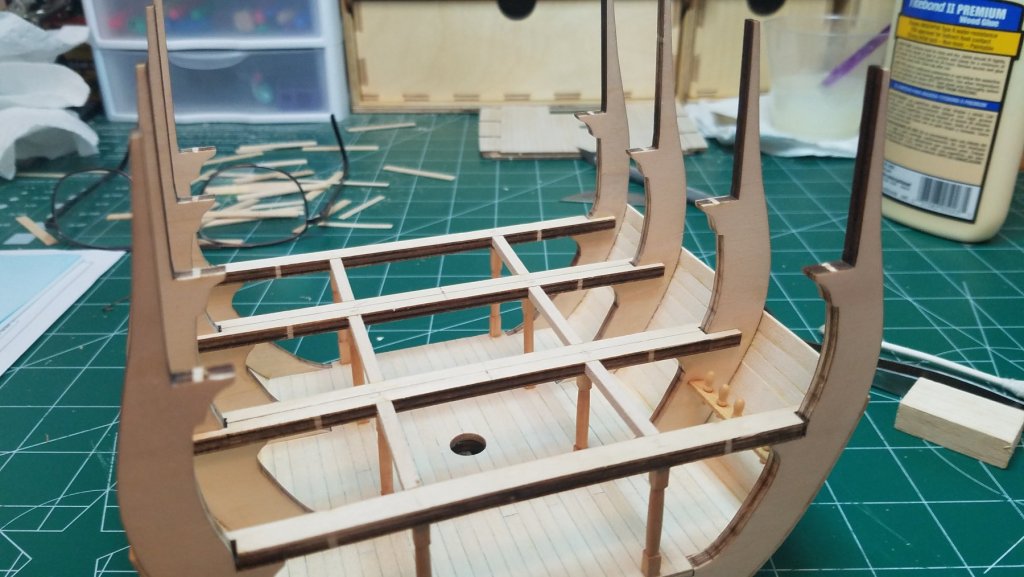
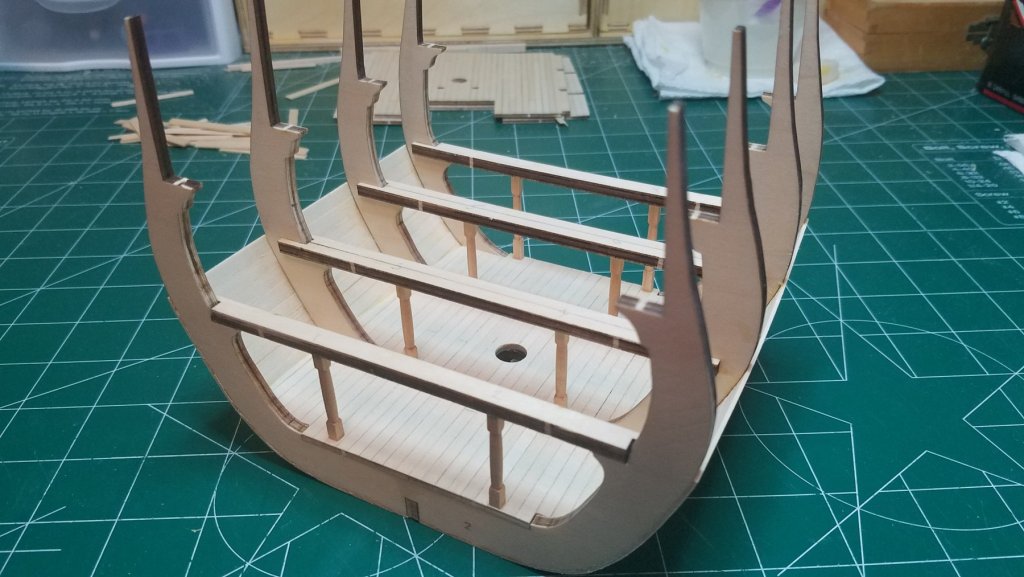
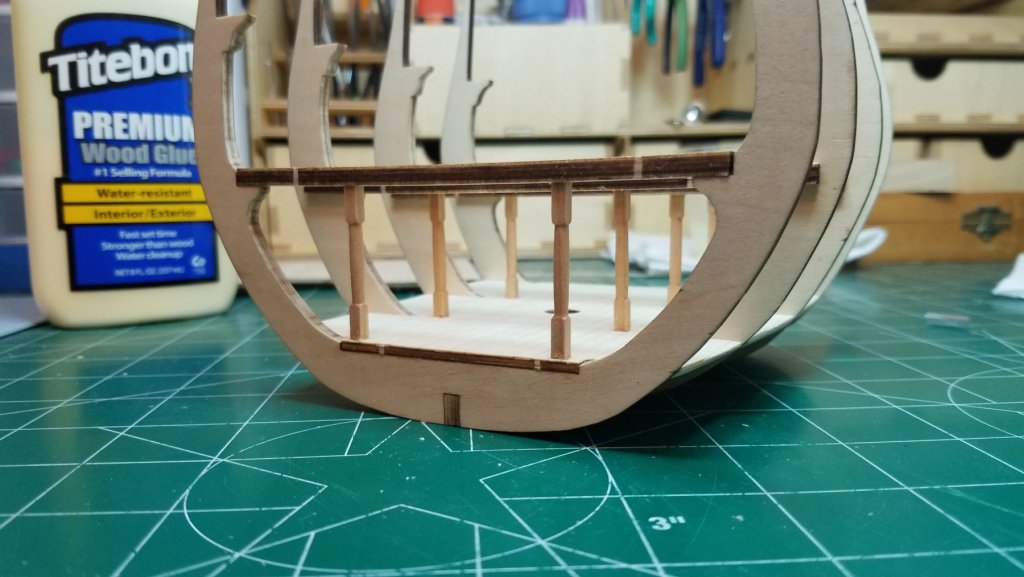
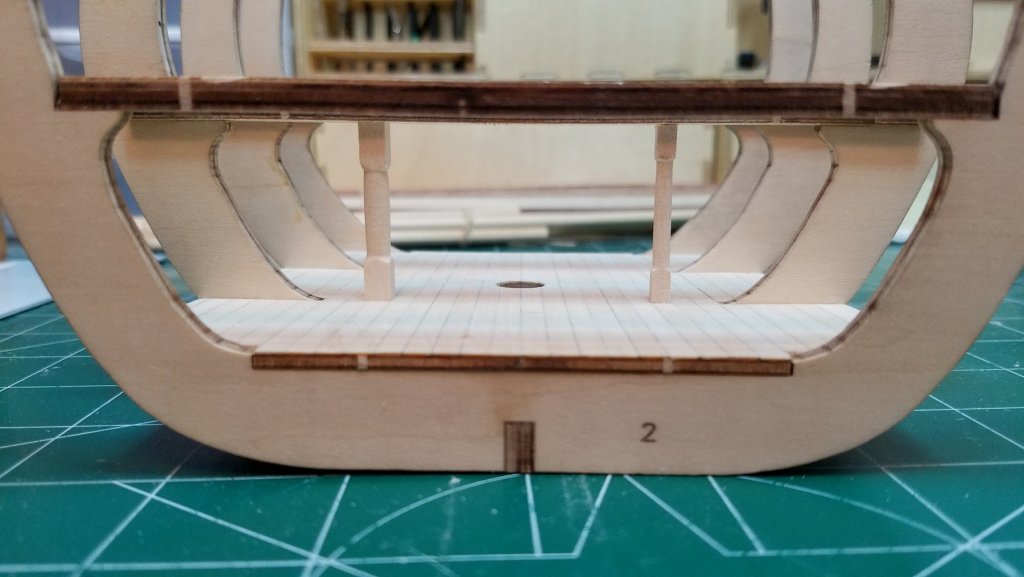
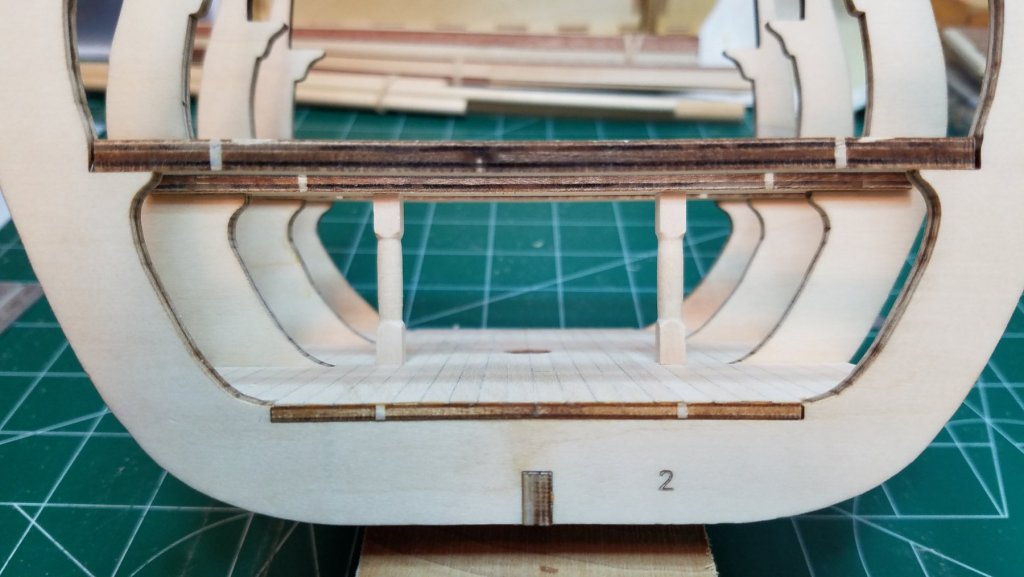
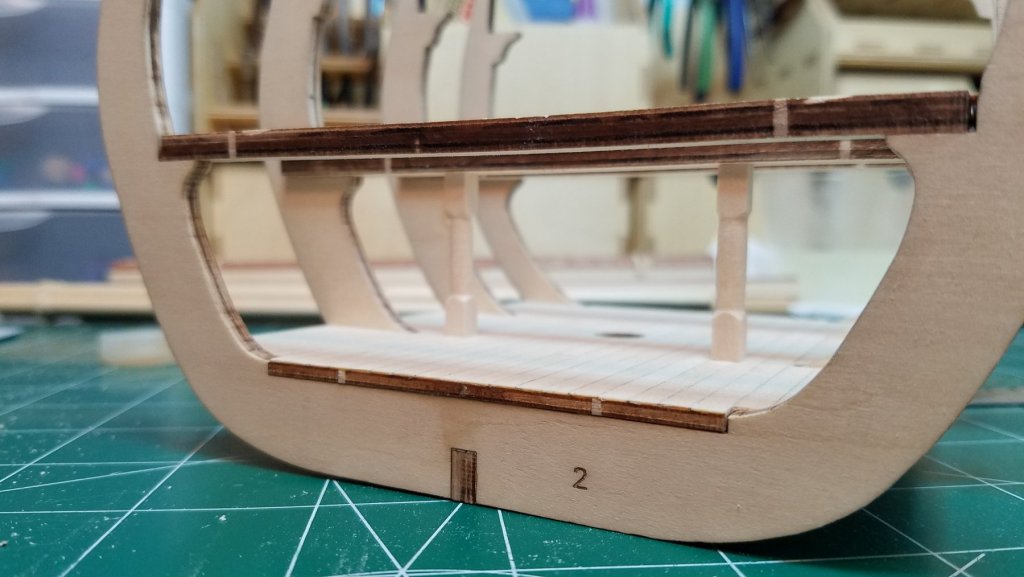
Thanks for all the likes and comments. I seem to be going side ways instead of forward. A couple of more details which will be just about invisible on the finished model. But, I believe that the very small portion that will be seen will add to the overall depth of the finished product (that's my story anyway). I plan on doing the hatches and gratings slightly different than the instructions call for. This will leave the edge of the opening visible. I am sure that the opening would have been framed in somehow. So rather than just scab in a couple of pieces where they will be seen from the top why not try to make it look the way it might have. No effort to replicate the full structure just a small hint of detail. I will add the athwart beam to the edge of the hatch opening once the deck is in place. Above you can see the jig I made for aligning the longitudinal beams clamped in place. Both beams in place. Like I said no one is going to turn the finished model over to get a look under the deck but if they did at least there is more to see than just a sheet of plywood. Next up This is a cargo hold so I figured there would be rope stored and in use here. So why not a pin rail to hang it from. I am sure there is no historical precedent for this. But I just figured it was a nice little detail to catch someones eye. This will be right at the base of the ladder where it would be readily available. I will add some coils of rope later. Now I need to get to the store for a couple of new paint brushes. Thanks


- 139 replies
-
- 2
-
-
- san francisco
- artesania latina
- (and 1 more)
-
Yes, I have used Titebond II on the entire kit so far. I was planning on using it for the final planking also. This my first double planked hull also.
-
Not at all. Matte Finish Polyurethane for sealing and finishing. It seems most guys prefer water based poly I still like oil based. There is a bit more clean up involved but I feel like it goes on nicer for some reason. I did use wipe on poly on my last project and could become a fan of that also. Regards
-
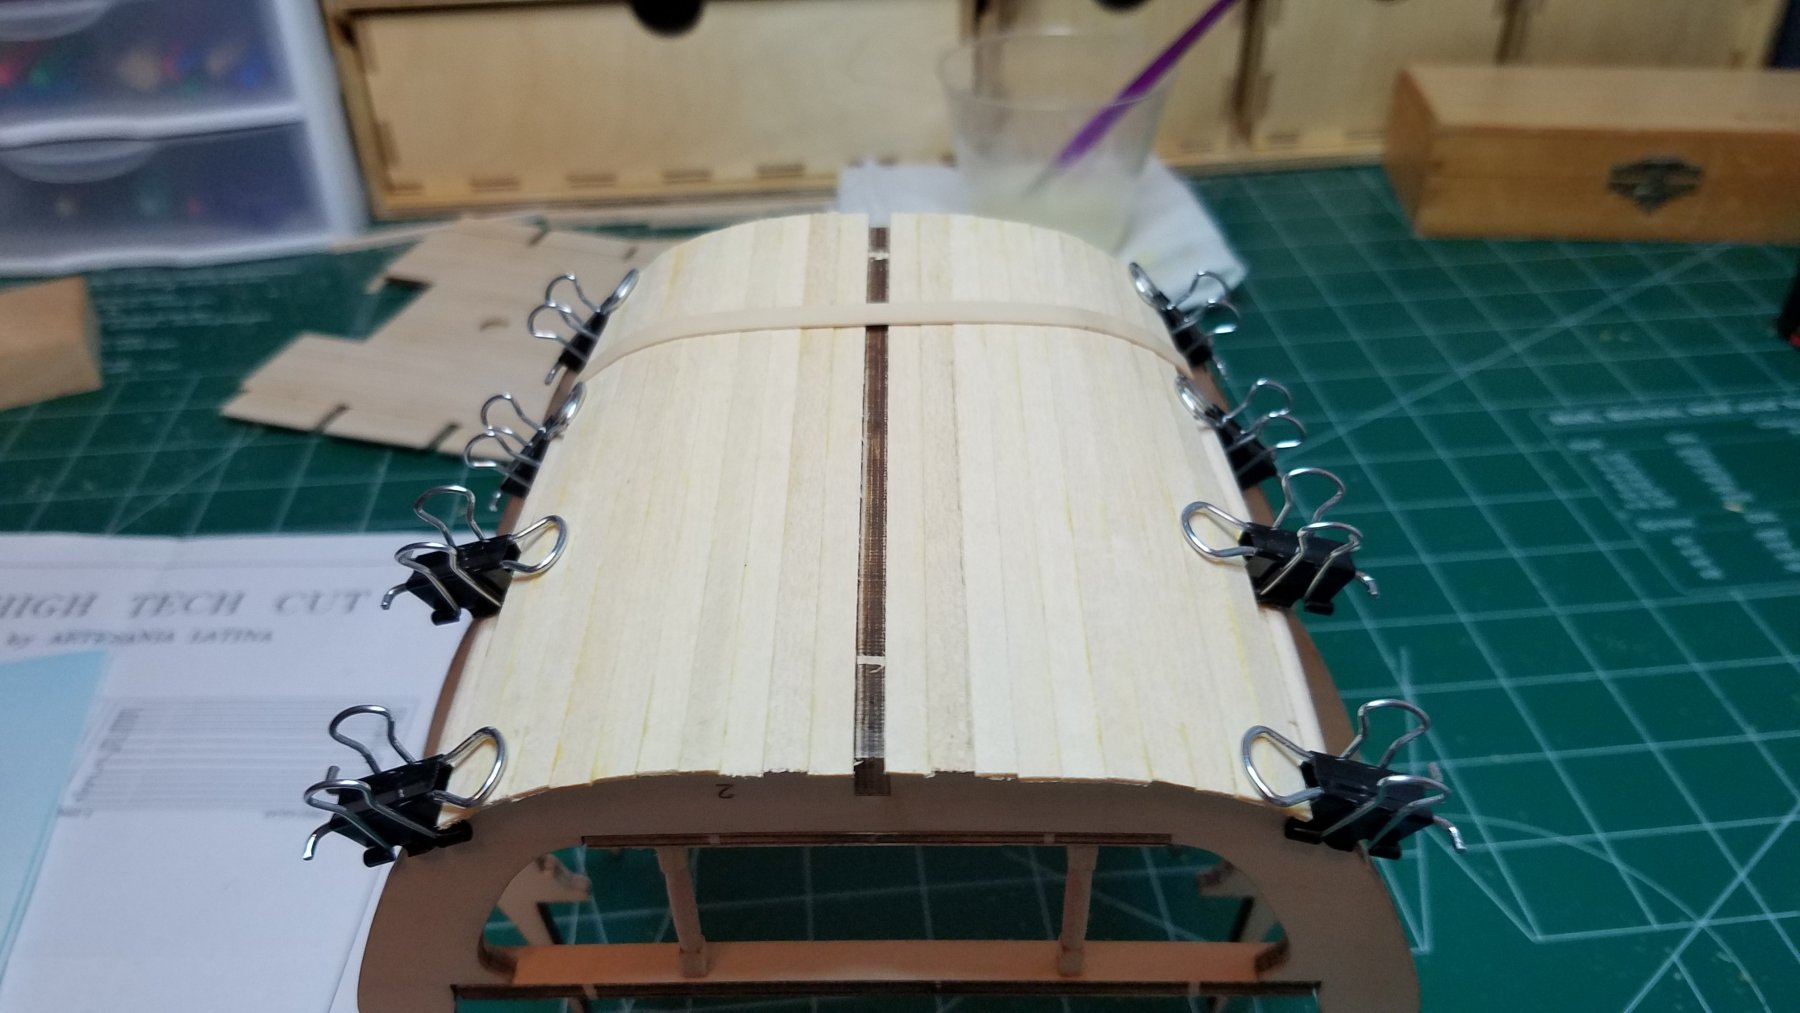
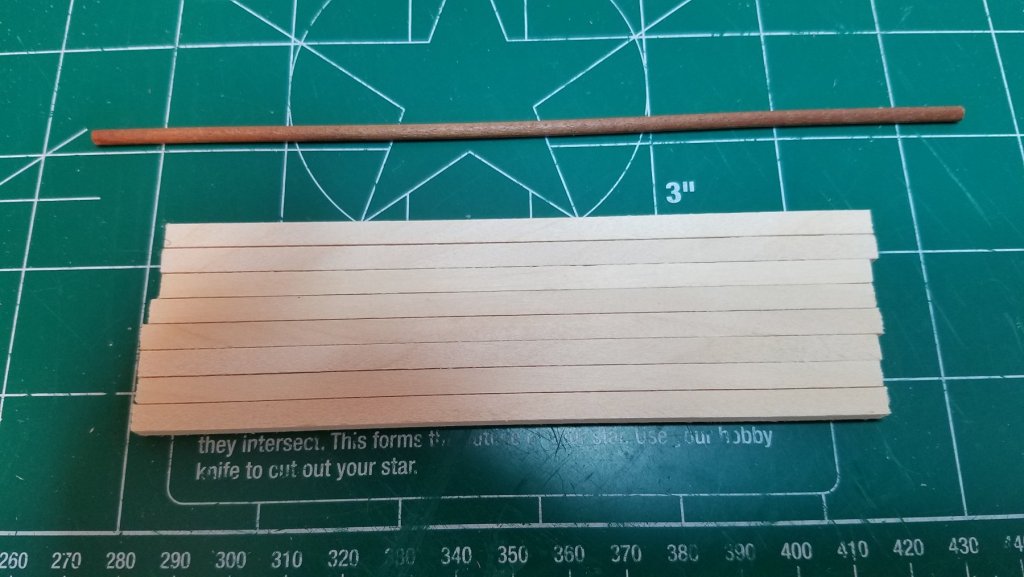
The first layer of planking is on up to the middle deck. All the rough sanding is done for now. The interior needs a little more light sanding then a couple coats of matte poly. If it looks like the front left stanchion is misaligned that is because it is. My sausage fingers and lack of attention caused a slight accident. I knocked it loose. Once I am done with the sanding I will glue it back in place. I will finish sanding the outer hull when the first layer of planking is complete. Regards,
- 139 replies
-
- 3
-
-
- san francisco
- artesania latina
- (and 1 more)
-
Cargo tie downs
Osmosis replied to Osmosis's topic in Discussion for a Ship's Deck Furniture, Guns, boats and other Fittings
Thank you all again for the replies. It looks like it is unanimous, No Tie Downs. Once you give it some thought there are some very compelling reasons for not having them. -
Hello Tom, Ah, if only I had the room. I am limited to an 8'x8' room that also has to house my other hobby (rc sailing) as well as anything the Admiral does not want laying about the rest of the house. But some day. What is that on your workbench Tom? Best Regards,
-
Cargo tie downs
Osmosis replied to Osmosis's topic in Discussion for a Ship's Deck Furniture, Guns, boats and other Fittings
Thanks for the quick replies. I do apologize, I should have been more precise in my description. The ship I am modeling is a 16th-17th century Spanish Galleon. Regards -
I am currently building the San Francisco Cross Section. I am getting to the point where I will be gluing down the middle deck and I was wondering. Would there have been rings or eye bolts permanently installed in the cargo hold deck or bulkheads for lashing down loose cargo? If so now would be the time to put them in. The instructions don't call for them but if they would have been there it is an easy enough detail to include. The kit does include crates and barrels and spare billets of lumber to put in the hold it seems there would be a way to tie them down. Thanks
-
The planking is progressing nicely. In the mean time, I am getting to the point where I will be gluing down the middle deck and I was wondering. Would there have been rings or eye bolts permanently installed in the cargo hold deck or bulkheads for lashing down loose cargo? If so now would be the time to put them in. The instructions don't call for them but if they would have been there it is an easy enough detail to include. The kit does include crates and barrels and spare billets of lumber to put in the hold it seems there would be a way to tie them down. Thanks
-
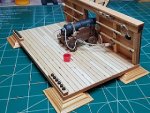
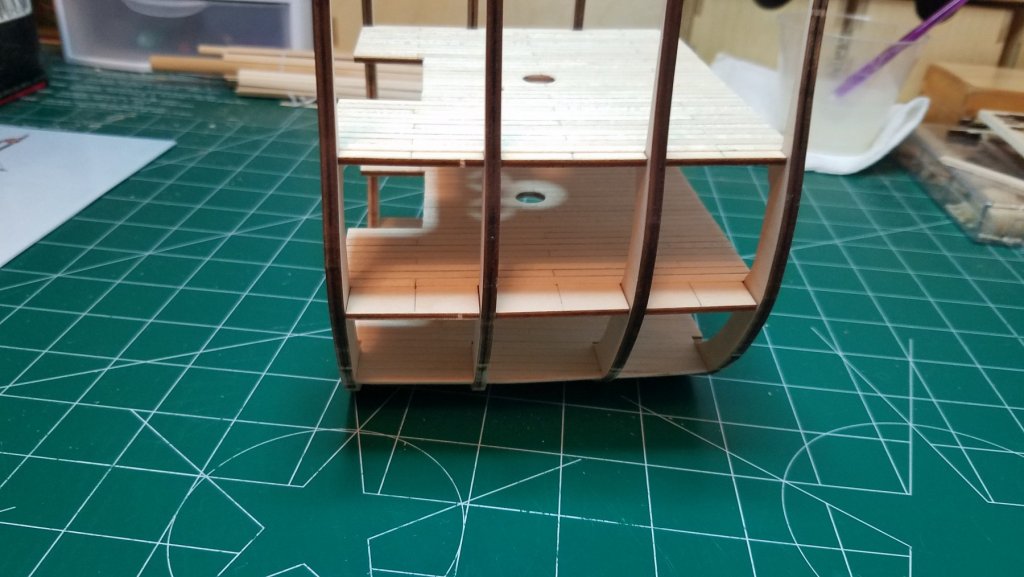
Peter, That was the reason I wanted to make the deck removable. So that I could clamp it in place while planking the hull above the lower deck. Once the planking is complete up to that point I will remove the deck, do any interior work then glue the deck into place and repeat for the top deck. Not sure you can see it in the pic but I stopped planking last night when I reached the lower deck level for that exact reason. Maybe I am over thinking it (I usually do). But hopefully it will work out the way it looks in my head. I will be stopping at Lowes on my way home to get a couple of the clamps you used to hold the center of the deck down though. Thanks again
- 139 replies
-
- 2
-
-
- san francisco
- artesania latina
- (and 1 more)
-
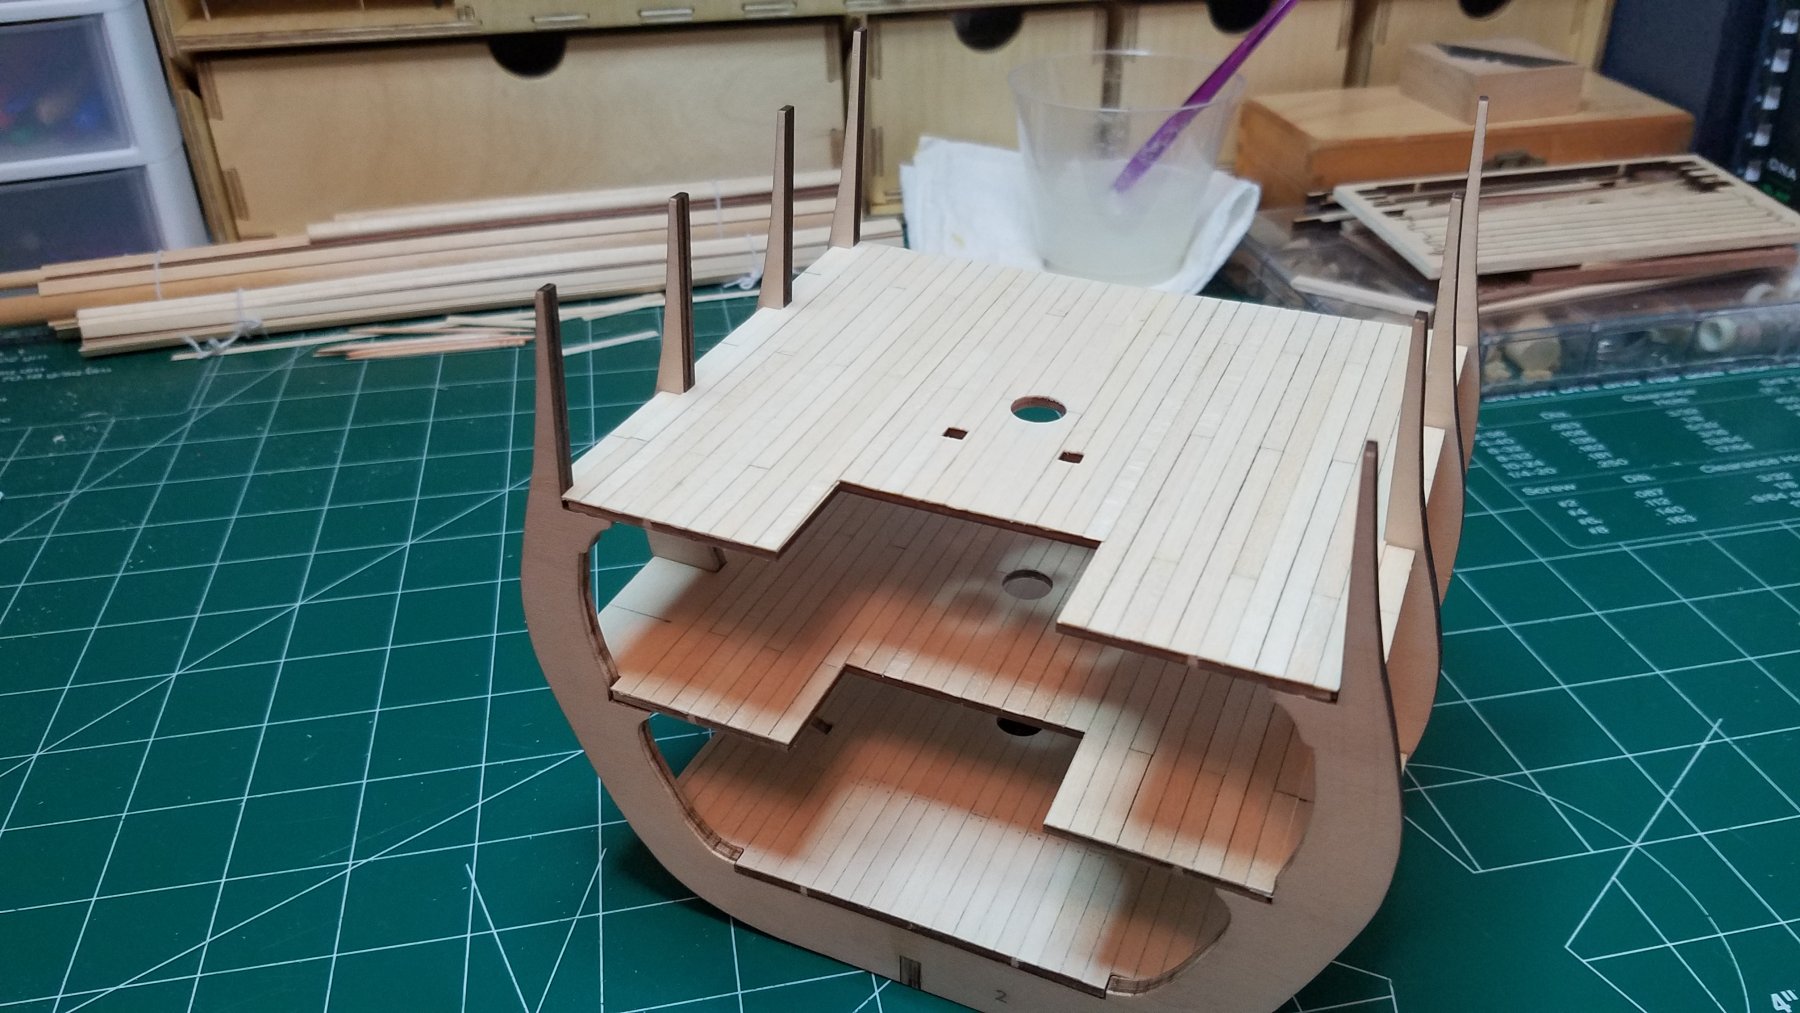
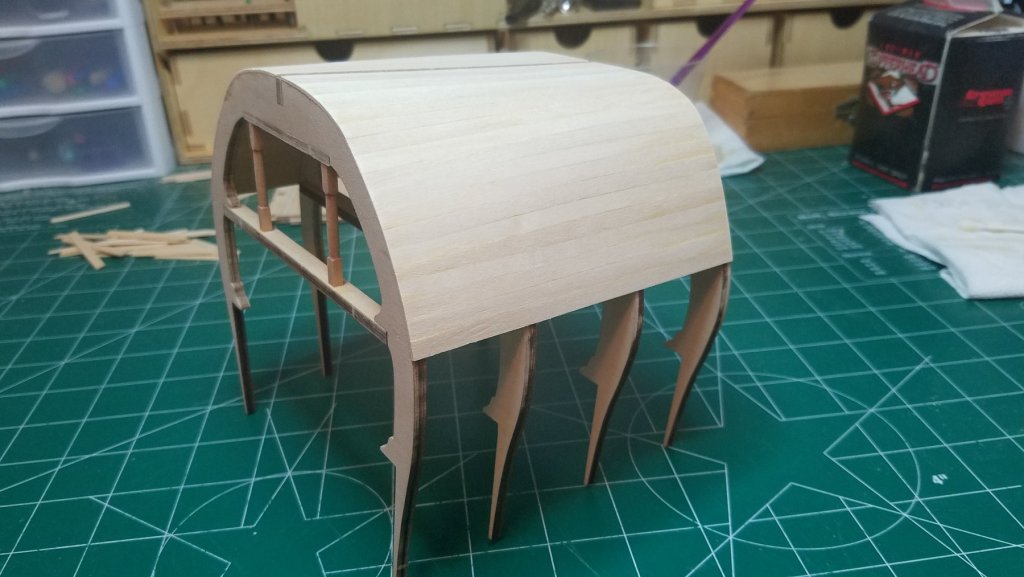
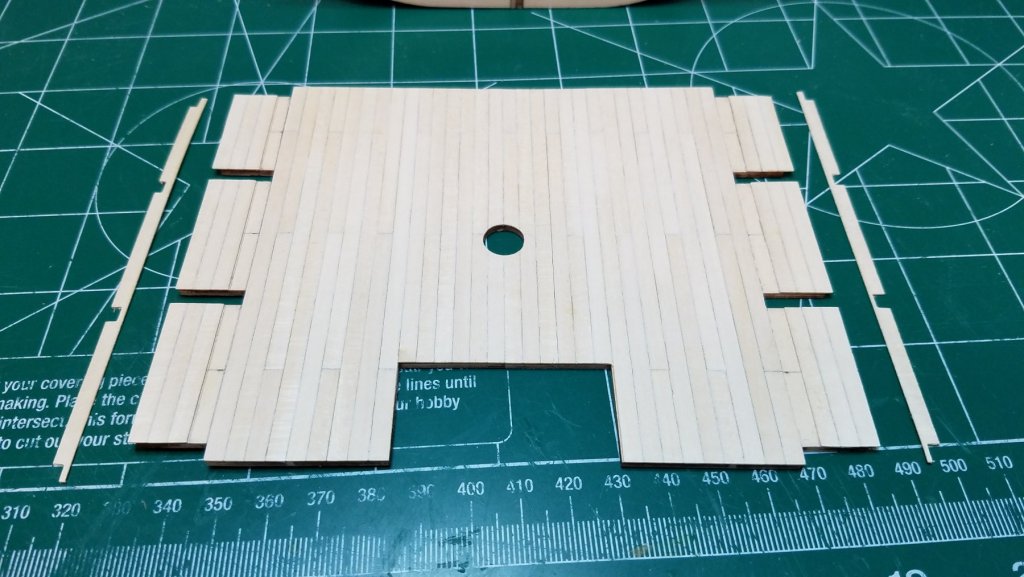
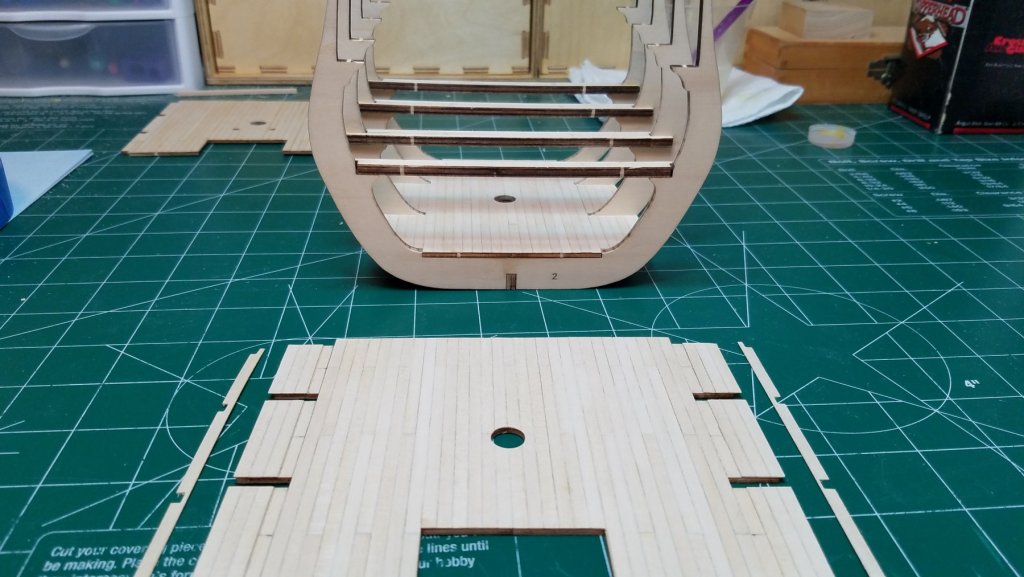
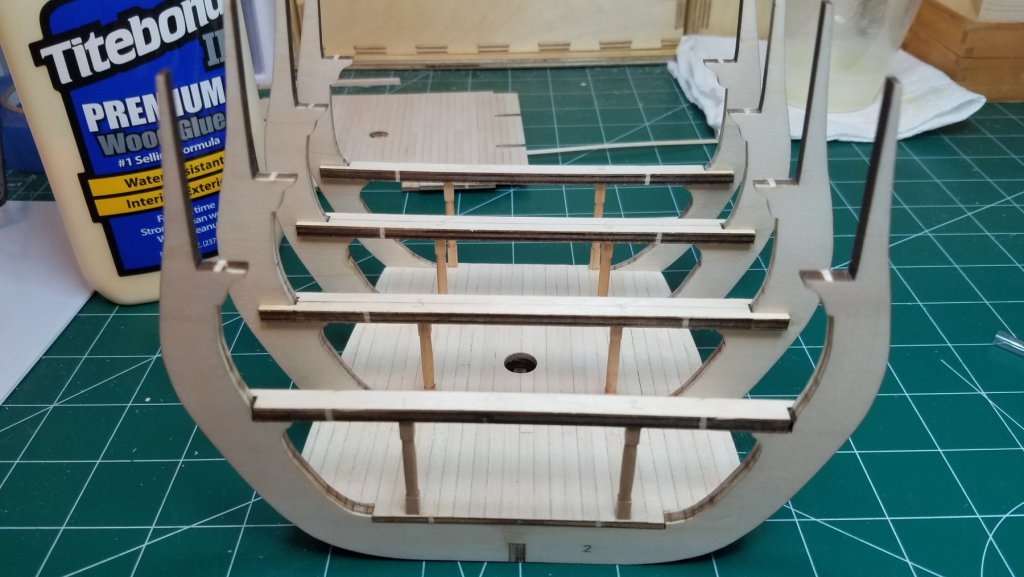
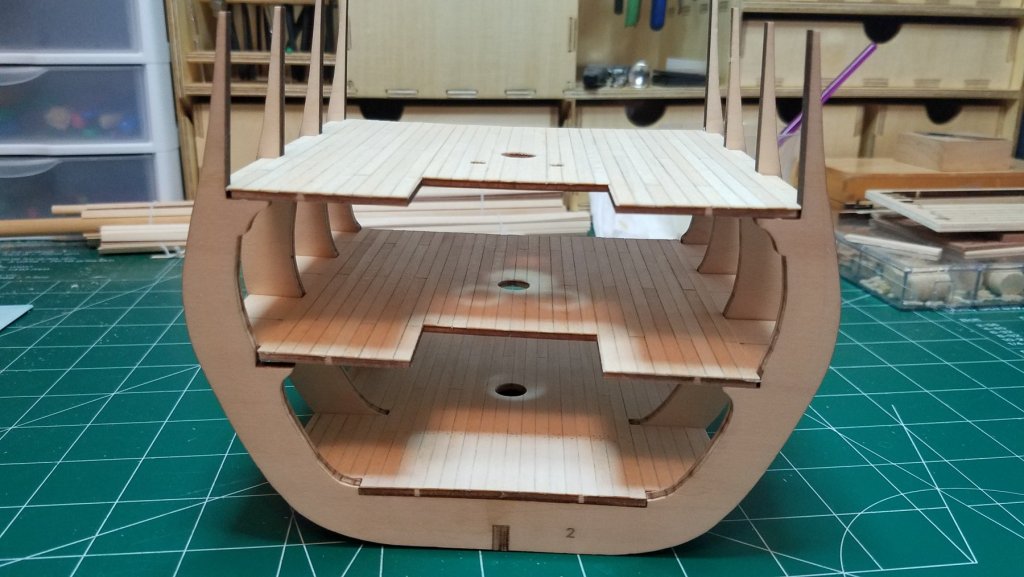
At last some progress. But I am going to give you one more stanchion update. They are in! I think they came out OK. And here is where I take another deviation from the instructions. They would have you stain and varnish the deck and stanchions at this point then install the middle deck more stain and varnish then the upper deck and stain and varnish again. Then after all that turn to planking the hull. It seems to me that the purpose of a cross section is to allow the inside to be viewed and admired. If I were to do things in the order the instructions suggest it would be impossible to get at the inside surface of the hull to sand or finish them at all. So my plan is to begin planking the hull now and continue to just below or even with the middle deck beams. Then sand the entire inside surface of the hull and apply poly to deck stanchions and bulkheads. Then install the middle deck and repeat the process until the planking is complete. This will also allow me to install some of the interior hardware and fittings on each interior deck much easier with open access from the top. So let the planking begin. That is as far as 10 strips of planking got me. Is it just me or does it always seem like you are not going to have enough? This is my first planking job so I was wondering. When double planking a hull as in this case, gluing and clamping the inner planking is fairly straight forward. But without access to the frames to clamp to how does one secure the finish planking while the glue dries? Another slight change in plans. Because of the hanging knees being part of the frames the middle deck can not be installed or removed once it is fully planked. Again the instructions would have you install the sub deck then do all of the planking, scraping and sanding in place. My sausage fingers are not made for that so I planked the deck as far as the first plank that interfered with the slots. This plank I laid in place with no glue then continued with the small filler planks. Once the unglued plank was removed and the slots were trimmed I put the deck in place and shaped the two unglued planks to fit. I then removed the deck and pressed the two planks into place. This allowed me to scrape and sand the deck out on the work bench rather than trying to work between the frames. When I am ready to install it all I have to do is place it in and glue in the last two planks. Hopefully thing will progress at a more steady pace from here on out. Thanks for stopping by.


- 139 replies
-
- 4
-
-
- san francisco
- artesania latina
- (and 1 more)
-
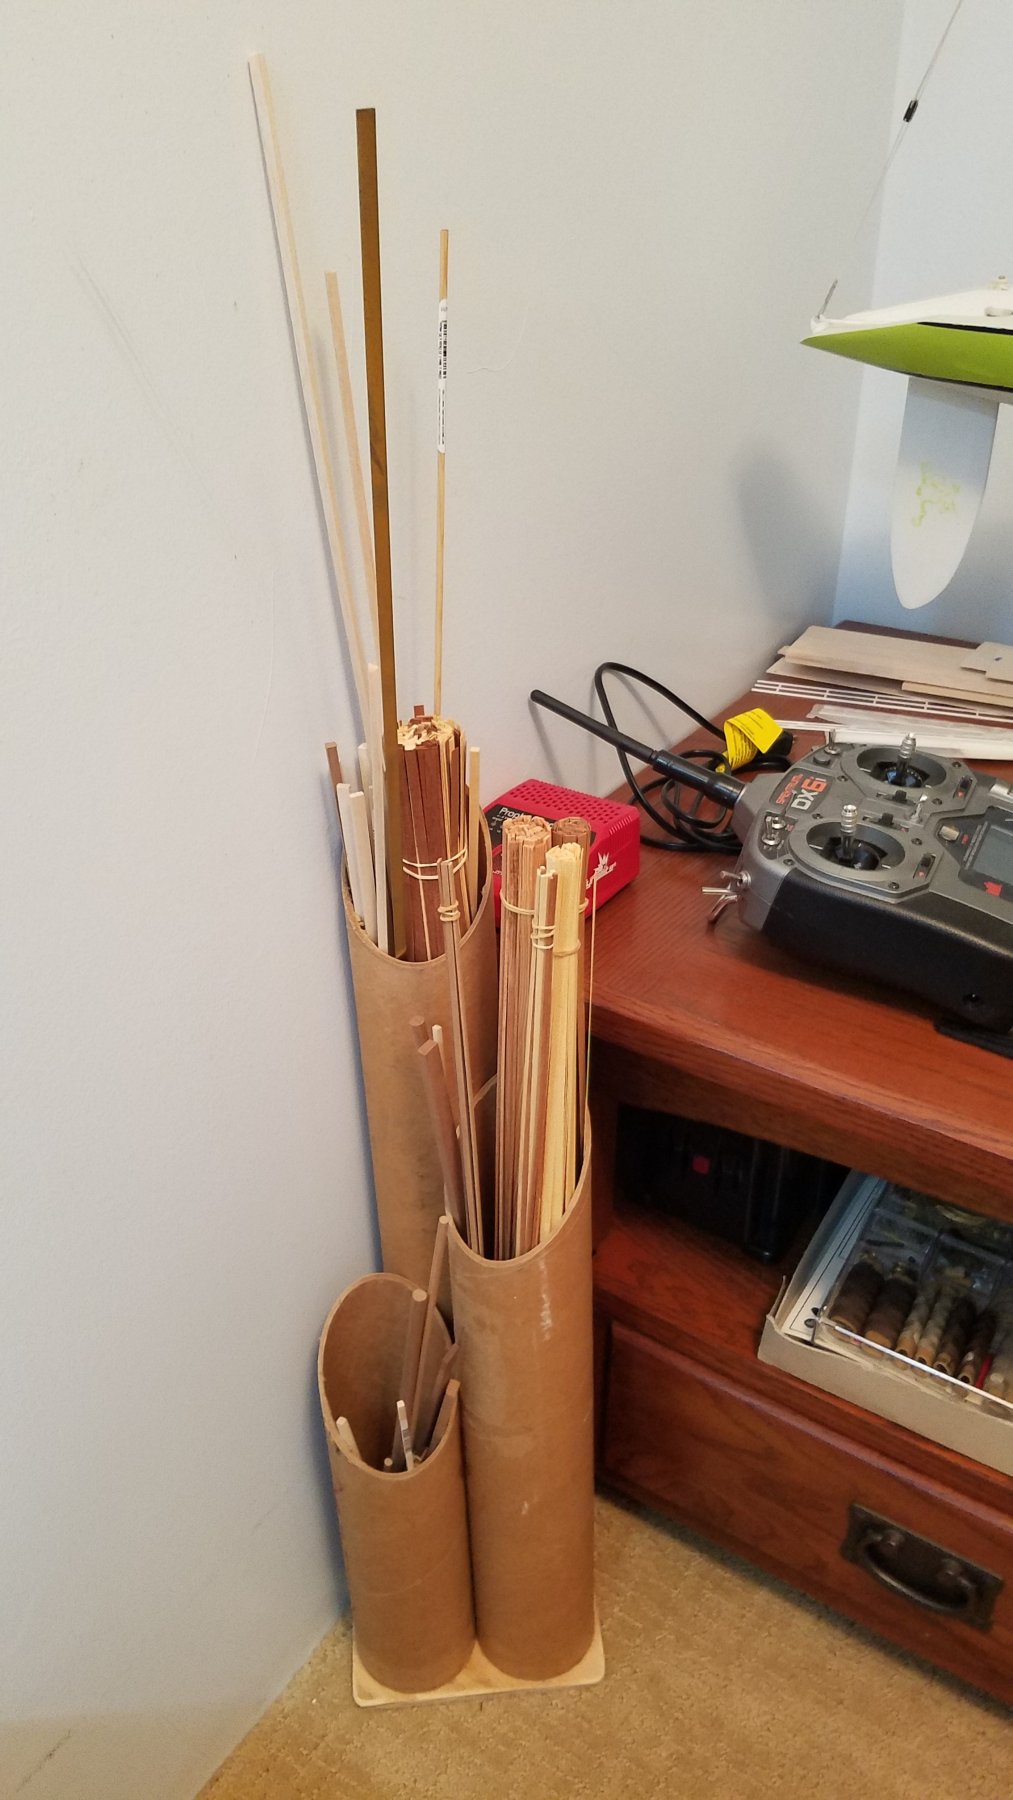
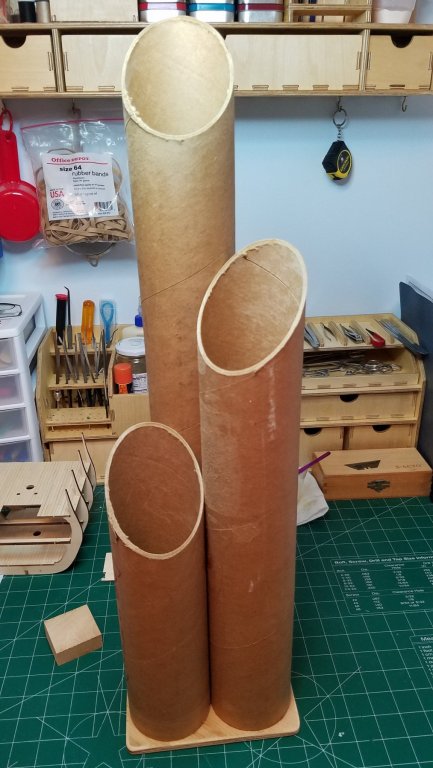
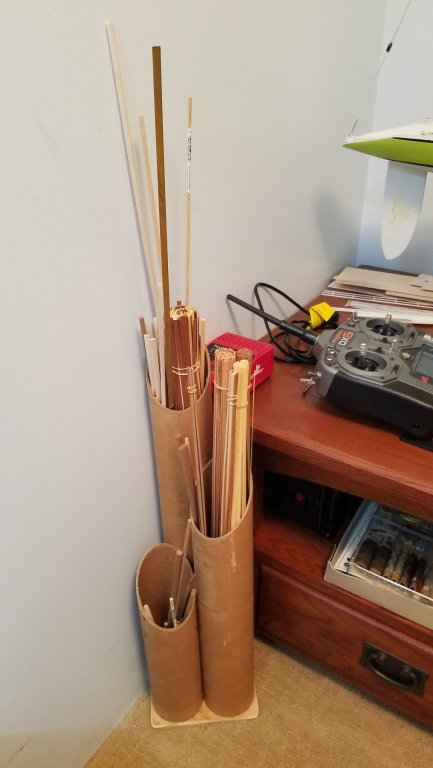
I have been meaning to do this for quite a while but just got around to it. If you are like me and most model builders I know there is just no piece of wood that is truly scrap. So I made this today, a quick and dirty wood storage solution. It is made from some 3" cardboard shipping tube that we get SS tubing in at work and a couple of pieces of plywood that I had laying around (not scrap!). Cost of Materials $0.00 And it made the Admiral very happy, Priceless!
- 18 replies
-
- 16
-
-
Fellow member robdurant posted an excellent photo collection of the Victory there are about 150 or so pics and they are very informative. One shot is of the exact area you are asking about and clearly shows the "lidless" waist gun ports. Follow the link bellow. Rob Durant Victory Photos Best Regards
-
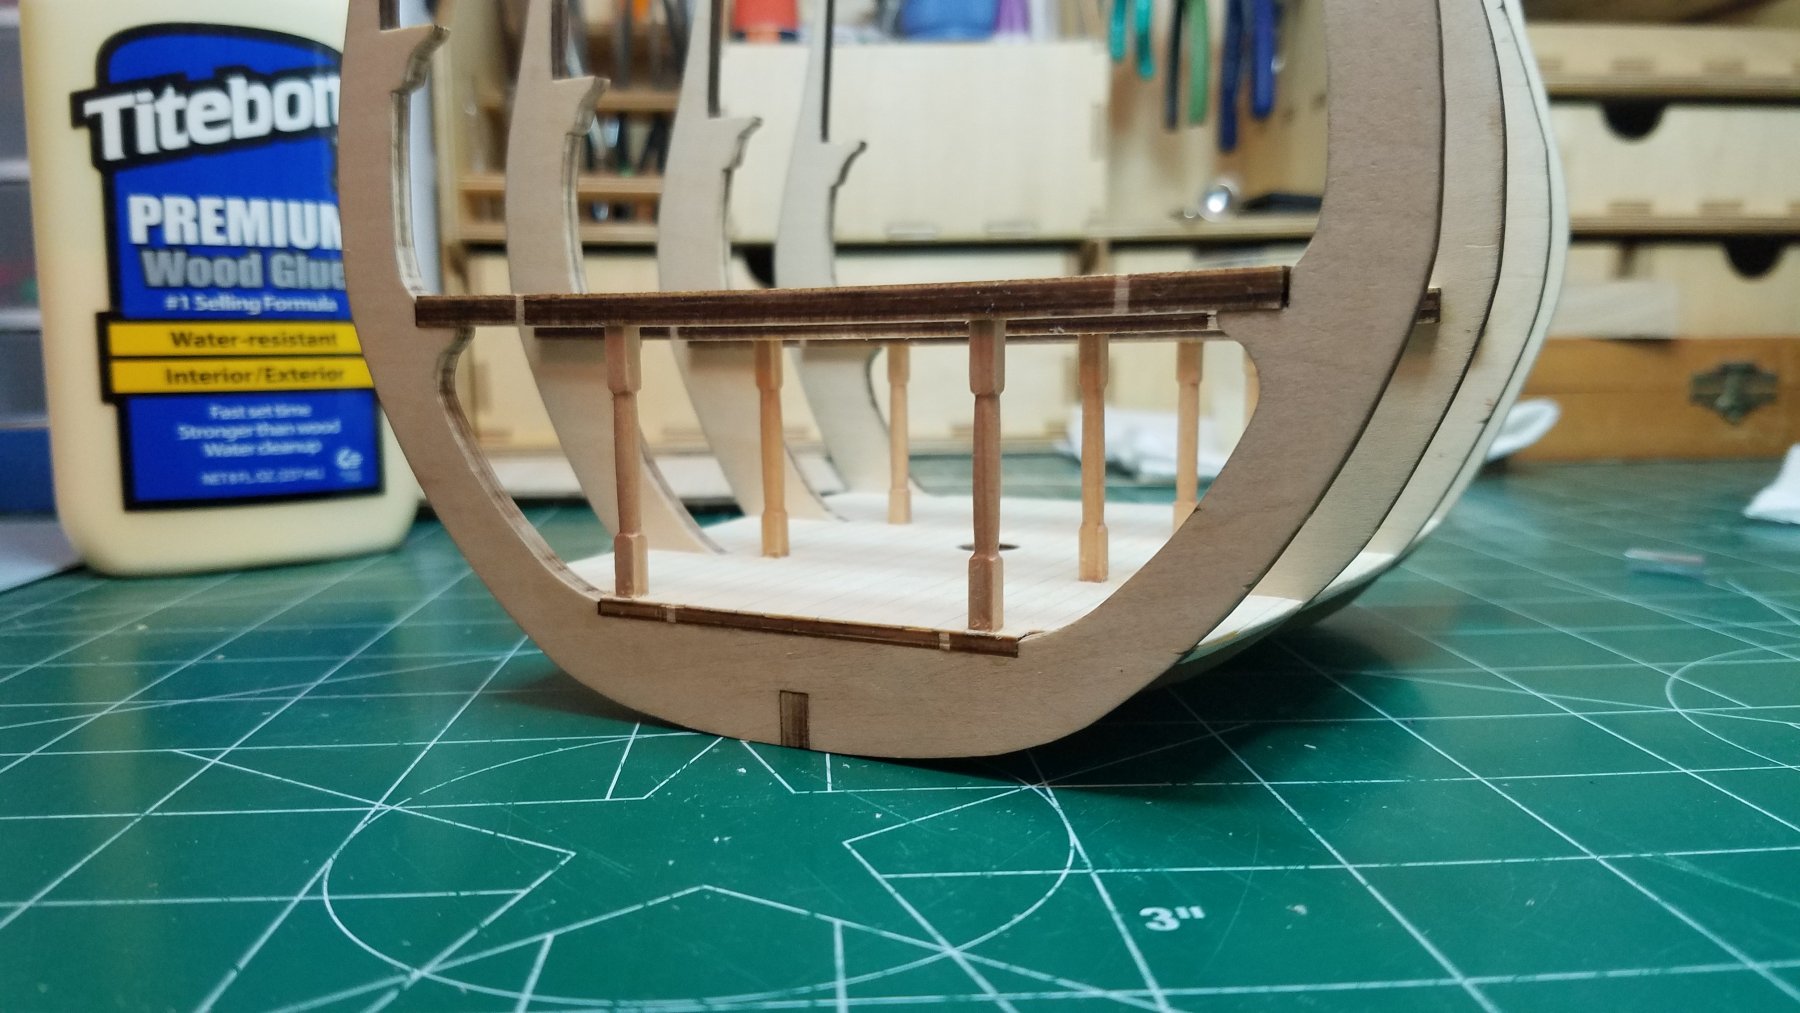
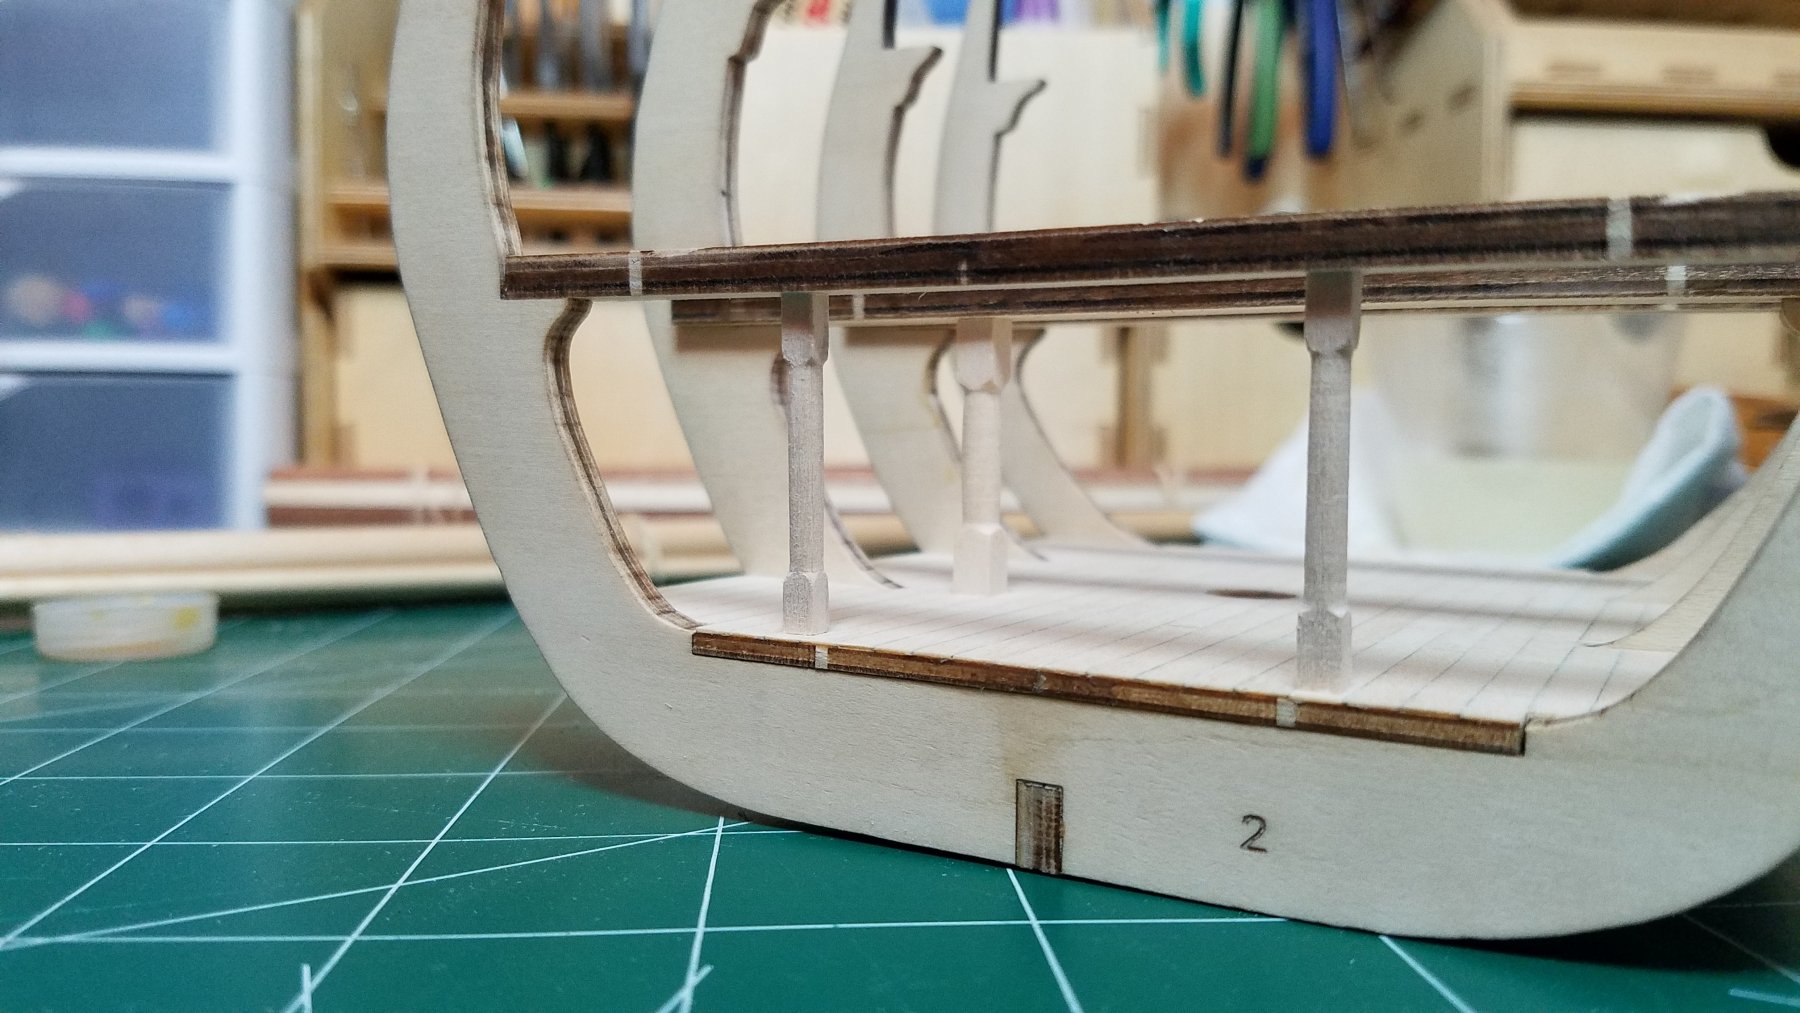
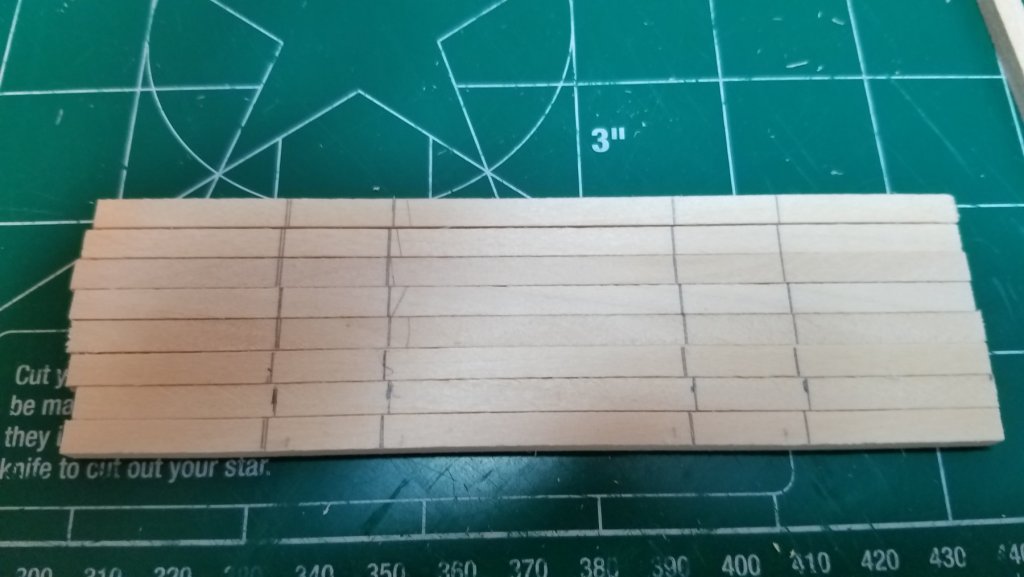
Well finally 16 little stanchions. Now all I have to do is trim them to length, hit them with some 400 grit sand paper, stain and install them. That should only take the rest of the weekend.
- 139 replies
-
- 4
-
-
- san francisco
- artesania latina
- (and 1 more)
-
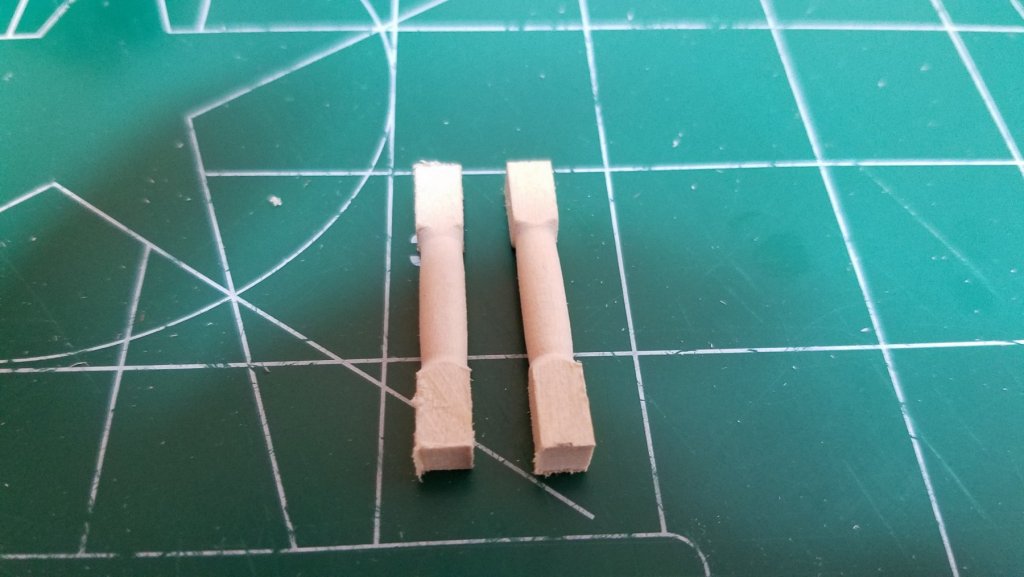
I have a bunch of 1/8" bass wood laying about so I made a couple of stanchions to compare with the 5/16" ones. The 1/8" is still slightly larger than the 3mm stock provided in the kit. It requires a little more patience to set the smaller stock up in the lathe and a much lighter hand while turning. As you can see I made no attempt to shape the barrel this time. These are only the first samples to see if I could even turn 1/8" material. I think they look much better. The difference is a little over 3-1/2" at full scale. Since the setup is so finicky I think I will wait till Saturday to do the final turnings that way I have the whole day uninterrupted. In the mean time there are plenty of crates and barrels to work on. Regards


- 139 replies
-
- 4
-
-
- san francisco
- artesania latina
- (and 1 more)
-
Try a fabric or dress making shop they usually carry paper or cloth tapes. That could turn into a little weekend side project.
-
After thinking about it I might try to find some smaller stock today and see which I prefer.
-
The deck planking looks fantastic. What is this jig of which thou speaketh.
-
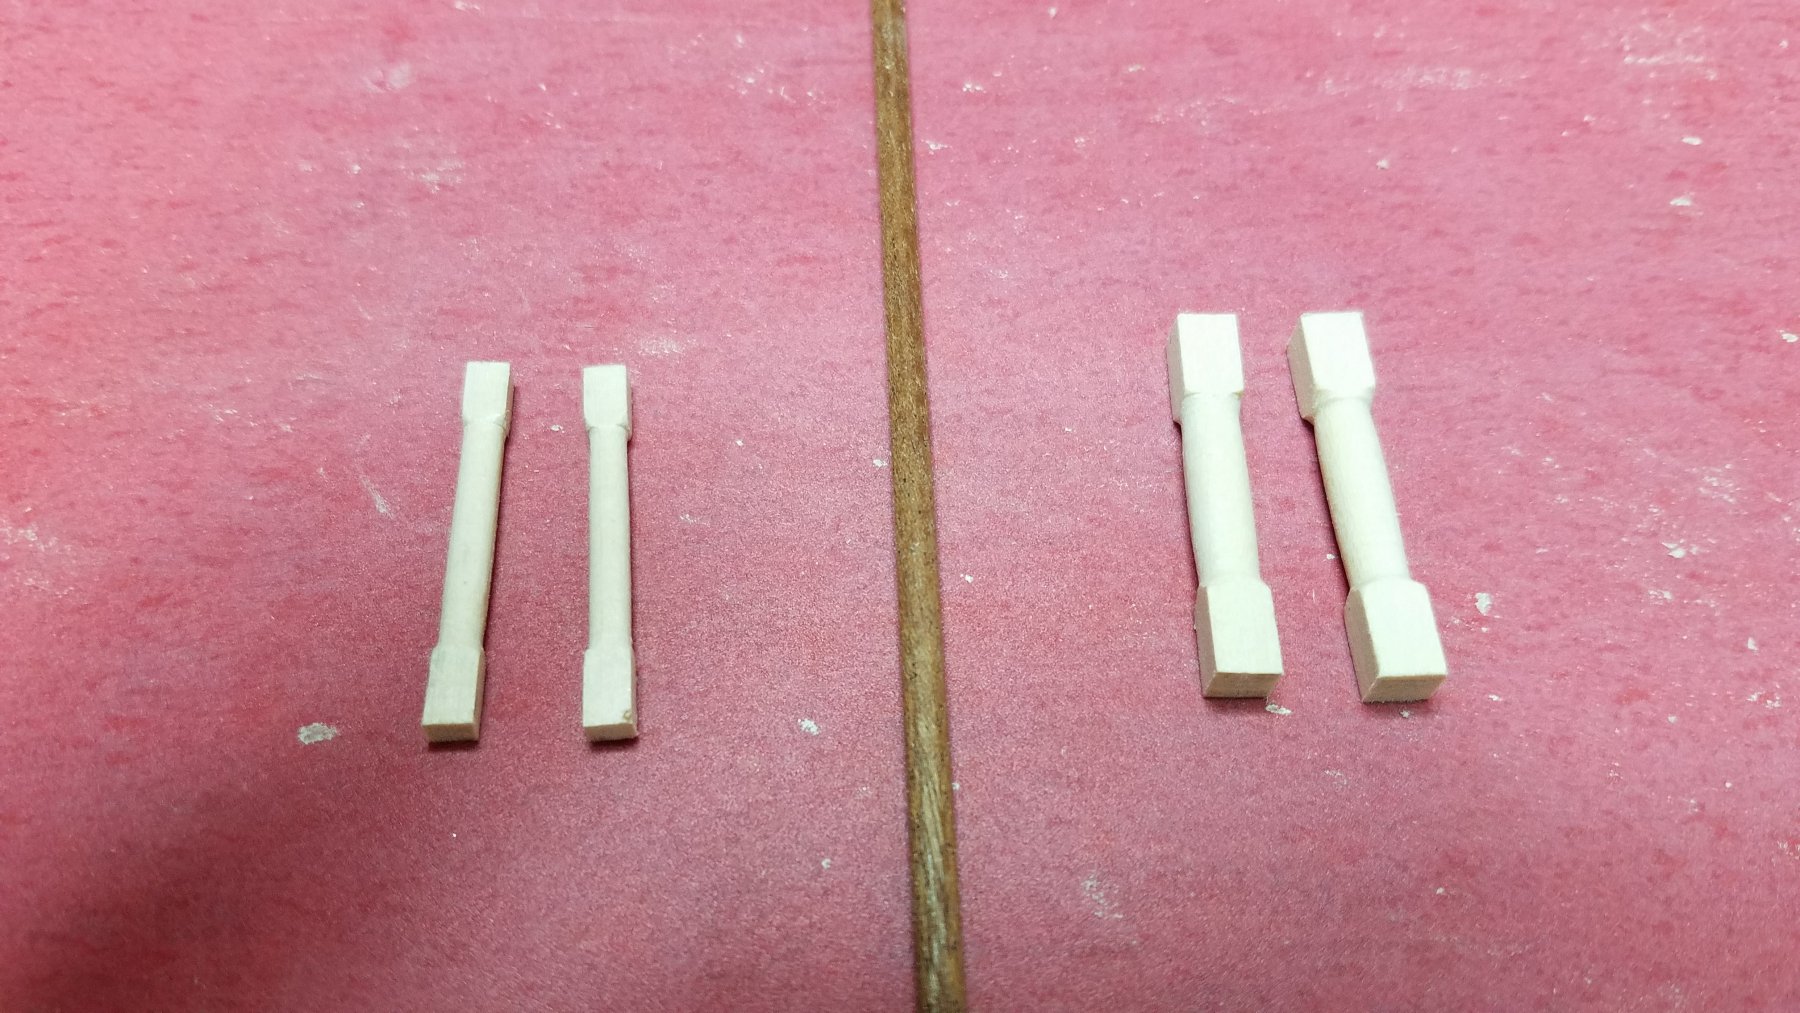
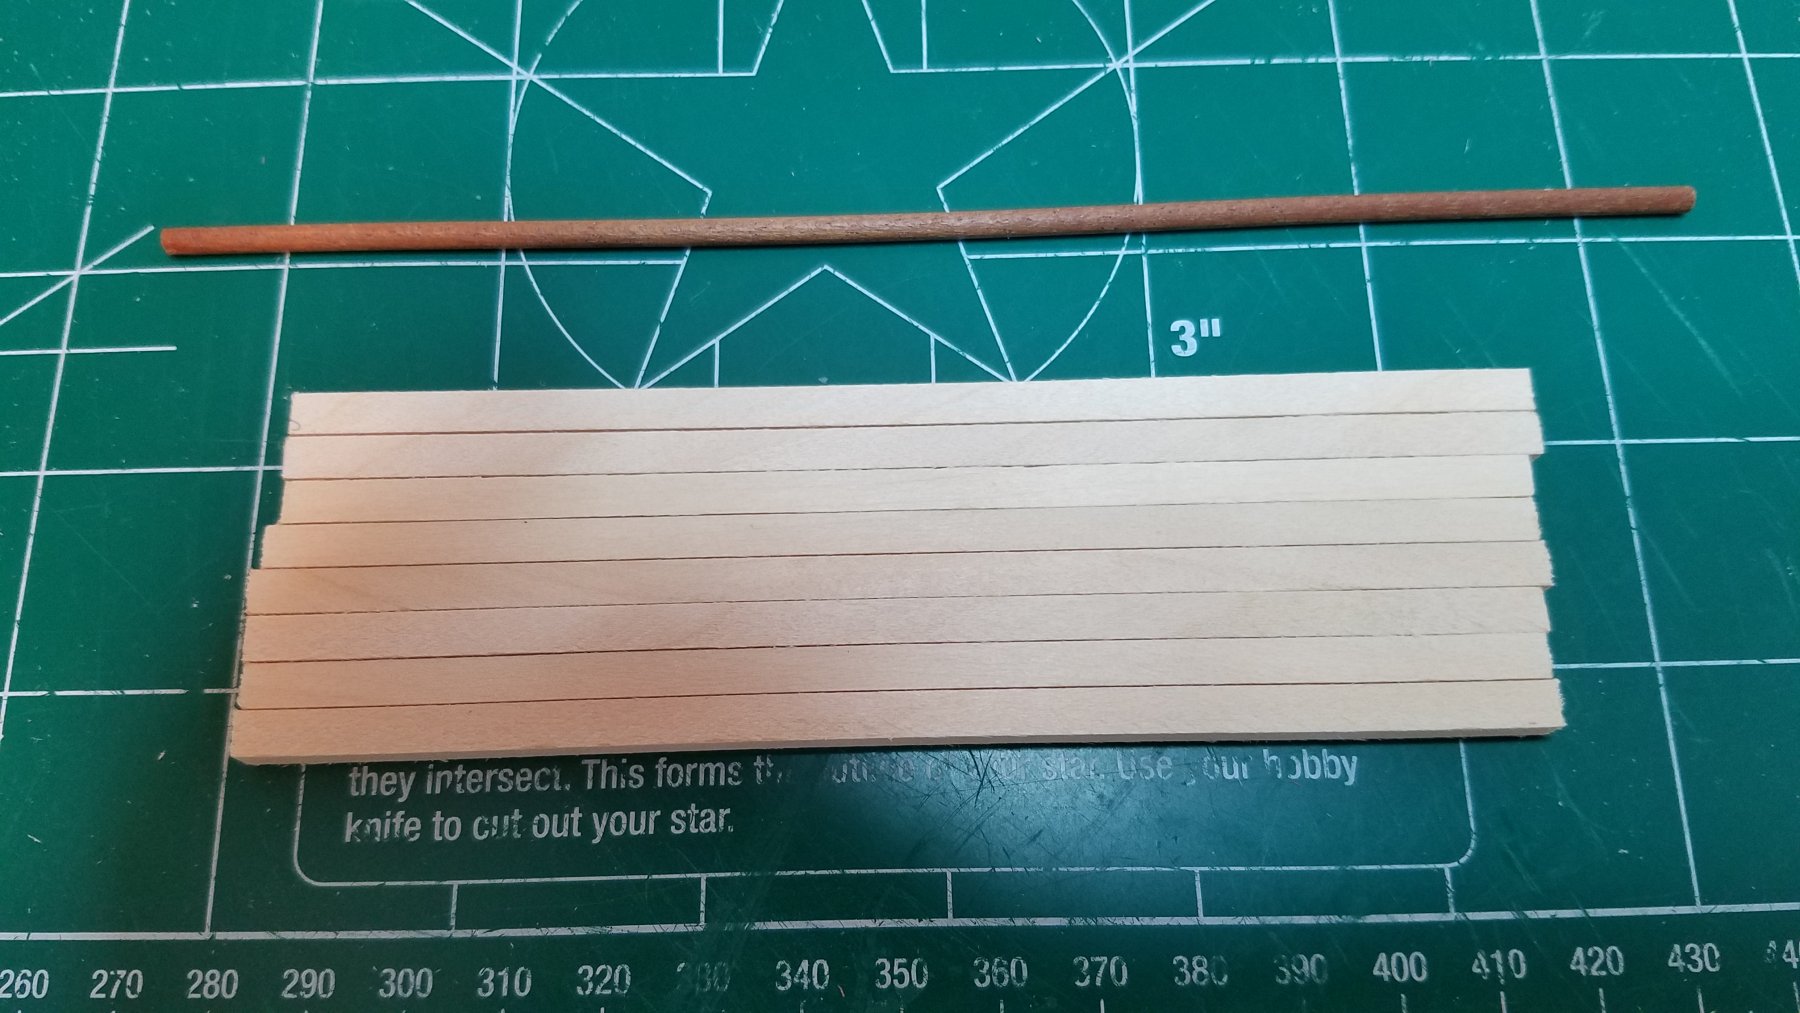
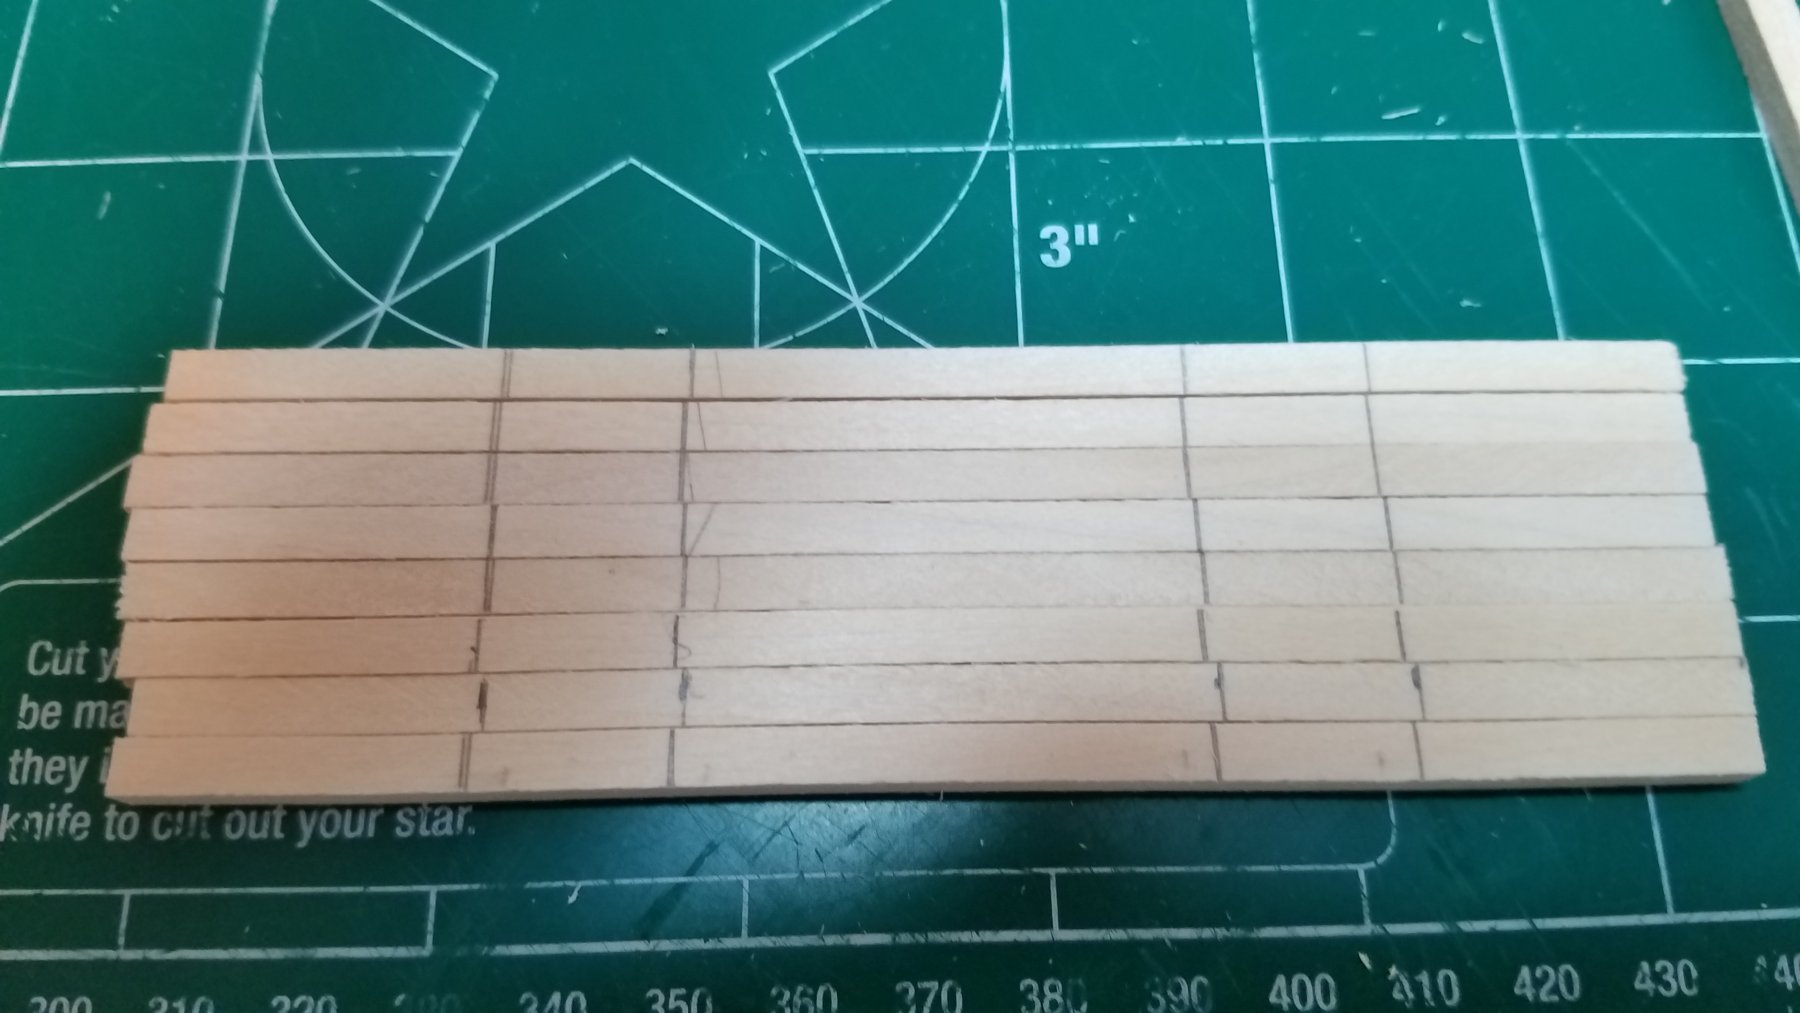
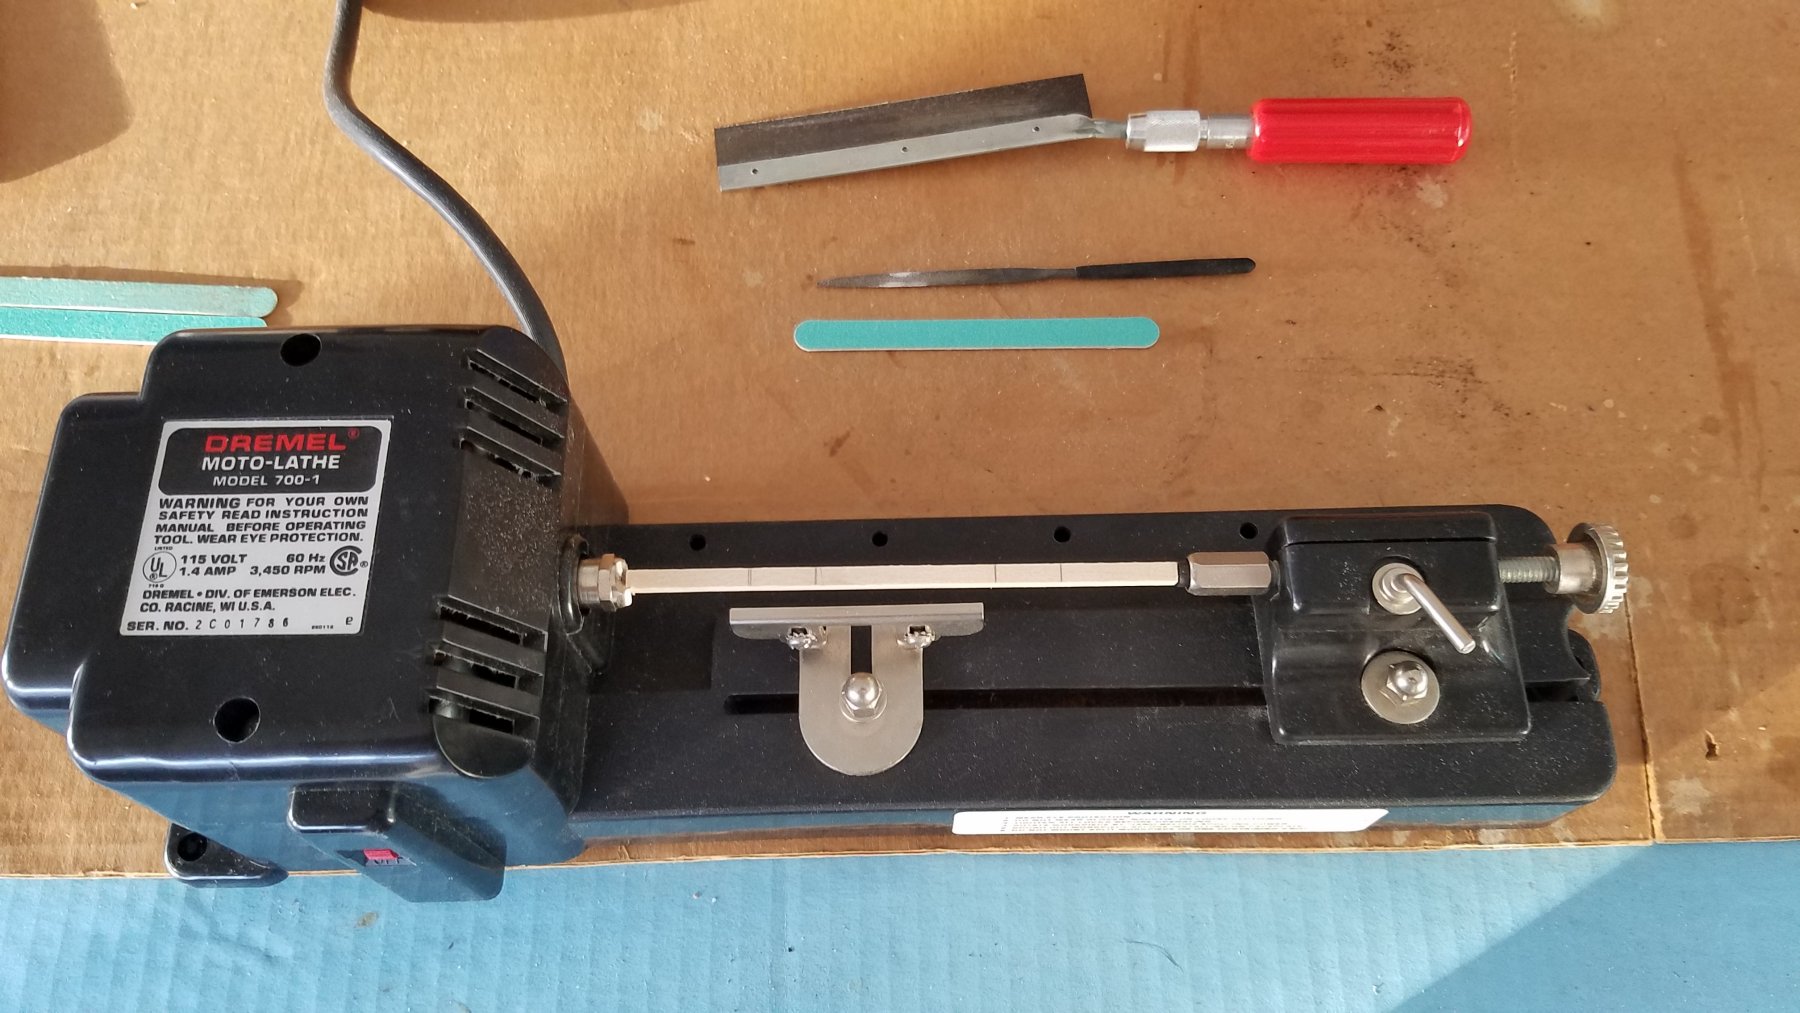
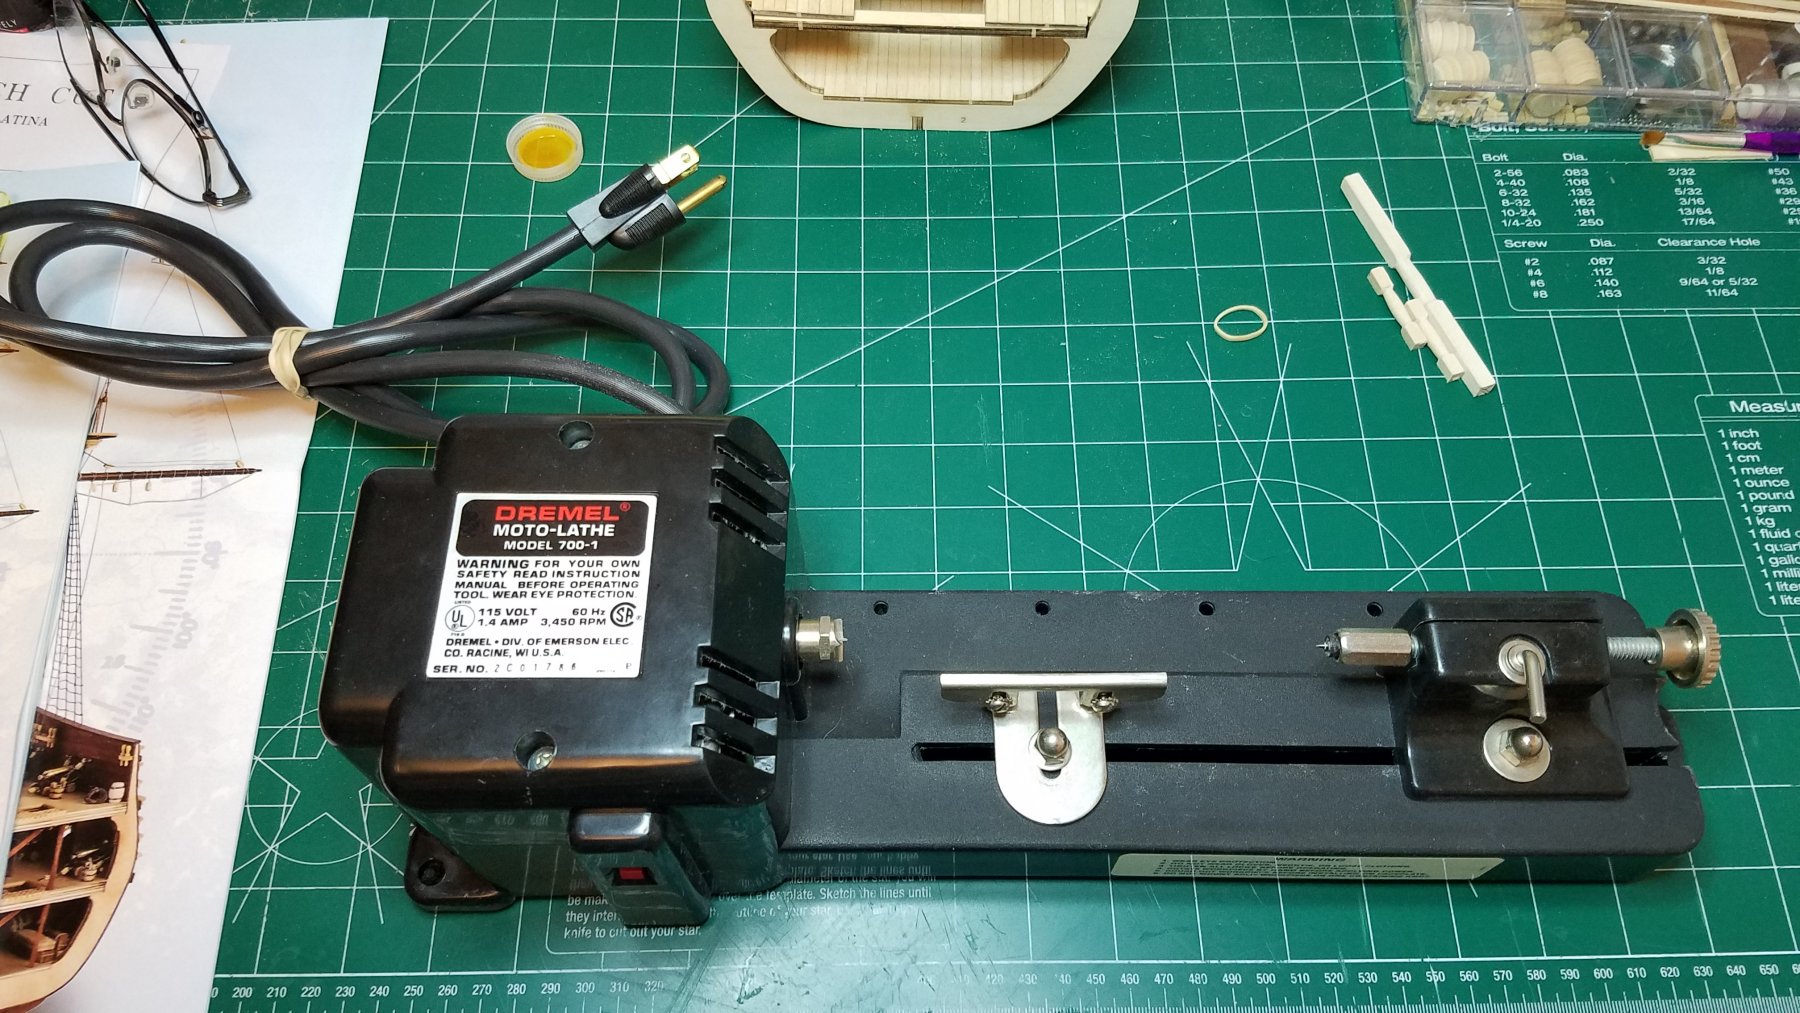
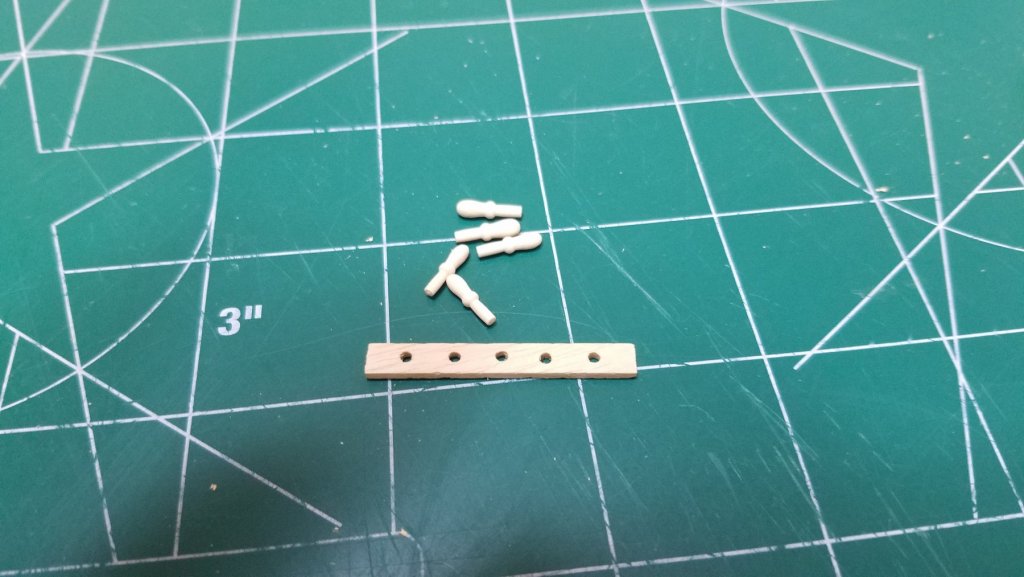
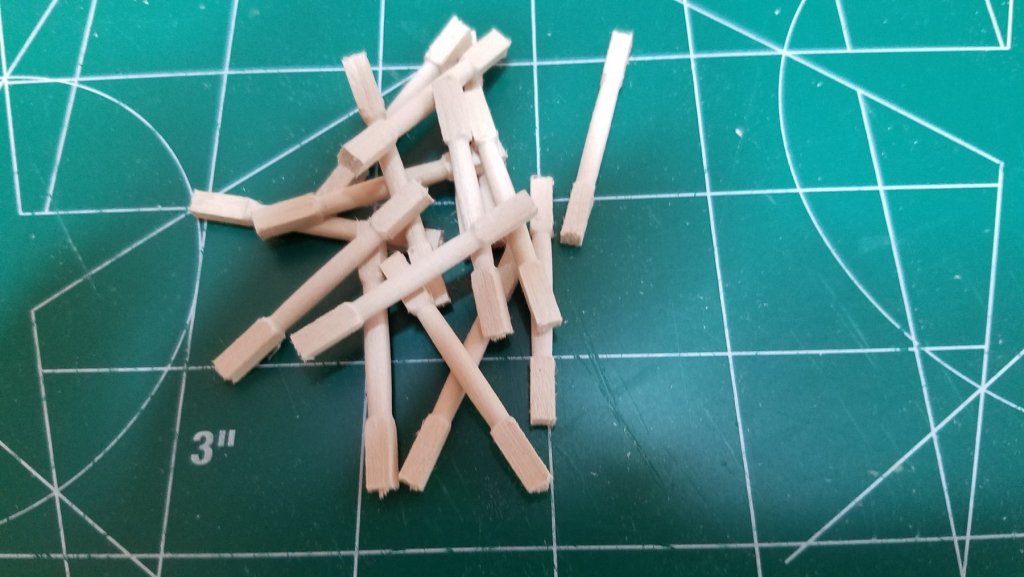
Thanks for all the likes and kind words guys. Well in the end I decided to forget the tree nails and following Jim's advice sanded them out. I then glued the lower deck in place and installed the cross beams for the middle deck. Then it was time to make the support stanchions. The kit supplies some 3mm walnut dowels that you are supposed to thin down in the middle for this purpose. While going through the supplied lumber I realized that they only gave me 1 of the required 4 dowels. I did not like the look that the dowel gave anyway so I decided to turn the needed stanchions. It was then that I remembered I did not have a lathe. So on to "offer up" I went and found someone about 5 miles away selling a pretty much brand new Dremel Lathe for $50.00. I know it is less than average quality but for the price I figured if I have to toss it after this project I won't really cry about it. The larger turning in the upper right is a sample I made from 1/4" Basswood in less than 5 minutes. The only material I had that was near the right size was 3/16" Basswood. Like I said the 3mm dowel looked way under sized the 3/16" stock looks huge laying next to it. I need 16 stanchions total here are the blanks laid out for 2 each. Oh did I mention that the lathe did not come with any gouges. Here is a picture of the first piece chucked up and ready to go. Also pictured are my turning tools. A 1/2 round tapered needle file, a 1/2" wide emery board, and my exacto saw. And 10 minutes later the first pair of stanchions. I know there is a lot of waste but I was not sure what the final length of each stanchion would be as each pair is different. Not to bad for a cheap lathe no proper tools and a 62 year old guy that has not done any wood turning since High School wood shop. Because this kit models the deck sheer all of the pairs of stanchions are slightly different lengths so they need to be trimmed and fitted individually. I am not sure why but they look really chubby in the photos. They do not look that big in person. I guess it is true the camera adds 10 pounds. Anyway I think they look better than the puny kit supplied dowels would. I managed to get 2 more done tonight so that leaves 4 more for tomorrow. I decided when I started this kit that I would not use paint and keep stain to a minimum but since I do not have any small walnut stock I will stain these so they stand out a little. All in all the little lathe did just fine very quiet and very, very little vibration. For the price I am quite happy. Thanks for looking in.


- 139 replies
-
- 8
-
-
- san francisco
- artesania latina
- (and 1 more)
-
Very impressive Doc. A beautiful piece of eye candy for sure. Can't wait to see what's next.
-
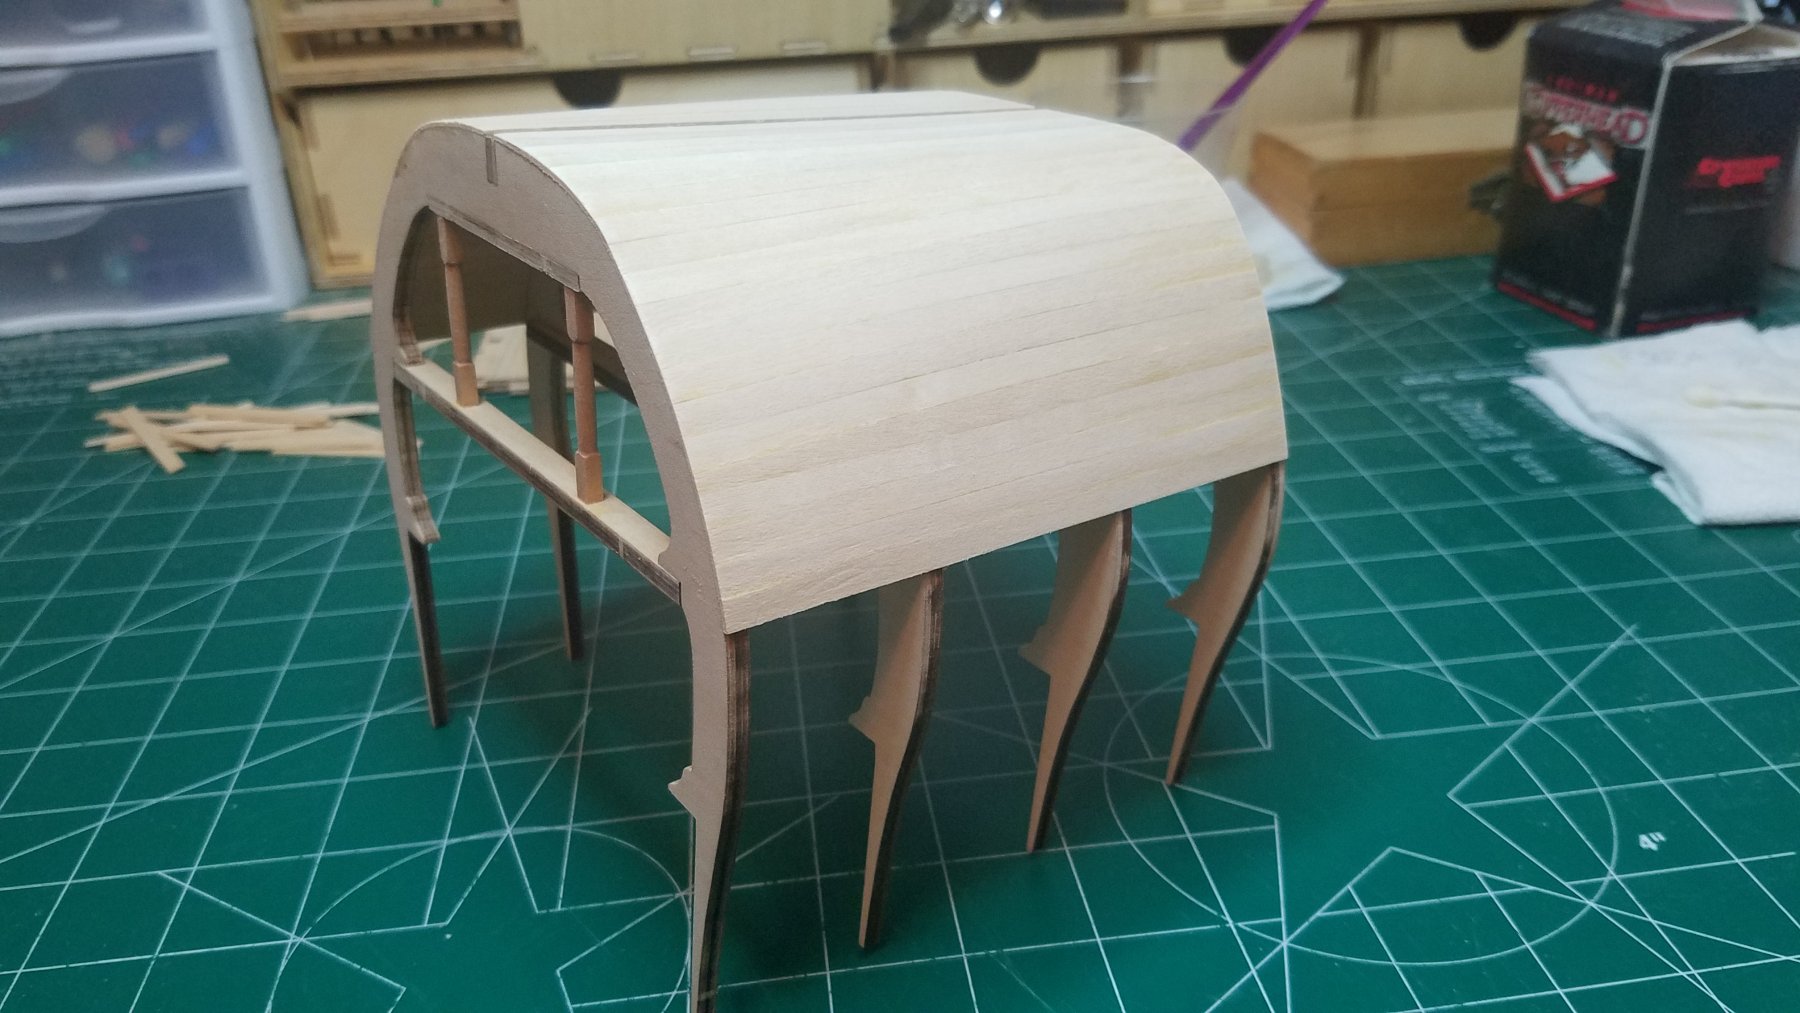
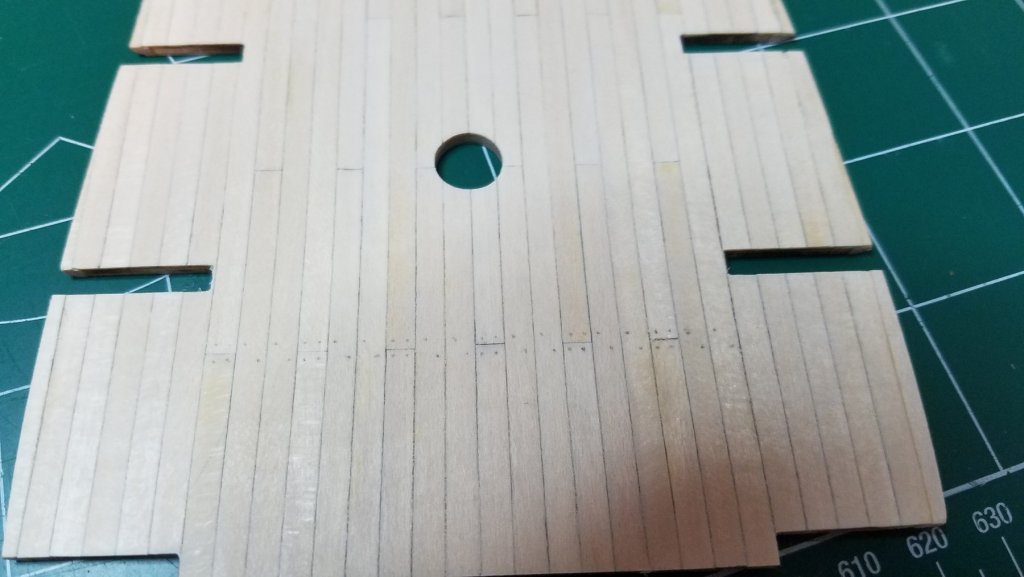
Well I have not had much time to work on this in the past few days but what little time I had was spent on planking the other two decks. The upper deck is finished except for final sanding. The extreme outboard edges of the middle deck will need to wait for the support beams to be in so that the remaining planks can be fitted around the frames. I also tried to draw in some tree nails. I must say my first attempt at it is a complete disappointment. If I could figure a way to get rid of them I would and just forget about doing the rest. I know there must be a better way. Oh well, practice, practice, practice. Is there a tutorial on tree nails? At least I was smart enough to start on the lower deck where they will be fairly well hidden. Thats all for now.

- 139 replies
-
- 3
-
-
- san francisco
- artesania latina
- (and 1 more)
-
Funny I was just reading up on that in Historic Ship Models by Wolfram zu Mondfeld and he agrees with Pete that capstan and winch handles would have been stored on brackets around the mast or on nearby bulwarks or deck house bulkheads. Regards
-
I would love to build one of these but lack the workshop resources (and probably the skill). Understanding that the kit itself would probably not be the same quality as we are seeing here. I would still like to give it a go. I was just wondering is there any reason that anyone in general, MSW members in particular should not order one of the kits from MSB? Thanks
- 128 replies
-
- 3
-
-
- mordaunt
- battle station
- (and 1 more)