Osmosis
-
Posts
626 -
Joined
-
Last visited
Content Type
Profiles
Forums
Gallery
Events
Everything posted by Osmosis
-
 Thanks Morgan I checked them out and yes that is a bit more than I want to spend. In the mean time an extra brain cell or two kicked in. Since I have already built the Model Expo version in 1/24 scale I sent them an e-mail to see if they would sell me just the barrels. Regards
 -
I have decided that my next build will be a scratch built battle station. Does anyone know of a reliable source for larger scale preferably brass cannon barrels? I have been searching but have not come up with anything. Thanks in advance
-
As usual I am a little late to the party. Mind if I join in?
-
Welcome aboard Dave. +1 on the build log it is the best way to get help while giving a little back at the same time.
-
Welcome aboard. Not to worry lots of helpful folks around here.
-
Welcome aboard, I have been looking in on your build also. From what I have been able to find on the web this does not really detail a specific section of the ship so much as it does a compressed version of details mashed into a few frames. So I will not be going for any kind of historical accuracy. But I do plan on having fun with it and in the end hopefully turn out a nice display. Best regards
- 139 replies
-
- 1
-

-
- san francisco
- artesania latina
- (and 1 more)
-
Aha! I get to add a new term to my ship building database. That would explain it. Thank you once again Peter.

-
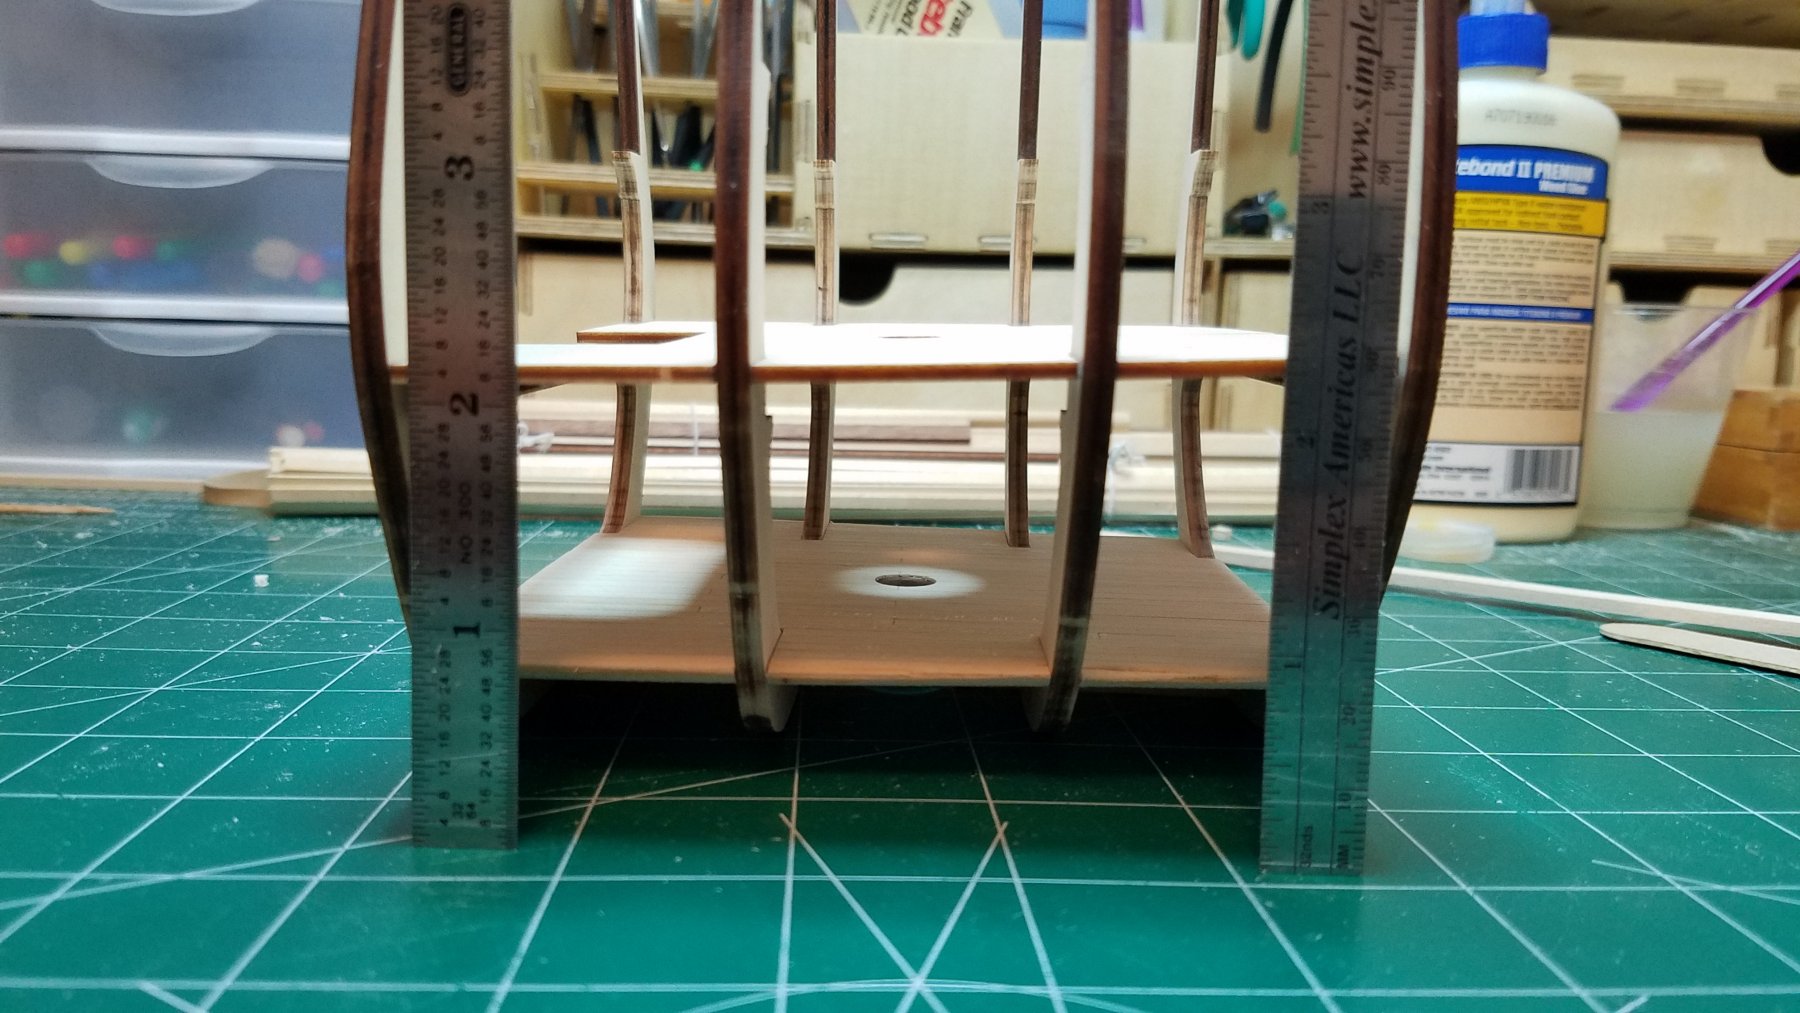
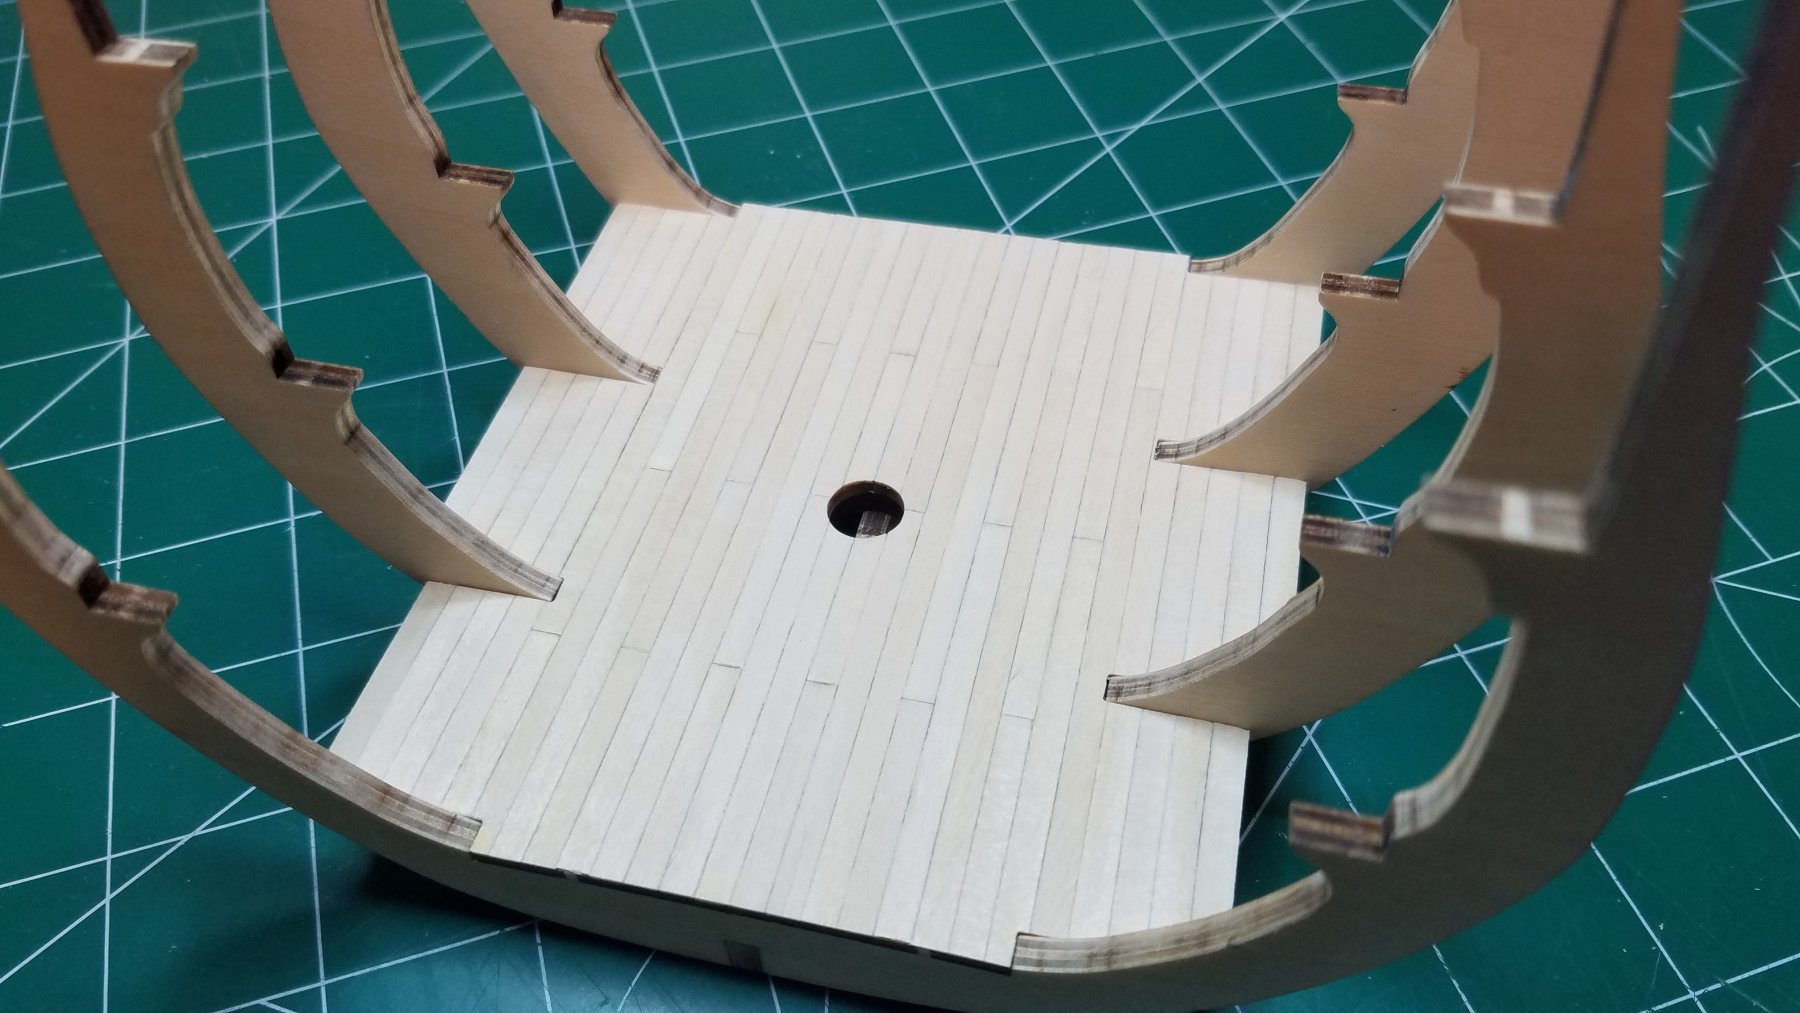
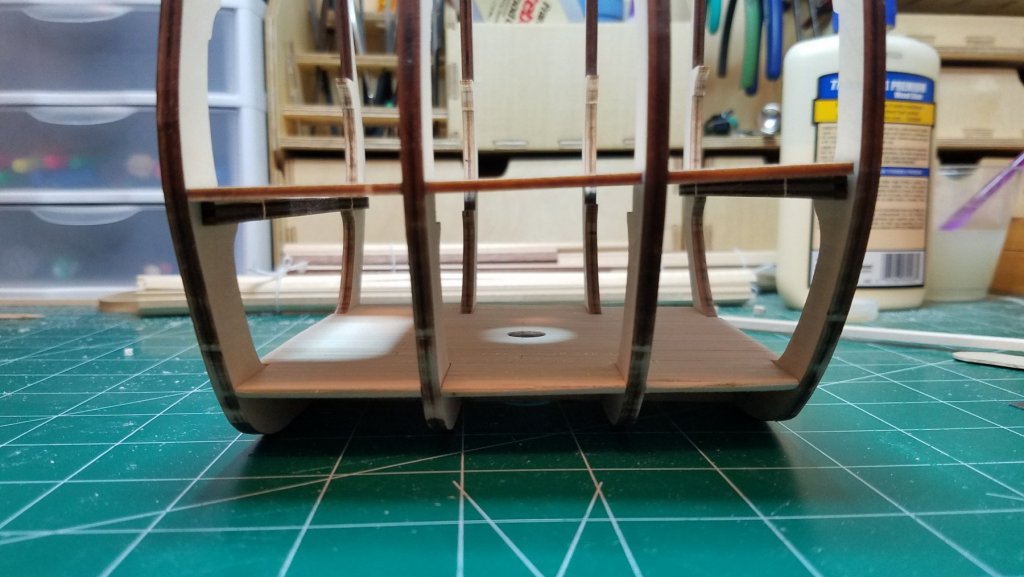
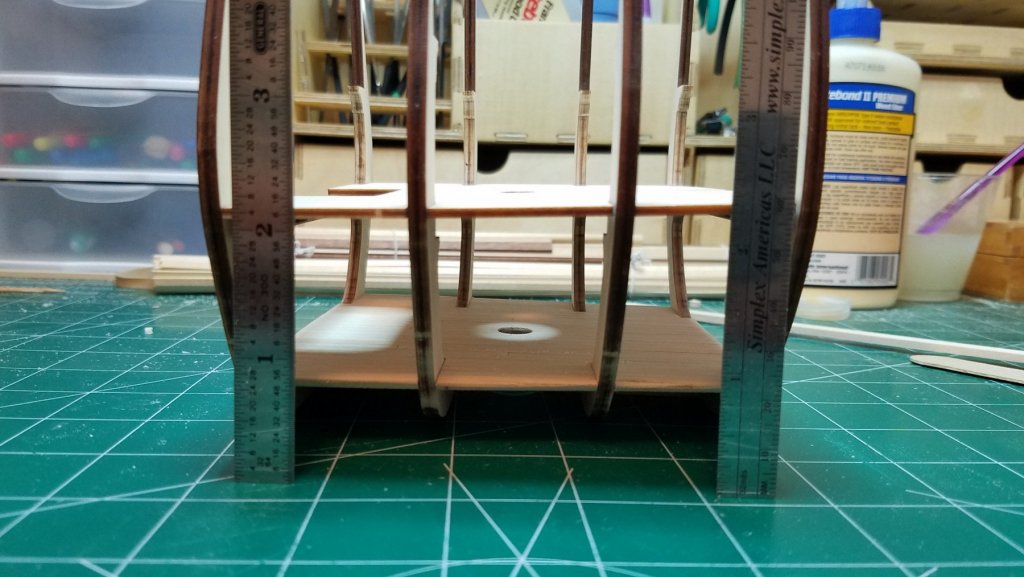
Well Fixed one problem and found another. Last row of planks on and waiting for someone (Me) to layout the nails. I have read in other builds that the mid and upper decks sat on only the fore and aft most knees. So I wanted to check that and install any shims before it was too late. What I found is that not only is that the case, but..... The mid deck tilts about 3/16" running down hill from stern to bow. Also checking the upper deck found it runs about 1/8" from stern to bow. Both when compared to the lower deck. The center deck beams are not in place in these pictures but if you hold a straight edge on all four knees there is about a 1/16" gap between the center two knees and the deck. There are no pictures in the instructions that show this much of a side view. Could this be intentional? Has anyone else run across this? Should the decks be parallel to one another? I know that is not always the case. The obvious fix is to file down the aft two knees until the deck sits on all four frames then add shims if needed. The good news is that the mid deck runs all the way to the outside edge of the frames. Thanks and best regards,

- 139 replies
-
- 2
-
-
- san francisco
- artesania latina
- (and 1 more)
-
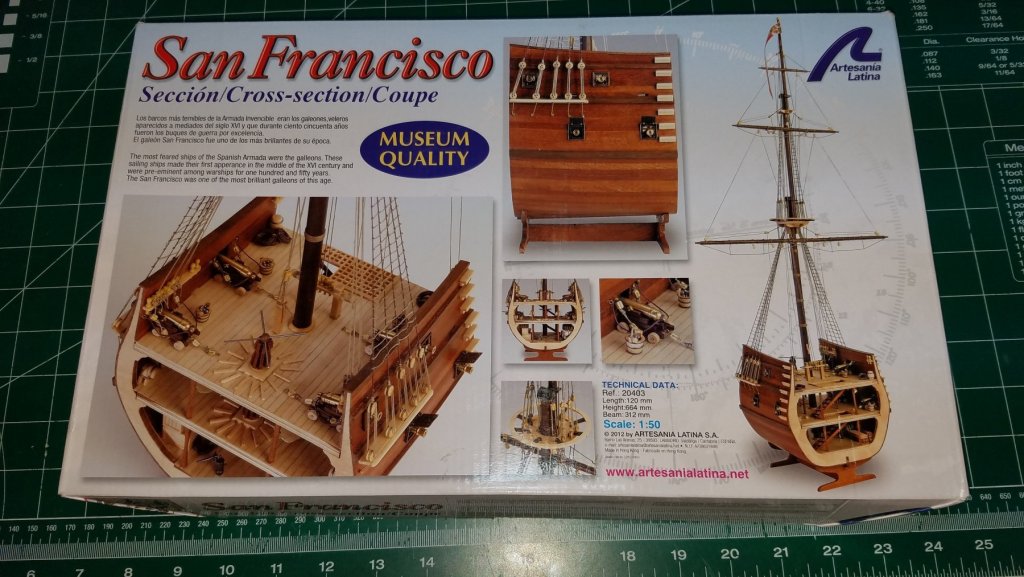
Has anyone read this? Since I am building the San Francisco cross section I thought it might be worth a look.
-
Wow, In my excitement to find a build log on this kit I did not notice the date on the last post. I would very much appreciate it if you dropped everything else and got back to work on it. Just kidding of course. I just got back to model building after an eight month layoff myself. Life has a habit of intruding on our passion every now and then. Best Regards
-
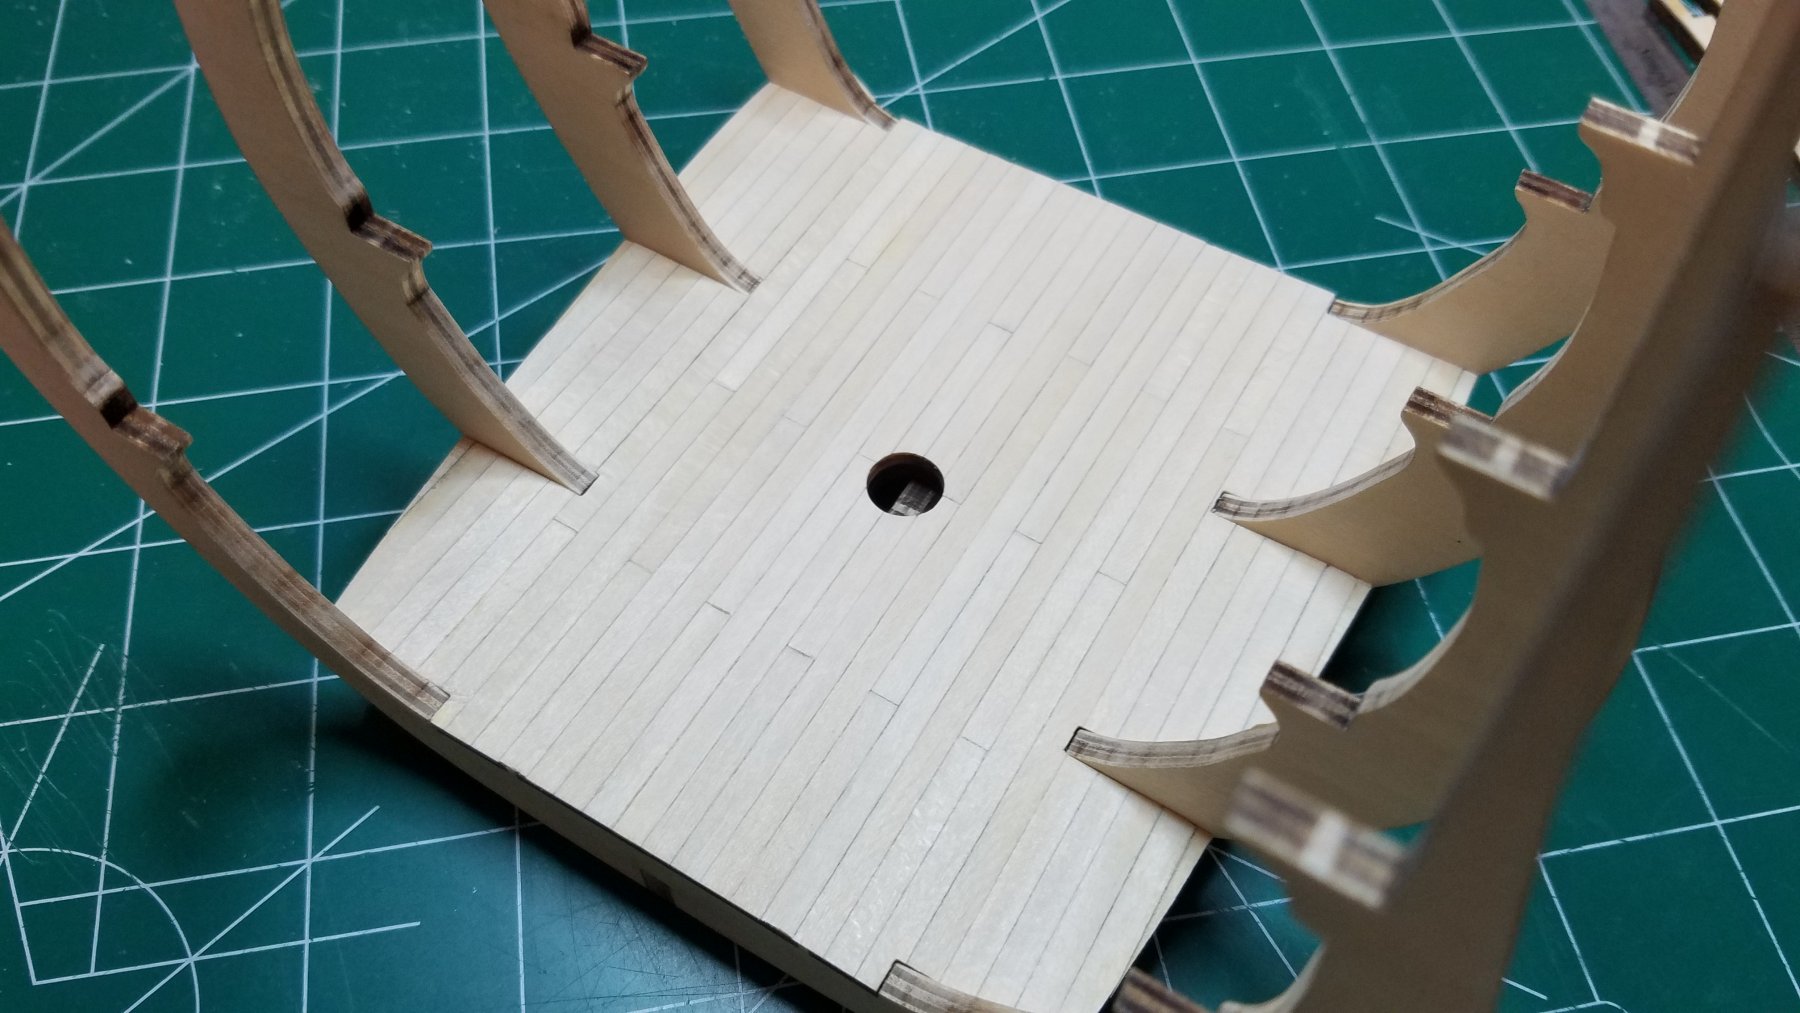
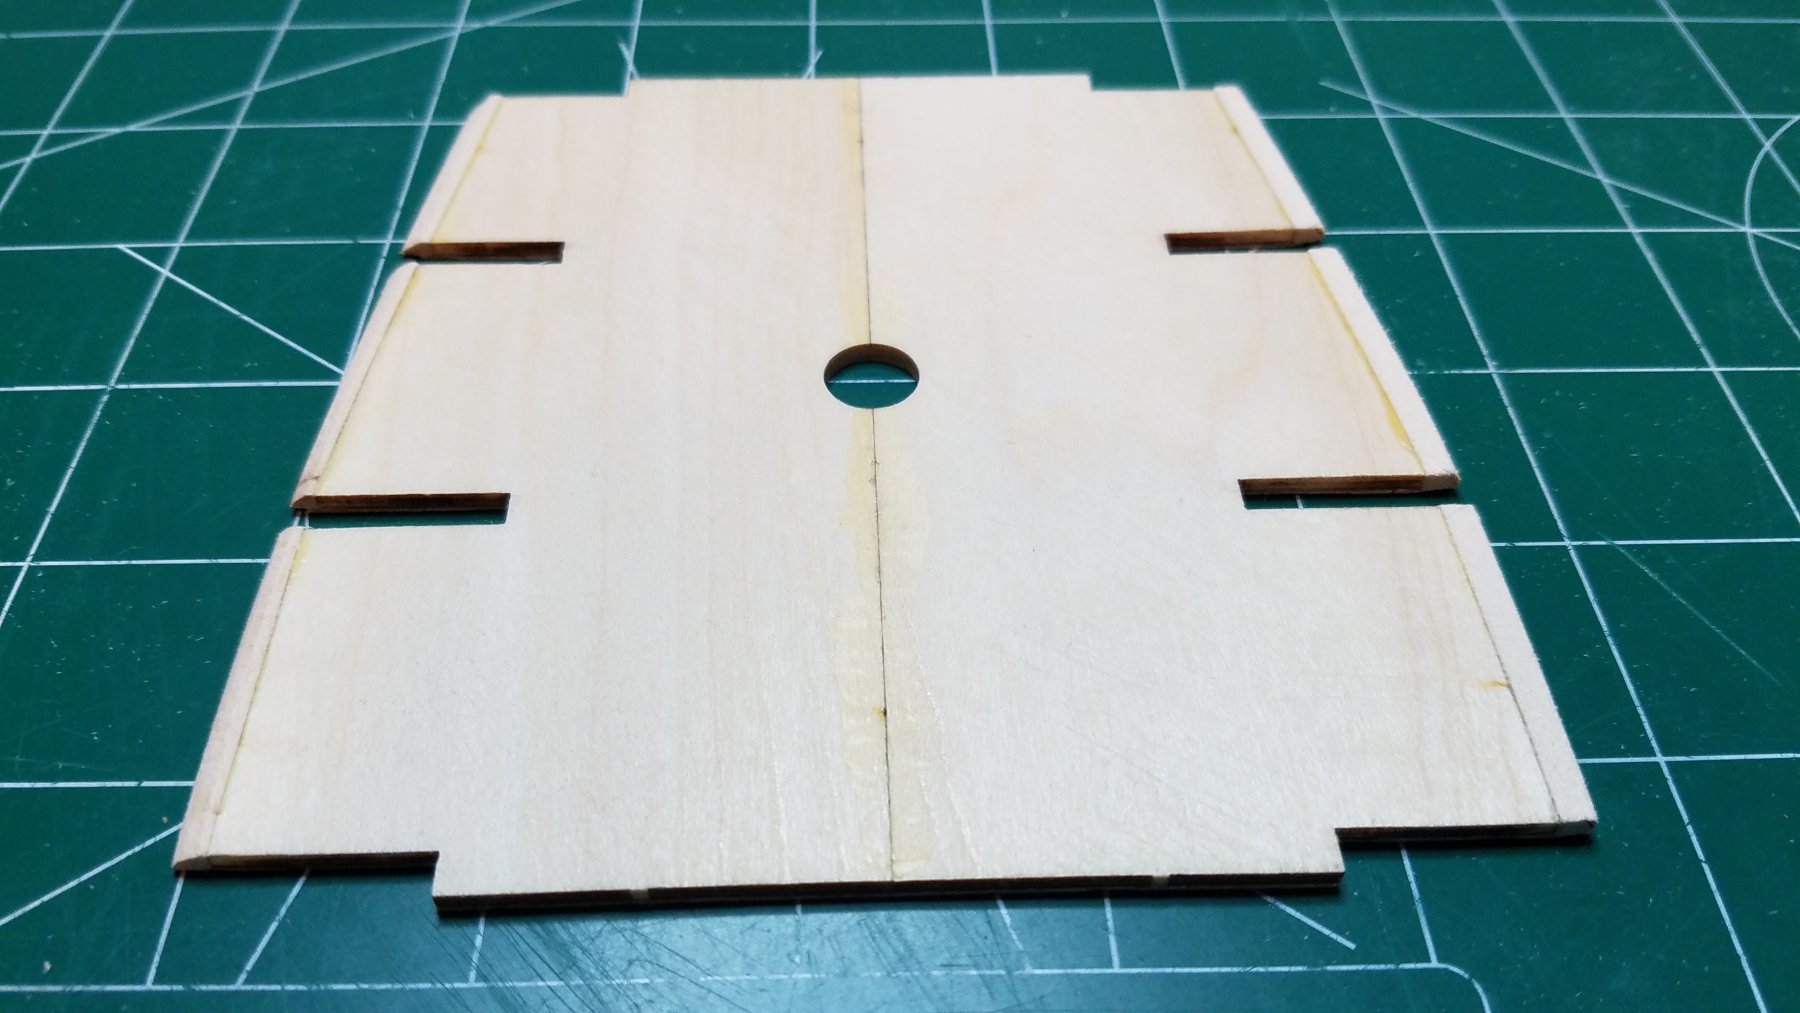
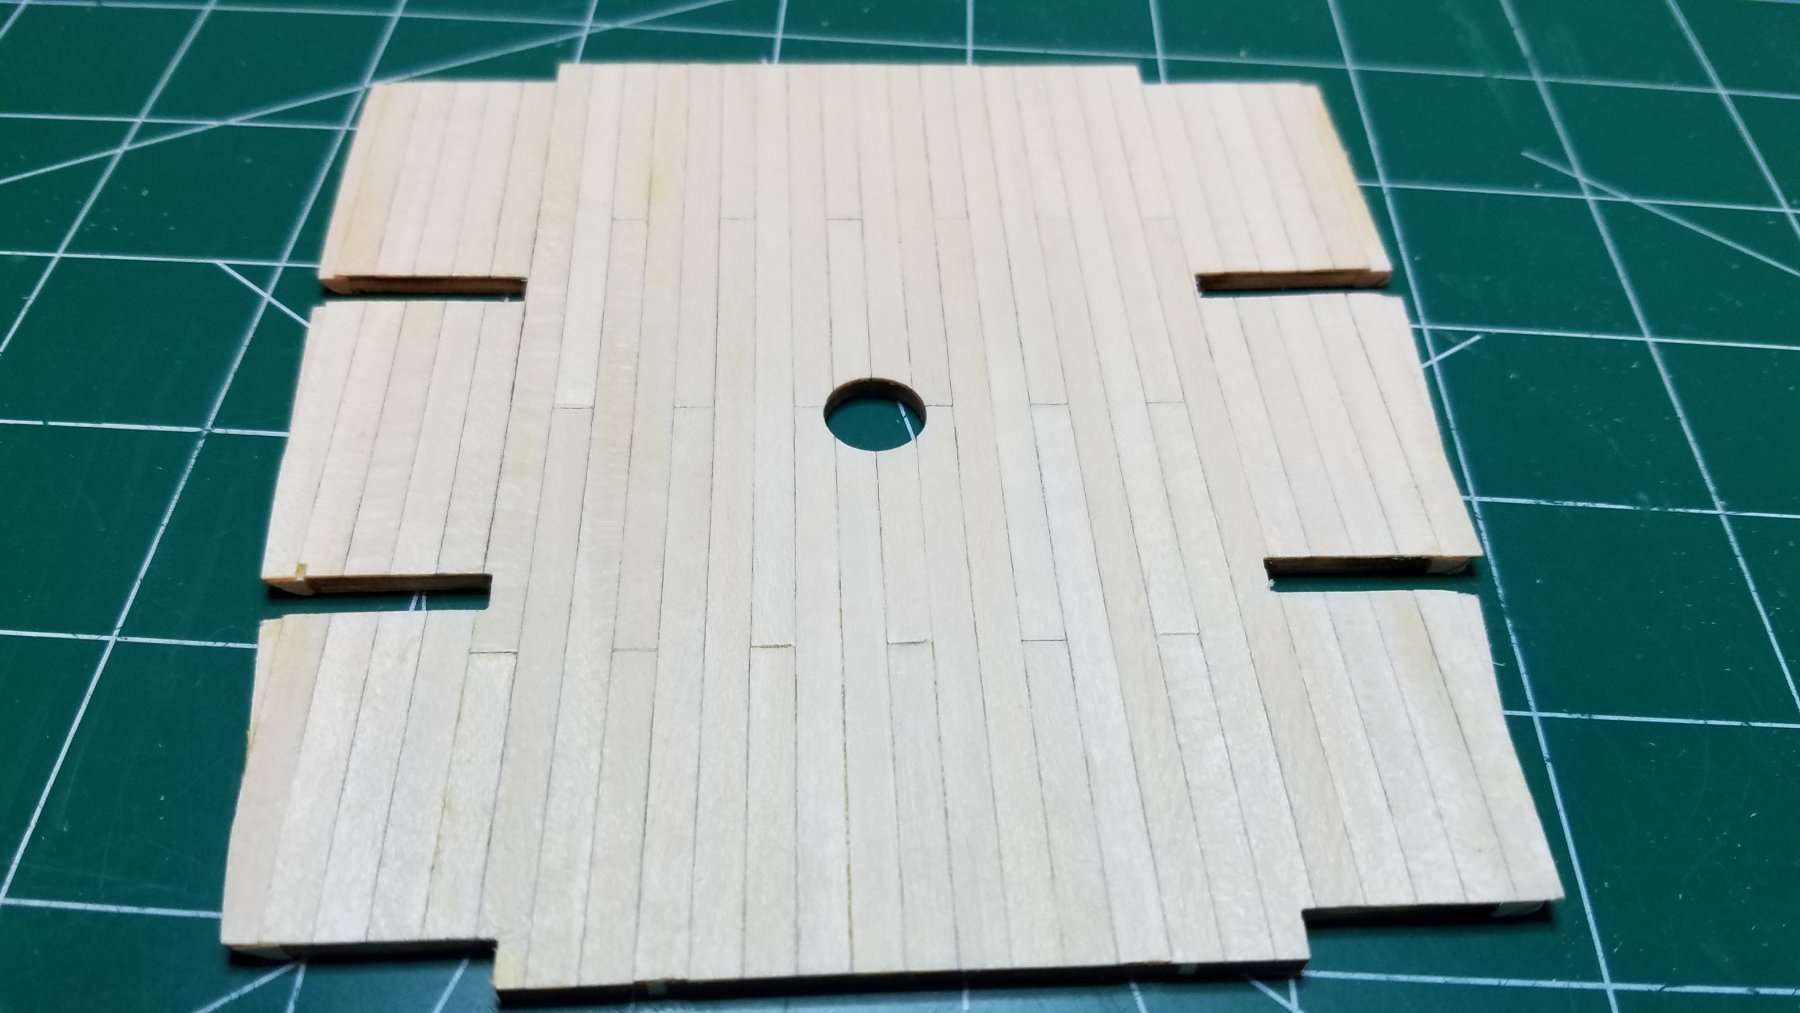
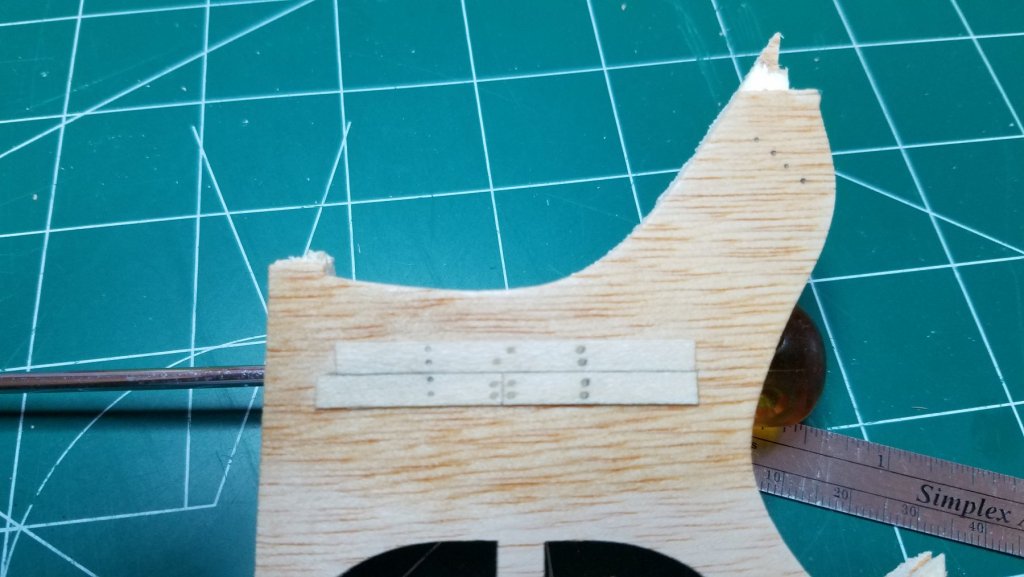
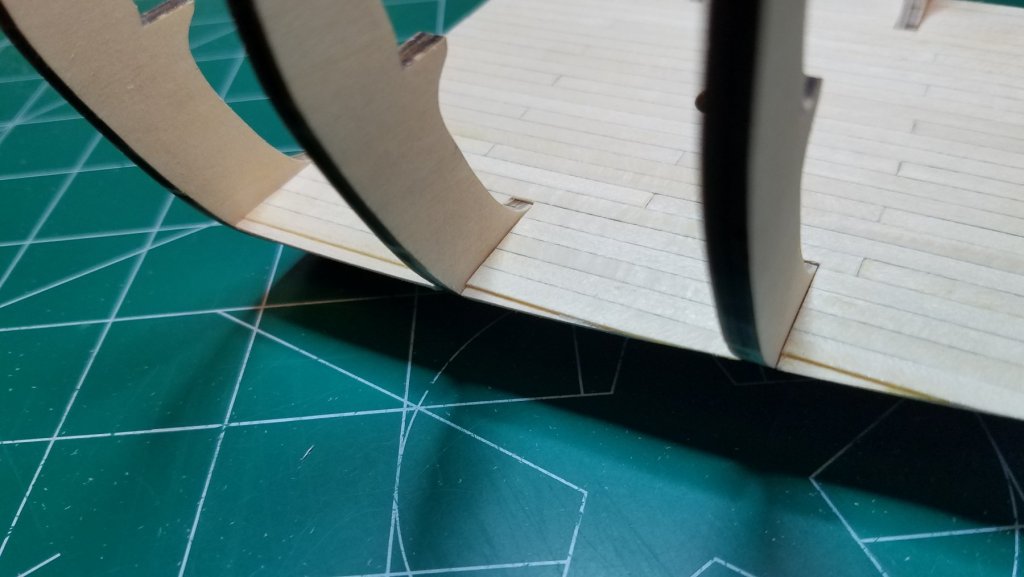
Thanks for all the likes and comments. Believe me Peter I have been keeping a very watchful eye on the tips of the frames. Even with our after church breakfast club and then spending a few hours shopping with the Admiral I did manage to get a little done today. First I experimented with a couple different methods for put the deck bungs in. I made a little deck sample and tried out two different drilling and filling methods but in the end I think at this scale and with my already stiff fingers the 0.5 mechanical pencil (left most and upper right corner) is going to be the winner. I have never done it this way before so if anyone has a method for laying them out nice and straight I am all ears. Then it was on to finishing the deck. The instructions call for laying the deck planking right up to the hull planking. However as you can see in the pic the sub deck stops well short of the edge of the frames and I have already got the planks overhanging the edge. So I edge glued some 1/8" square basswood to the sub deck. Then a little sanding and now there is a place to lay that last row of planks. I am sure that once everything is together the gap would hardly be noticeable but it would drive me nuts just knowing it was there. That is it for tonight.

- 139 replies
-
- 5
-
-
- san francisco
- artesania latina
- (and 1 more)
-
I know I am old but I did not think I had gotten that slow. This little bit of planking turned into an all day affair. Ok so I did get 4 loads of laundry done and make myself breakfast and lunch but still. I did actually cut the planks and laid them in a simple 3 plank shift instead of drawing on the butt joints with a pencil as the instructions would have you do it. Deck dry fitted into frames Maybe next time I will even remember to lay out the joints so they fall on the frames! Duh. This is the hold deck so I have two more chances to get it right. Or at least half way between them. I would not want to try laying out a joint on the end most frames. Peter, How much fairing did you need to do? It seems that just a little bit on the extreme lower portion of the forward most frame should do it. Till Tomorrow

- 139 replies
-
- 4
-
-
- san francisco
- artesania latina
- (and 1 more)
-
Well the dogs let me sleep in until 8:55 this morning so I am getting kind of a late start. Thanks for the reply Peter and to all those who liked this thread. Tom good to see you are still lurking about. We still need to get together for breakfast one Sunday. Peter, I gave it a lot of thought while tossing and turning last night. Even though I am pretty sure that a ship of this size would have had some inner planking I decided to forgo it at least for the lower deck. I may still add some timber framing on the middle deck for the gun ports. Regards
- 139 replies
-
- 2
-
-
- san francisco
- artesania latina
- (and 1 more)
-
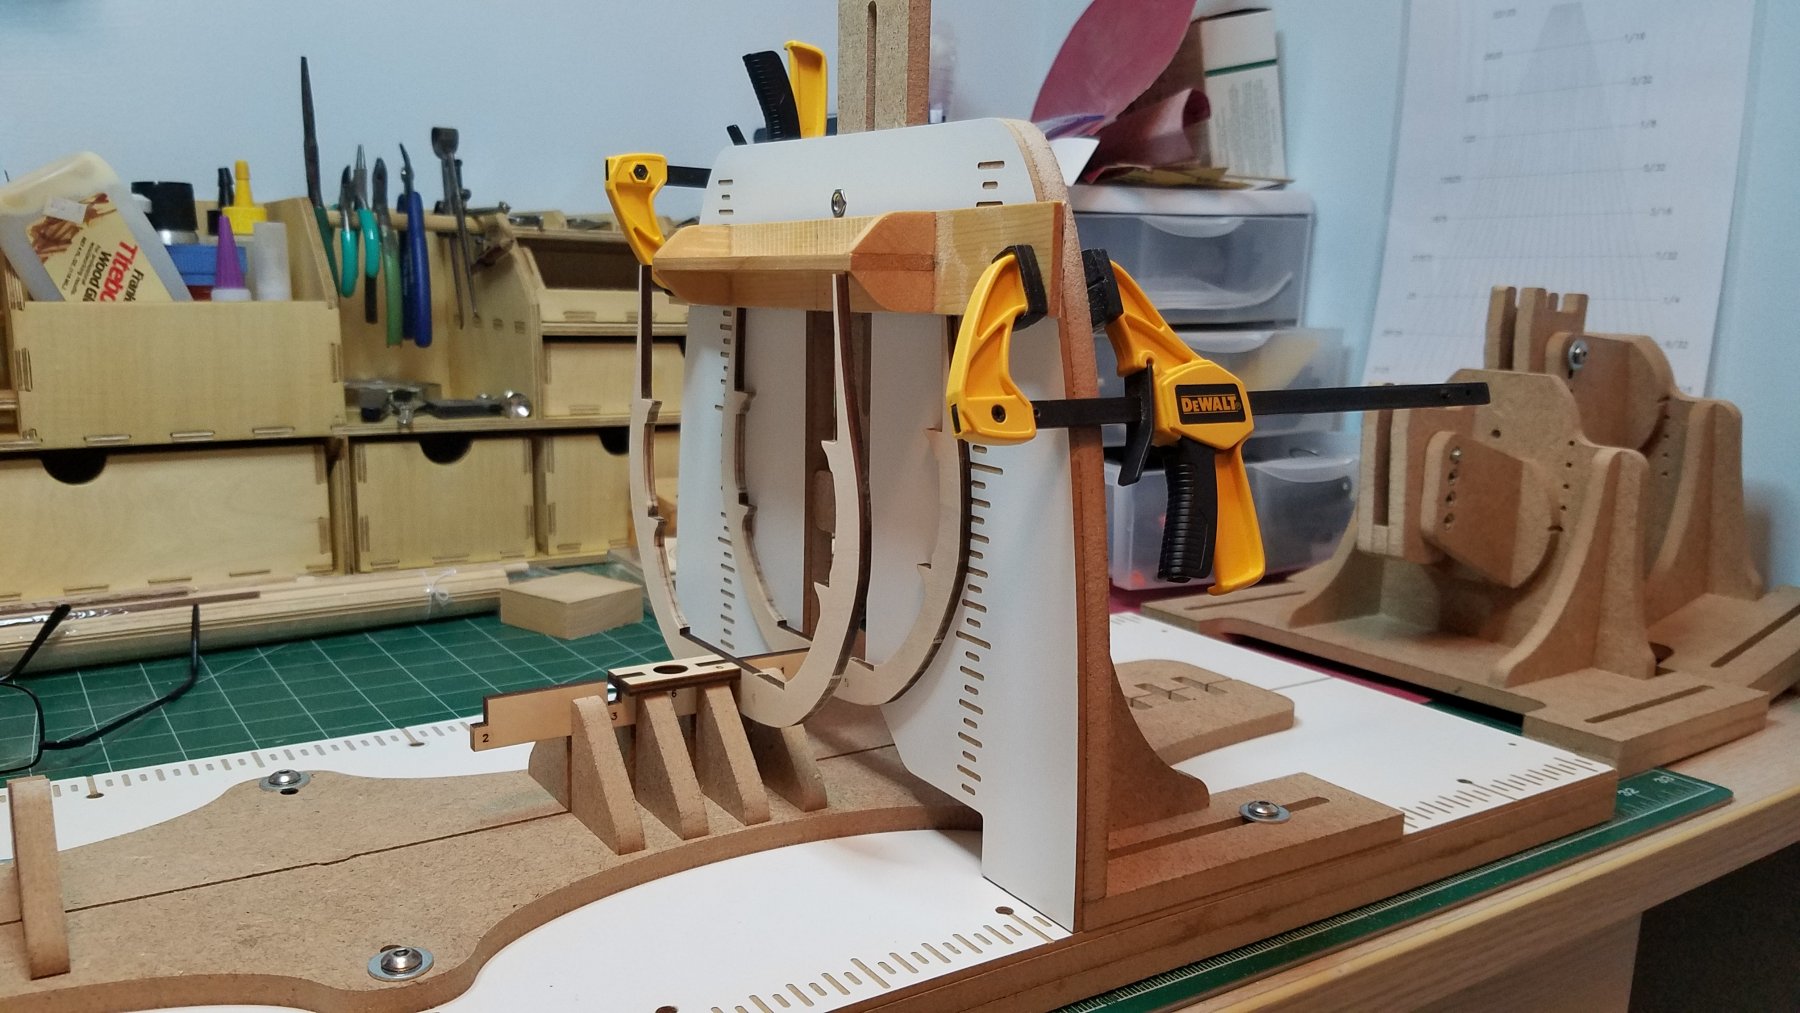
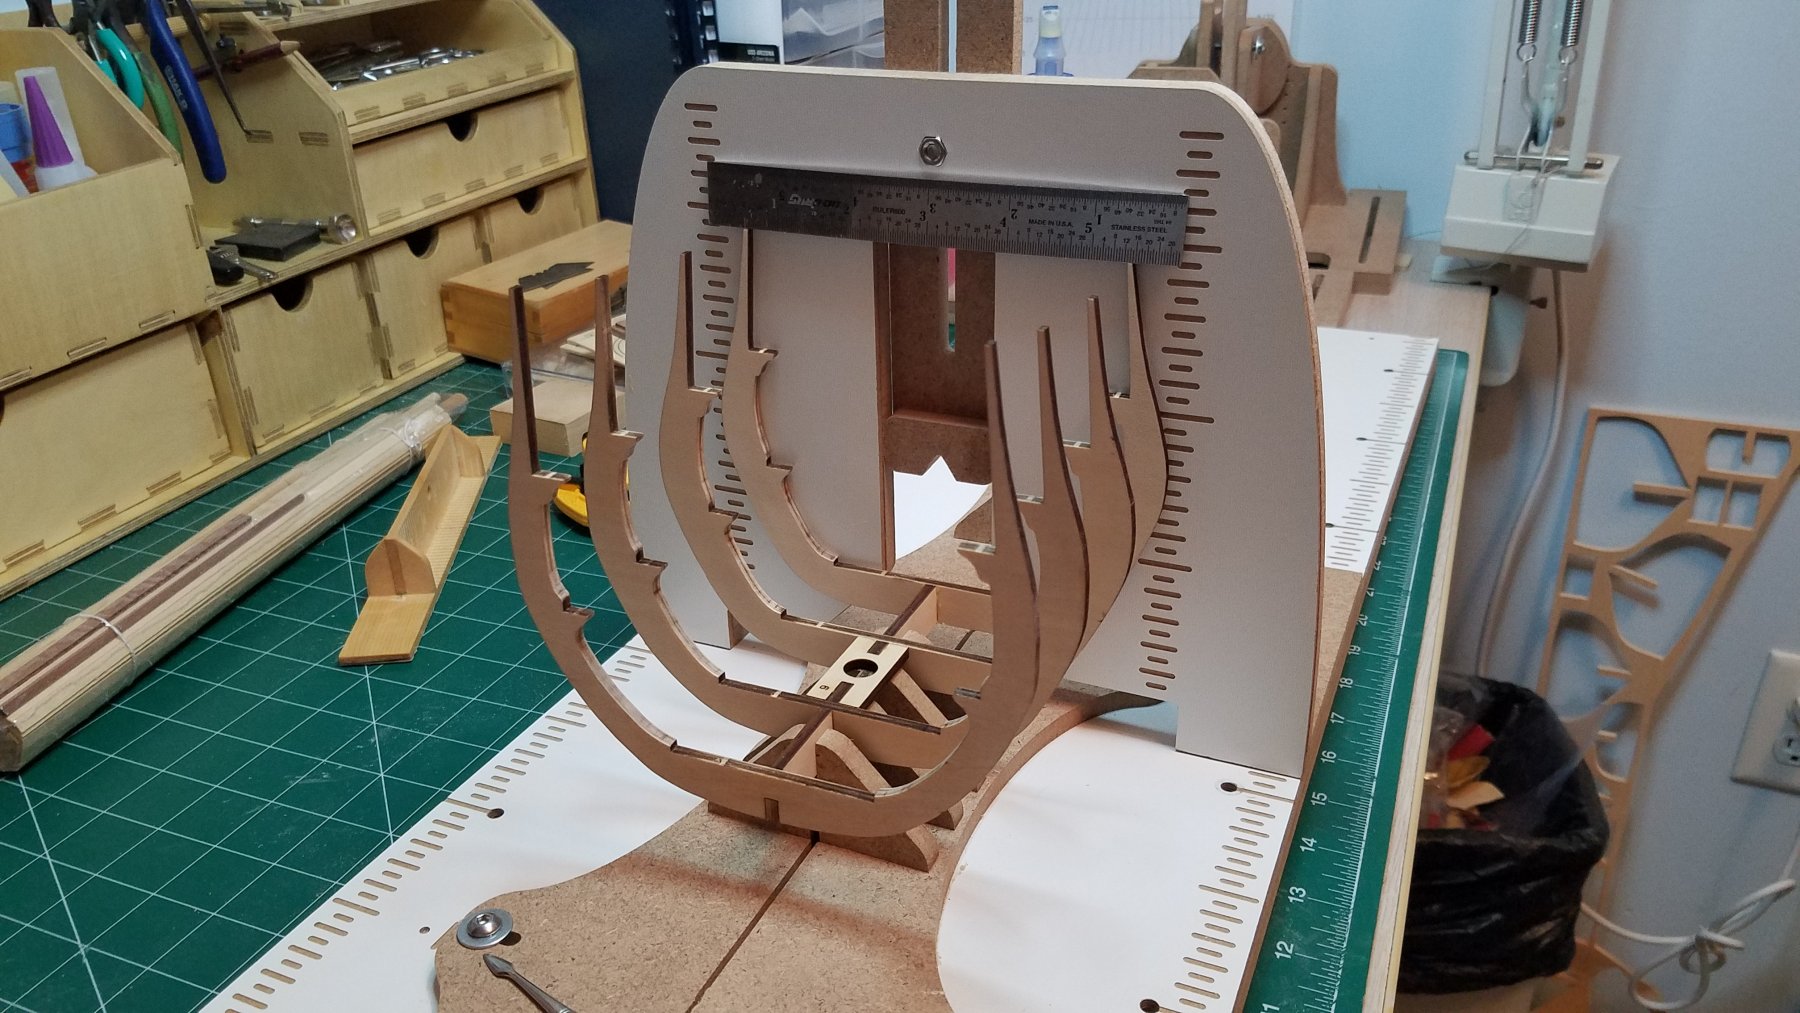
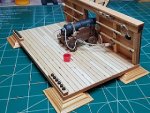
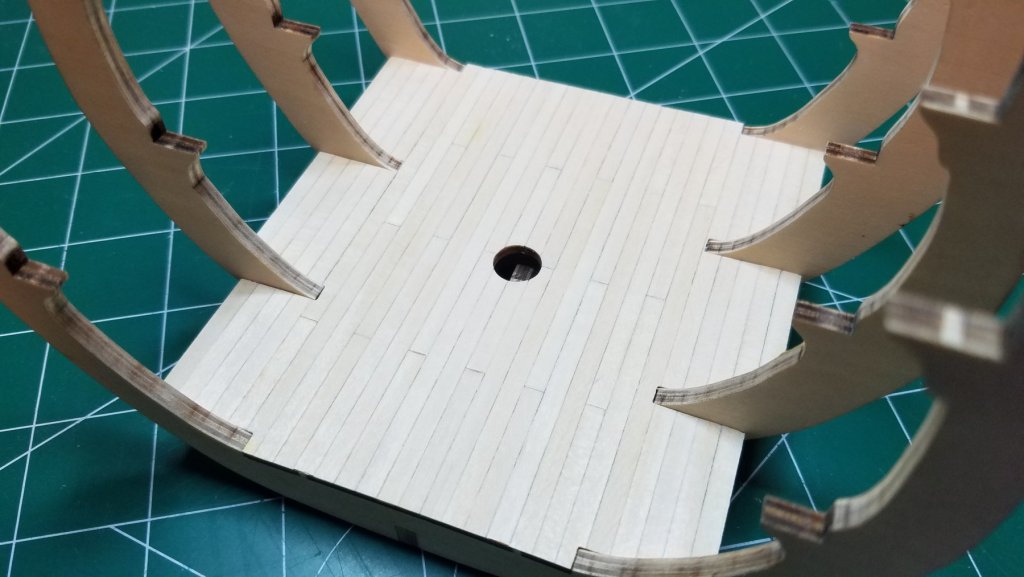
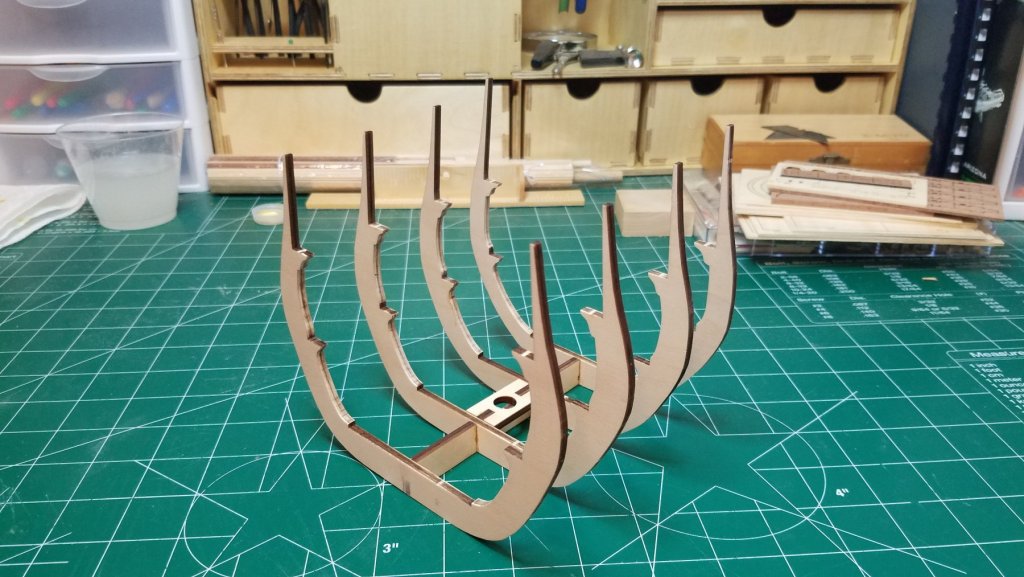
Well a little actual assembly tonight. I know it might seem like overkill to break out the building dock to set 4 frames but this thing is great. Its like having 5 extra hands and really simple to use. First frame drying. And the second 30 minutes later. The one sheet of frames was a little warped in the package so I clamped it to the jig just as a precaution. My sanding block makes a pretty decent strong back. With all of the alignment marks it really takes out the guess work. The lower deck dry fitted. Dropped right in, no trimming at all. Its way past my bedtime so tomorrow I will start planking the lower deck and figure out how I am going to plank the inside hull.


- 139 replies
-
- 6
-
-
- san francisco
- artesania latina
- (and 1 more)
-
I have this kit also and don't feel I am quite up to it yet. Yours is coming along very nicely mind if I pull up a chair? Regards
-
Question? The kit instructions make no provisions or mention of planking the inner hull. I know this would have been done in the real world. My question is this. Would the planking simply be placed on the inside surface of the frames or would some supporting structure been built between the frames and then be planked over leaving a portion of the frame visible? The reason I ask is the rather drastic thickening of the frames as they descend to the keel would make for a very large gap between inner and outer planking. Thanks
-
Doc, Just found this thread and read the entire thing. This is amazing.
- 128 replies
-
- 4
-
-
- mordaunt
- battle station
- (and 1 more)
-
Doc, Just got back into model building mode after a couple month layoff and found this thread. Very nice work. I have already downloaded the plans but do not have access to a lathe. Would you be up turning another barrel? If so you can e-mail me to work out the details. In any case keep the updates coming.
-
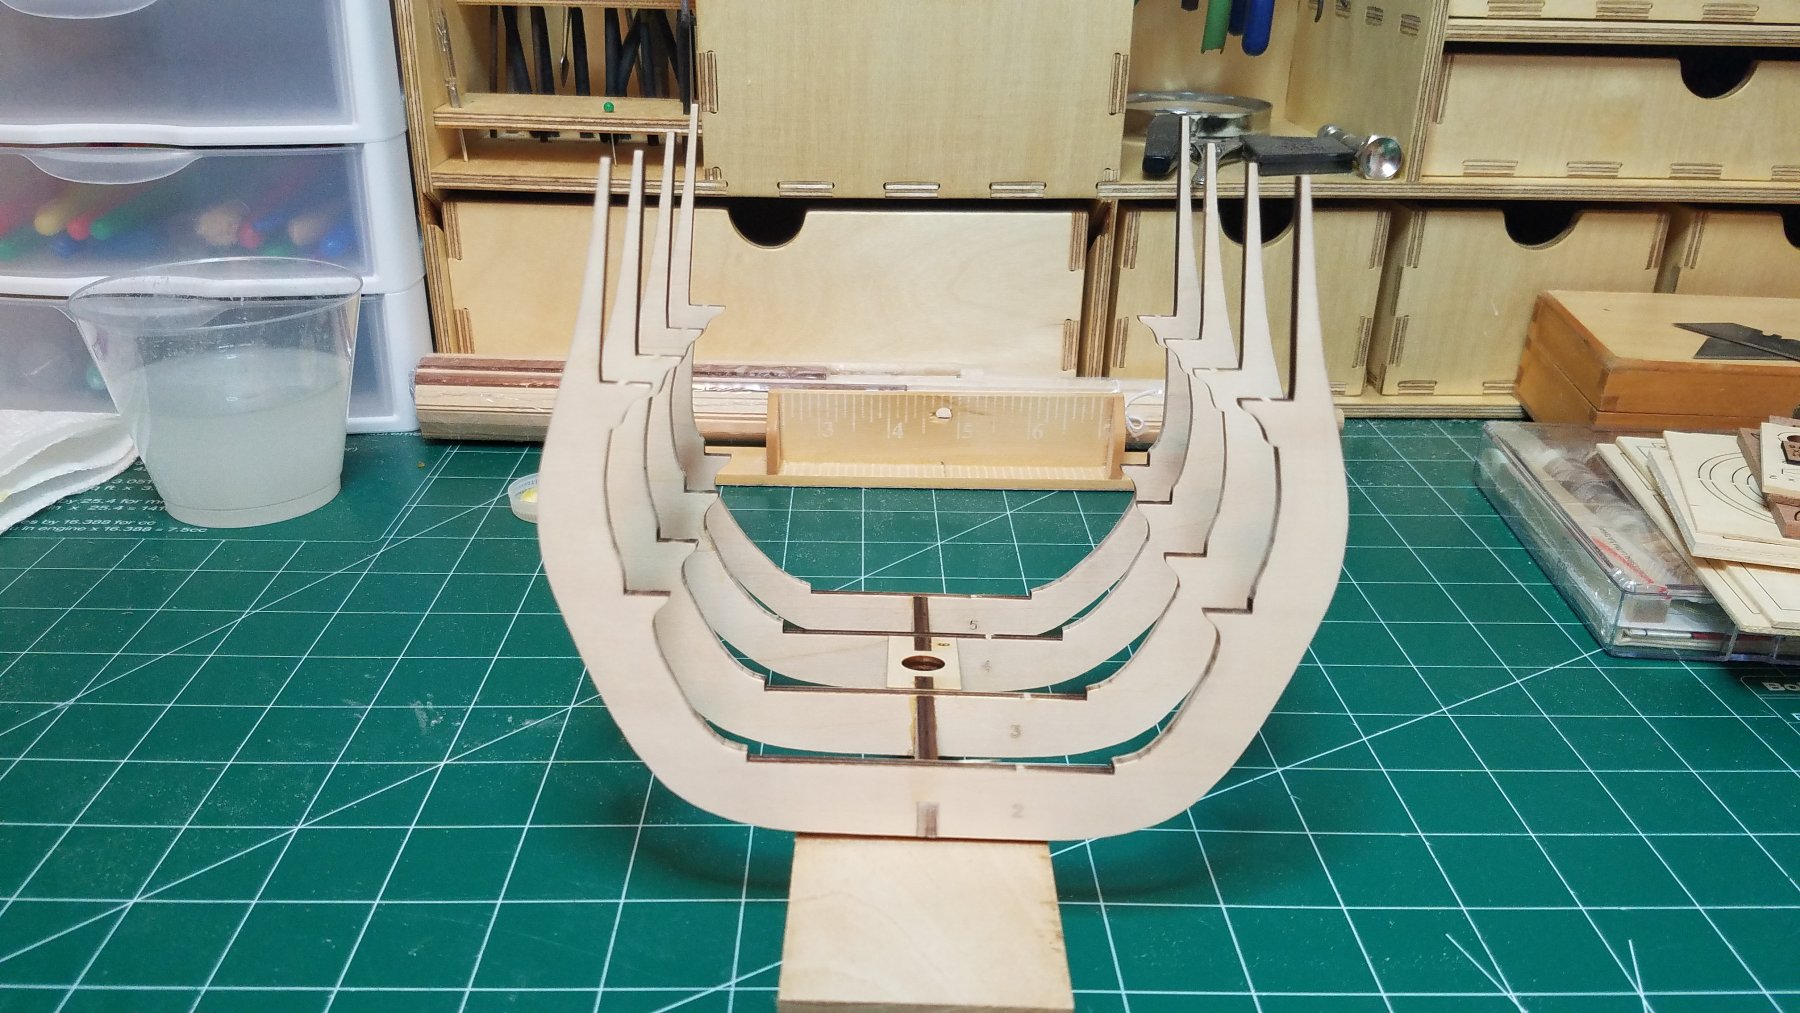
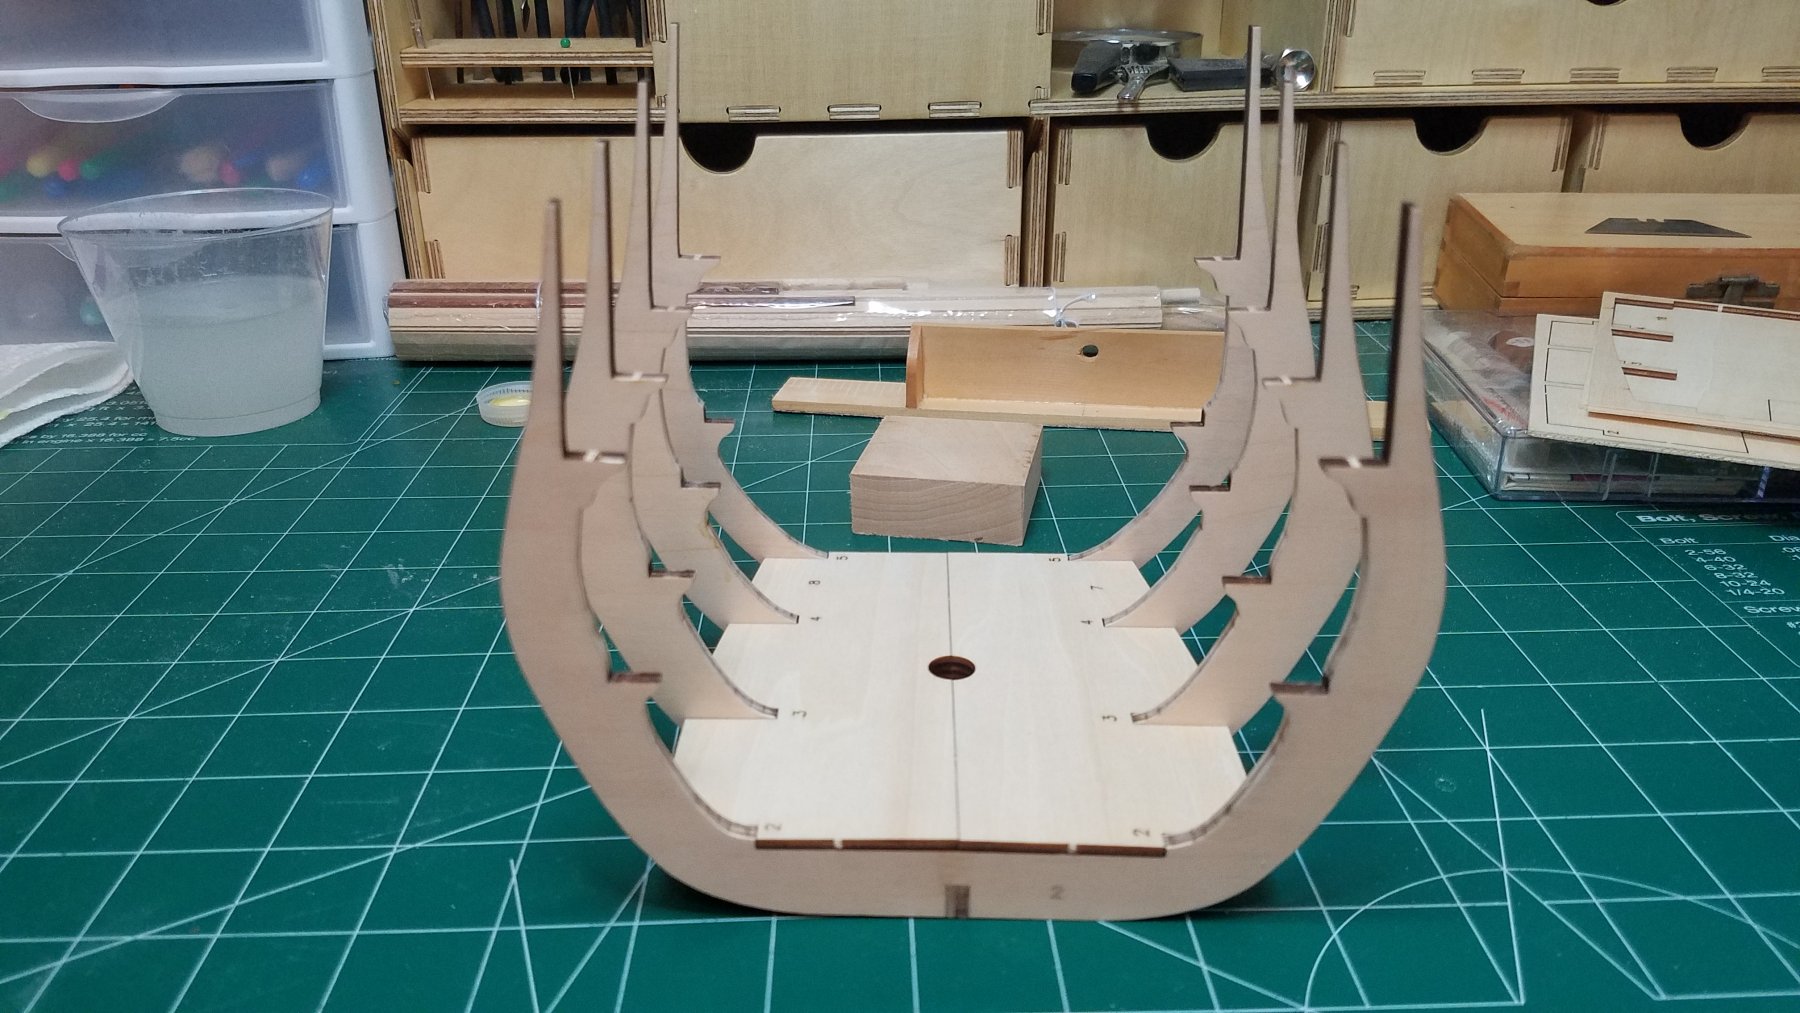
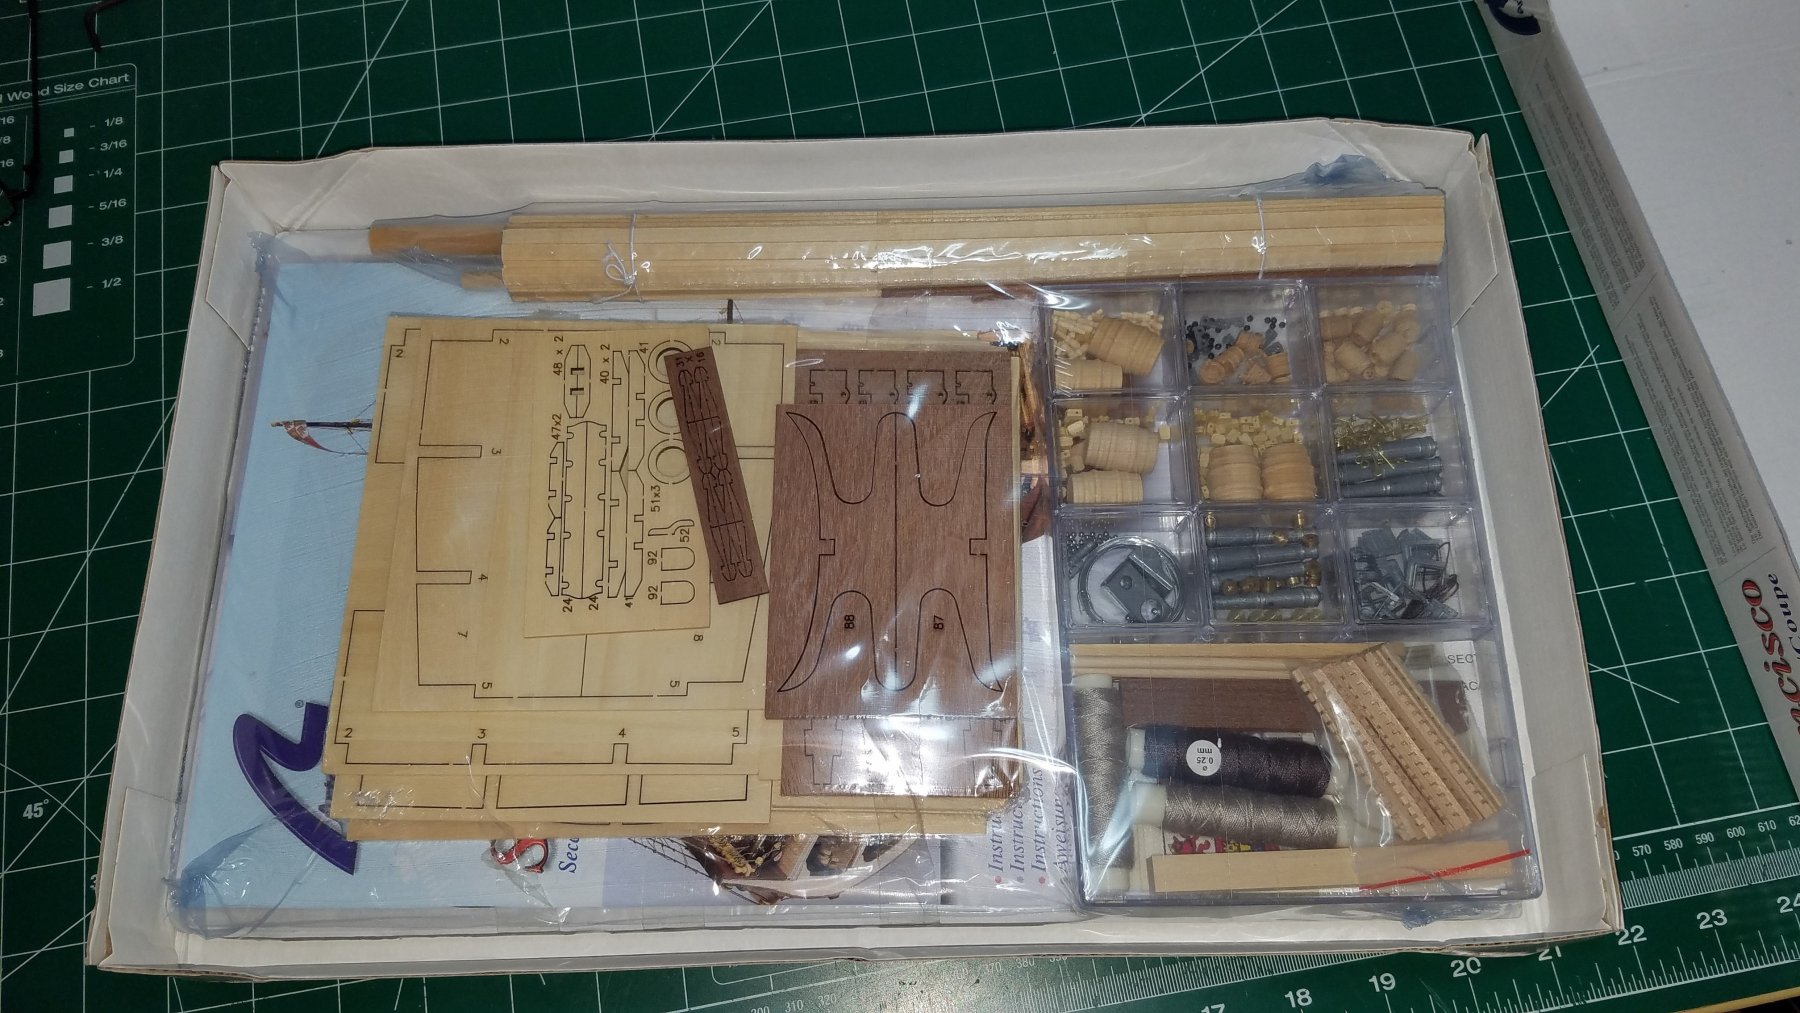
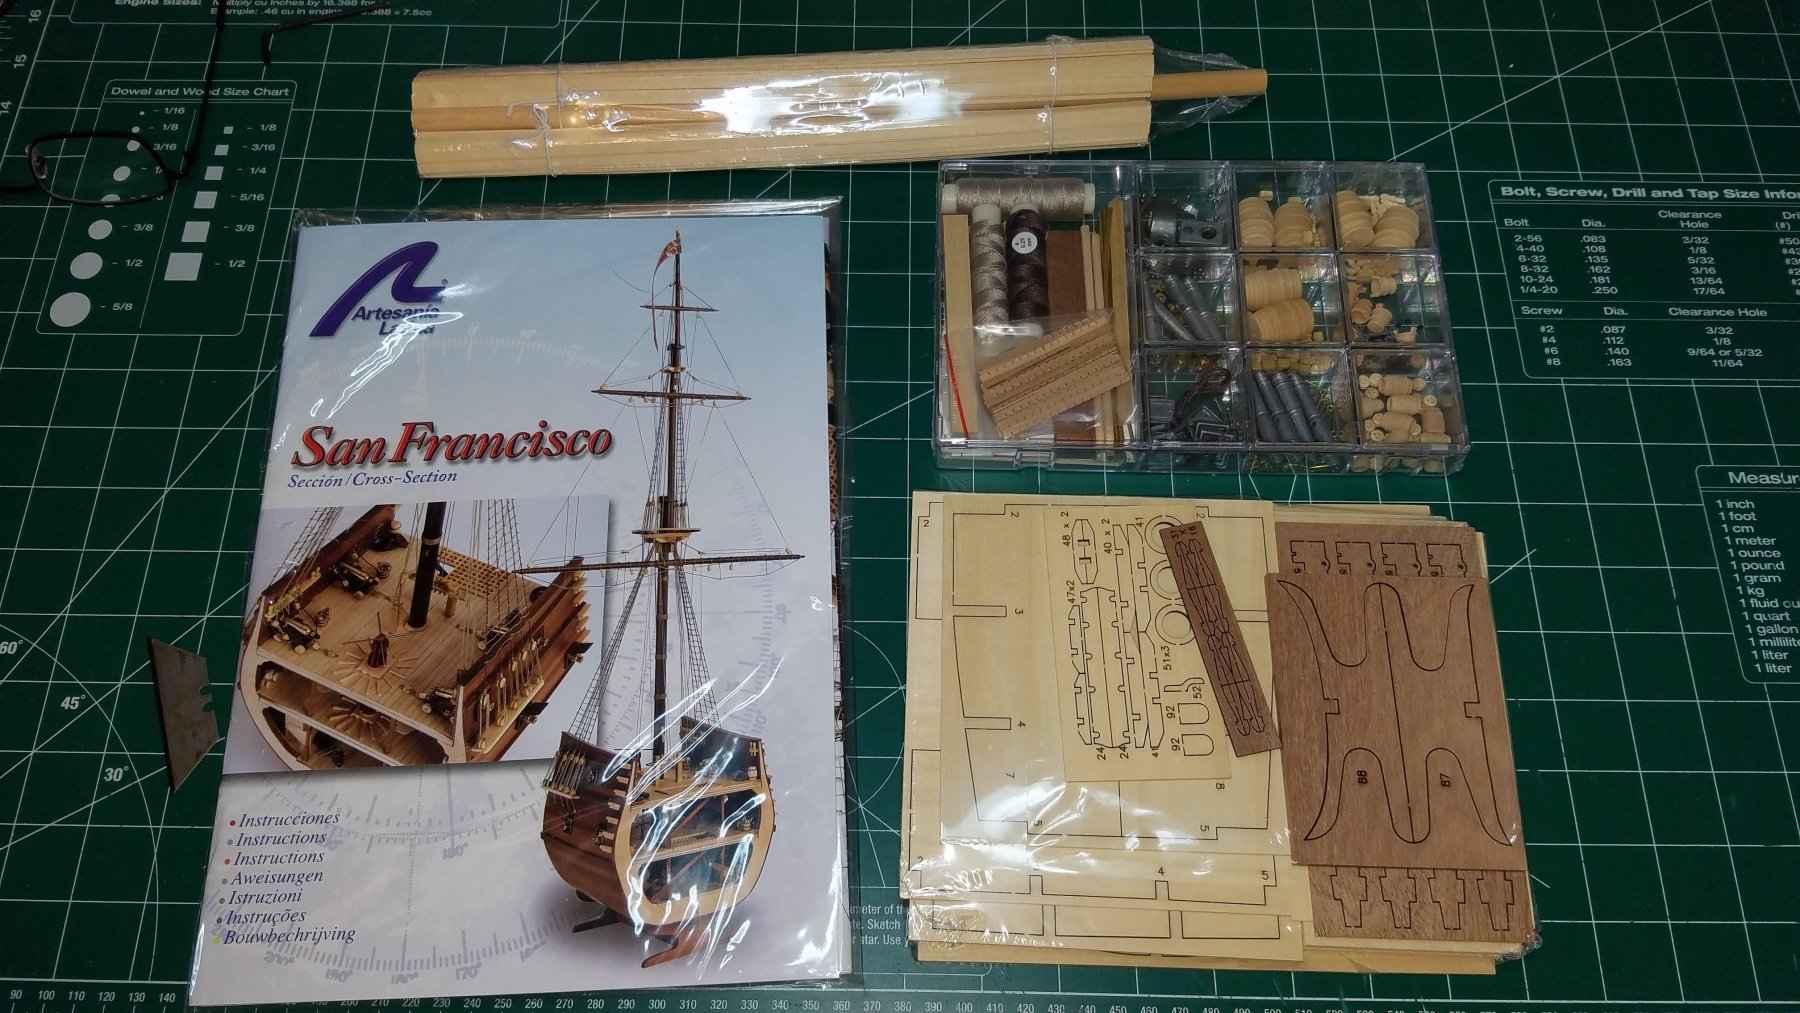
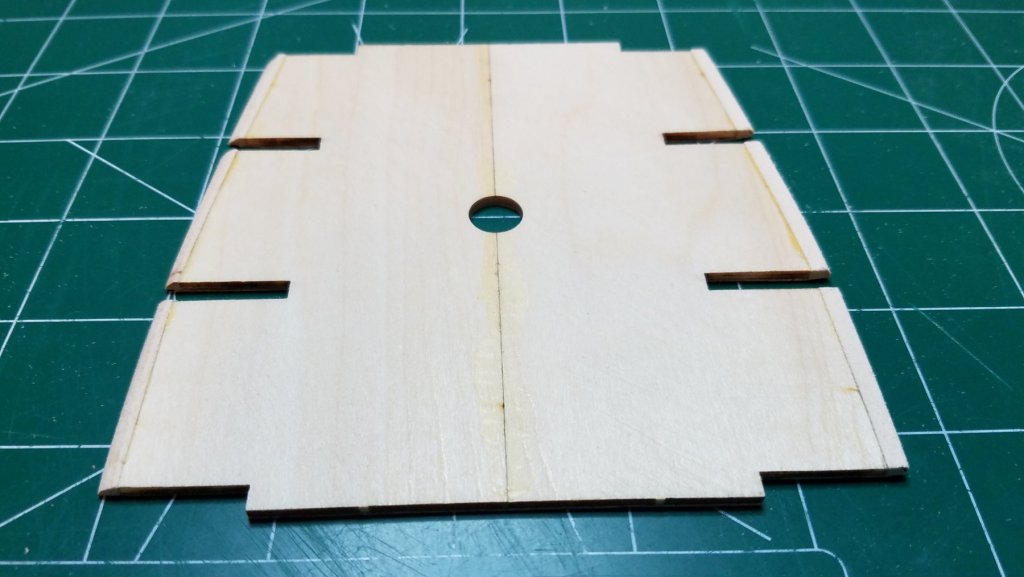
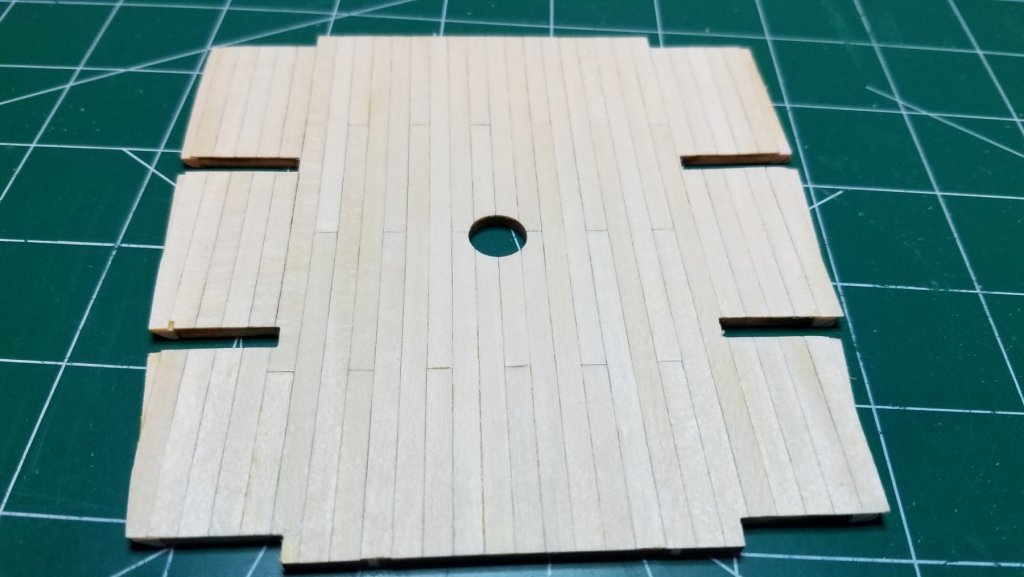
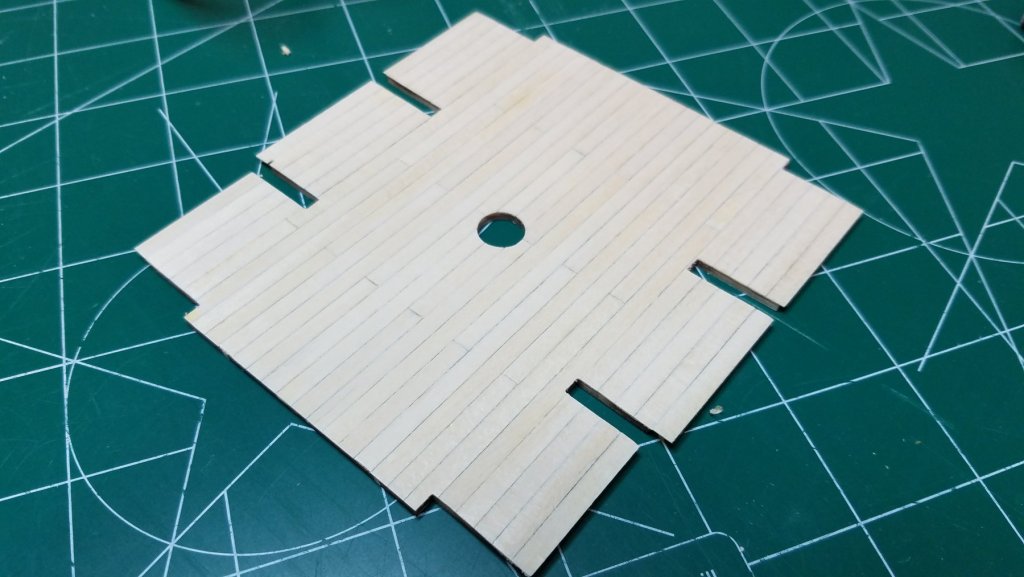
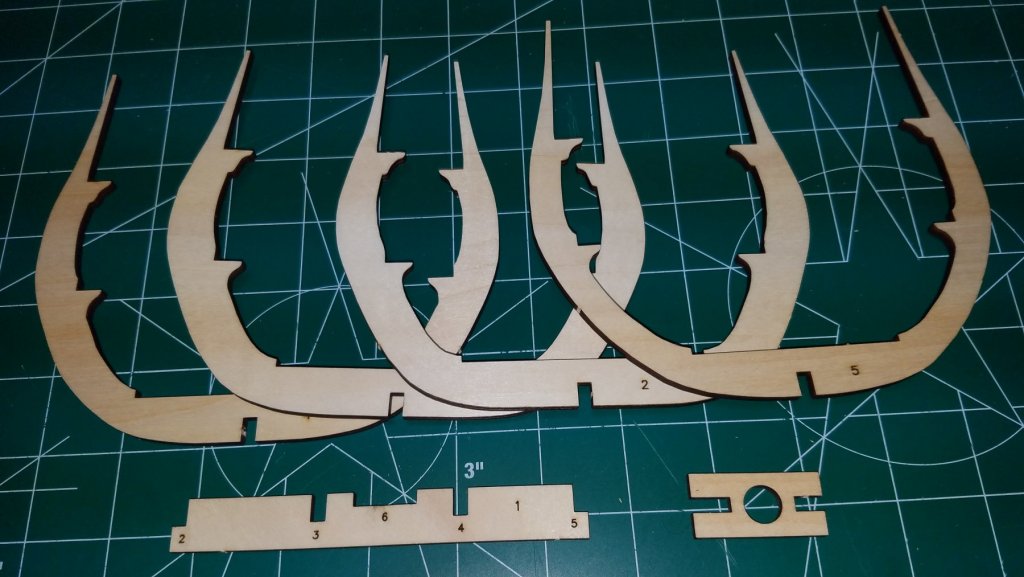
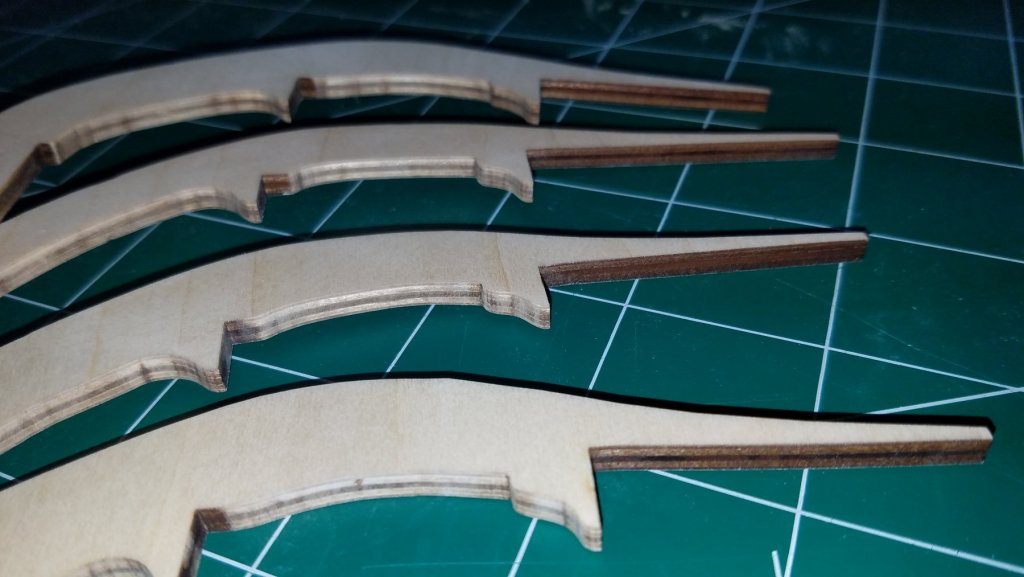
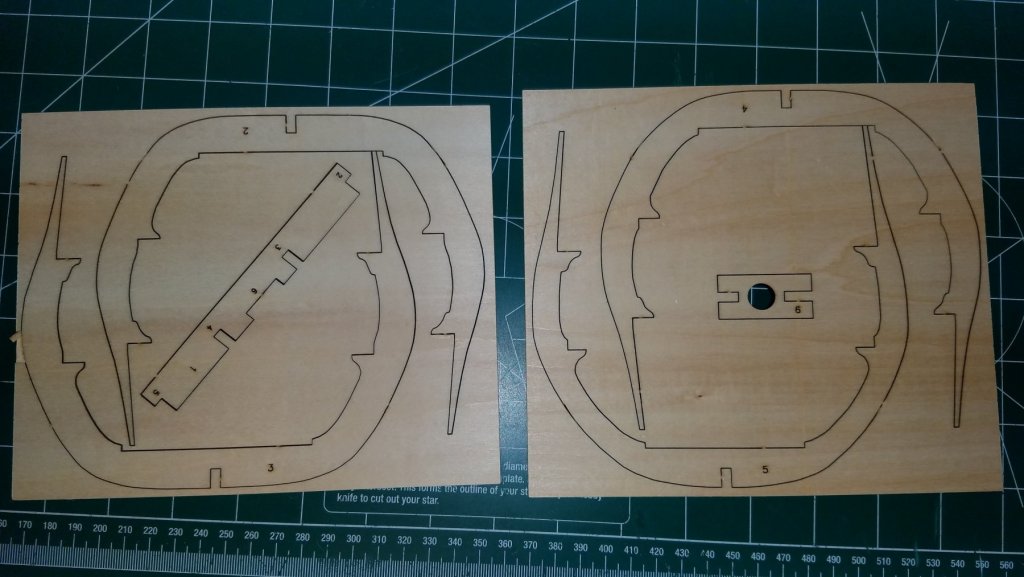
Well I got home from work and got started. First I opened the package containing the beautifully laser cut well labeled sheets. Nice crisp cuts, each sheet cut all the way through with enough tabs to hold the pieces securely in place, but not so many that it made it difficult to get them out. I started with the keel and frames that I would need for the first part of the assembly. I have never cared for exposed plywood edges but, so many parts in this kit are made of plywood that it will be a monumental task to cover them all so I will have to deal with them one at a time. As I said the frames and keel parts a nicely cut but once I got them out I noticed the very heavy charring. It took me quite a bit of time and sanding just to halfway clean up just the surfaces that will be visible once the kit is assembled. Well that is it for tonight. I hope to get started on a little bit of assembly tomorrow. Till then thanks for looking in.
- 139 replies
-
- 2
-
-
- san francisco
- artesania latina
- (and 1 more)
-
I just got this from amazon today and can't wait to get at it. The box was a little damaged and had been opened previously so I think it was a return. The contents were well packed and still in the original shrink wrap so I think it will be fine. I have only found a couple of build logs for this one and none of those were done to completion so I guess I am on my own on this one. I can already see quite a few changes/"improvements" that will make this an interesting build for me. As others have pointed out historical accuracy is not what this kit was made for. I will get started in earnest tomorrow night. Hope to see you all then.


- 139 replies
-
- 4
-
-
- san francisco
- artesania latina
- (and 1 more)
-
Hello Bob, I have been been away from model building for a couple of months but am ready to settle back in and wanted to catch up on your progress. Wow did I miss a lot! What a great build you have going. Keep up the good work. Looking forward to more updates.
- 359 replies
-
- 2
-
-
- prince de neufchatel
- model shipways
- (and 1 more)
-
Home Made Sanding Blocks
Osmosis replied to Osmosis's topic in Modeling tools and Workshop Equipment
I don't know if it stiffened it but it created a nice smooth surface that I think makes it easier to peel off the self adhesive paper. -
Thanks John, Kind of what I figured. Being my first one I want to make sure I don't take away any material I might need later. Regards
-
Home Made Sanding Blocks
Osmosis replied to Osmosis's topic in Modeling tools and Workshop Equipment
Thanks Mike. If they hold up for any length of time I think it will have been worth the little bit of time it took to make them. And the curved one work great on the concave sections of the bulkheads. -
Home Made Sanding Blocks
Osmosis replied to Osmosis's topic in Modeling tools and Workshop Equipment
Thanks to everyone for all the likes and replies. I applied three coats of oil based poly. I hope this will make it a little easier to peel off and replace the sand paper. Here they are with some 80 grit self sticking sand paper applied. The holes in the handles were drilled so I had a way to hang them while the poly dried. I have already started using them on my current build and thy work great. Best regards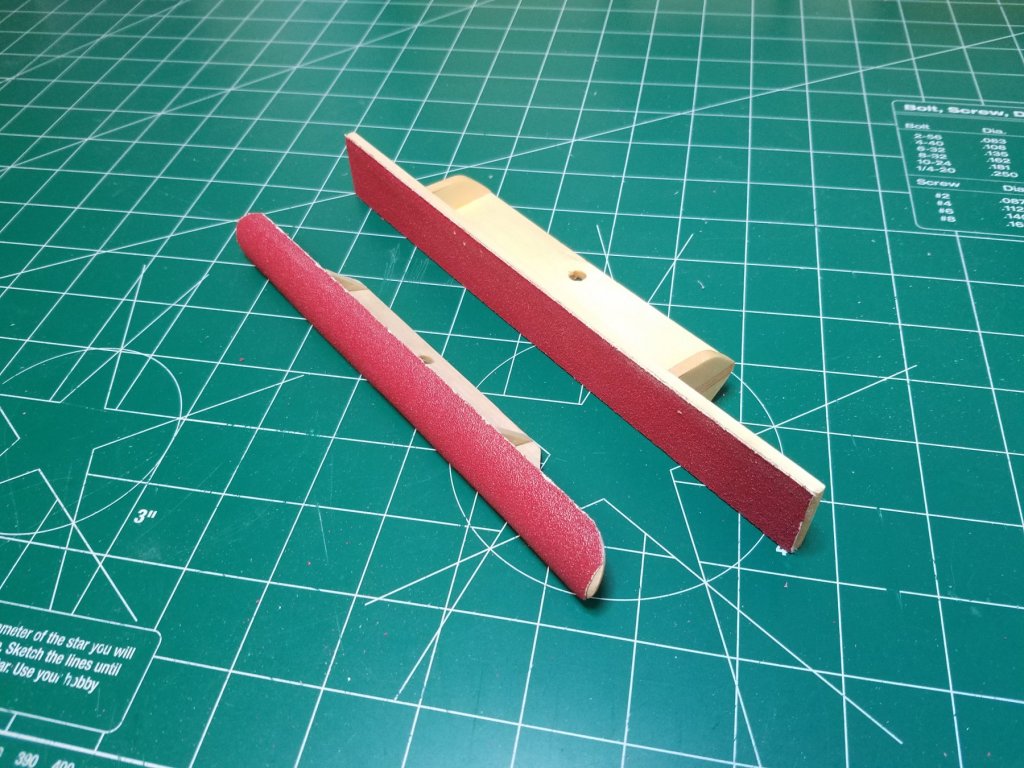
- 12 replies
-
- 10
-