HOLIDAY DONATION DRIVE - SUPPORT MSW - DO YOUR PART TO KEEP THIS GREAT FORUM GOING! (83 donations so far out of 49,000 members - C'mon guys!)
×

Osmosis
-
Posts
626 -
Joined
-
Last visited
Content Type
Profiles
Forums
Gallery
Events
Everything posted by Osmosis
-
 I am always amazed when I see one of these coming together. So far beyond my skill level and a real treat to watch. I am most definitely on board for the rest of the voyage.
 -
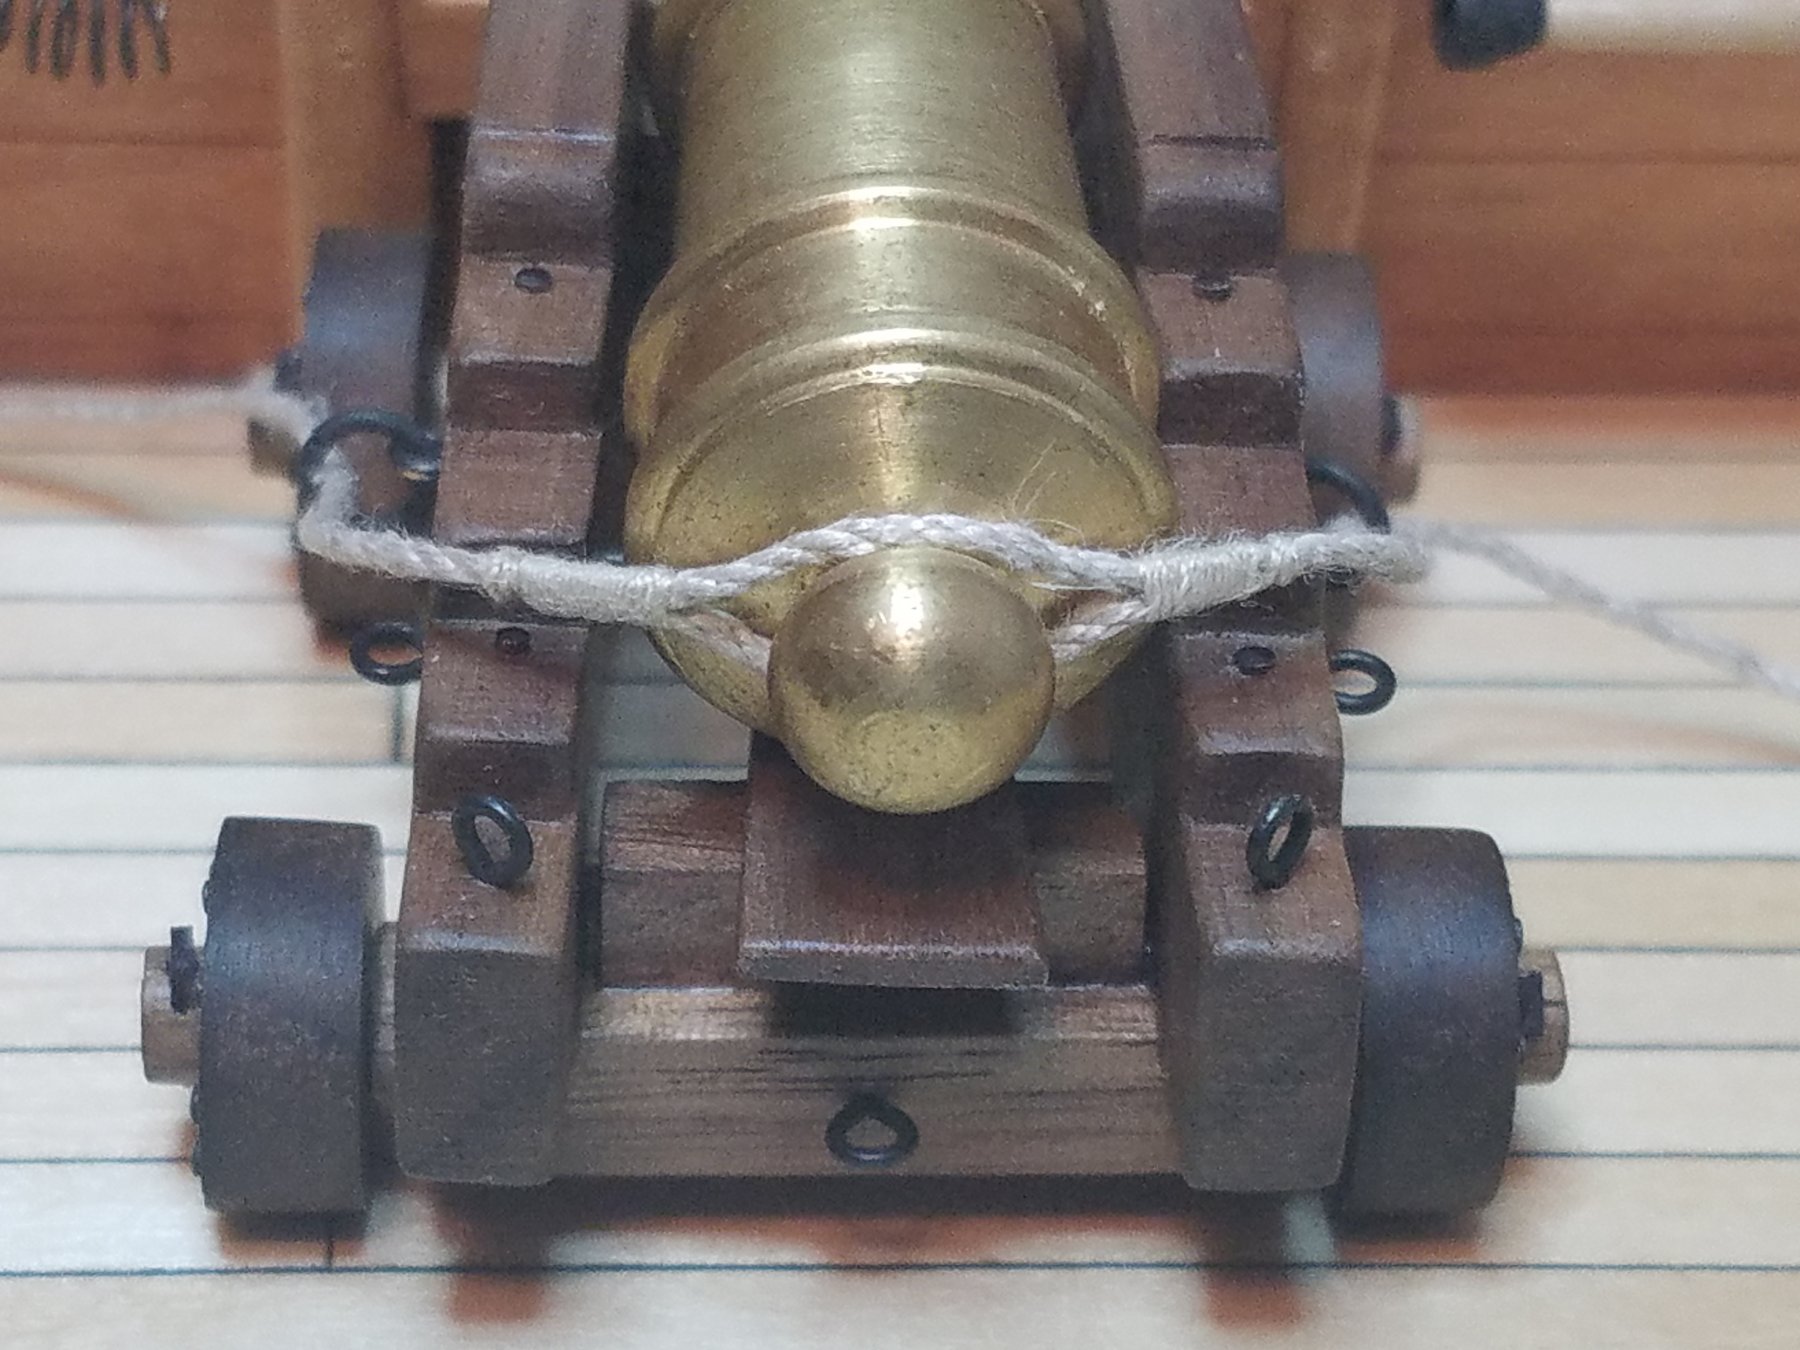
Thanks for looking in everyone and for the likes and comments. Not much accomplished in the last few days. I always think I am going to get so much done over a long weekend but never seem to find the time. I got my bore tools finished and started to make the breeching line. I know that this is not the typical breeching line but I saw a Naval Historical Foundation pamphlet titled Constitution Gun Deck and there is an illustration depicting this style and I thought it was more interesting then just looping it around the cascabel. I also got started on making a quoin I will finish that tomorrow I hope, also all of the carriage hardware is complete and waiting to be blackened. Still a lot to do but getting closer. Best regards and Happy New Year to All

- 82 replies
-
- 10
-

-
- naval smoothbore
- model shipways
- (and 1 more)
-
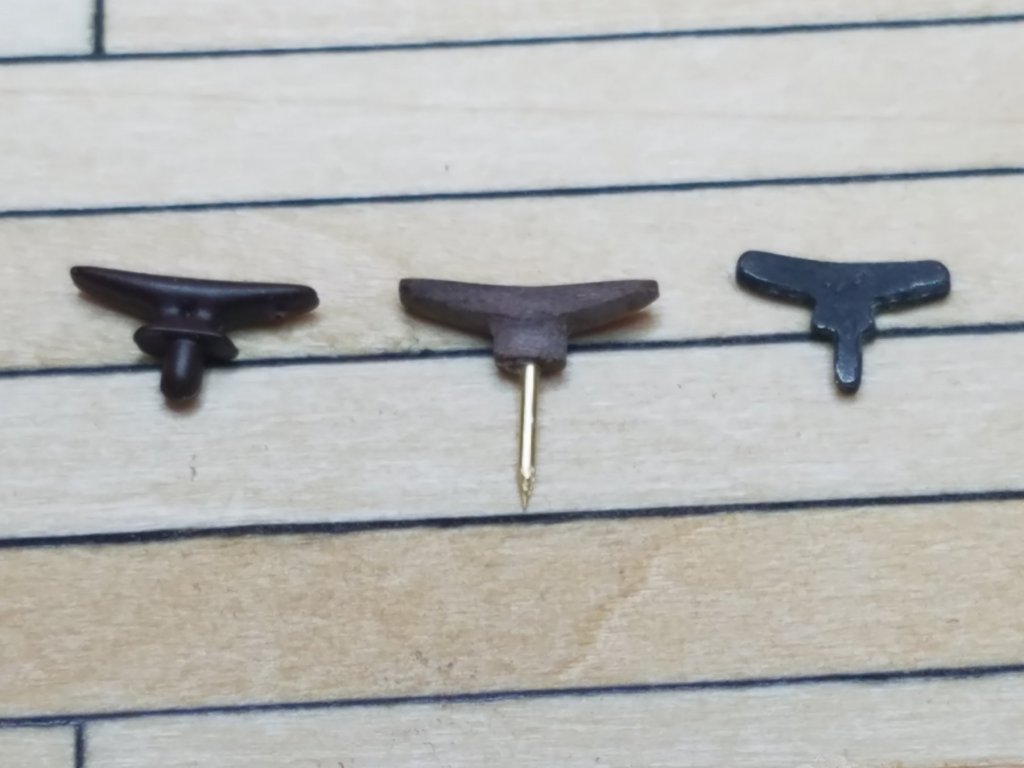
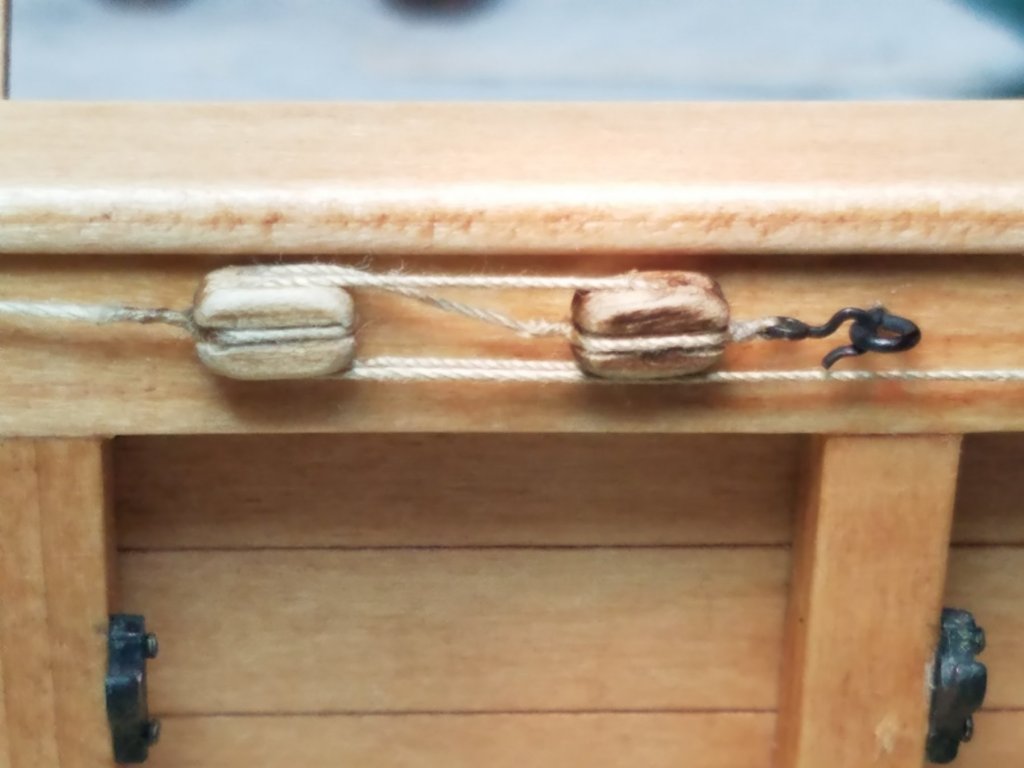
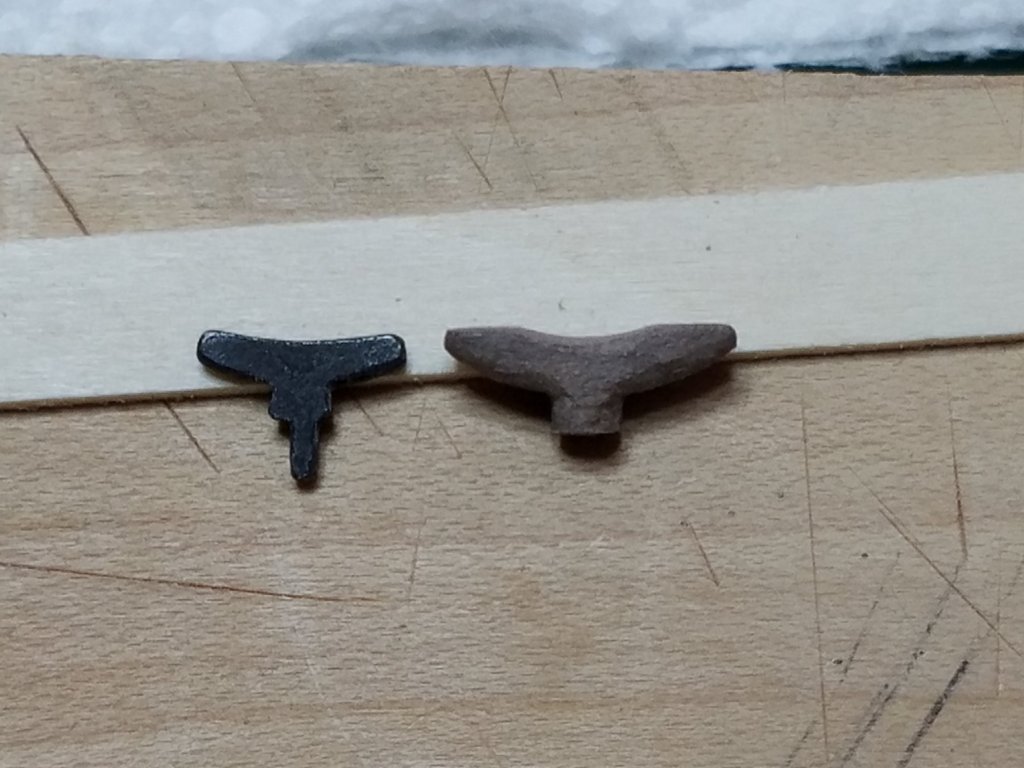
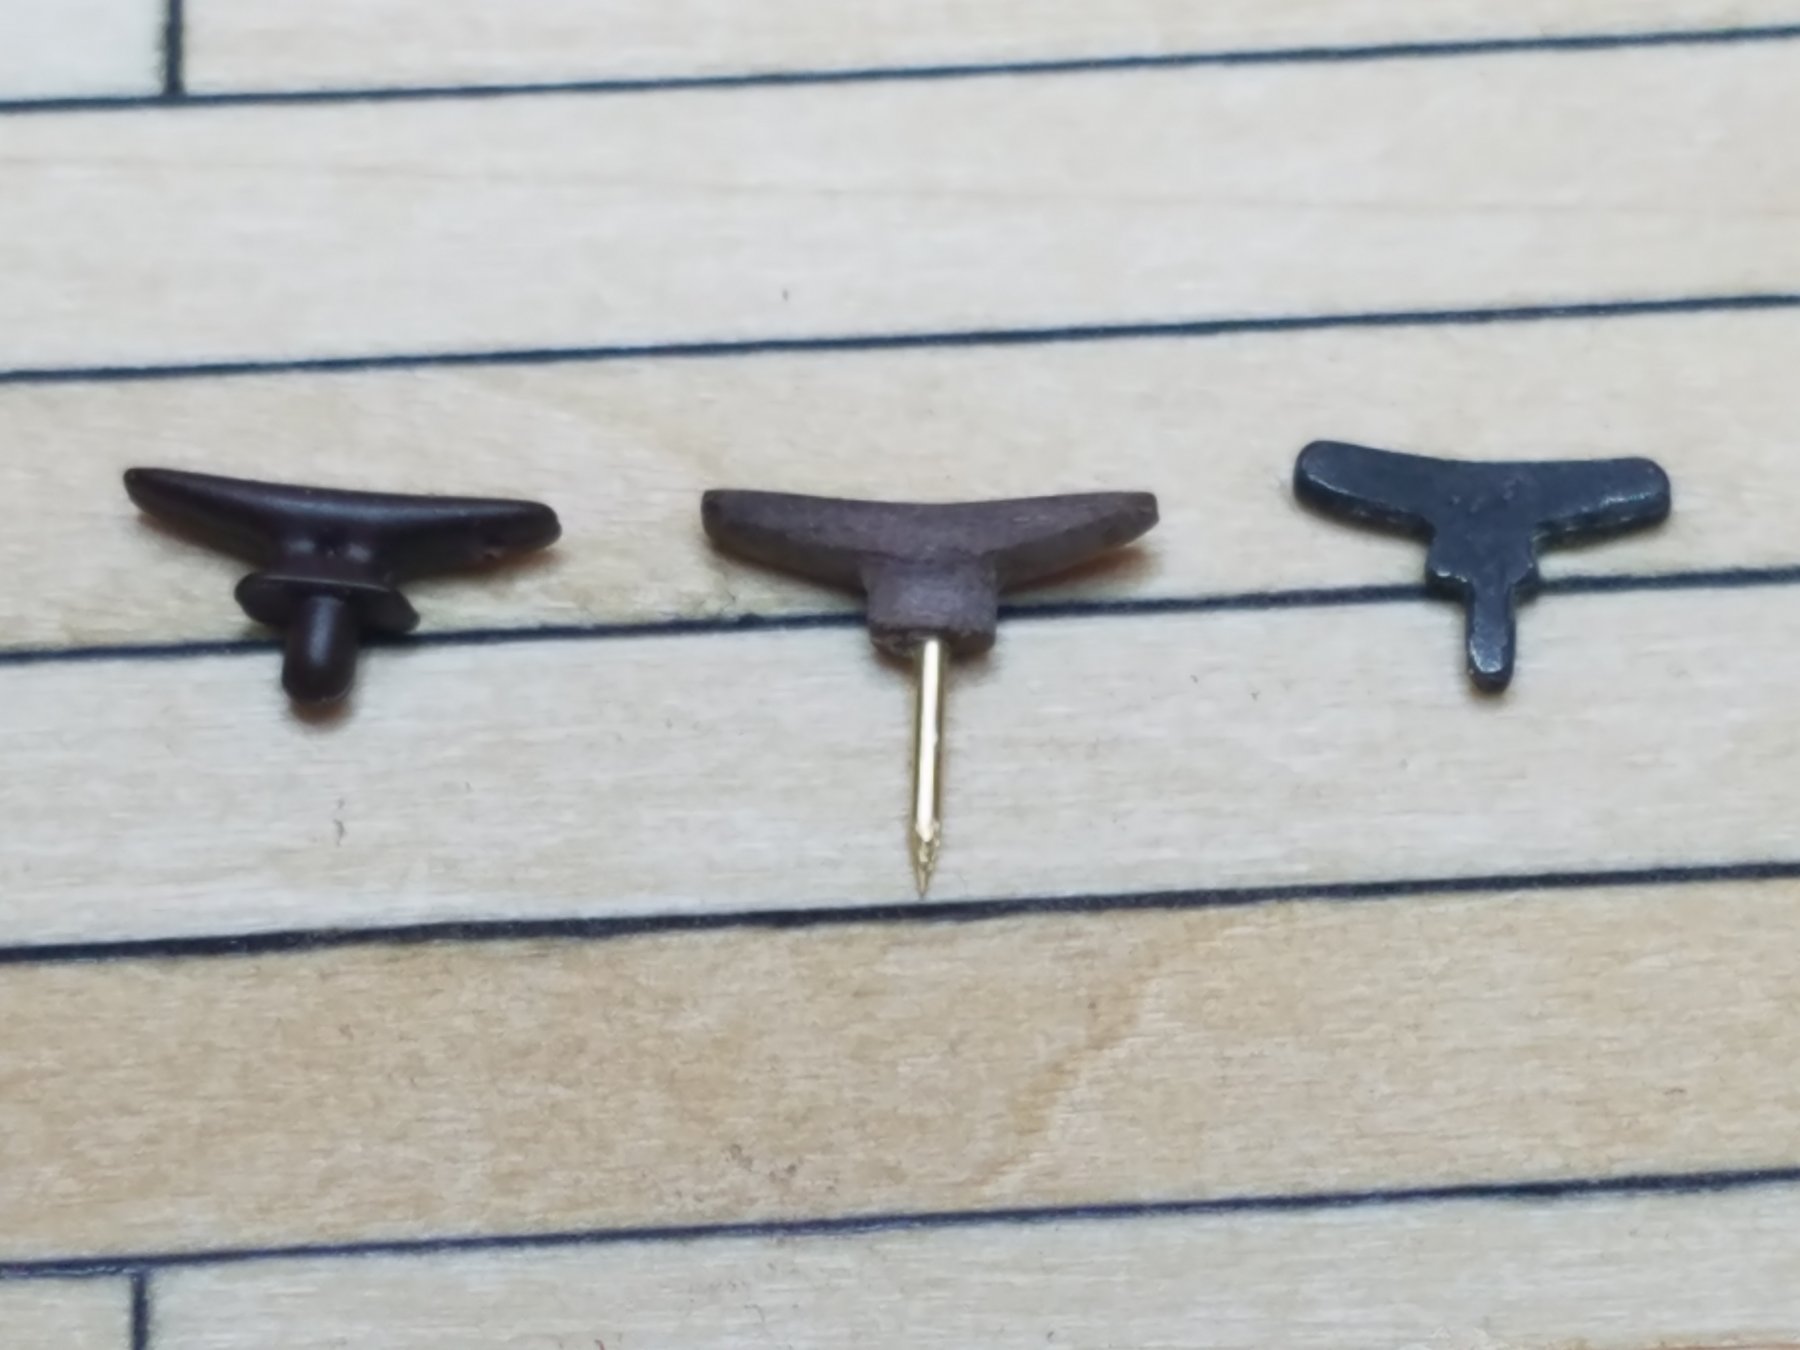
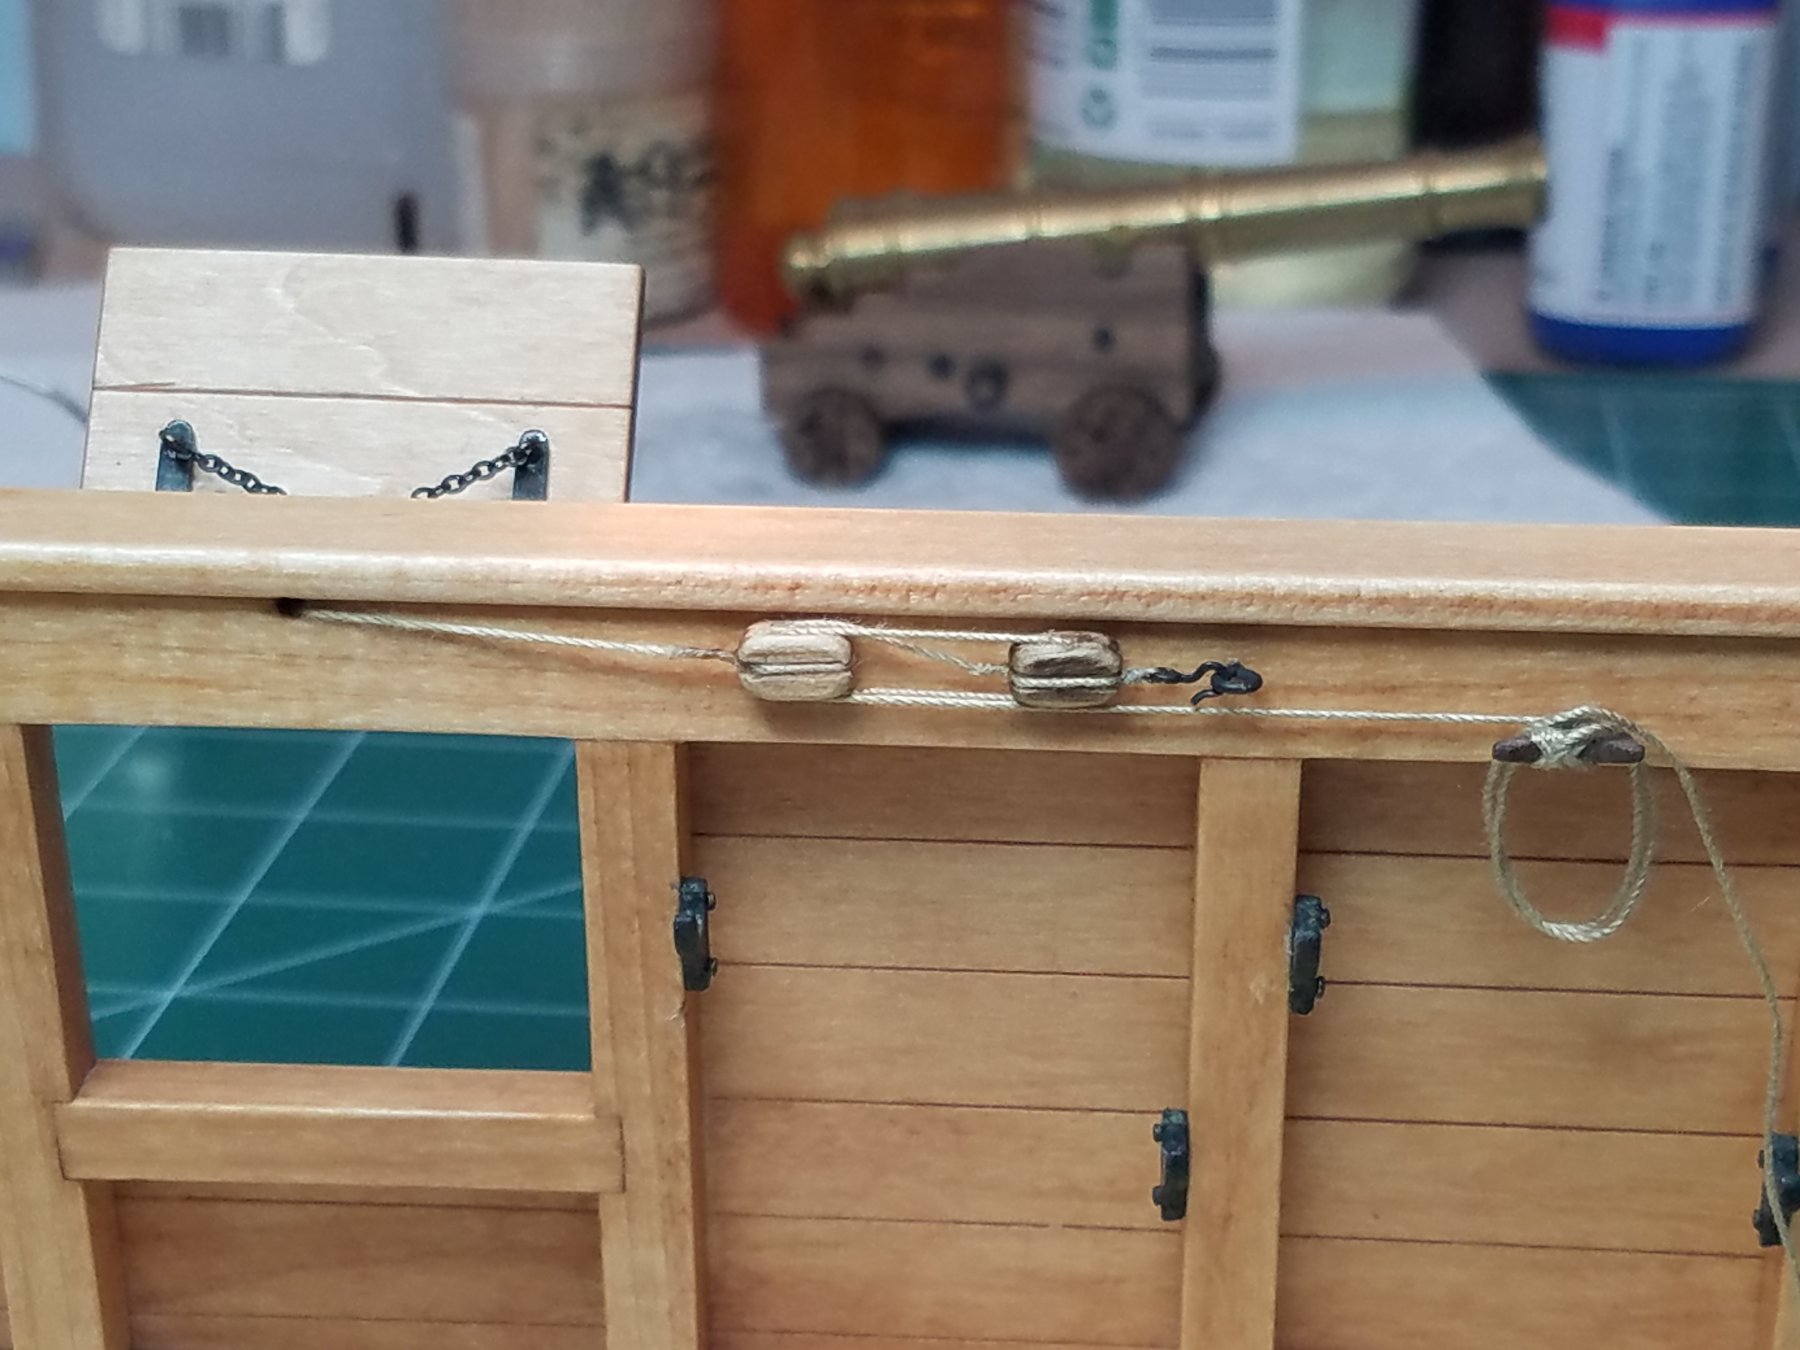
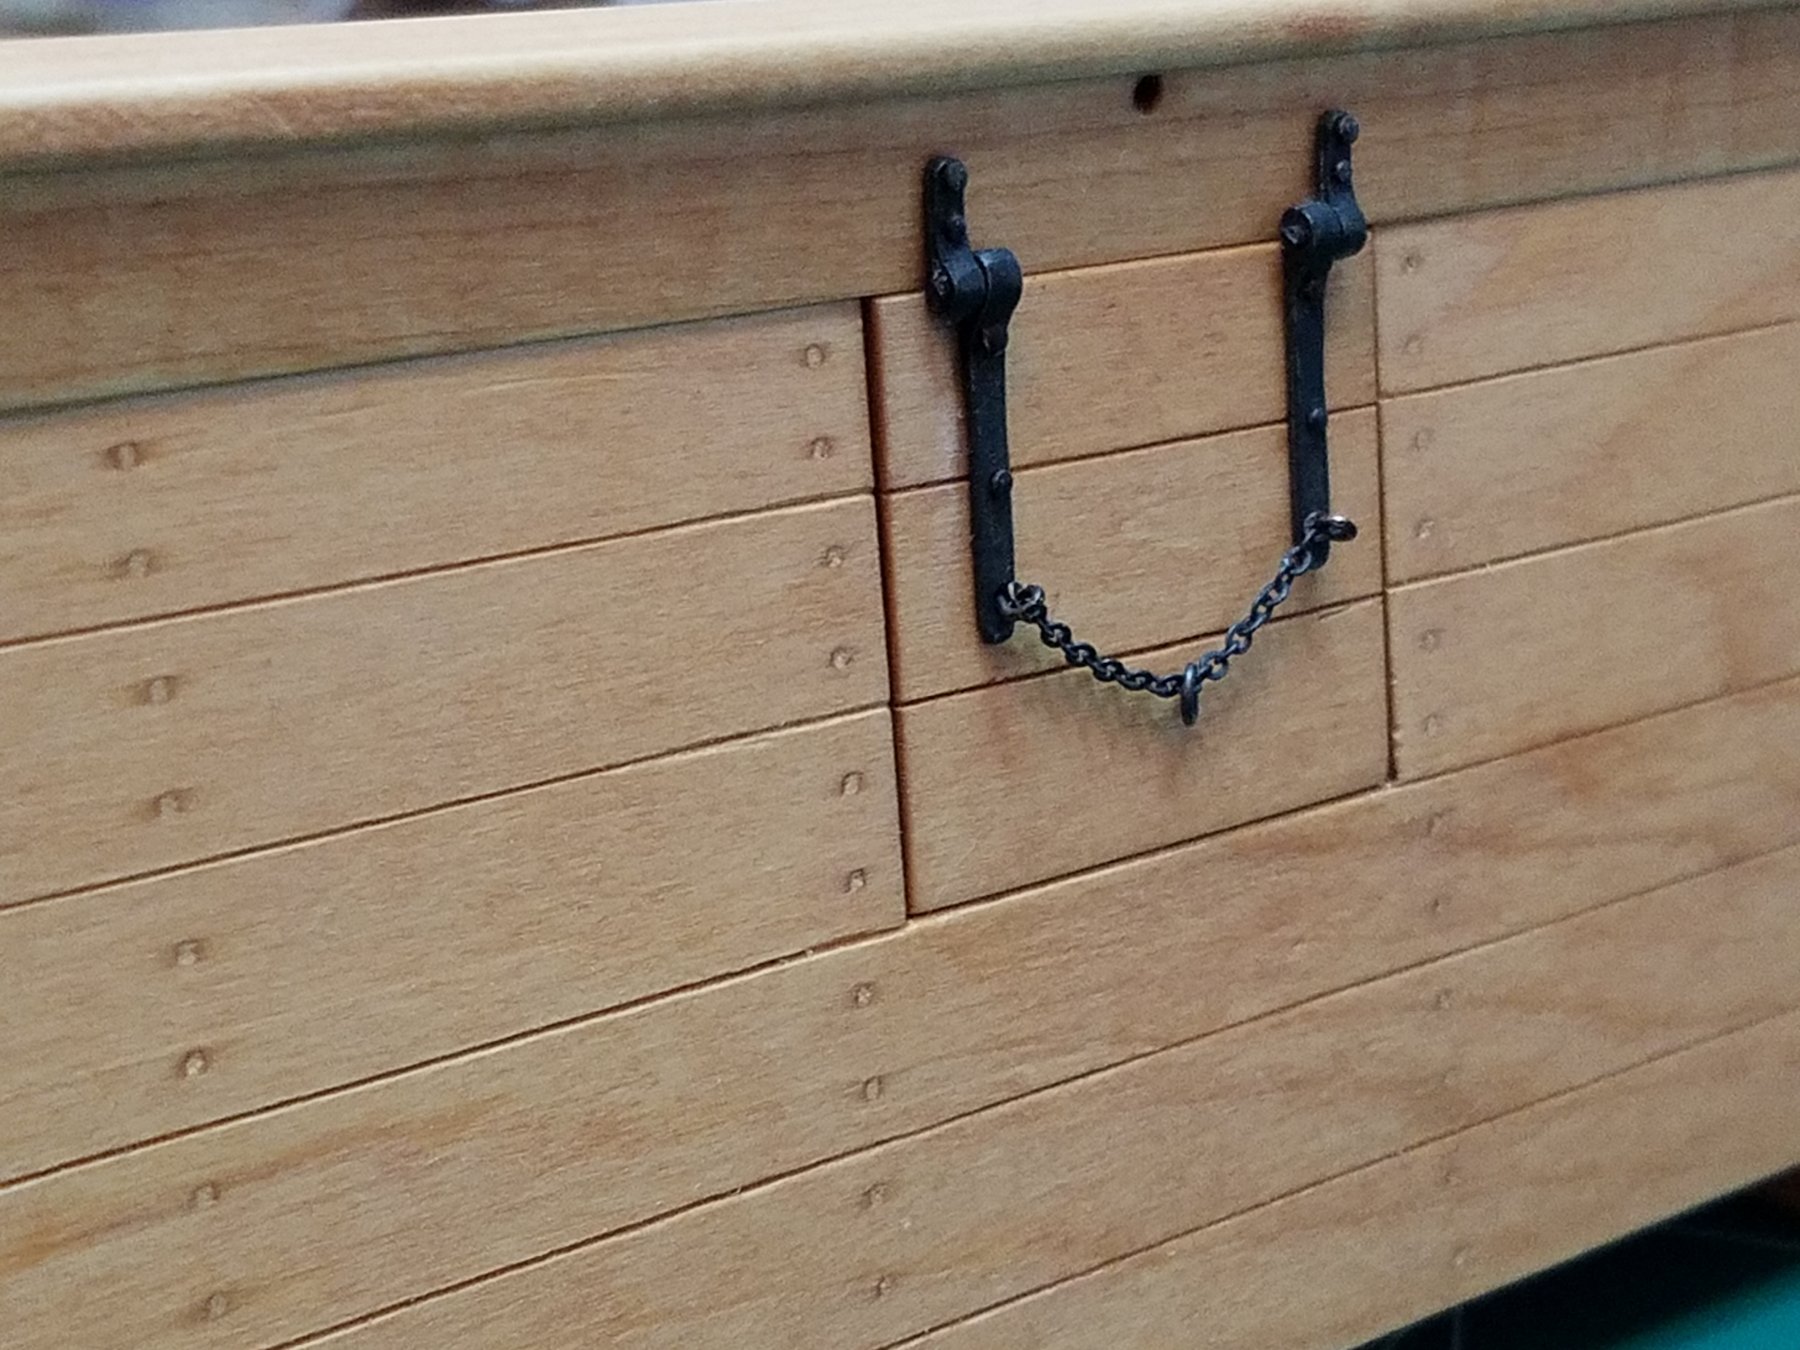
Thanks Eric and Dan for the replies and kind words. Not much progress to show tonight but what I did do was a nice change. My first attempt at stropping and rigging wooden blocks was a challenge and I hope I succeeded to some degree. First I had to finish my wooden cleat to replace the cast metal one that came with the kit. The one on the right is the metal one supplied in the kit. The one on the left is a plastic one that I had left over from my Daysailer build. The center one is the one I made from walnut. I did not try to take any step by step pictures of the stropping ind rigging work. I was too wrapped up in the process being my first attempt but below are a couple of shots of the finished gun port rigging. That's it for tonight I am off to bed.

.thumb.jpg.8aa9bc6d4ca6b84c3b2bd823ca0008fa.jpg)
- 82 replies
-
- 10
-
-
- naval smoothbore
- model shipways
- (and 1 more)
-
I am not sure. I just assumed that is what the kit came with. As a matter of fact I picked the kit off of the shelf myself on one of my trips down to Model Expo. Guess I should have bought a lotto ticket that day instead.
- 82 replies
-
- 3
-
-
- naval smoothbore
- model shipways
- (and 1 more)
-
Thanks Semore, Geo and Steve for the kind words and to all the others who sent likes. Really a cast white metal cannon? I just posted a question in another thread about trying to find manufacturers that use less cast metal parts and it looks like Model Expo is going the other way on us. Although we did just get word where I work of a huge price increase on all the brass and copper products we buy from different manufacturers. I am really going to try to wrap this up by New Years.
- 82 replies
-
- 2
-
-
- naval smoothbore
- model shipways
- (and 1 more)
-
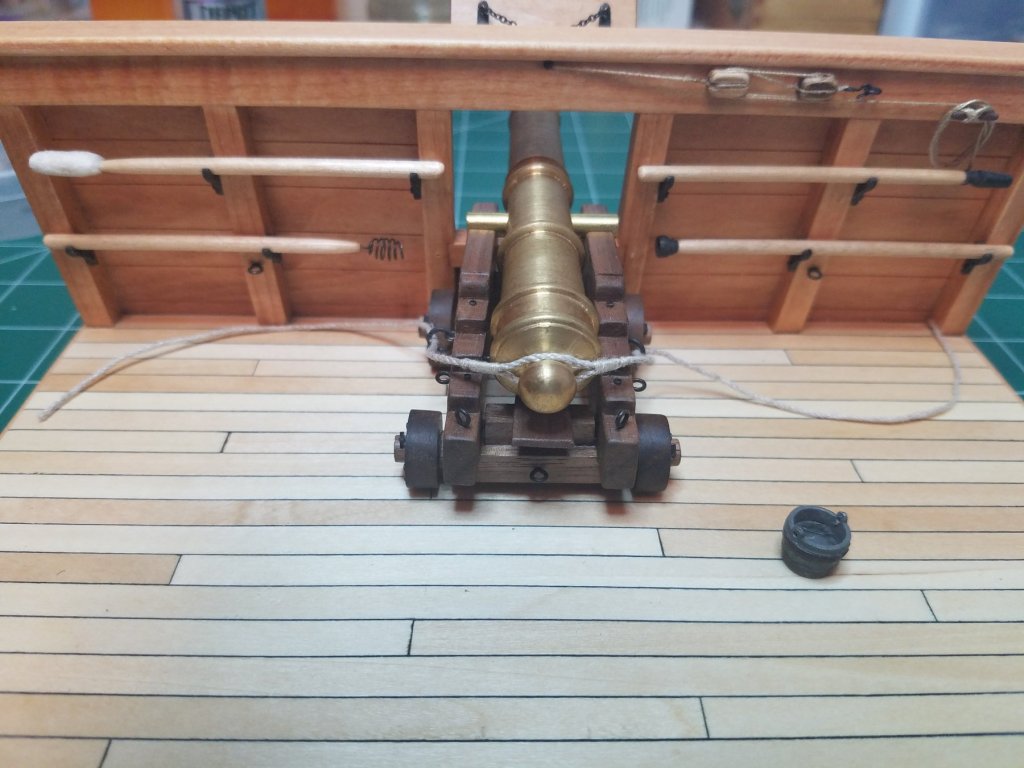
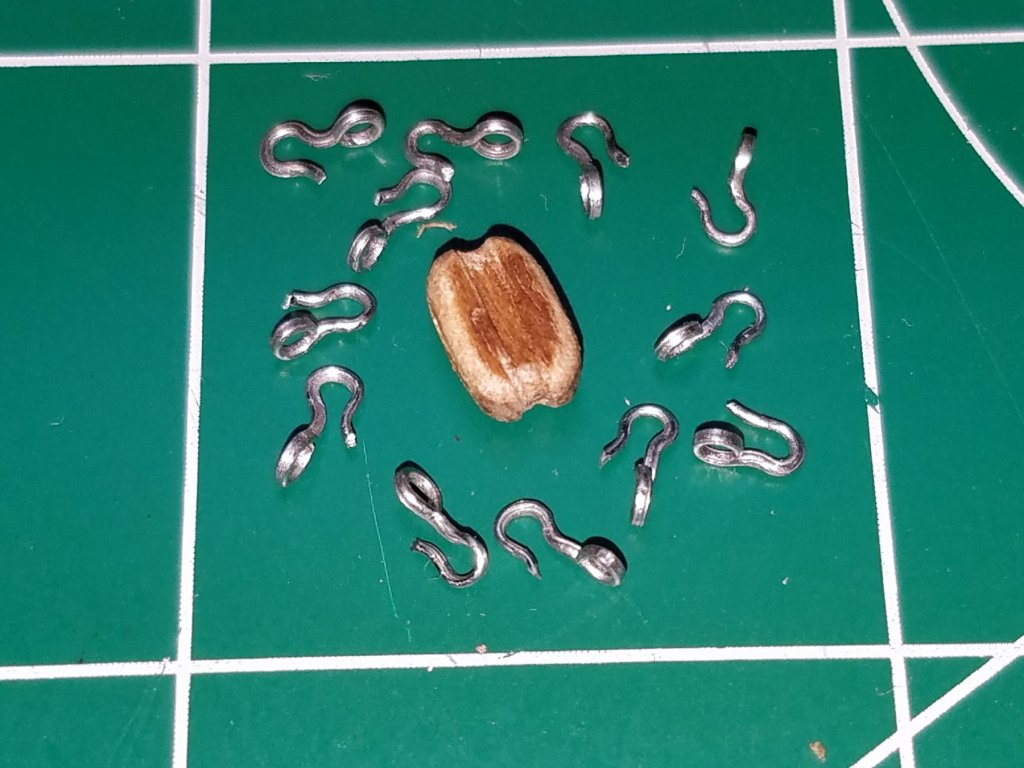
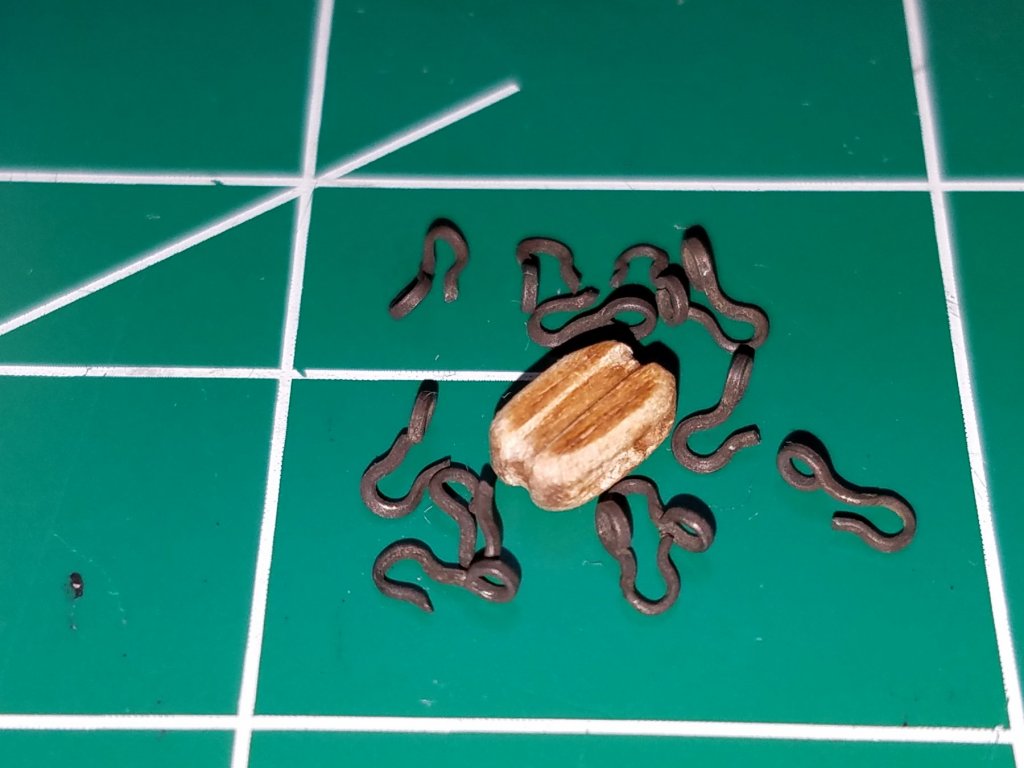
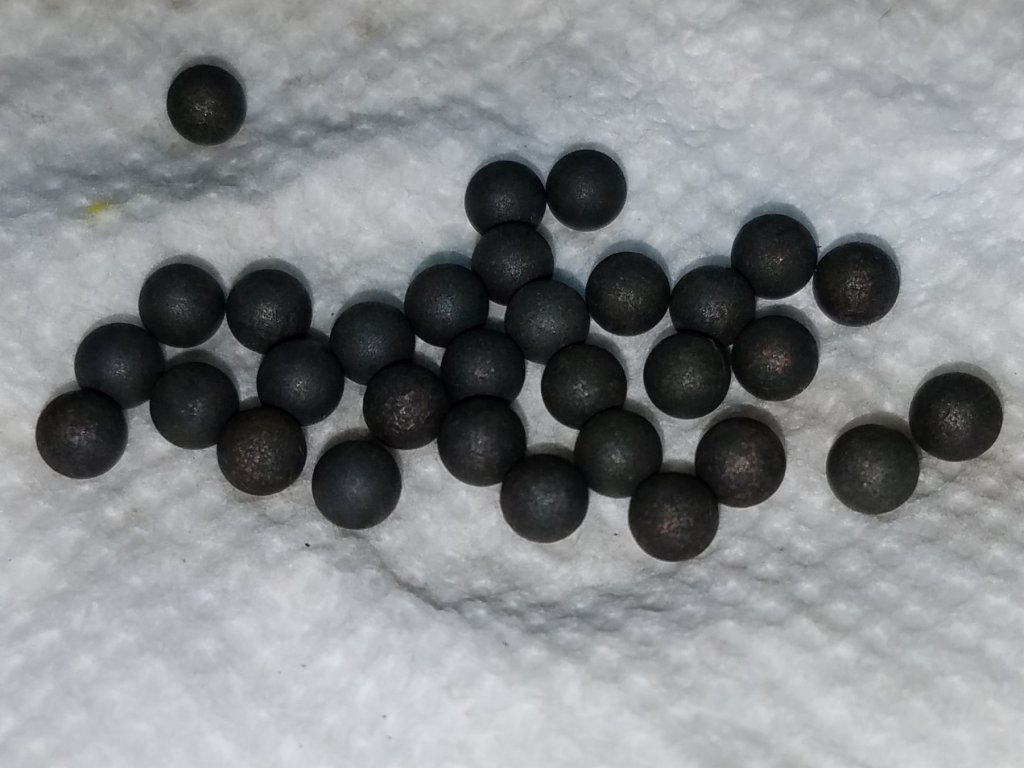
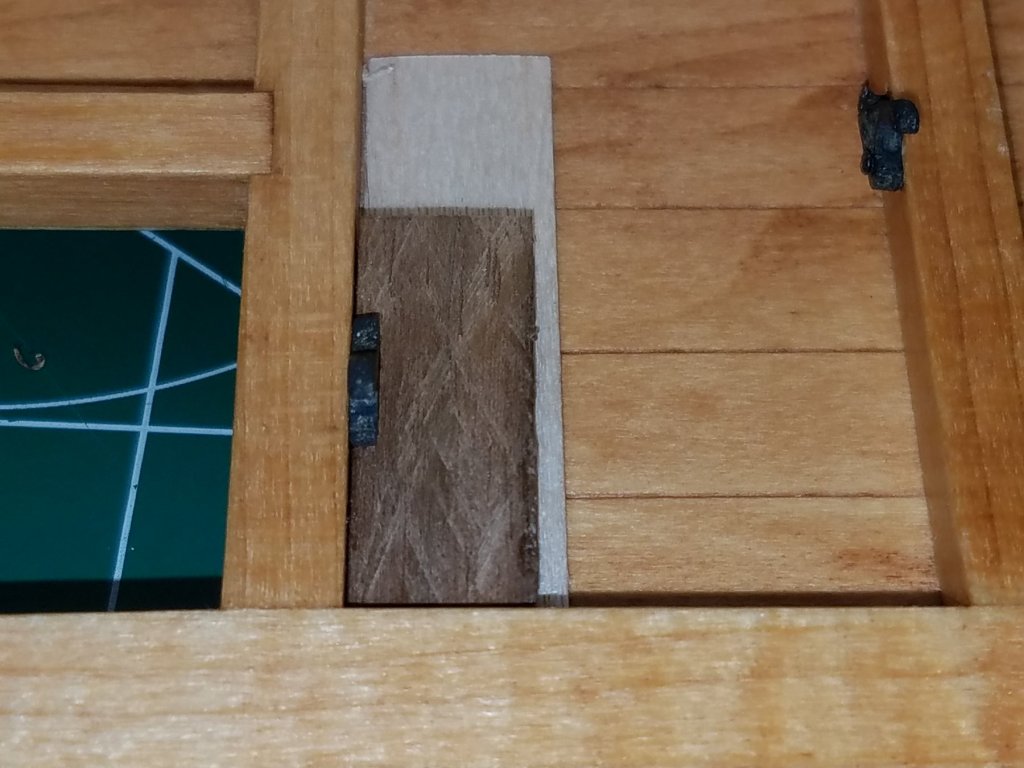
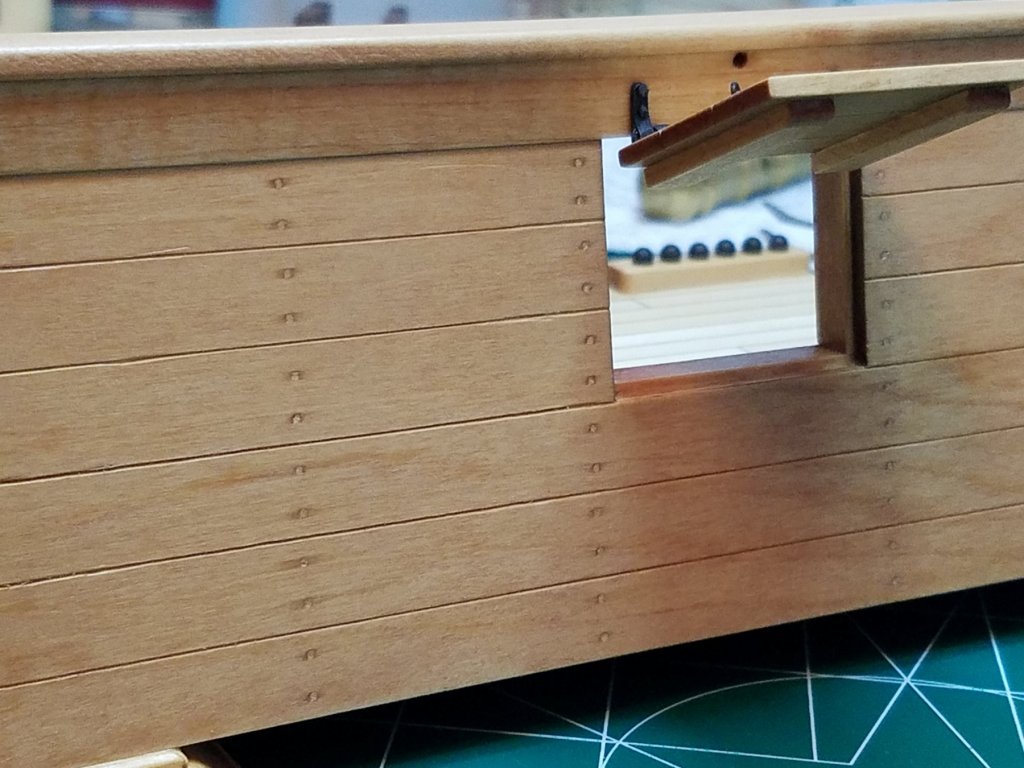
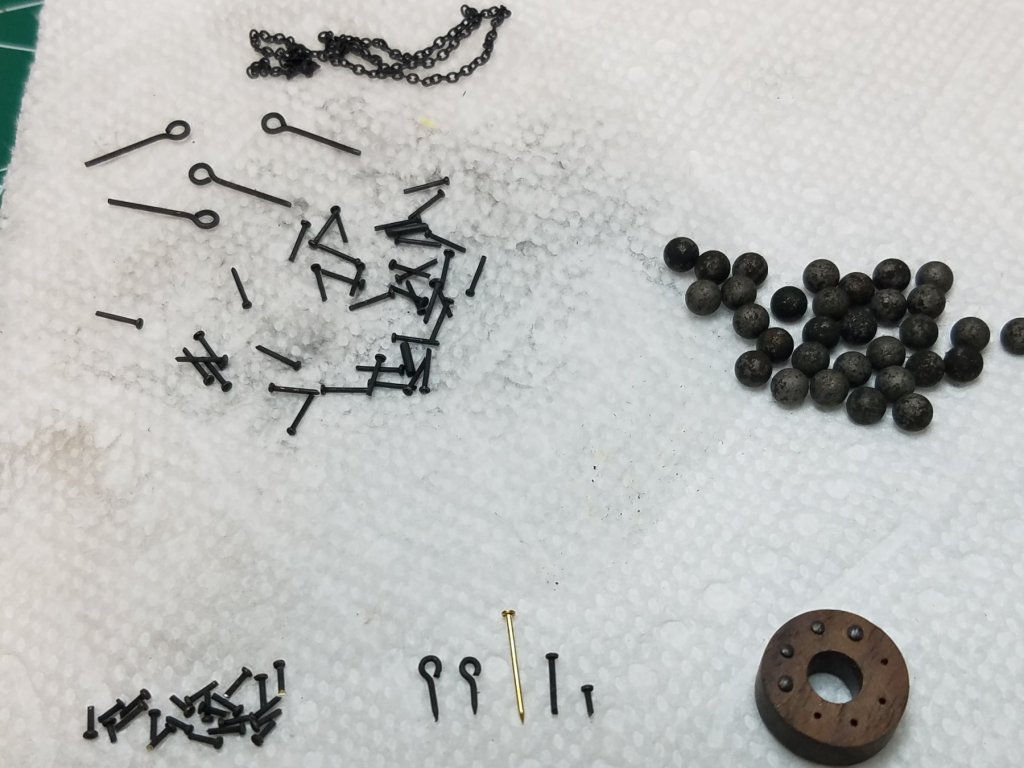
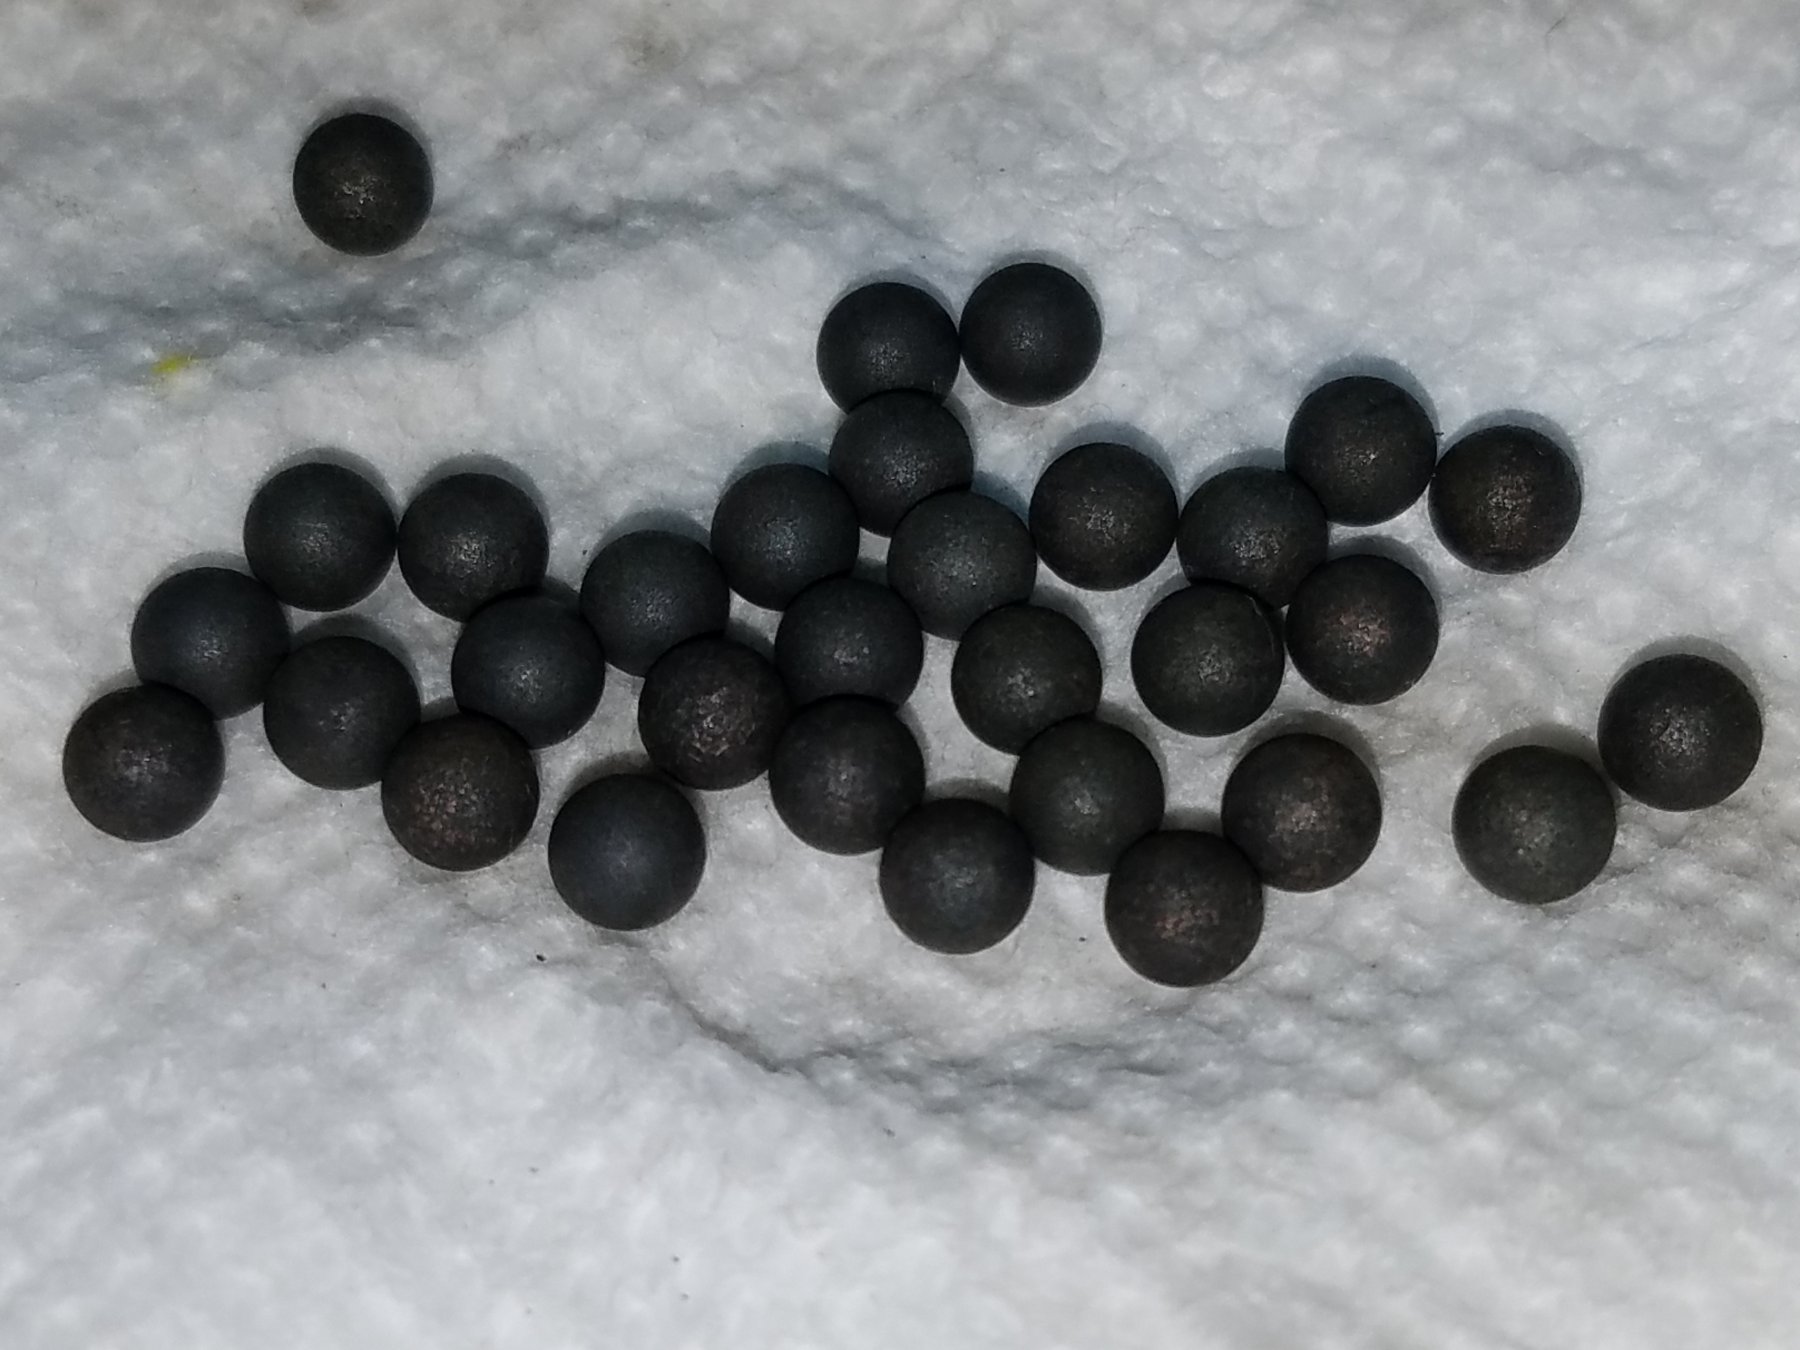
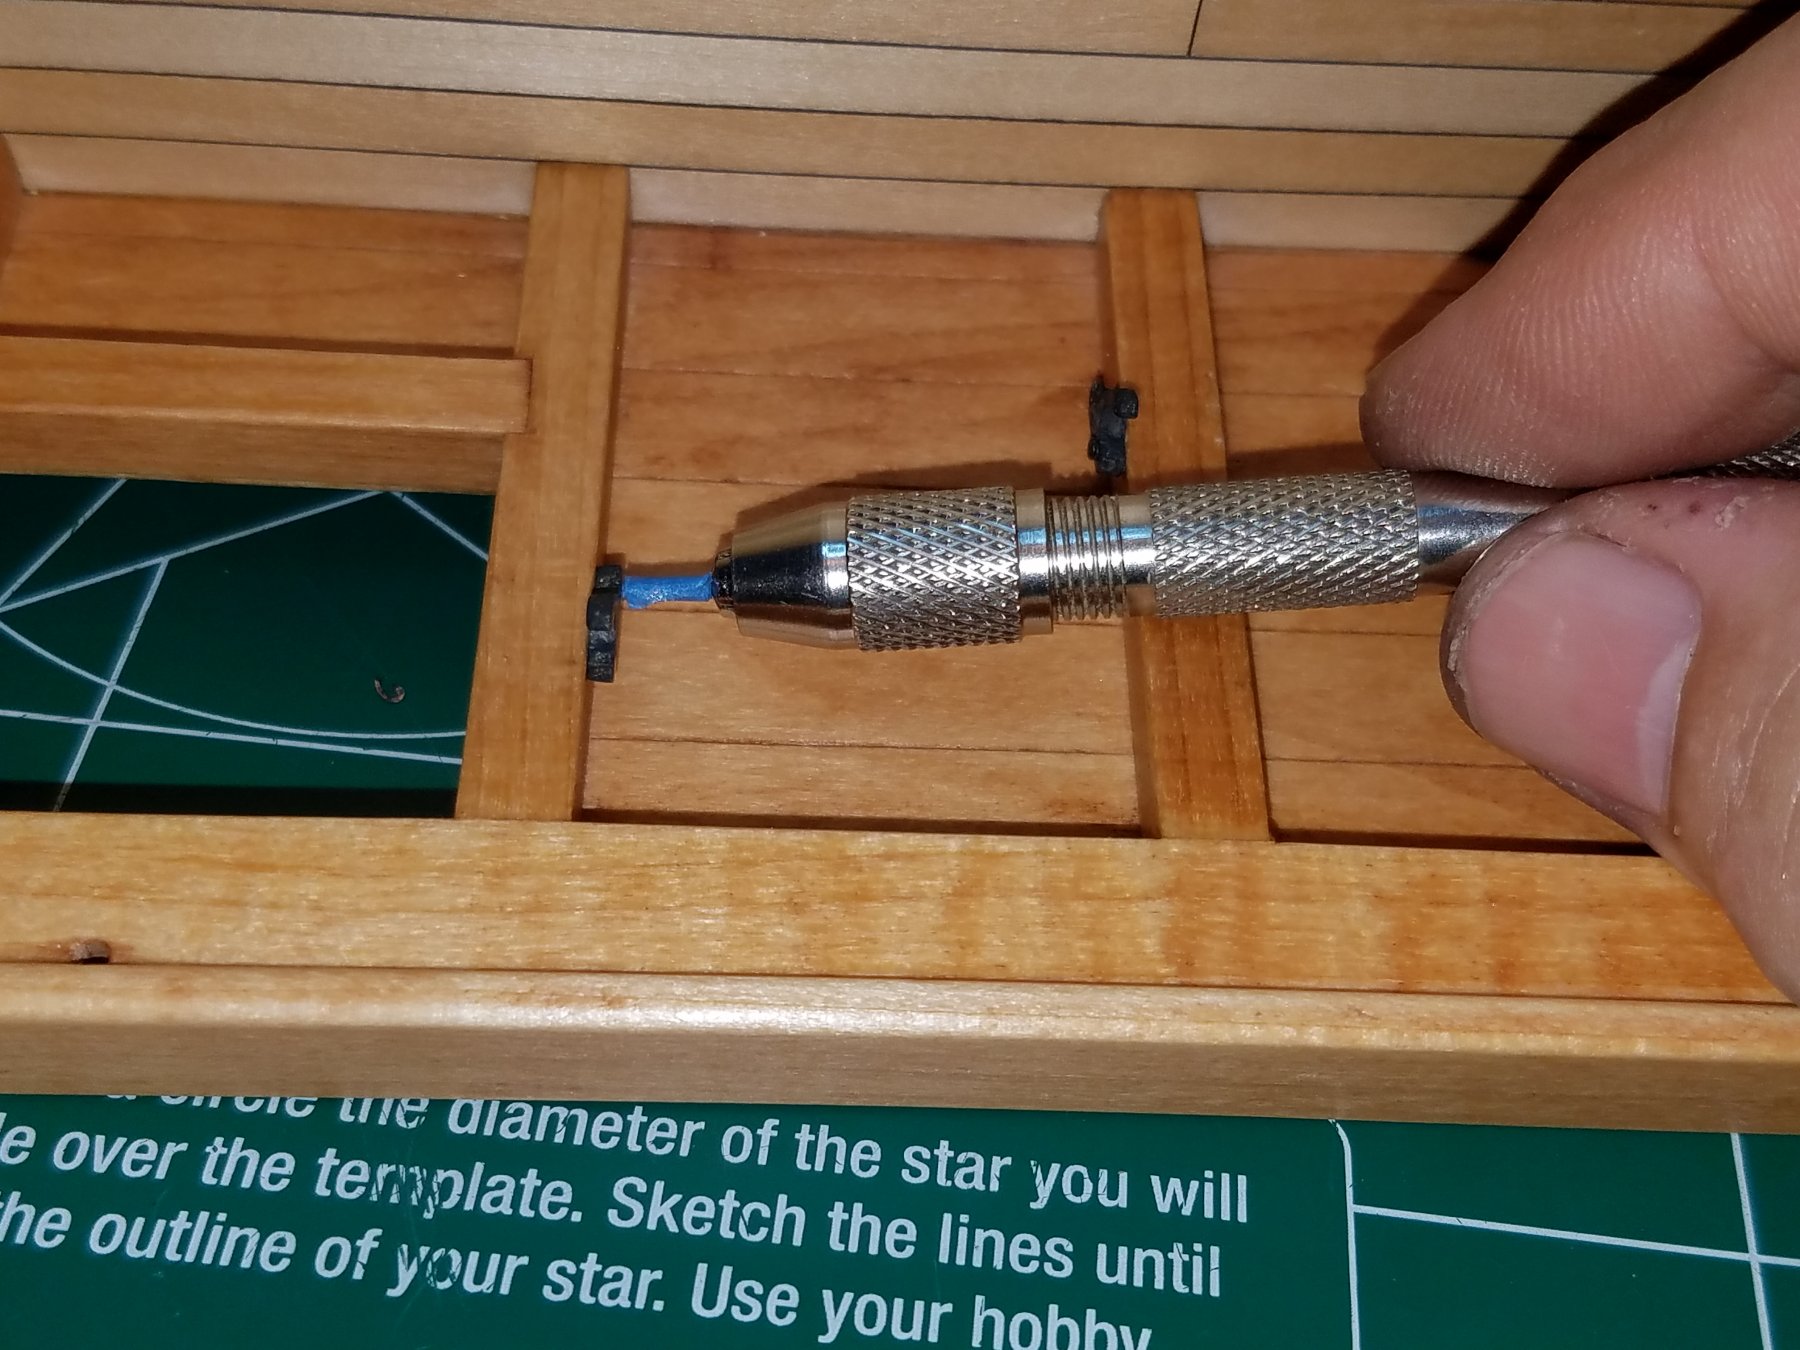
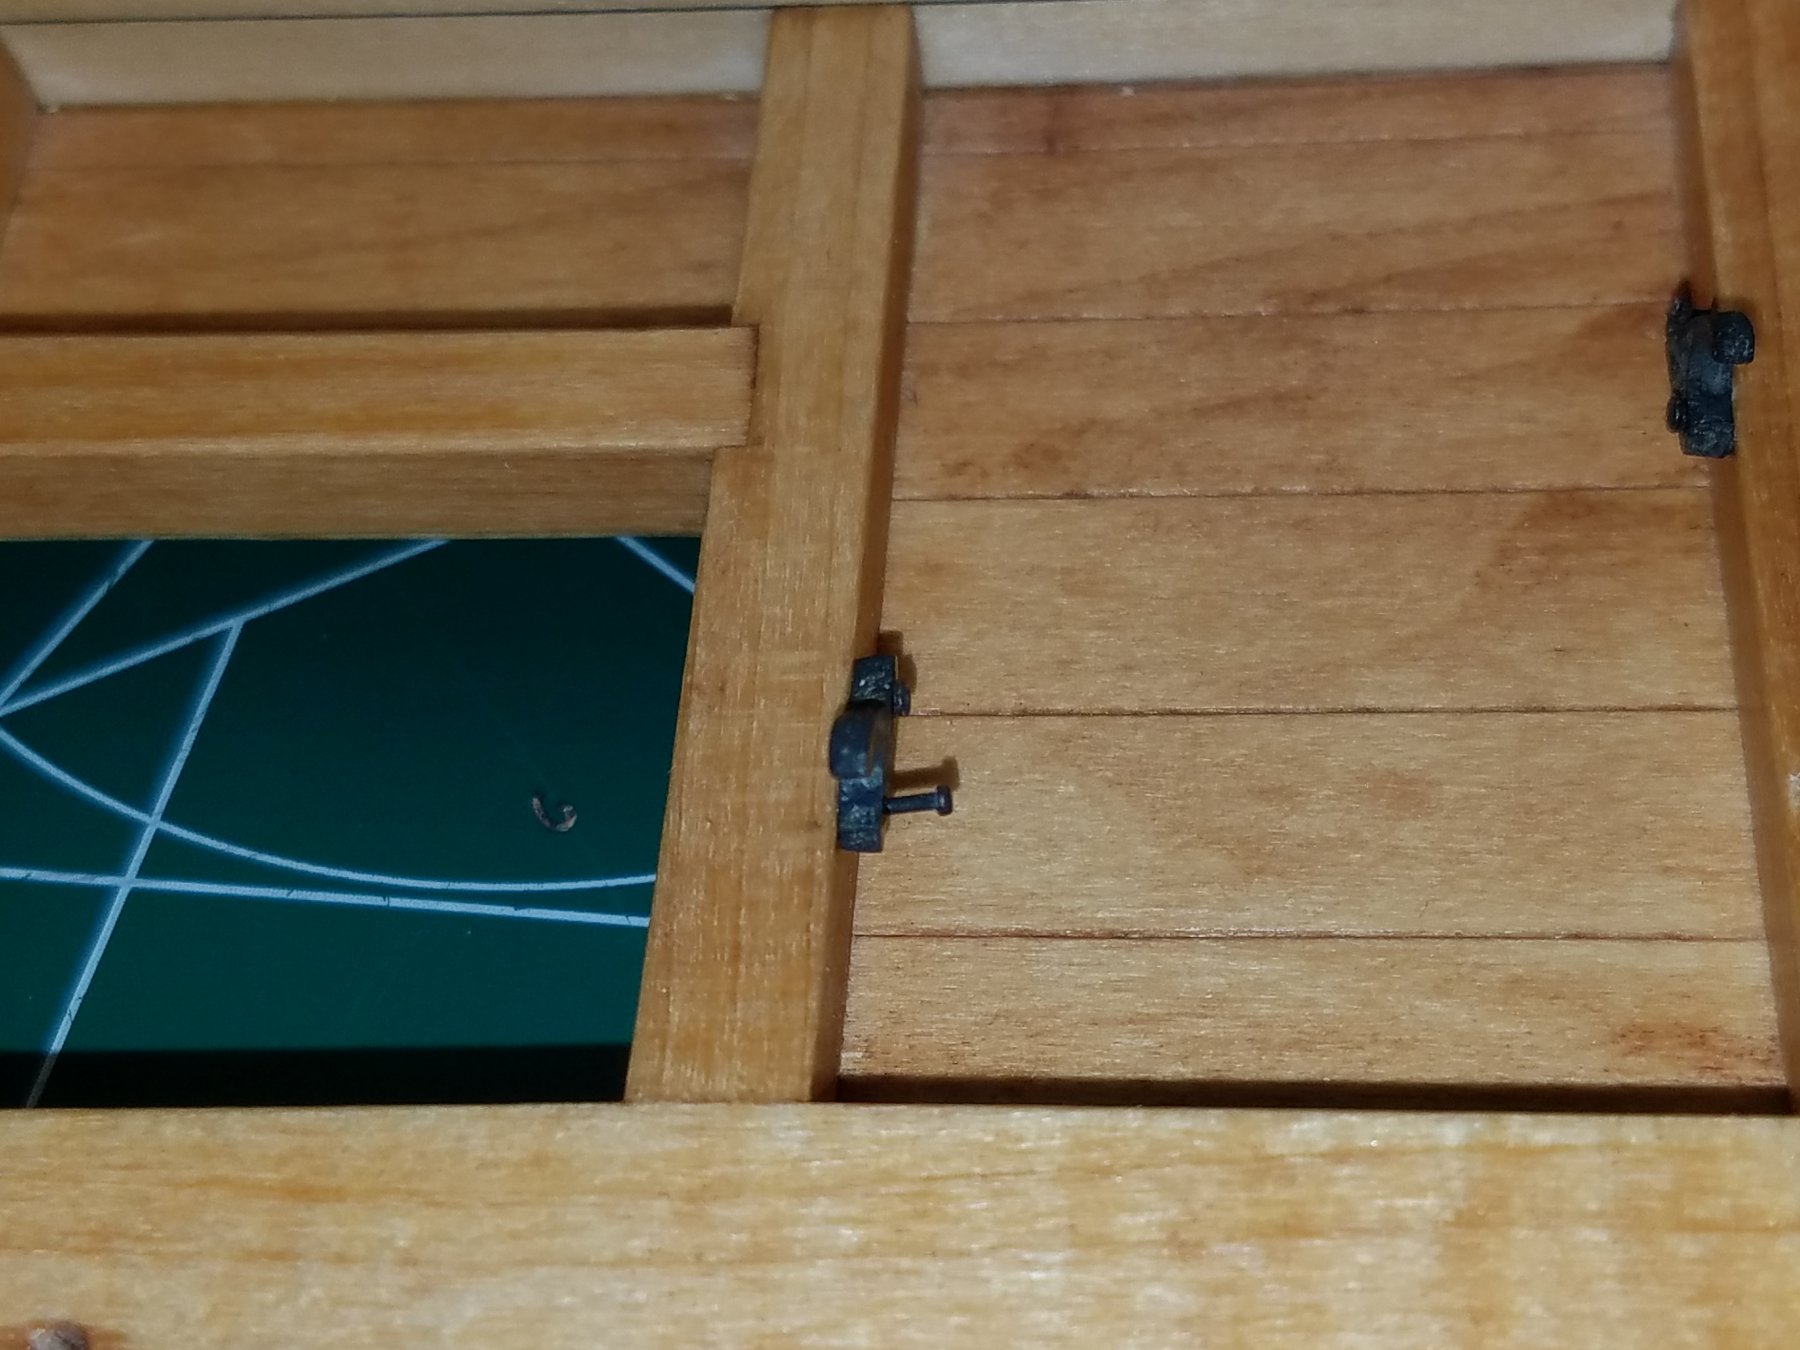
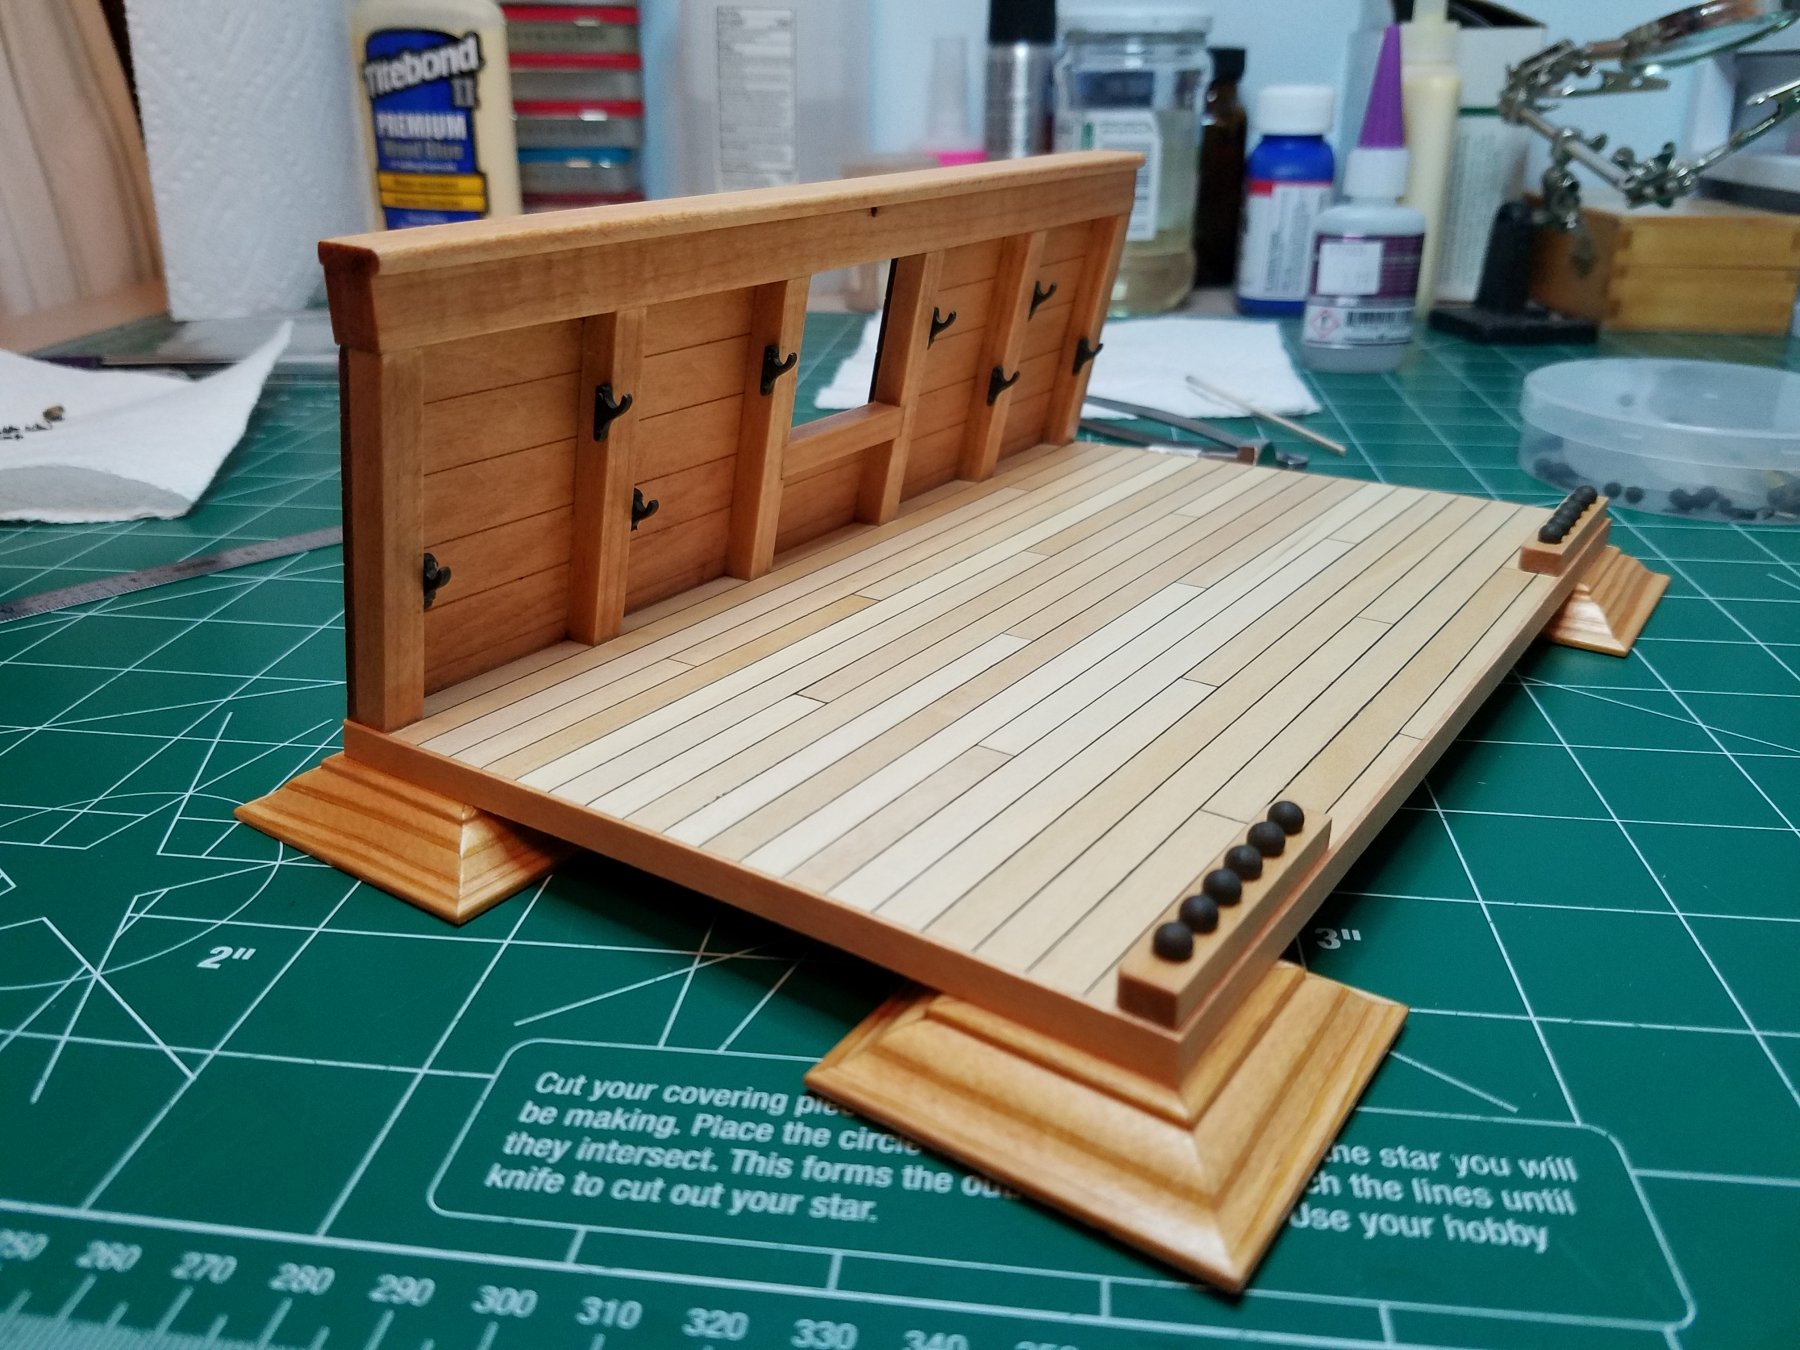
Did not have as much time over the holiday weekend to work on anything model related as I had hoped. But since this week is nortoriously slow at work I took some tools and wire to the office and made some rigging hooks. I took the pictures after I got home. Shown with the block they will be used with. I made 12 and only need 6 so I should be able to find enough decent ones in there. And here they are after 30-45 seconds in full strength Birchwood Casey Perma Blue. Same thing for the BB Cannonballs. Then I finally got to attaching some hardware to my bulwarks. First up were the tool hooks. After reading some of the build logs for these kits this part scared me the most. It seems like a lot of people had trouble with it. Here is how I did it just in case it helps anyone planning on doing this. First I found some wood scraps that elevated the bracket to the correct height. Then I measured down from the cap rail to the position I thought looked good and made a small tic mark on the frame. Next I applied a small drop of medium CA to the bracket between the nail holes and set it on the wood block and aligned with the tic mark and held it in place for 30 seconds. After removing the wood blocks I carefully drilled the bottom hole Using a #73 bit and inserted a nail that I already had cut to about 1/4" with a drop of CA and pressed it into the hole. Lather, rinse, repeat for the top hole. Be sure to angle the drill slightly downward. And the nail also when pressing it in. Even taking as much care as I could I had 2 nails that somehow got away from me and raised a pimple on the frame but after removing them and trying again they went where they were supposed to with no harm done. Then I glued on some of my newly blackened Cannonballs. And got to work on the Gun Port Lid. This was pretty straight forward. I attached the brackets on the lid using a small drop of CA then once that was dry applying the nails and rings just like I did for the tool brackets one at a time. Then I glued the pin into the upper bracket. Once it was dry I inserted it into the hole in the lower bracket. Holding the door in position I folded the upper bracket down and applied a drop of CA to the back side then flipped it up into position and held it until dry, about 30 seconds or so. Installing the nails the same way again. I am only using the short length of chain on the door itself I will be using rigging line to complete the rigging from this point. Getting close to the end now. I did manage to make the cap squares over the weekend but they still need some finishing. Maybe tomorrow that's it for tonight. Thanks again for all the likes.


- 82 replies
-
- 12
-
-
- naval smoothbore
- model shipways
- (and 1 more)
-
Thanks Bill but I think you misunderstood my point. My goal is to find those kit manufacturers that have no or at least as few cast parts as possible. I just prefer working with real wood over metal or plastic. As for the general public I doubt that any of my efforts at modeling would ever be viewed by the general public. Unless you count the Admiral who has to dust them. Best Regards
-
I am very new at model ship building however, I can already see one aspect of the hobby that bothers me. That is the increasing use of cast metal parts by some kit manufacturers to replace parts that were and should be made of wood. While I guess I understand the reasoning behind it and it does give me a chance to add a little touch of my own to an otherwise generic kit. I was still wondering if there was a manufacturer of "quality" kits that uses less metal than others? Thanks
-
I have two of these sitting on my bench as replacements for the cast metal ones on my Bluenose II. Both with the same crappy instructions. I started one and decided I needed to get some bending experience on something a little bigger. I could not manage the tight radii of the bends without splintering no matter how I tried. Best Regards
-
"Brass Black" is a Birchwood Casey product the same folks who make gun bluing solutions as well as many other metal treatment chemicals. If you have a Bass Pro or other large sporting goods or shooter supply store near you they might carry it but I ordered mine from Amazon. About 8 bucks a bottle but it says you can reuse it several times and it only takes a small amount. Best Regards
- 82 replies
-
- 5
-
-
- naval smoothbore
- model shipways
- (and 1 more)
-
Sorry I'm a little late but try to find a cabinet shop nearby. I work in Ft Lauderdale and found a marine cabinet maker near me that invited me to root around in their "scrap" pile anytime I want. I always offer to pay and they refuse every time. There is always some usable "scraps" of exotic wood in there. If I had a band saw I could just about go into business off of their throwaways. Best Regards
-
Model Shipway Ratline tool
Osmosis replied to fnkershner's topic in Modeling tools and Workshop Equipment
I saw a prototype on my visit down there a couple of weeks age but they had not released it for sale yet. Looked pretty interesting from a newb's perspective. -
Welcome aboard Zuko, Like you I was a complete newb only a few short months ago. Now nearing completion of my second build I am still a newb but with a lot more confidence. There is lots of great advice and encouragement here. As Chris stated above my first build was a Midwest Daysailer kit I picked up off of e-bay for 30 bucks. Dive in take your time and most of all have fun. Best Regards
-
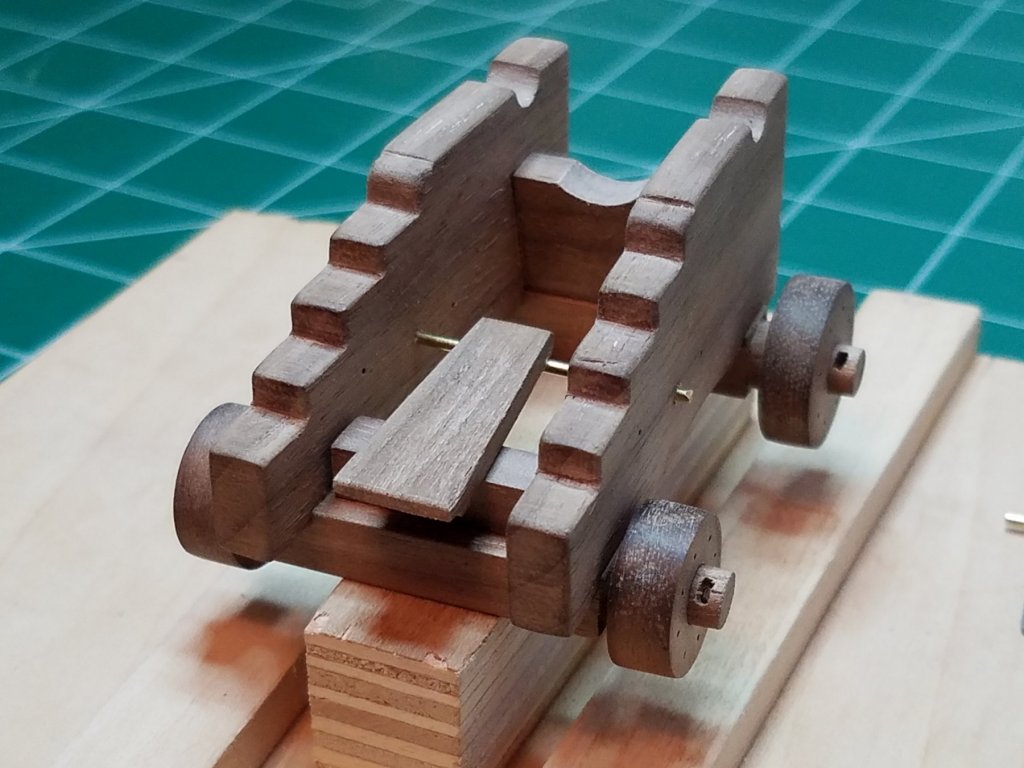
MSW might not have been working last night but I was hard at it. Had my first experience using Brass black and it went pretty well I think. First I needed a few small washers for the cross bolts. I am sure I could have bought these somewhere but where is the fun in that. I also needed a couple of smaller eye bolts that were not included in the kit so I made them from small brass nails as you can see below and I spent quite a bit of time cutting 75 or so of the same nails to the correct length prior to blackening. I took this picture after I started installing some of the hardware there was quite a bit more. This is only about half of the hardware done in the first batch. I must say I was quite impressed, that Brass Black work great and very fast. Still not happy with the BB cannon balls I think I will try the gun bluing next. And here is the carriage semi outfitted. Just the capsquares yet to be made and blackened along withe the barrel and that should complete the gun and carriage. Still debating on the bucket I am thinking I will have to try to make one. That is it for now I hope to find a couple of hours tomorrow to work on it some more. Thanks for all the likes. Hope everyones shopping is all done unlike mine.


- 82 replies
-
- 15
-
-
- naval smoothbore
- model shipways
- (and 1 more)
-
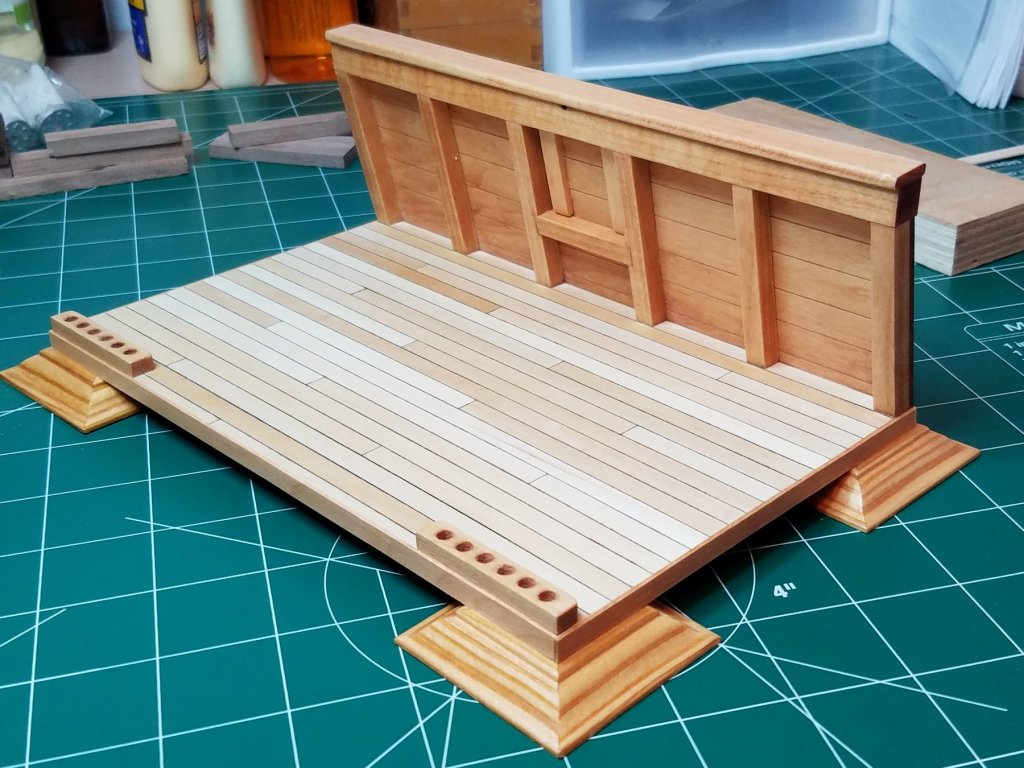
I think the wood work on the carriage is complete. At least I hope it is because after drilling the last of the hardware pilot holes I put the first coat of wipe on poly on. Then I turned my attention to the hardware. I was going to blacken the brass tonight so that I could start installing it tomorrow. But, I kept looking at that pathetic little cast metal cleat. I could not convince myself to like it sooooo, you guessed it. I don't know what the camera did to the texture of the wood in this picture but believe me it is walnut. It is a little over sized but I will deal with that over the weekend. Tomorrow night is our weekly dinner outing with my 2 yr old Grand Daughter so we will be feasting on Pizza. Thank you everyone for all of the likes. I hope to have this done by the time the Jolly Old Elf brings me a new project to start.
.thumb.jpg.795cf165a7ce6ed8bd0f4ed9e93b7927.jpg)
- 82 replies
-
- 9
-
-
- naval smoothbore
- model shipways
- (and 1 more)
-
Hello and welcome aboard.
-
Let me add a late but well intentioned welcome aboard.
-
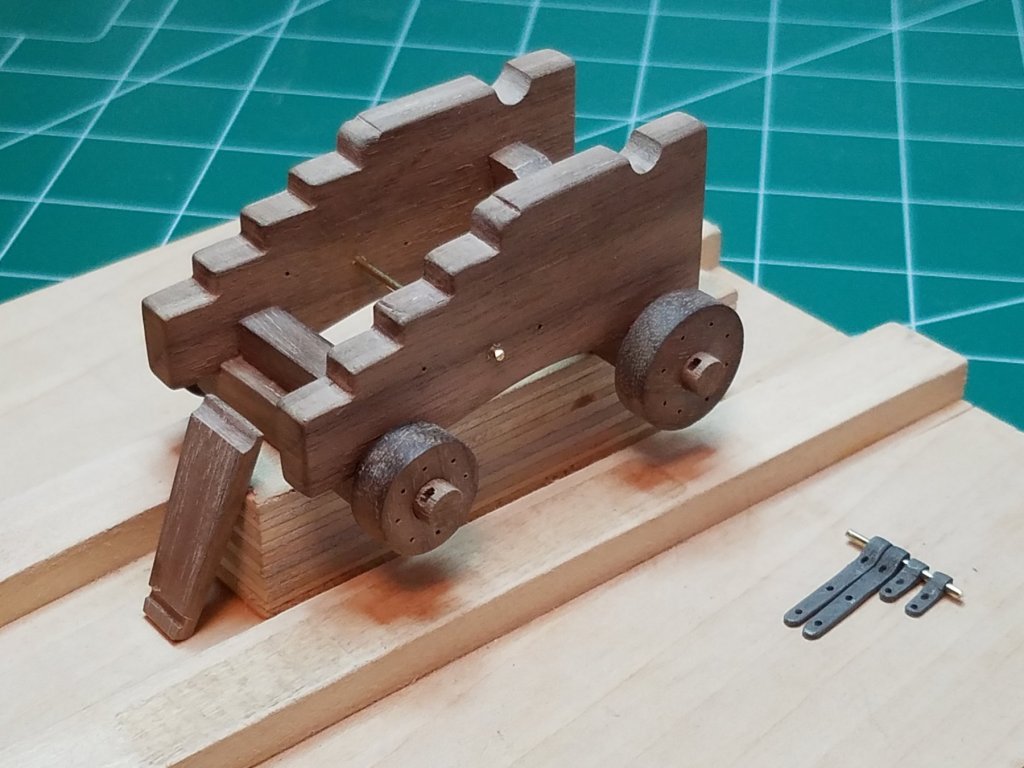
A little more progress tonight. The carriage is finally glued up. The Transom and Bolster are installed and the Stool Bed is shaped and waiting for my Brass Black to arrive tomorrow. Having not found a reasonable method for blackening brass under my kitchen sink I was forced to break out the amazon prime account and order some. The Piece of tubing supplied for the cross bolt was way too big in my opinion so I used the rod meant for the port hinges. By the looks of the illustrations in the "instructions" you are to use the entire length of rod and span the entire port. As you can see there is plenty to do both hinges as they should be and to make the cross bolt. I will fashion some washers for the ends from sheet brass. I think that will do it for tonight. As always thanks for looking in.
- 82 replies
-
- 11
-
-
- naval smoothbore
- model shipways
- (and 1 more)
-
Thanks for the info and the compliment Jud. I am glad I only made 1 before asking for help. I will try to refine the shape on my next attempt.
- 82 replies
-
- 4
-
-
- naval smoothbore
- model shipways
- (and 1 more)
-
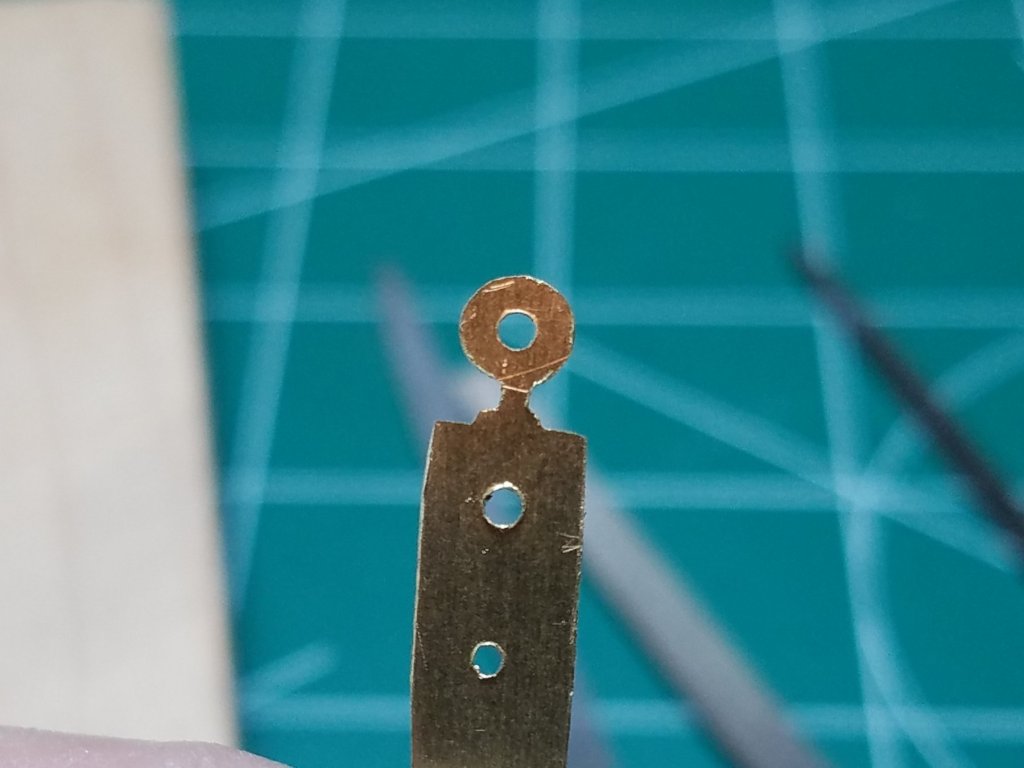
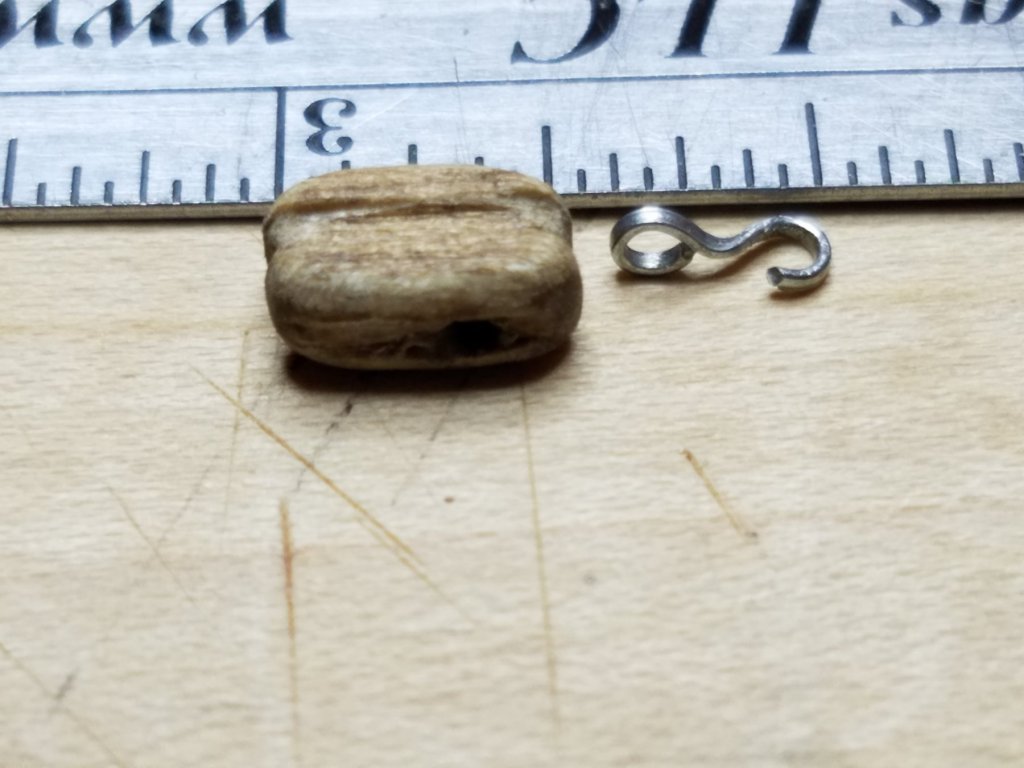
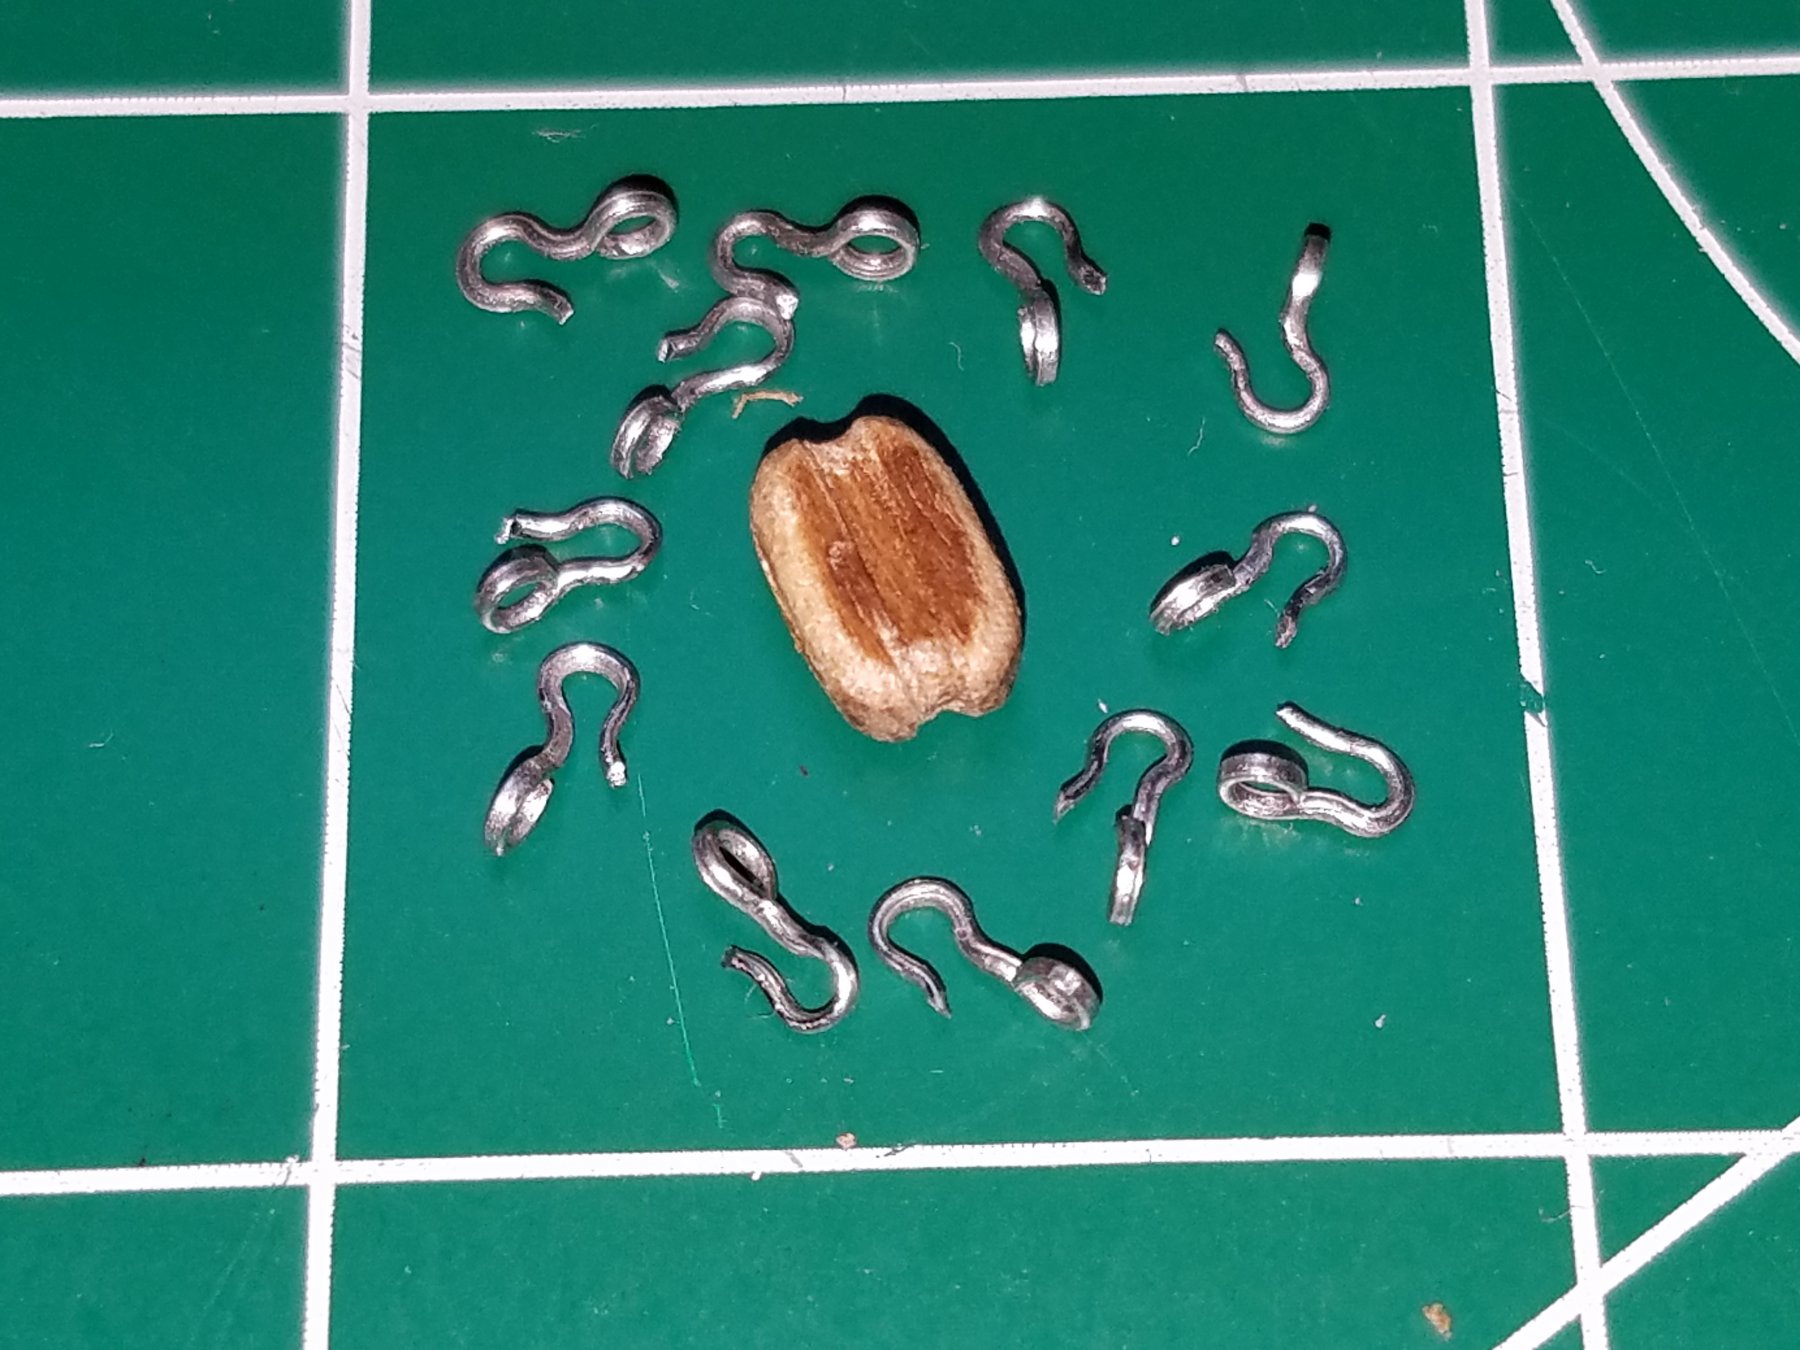
This is the smallest hook my tired eyes and stiff old fingers not to mention my round nose pliers will allow me to make, pictured next to the block it will be stropped onto. At 3/16" it scales up to 4.5 real world inches. Can anyone tell me if that seems about right. Having only seen pictures it is hard to tell. Unfortunately SS wire is all I had available this small. Is there a way to blacken stainless steel?
- 82 replies
-
- 9
-
-
- naval smoothbore
- model shipways
- (and 1 more)
-
That may work but since I only use it for RC I would not chance, it however for a static model I don't see why not. I buy all my stuff from Midwest model yachting they may have something that will work for you.
-
+1 for the fishing wire. That is what we use for rigging our RC Yachts. Be sure to get the crimp ferrules too.
-
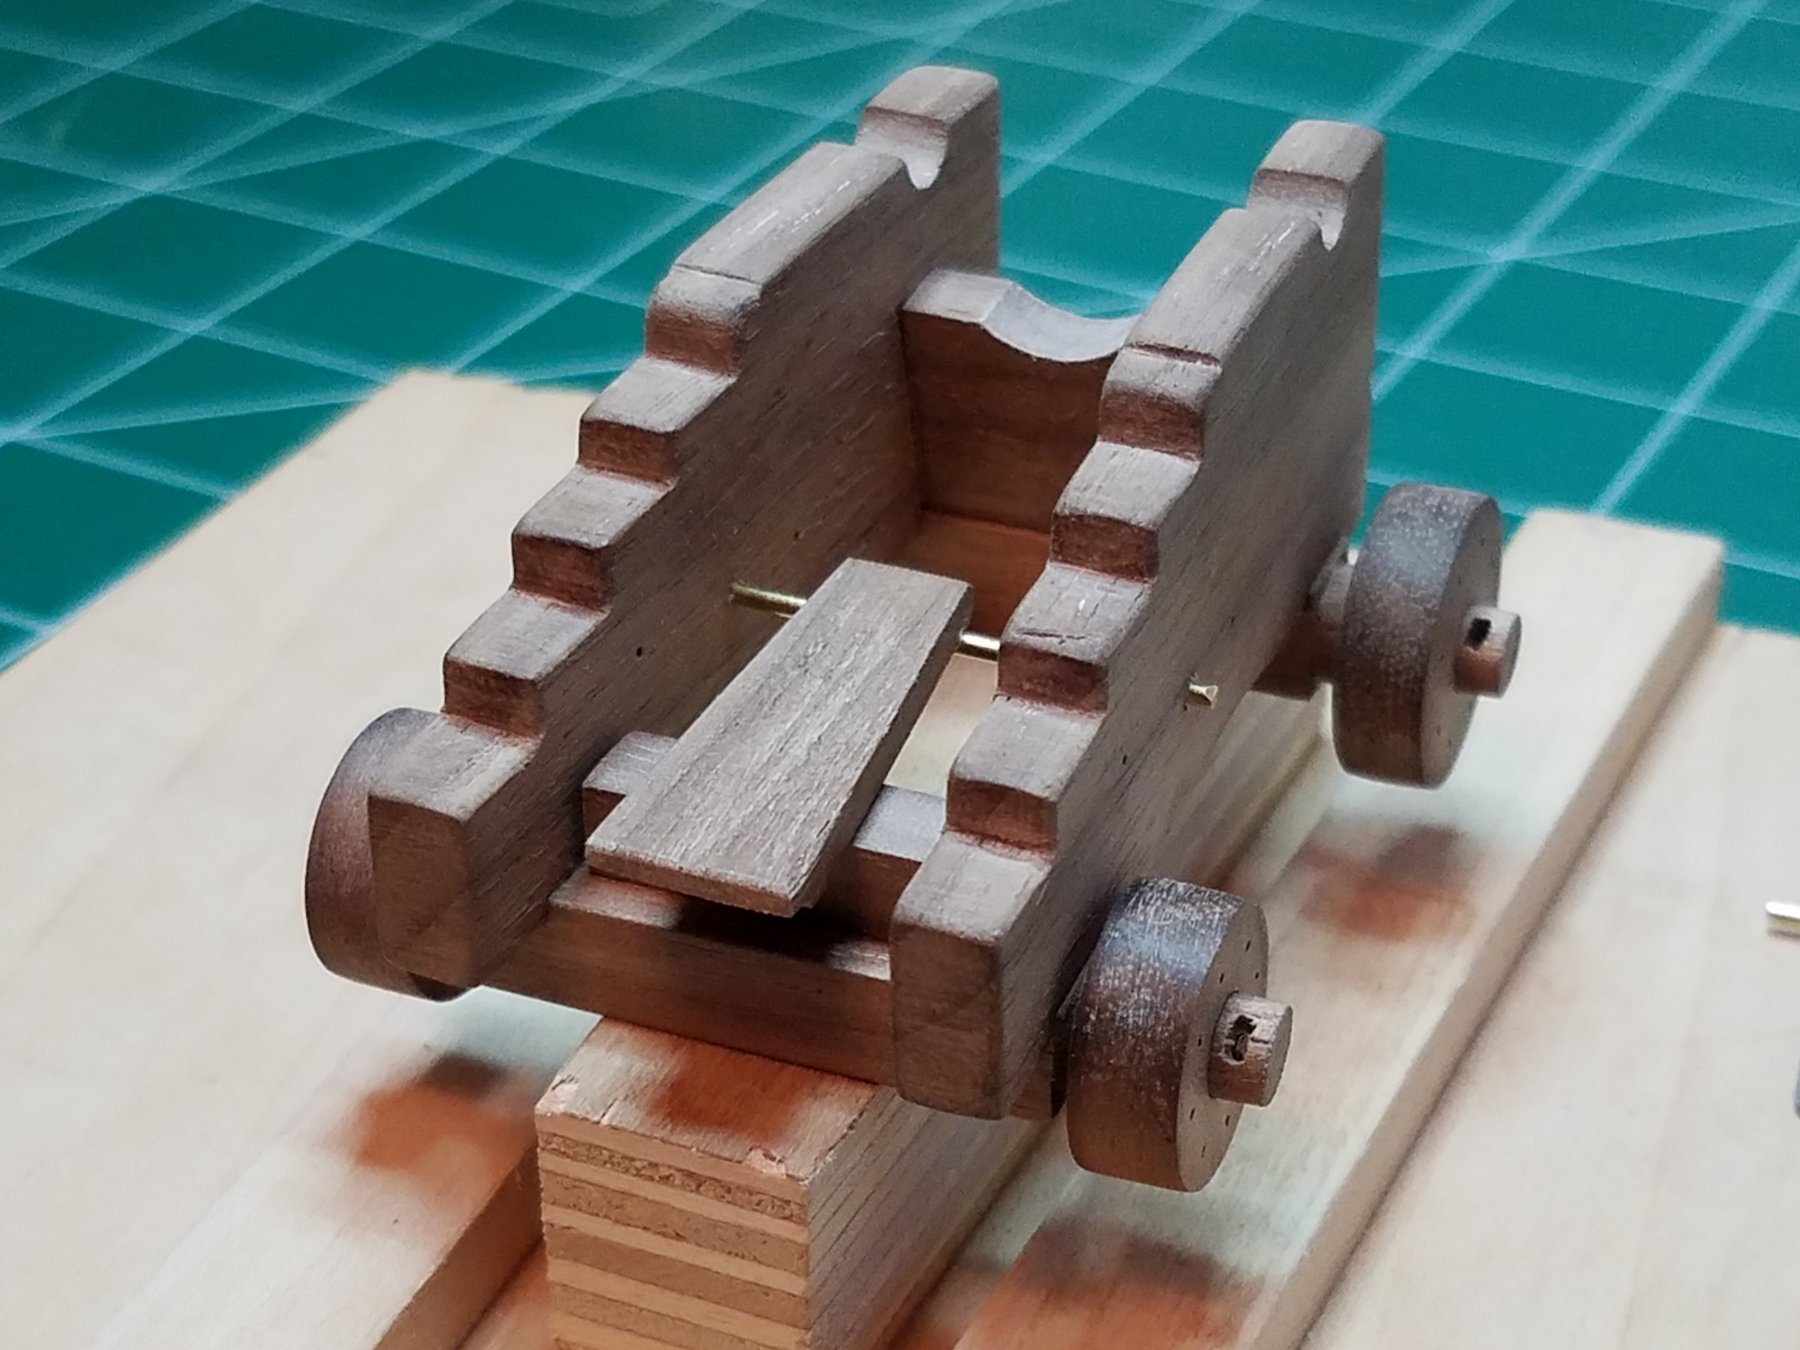
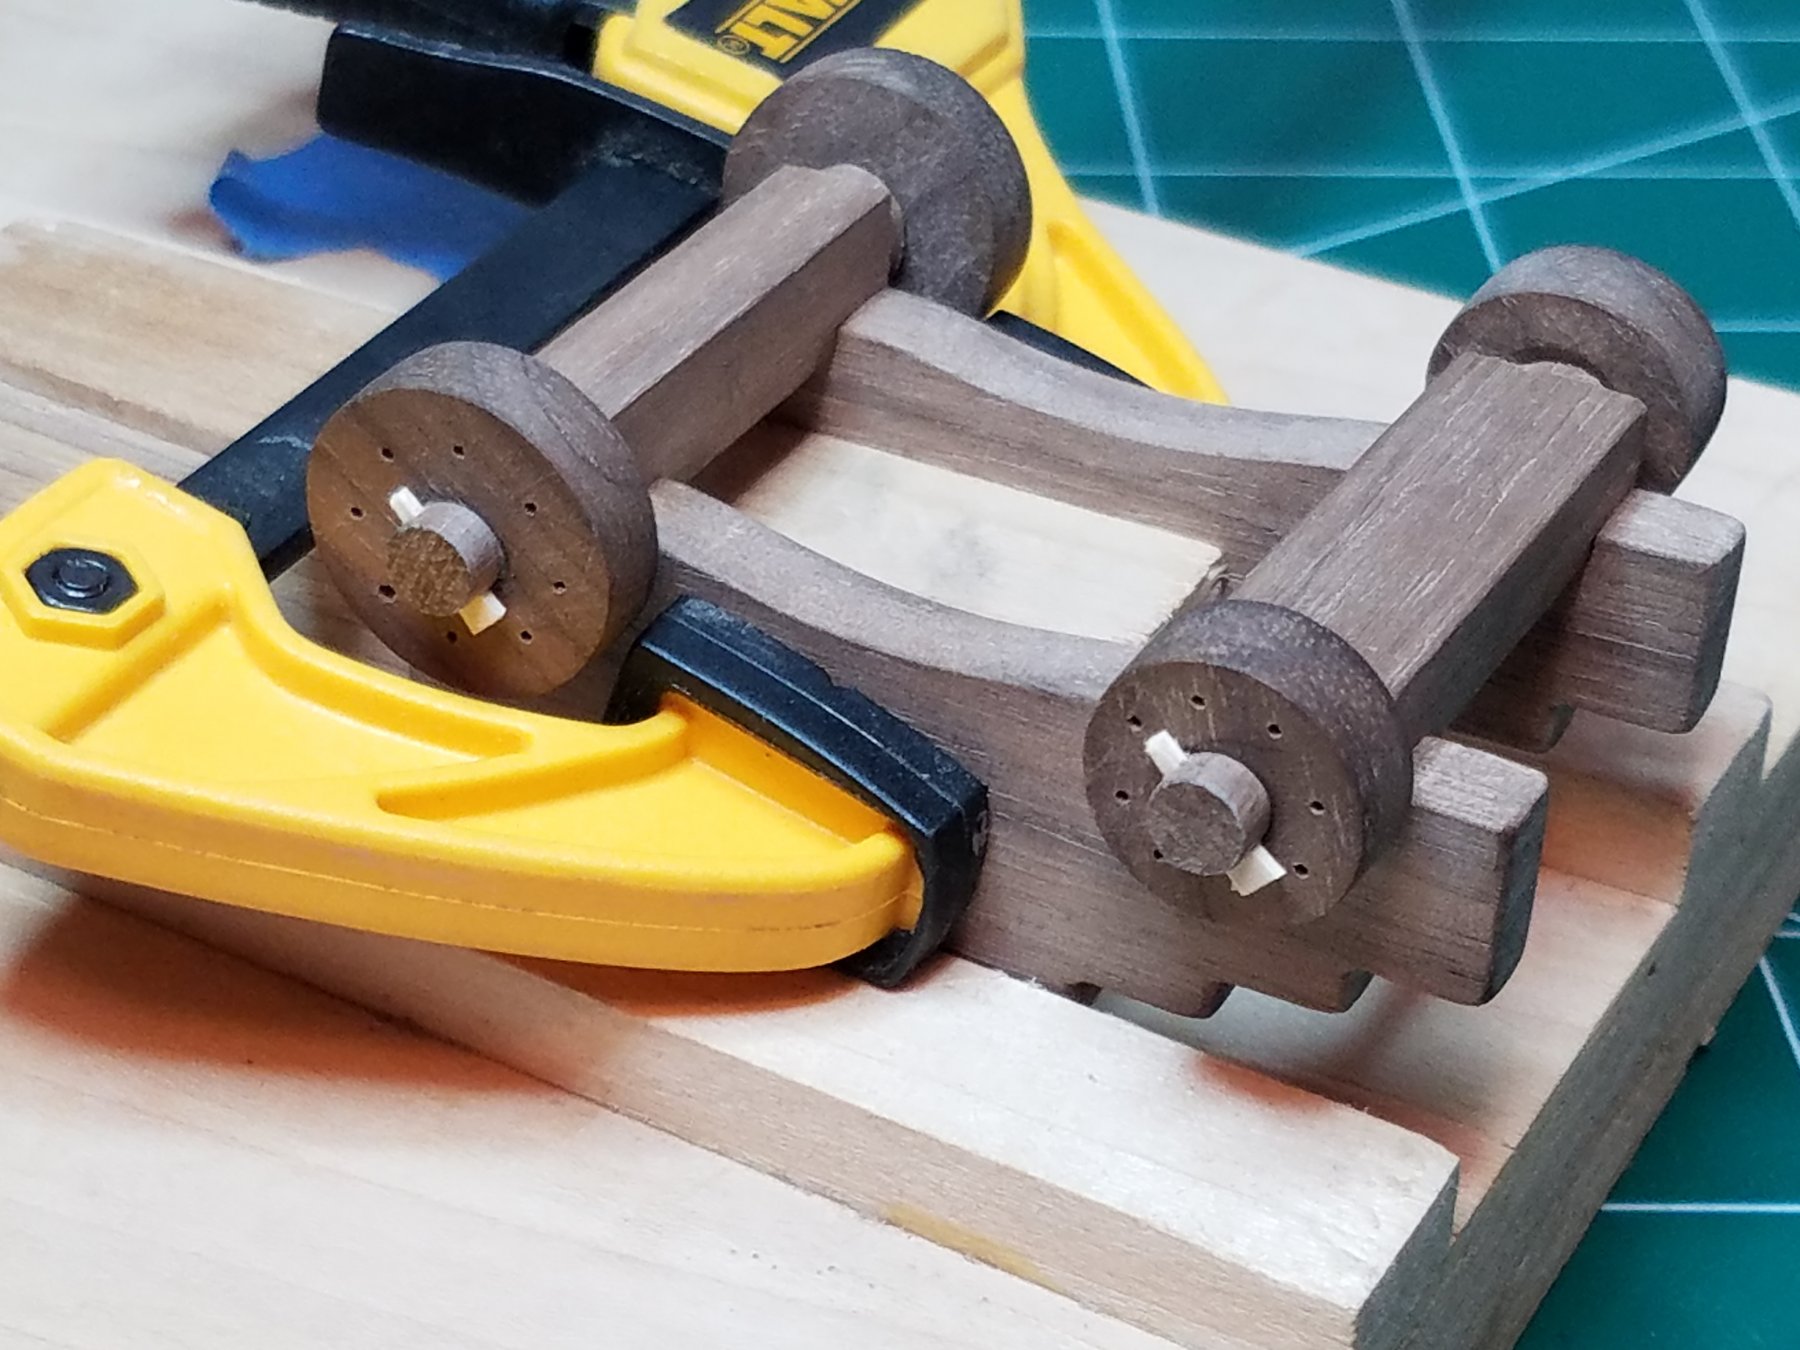
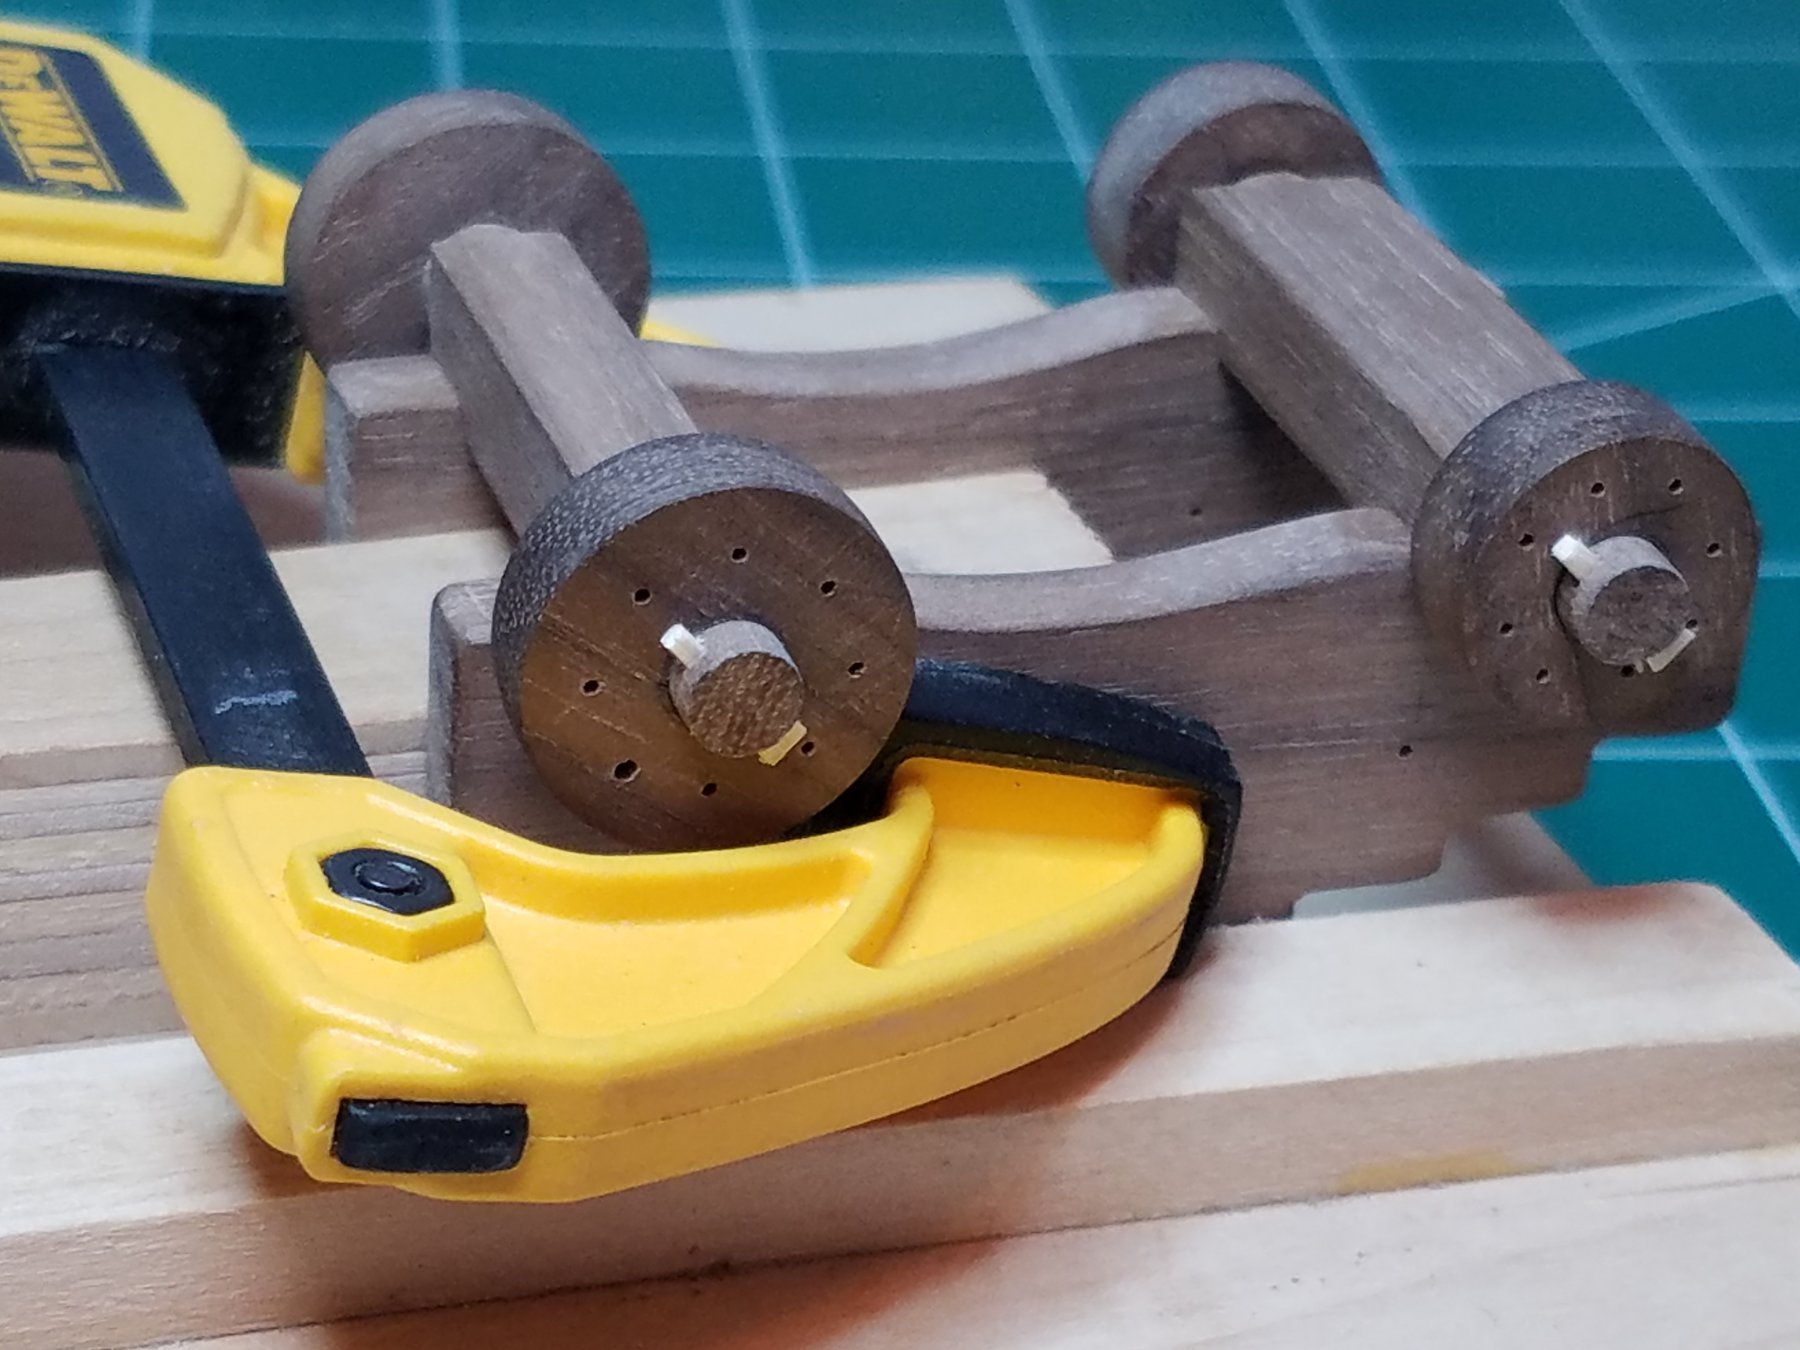
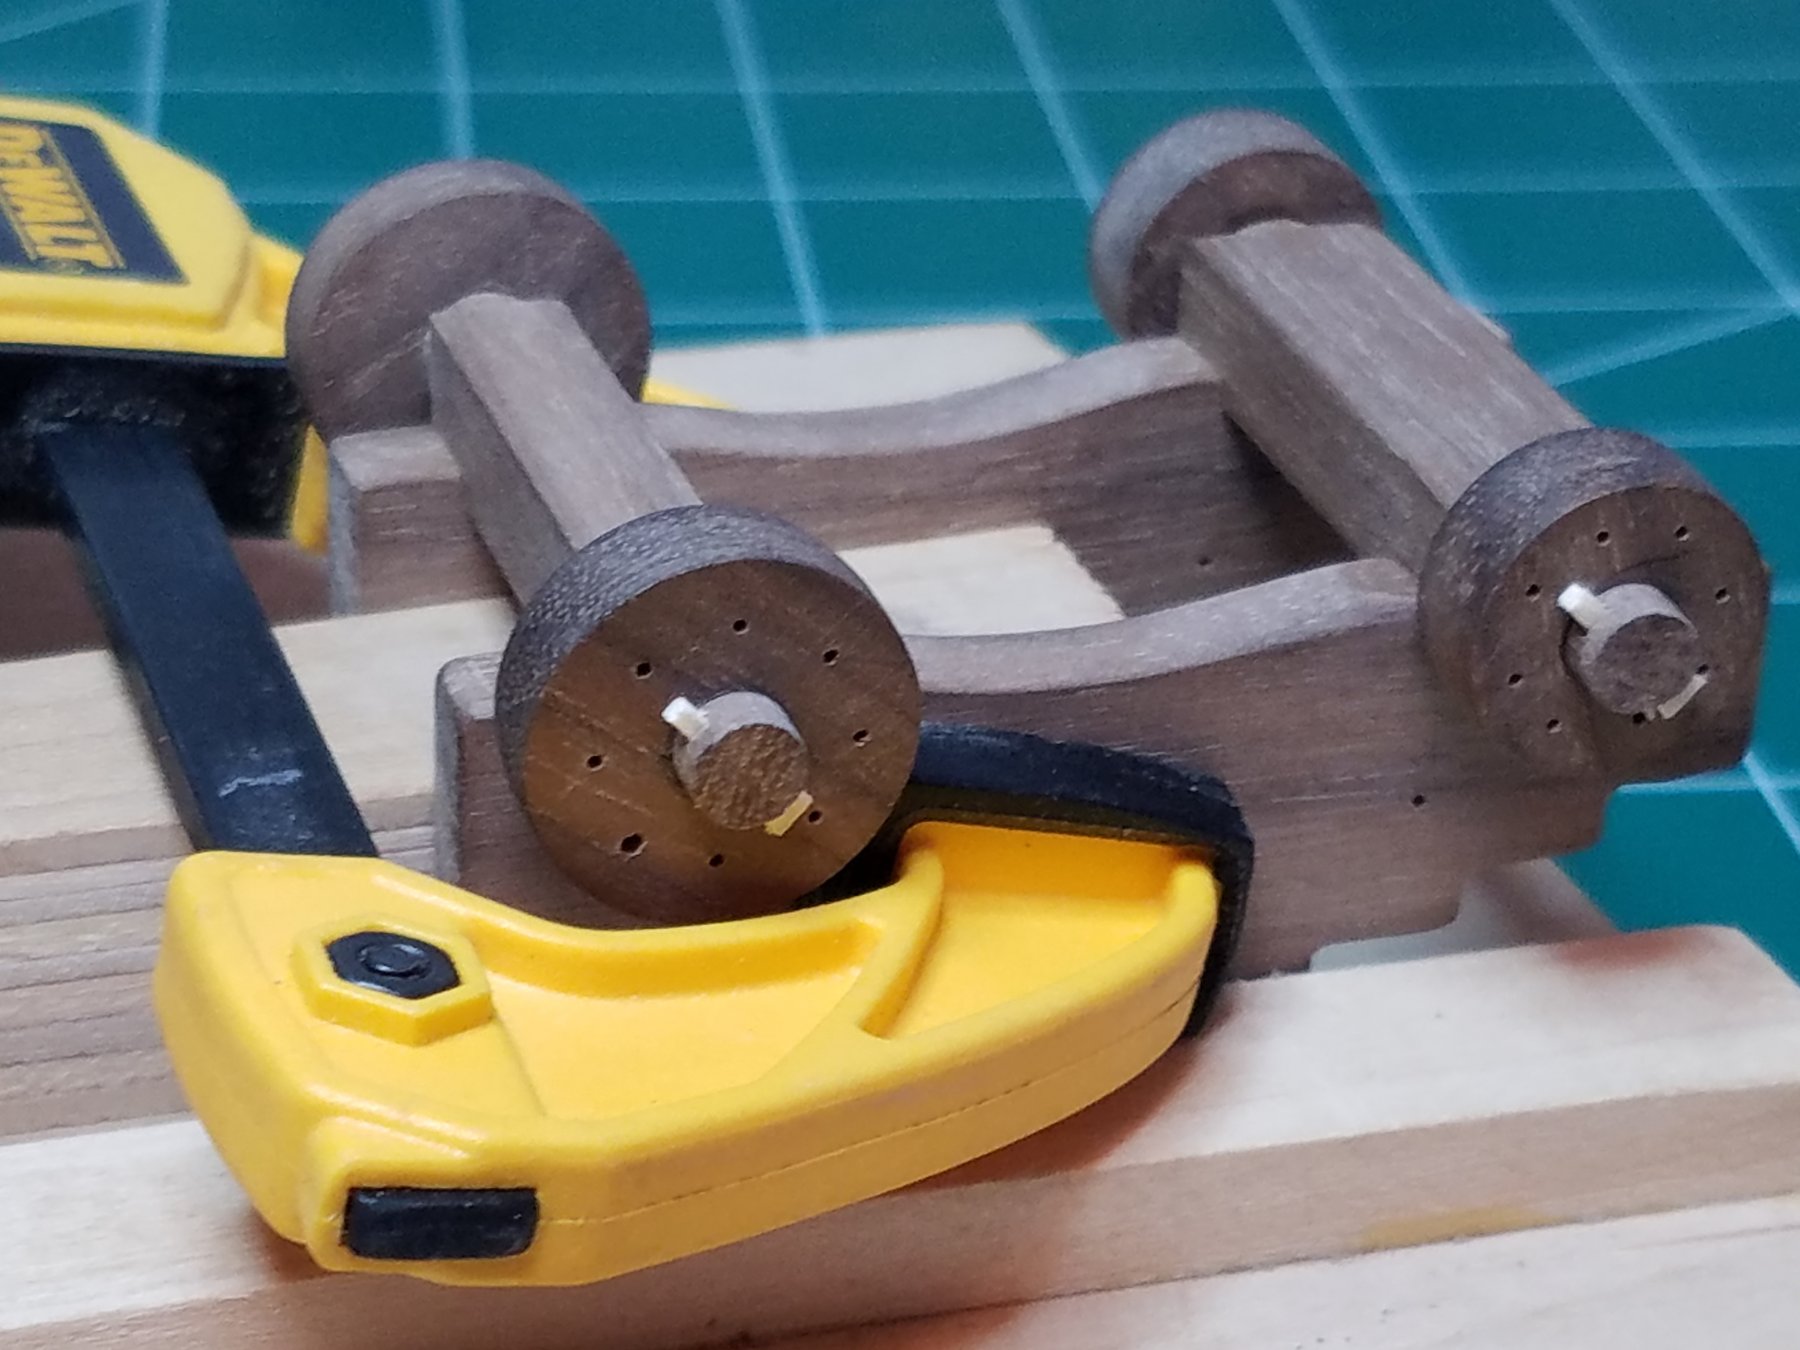
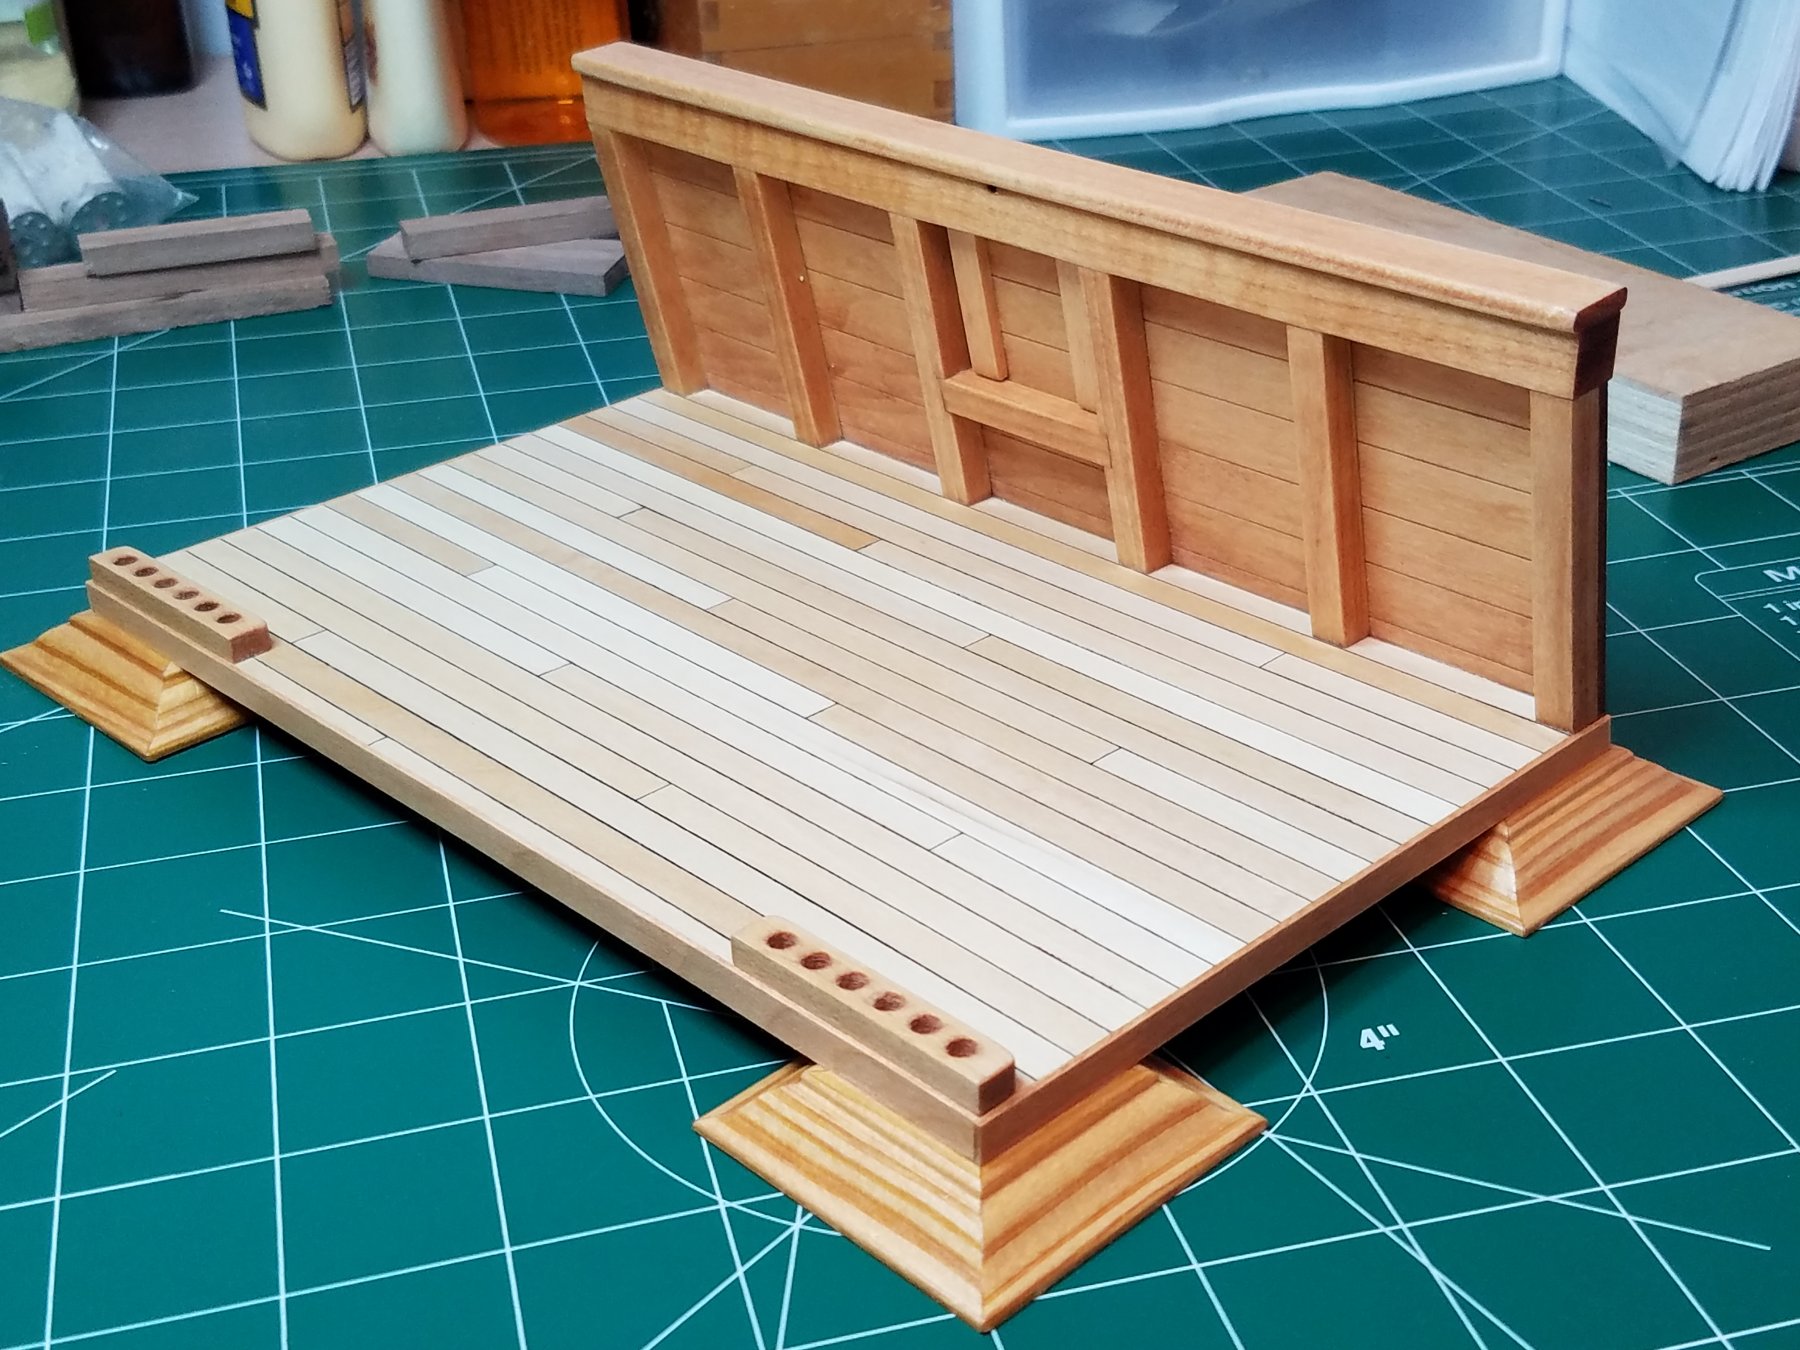
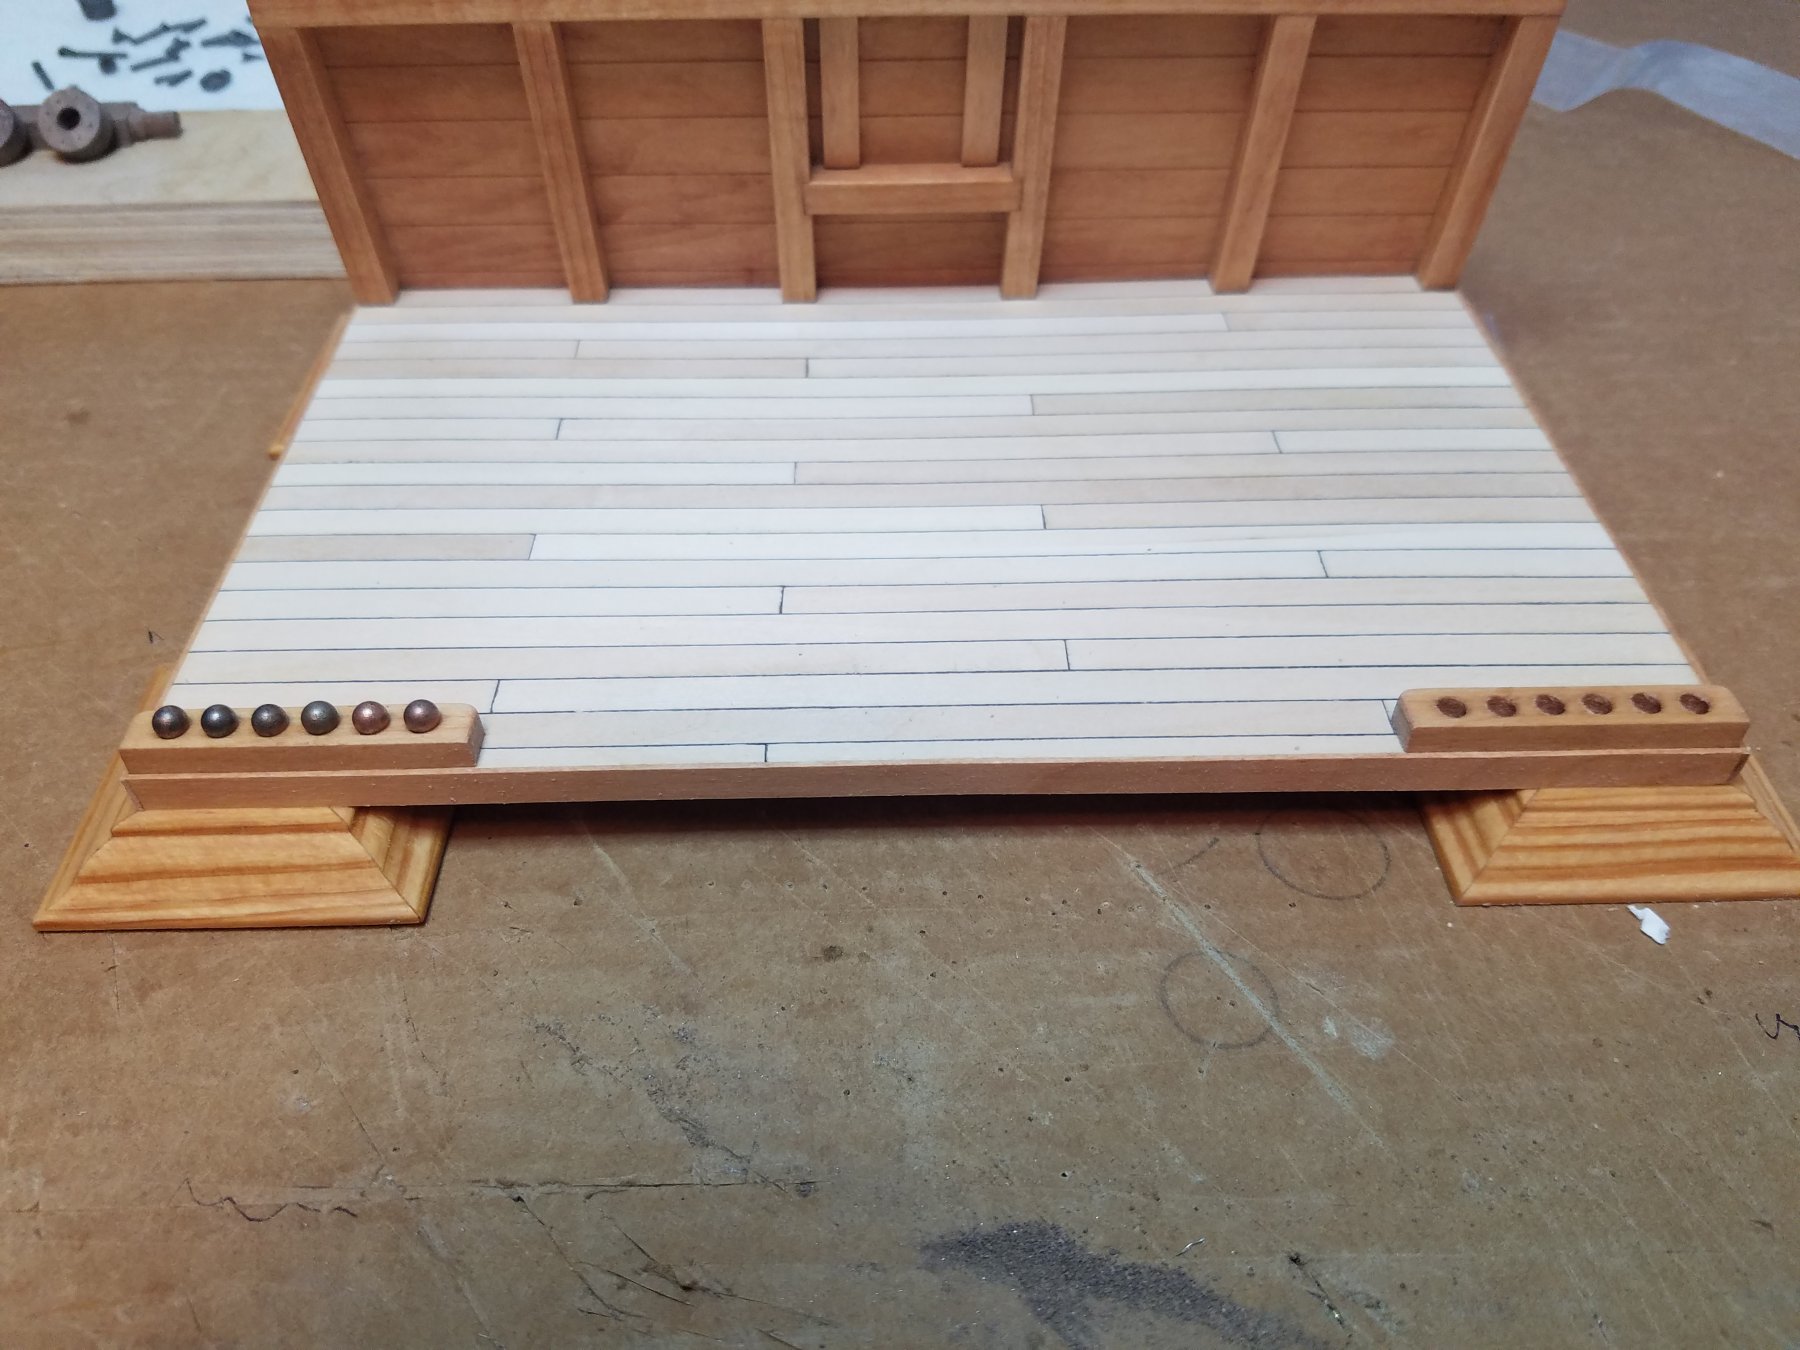
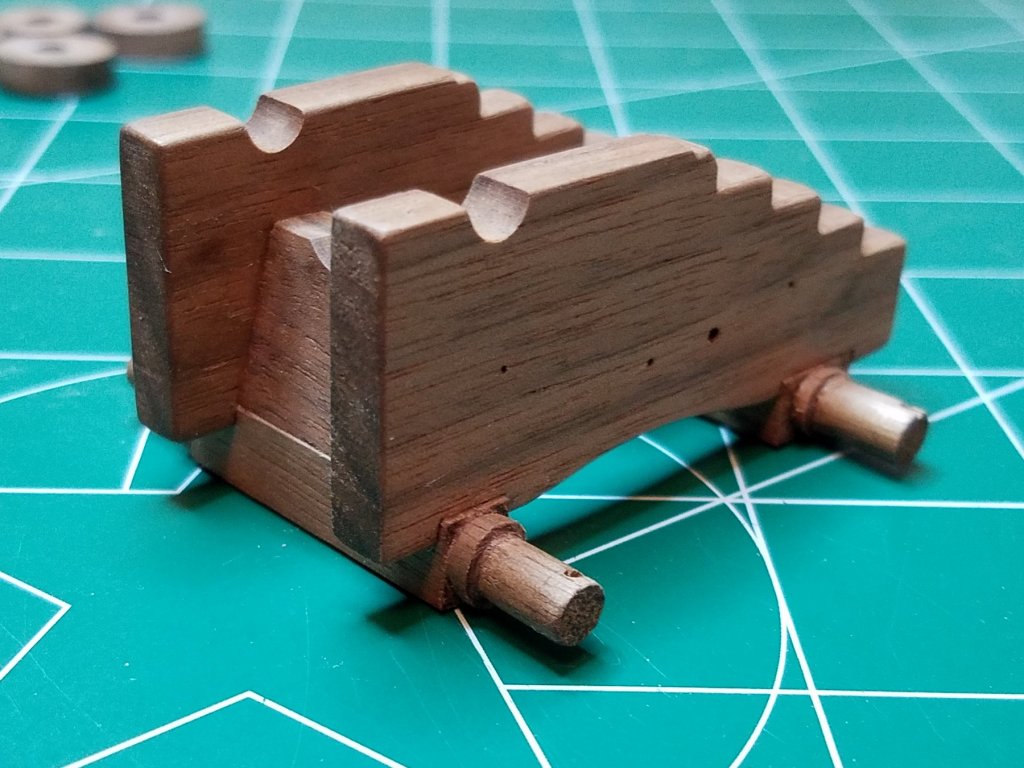
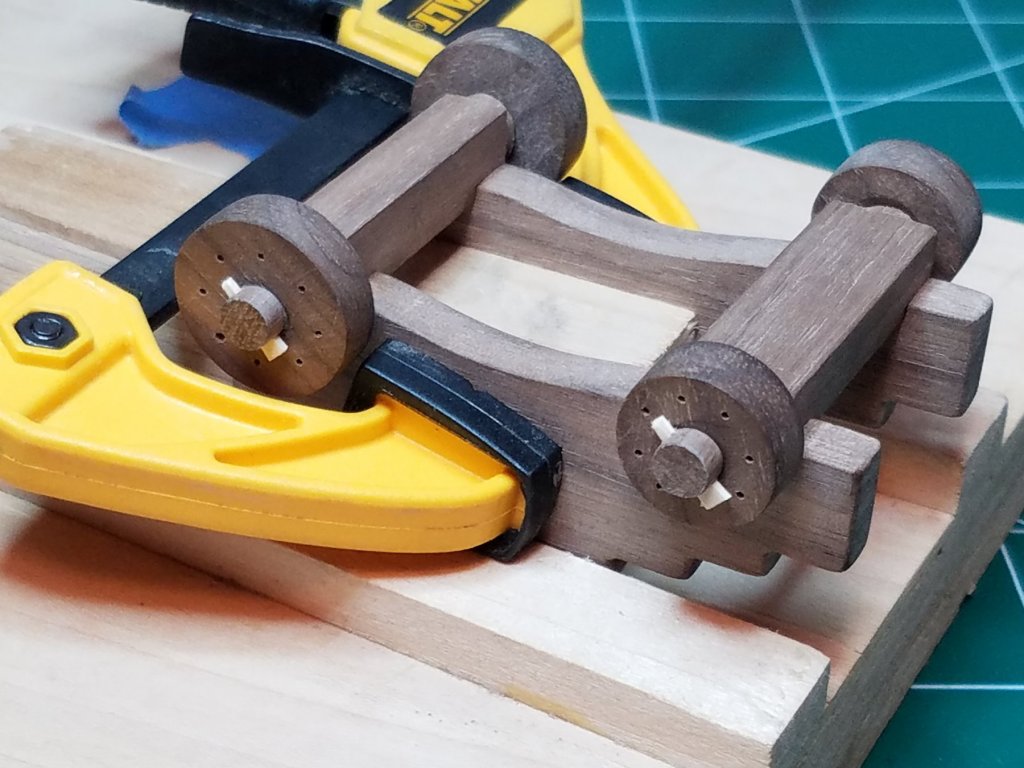
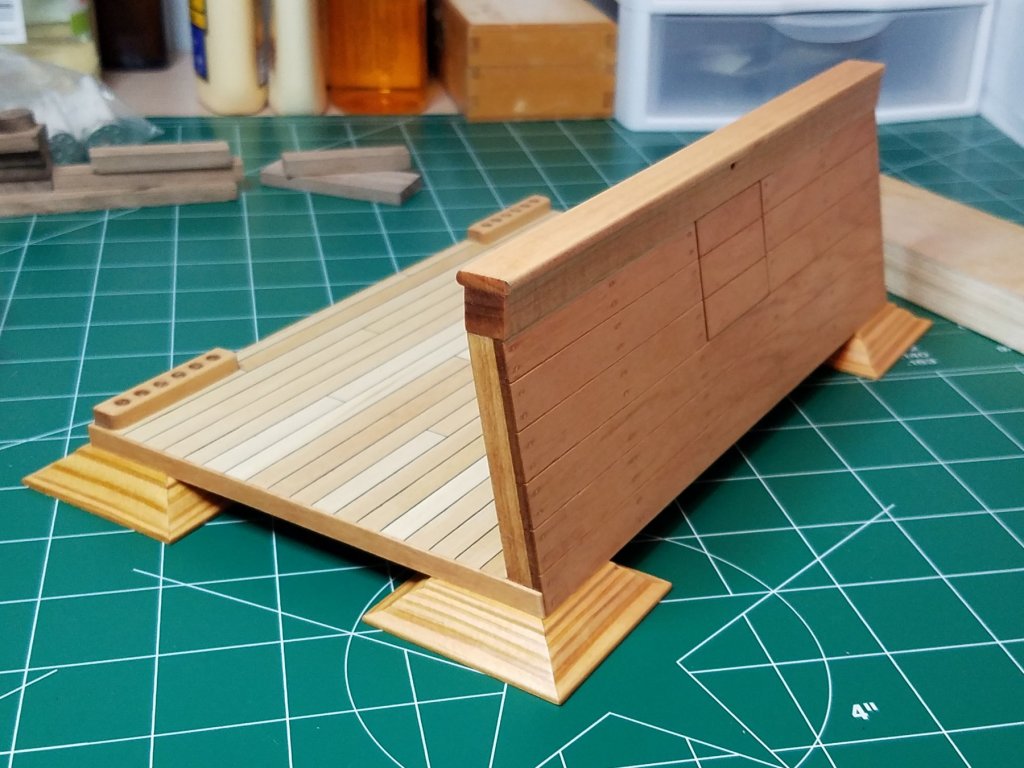
I never intended to spend this much time on this little kit, but I think I can see light at the end of the tunnel. I just hope it is not the proverbial on coming train. But really an awful lot of the time has been trying to figure out how to make "little improvements" and develop ideas that may be useful on the next build. Anyway I do have a little more progress to report. As you can see I also got an upgrade to my work space for my Birthday, thanks to the Admiral. A new cutting mat to replace the old piece of cardboard. I decided on satin wipe on poly for the finish. Now I can finally start attaching some hardware and rigging. And although I am not quite ready to change my name from Smith to Wheelwright I did mange 4 usable trucks. Need to stain the wedges. I made them out of walnut initially but you could barely tell they were there. I will stain them a color slightly lighter than the walnut to make them stand out a little bit. As you can see the carriage is back in the fixture ready for the axetrees to be glued and pinned but since I am working without a net so to speak (the only plans are in my head) I am going to sleep on it for tonight in case I think of anything that has to be done to the parts before gluing. I think things will proceed more quickly now that the deck and bulwarks are complete. Once again thanks for looking in.


- 82 replies
-
- 9
-
-
- naval smoothbore
- model shipways
- (and 1 more)
-
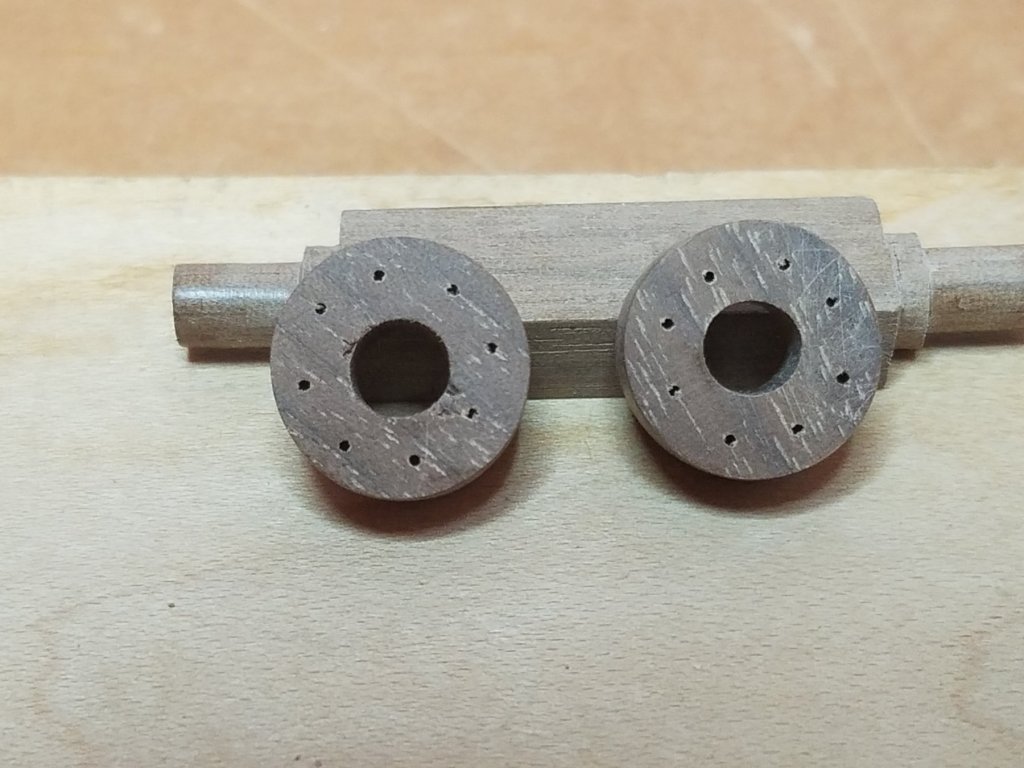
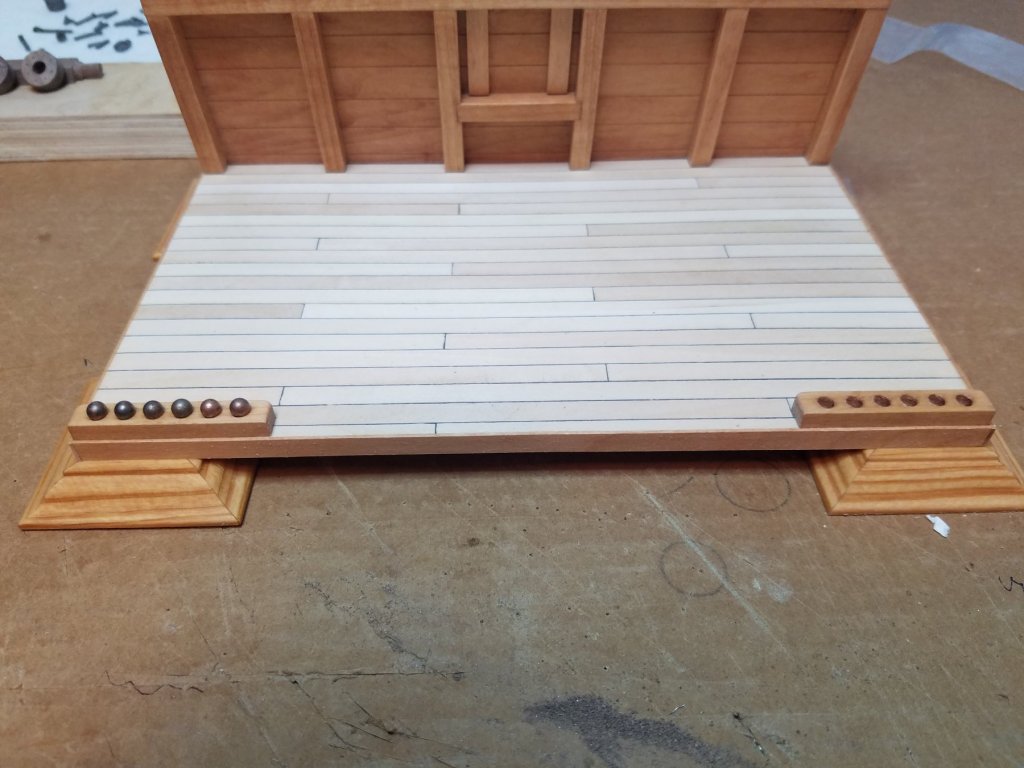
Thanks Ron, I think Mantua had them on their kits. It adds a bit of elegance to it I think and they are easy enough to make. You can probably find some suitable pre-made wood blocks at the local craft store. A little progress to report very little actually. Added the shot racks. I wish I had thought of them before I started planking. Also my second attempt at truck making turned out much better then the first try. Still not perfect but good enough to carry forward with. I have enough blanks cut and since they will not be glued on I will keep trying to refine them as I move along. On the next set I will not pre-drill for the nails but save that for last. Hopefully I will be able to get them a little more concentric to the circumference. Thanks for stopping by.
- 82 replies
-
- 9
-
-
- naval smoothbore
- model shipways
- (and 1 more)


.jpg.9e071aa08eaa1dfd6d499cef879cdc0a.jpg)


.jpg.d5346639dbc26662a01d241b82a52f74.jpg)