HOLIDAY DONATION DRIVE - SUPPORT MSW - DO YOUR PART TO KEEP THIS GREAT FORUM GOING! (Only 72 donations so far out of 49,000 members - Can we at least get 100? C'mon guys!)
×

Osmosis
-
Posts
626 -
Joined
-
Last visited
Content Type
Profiles
Forums
Gallery
Events
Everything posted by Osmosis
-
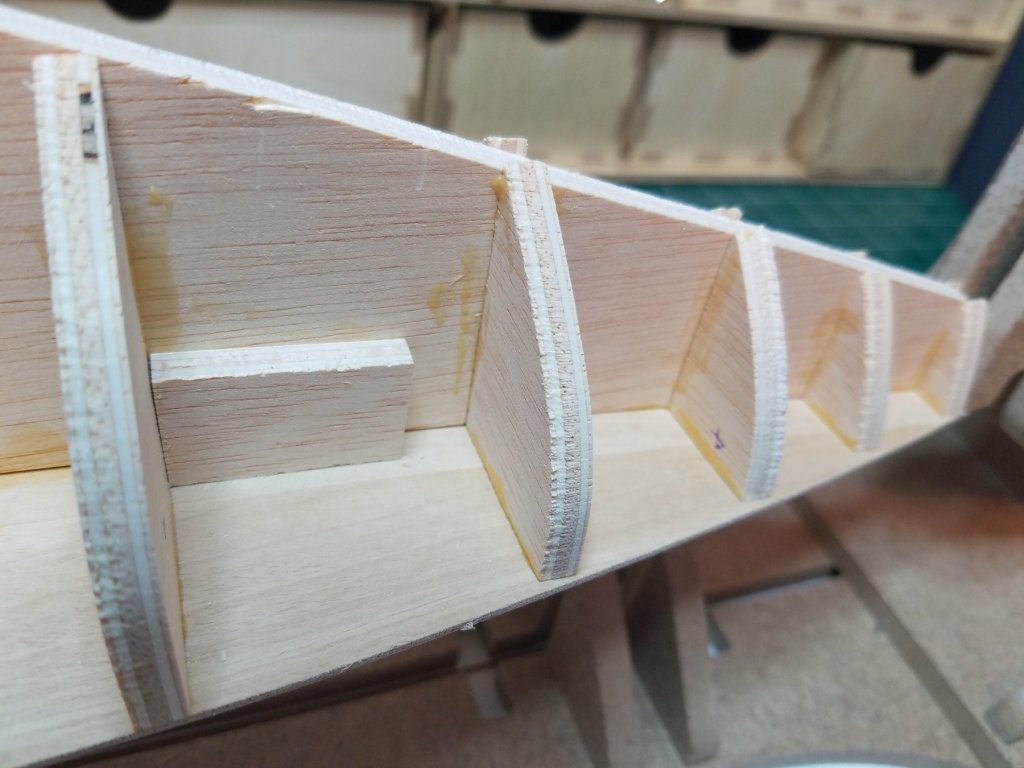
 OK so I have started fairing the bulkheads and my new sanding blocks work great. A few questions though. As you can see in the pics below frames 1-3 were so long that they protruded past the edge of the keel. I have sanded the right side down flush with the keel edge so far however this leaves no room for tapering the keel to accept the planking. 1. Should I continue fairing the frames and keel in this area so that the final thickness after planking is the same as the original thickness of the keel? Note that the false deck is a bit over sized at the bow and at bulkheads 1-3. I have already filleted these bulkheads to bring the edge out closer to the edge of the deck somewhat. However they are still about 1/32 or so shy of the outside edge of the deck. 2. Should I continue fairing the bulkheads and at the same time sand the edge of the deck to match the edge of the faired bulkheads? 3. Should I taper the bow portion of the deck to match the keel where they meet? And should I further taper/thin the keel/bow and deck in this area as described in question 1? I hope I expressed my thoughts clearly enough. The instructions are rather vague in regards to this so any clarification would be appreciated. Regards
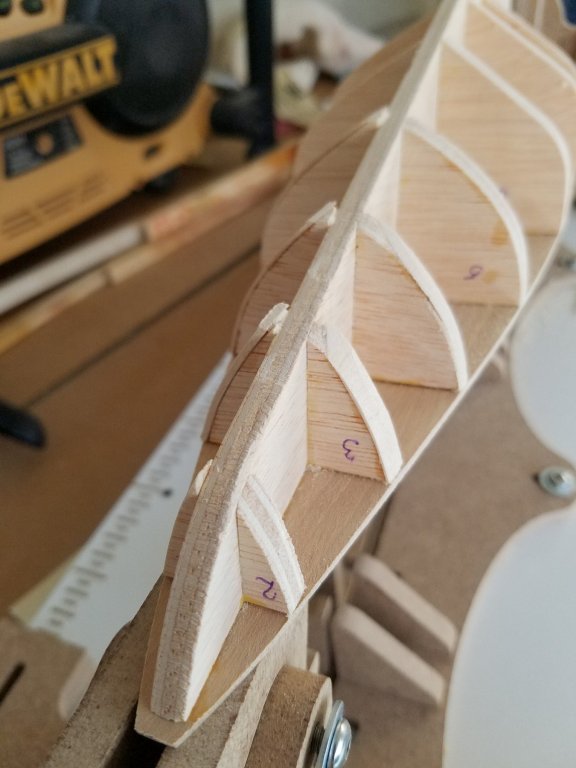

- 22 replies
-
- 1
-

-
- bluenose ii
- artesania latina
- (and 1 more)
-
Well I realized that I could not start fairing without proper sanding blocks so this is what I came up with. They are fairly straight forward but if you want to see how I made them click here. Now I have no more excuses I have delayed the inevitable as long as I can. Time to start sanding. I wonder was everyone this nervous their first time (Fairing I mean). Whats the worst that can happen right I have another whole kit if I should screw this one up. Regards
- 22 replies
-
- 1
-
-
- bluenose ii
- artesania latina
- (and 1 more)
-
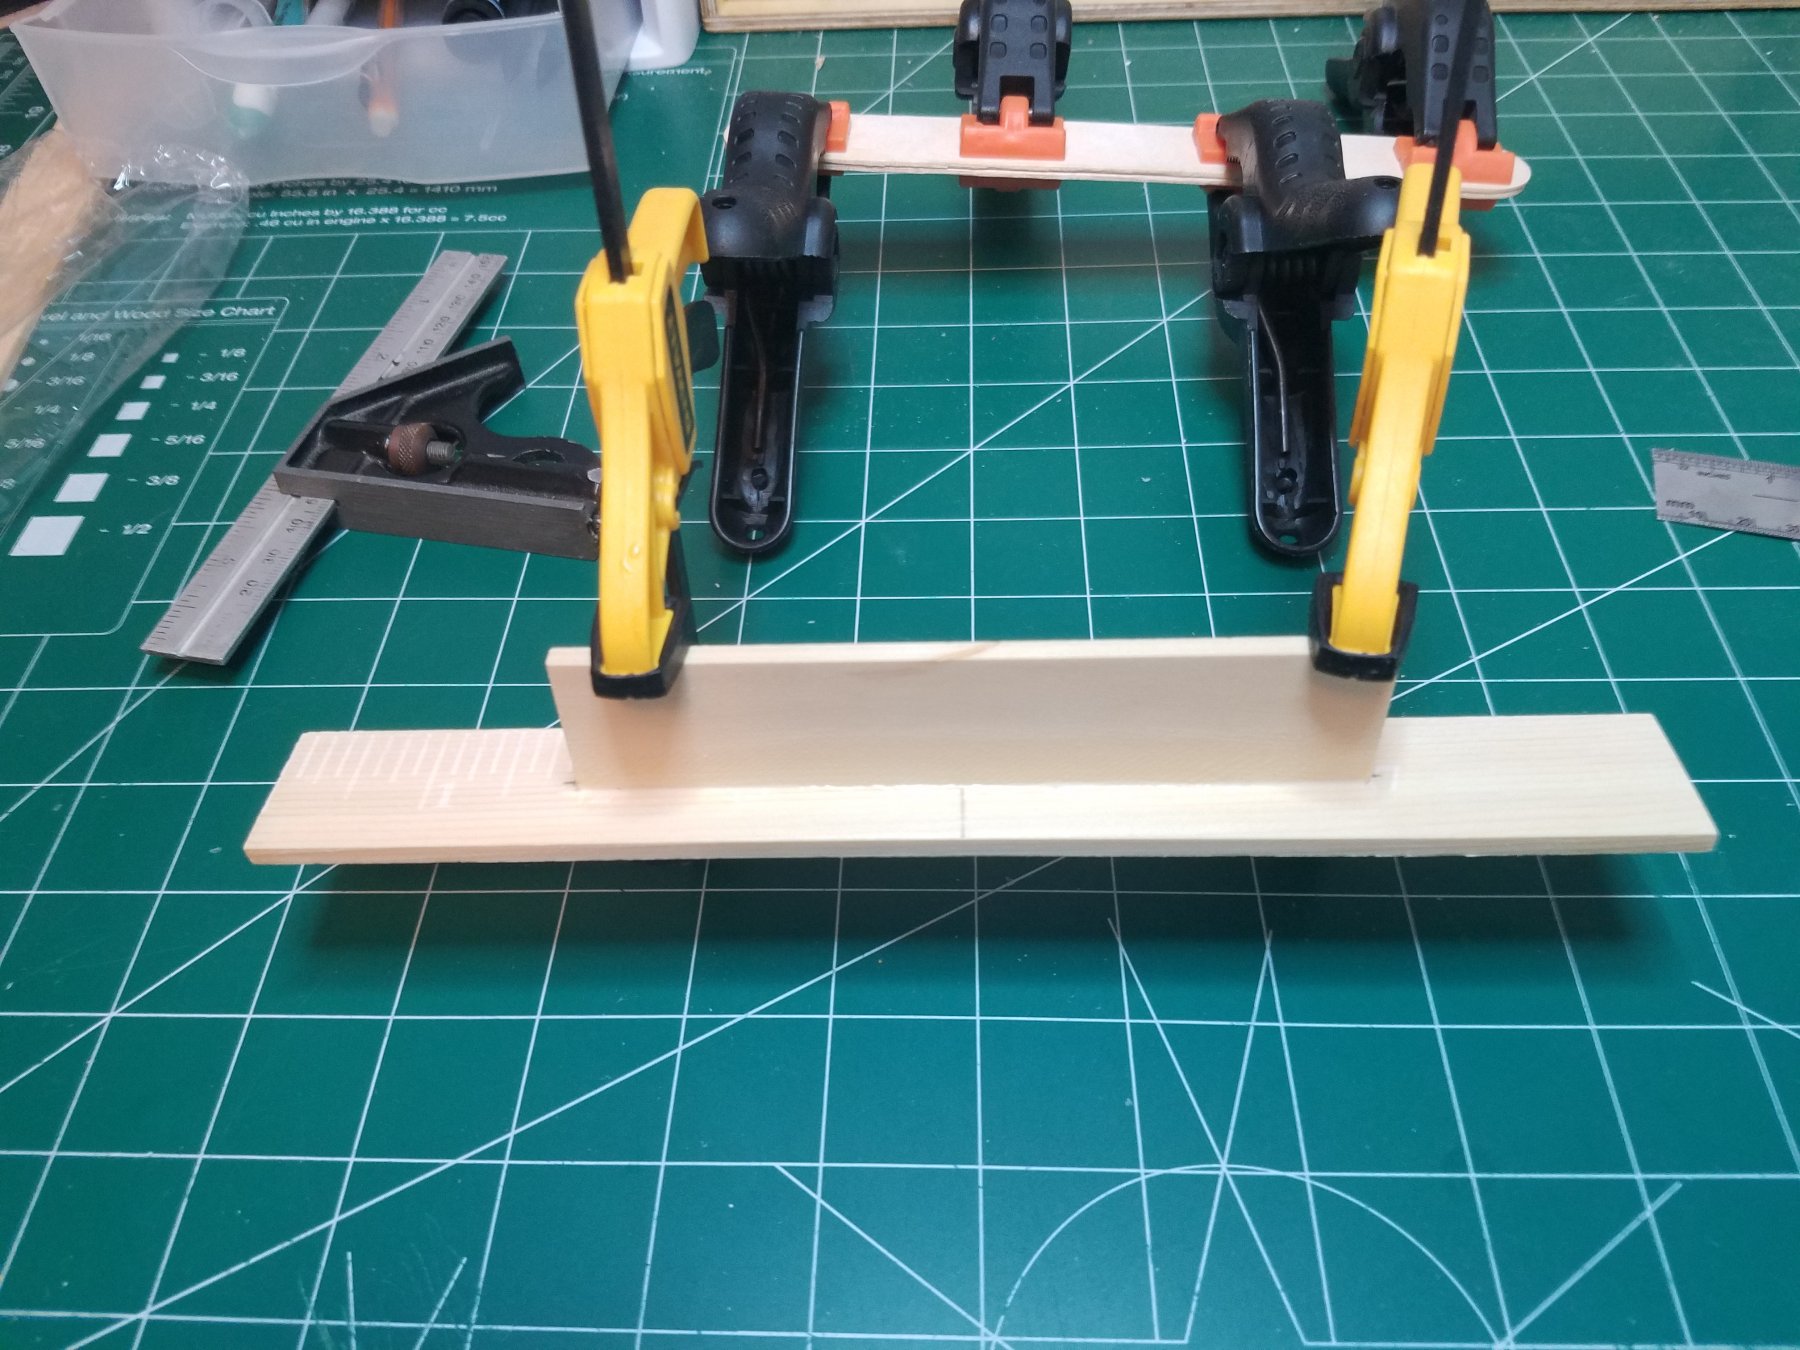
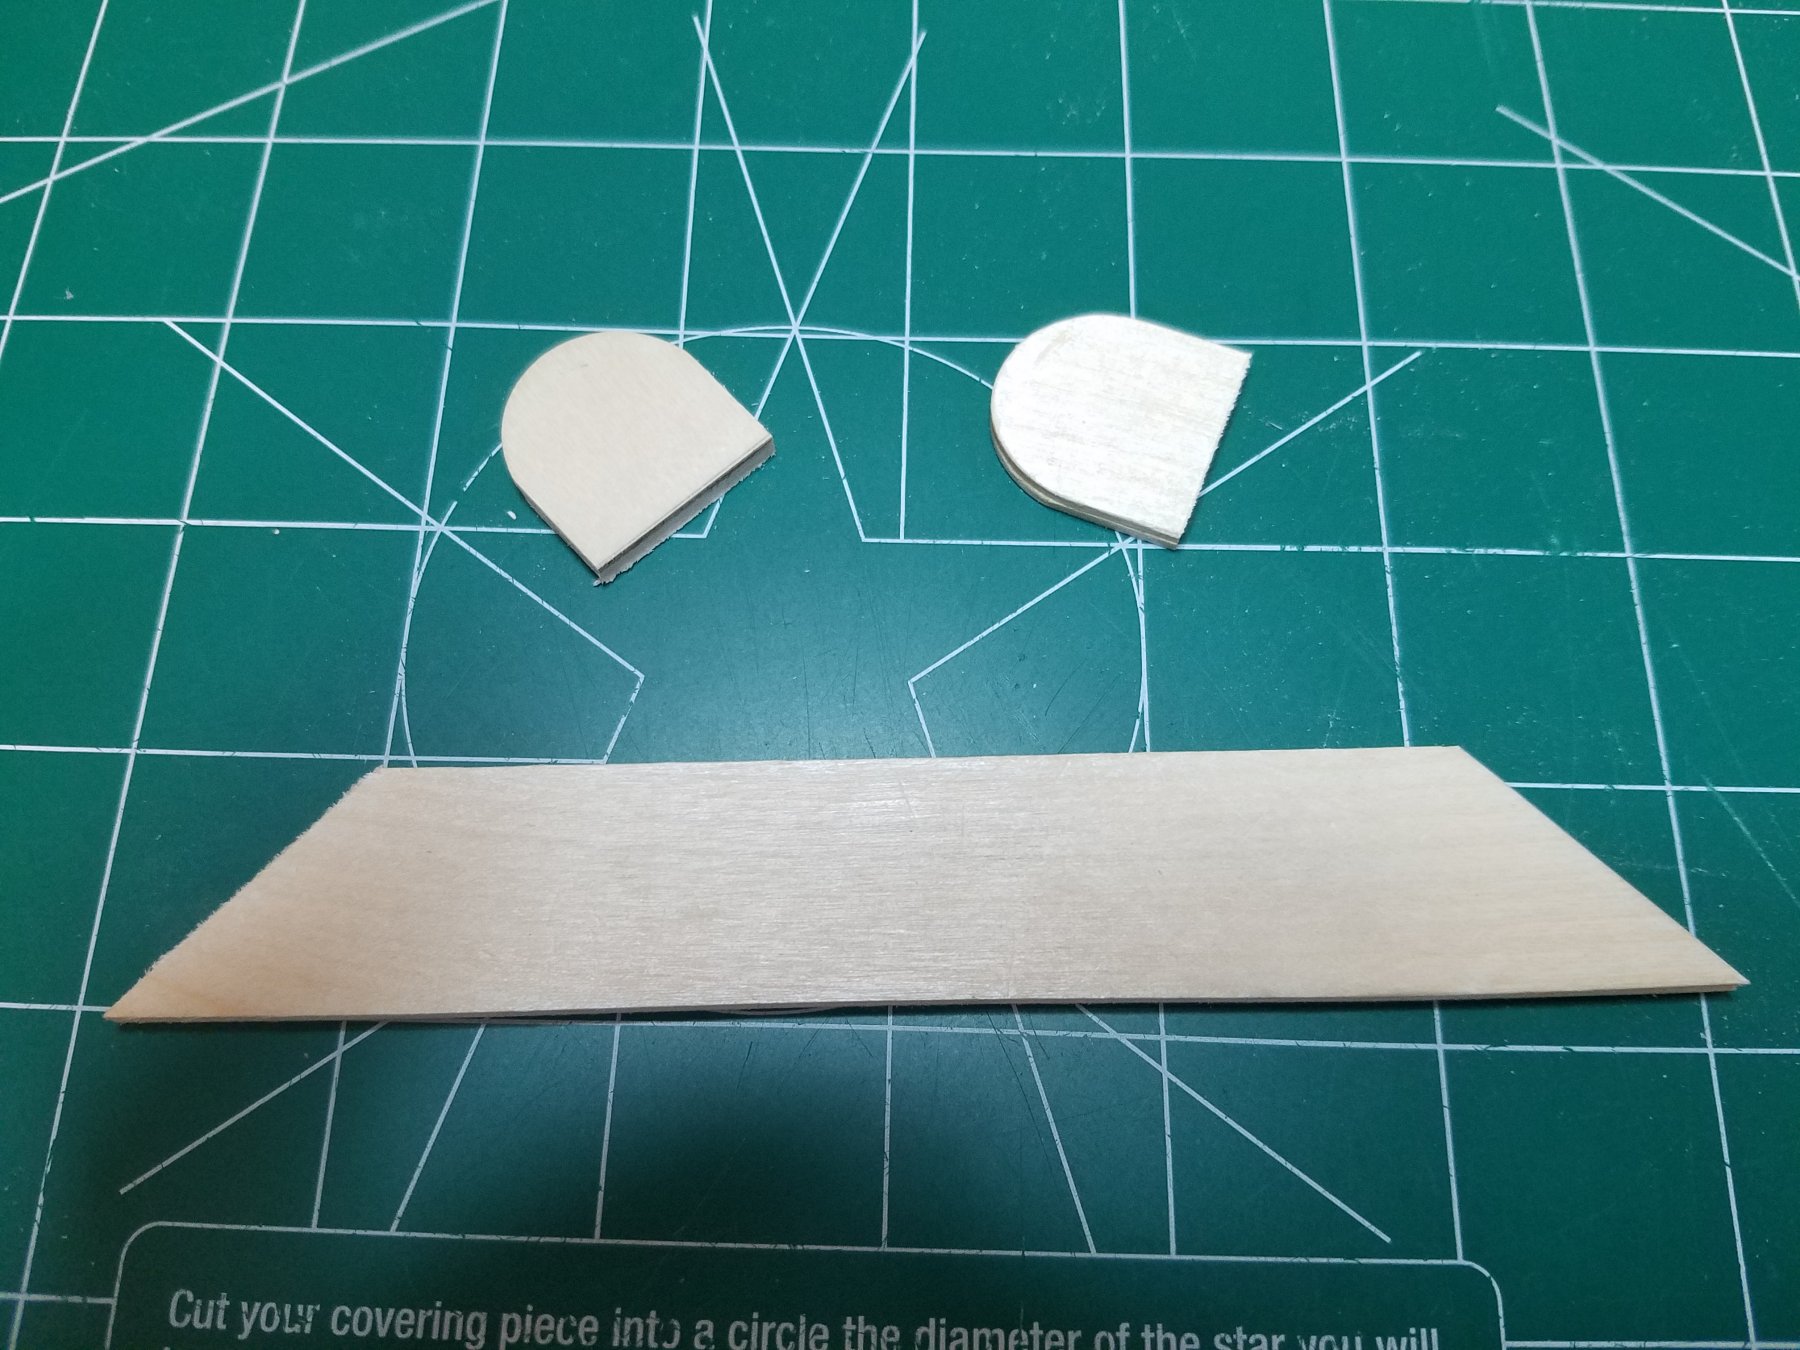
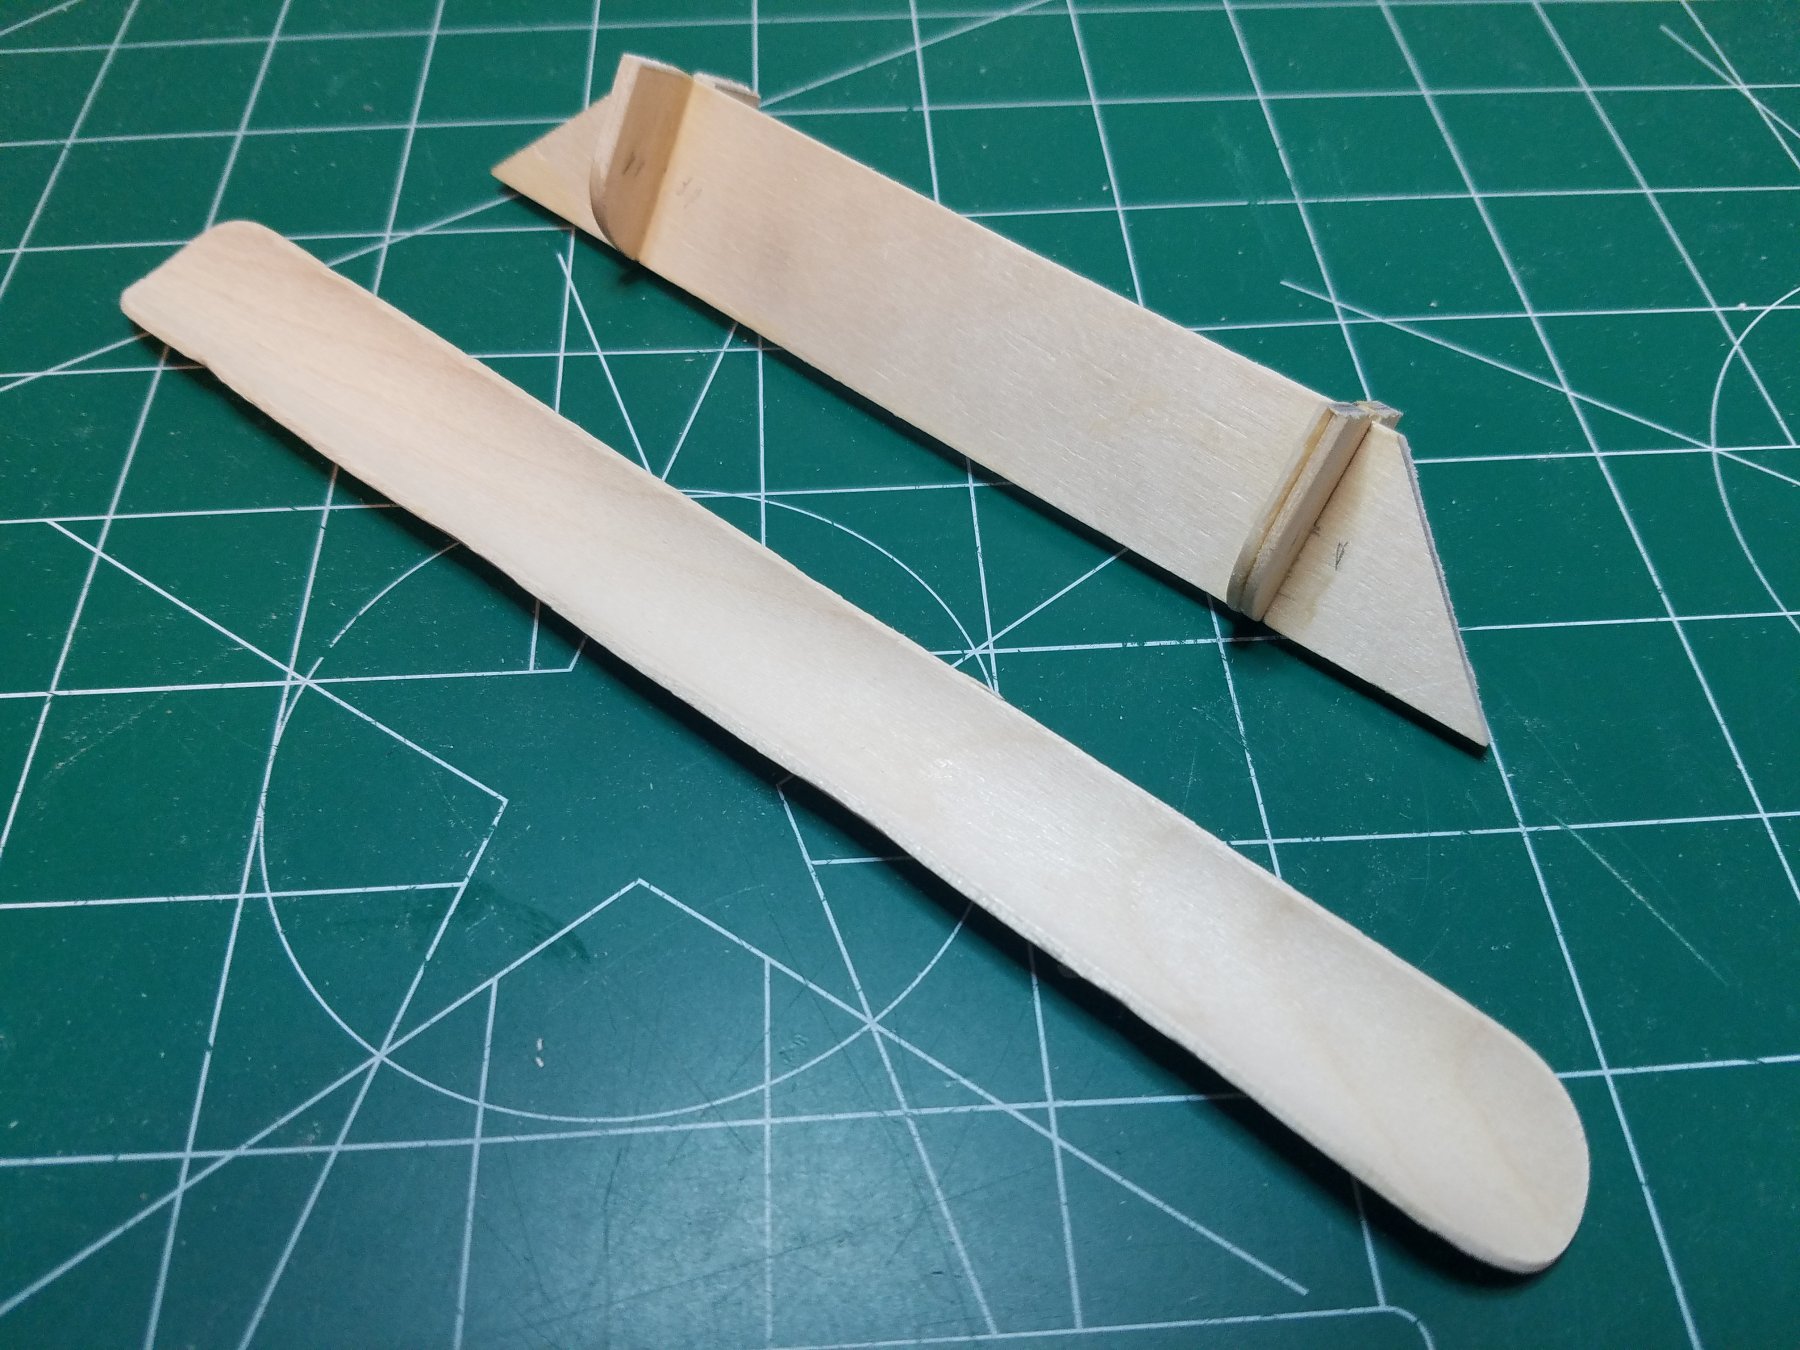
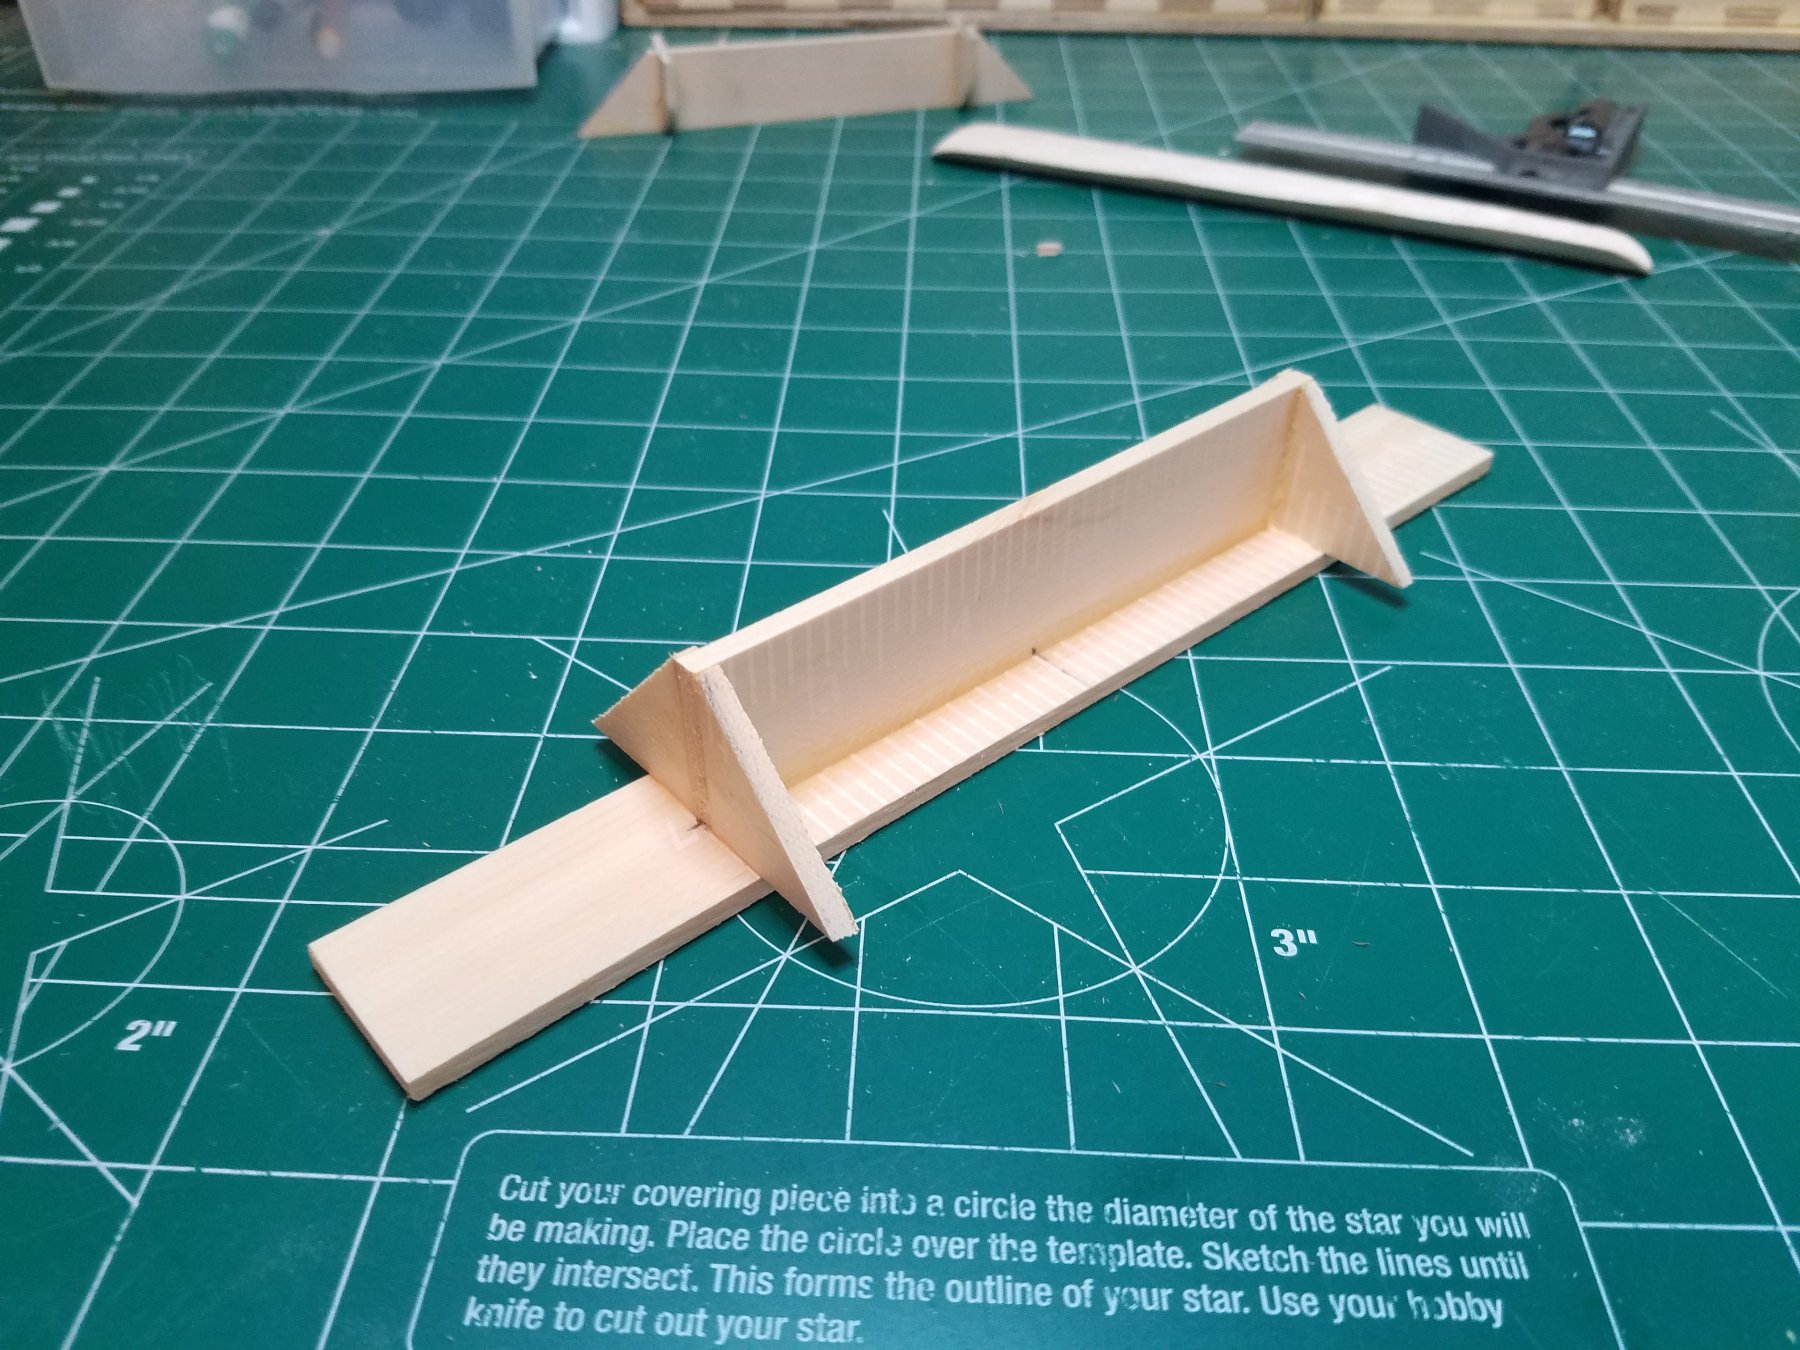
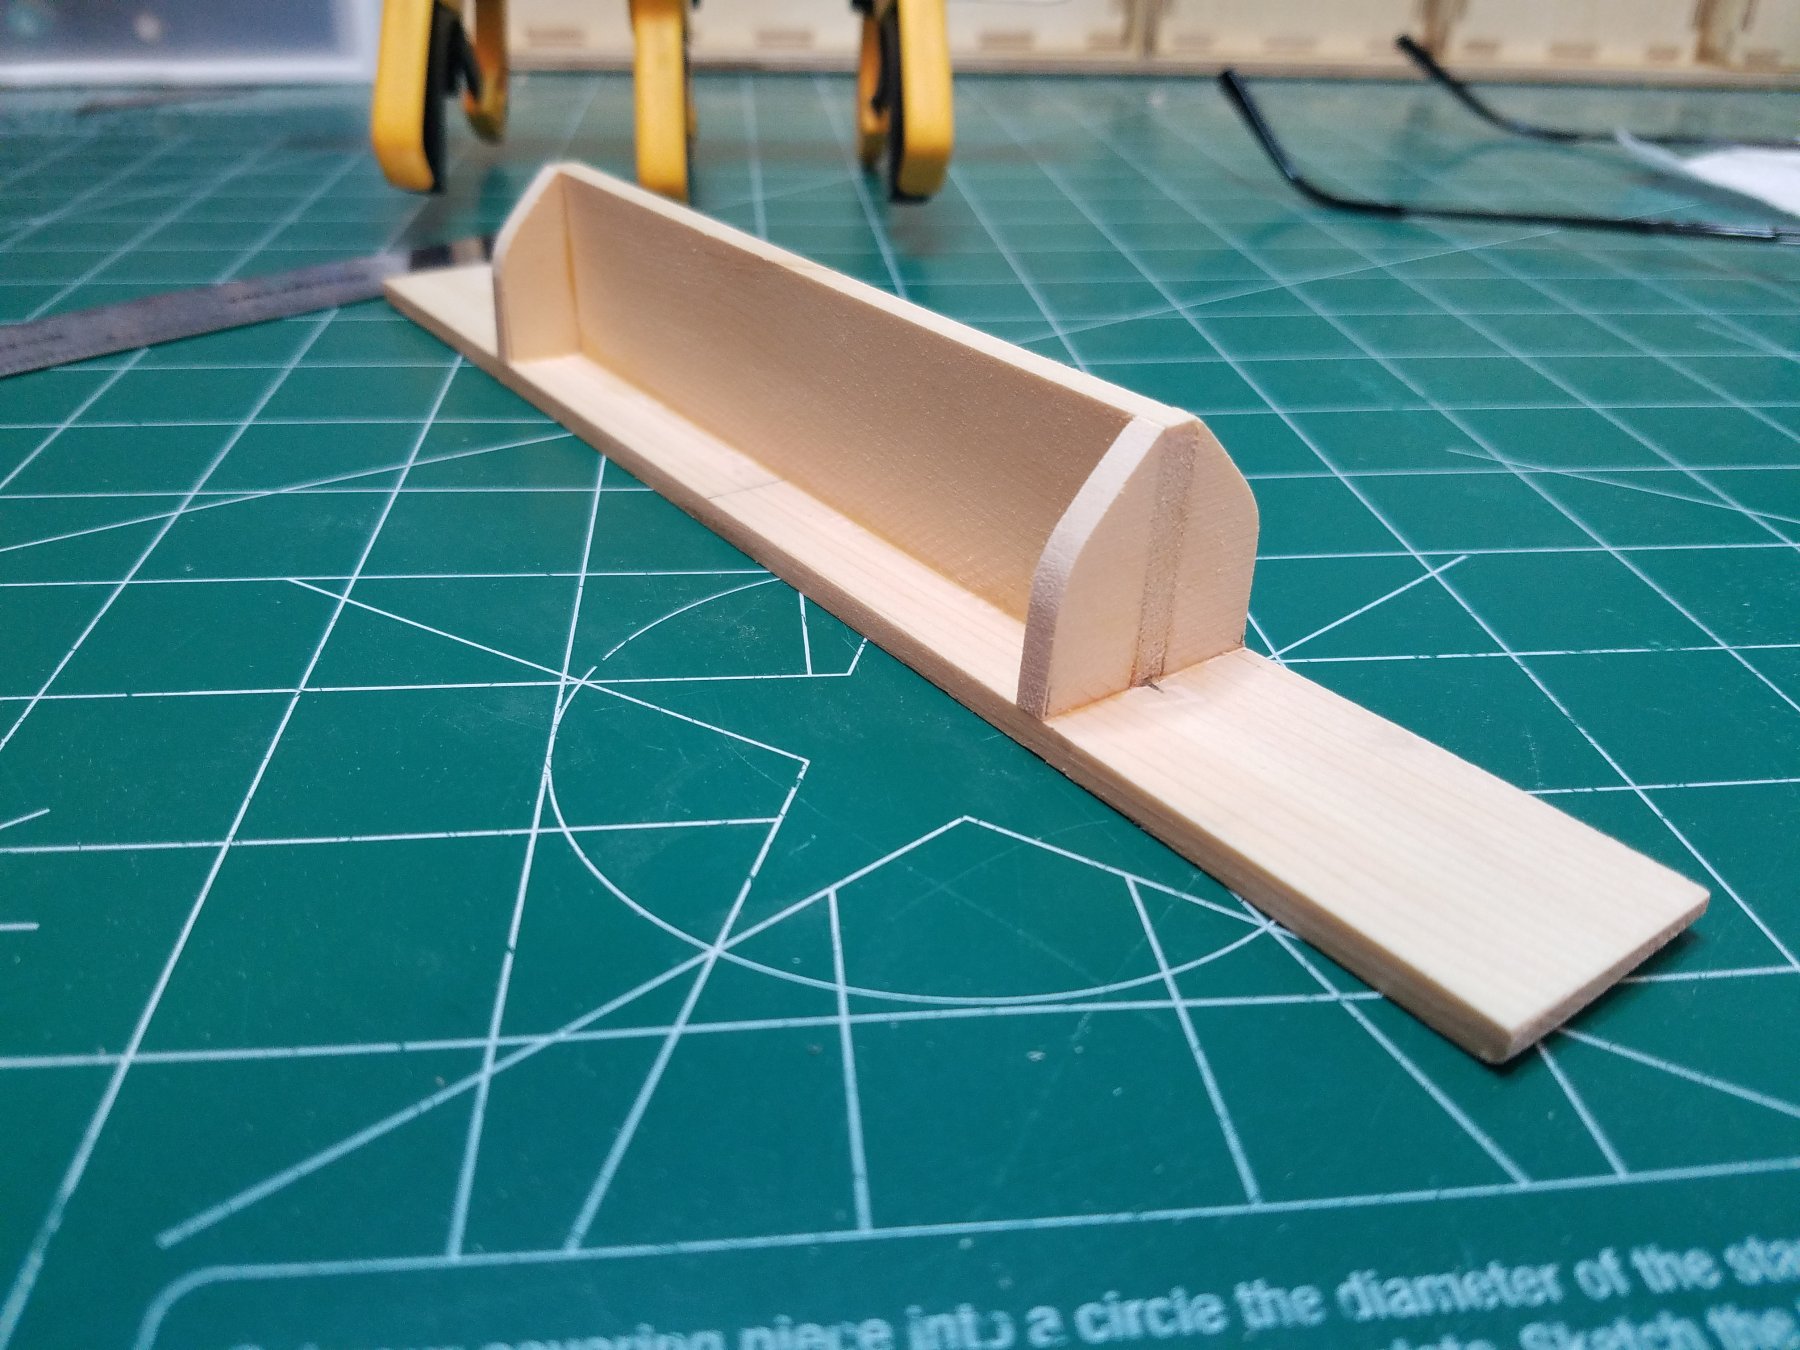
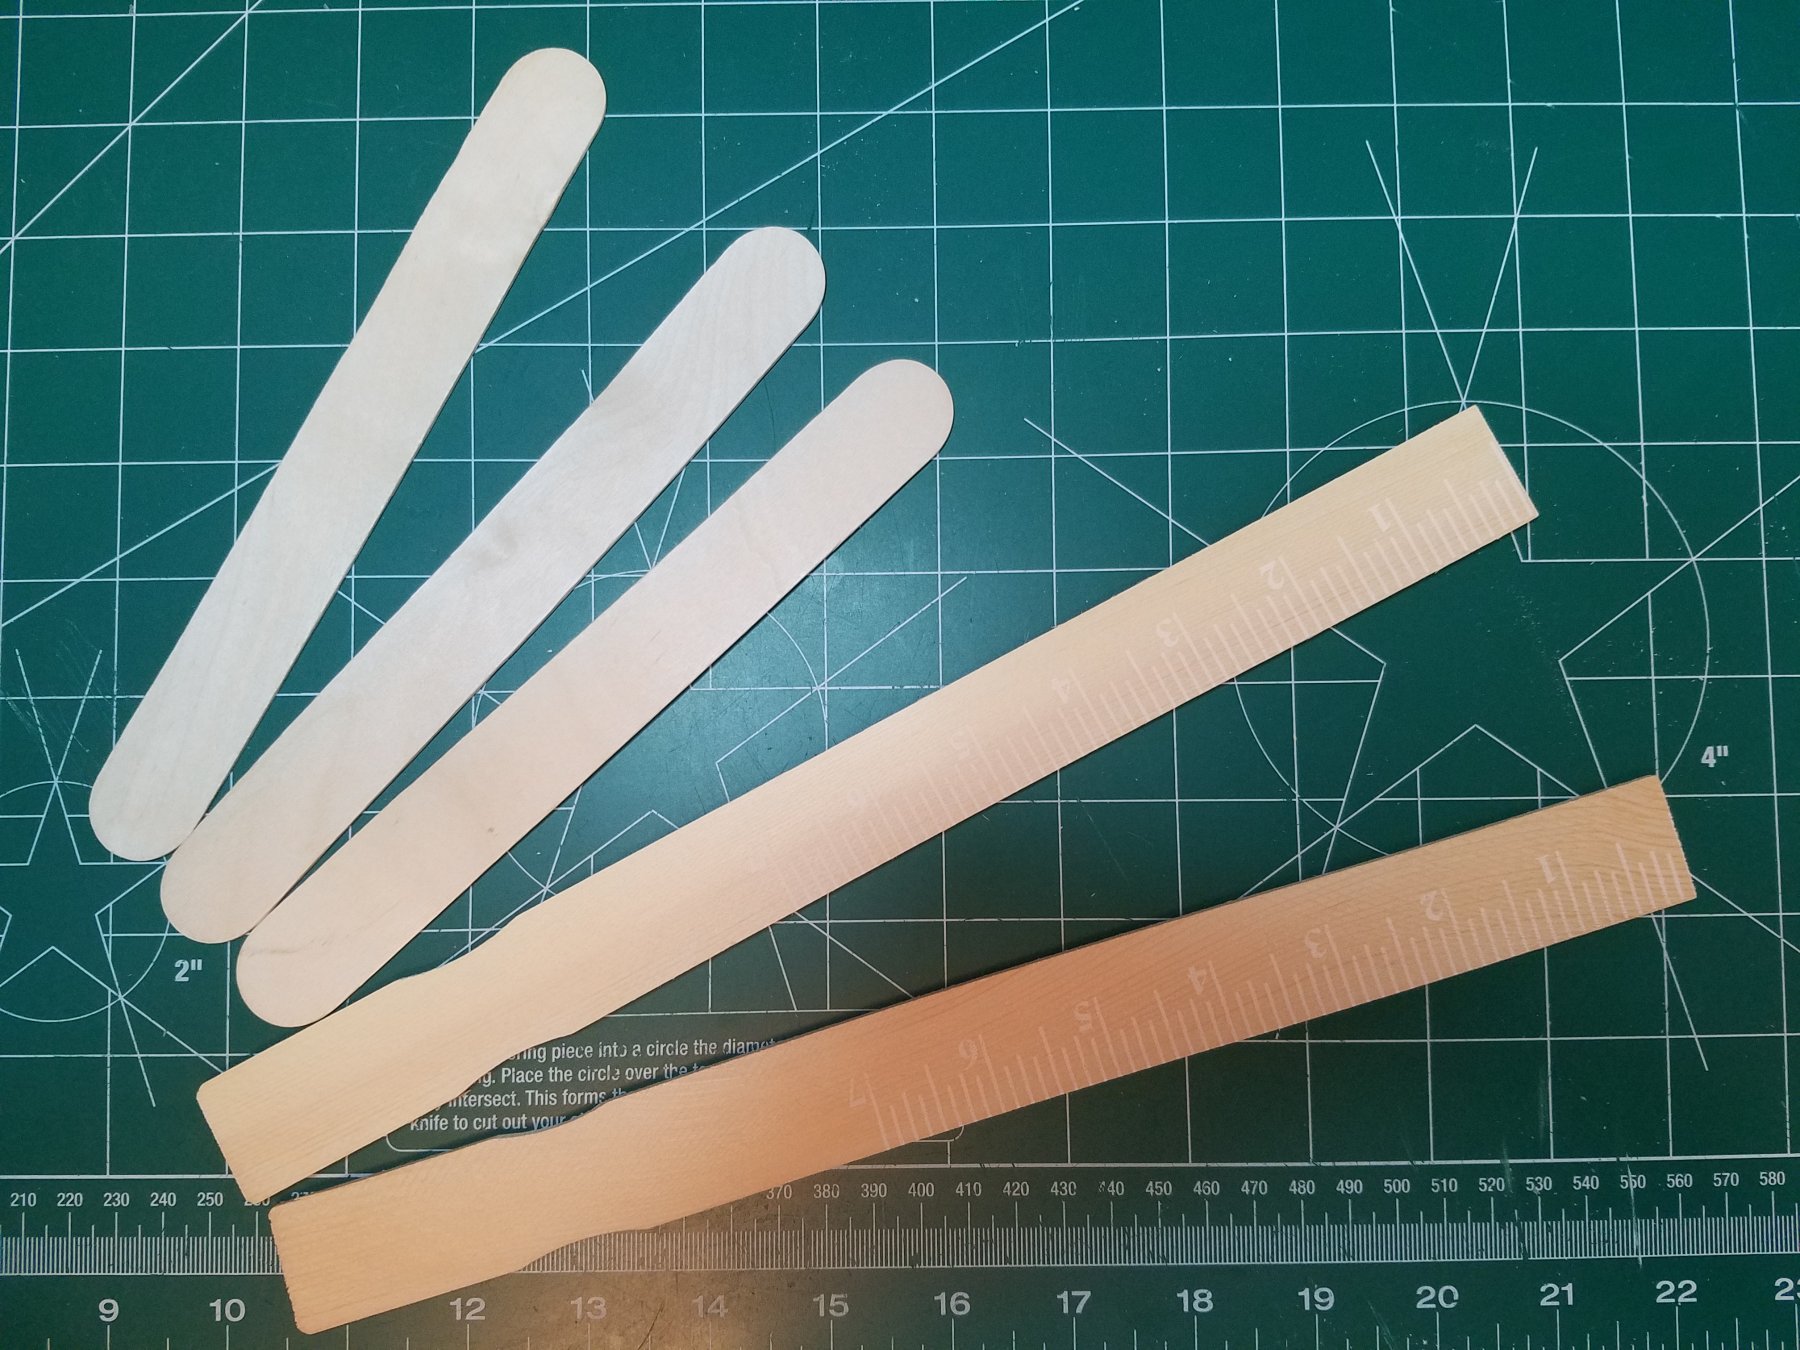
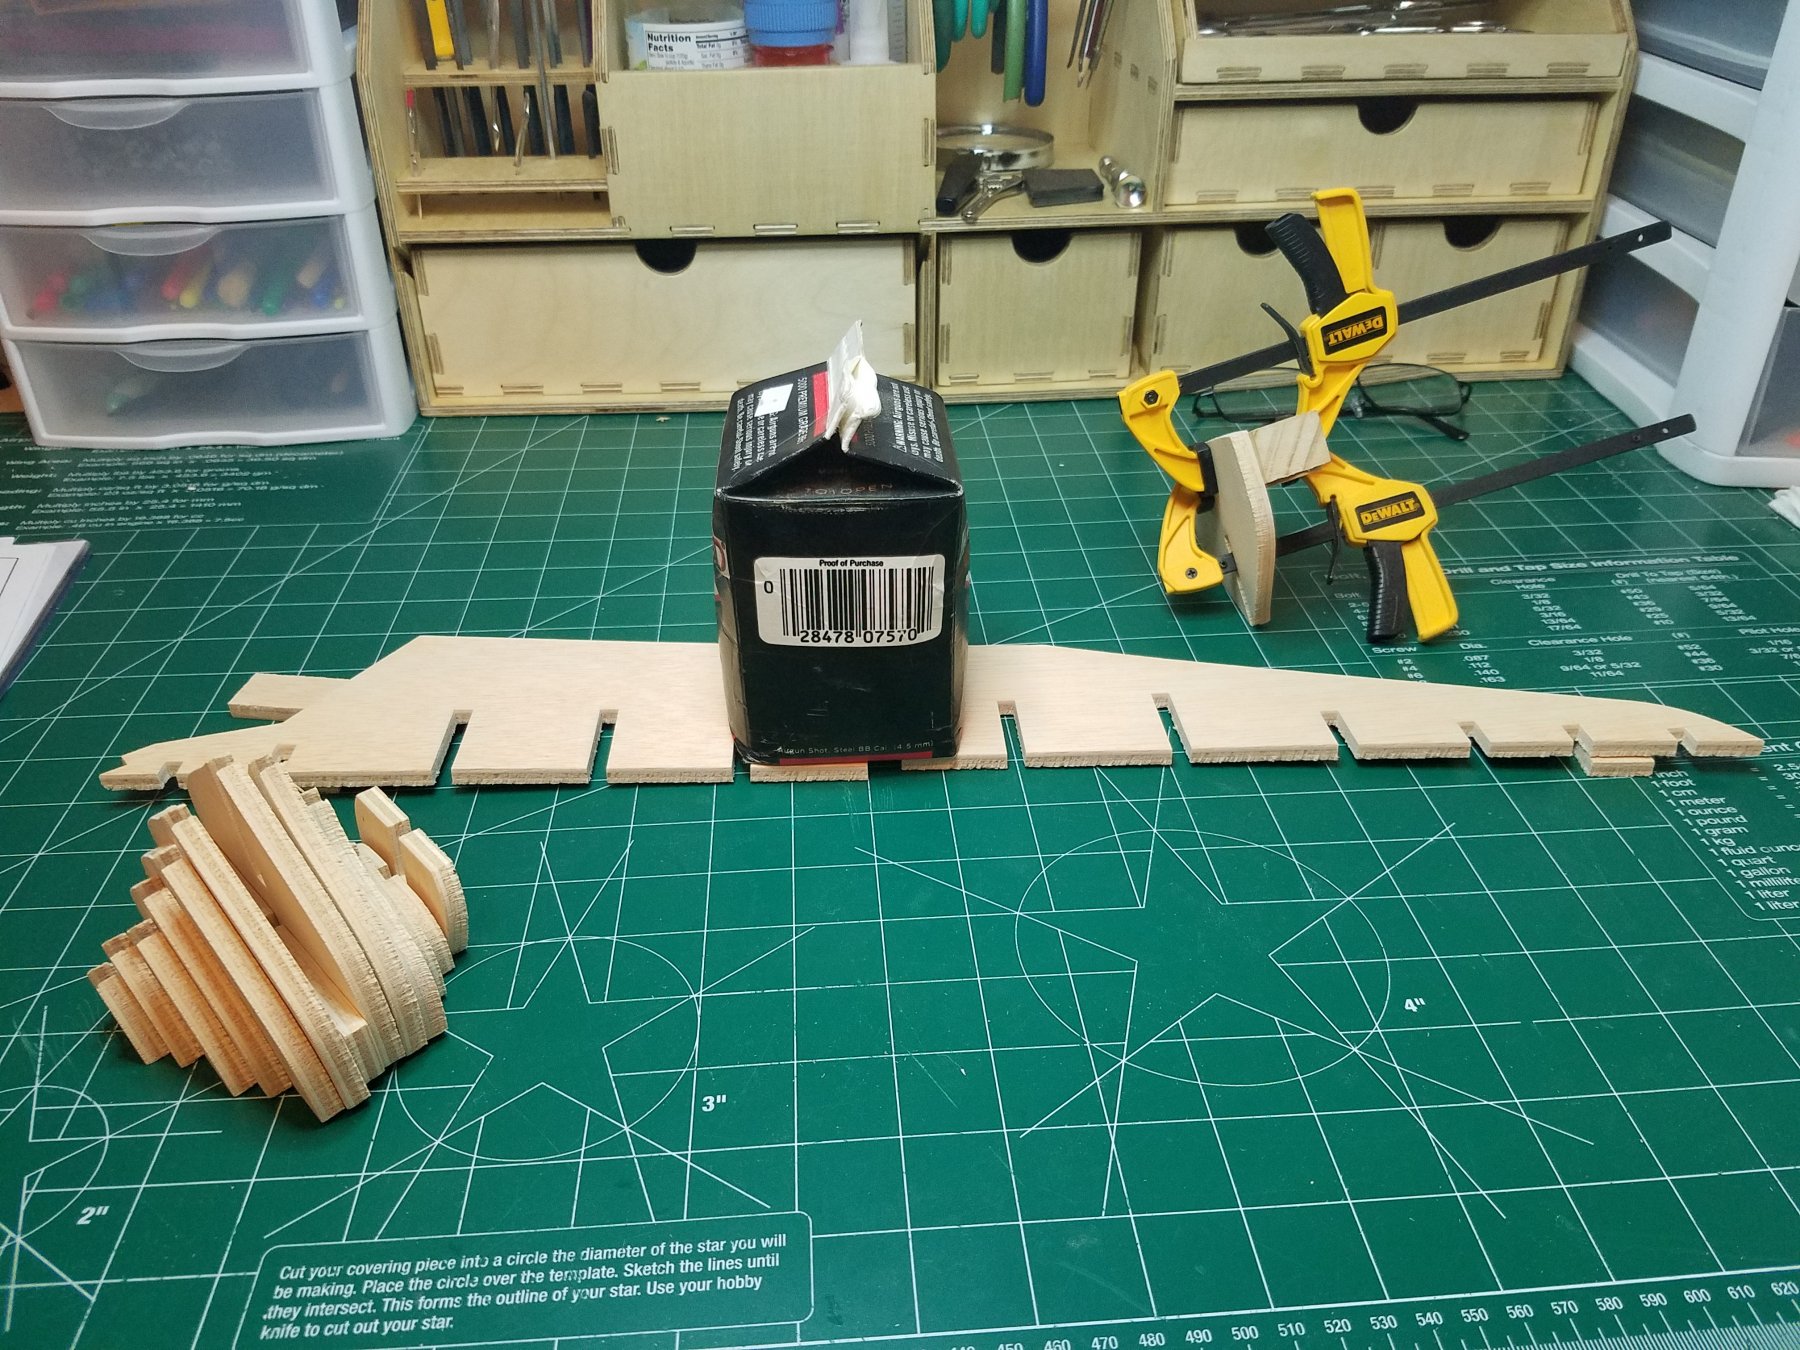
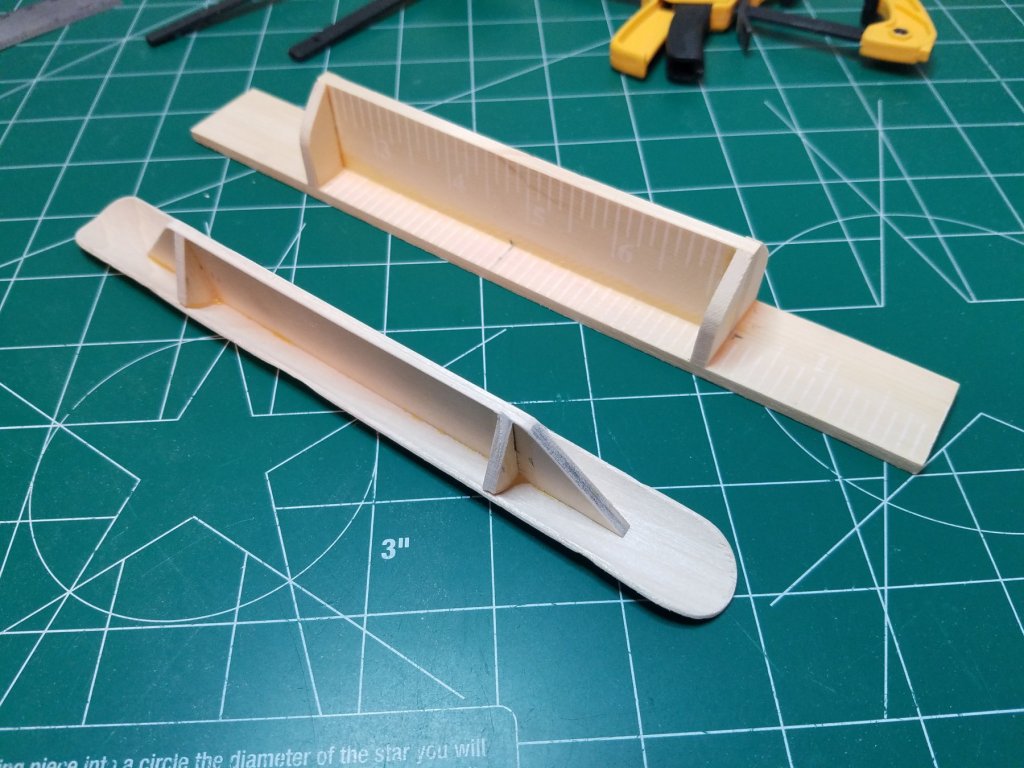
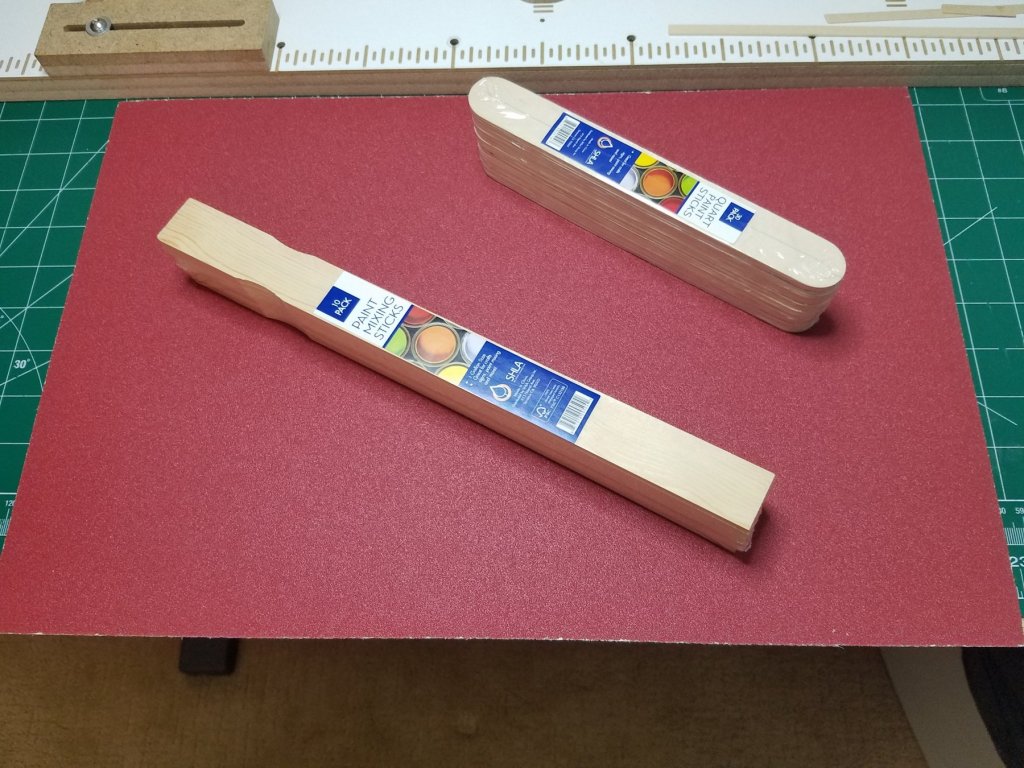
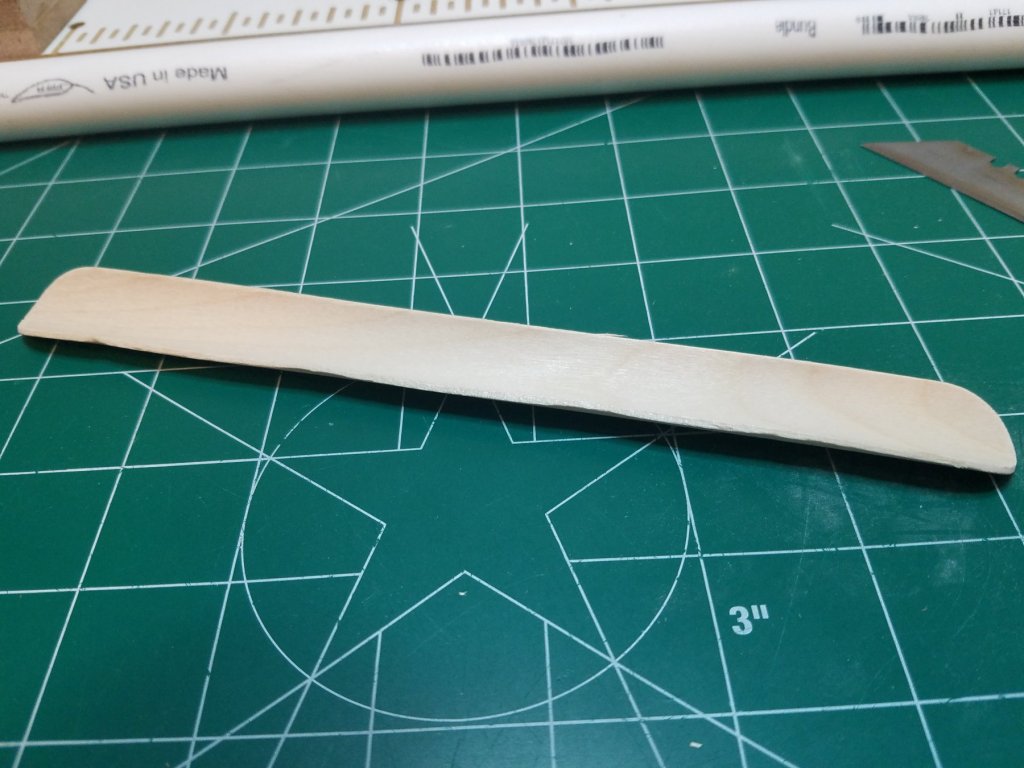
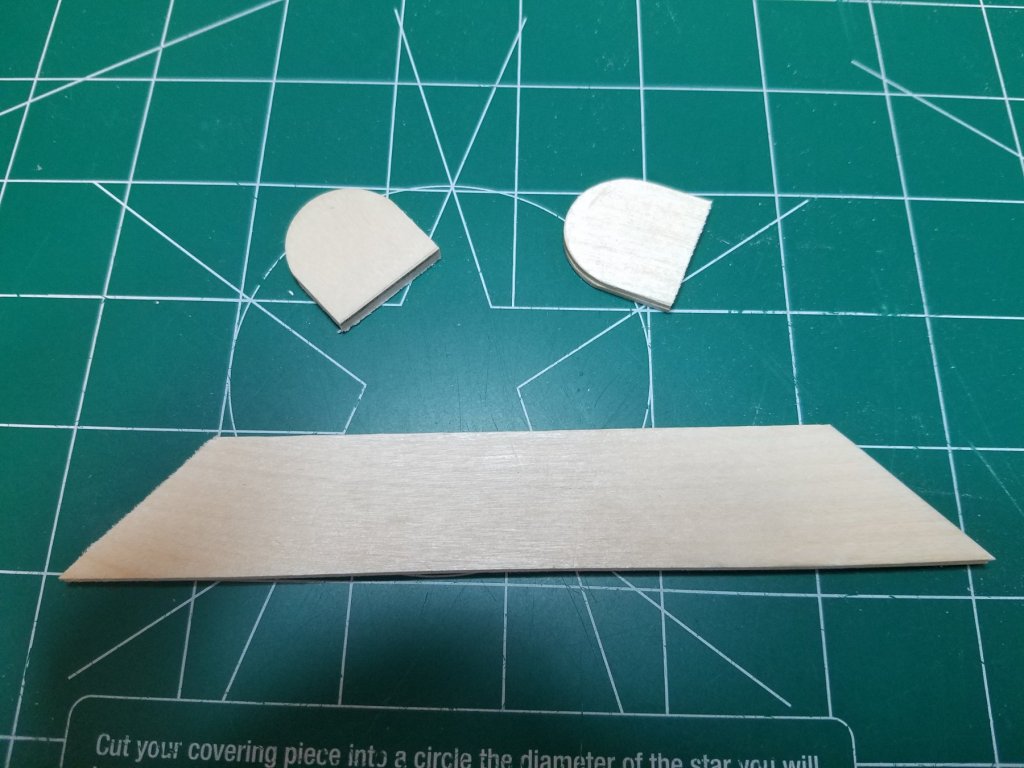
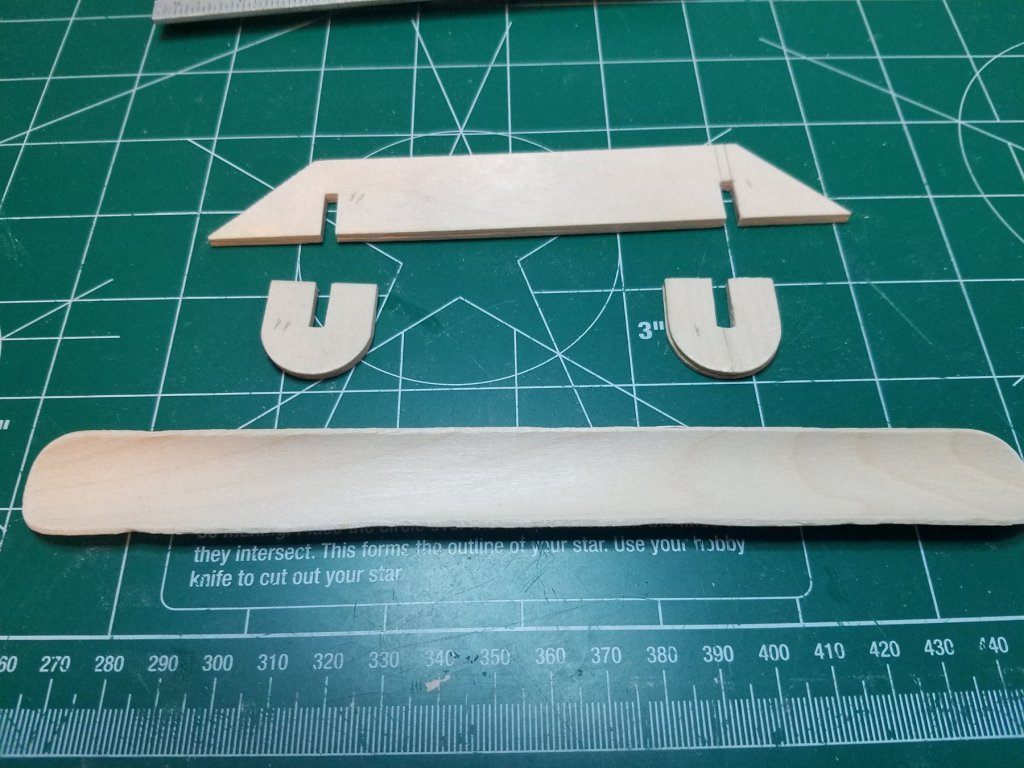
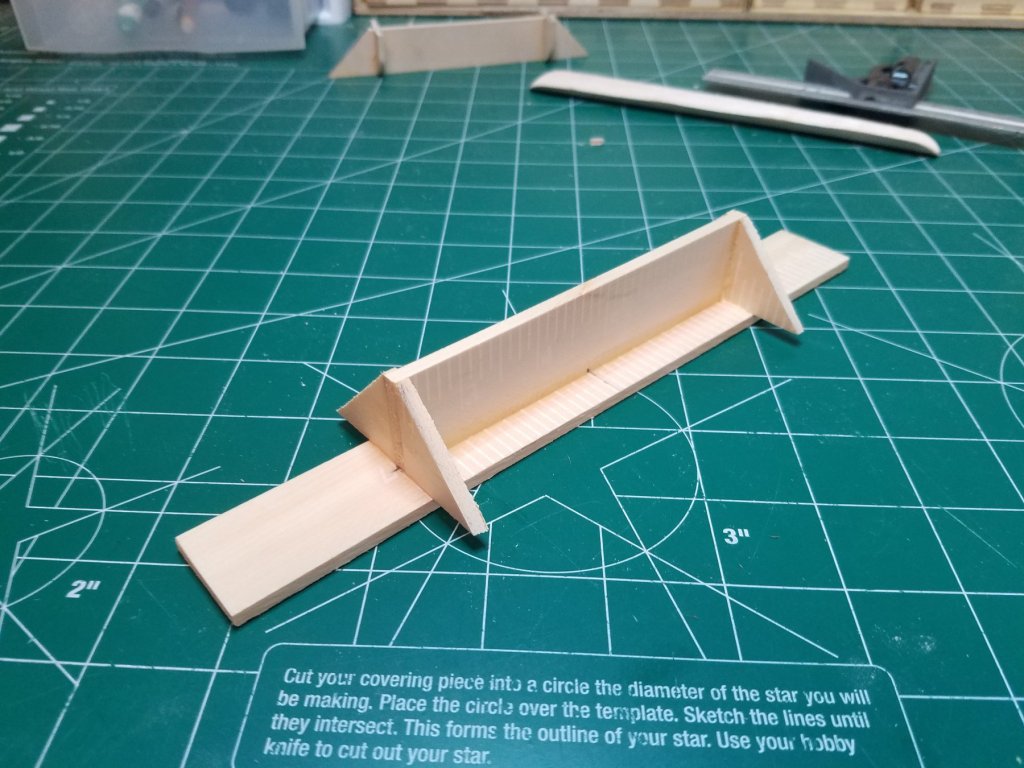
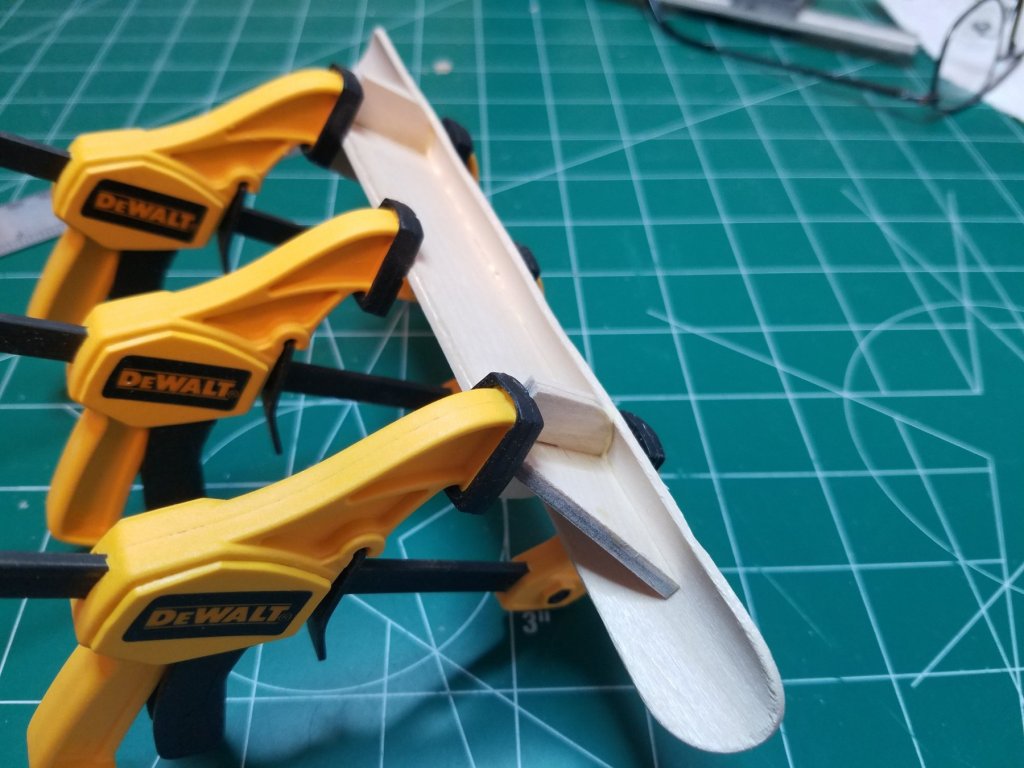
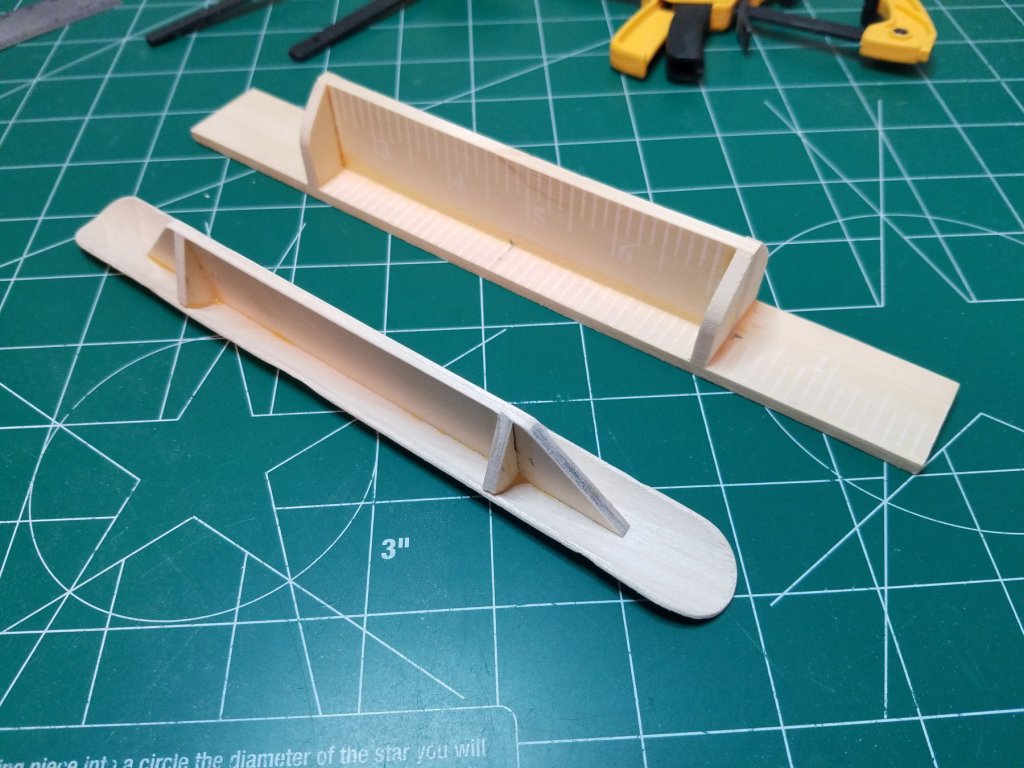
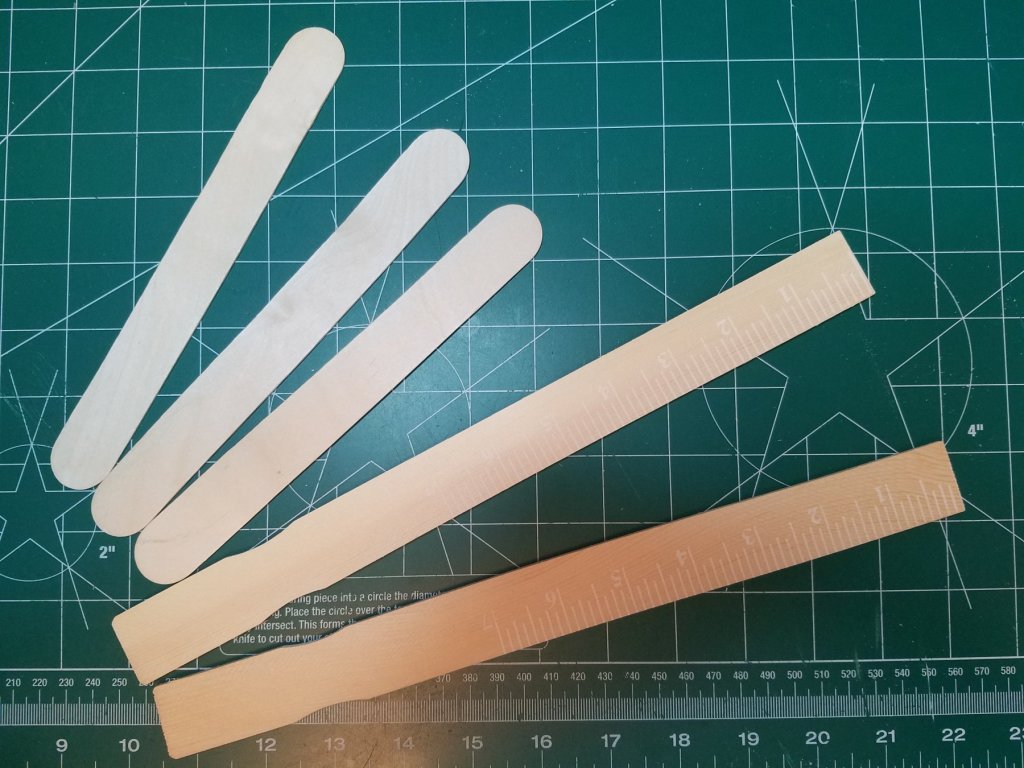
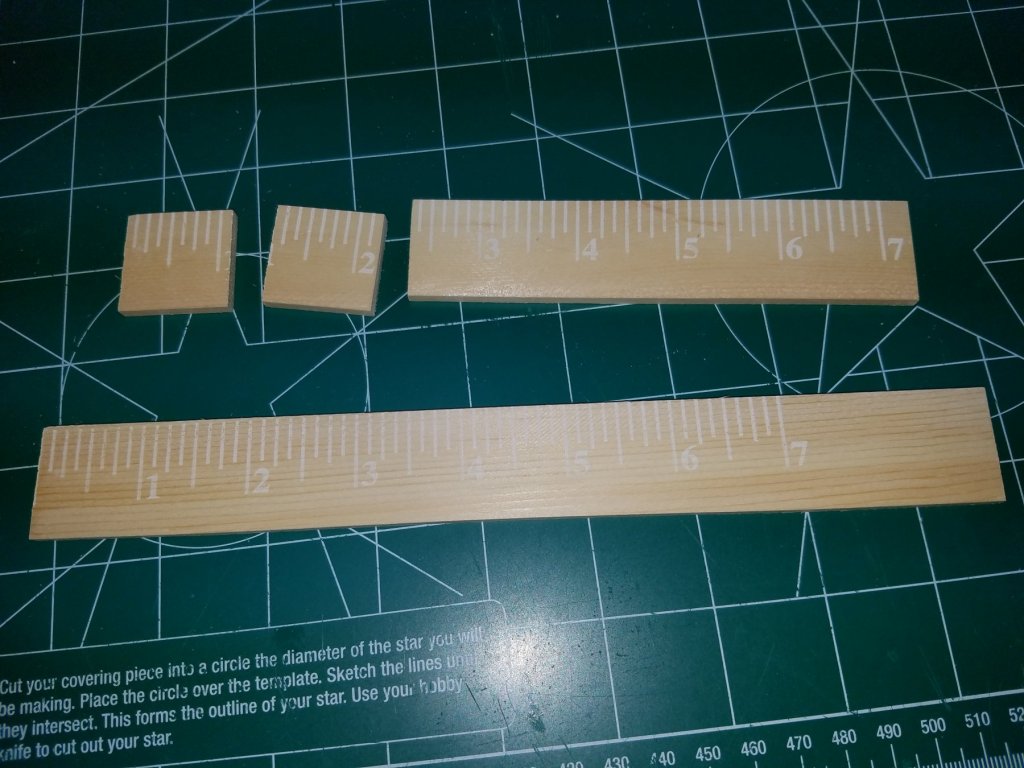
Well, I am about to start fairing my first POF ship and realized I had no proper sanding blocks. So off to the local Home Depot for a look around. I quickly realized that they had for off the shelf sanding blocks was not going to work. As my wife and friends have told me over the years "my brain has no off switch" so I started looking around for materials to make my own. I did not want to spend a lot of money or time so I went looking for lumber that was the right size to begin with. I was in the paint department looking for adhesive backed sandpaper when I thought of those stir sticks they give you. Perfect. Only now you have to buy them $.98 for a pack of 10 and right with them were packs of 30 over sized tongue depressors for the same price. Plus one 12"x18" sheet of adhesive backed sandpaper came to about $8.00. By the time I got home I had a rough plan anyway. I was only going to need a couple of each so I had plenty for several attempts. The only tools I would need would be my Exacto razor saw and miter box, needle files, a square, a ruler and a few clamps. One of the tongue depressors after soaking in hot water for about 15 minutes and then getting wrapped around a piece of 1/2" PVC pipe. While that was drying I laminated the other 2 together and set them aside to dry. While I cut up the 2 stir sticks. The first pieces clamped up and set aside to dry. Back to the tongue depressors. The ends were cut off approximately the same length as the width of the TD and the ends of the remaining piece mitered. I think you can see where this is going. Glued up and set aside to dry back to the other one. I cut the 2 squares in half and glued them in on both ends. And here they are after a little trimming and sanding. Not bad for less than $8.00 and a couple hours work. I think the flat one will be fine but I am not so sure about the rounded one. I think I should have laminated 2 together for the rounded part as well. We will find out how they work after a couple of coats of oil based poly to toughen them up a little. Best Regards


- 12 replies
-
- 17
-
-
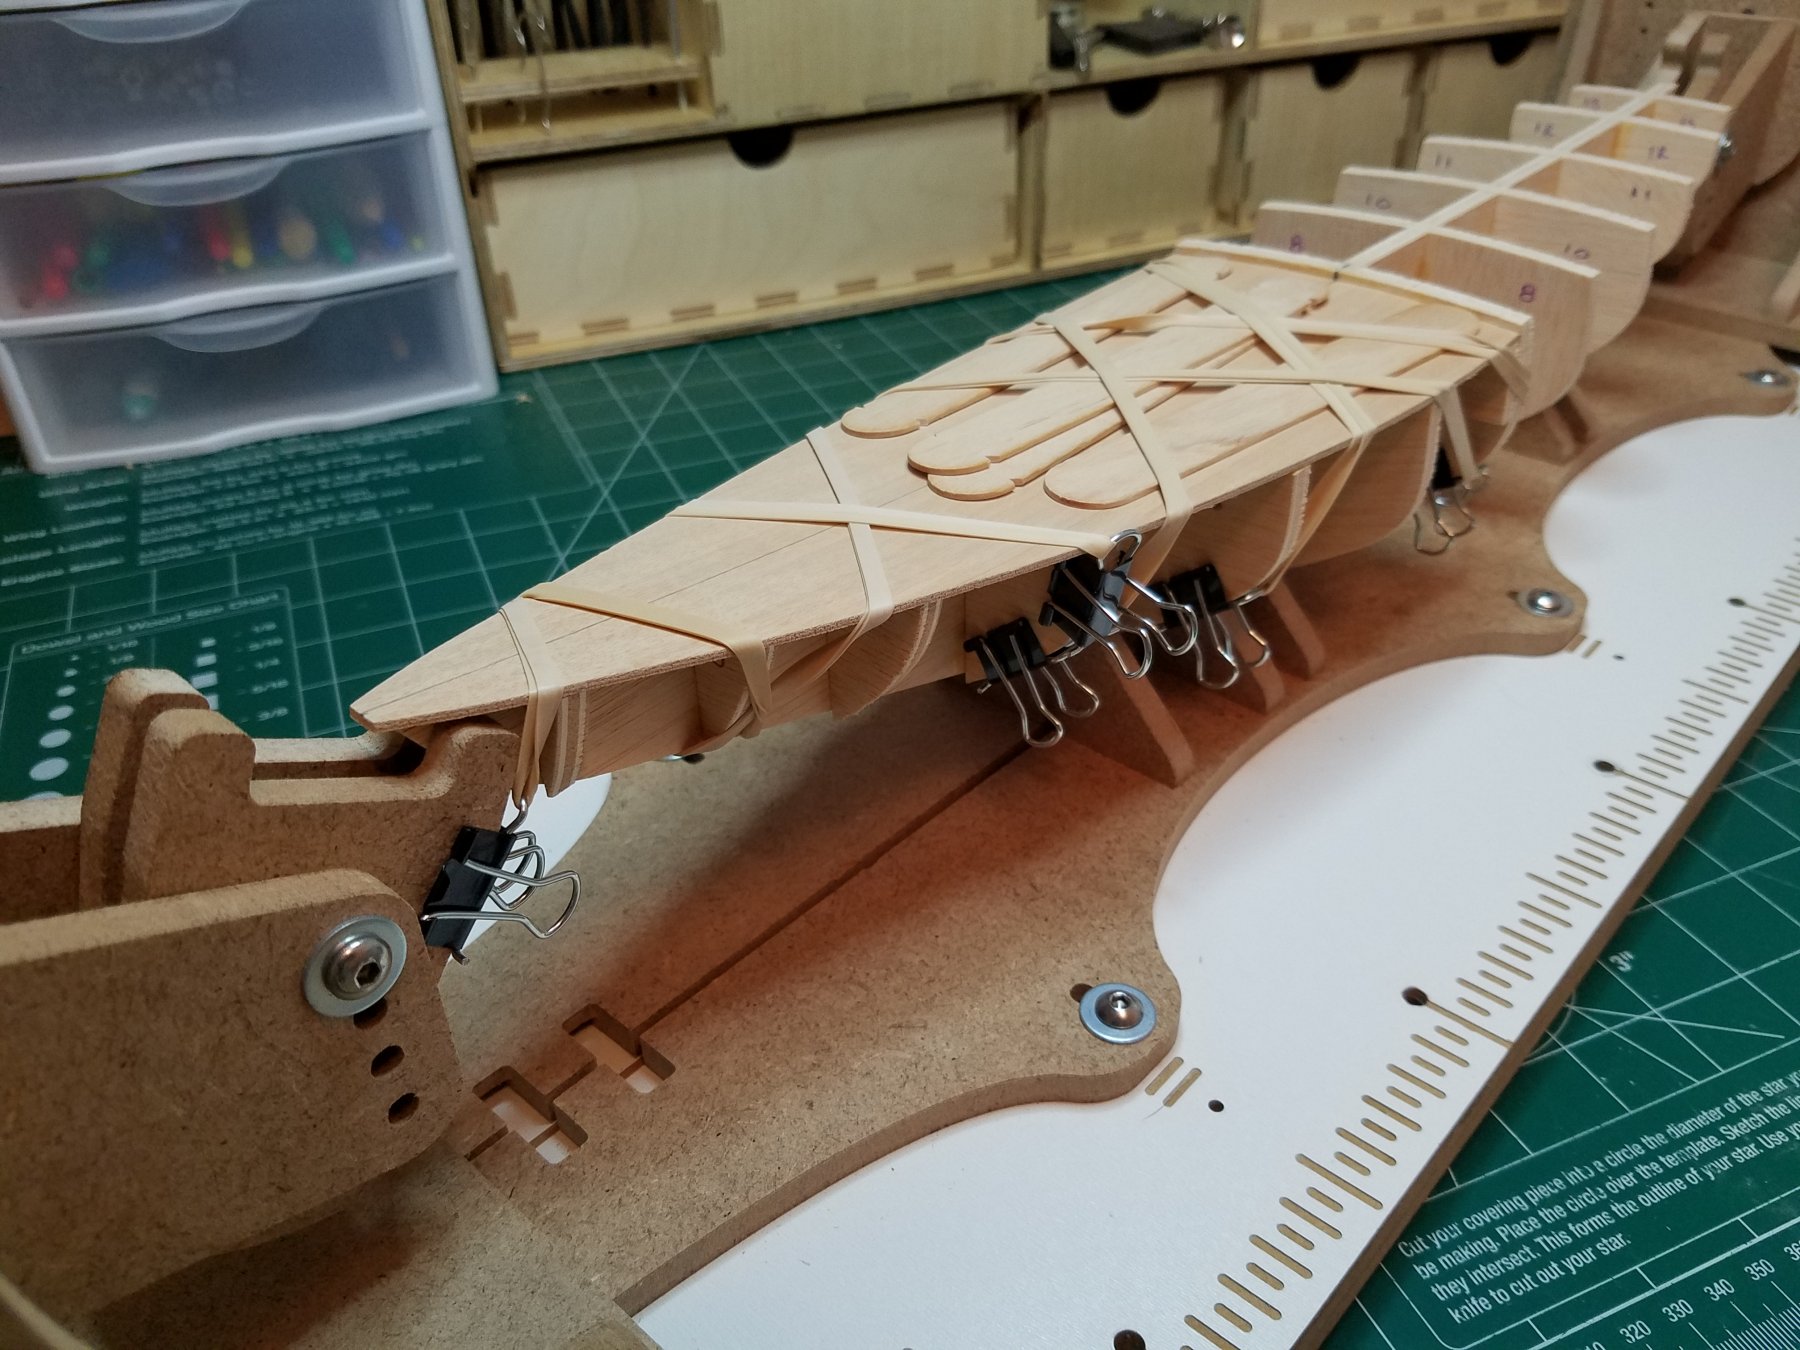
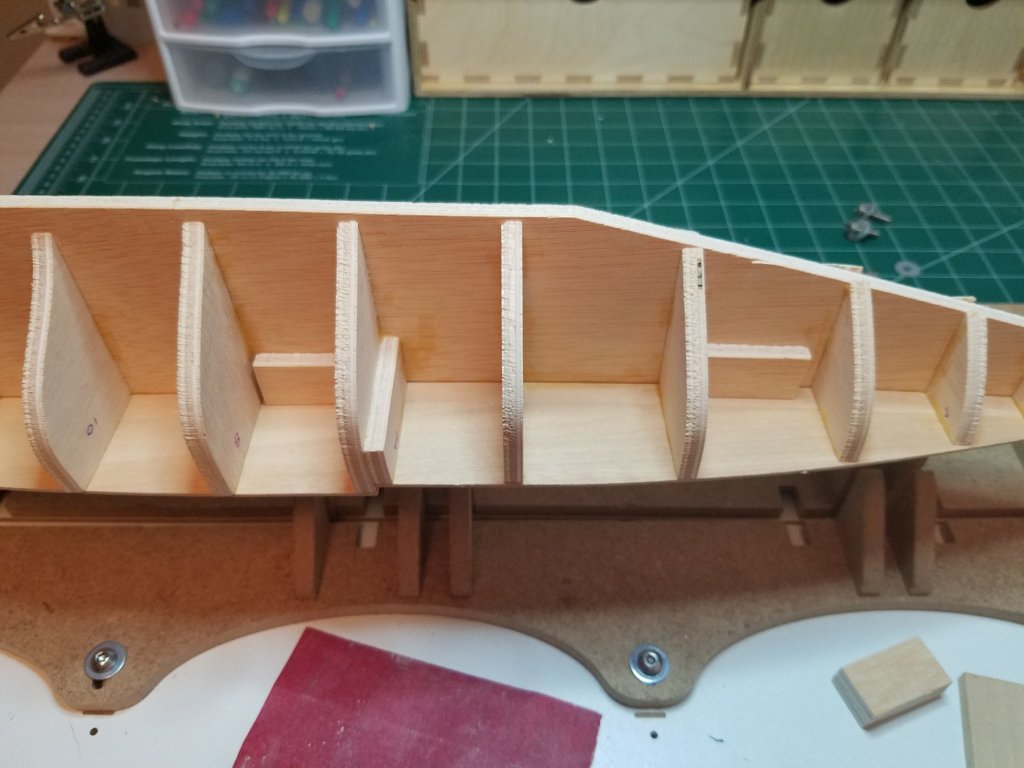
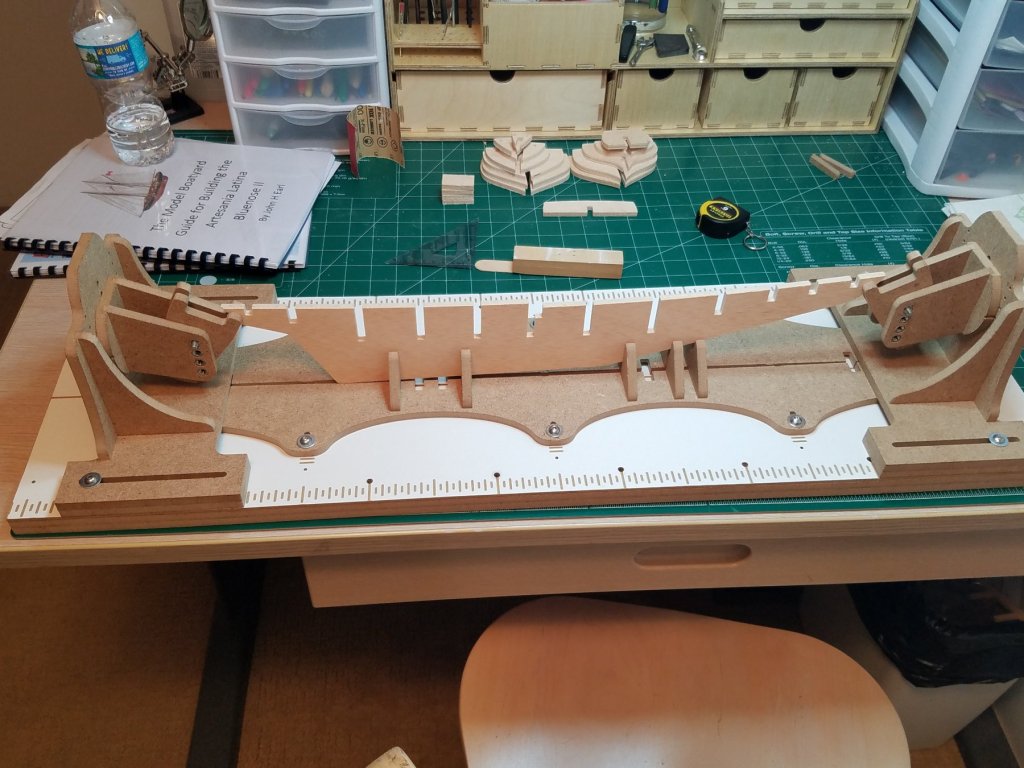
A little progress to report. The mast blocks are in. So I turned my attention to fairing the bulkheads. Even a not so close inspection reveals that bulkheads 3-5 need a little fillet work. Setback from the edge of the deck is about the same on both sides as it should be. So some 1/4x1/32 and 1/4x1/16 bass wood and some medium CA and in a few minutes all better. I know this is adding material that in all likelihood I will be removing later but I would rather add a little now and start with too much than have to try and add a whole bunch later. Also a new Ensign reported aboard for cupcake duty today. I think she will fit right in.

- 22 replies
-
- 2
-
-
- bluenose ii
- artesania latina
- (and 1 more)
-
Thanks for the quick replies. Frankie after sleeping on it last night that is exactly the conclusion I came to. there is a full scale drawing which locates the deck penetrations so that is what I will go with. Thanks again and happy St Patty's day
-
Thanks John, I finally looked at the full size drawing (my limited work space only allows me to hang one sheet at a time) and noted that the locations there match the assembly drawing so that is where they will go. Regards
- 22 replies
-
- 1
-
-
- bluenose ii
- artesania latina
- (and 1 more)
-
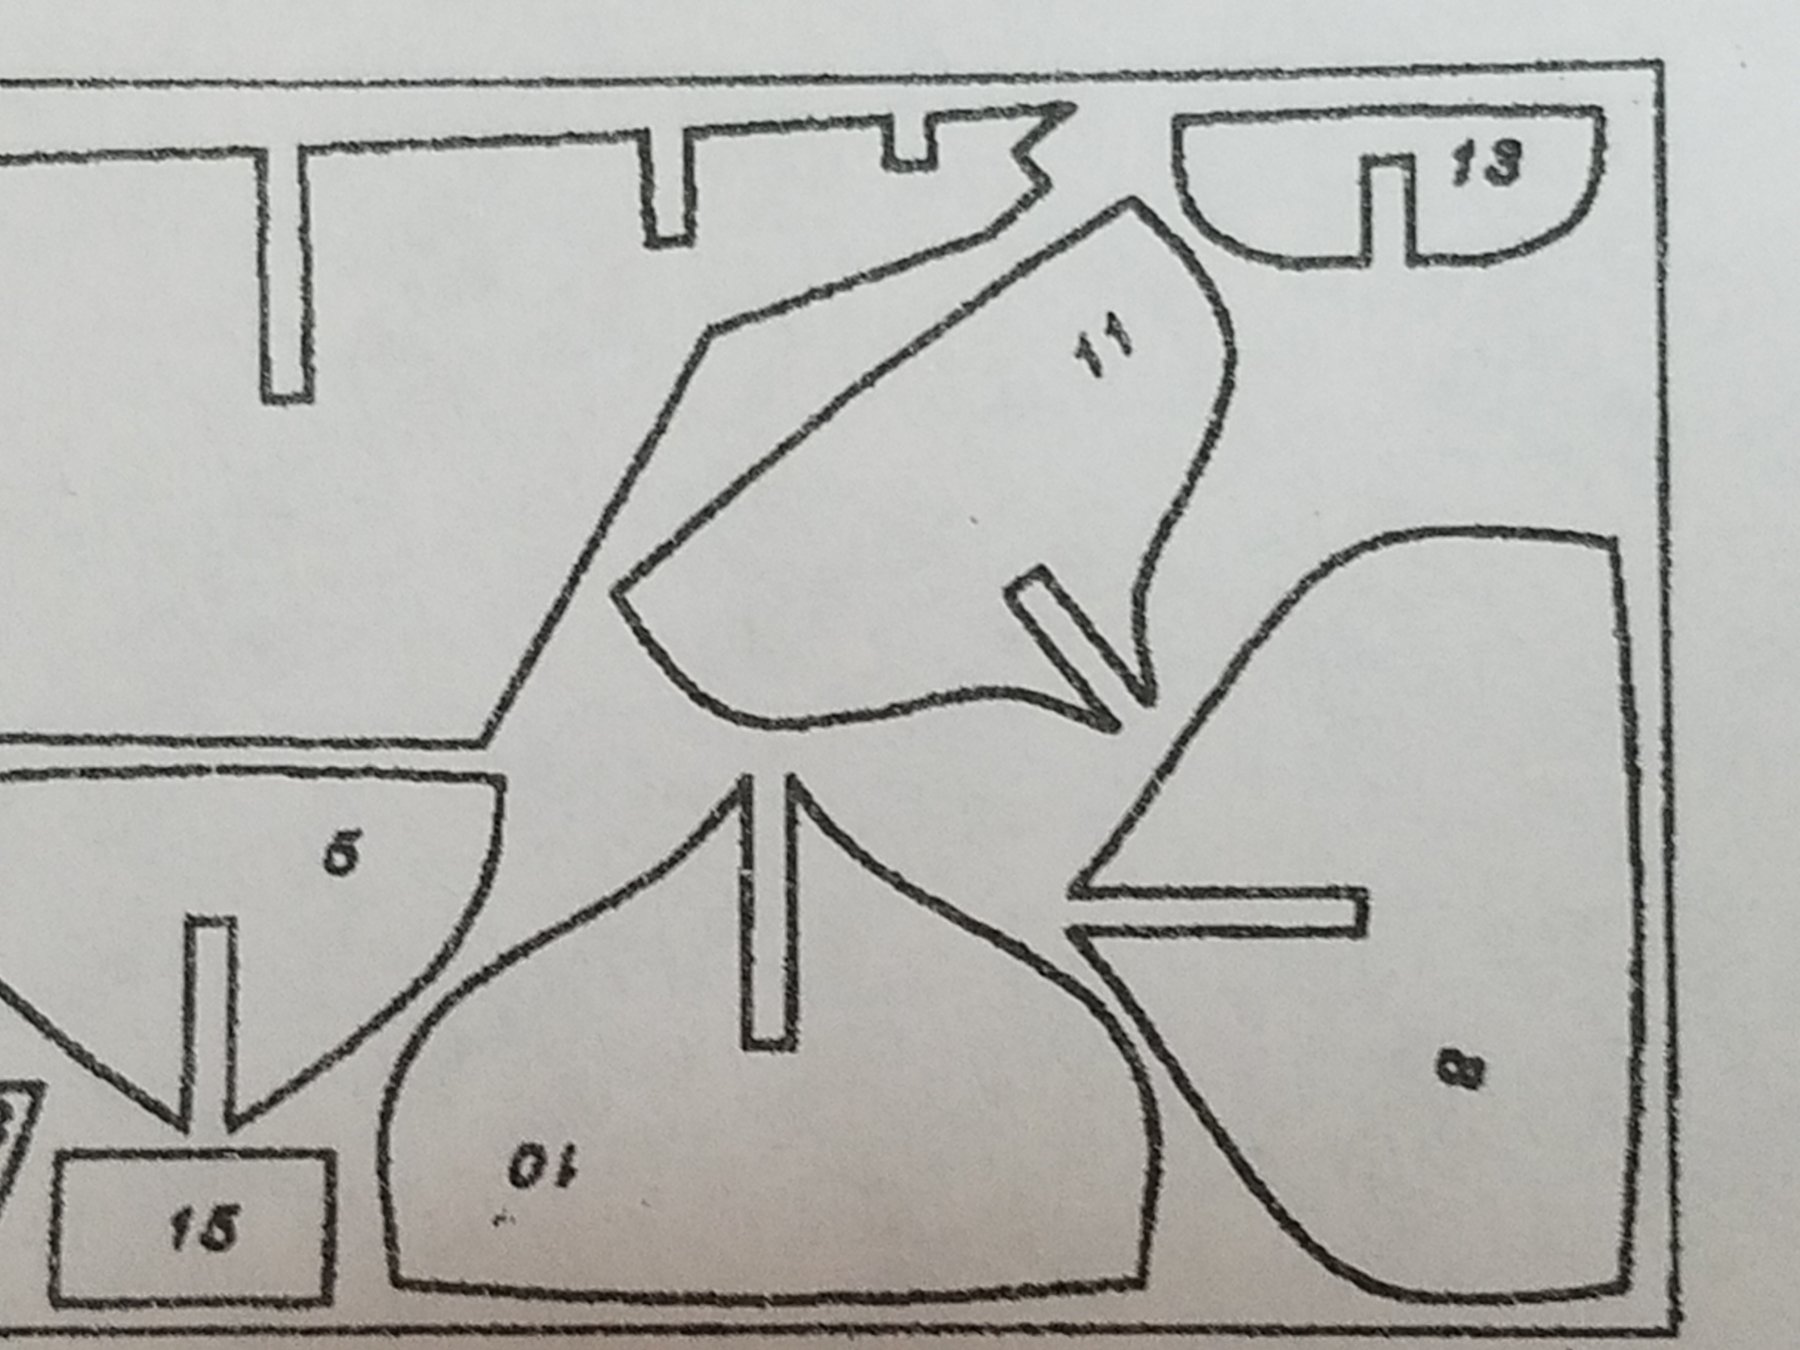
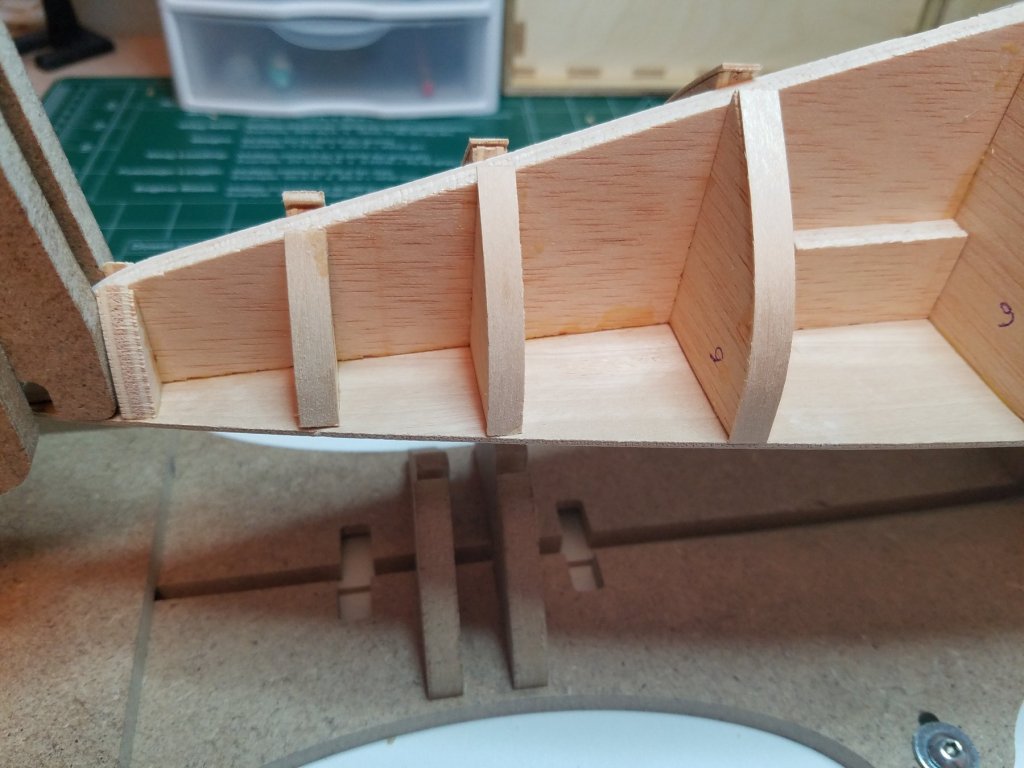
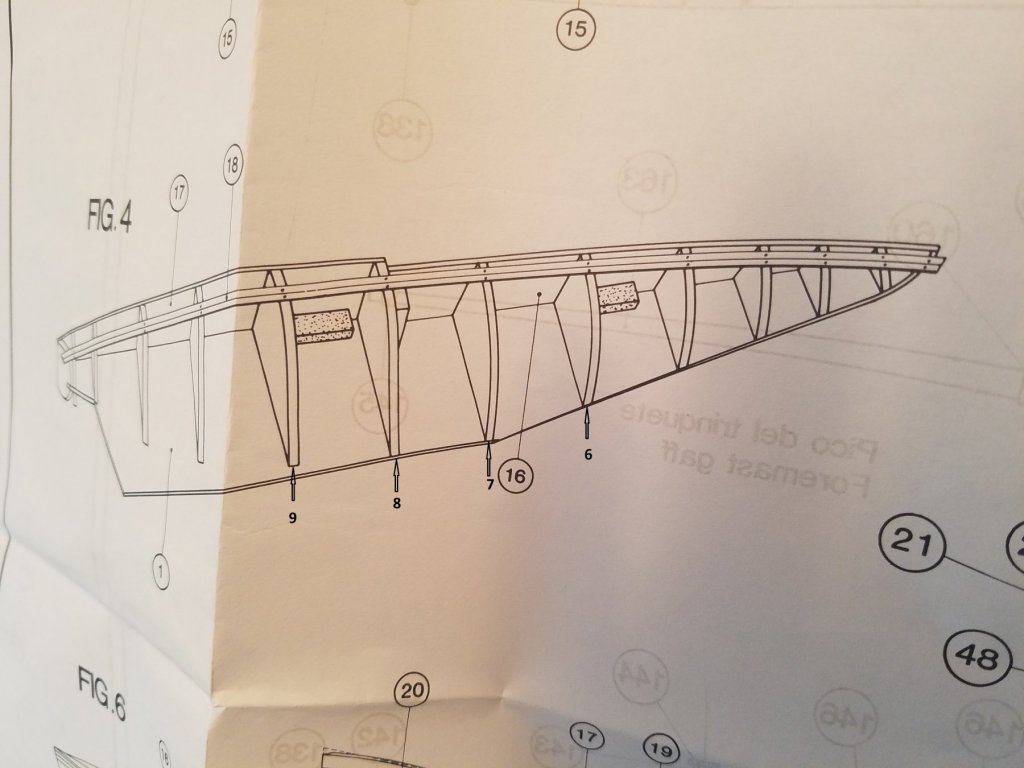
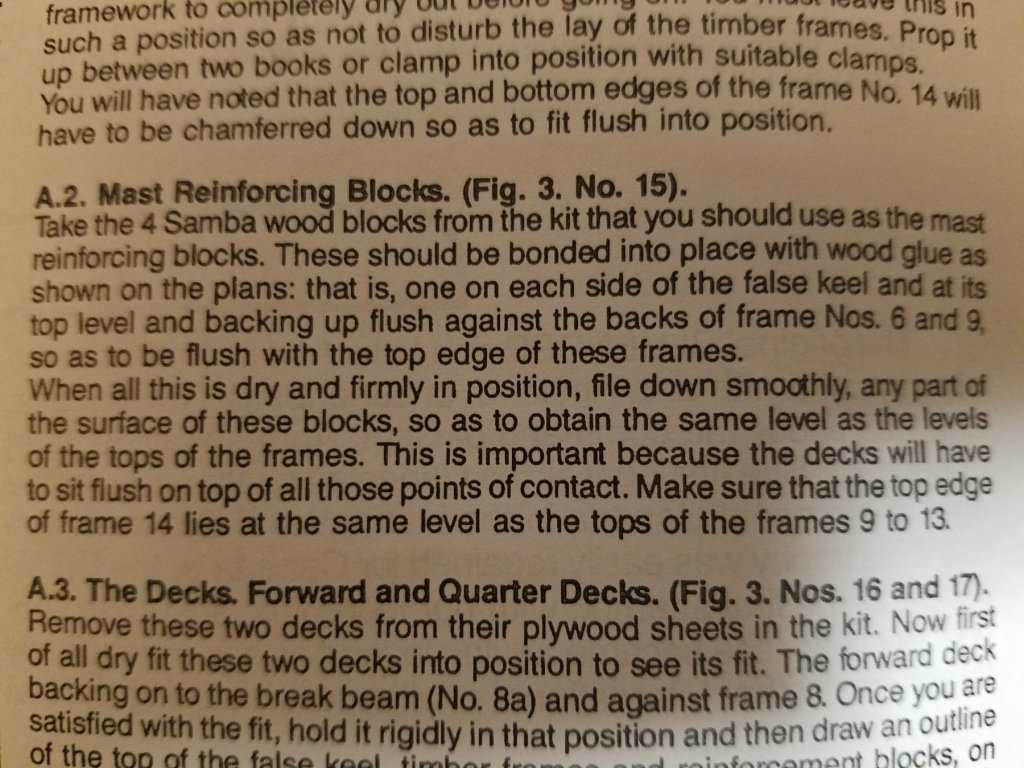
I posted this in my build log but thought I might get a quicker response here. I Removed the assembly from the clamps and turned it upside down in order to install the mast reinforcing blocks. I have the kit instructions and plan sheets, and the J. Earl Practicum, and the manufacturers instructions for the newer version of the kit. Problem: No one even the kit manufacturer can agree where they should be placed. As you can see below the kit instructions not so clearly states that "These should be bonded into place ... as shown on the plans ... backing up flush against the backs of frame Nos. 6 and 9. ..." That places them like this; However when we look at the plans which are referenced in the written instructions we see this Which moves them forward of bulkheads 6 and 9, like this. The Earl practicum does not mention them at all however, on page 7 of section 2 we can just barely get a glimpse one of the blocks in Photo 4 located aft of bulkhead 6 as per the written instructions. The newer kit has slots pre-located in the keel and different bulkhead spacing so we can disregard the instructions for the new kit except as perhaps a general reference for location in relation to the "Great Beam". Question: Could someone who has built this version of the AL Bluenose II kit # 20500 please measure the distance from the "step" in the deck to the center of each of the masts? Or at least verify which location they used. Many Thanks

-
I Removed the assembly from the clamps and turned it upside down in order to install the mast reinforcing blocks. I have the kit instructions and plan sheets, and the J. Earl Practicum, and the manufacturers instructions for the newer version of the kit. Problem: No one even the kit manufacturer can agree where they should be placed. As you can see below the kit instructions not so clearly states that "These should be bonded into place ... as shown on the plans ... backing up flush against the backs of frame Nos. 6 and 9. ..." That places them like this; However when we look at the plans which are referenced in the written instructions we see this Which moves them forward of bulkheads 6 and 9, like this. The Earl practicum does not mention them at all however, on page 7 of section 2 we can just barely get a glimpse one of the blocks in Photo 4 located aft of bulkhead 6 as per the written instructions. The newer kit has slots pre-located in the keel and different bulkhead spacing so we can disregard the instructions for the new kit except as perhaps a general reference for location in relation to the "Great Beam". Question: Could someone who has built this version of the AL Bluenose II kit # 20500 please measure the distance from the "step" in the deck to the center of each of the masts? Or at least verify which location they used. Many Thanks
- 22 replies
-
- 1
-
-
- bluenose ii
- artesania latina
- (and 1 more)
-
Hello all, Been feeling a little under the weather the past couple of days but back at it now. Thanks Steve good to have you along. Well I decided to play hooky from work one more day even though I felt much better. I managed to get the aft deck on. Now comes the part I have been dreading the most, fairing the frames. Not a lot of guidance on this in the instructions so I will just take my time and try not to get into too much trouble. Stand by for lots of questions.
- 22 replies
-
- 1
-
-
- bluenose ii
- artesania latina
- (and 1 more)
-
Bob, Just found and read your build log and will be along for the duration. Looking forward to meeting you in person on Saturday. See you then.
- 359 replies
-
- 5
-
-
- prince de neufchatel
- model shipways
- (and 1 more)
-
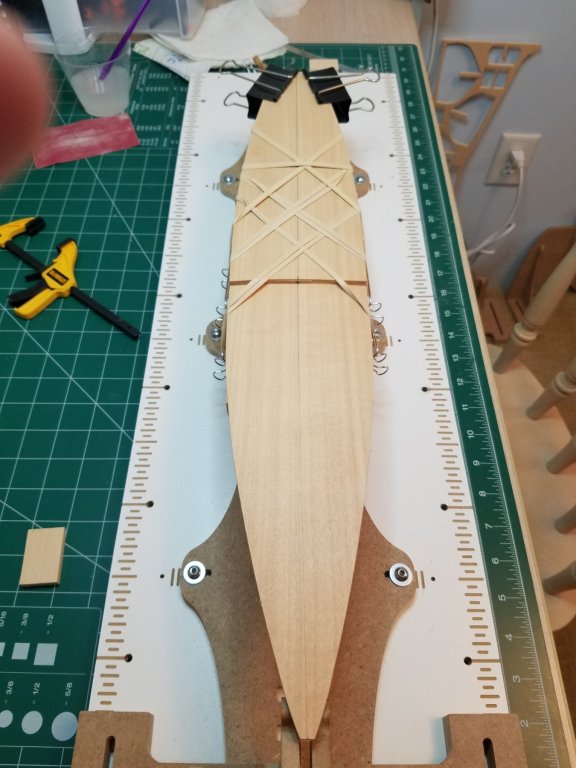
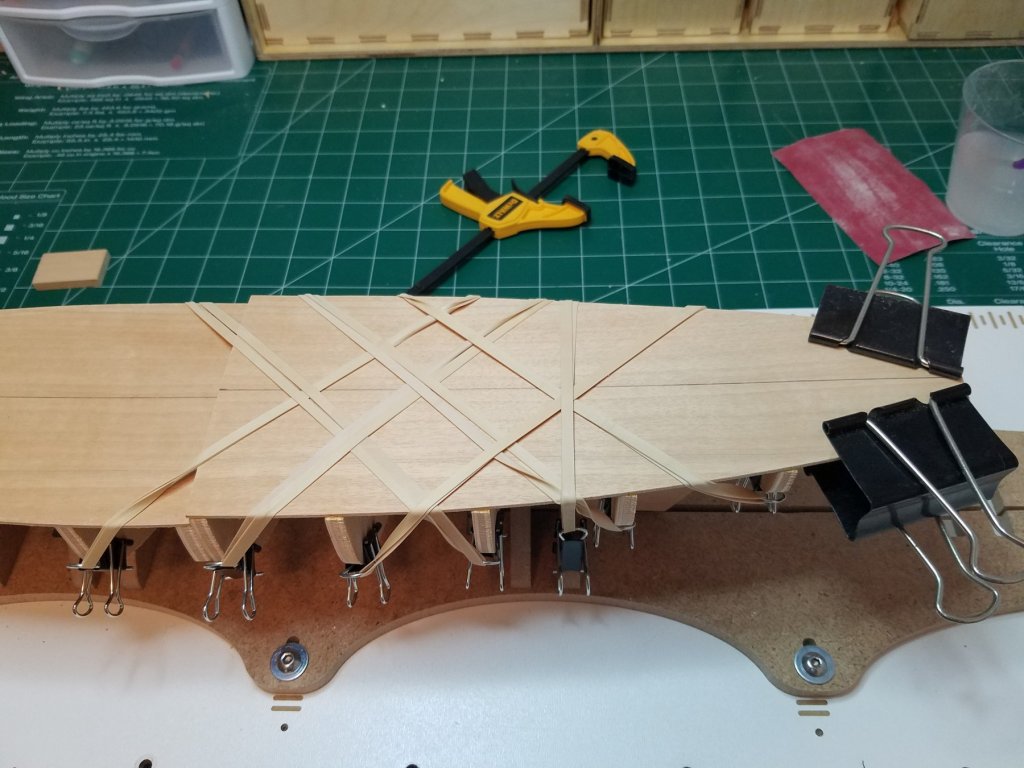
A very small amount of progress to report. Yesterday I went to the local office supply store and for about 10 bucks got enough of two different size binder clips to make 60 planking clamps of each size. Then tonight after taking the Admiral out to the local Irish Pub for Taco Tuesday (yes you read it right) I managed to get the fore deck glued on. Well that's about it for now. Best Regards


- 22 replies
-
- 2
-
-
- bluenose ii
- artesania latina
- (and 1 more)
-
All the bulkheads are glued in and I only made one small goof. I was not paying attention and got #4 in backwards. But since I have not sanded the outer edge I think it is no harm no foul. Everything still lines up O.K. The fore deck goes on tomorrow Then I will unclamp the stern and install the transom. Regards
- 22 replies
-
- 1
-
-
- bluenose ii
- artesania latina
- (and 1 more)
-
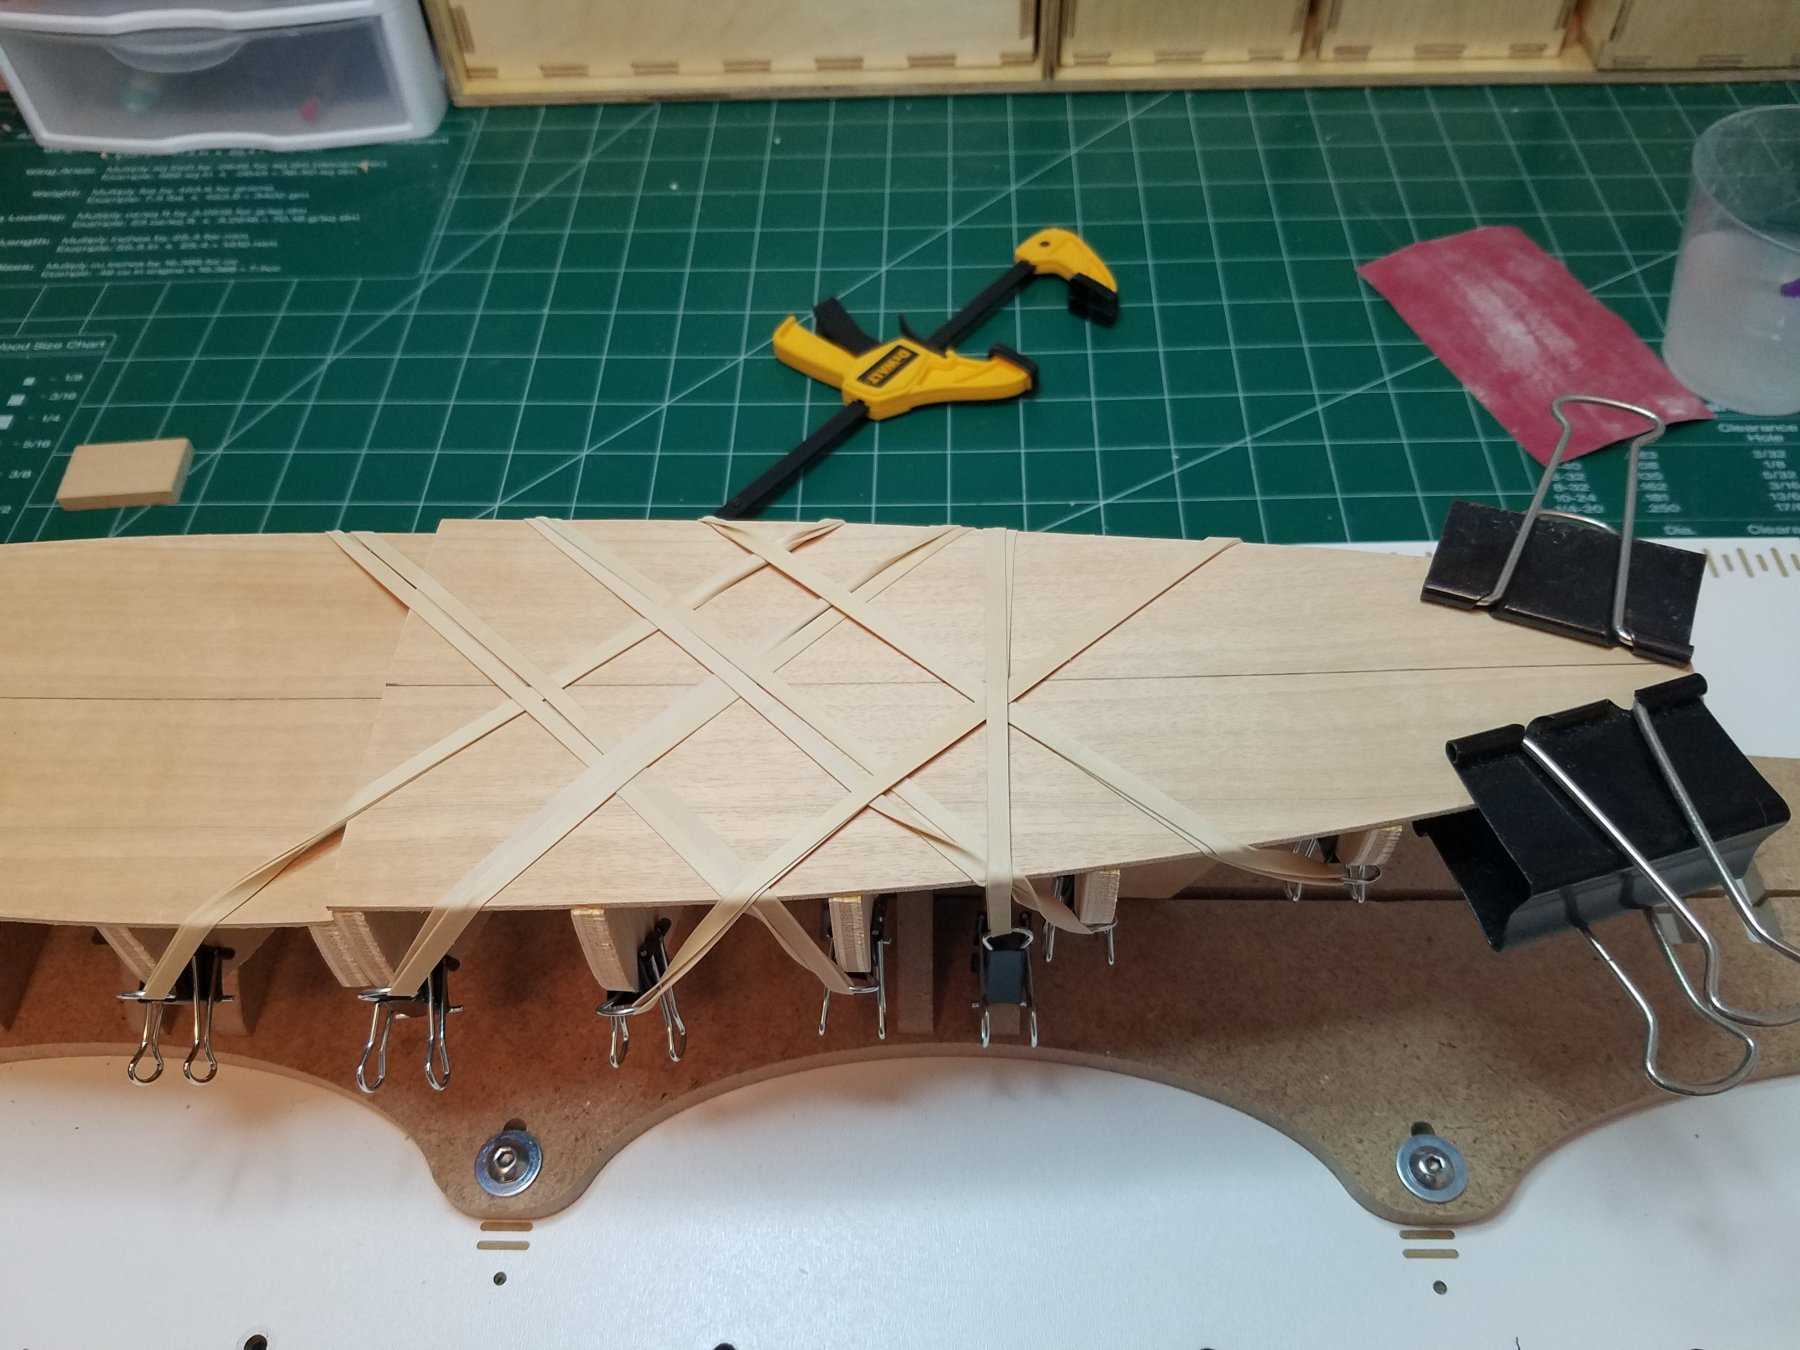
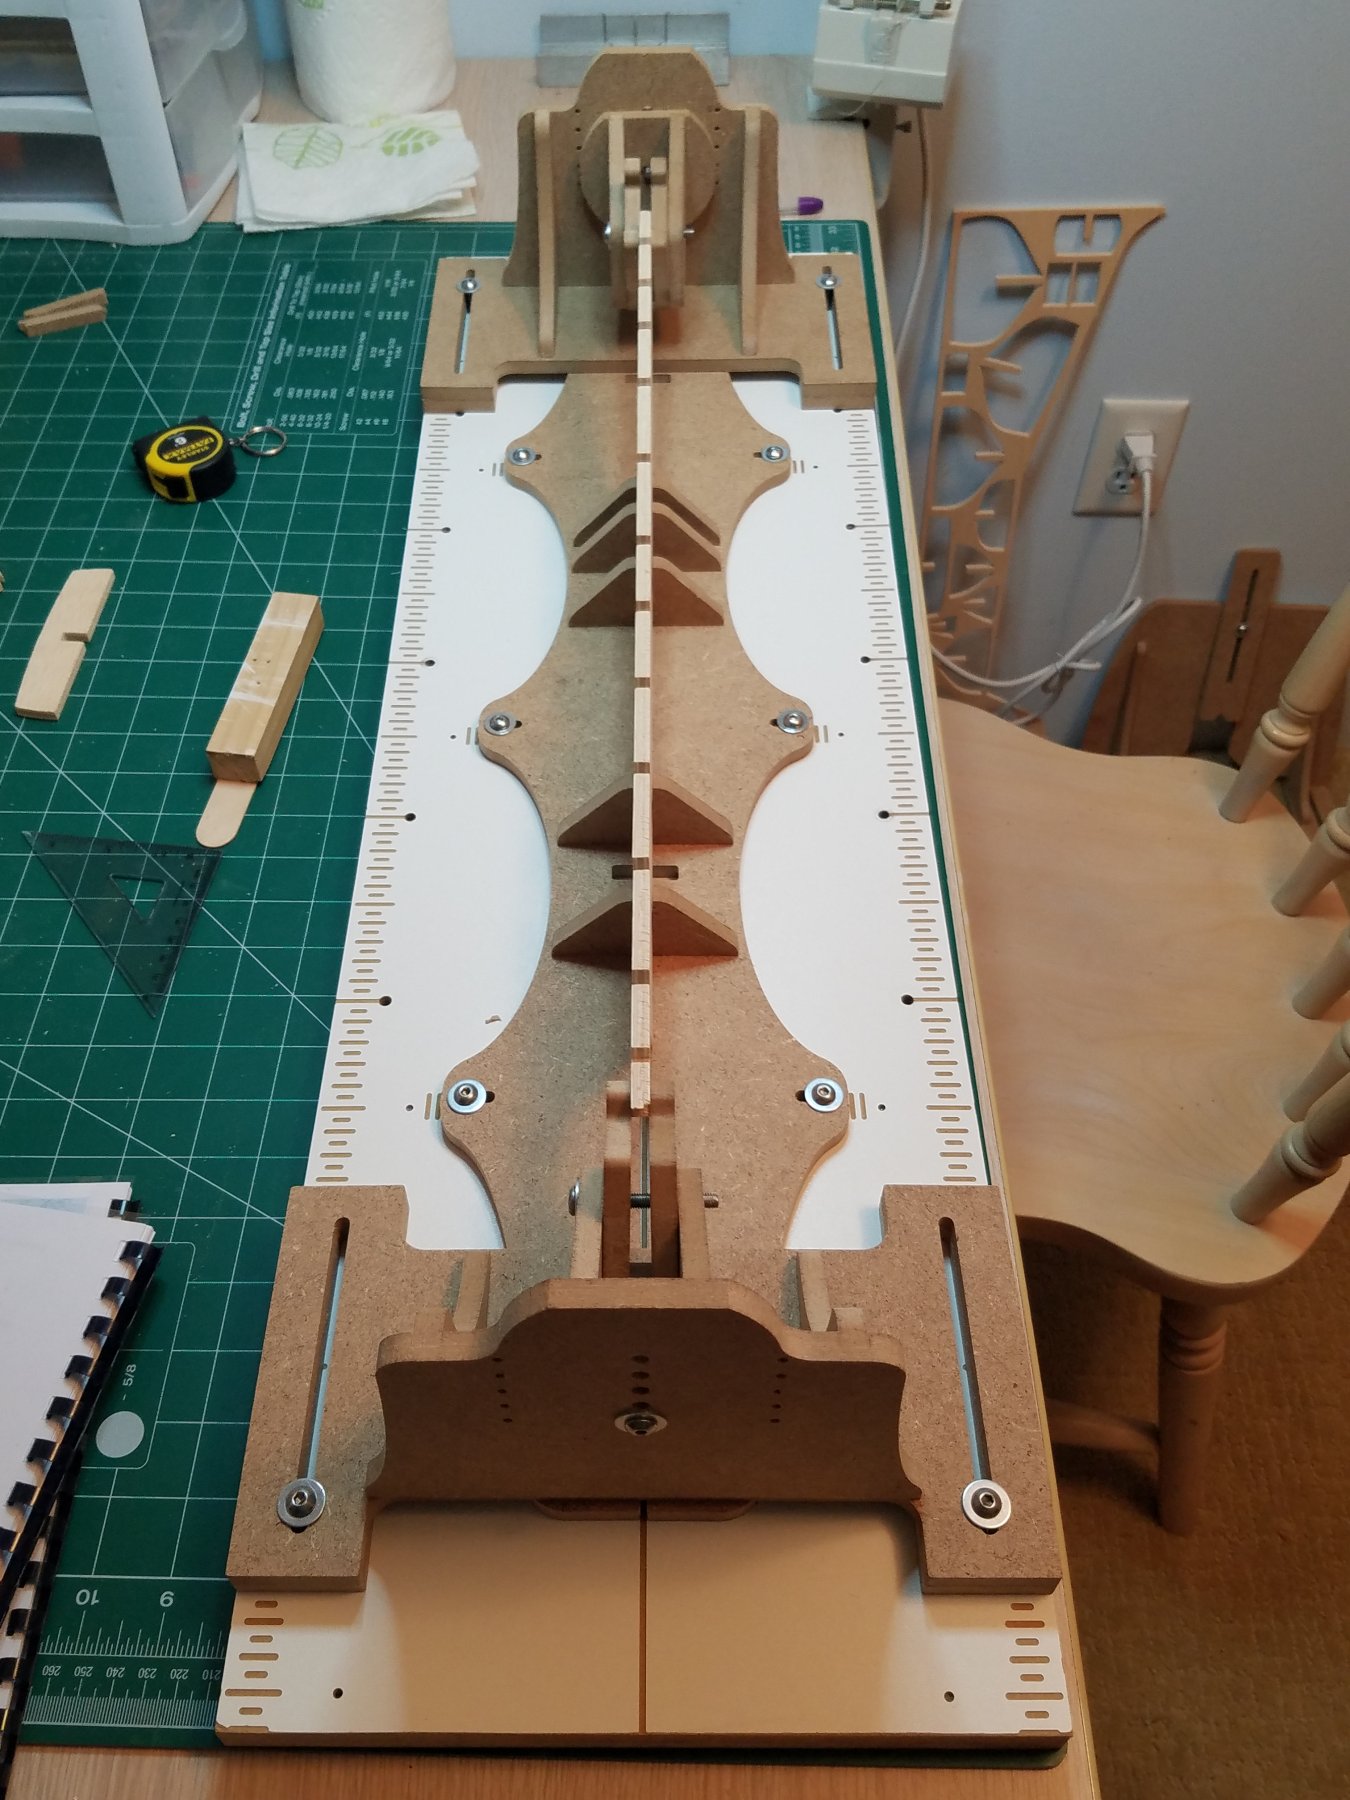
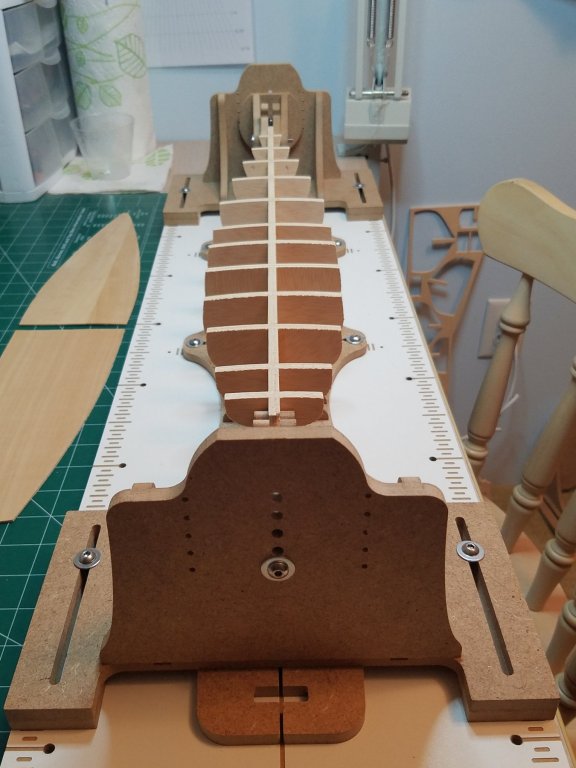
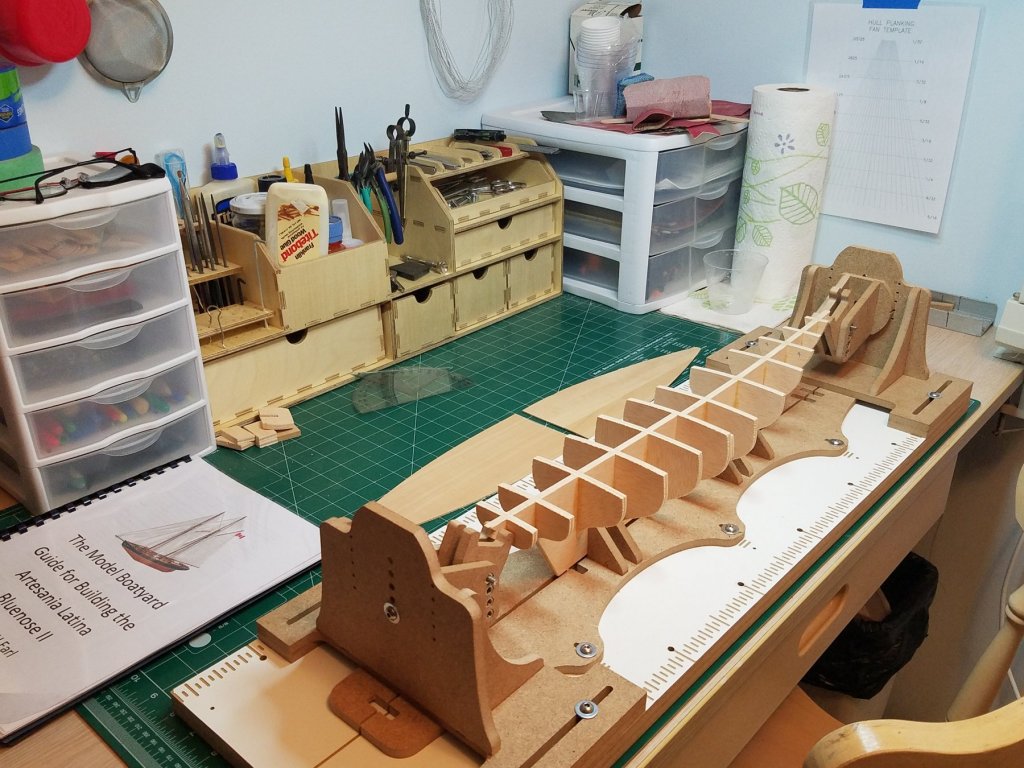
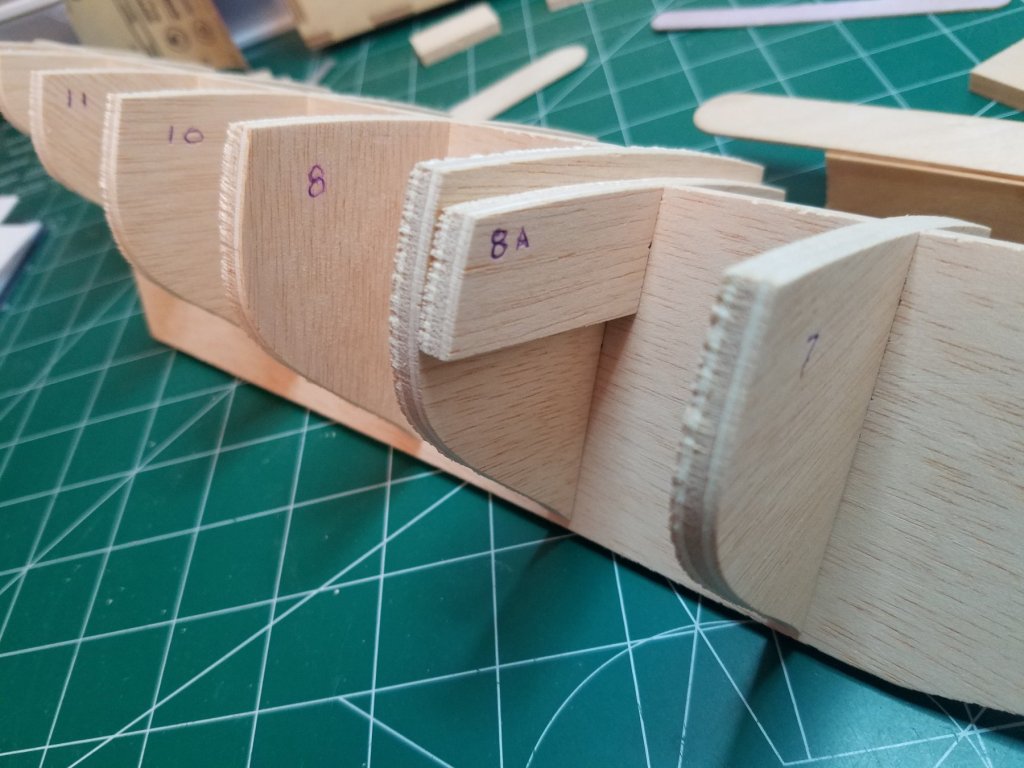
I went ahead and got started gluing the bulkheads. First step was getting the keel in the building jig ensuring that it was nice and straight. The jig did not come with any instructions on set up and use but for anyone even remotely used to model building in general should have no problem. It is really quite intuitive.It took some fiddling and lots of adjusting but I finally got the results I was looking for. Considering how warped it was I don't think it looks too bad now. Then starting at the bow I began gluing in the bulkheads. Working my way aft and letting the glue set for 20 to 30 minutes before moving the on to the next one. Lots of time to spend on this one so not in any rush. If it takes a day or two to get the all the bulkheads in then so be it. Well # 5 should be dry by now. I am going to get a couple more in before hitting the sack. Regards,

-
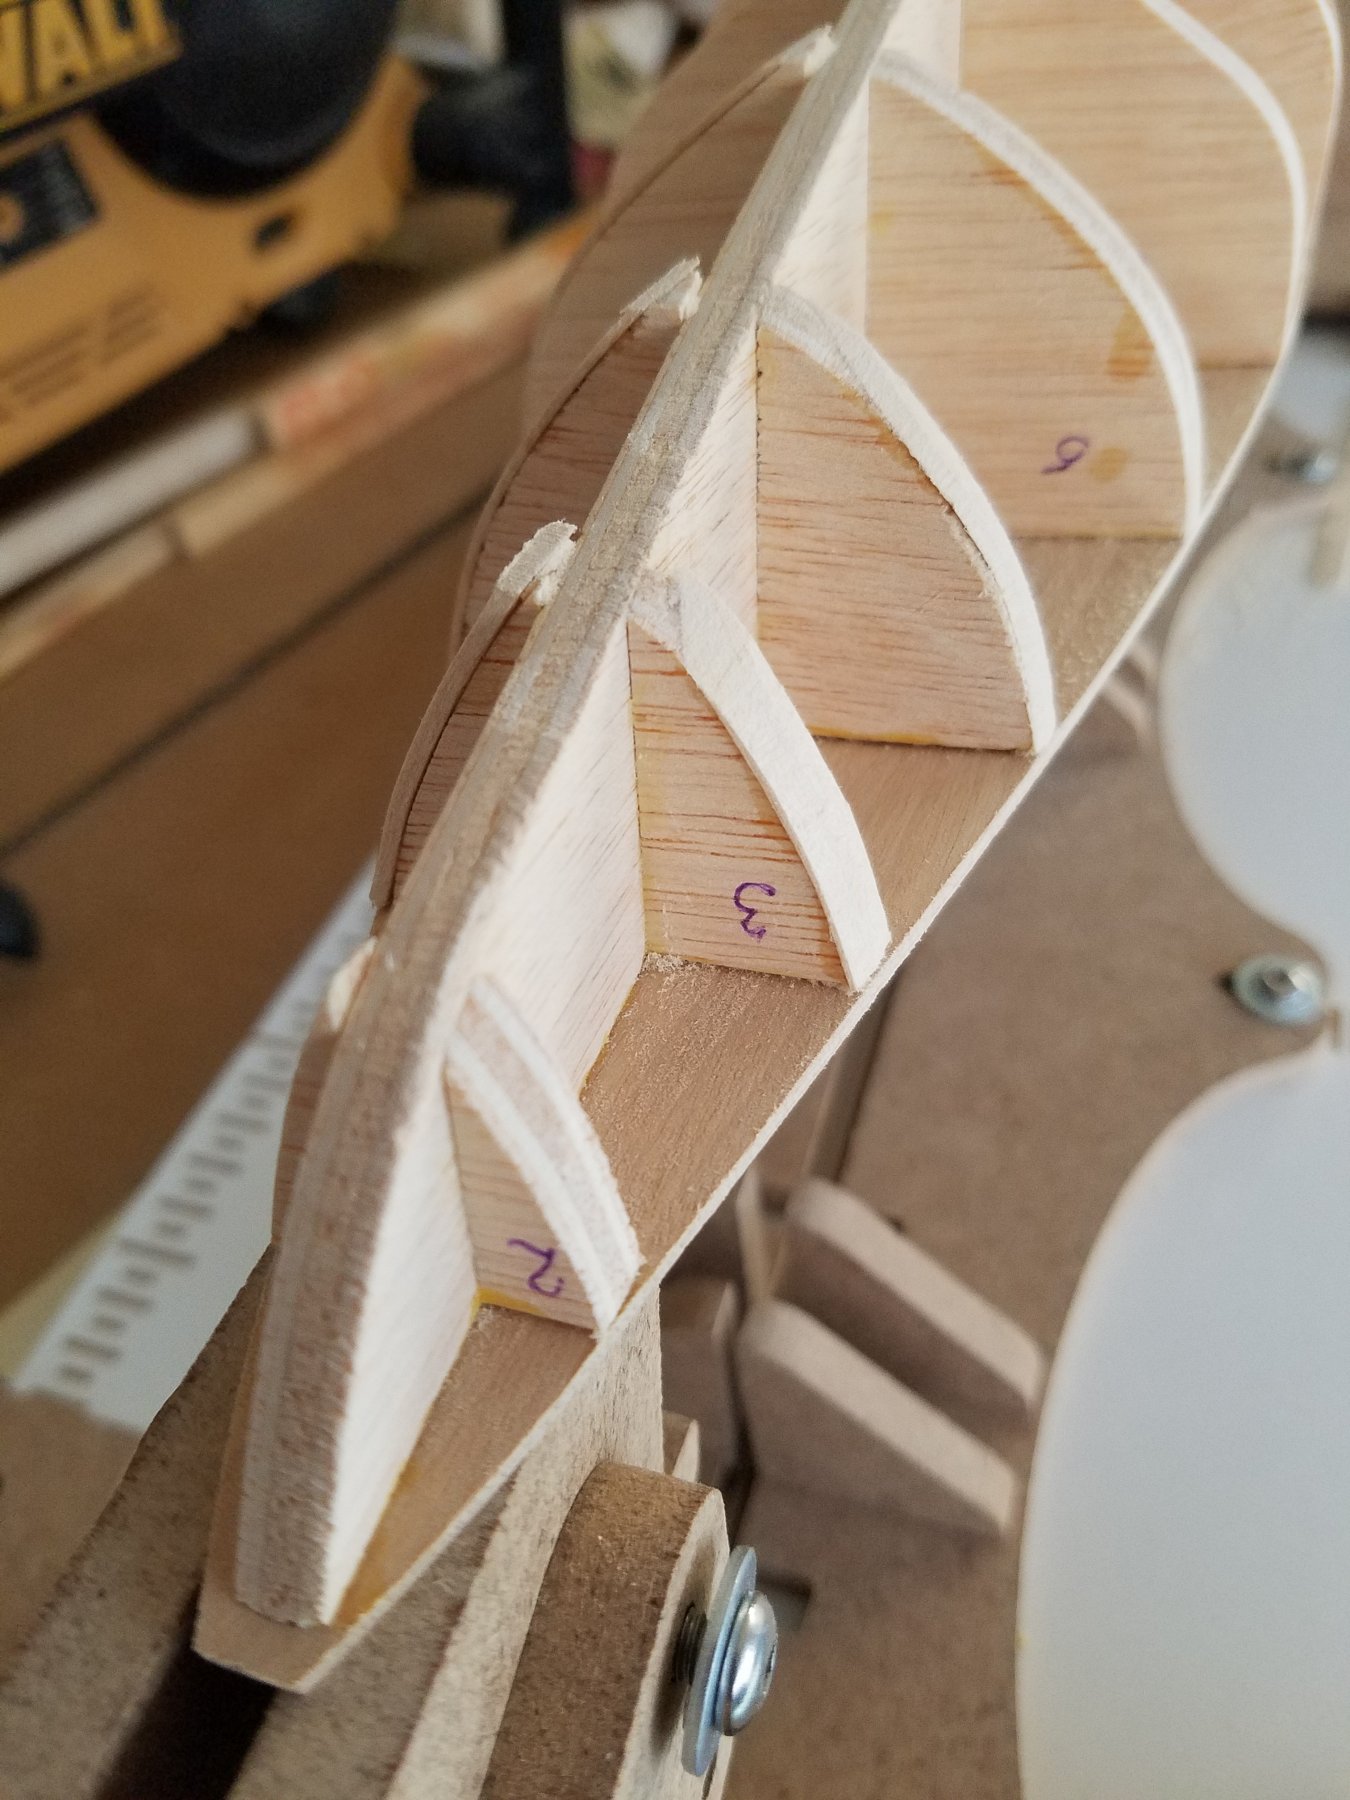
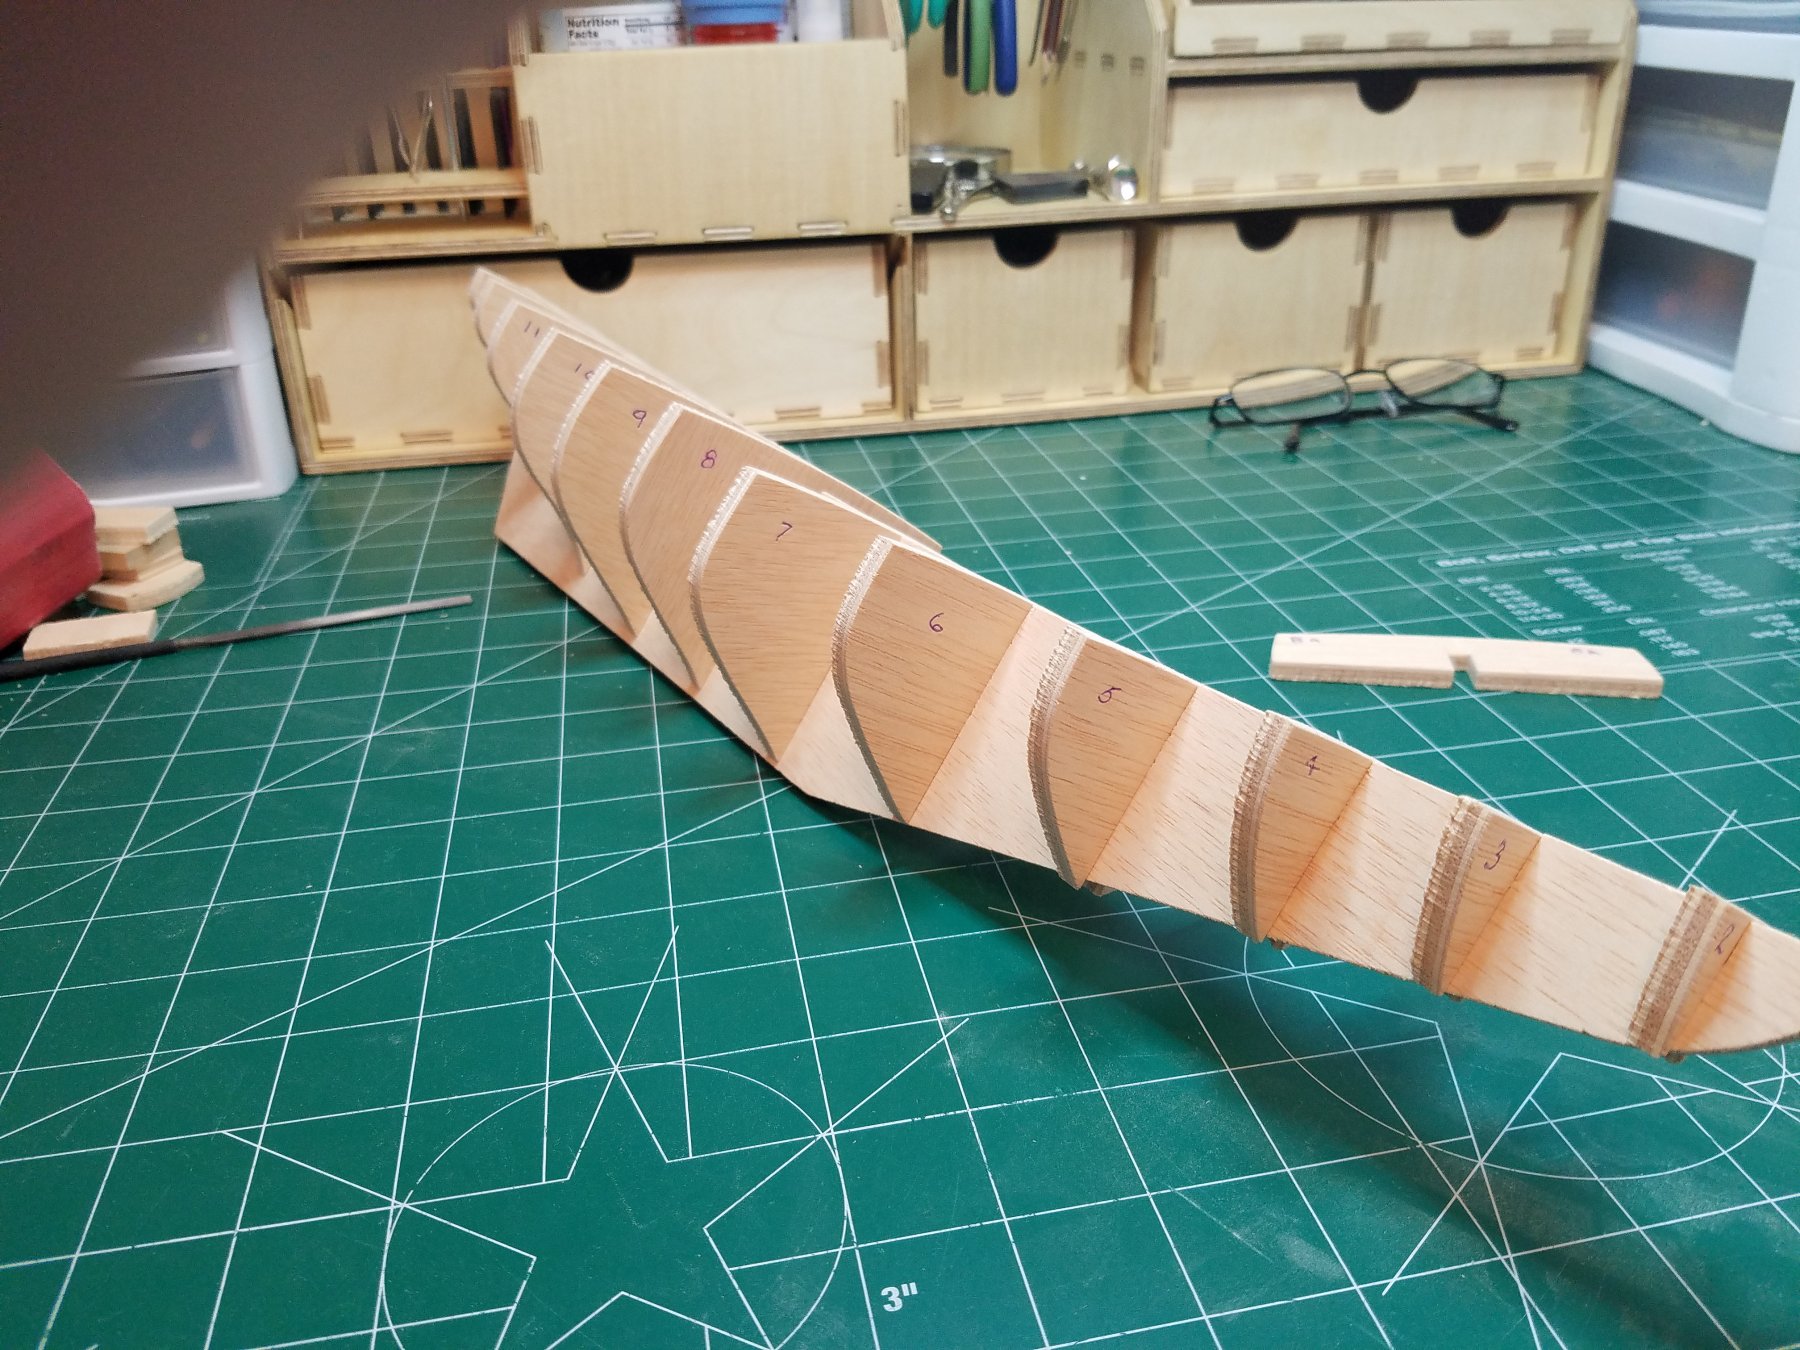
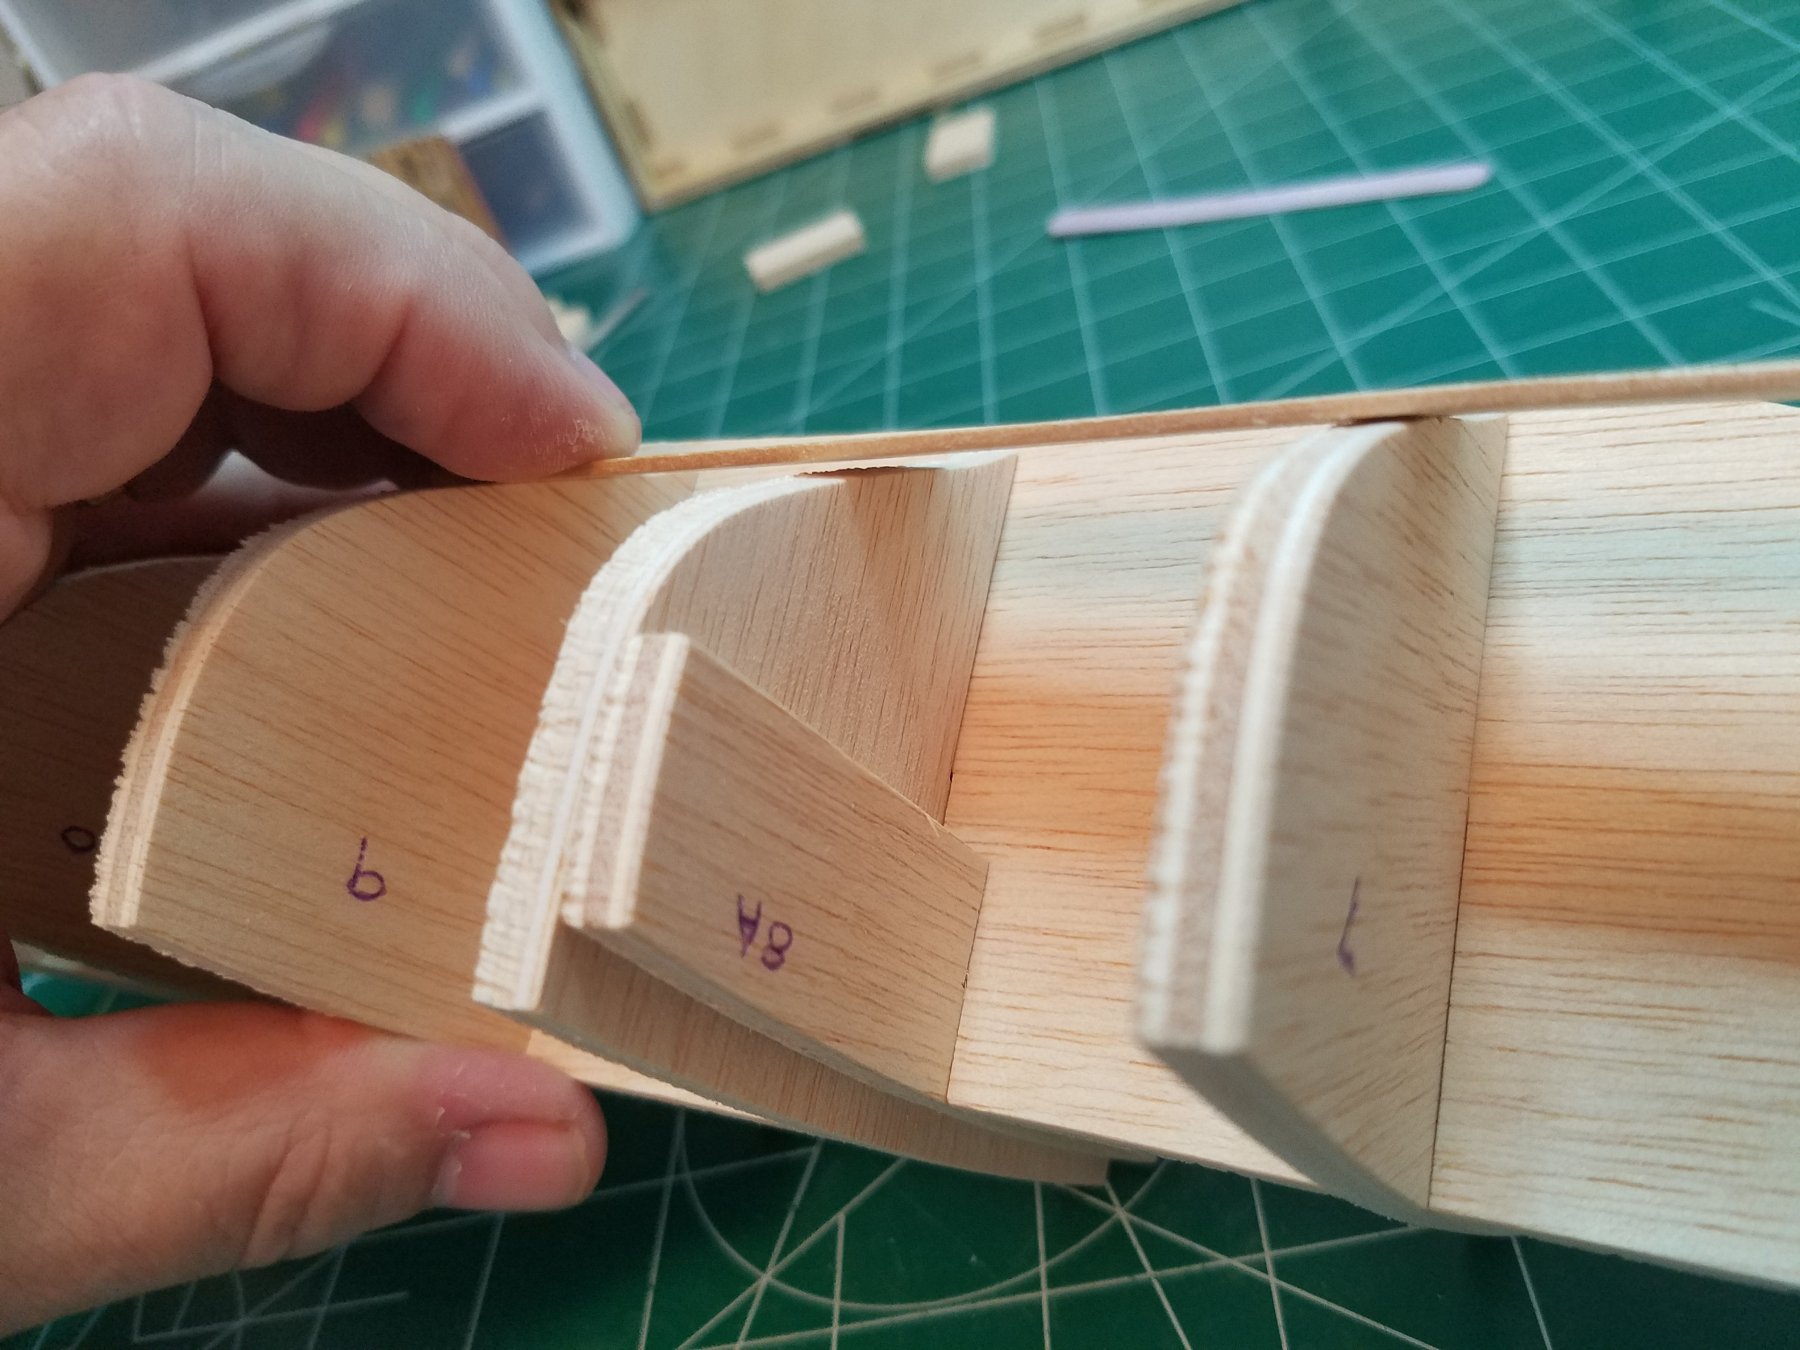
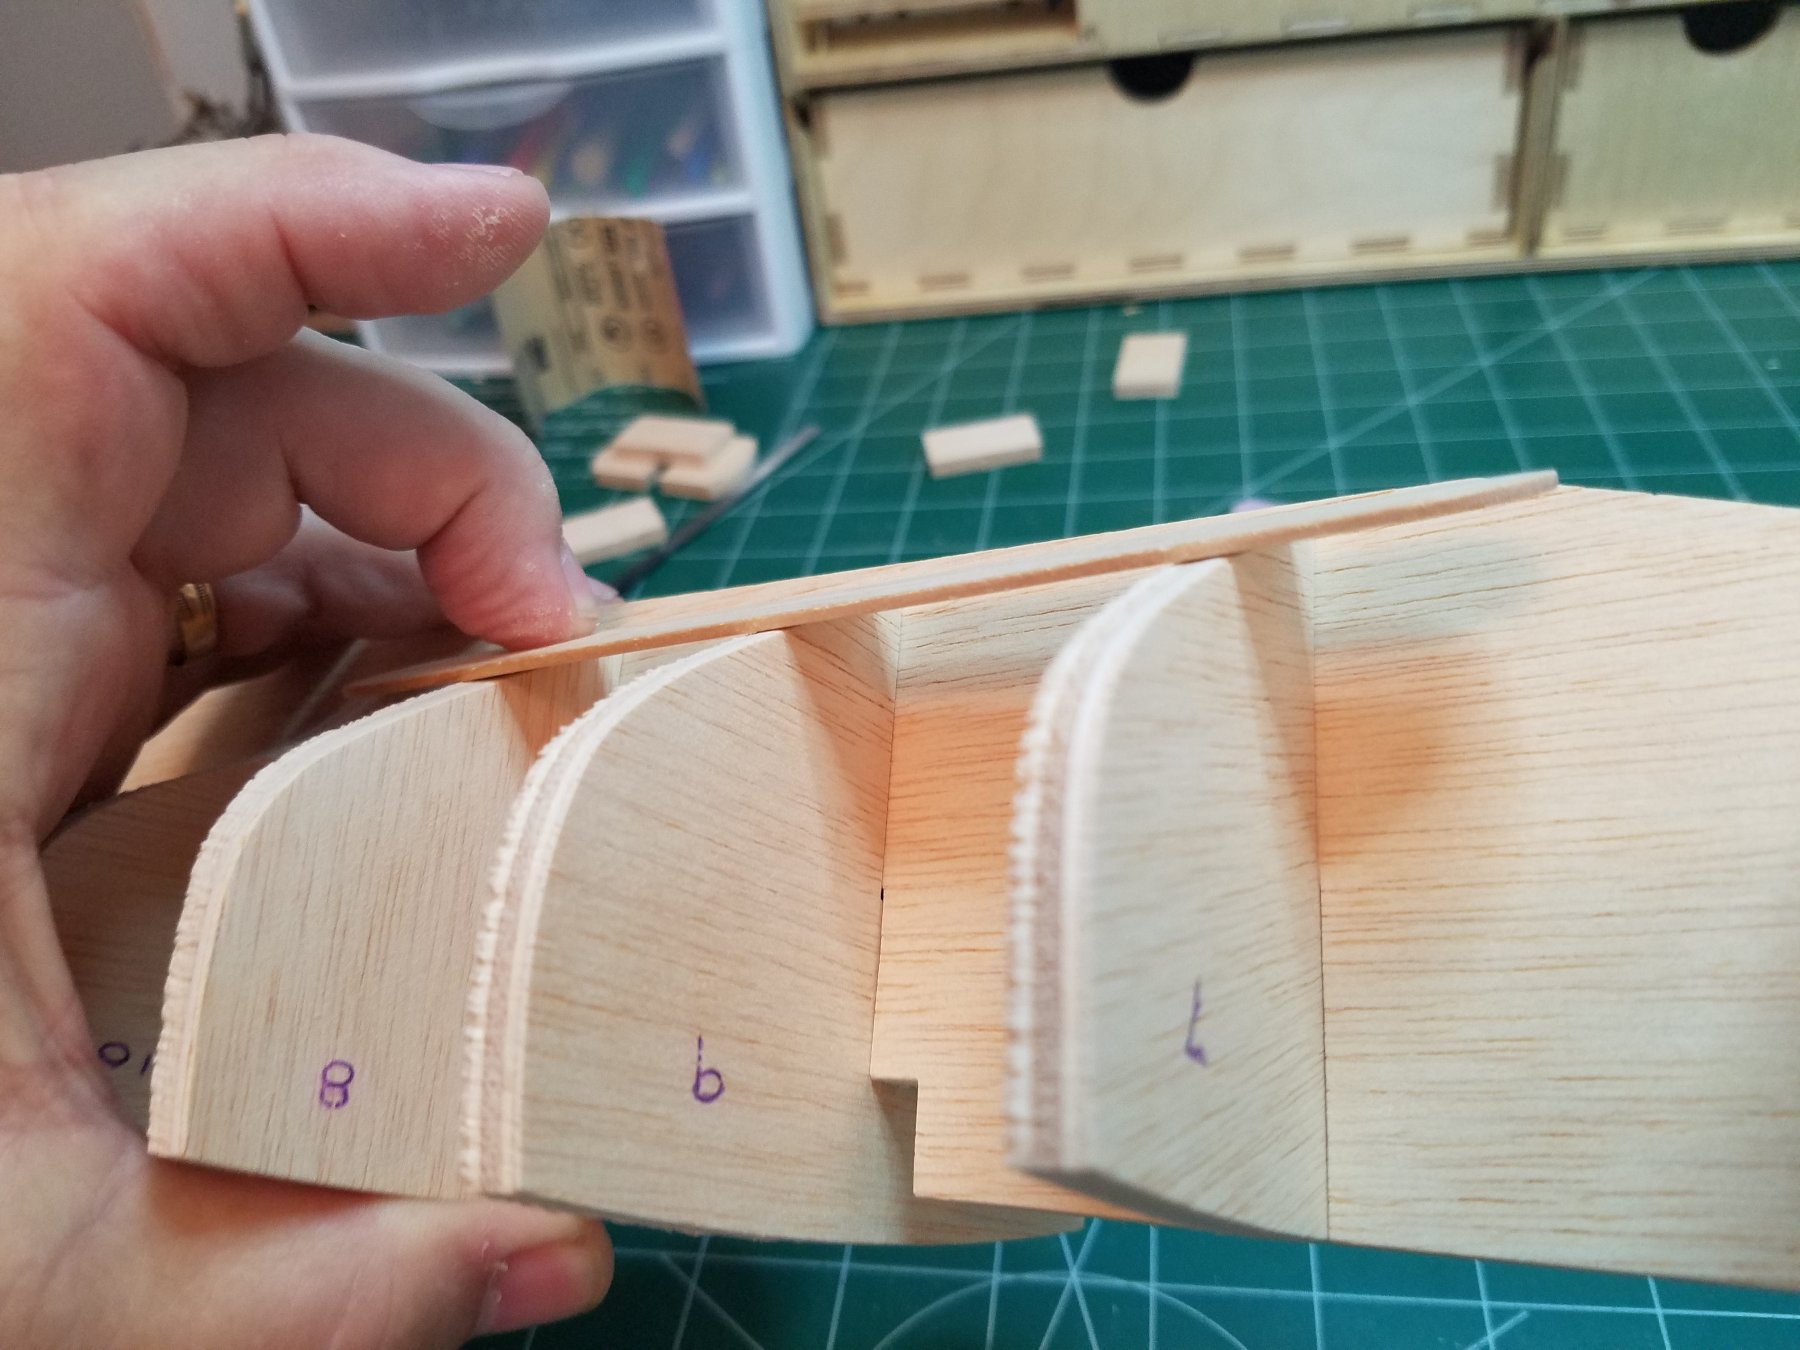
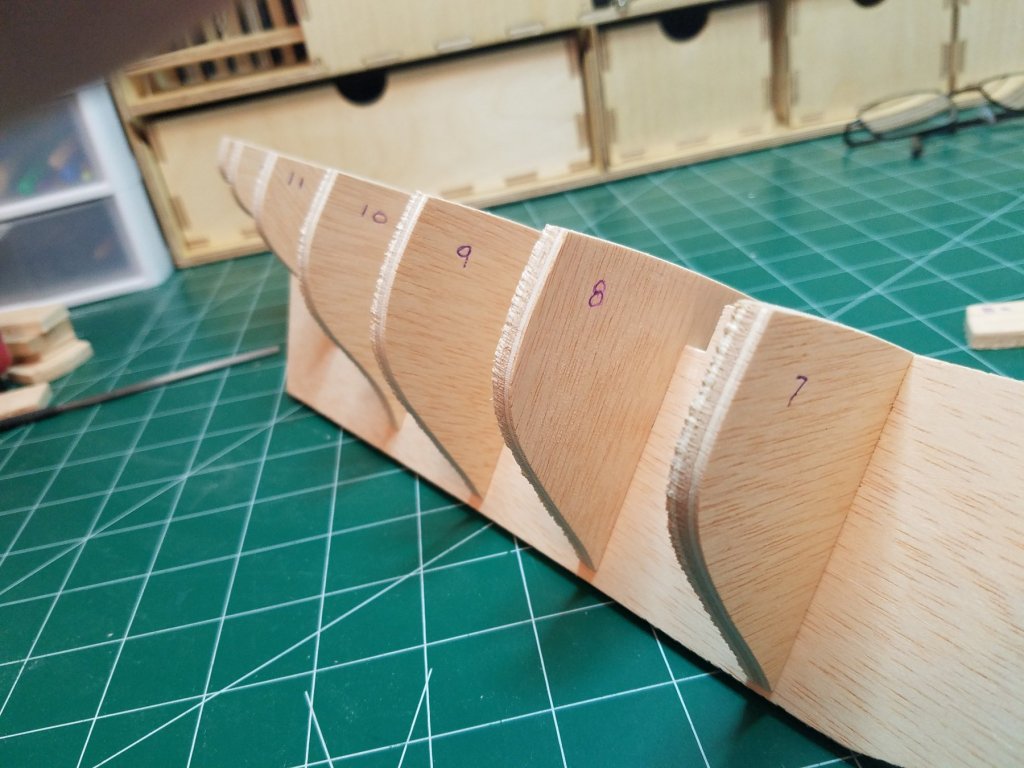
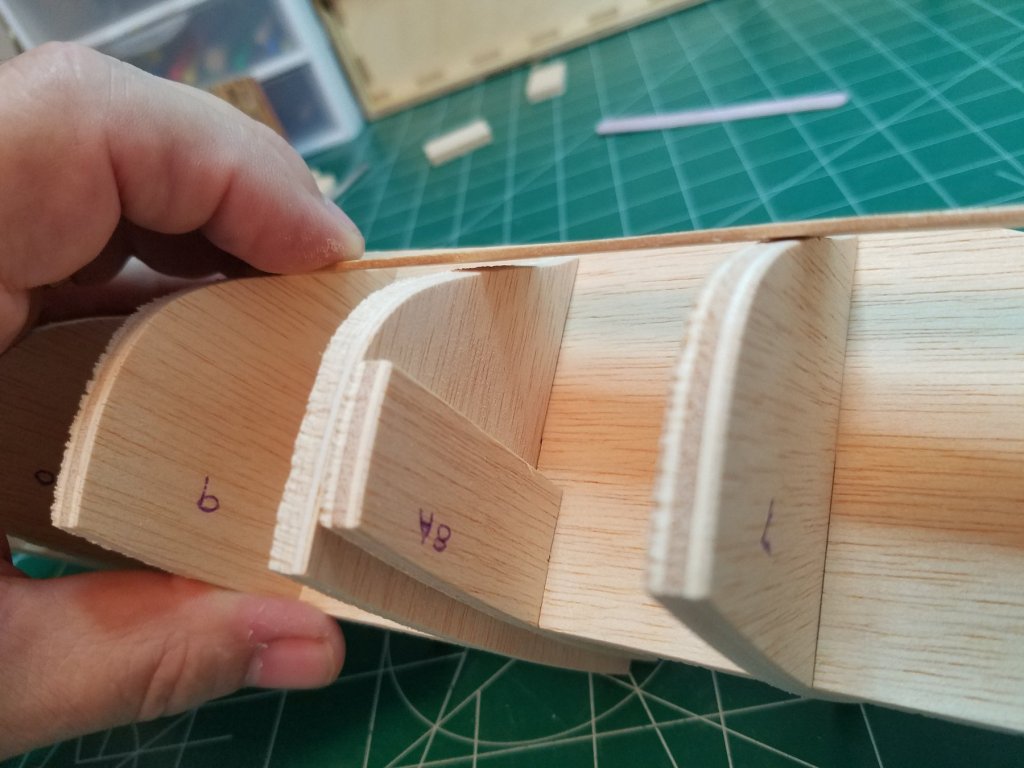
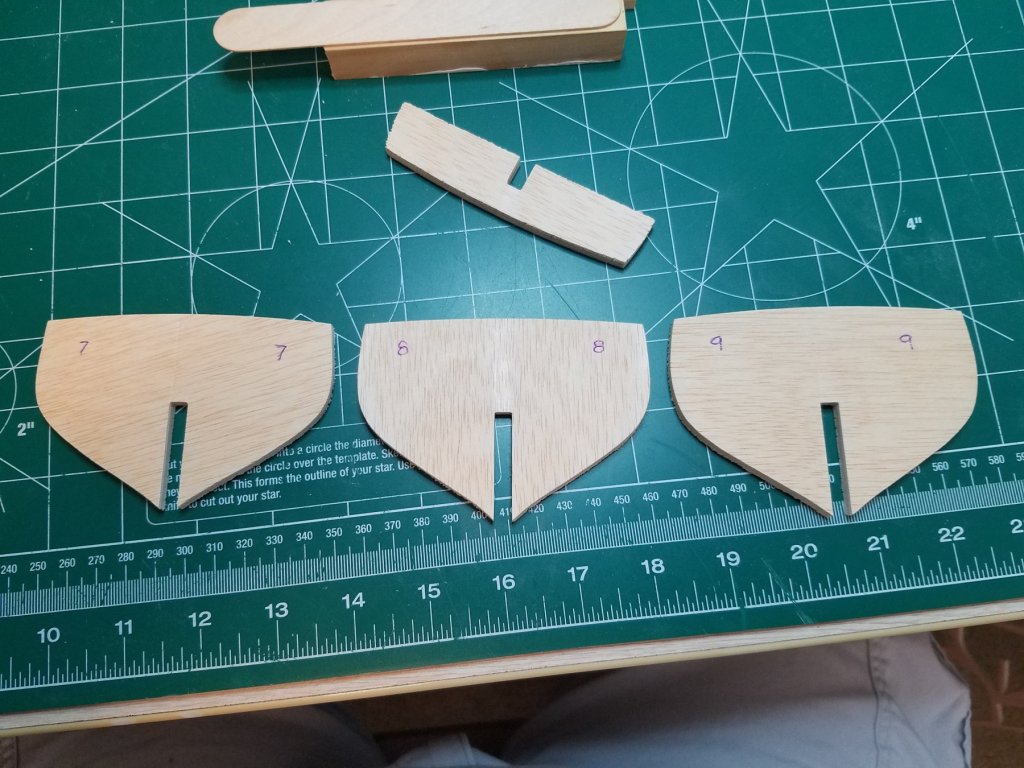
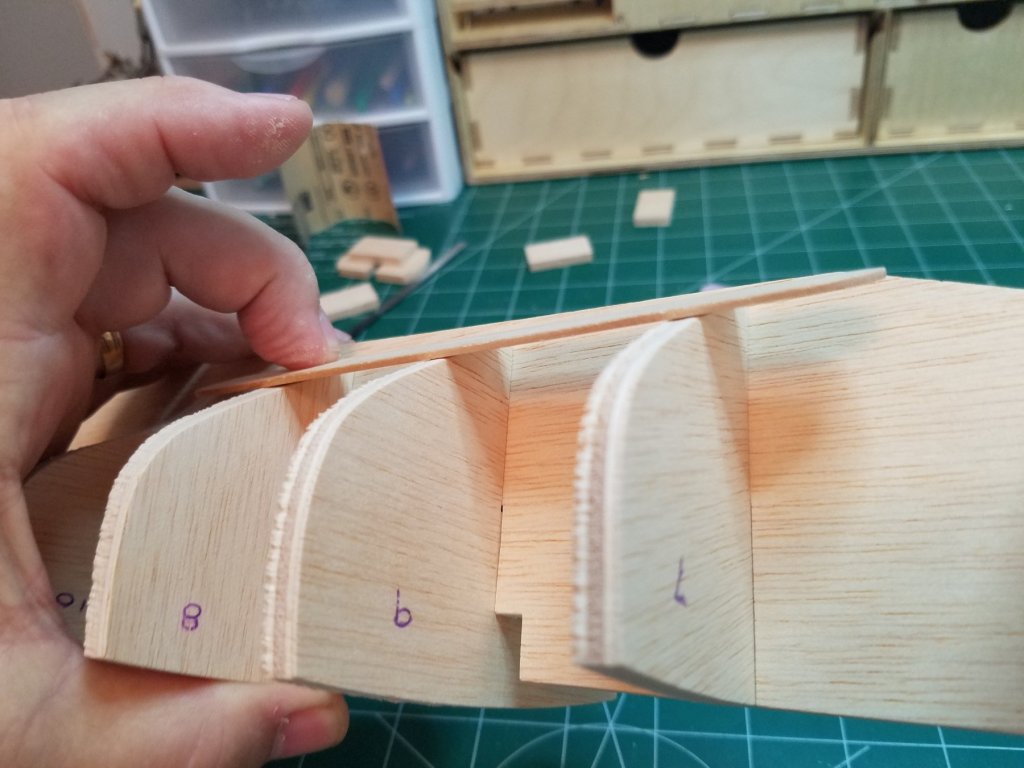
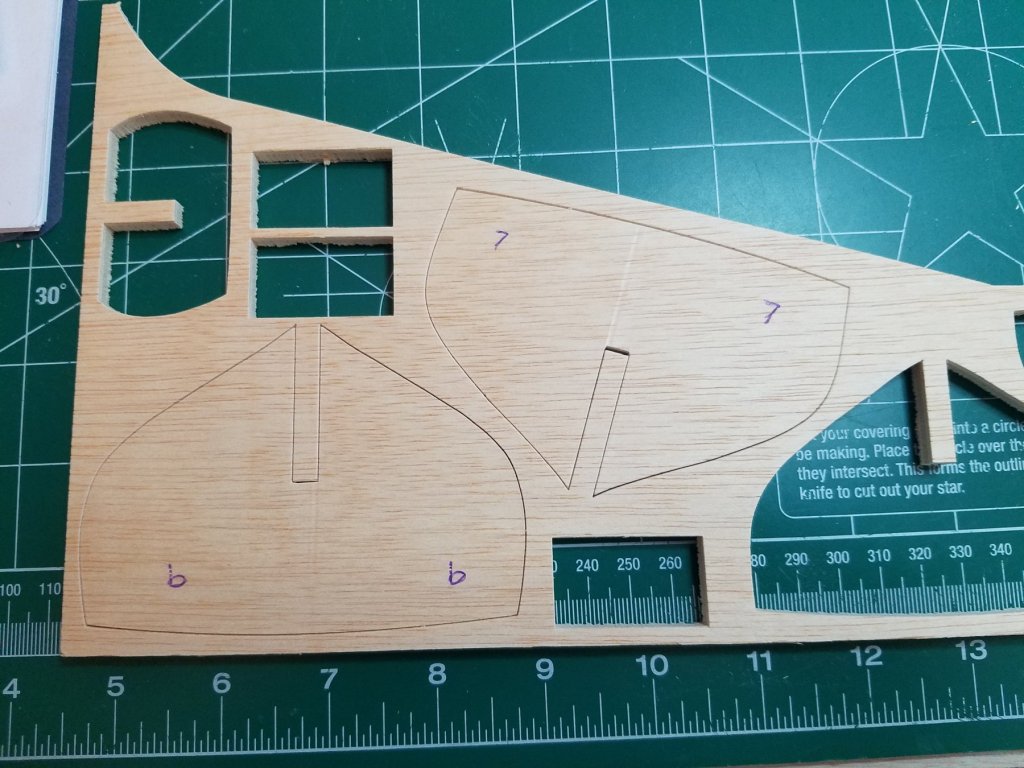
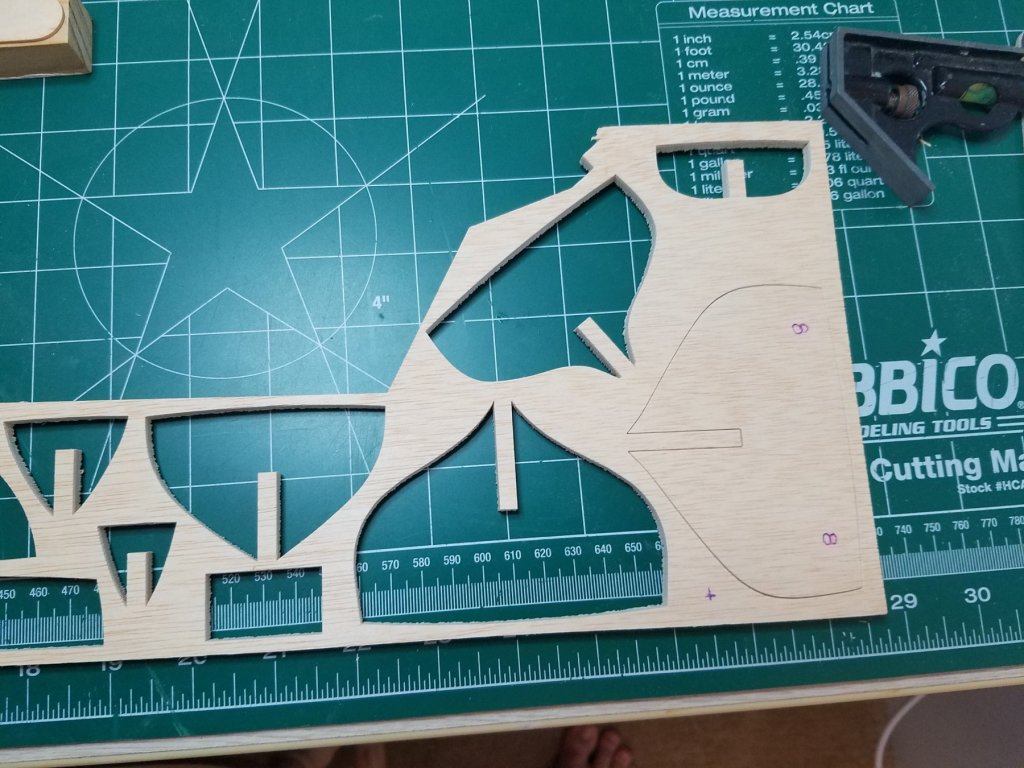
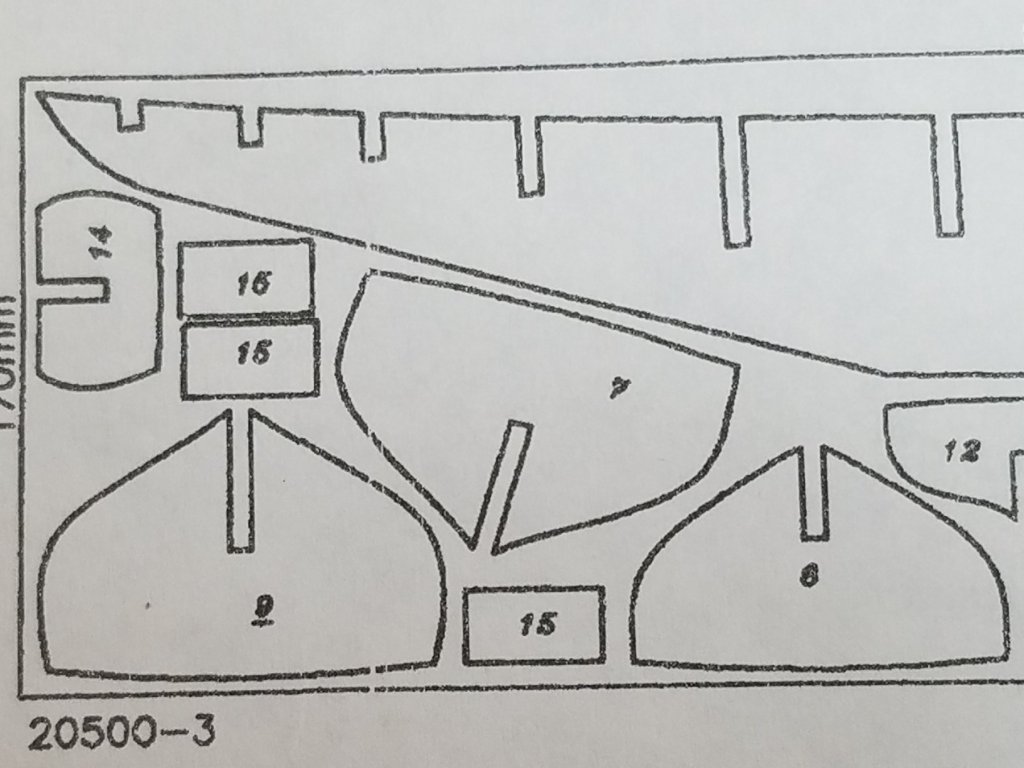
Good Morning, Not much change to the curve in bulkhead #8 over night but I really was not expecting much. Any way a new day brings new problems. So I was very careful last night to label all the bulkheads prior to removing them from the die cut sheet. AL even gives you a "High Tech Cut Sheet" (their name not mine) to go by. This morning I got up early and got to work trimming and dry fitting the bulkheads to the keel. As you can see below all is good with the world. But lets take a closer look at #'s 7,8,& 9 shall we. Note the lower portion of the three bulkheads below the bilge turn. I have noticed in other build logs that some people had trouble with low spots when fairing the bulkheads. I am not sure if it was the same area or not. Here are the three adjoining bulkheads removed from the keel. Even the size and shape don't look quite right. I must have mislabeled them before I took them from the sheet. So I put them back in their respective places in the sheet which luckily I managed to keep intact. Even though they are very close in size and shape they only fit in their respective place. I tried swapping them and it was quite obvious where they went. The proverbial square peg in a round hole. So I must have misread the "High Tech Cut Sheet" right. Below are a couple of close ups of the sheet in question. So after double and triple checking. Then fixing sausage and eggs for breakfast and two more cups of coffee I decided the best option is to swap #'s 8 & 9. This would also take care of the problem with the warp in bulkhead #8. While having a warped bulkhead anywhere is not ideal, having a straight bulkhead in the transition between the main and poop decks will be much better to build off of. Even the line where they meet the keel at the very bottom looks more correct to my eye. Before I start gluing and getting myself into trouble I would very much appreciate any input you guys might have on this. I know that with all the kits that have been sold and built since 1985 I can't be the first one to notice this. Am I missing something? Thanks in advance for any advice you can offer. Regards


- 22 replies
-
- 2
-
-
- bluenose ii
- artesania latina
- (and 1 more)
-
I have been quietly following along with this build for a while now as it is on my short list of future builds. I hope you won't mind me stealing some of your ideas. What a great project you have going keep up the great work. Best Regards
- 228 replies
-
- 5
-
-
- gunboat
- model shipways
- (and 1 more)
-
Mr Earl, Thank you for looking in on my build. As you can see in my signature this is the second boat build we have in common. I built the Sakonnet Daysailer after reading your recommendations for beginners kits. I have already downloaded and read your complete series. I have it bound and at the ready on my workbench. I would really appreciate it if you would look in from time to time and keep me headed in the right direction. I punched out the keel and bulkheads tonight and found that the keel and the #8 Bulkhead were slightly warped. I am not too worried about the keel. Once I clamp it in my building jig and attach the decking using the method outlined in Mr Earls practicum it should be straight as an arrow. Bulkhead #8 however is the dividing bulkhead between the main and poop decks. As such it needs to be pretty well perfect. I dampened the concave side and clamped it to a 1x1 block of wood. I will see what it looks like in the morning. Thanks to all who have commented or liked this so far I hope you all hang around til the end. Regards

- 22 replies
-
- 1
-
-
- bluenose ii
- artesania latina
- (and 1 more)
-
Thanks Doug, I have been enjoying your build since I picked up the first kit a few months back. Please feel free to jump in and let me know if I am going astray at any time. Regards
- 22 replies
-
- 1
-
-
- bluenose ii
- artesania latina
- (and 1 more)
-
Welcome Lou I also started building model ships at the tender young age of 60. It is amazing how we gain patience as we get older, isn't it?
-
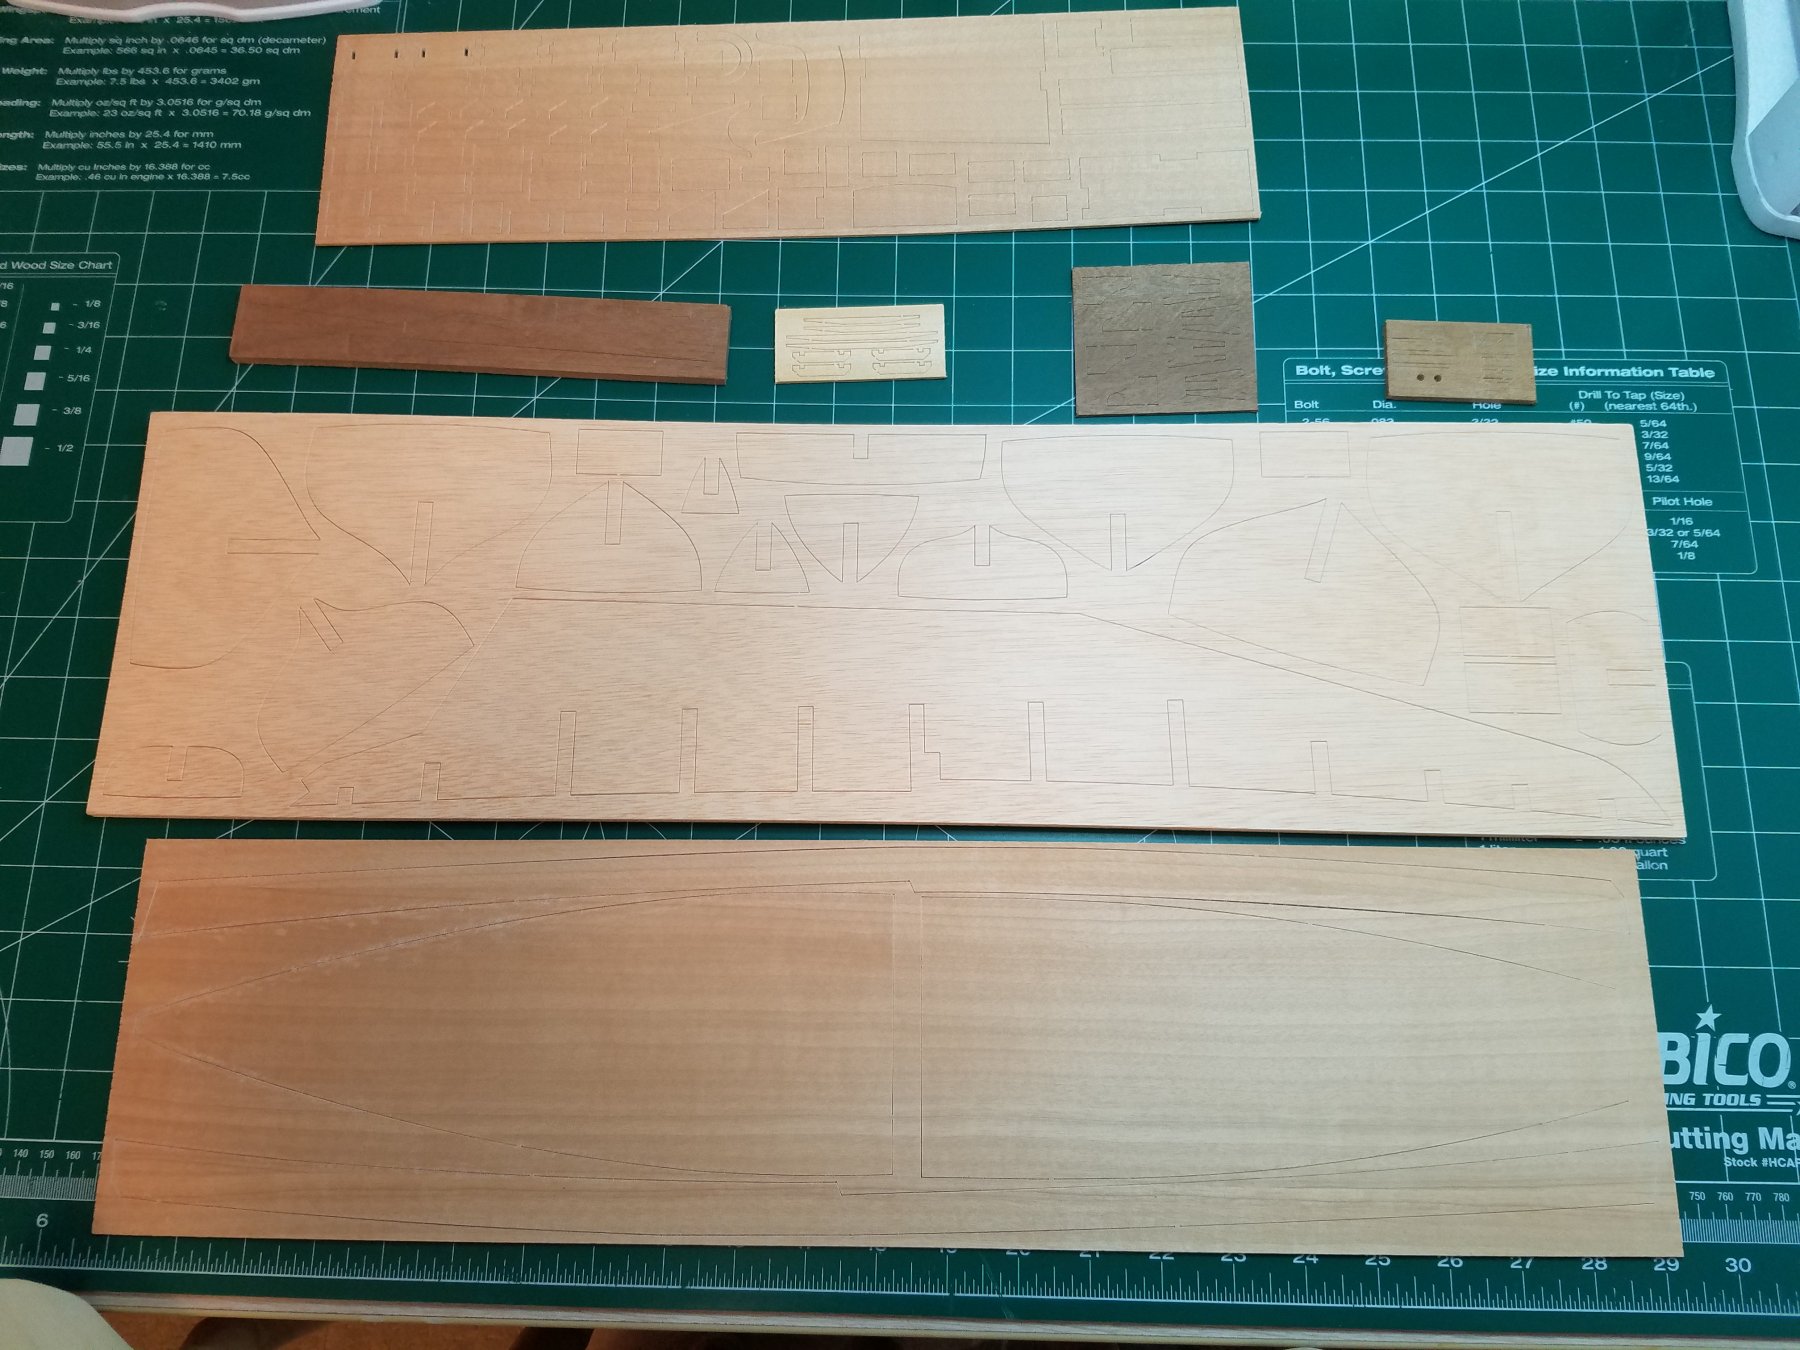
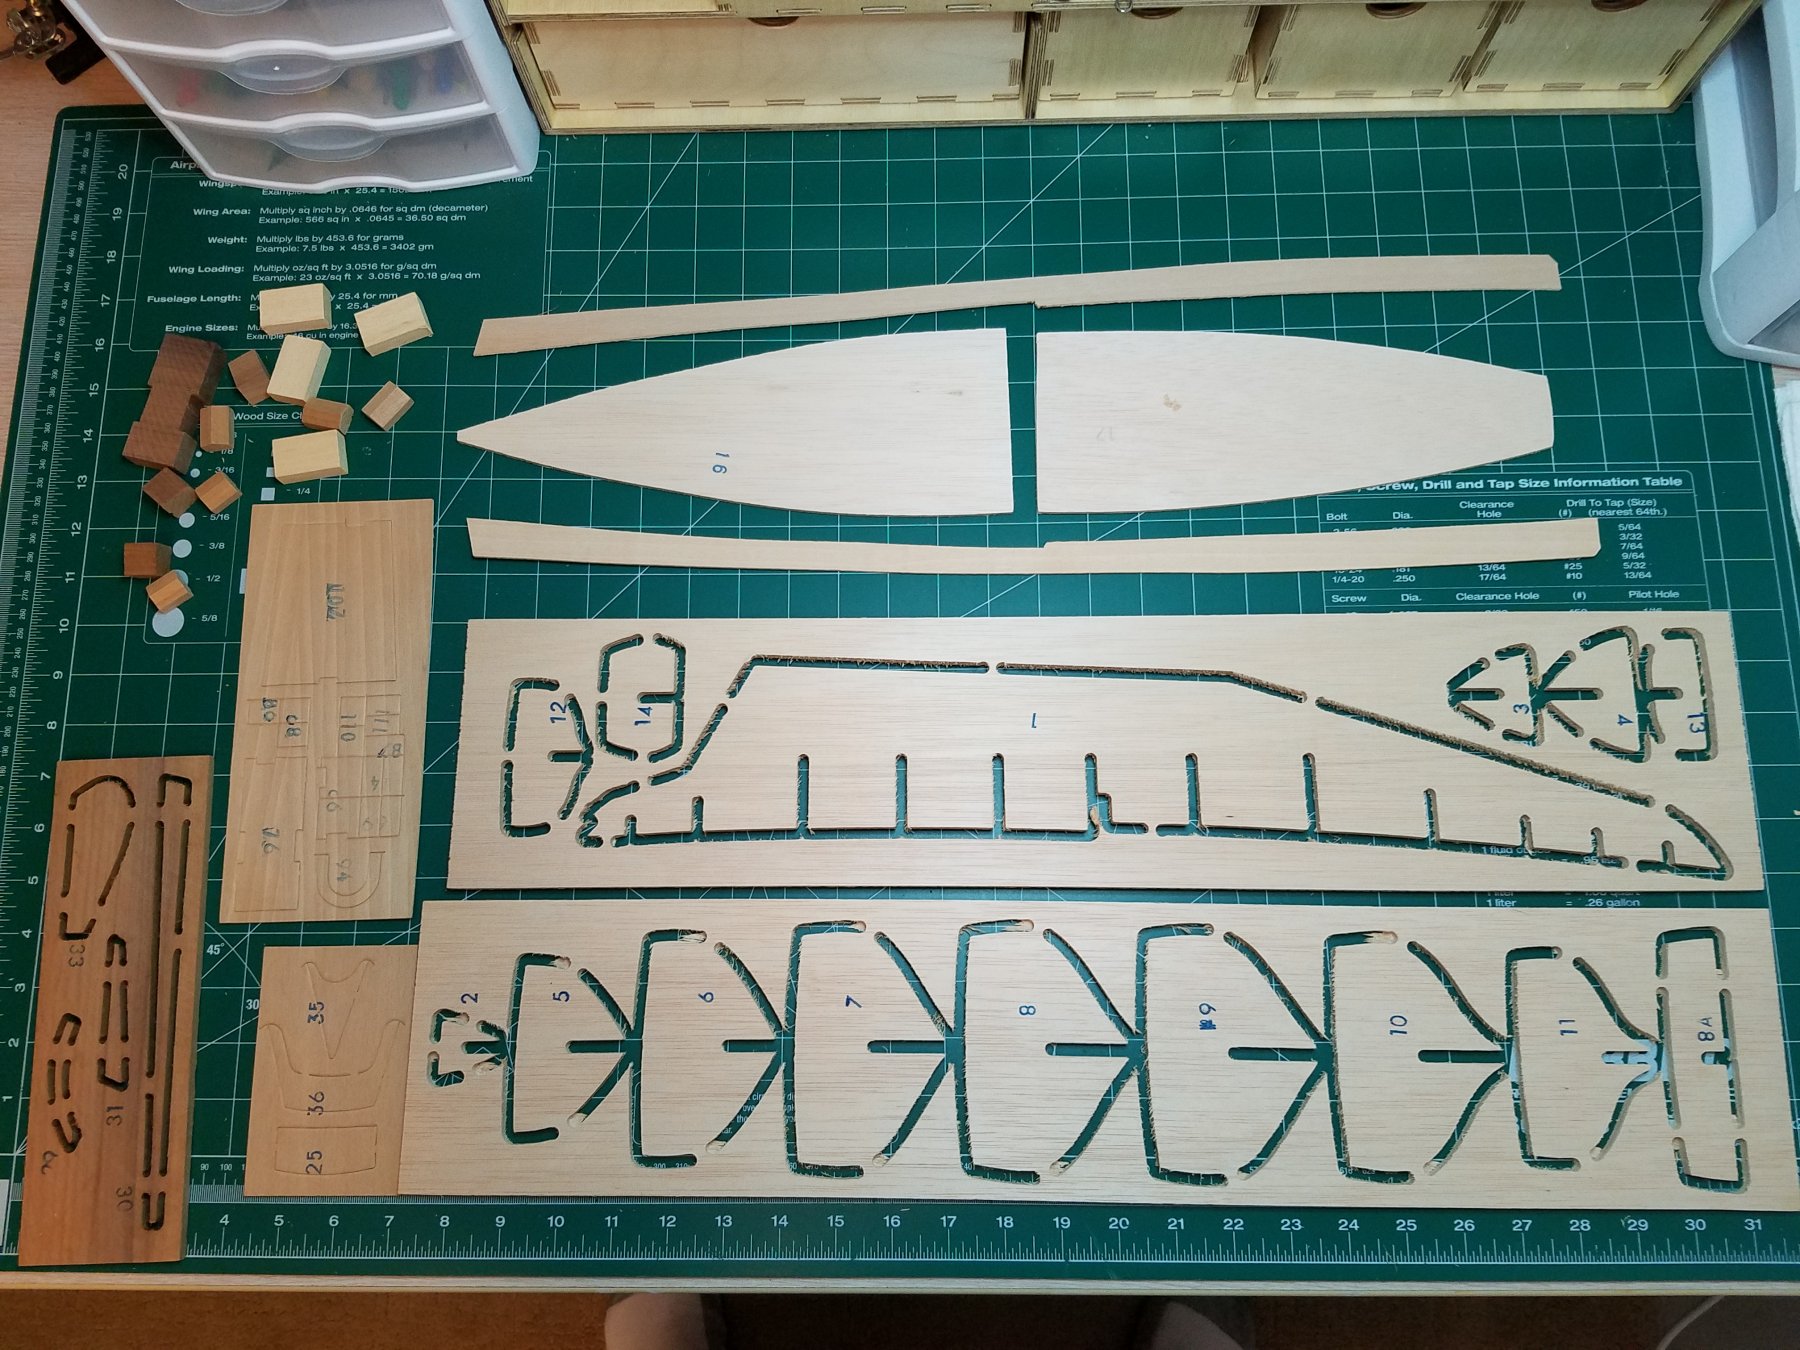
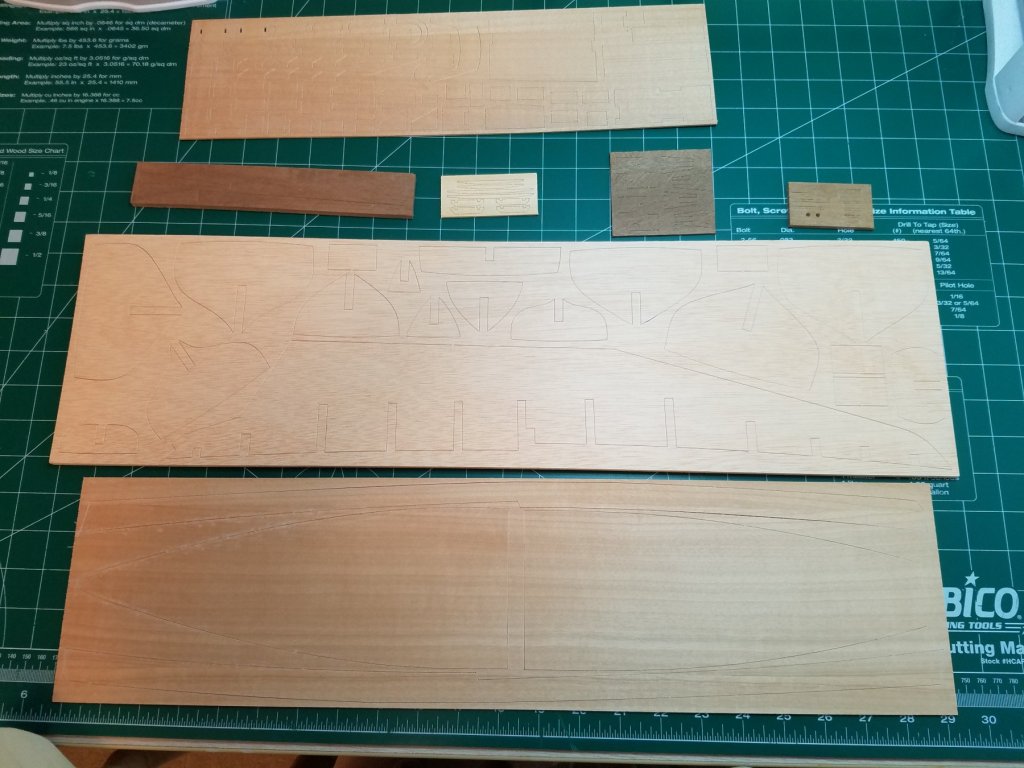
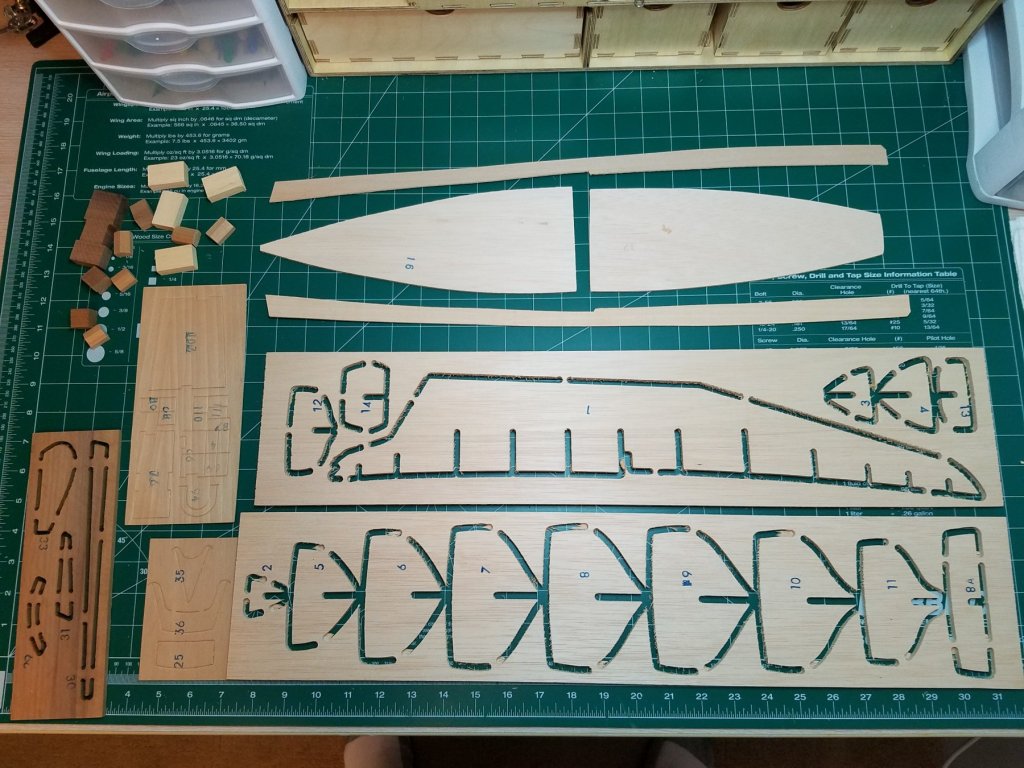
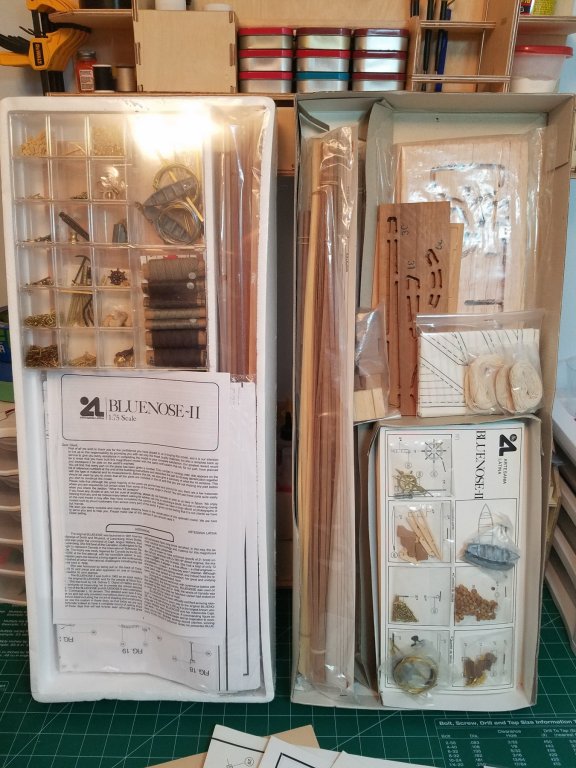
I decided to open the second kit and inspect the wooden parts and found that they are all on die cut sheets where the other kit is router cut. The die cuts are nice and sharp and seem to be better quality plywood. All of the deck parts ie, cabins and fittings are also on die cut sheets and need to be assembles where the others are just solid blocks of wood. I think I will start with the die cut parts as there will be less prep work involved so I can get a quicker start. Also the parts that I thought were plastic turned out to be pre- blackened metal.
- 22 replies
-
- 2
-
-
- bluenose ii
- artesania latina
- (and 1 more)
-
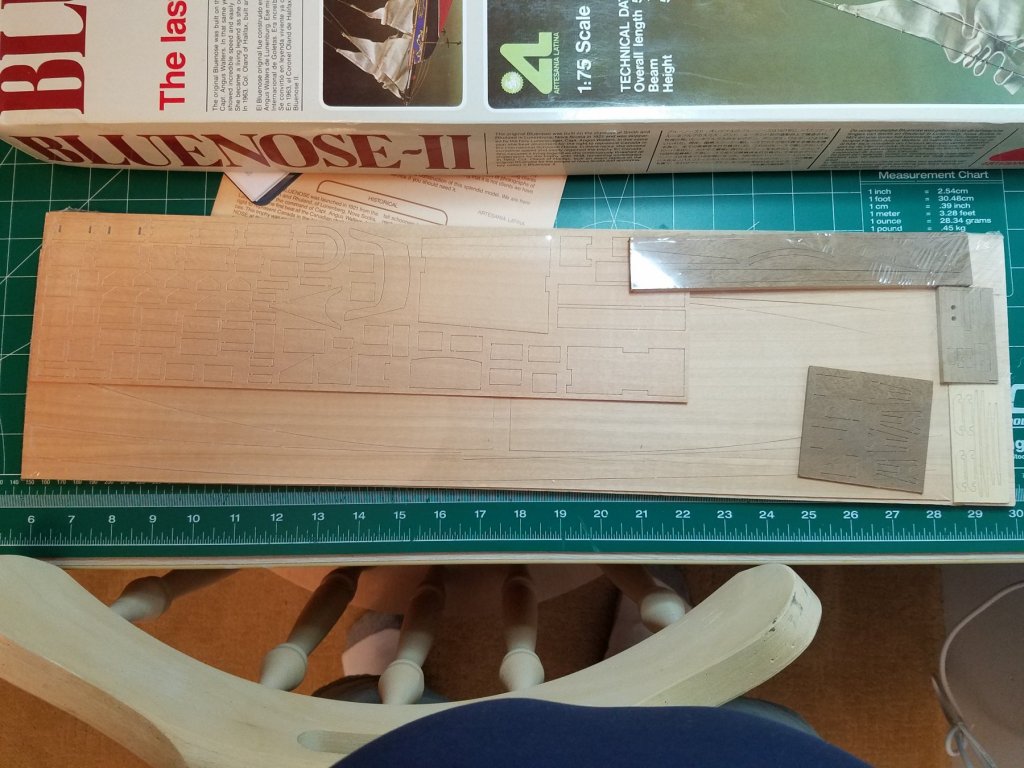
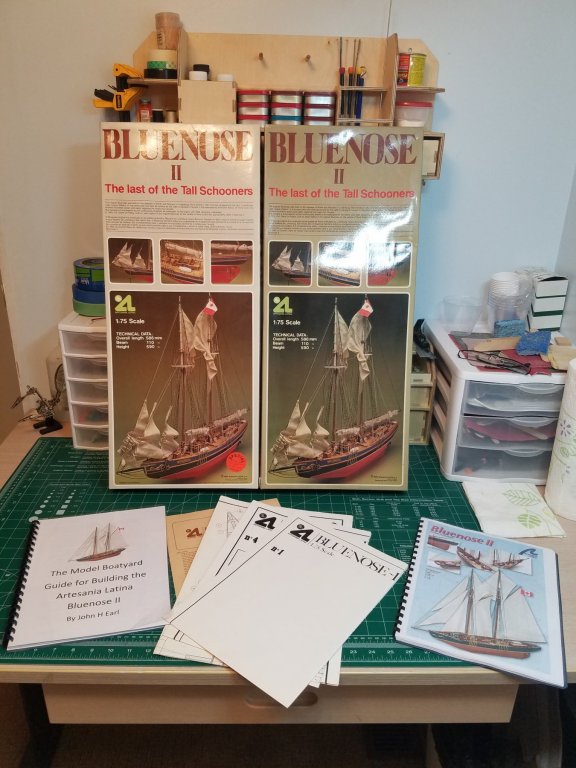
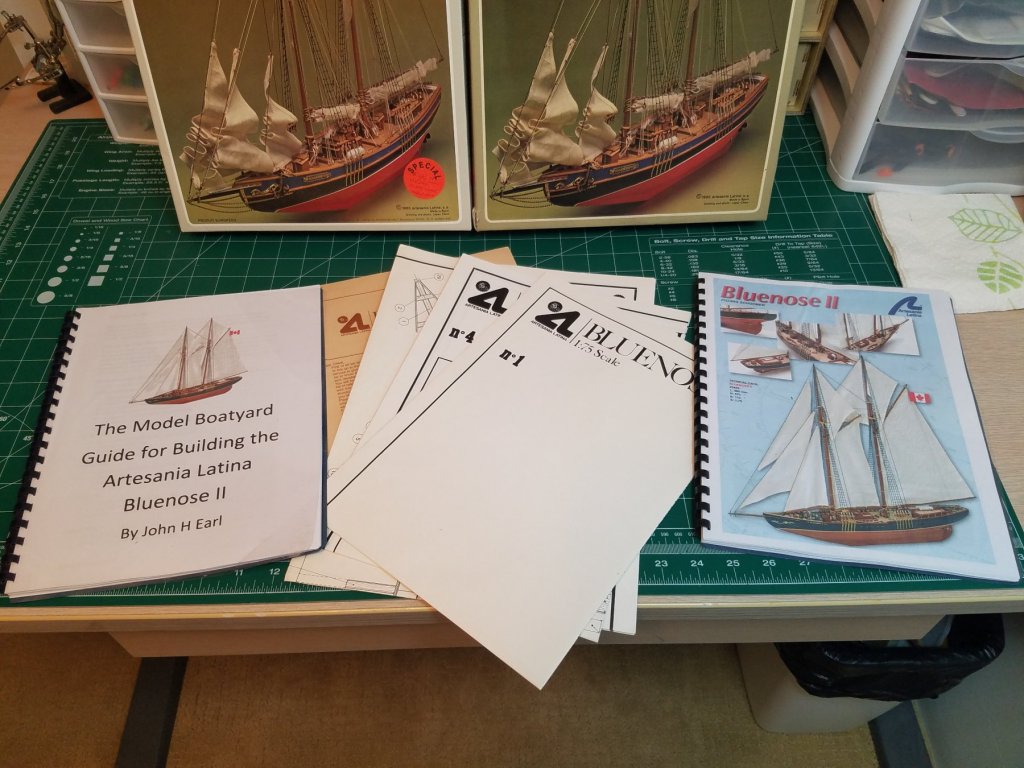
I am finally ready to begin what I would consider my first real build. The Bluenose II by Artesania Latina. I picked up two of these older kits one from E-bay and one from Offer Up both for a really good price. Although they look alike, upon closer inspection there are quite a few differences. The one on the left has all of the misc parts and fittings in a nice divided plastic case while the those in one on the right are in bags stapled to cardboard cards. the one on the left has quite a few plastic fittings ie, anchors, ships wheel, propellers etc the one on the right has no plastic that I can see. I have not opened the inner wrapper of the one on the left to inspect the quality of the wood parts yet. All of the instructions such as they are and plans seem to be the same. There are some subtle differences in the brass parts some are pre-drilled in one kit and not in the other. Also the one on the left came with a video tape from Model Shipways titled "you take the helm". I did manage to borrow a VCR ( I no longer own one) to watch and while interesting to watch, at 30 yrs old it did not really contain much that was informative. Thinking they were identical I had planned to build one and keep one in reserve for a possible second attempt but now I am wondering if I should take the best parts from both and build just one. The instructions are skimpy at best only 8 or ten pages with no pictures and very few illustrations. I down loaded and printed the instructions for the newer version of this kit so that I can at least reference the great photos. I also down loaded and printed John Earls practicum and while informative it tends to gloss over entire portions of the construction by simply saying refer to this or that book. I was wondering if the Lauck Street practicum would be a worthwhile investment. At $100.00 ($120.00 with the photo library) it is a little pricey and also it is for the newer version. But I got the kits so cheap I feel like I could justify it if anyone has used it and can recommend it as a useful tool. After reading here and in other places about the historical short comings of this kit I have no illusions in that regard. Instead I intend to use this a a learning opportunity for future builds. Still I would like to end up with something to be proud of so PLEASE any input would be greatly appreciated. I will get started in earnest tomorrow night so wish me luck. Hopefully I can make a good job of it. Best Regards
- 22 replies
-
- 4
-
-
- bluenose ii
- artesania latina
- (and 1 more)
-
My First Attempt At Metal Blackening
Osmosis replied to Osmosis's topic in Metal Work, Soldering and Metal Fittings
I saw that on one of my google searches but could not find it locally. -
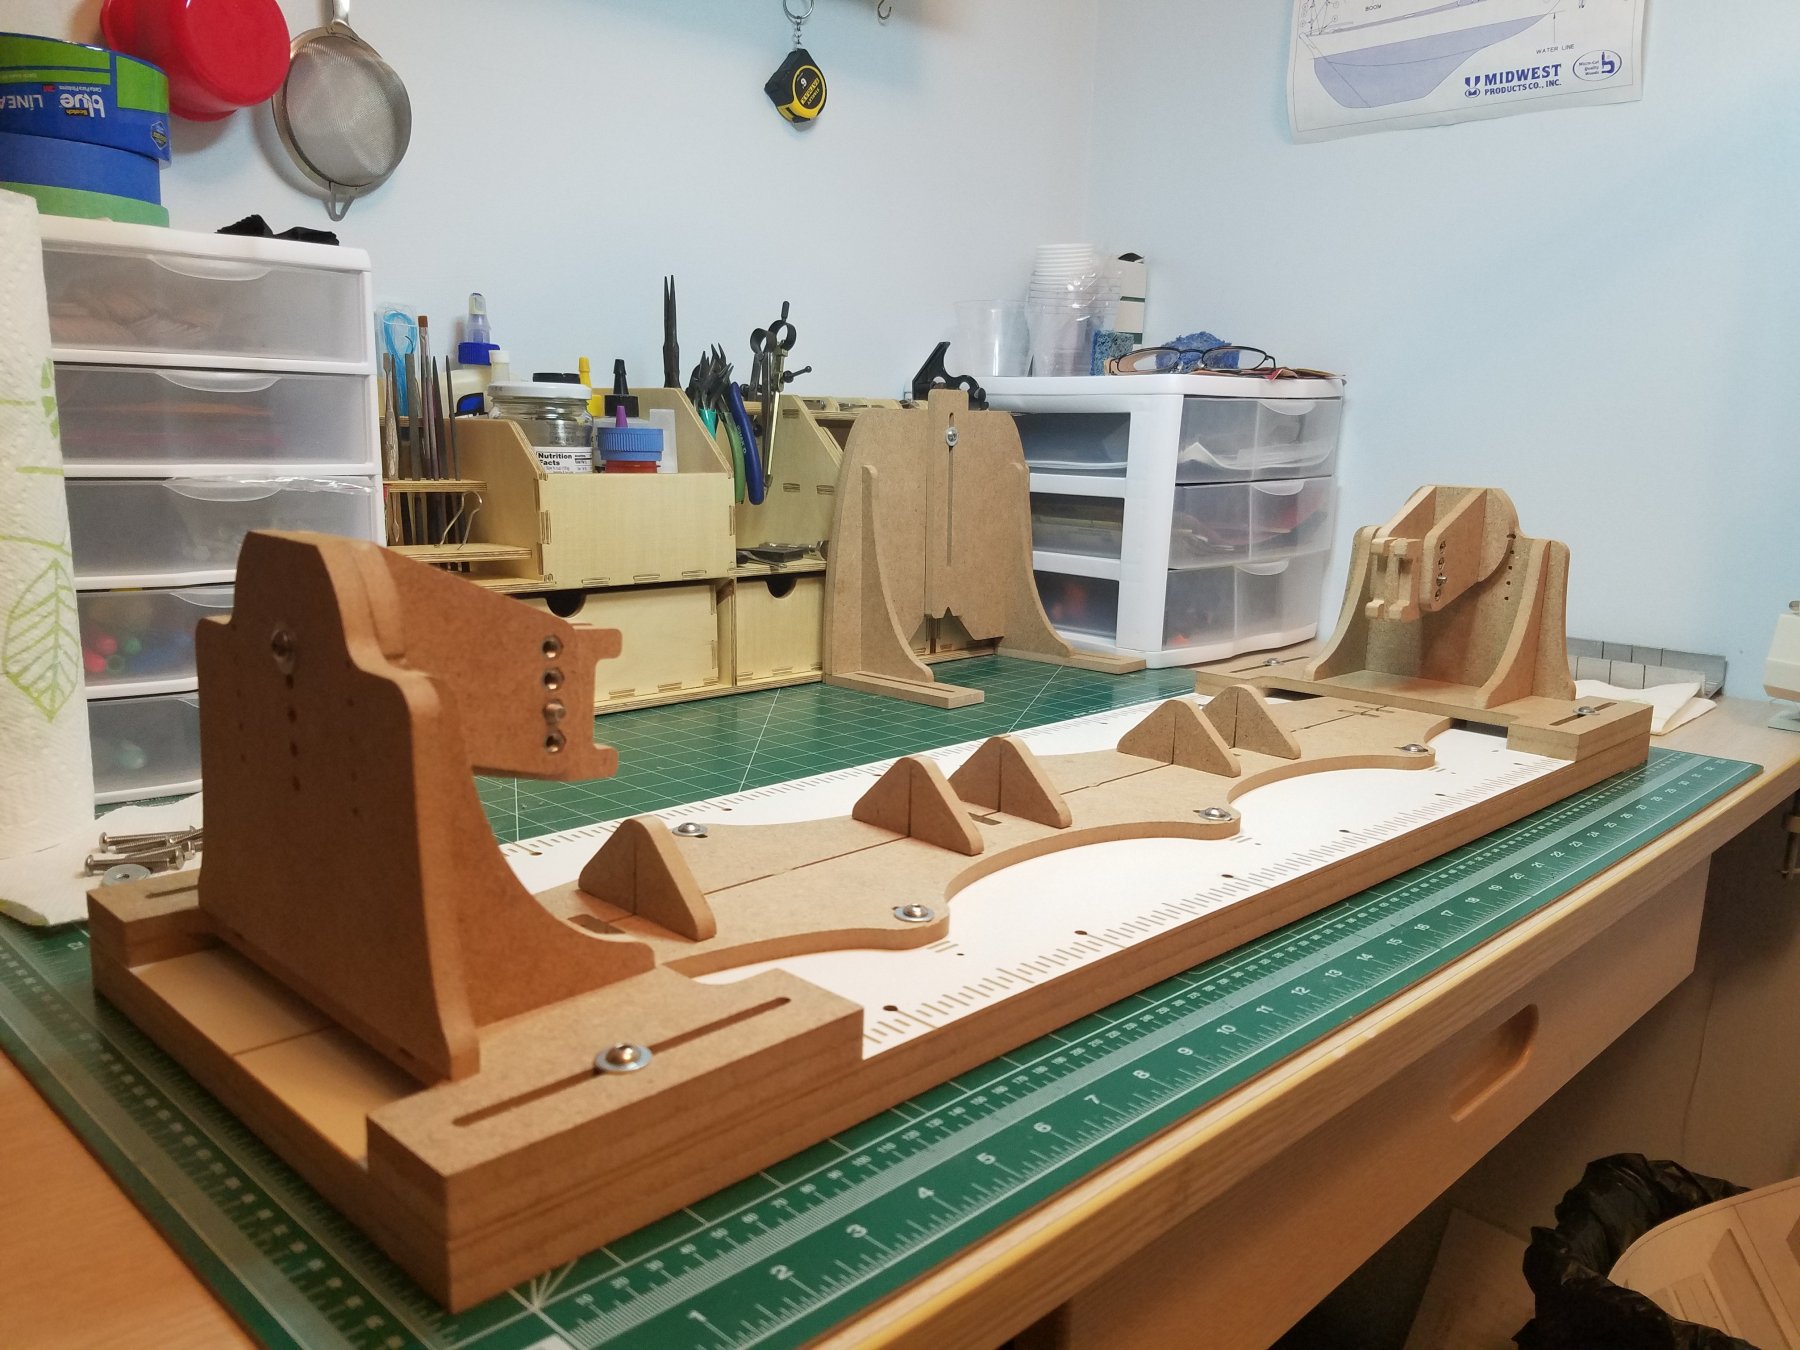
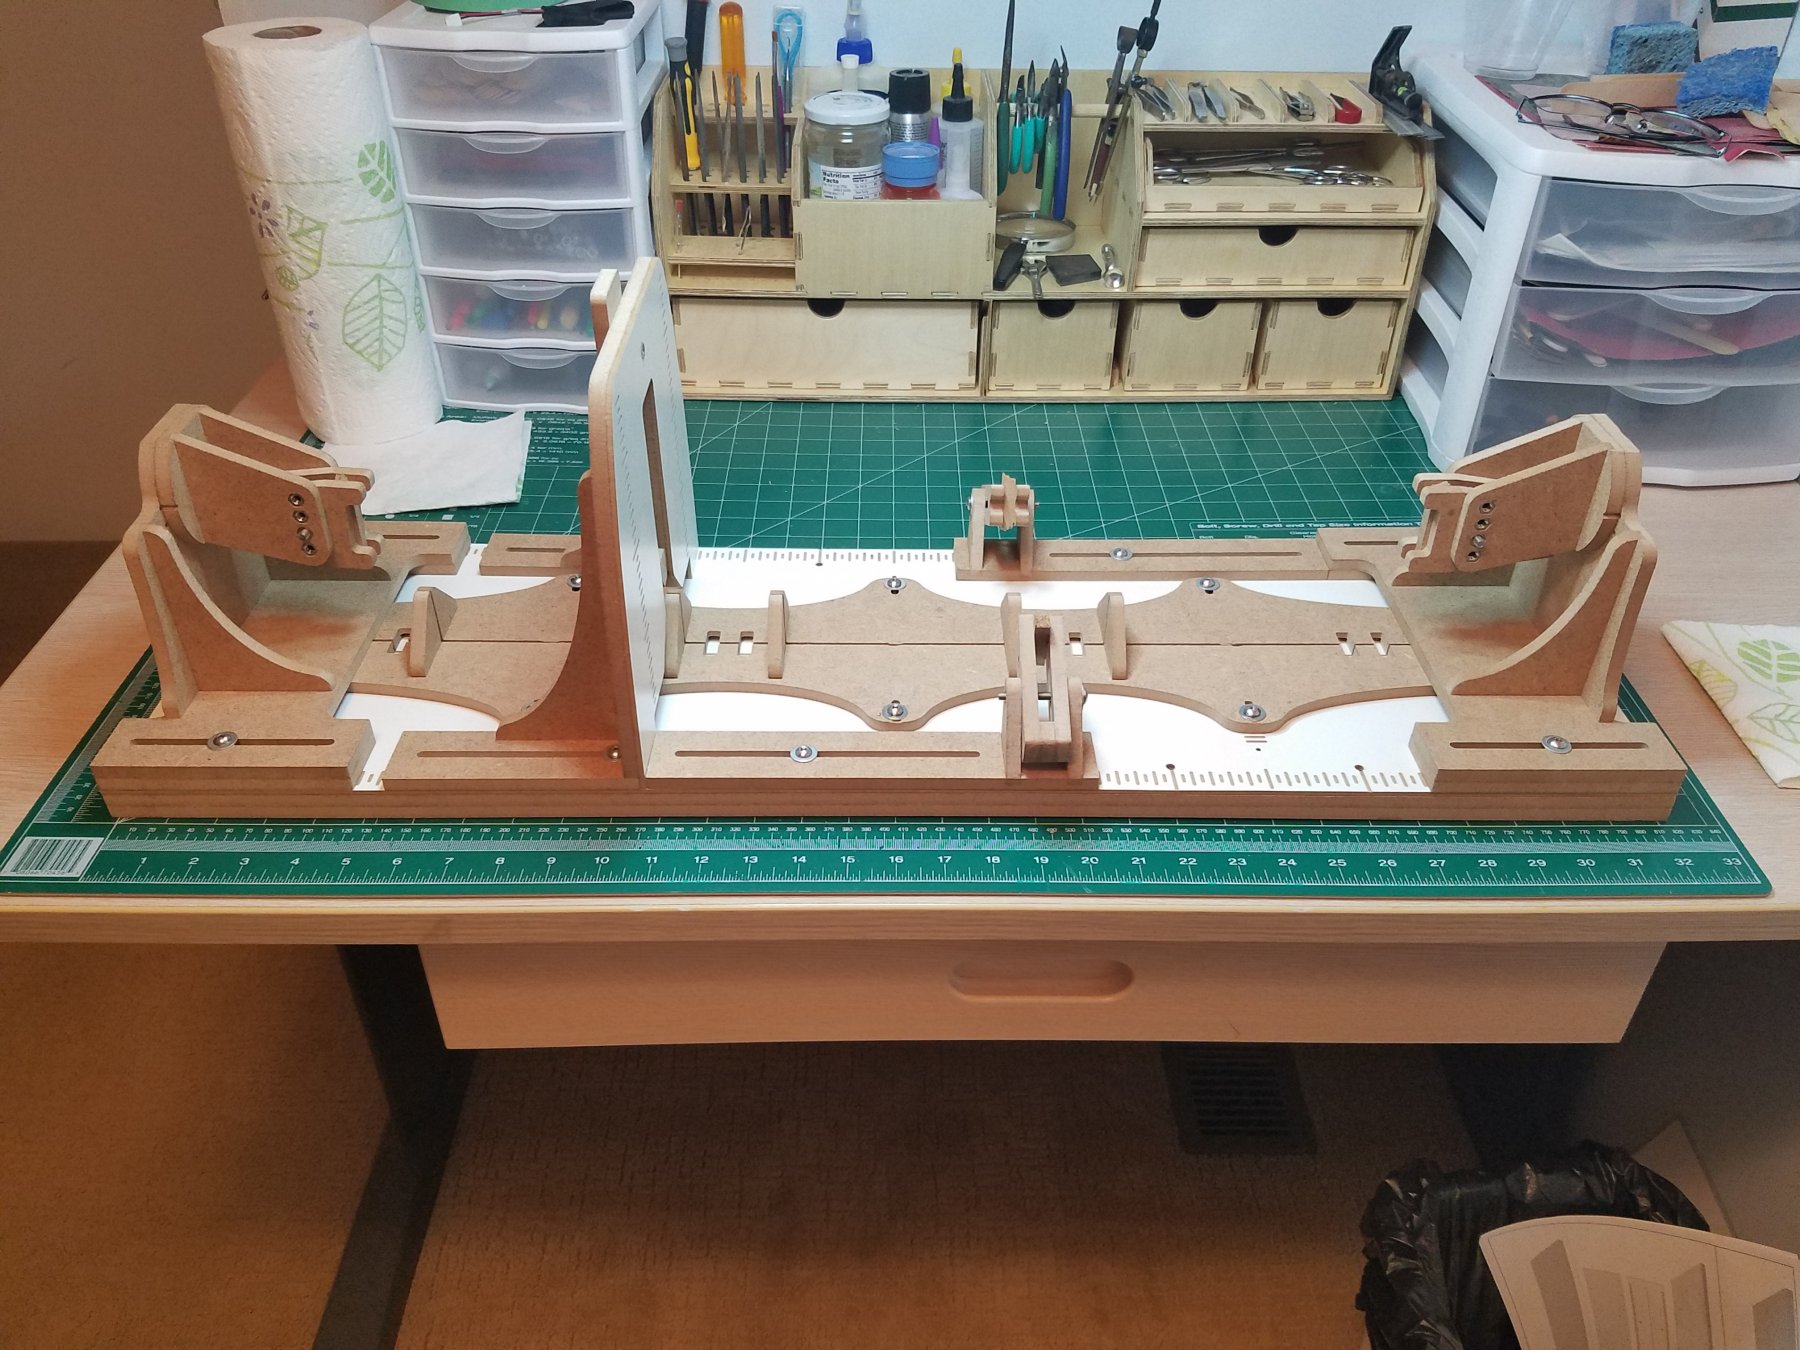
Hobby Zone Organizers and Ship Building Slip
Osmosis replied to Osmosis's topic in Modeling tools and Workshop Equipment
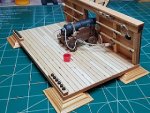
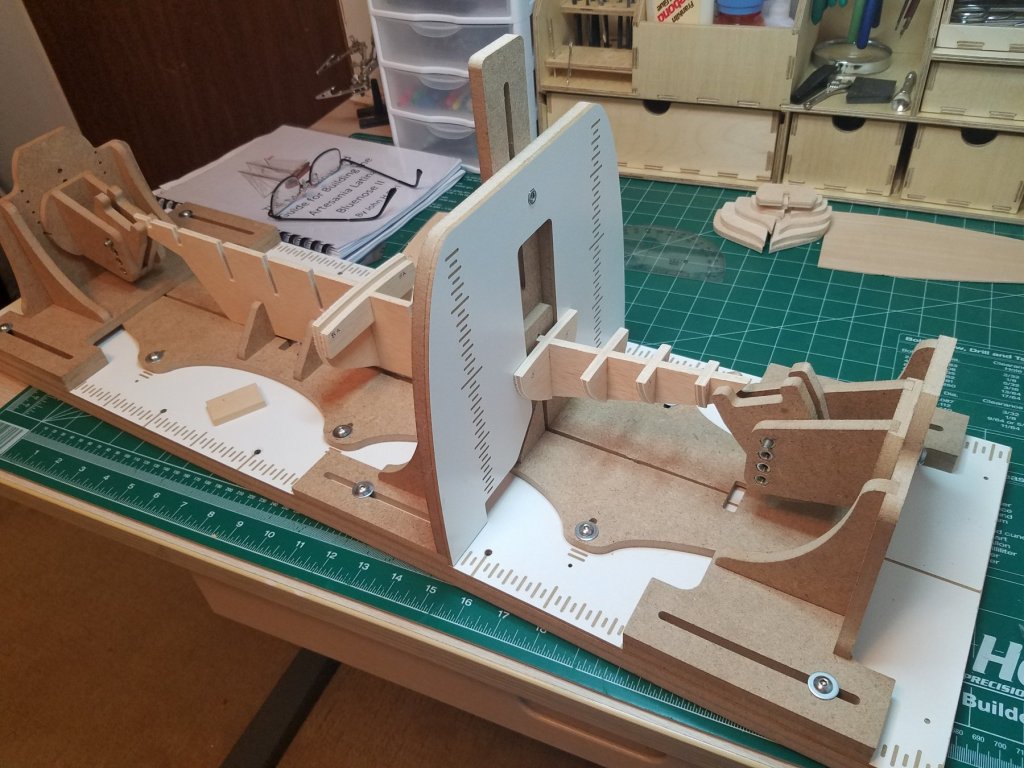
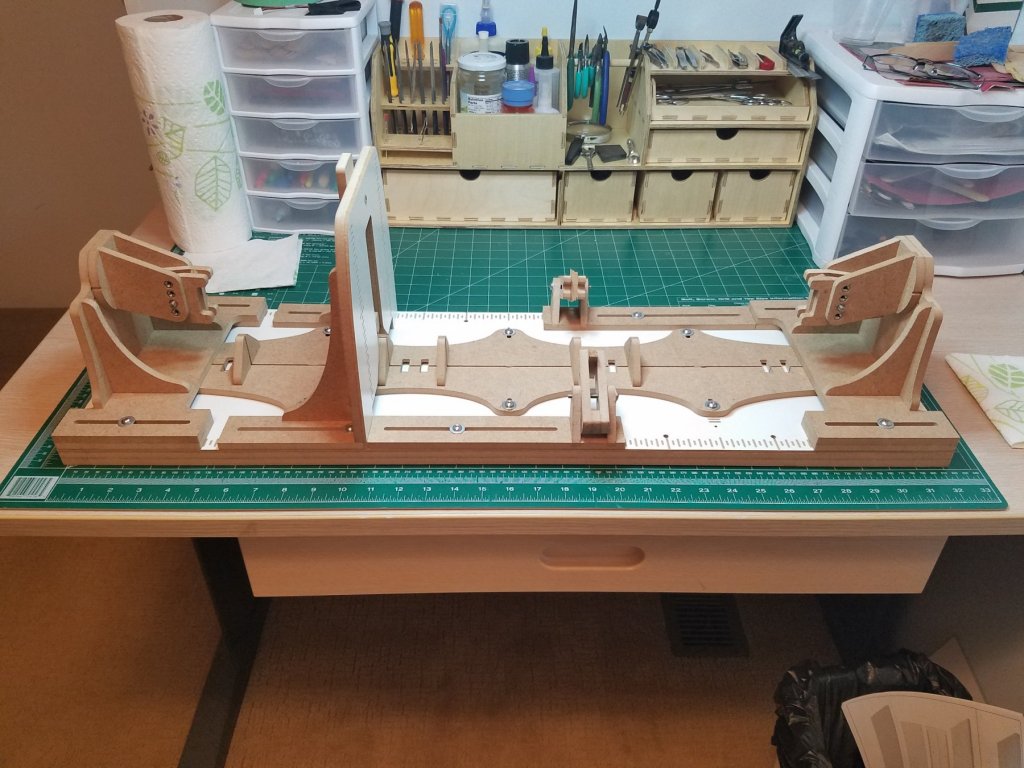
Well I finally managed to finish the building slip. I shortened the base to 32" inches which means the largest keel I can mount is 27". That is the distance between the clamps when moved all the way out. It fits much better on my work bench at this length. I also replaced all the kit steel hex head hardware with stainless button head screws. I will take it for a test drive on my Bluenose build, hopefully beginning later this week and let you know how it works.

- 13 replies
-
- 10
-
-
My First Attempt At Metal Blackening
Osmosis replied to Osmosis's topic in Metal Work, Soldering and Metal Fittings
Thanks Vince, I later discovered that they are plated with copper. I wound up using Perma Blue gun bluing solution and they came out pretty nice. I went into a little more detail in my build log. Regards -
Hobby Zone Organizers and Ship Building Slip
Osmosis replied to Osmosis's topic in Modeling tools and Workshop Equipment
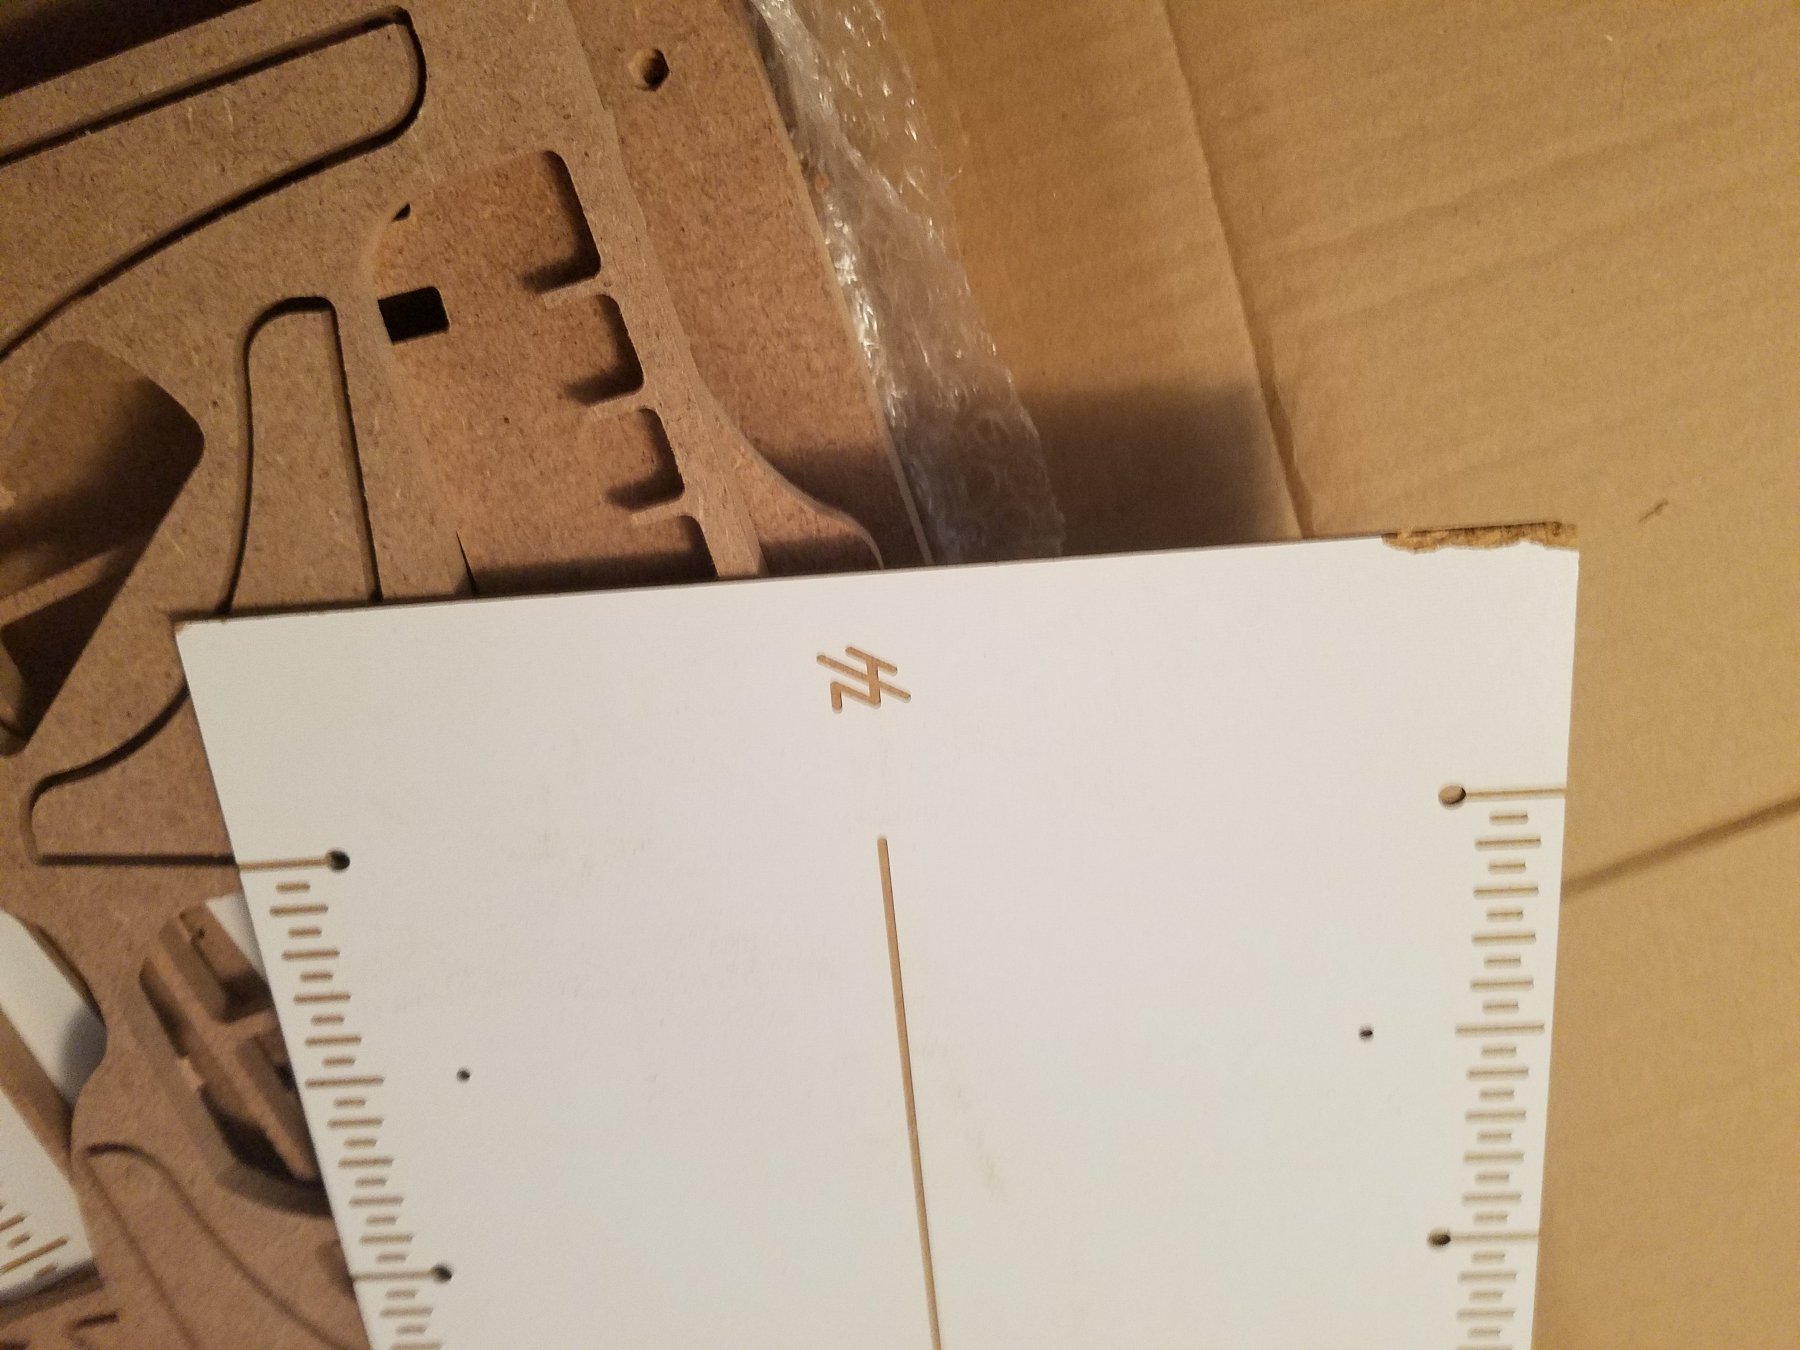
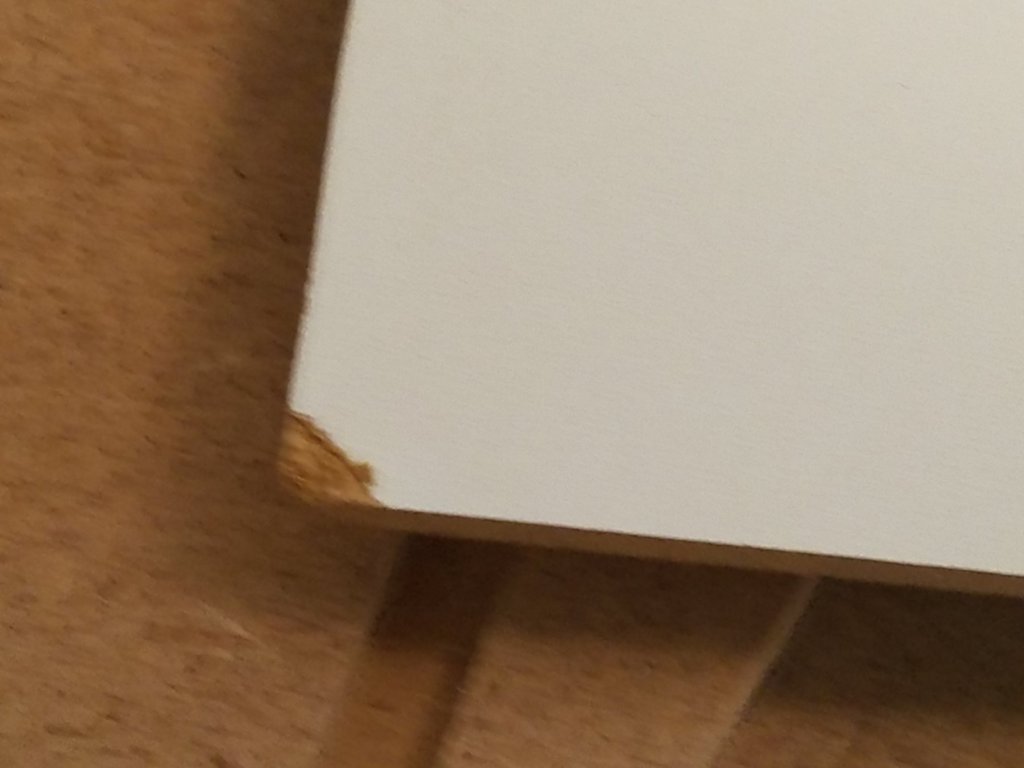
I just opened the Building slip and found this. The corners on both ends of the top sheet are pretty dinged up. Also they shorted me on a couple of hex nuts. This while disappointing will not be a big deal as I had already planned on shortening the base by about 4" in order to make it a bit more manageable on my smallish work table. The building of this jig has been covered in another thread so I don't plan on going into detail here.
-
Kingfisher by amateur - FINISHED - 1:1 - CARD
Osmosis replied to amateur's topic in Non-ship/categorised builds
Looks like fun. What kind of glue do you use? Would one of those glue sticks work? Thanks