
vulcanbomber
-
Posts
396 -
Joined
-
Last visited
Content Type
Profiles
Forums
Gallery
Events
Posts posted by vulcanbomber
-
-
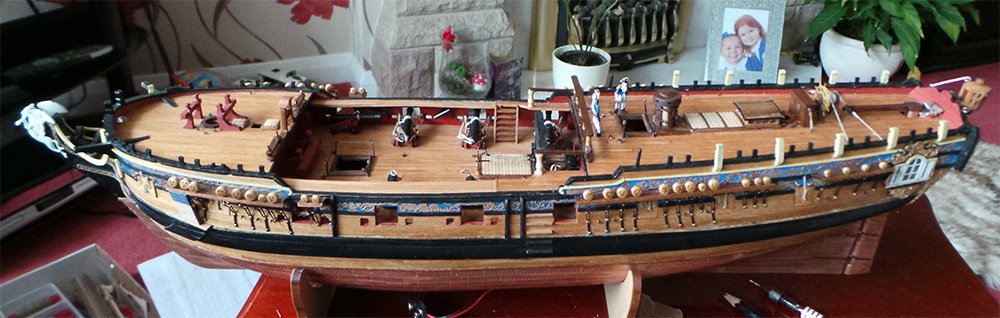
Lovely work Jeff, she is looking very fine.
-
-
Awesome, magnificent, amazing, stunning, astounding, spectacular, impressive, fantastic, remarkable.....
.... or maybe I should just say - WOW!!!!!
Can't wait to see her on mounted on the rails.
- mtaylor, Dan Vadas, thibaultron and 5 others
-
 8
8
-
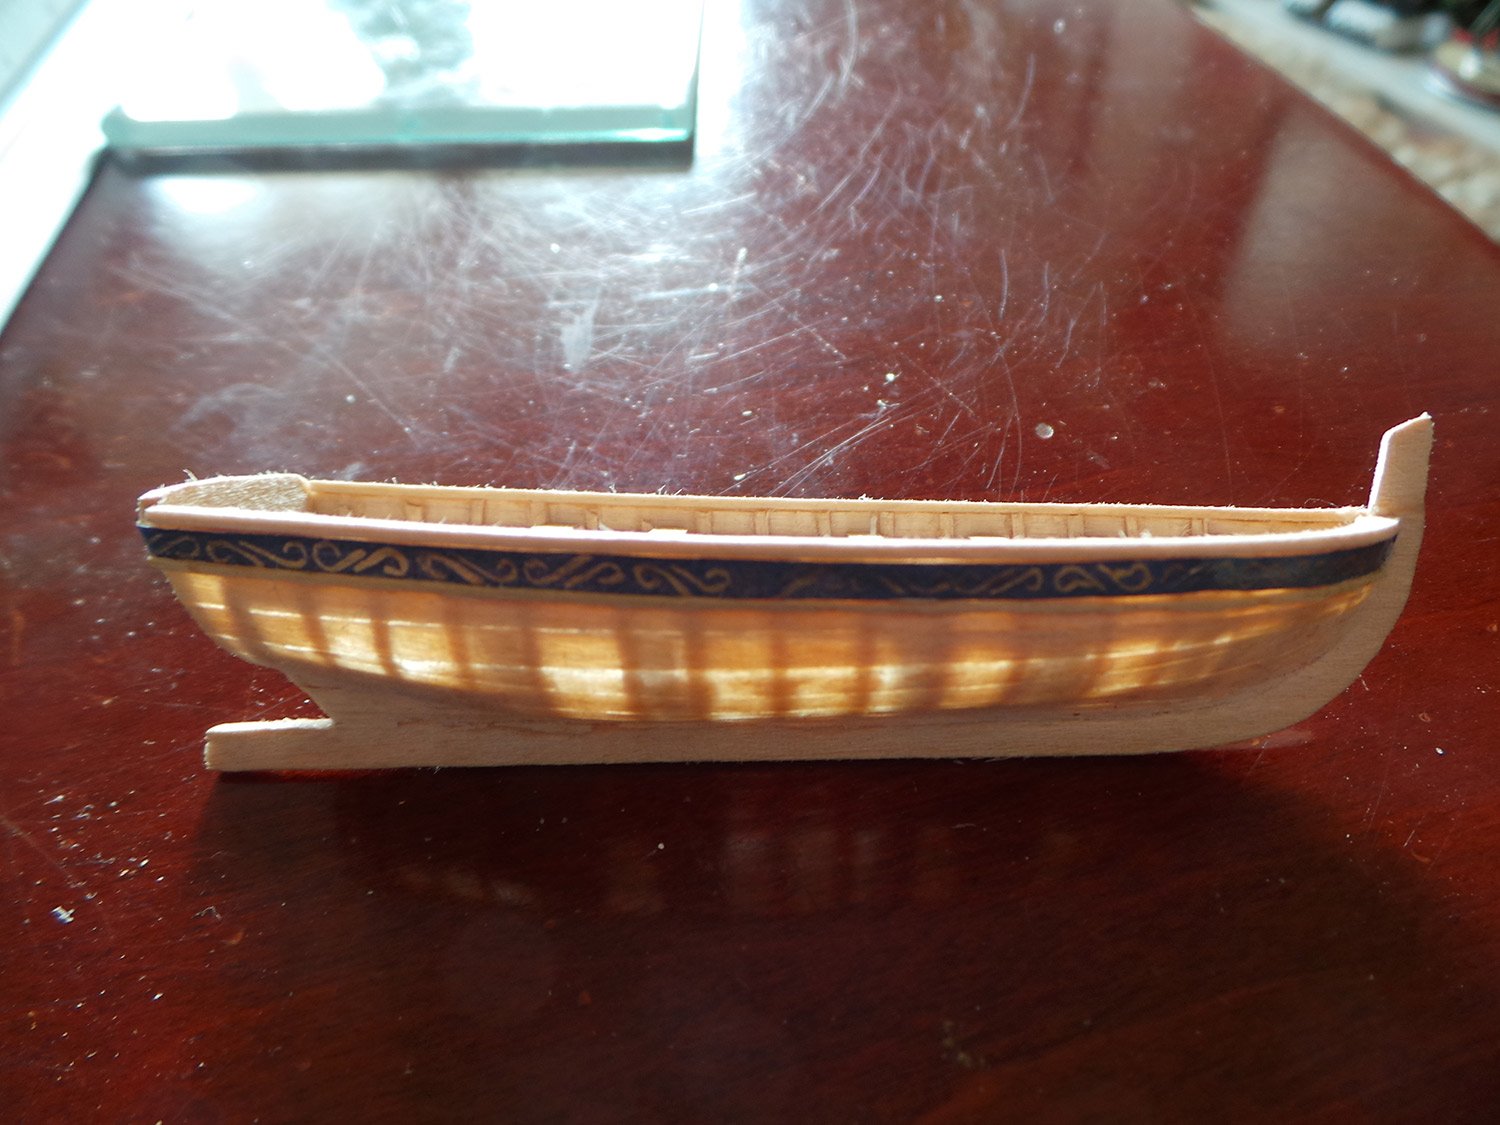
That is a superb job on the second planking. It will look amazing with the beauty of the planks brought out when varnished. I love the colour differences in the planks and think it adds extra interest.
Regarding coppering, I was initially undecided about coppering the hull on my Pegasus, but in the end decided to, just for the experience as the hull on my San Francisco was uncoppered. I didn't like the coppering experience and found it fiddly, though I am pleased with the results, but I won't copper any more hulls, I like to see the planking instead, especially with the scale lengths.
Planking the stern counter - it's down to personal preference. I didn't plank mine as I actually liked the piece of walnut that was used.
Like Spy suggested, a light varnish, just to seal the hull.
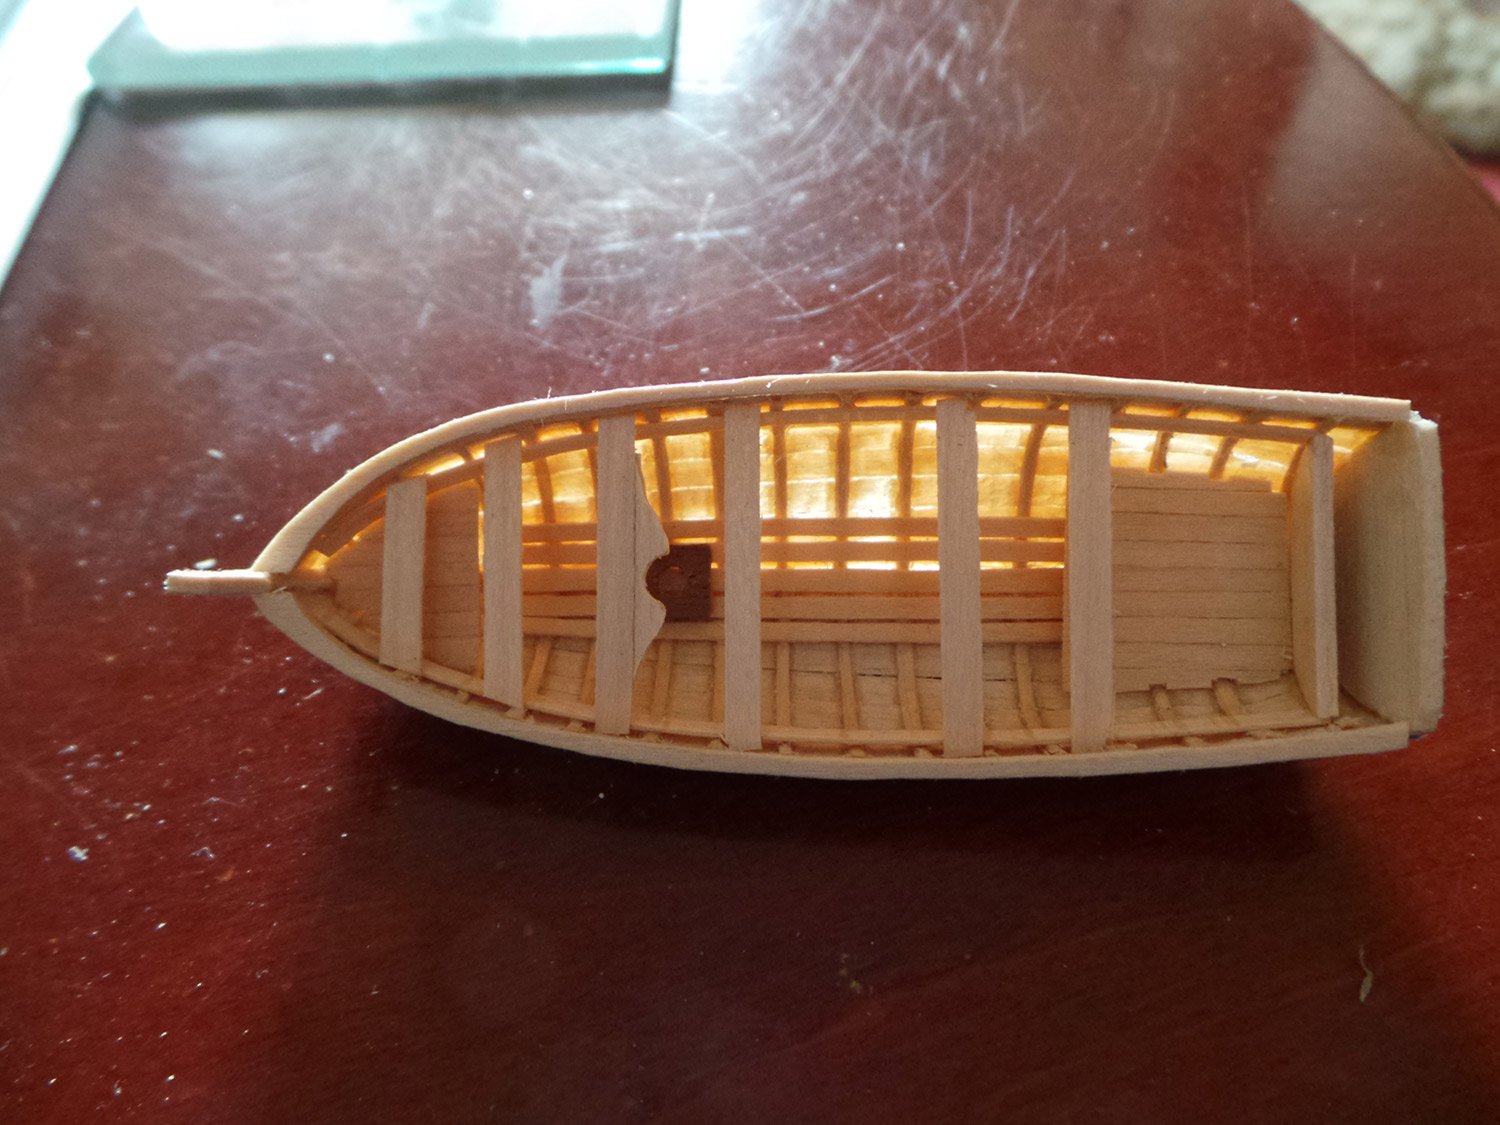
The next thing I did was to remove the bulkhead piece (if not done already) and plank the insides. You will find it easier to paint the lowest plank red before installing them, that way you won't get paint on your deck. Some builders (myself included) made bulkhead walls for the bow and stern at this point too. They make a nice little scratch build project - but again, just personal preference.
The wales can be fitted now too. Make sure to leave the correct gap for the quarter badges at the stern.
Then I made some of the deck fittings for the lower deck, but didn't glue them in until much later in the build. Sometimes making the little things is a nice reprieve from the big stuff!
After that I made the gunport linings - again personal preference - and made the gunport lids.
Then I painted the upper parts of the bulwarks for the frieze and the wood parts for it and glued at them all on.
I think there is a lot there to get to grips with!!!
Great progress.
-
Great to see you back Haiko. Look forward to seeing your progress.
-
16 hours ago, ccoyle said:
If you like this model and decide to do additional RR models, the key will be to look for the designer's name on the issue in addition to the publisher.
Thanks for the tip Chris.
I'm looking forward to starting it, watching Danny's 'Bulgar' come to life is so inspiring. It's amazing to think so detailed a model can be created with paper and card.
- popeye the sailor, Canute, ccoyle and 1 other
-
4
-
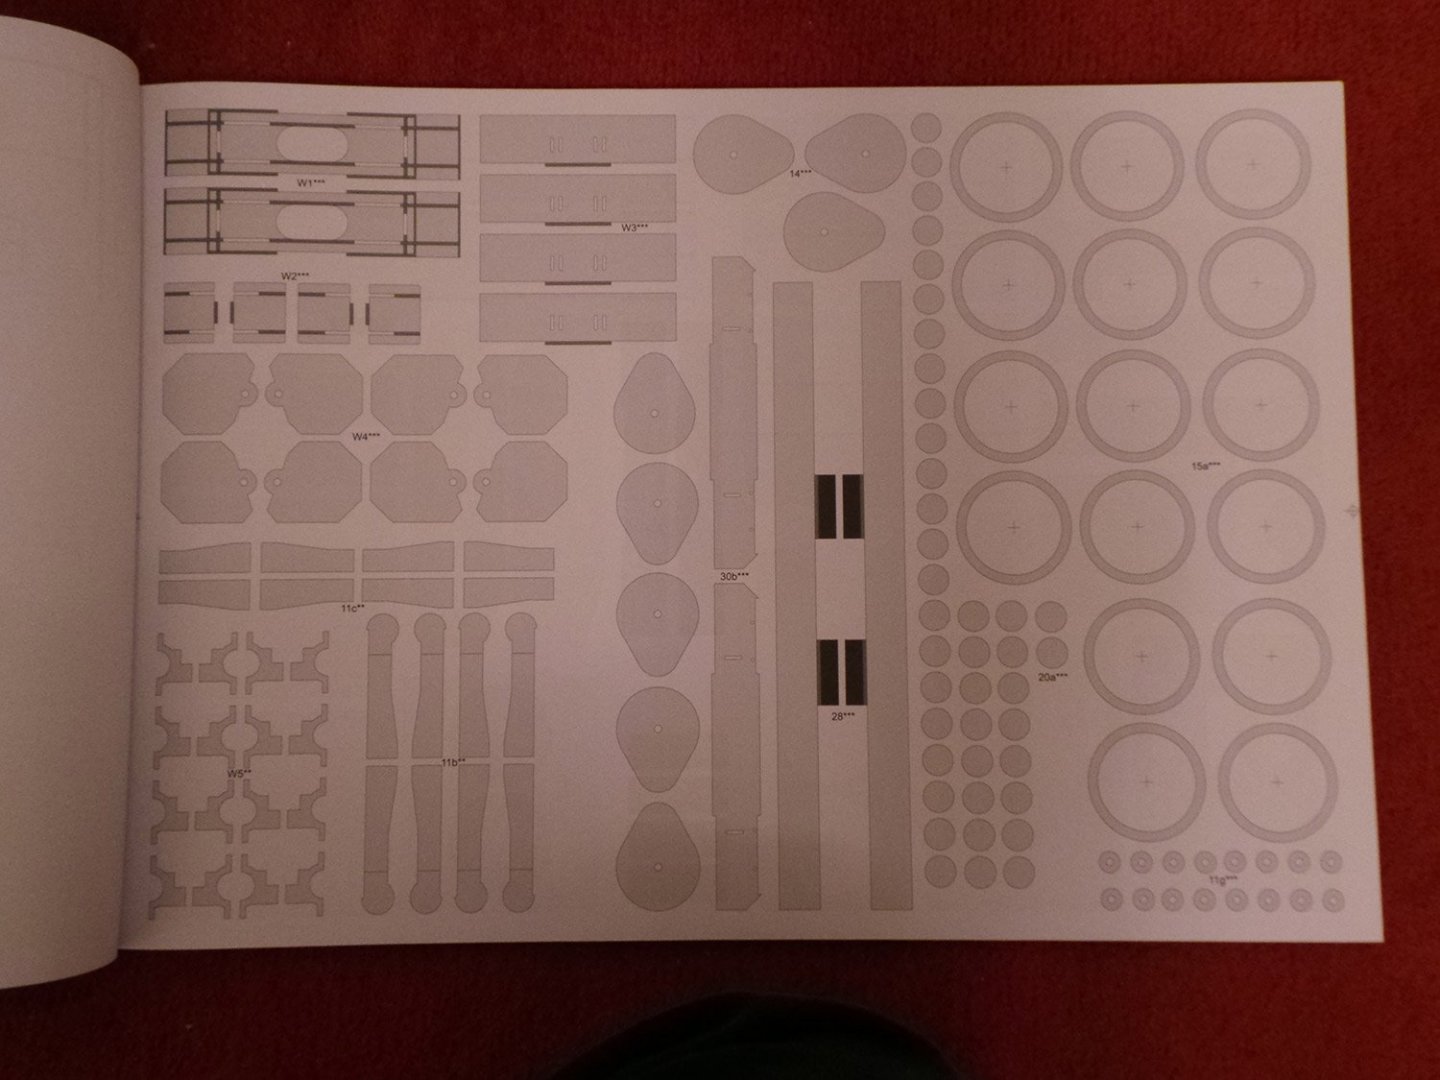
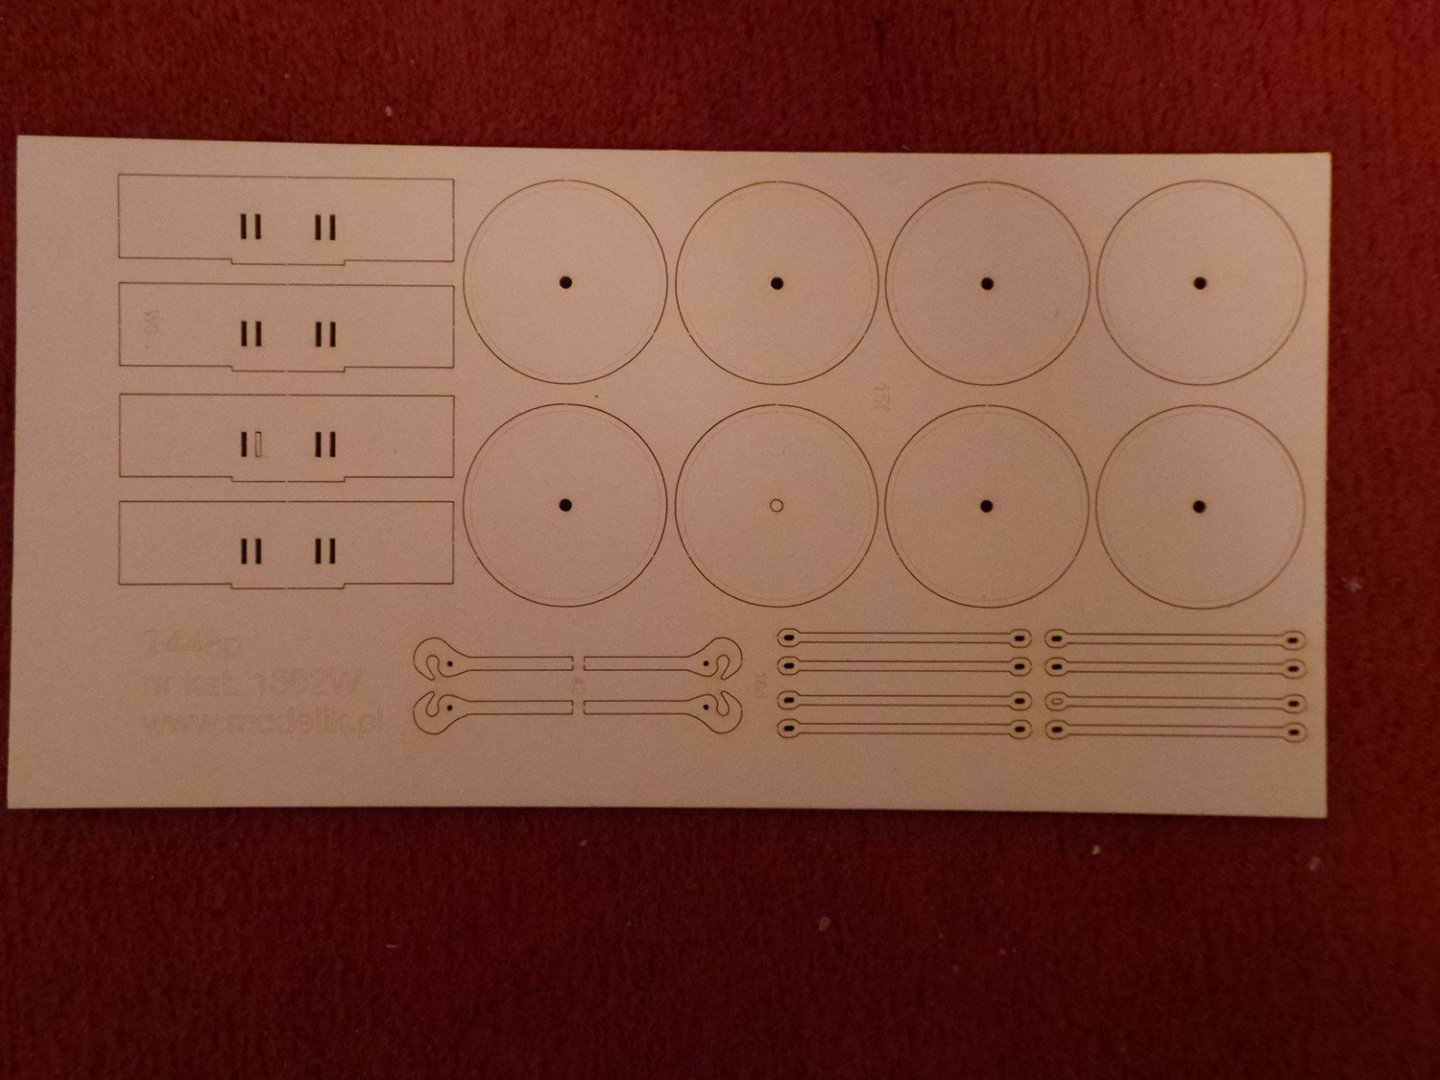
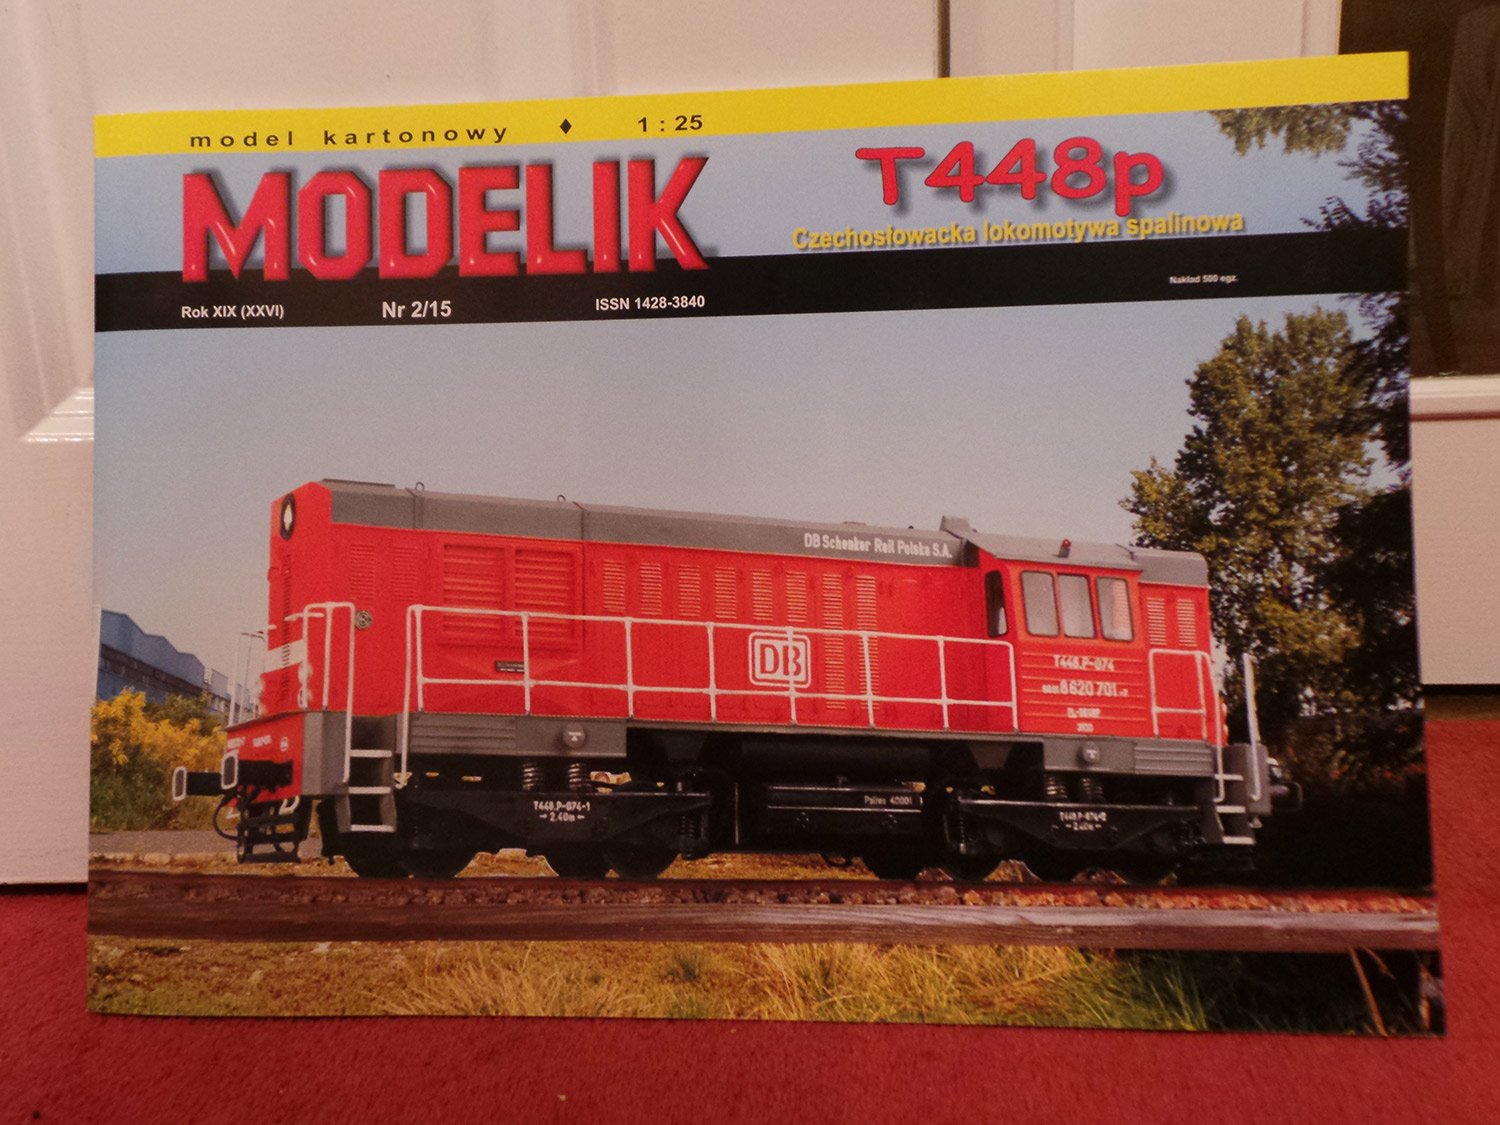
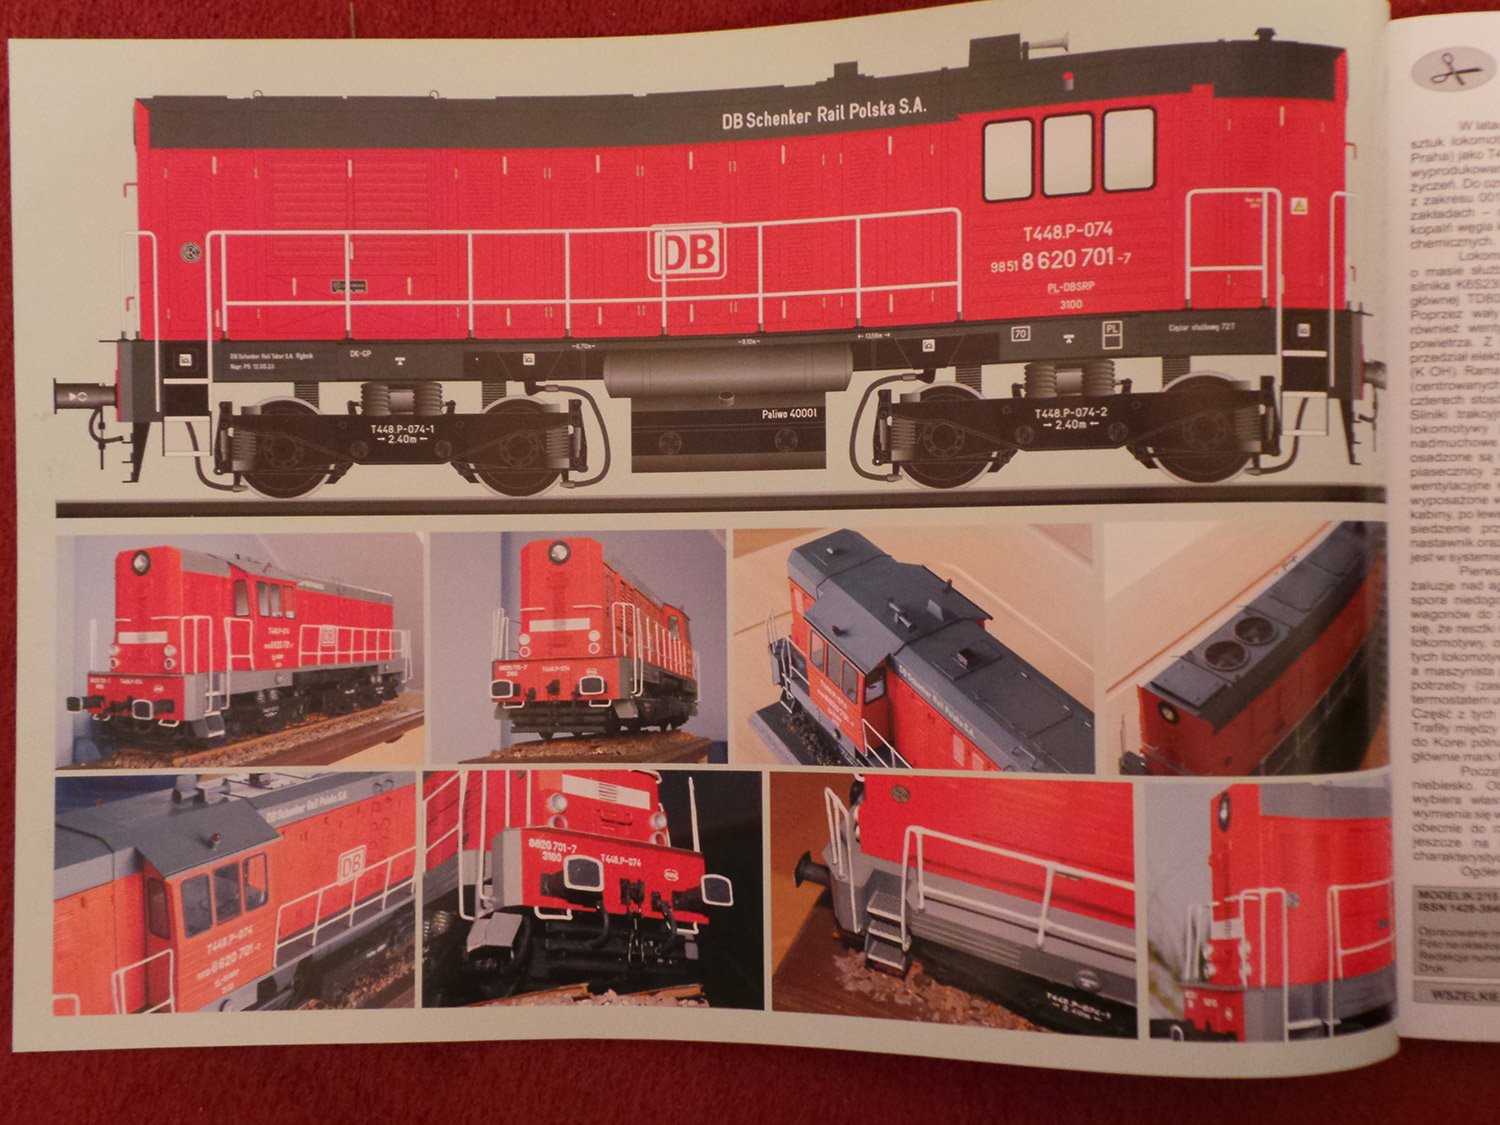
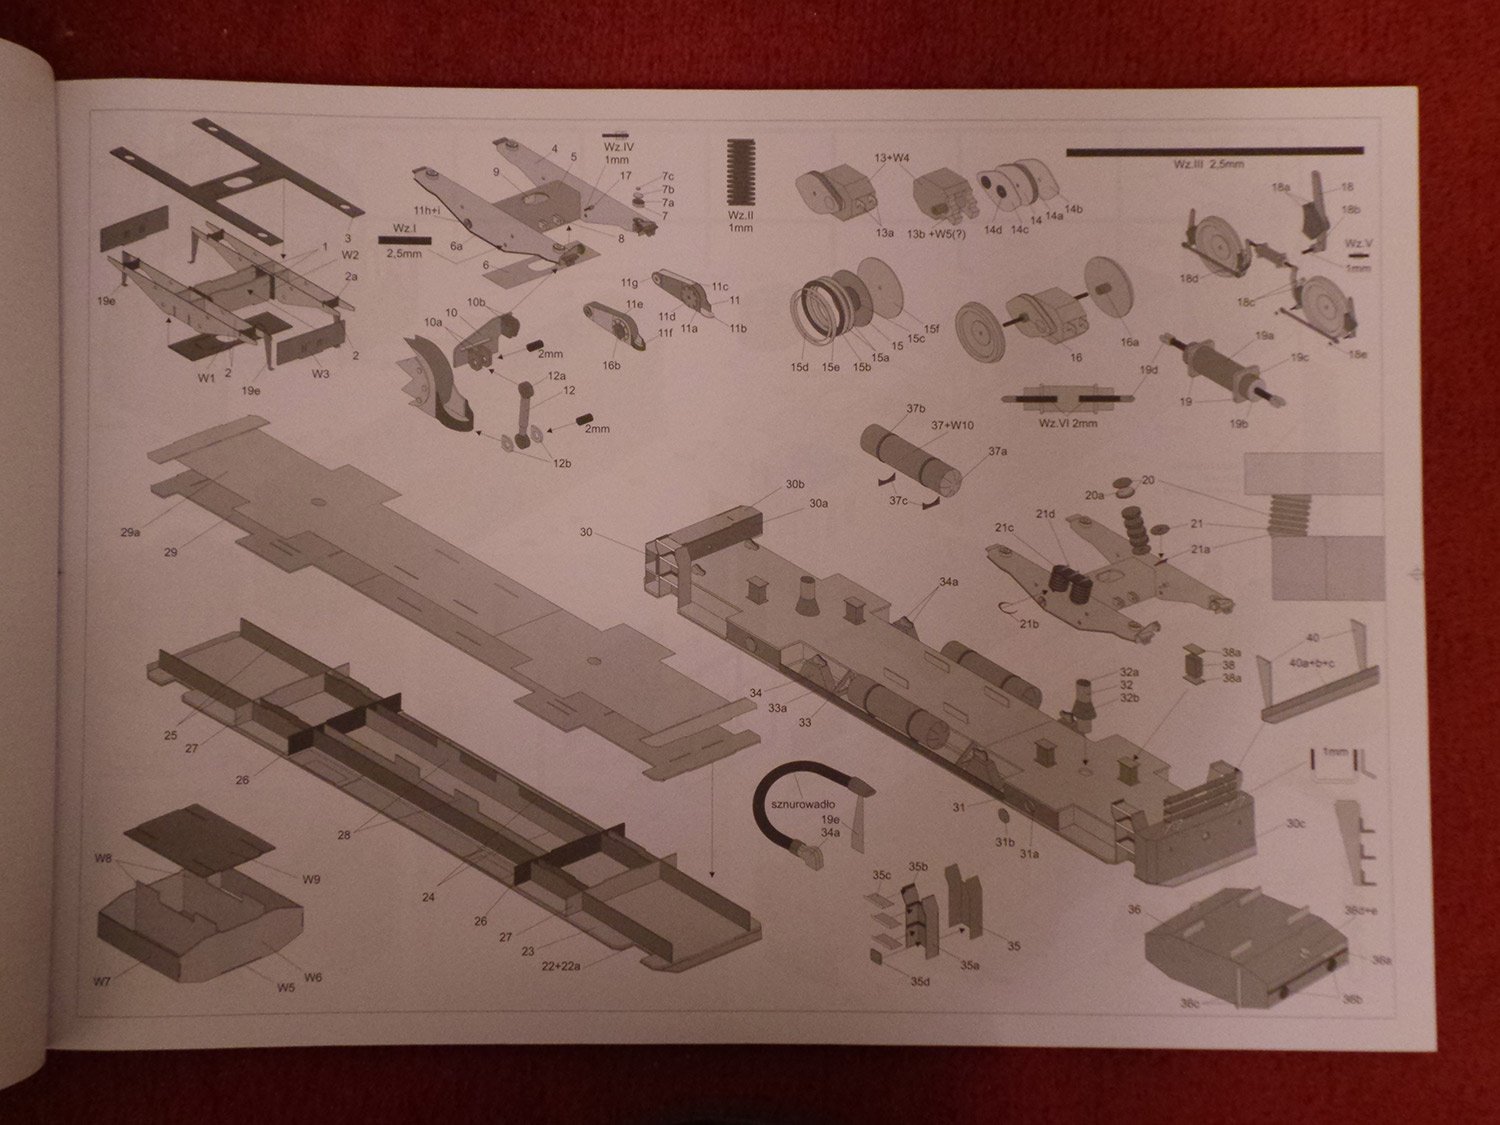
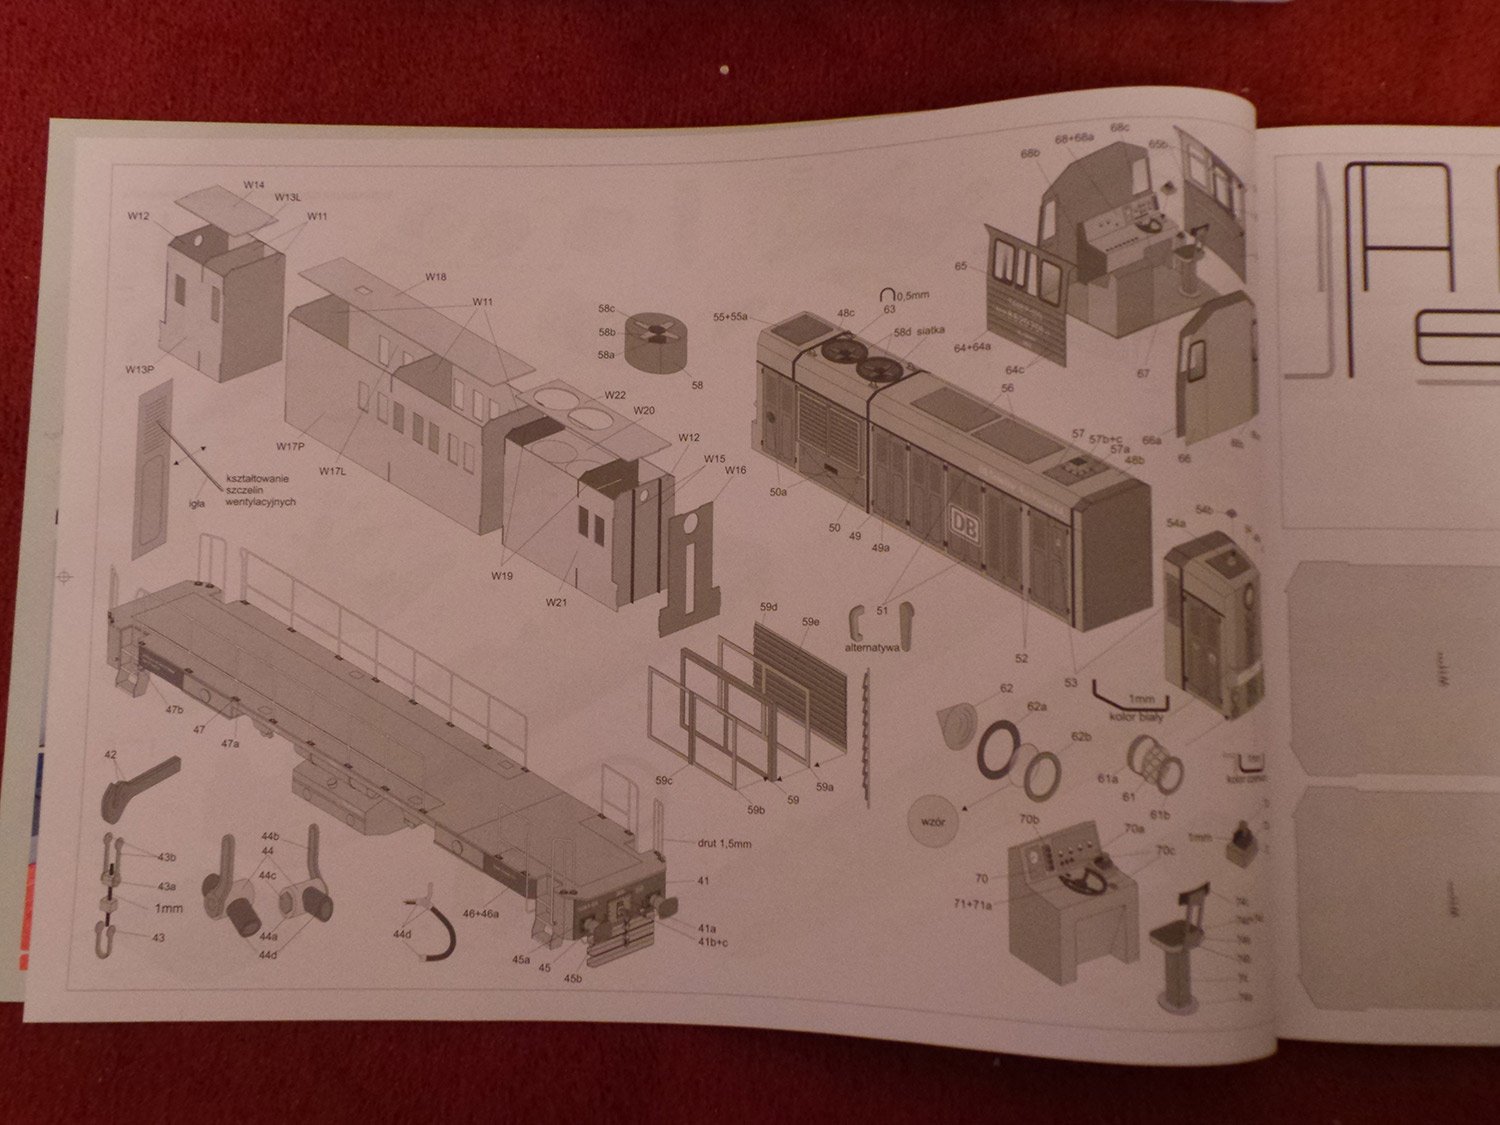
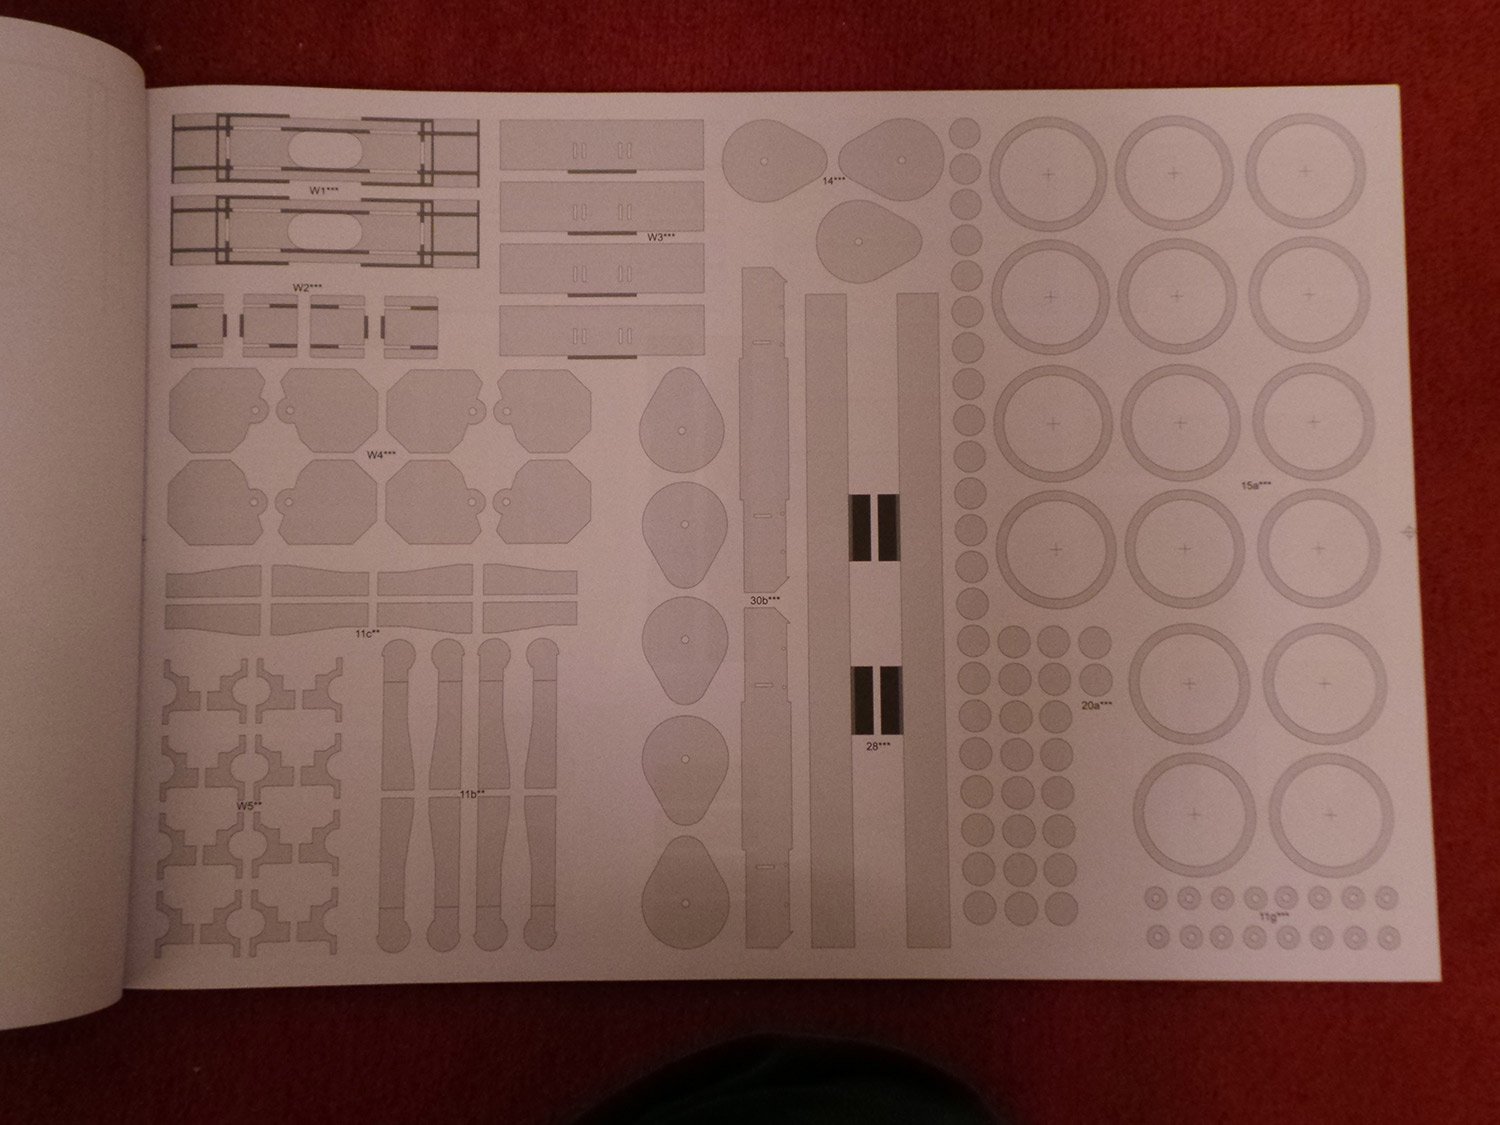
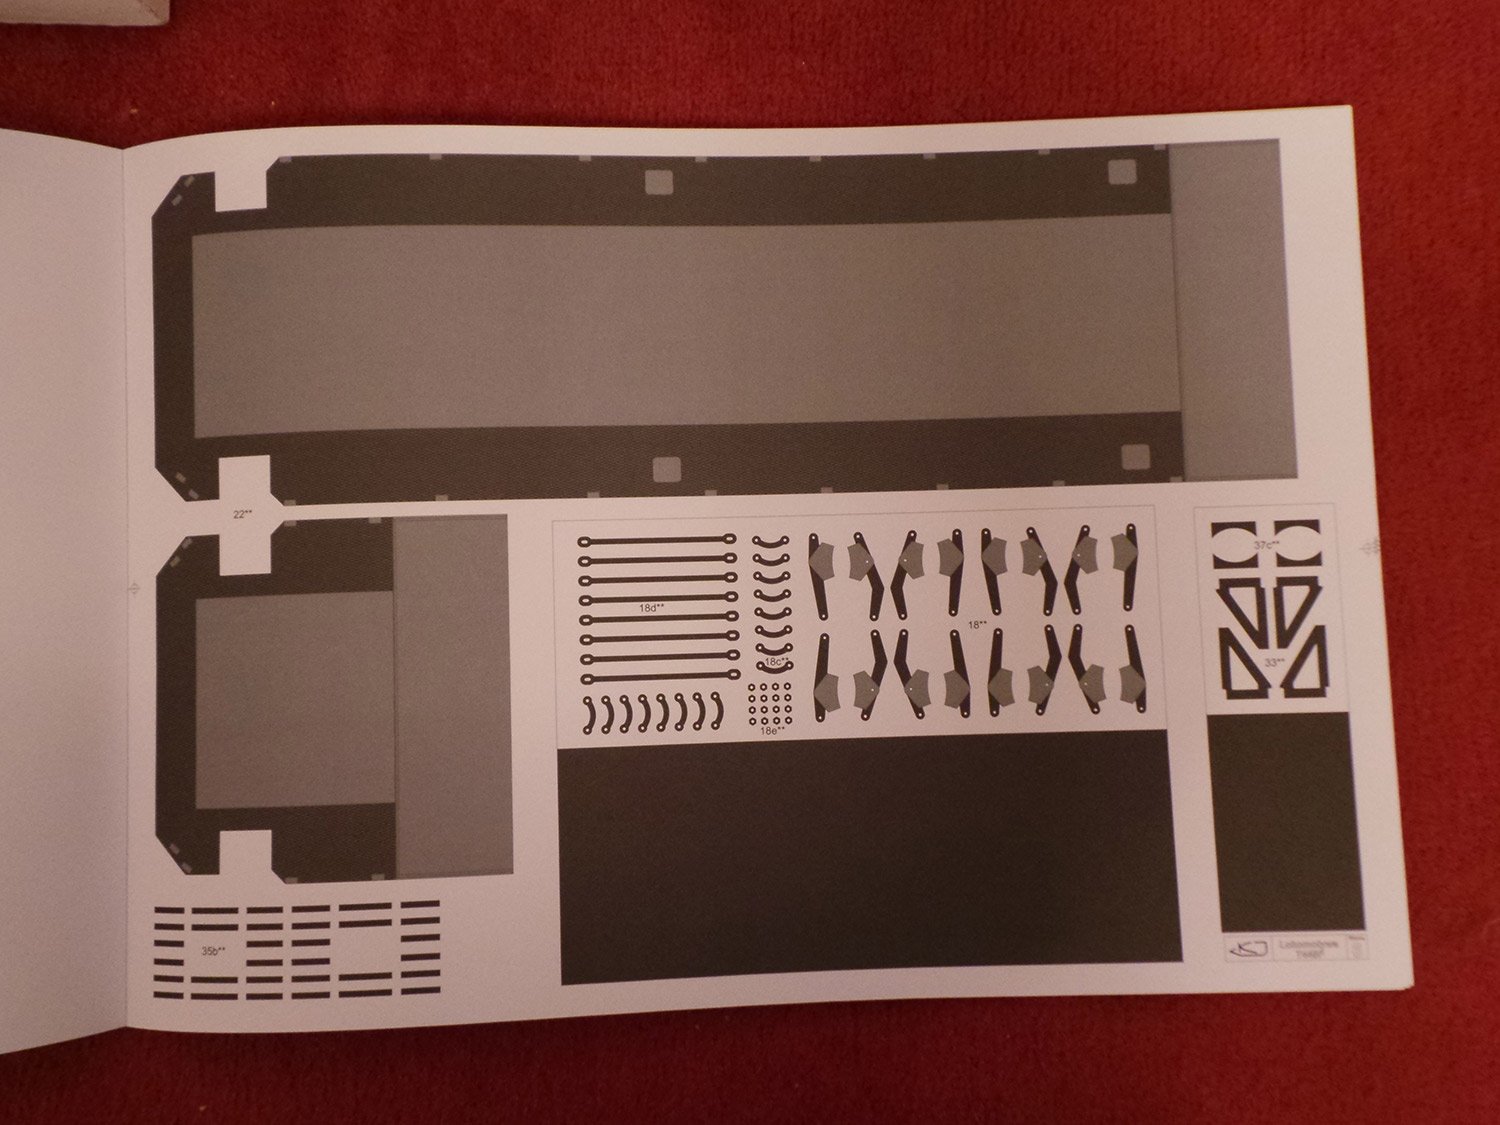
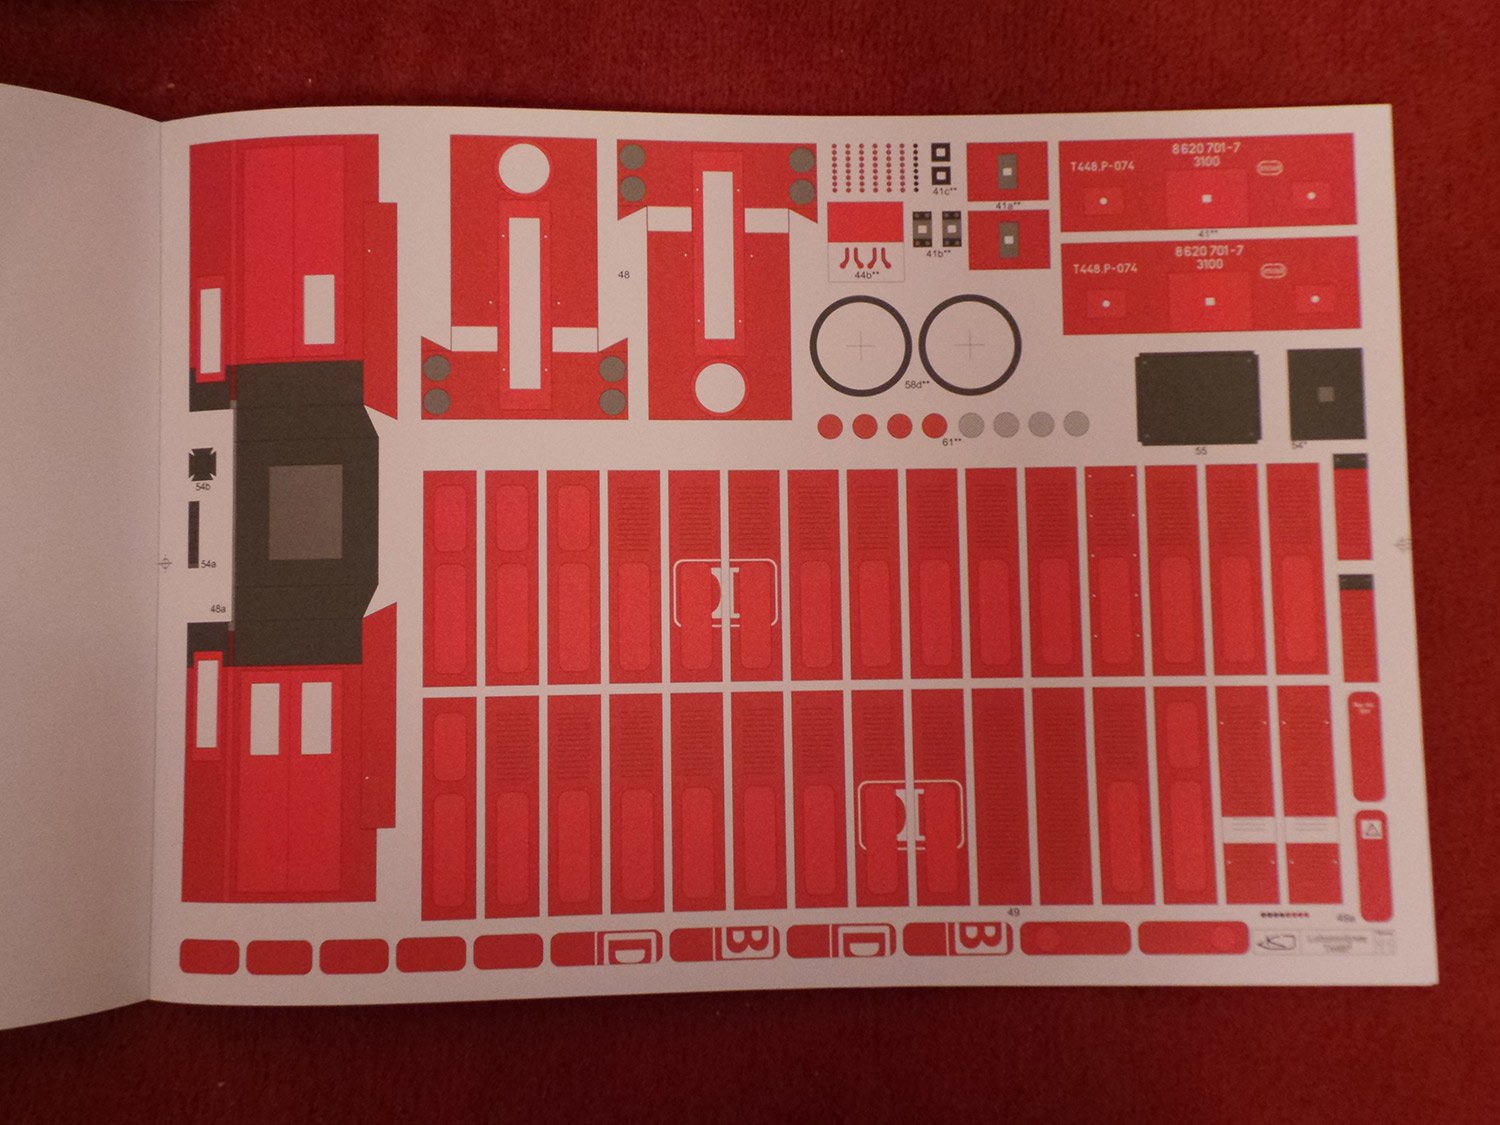
I have received my card model of the 1/25 scale T448P diesel loco. It is published by Modelik, a polish model company who seem to produce excellent card models (if this one is anything to go by) of a wide variety of subjects.
I blame Dan Vadas for my purchase of this model, after seeing the fantastic build of his 2-6-6-4 'Bulgar' Steam Loco, (yes Danny, this is all your fault!!!)
I have made card models before, mostly free card models found on line like the Mark Twain paddle boat created by Disney (I had a log of the build of it on MSW1, but sadly I couldn't resurrect it when MSW1 was lost.
I only hope that I can make a half decent model of the T448P loco with the skills I have, and tips and hints learned from Danny's card model build logs.
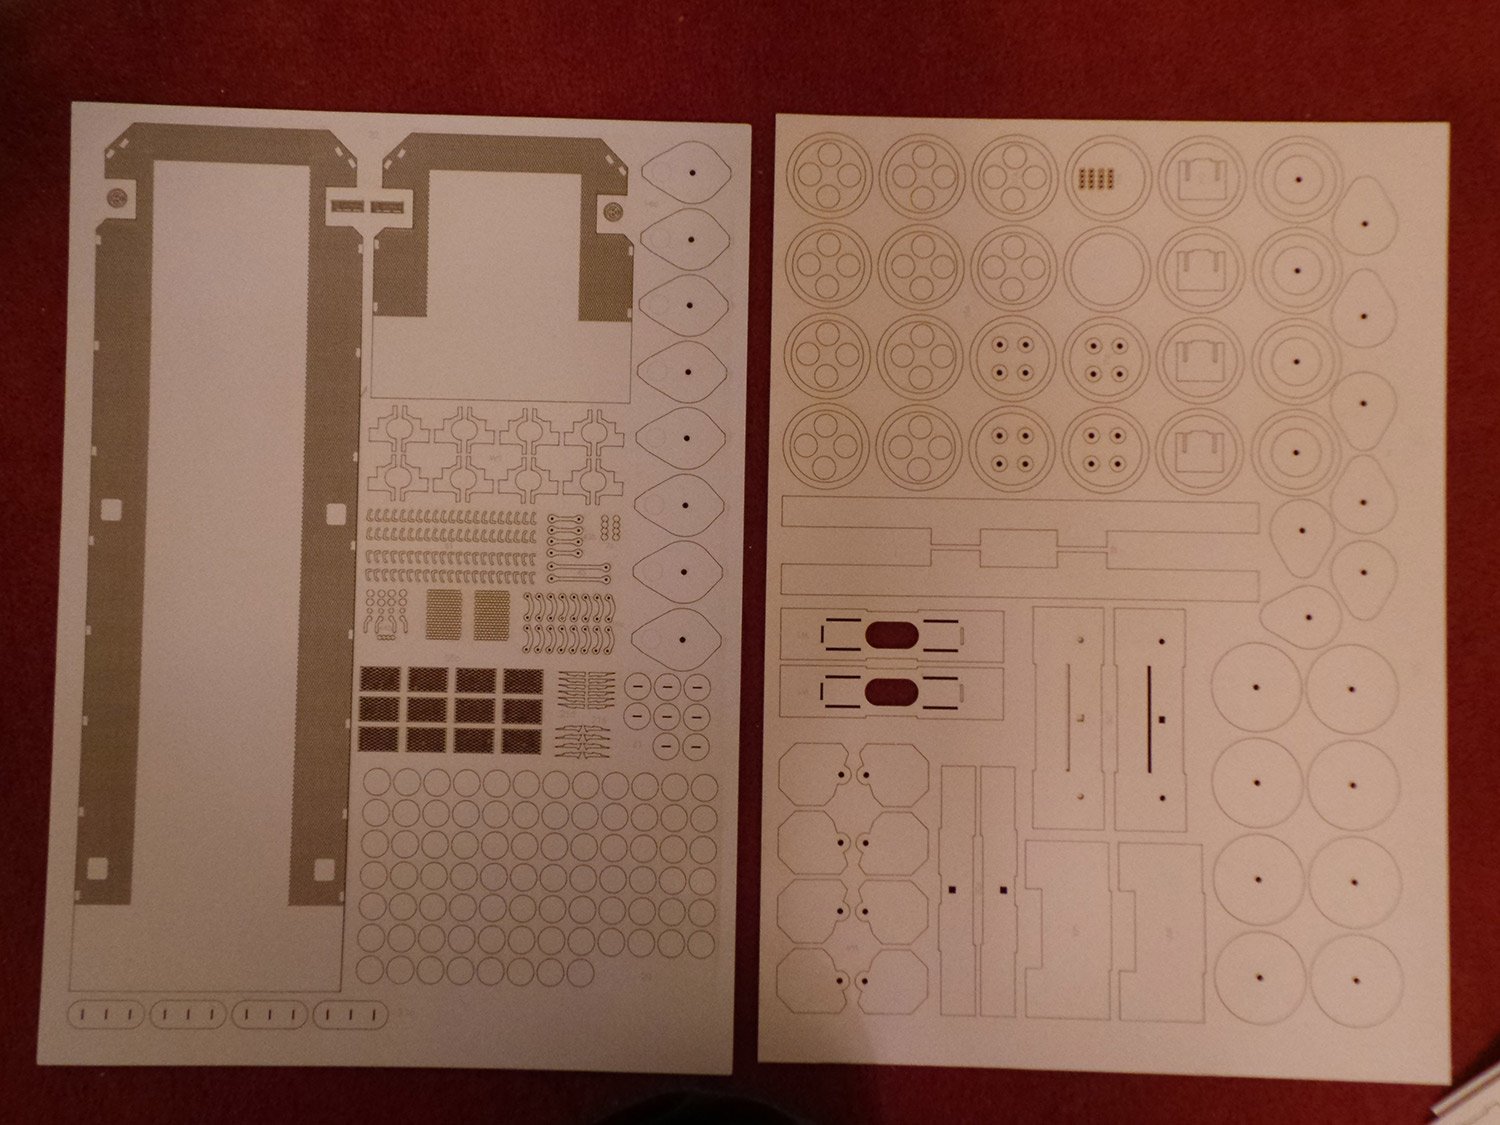
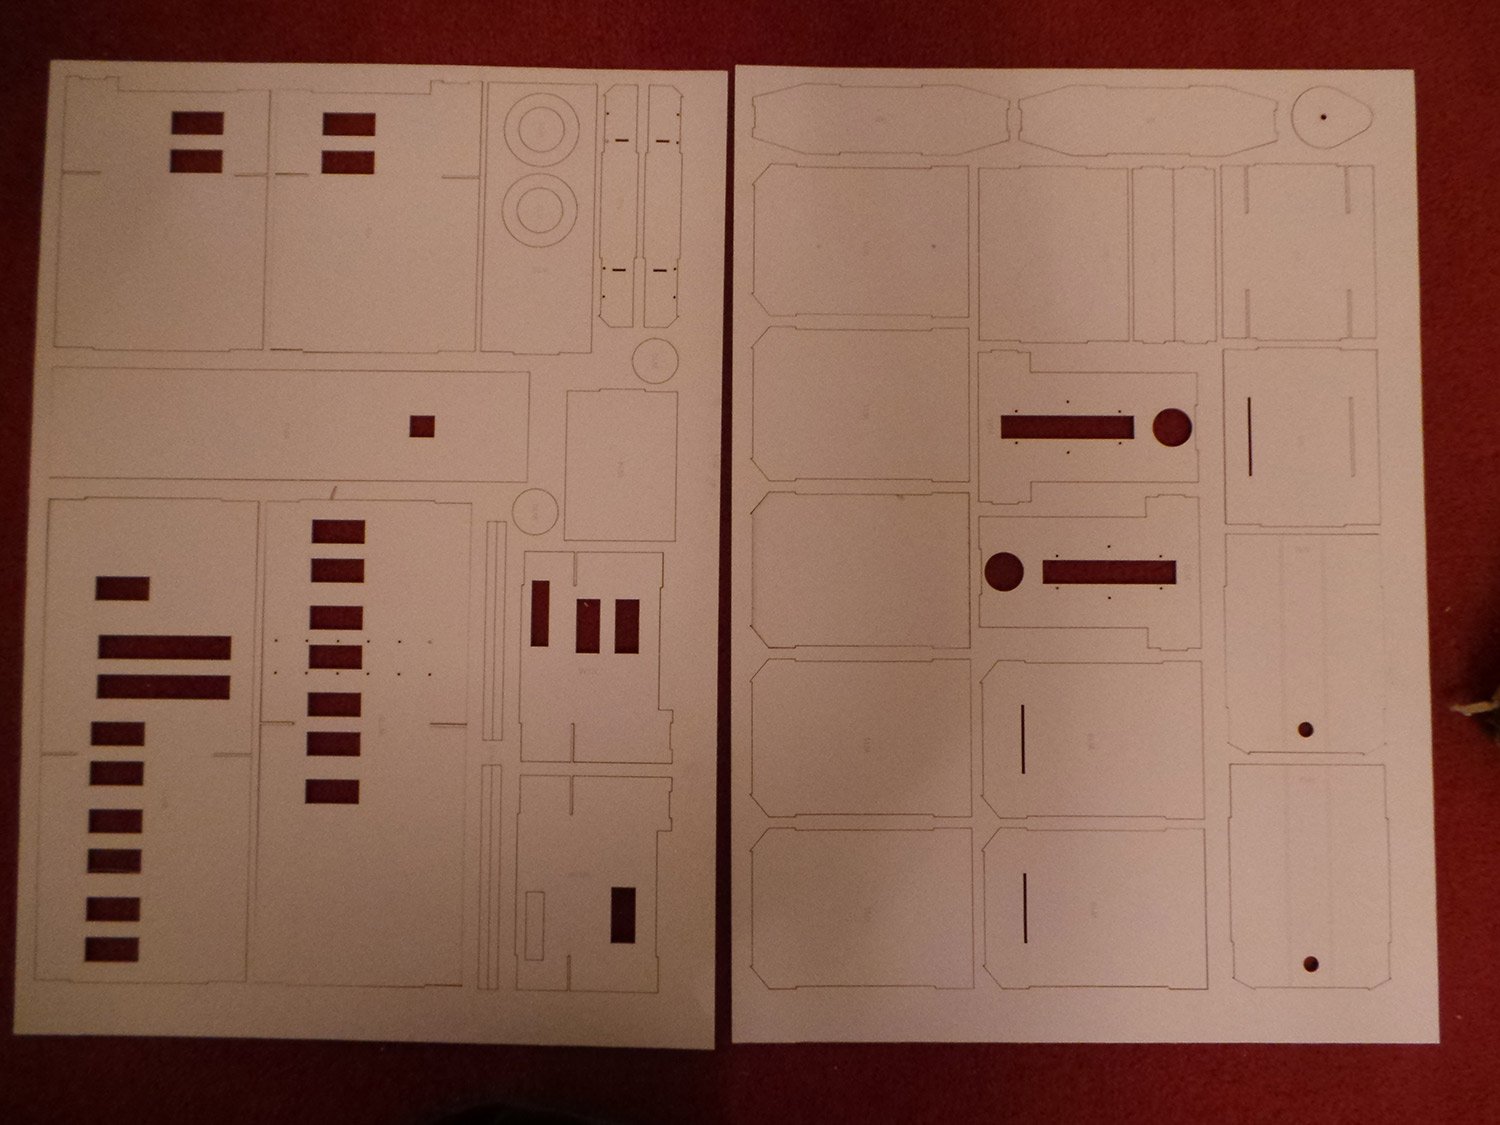
Here are pics of the 'kit'. I also have the laser cut frames and wheel. The details are simply amazing! When built it will be approx 543mm long.
It will be a while before I can make a start, but I am looking forward to it.

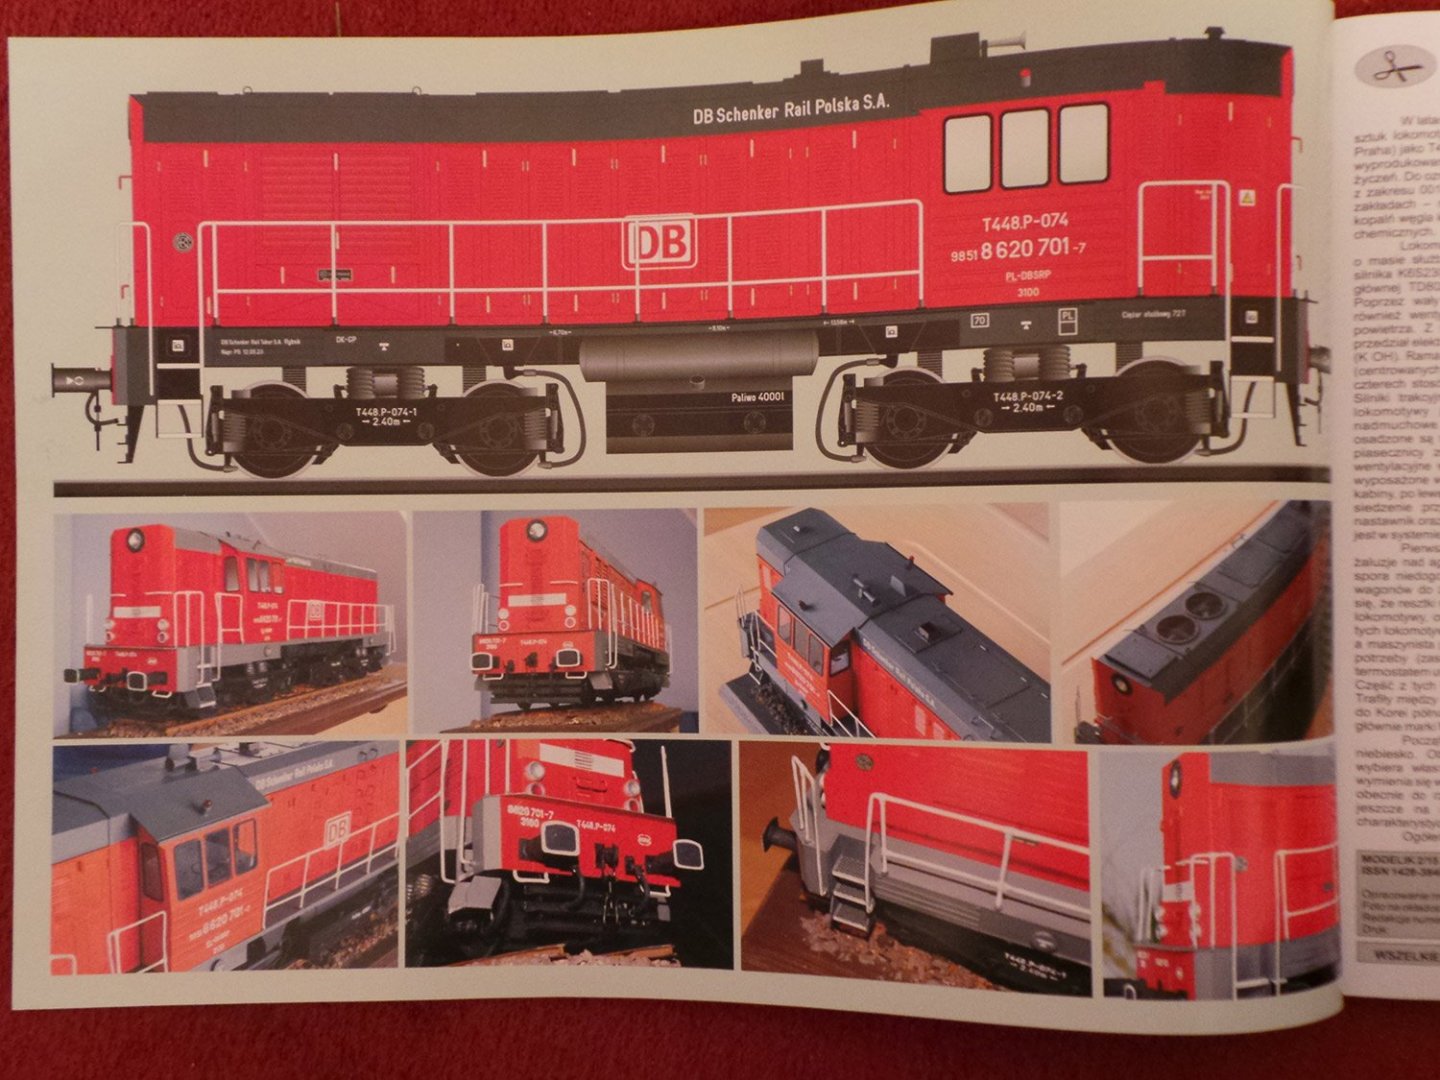
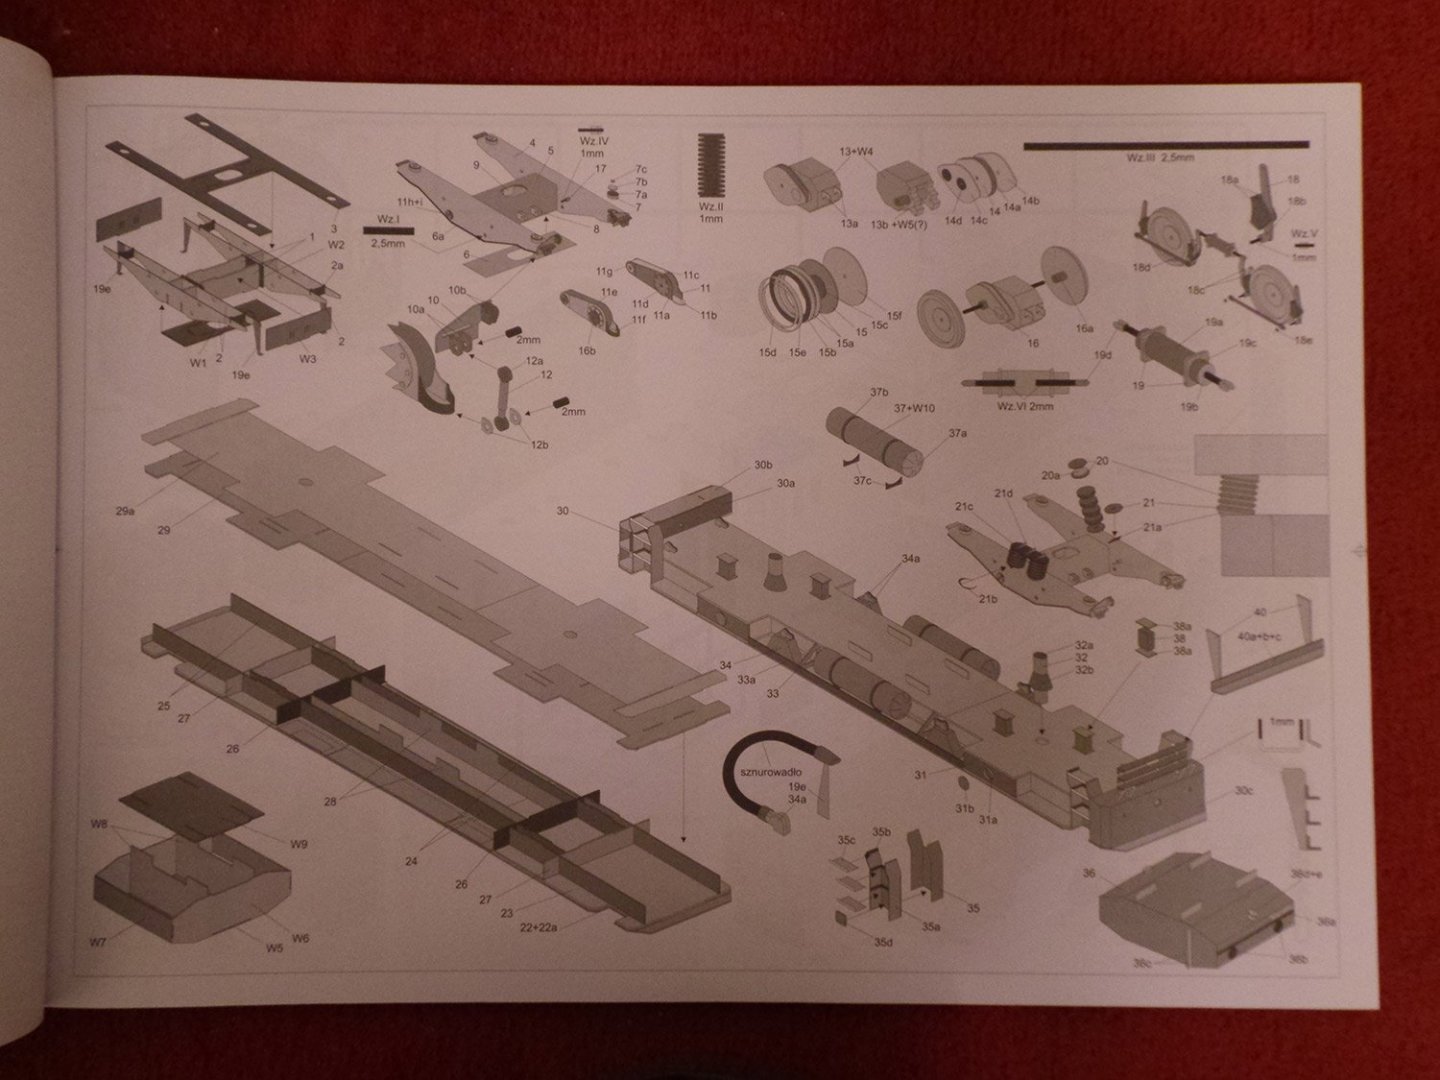

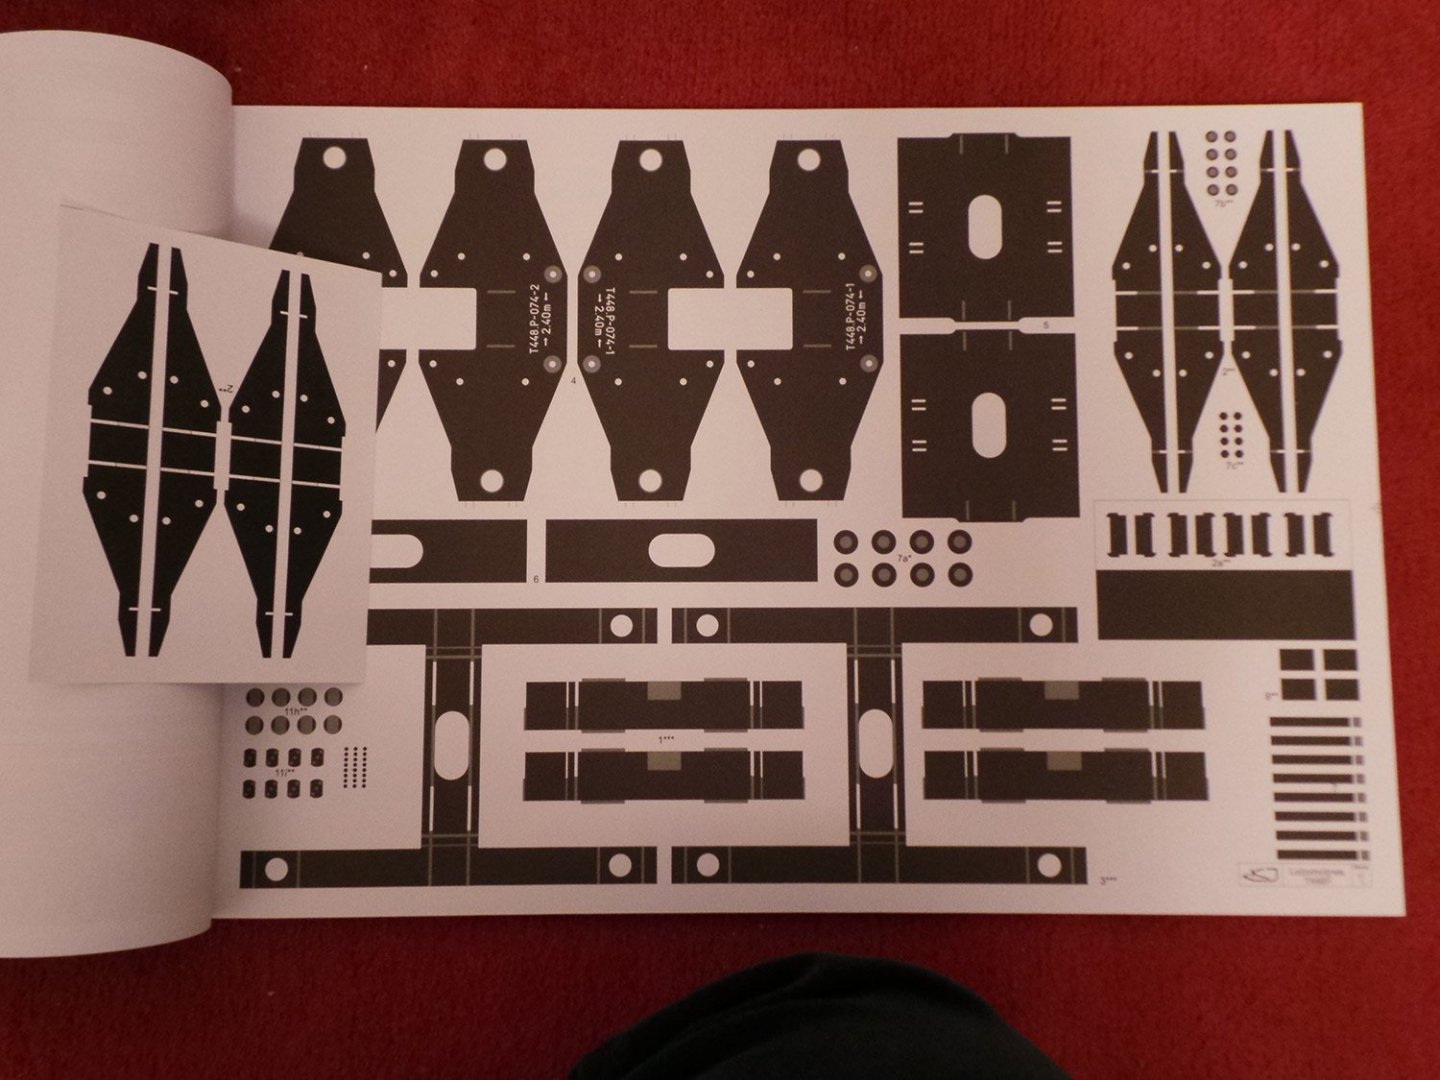

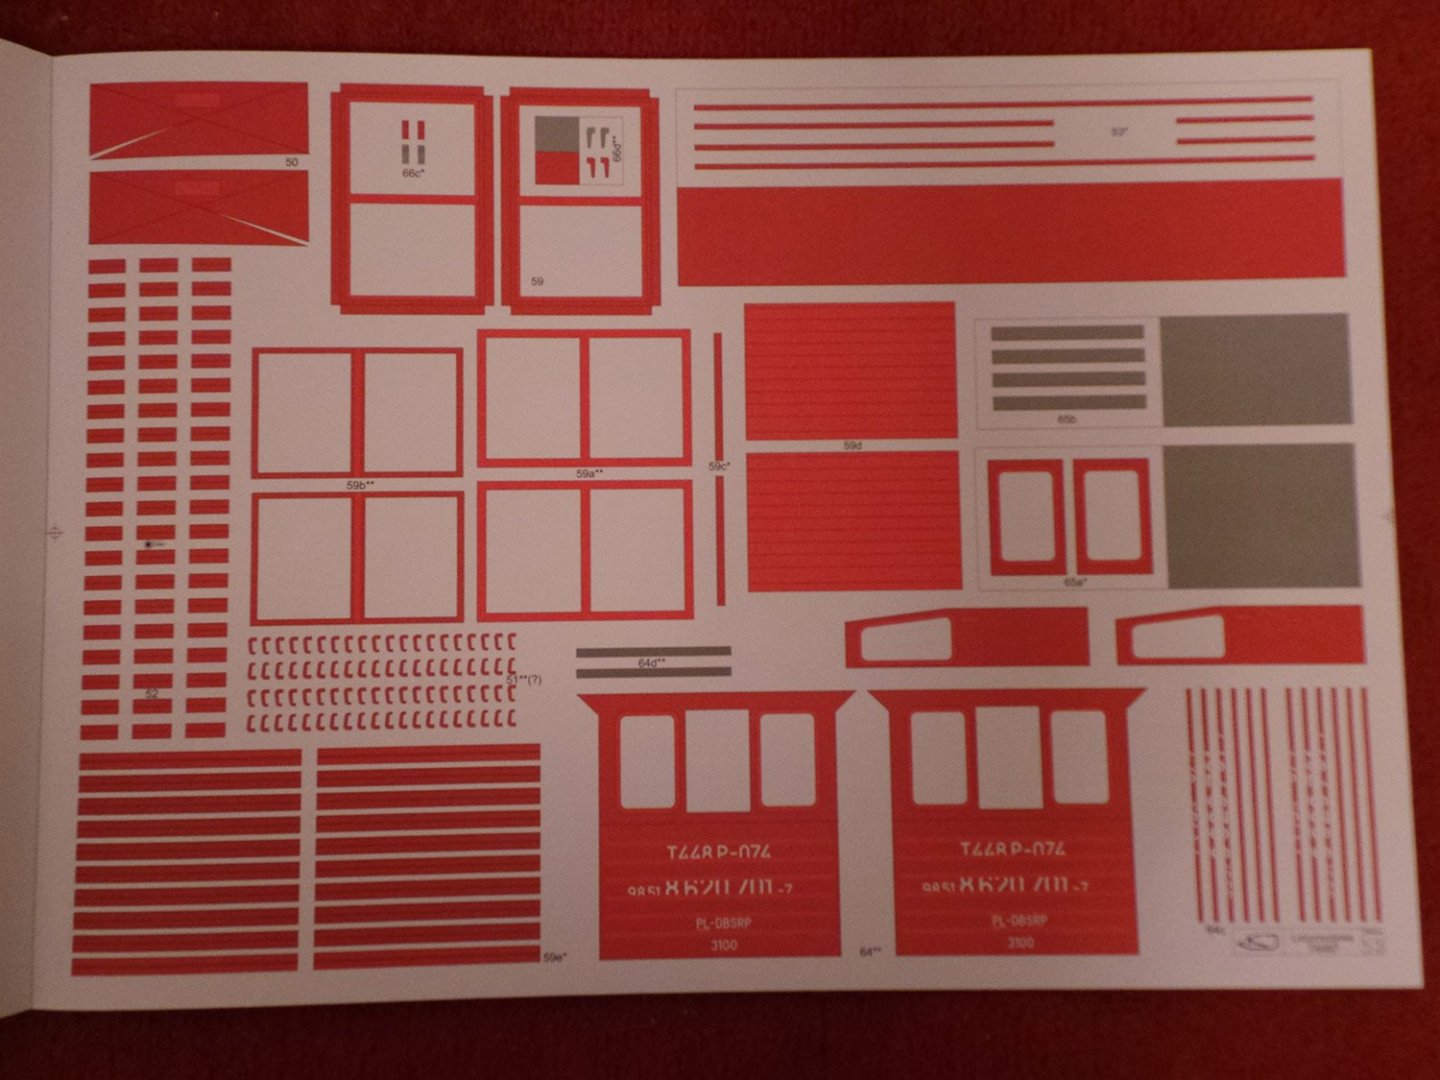
Laser cut frames & wheels.


- mtaylor, GrandpaPhil, ccoyle and 3 others
-
6
-
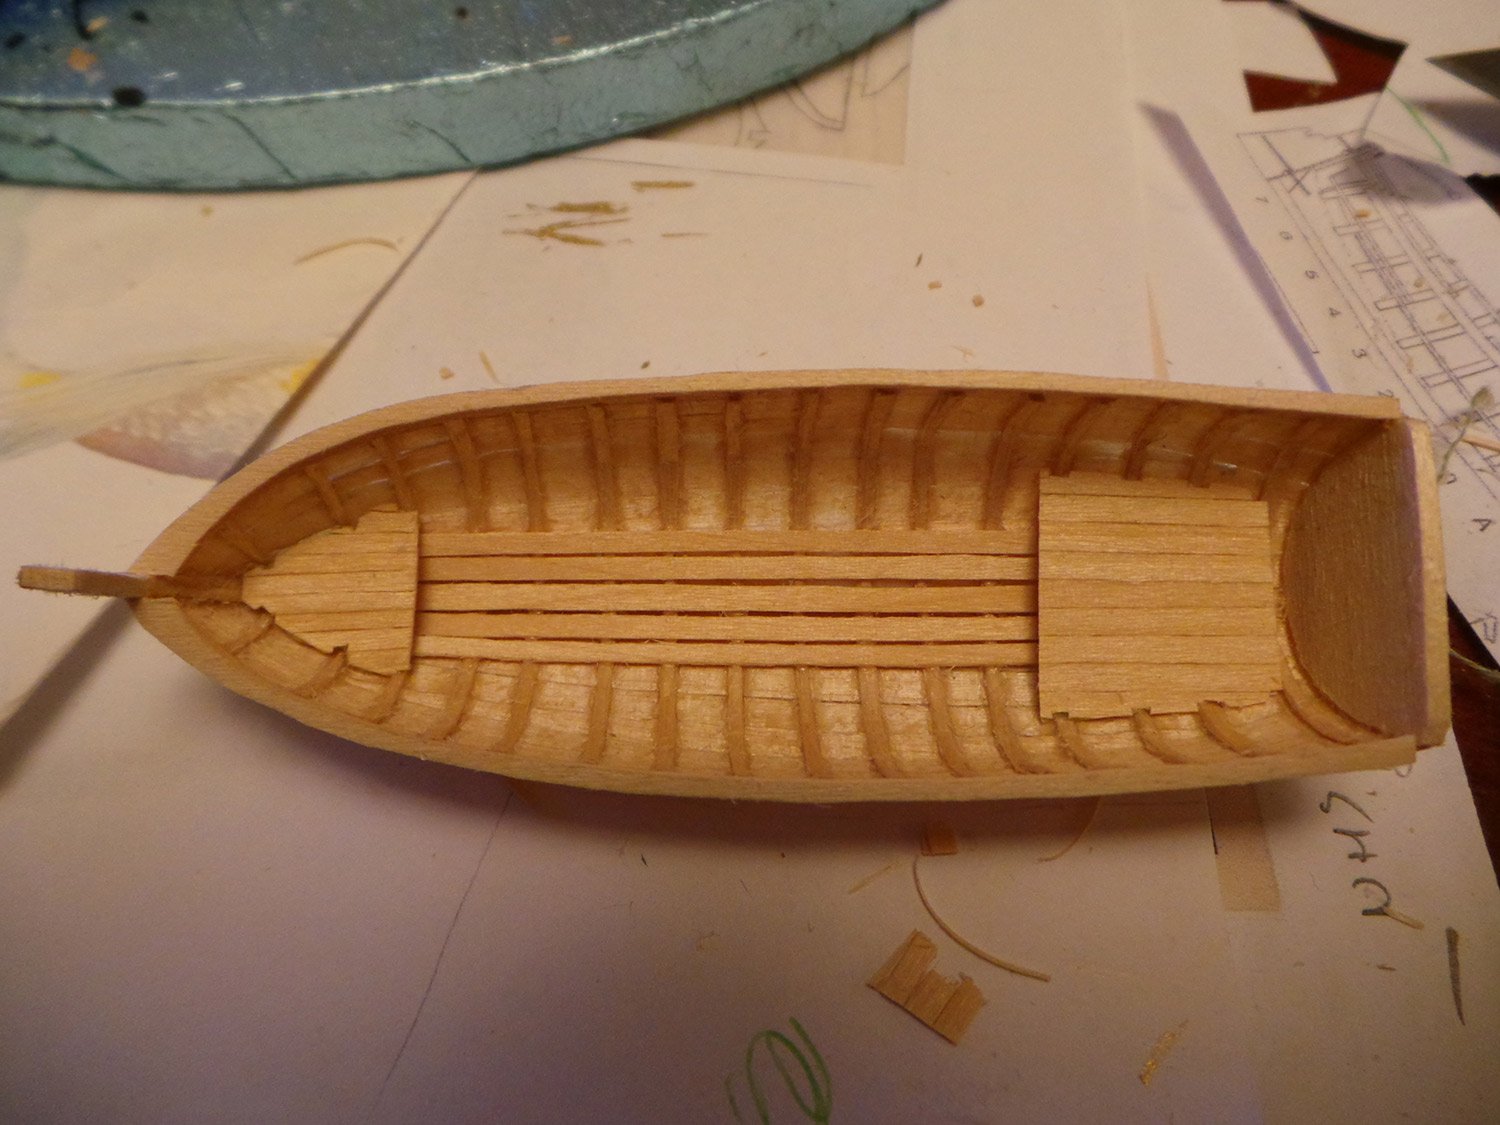
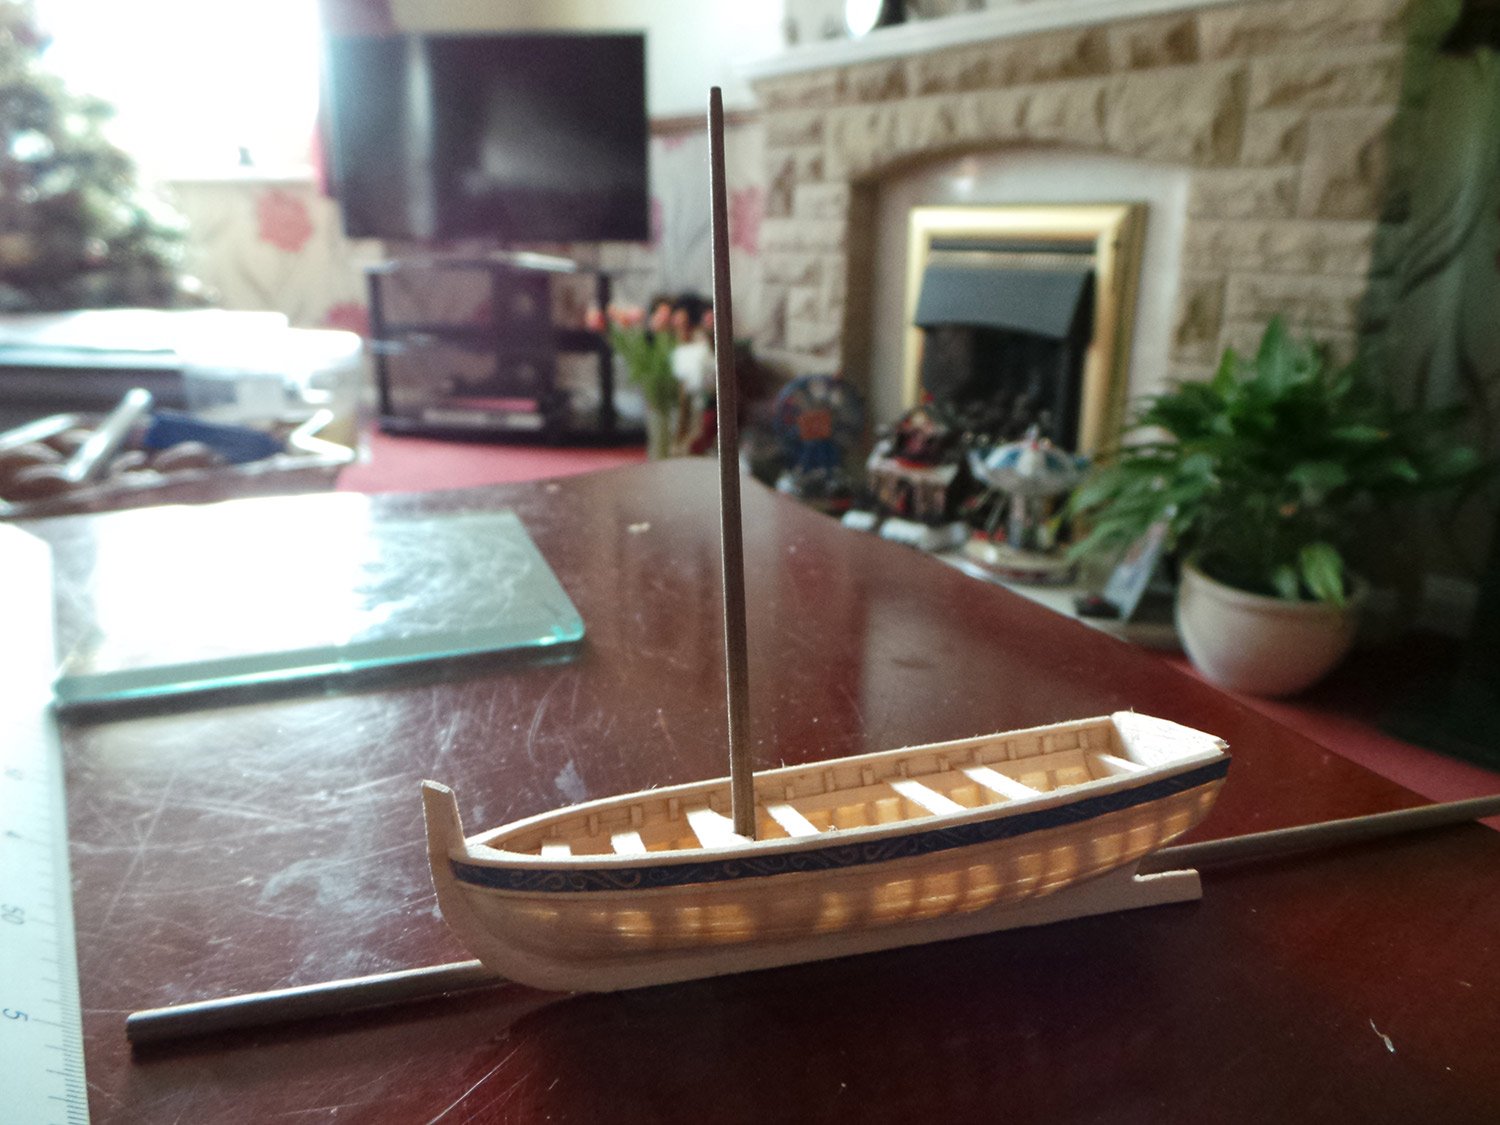
A little more progress over the Christmas period on the Longboat for Pegasus.
Floorboards installed and bow & stern platforms.


Frieze (hand painted paper) added to hull.
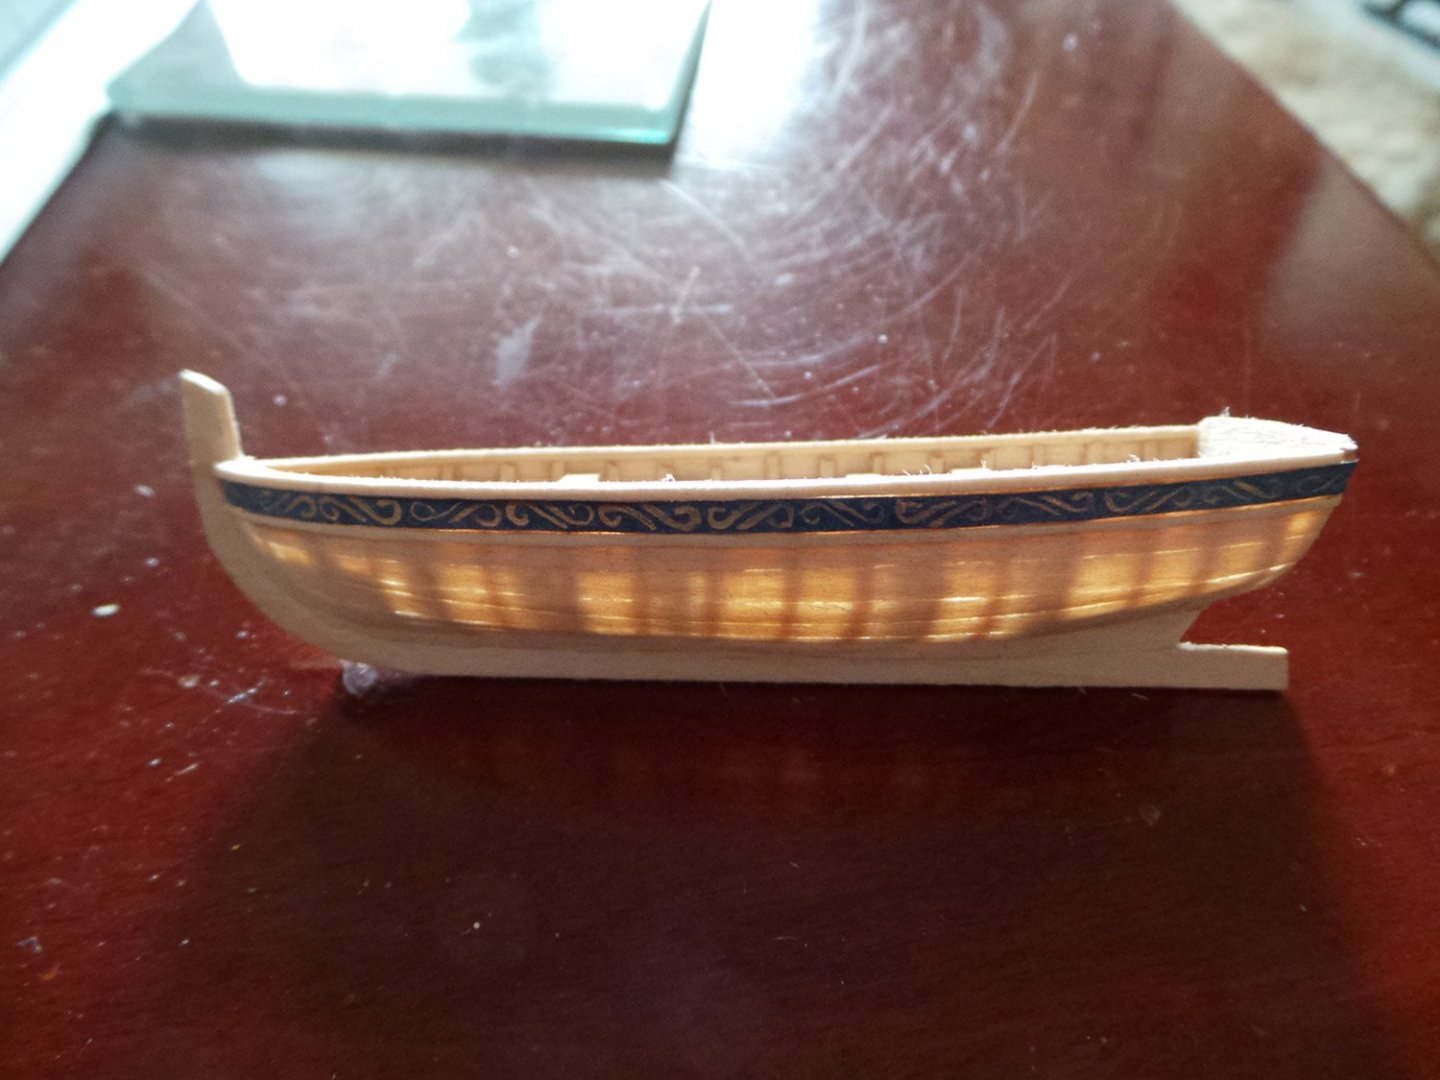

Thwarts, mast step and stern locker wall.

Mast, gaff, boom and bowsprit made.


Now on the the windlass and other fittings.
- mugje, Ryland Craze, mtbediz and 5 others
-
8
-
 Nice bit of pipework there!
- thibaultron, popeye the sailor, Moab and 1 other
-
4
-
That's a very good attempt at planking for the first time. Well done!
-
-
-
1 minute ago, el cid said:
My thinking is the mast would be stowed in the boat or lowered down to the boat crew after launch, then rigged. Seems like a boat with mast rigged and protruding fore or aft would be difficult to maneuver through the ships rigging.
FWIW,
Keith
That makes sense for manoeuvring through the rigging from it's resting place.
The mast is longer than the length of the boat, so maybe it was put into the longboat while held alongside Pegasus, before lowering onto the water?
Still trying to find clues in old seamanship manuals, but there doesn't seem to be much mention of the process of making a ship's boat ready.
- thibaultron and mtaylor
-
2
-
41 minutes ago, Roger Pellett said:
The thwart supporting the mast on eighteenth Century longboats was fixed-that is secured by knees to the clamps running fore and aft inside the boat. Furthermore, the mast is secured to the aft side of this fixed thwart. This scheme would, therefore, not work.
Roger
Drat! Back to the drawing board!
- mtaylor and thibaultron
-
2
-
Thanks for the help guys,
I have also found this passage from 'The Elements and Practice of Rigging and Seamanship', 1794 By David Steel, a digital copy of which is freely available on the San Francisco Maritime National Park Association's website.
QuoteSLOOPS, SMACKS, BARGES, and LIGHTERS, that go through bridges, have the mast confined in a trunk or wooden cap, above the deck, and fastened in by an iron strap on the aft-side: some have a strong iron hinge at the heel of the mast, or a bolt through the heel; so that it can be lowered at pleasure, by the stay-tackle easing away the fall by degrees. To raise the mast, the fall is brought to the windlass, and hove upon, until the mast is up in its place: the fall is then stopped to the windlass bitts.
So could the stay tackle falls and windlass also be used to raise the mast on the longboat that is in the process of making ready?
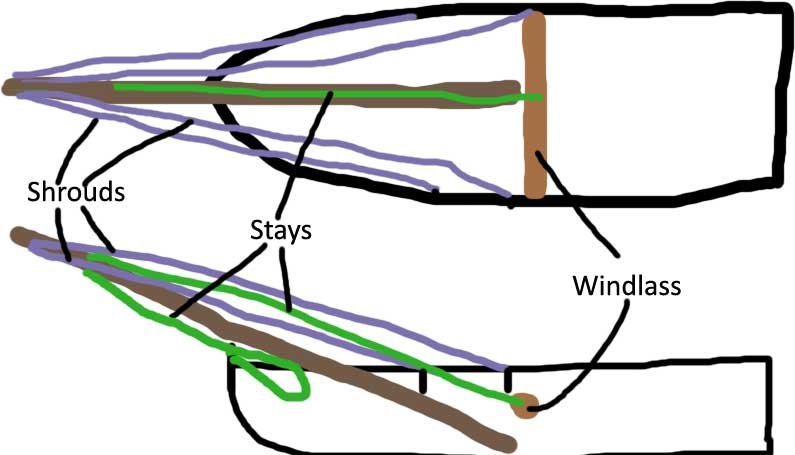
Your suggestions and the above text has given me an idea. Would the following set up look plausible while the longboat is being hoisted from the deck of Pegasus? The forward thwarts would need to be removed to clear the bow for the mast to rest as shown below - plausible?
The shrouds (shown in blue) attached to the mast and longboat chain plates, (the lanyards loose so they would be tightened when the mast is upright)
The stay (shown in green) attached to mast, the lead attached to stem (again the lanyard would be loose as would the stay) and the fall to the windlass.
Do you think all the standing and running rigging would be attached before lowering onto the water or just the main standing parts as shown below? My thinking is that if all of it was attached while the mast is lowered, it would be easier than trying to climb up the mast when it is set, to attach all the rest.
- mtaylor and thibaultron
-
2
-
I have a question regarding the stowage of the mast and rigging for the longboat when it is not in use / being readied for use.
I am toying with the idea of having the longboat I am making, shown being lowered from my Pegasus's spars, as though it was being readied for launching, but I don't know how the mast and rigging would be stowed and how much would be in place before it is lowered to the water?
What rigging (if any) would be attached to the mast ready for stepping it when the boat hits the water?
How would the shrouds and ratlines be stored, would any of it be left attached to the longboat? Same with the stays?
Any thoughts and suggestions would be appreciated.
Thanks guys.
- thibaultron and mtaylor
-
2
-
7 minutes ago, Blue Pilot said:
I just read through your entire log, beautiful work. Thanks for sharing it was fun to read.
Thanks for looking in, always welcome.
-
I have a question regarding the stowage of the mast and rigging for the longboat when it is not in use / being readied for use.
I am toying with the idea of having the longboat shown being lowered from Pegasus's spars, as though it was being readied for launching, but I don't know how the mast and rigging would be stowed and how much would be in place before it is lowered to the water?
What rigging (if any) would be attached to the mast ready for stepping it when the boat hits the water?
How would the shrouds and ratlines be stored, would any of it be left attached to the longboat? Same with the stays?
Any thoughts and suggestions would be appreciated.
Thanks Guys.
-
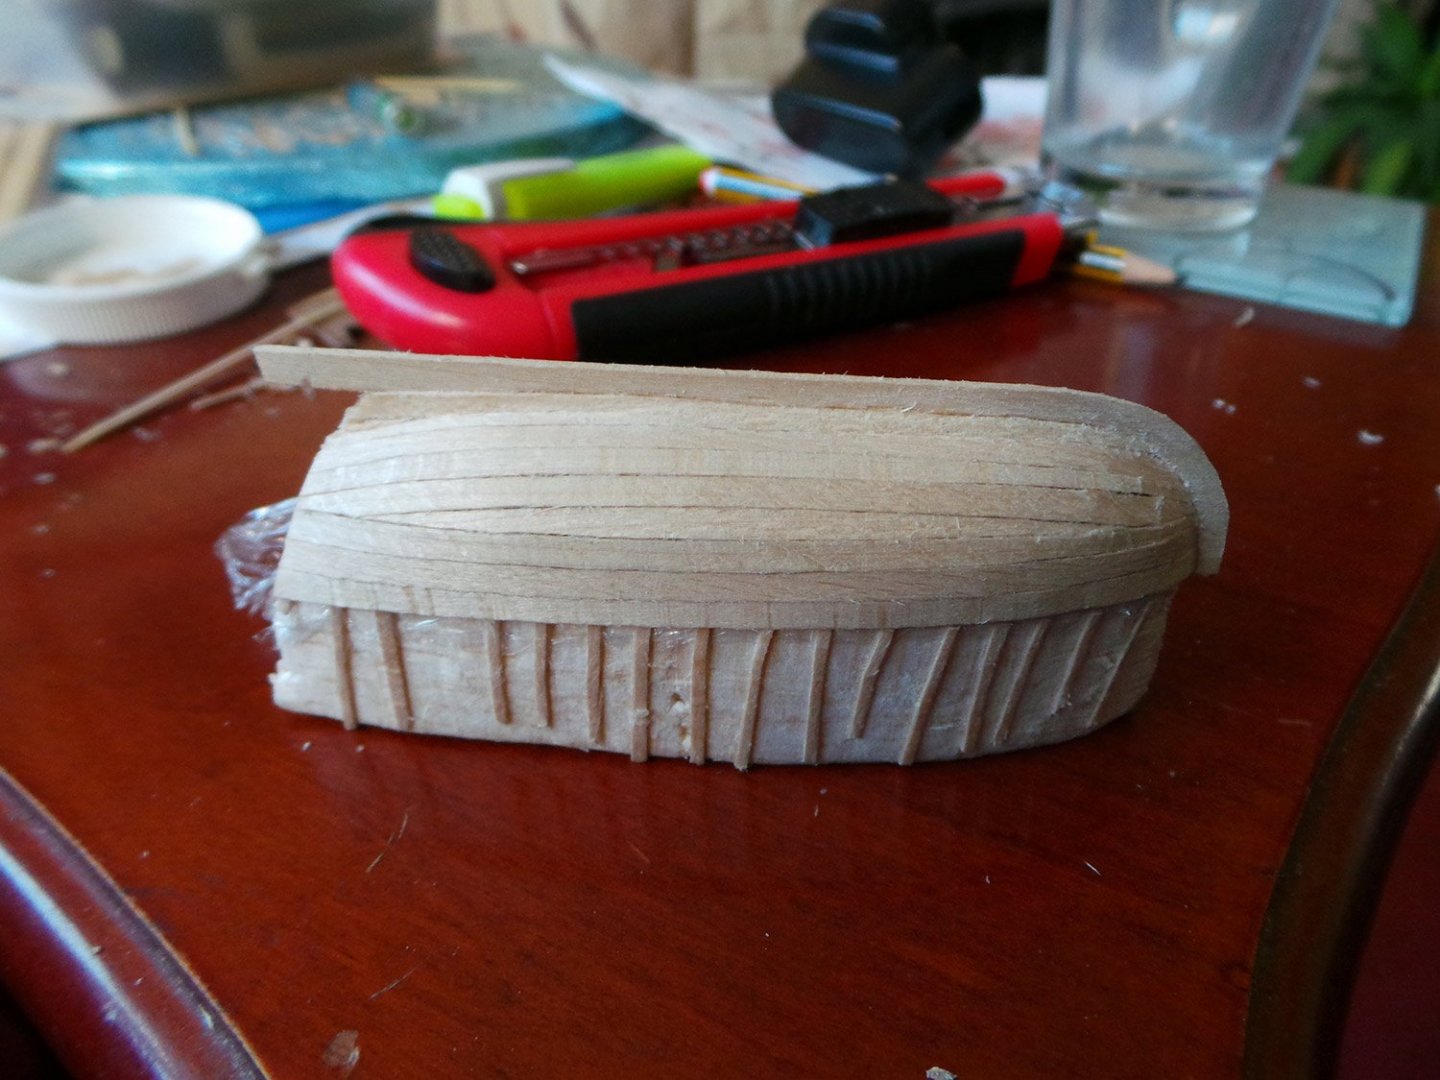
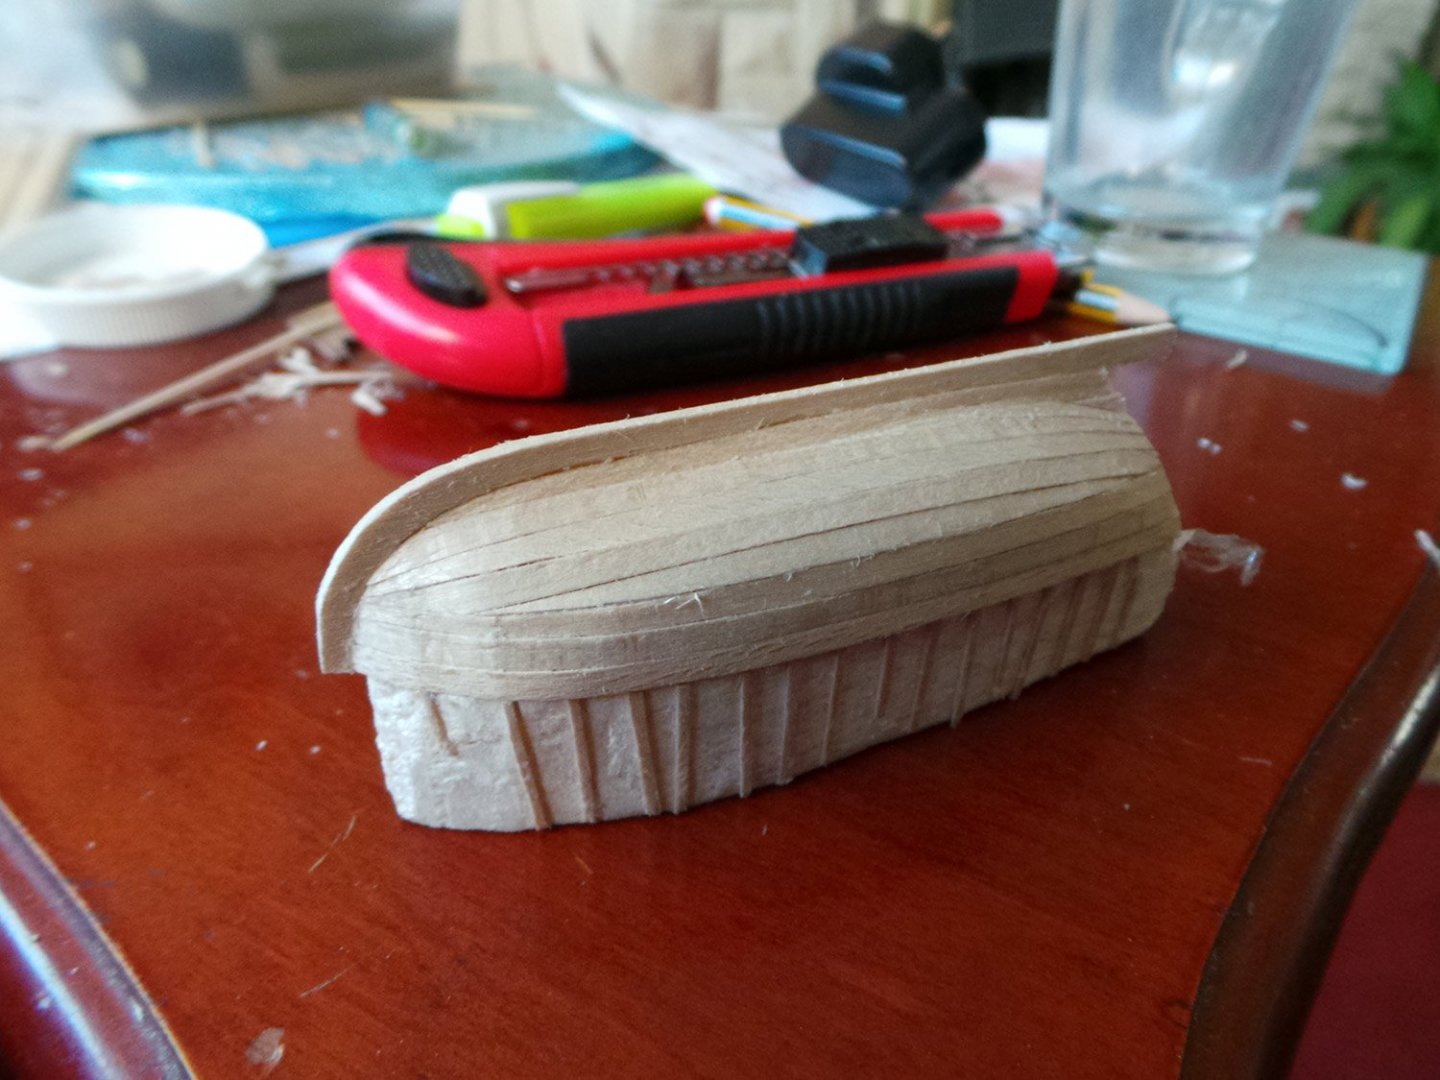
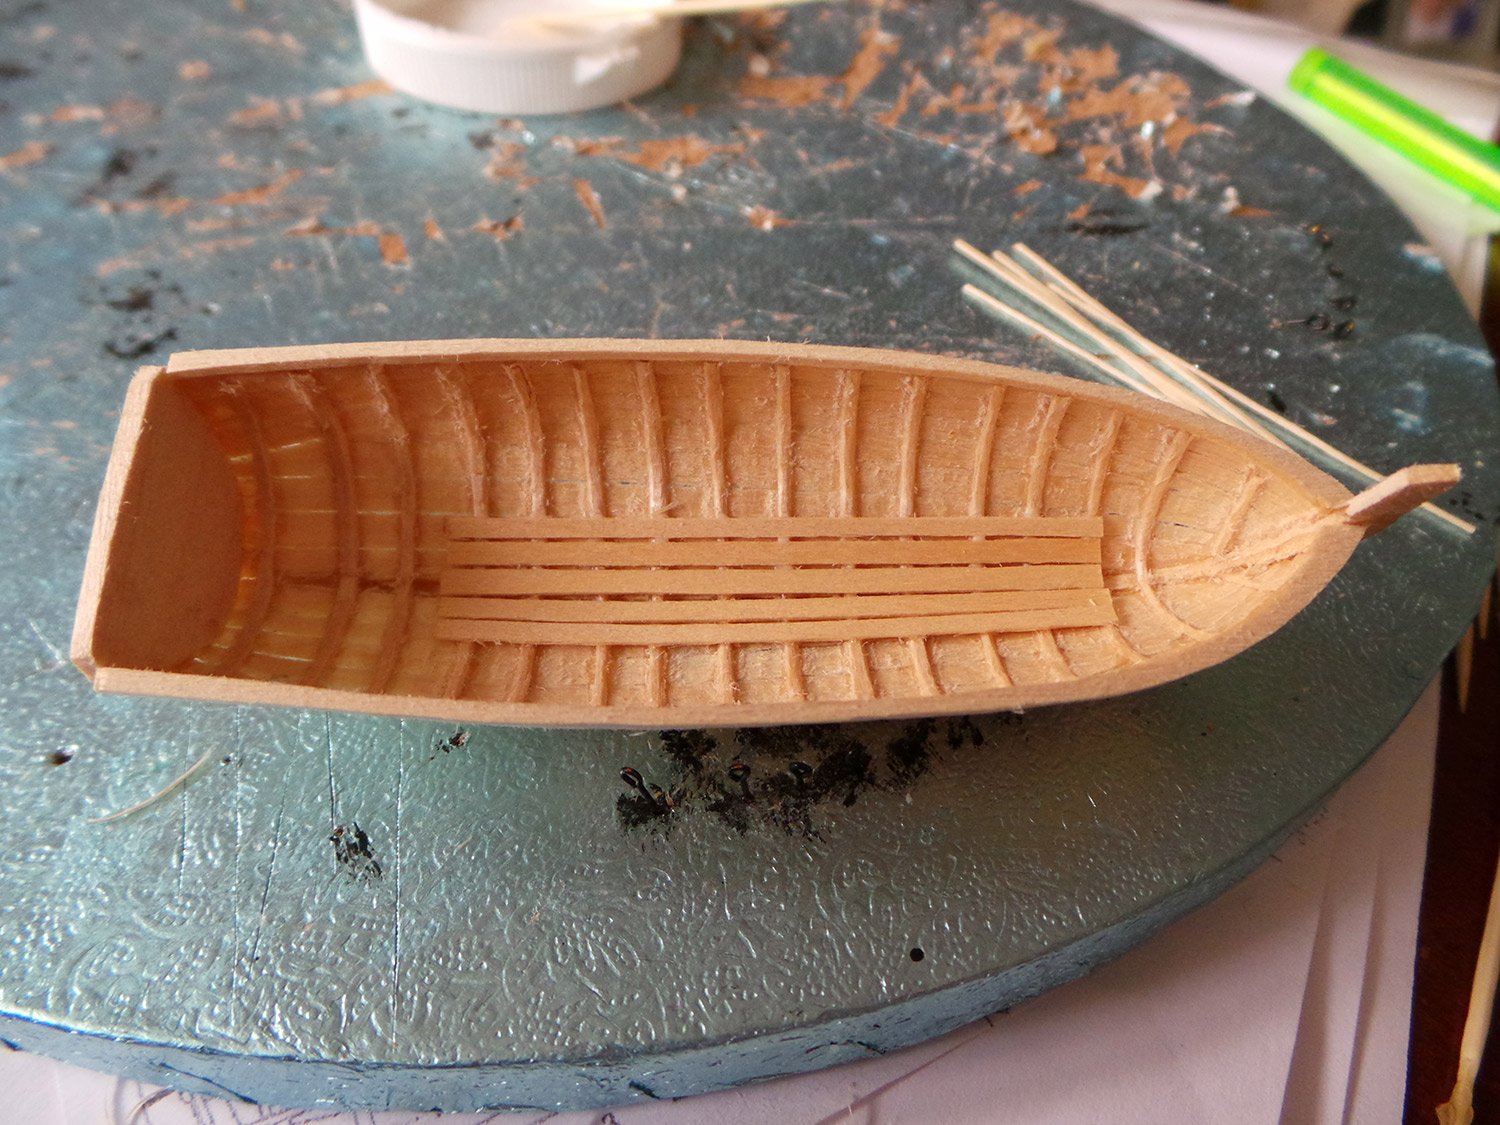
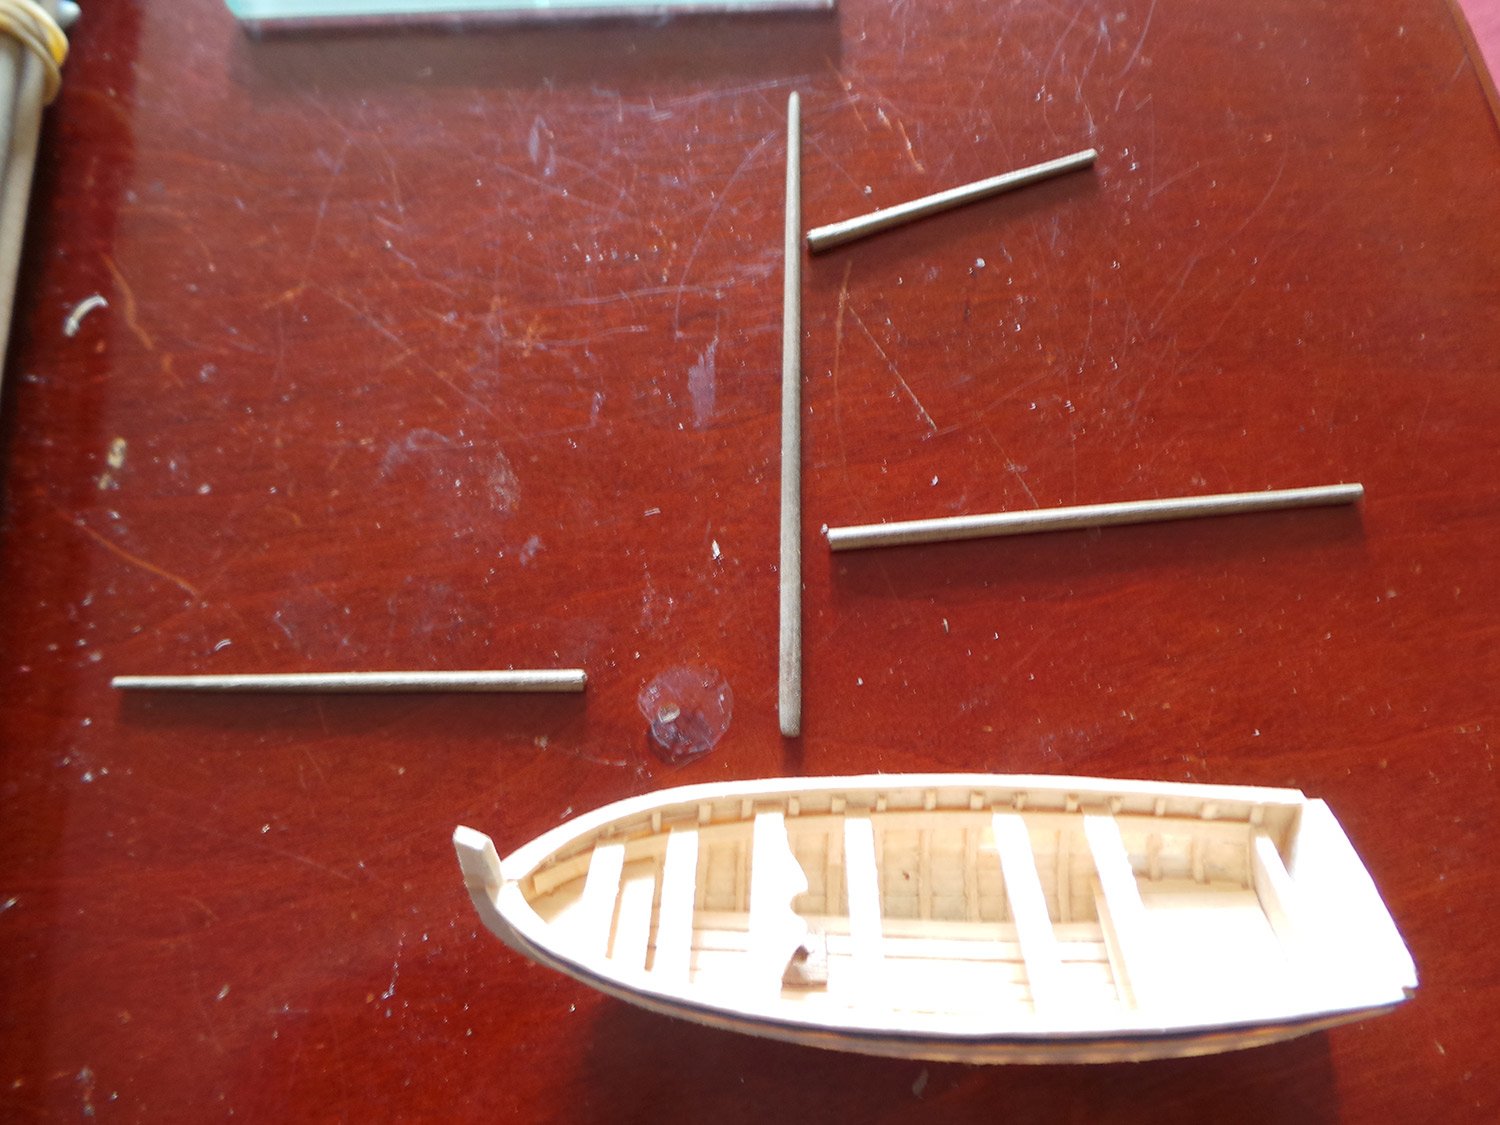
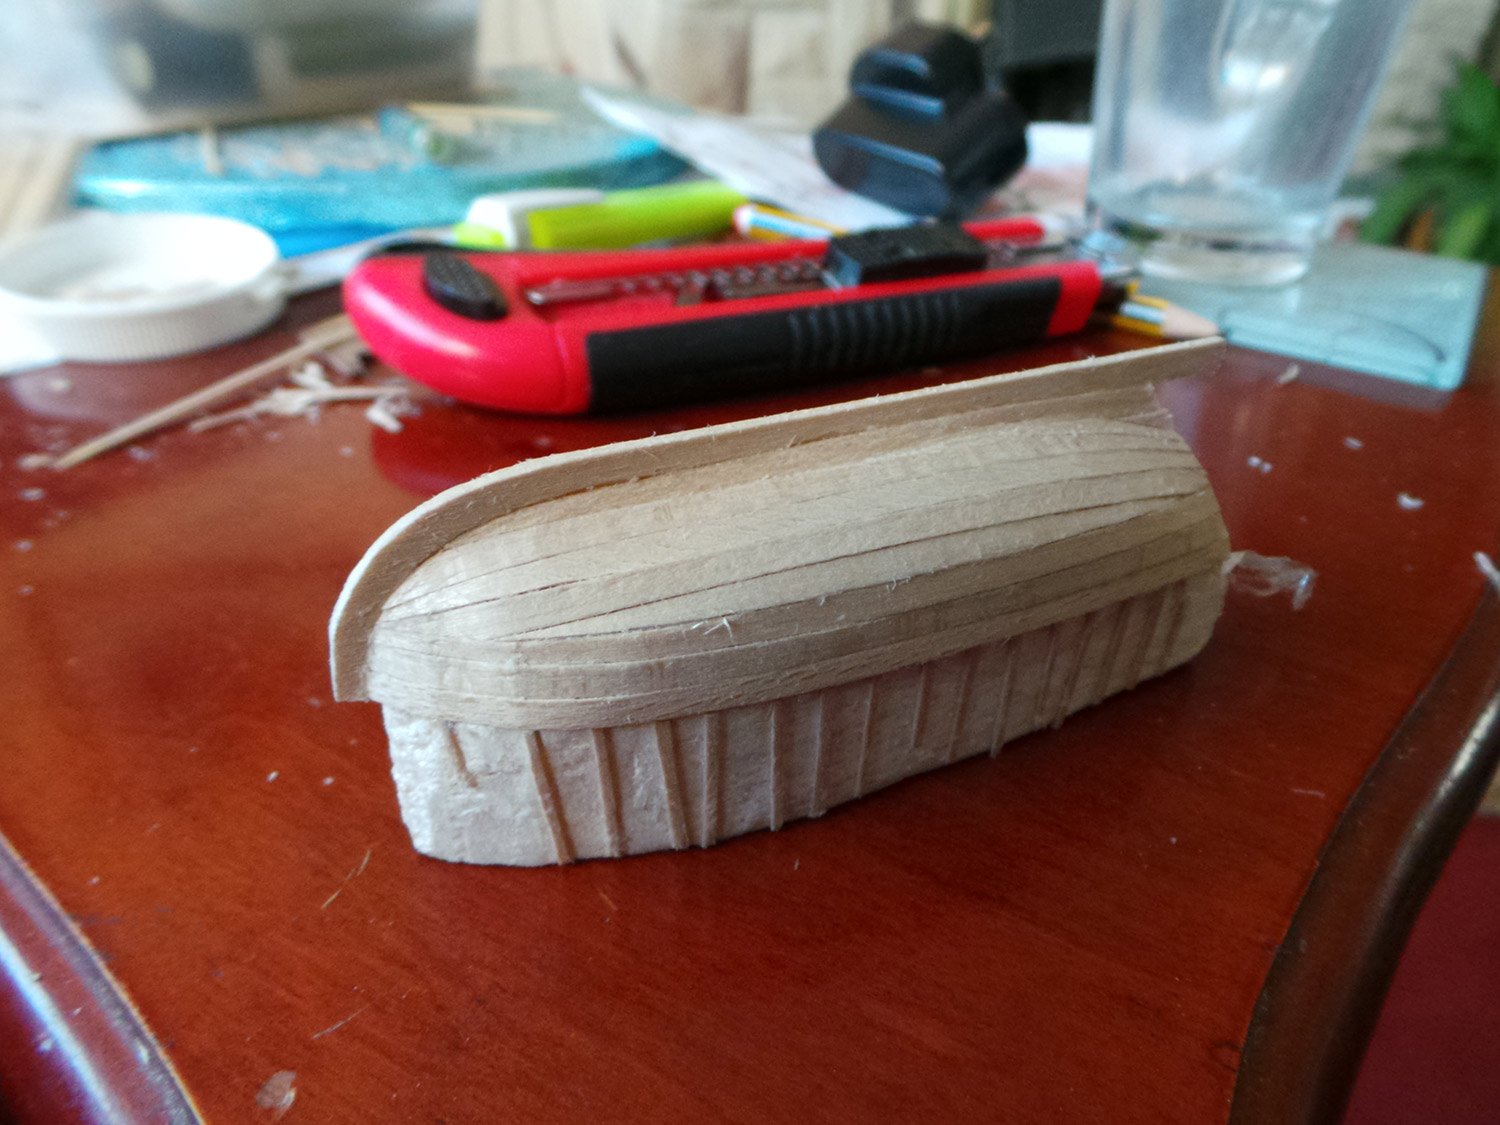
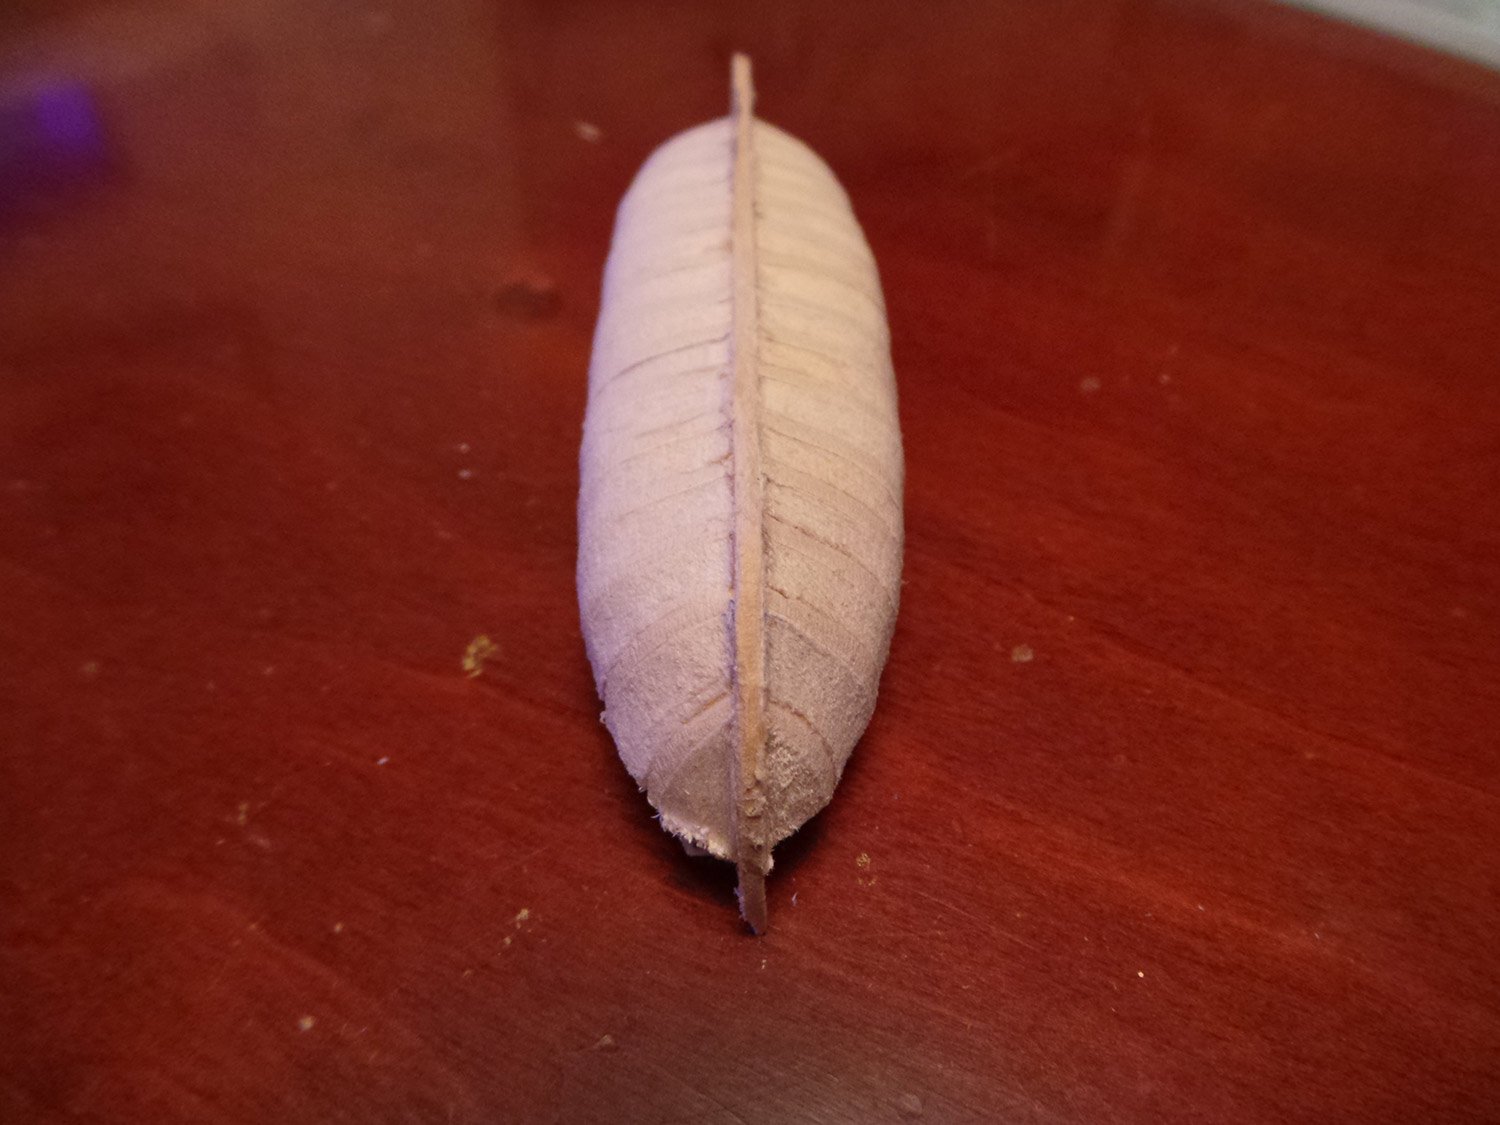
Now off the plug and in need of a tidy up inside.


After a tidy up with my trusty Dremel and the capping rail fitted (cut from 0.8mm basswood)
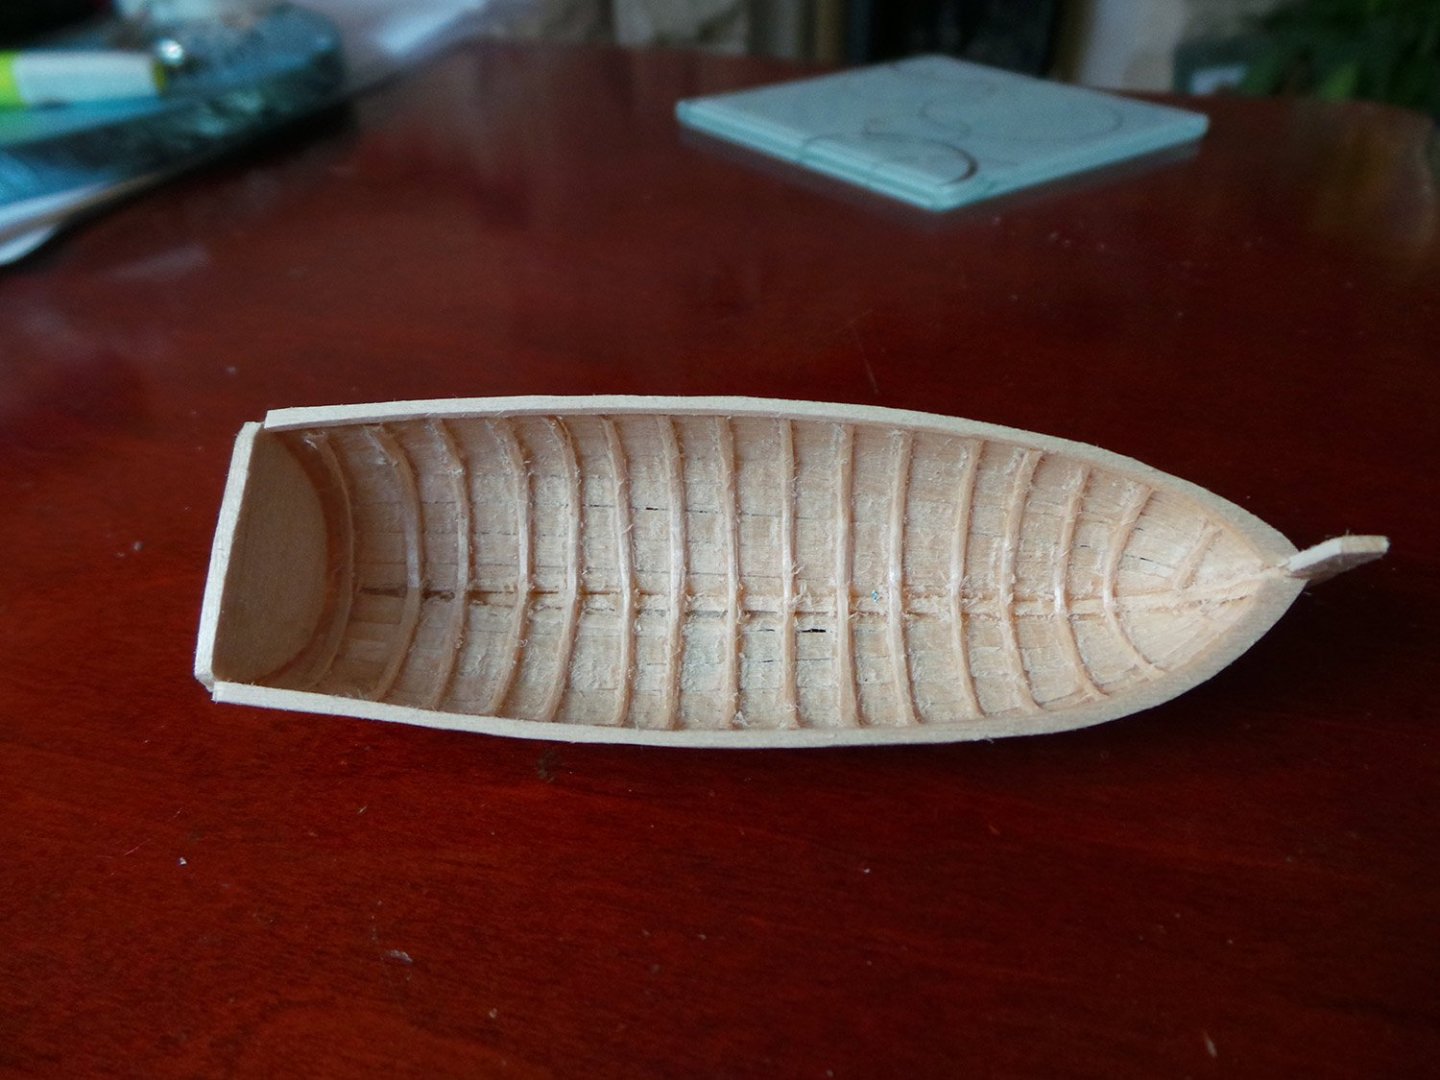

So this is where I am at now. Next will be the floorboards.
-
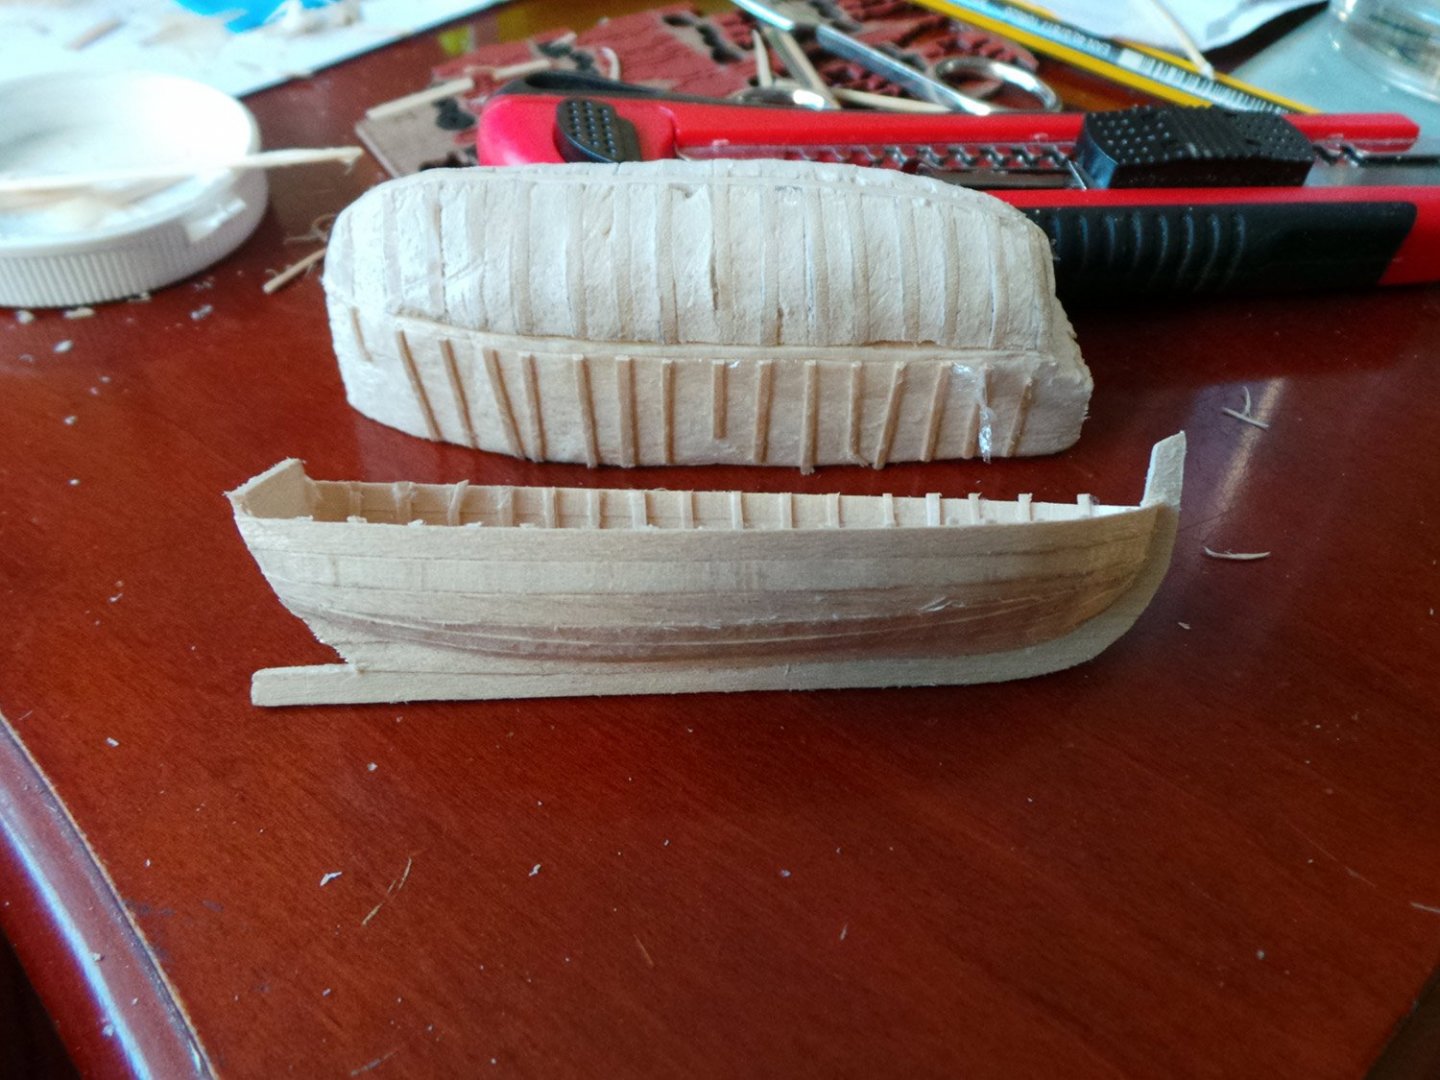
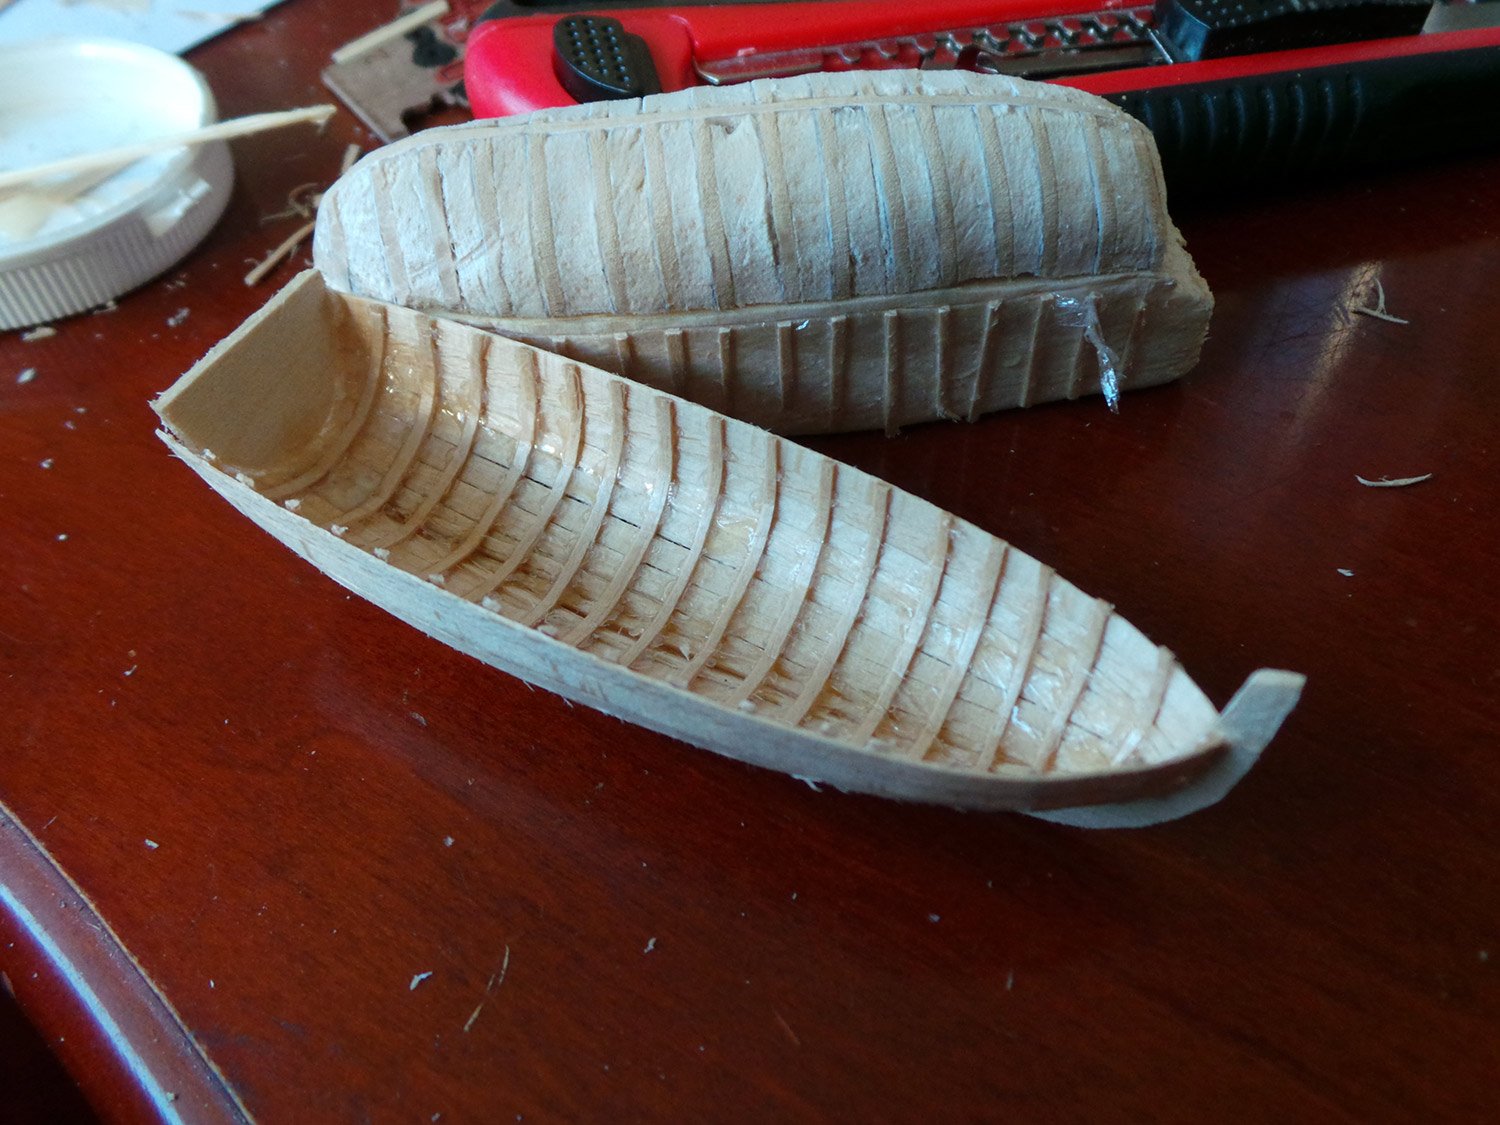
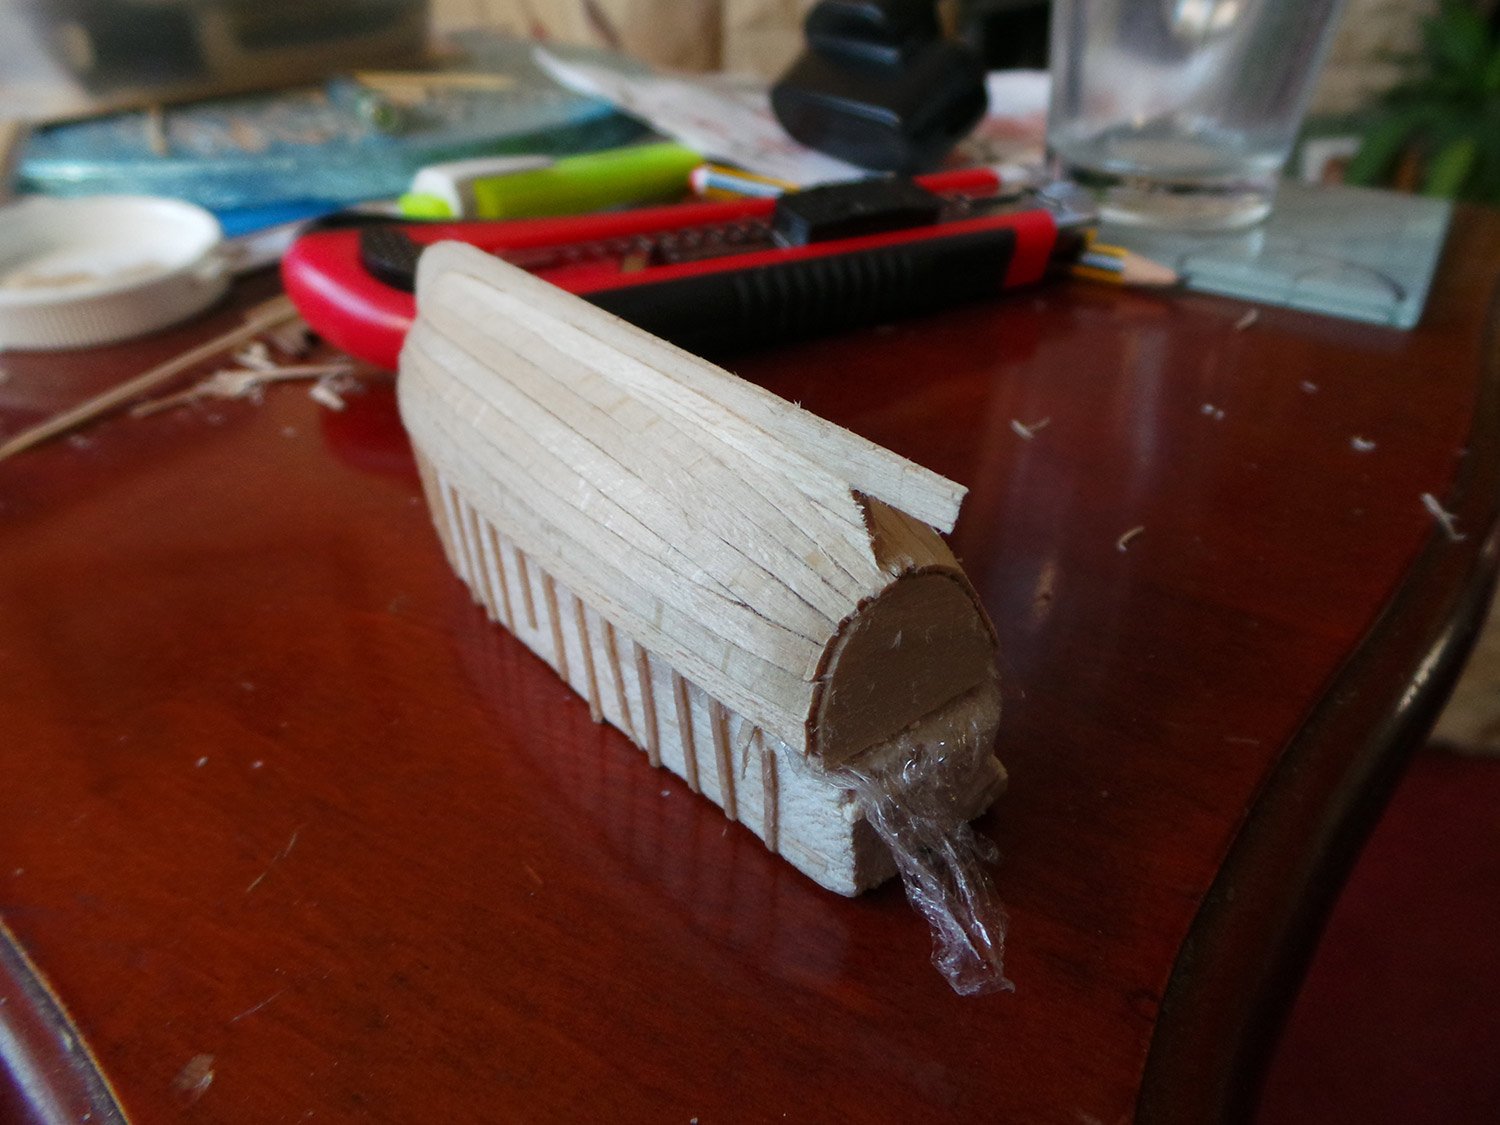
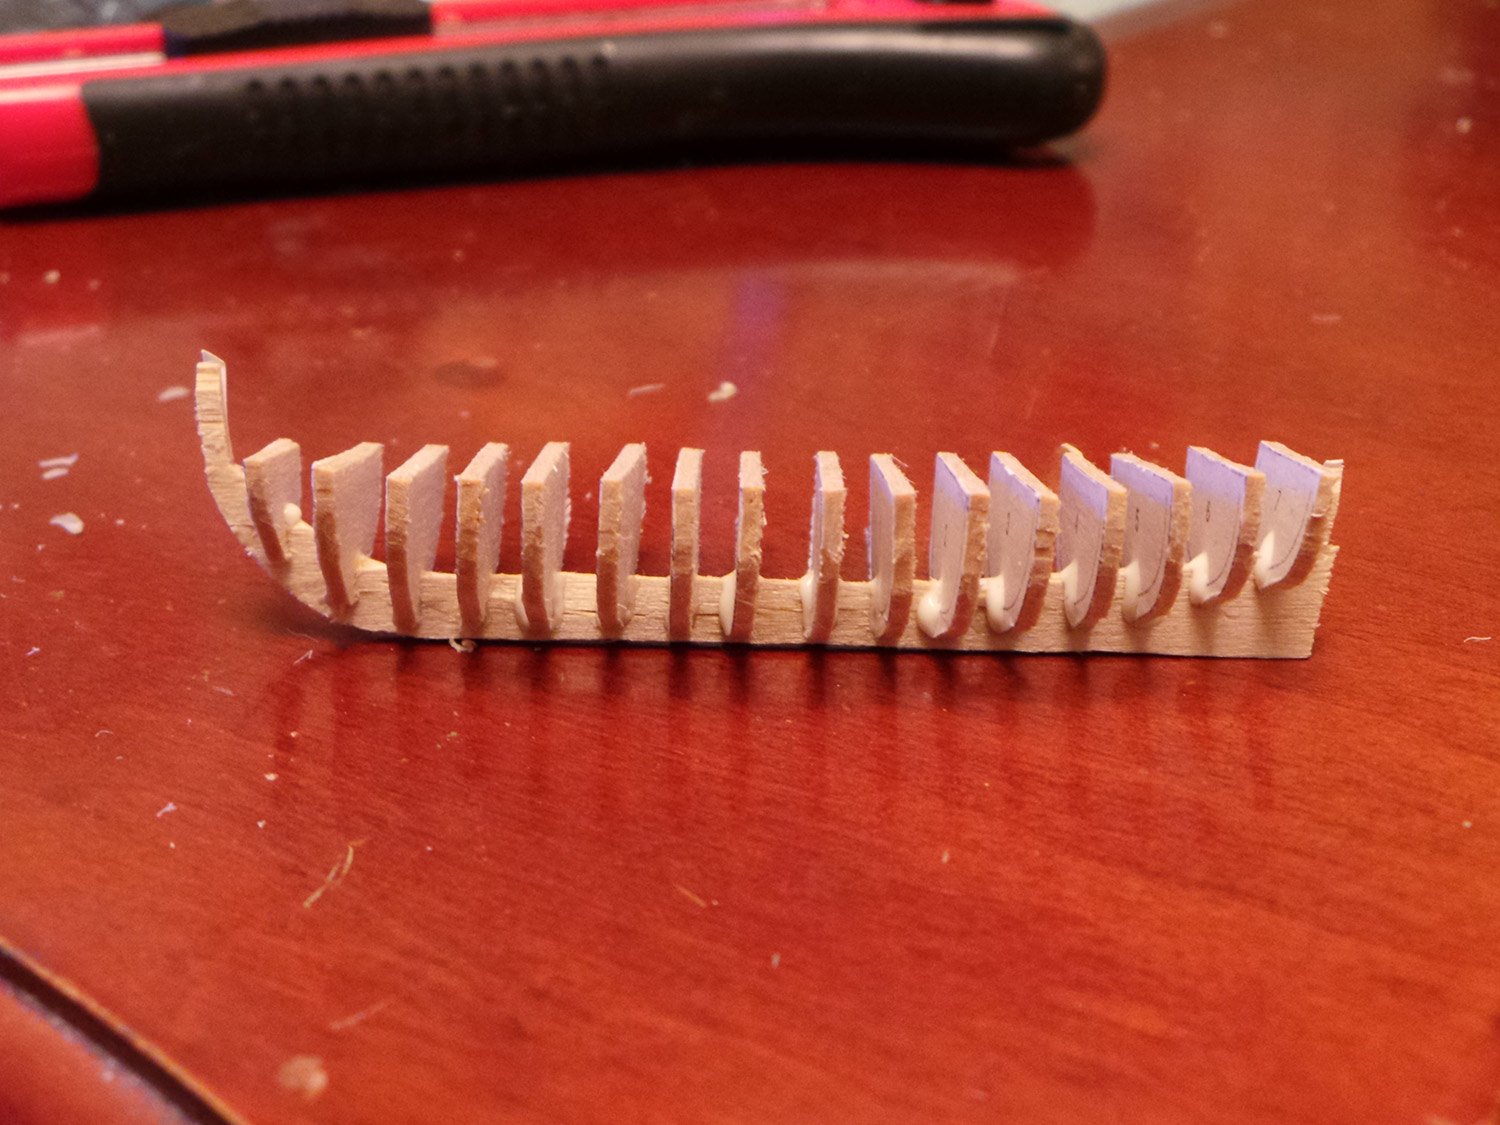
The new keel was cut from 1.5mm basswood and glued in place. I even managed to make a rabbet!
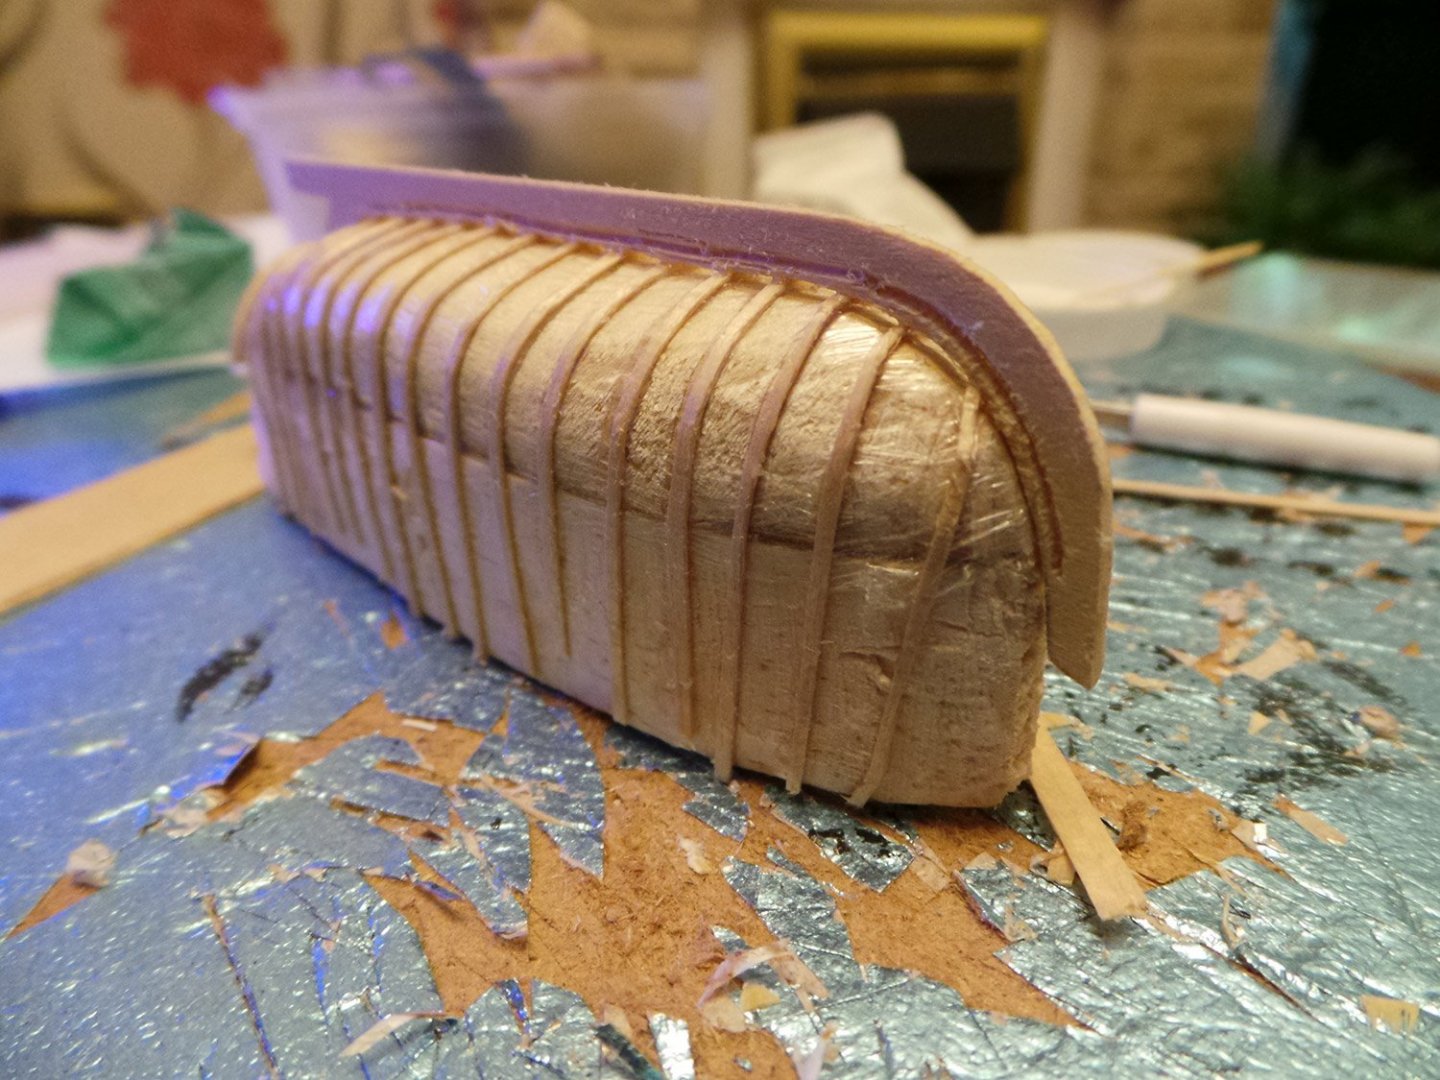
Planking is 0.5mm maple strips 3mm wide.


Now ready to cut from the plug.
-
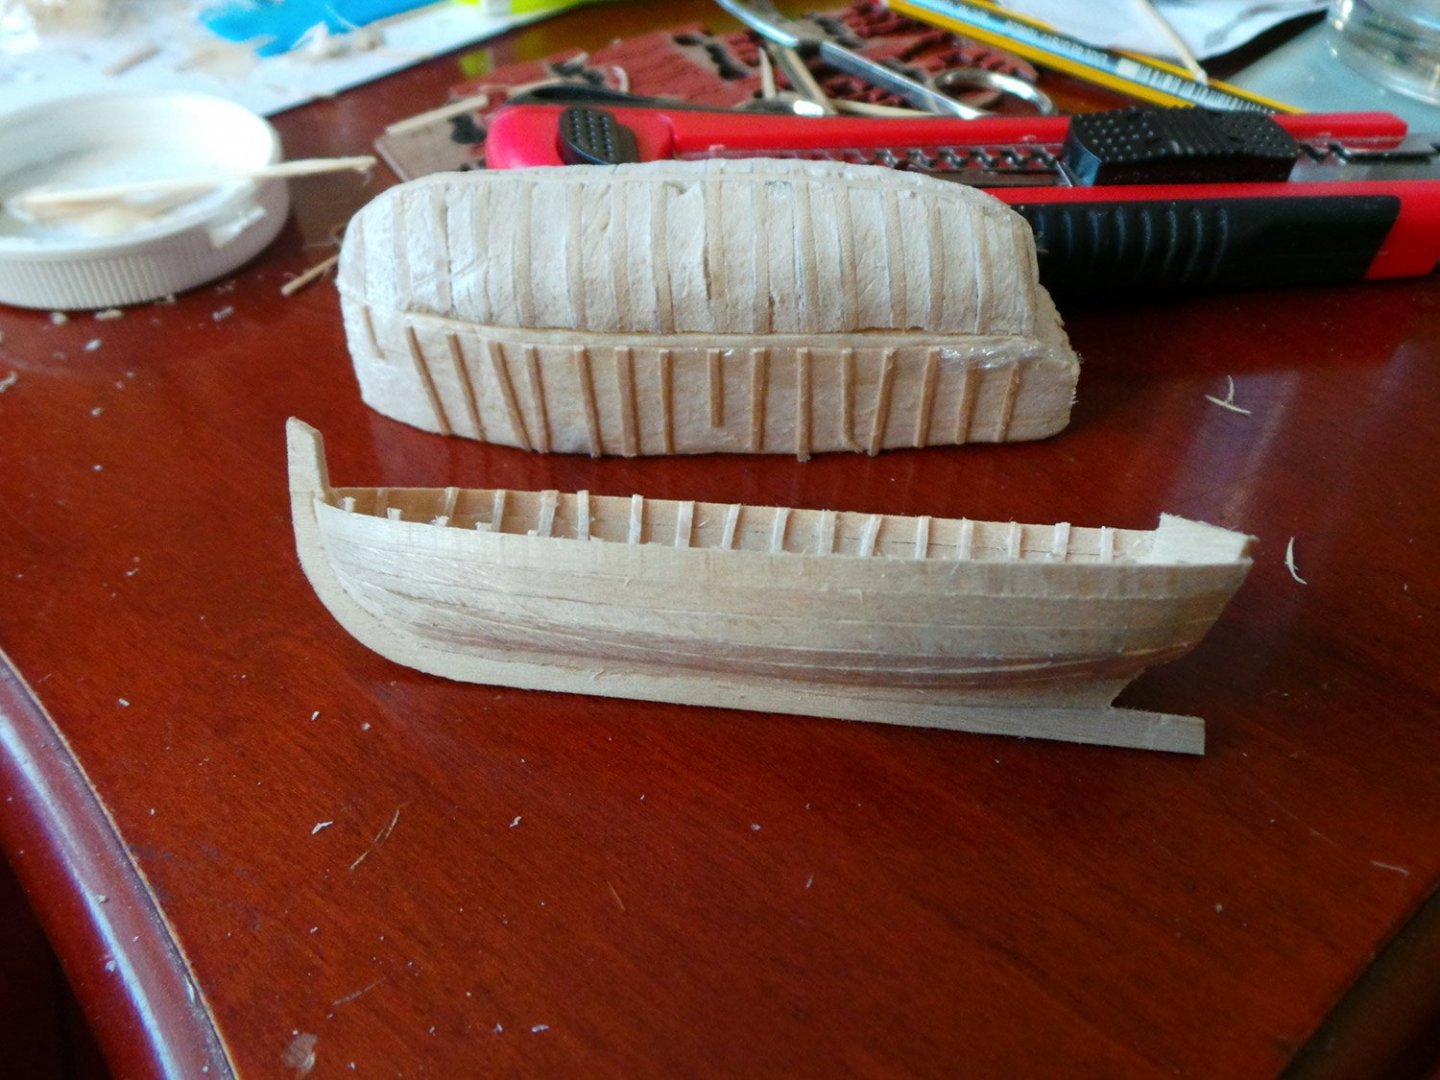
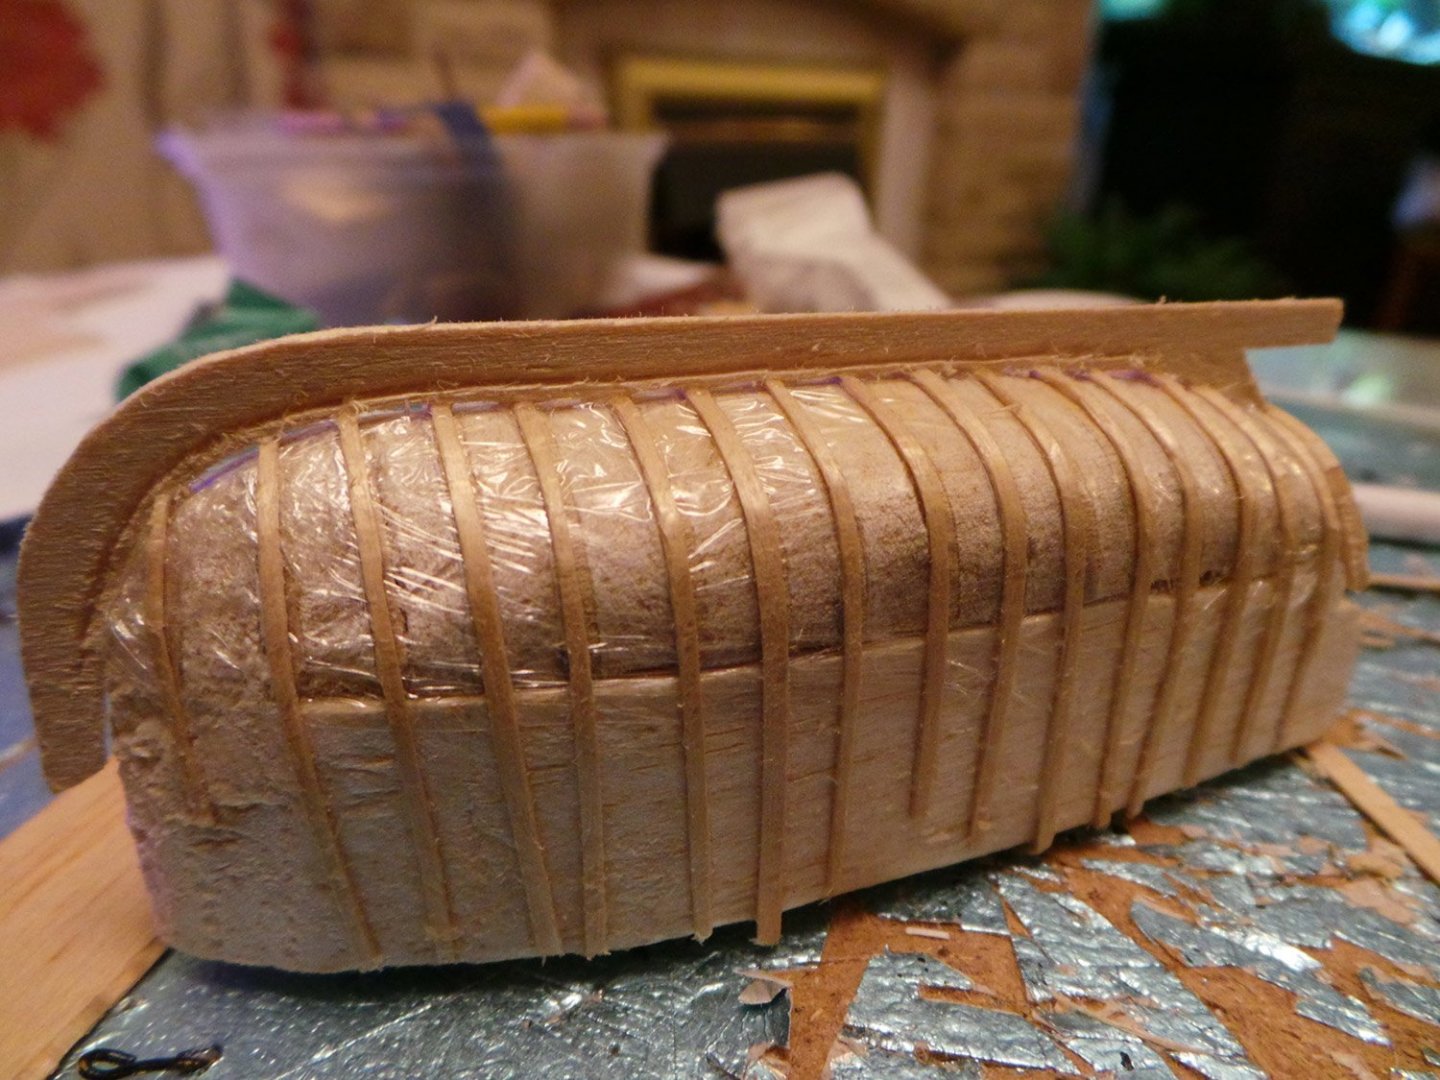
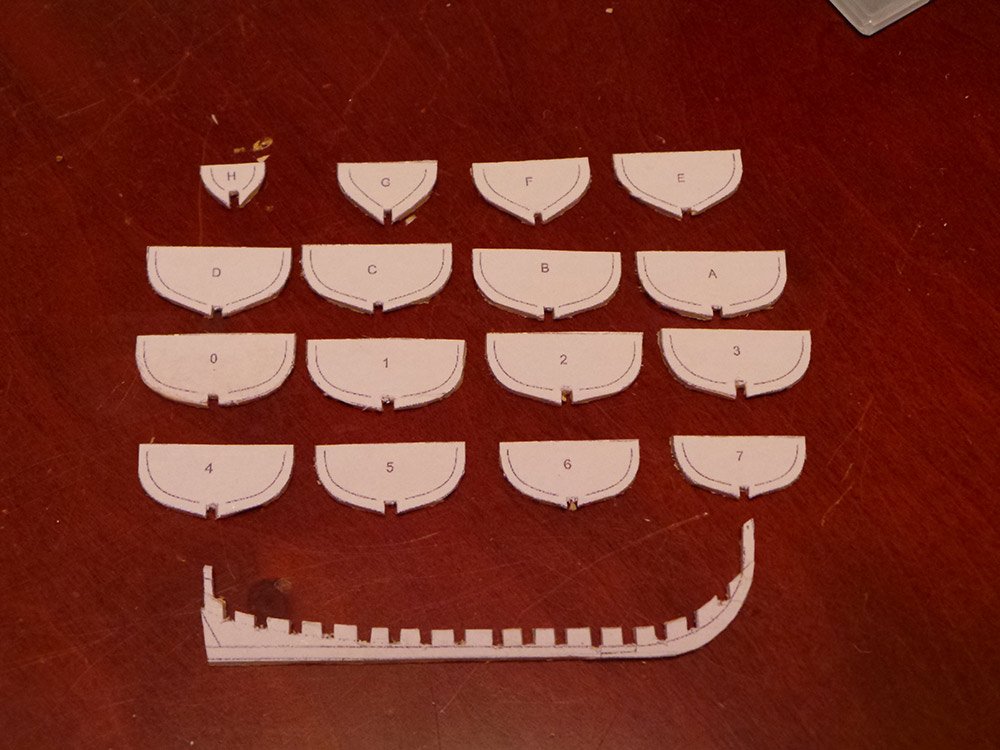
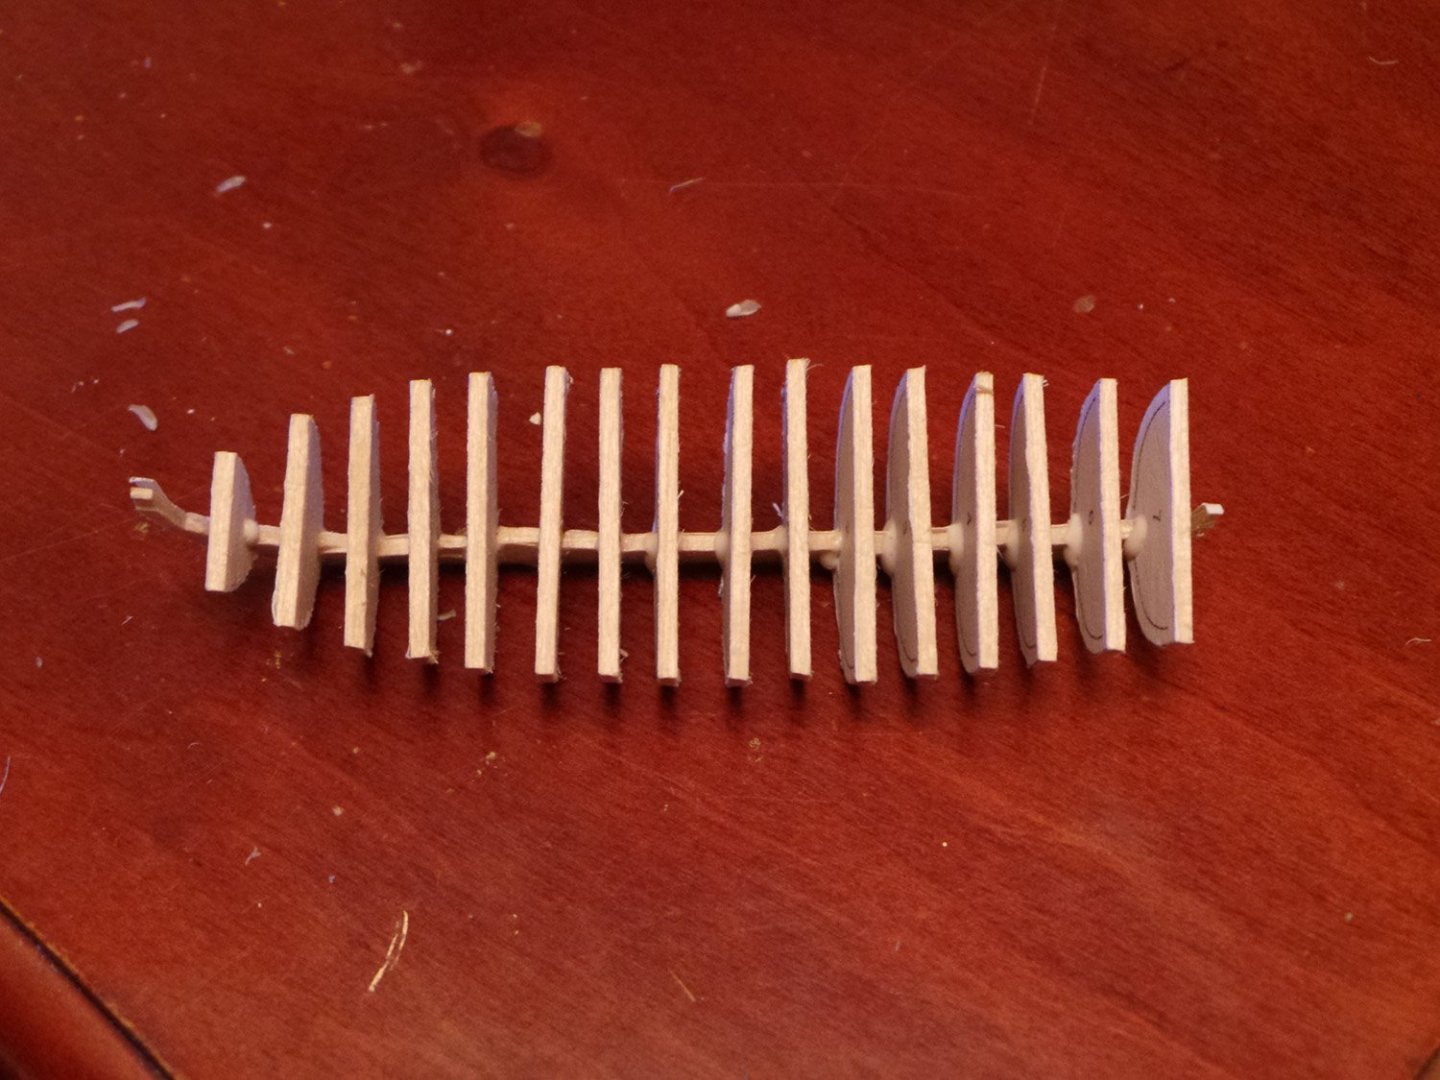
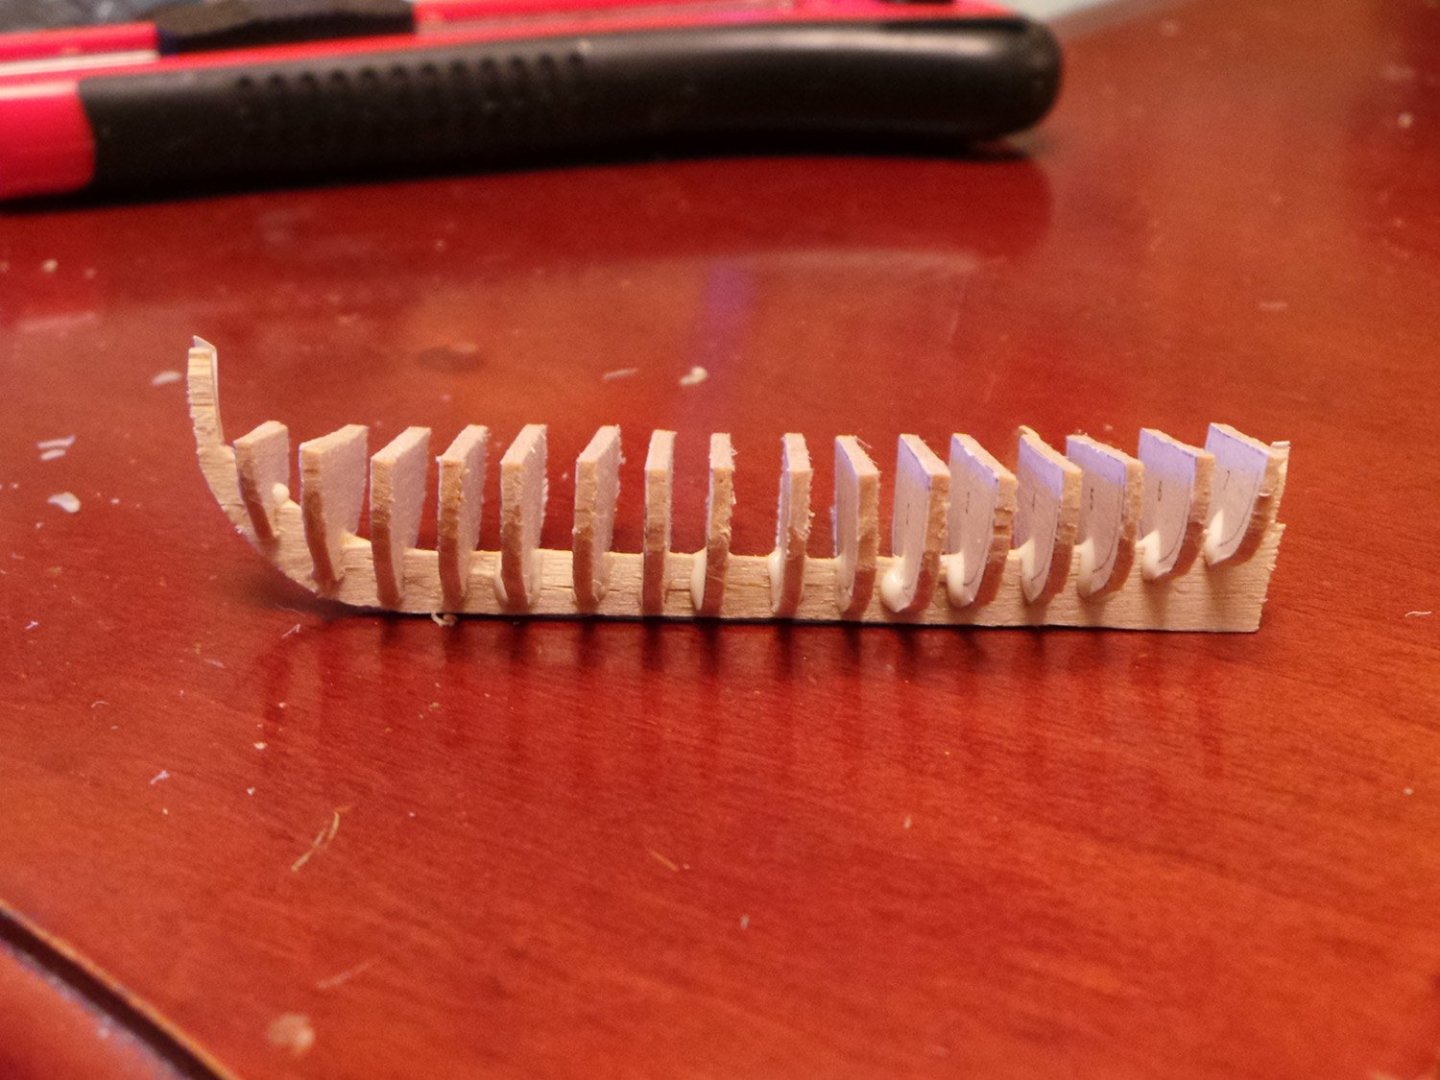
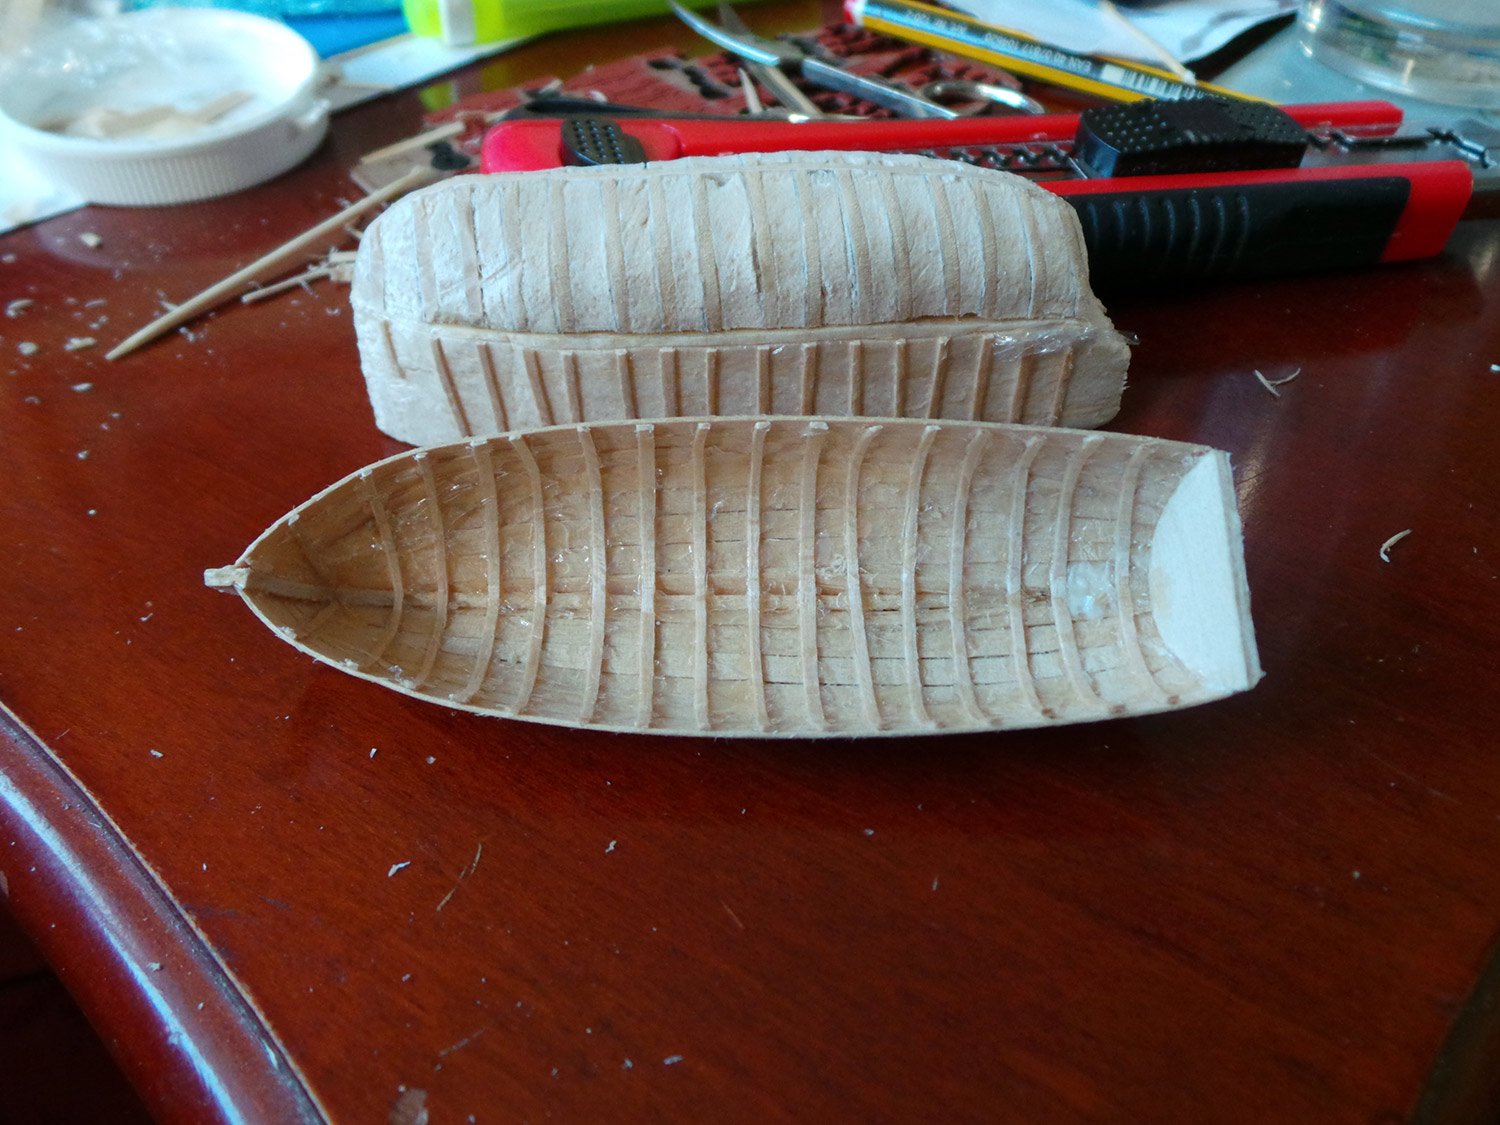
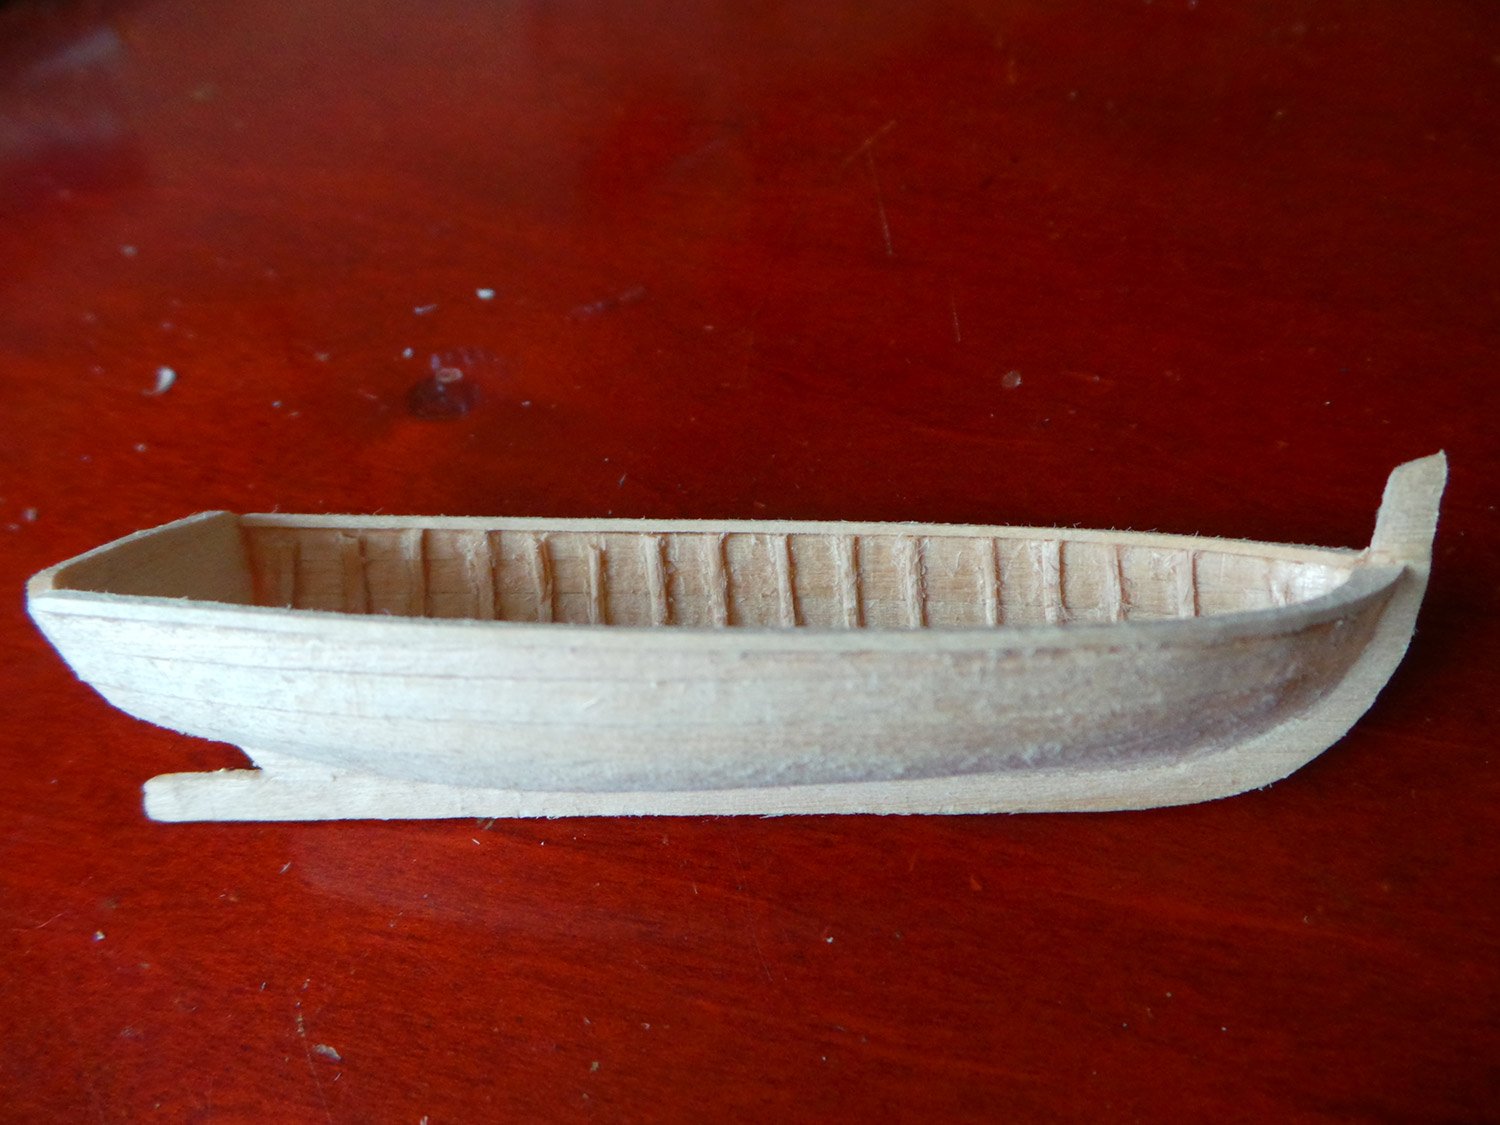
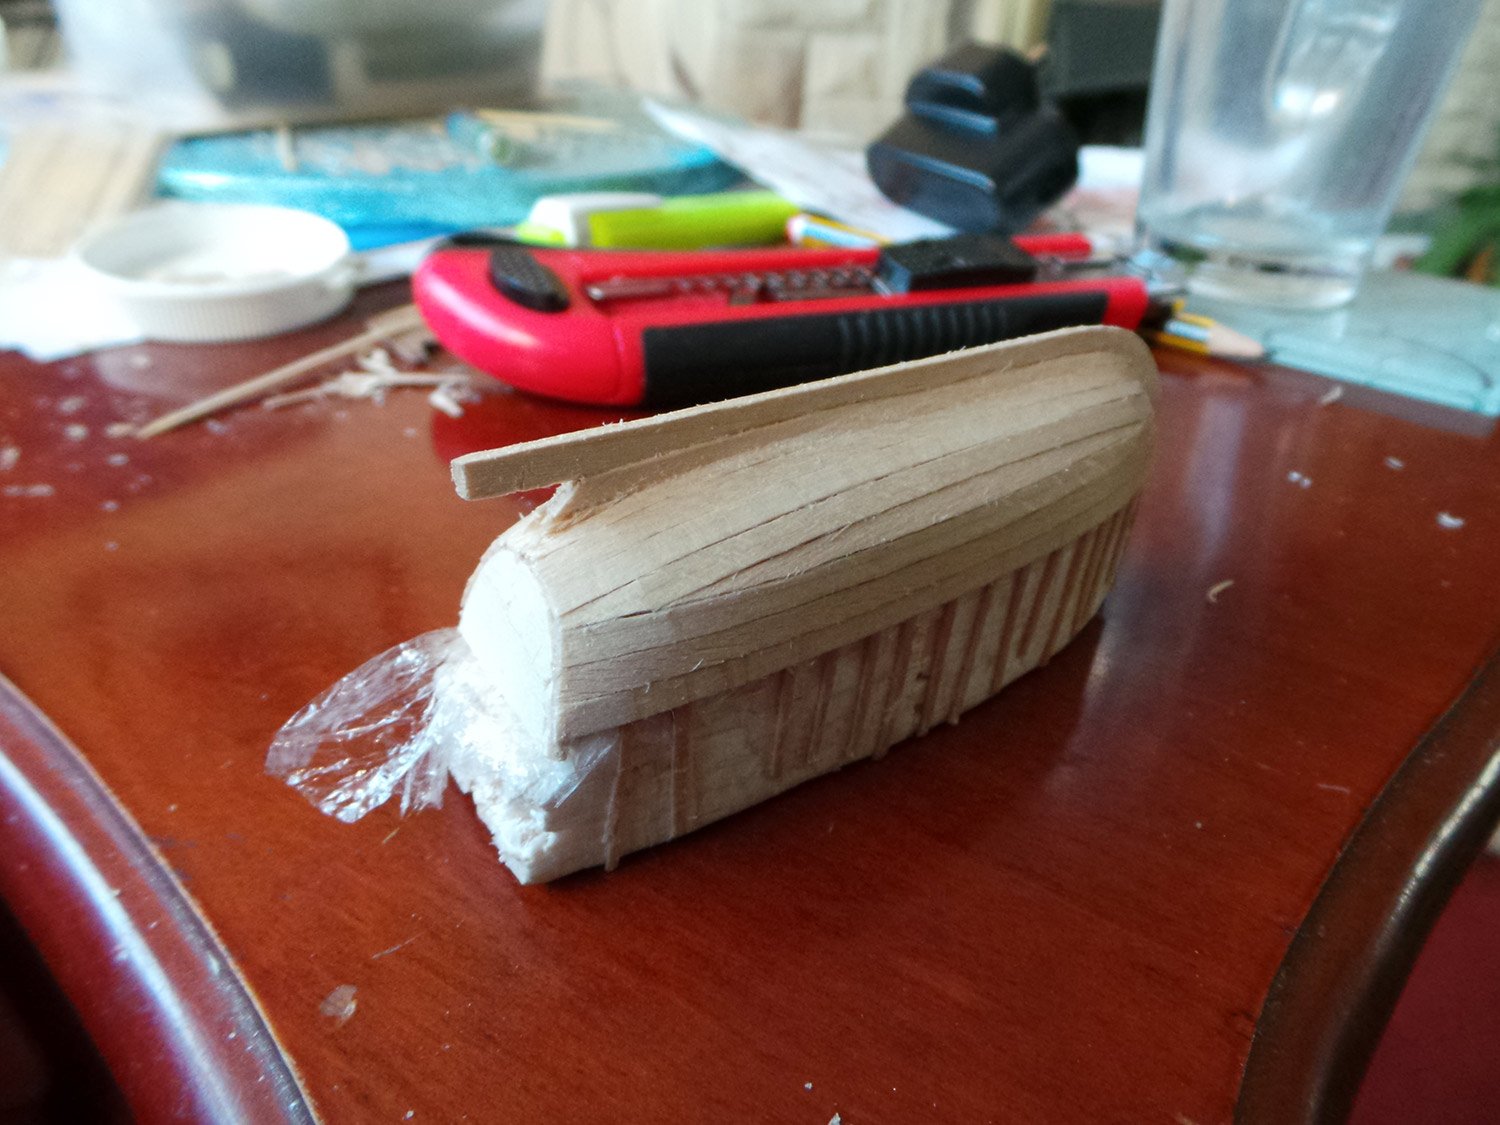
I have been working on my little longboat for Pegasus.
I have made the hull using the plug method again.
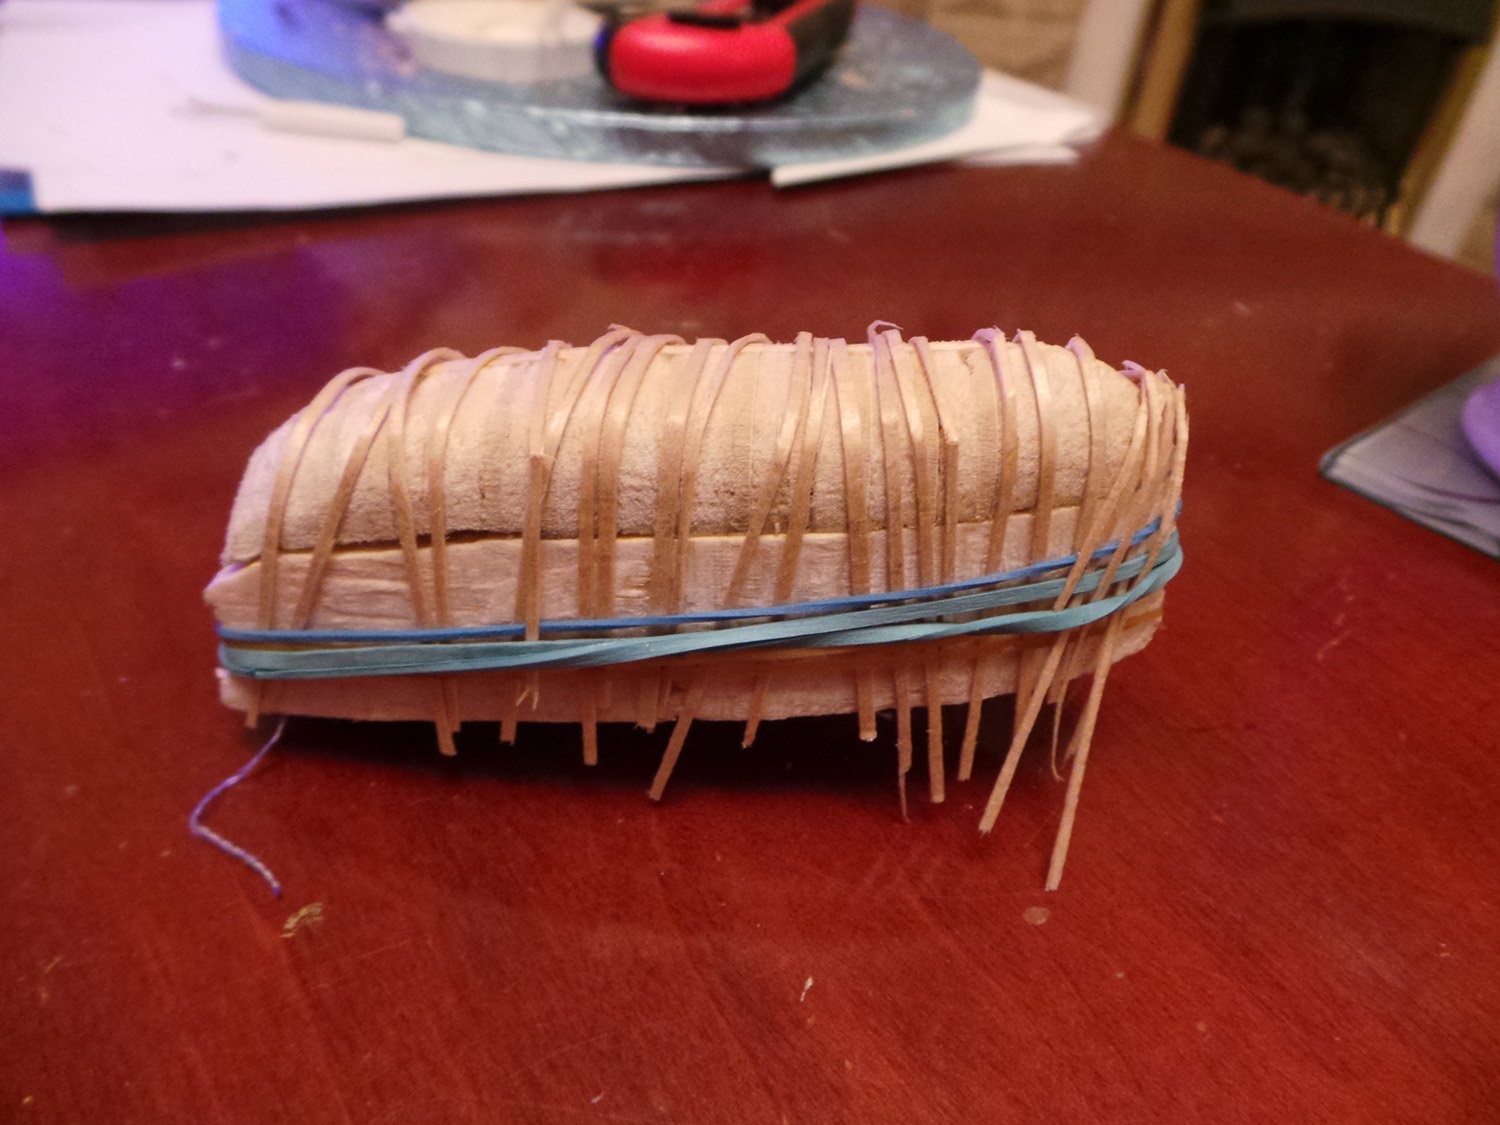
The false keel and frames were cut from 1.5mm Basswood, frames are glued to keel and let dry.
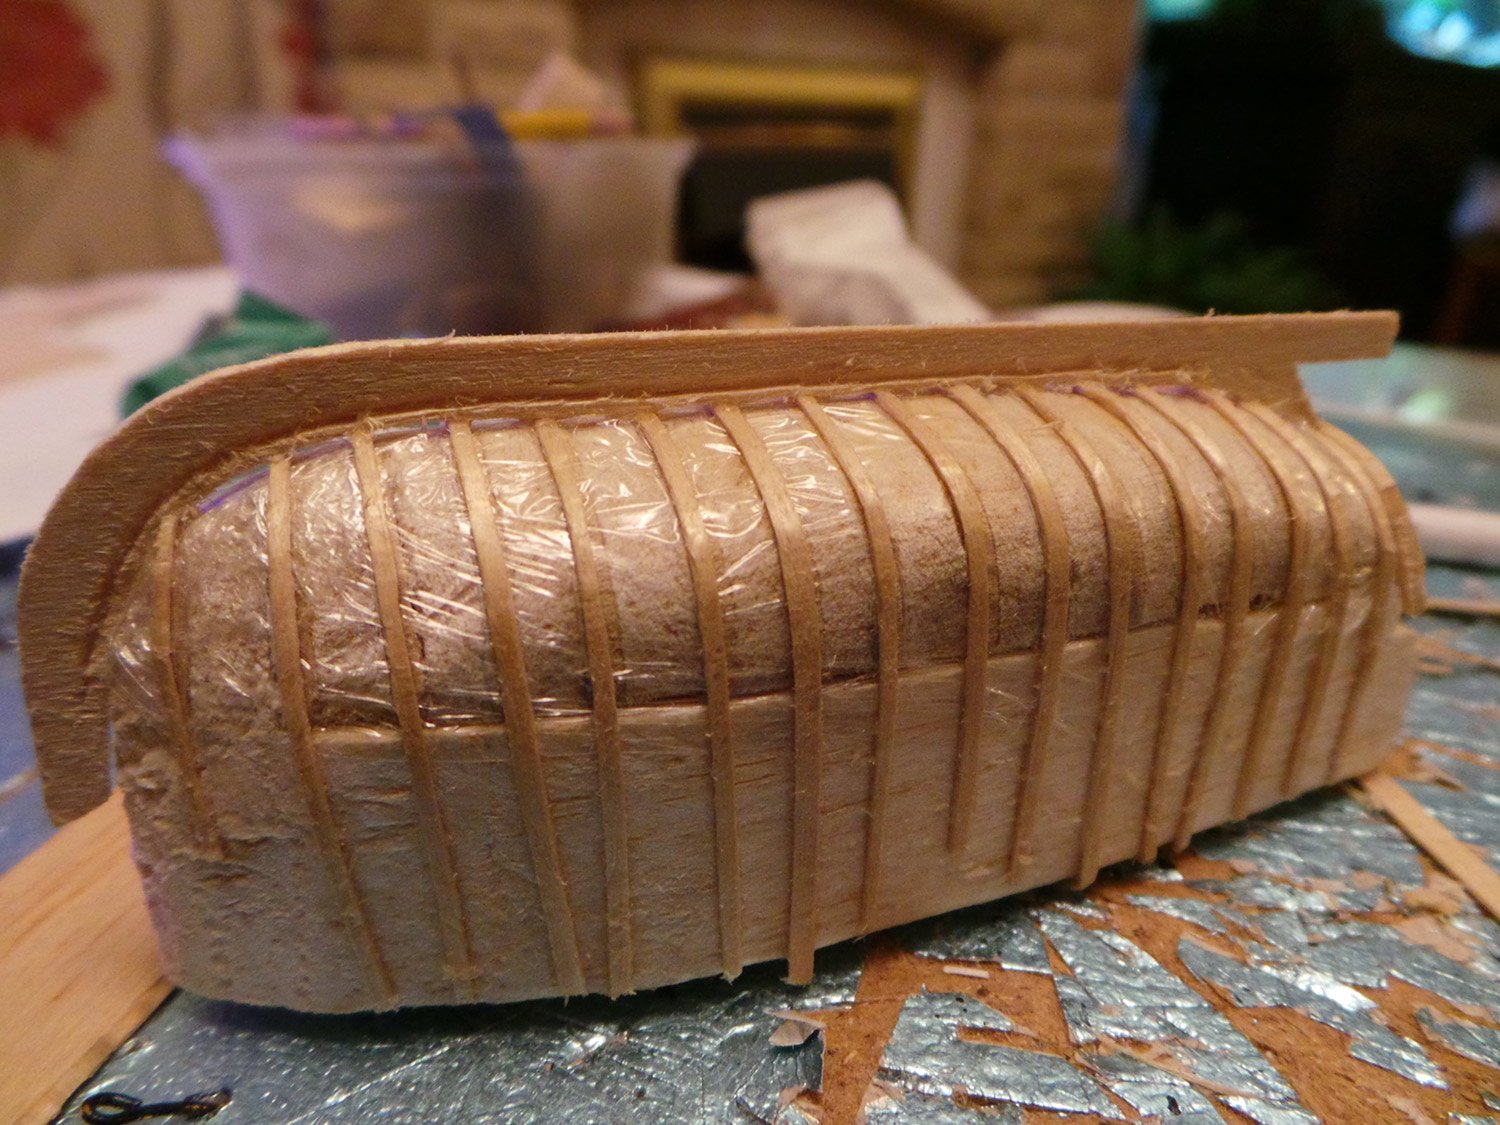
The balsa fillers glued in and roughly shaped.
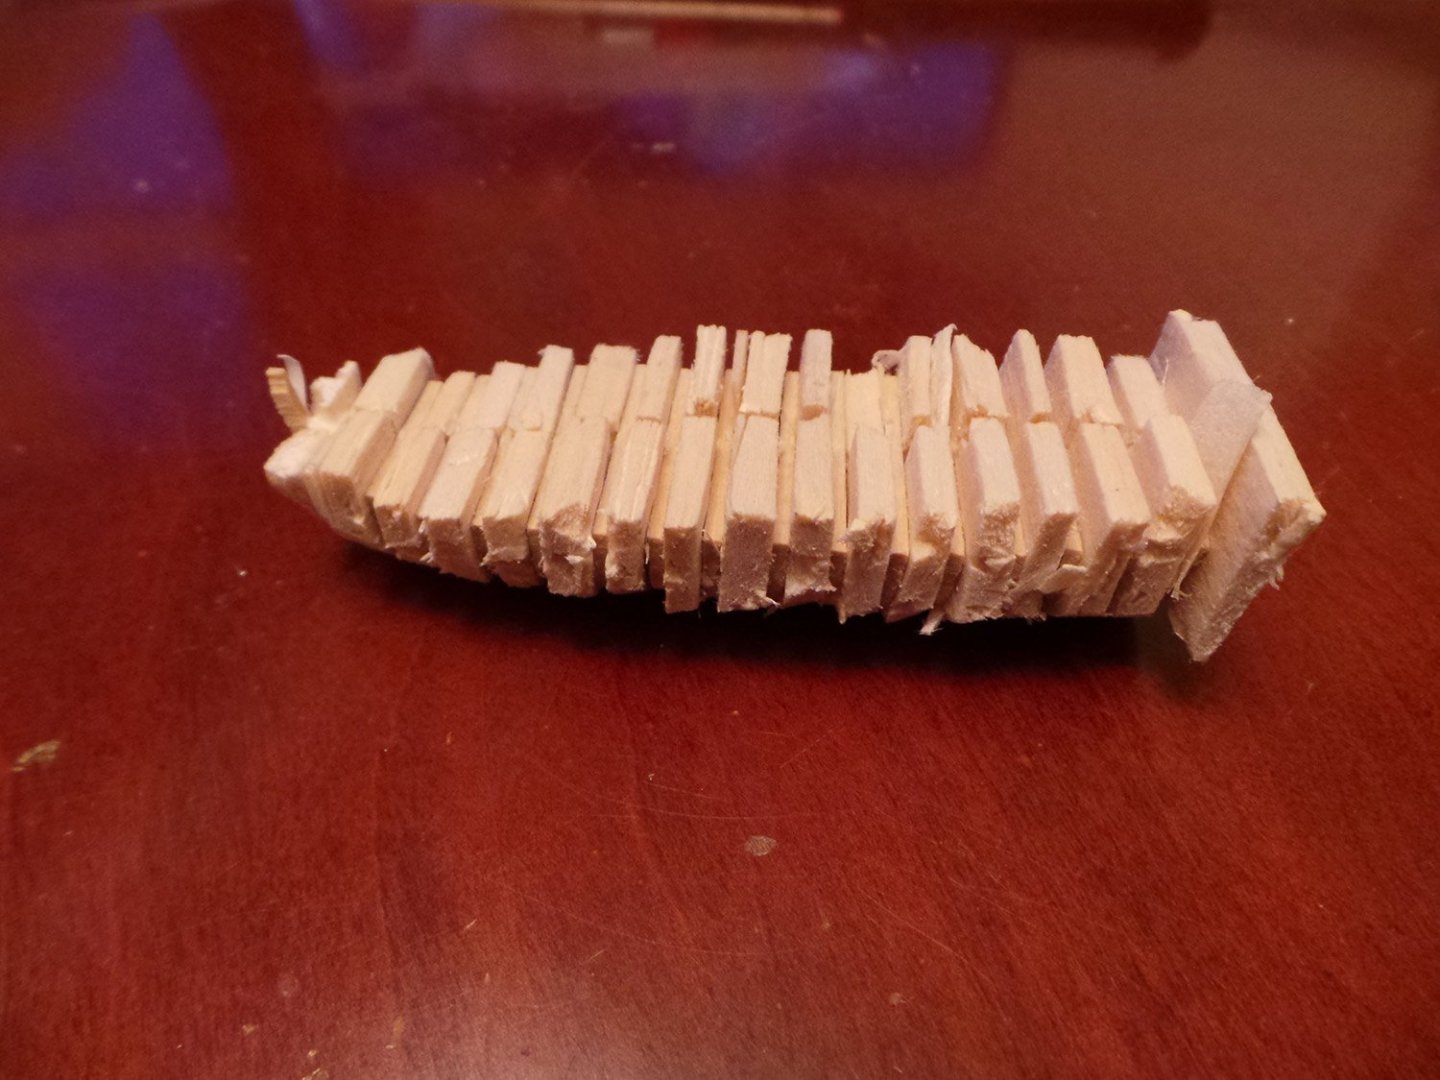

After sanding.
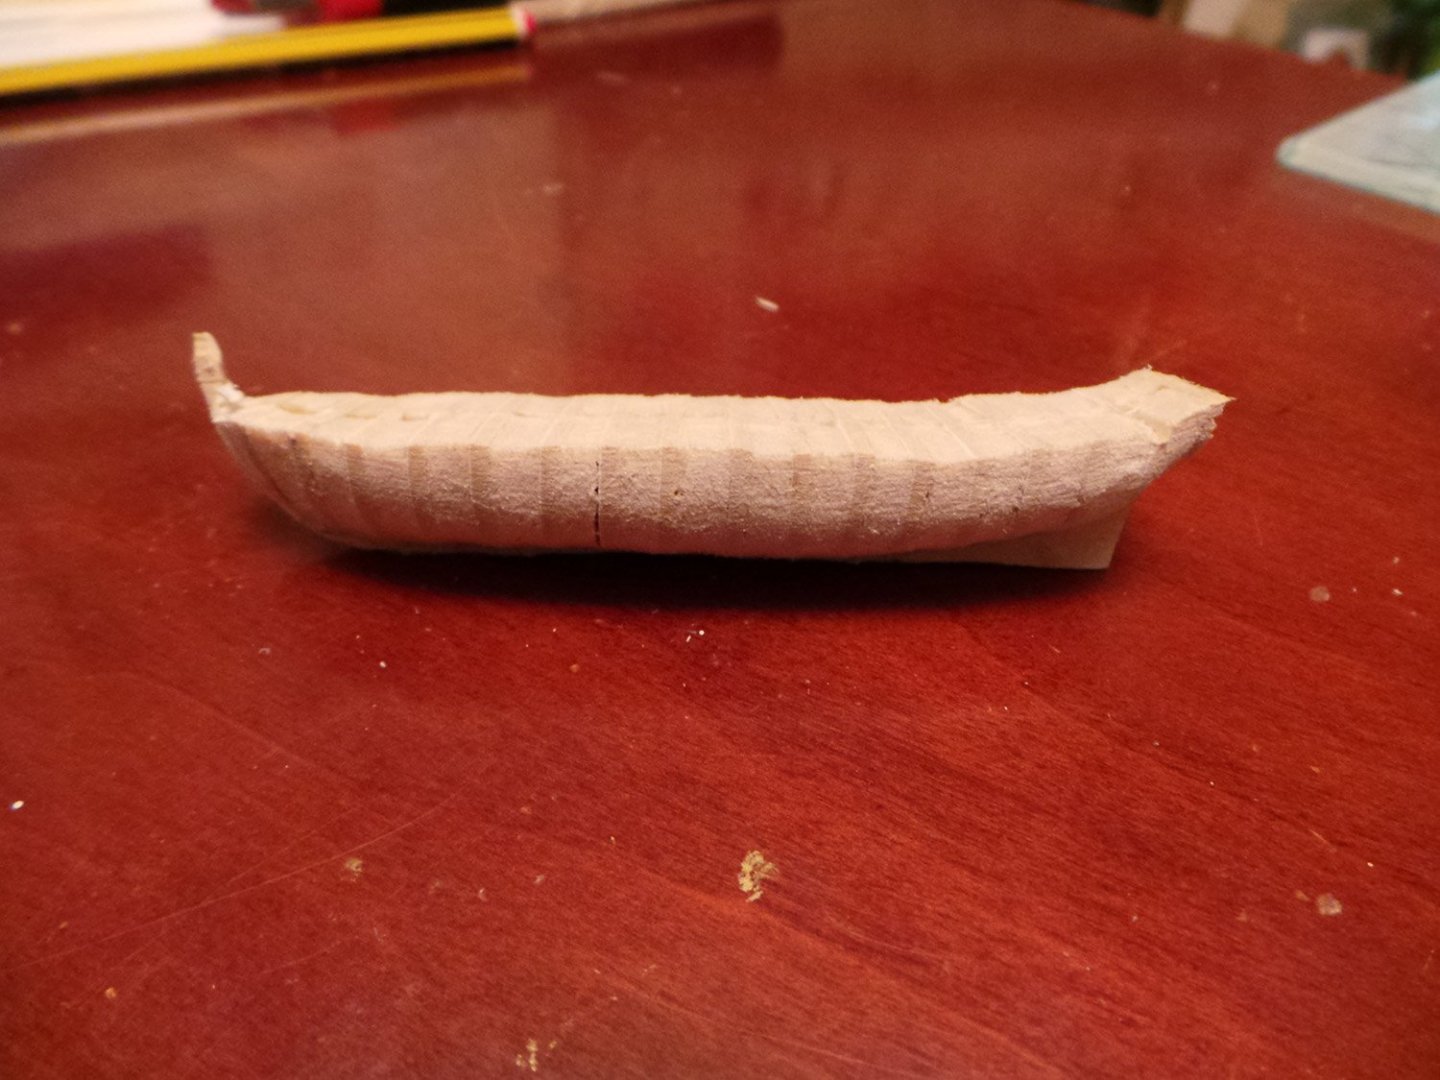


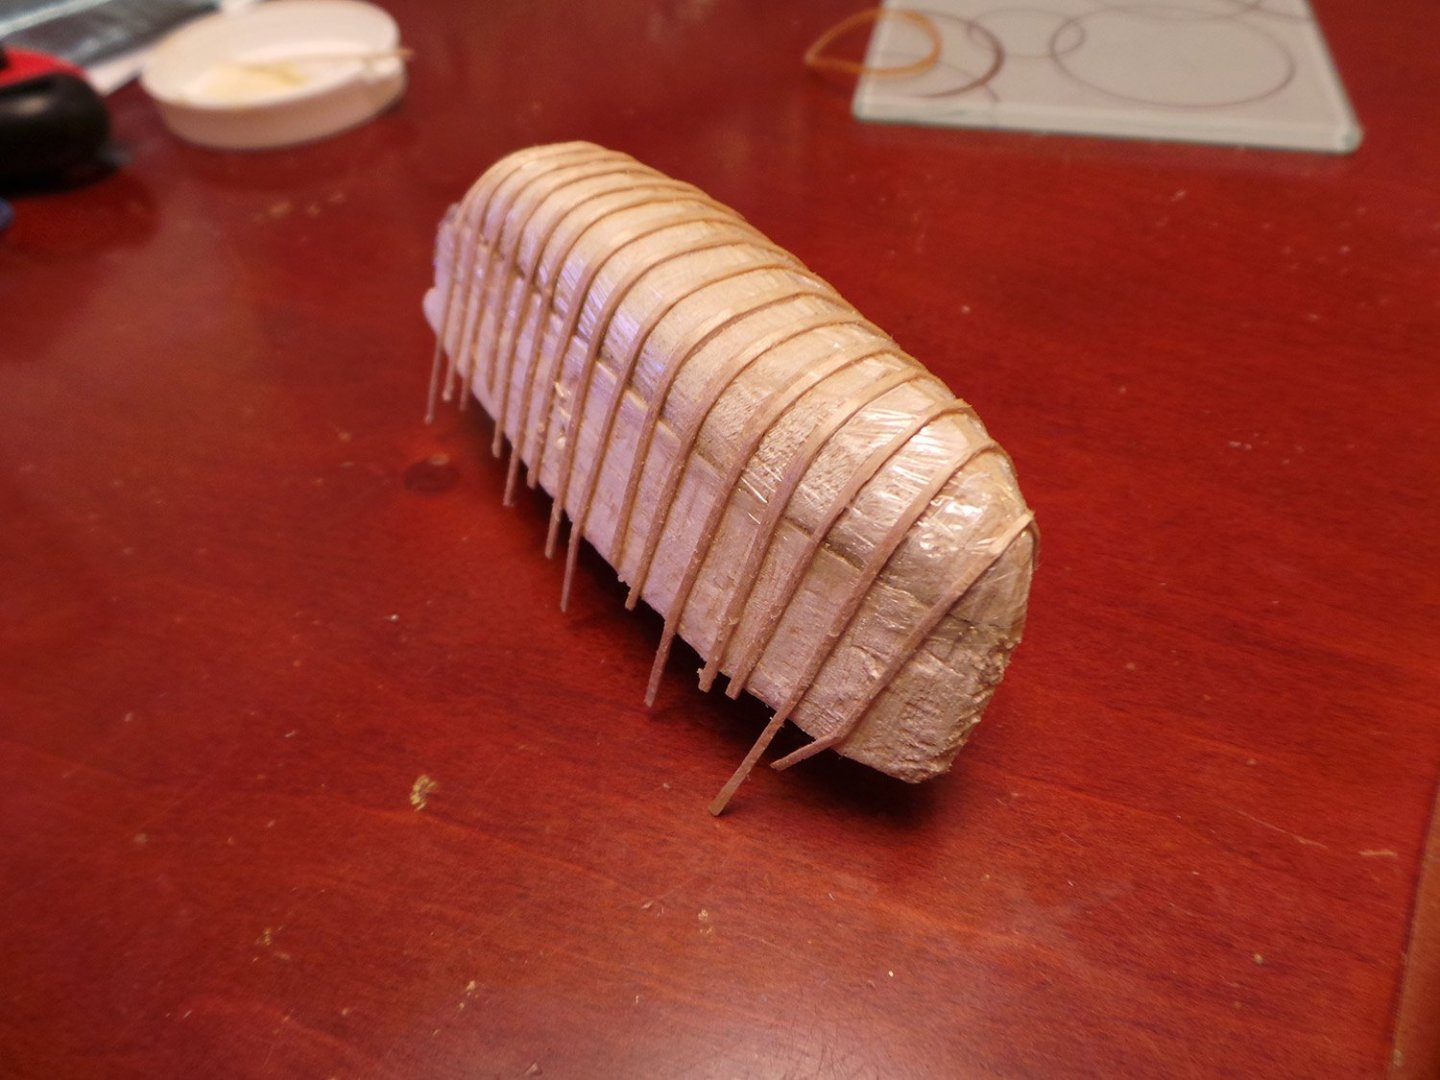
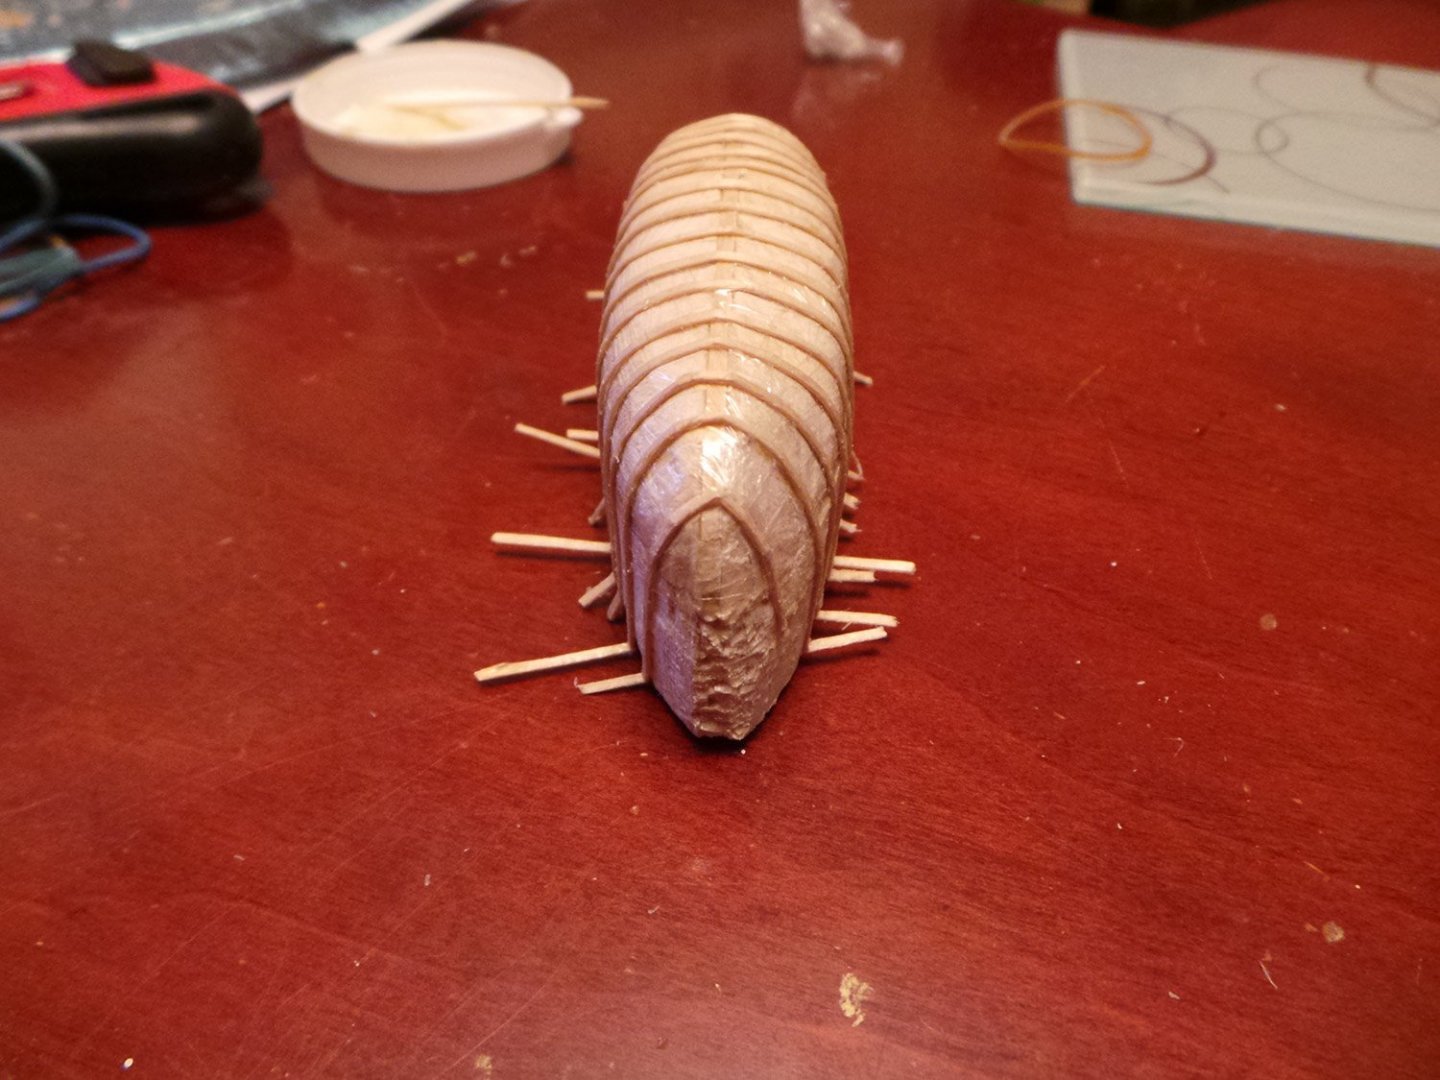
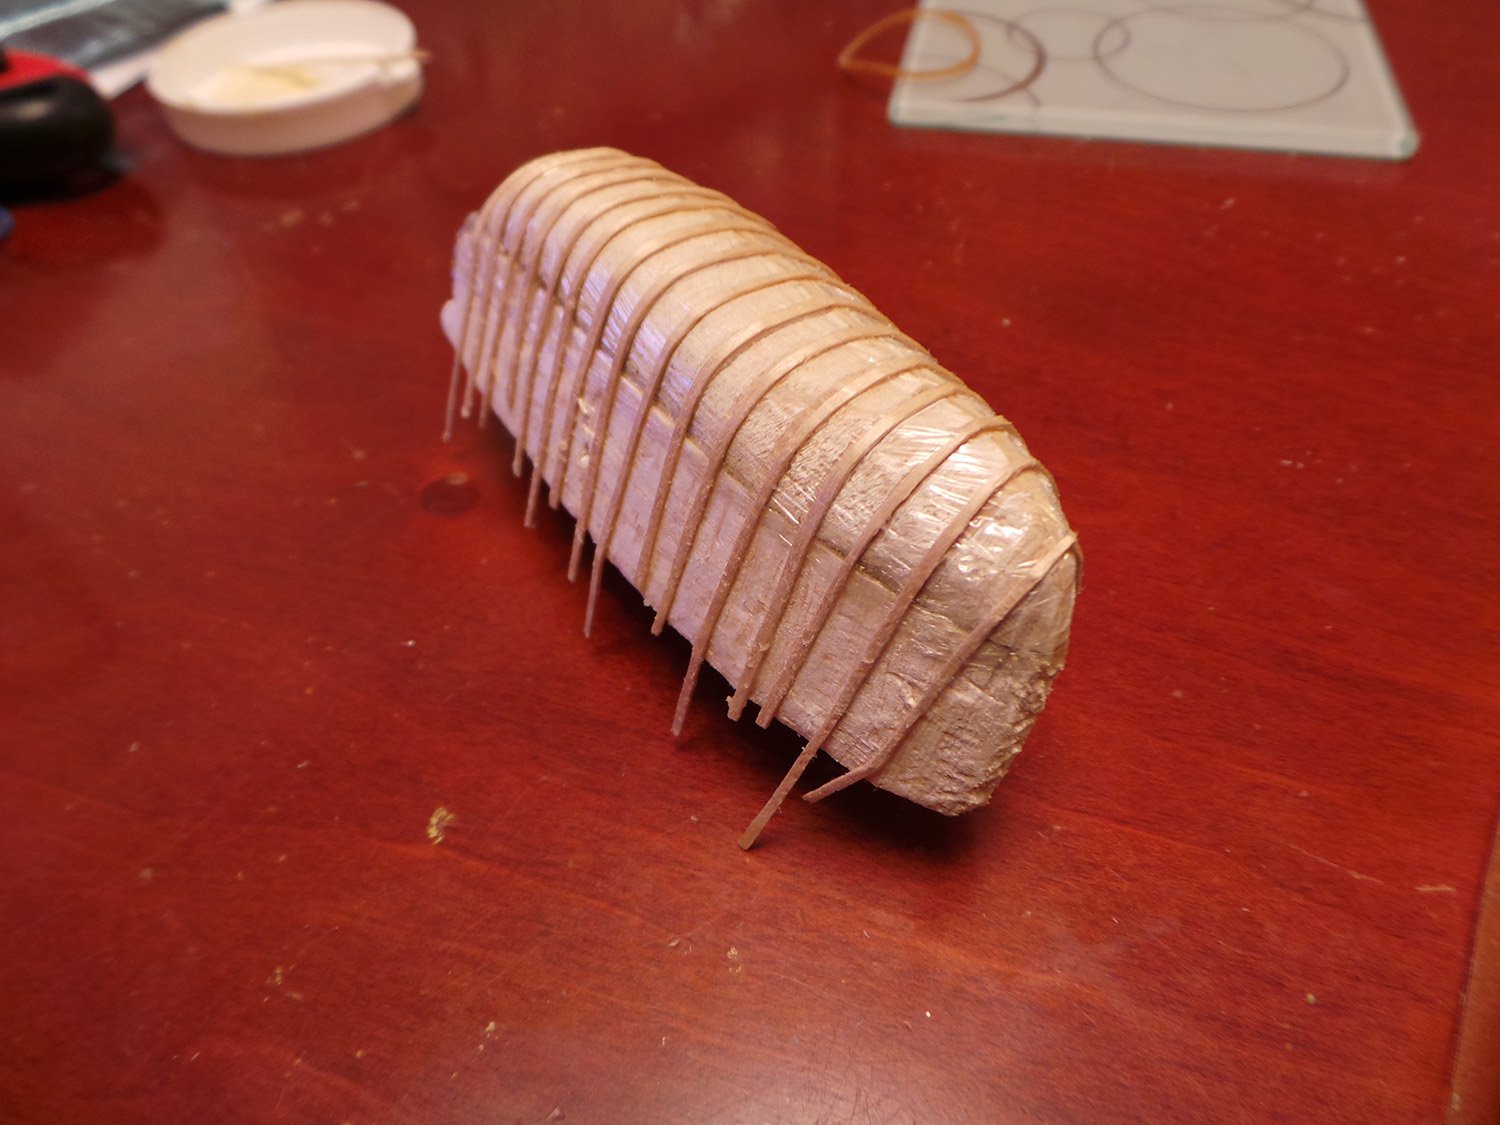
Large balsa bock glued to top of plug for sticking the frames to, and the frames cut, soaked and bent round the plug. Held to thoroughly dry by rubber bands.

Frames now glued in place and ready for the planking.

- mugje, mtbediz, Edwardkenway and 6 others
-
9
-
-
-
Thanks for the pics, they will be helpful.
I chose the model as I am hoping a diesel will be an easier introduction than a steamy to loco's! I will have a look at the rails you mention. It will be displayed on top of our son's Hornby engine display cabinet (when finished (hopefully!!))


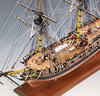
Revenge 1577 by xodar461 - FINISHED - Amati - Scale 1:64
in - Kit build logs for subjects built from 1501 - 1750
Posted
Very good solution to the fixing of the curved beams. Neat job.